How to Make Homemade Soap (Step-by-Step)
This post may contain affiliate links: full affiliate disclosure.
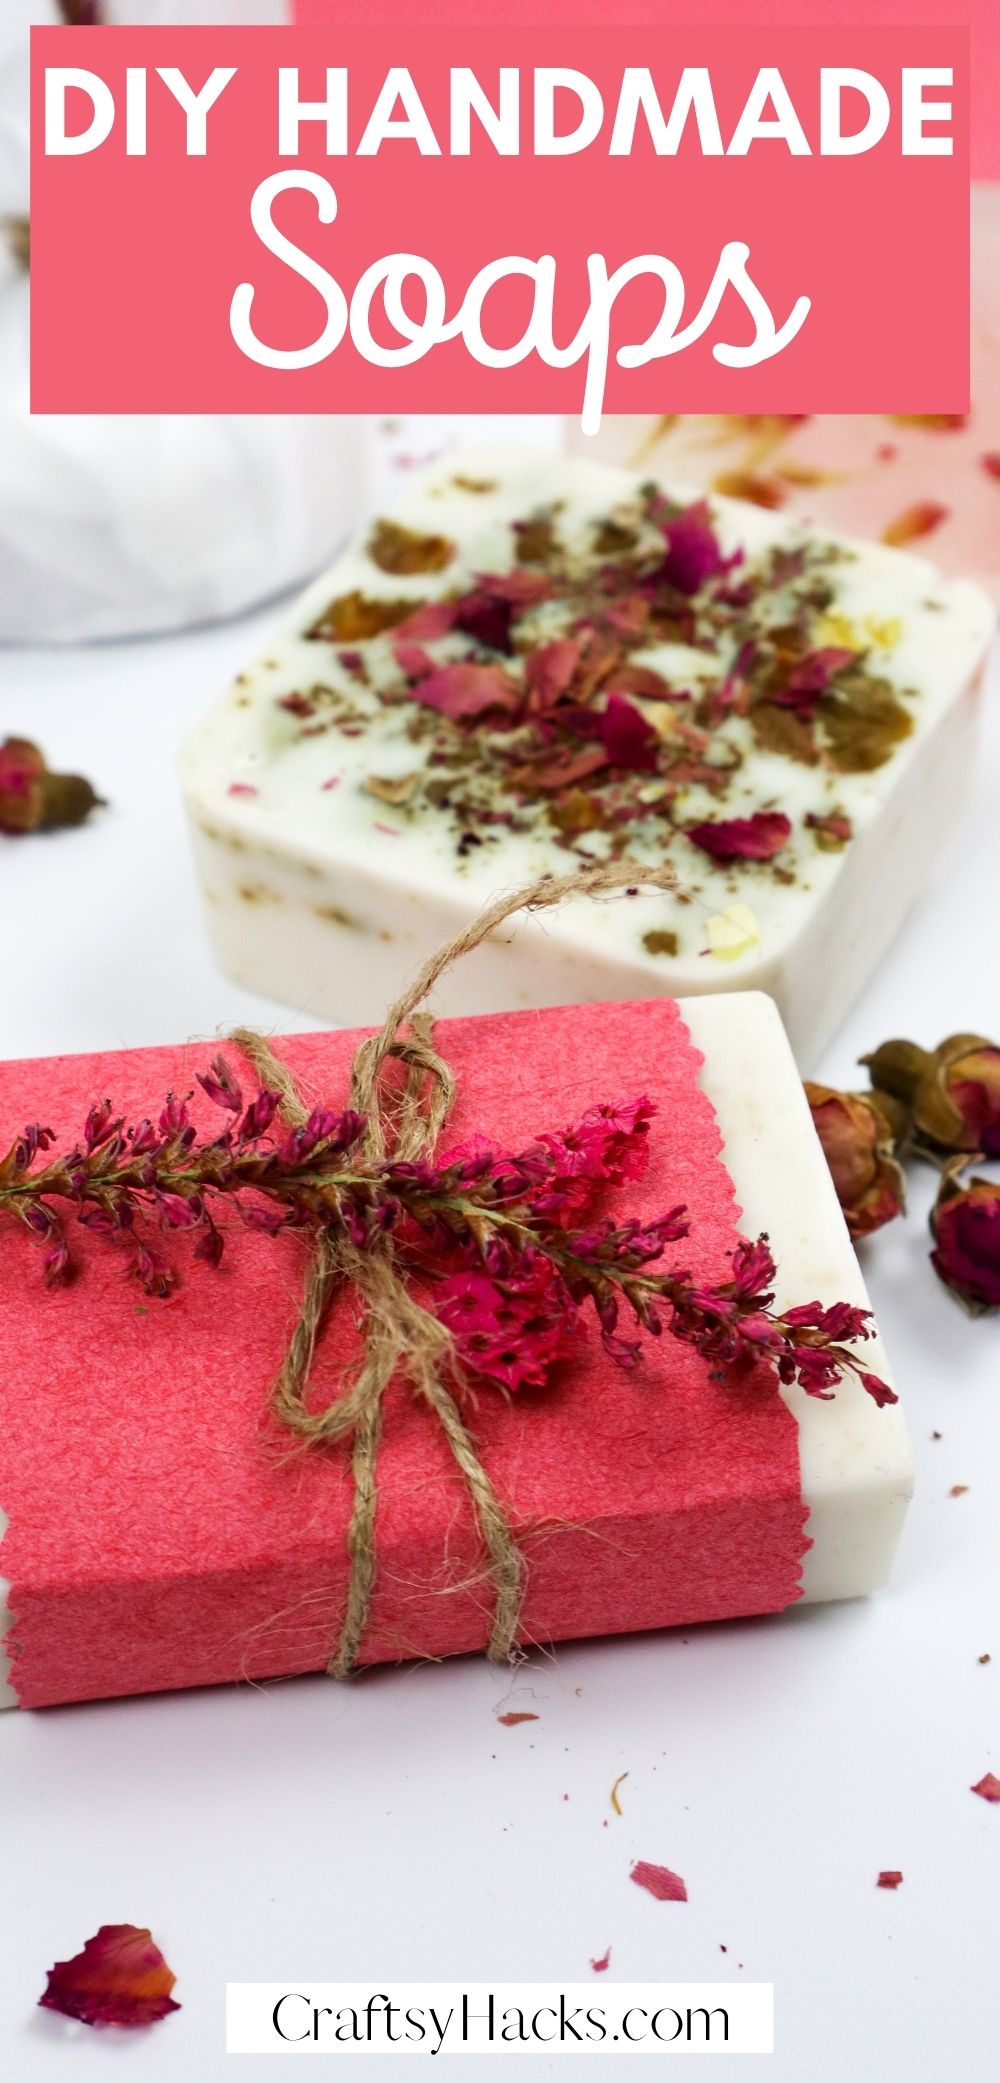
Your very own soap bar can be a beautiful DIY gift or just a fun project for teens and adults out there. Here is a full step-by-step tutorial on how to make homemade soap.

There’s just something about handmade soaps, isn’t there? It’s so simple to make but also so utterly luxurious. We’ve all been there, right?
You get a gift basket with a few cakes of handmade soap, and you’re instantly eager to go try it out.
They’re also just so very pretty. If they didn’t smell so good, I’d hardly have the heart to use them at all. Instead, I’d probably place them in a display bowl and let them sit out on a counter for everyone to see.
What if I told you that you’ll never have to wait for a gift basket of handmade soap or have to buy an expensive one ever again? How about you make your very own homemade soaps?!
Supplies and Tools You’ll Need
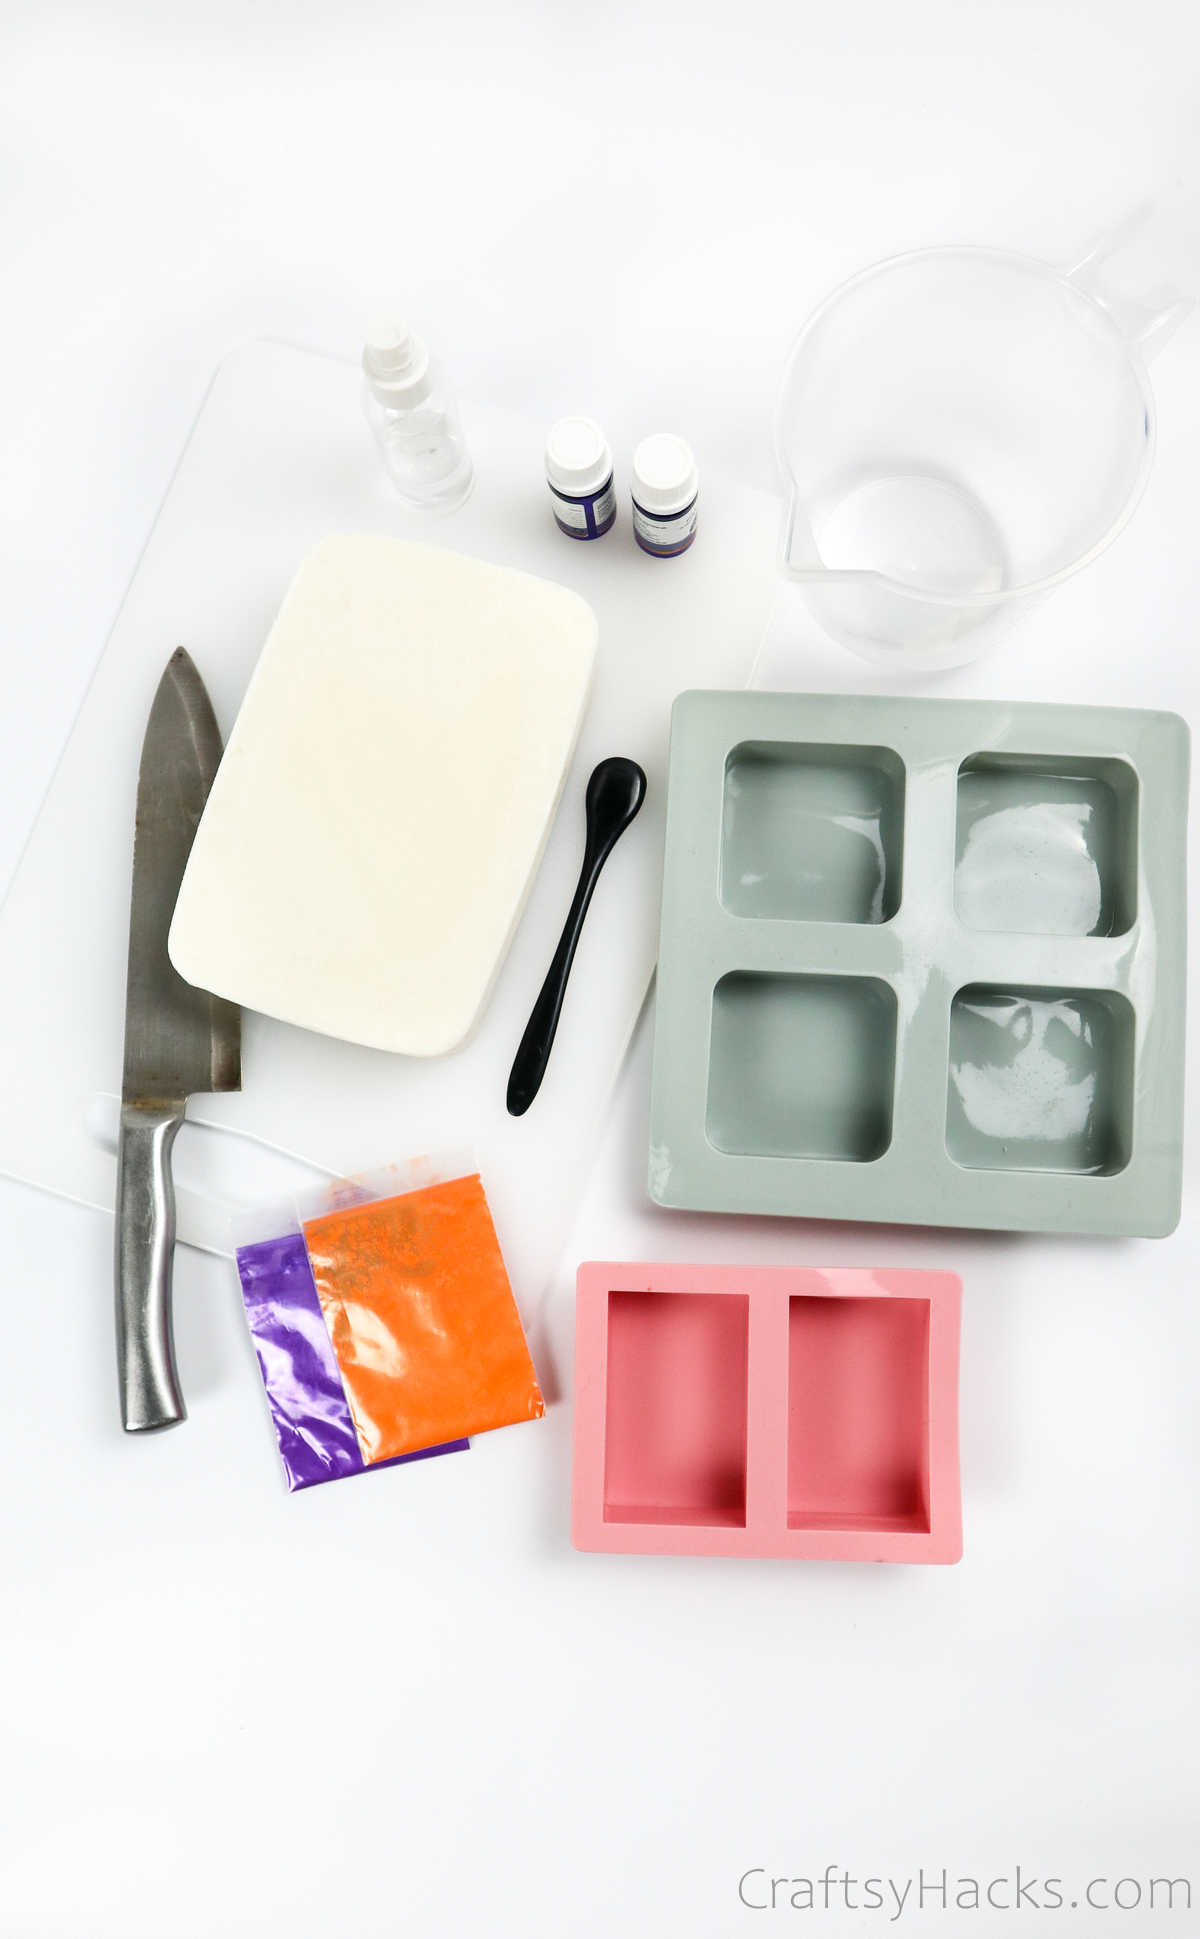
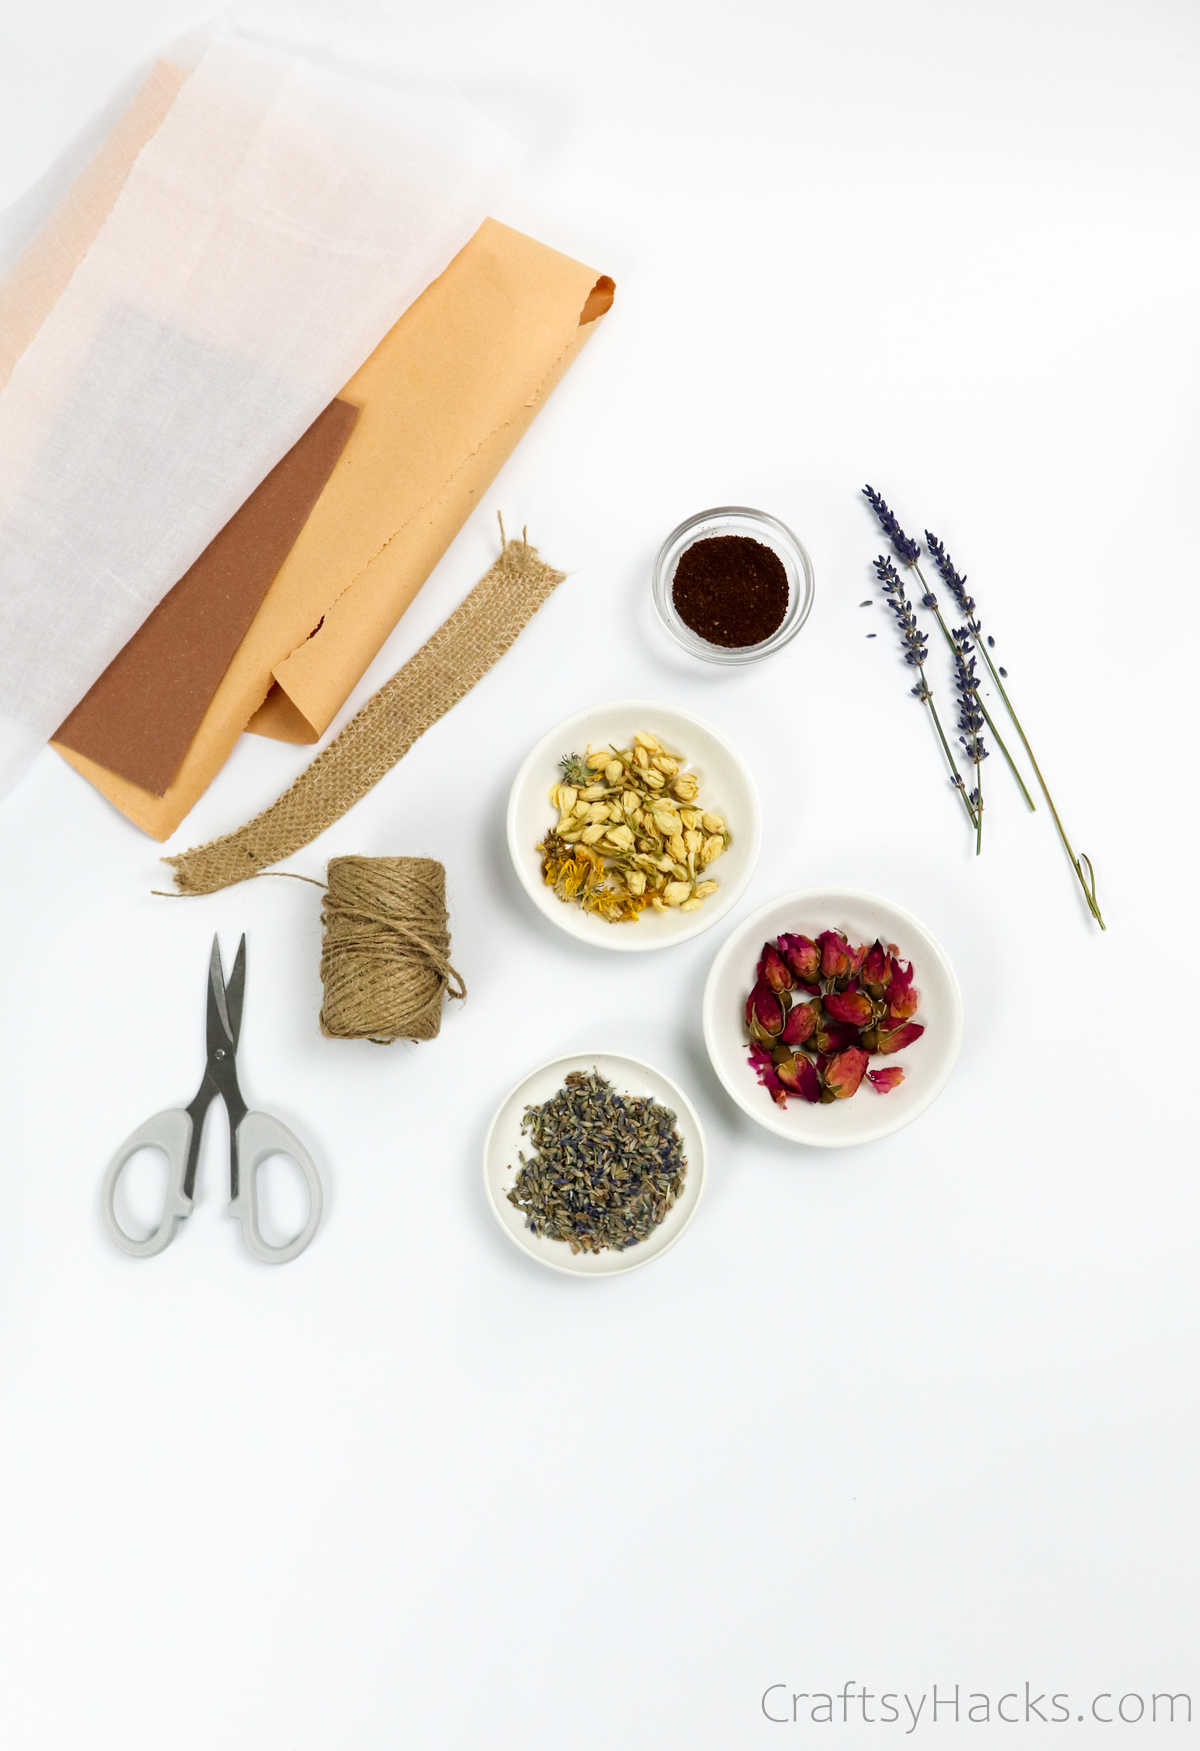
Here’s a list of all the supplies you’ll need:
- Melt and pour soap base
- Silicone molds (or plastic cups)
- Chopping board
- 99% isopropyl alcohol (91% works too)
- Heat safe container
- Spatula
- Knife
- Essential oils
- Mica powder
For decorating and packaging
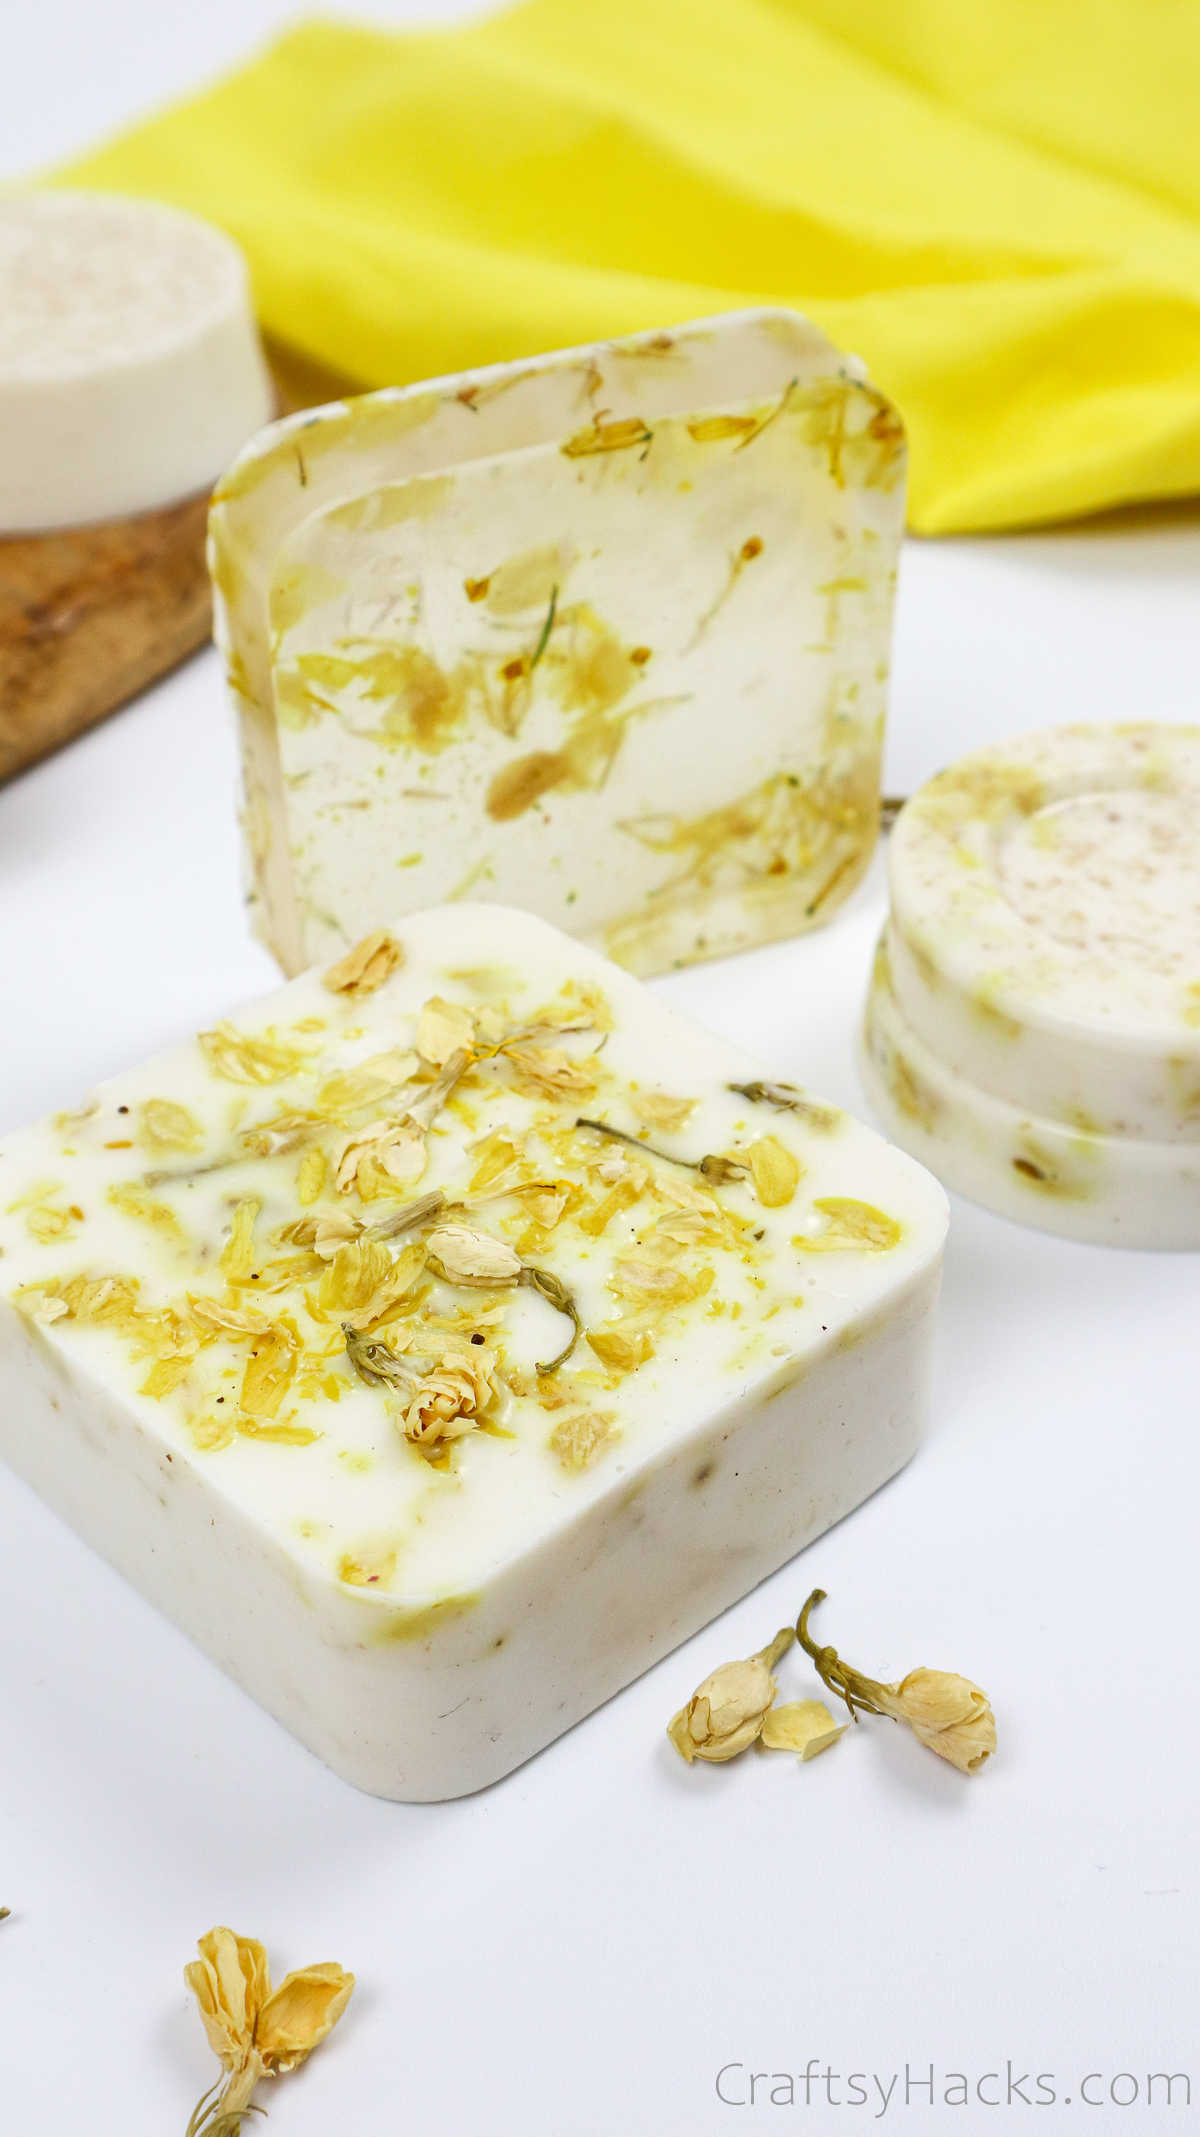
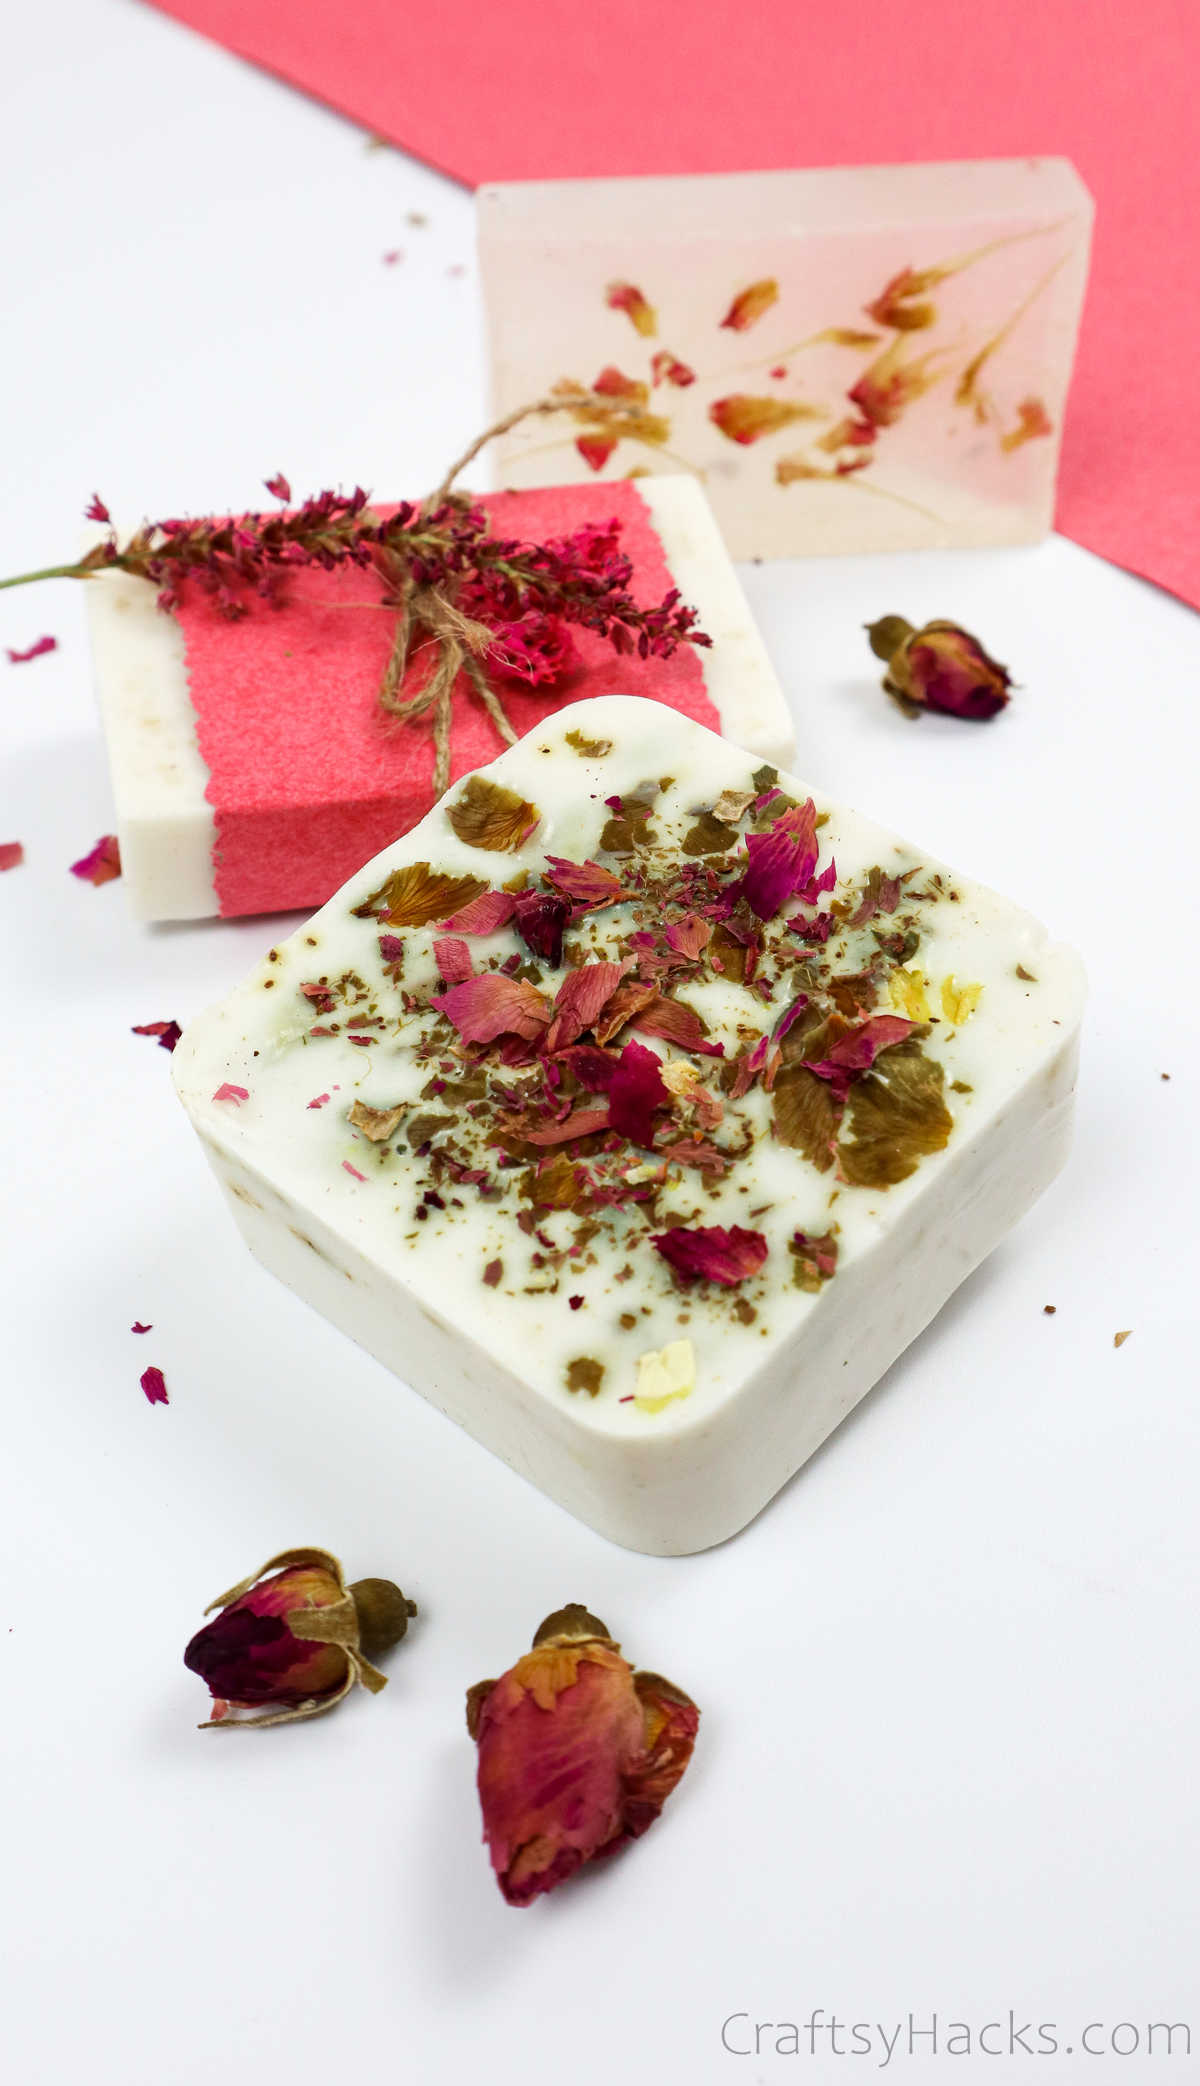
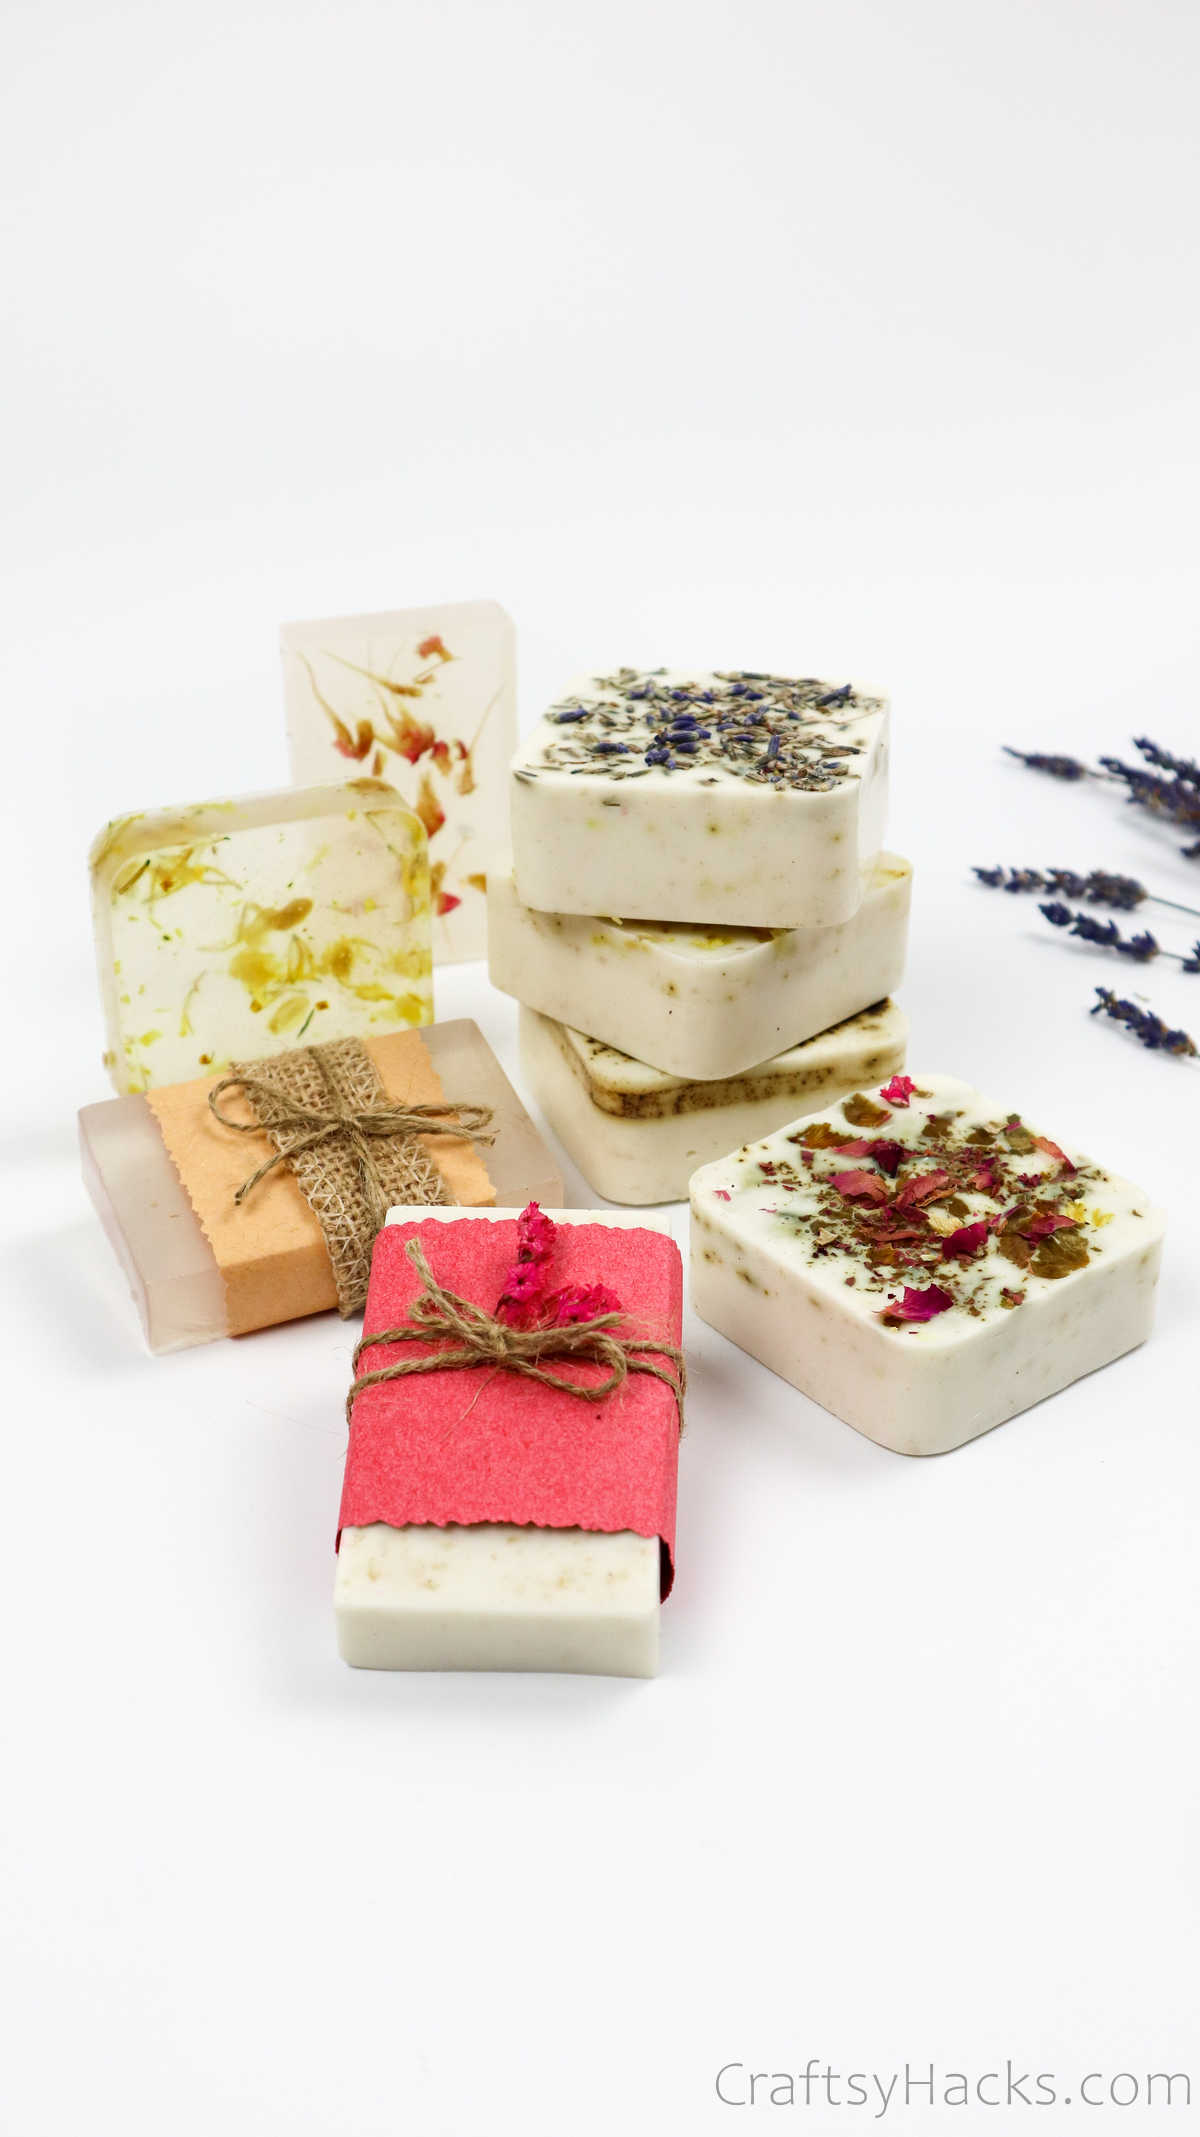
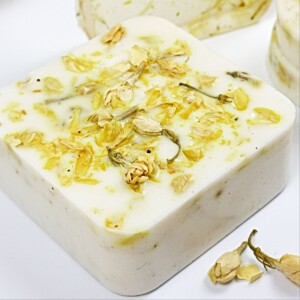
What makes homemade soaps really stand out are the pretty colors, scented herbs, and pressed flowers, and more that turn a regular bar of soap into something that looks like it belongs in a boutique.
So, here’s a list of things you can use:
- Dried herbs and flower petals
- Ground coffee
- Scissors
- Jute twine
- Jute ribbon
- Craft paper
- Cheesecloth
How to Make Soap at Home
Here is how to make the very best soap from scratch.
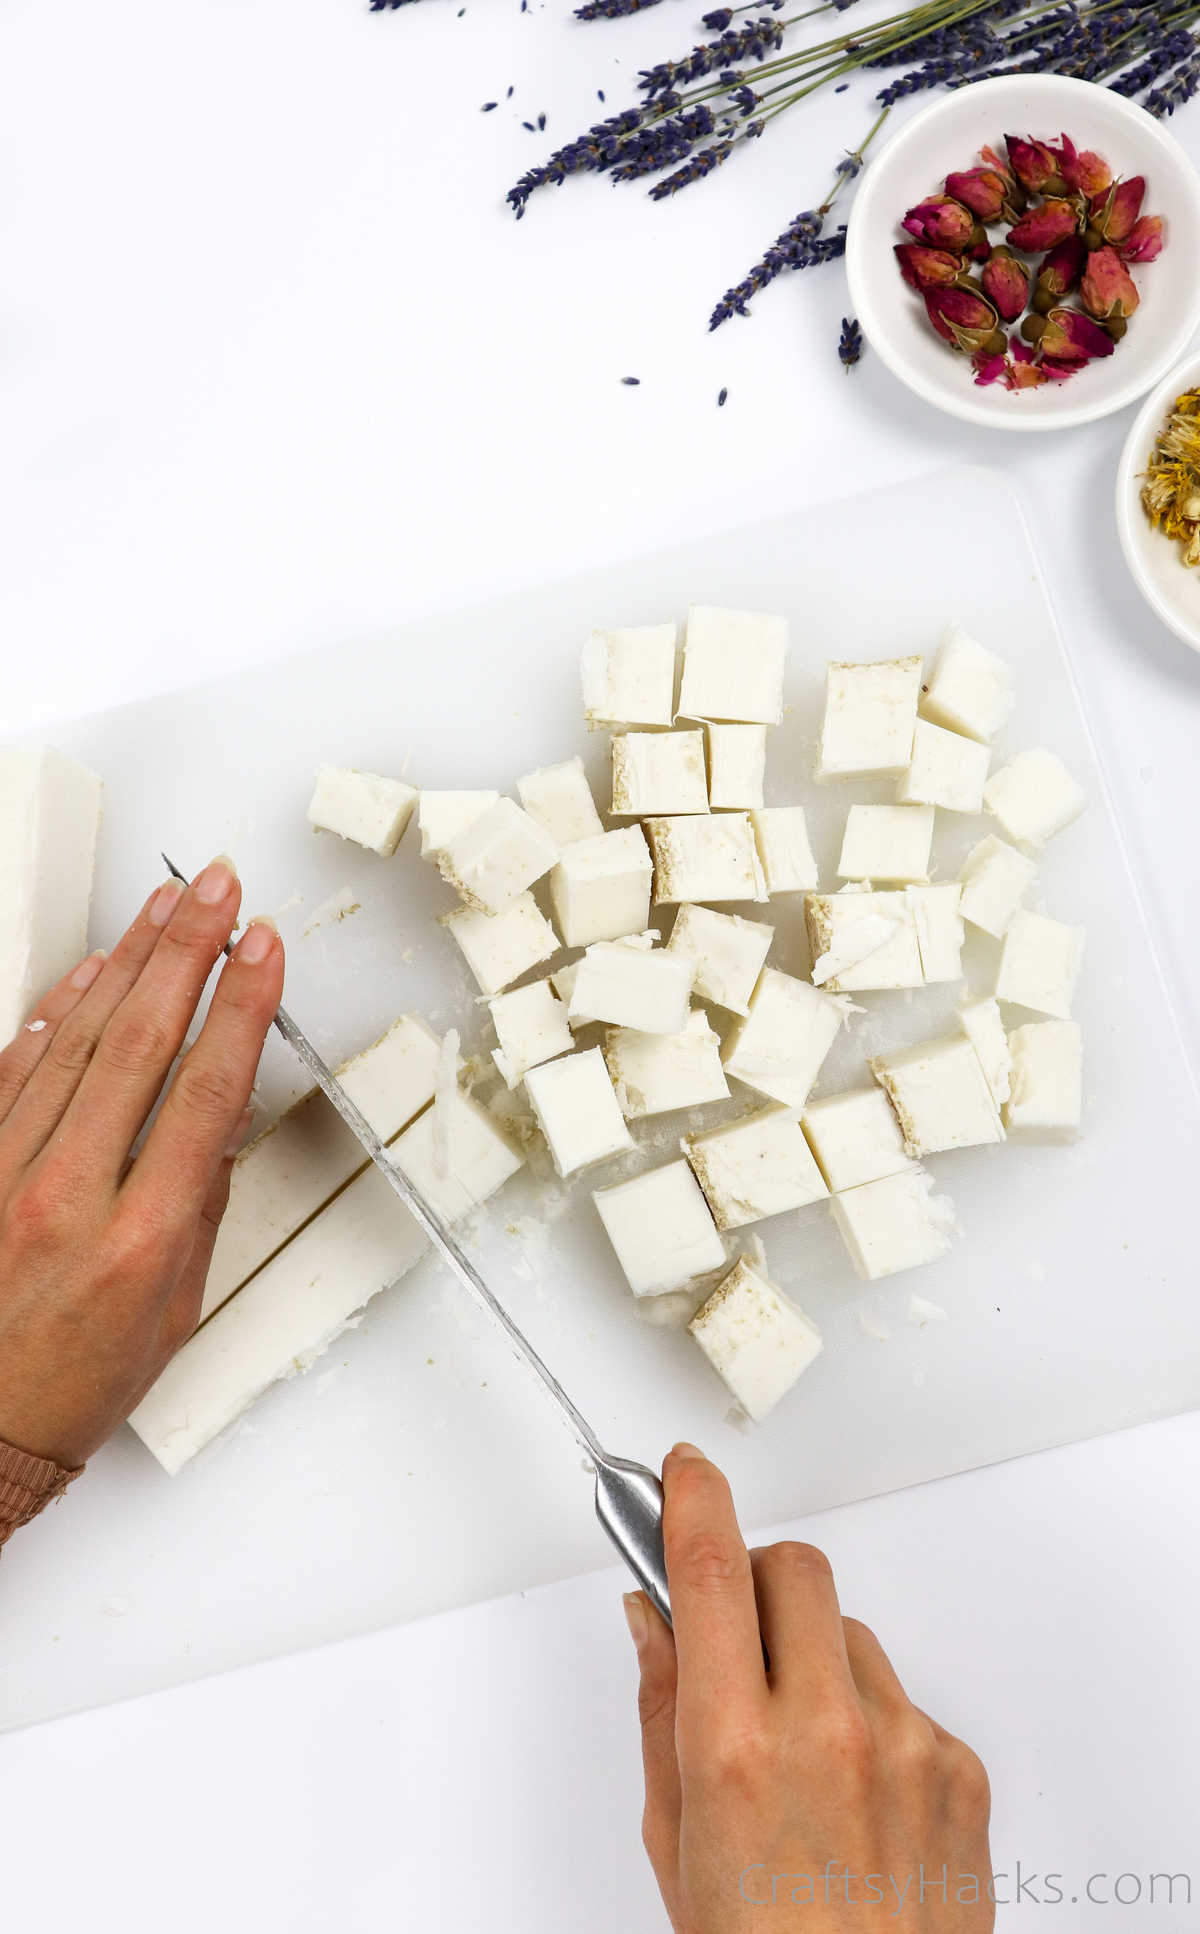
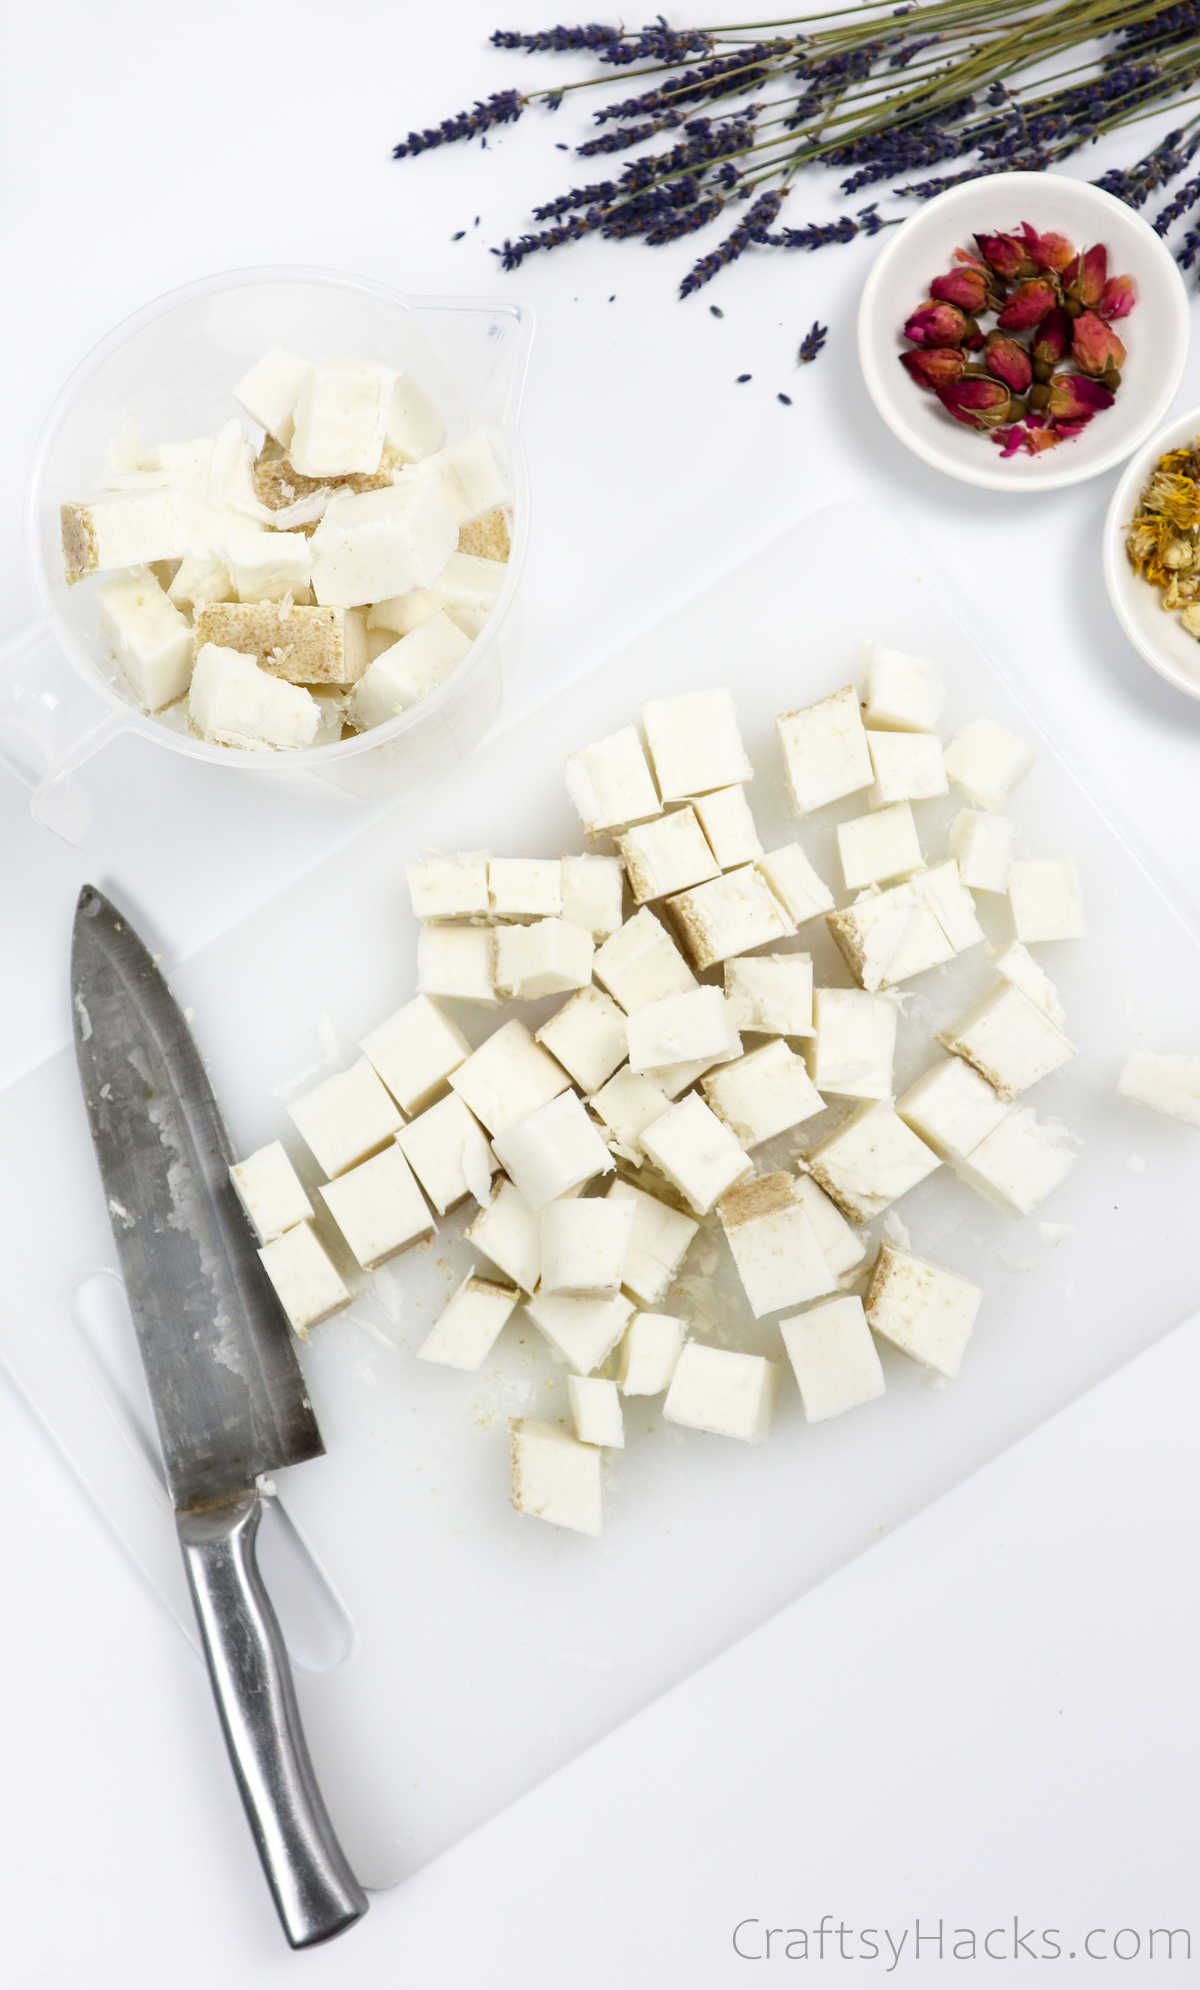
Step 1
The first step is to take a block of your soap base and place it on a cutting board.

Grab a knife and chop the block into smaller cubes. This will allow the soap to melt easily, and you’ll find it easier to stir out lumps.
Step 2
Next, you’re going to be melting your soap. You can do this in two different methods.
First, you can either melt it in the microwave. Remember to remove it every 20-30 seconds to stir the contents around before it goes into the microwave again.
Alternatively, place a big pot of water on the stove. Then, you can place your soap in a smaller container and place that into the pot over the water. The heat from the water will warm the container the soap is in, and it will melt.
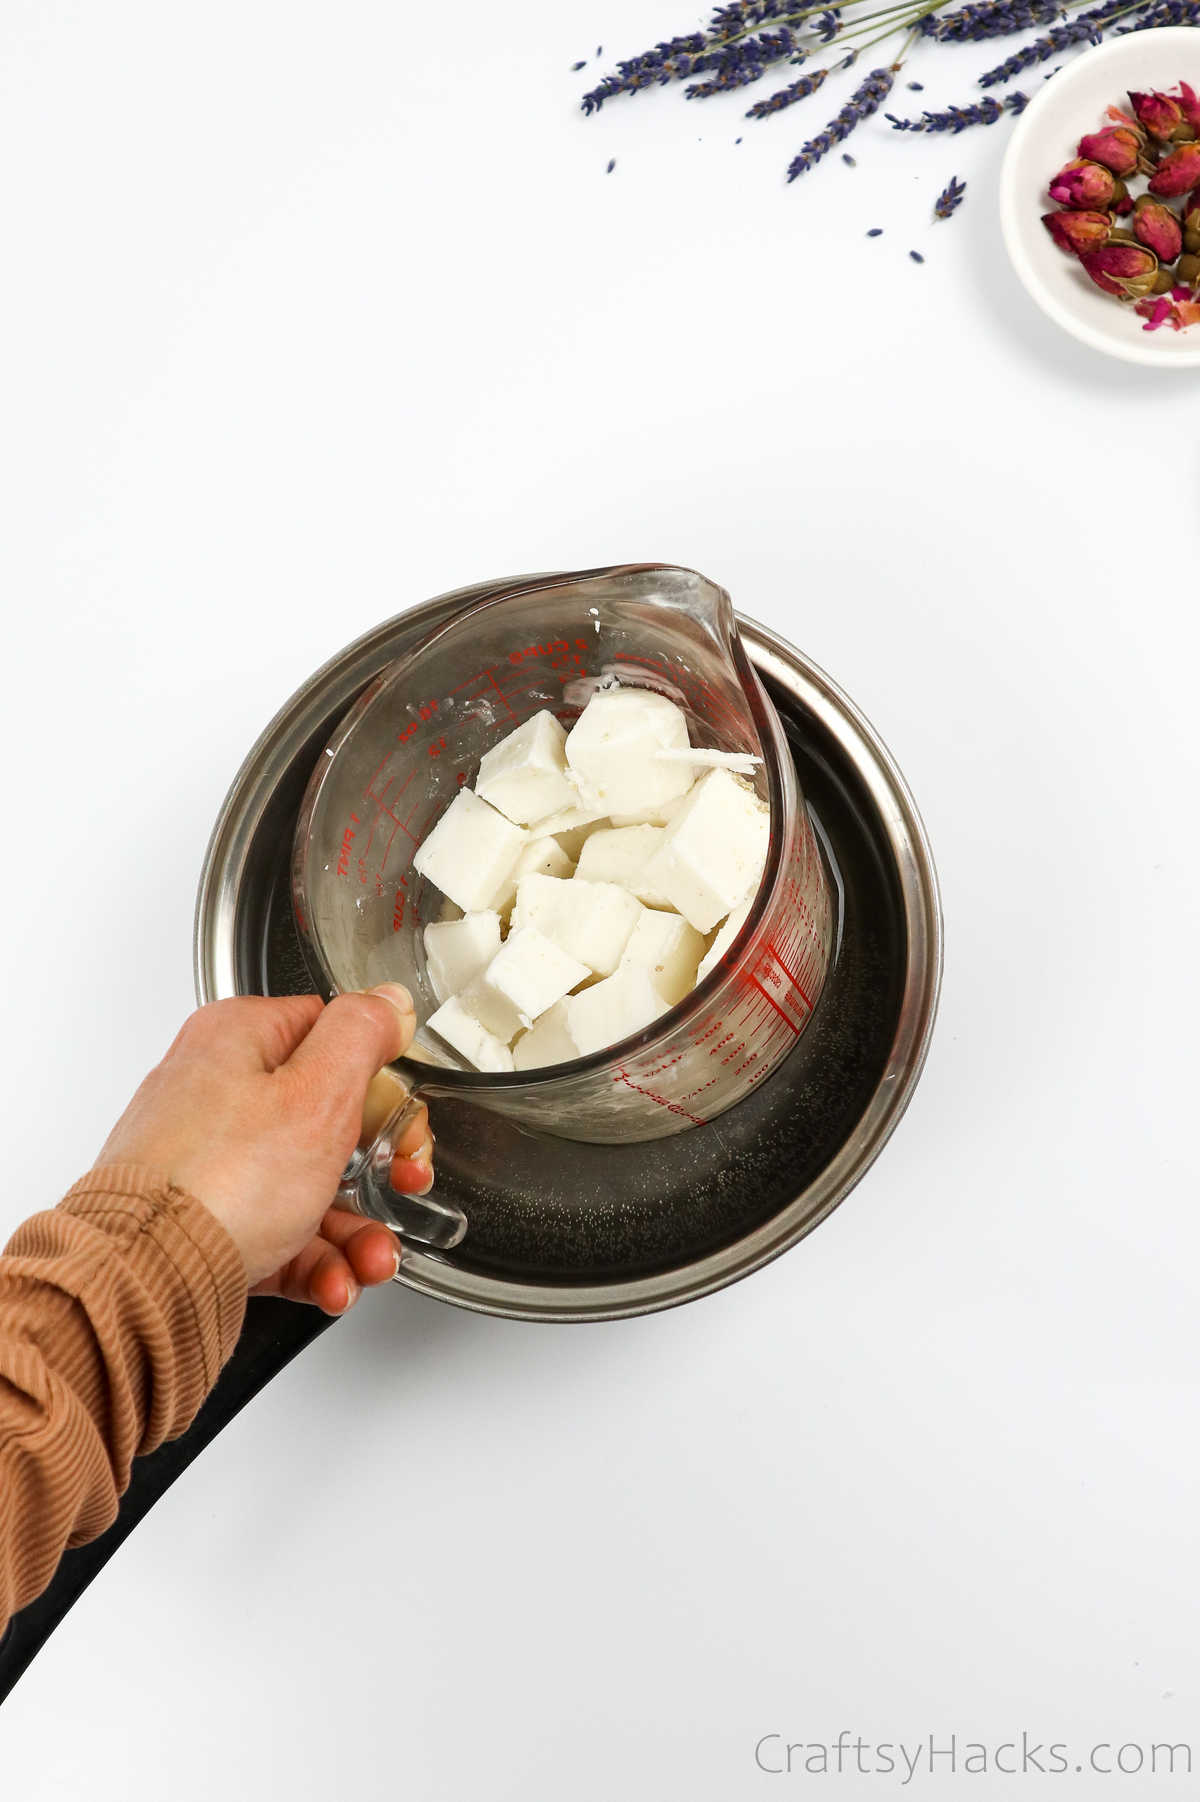
Use a stick to stir the soap and remove any lumpy you find. Stirring will also prevent the soap from burning and sticking to the container.
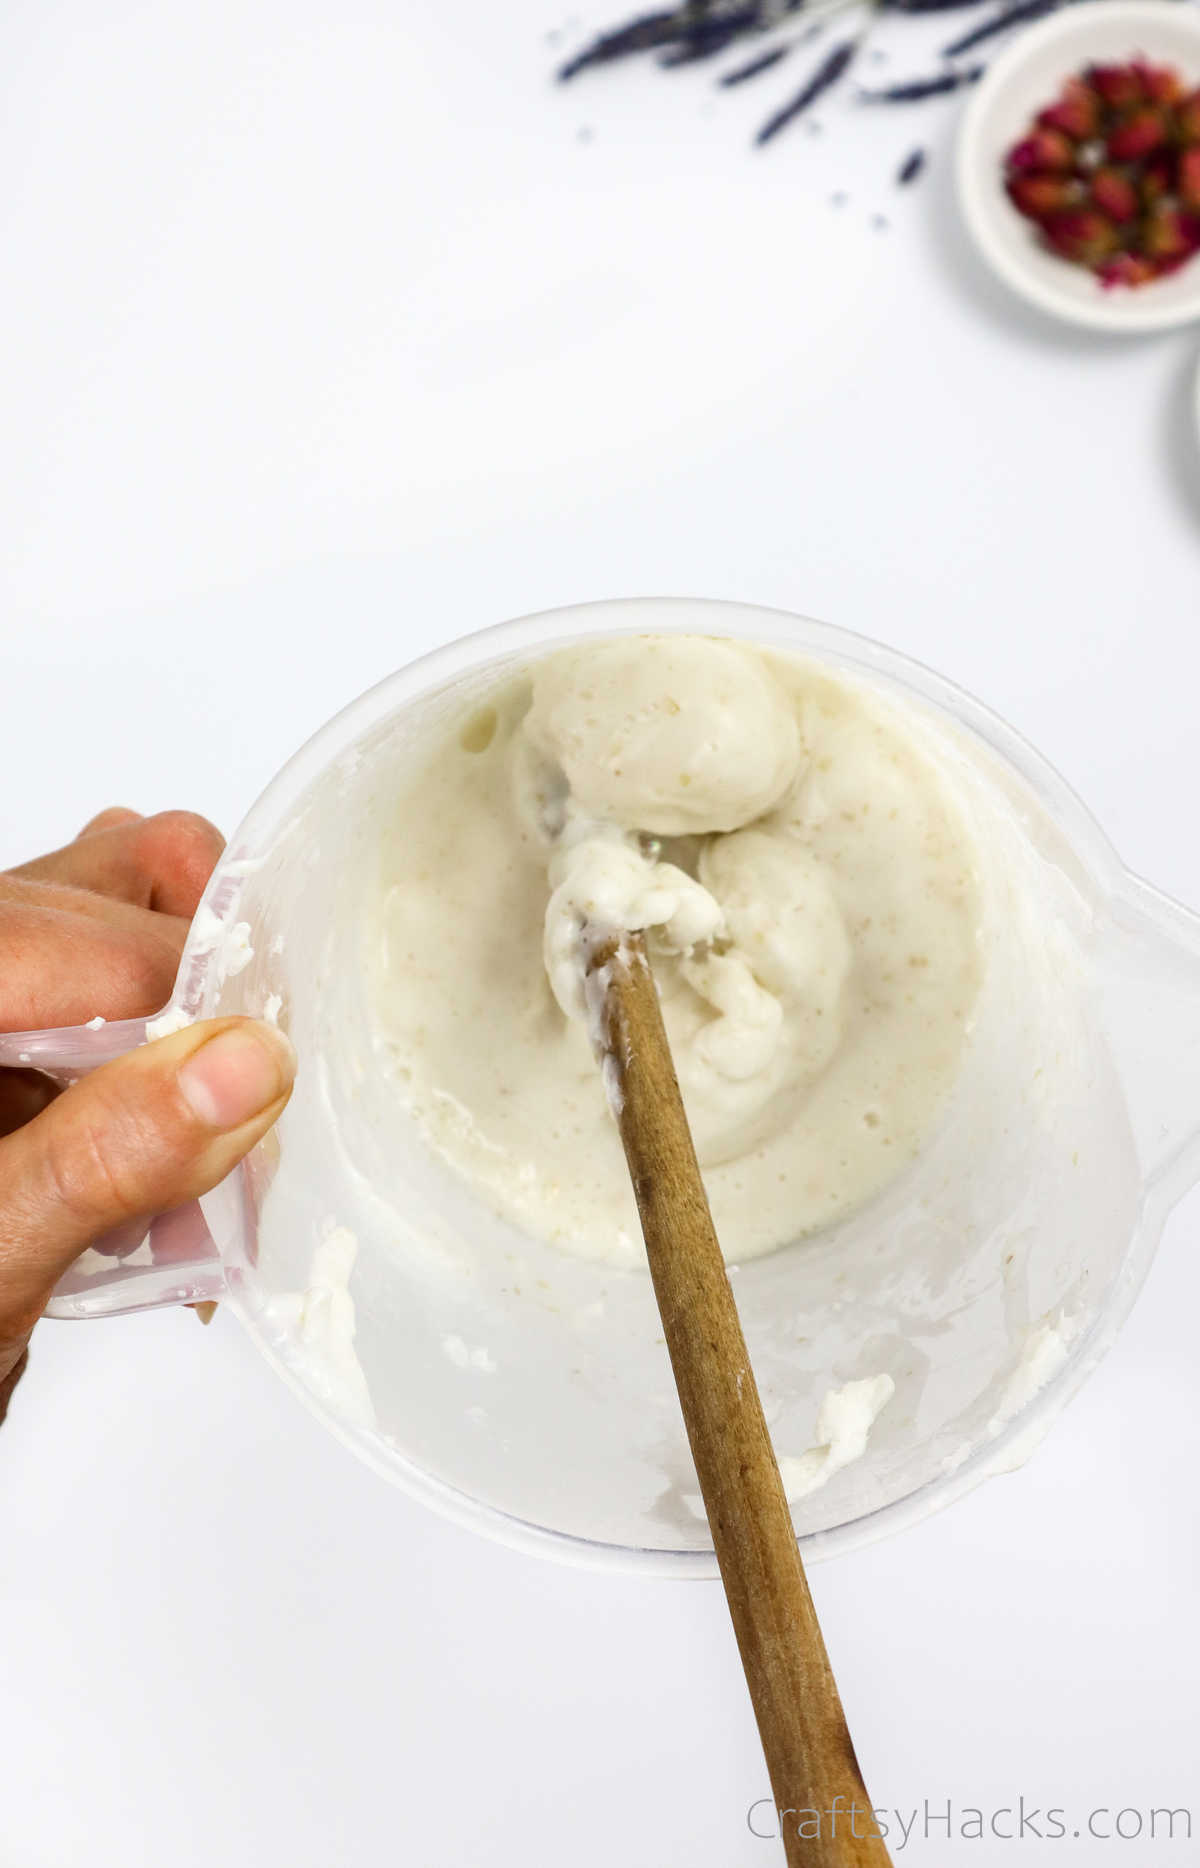
Step 3
Next, you’re going to add a few drops of essential oils to the melted soap and stir it in well. This is a good opportunity to experiment with scents and pick out your favorite one!

Step 4
Once you’ve stirred the oils in, you’re going to grab your silicone molds and pour the melted soap into each mold.
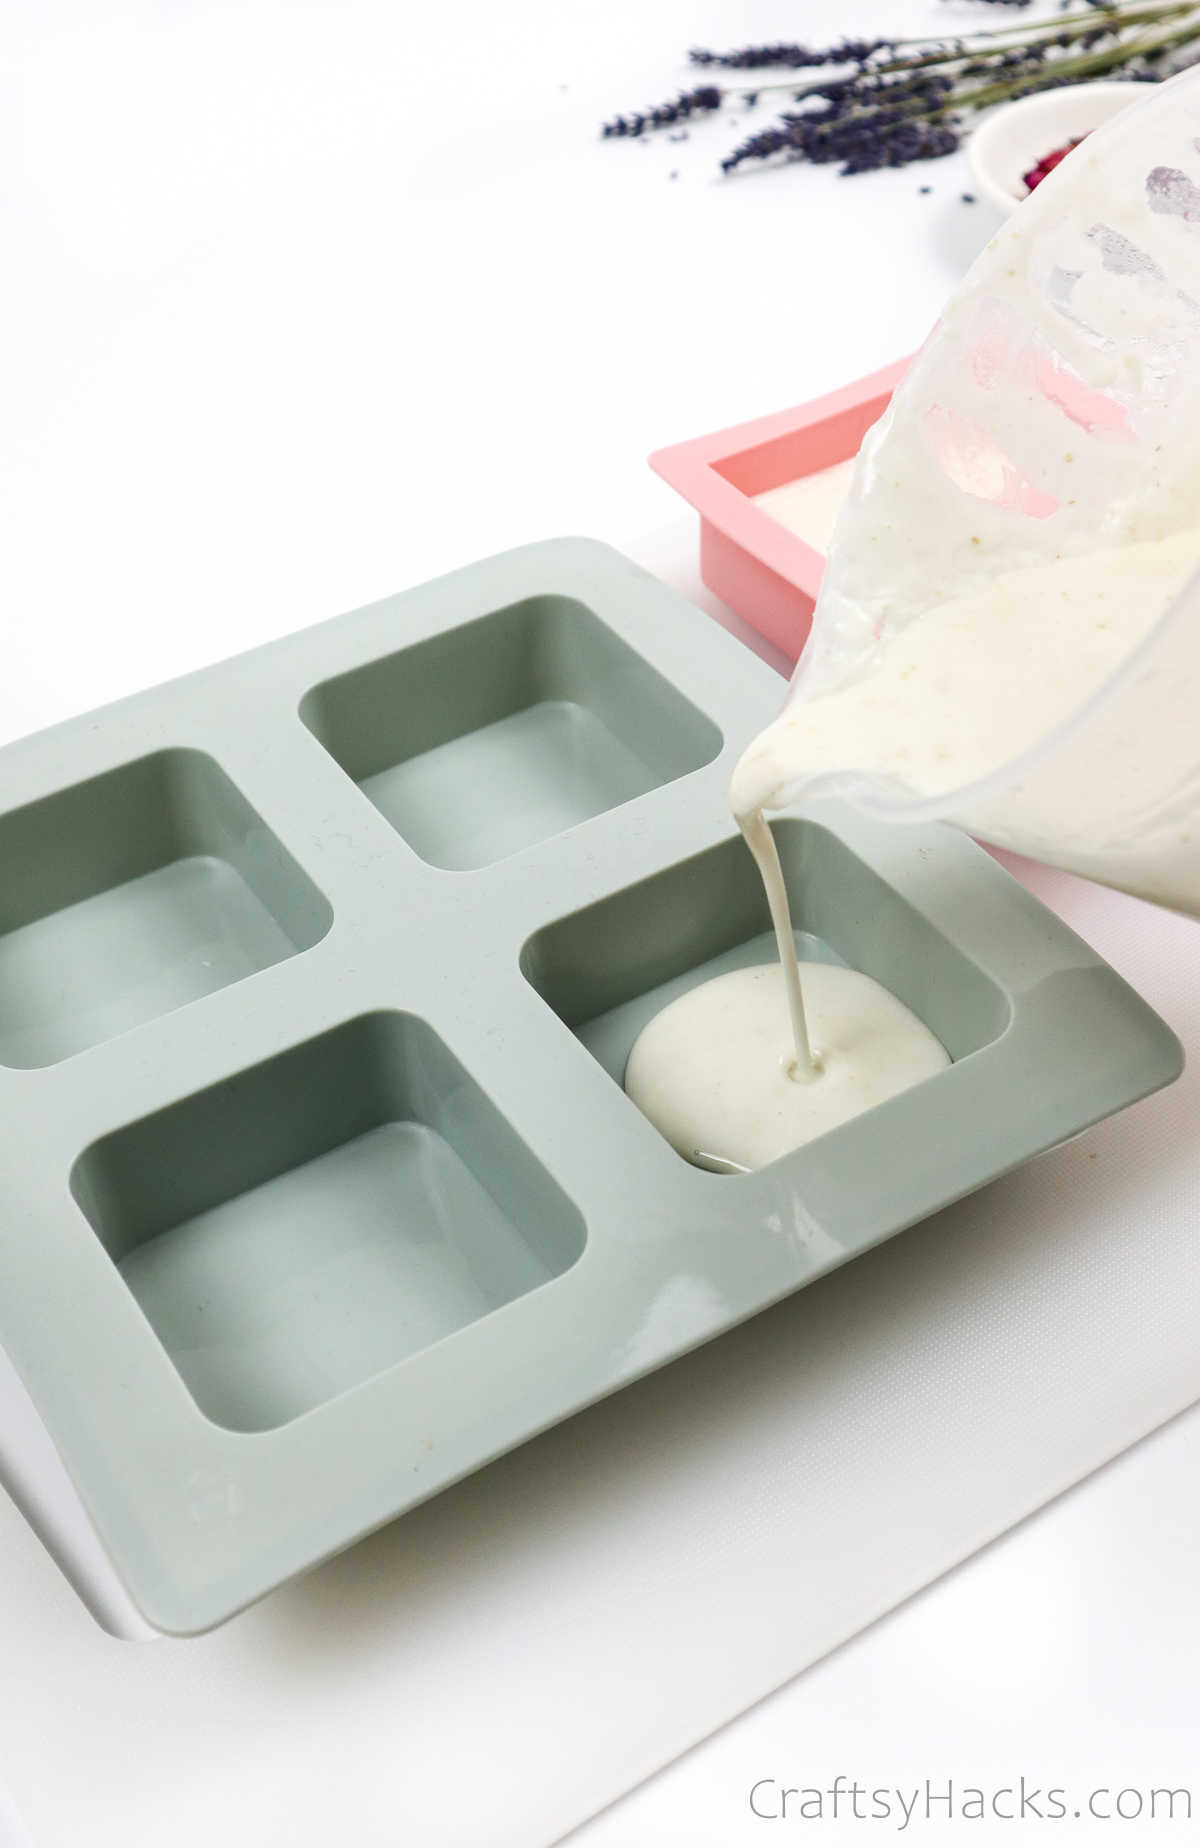
You’ll have to be quick; once you remove the soap from the heat, it will quickly start to harden, so make sure you get them into the molds as soon as you can.
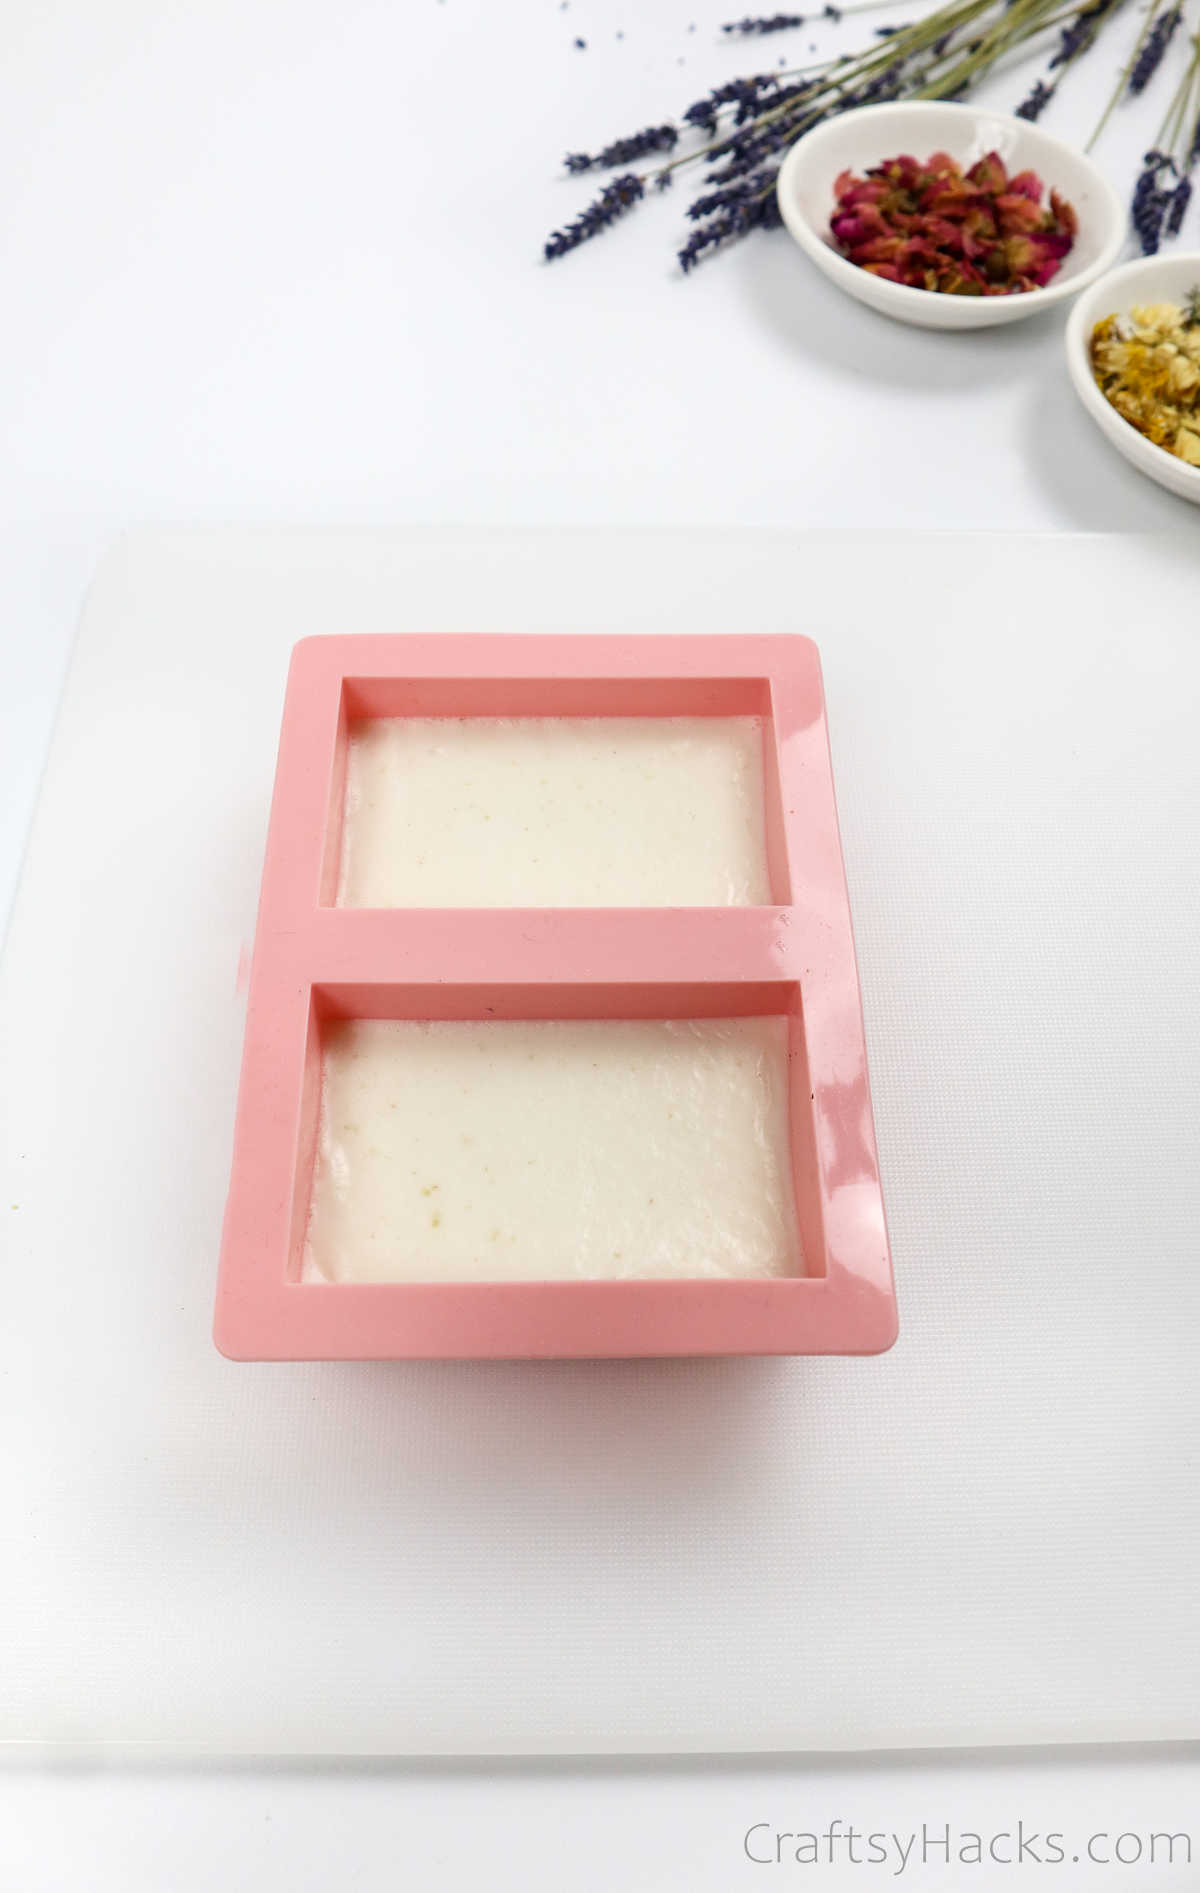
Once you’ve poured the soap in, spray the surface with isopropyl alcohol. This will remove all the bubbles from the surface in a jiffy. Your soap is technically ready, but you can’t not decorate it, can you?
Step 5
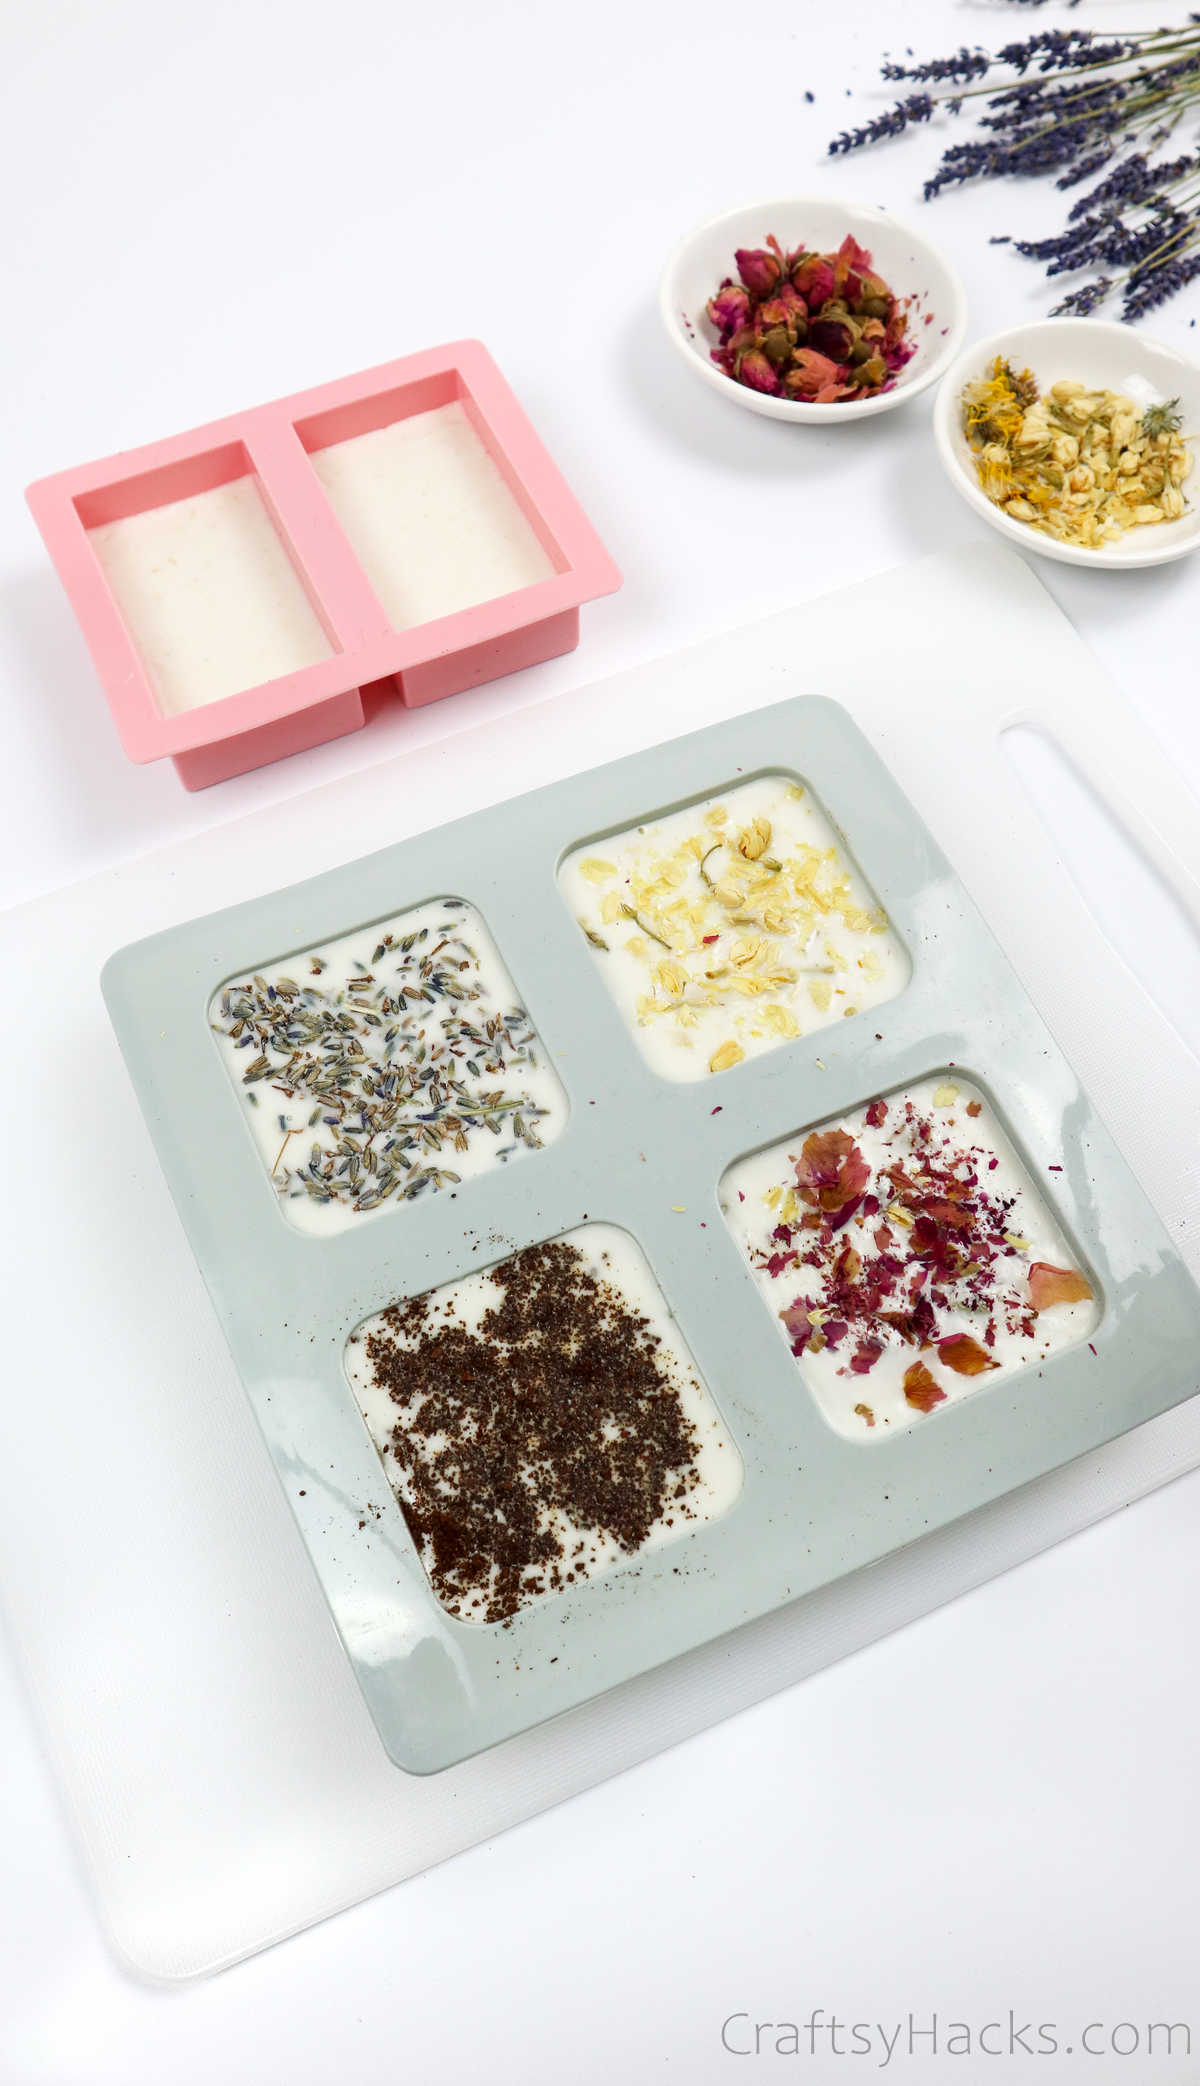
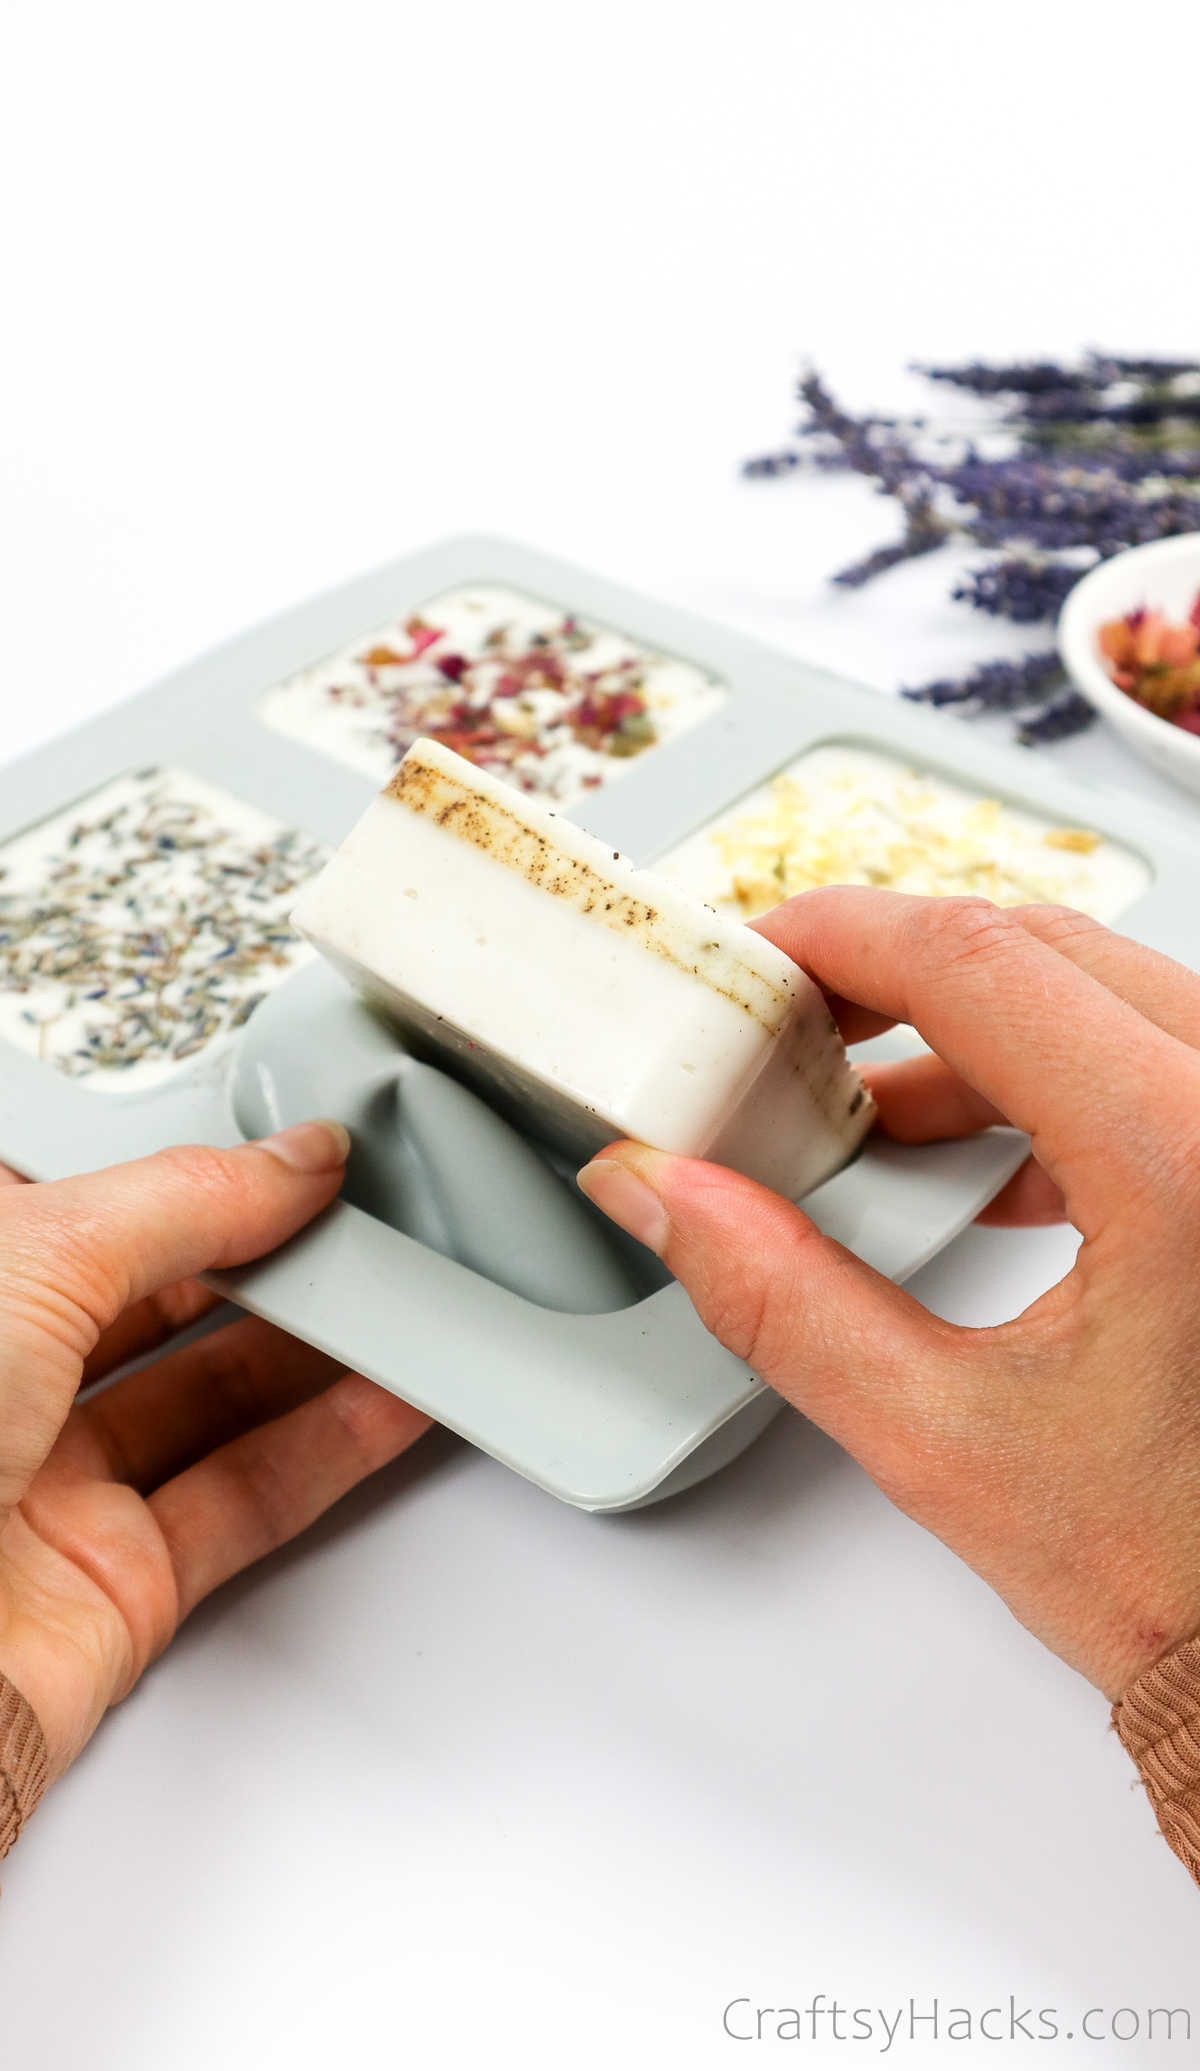
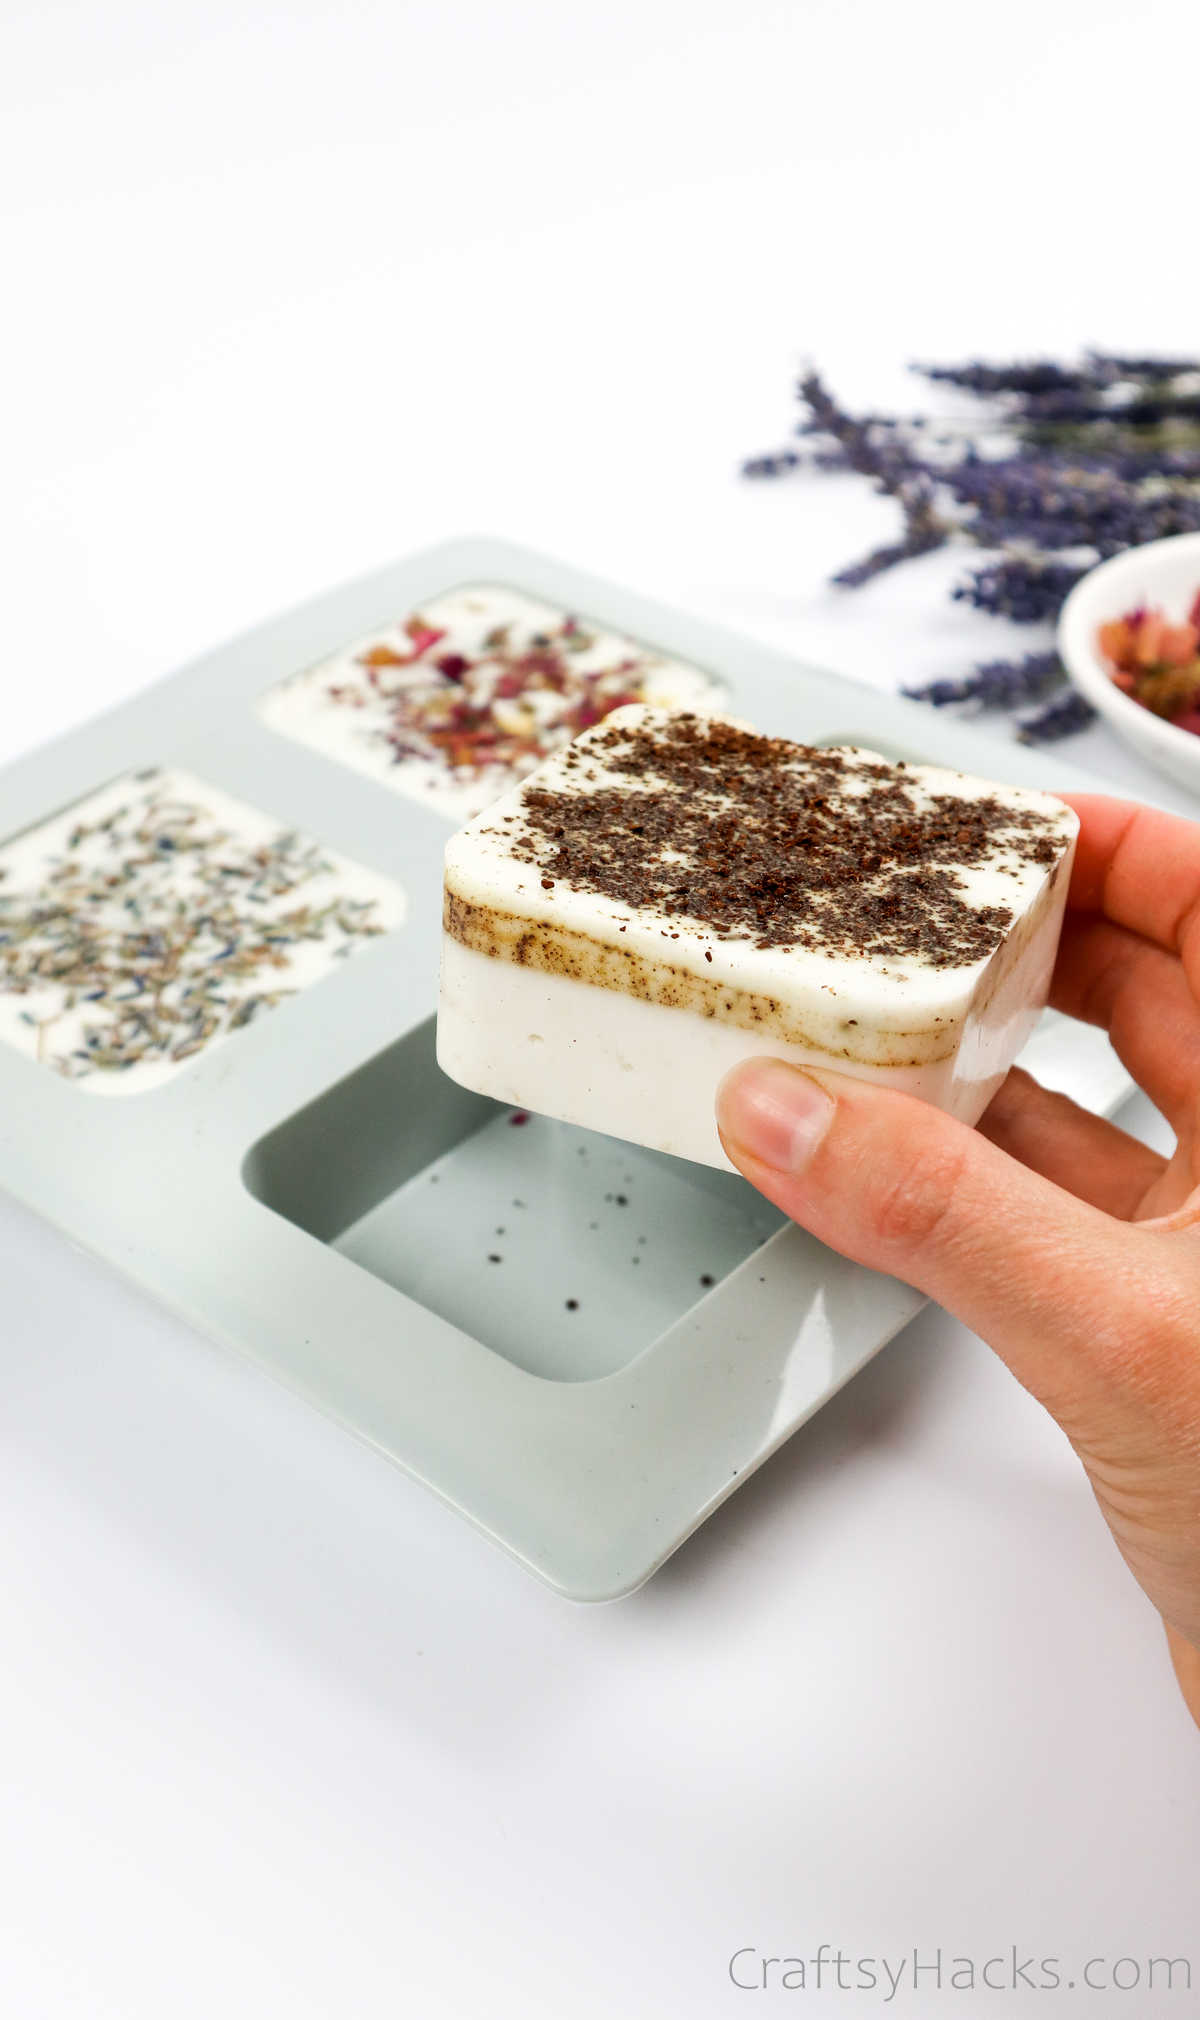
Decorating the soap is like artwork, truly. I’m always in awe of how homemade soaps are so exquisite. You remember the different items you picked out earlier to help you decorate? Well, here are a few ideas about what you can do with them and how you can decorate your soap!
You shouldn’t wait too long before you add your dried flowers or herbs to the soap. The minute you pour the melted soap into the molds and spray the alcohol, your herbs and flowers follow immediately after.
Herbs and flowers can sink into the soap so you can stir them in, or you can layer the bottom of the mold with them before you pour the soap, too!
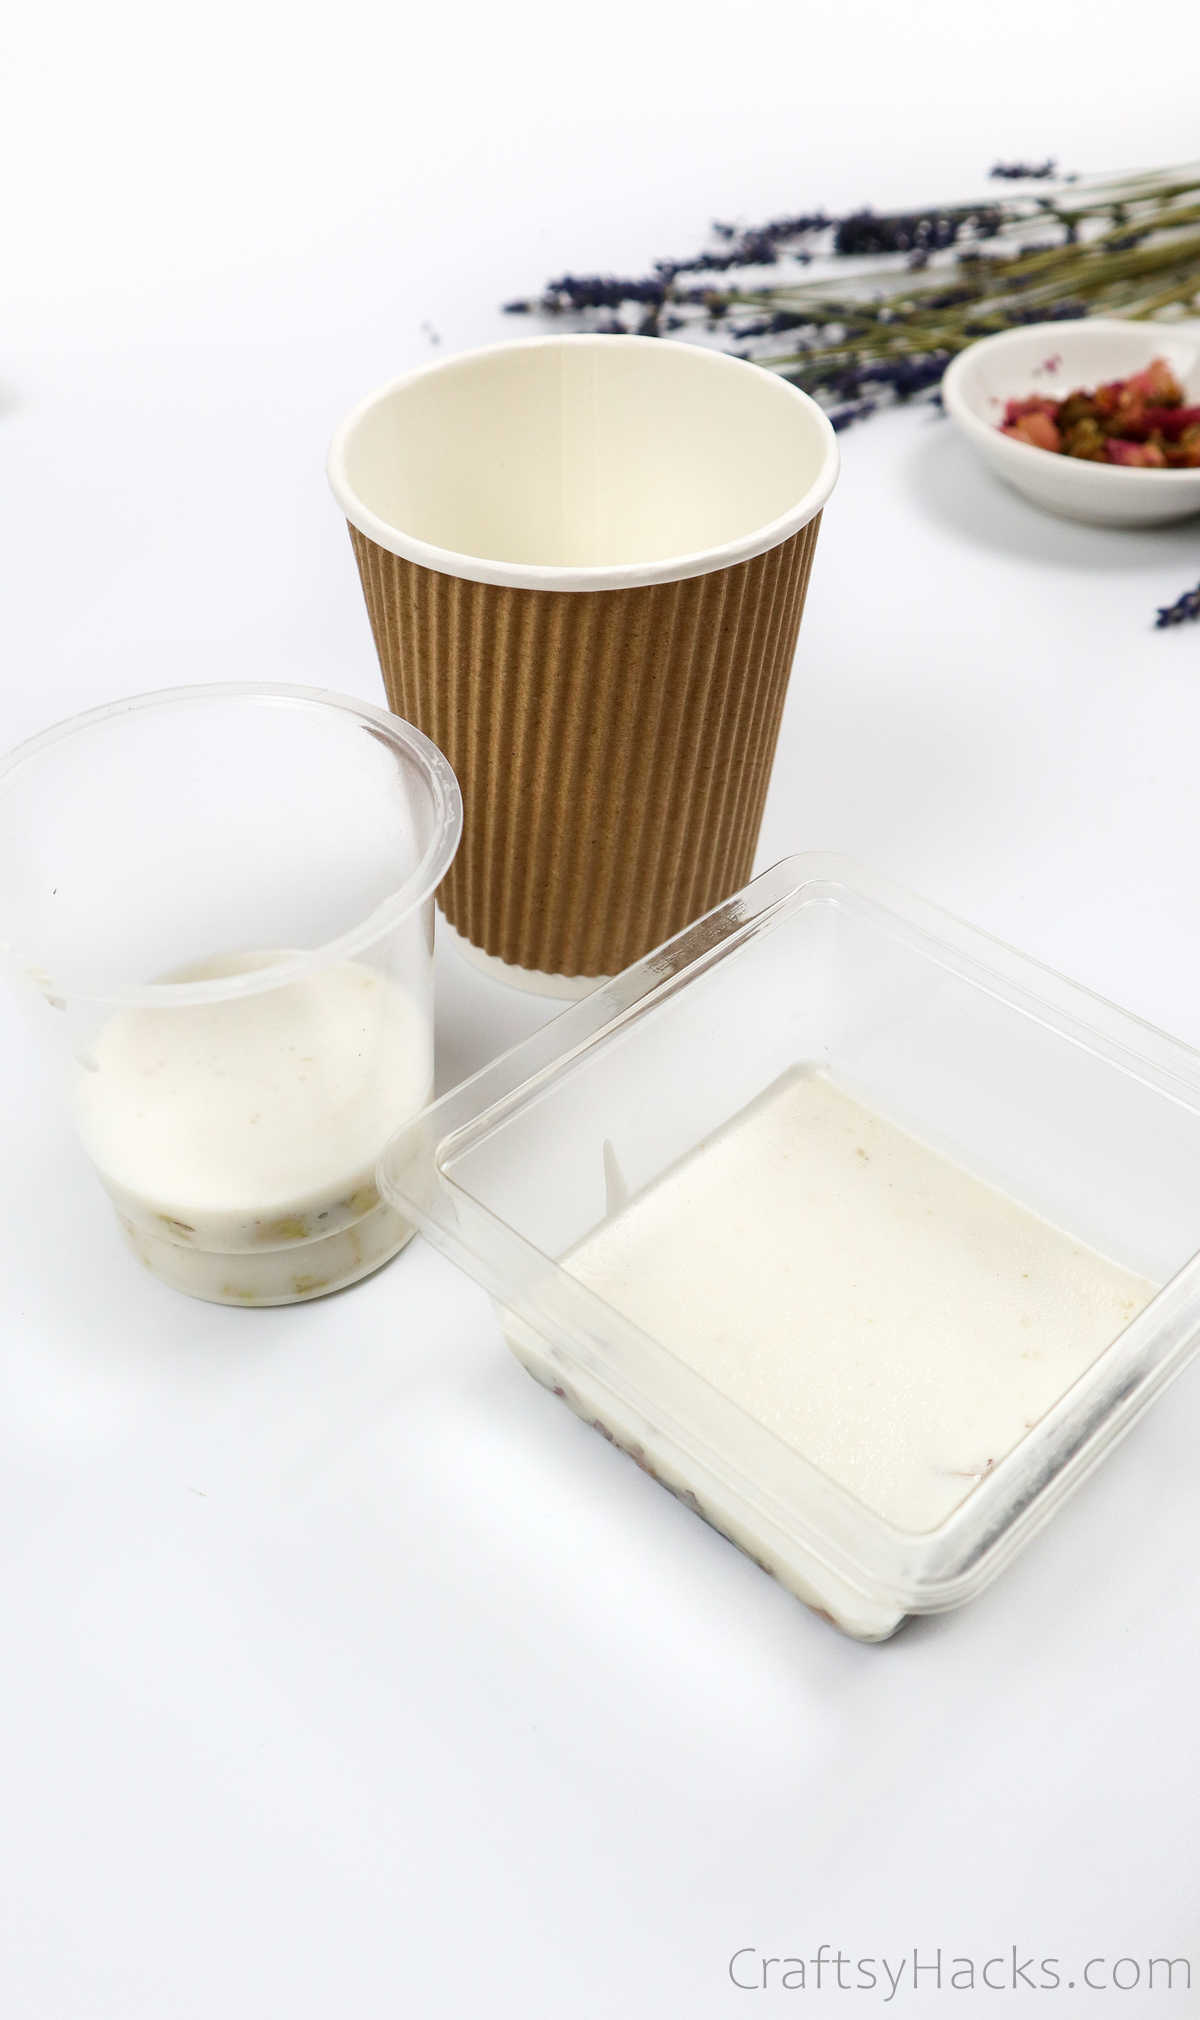
If you want different shapes of soap, or if you don’t have silicone molds, you can switch them out with everyday items like paper cups or plastic containers.
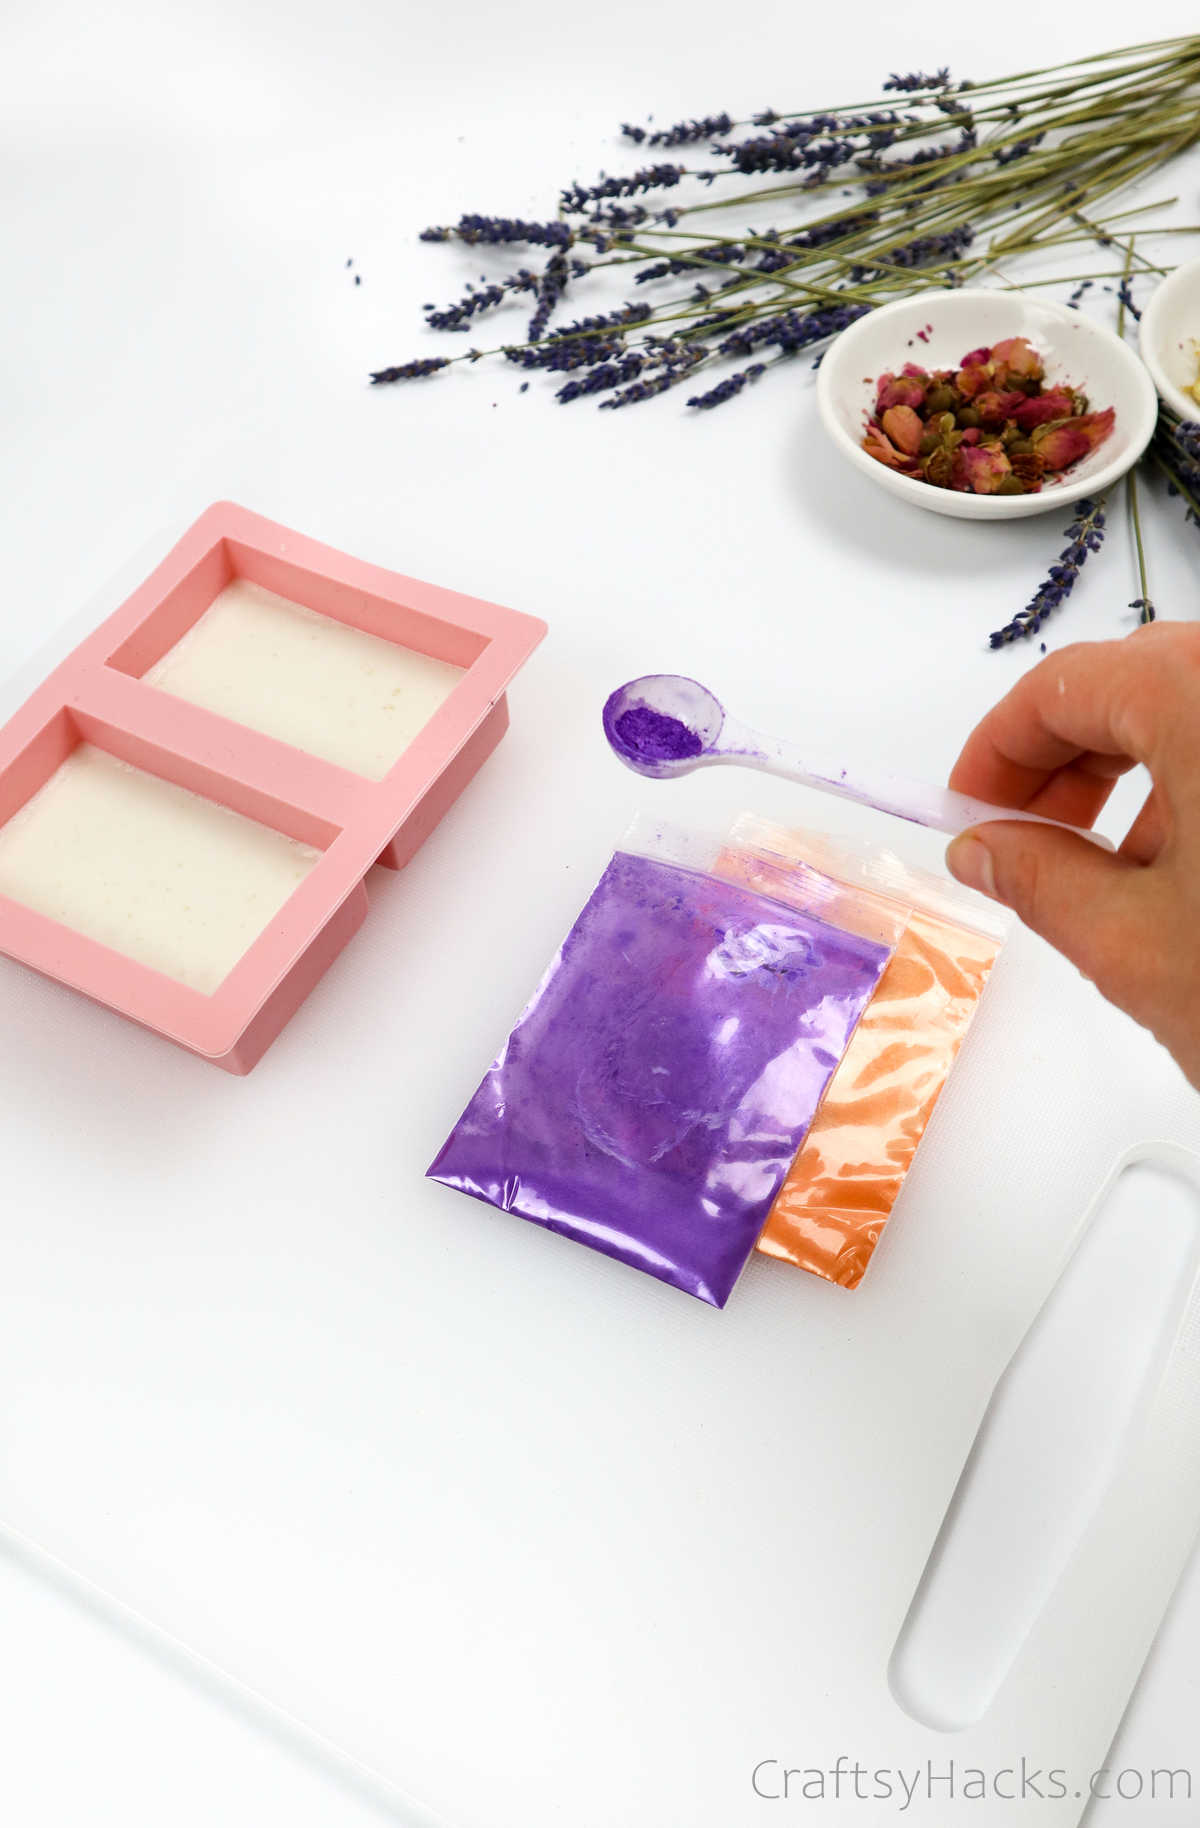
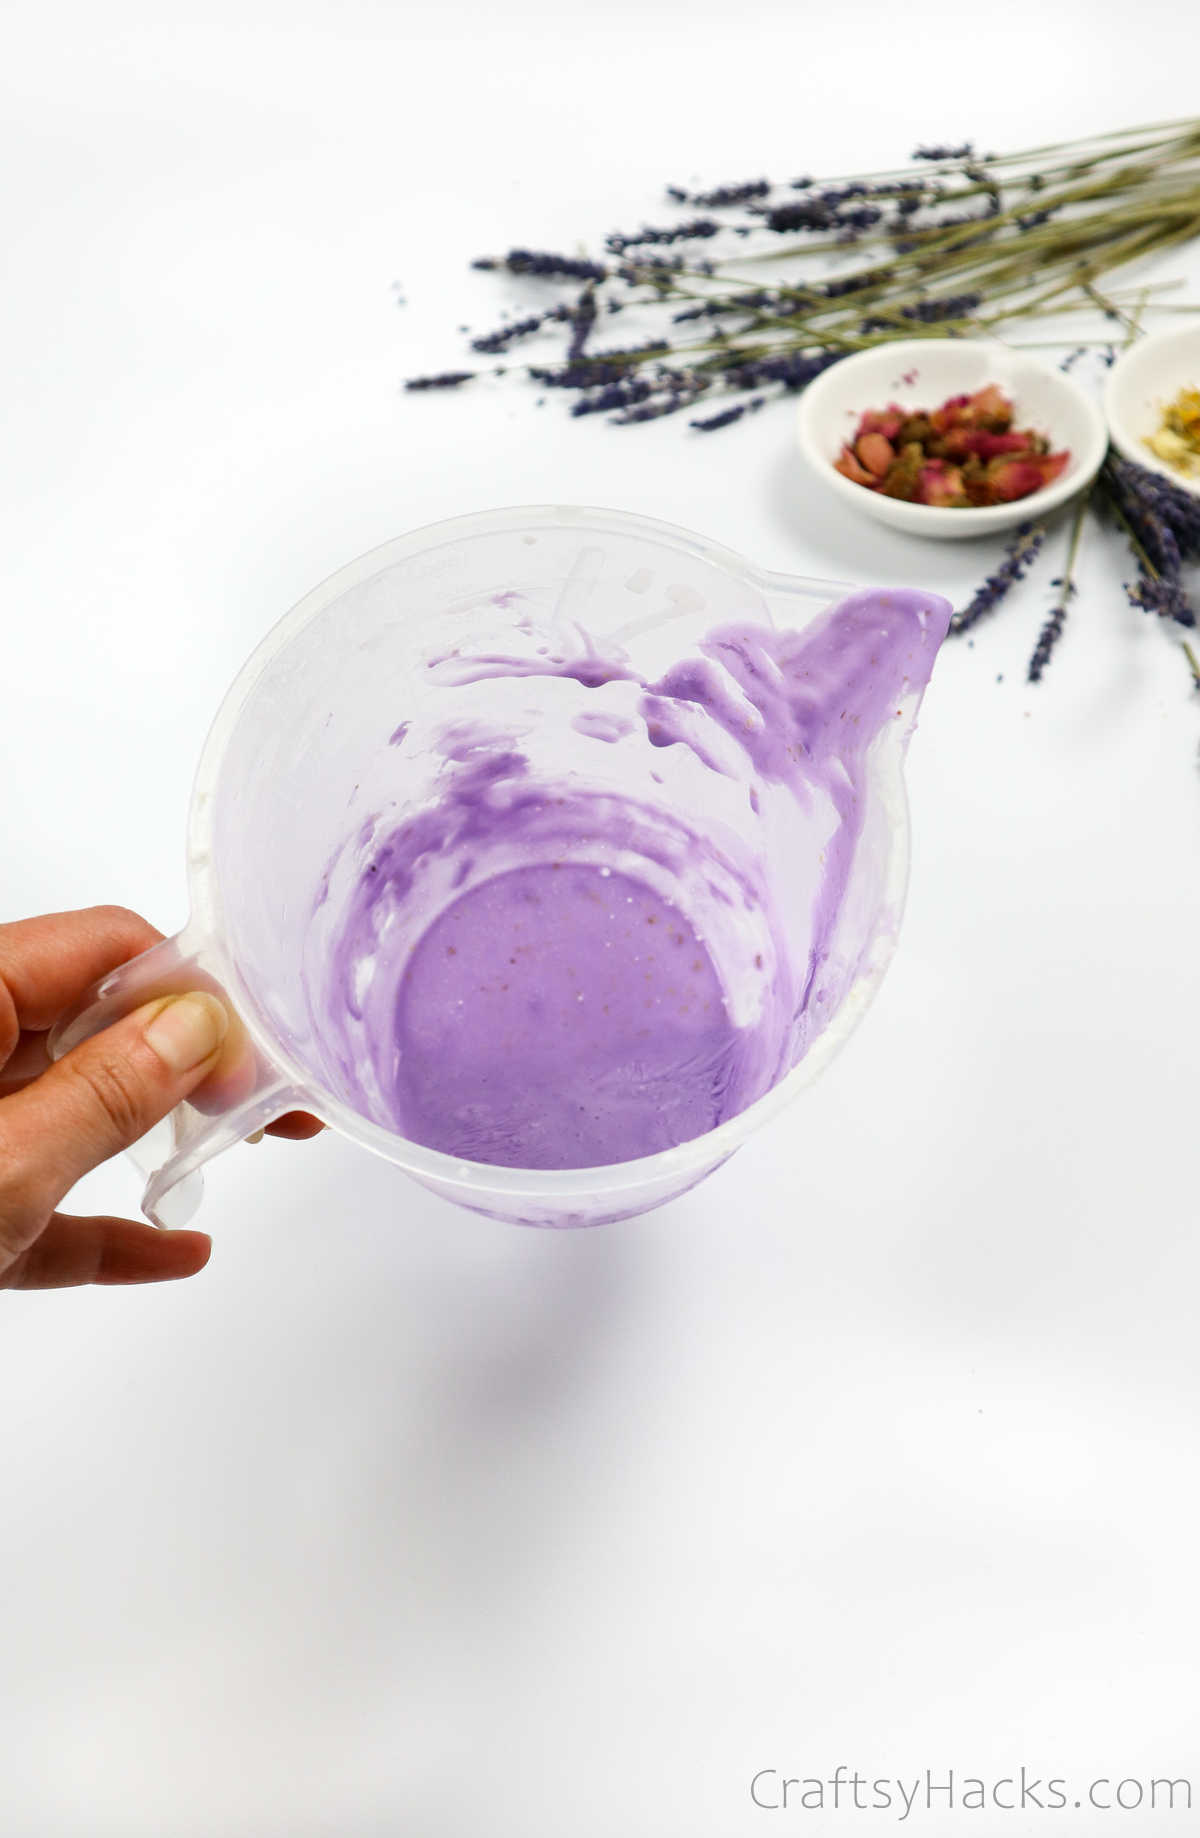
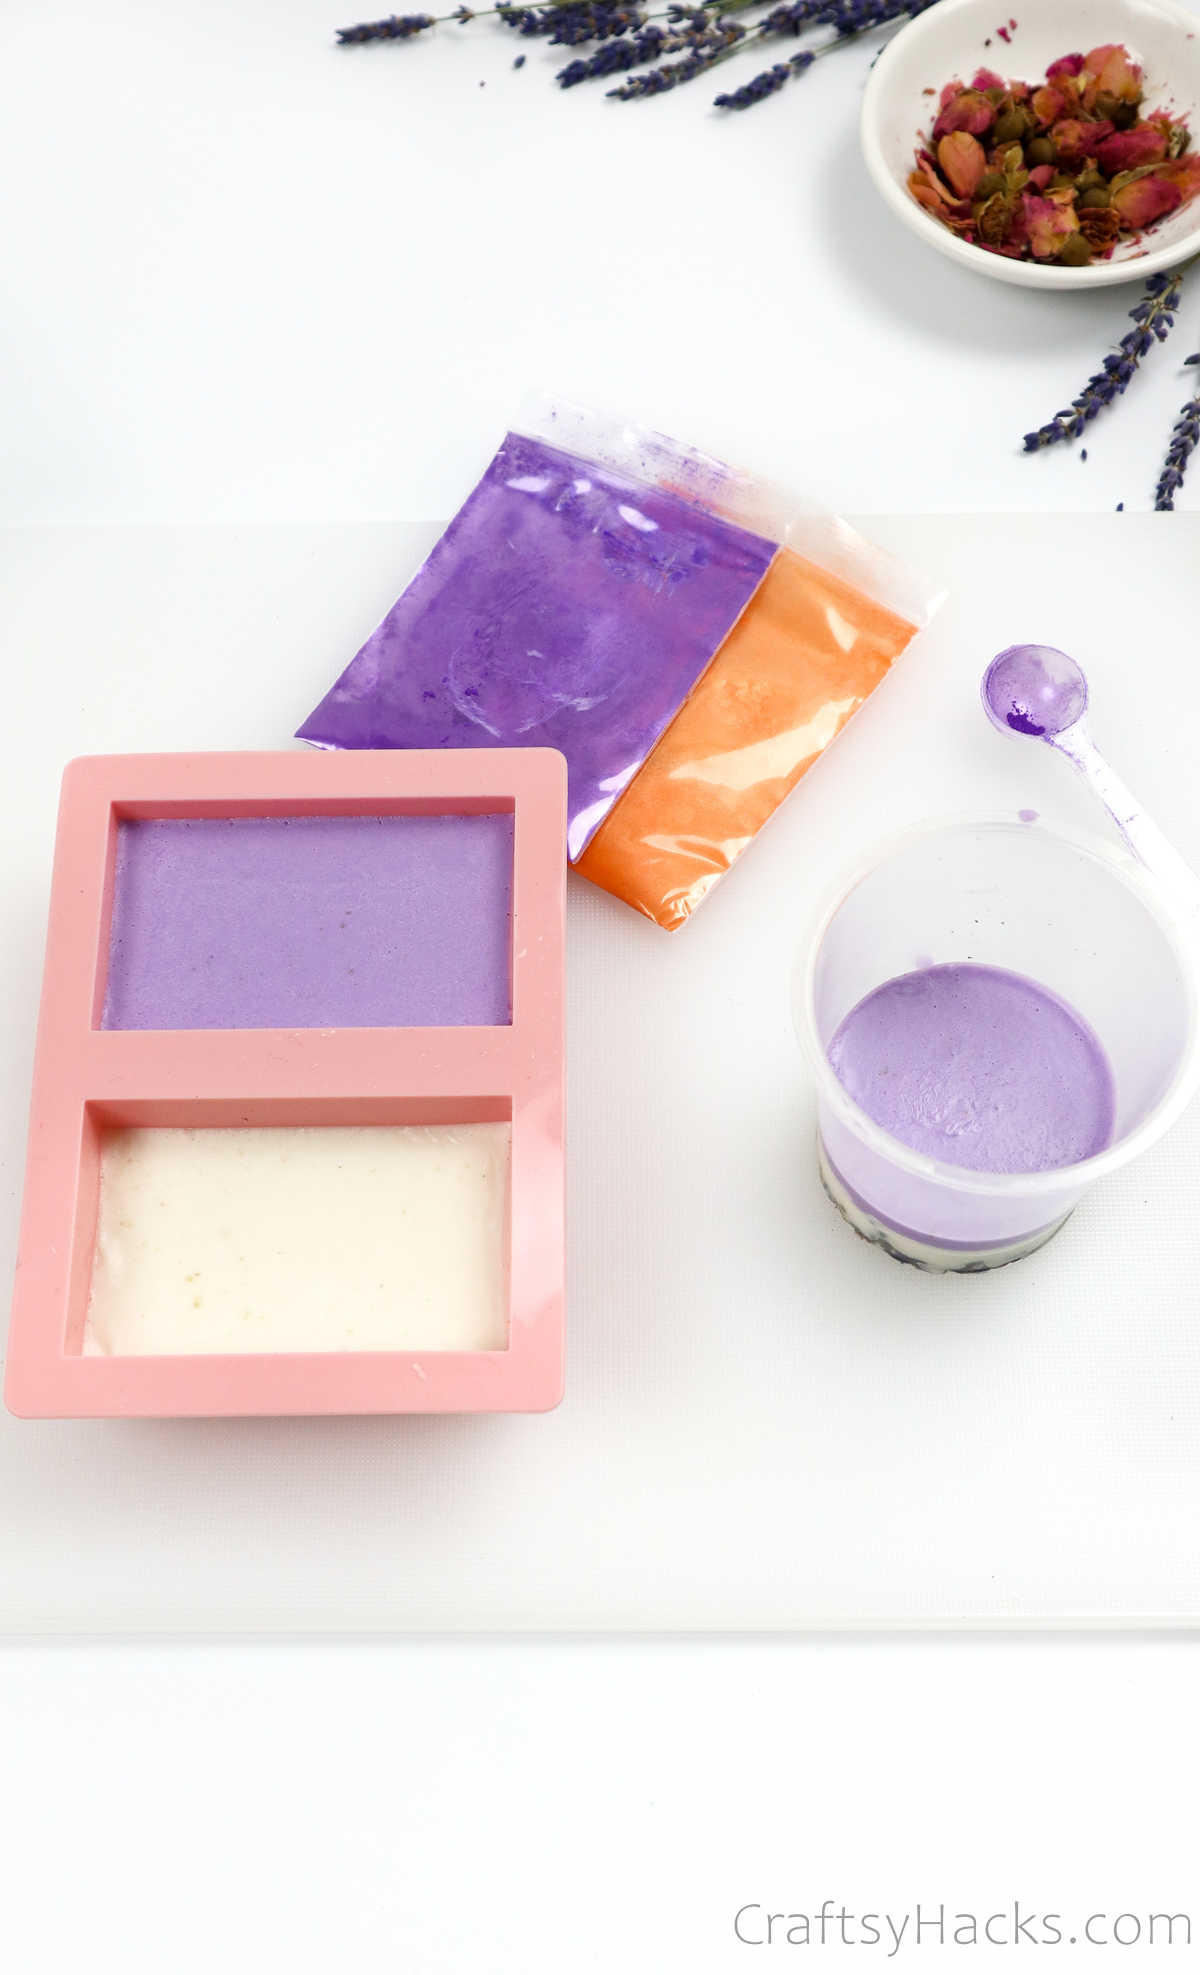
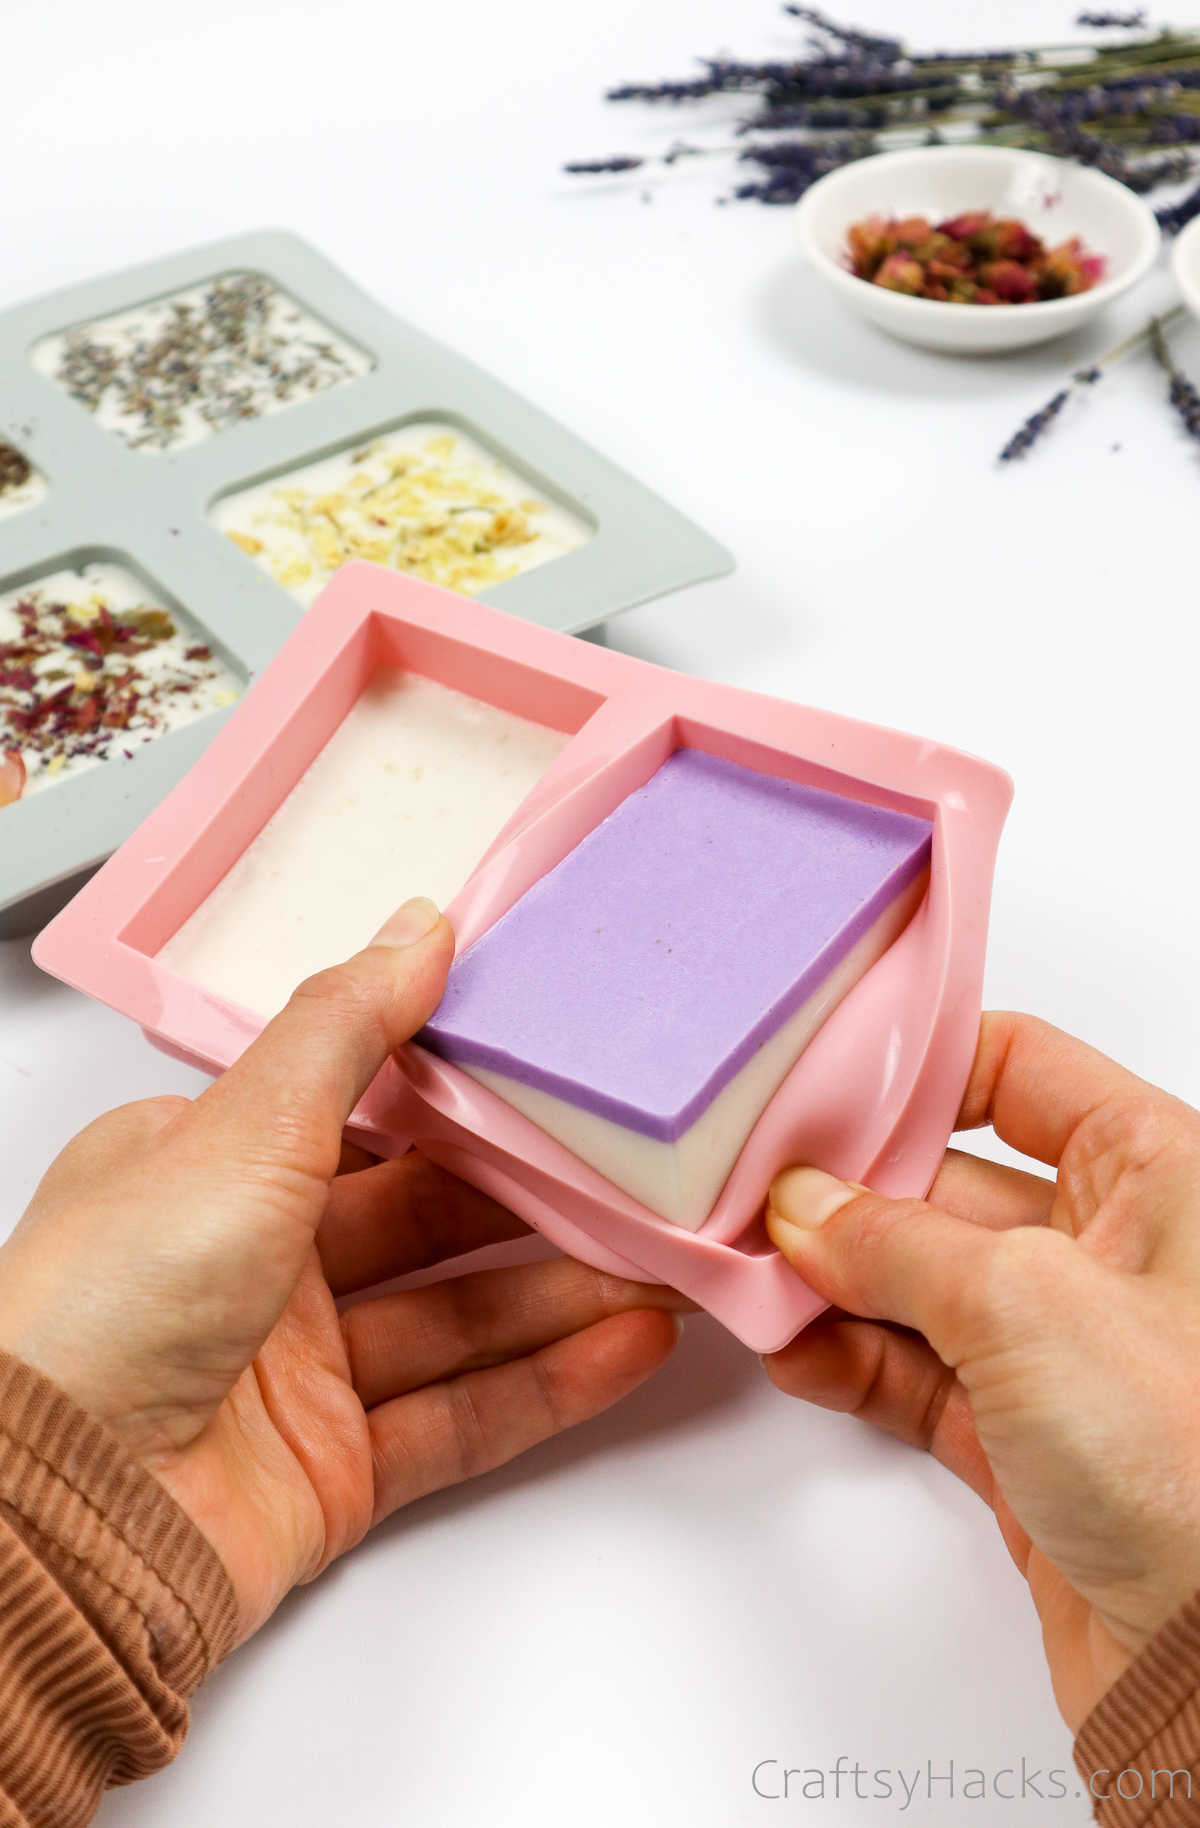
You can dye your soaps, too! You can layer the colored soap over a white base or simply color the entire soap. When you’re layering the color, you’ll have to wait for the surface of the previous layer to harden.
Then, before you pour in the next layer, spray the surface with isopropyl alcohol first so that the layers won’t blend in.
Step 6
When you’re happy with how your soap has turned out and when you’re sure it has hardened, you can remove them from its mold.
If you used paper or plastic containers, use a pair of scissors to cut the plastic and pull it away from the soap, as seen here.
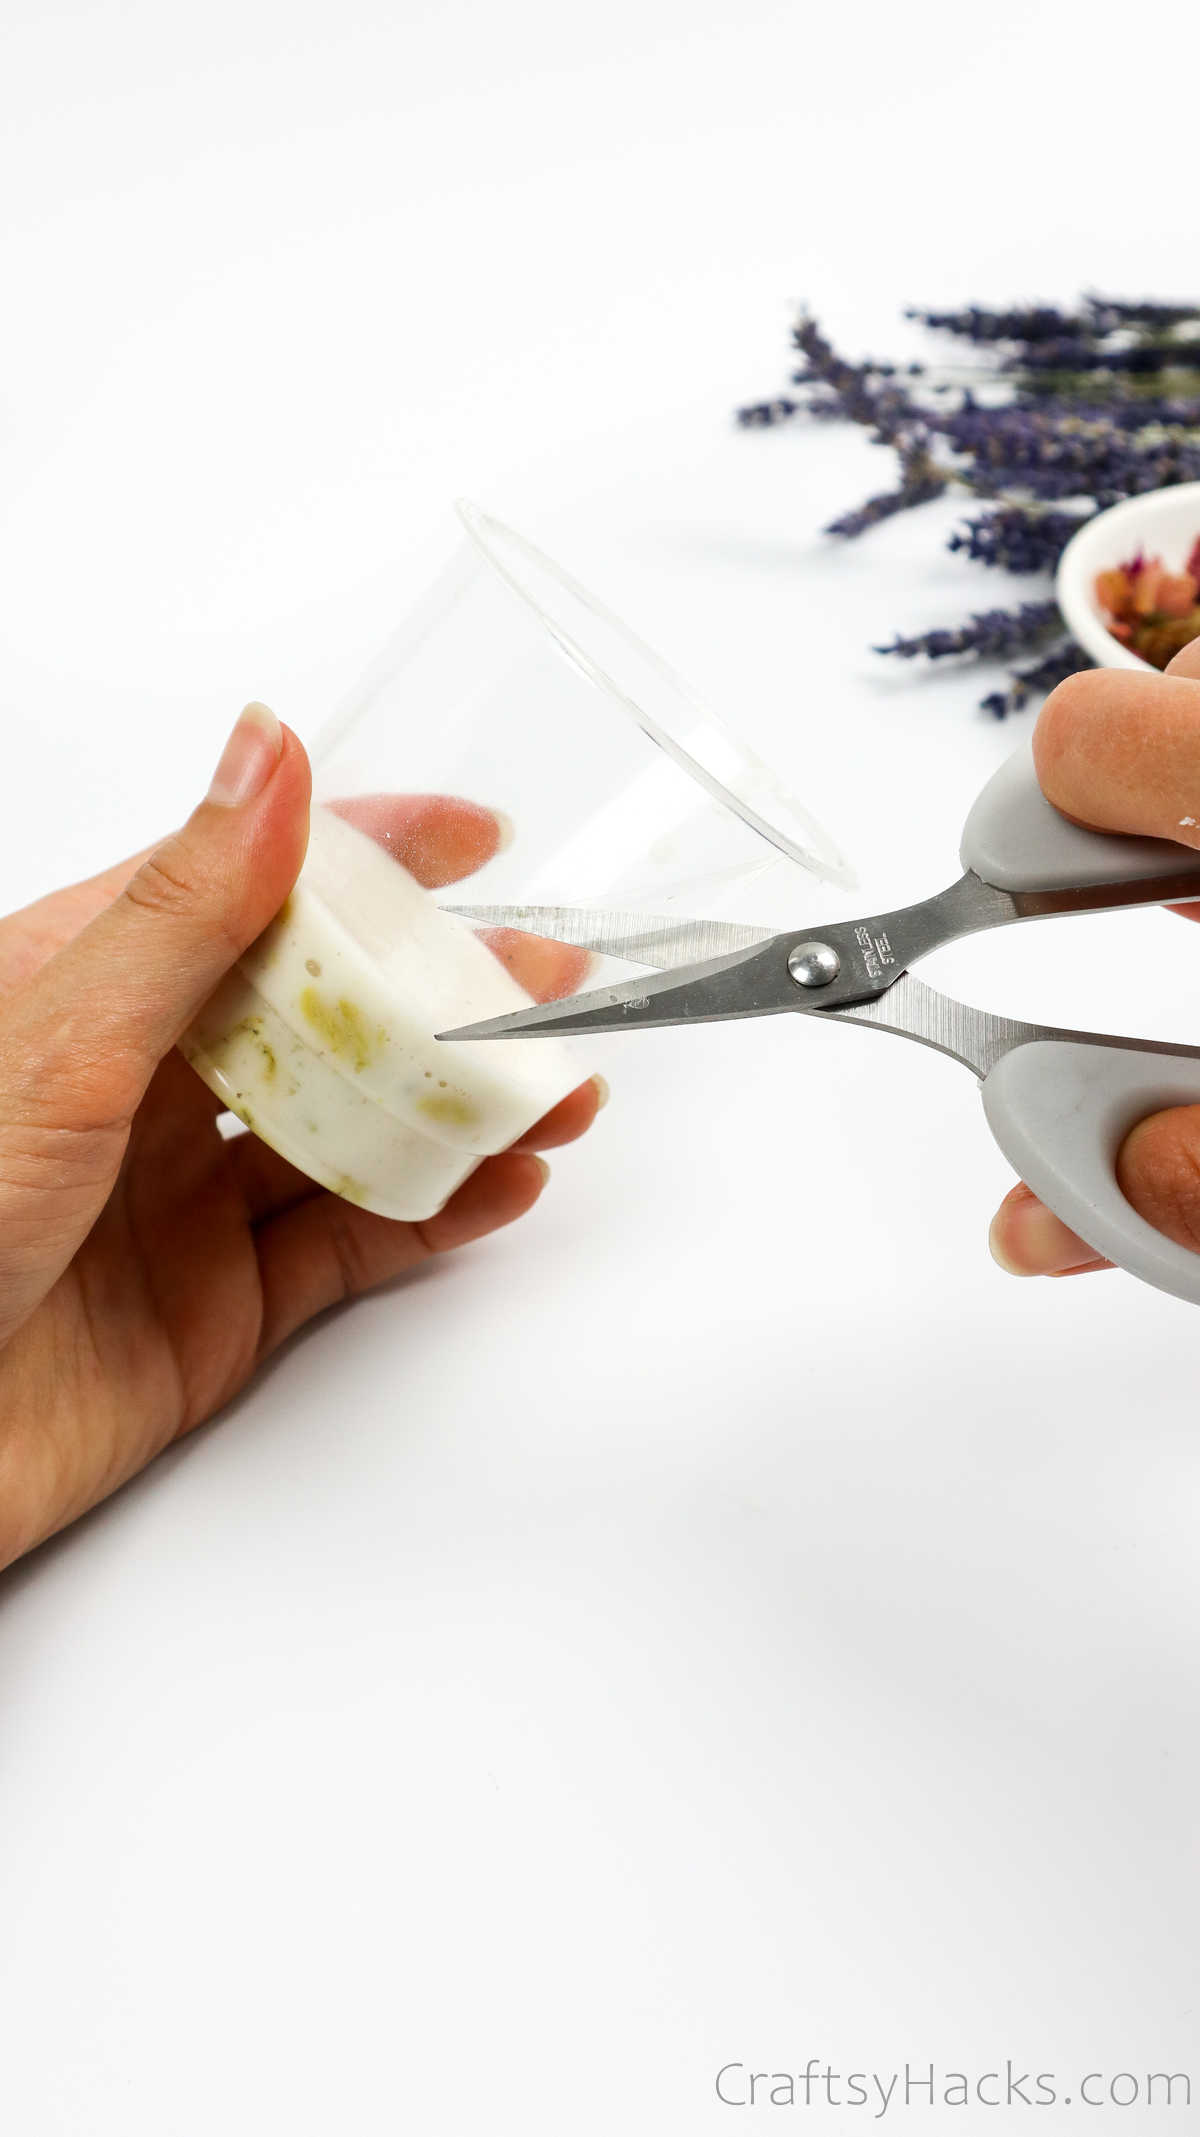
It’s way easier to remove them from silicone molds; just push the mold inward and pop the soap out.

Step 7
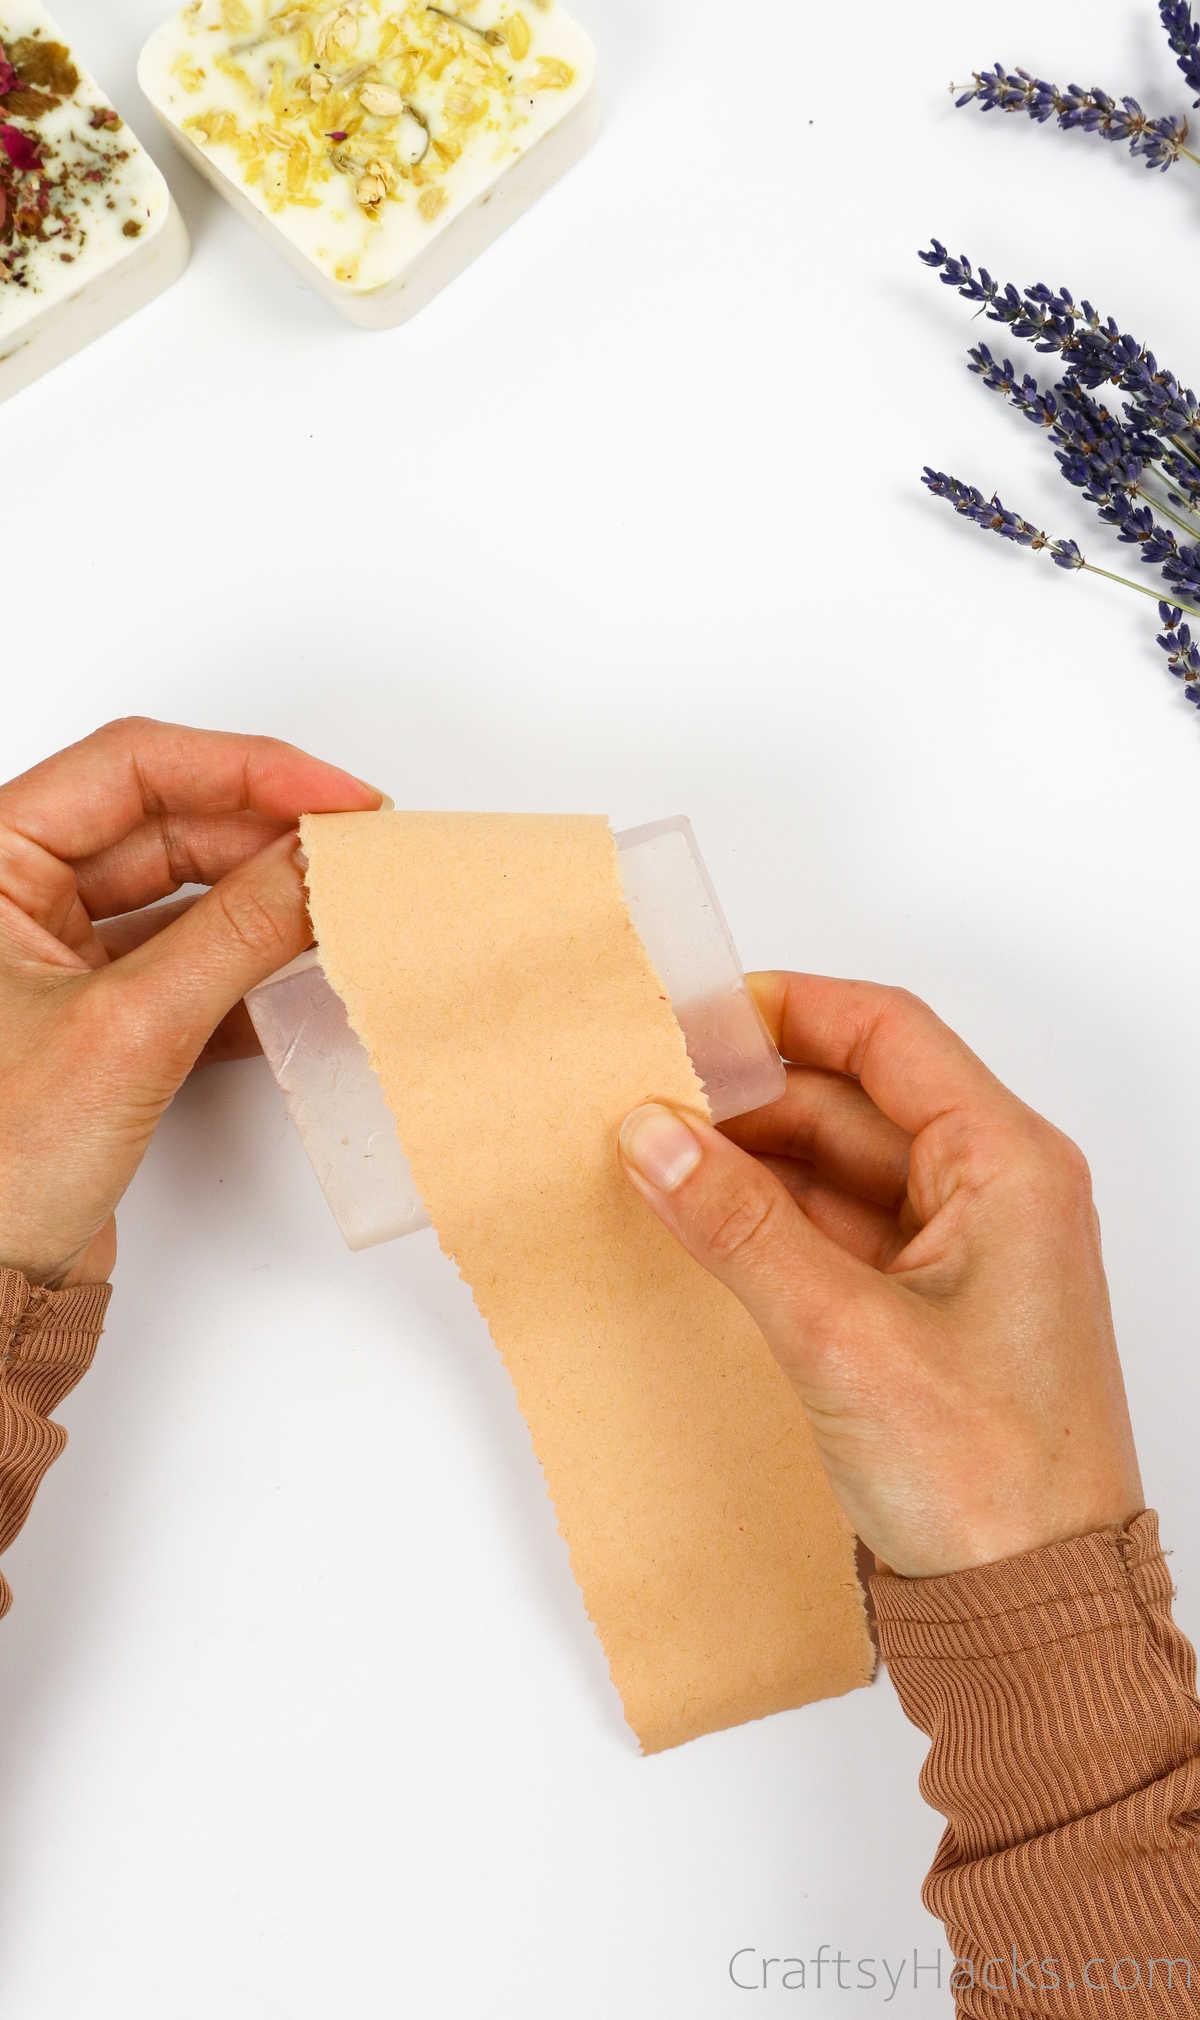
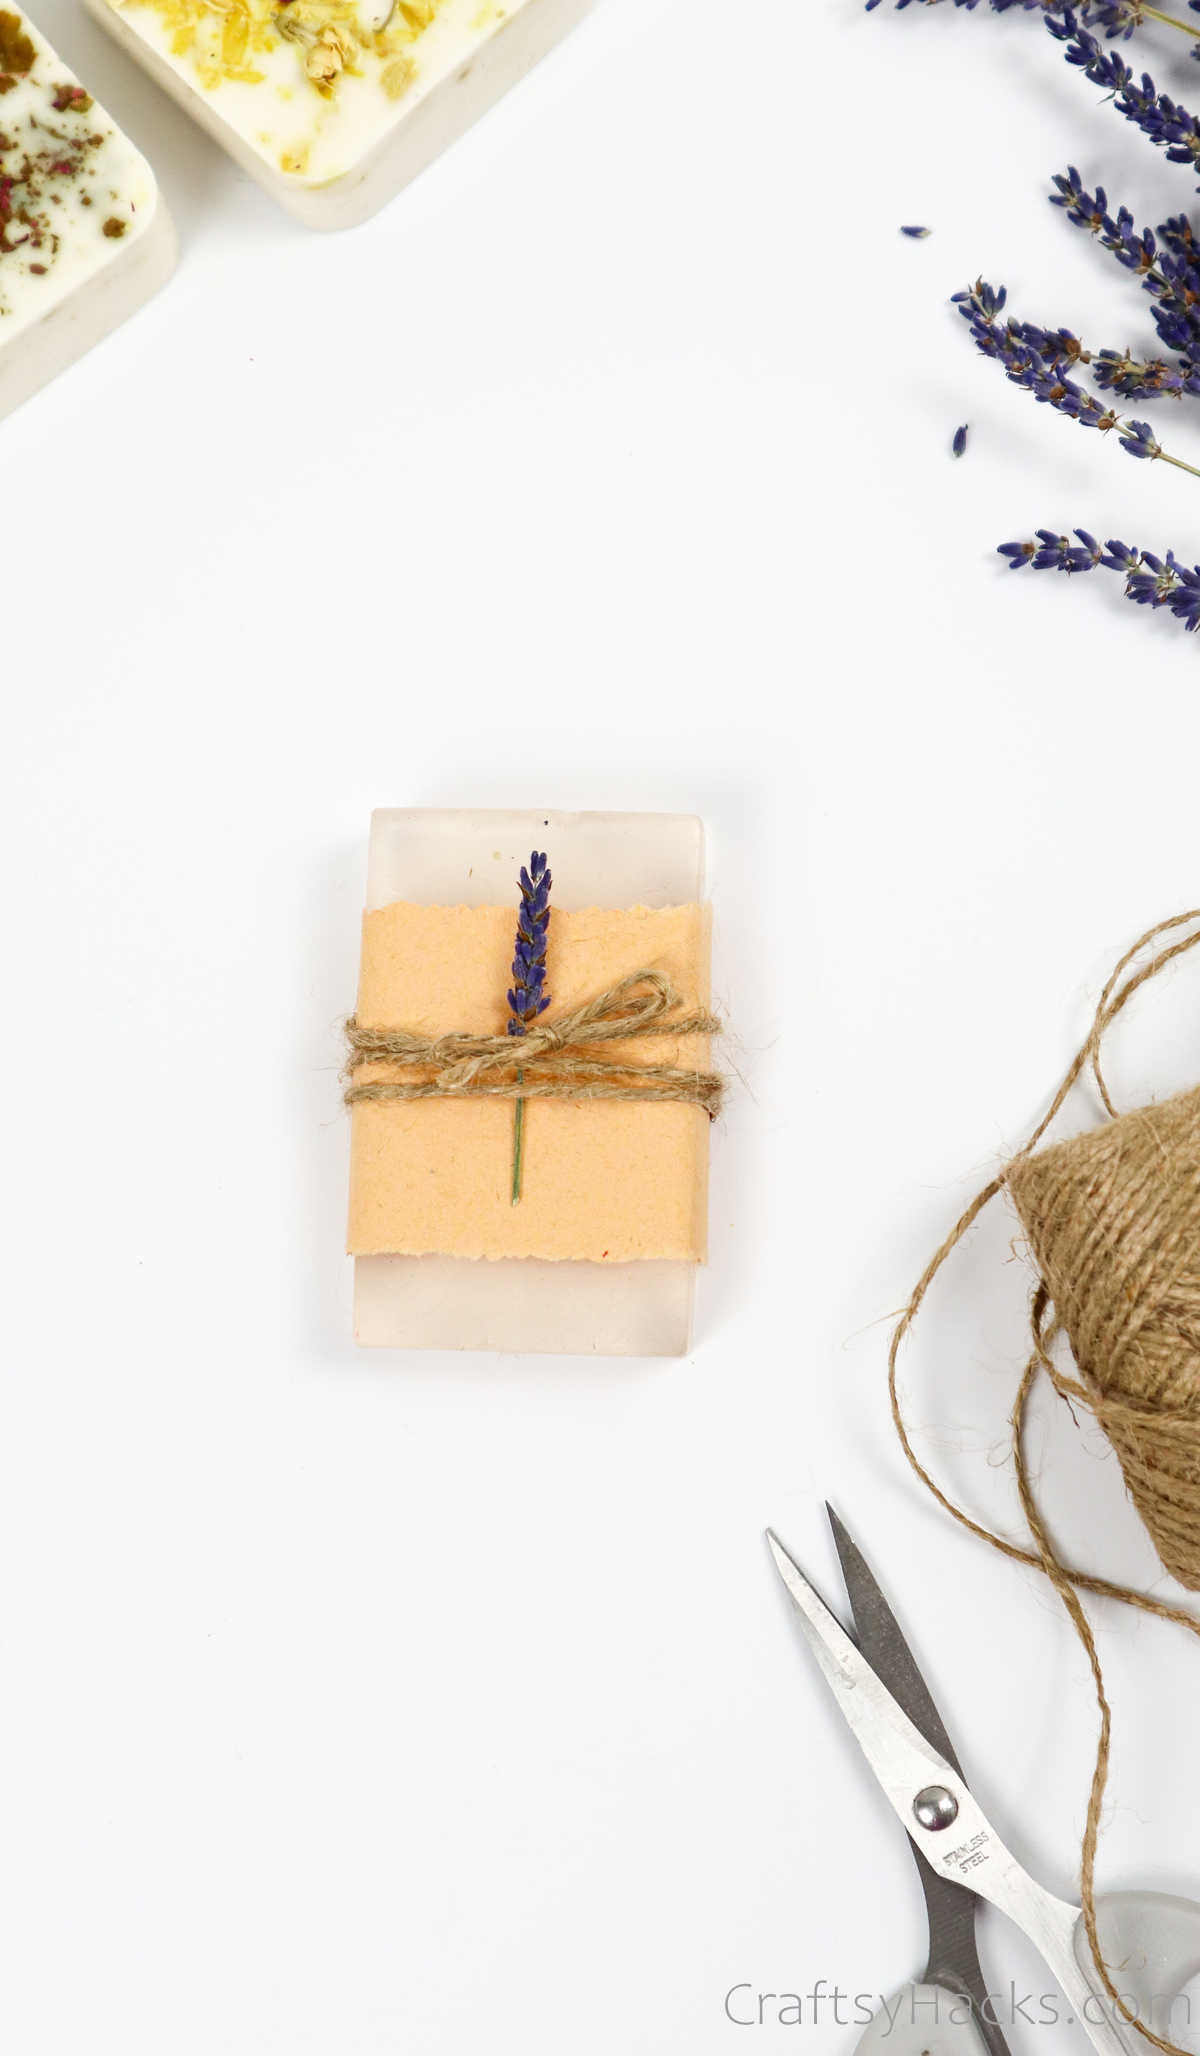
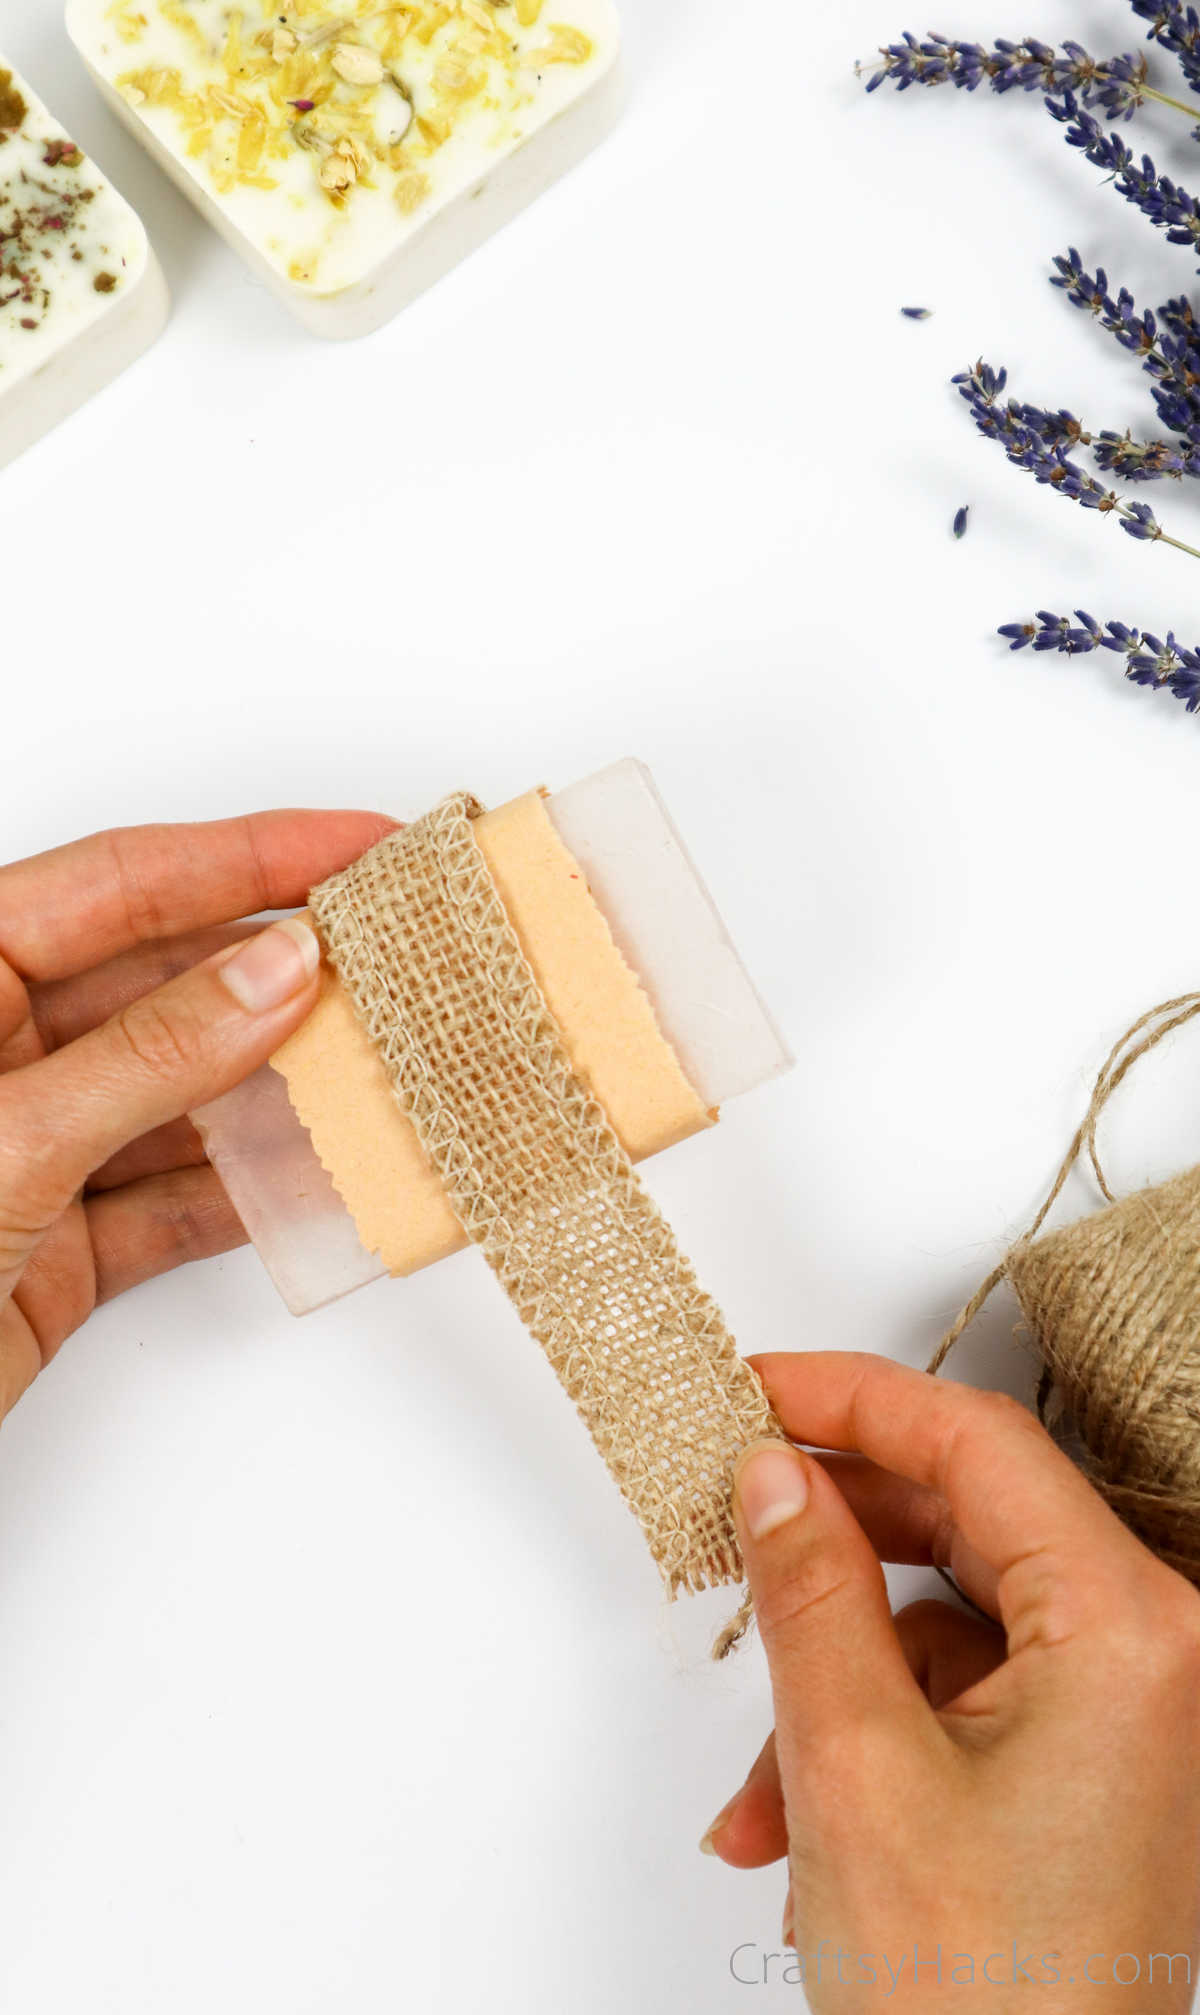
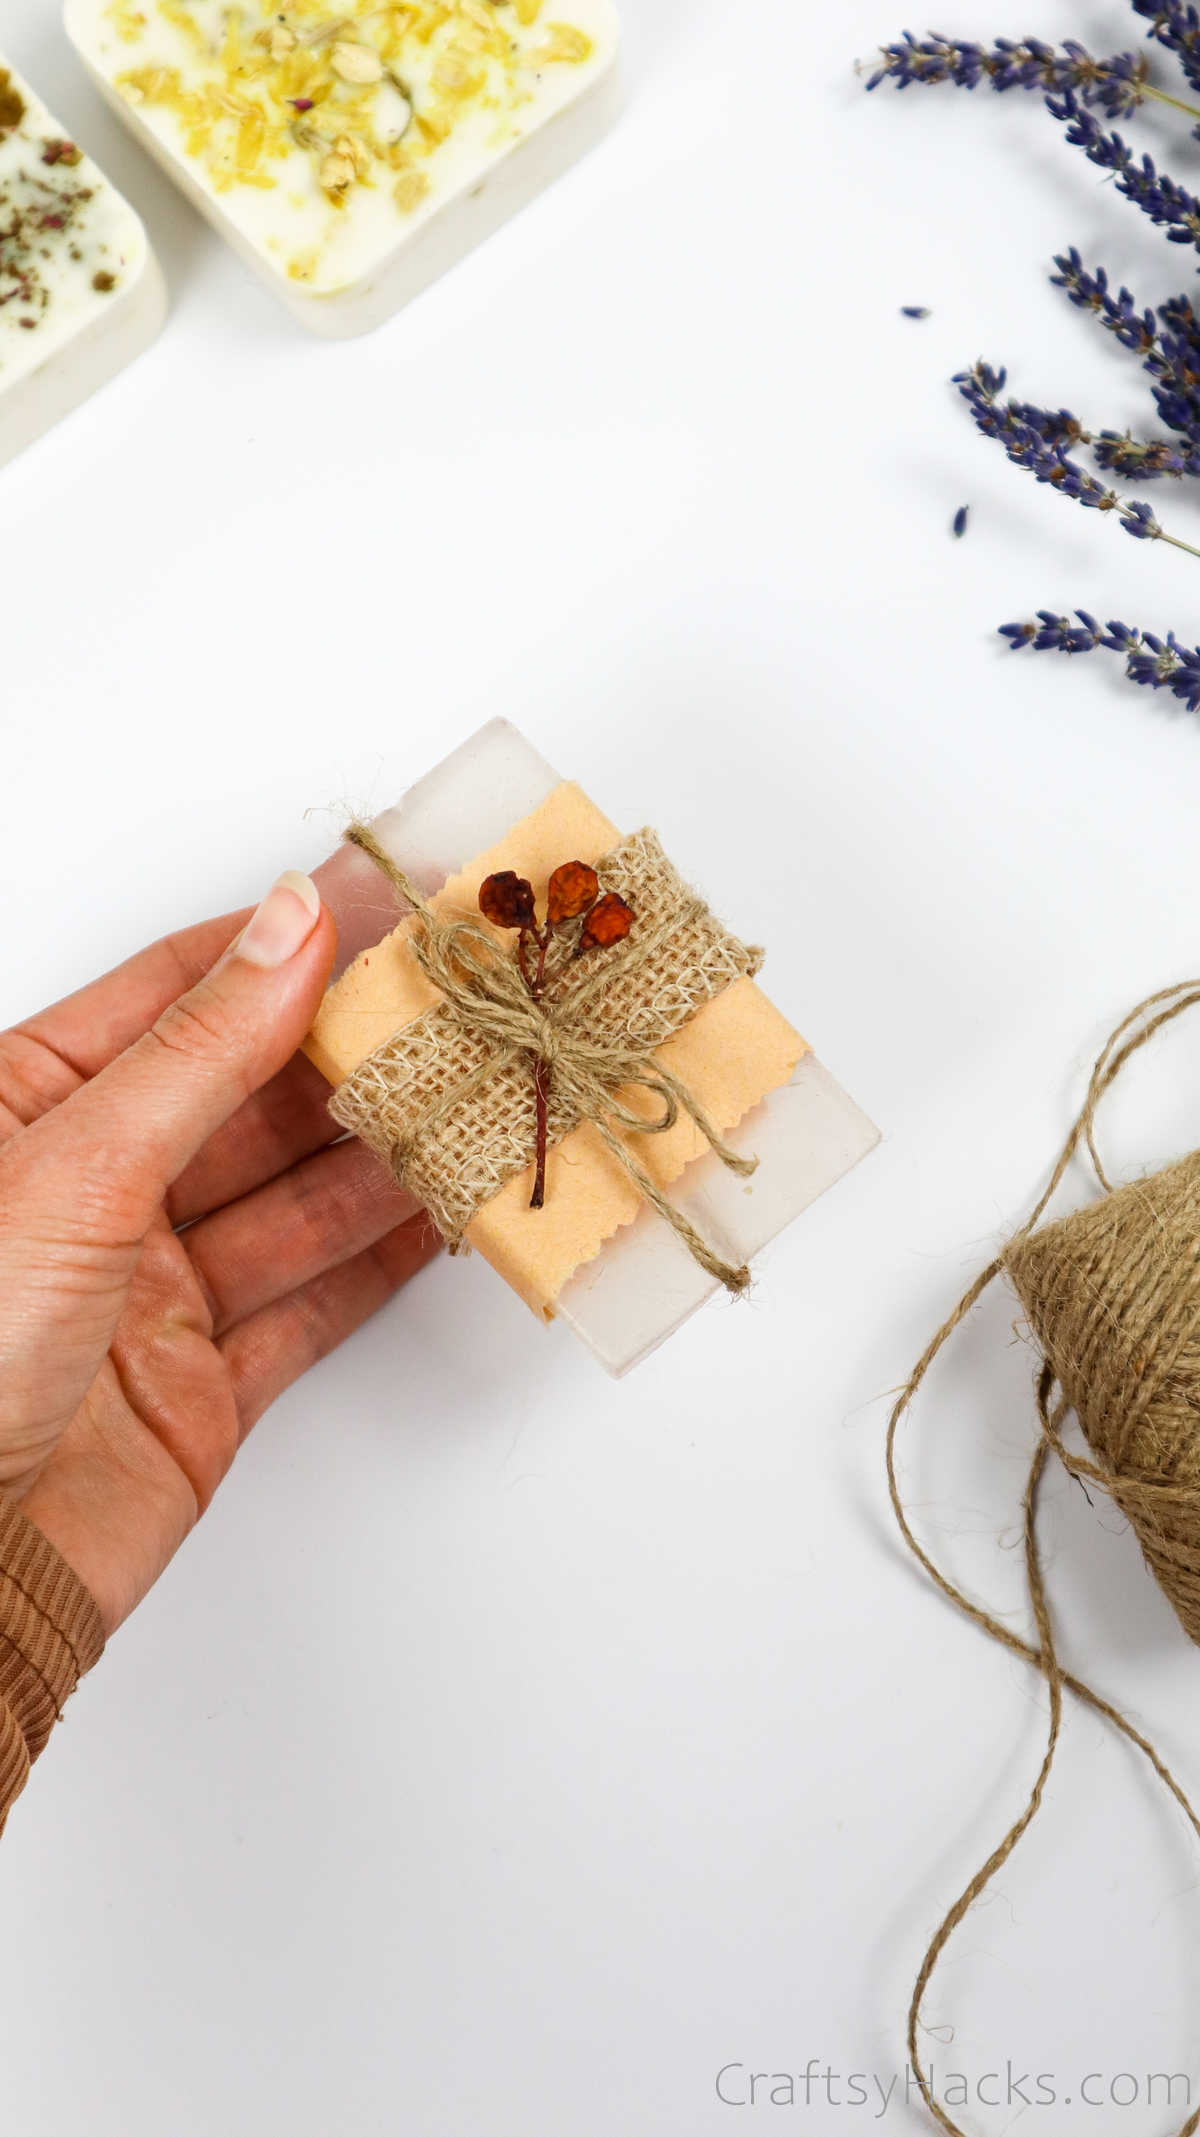
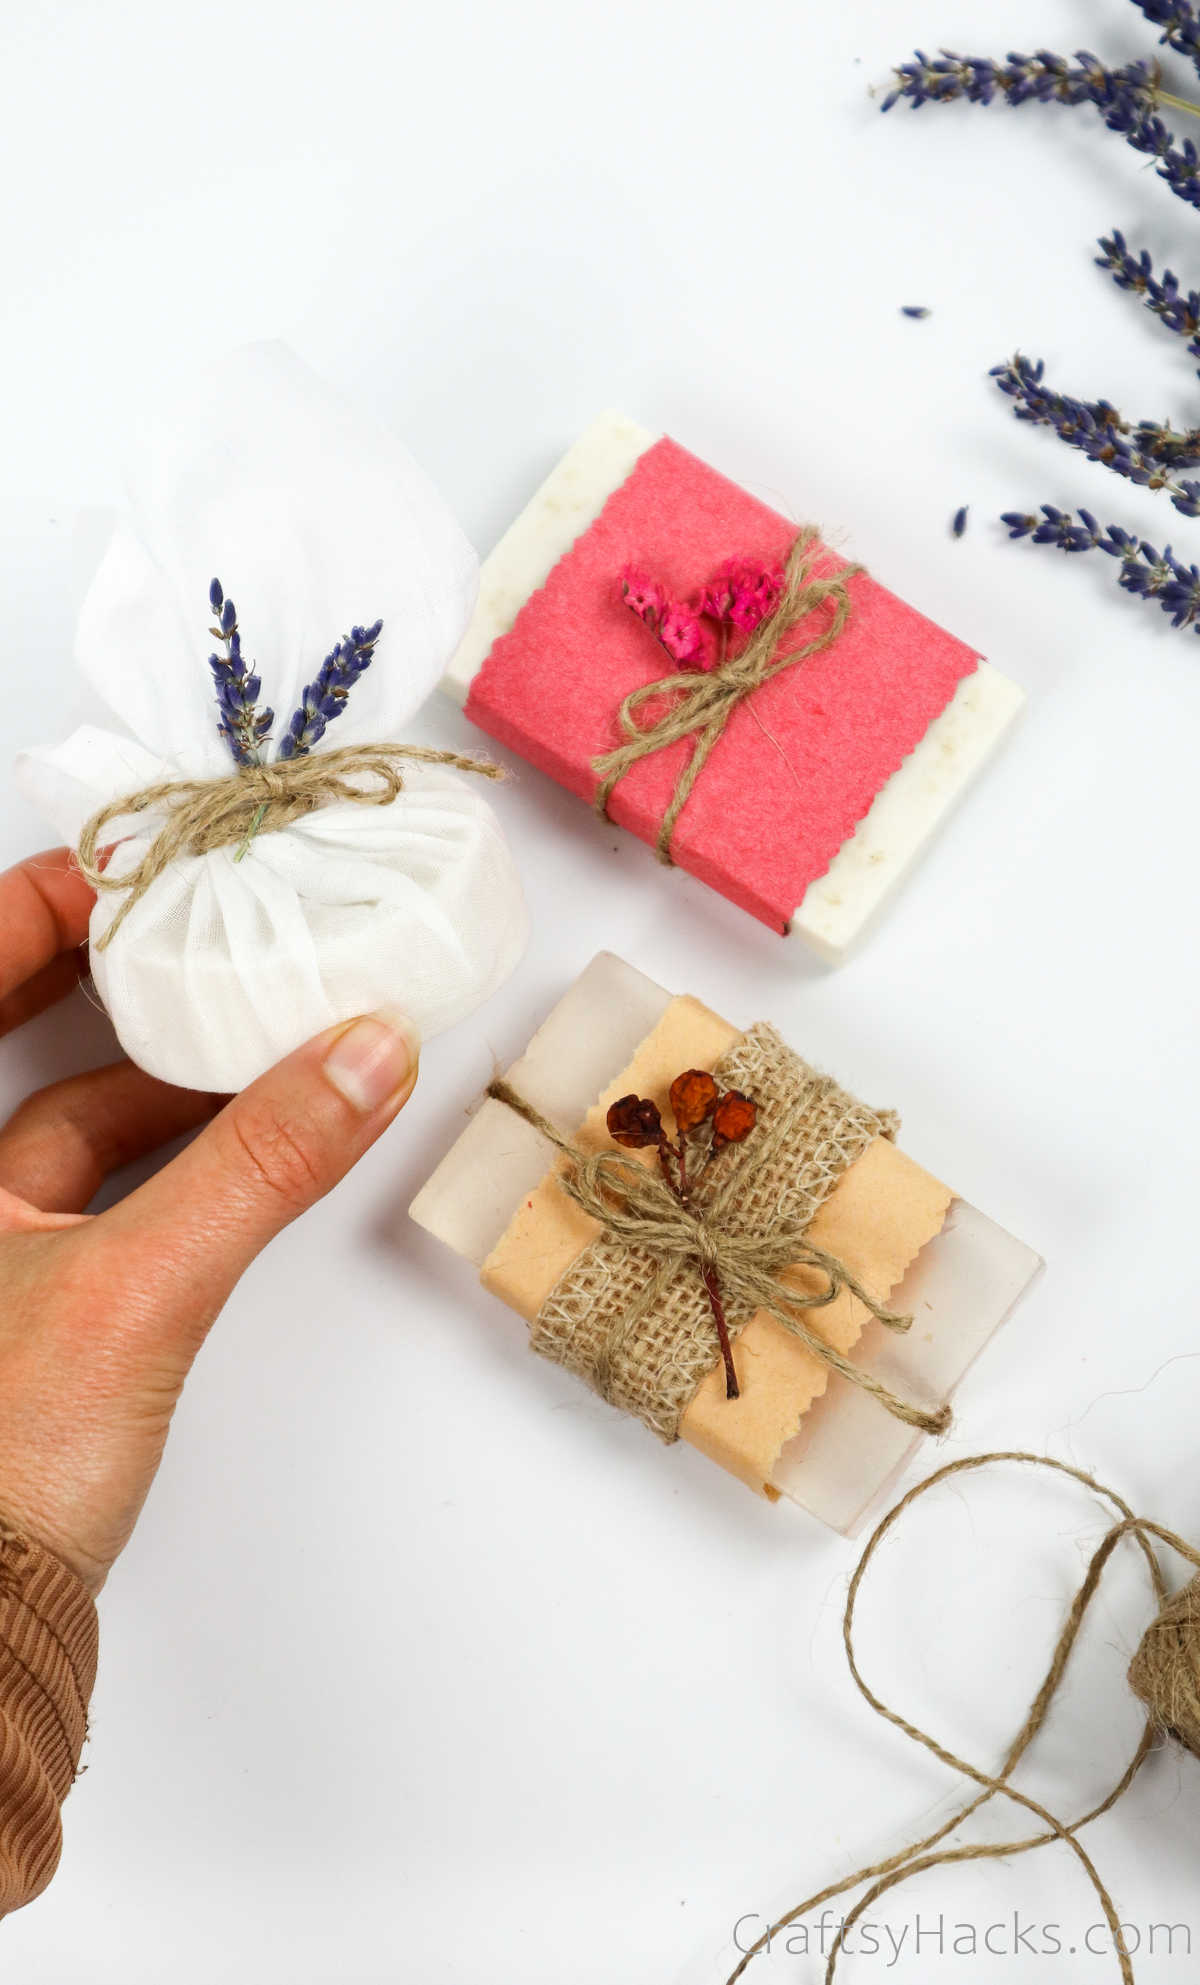
When you want to store these bars of soap or gift them, you’ll need to make sure they’re packed properly. Grab some craft paper and artfully pack the soap in it.
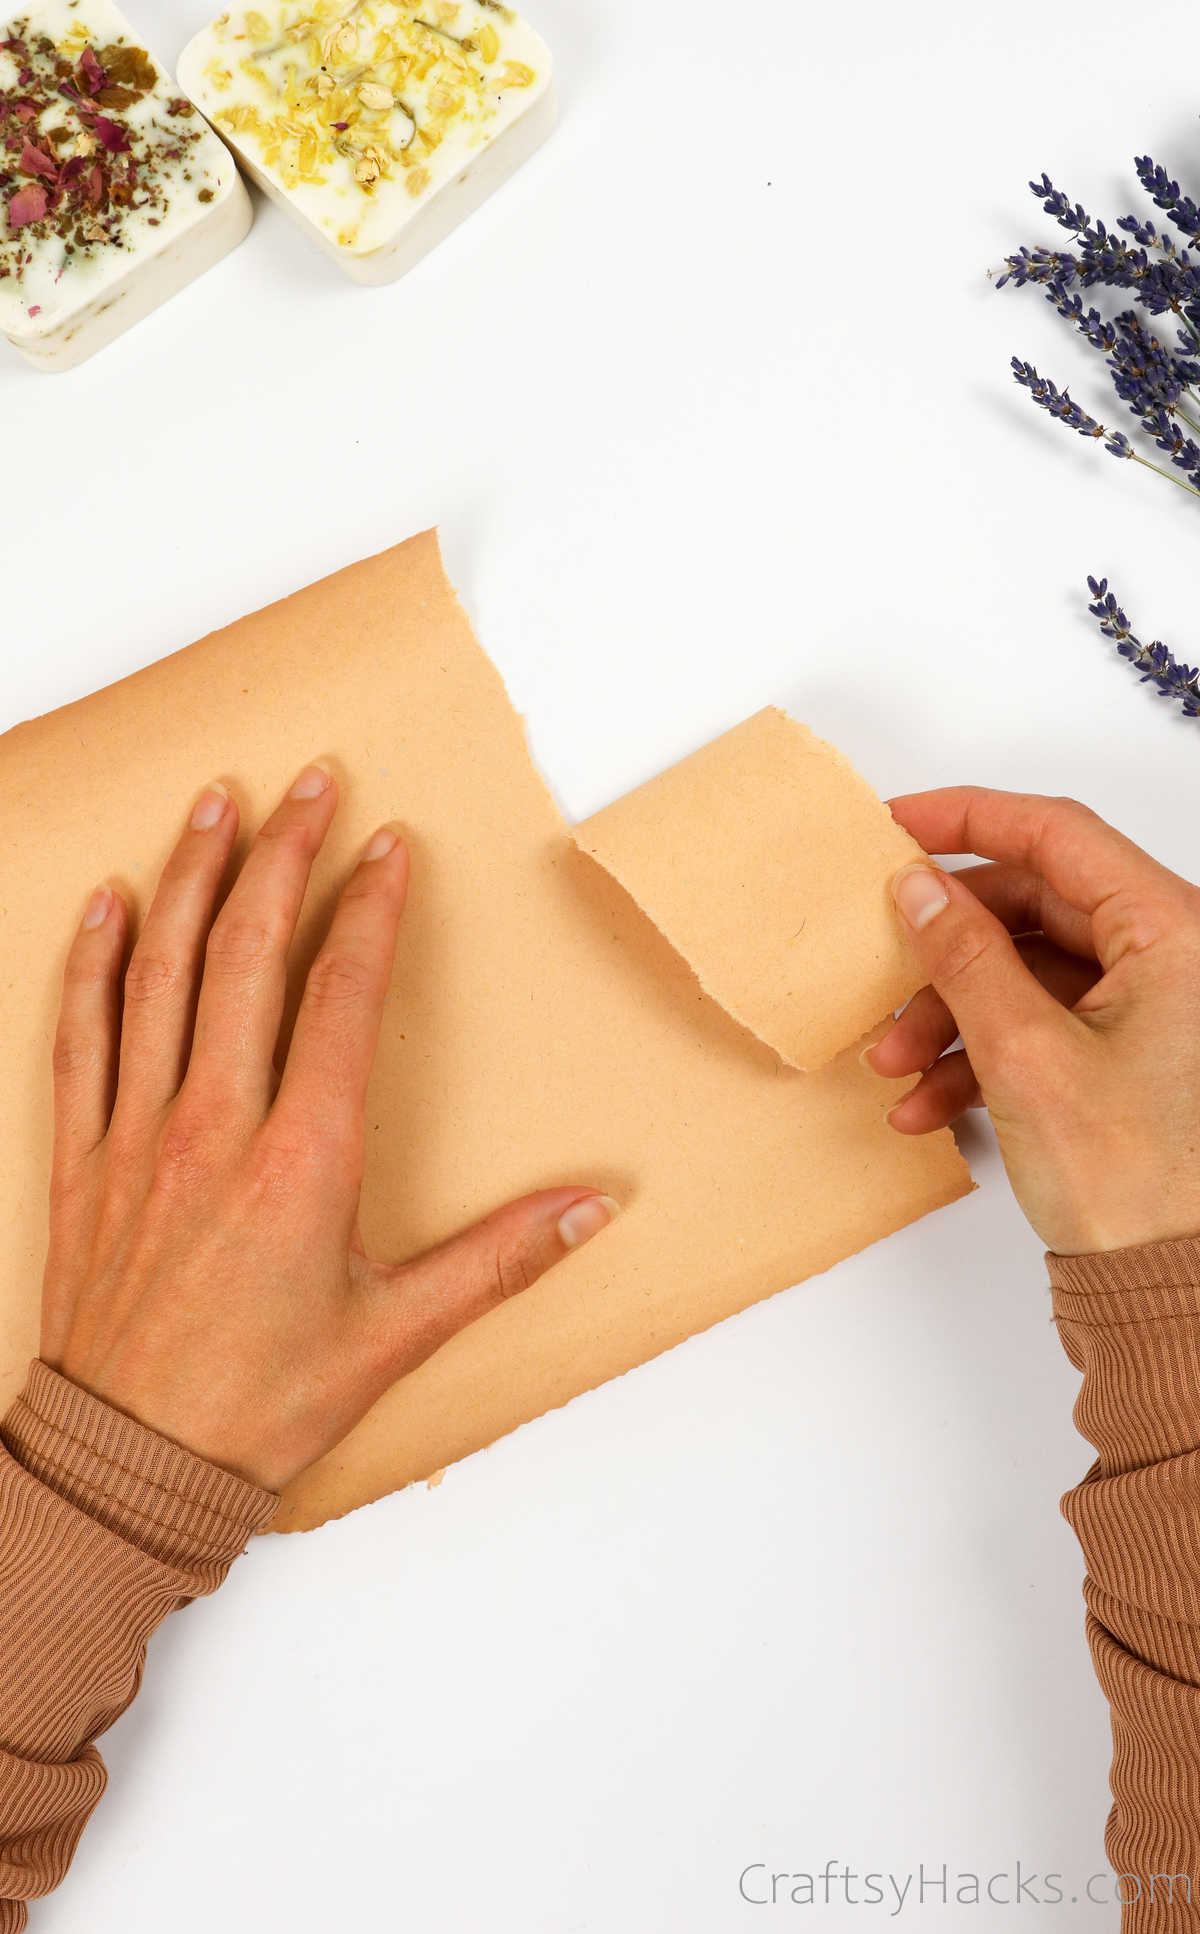
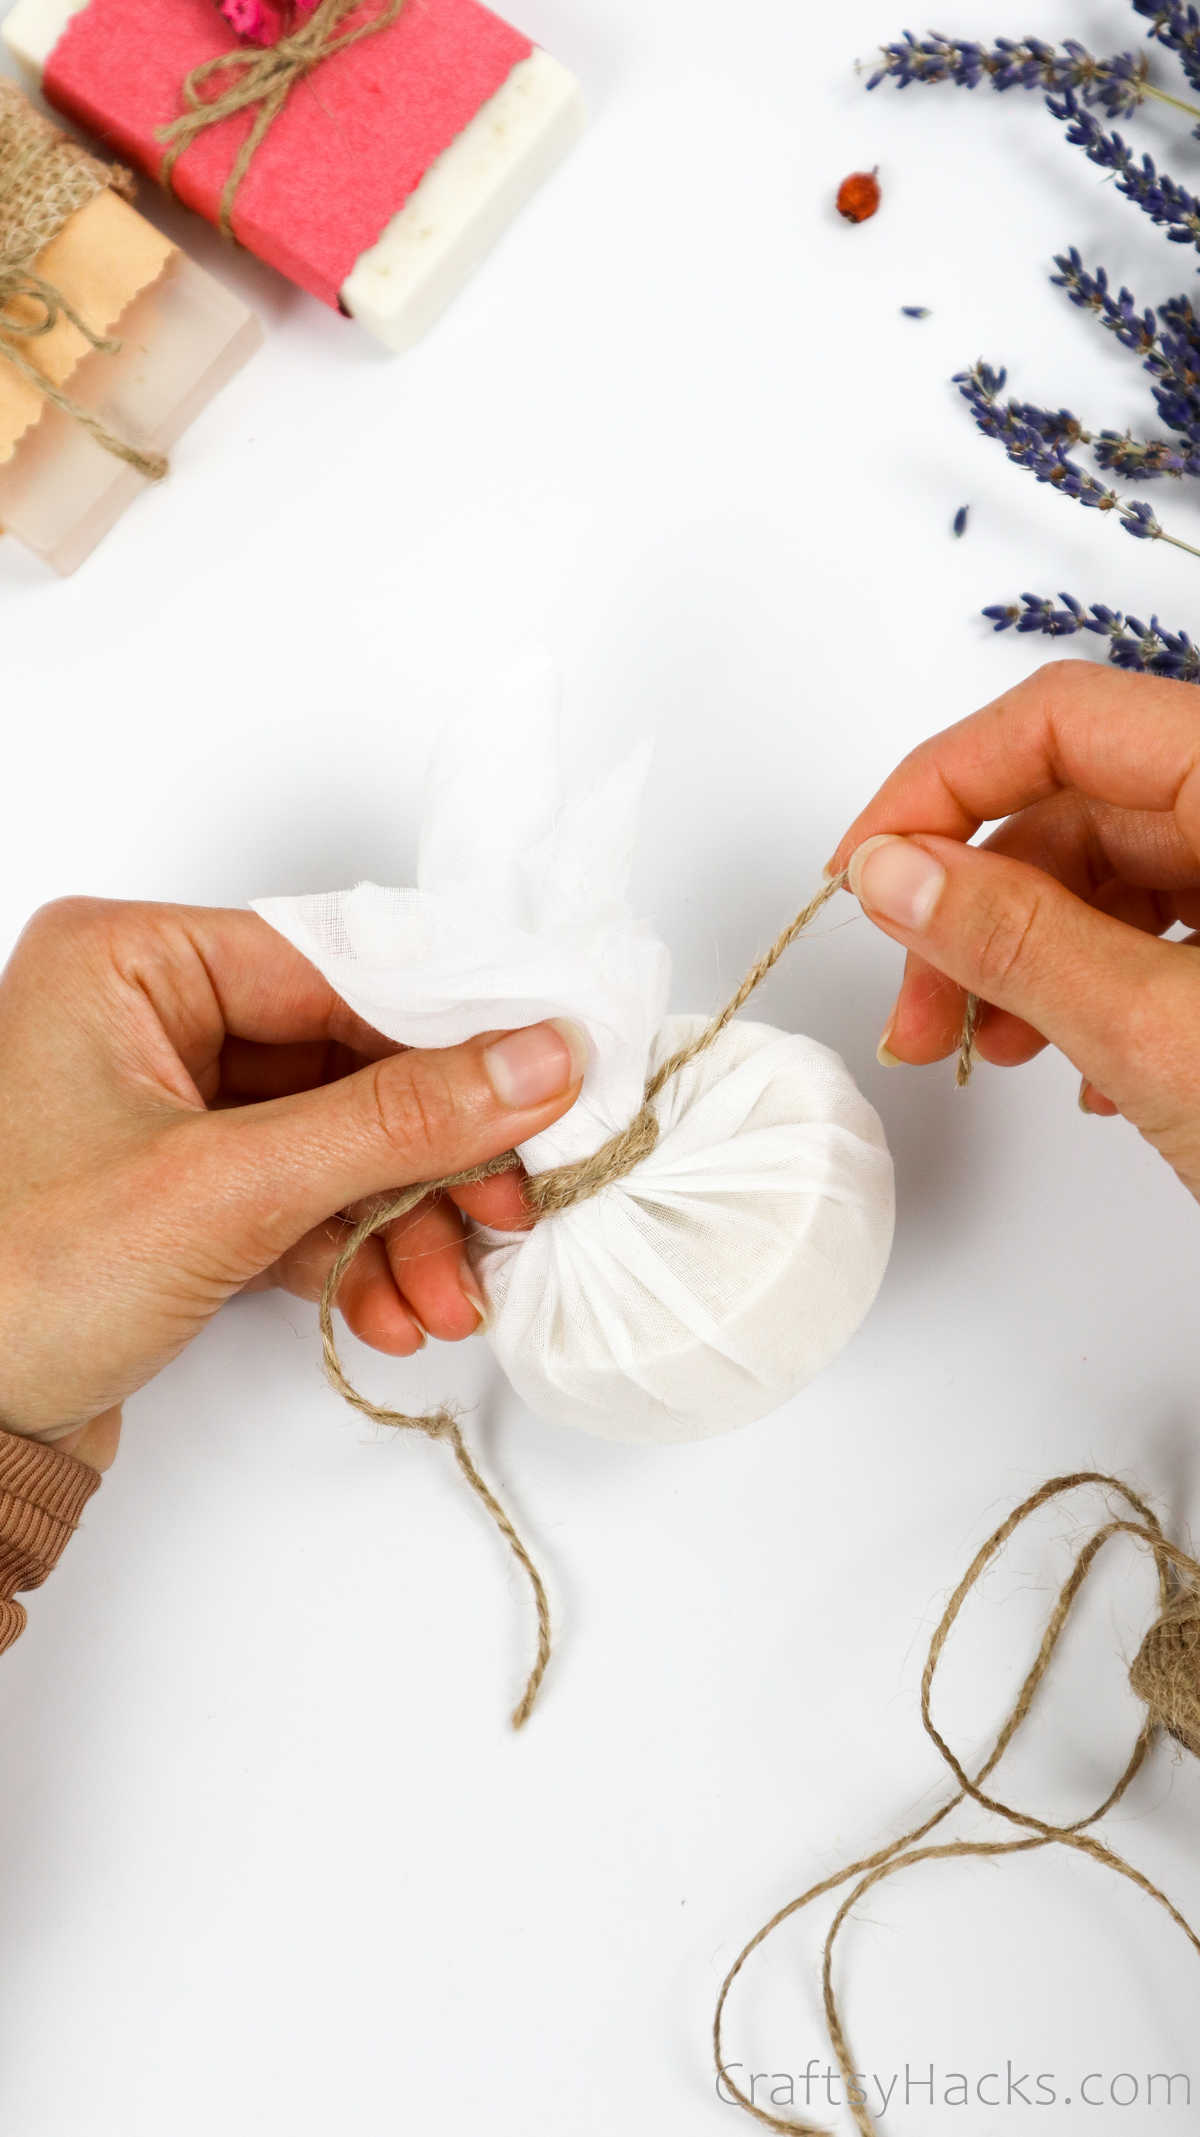
You can secure the packaging with some twine, jute, or burlap ribbon, too.
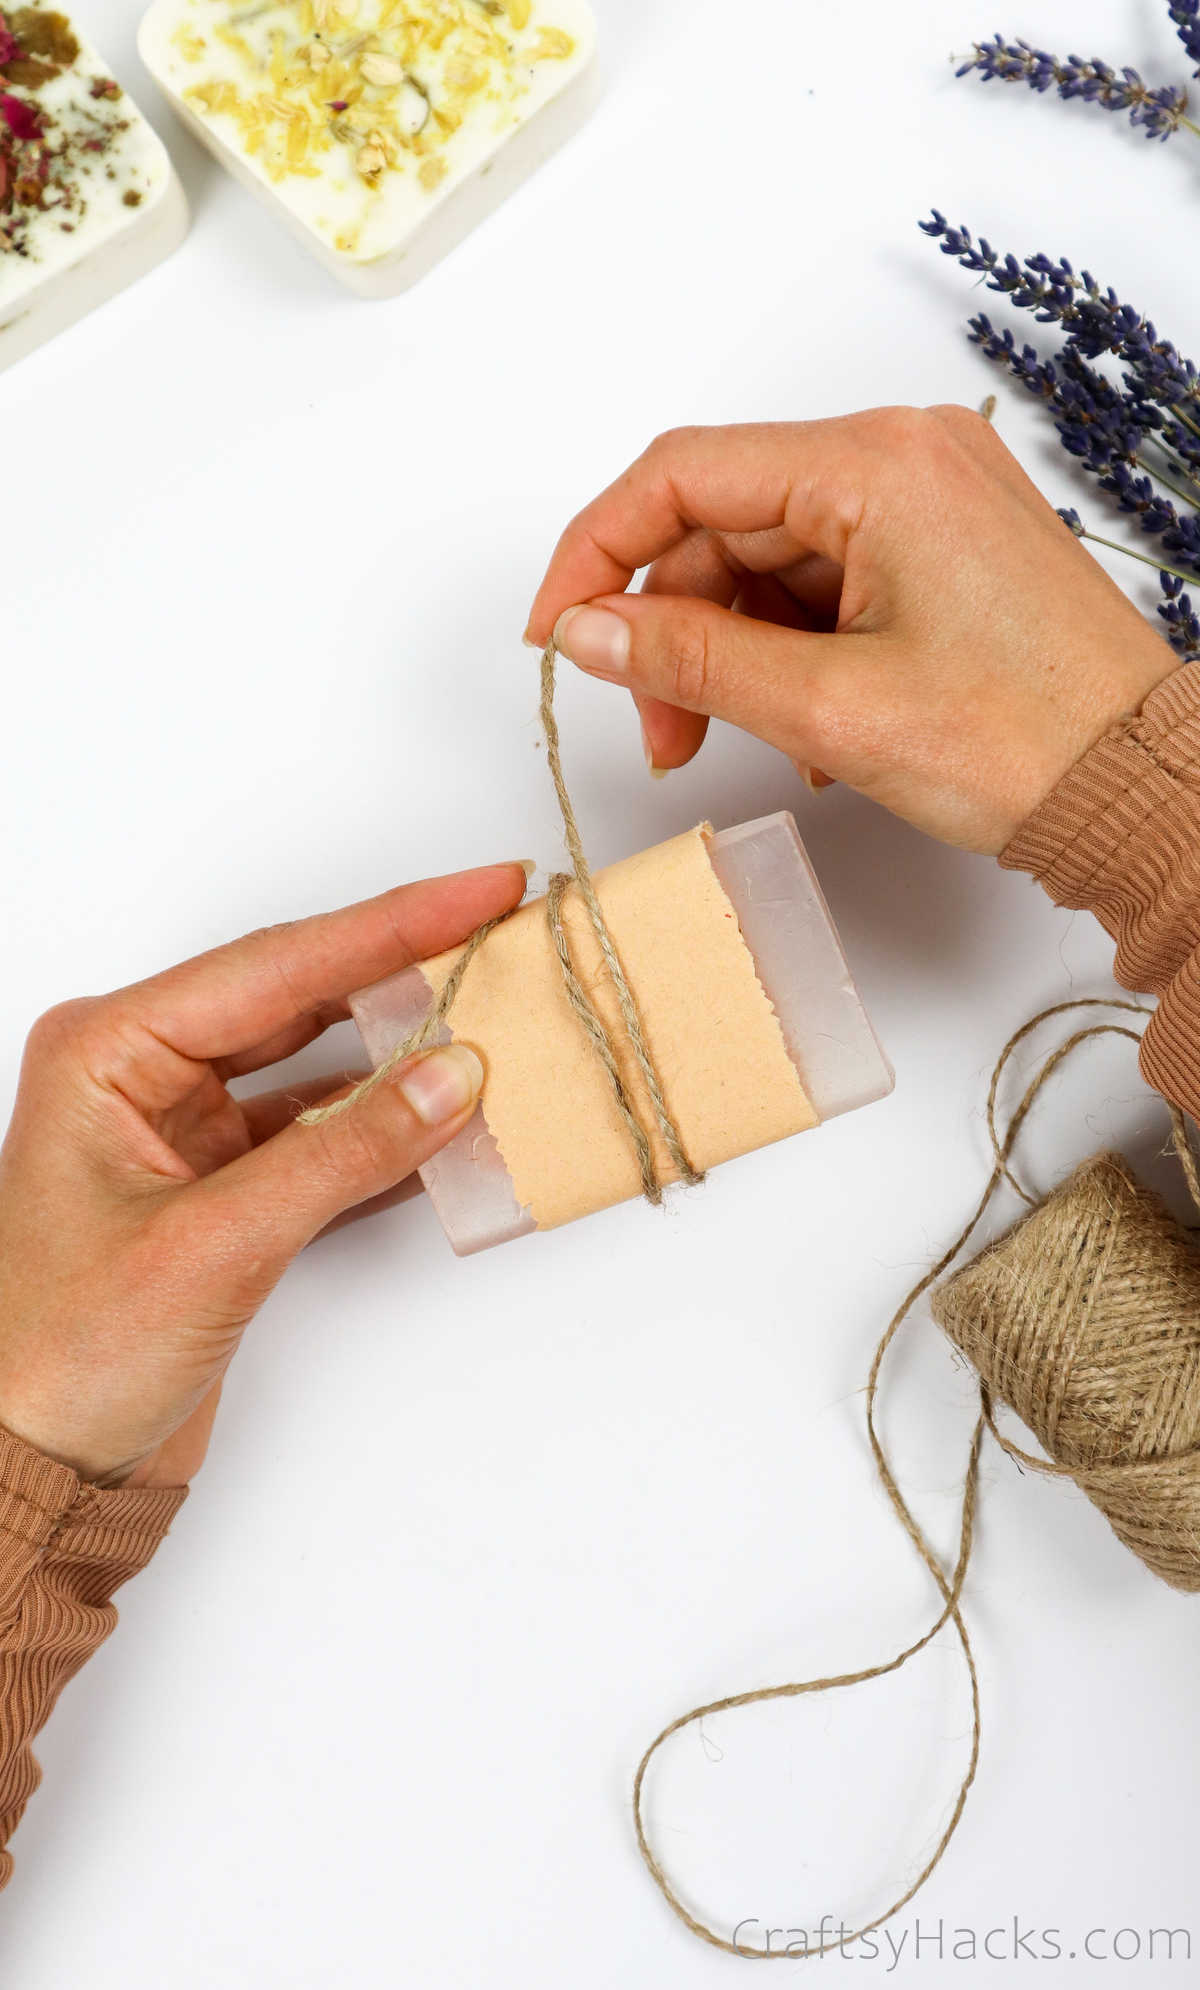
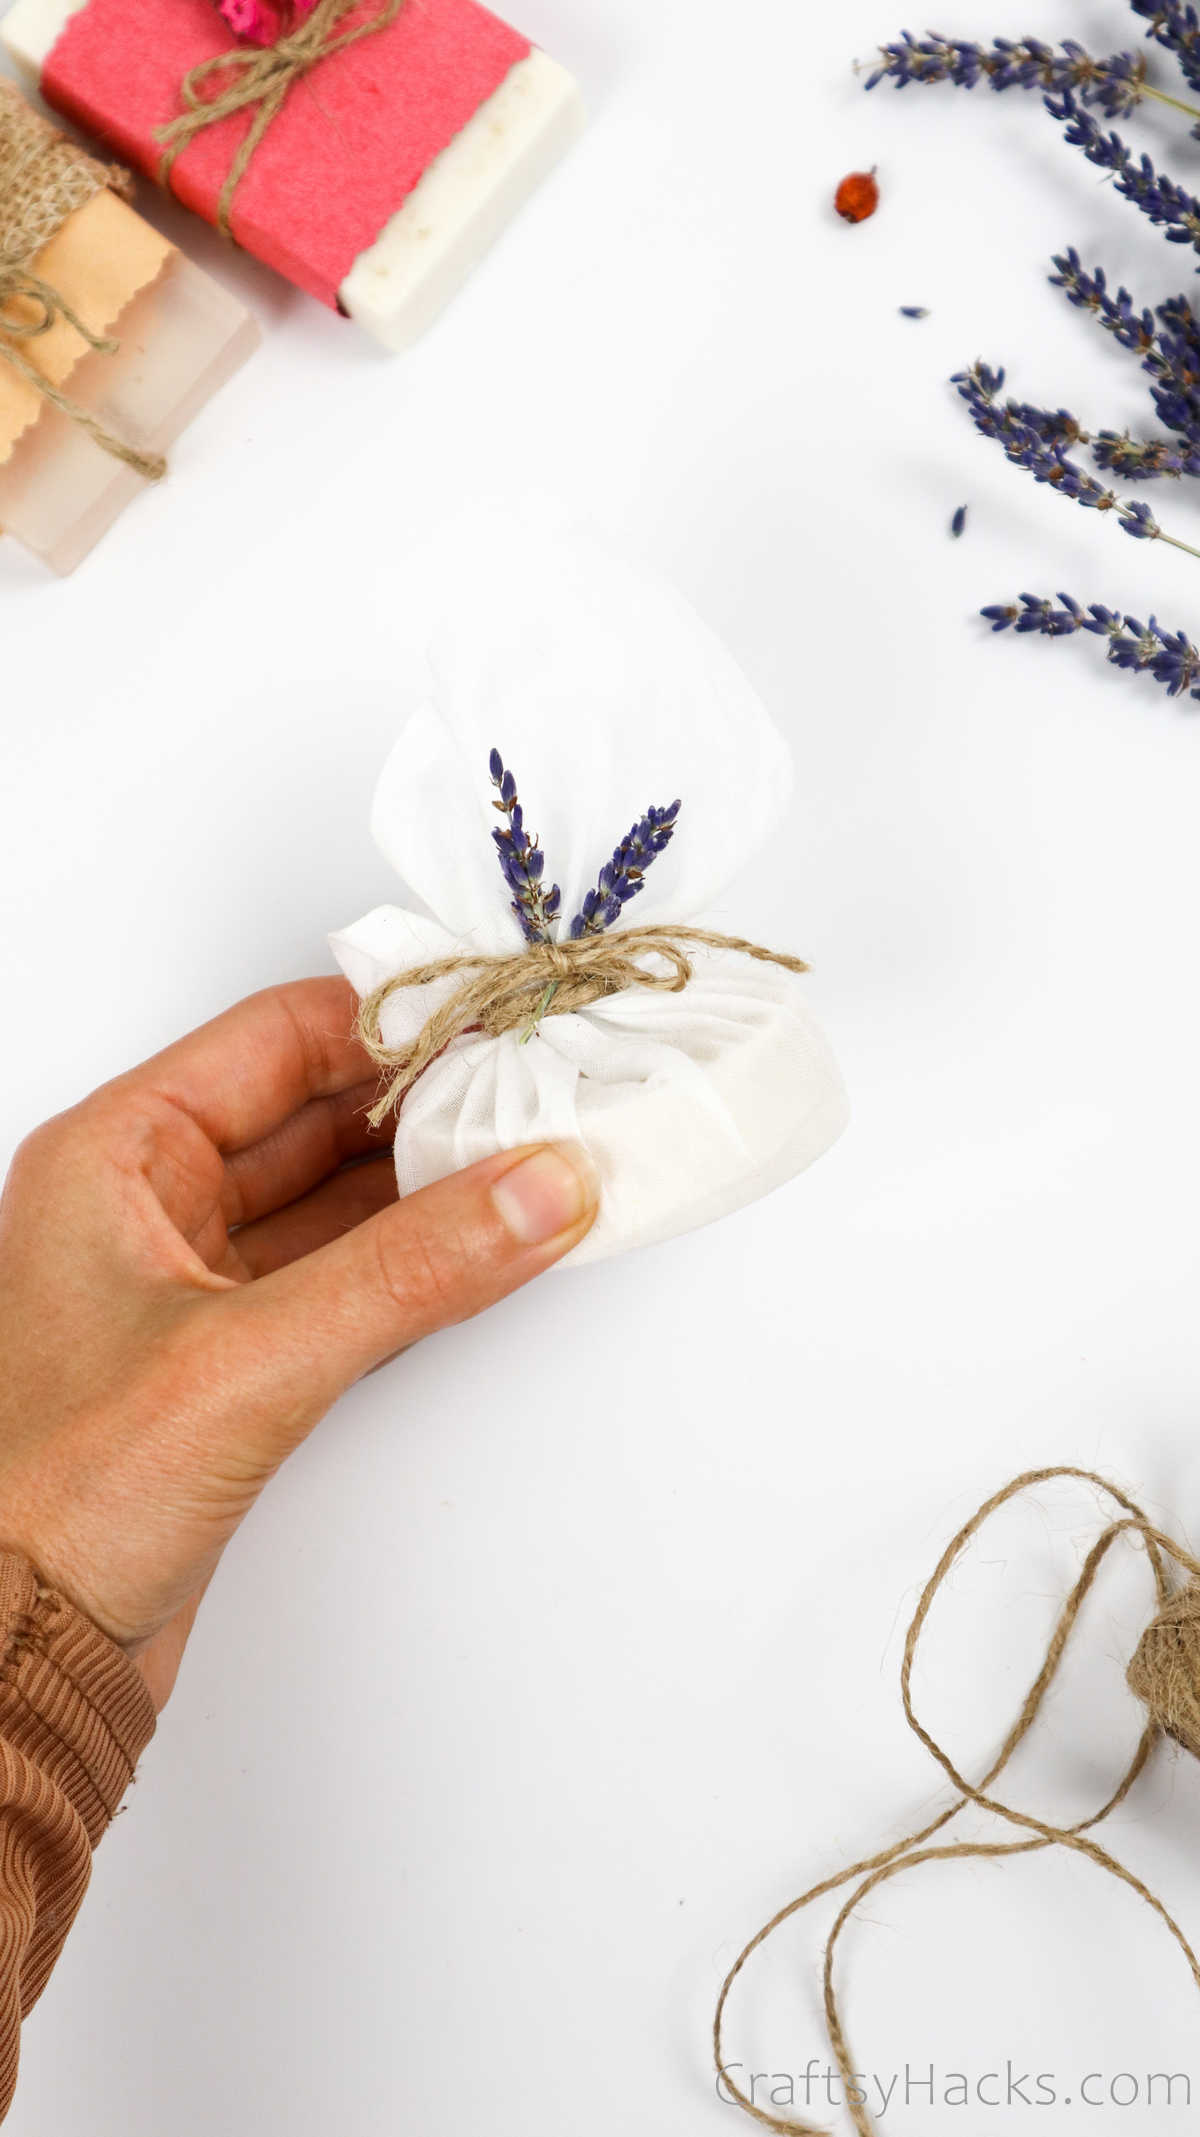
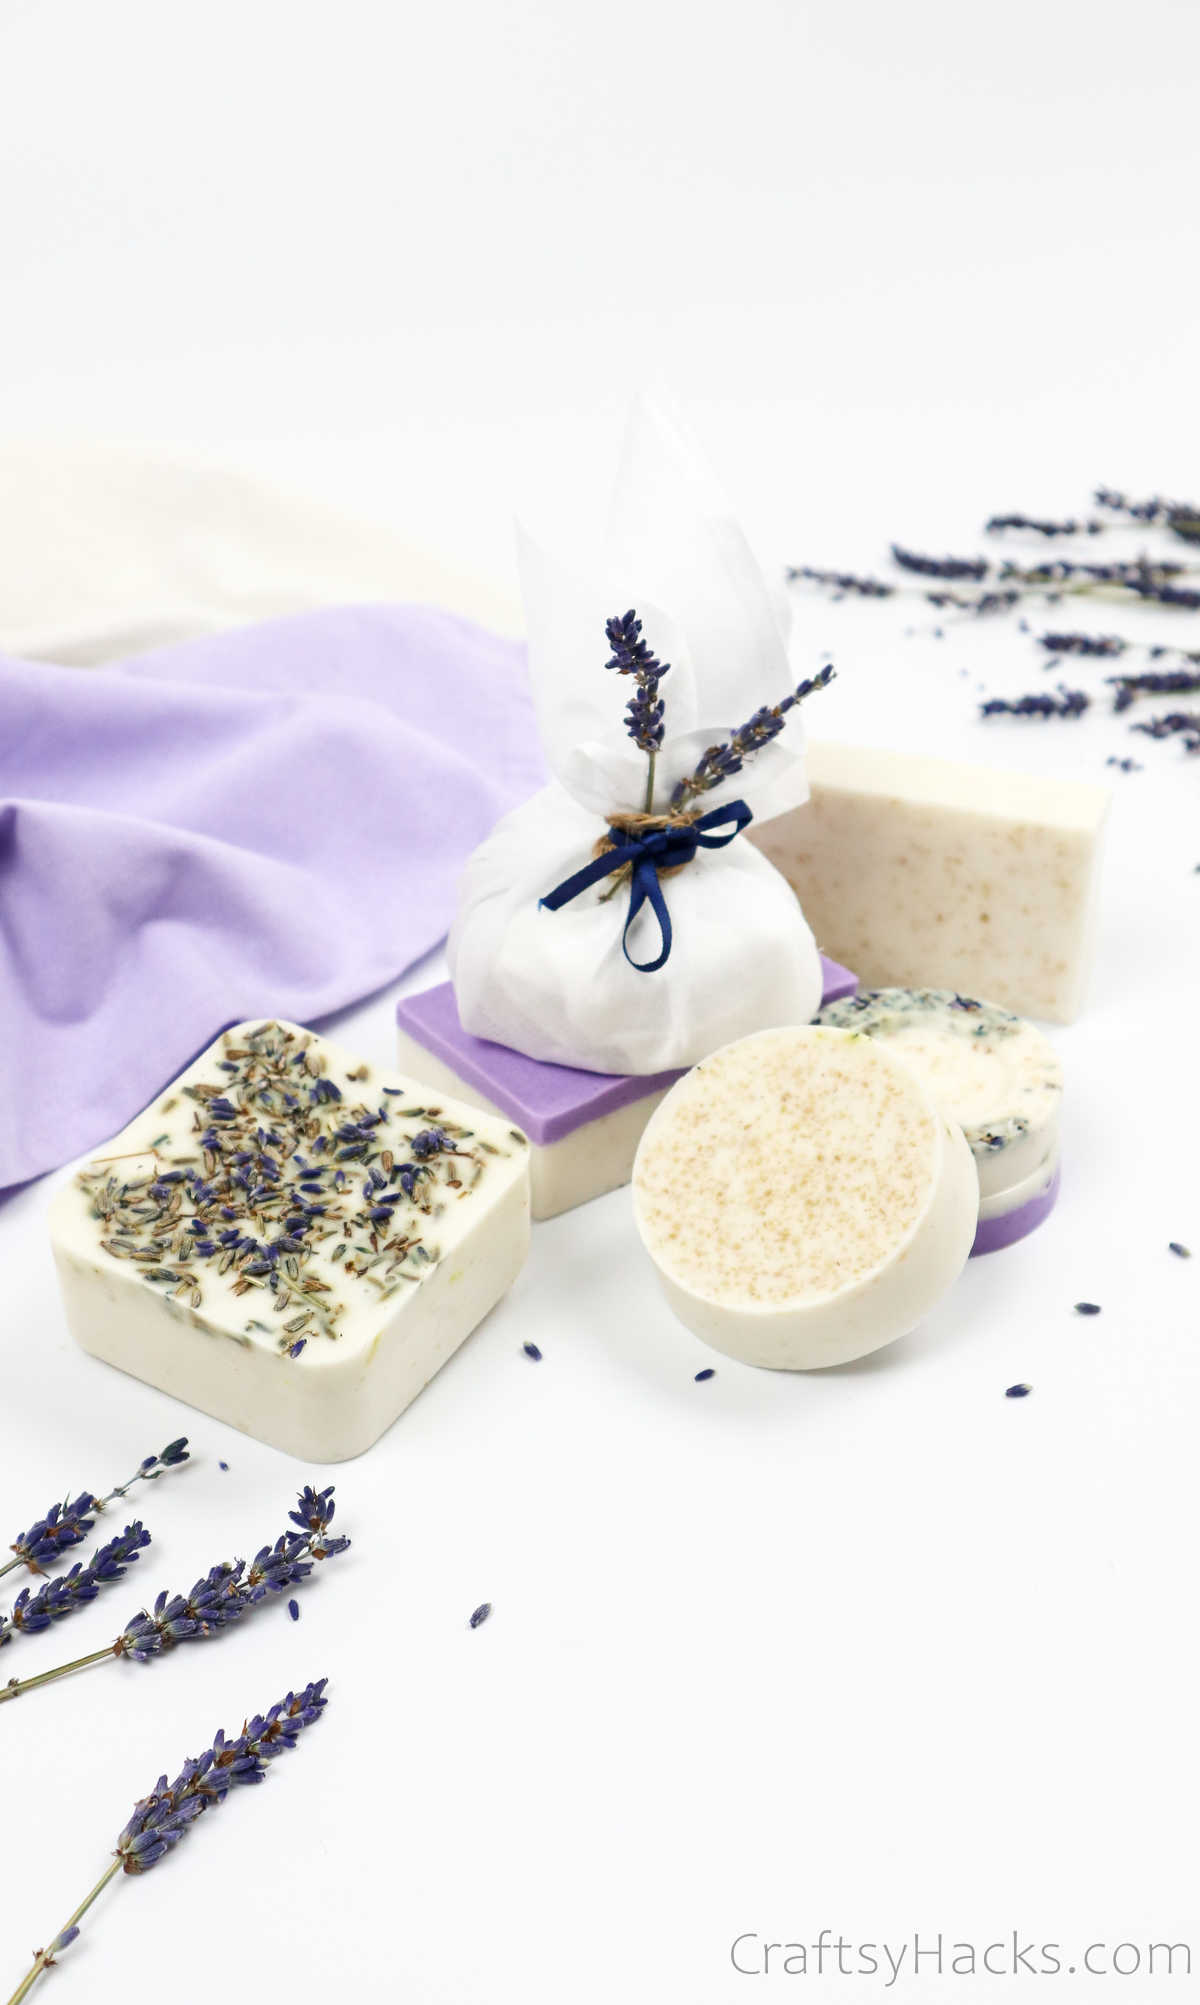
Then, you can go the extra mile and add a sprig of lavender, dried flower, or herbs to the packaging.

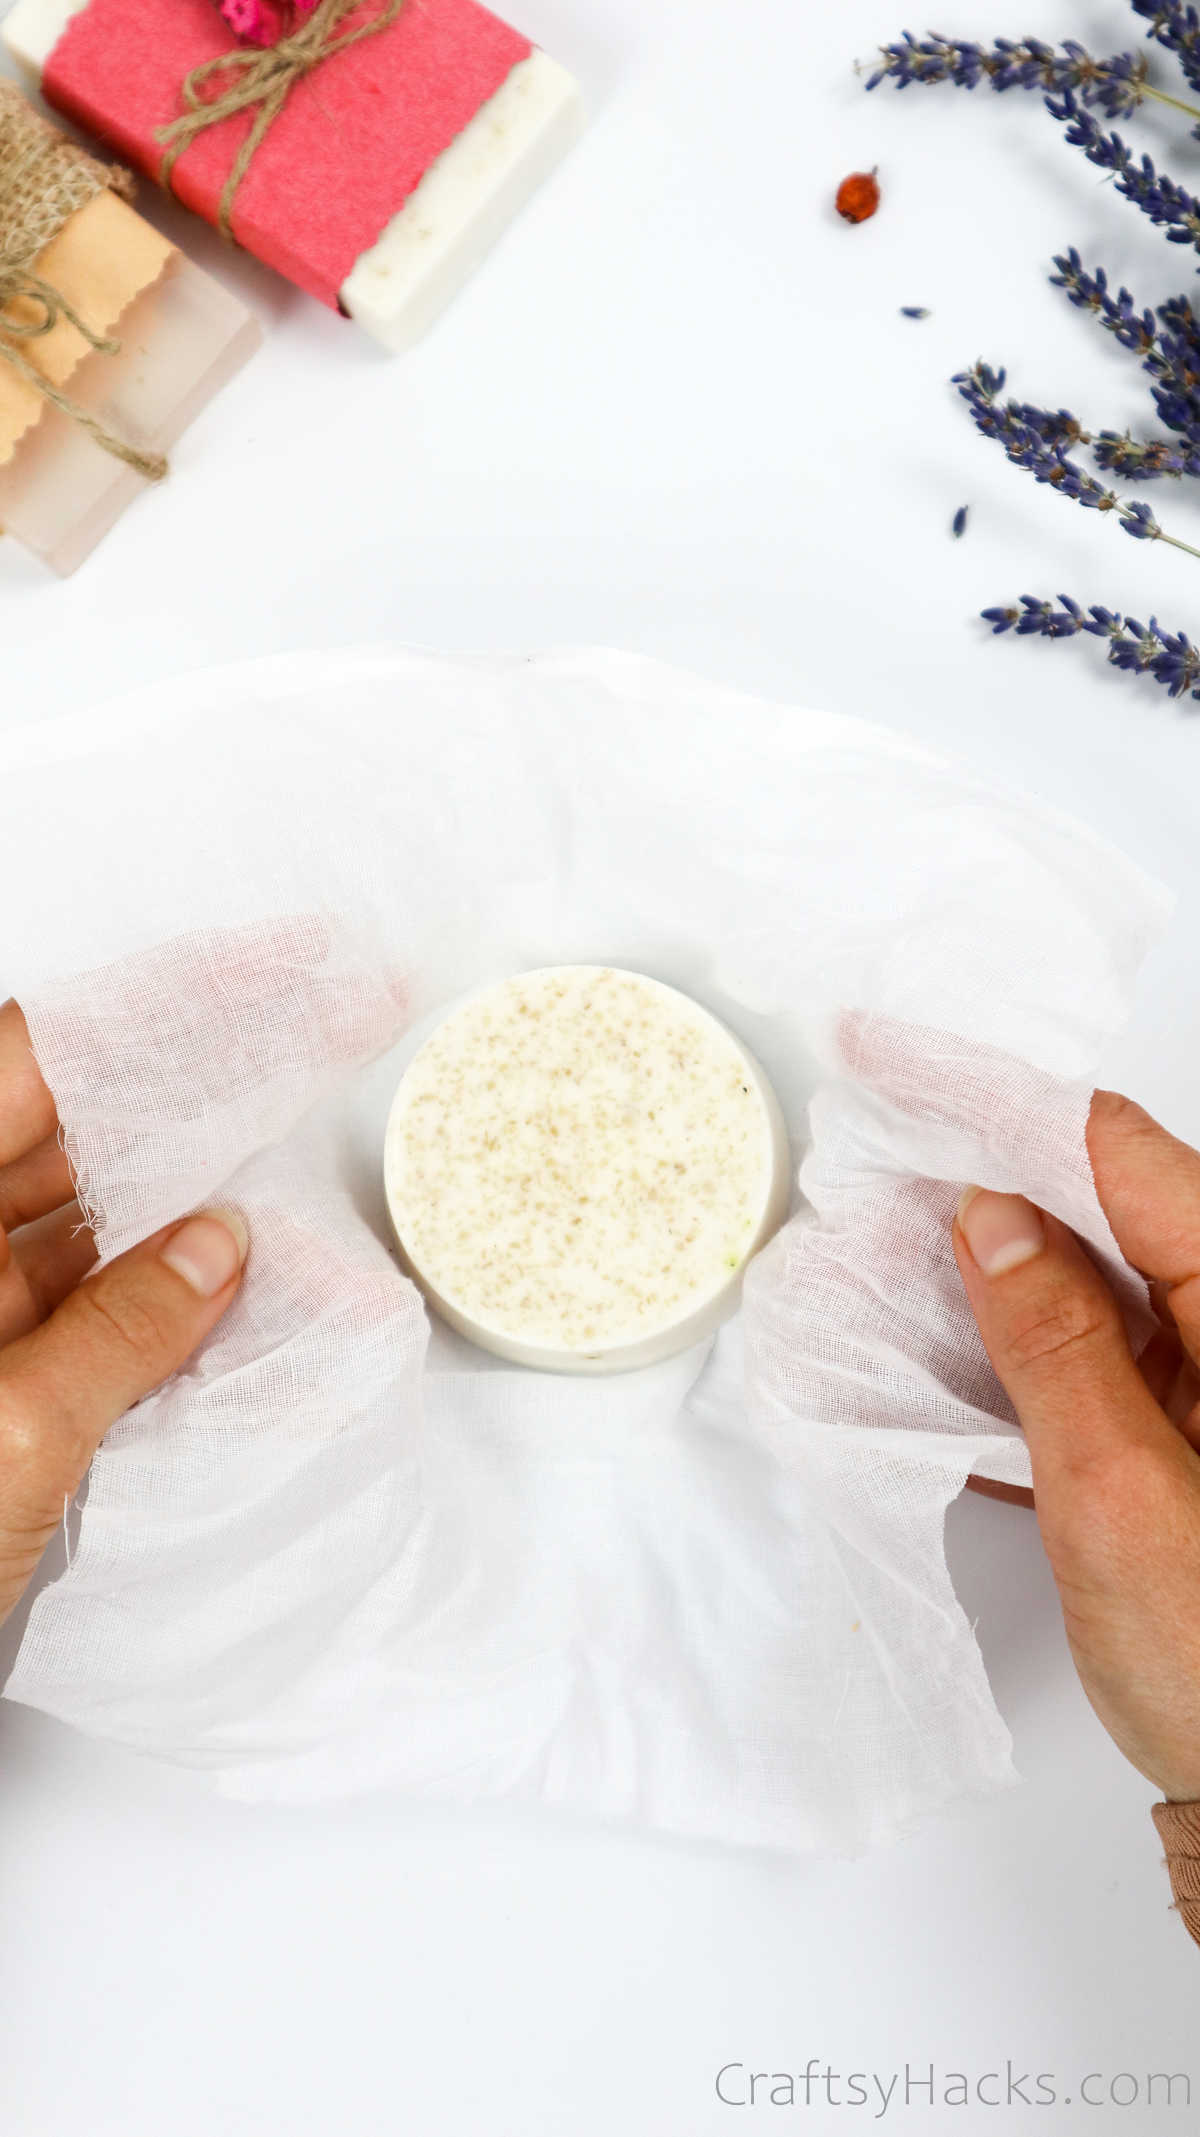
You can also wrap the soap up in cheesecloth for a more rustic and earthy finish!

There you go; your homemade soaps are all done and ready to use or gift!
Watch: How to Make Your Own Soap
If you’re a visual learner, you can check this video tutorial on how to make your very own soap.
Fragrances You Can Use to Make Soaps
You have no idea how many different fragrances there are to choose from when you’re trying to figure out which scent you want to add to your soap.
Here are a few suggestions:
- Lemon balm or lemongrass
- Coffee
- Rose
- Sandalwood
- Lavender or Jasmine
- Orange or grapefruit
- Fruity scents like strawberry
- Vanilla
- Mint
- Eucalyptus, bergamot or tree oil
What Else Can I Add to These Soaps?
Apart from adding essential oils to your soap, you can also add plenty of natural ingredients. This serves a dual purpose: to boost the scent naturally and add texture and color to it to jazz it up.
You can also add different ingredients to your soap full of moisturizing and conditioning properties, which are anti-inflammatory and rich in antioxidants. Soap isn’t just meant to look and smell pretty; it’s meant to hydrate, smooth, exfoliate, and nourish your skin.
So, take a look at some of the ingredients you can use:
Natural ingredients: coconut flakes, oatmeal, seeds like chia, poppy, or apricot, Himalayan pink salt crystals.
Coffee grounds, cocoa powder, loose tea leaves.
Moisturising butters and oils: shea and cocoa butter, coconut oil, apricot oil, almond oil, avocado oil, olive oil, oat, and almond milk, honey.
Dry herbs: thyme, rosemary, lavender, chamomile, mint, calendula.
Dried flowers and petals: rose, jasmine, lavender buds, cornflower, marigold.
Vitamin E and Vitamin C oils. Activated charcoal.
Citrus: lemon, grapefruit, lime or orange peels, rinds, and zest.
Vegetable or fruit ingredients: beetroot powder(for color), dried berries.
You can even add scraps of loofah into the soap and allow it to set. The loofa will be the perfect exfoliant for this project.

How to Make Soaps into Nice Gifts
Your homemade soaps can look like a million bucks and it can still not look like much if you don’t package them well. Especially if you’re thinking of gifting them, you have to pack them up elegantly.
- You can choose colored craft paper to wrap the soap completely, or at least a strip around the middle for a more rustic finish. You can also place the soap in some cheese cloth and artfully fold it over or bunch it up around the soap.
- To secure the soap in the packaging, or just for an extra bit of color and flair, wrap rustic jute twine, burlap or lace trim, or a length of ribbon. Feel free to stick a couple of sprigs of dried flowers, lavender, or herbs to the twine.
- You can also decorate the packing seasonally with, say, a stick of cinnamon or dried orange slices for the fall season. Then, come winter, you can switch them out with some holly, dried cranberries, and frosty baby’s breath.
Other Crafts You Might Like
- How to Make Tissue Paper Flowers
- 47 Fun Crafts for Adults
- How to Make a Dreamcatcher
- DIY Bottle Vase
- How to Make Air Dry Clay Bowls
- 37 Crafts to Make and Sell
- How to Make Paper Lanterns
- 37 Cute Crafts for Girls
- How to Make Scented Candles
- 25 Mason Jar Gift Ideas
How to Make Homemade Soap (Step-by-Step)
Video Tutorial
Equipment
- Silicone molds (or plastic cups)
- Chopping board
- Heat safe container
- Spatula
- Knife
- Scissors (for decorating and packaging)
Materials
- Melt and pour soap base
- 99 % isopropyl alcohol 91% works too
- Essential oils
- Mica powder
- Dried herbs and flower petals for decorating and packaging
- Ground coffee for decorating and packaging
- Jute twine for decorating and packaging
- Jute ribbon for decorating and packaging
- Craft paper for decorating and packaging
- Cheese cloth for decorating and packaging
Instructions
- Gather all the materials listed out to begin.
- First, chop a block of soap into smaller pieces and melt them. You can either melt them in a microwave or place the blocks in a container and place it in a pot of boiling water. Keep stirring the soap so it melts evenly and also to keep it from burning.
- When it has melted, you can add a few drops of essential oil if you want to. Then, quickly pour the soap into the mold—silicone or plastic/paper cups and containers are all adequate—before it hardens.
- Spray the surface with isopropyl alcohol to get rid of any bubbles.
- You can experiment with decorating your soap. You can layer the molds with herbs and dried flowers and pour the soap over it. Or, you can mix the flowers and herbs into the soap and pour it into the mold, too.
- You can also add a few drops of liquid soap colorant or mica powder to color the soap. Stir the color in to mix it thoroughly. You can either marble the soap,or, if you want clear and distinguishable layers, allow the previous layer to harden, spray isopropyl alcohol over it, and then pour the second color over it.
- Let the soap dry for 4-6 hours.
- Wrap the soap in cling film, paper, or cheesecloth and decorate it with twine or ribbon if you’re looking to gift them.


Can you use mica powder that you use in painting?
We used mica powder added to varnish to paint Japanese art.