Yarn Bird Craft
This post may contain affiliate links: full affiliate disclosure.
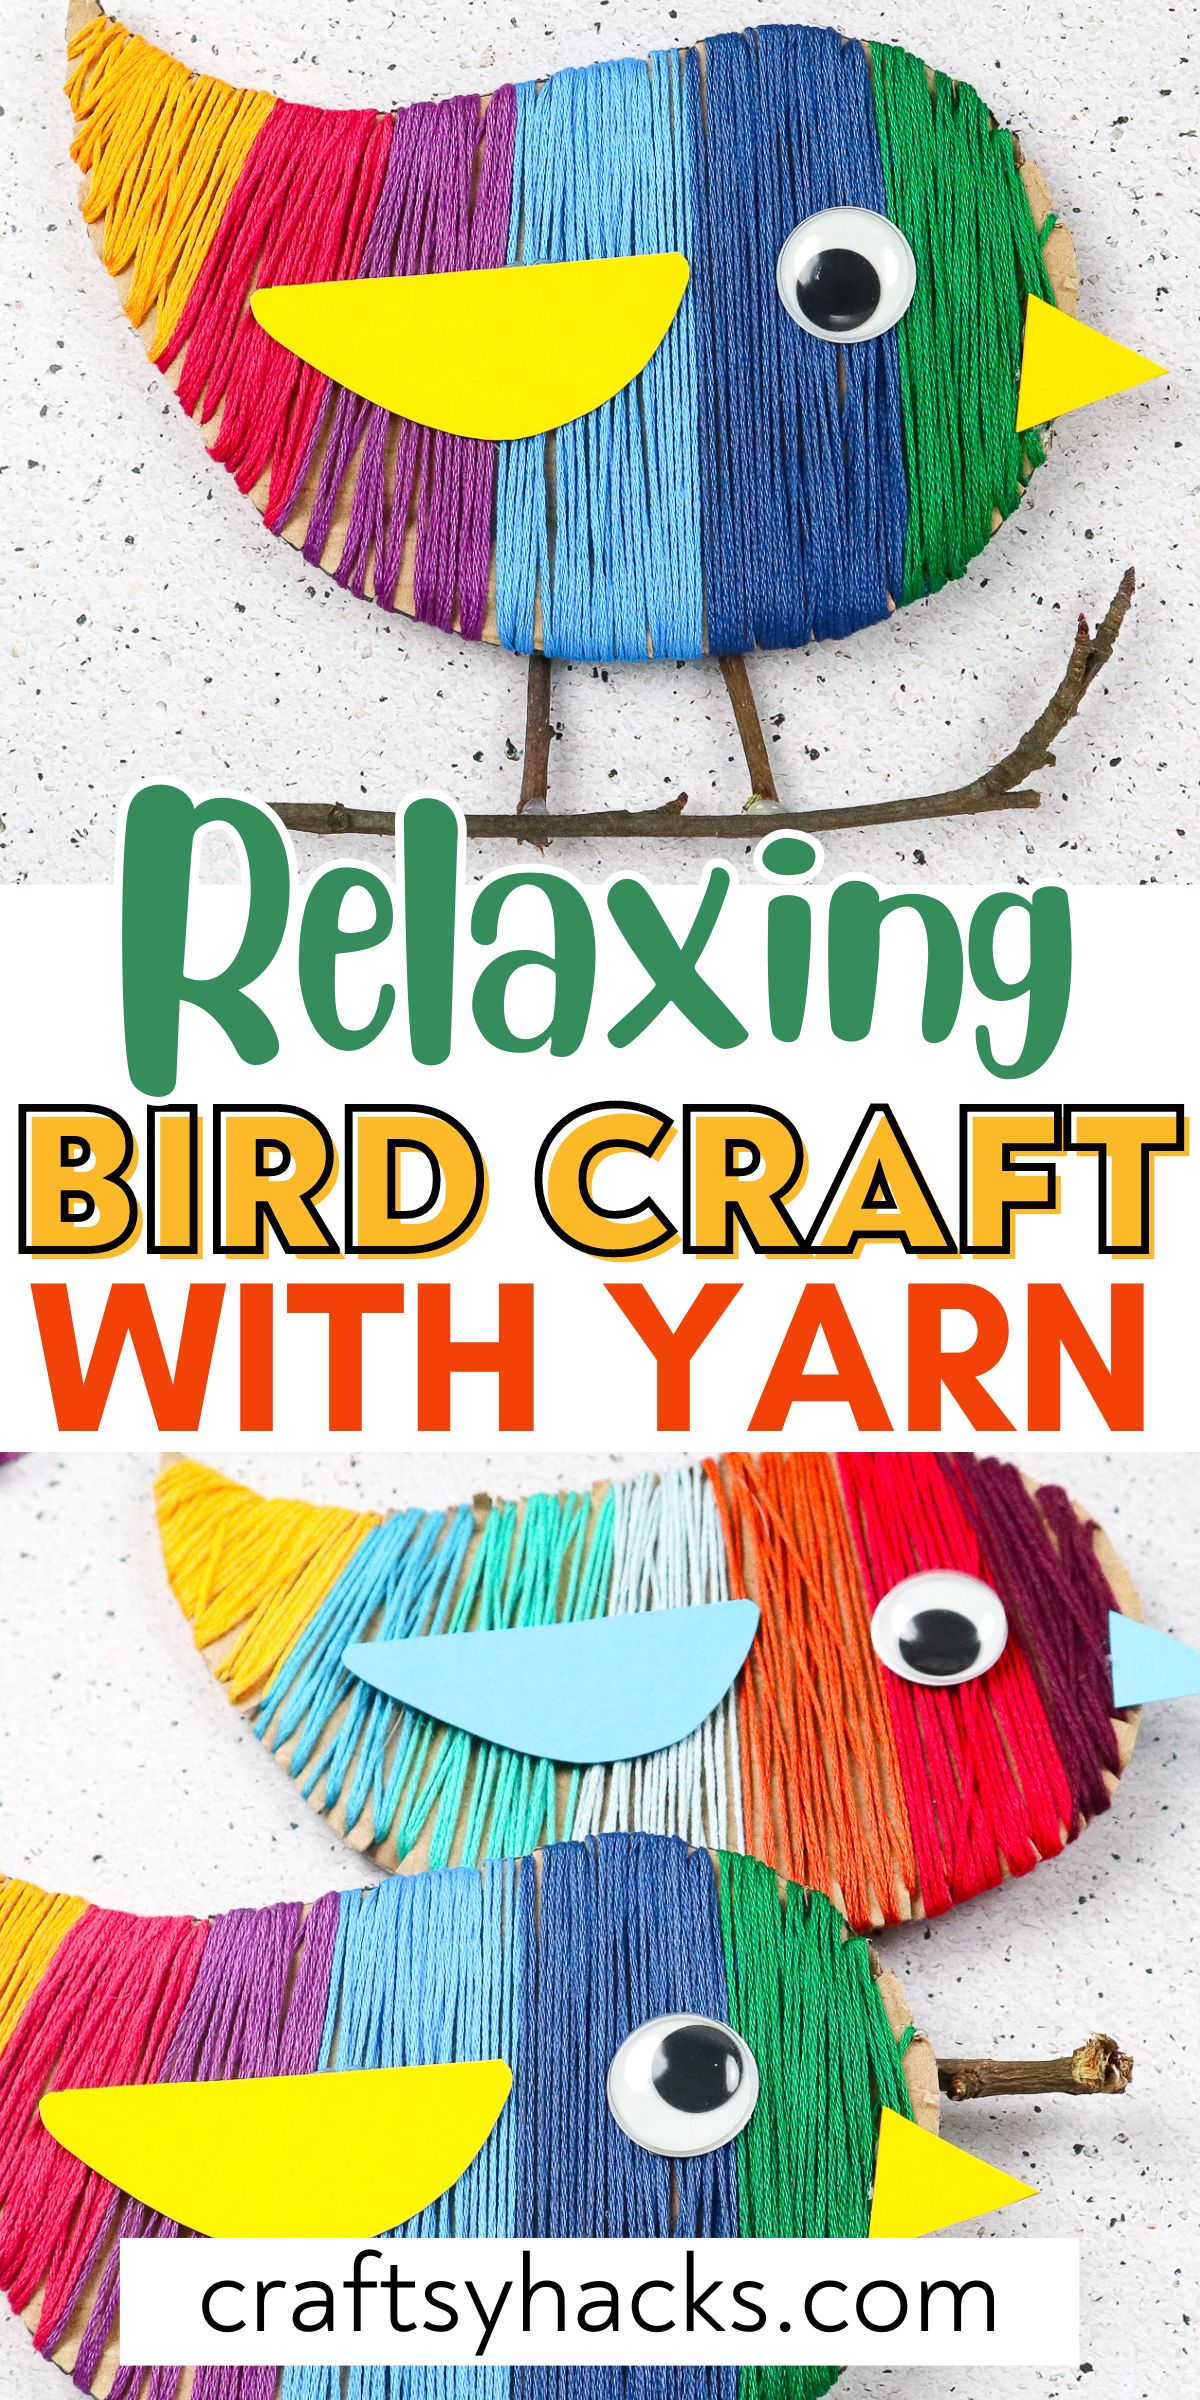
Do you love quick and easy projects that use items you already have lying around your house? I am the exact same way, and this yarn bird craft fits the bill perfectly!
Don’t be fooled by how simple it is, though. When you are all finished making this, you will have a beautiful and elegant yarn bird.
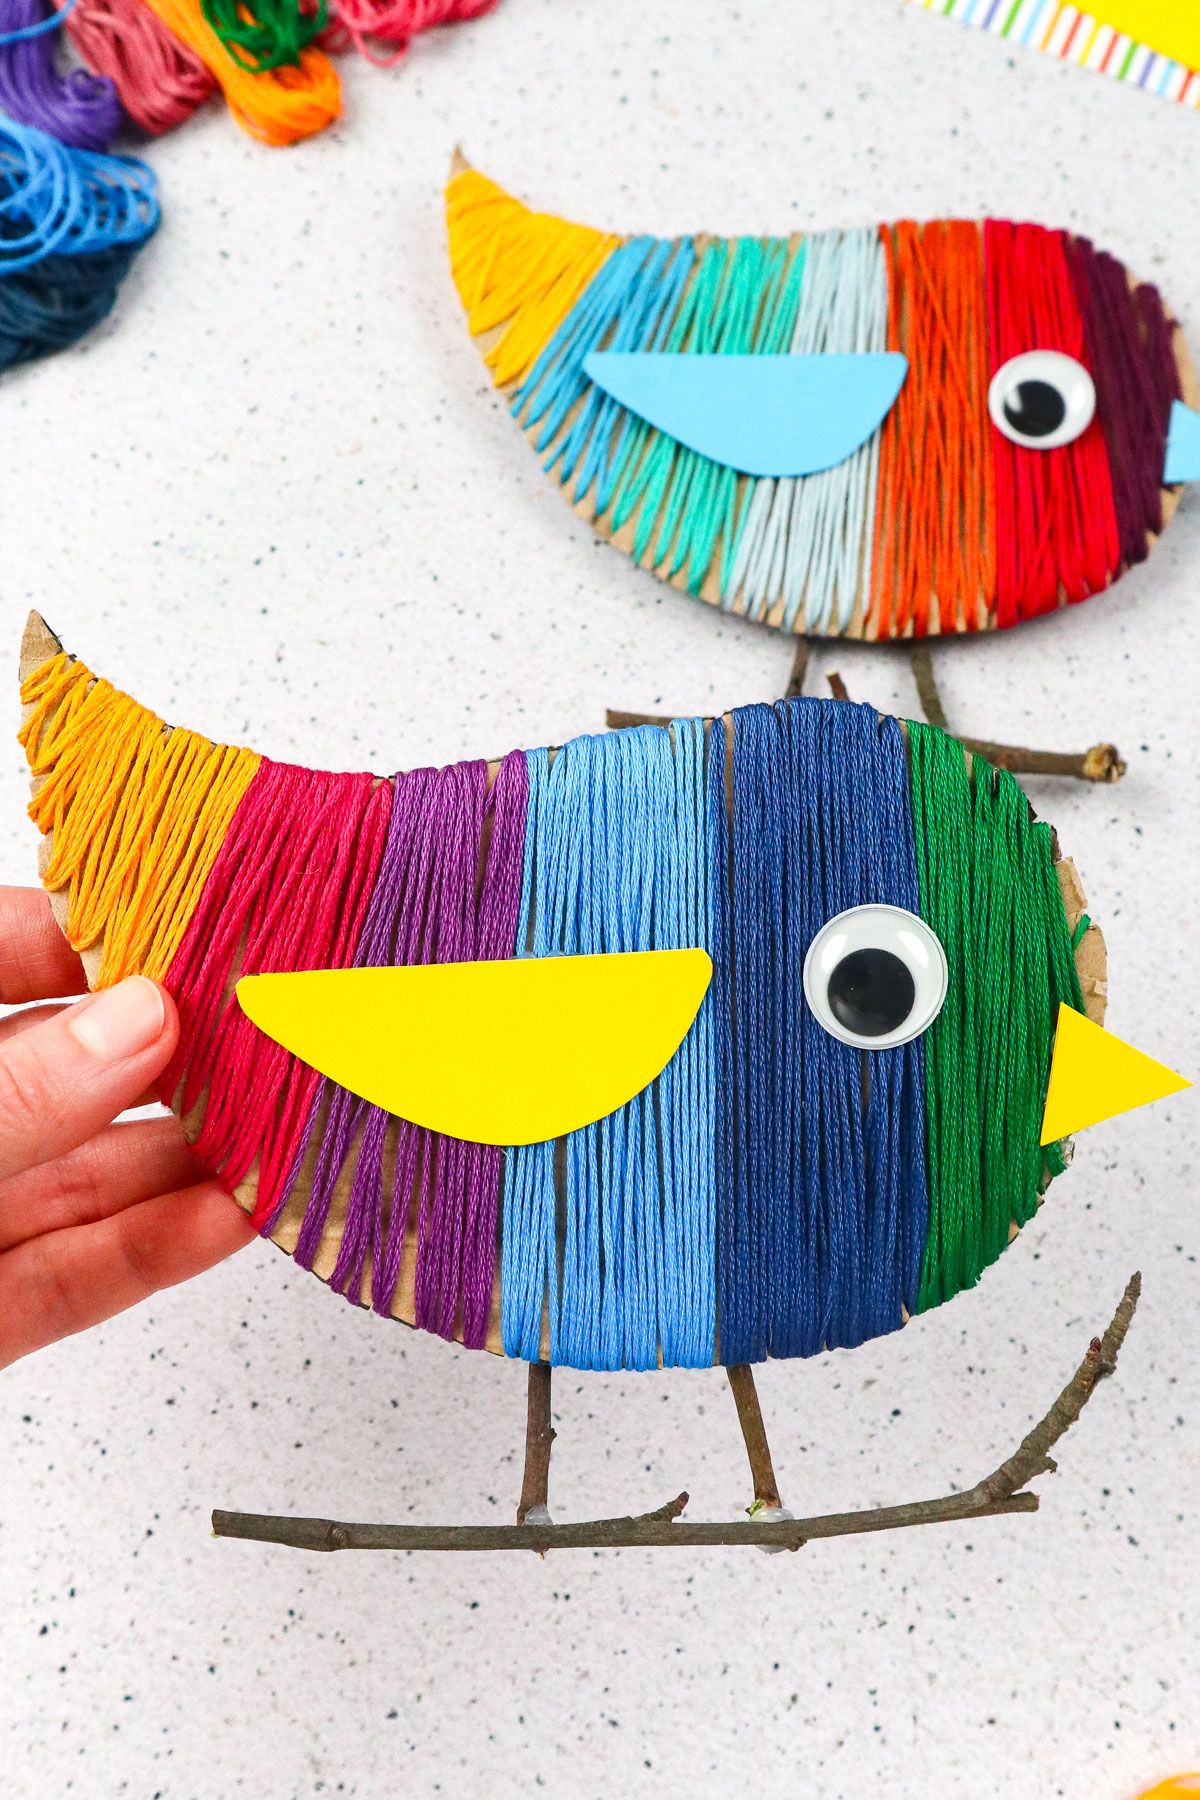
You can choose whatever colors of yarn you want for this project, depending on the vibe you are going for.
If you are using it as décor, you can try to match the colors to the room in which it will be displayed.
I can’t wait for you to see how simple this project is! Gather up your supplies and let’s make a lovely yarn bird!
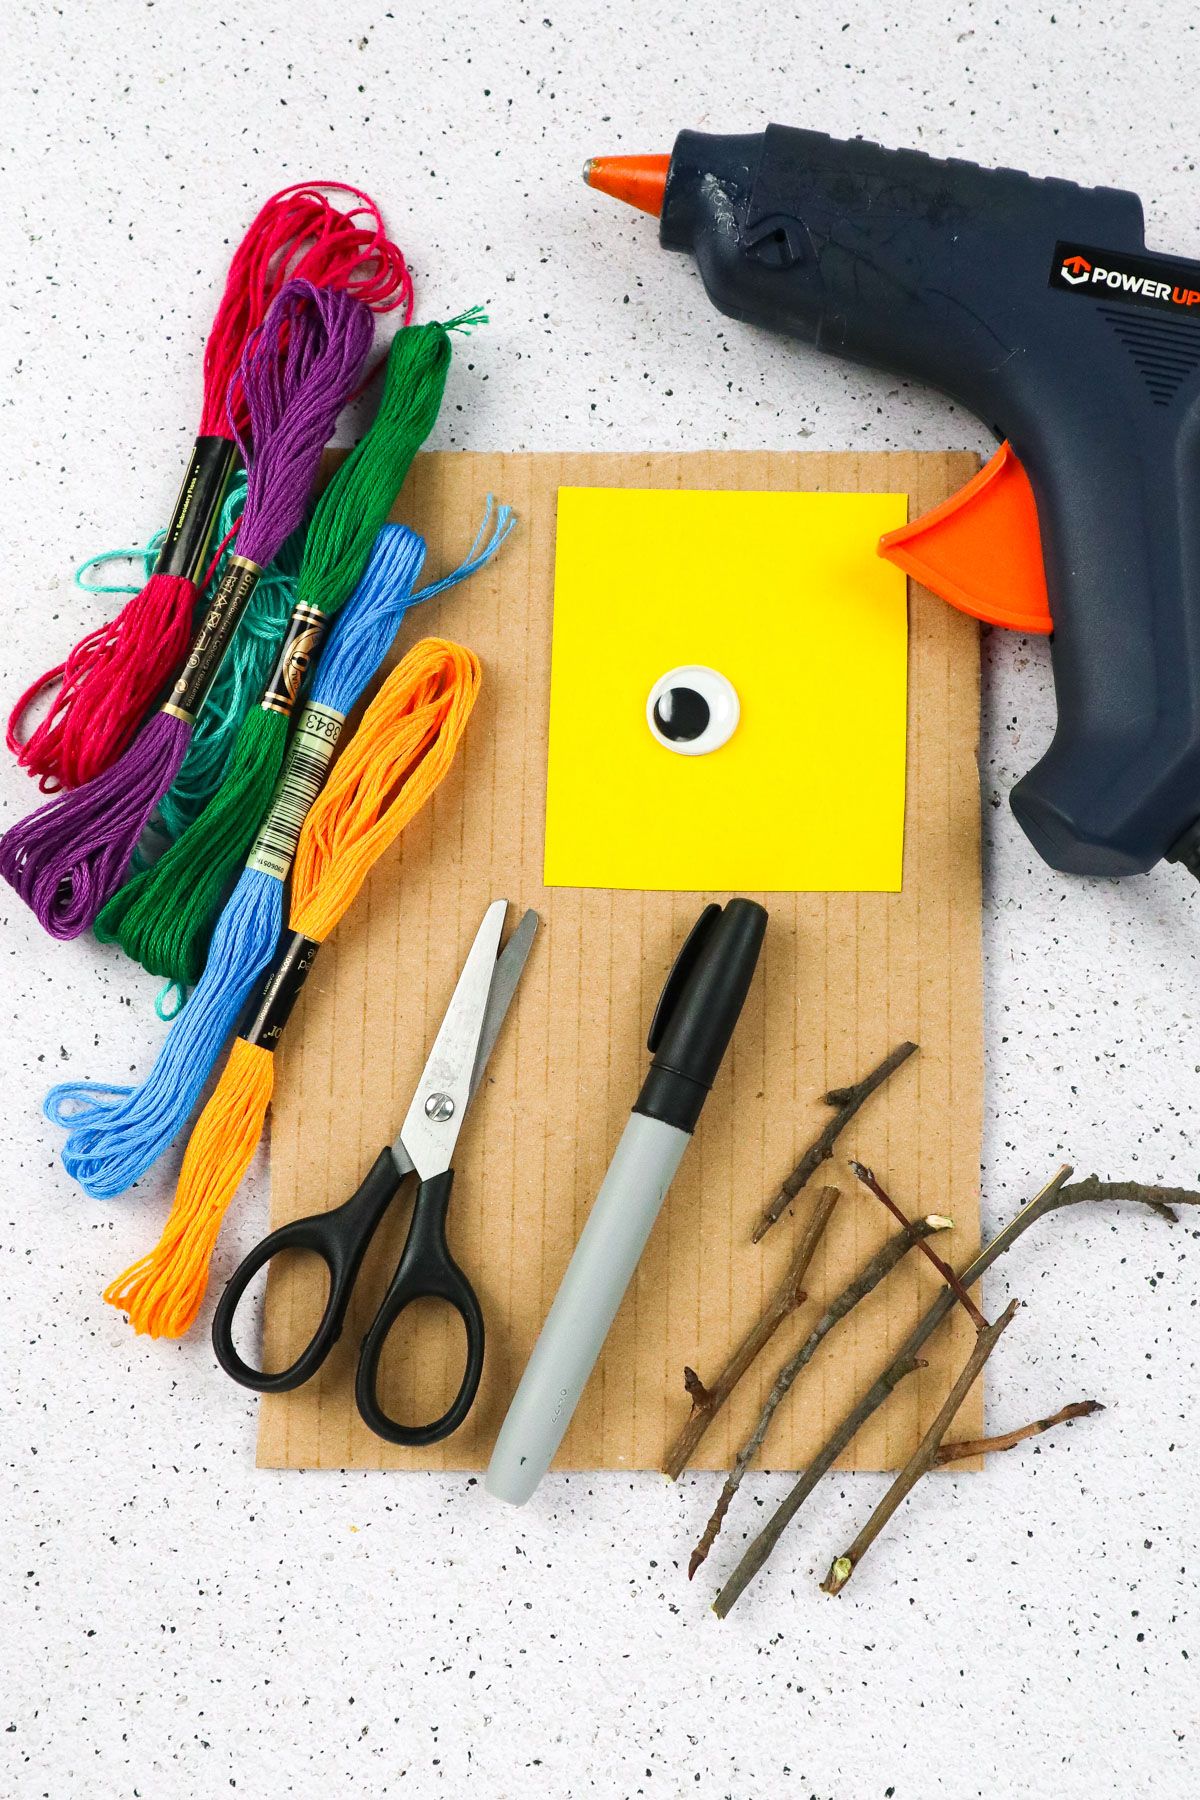
Supplies You’ll Need
- 6″x 8″ scrap cardboard
- Yarn
- Scissors
- Sticks
- Large googly eye
- 3.5″x 3″ Card stock
- Hot glue gun
- Marker
How to Make a Yarn Bird Craft
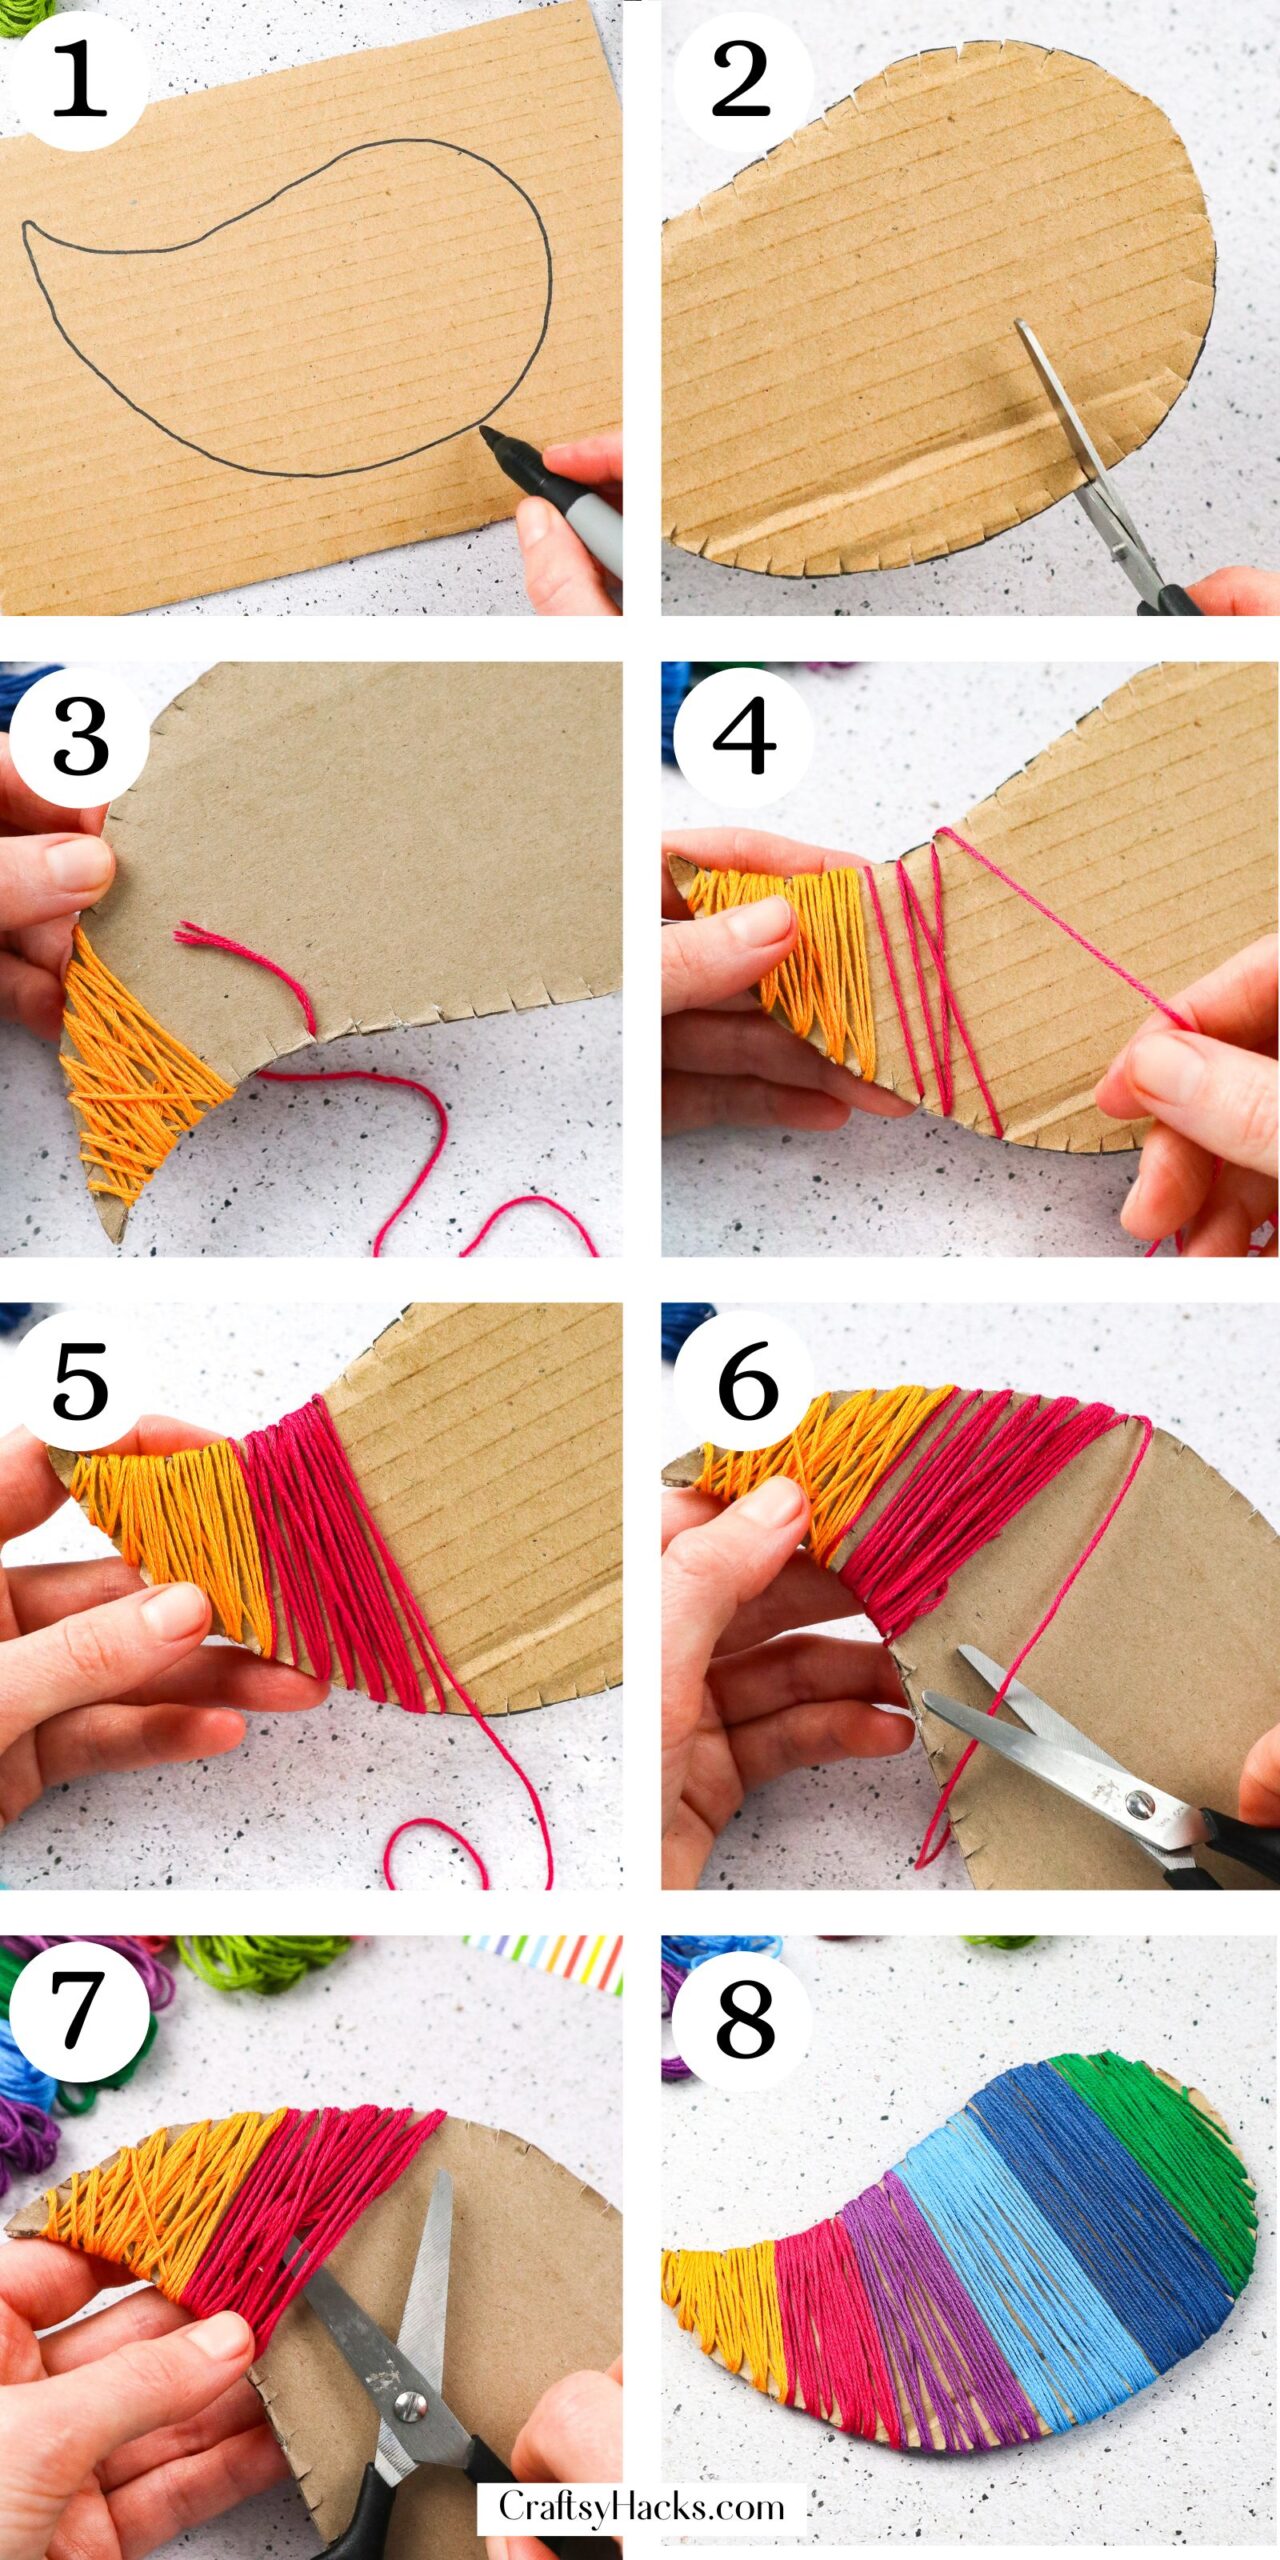
Step 1. Let’s start by drawing the outline of your bird’s body on a piece of cardboard. When you are satisfied with how it looks, cut it out and decide which side will be the front of the bird’s body and which side will be the back.
Step 2. Next, get your scissors because it’s time to cut! You will cut little slits all around your bird’s body. This is where the yarn will be placed.
Step 3. Choose your first color of yarn. Starting from the tail, insert the end of your yarn into one of the slits.
Thread it through so that the yarn is secure. Now, wrap the yarn around the bird’s body.
Step 4. Pick a different color of yarn and do the same thing. You can use each color for as much of the bird’s body as you would like.
The sections can be big or small, or you can vary the sizes.
Step 5. Continue to wrap the yarn as many times as you prefer to form a section.
Step 6. When you are ready to switch to a new color, simply cut the thread, insert the loose end underneath the wrapped yarn (or add a little bit of tape for added security), and move on to your next color of yarn.
Step 7. Keep wrapping your bird with the yarn, switching colors as you go.
Step 8. Soon, your entire bird will be wrapped from tail to head.
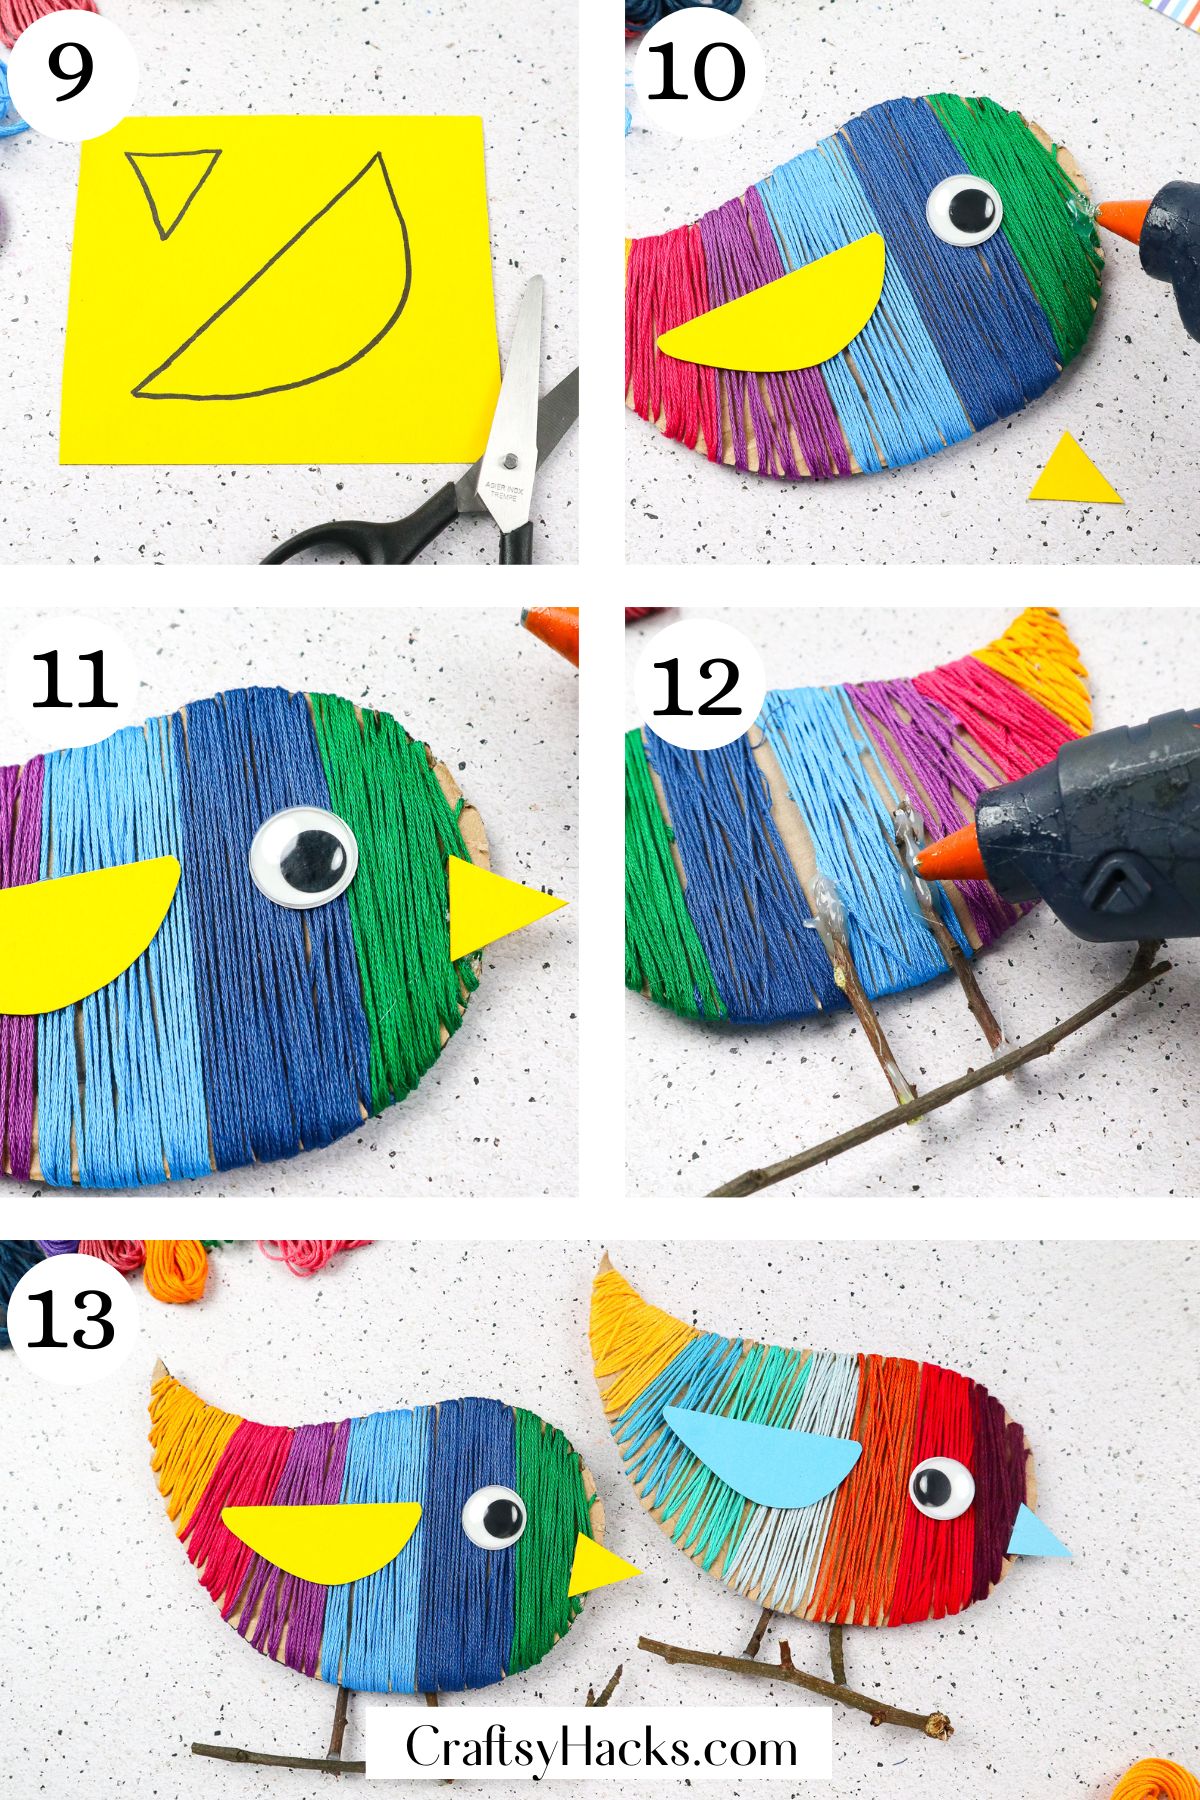
Step 9. Now, it’s time to get your black marker again, along with the card stock. Draw a beak and a wing, and then cut them out using your scissors.
Step 10. We are getting close to the end! These are the finishing touches. Grab your hot glue gun and start to glue on your bird’s features.
Step 11. When you are finished with this step, you should have your googly eye, bird’s wing, and bird’s beak securely attached to the cardboard.
Step 12. It is time to add legs to your bird’s body. Cut some wooden sticks into whatever length you prefer.
Next, get your glue gun again and glue the legs onto the back of your bird’s body. Get a larger piece of wooden stick to serve as a branch.
Position the branch horizontally underneath the bird’s legs and glue this third stick so that it looks like the bird is standing on a tree branch.
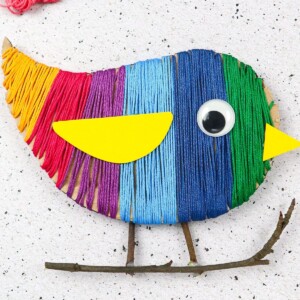
Step 13. We are all finished! Now, you have an adorable yarn bird to display wherever you would like!
Watch How to Make
How to Use These Birds
These yarn birds look adorable pretty much anywhere! I love to use them as window décor during the spring season.
You can also use them as gift wrap toppers or add them to greeting cards.
If you are a gardener, they would also look wonderful in or around your garden. You could even stand them up in your potted plants!

More Crafts to Make
- Yarn Turtle Craft
- DIY Pom Pom Hedgehog
- Paper Plate Snails
- Pipe Cleaner Butterflies
- Paper Plate Dinosaur
Yarn Bird Craft
Equipment
- Scissors
- Marker
Materials
- Scrap cardboard 6"x 8"
- Sticks
- Yarn
- Large googly eye
- Card stock 3.5"x 3"
Instructions
- Start by drawing the outline of your bird’s body on your cardboard and cut it out.
- Cut little slits all around your bird’s body.
- Insert the end of one of your yarn colors into a slit. Thread it through so that the yarn is secure and start wrapping it around your bird’s body.
- Do the same thing with another color of yarn. Use each color for as much of the bird’s body as you would like.
- Continue wrapping your yarn to form sections.
- When switching colors, cut the thread and insert the loose end underneath the wrapped yarn (use tape if necessary).
- Keep wrapping your bird, switching colors as you go.
- Continue going until your bird is fully wrapped.
- Draw a beak and a wing onto cardstock and cut them out.
- Glue on the beak and wing.
- Make sure that your googly eye, wing, and beak are securely attached.
- Cut some wooden sticks for legs into your preferred length and glue them onto the back of your bird’s body. Glue a larger stick branch horizontally underneath the legs so that it looks like the bird is standing on a tree branch.
- We are all finished! Now you have an adorable yarn bird to display wherever you would like!


