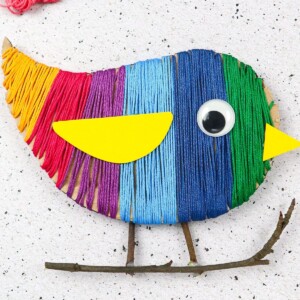
Yarn Bird Craft
This craft is very relaxing to make and looks beautiful. Perfect for any beginner crafter - kids, teens, and even adults.
Equipment
- Scissors
- Marker
Materials
- Scrap cardboard 6"x 8"
- Sticks
- Yarn
- Large googly eye
- Card stock 3.5"x 3"
Instructions
- Start by drawing the outline of your bird’s body on your cardboard and cut it out.
- Cut little slits all around your bird’s body.
- Insert the end of one of your yarn colors into a slit. Thread it through so that the yarn is secure and start wrapping it around your bird’s body.
- Do the same thing with another color of yarn. Use each color for as much of the bird’s body as you would like.
- Continue wrapping your yarn to form sections.
- When switching colors, cut the thread and insert the loose end underneath the wrapped yarn (use tape if necessary).
- Keep wrapping your bird, switching colors as you go.
- Continue going until your bird is fully wrapped.
- Draw a beak and a wing onto cardstock and cut them out.
- Glue on the beak and wing.
- Make sure that your googly eye, wing, and beak are securely attached.
- Cut some wooden sticks for legs into your preferred length and glue them onto the back of your bird’s body. Glue a larger stick branch horizontally underneath the legs so that it looks like the bird is standing on a tree branch.
- We are all finished! Now you have an adorable yarn bird to display wherever you would like!
Tried this craft?Leave a comment below with your rating! I love the feedback and respond to every comment!