DIY Pom Pom Hedgehog
This post may contain affiliate links: full affiliate disclosure.
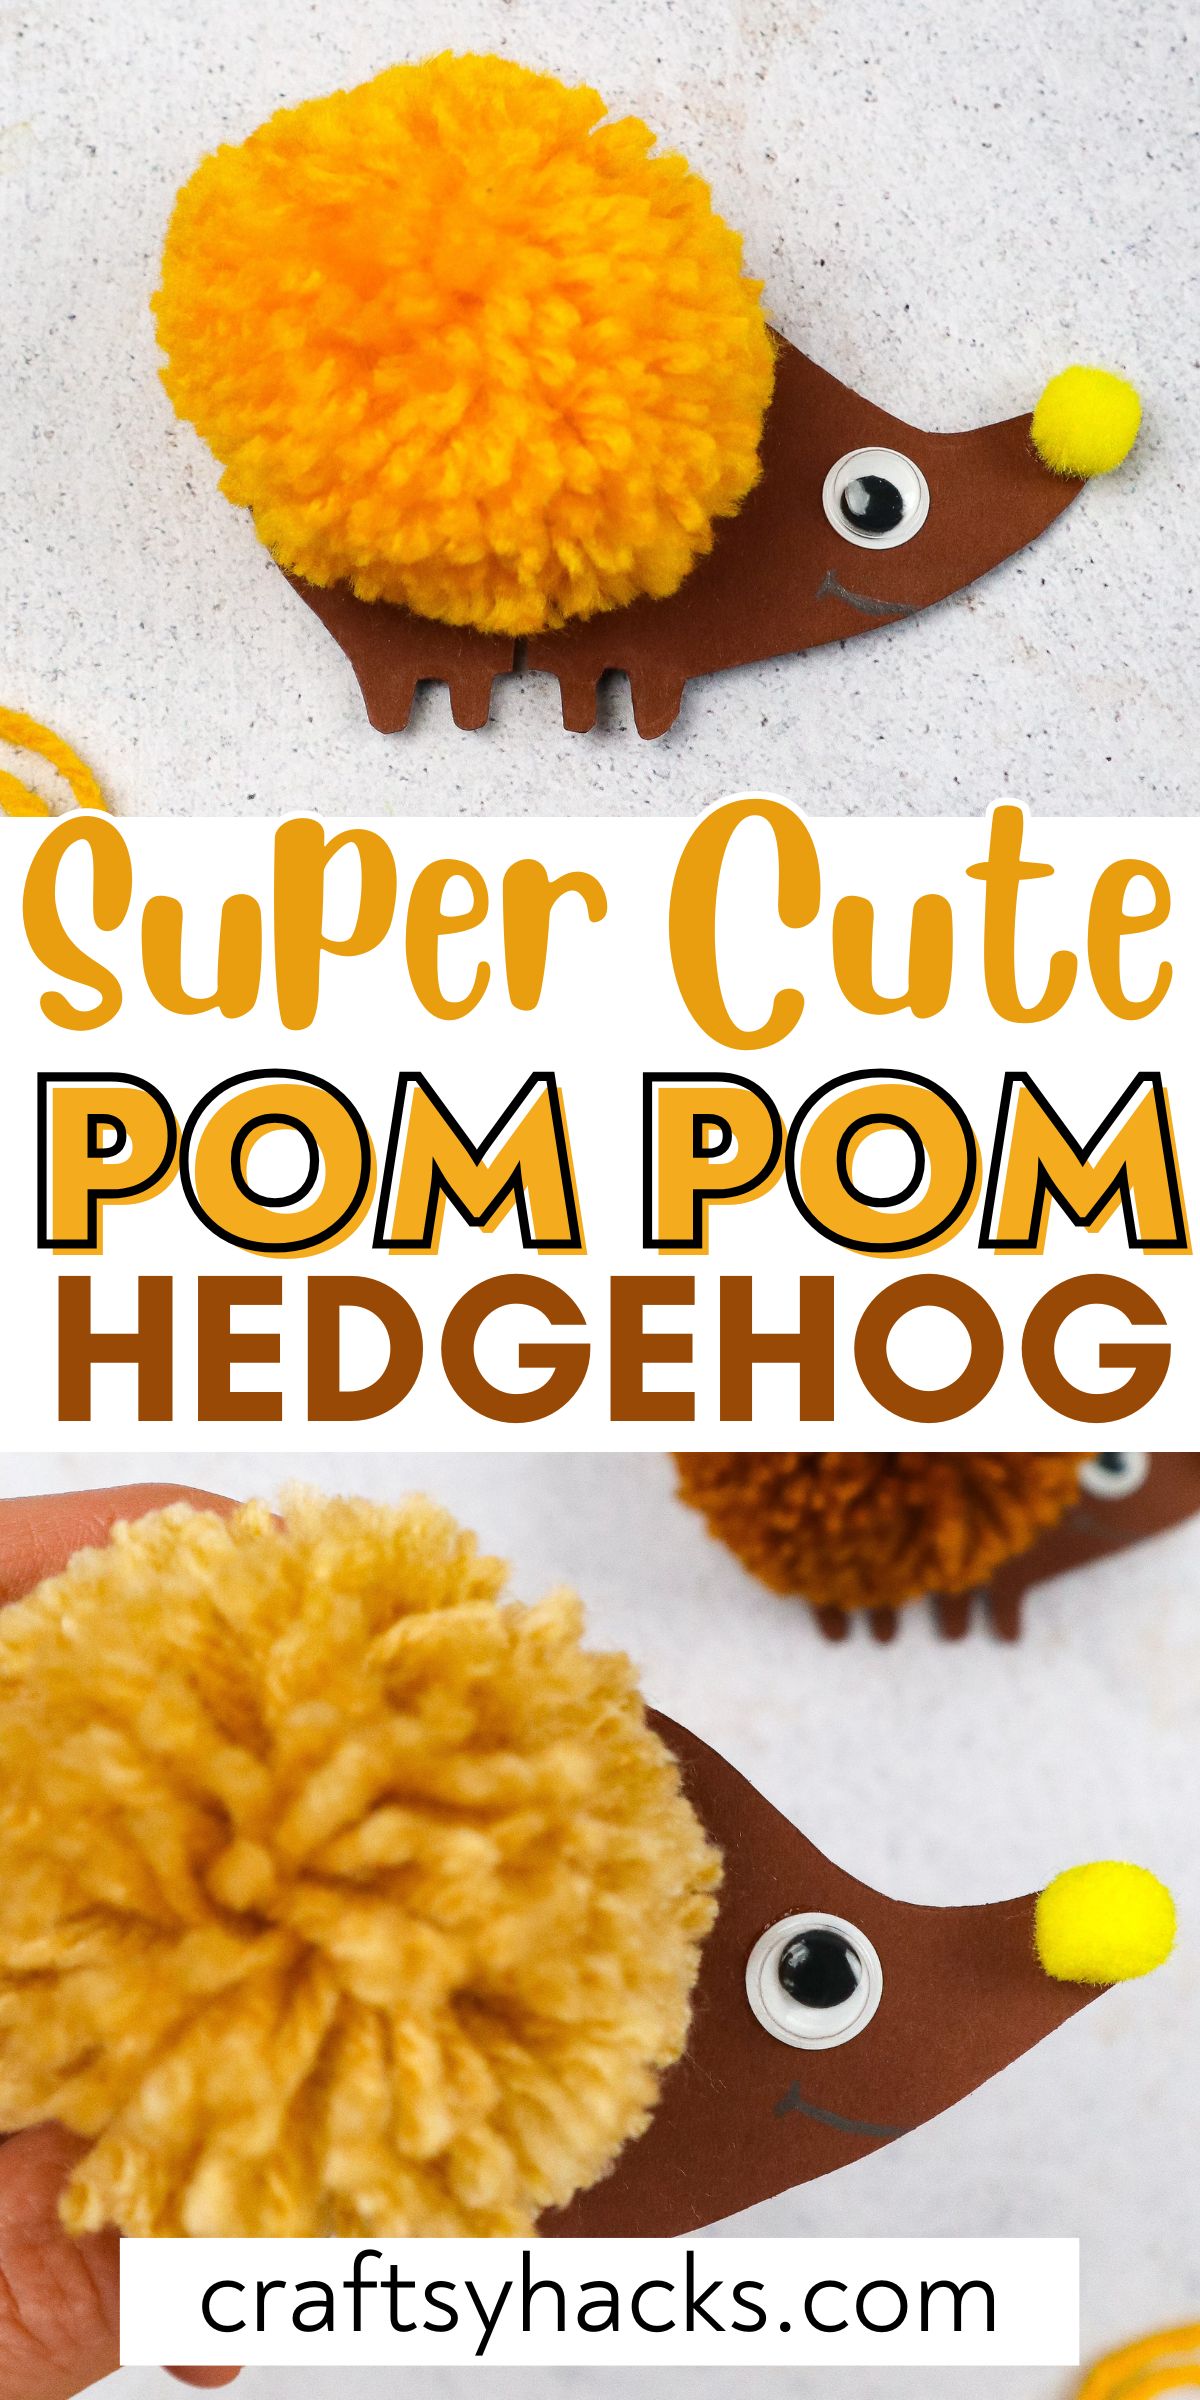
This DIY pom pom hedgehog is a perfect way to bring a little brightness into anyone’s daily life.
These cuties are great additions or add-ons to other projects–make them into bookmark toppers, fridge magnets, and even name tags.
Homemade pom poms are the real stars of the show for this project, and they are way easier than you’d think to make!
Before we move forward, if you are having trouble, check out my YouTube page with a video of the same name: DIY Pom Pom Hedgehog.
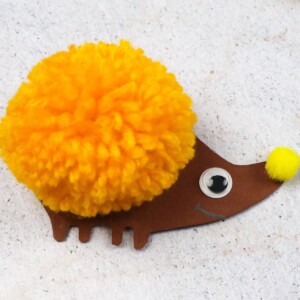
I hope you enjoy the sweet diy pom pom hedgehogs as much as I do! Now, on to the post!
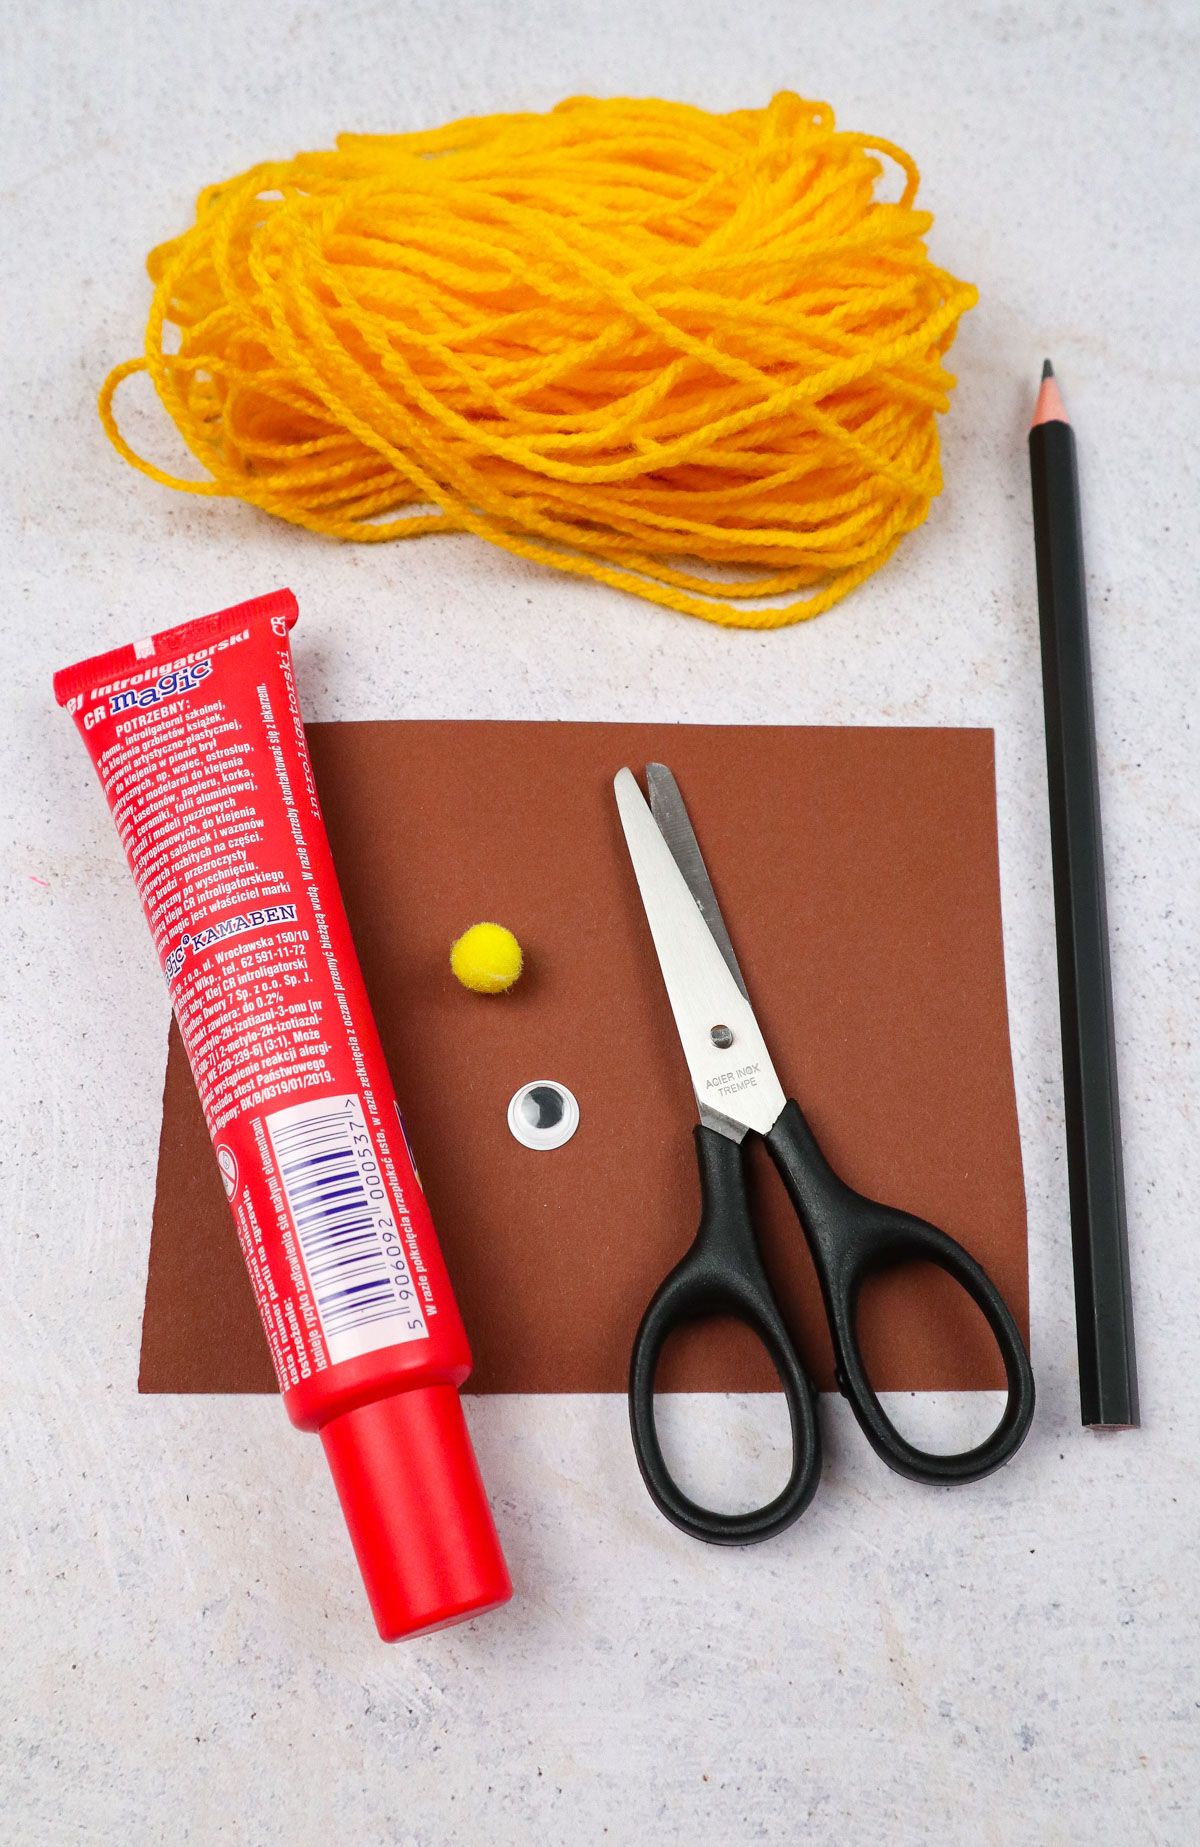
Supplies You’ll Need
1x googly eye
Craft paper 6″x6″
Scissors
How to Make DIY Pom Pom Hedgehog
Step 1. We’ll start by outlining a hedgehog. If you have trouble with drawing one or feel intimidated by this, opt for printing out a simple shaped one and using it as a stencil.
Step 2. Cut out the hedgehog and cut medium slits on either side of its body. One cut on its upper body and one on its belly–these cuts will anchor the pom pom later.
Step 3. Next, we’ll cut a 12-inch piece of yarn. This piece of yarn will also be instrumental with the pom pom production–set it aside for now.
Whenever handling this piece going forward, do not trim it! As mentioned, it will be used to tie the pom pom to the hedgehog’s body.
Step 4. Take the rest of your yarn and wrap it around four fingers. Thread the end of it between your pointer and middle fingers.
This technique is one of the easiest ways to make a homemade pom pom. The wrap doesn’t have to be tight, just enough for all of it to sit on your fingers, as shown below.
Step 5. Continue to wrap until your amount of yarn reflects the picture below, and snip any remaining yarn off. If you’re making a smaller or larger hedgehog, adapt accordingly.
Step 6. Once you have the yarn wrapped and cut, it’s time to form the pom pom. Take the tails and your 12-inch string and tie it off so you can slip the pom off your fingers.
Depending on how skilled you are with yarn or tying knots, you may need assistance with this part.
Step 7. Take the long pieces of yarn and tie another knot to double secure your pom pom. Two or three times should do the trick to keep your pom intact.
Again, grab an assistant for this part of the project if you need it! We want to ensure those pom poms are snuggly in place when tied around the hedgehogs.
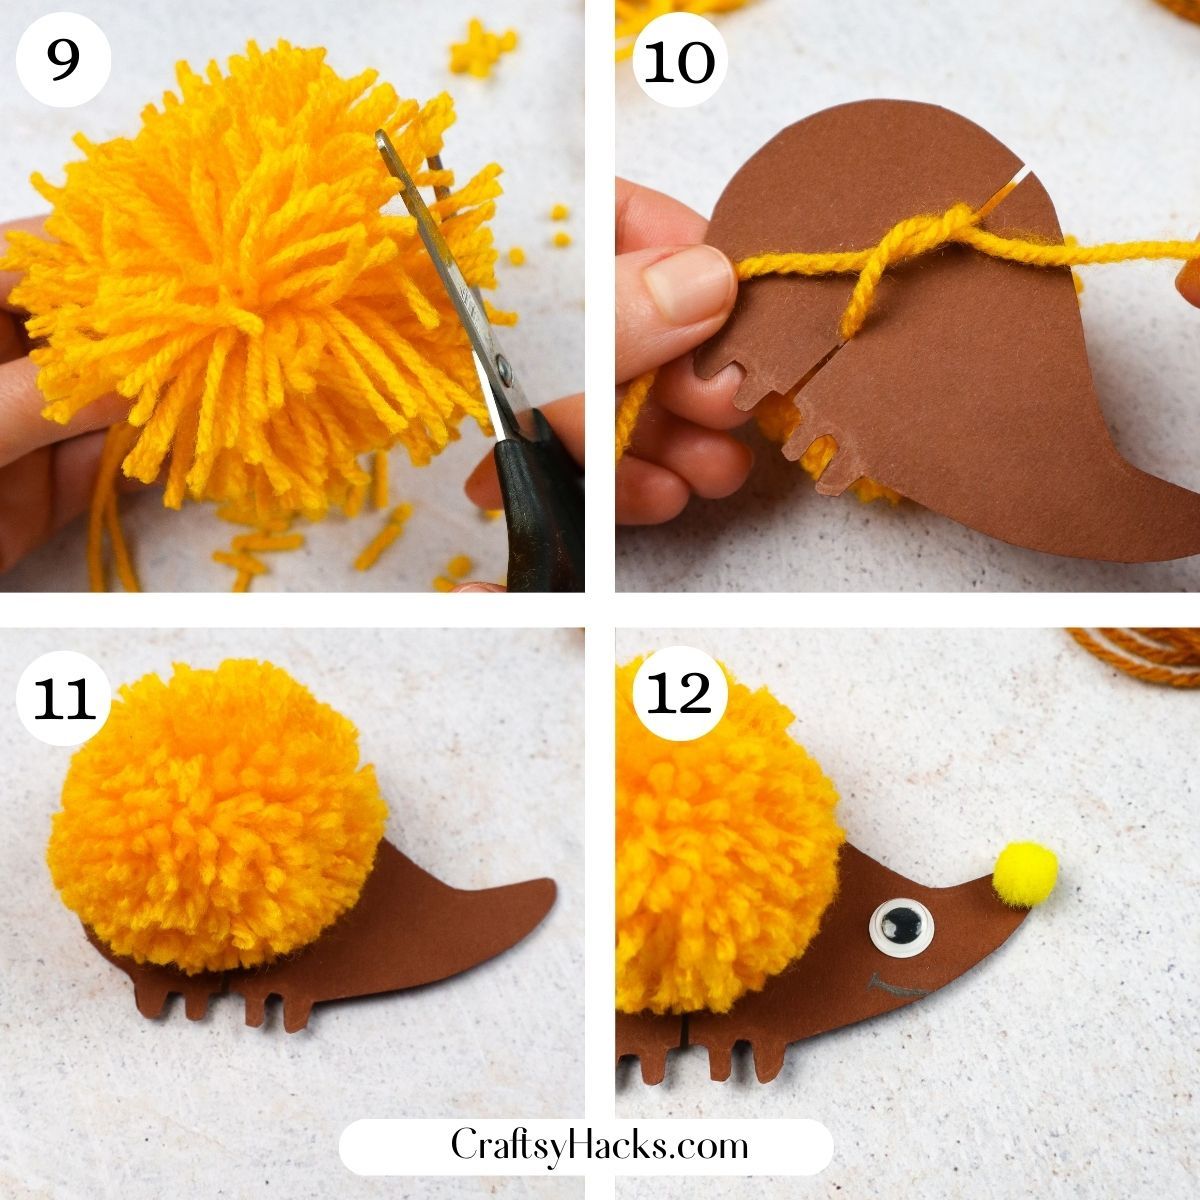
Step 8. Fluff out your pom and cut the loops in half at the widest point to create your hedgehog spikes. Make sure not to cut your longer 12-inch piece of yarn.
Follow the top of the loop around the circumference of the yarn circle.
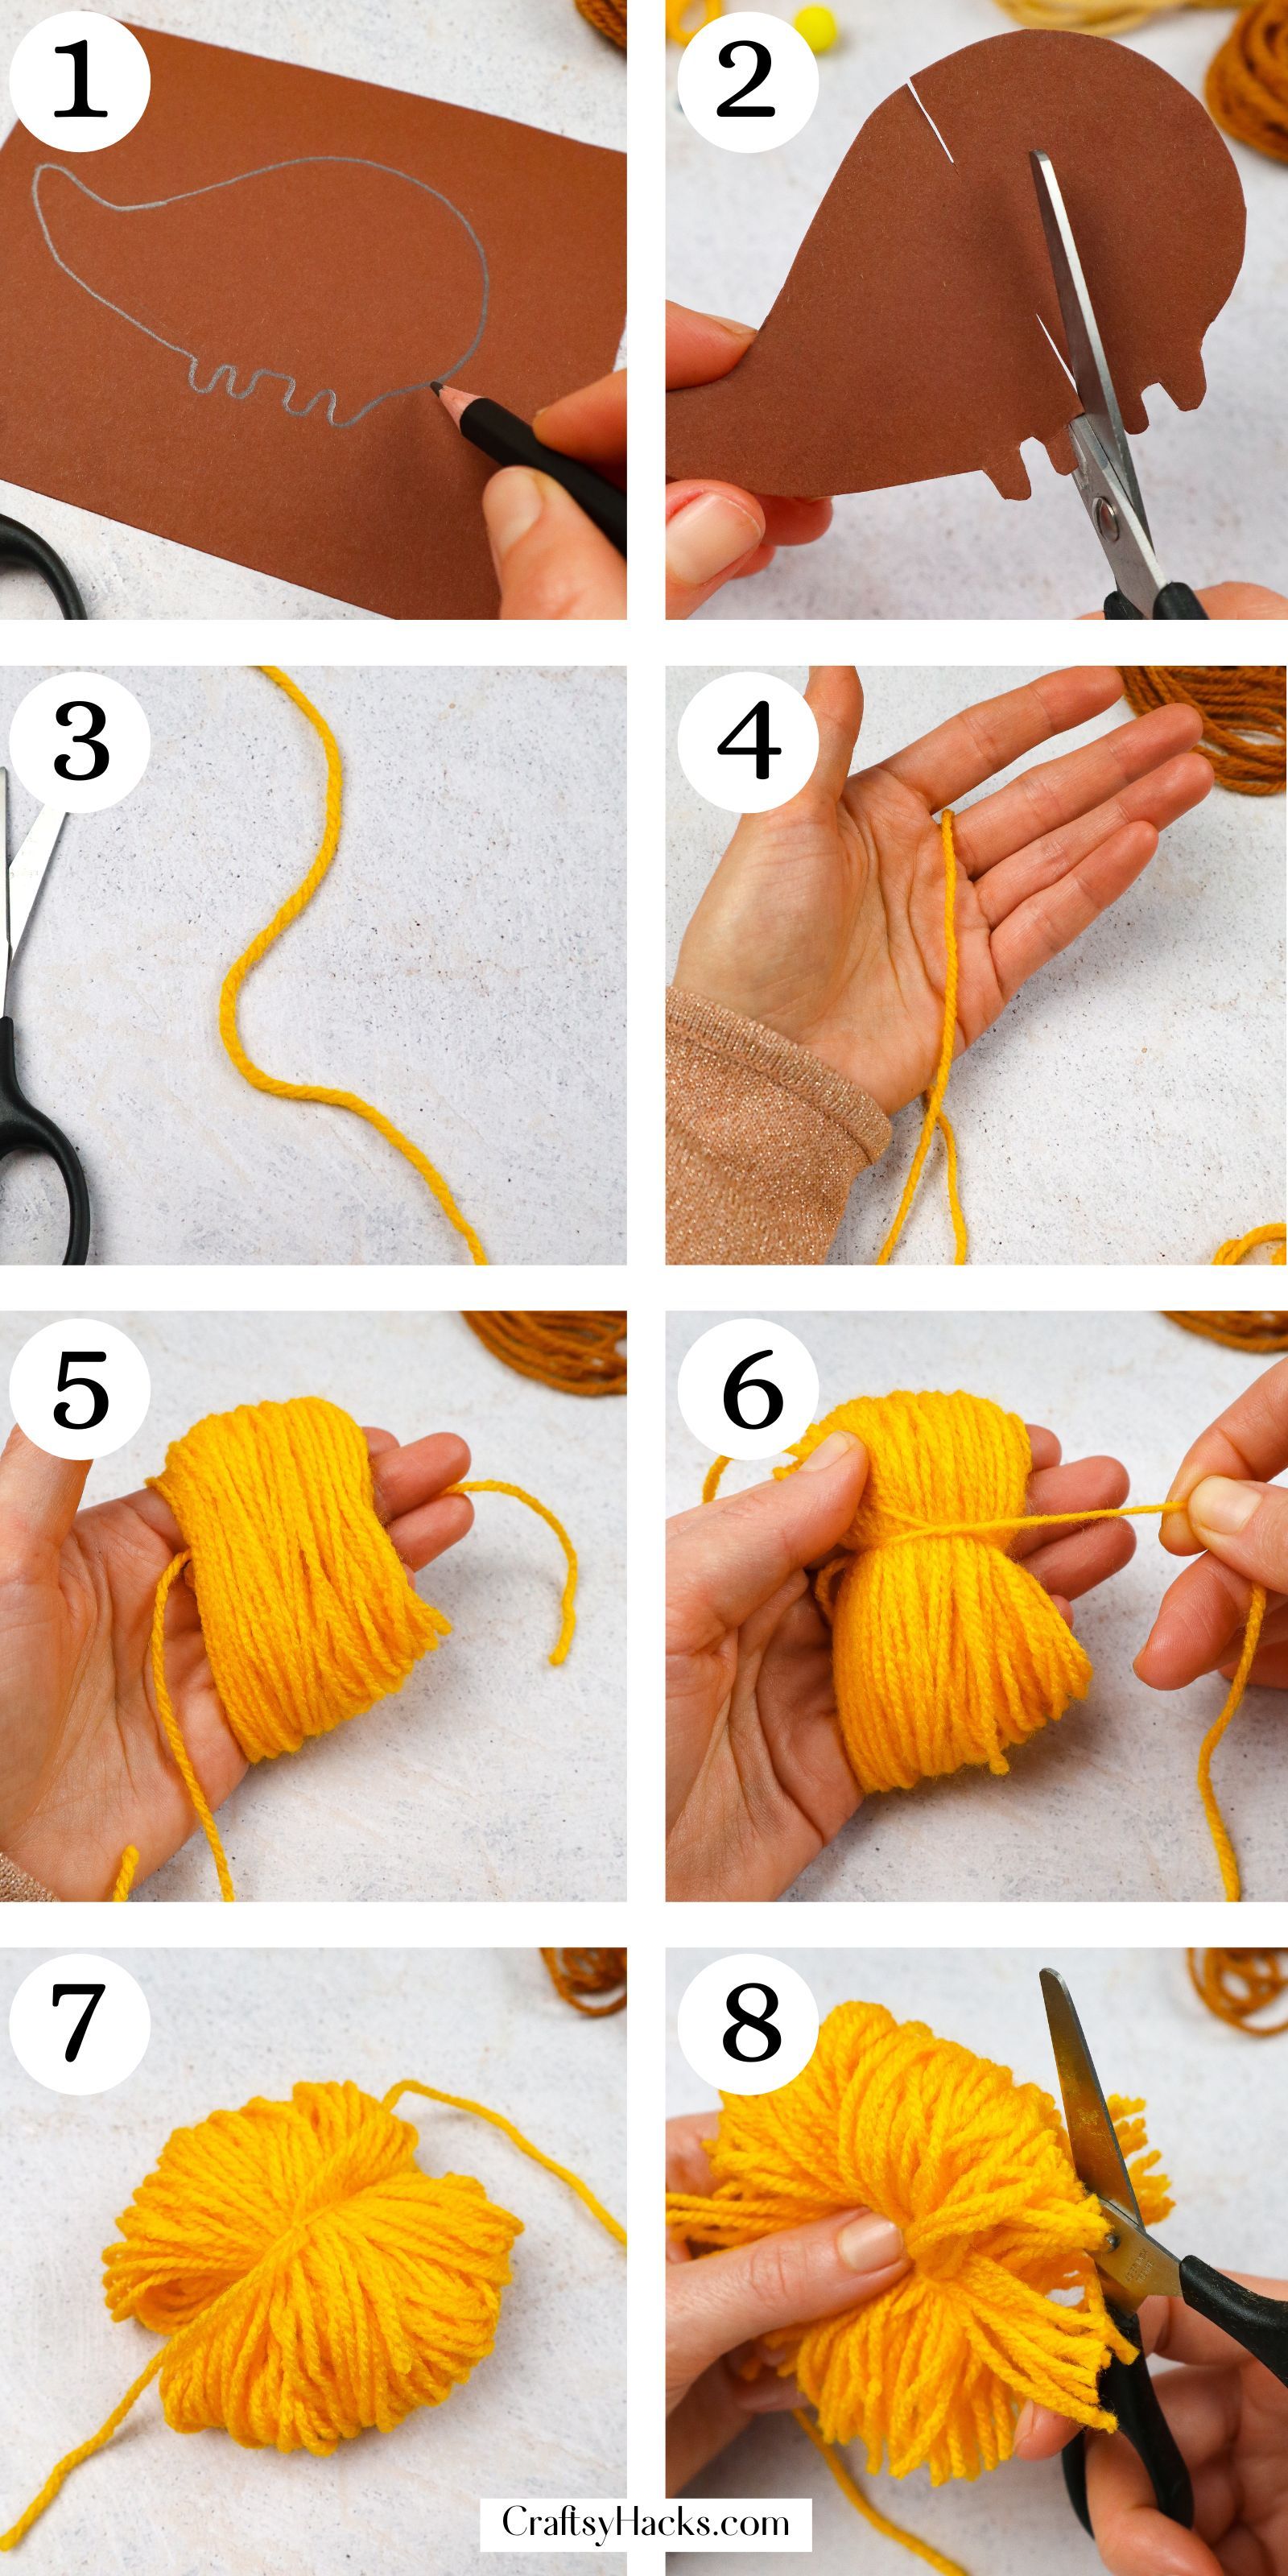
Step 9. Next, trim any uneven places on the pom pom, but make sure to avoid those tails–you need them for assembly.
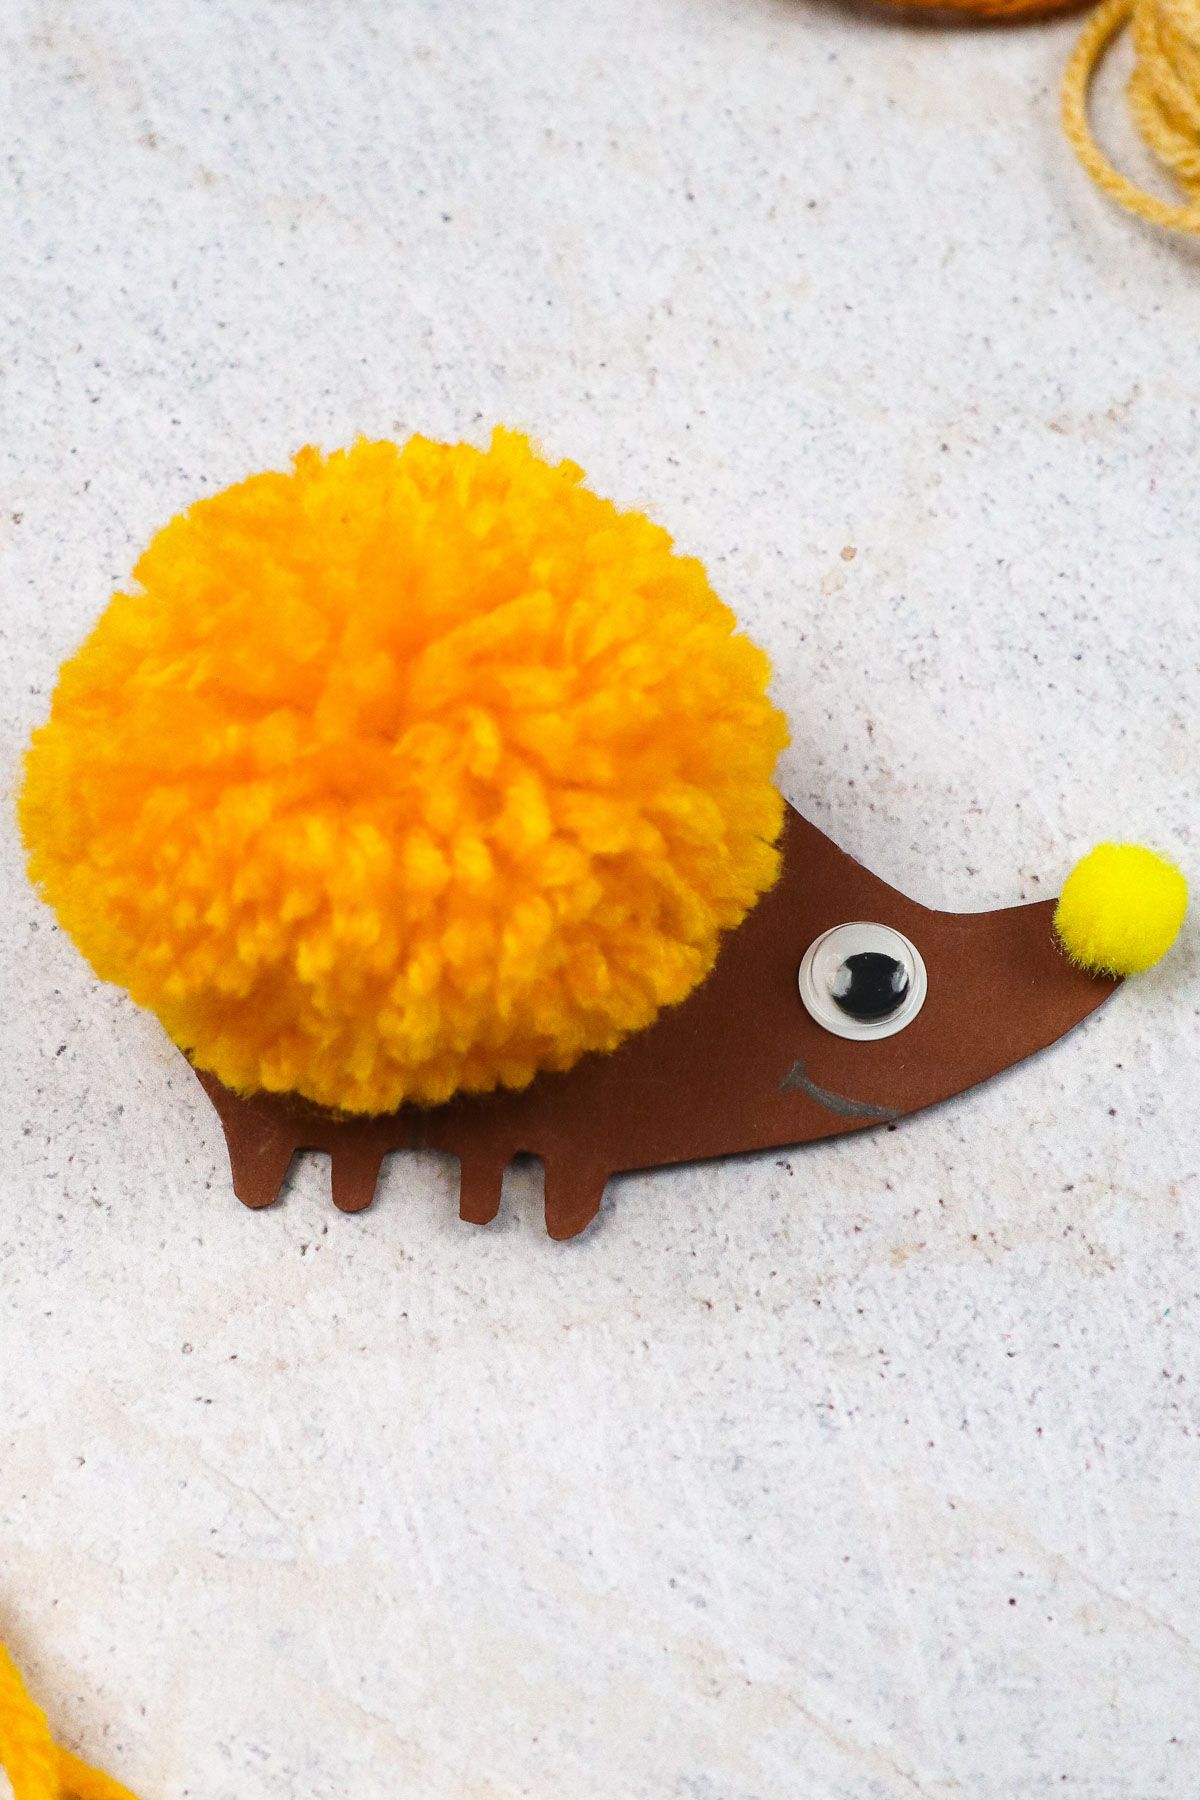
Step 10. After the shaping is done on your yarn ball, we’ll take the two tails and tie them to the hedgehog’s body. The tails should slip into the slots we cut earlier–tie them to the paper.
Step 11. Situate the pom on the front of the body and make any last-minute trims or shaping cuts. Re-tie if needed.
Step 12. Add your facial features–a mini pom pom nose, a googly eye, and even a smile! Whatever you’d like for your pom pom hedgehog is fair game.
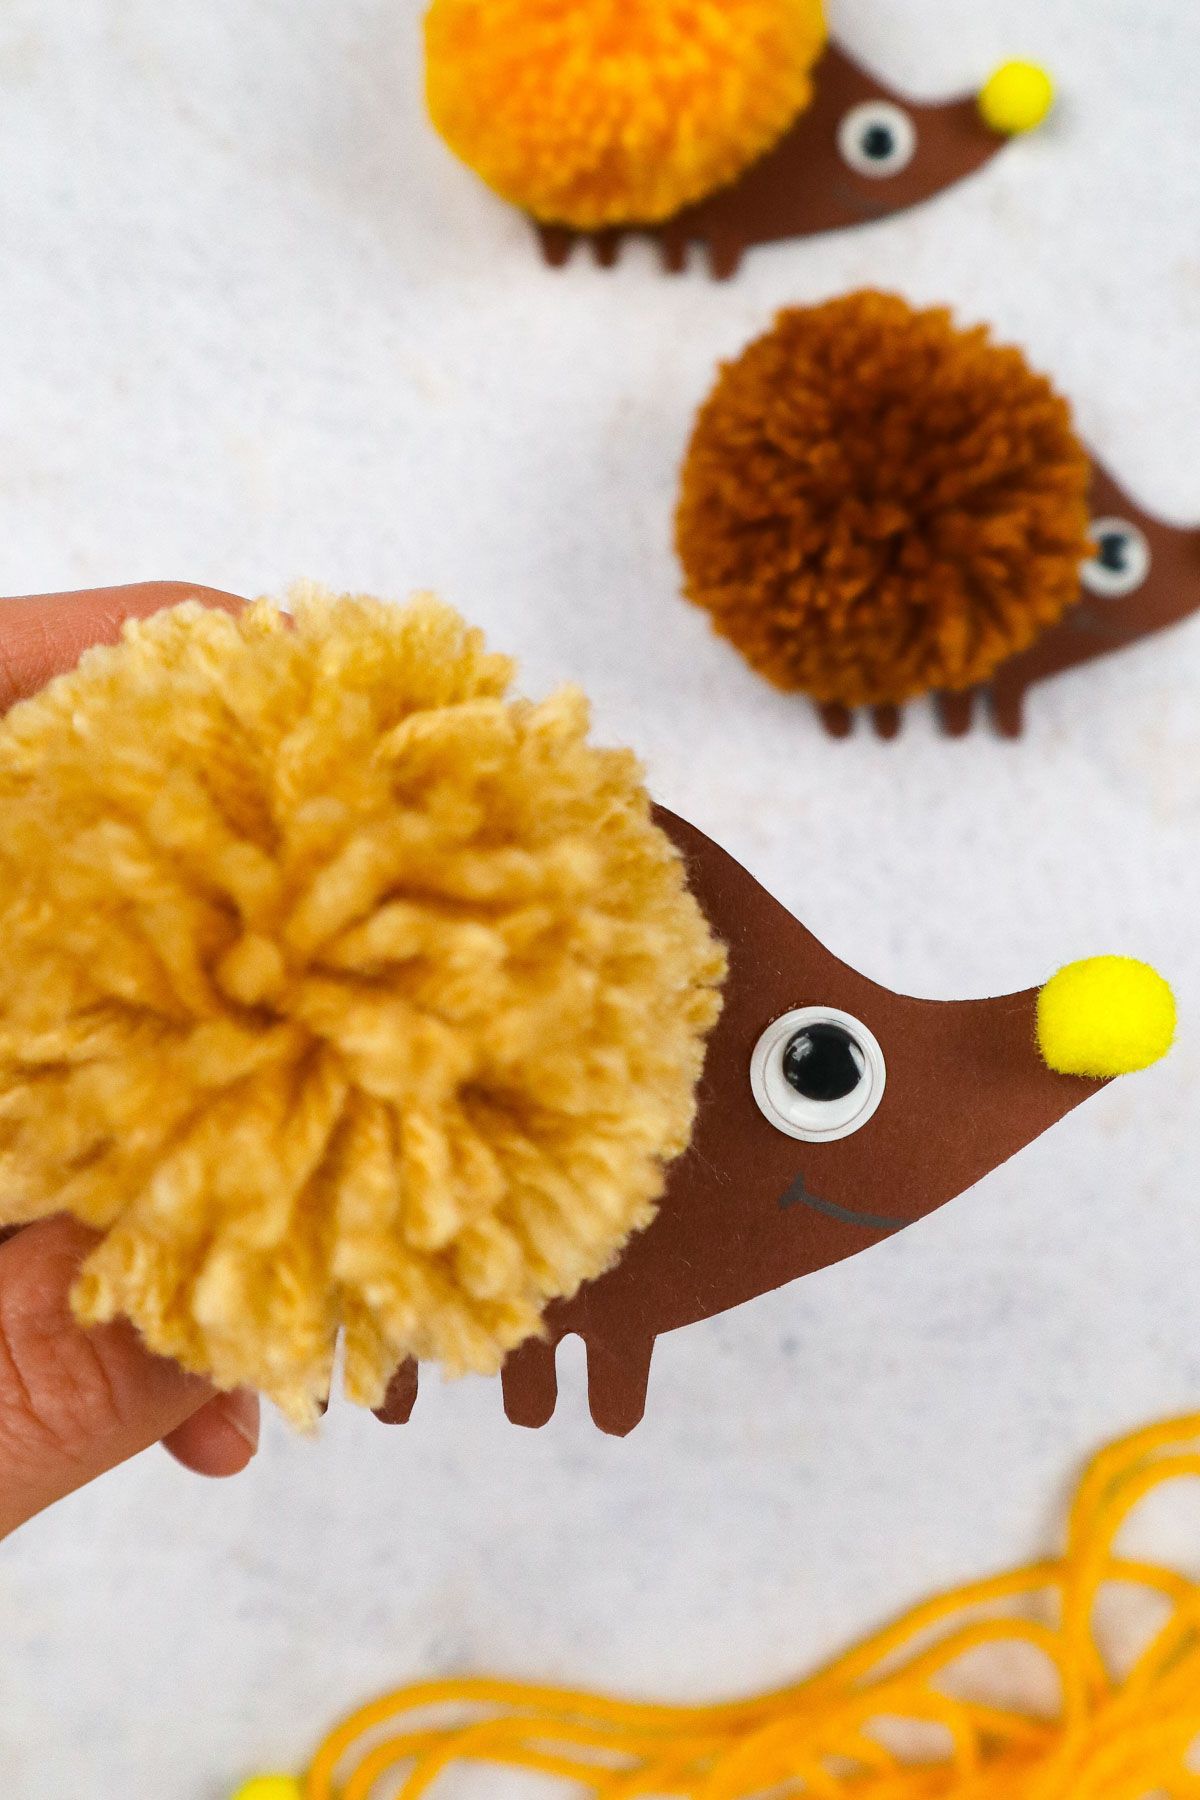
It’s done! Your cute hedgehog has come to life! Enjoy the cuteness!
More Cute Crafts
DIY Pom Pom Hedgehog
Equipment
- Scissors
- Pencil
Materials
- Yarn
- 1 x googly eye
- Craft paper 6″x6″
- 1 x small pom pom
- Craft glue
Instructions
- Draw a hedgehog outline or print one out to use as a stencil.
- Cut out the shape and cut a slit on the belly and back of the hedgehog.
- Grab your yarn and cut a 12-inch piece of yarn. Set aside.
- Thread the rest of the yarn between your pointer and your middle finger and start wrapping.
- Wrap a sufficient amount of yarn around your fingers–enough to make an appropriate-sized pom pom for your hedgehog.
- Secure your pom pom with your 12-inch piece of yarn by tying it and cinching the wrapped yarn. At this point, you can gently pull the yarn off your fingers.
- Wrap the yarn around a second or even third time to secure your pom pom’s structure.
- Fluff your pom and cut the loops open with a pair of scissors. Make sure to avoid the tails of the 12-inch pieces of yarn.
- Trim any uneven places on the pom pom, but make sure to avoid those tails–you need them for assembly.
- Once shaped, take the tails and use those to anchor the pom onto the hedgehog by tying them to the backside.
- Make sure the pom is sitting appropriately–re-tie if needed. Similarly, trim or reshape any last-minute details.
- Add any of the fun facial feature additions you’d like–googly eyes, mini pom pom nose, and smile.
Let everything dry, and your wonderful and cute diy pom pom hedgehog is there!


