DIY Bottle Vase (Step-by-Step Tutorial)
This post may contain affiliate links: full affiliate disclosure.
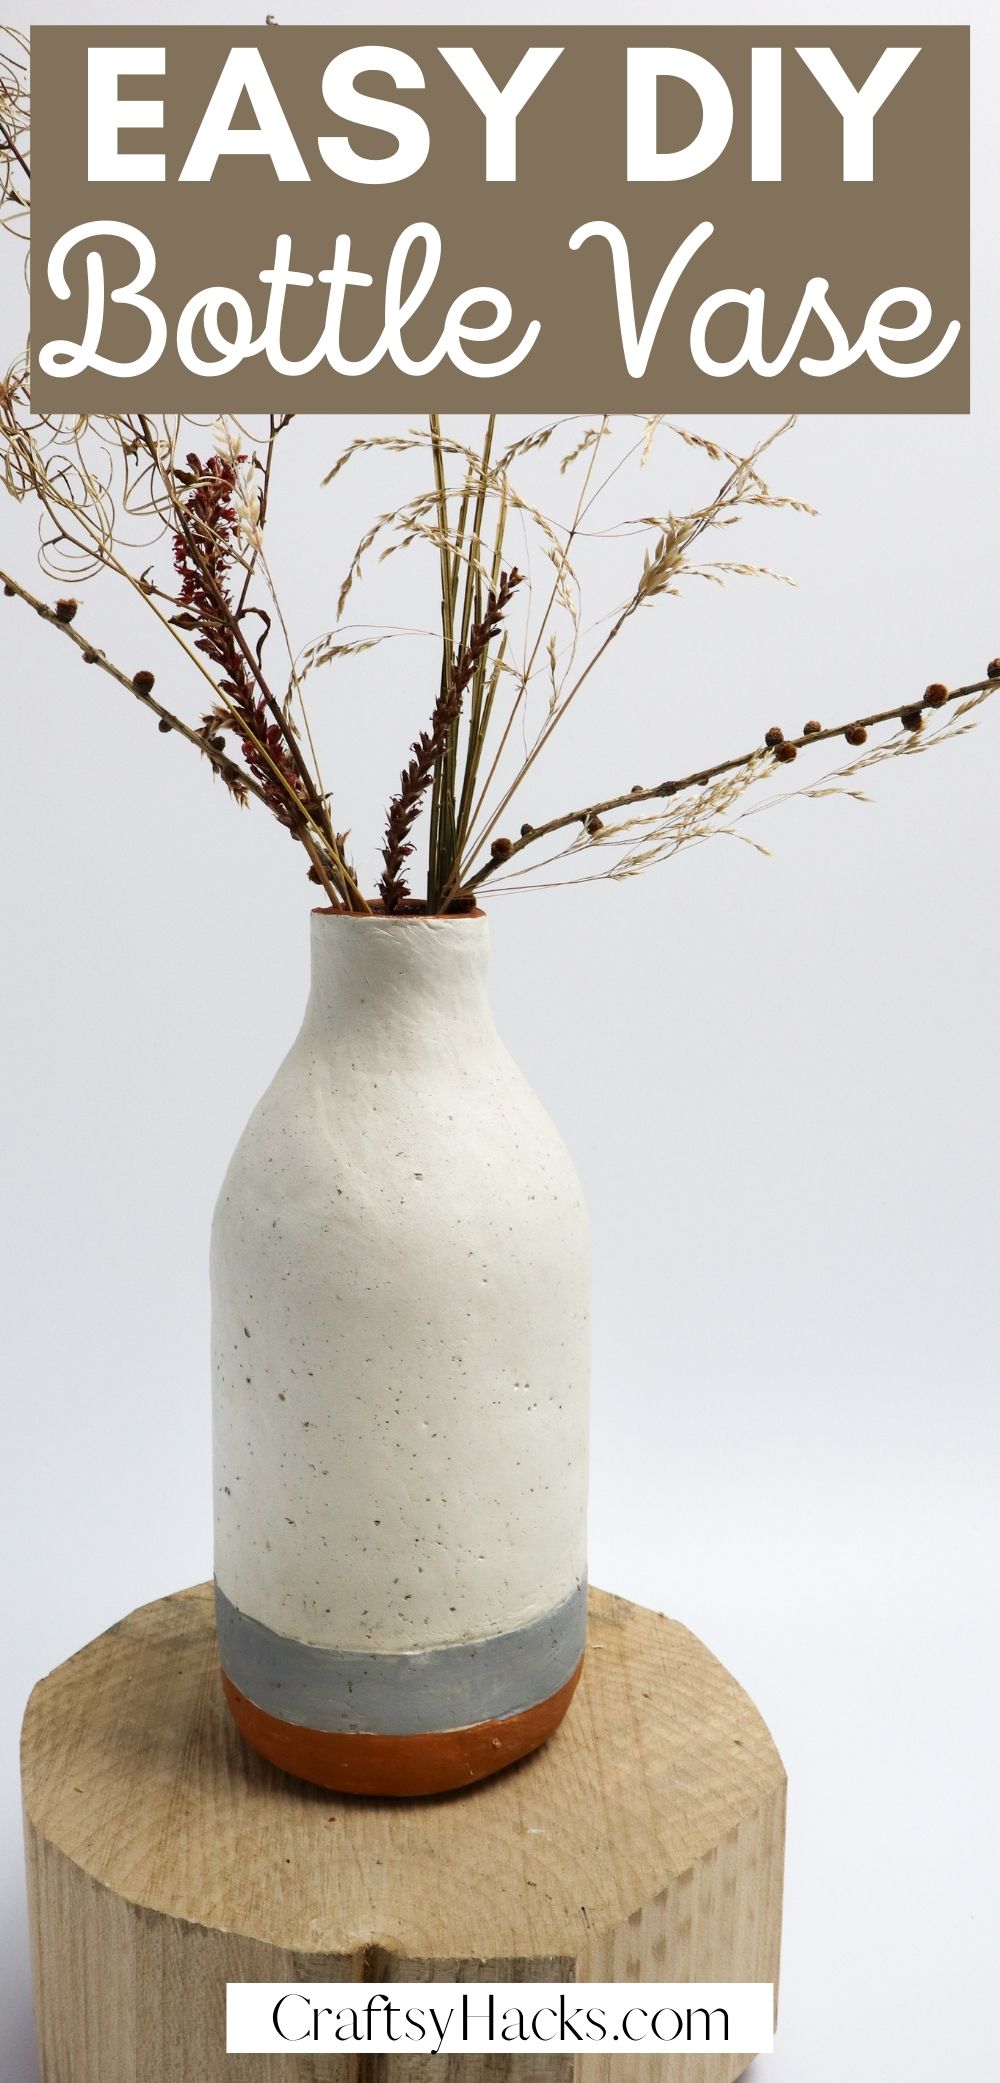
Feel like upcycling your glass bottles? Make your very own DIY bottle vase with air-drying clay and decorate your home with a creative touch. This is a perfect DIY project for adults and teens who need a relatively easy project to work with clay.
You cannot have too many vases around your house. Every room deserves to have colorful and cheery flowers to brighten it up, and those flowers deserve a fabulous vase like this one.
Since upcycling is so popular these days—and rightly so—why don’t you consider upcycling old bottles into a vase like this? You can use it as a flower vase, as a centerpiece, or just as a decorative item to place on the mantel.
Either way, it’s a stunning piece that will bring out elegance and will fit any home decor. Most importantly, it will give you bragging rights because you have made it all by yourself. Now what’s better than that?
Supplies and Tools for this Bottle Vase
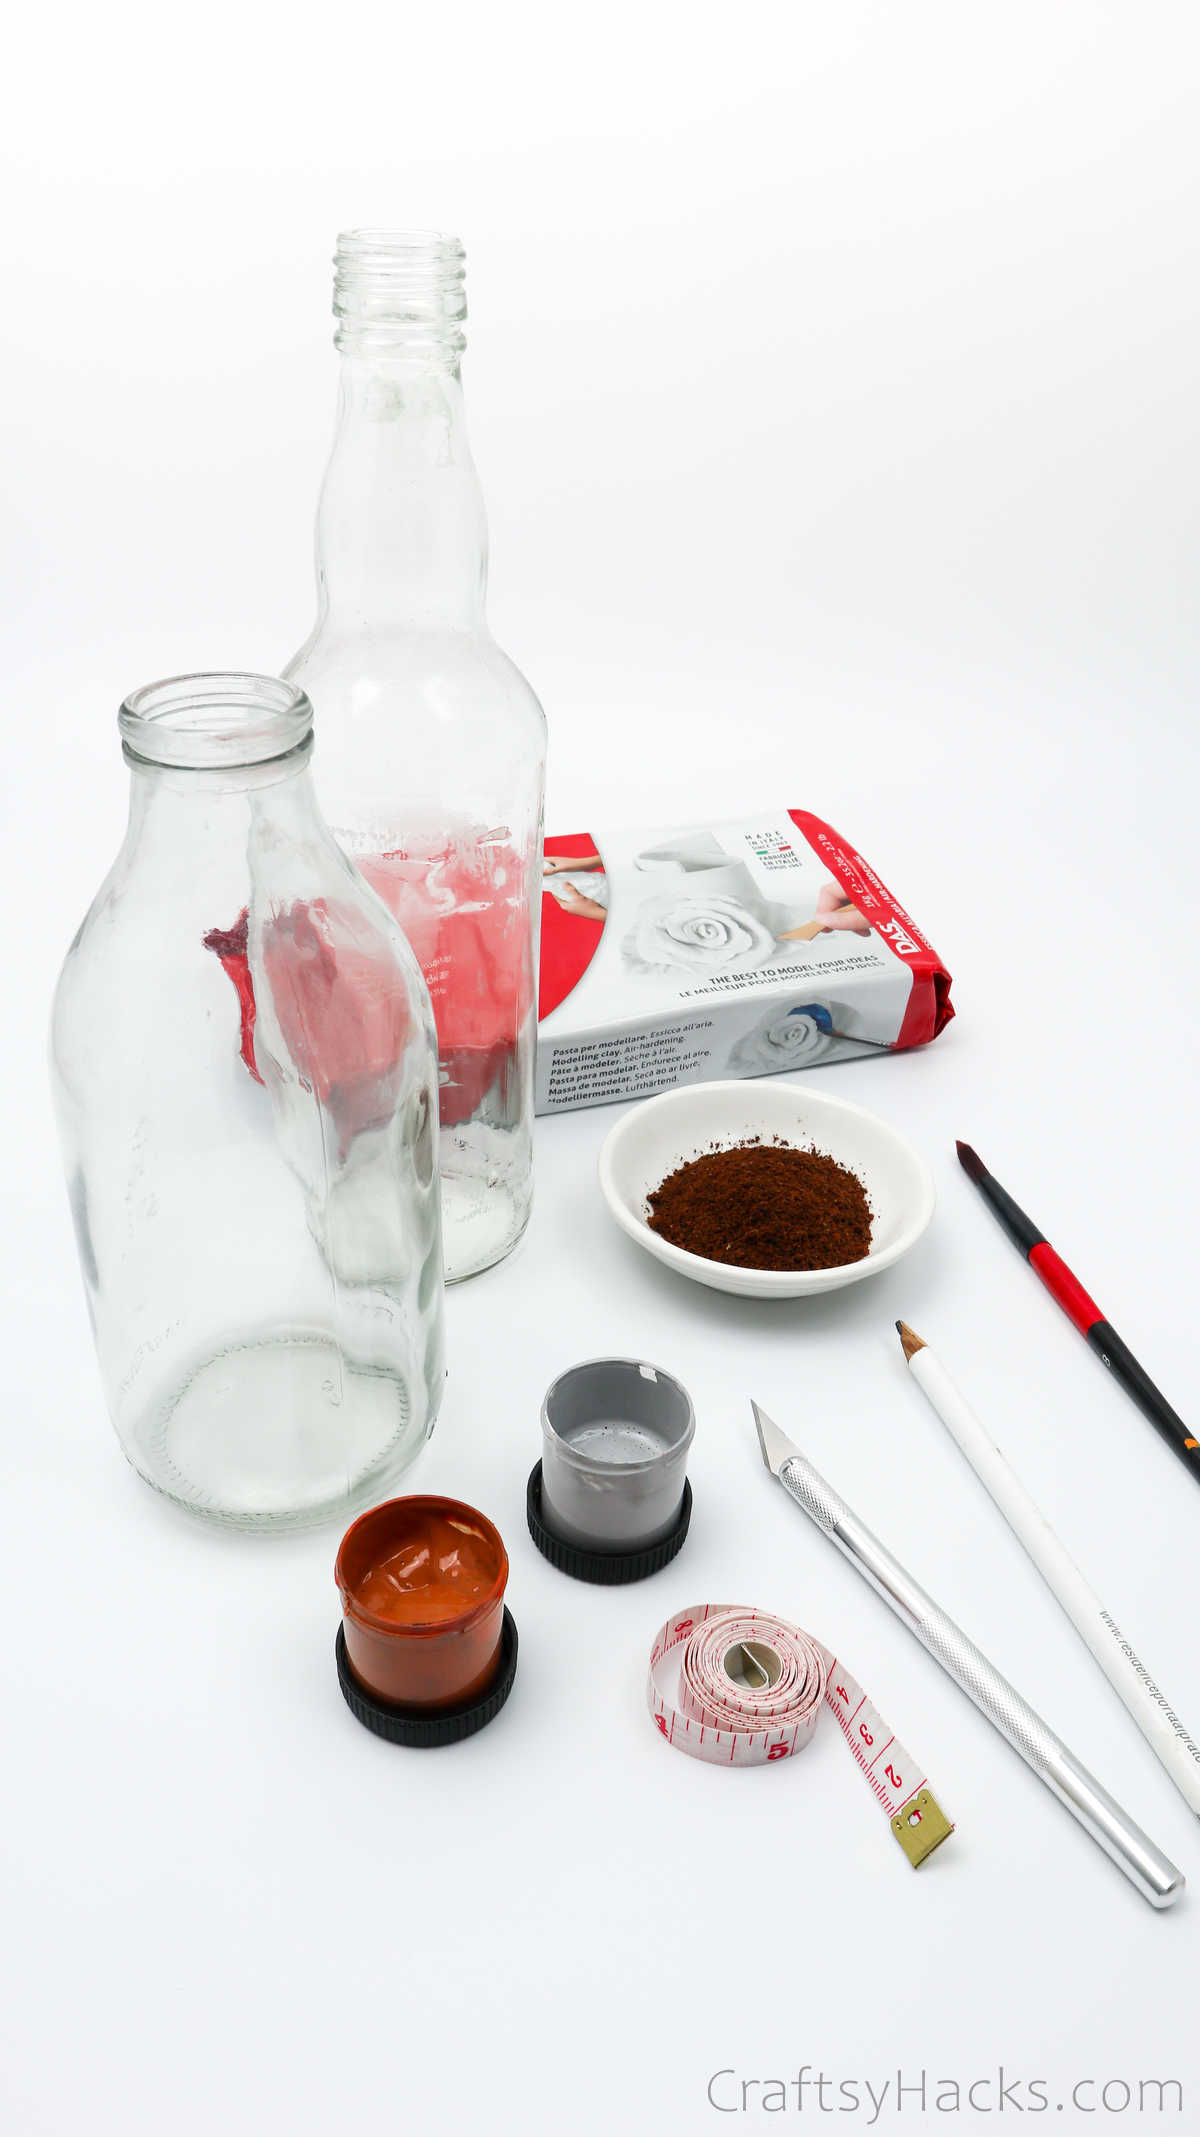
First, take a look at all the supplies you’ll need for this DIY project:
- Glass bottle
- Rolling pin (or another glass bottle)
- Air drying clay
- Ground coffee
- Tape measure
- Precision knife
- Pencil
- Paintbrush
- Acrylic paints (grey and brown)
Watch: DIY Clay Vase
If you’re not much of a reader, you can just follow this tutorial via video!
How Do You Make a Bottle Vase?
Air-drying clay is what turns a run-of-the-mill glass bottle into that chic and rustic vase you see. Curious to see how you can recreate that gorgeous and earthy speckled effect on the clay and turn your wine bottles into amazing crafts.
Well, then let’s take a look at how to make this vase!
Step 1
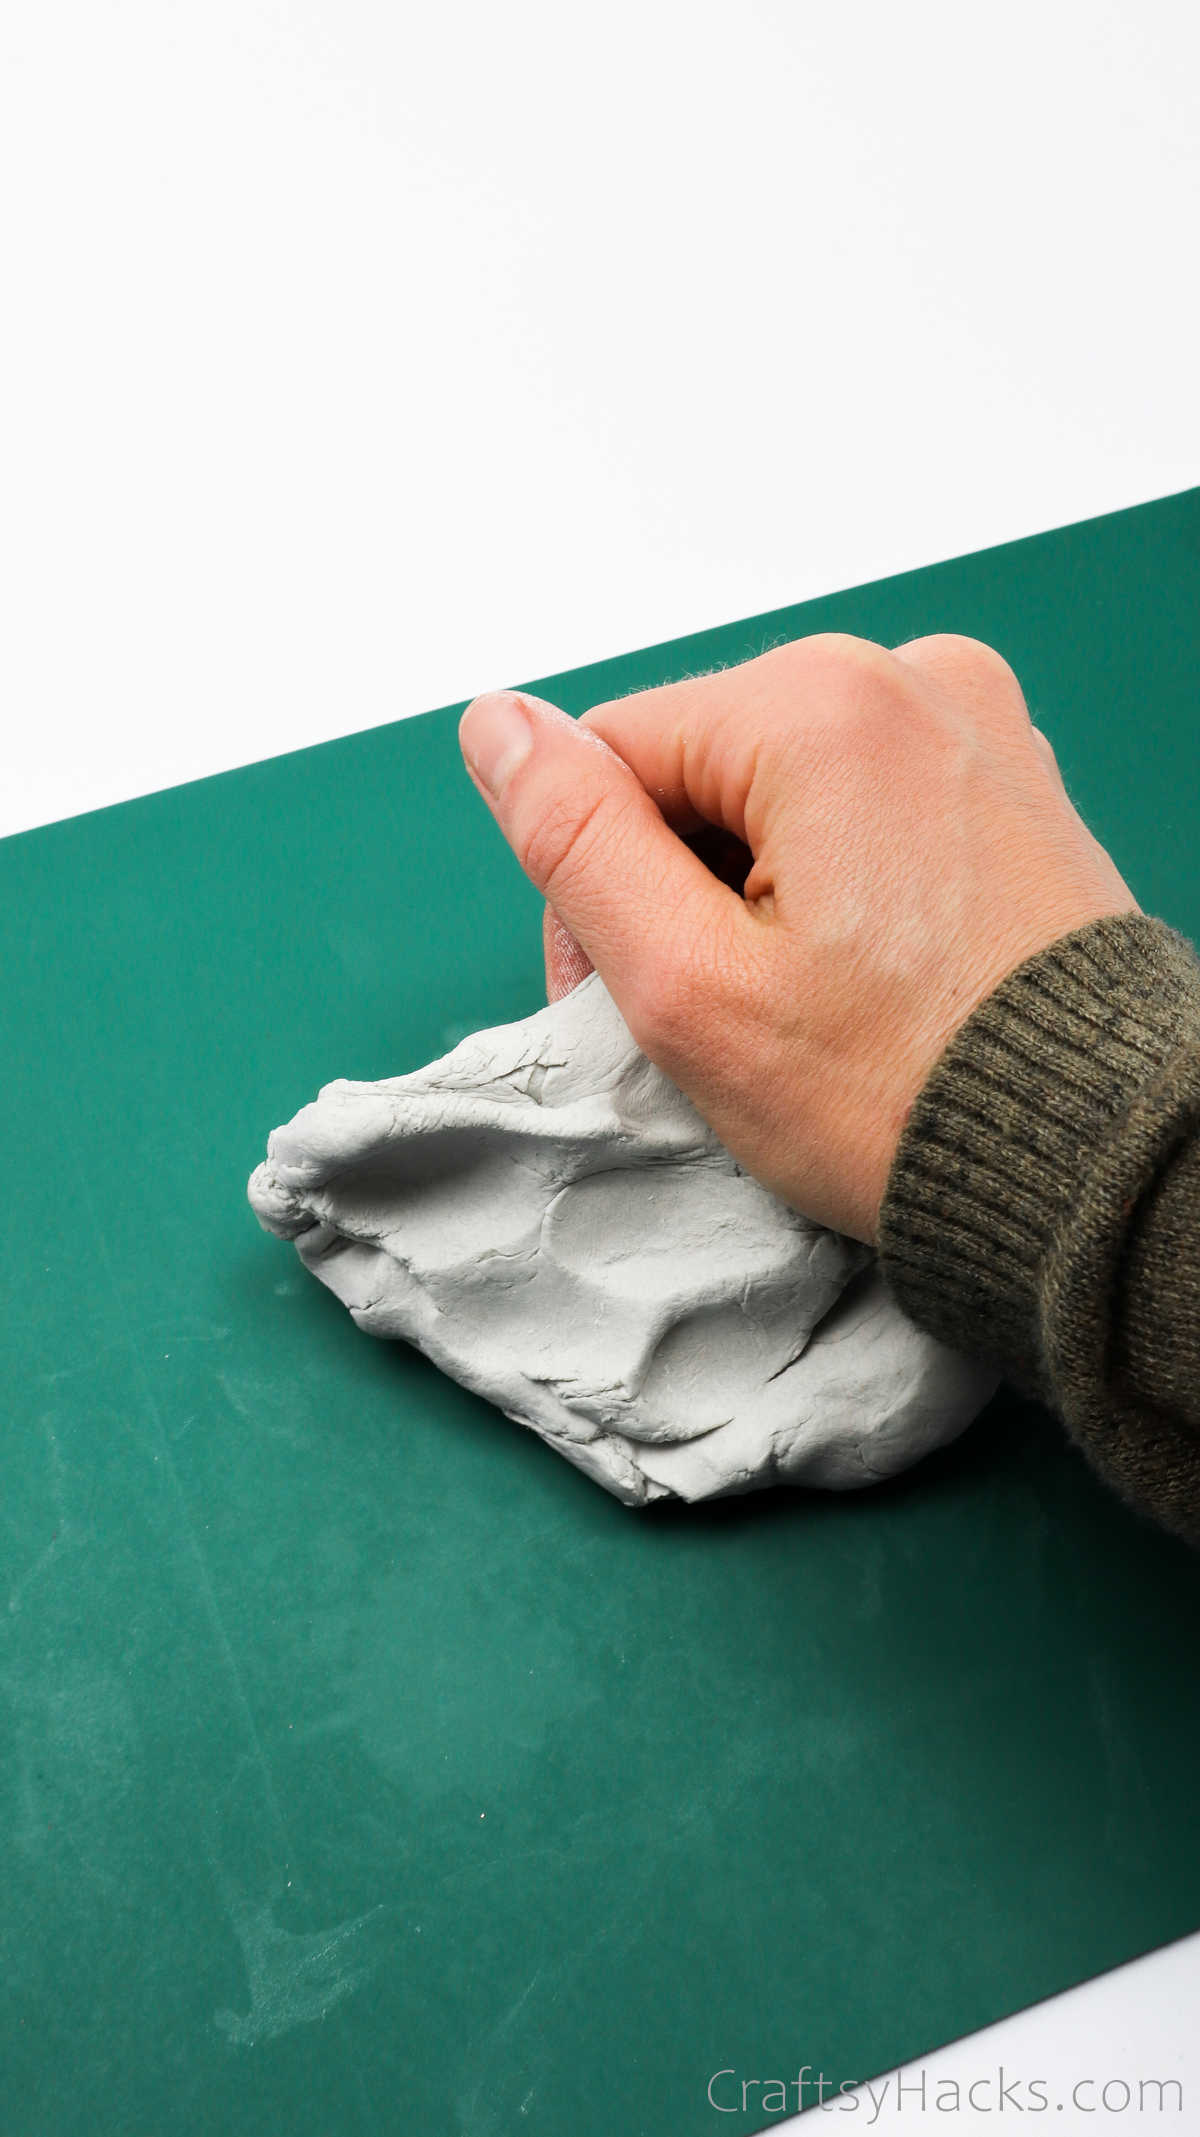
The first step is to cut out a portion of your air-dry clay and immediately pack the rest of it back into an air-tight container.
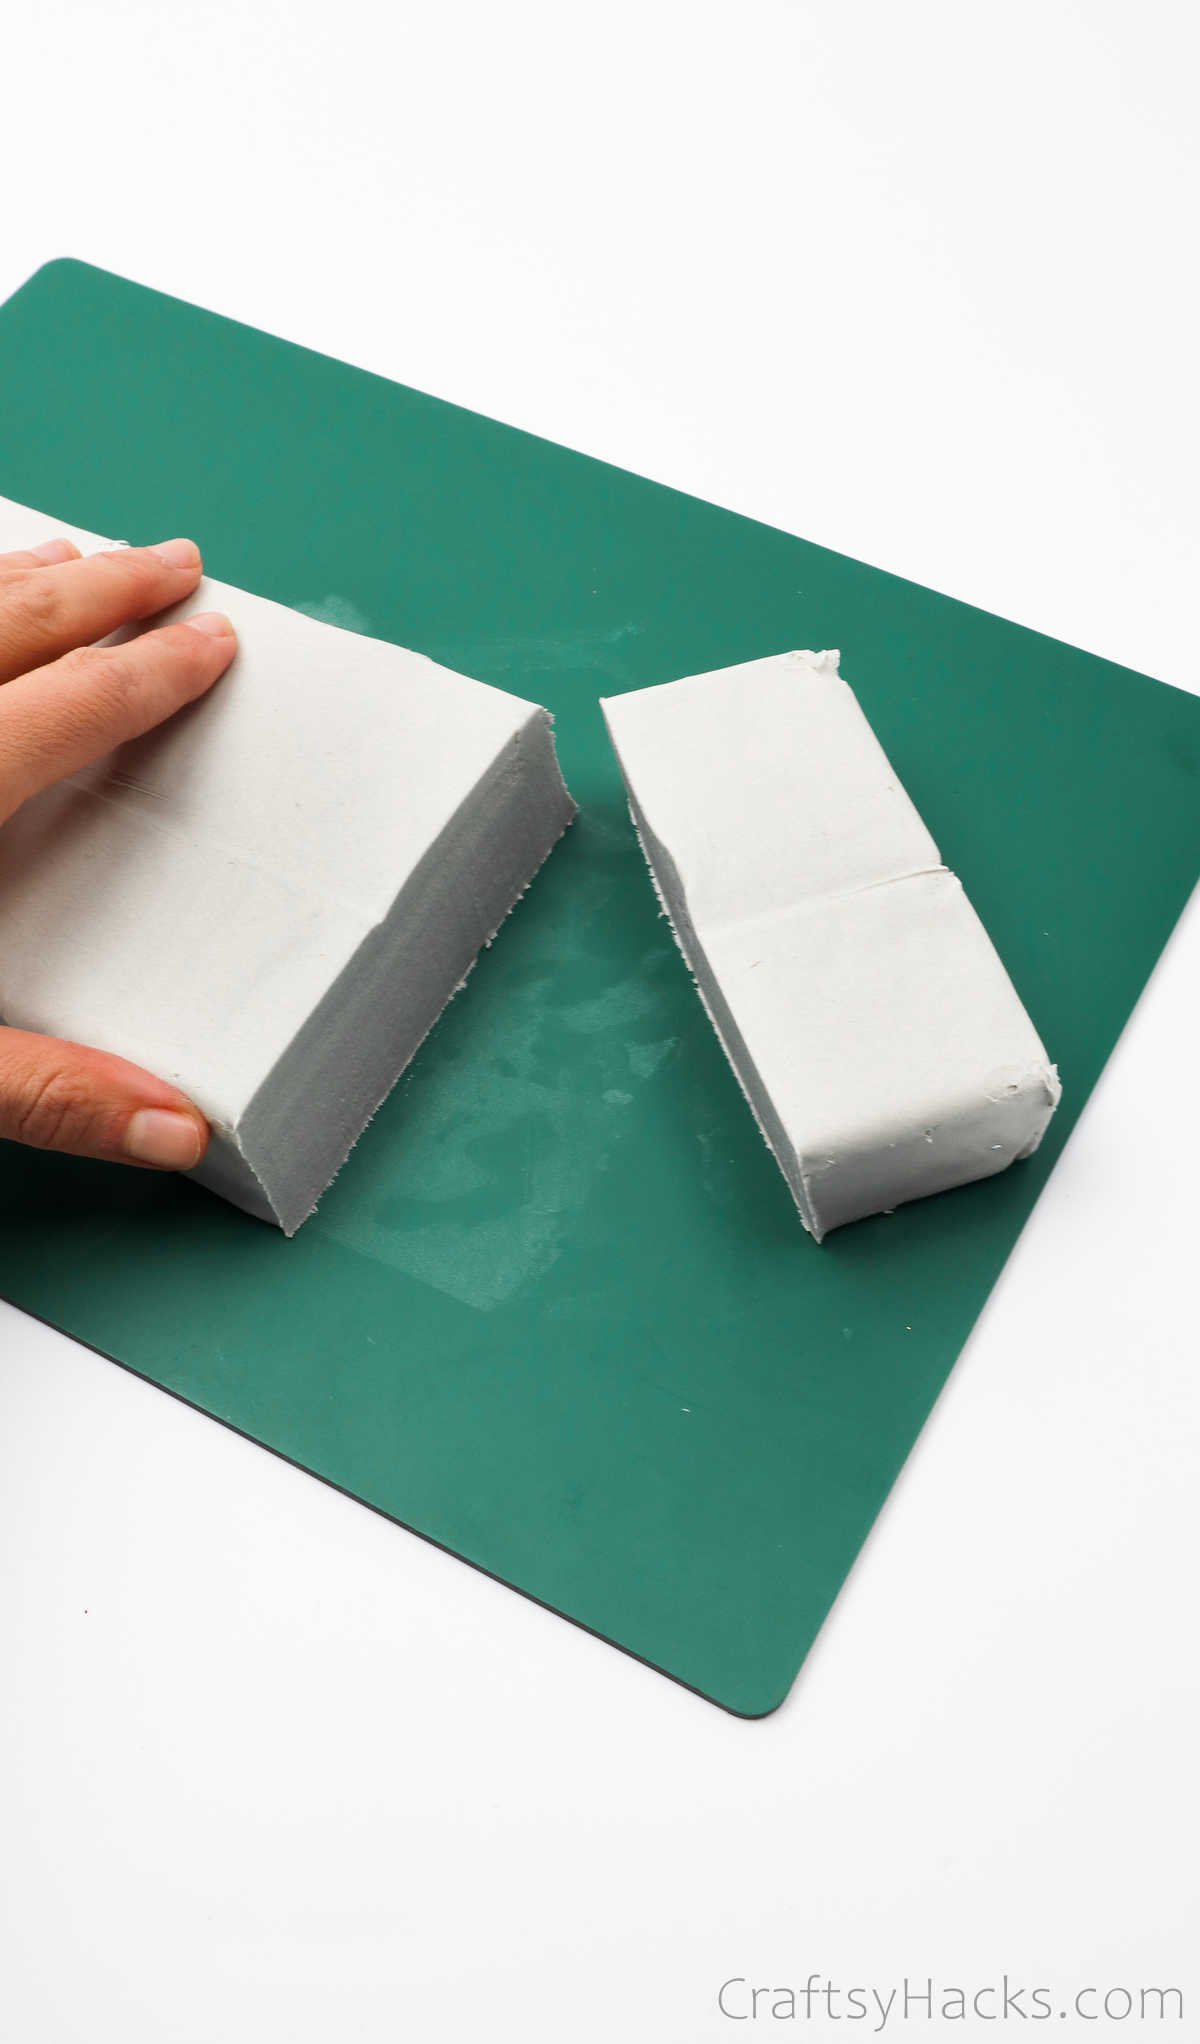
Use your palms to knead the clay until it becomes lump-free, soft, and pliable. Use a rolling mat over your work surface to keep it clean.
Step 2
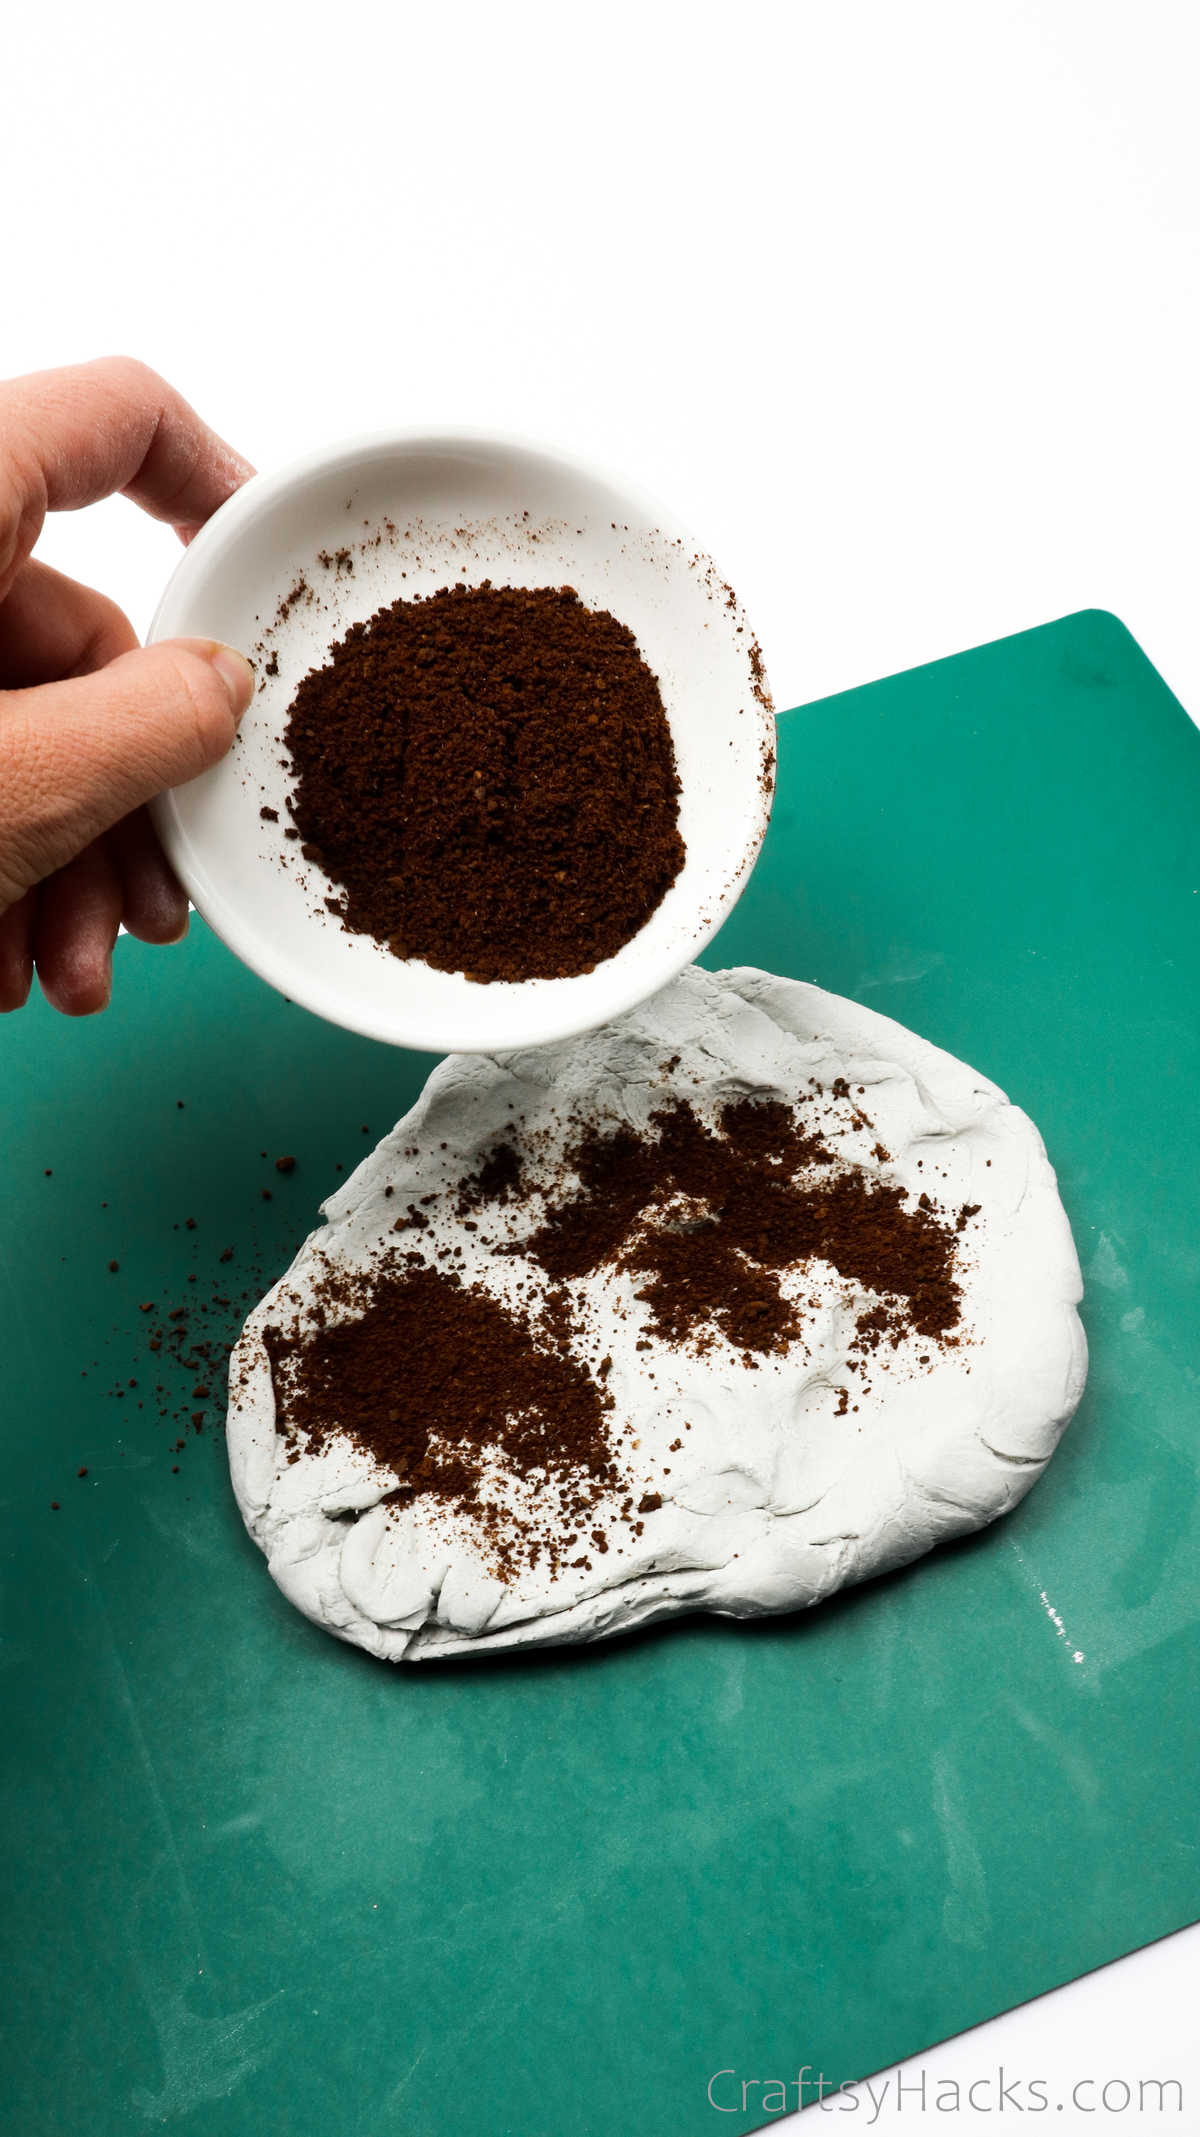
Remember when you were wondering how the clay looked speckled? Well, this is how you do it.
You take a cup of coarsely ground coffee—yes, coffee!—and sprinkle it over the dough you just kneaded. Now, this step is completely optional, of course. But doesn’t it look fabulous?
Step 3
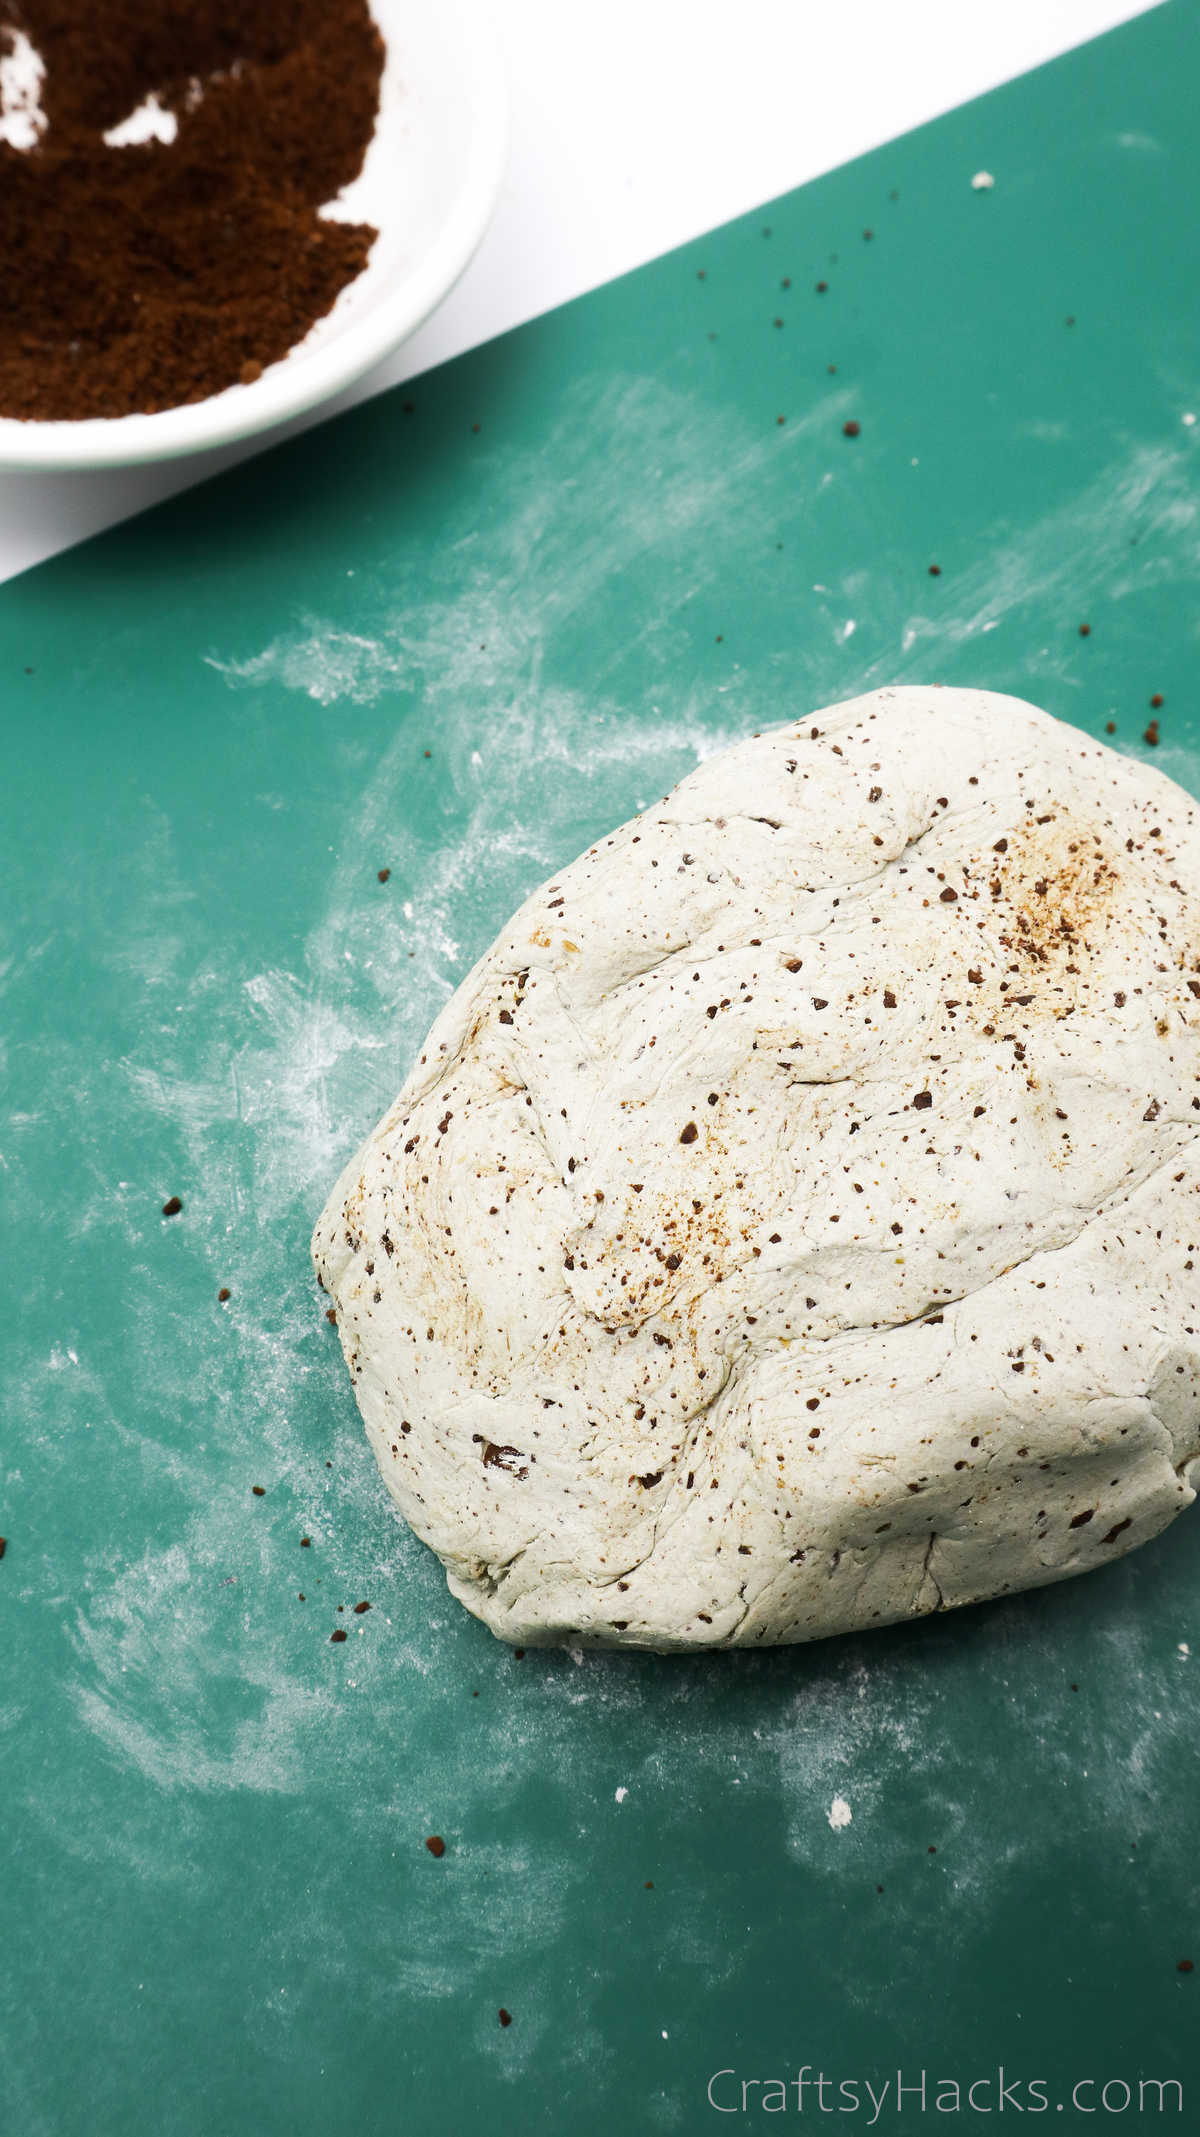
Work the coffee grounds into the clay by kneading it till it has spread evenly. Keep an eye out for possible coffee clumps.
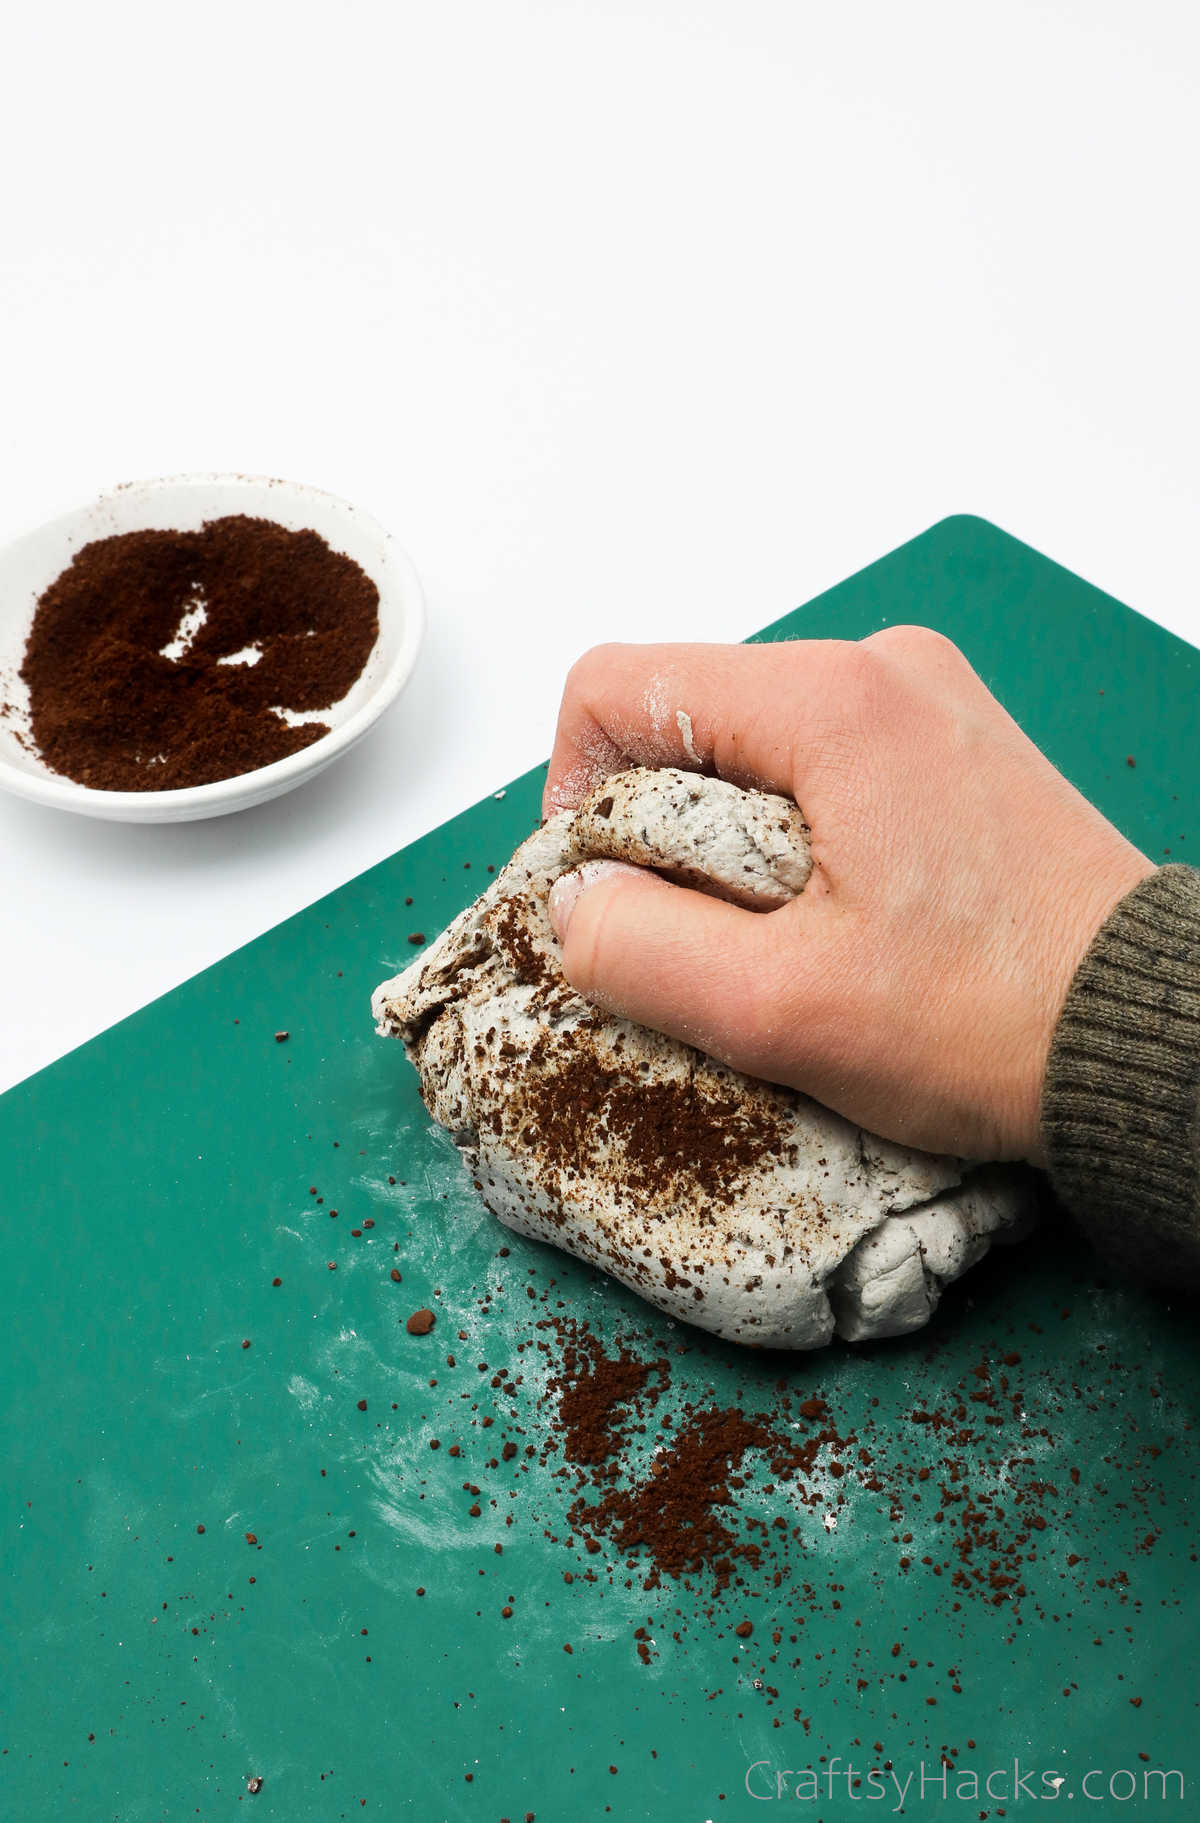
Your clay should look like this when you’re done kneading it.
Step 4
Grab a rolling pin or even just a glass bottle, and roll the clay into a flat tortilla-like shape. Don’t roll it too thin or too thick.
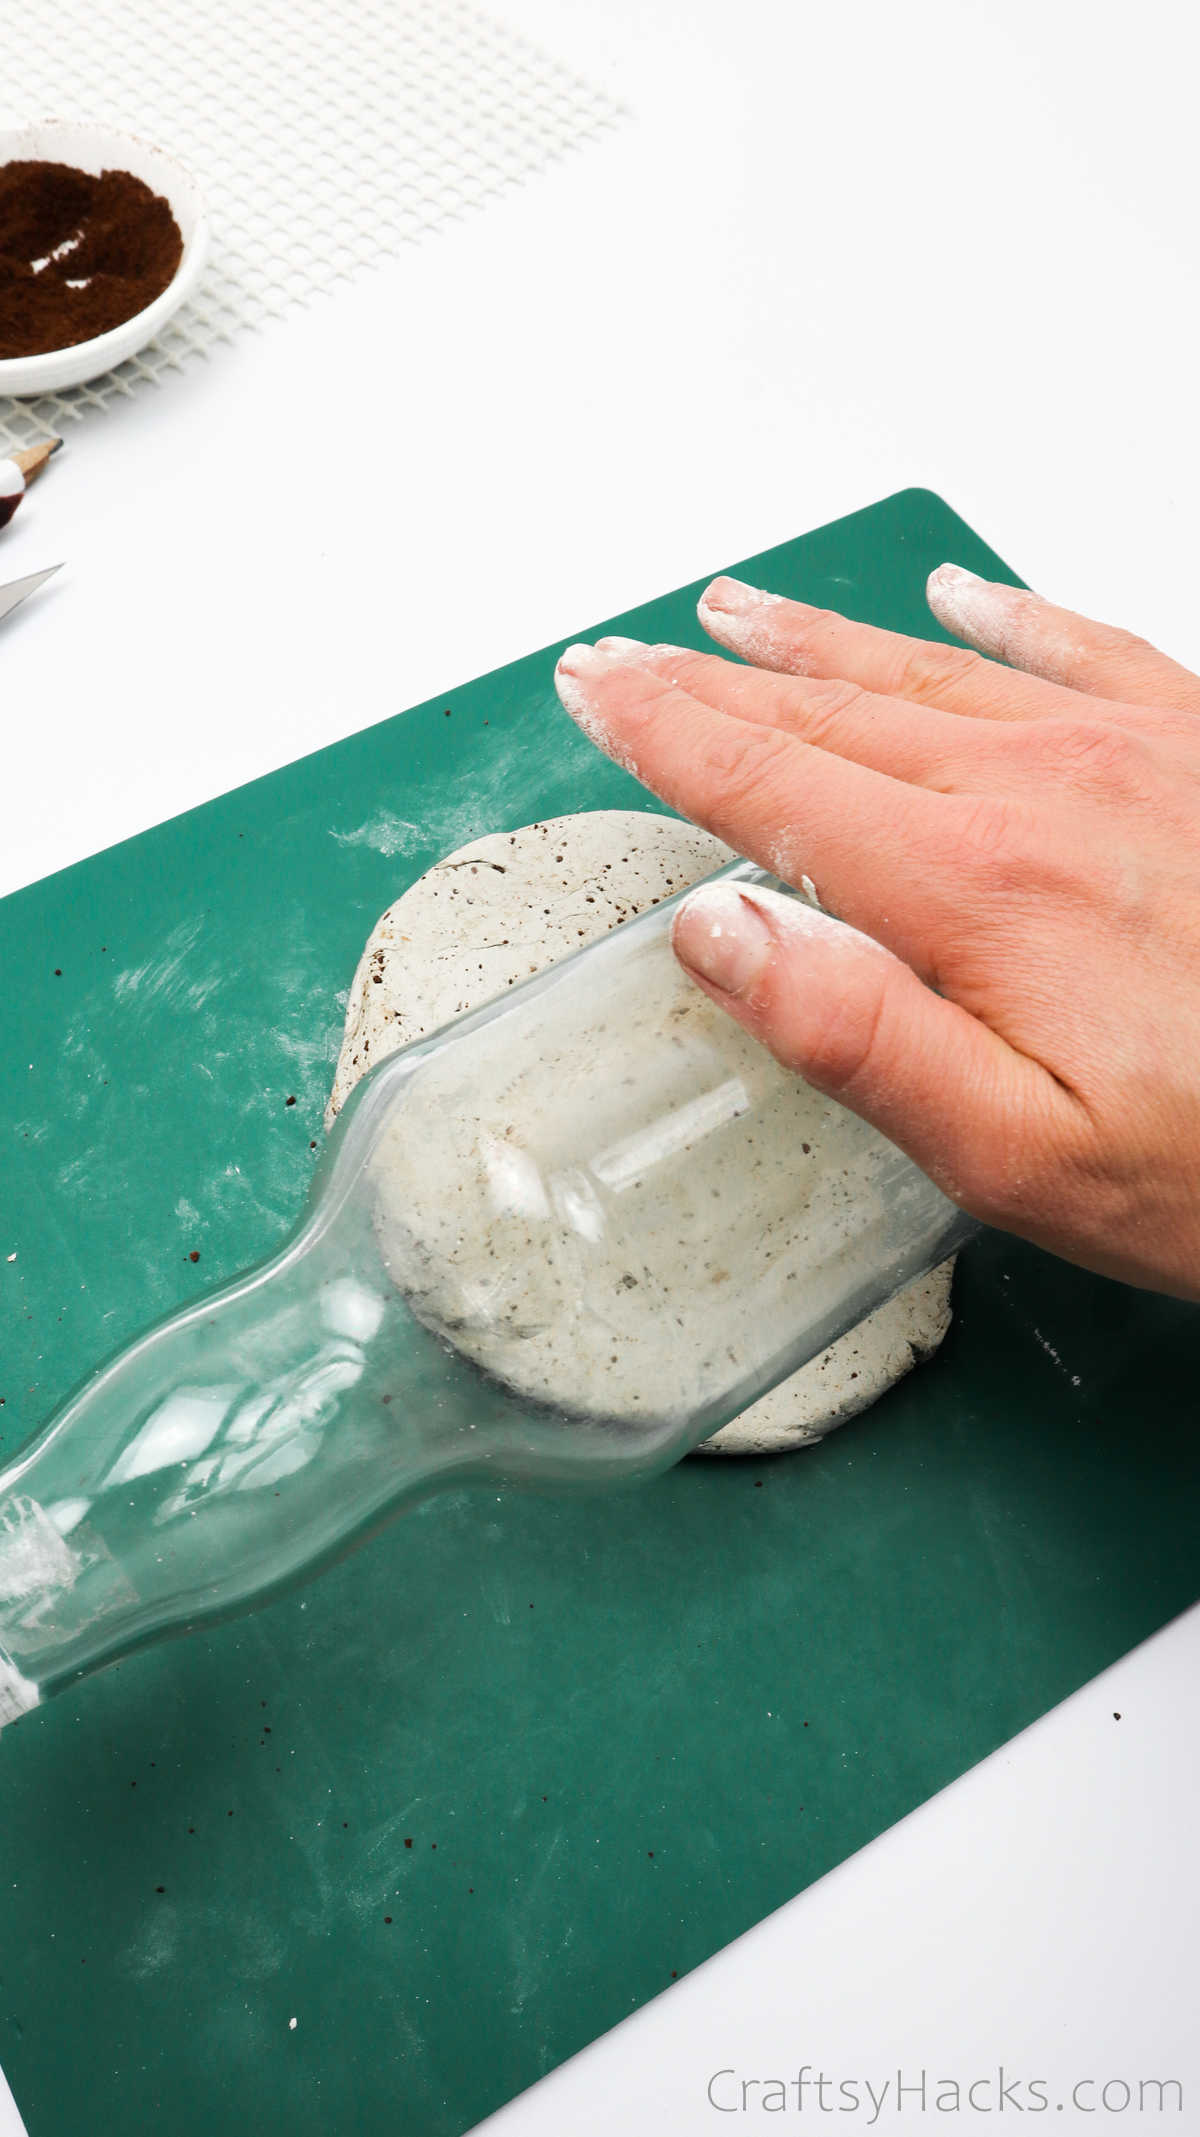

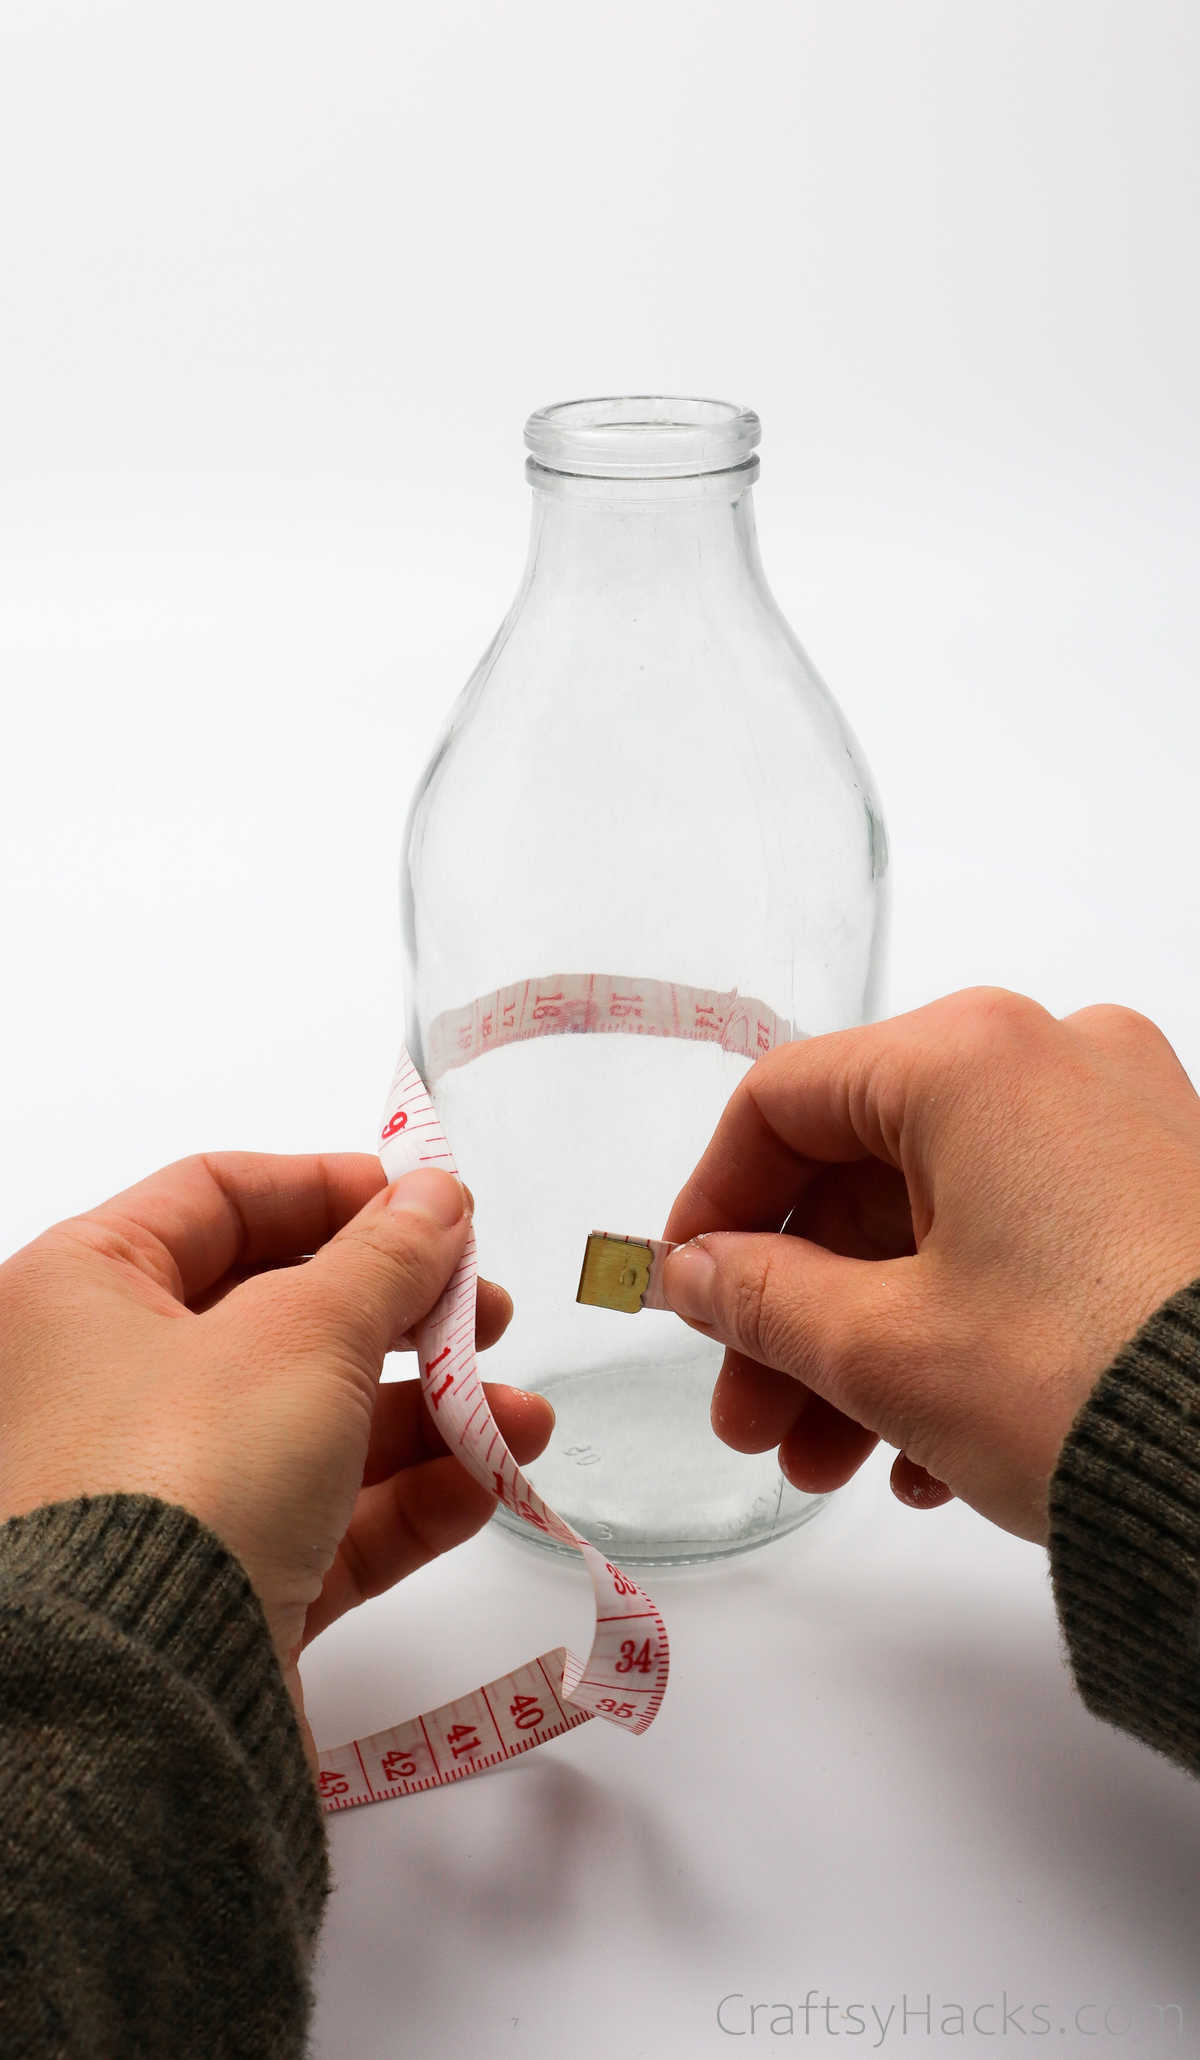
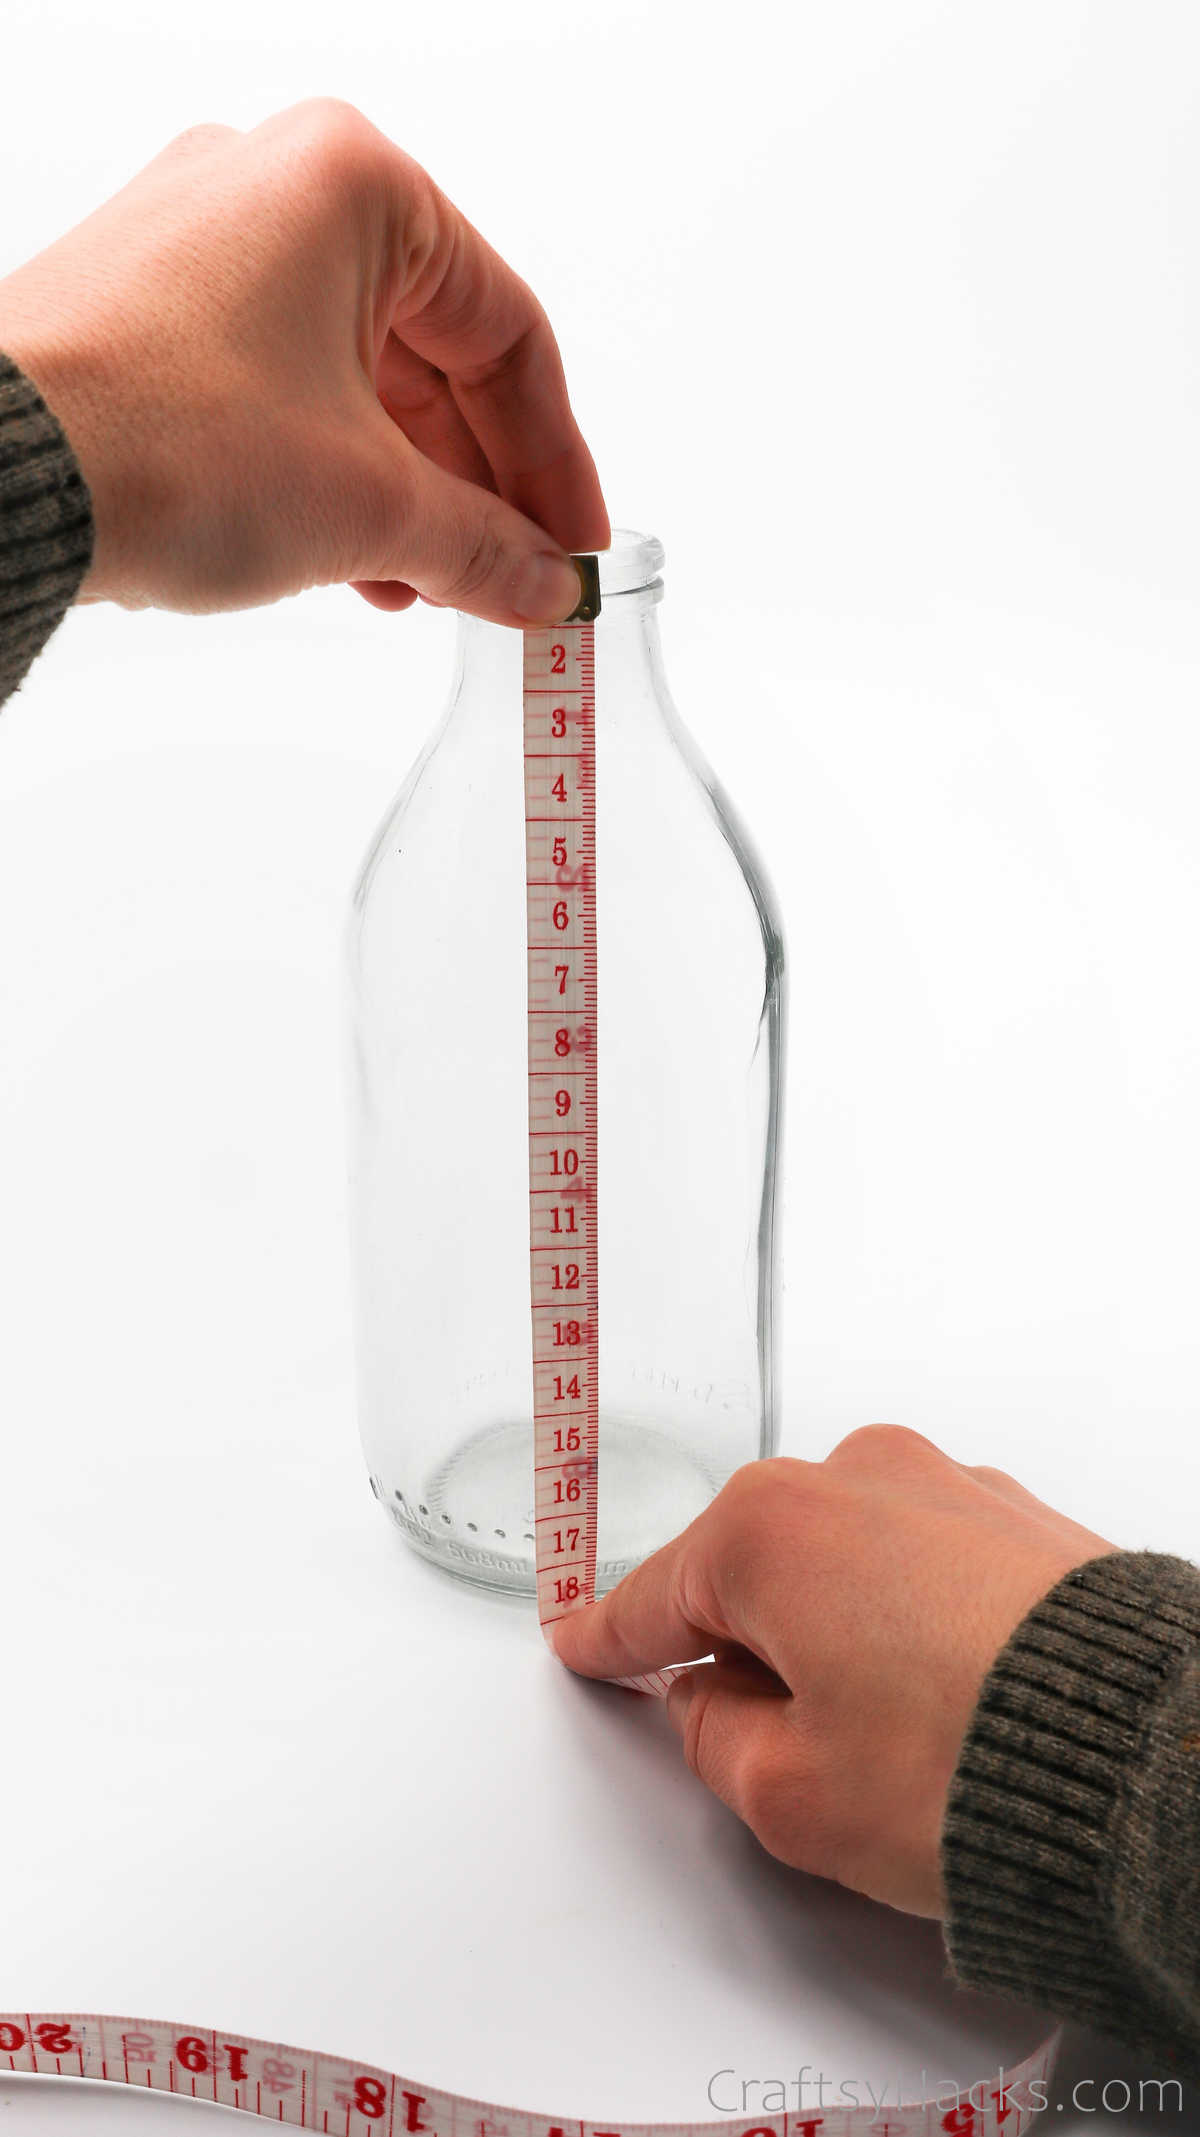
Measure your bottle and roll the clay until you’re certain it can cover the surface of the bottle you’re planning to use.
Or, just to be safe and err on the side of caution, grab a measuring tape and measure the height and circumference of the bottle. Now consider the clay you rolled—will it be enough?
Step 5
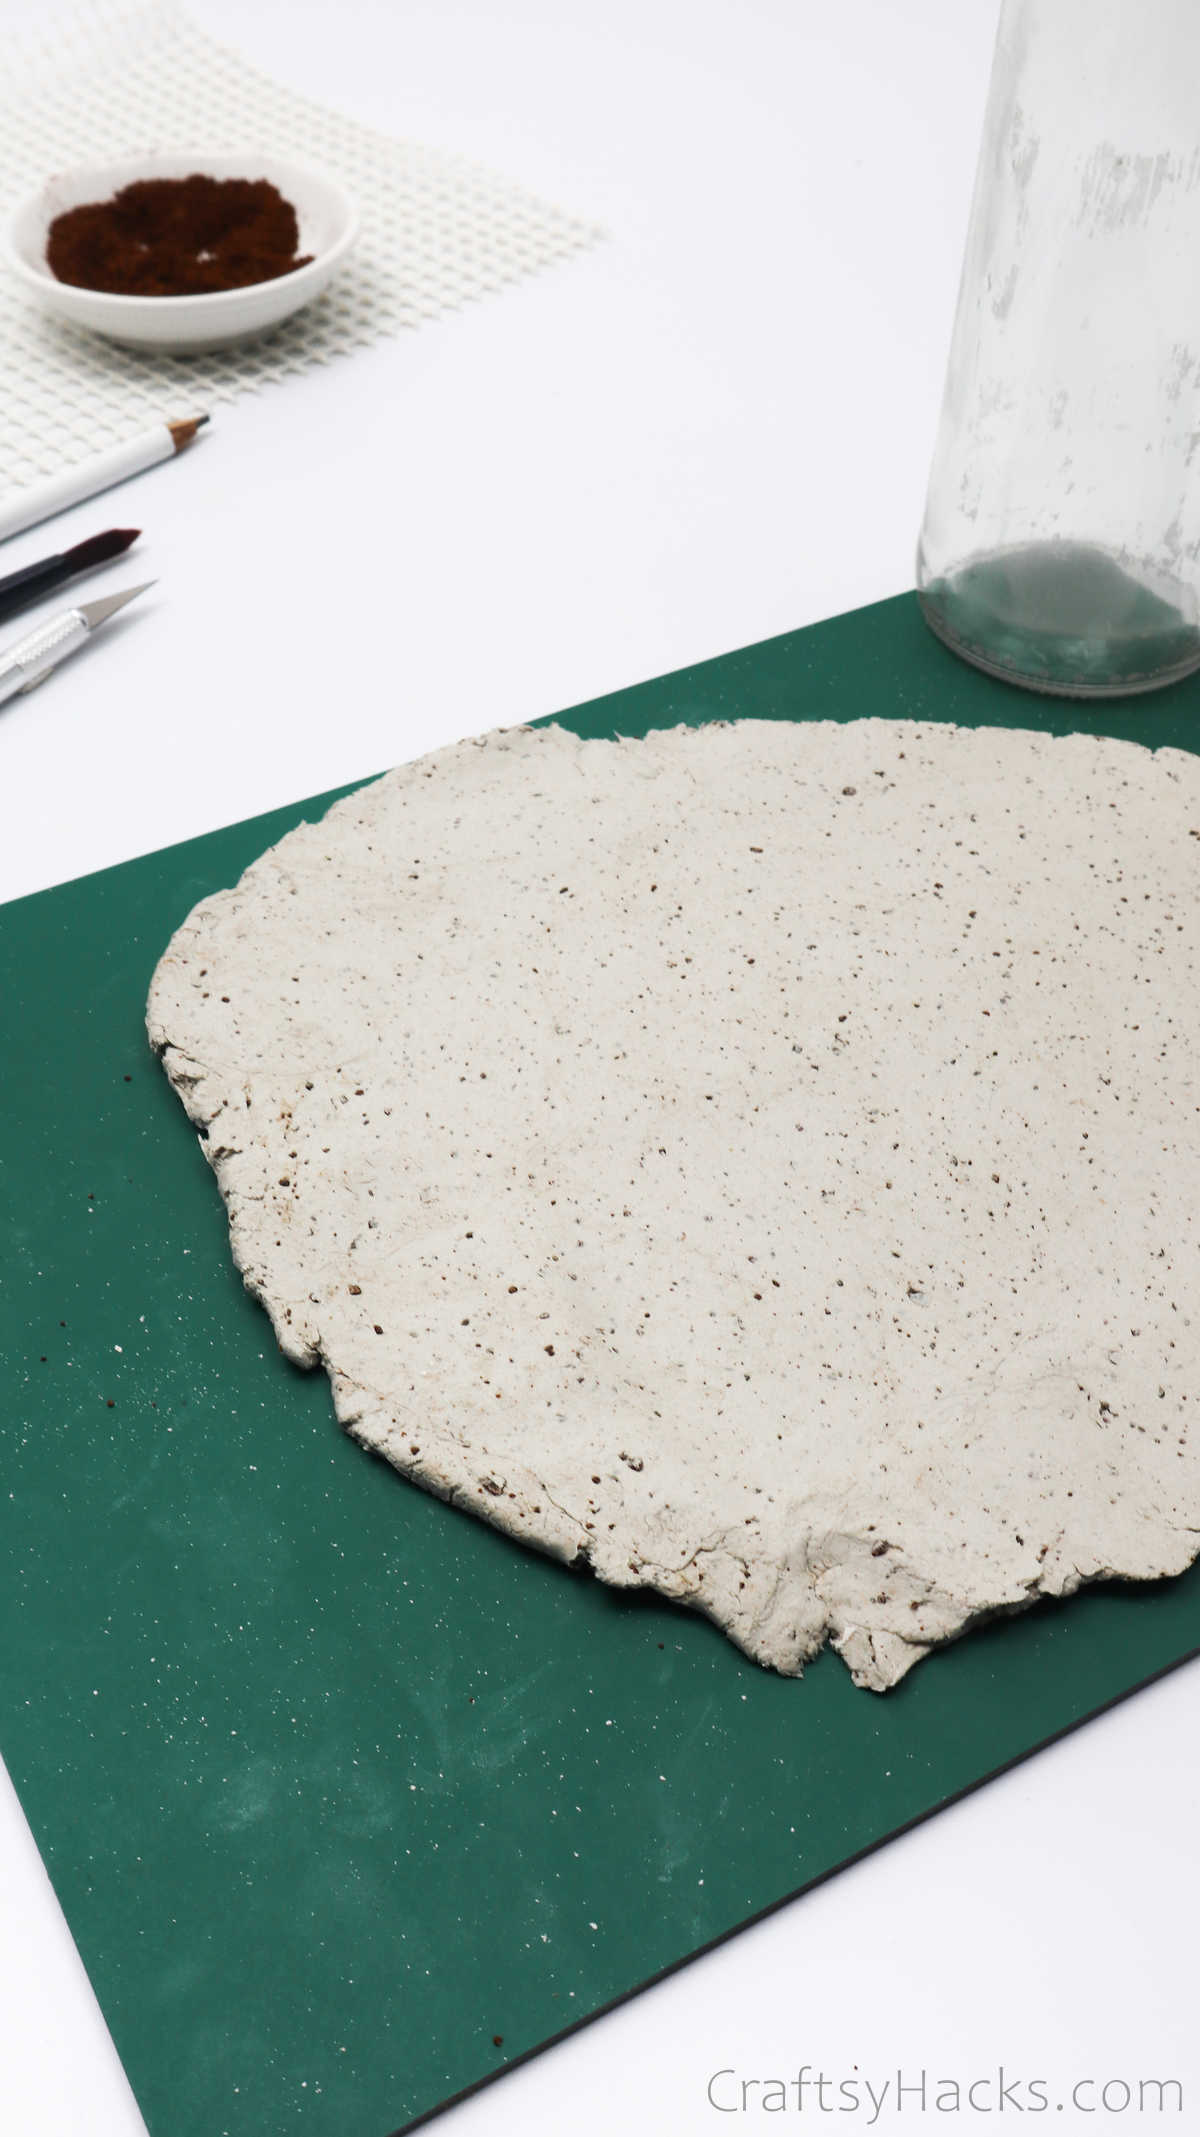
Now that you know the dimensions of the bottle grab a craft knife and cut the clay according to those measurements. Then, remove the excess clay and set it aside to use later. I’d recommend that you cover it up nice and tight so it doesn’t dry.
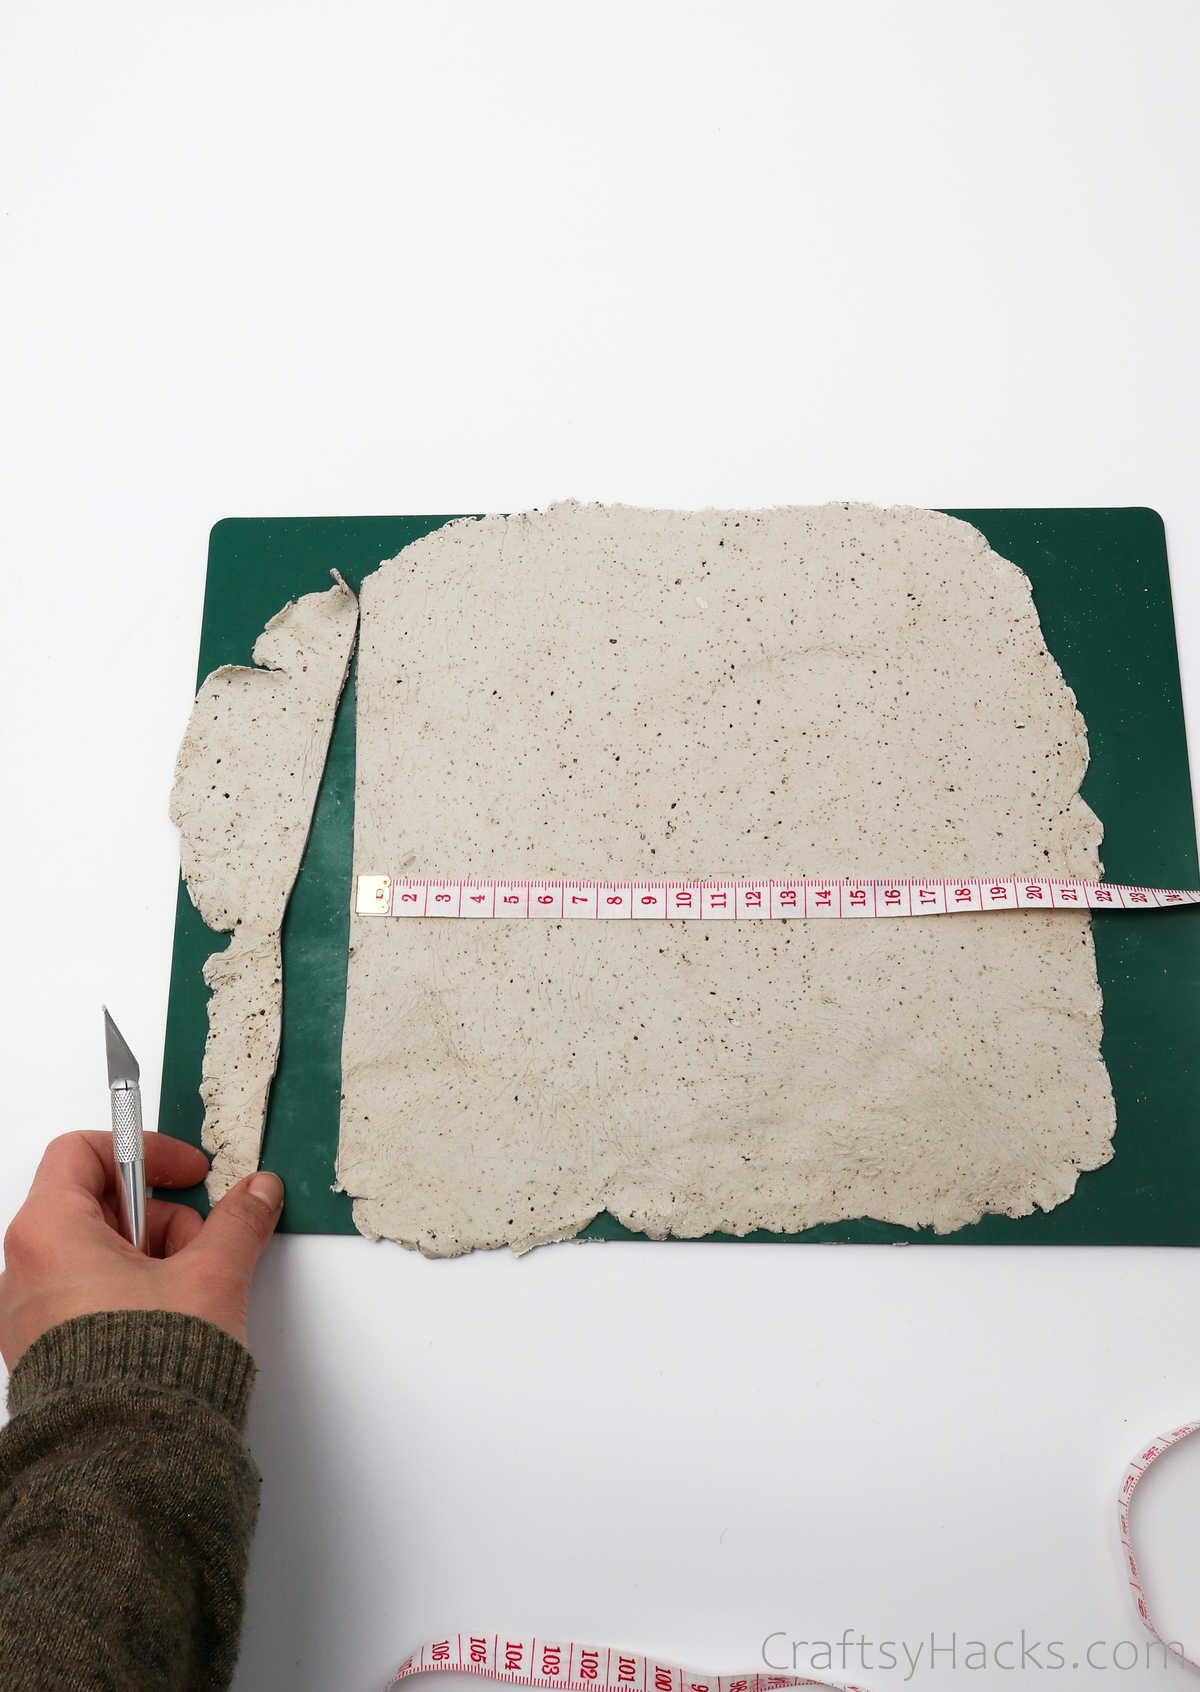
Place the bottle over the clay you just cut to check for size.

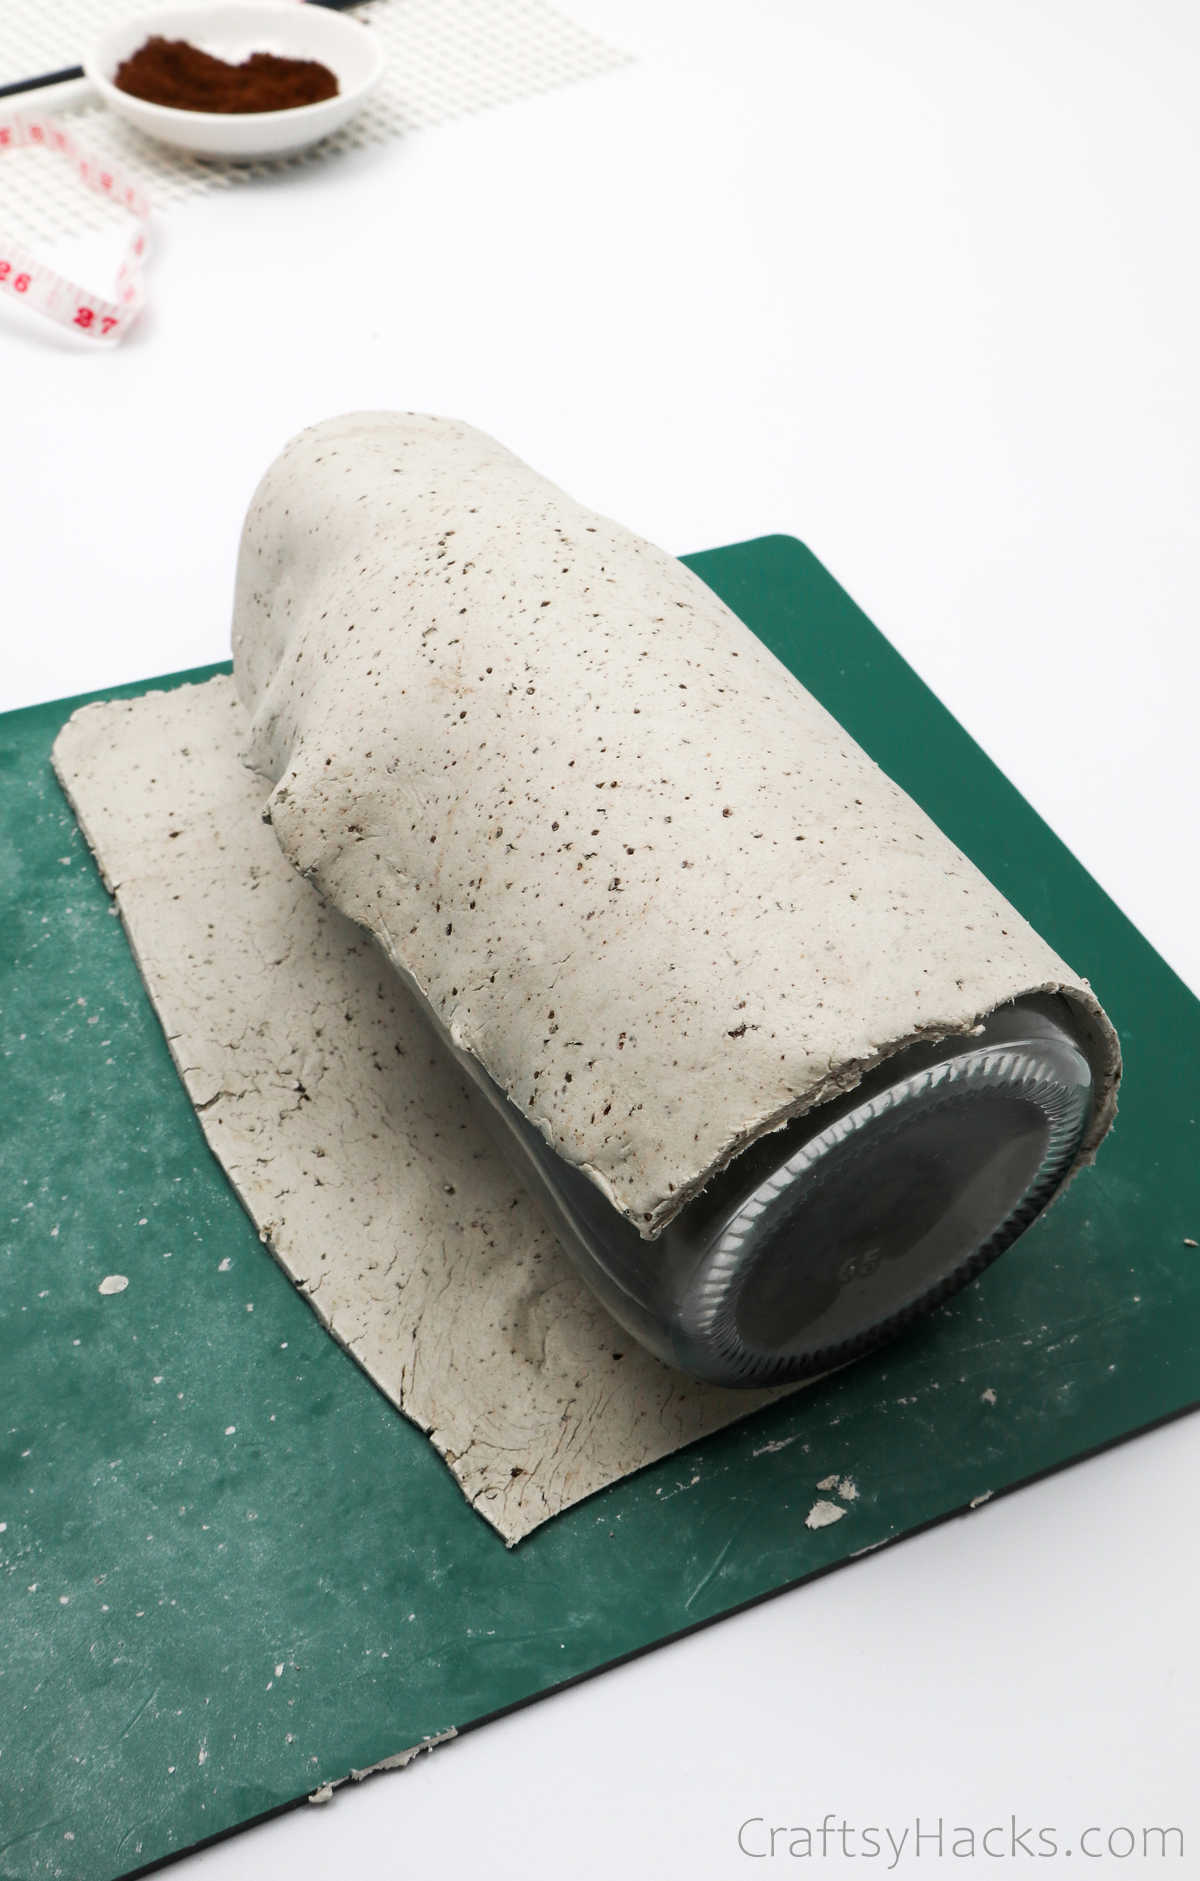
Step 6
Next, place the bottle on a flat surface and carefully lay the clay sheet over it.
It’s pretty similar to working with fondant and cake if you think about it. Keep an eye out for any fold, wrinkles, or cracks.
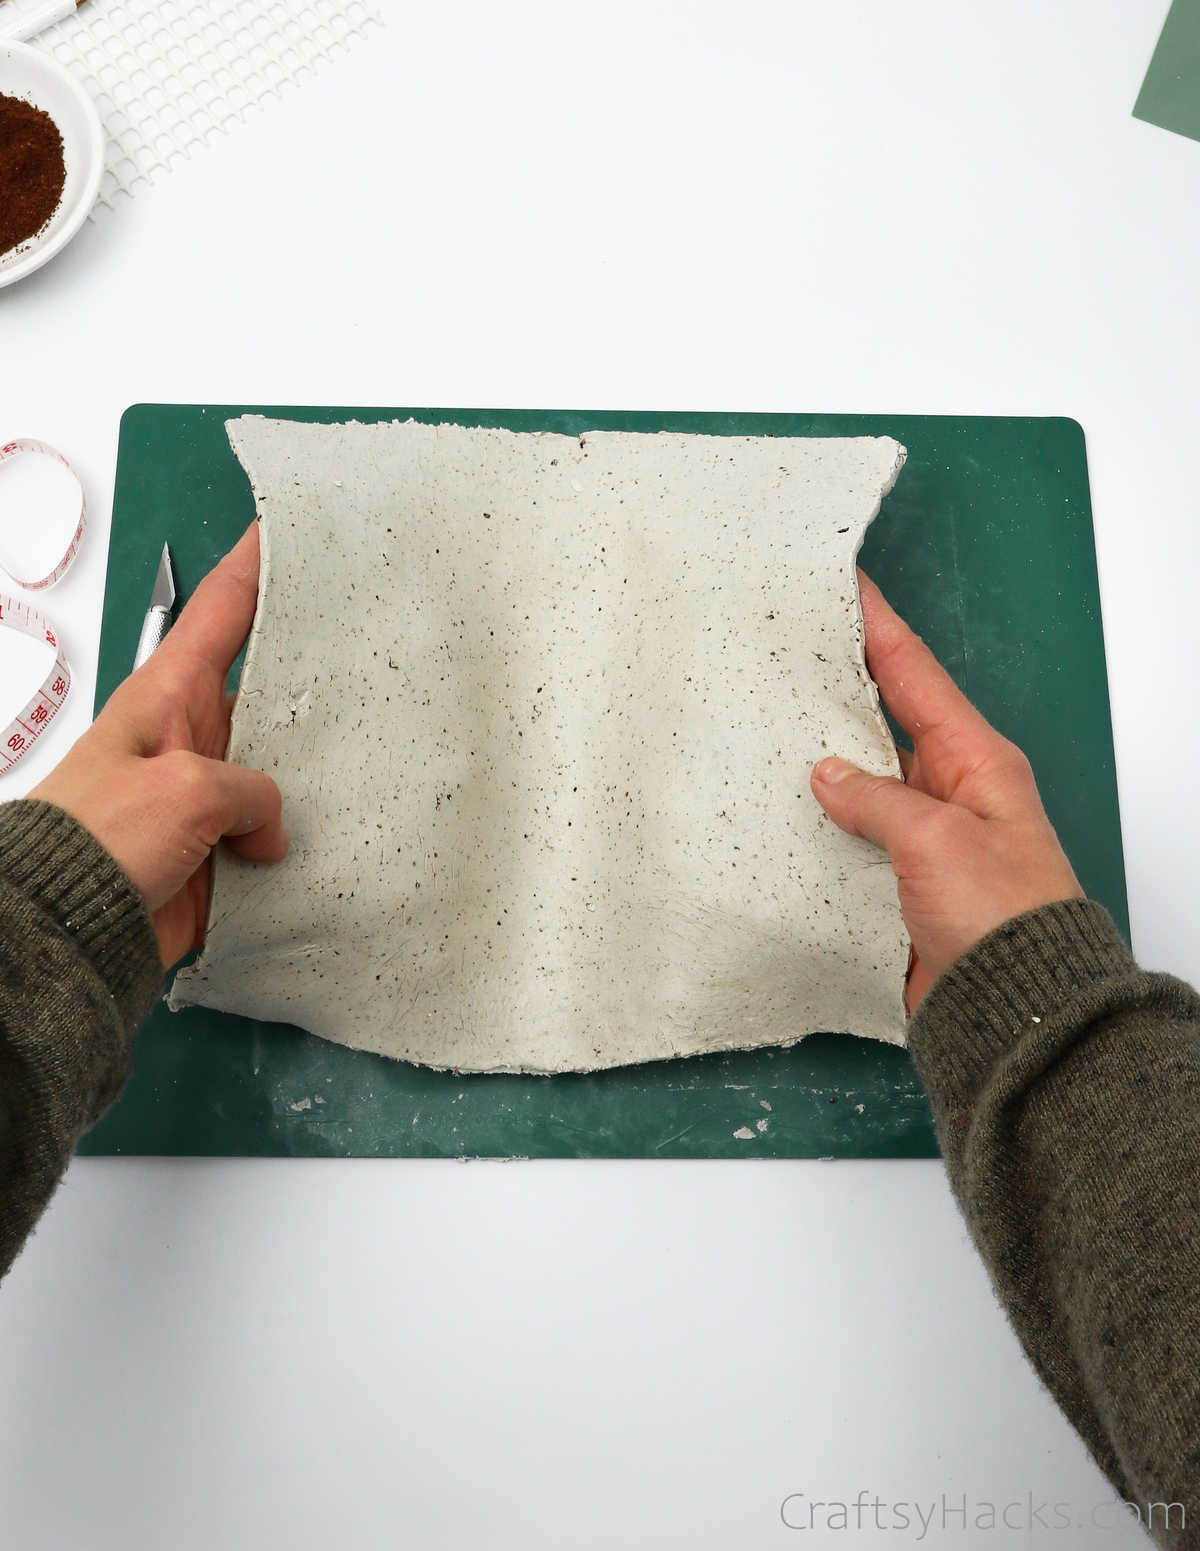
Roll the bottle around so that the clay sheet completely covers it.
Take your craft knife and slice a few notches on one end of the clay sheet. This will help you stick the ends together more effectively, trust me.
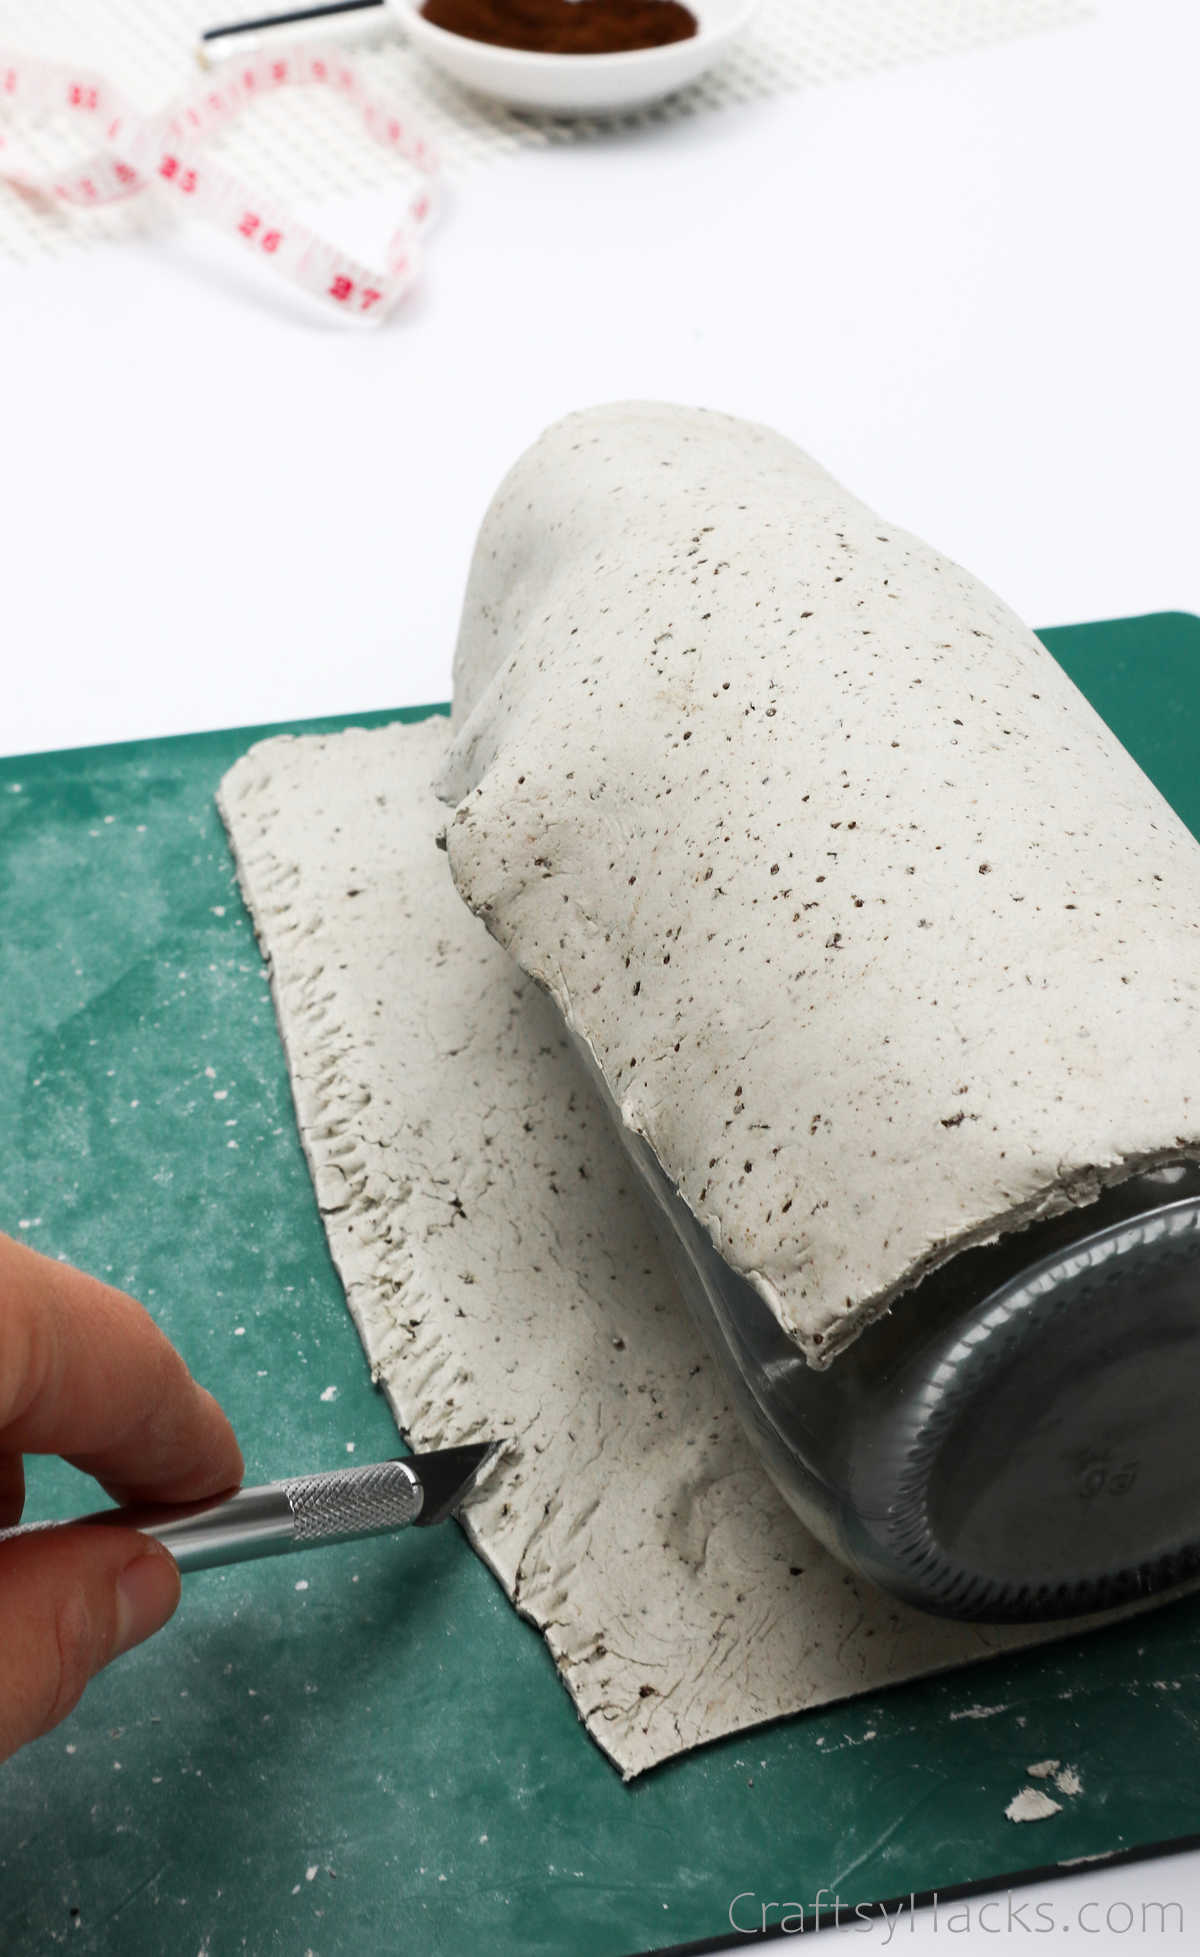
Step 7
Carefully bring the side with the notches up and press it together with the other side. Gently press the clay to blend both sides together.
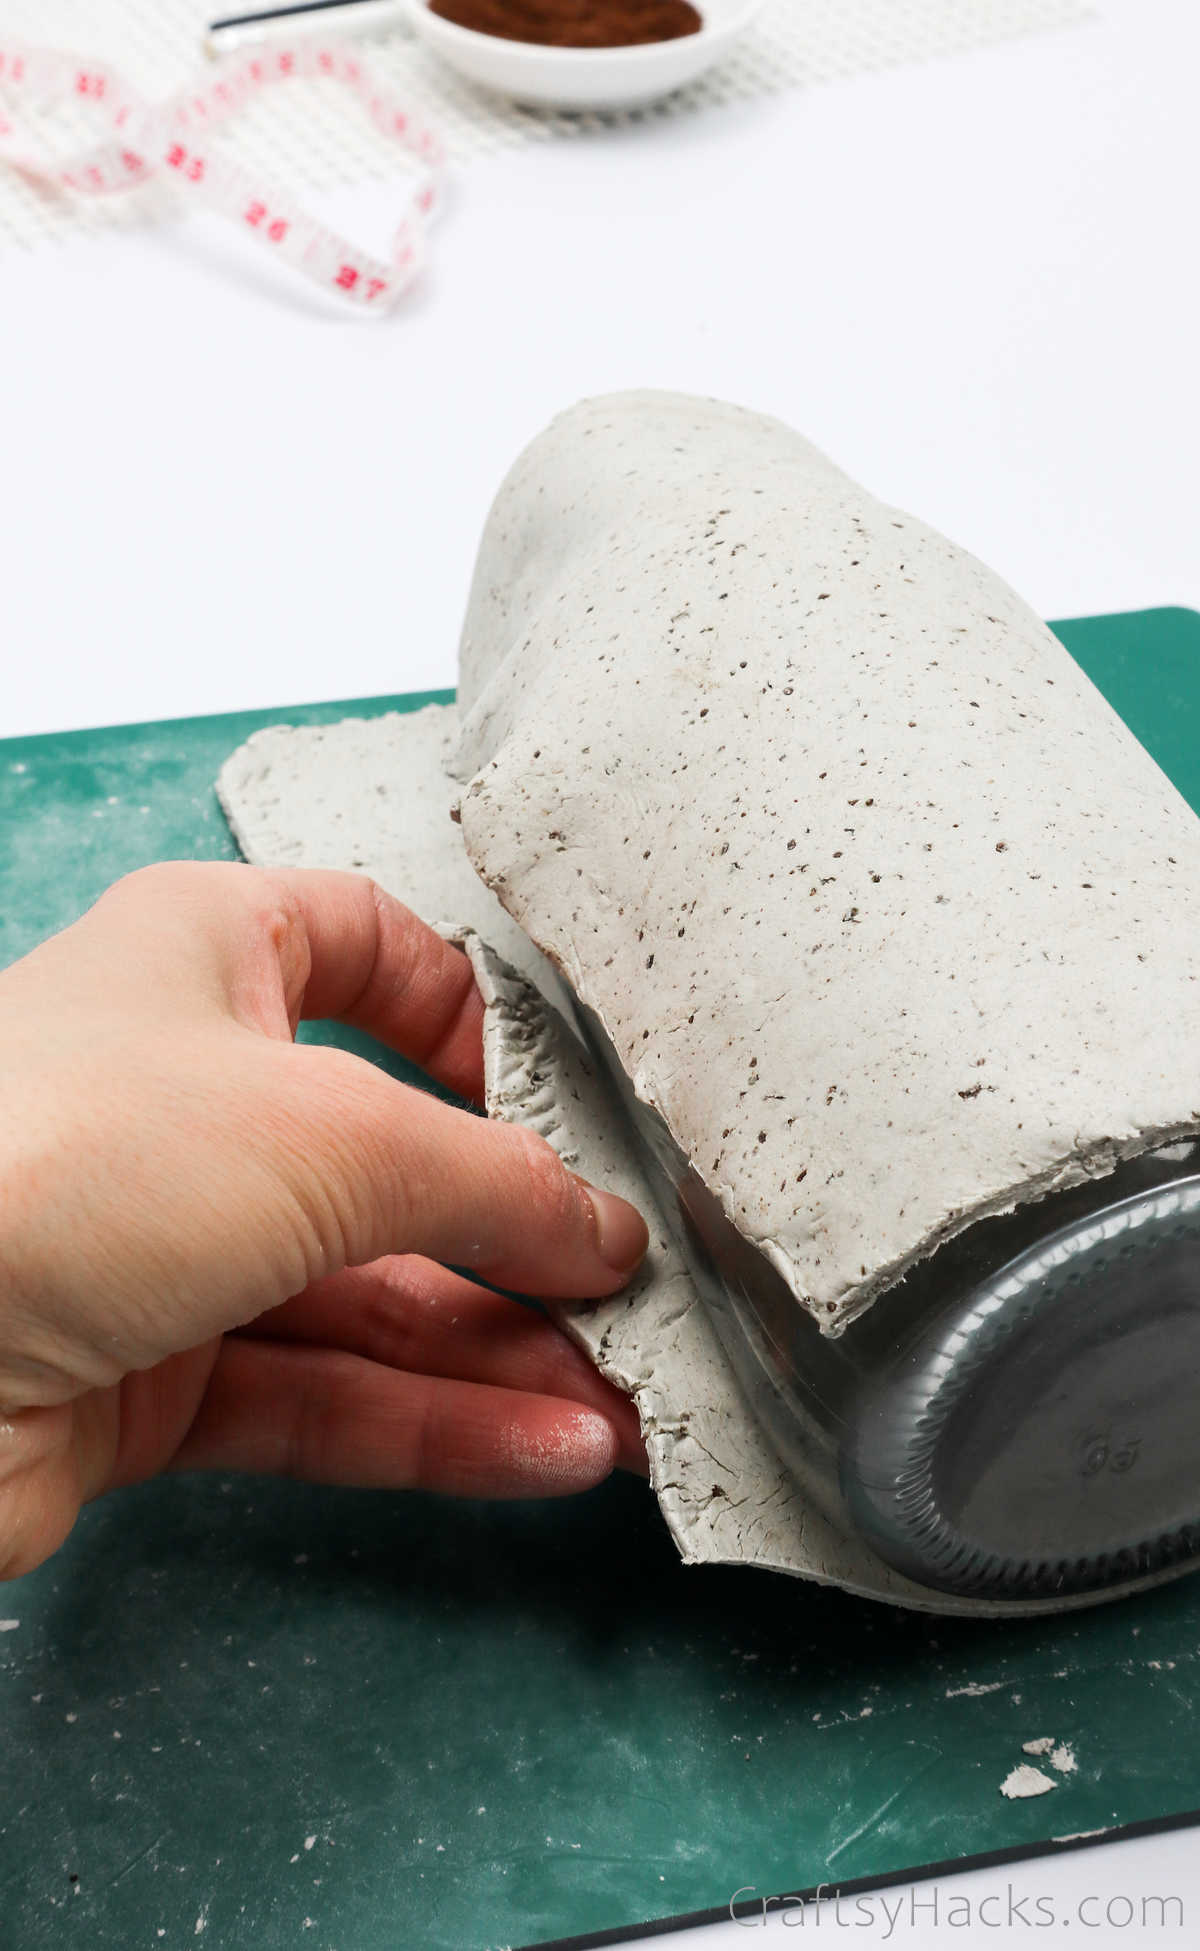
You can easily dip your finger in water and add a drop or two to smoothen out any cracks and indents that might appear. You should make sure that there’s no visible or demarcating line indicating where you joined both ends together.
So be extra careful when you smoothen out the clay.
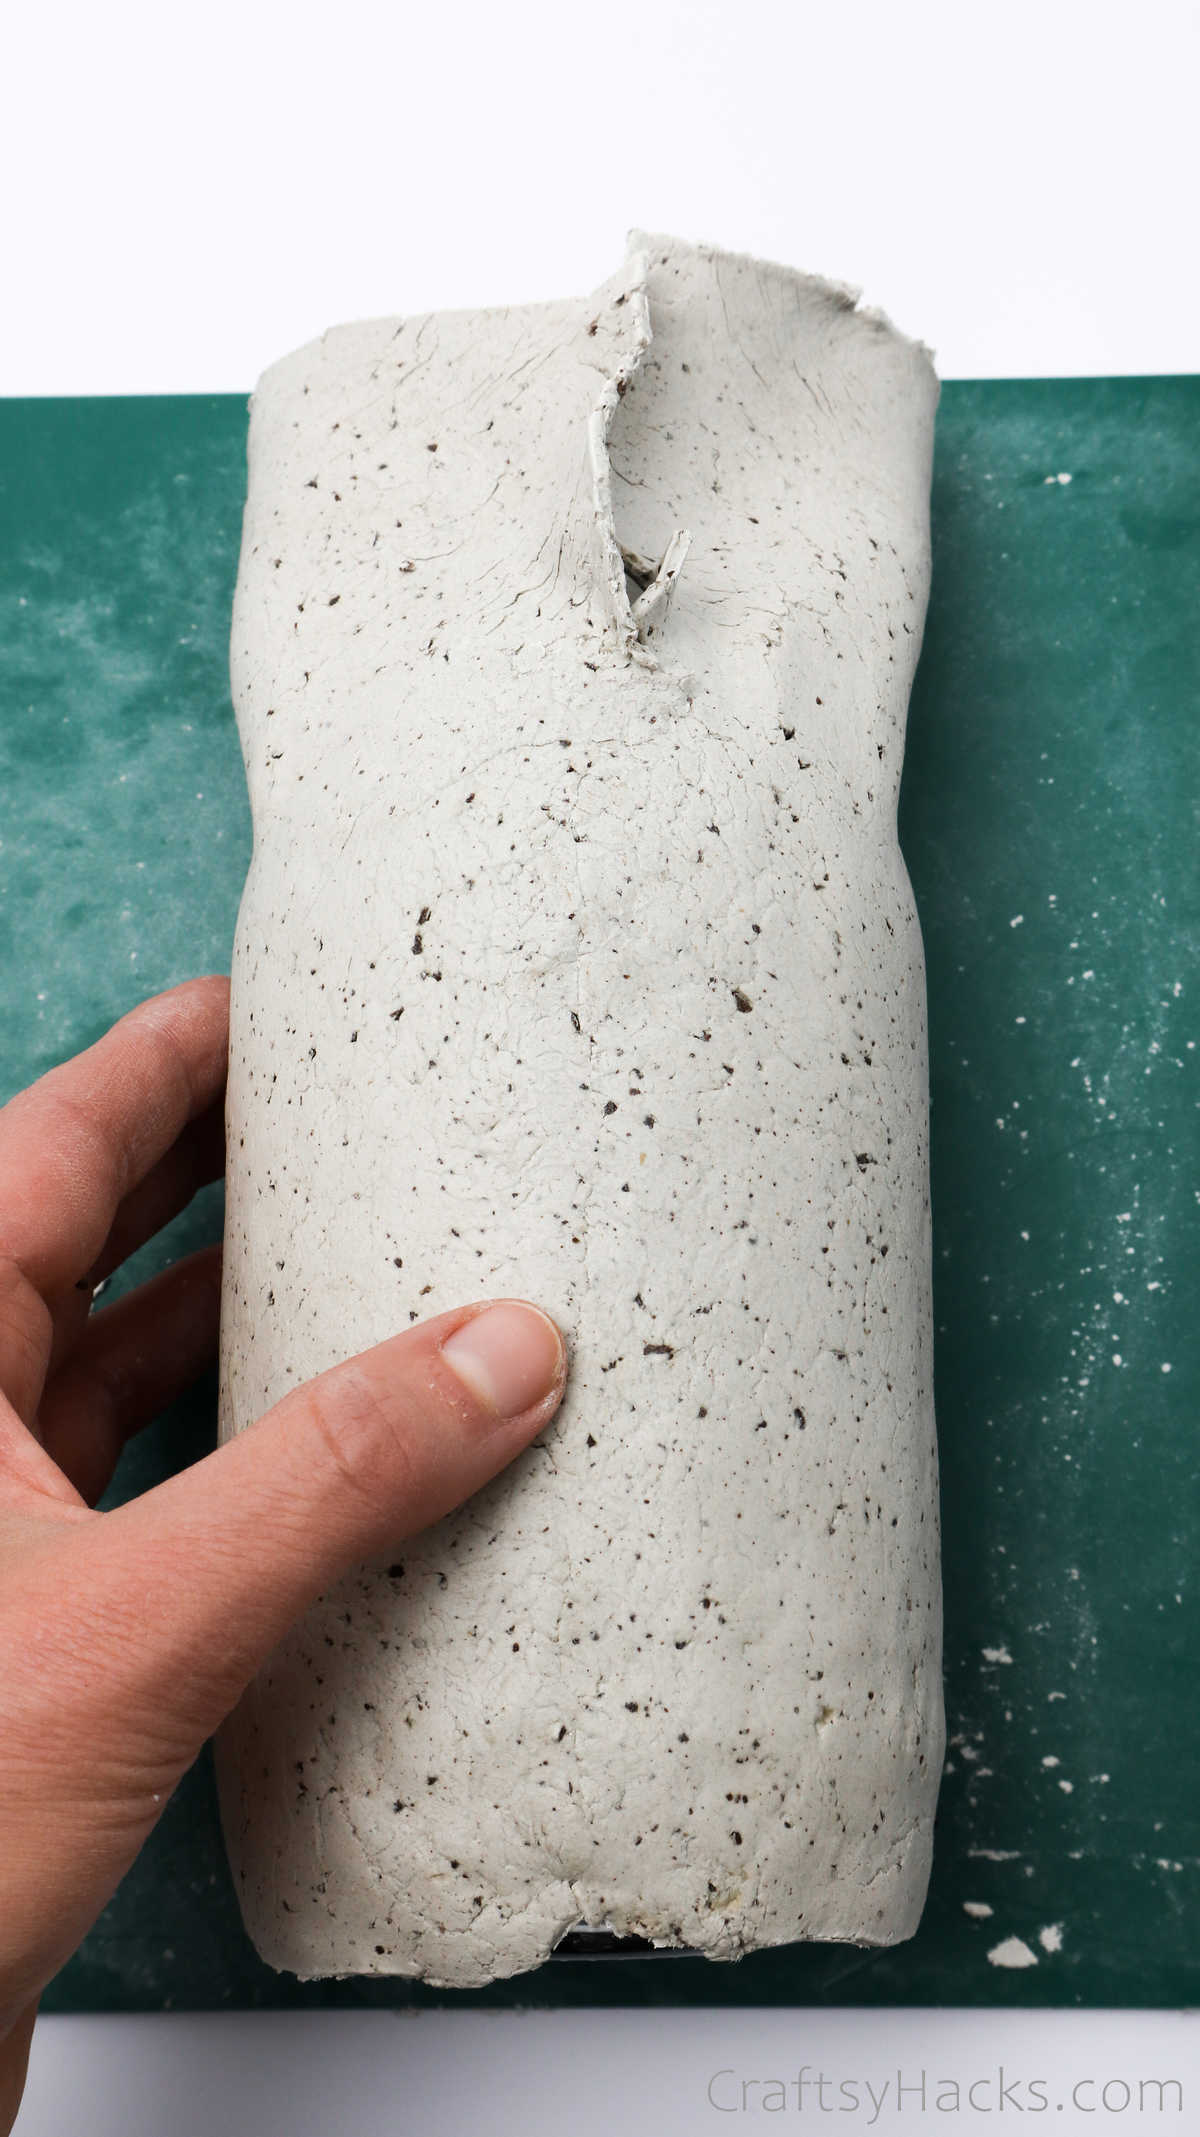
Step 8
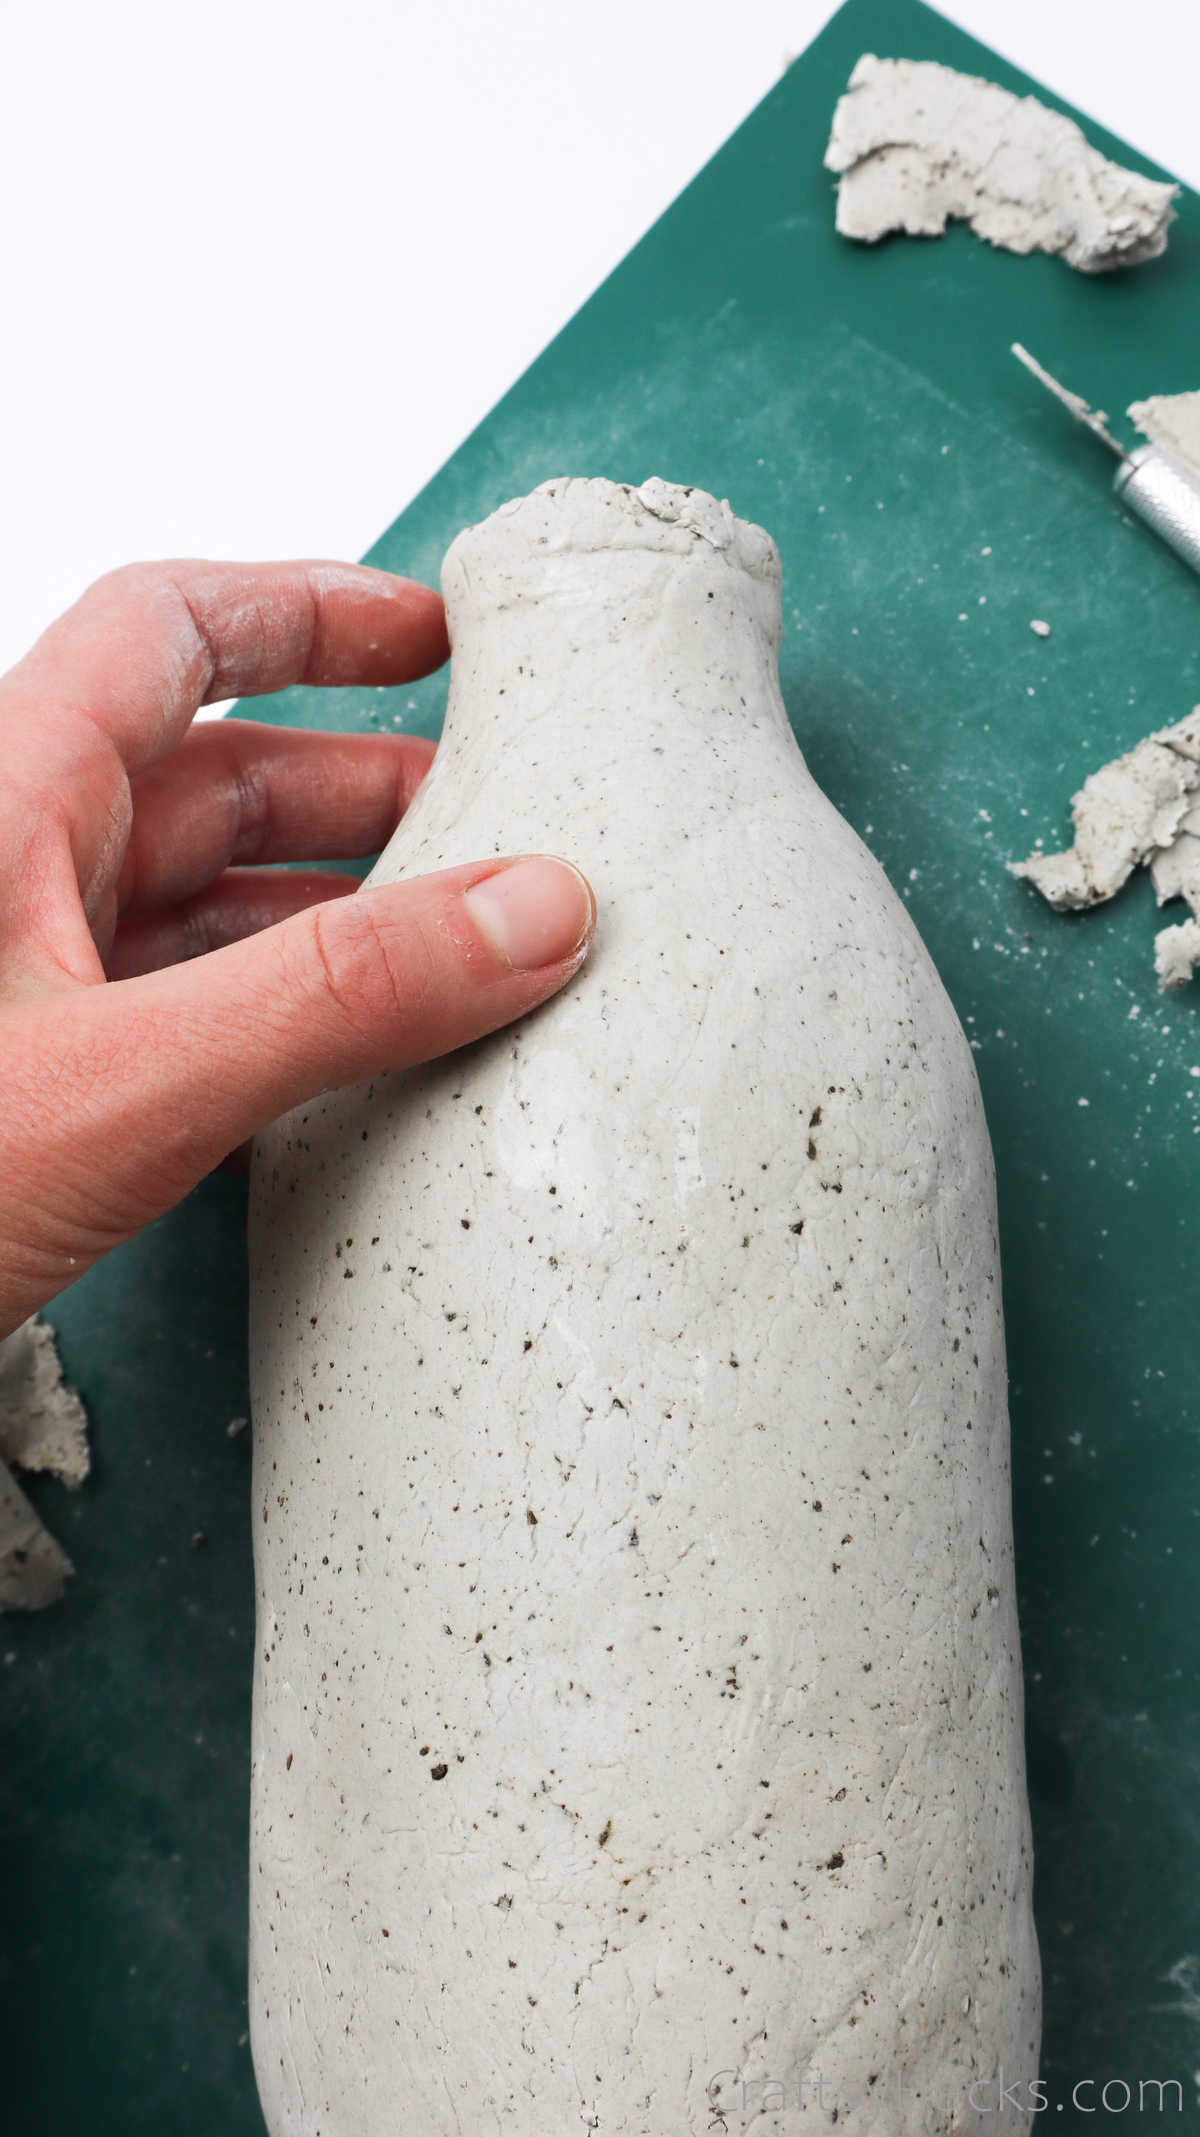
You’ll notice that the neck and the mouth of the bottle are still exposed. This part can get a little tricky so pay extra attention to it.
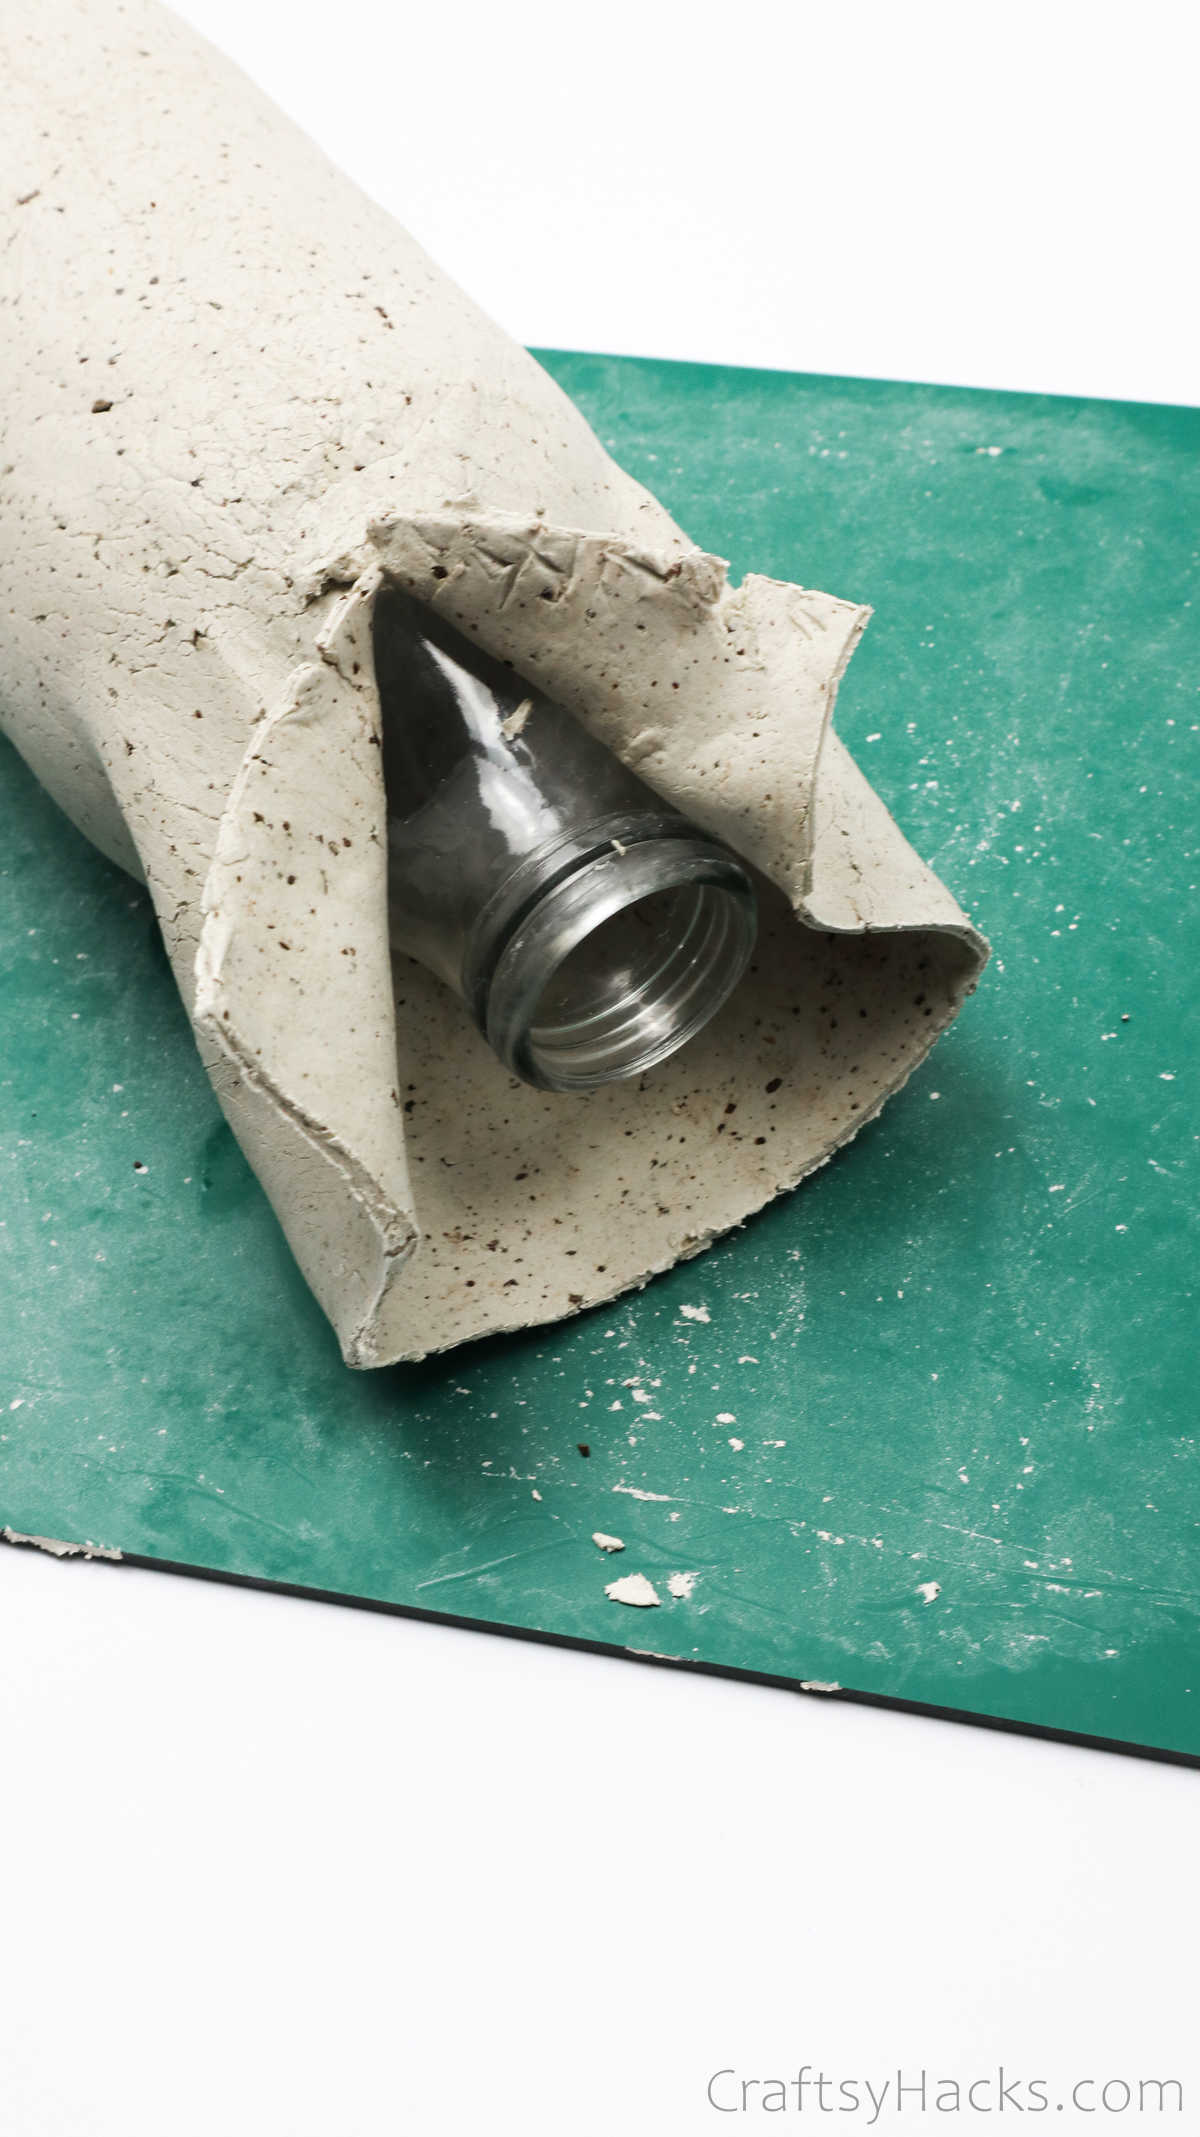
Not only will you have to blend the two sides together, but you’re also going to have to mold the clay a bit over the curved neck of the bottle. Use your thumb to mold the clay effectively.
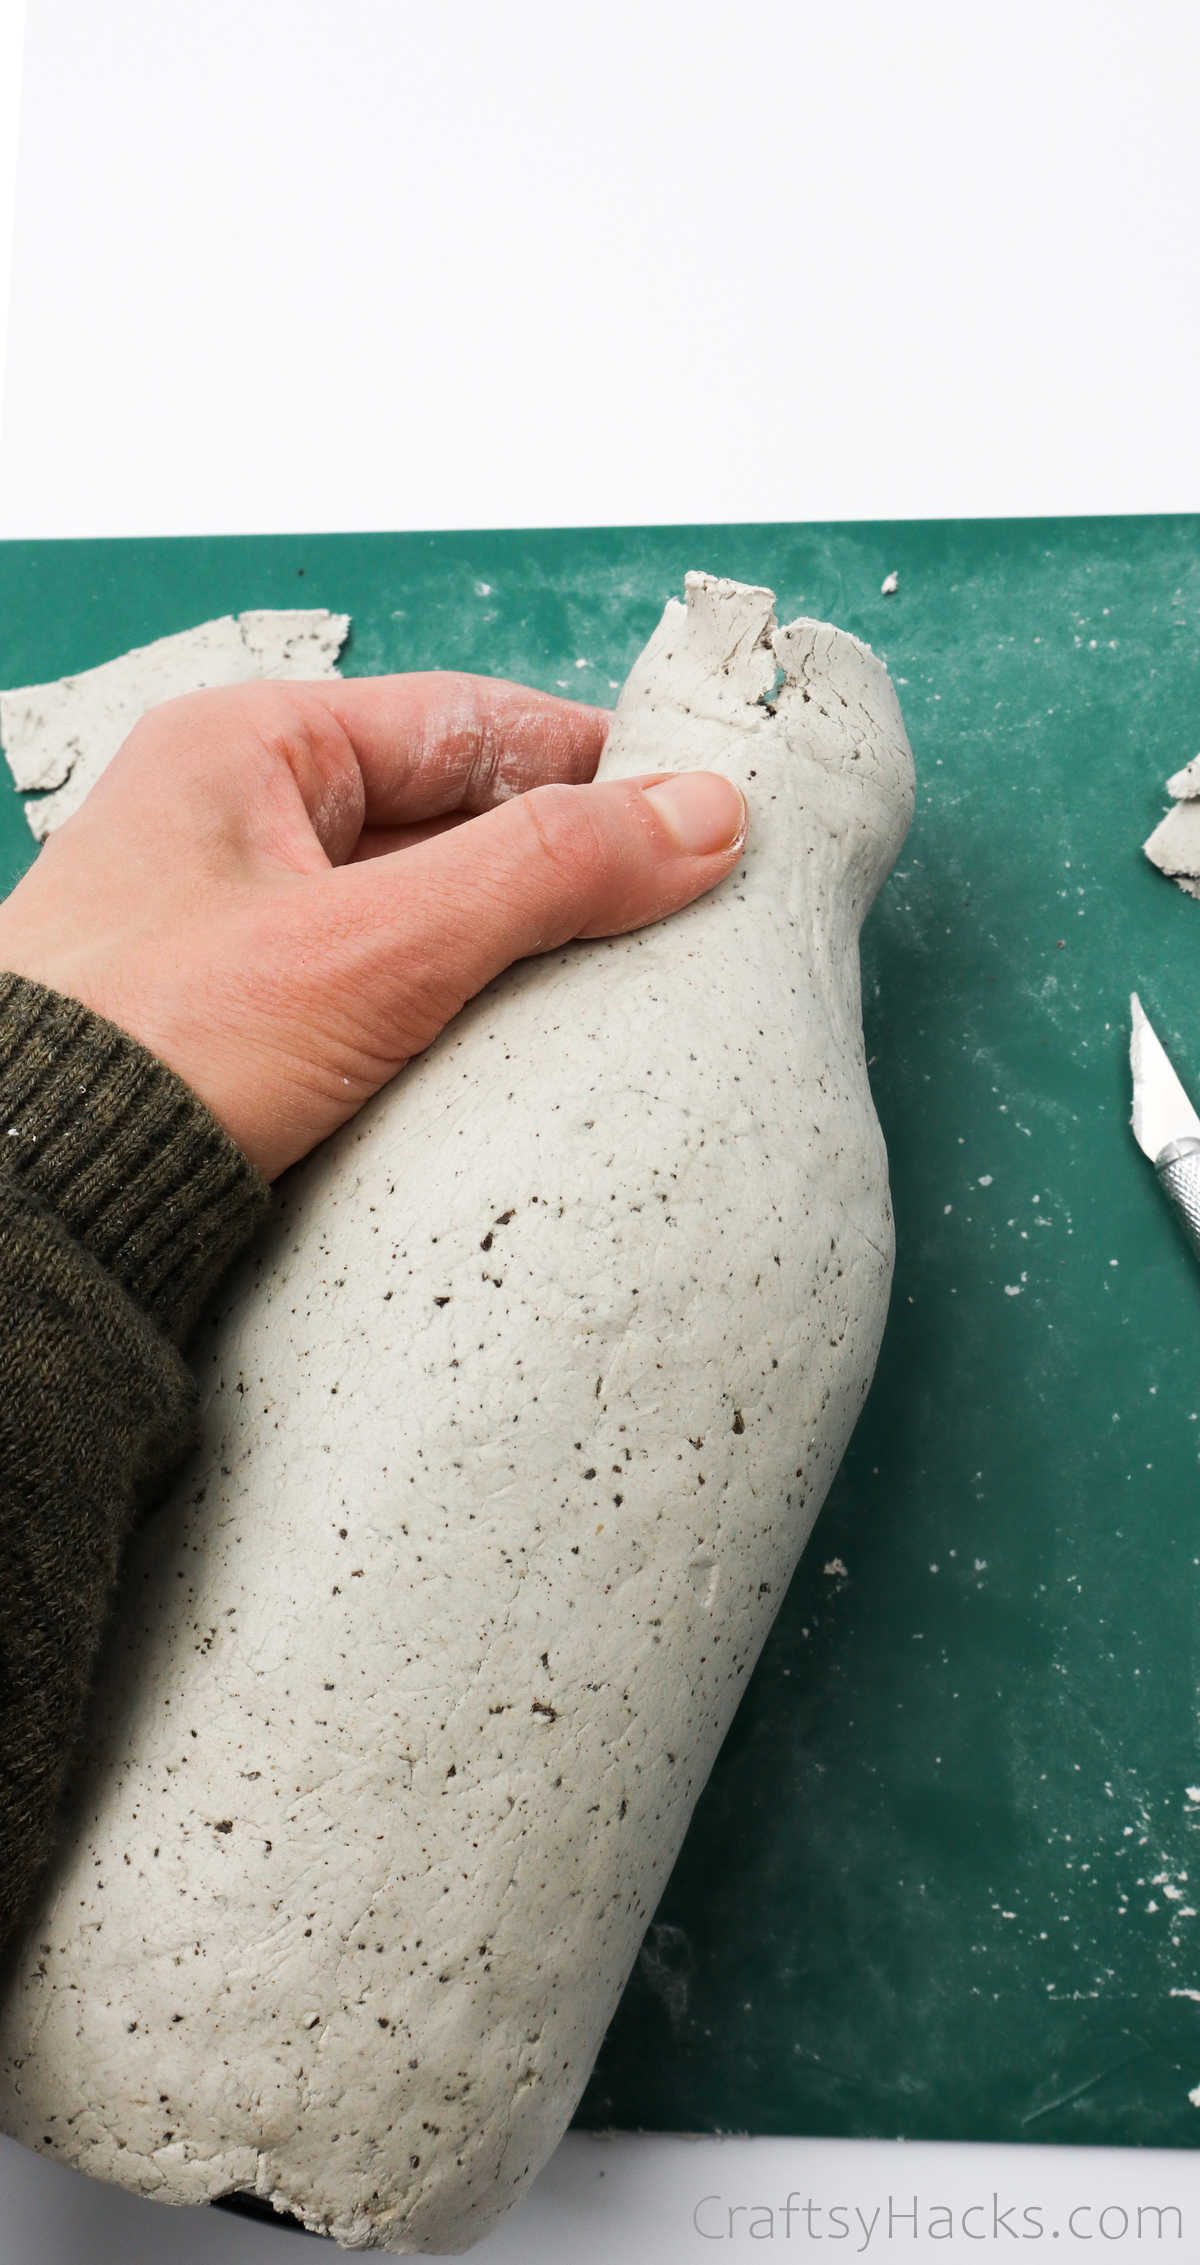
Also, remember to cover the rim of the mouth with clay, as well. Try to smoothen it out as much as possible, but don’t worry too much.
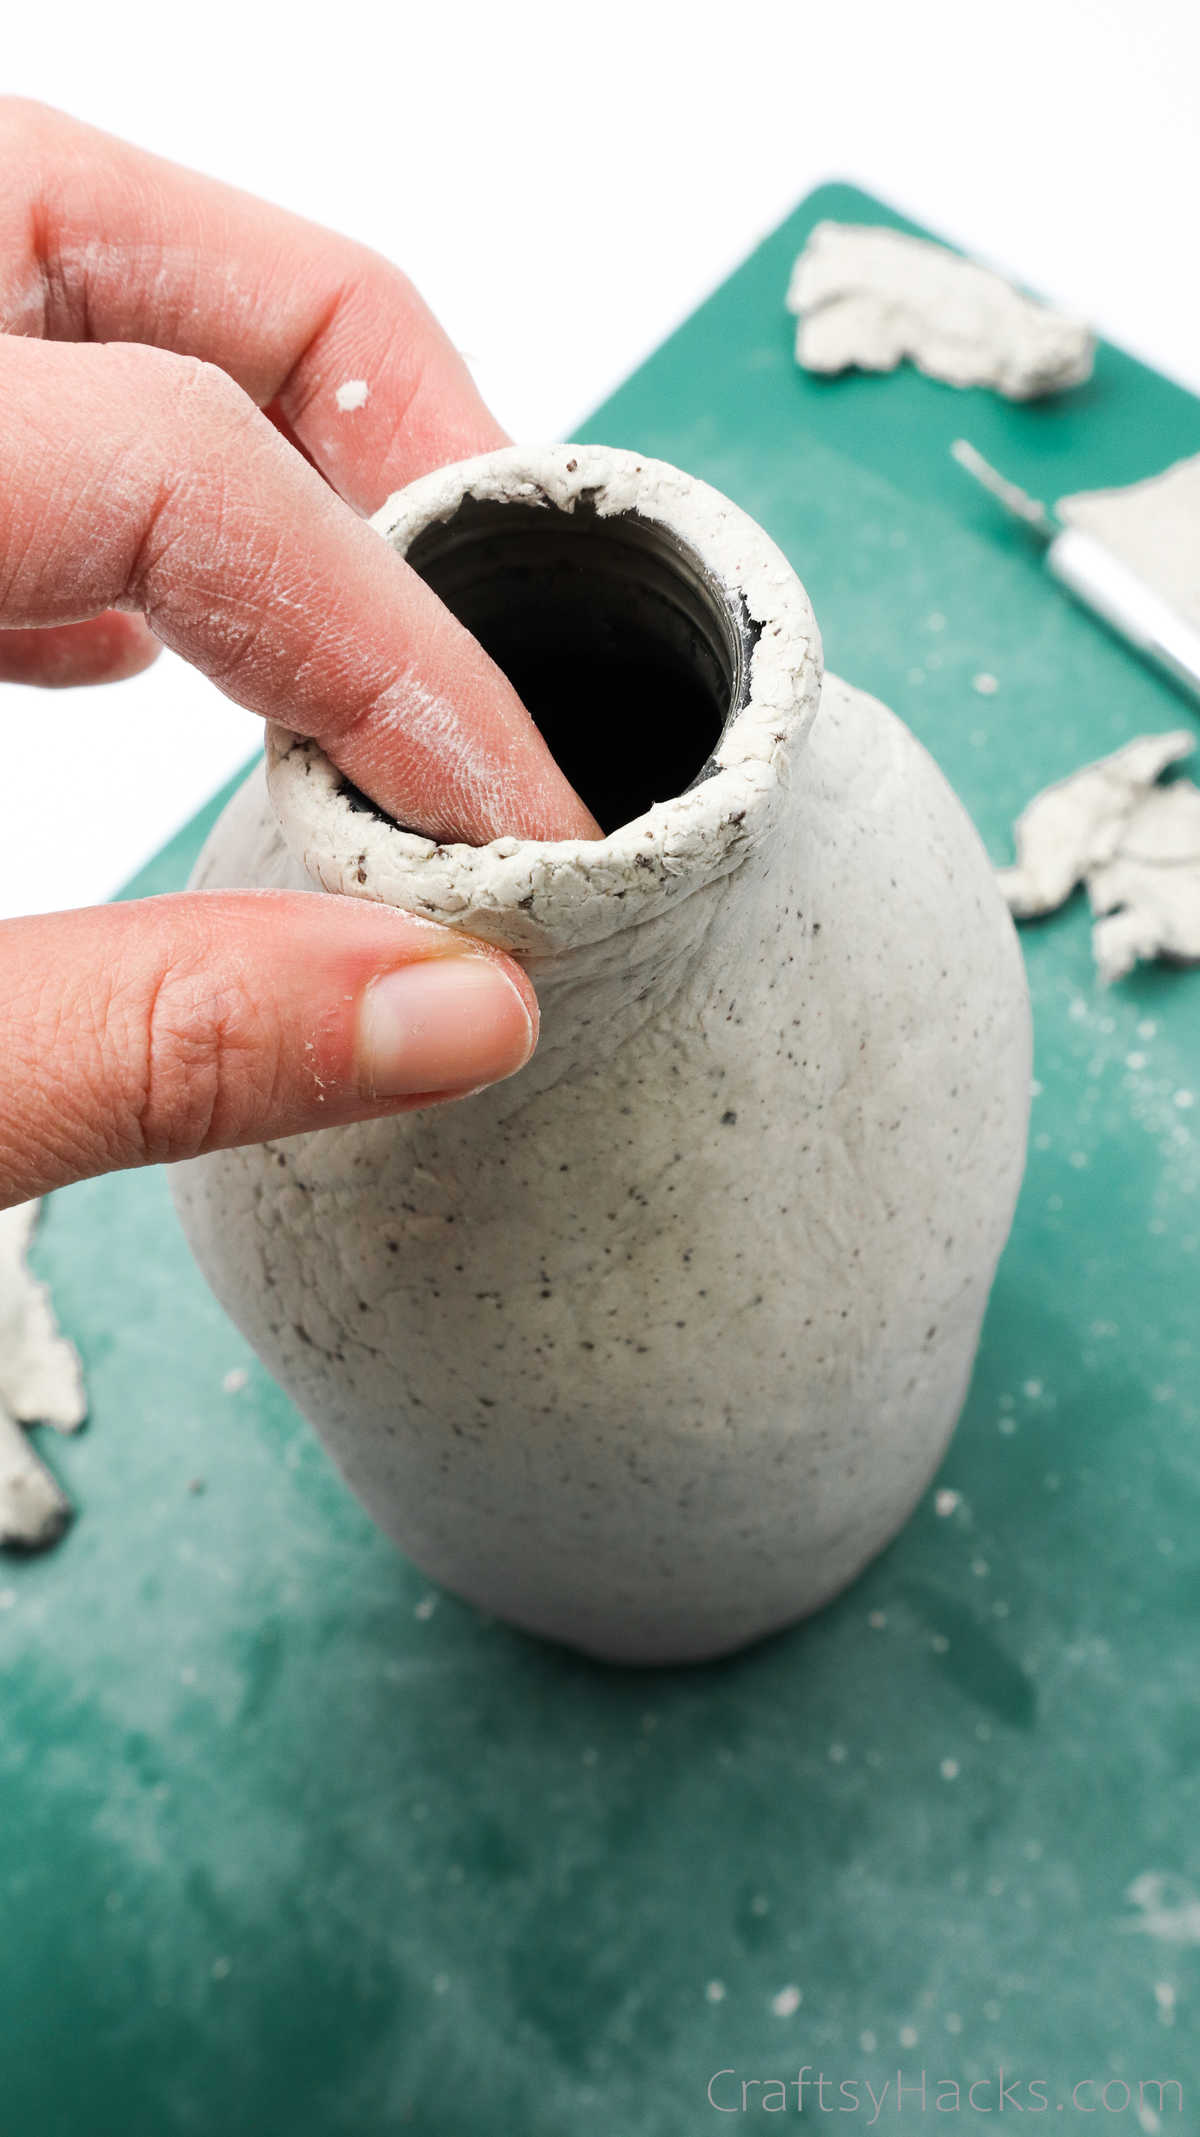
If you feel like it’s a little uneven or lumpier than you like, grab your craft knife and cut away the excess clay. You can also use the knife to even out the clay around the rim.
Your clay-clad bottle should look something like this when you’re done.
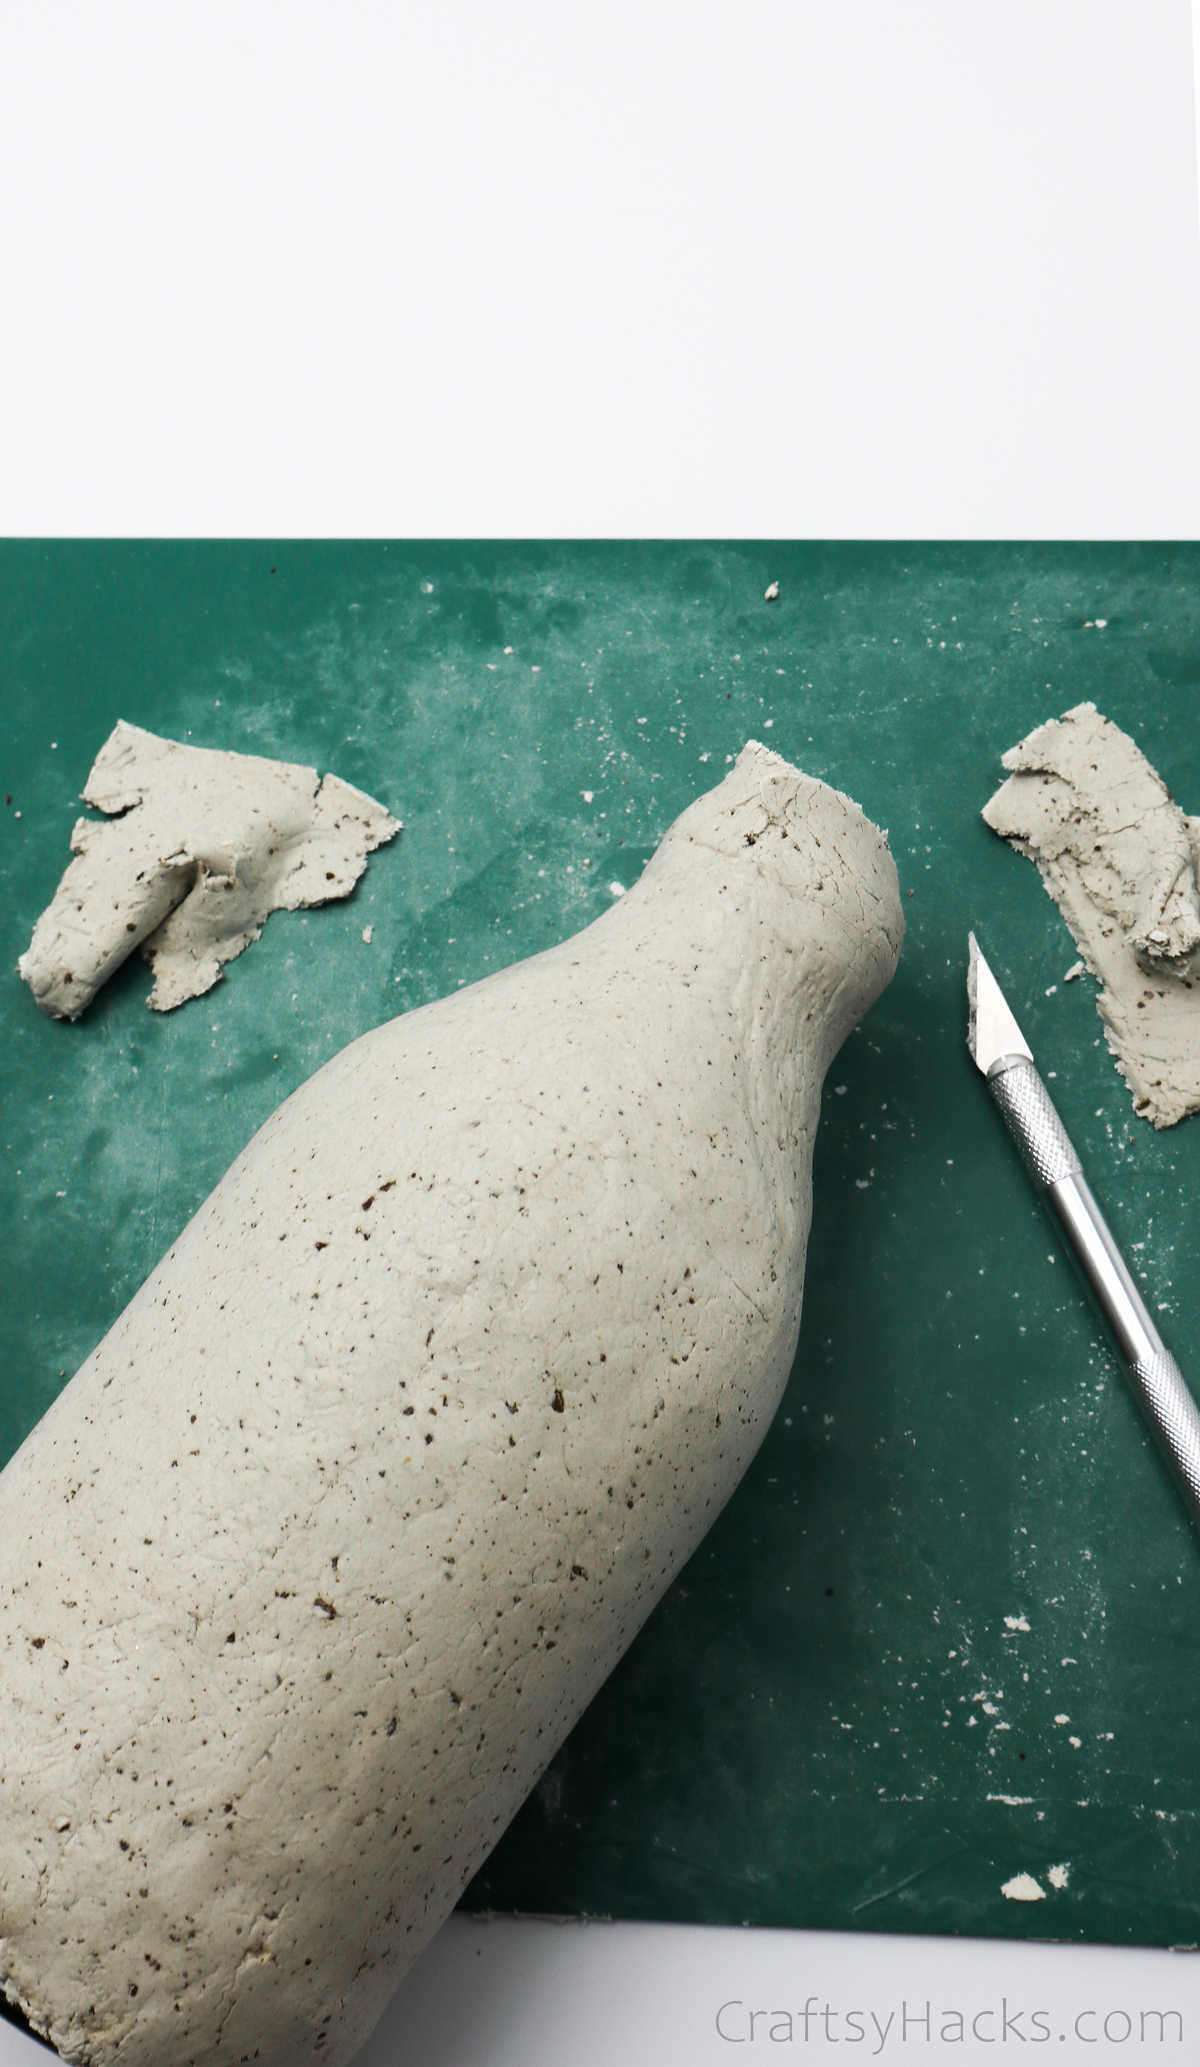
Step 9
It’s time to make use of the clay you set aside earlier to cover the bottom of the bottle. First, roll it out evenly and then place the bottle over it.
Use your craft knife to cut the clay around the bottle, as you can see here.
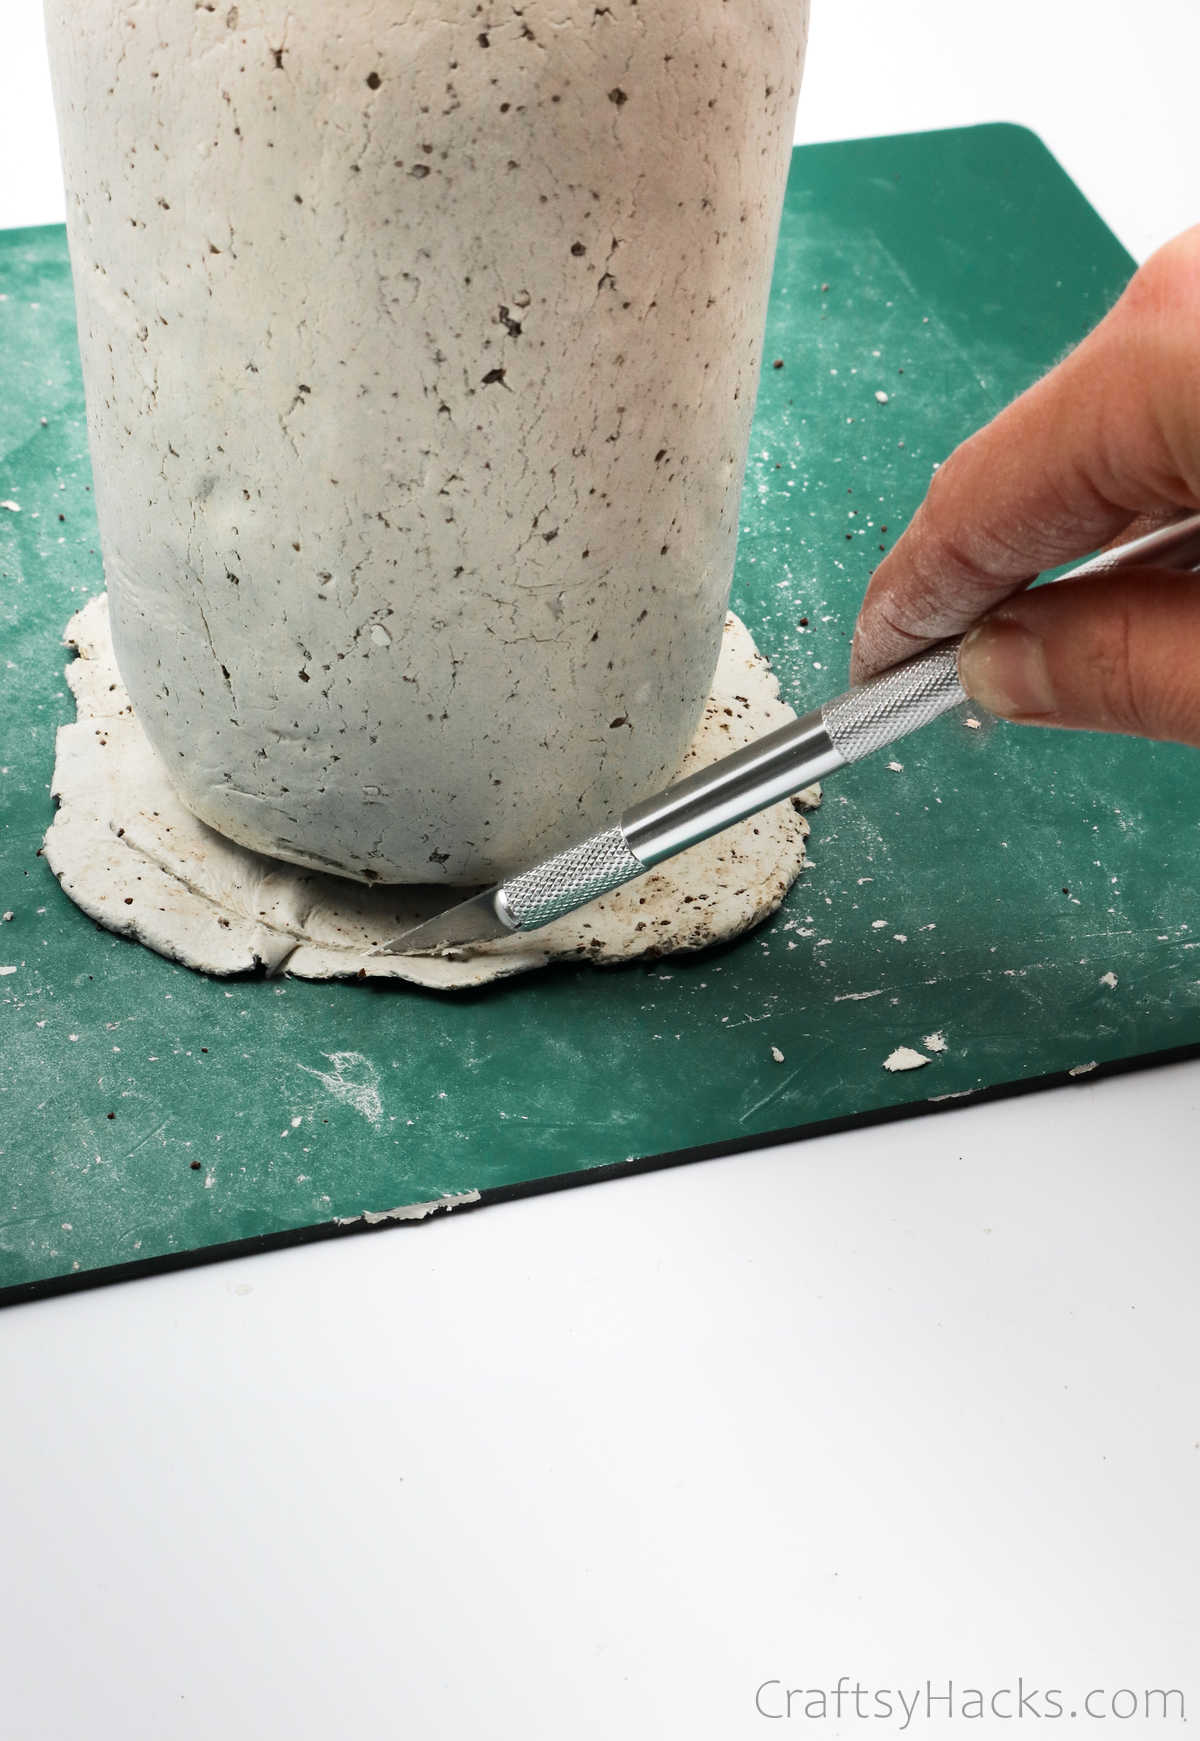
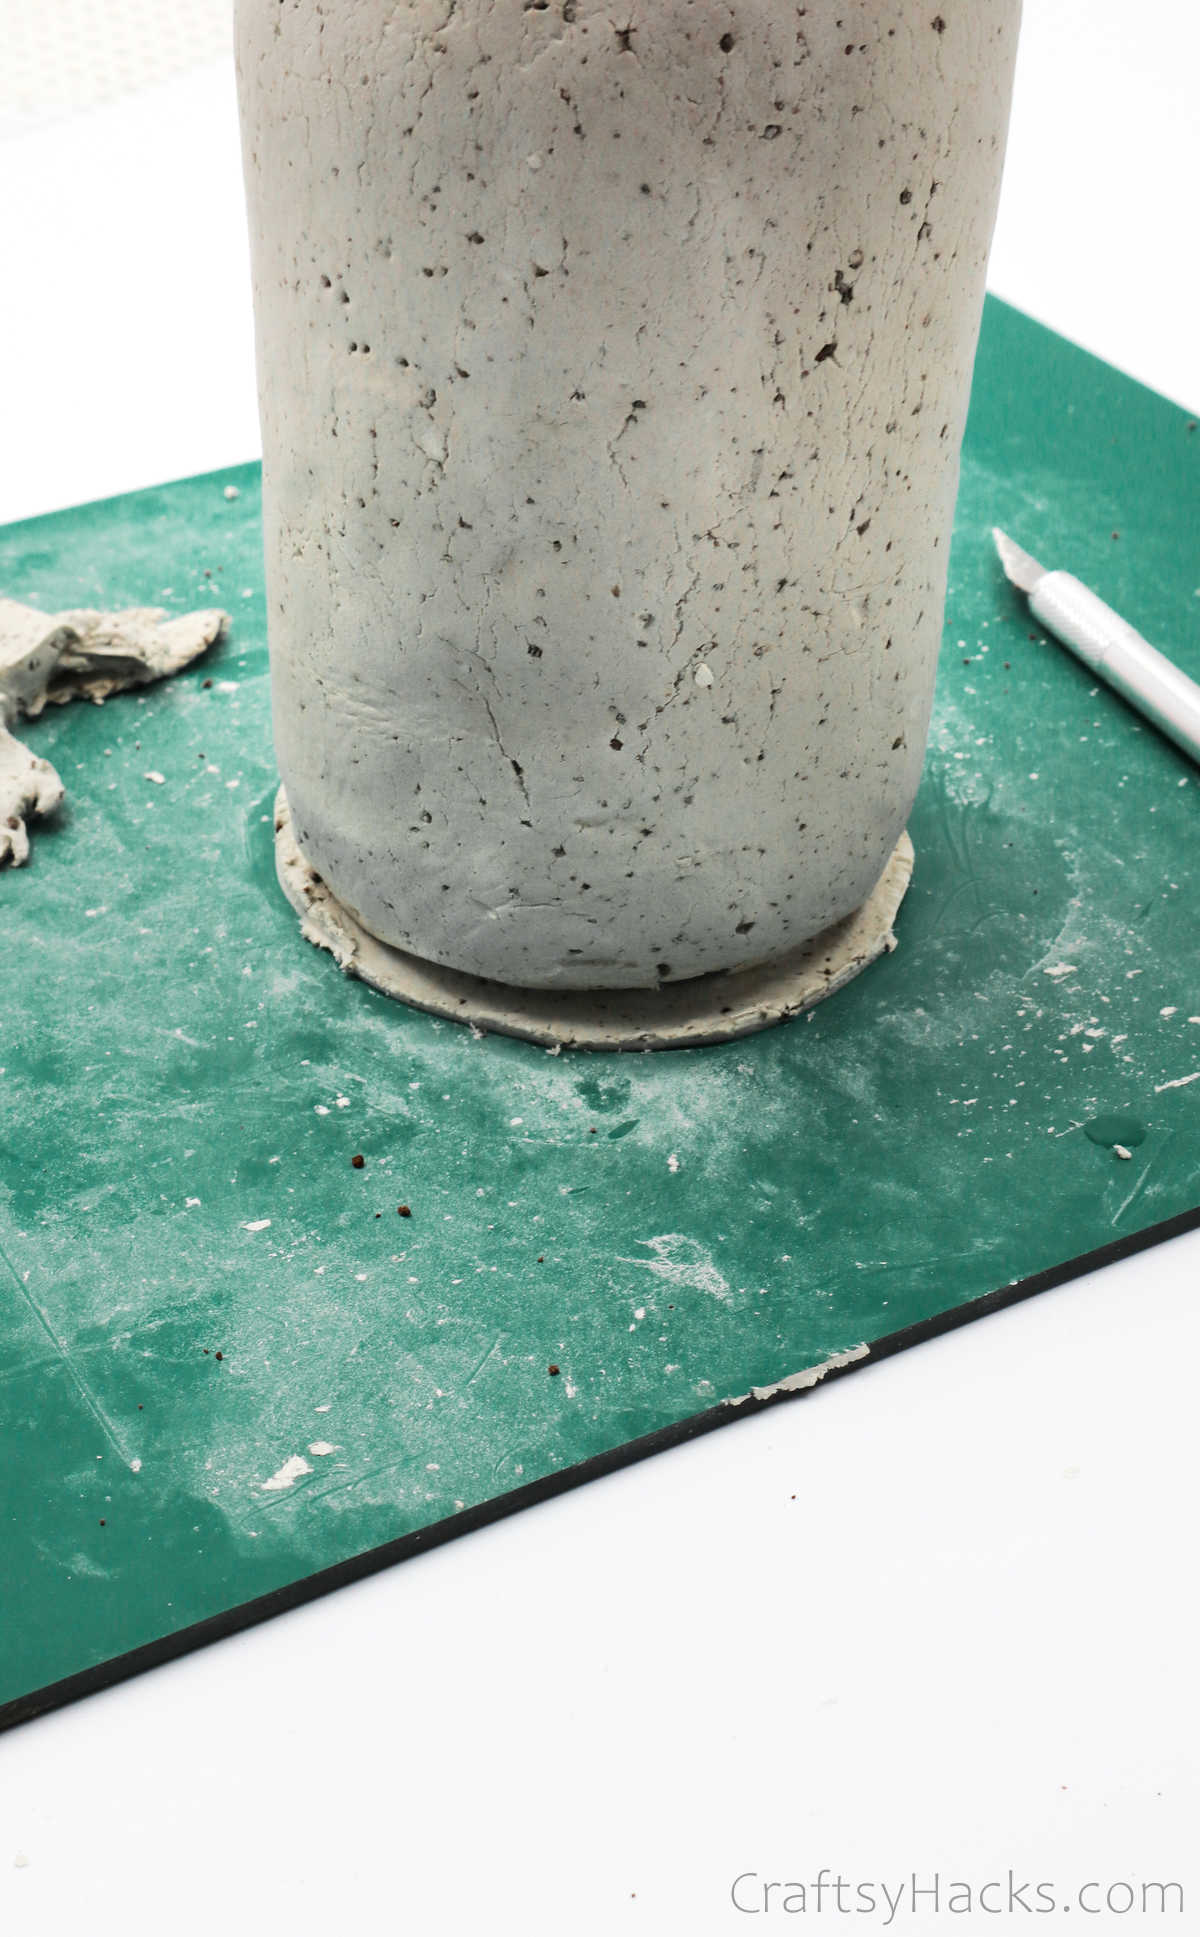
Carefully flip the bottle up to balance it on its mouth and then press the bottom component of clay into the bottle, blending it in with the rest of the clay.

Again, feel free to add a drop of water to fill in any cracks and to help you hide any lines.

Step 10
It’s time to allow the clay to dry. This can take anywhere between 48 to 72 hours, so be patient and let it dry completely before you move on to the next step.

Step 11
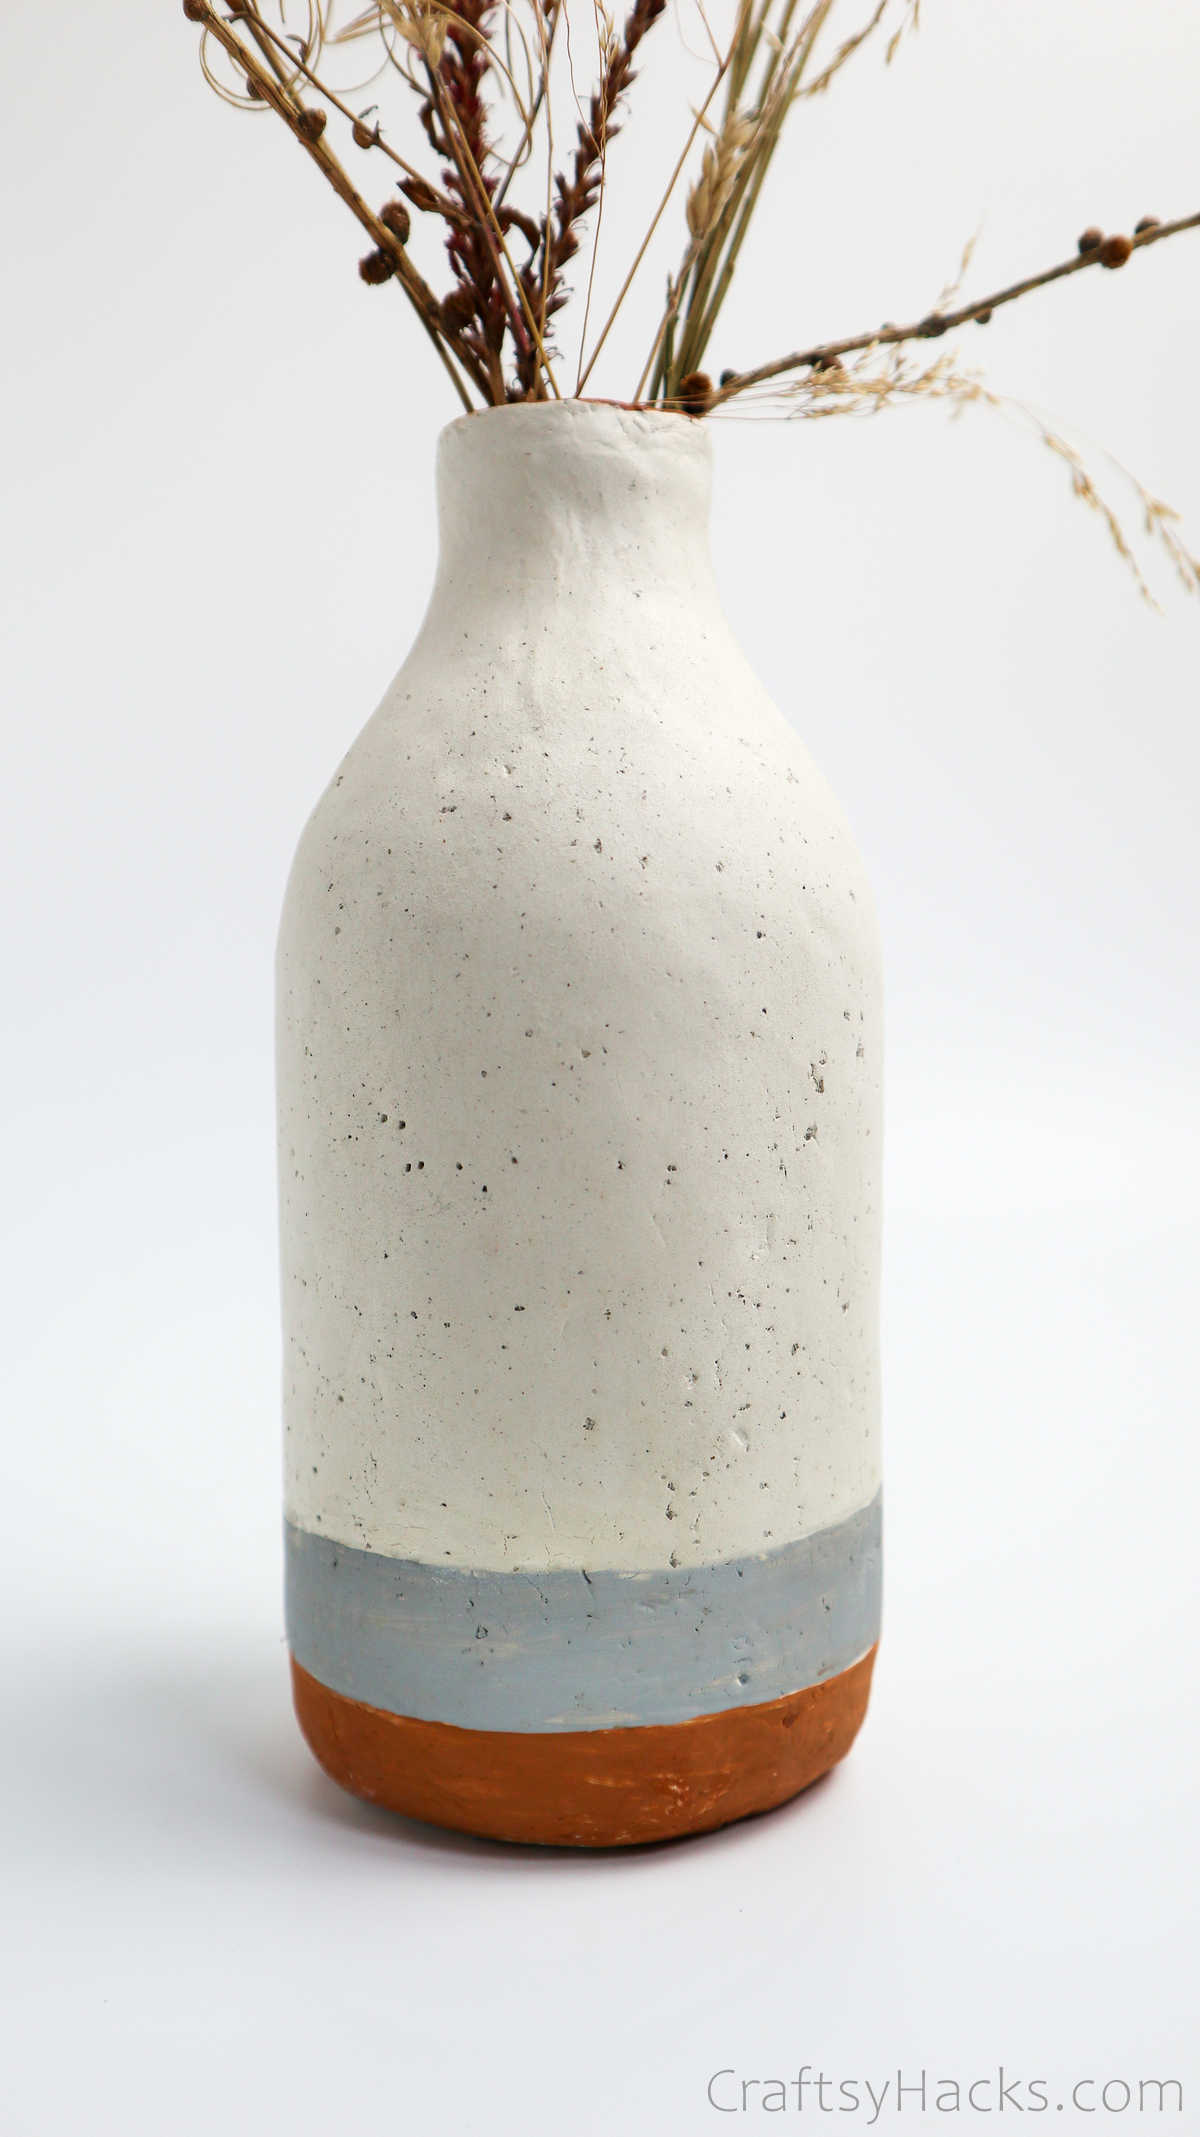
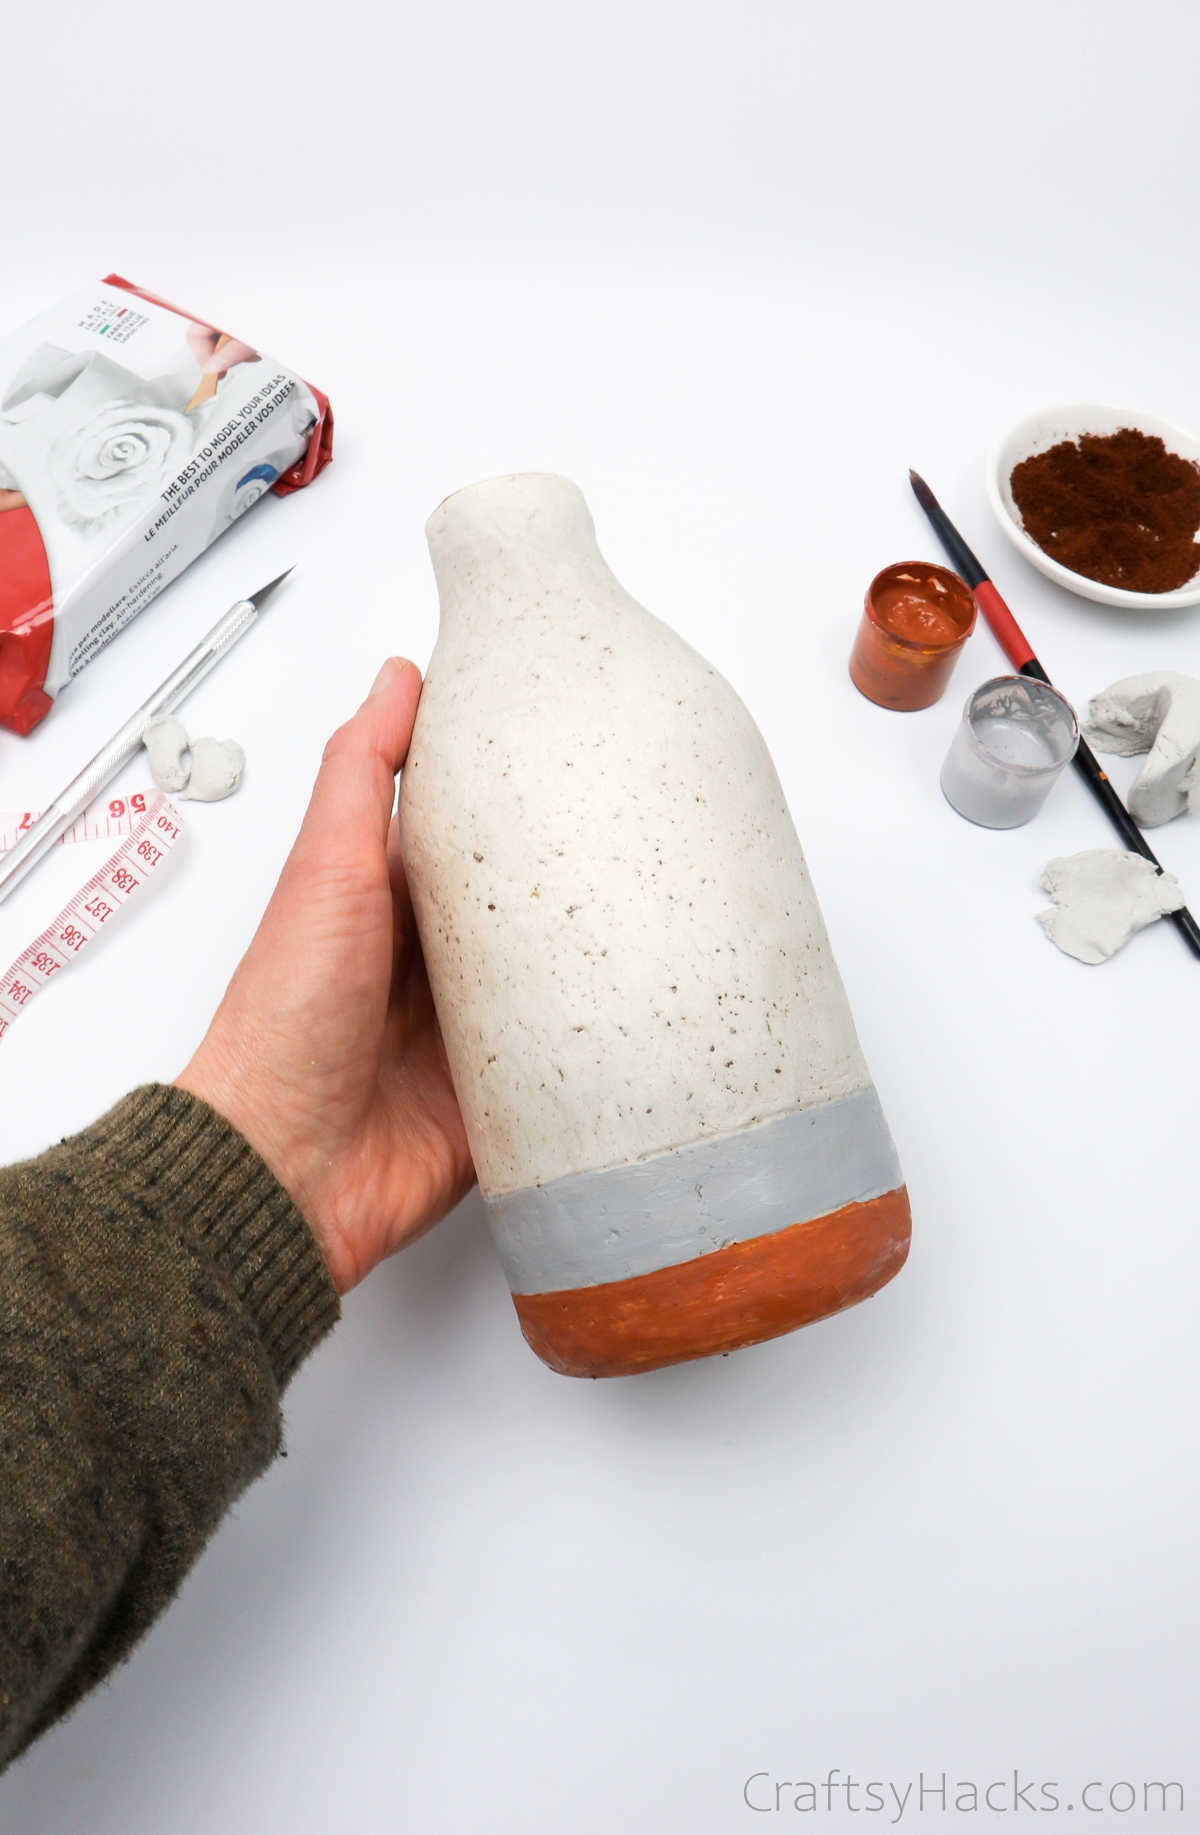
Once your slay has dried completely, you can move on to the fun part: painting it! Grab a pencil and draw two lines around the bottom of the bottle, as you see here.
Here’s a tip: place the pencil on the clay and hold it steady. Instead of moving the pencil around, turn the bottle so that the lines you draw turn out nice and even.
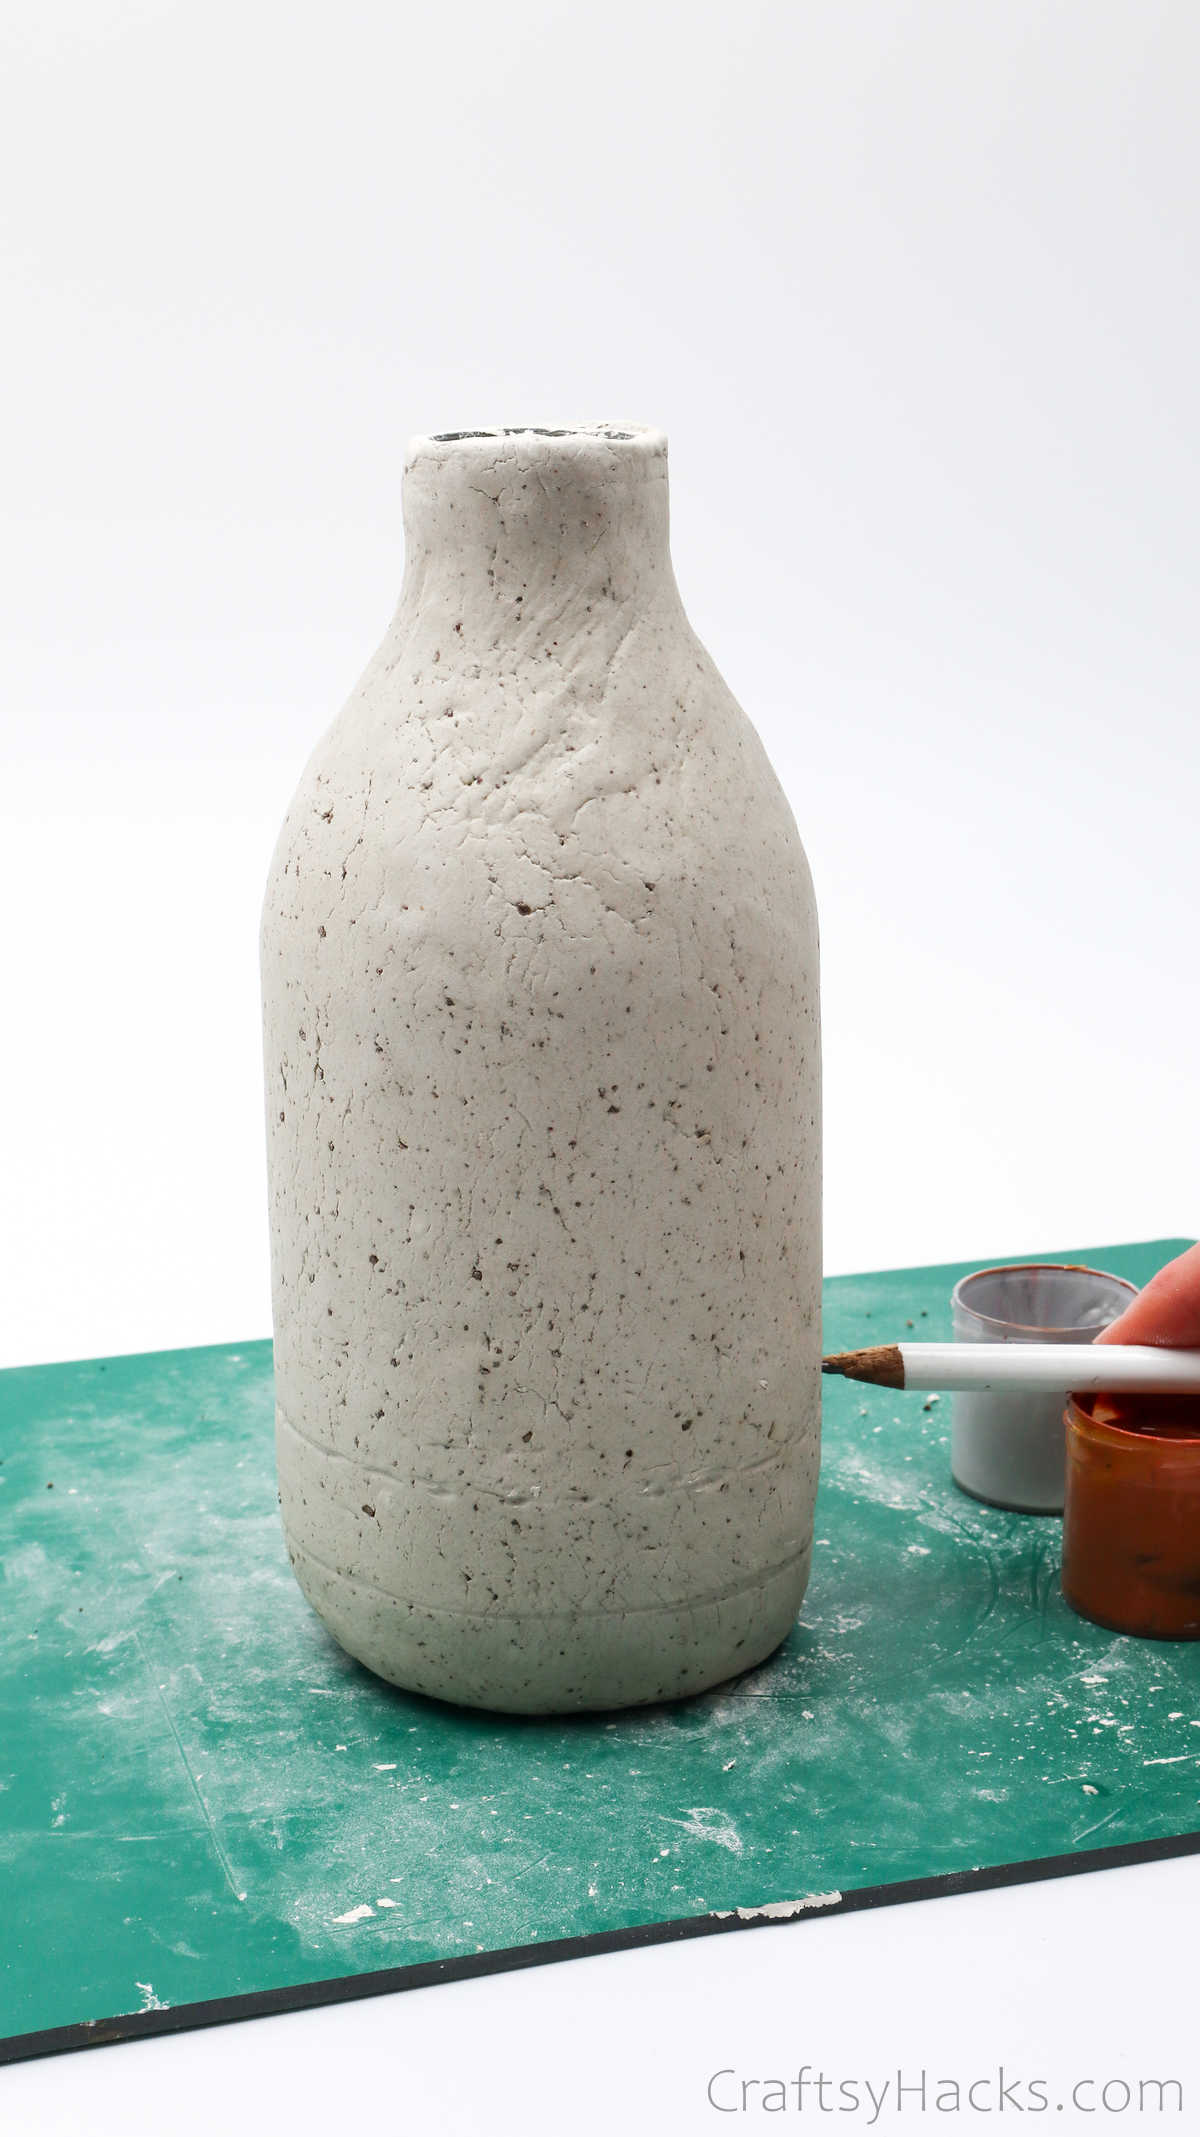
Step 12
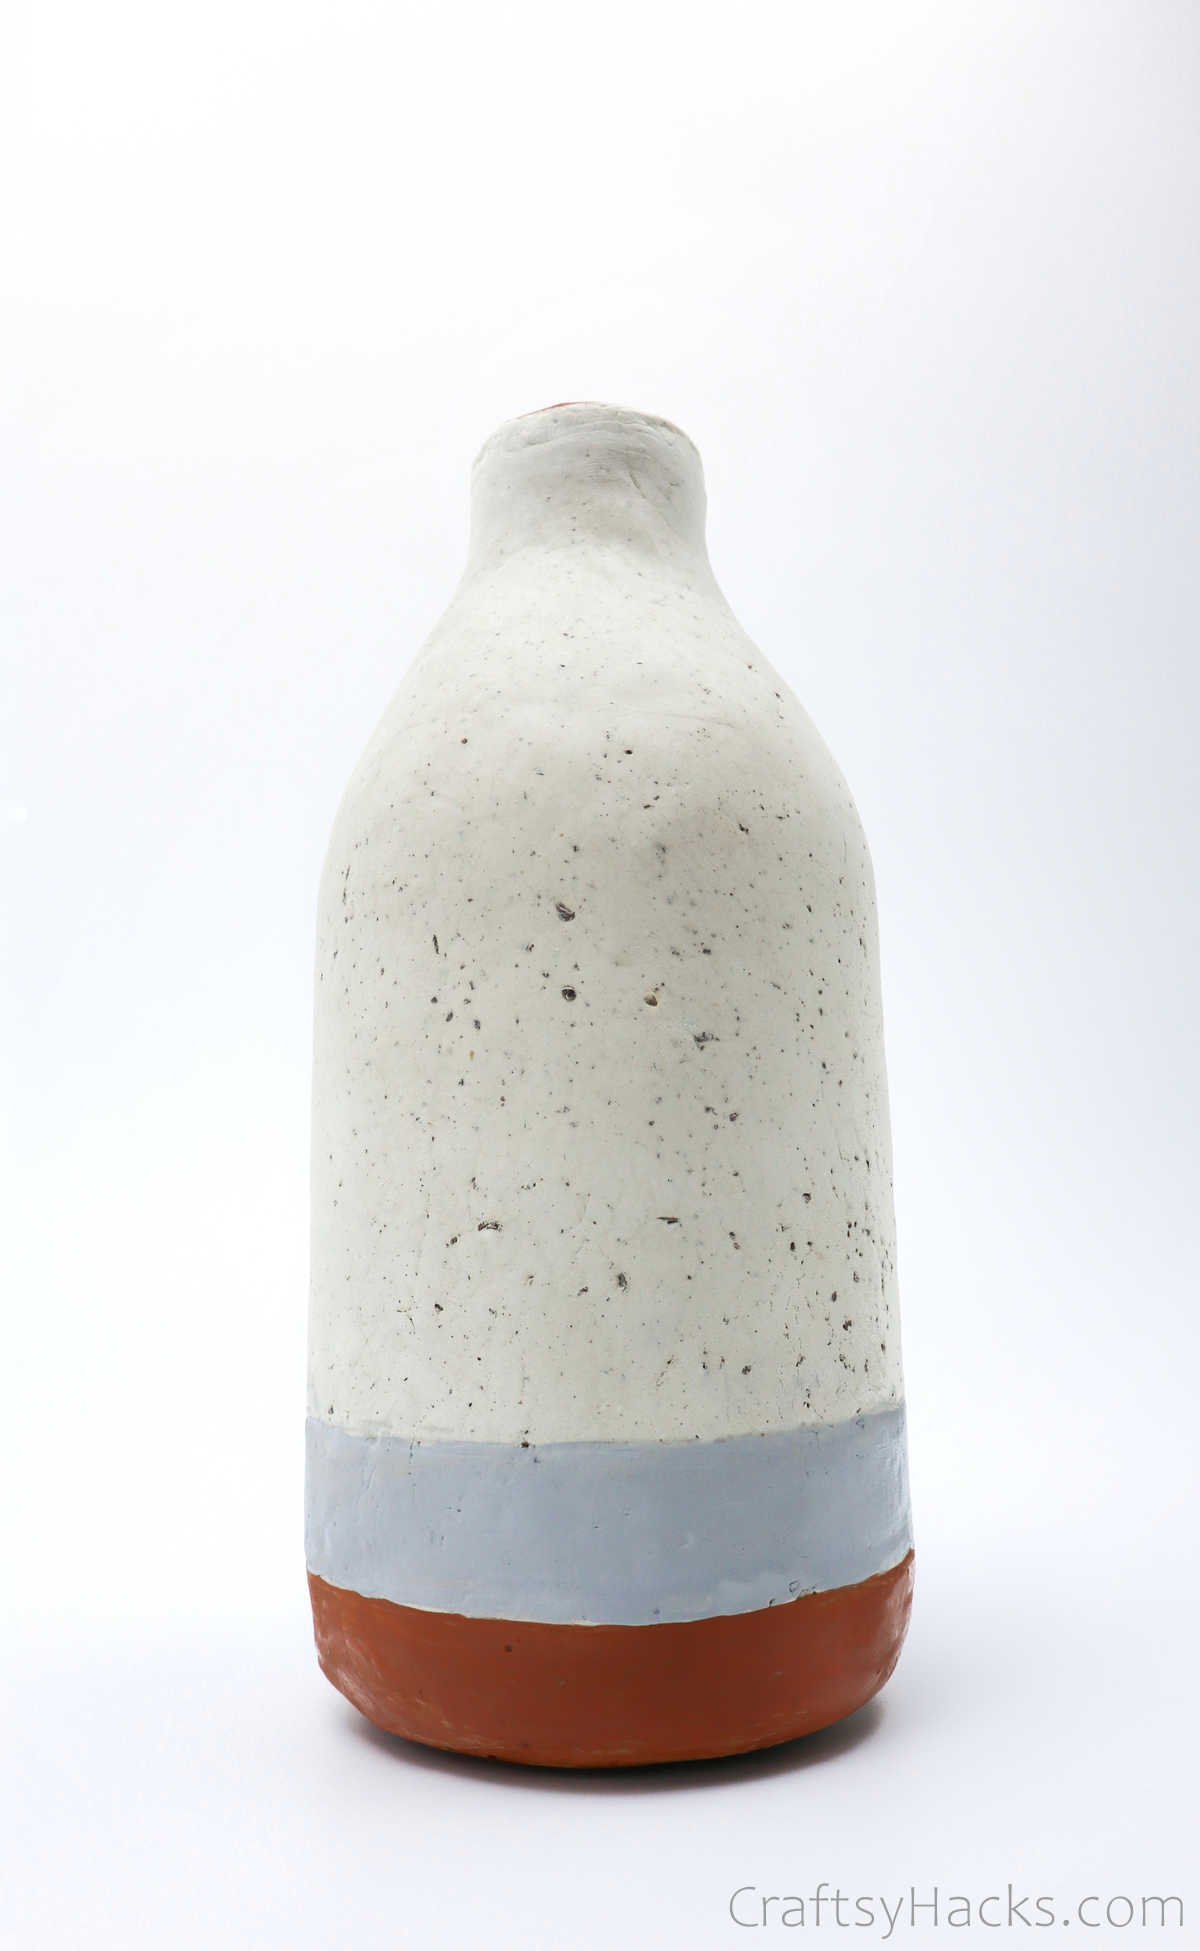
Grab your paints and brushes and paint the bottle any way you like. Make sure you allow each coat to dry completely before you apply the next.
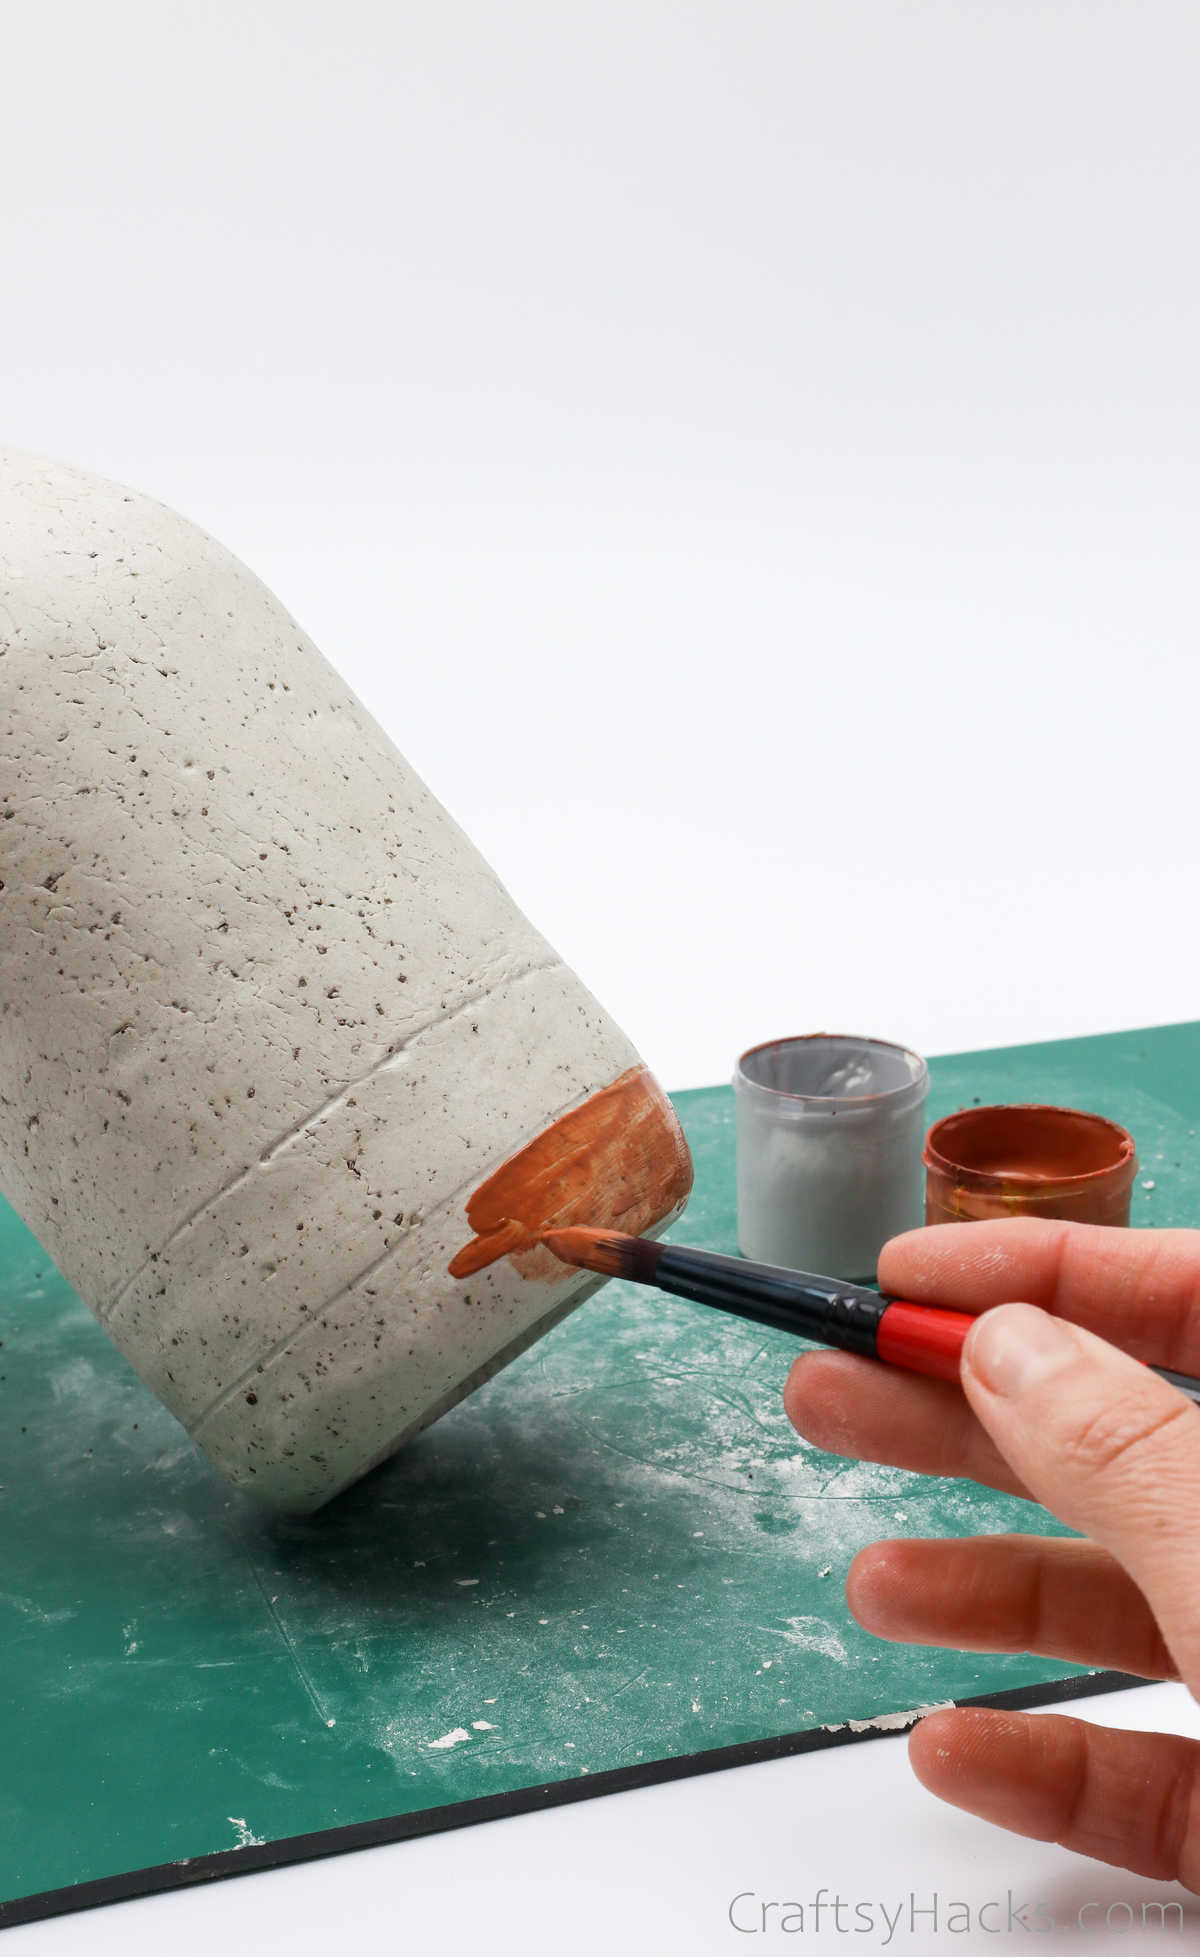
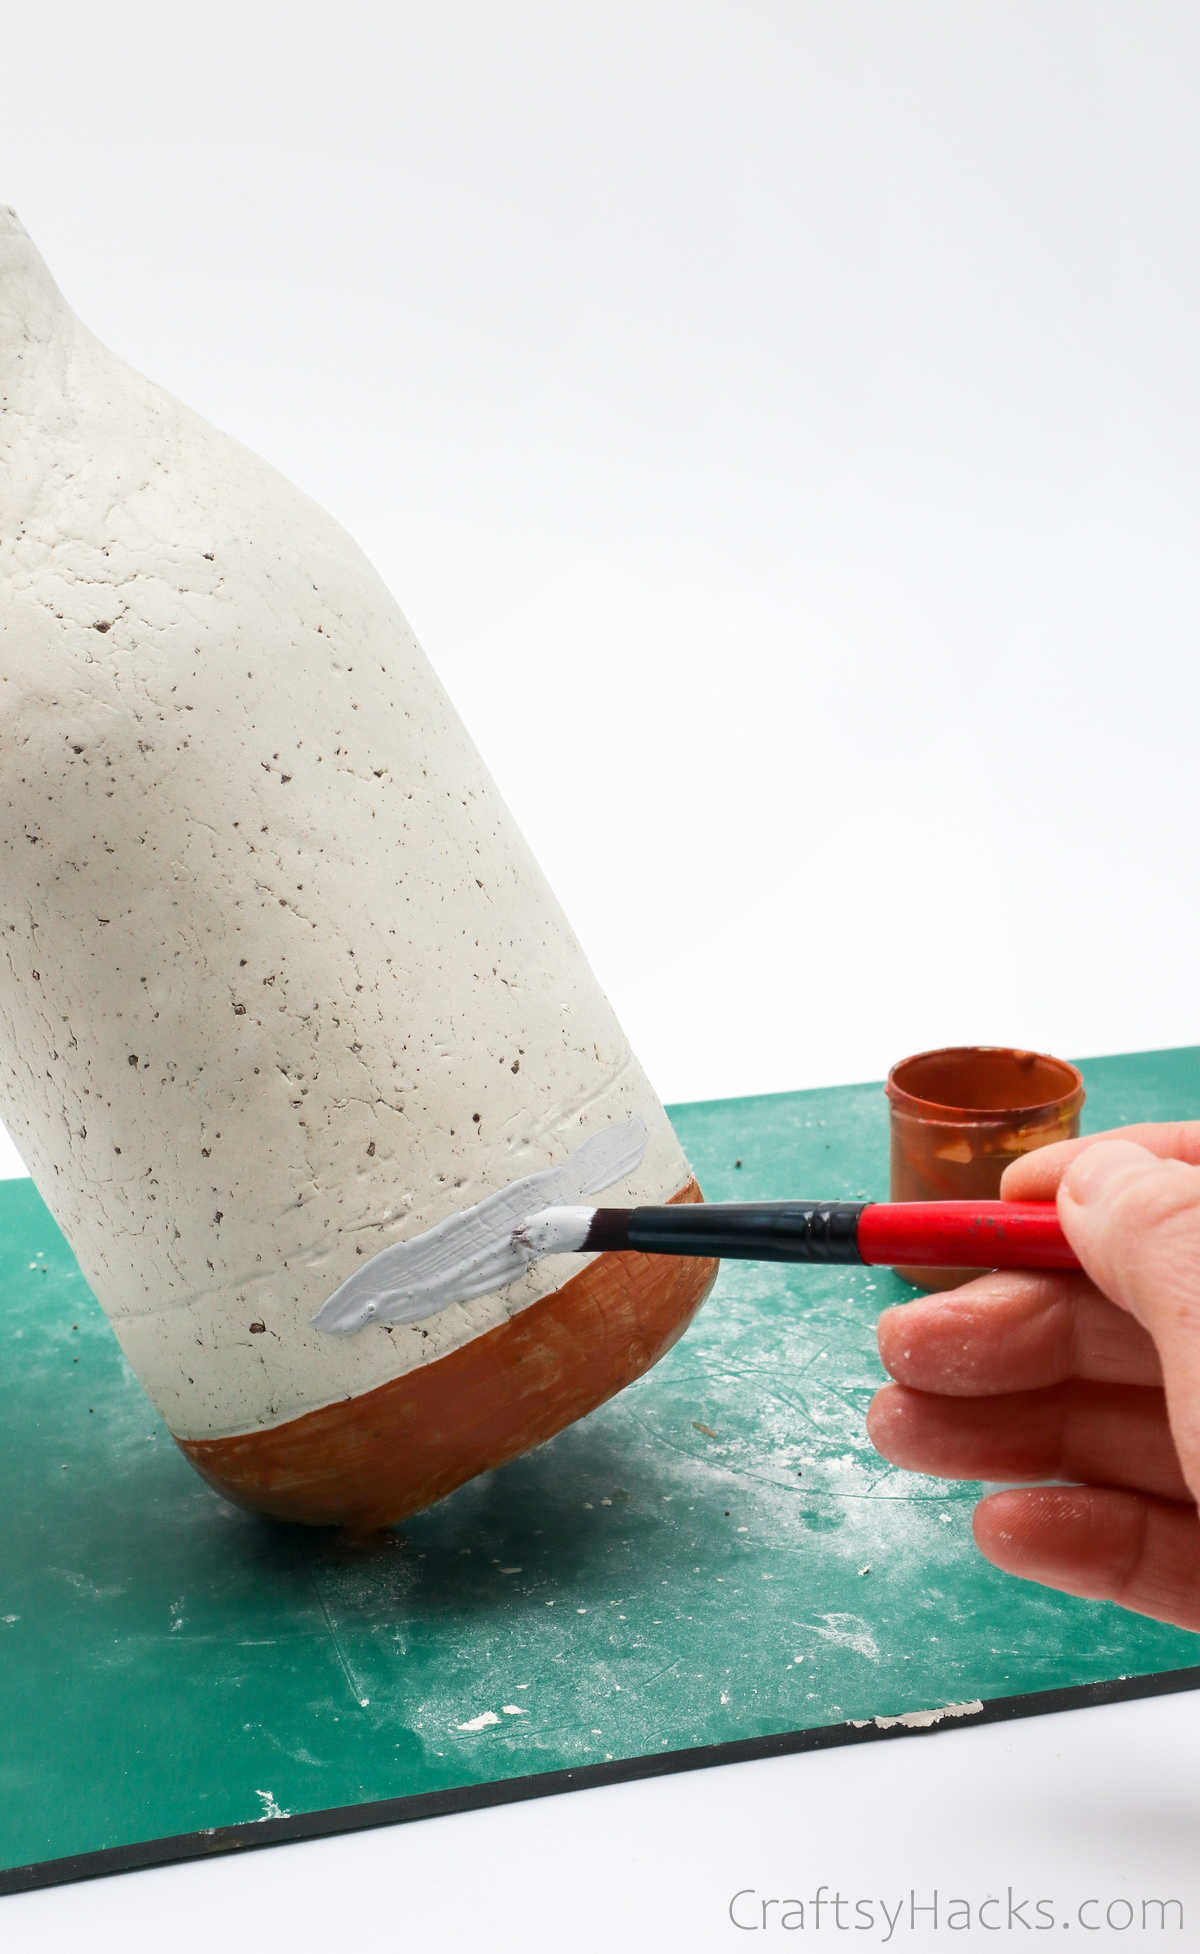
You can also paint the rim of the bottle if you like.
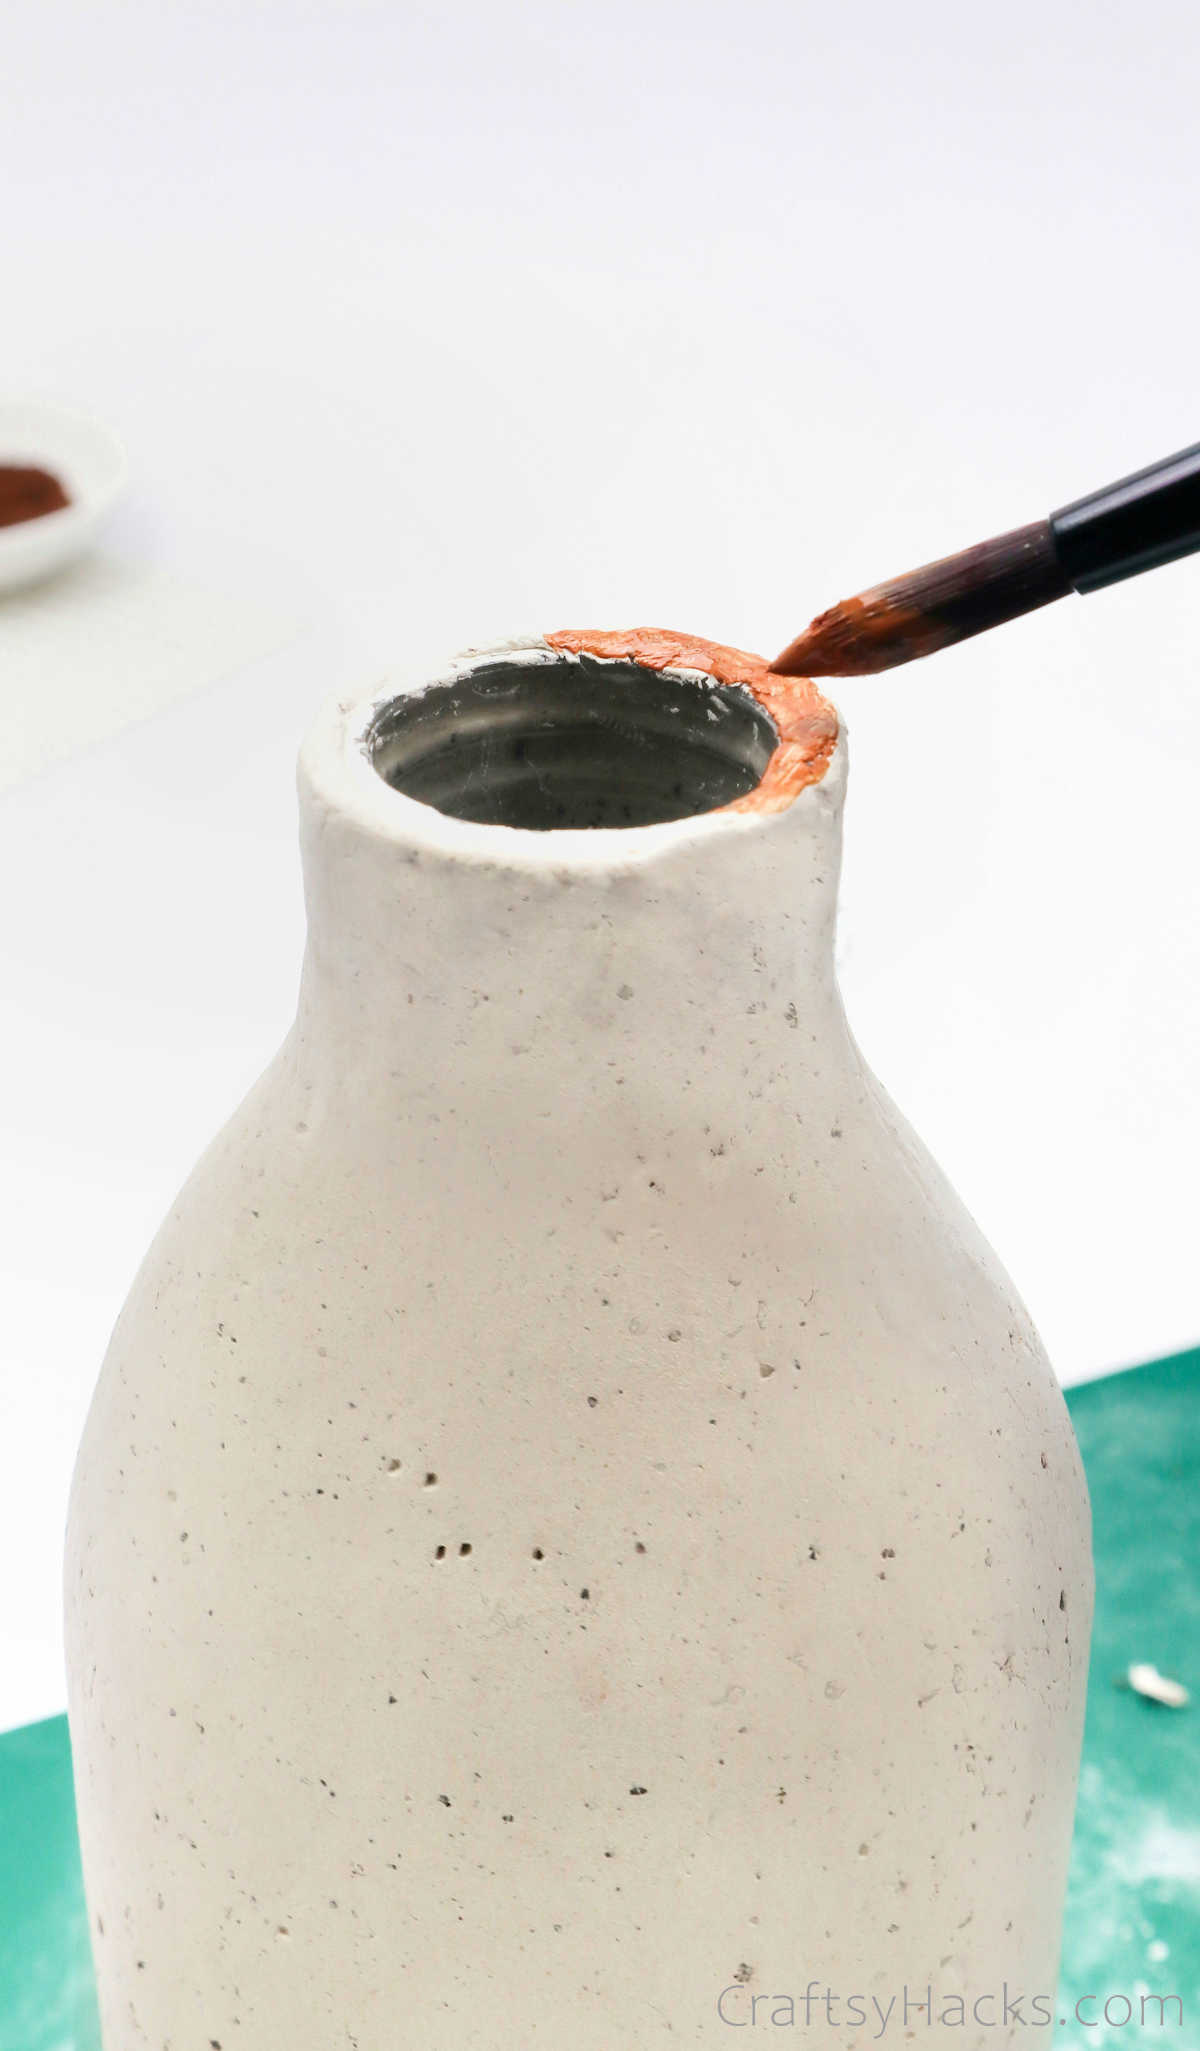
Just allow the paint to dry completely first. You can also consider applying a layer of sealant over your bottle.
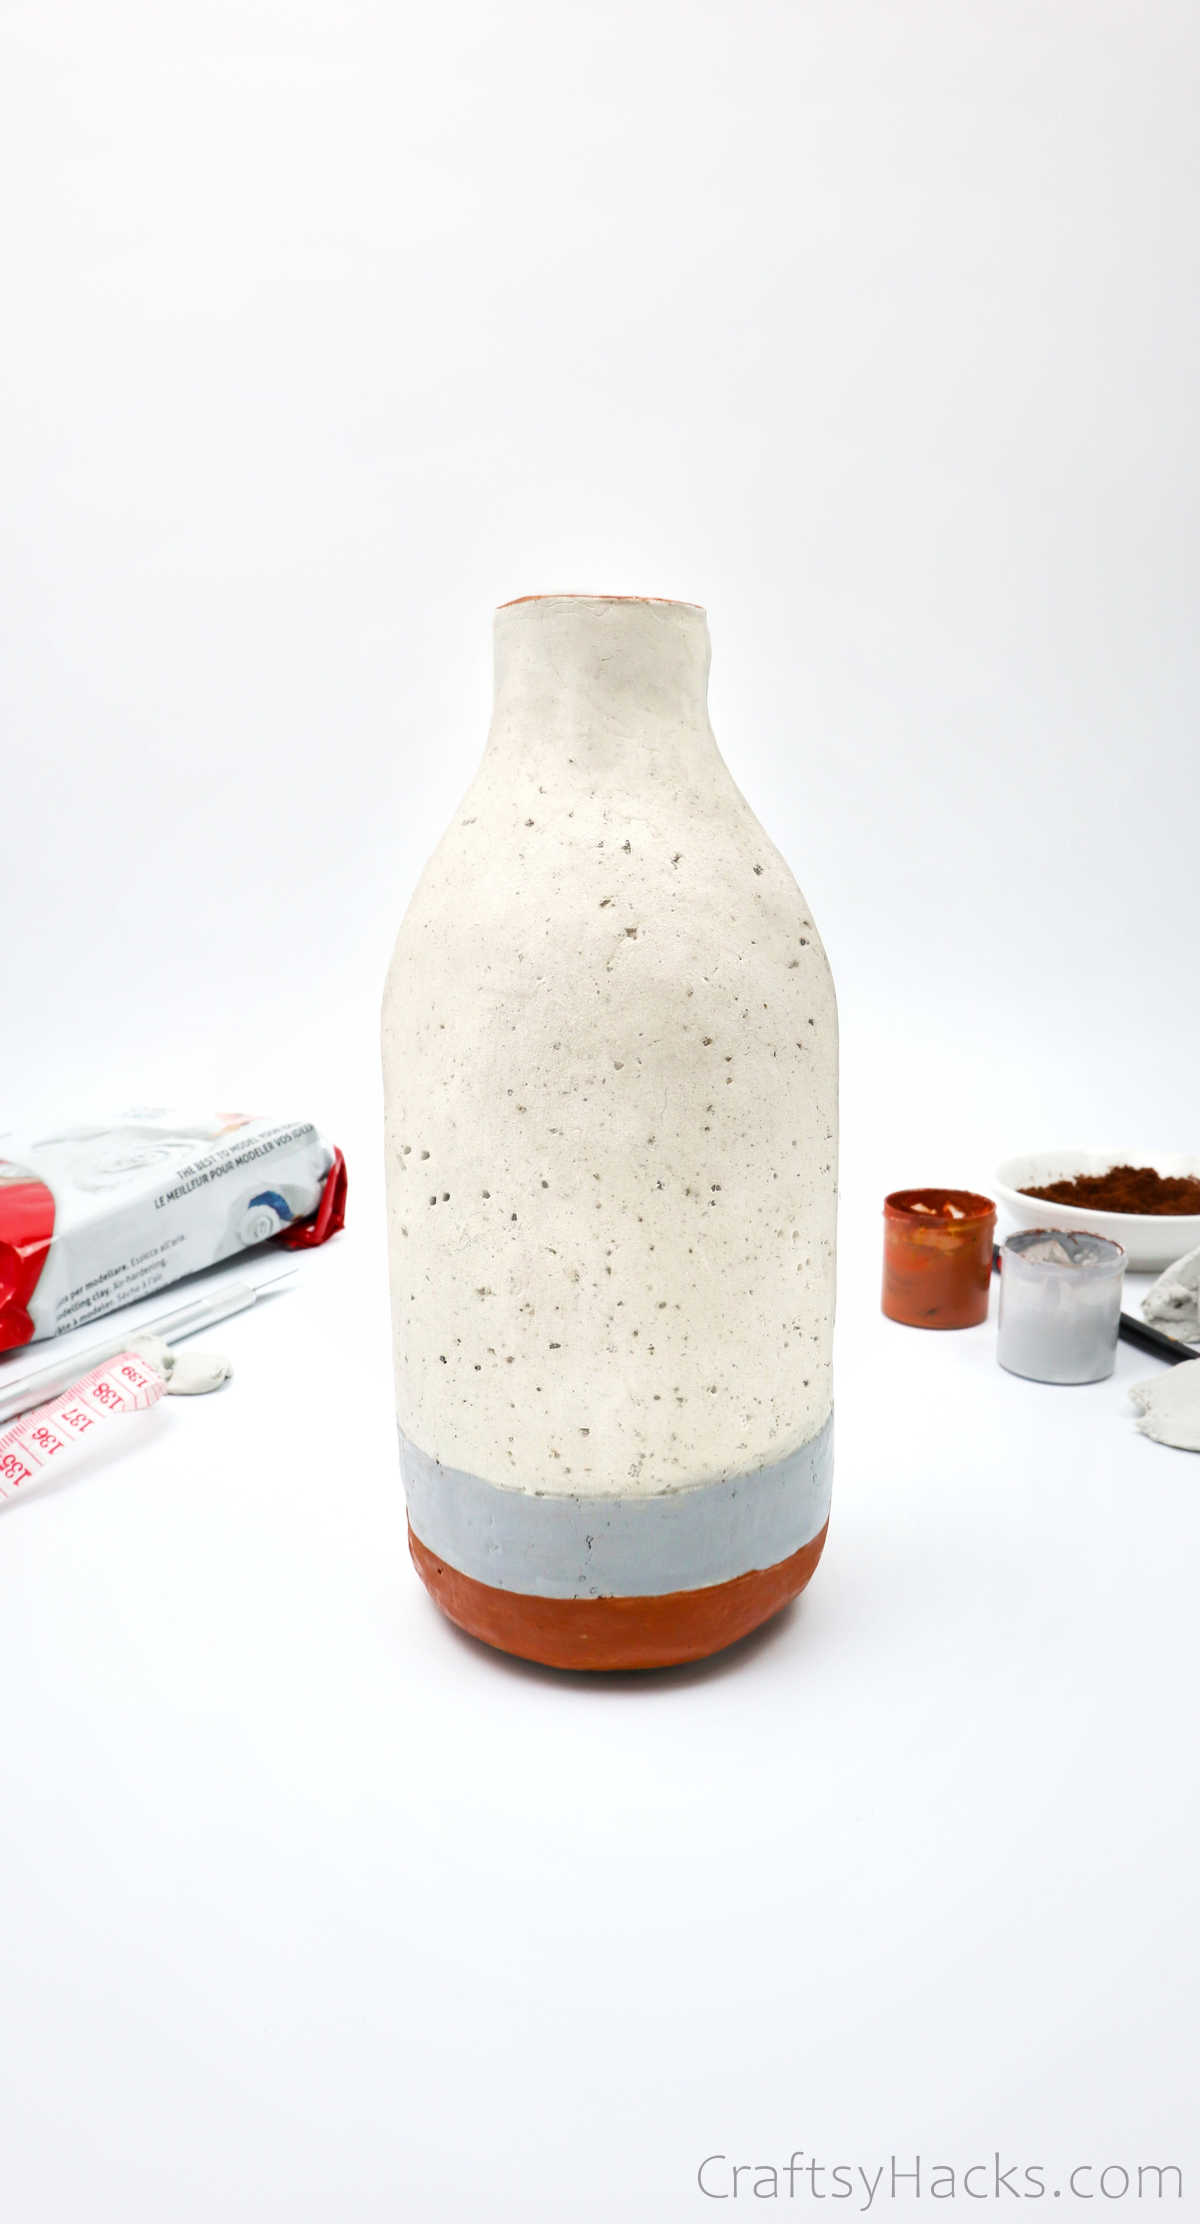
But, if you prefer a matte finish, then just let it be. But I’d recommend a layer of sealant to protect the surface—so instead, try to find and use a matte sealant.
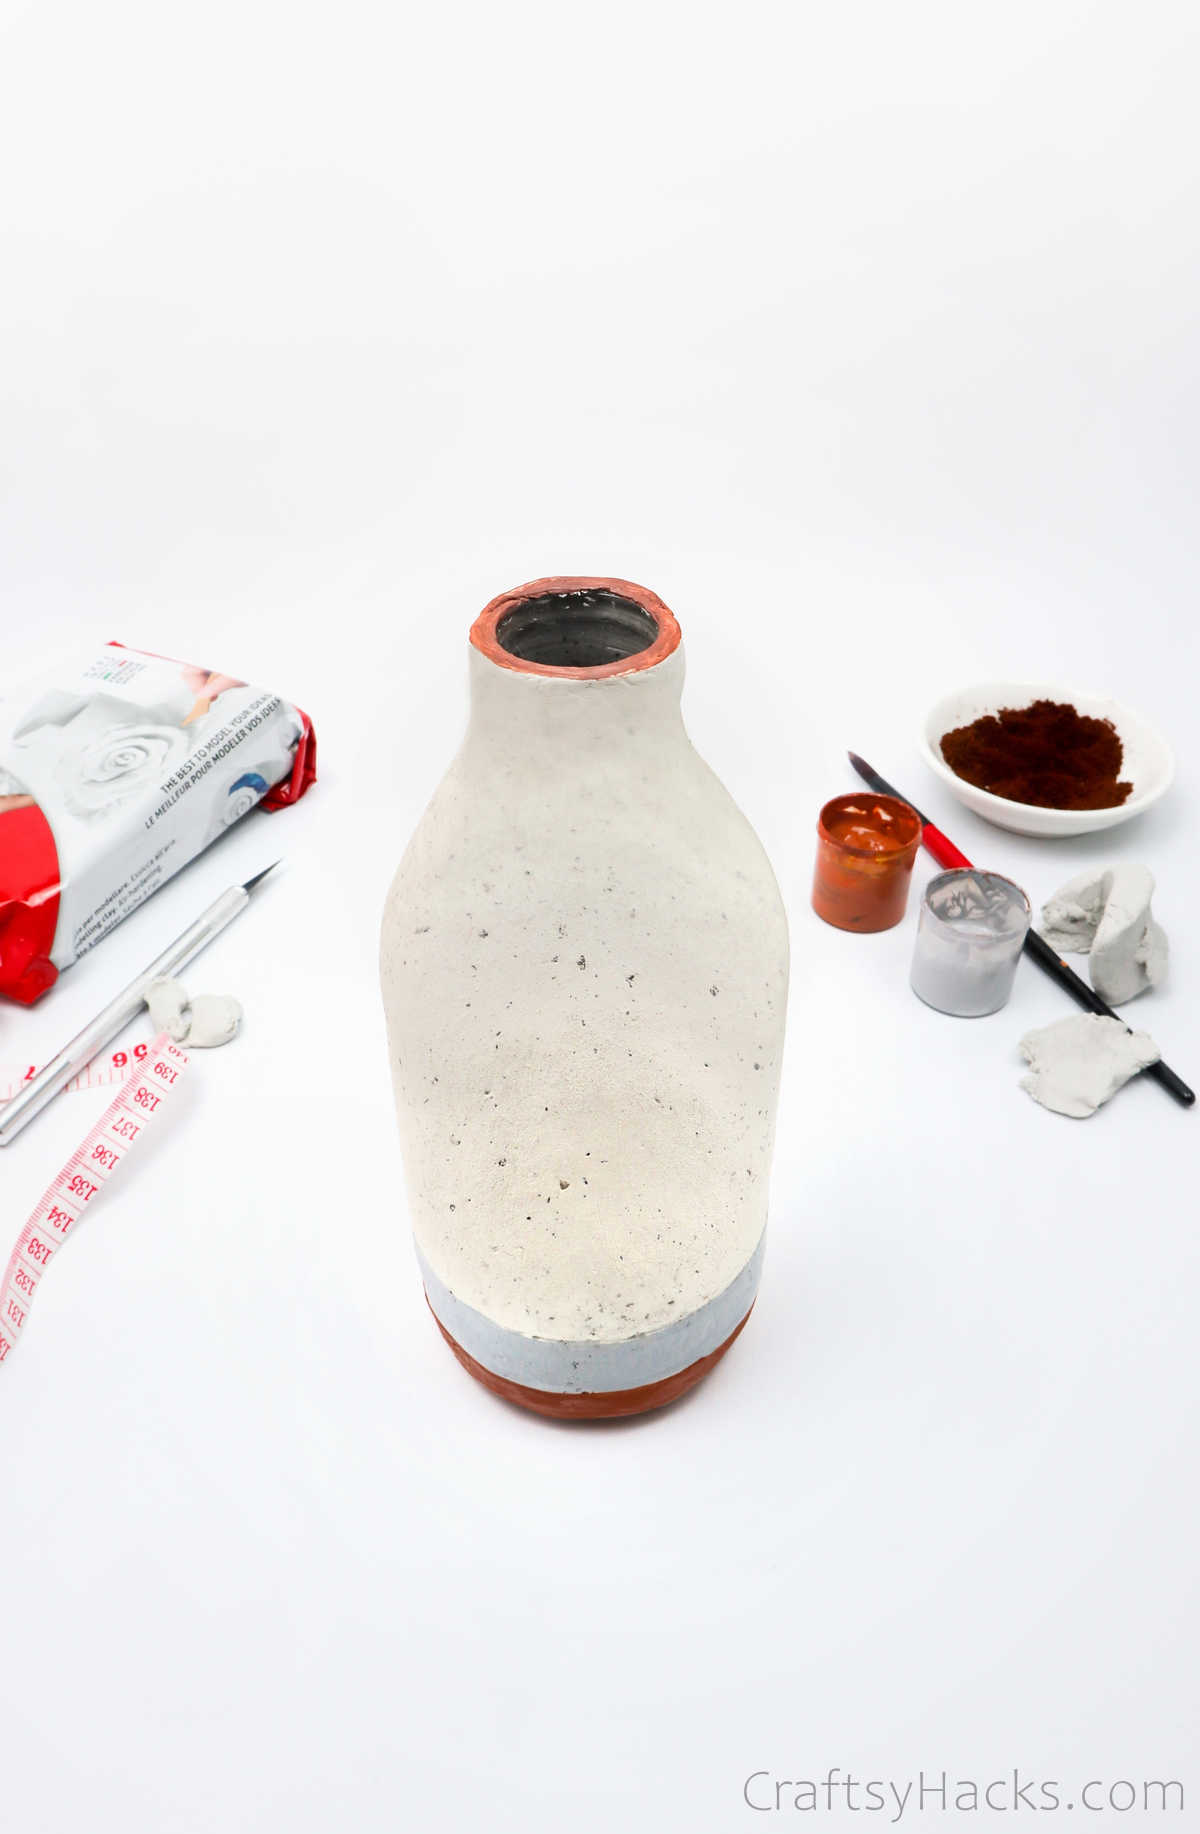
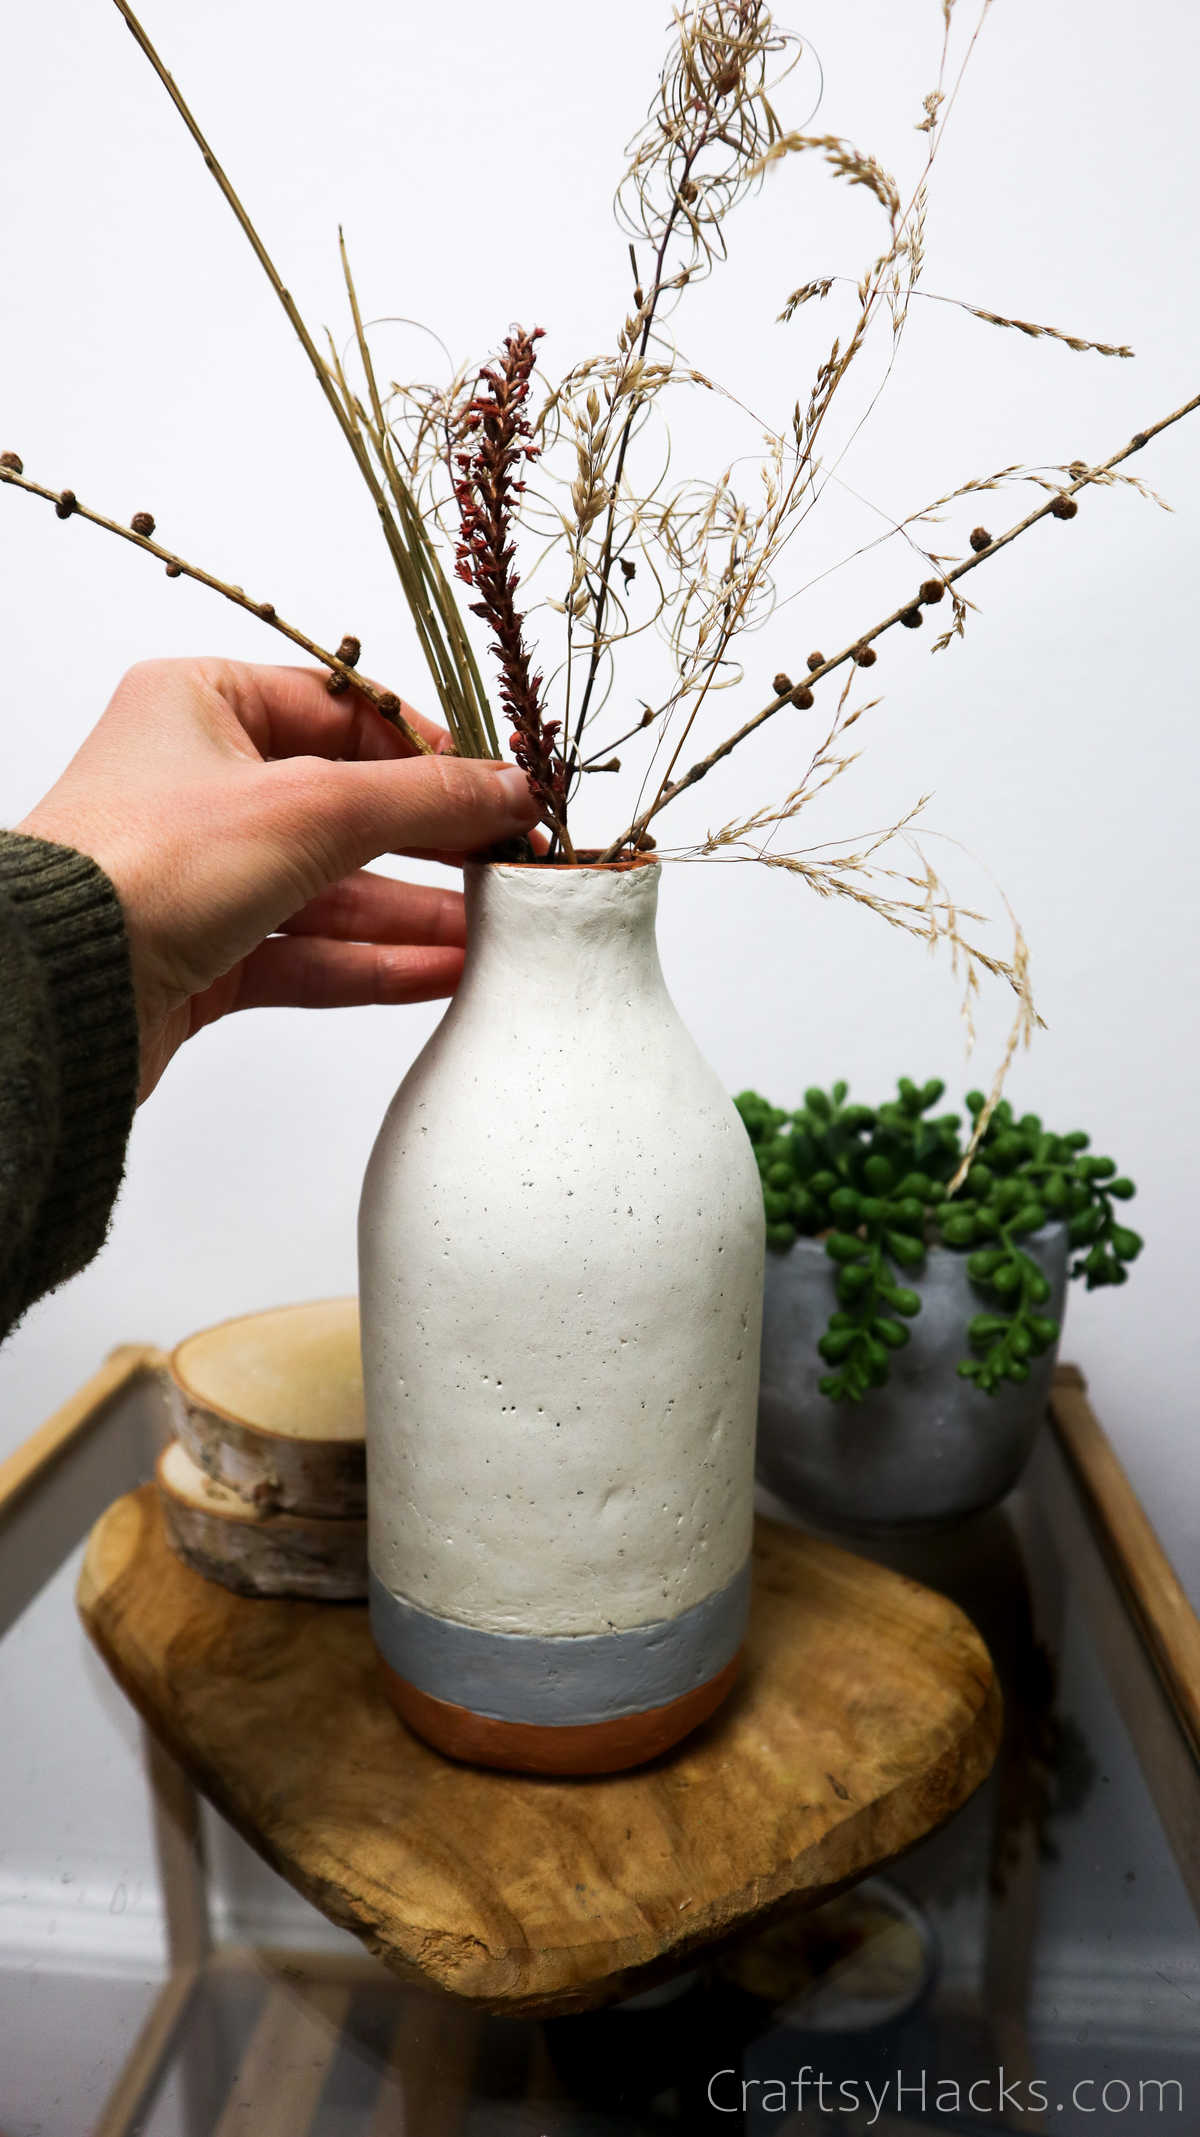
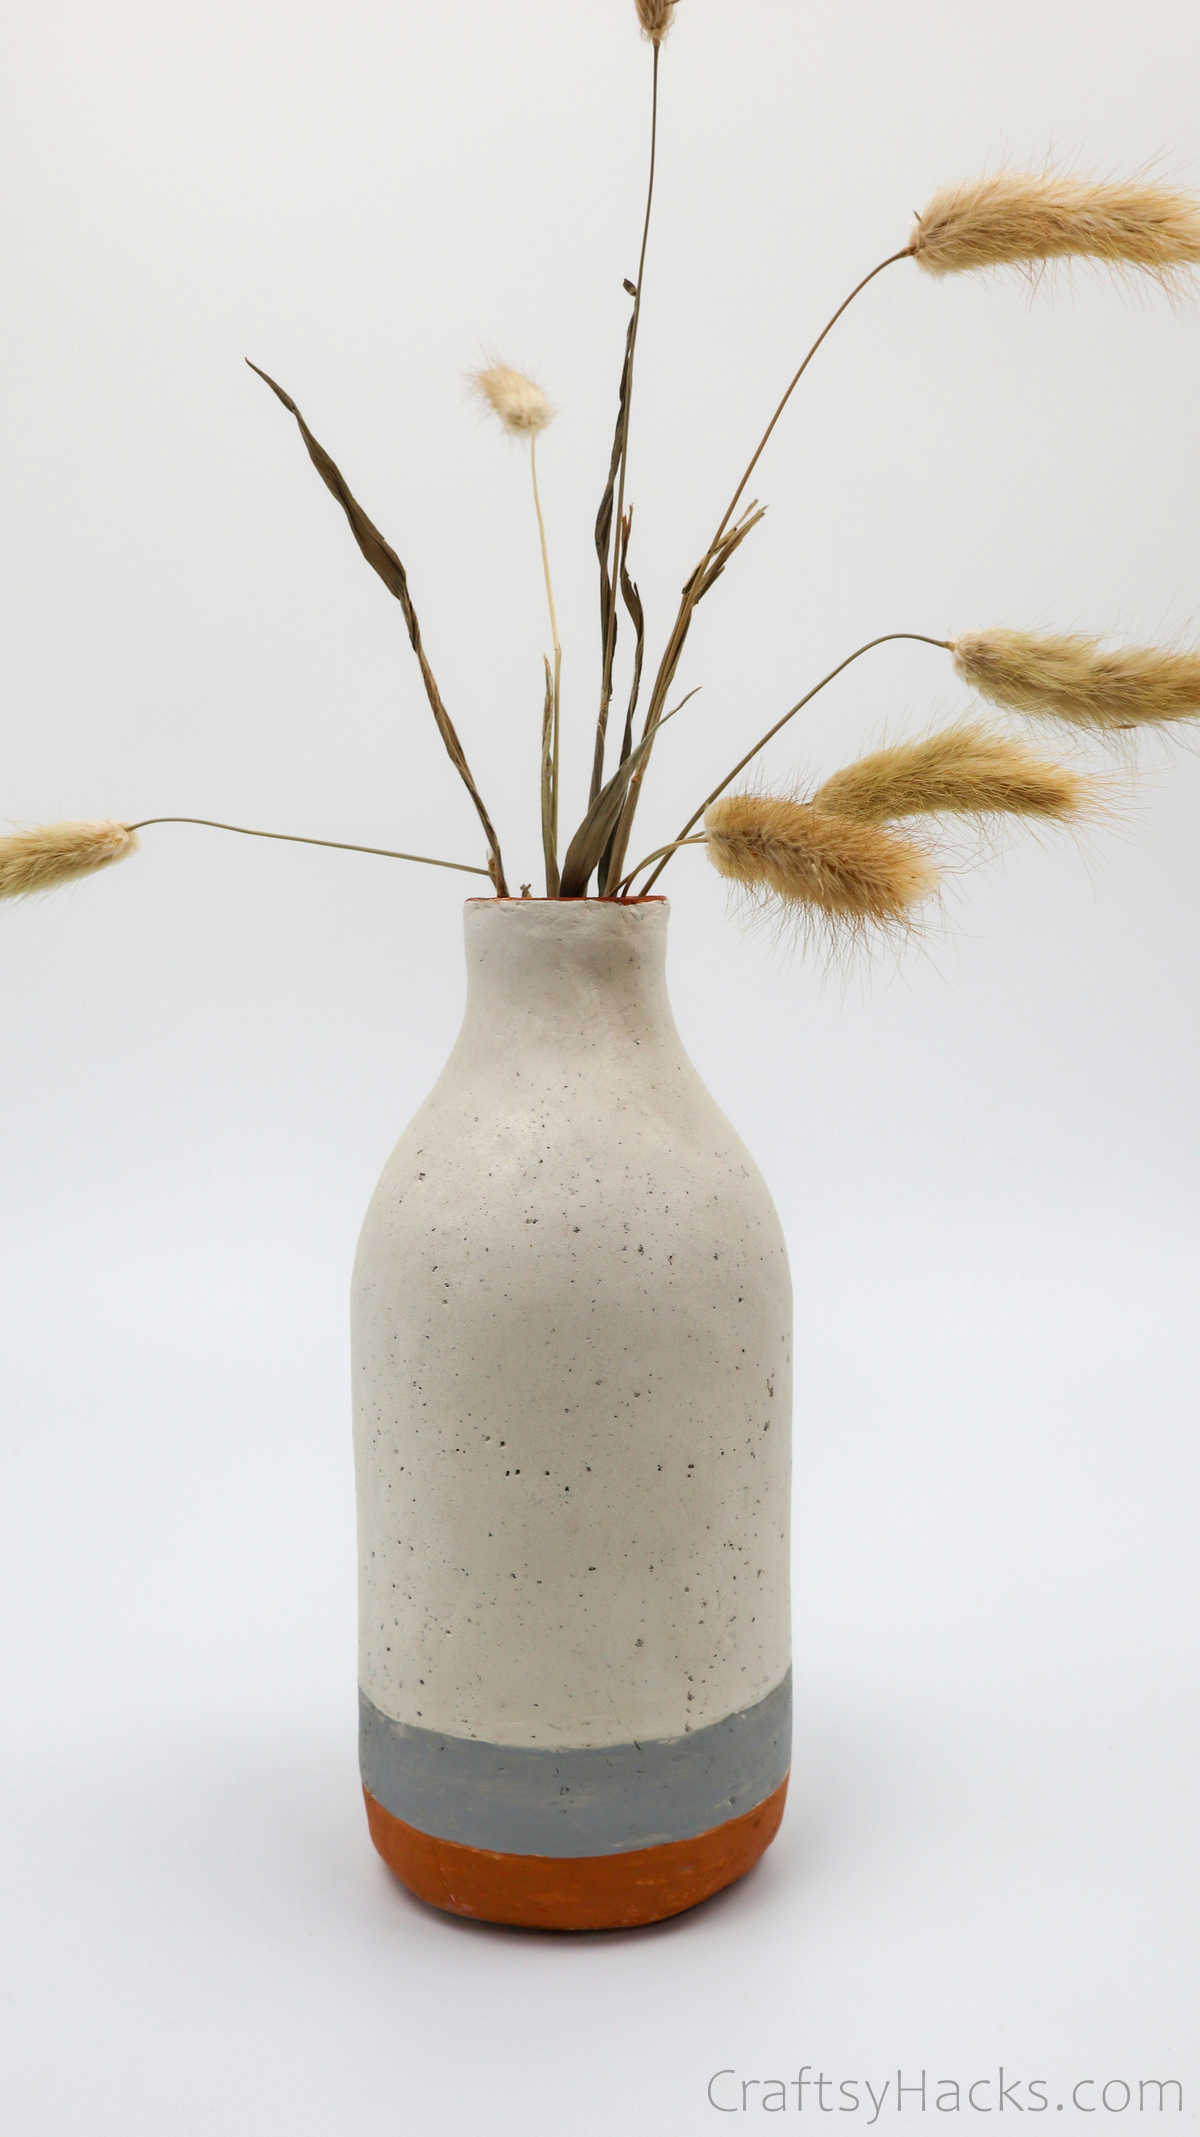
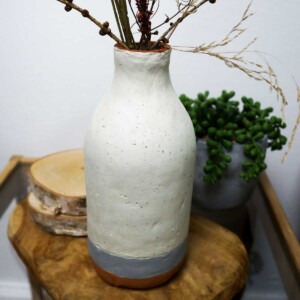
And there you go; your gorgeous DIY bottle vase is ready to use.
How Can I Decorate My Vase?
- You don’t need me to tell you how you can decorate your vase. But, if you’re looking for creative inspiration, then here are a few ideas:
- Use an embosser, stamp, or other texture-imprinting items(like a leaf, a ball chain, or flowers) to create a pattern on the clay. You’ll have a gorgeous textured vase that you can paint over and jazz up.
- Use embellishments, ornaments, or other similar bits and ends to decorate the vase.
- Consider drawing over the vase to create your own unique design.
- How about some glitter to add light and sparkle?
Other Crafts You Might Like Making
- Upcycled Tin Cans
- How to Make Scented Candles
- 37 Crafts for Men
- 37 Crafts to Make and Sell
- 20 DIY Dollar Tree Vases
- DIY Leaf Candle Holder
- Yarn-Wrapped Glass Vase
- 47 Crafts for Adults
- 40 Crafts for Teens
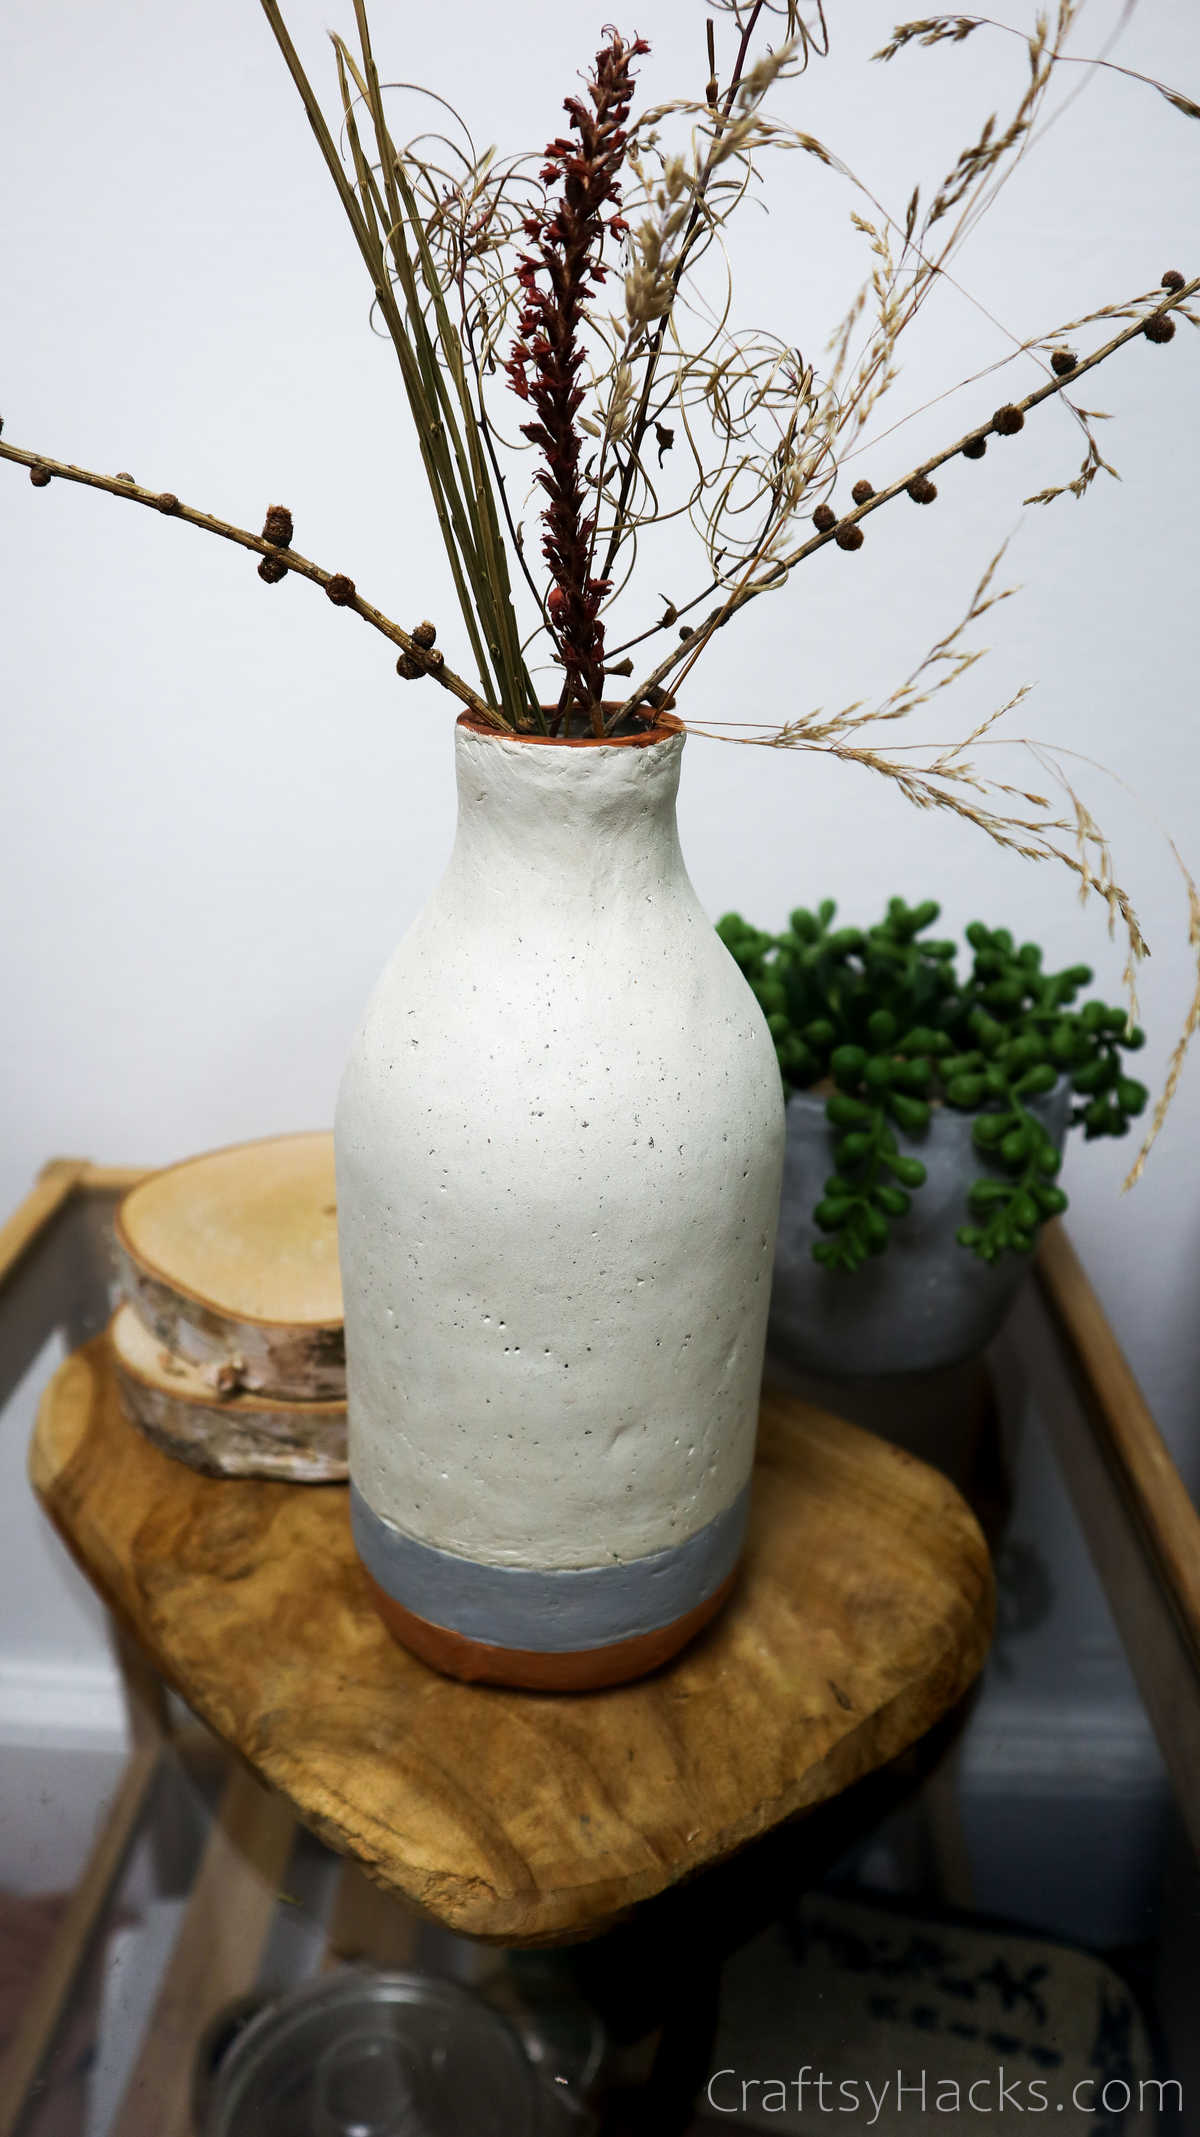
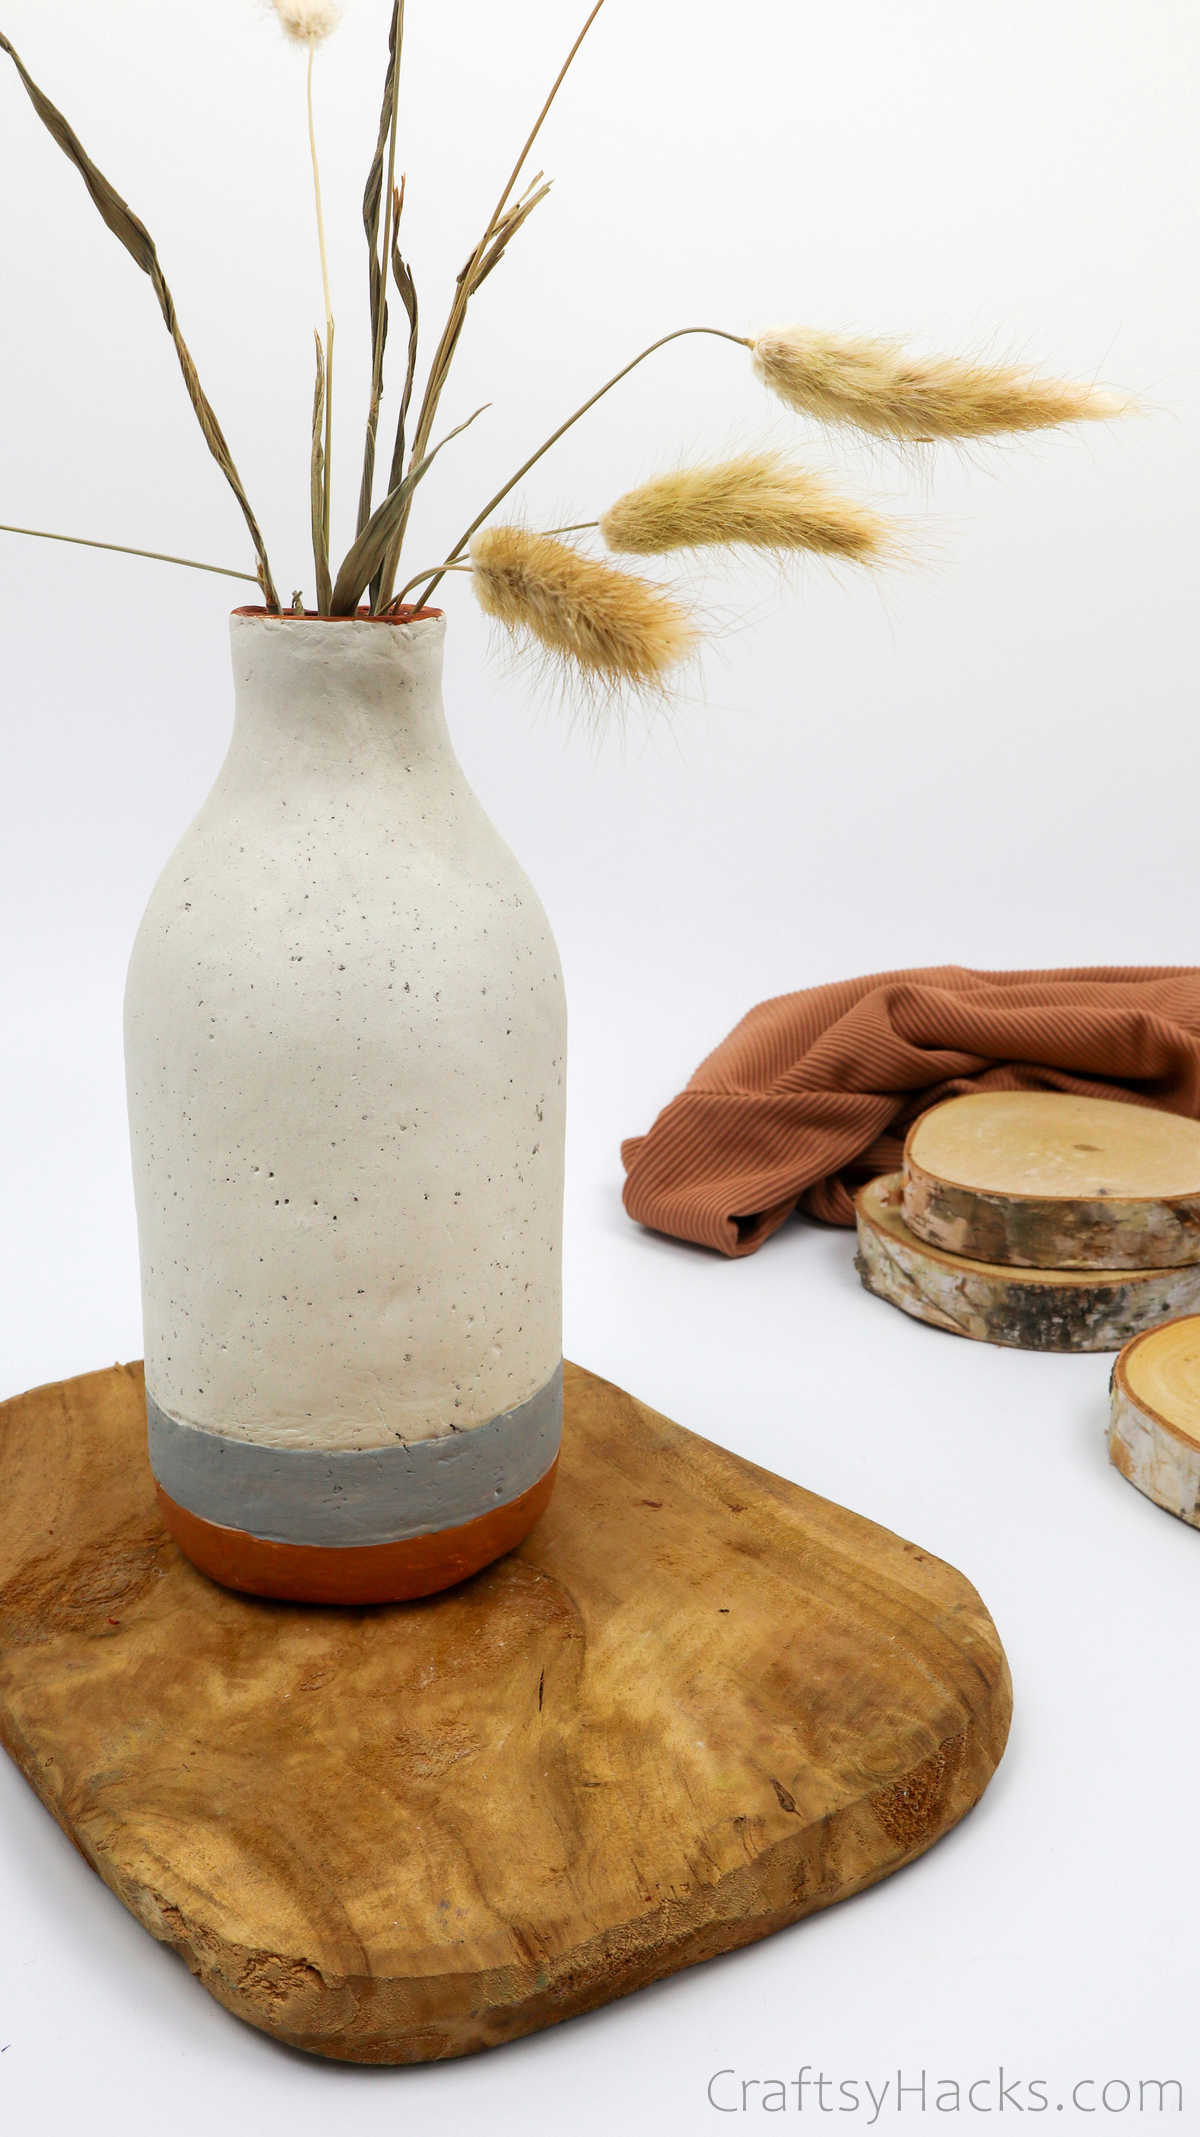
How Do I Display the Vase?
Here’s a list of ideas for you to consider if you’re wondering where and how to best display your vase:
- Place it on a shelf or inlet in the wall somewhere at the entrance of your home so you can see it as soon as you walk in.
- Depending on the size of the bottle and if it is big enough, you can use it as a floor vase.
- Pair the vase with some contemporary art and decor, or at least something that can complement it.
- Place it in a corner or nook on your kitchen counter or on your island.
- Consider using it to jazz up the space over your kitchen cabinets.
- Finally, the vase can be a lovely addition to your dining table—just fill it up with flowers and use it as a centerpiece.
DIY Bottle Vase (Step-by-Step Tutorial)
Video Tutorial
Equipment
- Rolling pin (or another glass bottle)
- Tape measure
- Precision knife
- Pencil
Materials
- Glass bottle
- Air drying clay
- Ground coffee
- Acrylic paints grey and brown
Instructions
- Gather all your supplies to get started.
- Cut a portion of the clay and promptly repack the remaining portion in an air-tight container.
- Use your hands to knead the clay to remove any lumps and to make it soft and pliable.
- At this point, you can choose whether you want to speckle your clay or not. If you do, then add a cup of ground coffee powder and knead it into the clay evenly.
- Use a rolling pin or a bottle to roll the clay over a flat surface. Make sure you measure the dimensions of the bottle with a measuring tape to ensure you’ve rolled out enough clay to cover it.
- Next, based on those measurements, use a craft knife to cut out a clay sheet. Set aside the excess clay for now—you’ll need it to make the bottom part for the bottle.
- Place the glass bottle you plan to use over the sheet to check for size. Now, carefully place the sheet over the bottle and roll it around so it is covered.
- Use your craft knife to make notches down one end of the sheet. This will help you blend both ends together more effectively.
- Next, use your fingers to blend the two ends of clay together and smoothen out any line or crack that may indicate that this is where you joined the clay. You can use a drop or two of water—not too much, mind, or the clay can turn sticky—to smooth over any cracks.
- When you’re working with the neck and mouth of the bottle, you’ll need to mold the clay into the curves. Again, use a drop of water to smoothen it out.
- Also, cover the rim with clay too. You can use your craft knife to cut away any excess bits at the rim and also even it out.
- To make the ‘bottom’ of the bottle, take the clay you set aside earlier and flatten it out with a rolling pin. Place the bottom of the bottle over it and use a knife to cut the clay around the bottles.
- Flip the bottle over with the rin balanced on your work surface as you blend the clay into the bottom and sides of the bottle. Use water to smoothen out any cracks.
- Allow the clay to dry for 48-72 hours before you start decorating it.
- You can paint the vase any way you like. When you’re done, apply a clear matte or glossy-finish sealant to protect the surface of the clay.
- Once that dries, your DIY bottle vase is ready to use!


