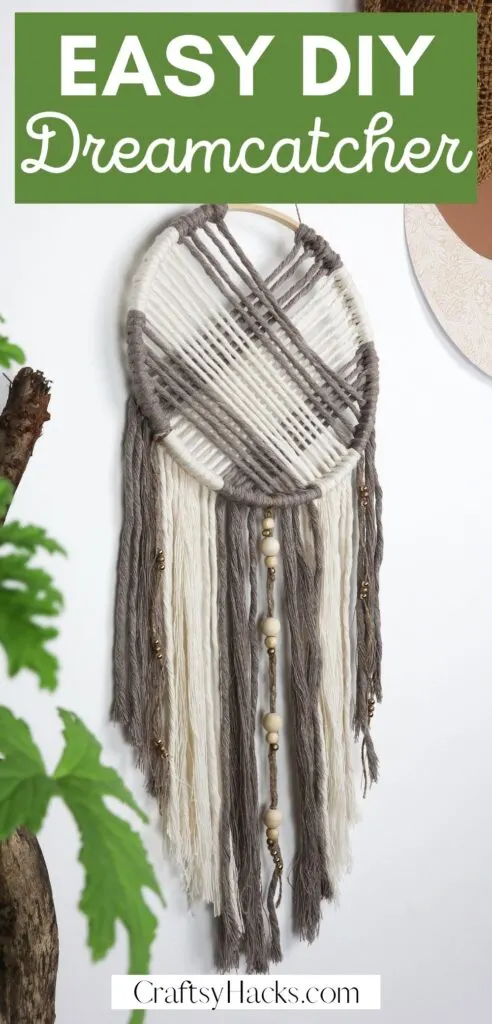
Have you been wanting to make a dreamcatcher of your own? This beautiful decoration will make your room look cozier and catch those nightmares.
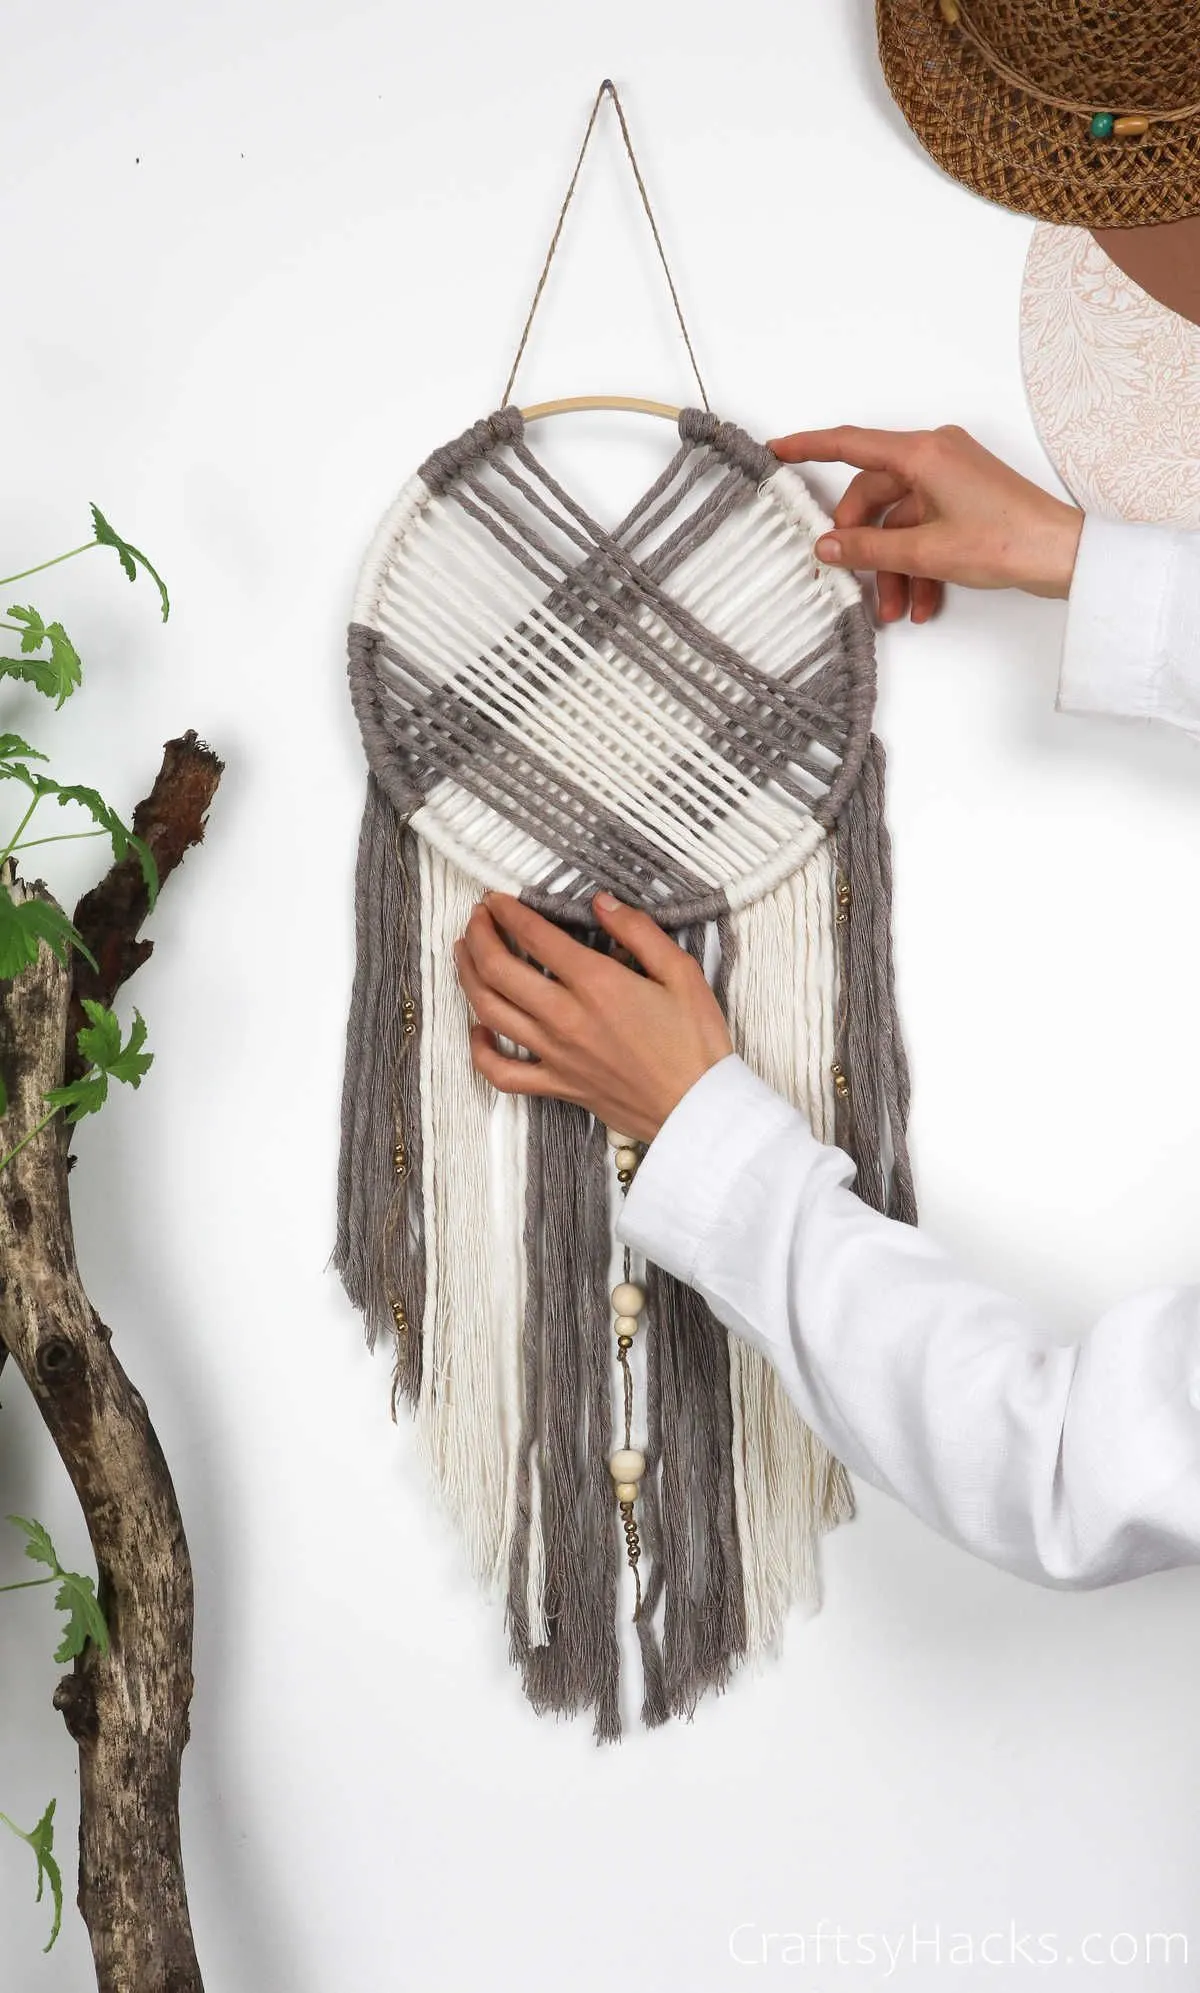
Think back to a couple of years ago when dream catchers were all in rage. You would find a dozen of these colorful dream catchers dangling down by every kid and teenager’s bedpost.
But what do you really know about the symbolism and meaning behind them? They’re not just decorative accessories, you know.
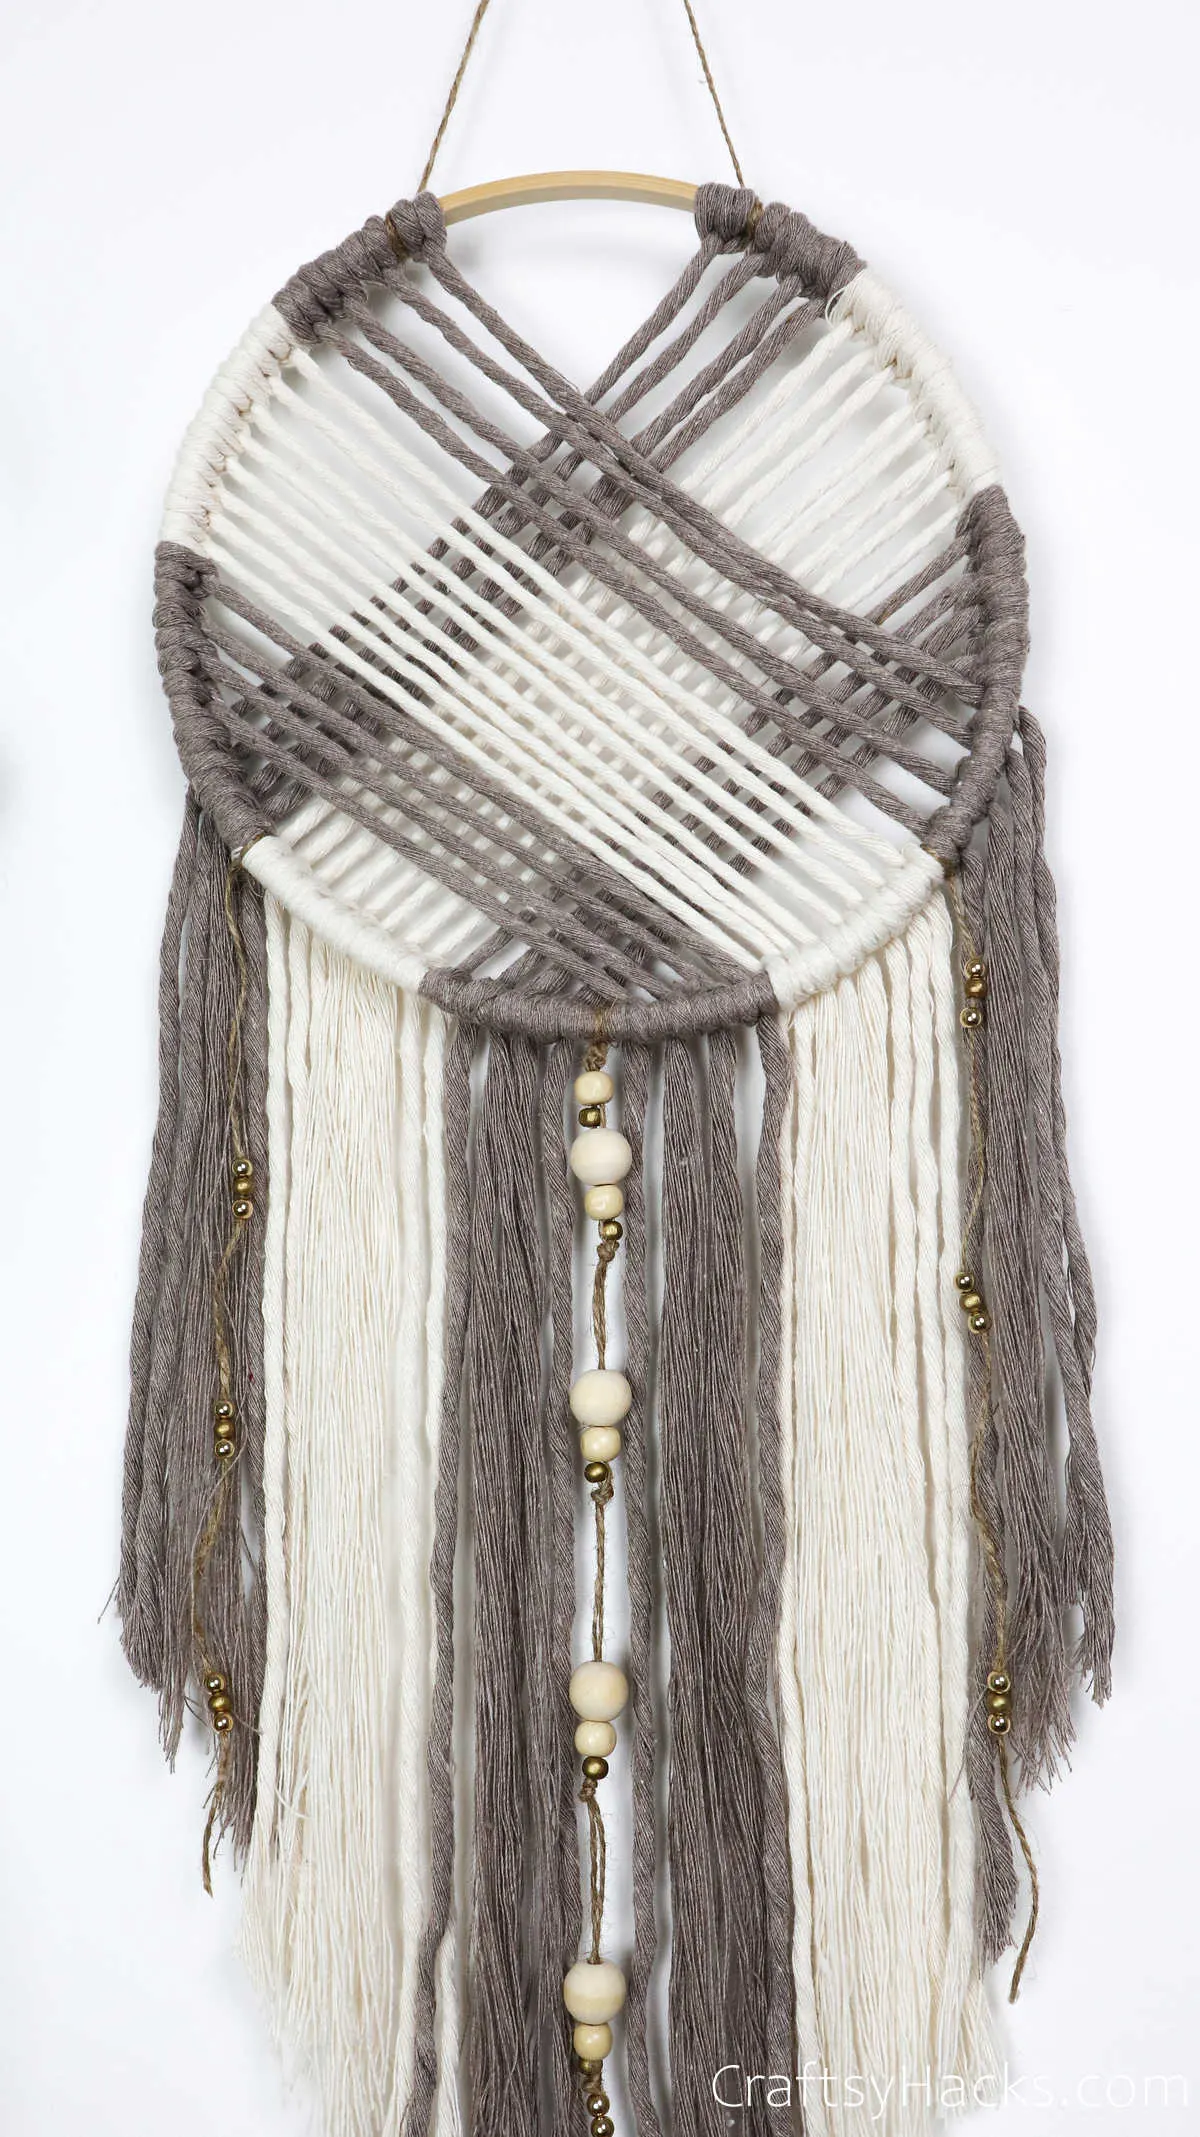
It’s actually one of the most long-standing symbols associated with Native American Literature. The crux of it is this: these talismans, with their circle ring and the woven web in the center, are meant to protect you when you’re at your most vulnerable—asleep.
They’d catch the bad dreams and let the good ones through, ergo the name. So, now that you know about the magic and meaning behind these dreamcatchers let’s take a look at how you can make them!
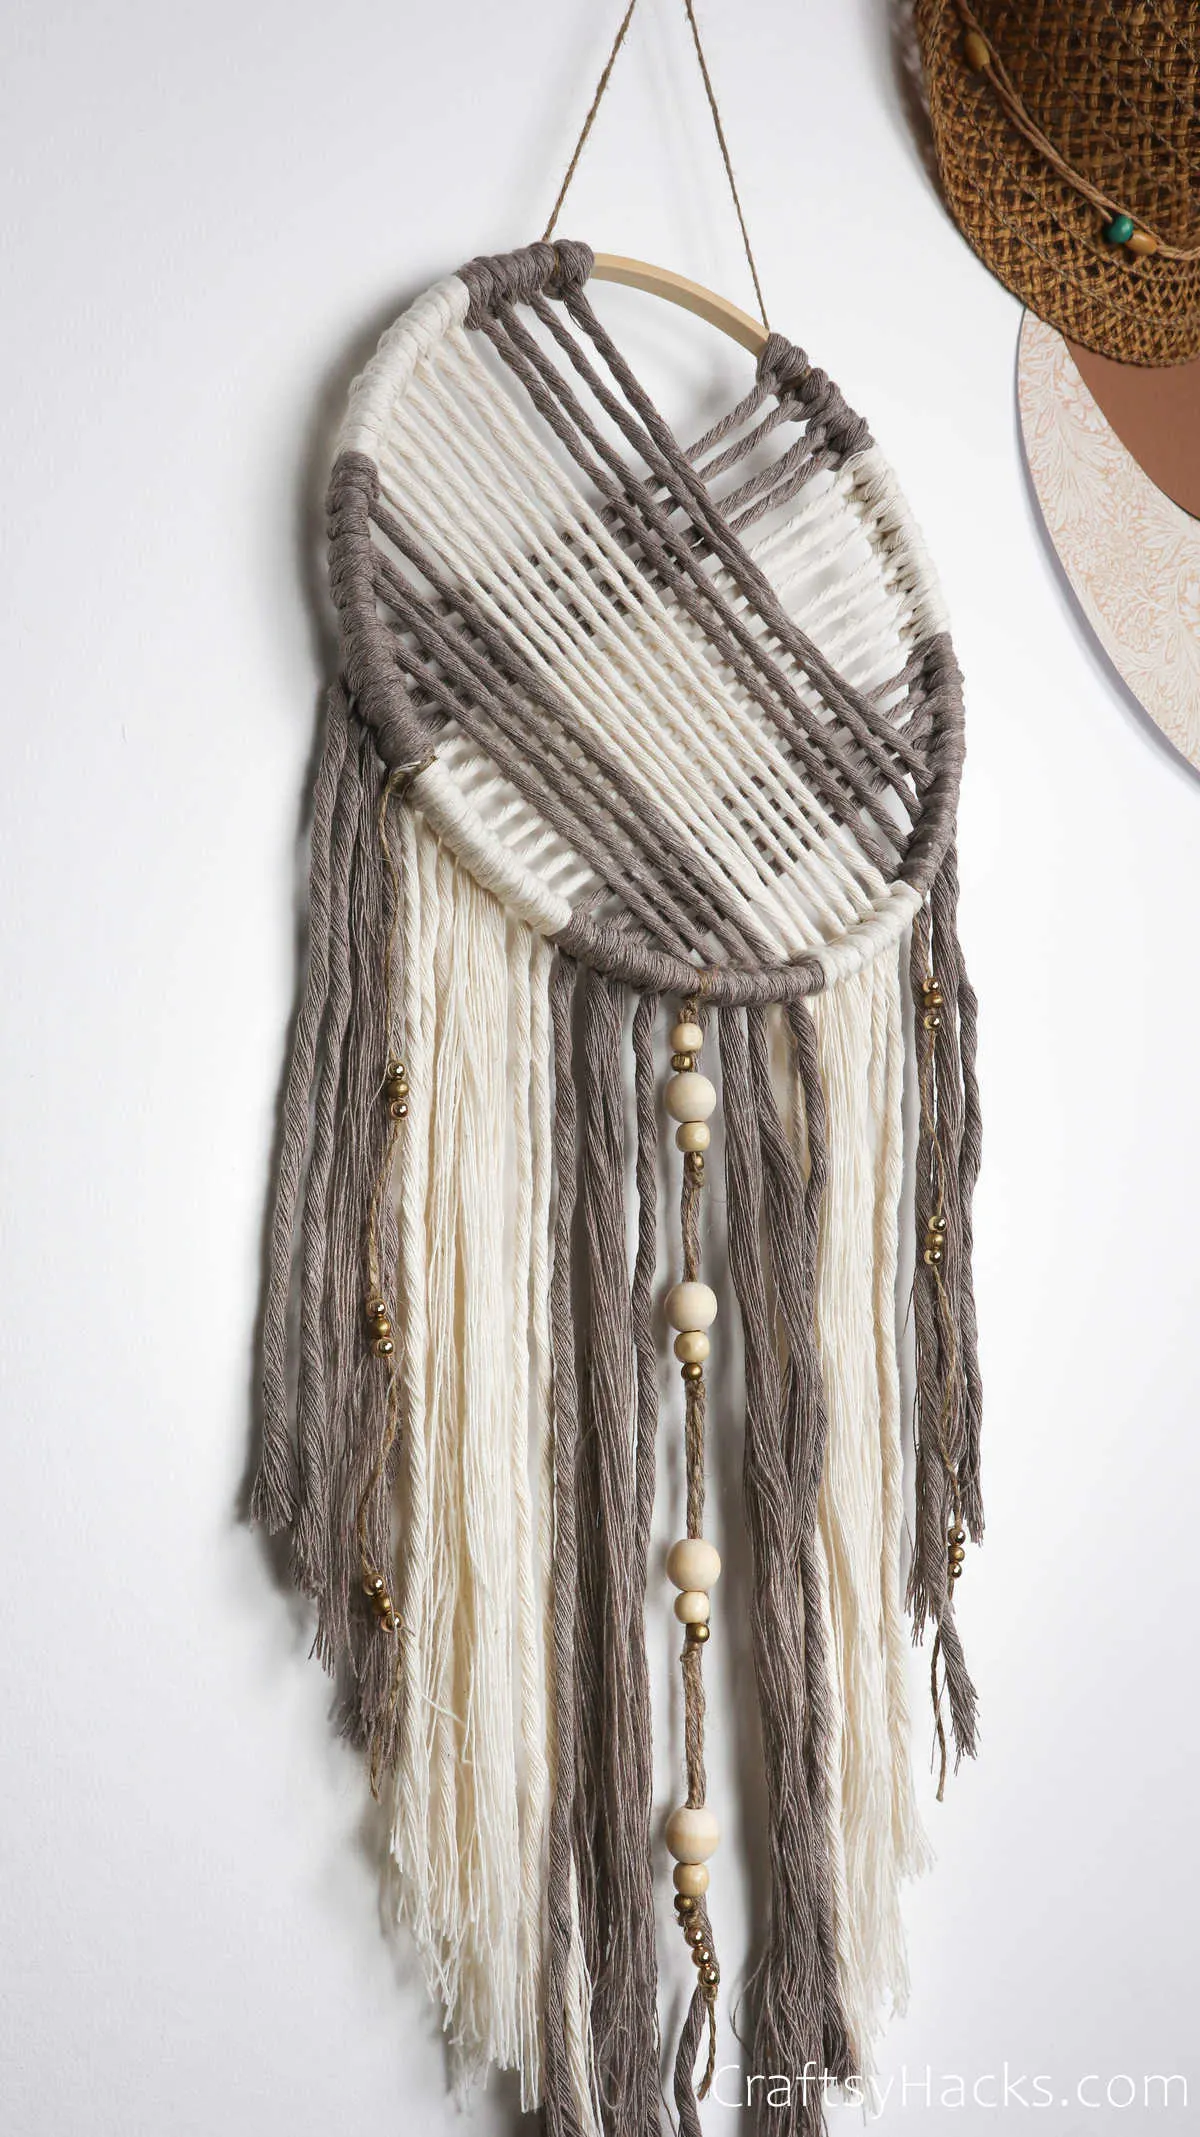
Watch: DIY Dream Catcher
In case you’re not much of a reader, you can watch the full tutorial on a video!
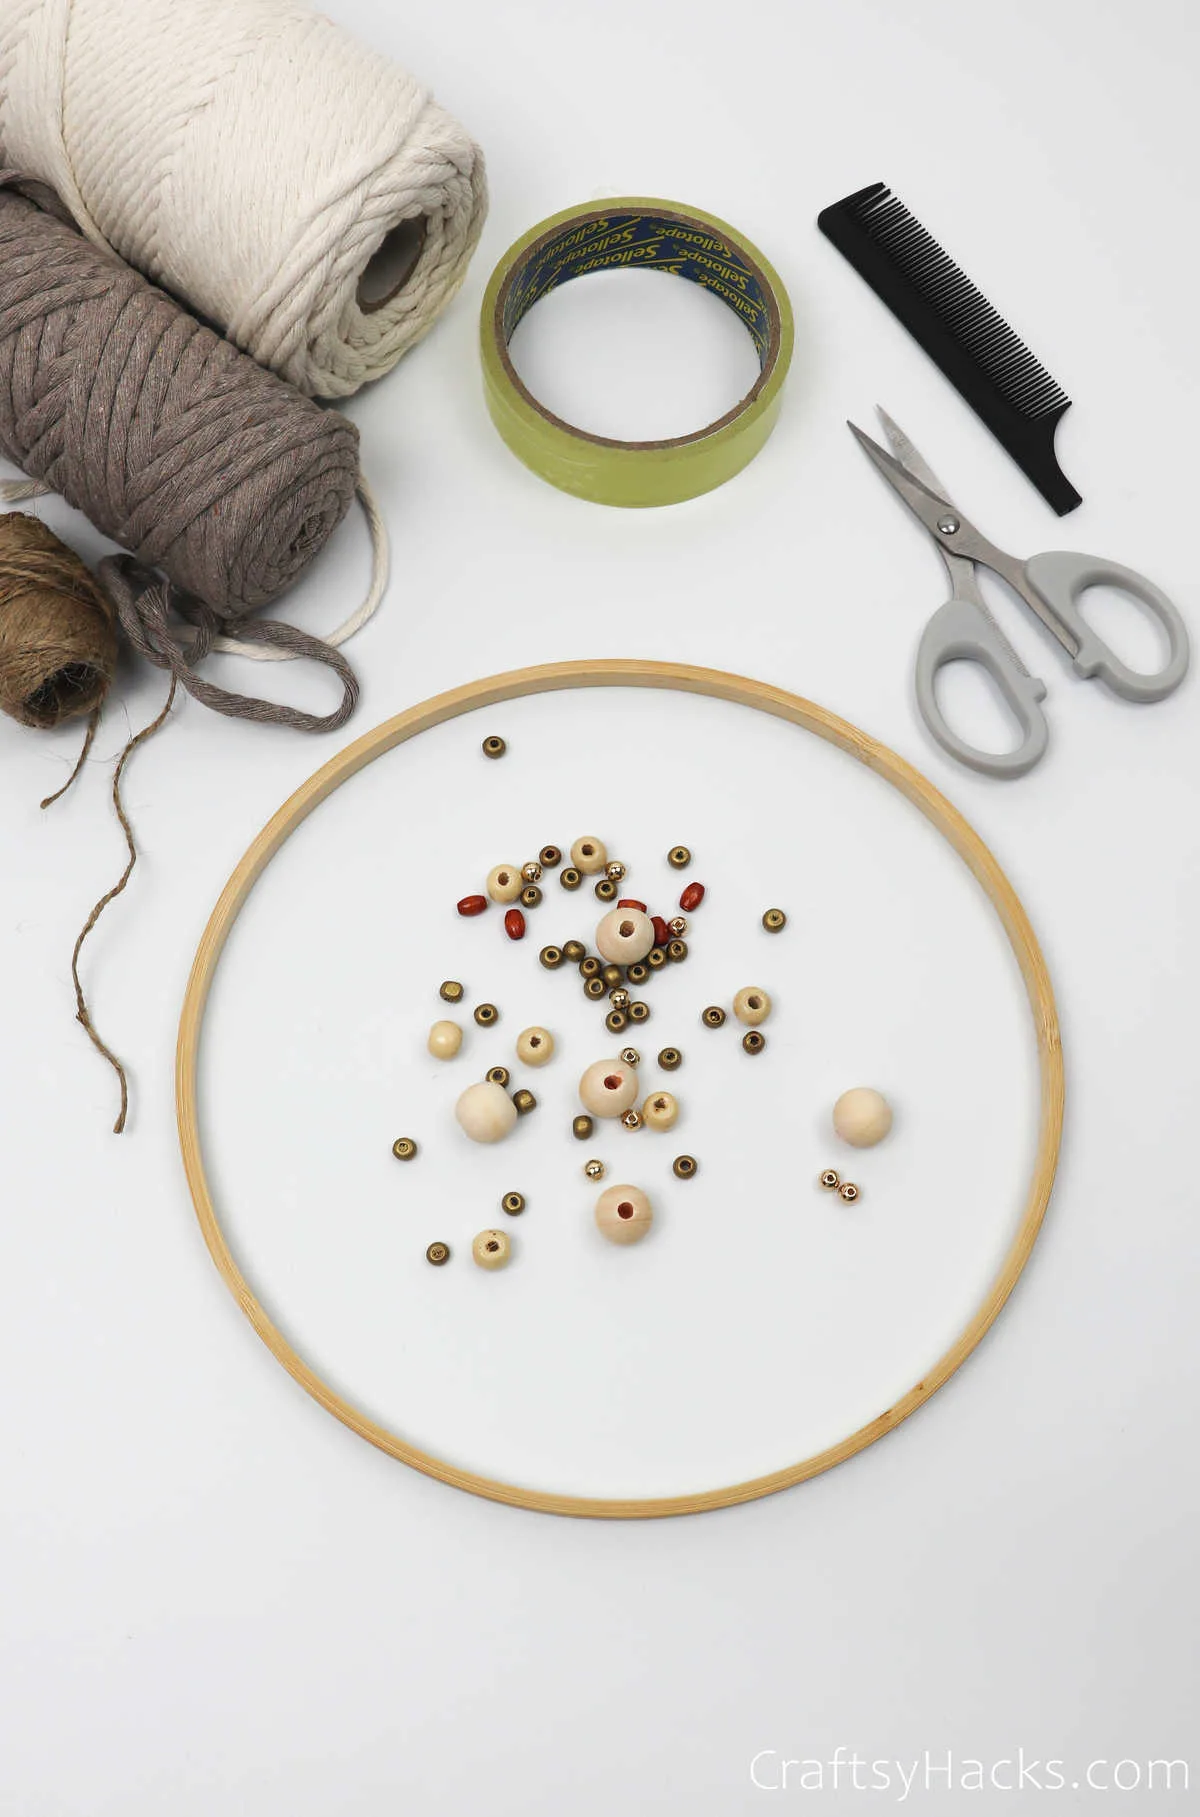
Supplies and Tools for the Dreamcatcher
Here’s a list of everything you’ll need for this project:
- Wood hoop (10″-11″)
- 15’’ thick single twist cotton cord (cream and cappuccino)
- Scissors
- Beads
- Hair combs
- Tape (optional)
- Jute twine (optional)
How to Make a Dreamcatcher?
Here is a step-by-step tutorial on how to make the dreamcatcher from scratch.
Step 1
The first step would be to unravel your cord. Then, measure out about sixty inches before you cut it with your scissors. This will be your first string.
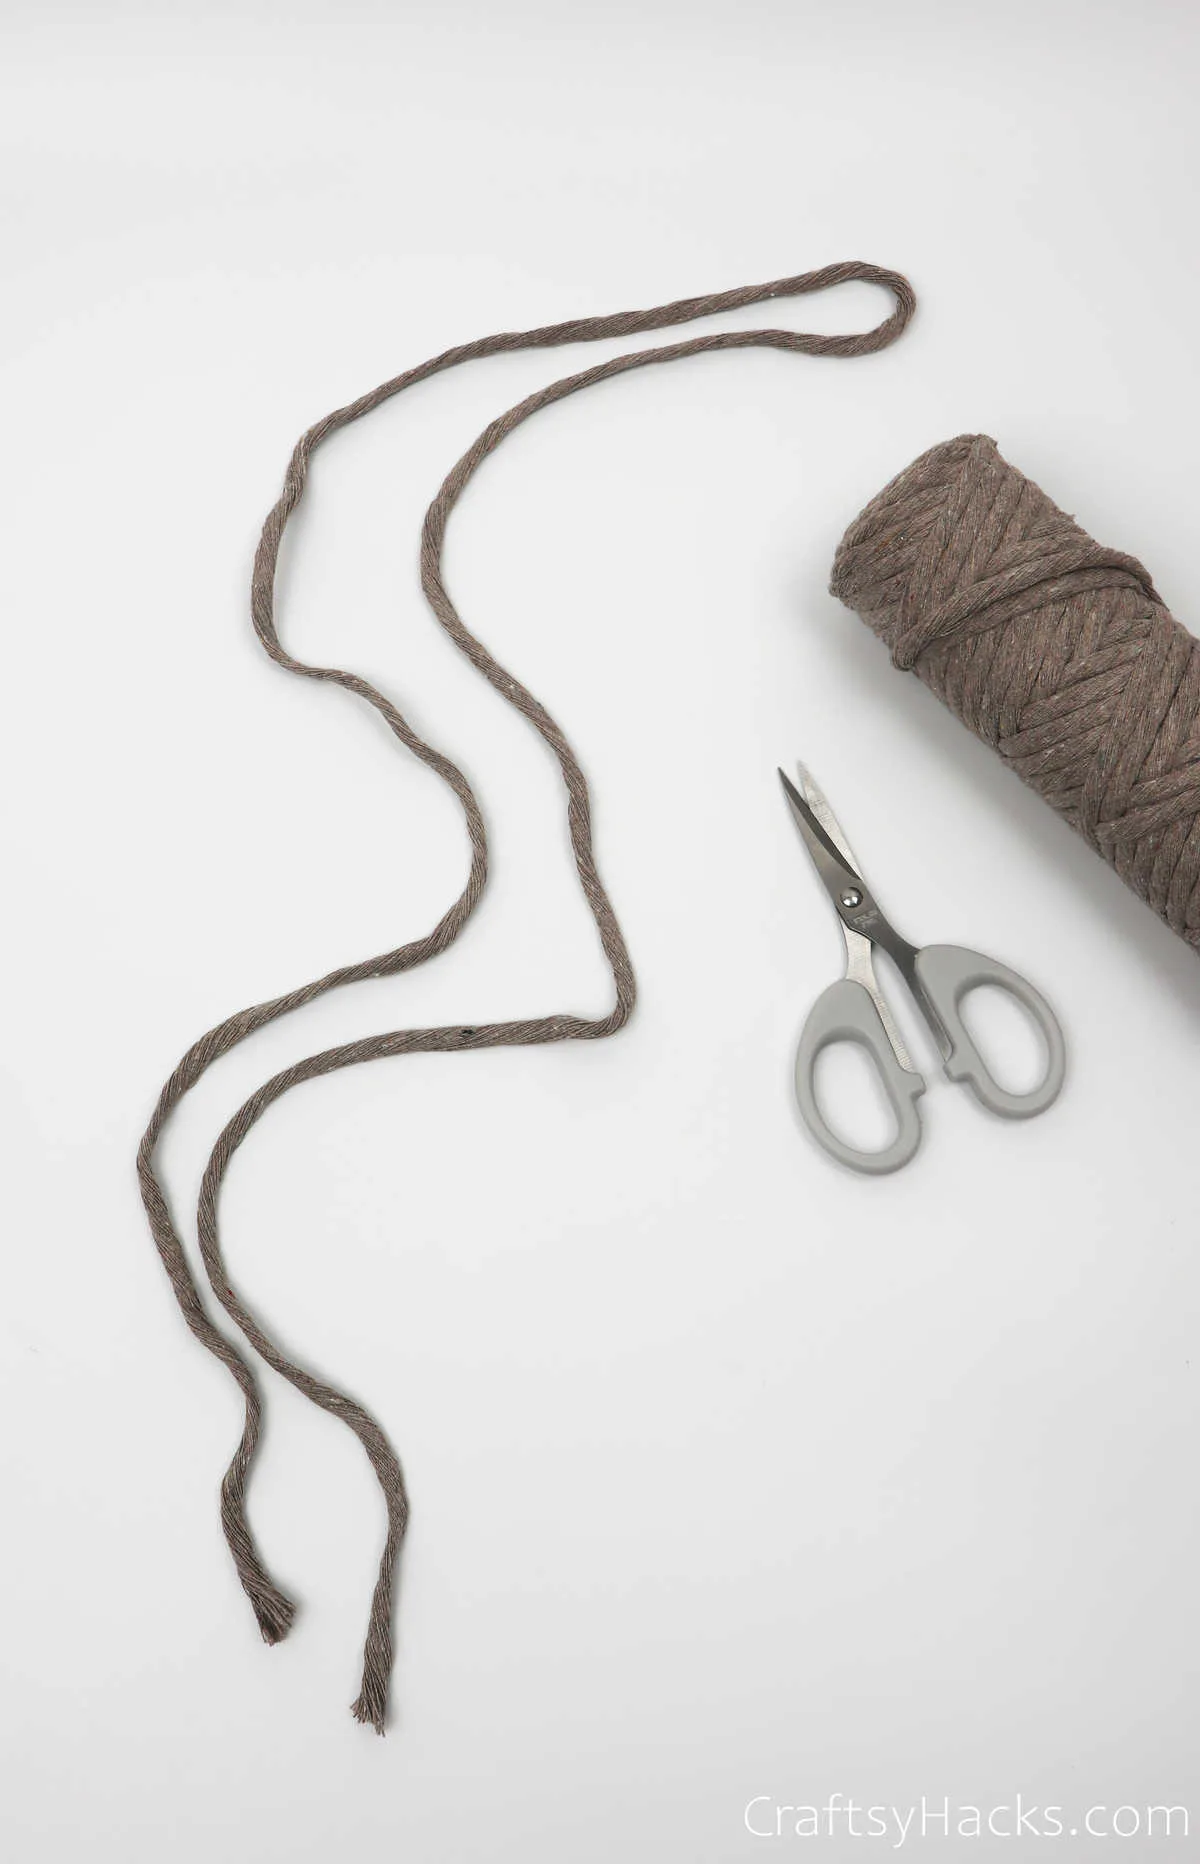
You will need eight of them, each measuring sixty inches. Lay them down, as indicated.
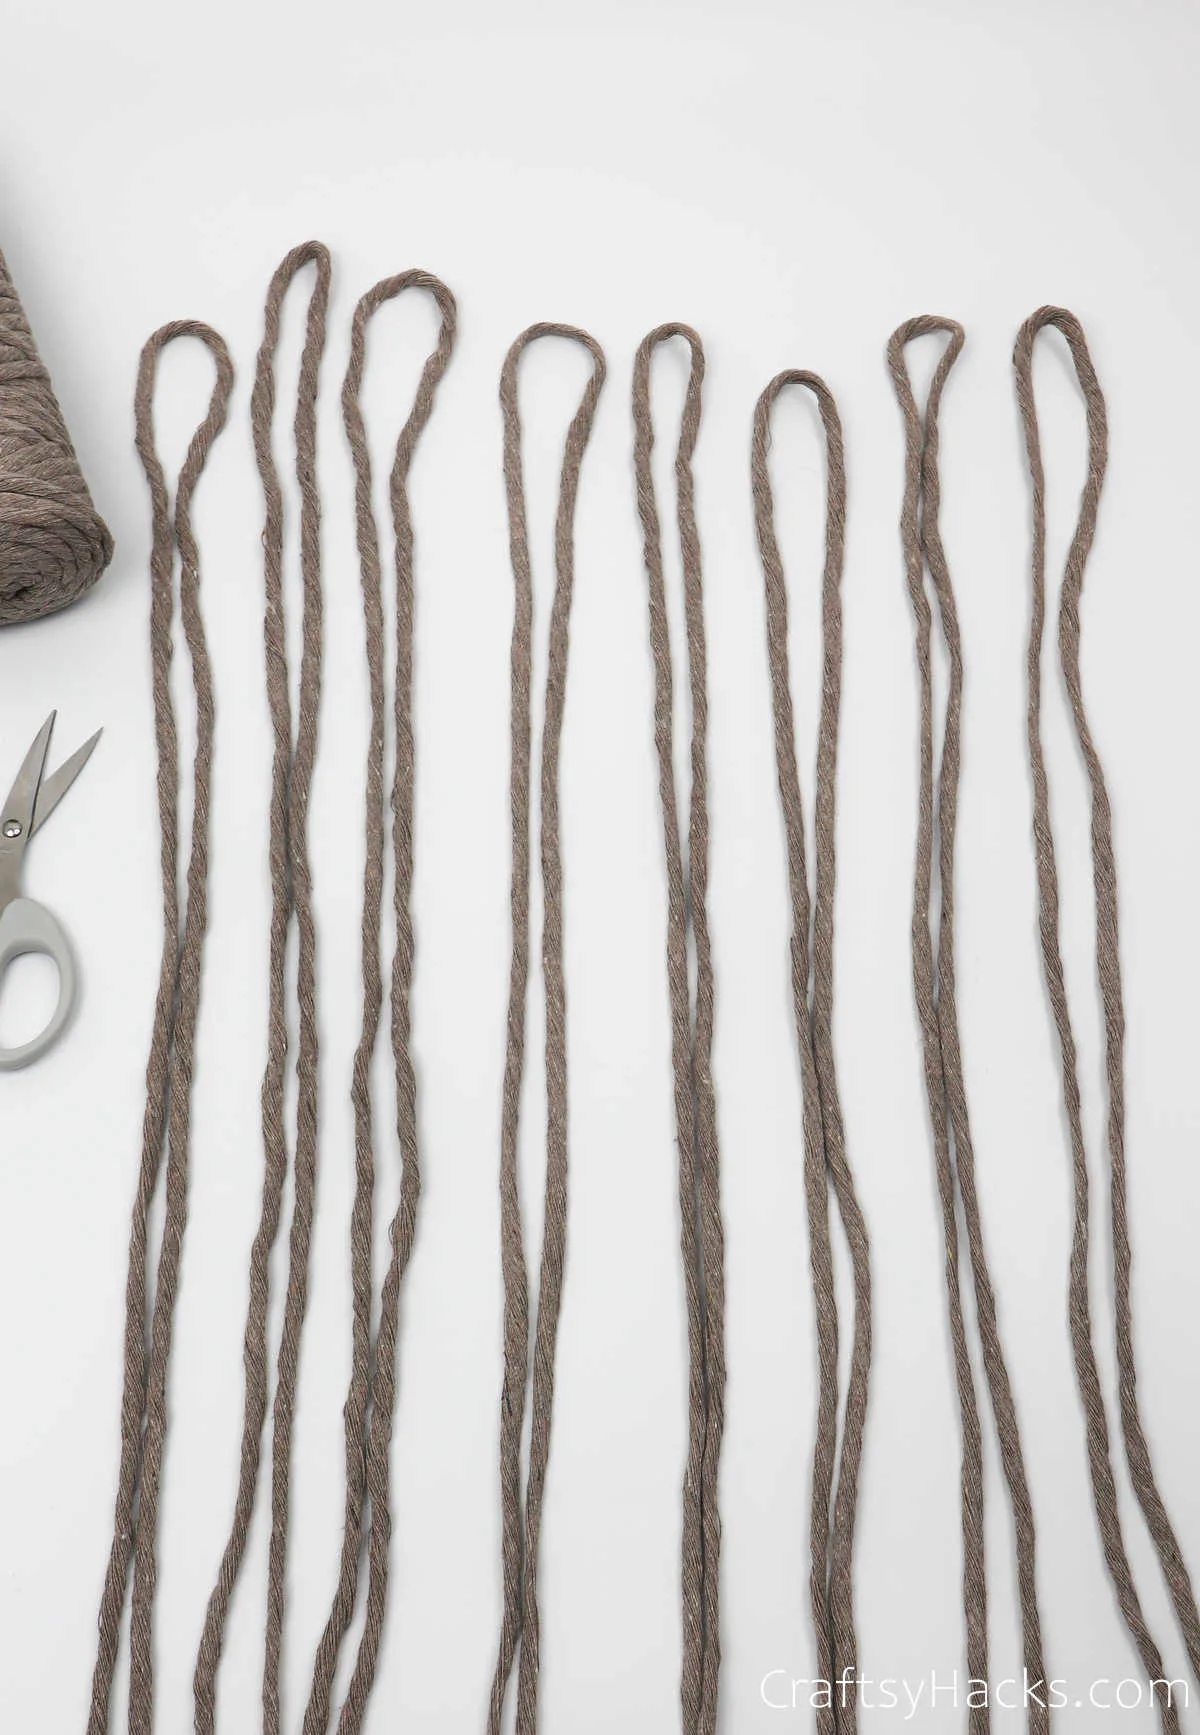
Step 2
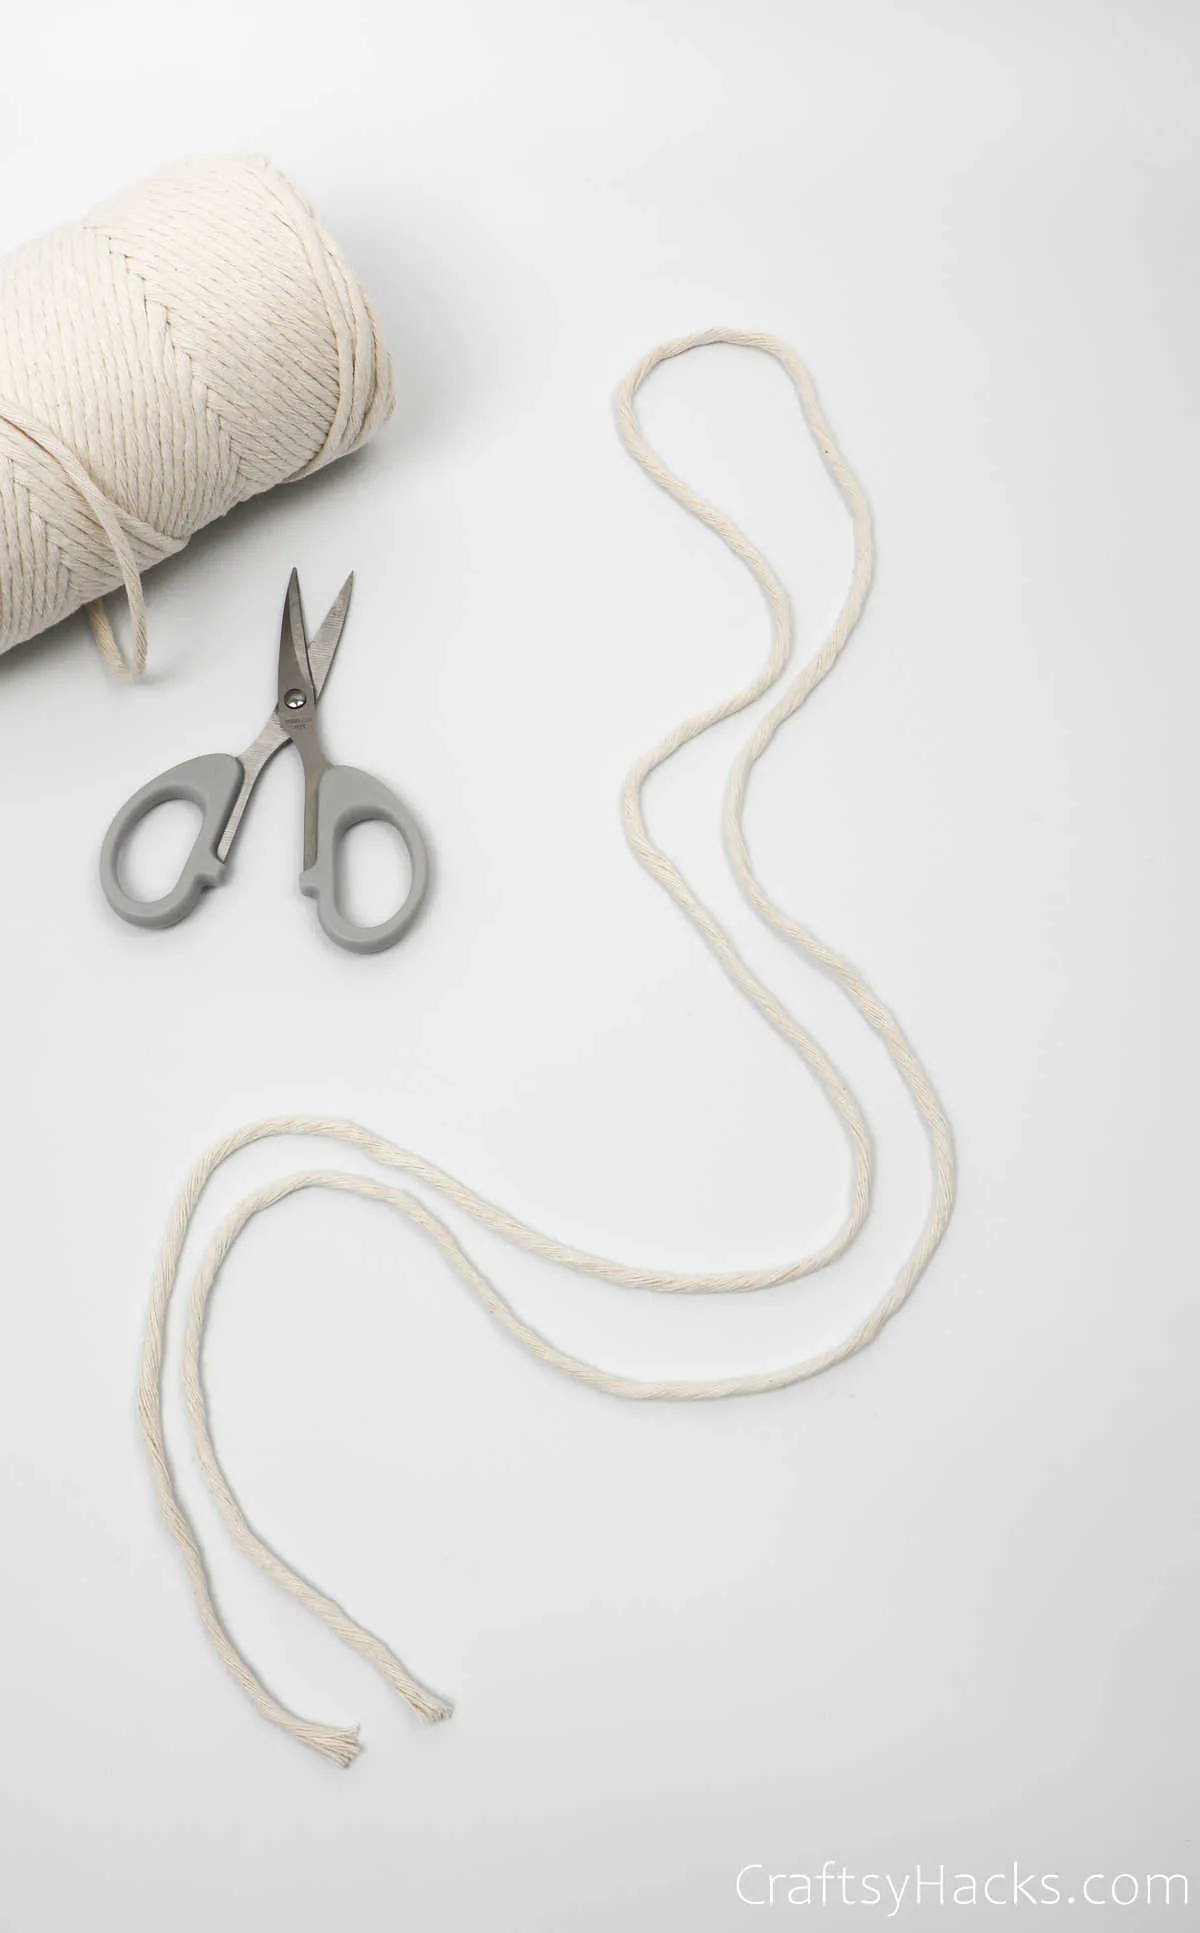
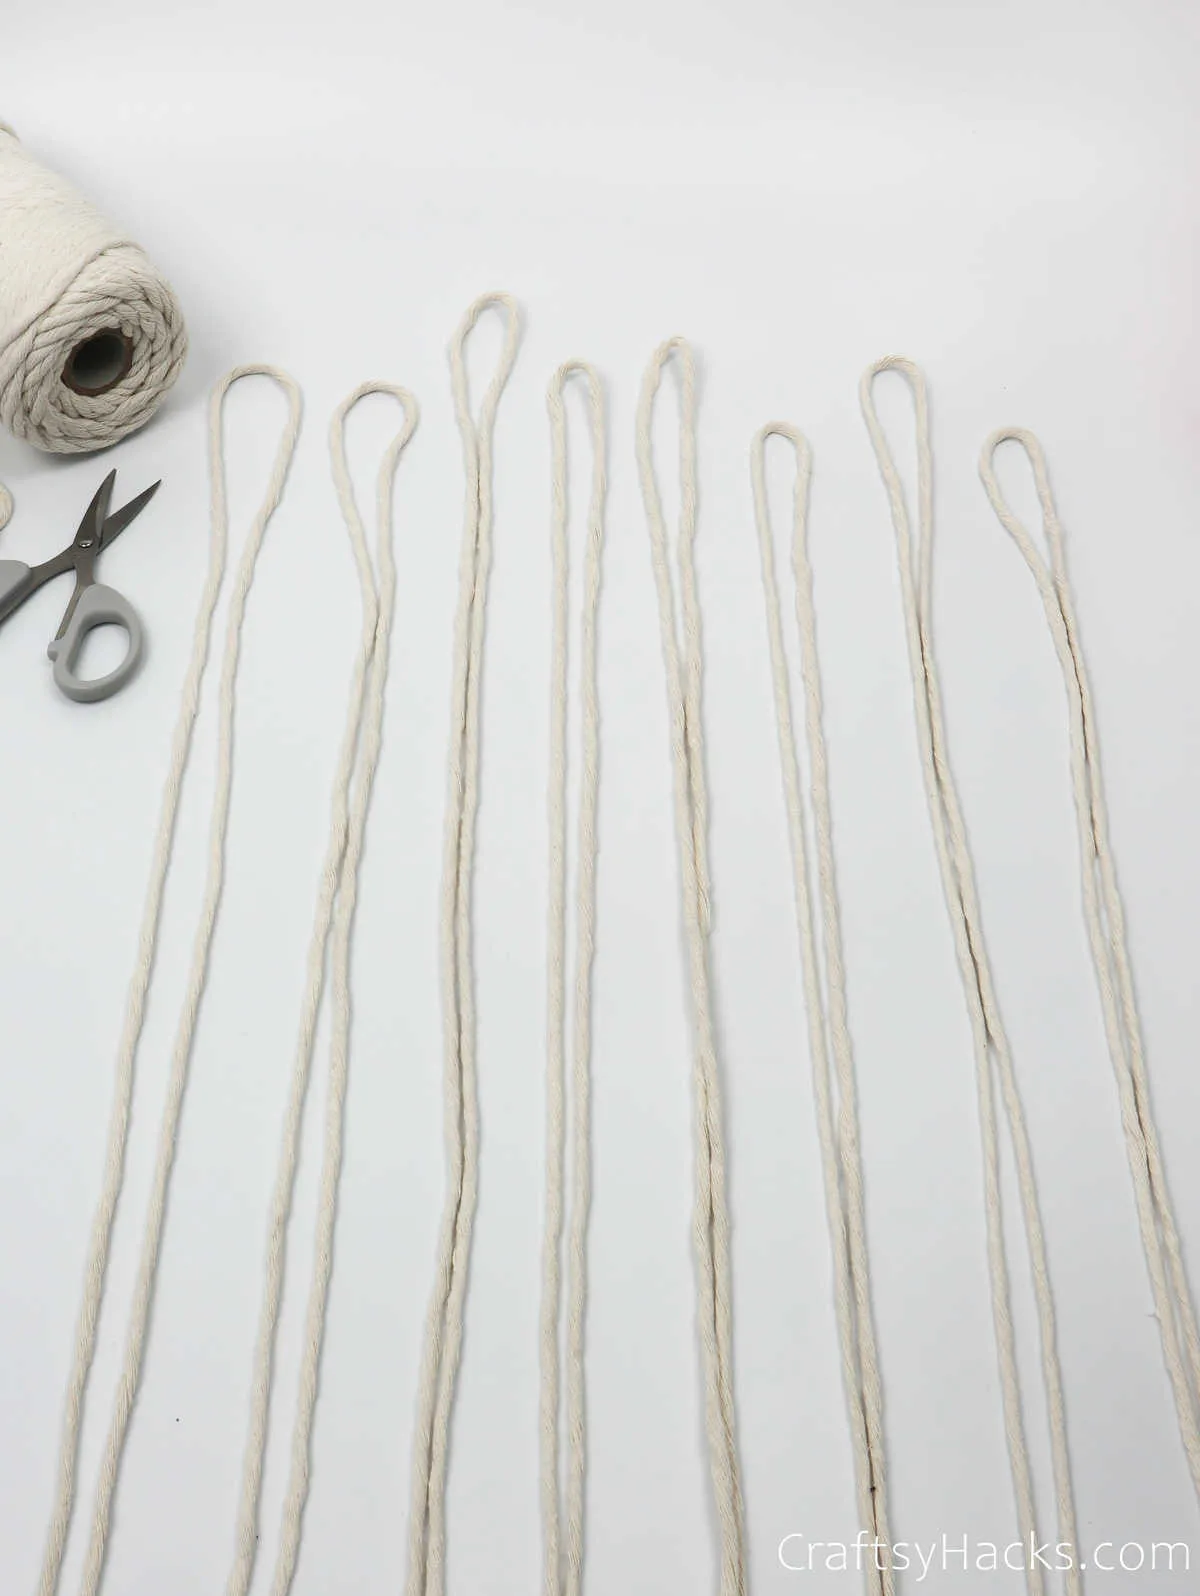
You’ll need to repeat step 1 with each color of cord you’re using. That means that for this project, you’ll have eight cappuccino-colored cords and eight cream ones.
Step 3
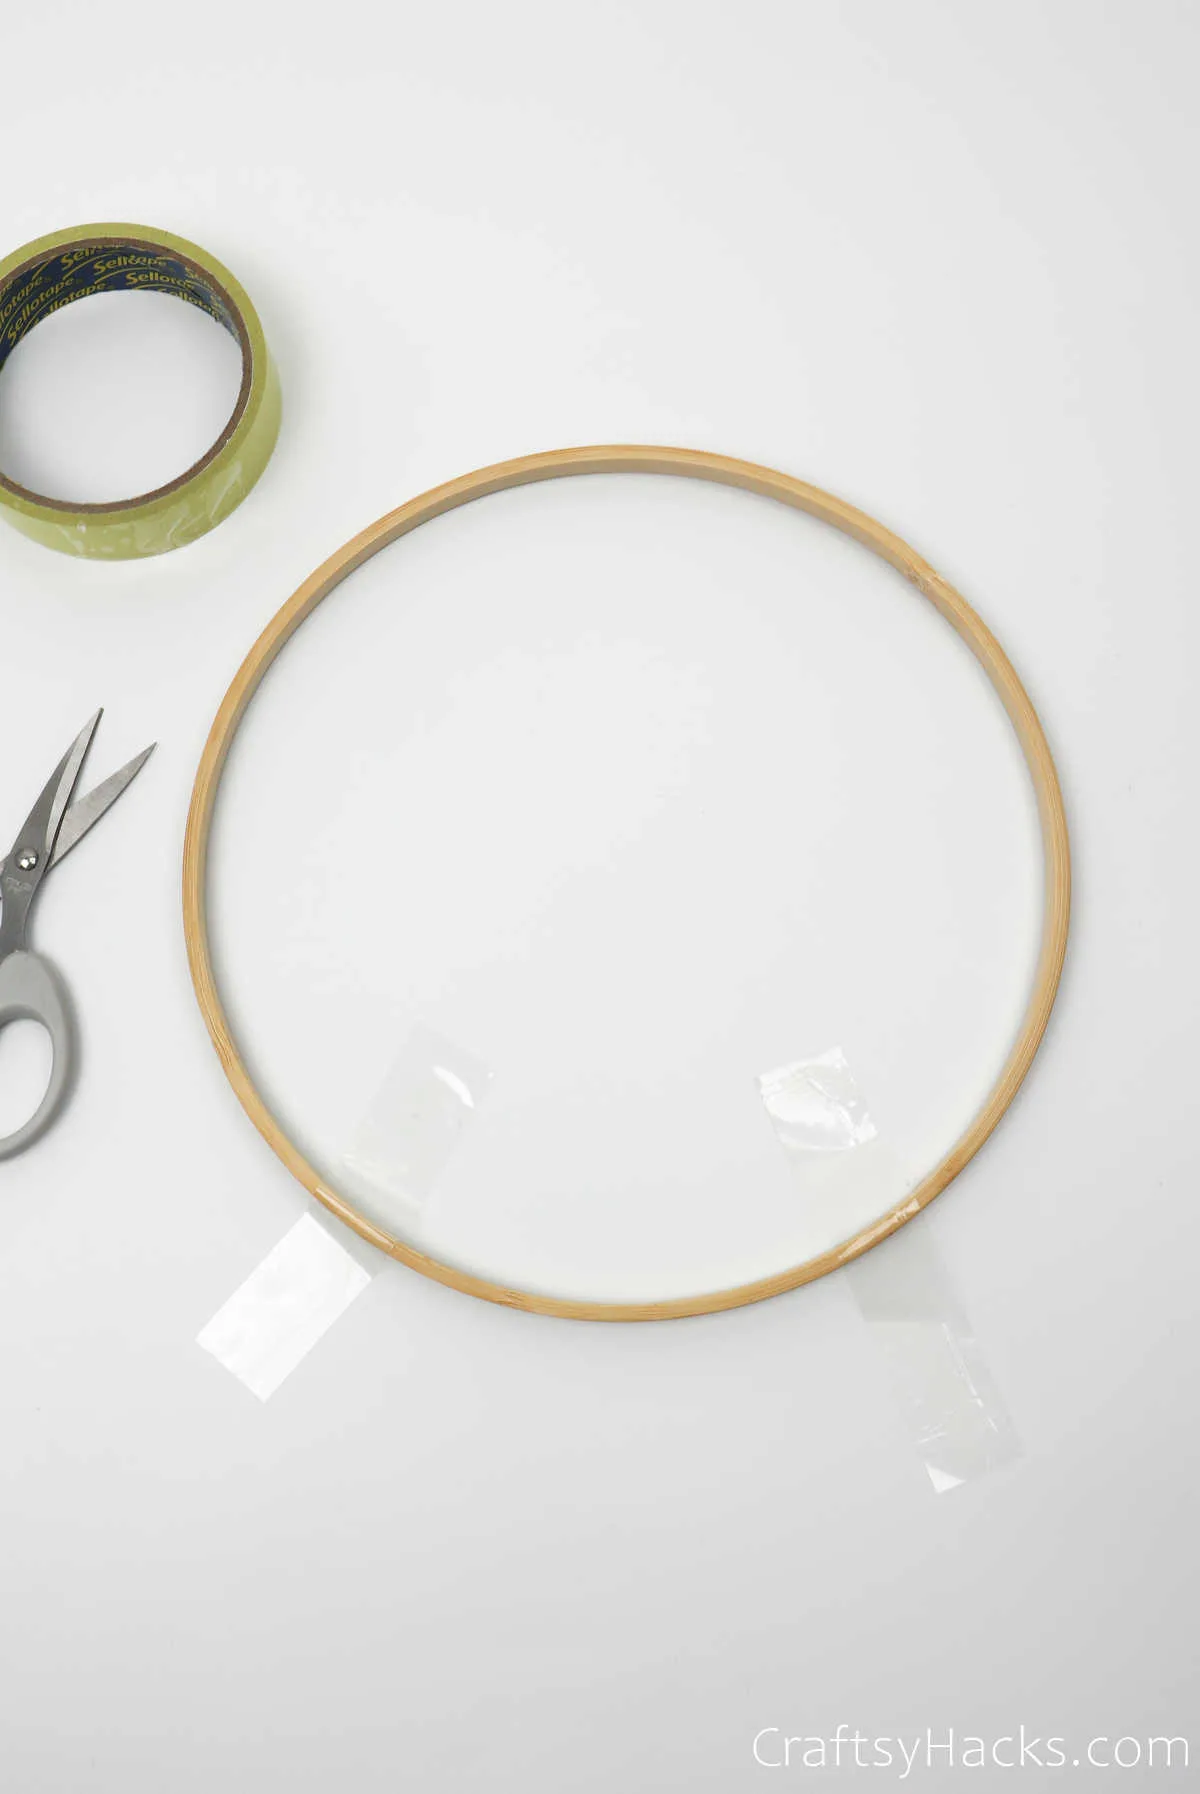
Next, place your hoop or ring on your work surface and tape it in place. This will ensure that the ring doesn’t move around when you’re working. Trust me; you’ll be glad for this step!
Step 4
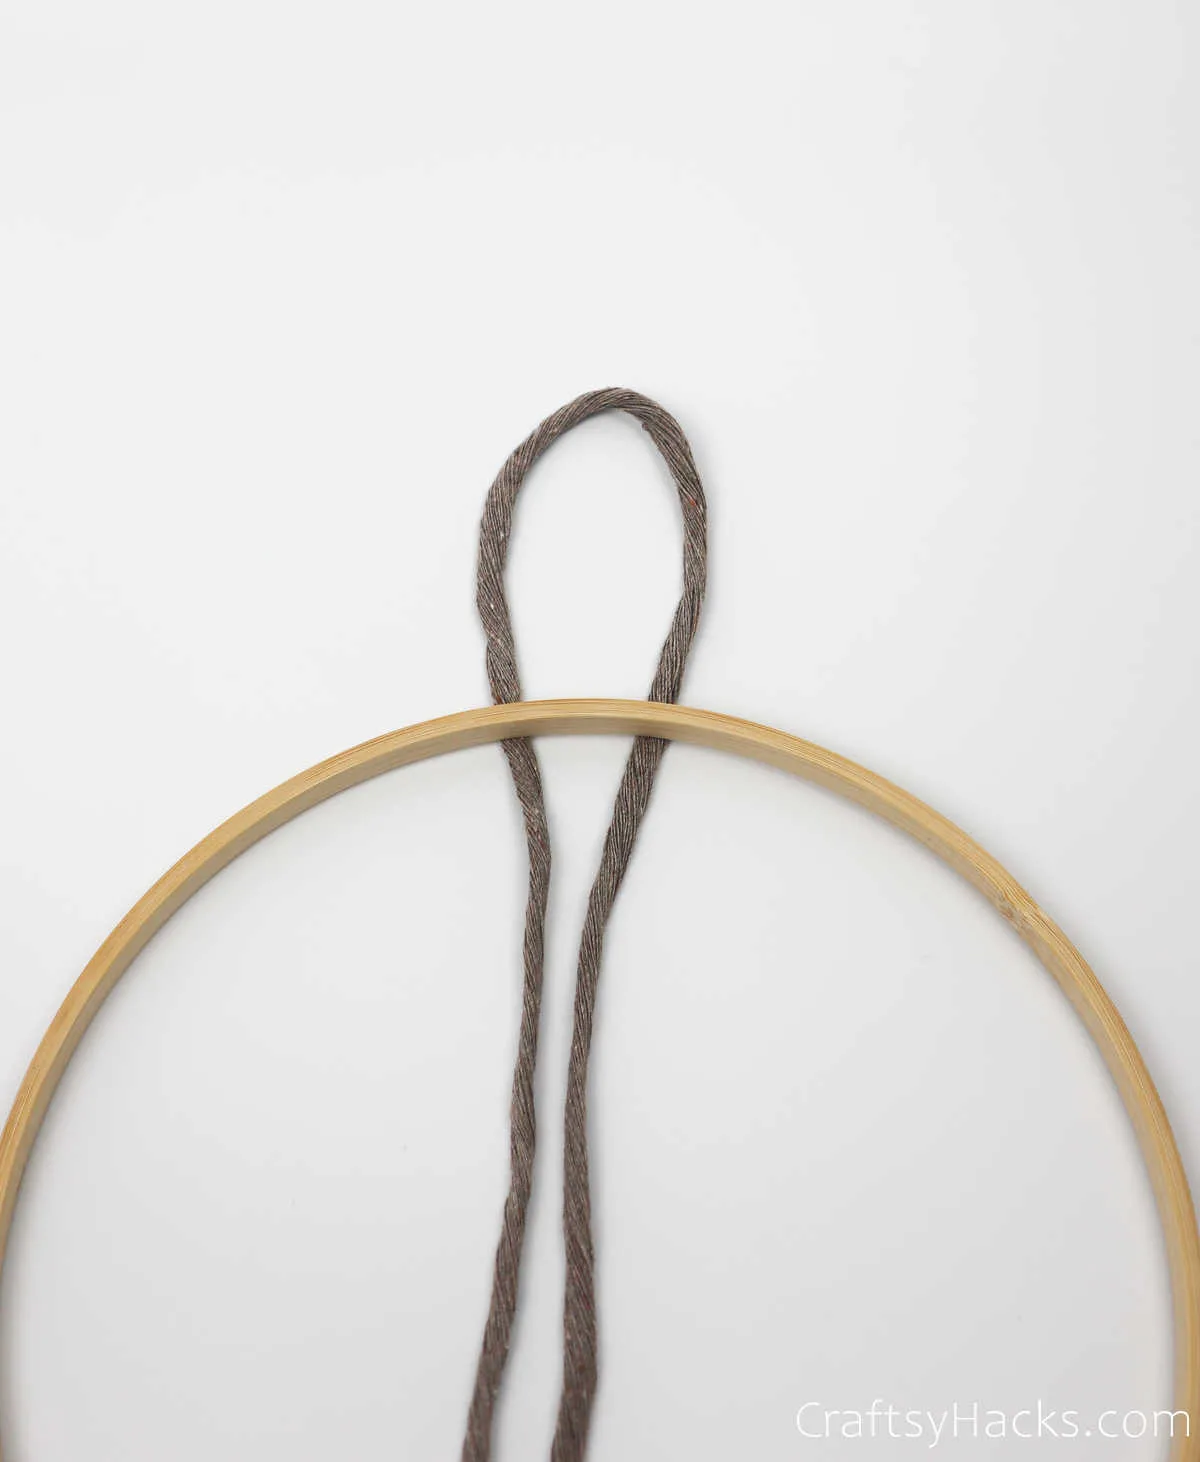
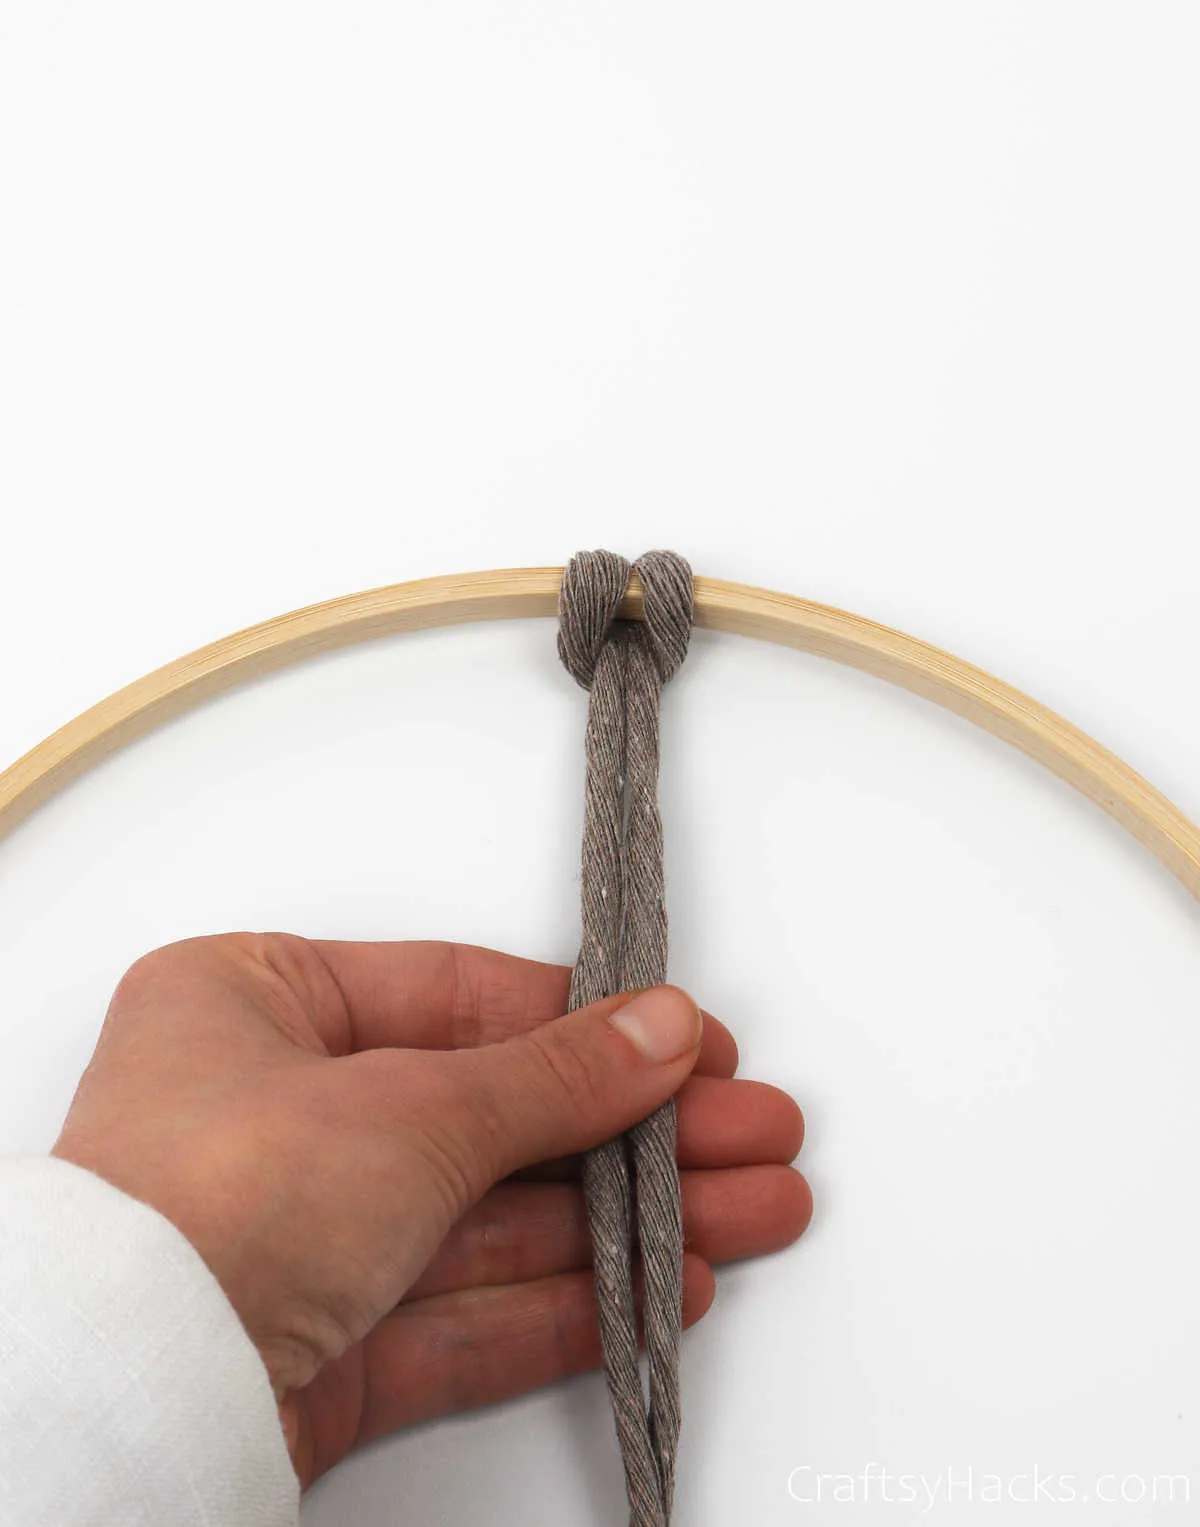
Grab your cappuccino-colored cord and fold it in half before you bring it down and under your hoop.
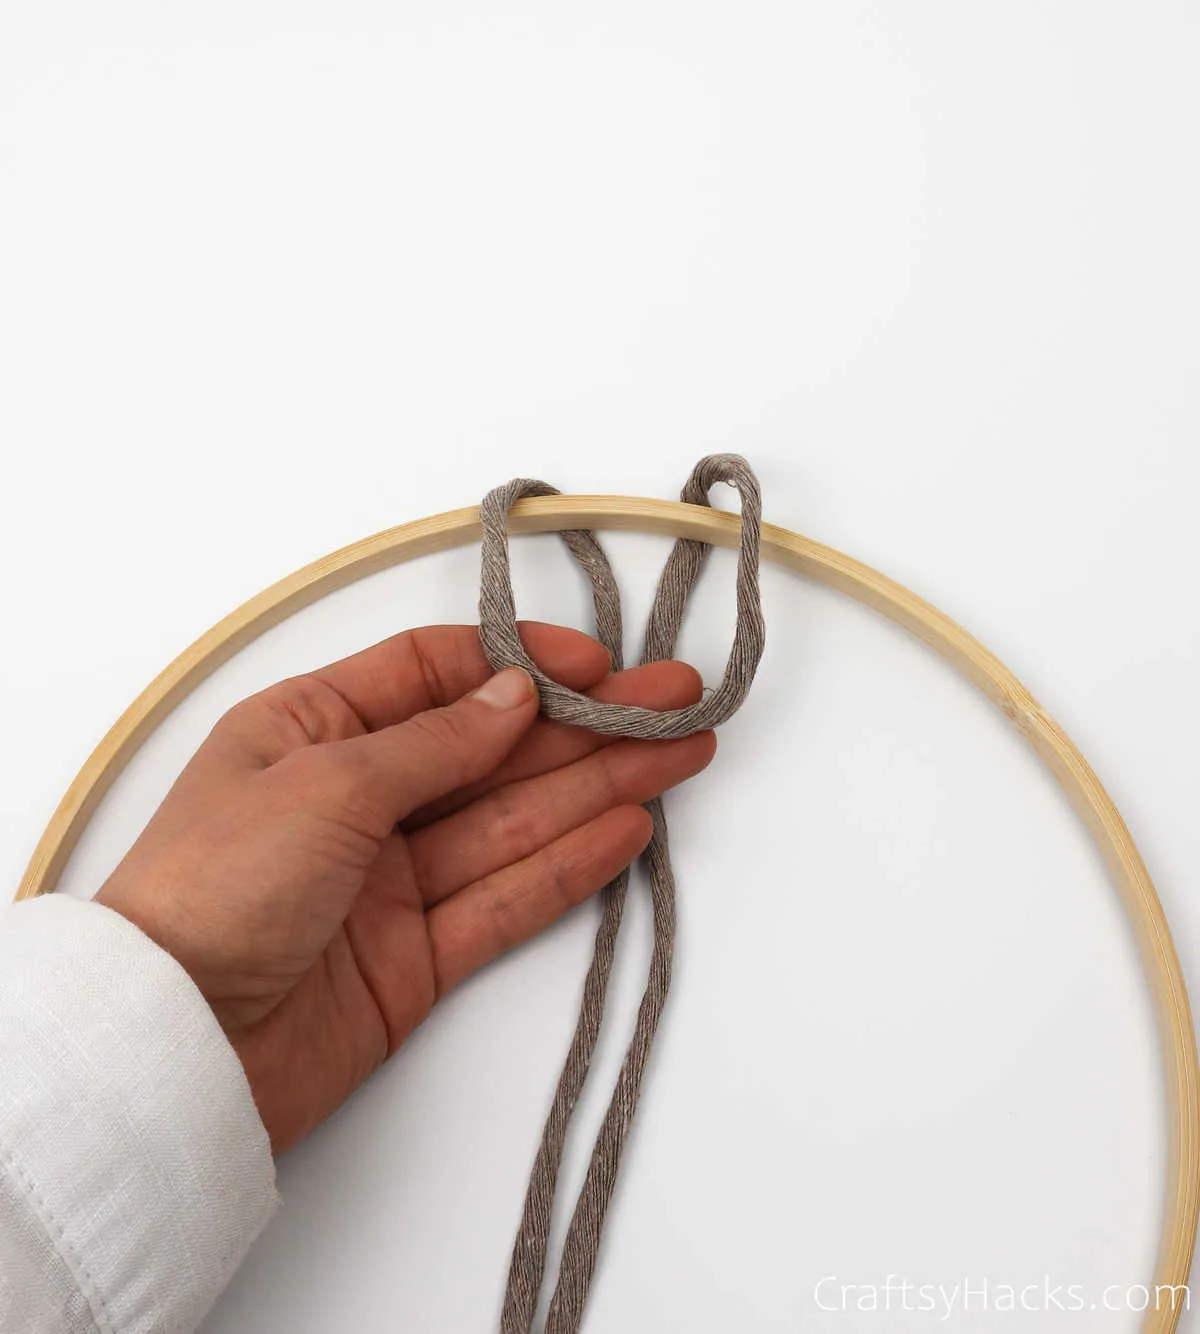
Then, take that loop and bring it over the hoop, so it overlaps the two loose-end bits.
Finally, take hold of the two loose ends of your cord and bring them through the loop.
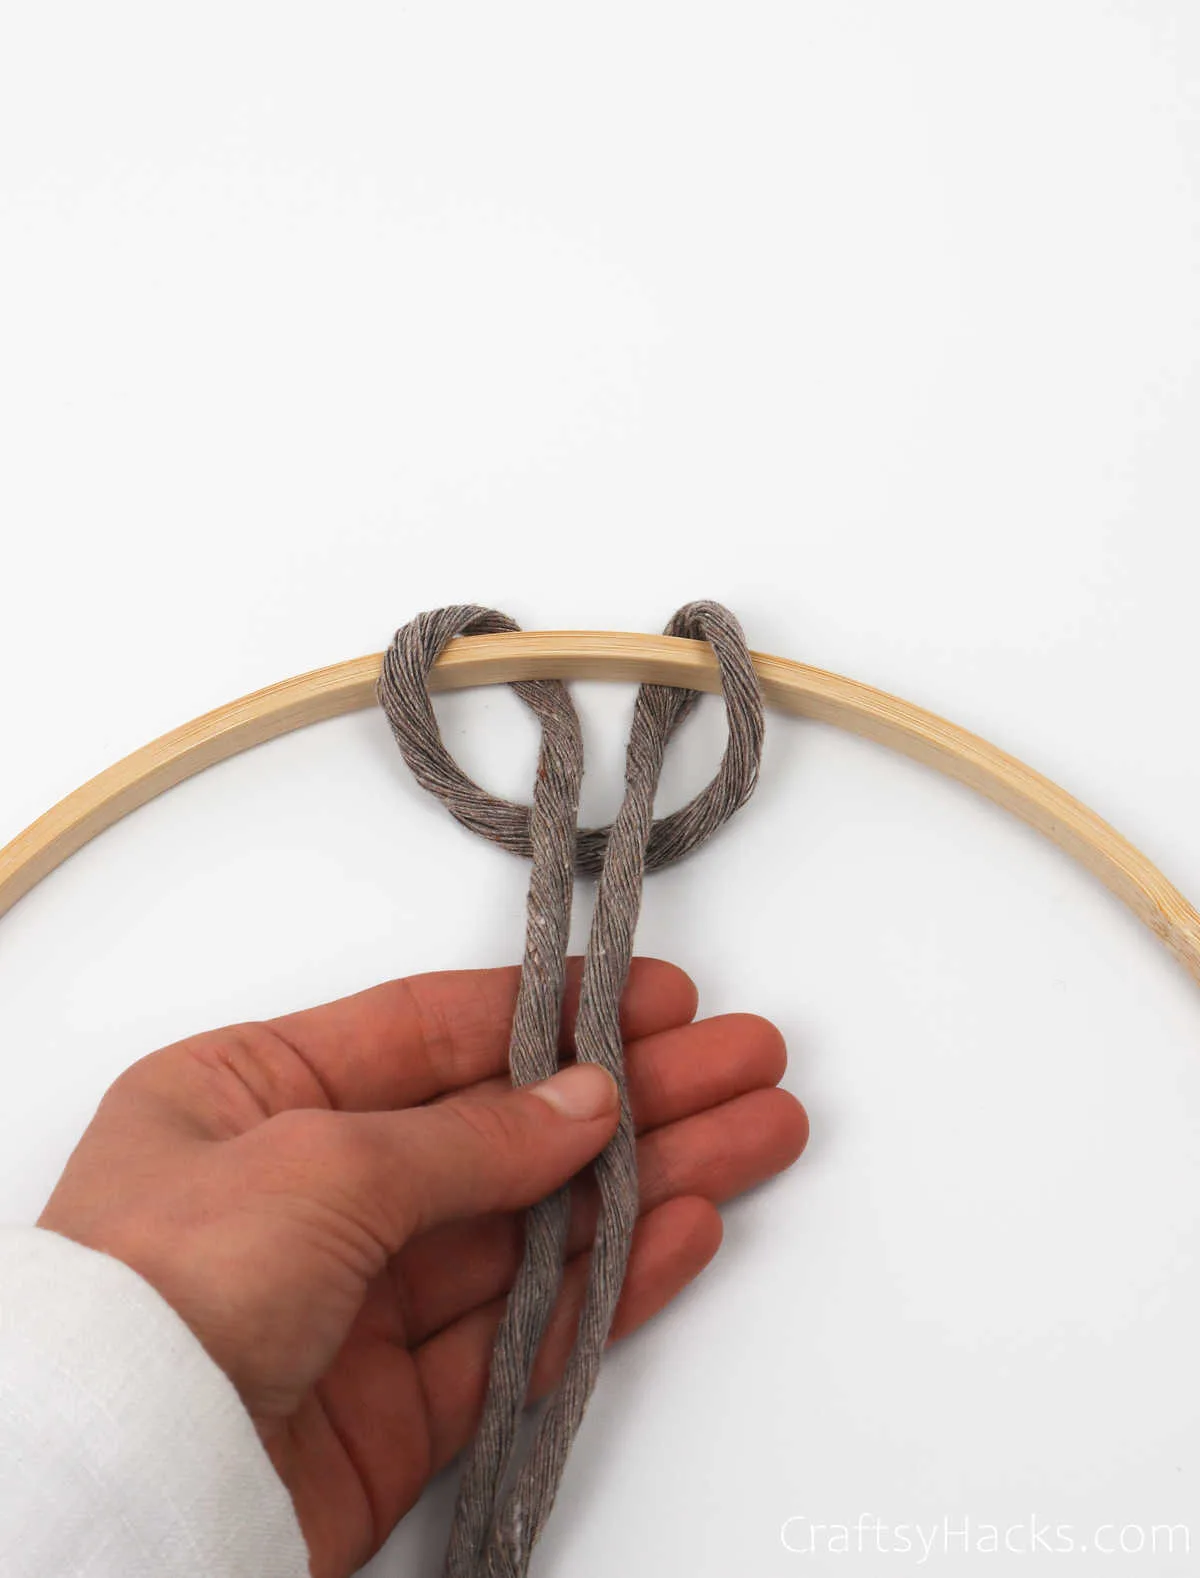
Tug the ends firmly to tighten the knot and create a knothead, as shown here. Voila! You’ve got your first knot on the ring. Remember this process as you’ll be repeating it around the ring.
Step 5
But hold up just a second before you move on to the next color; you’ve still got a bit of work to do with this one! Take one string—the left, as seen below—and bring it over and then under the hoop.
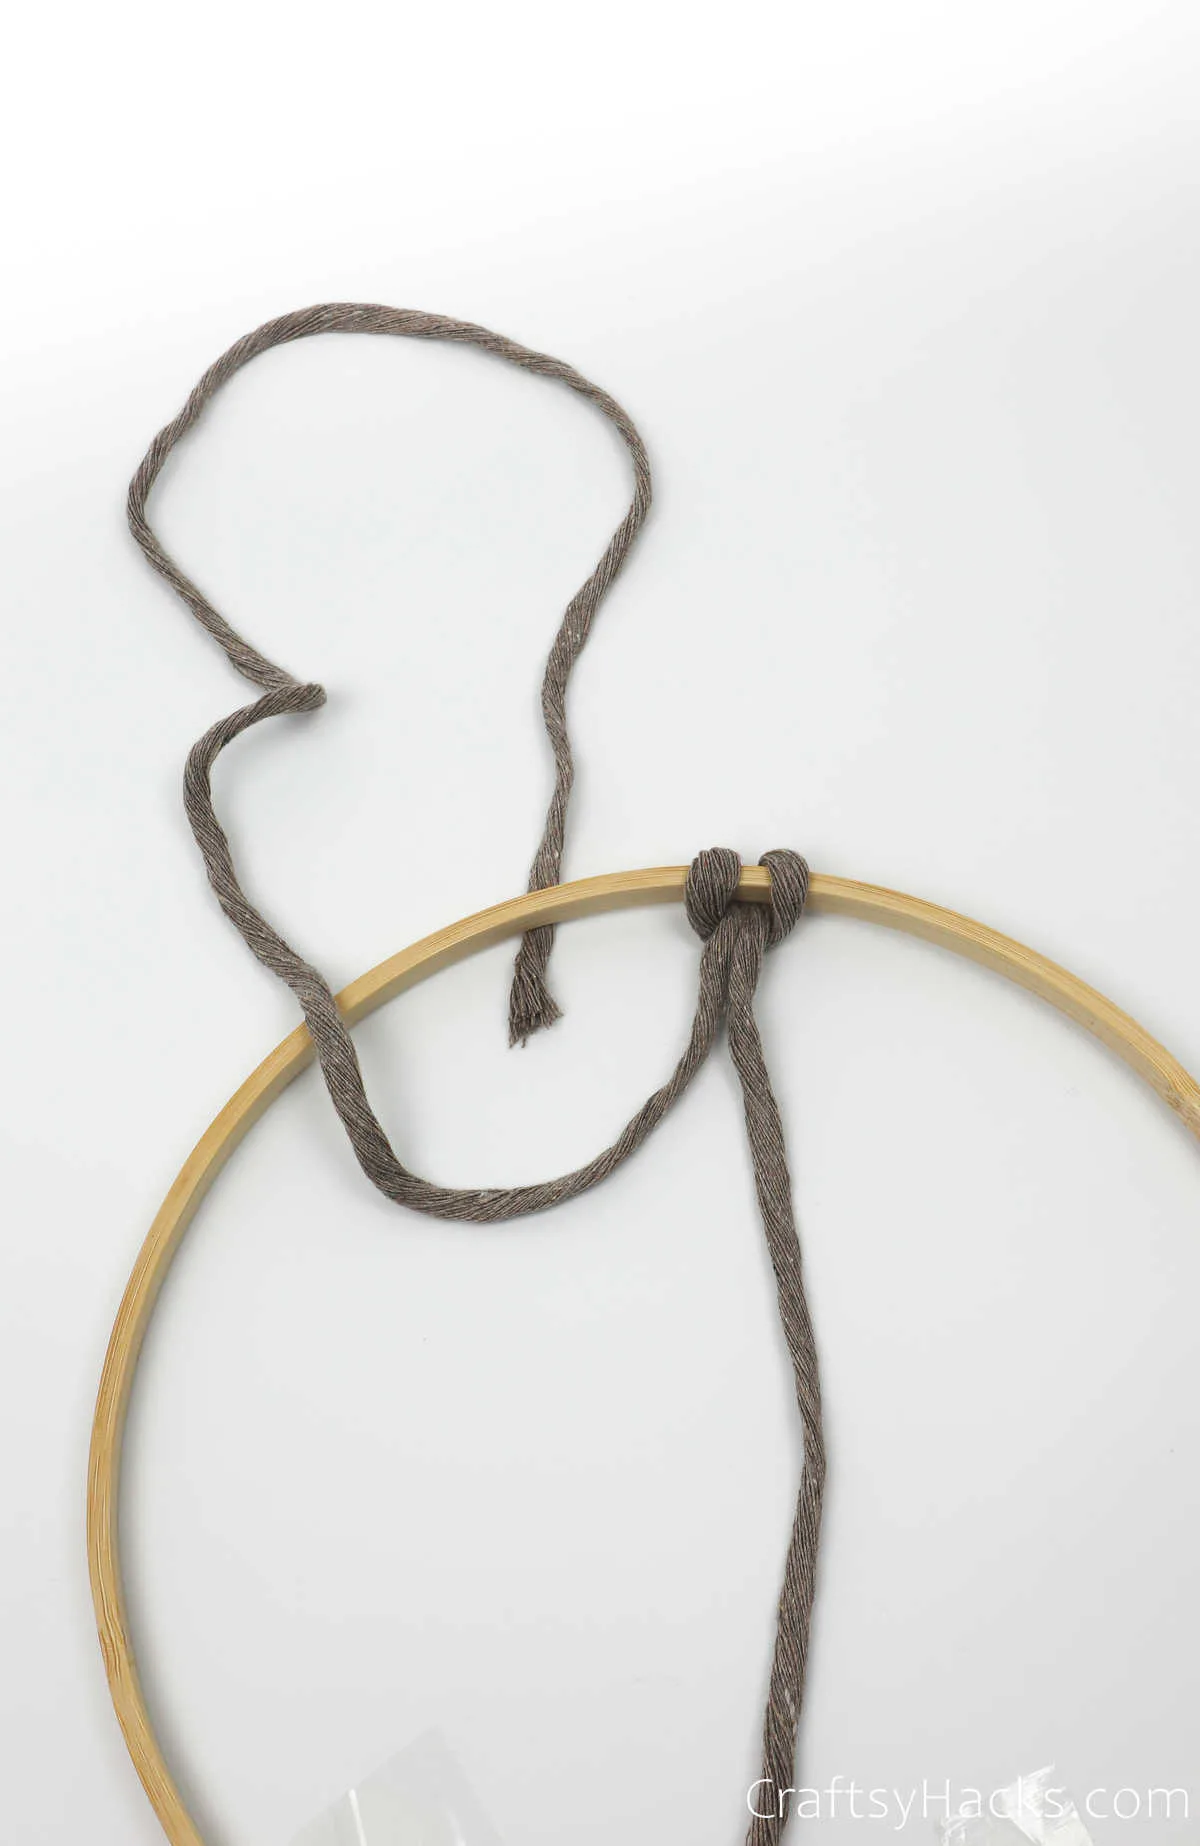
Bring the end of the string through the loop. It must pass through the hoop and over the string, as indicated.
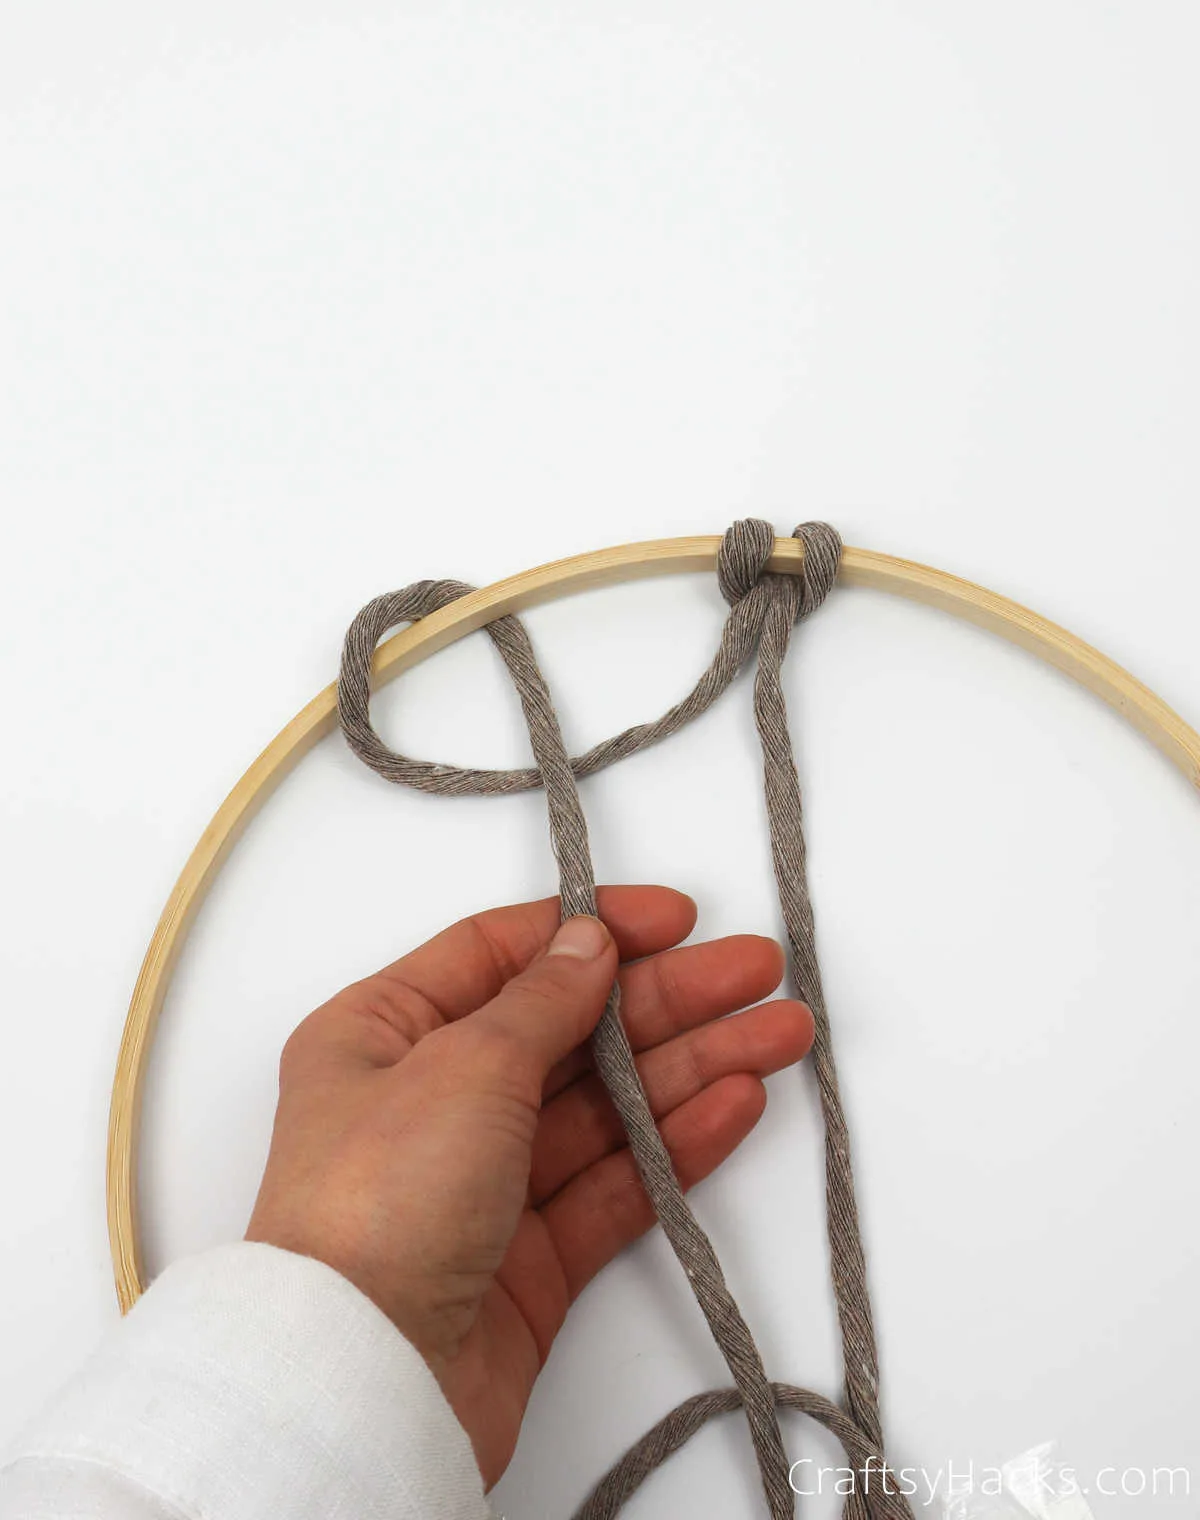
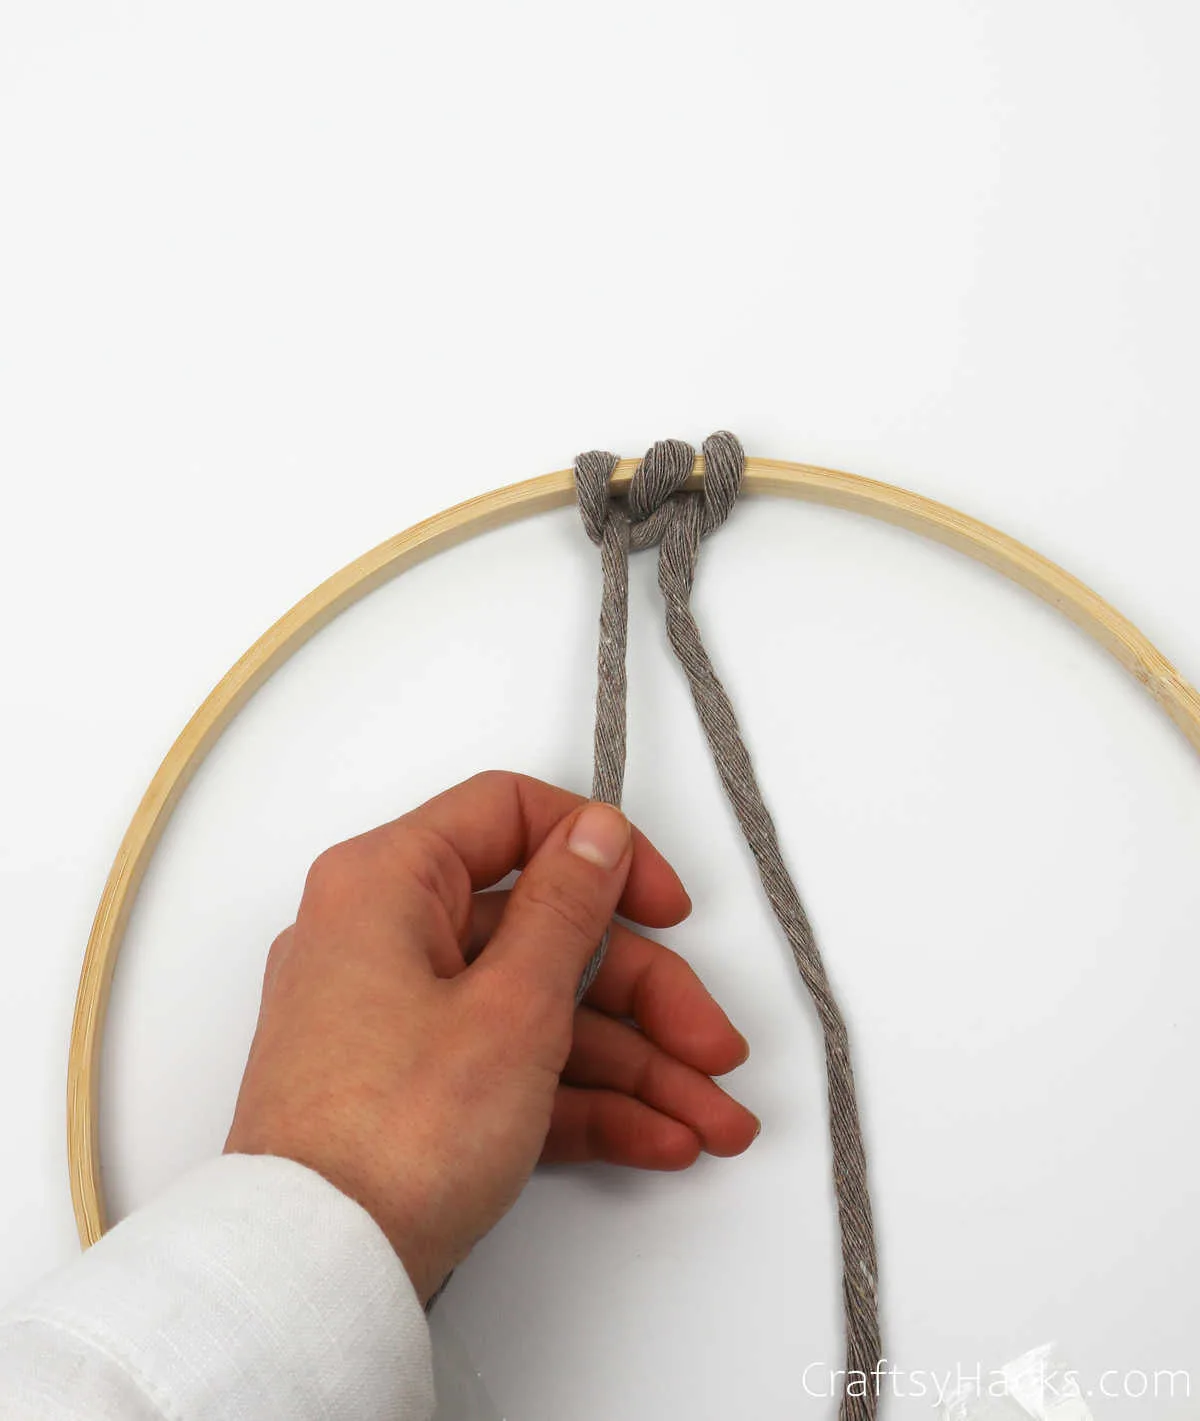
Then, pull it firmly to tighten the knot. You’ll have another knot head in place to the left of the original one you made.
Step 6
Now, repeat step 4 with the ‘right’ string.
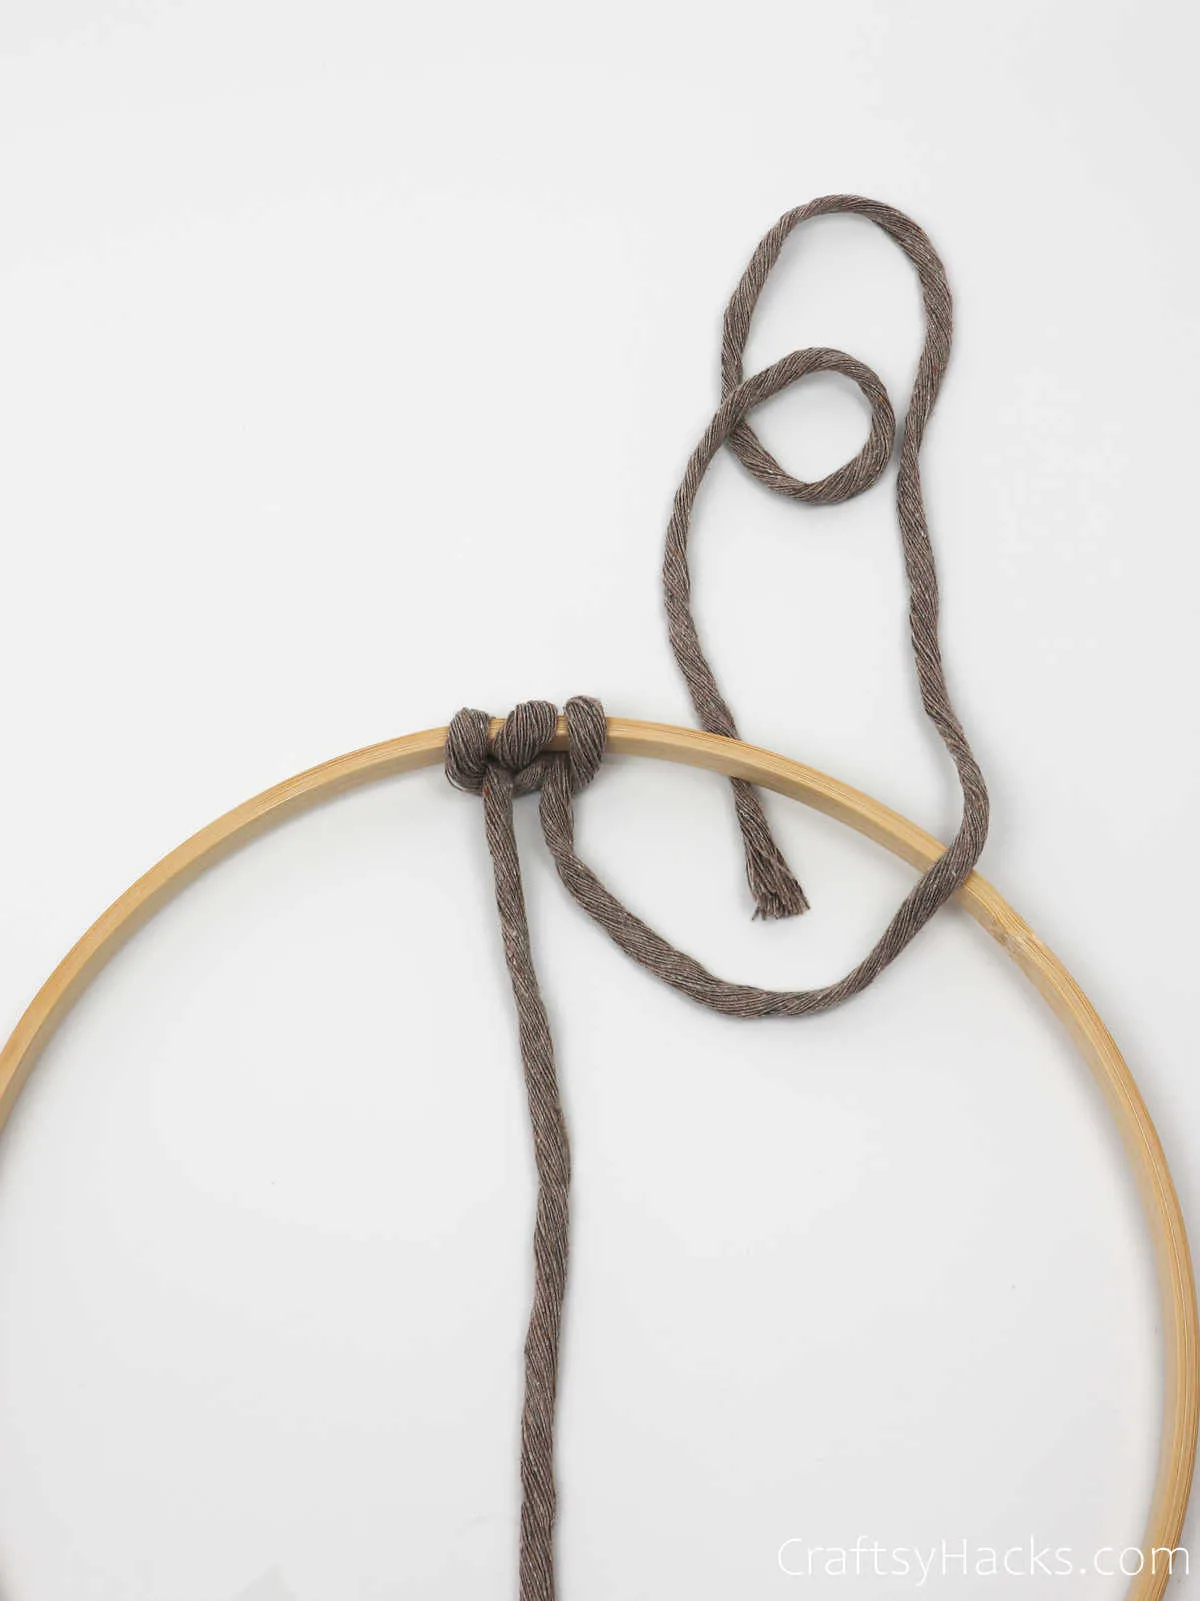
When you’ve pulled the end through, make sure you tug firmly to secure the knot head in place. When you’re working around the hoop, you don’t want the knot heads to keep moving around, do you?
So, there you have it! This is what you can call a ‘set’ of knots with one single cord. You’ll be repeating steps 4 through 6 with all 15 of the cords you have left.
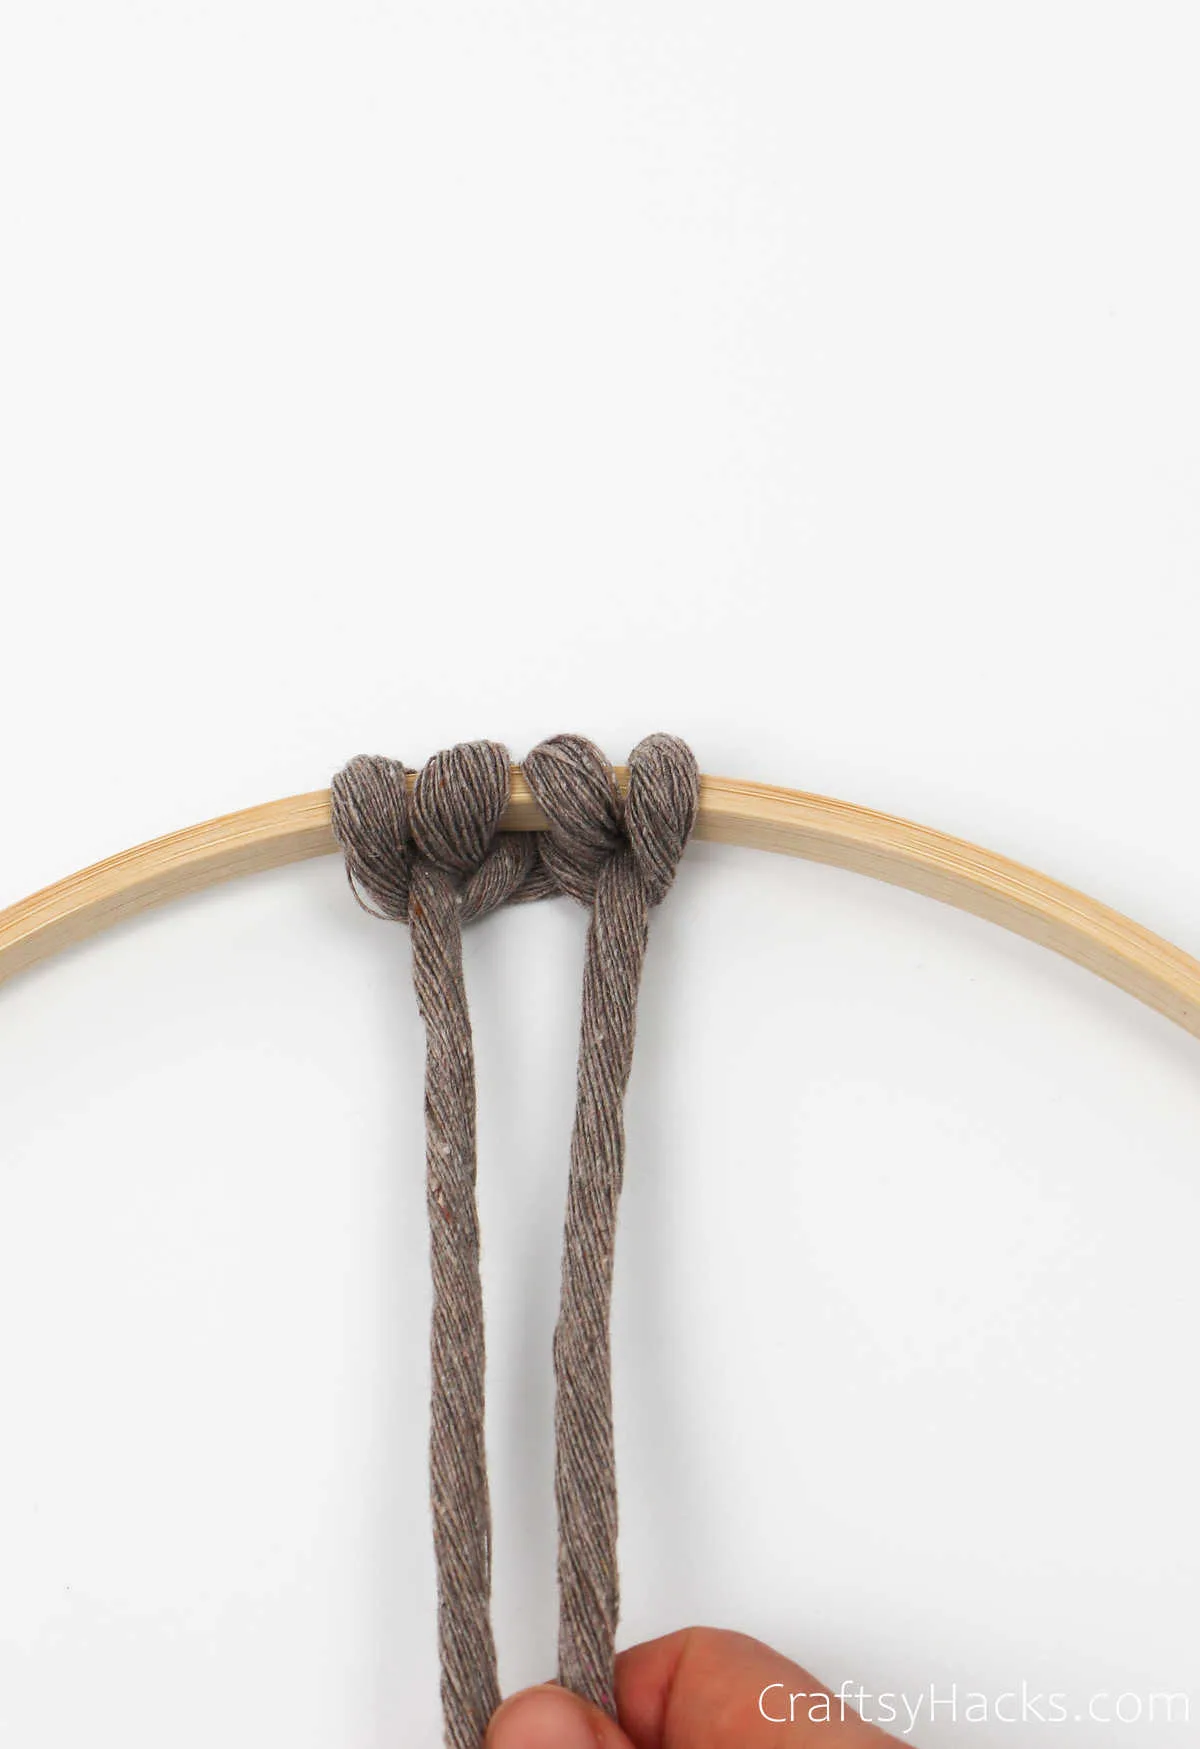
Step 7
For your next set of knotheads, you can either alternate colors or follow the pattern and grab one more cappuccino-colored cord. Don’t worry; you’ll be using the cream-colored one next!
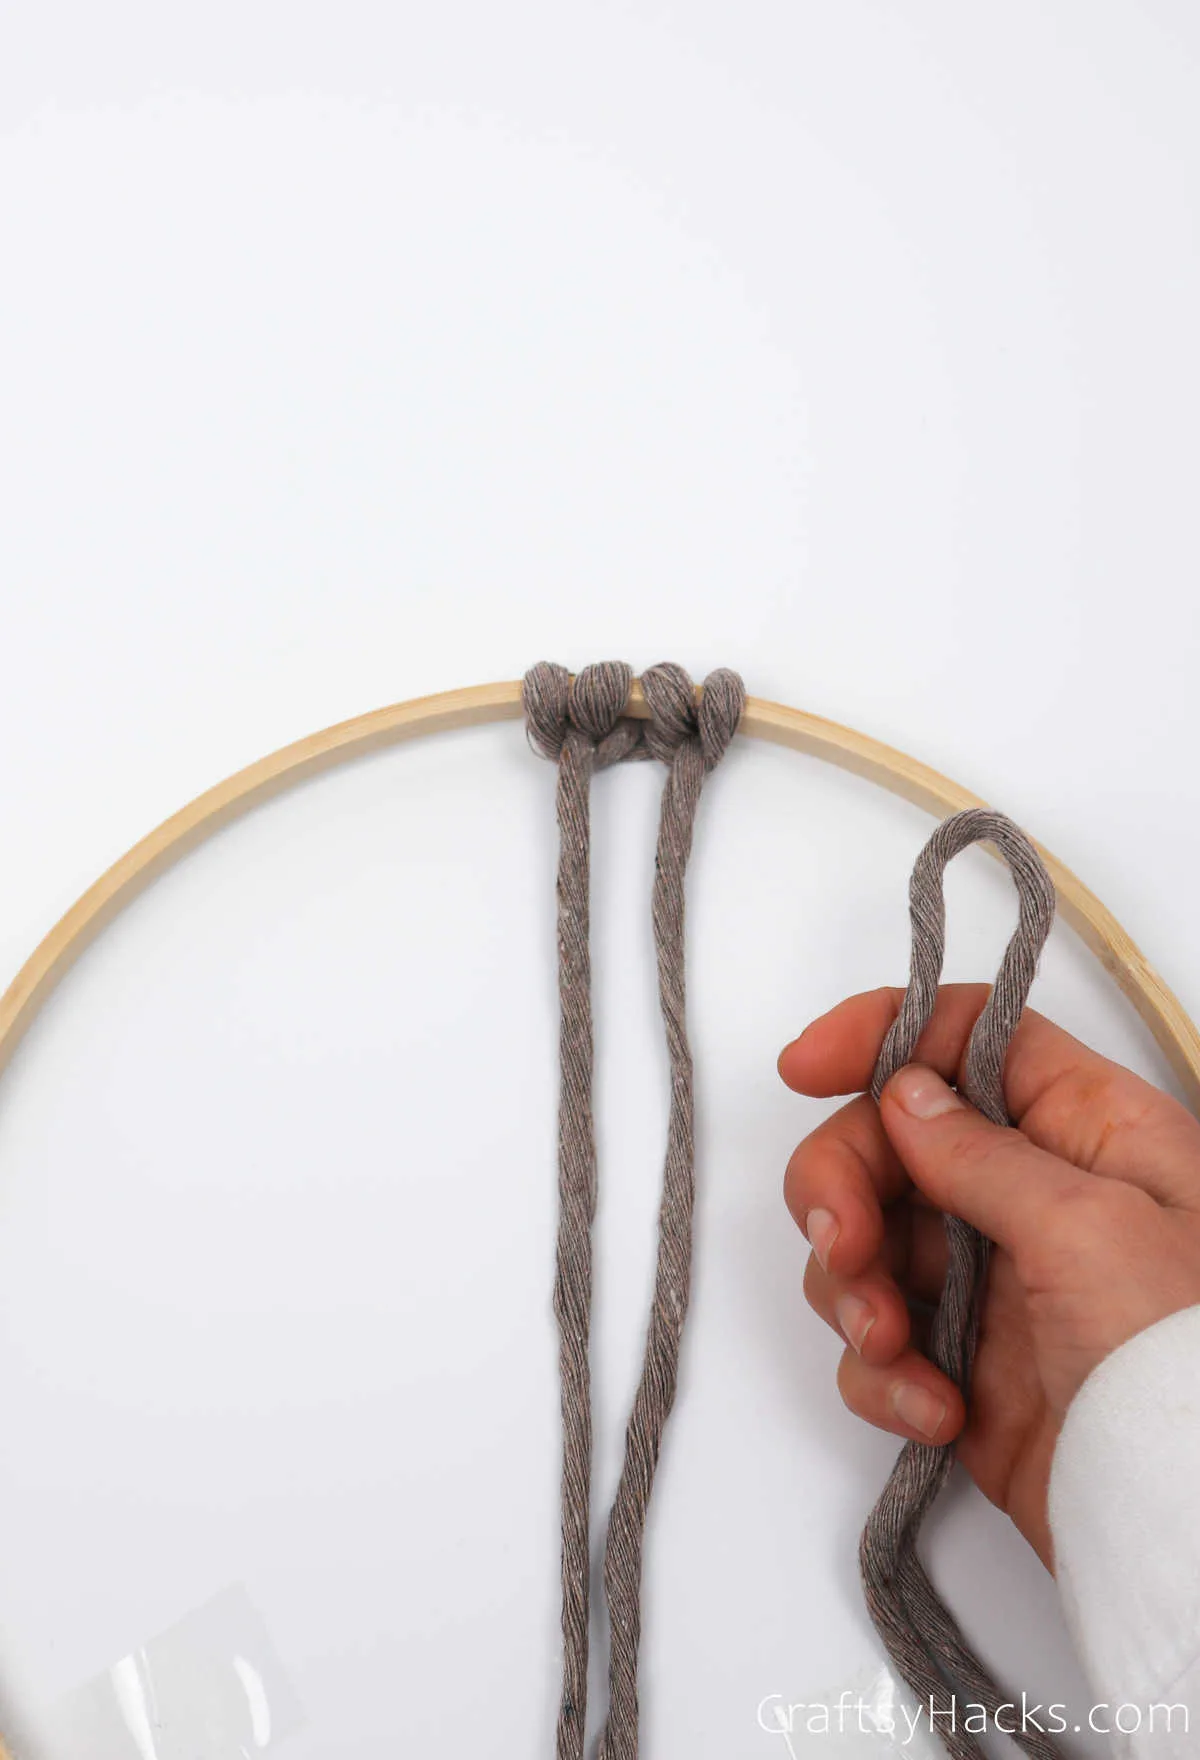
Go ahead and repeat steps 4-6, and you’ll have another ‘set’ of knotheads.
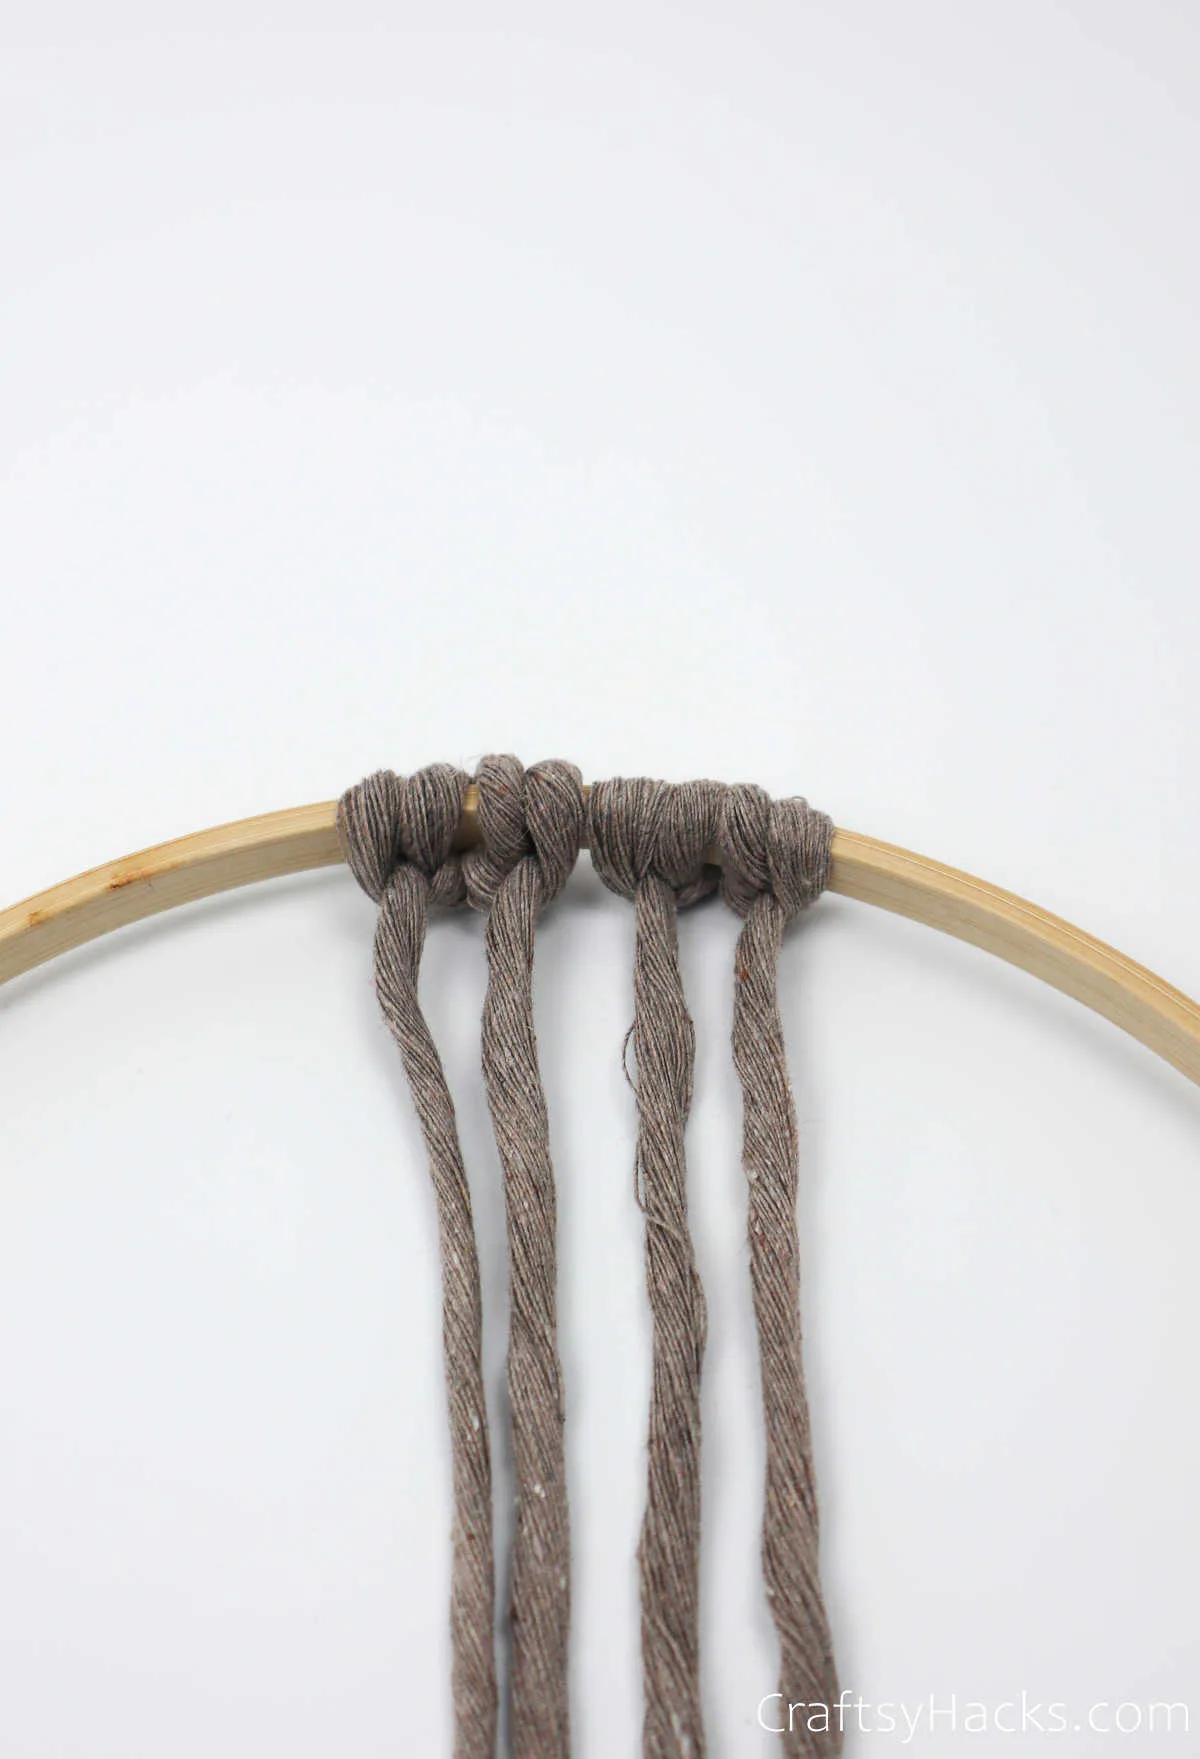
Step 8
Yes! It’s time to start working in your cream-colored cords. So grab them and start knotting them around the hoop—to the right of the cappuccino cords.
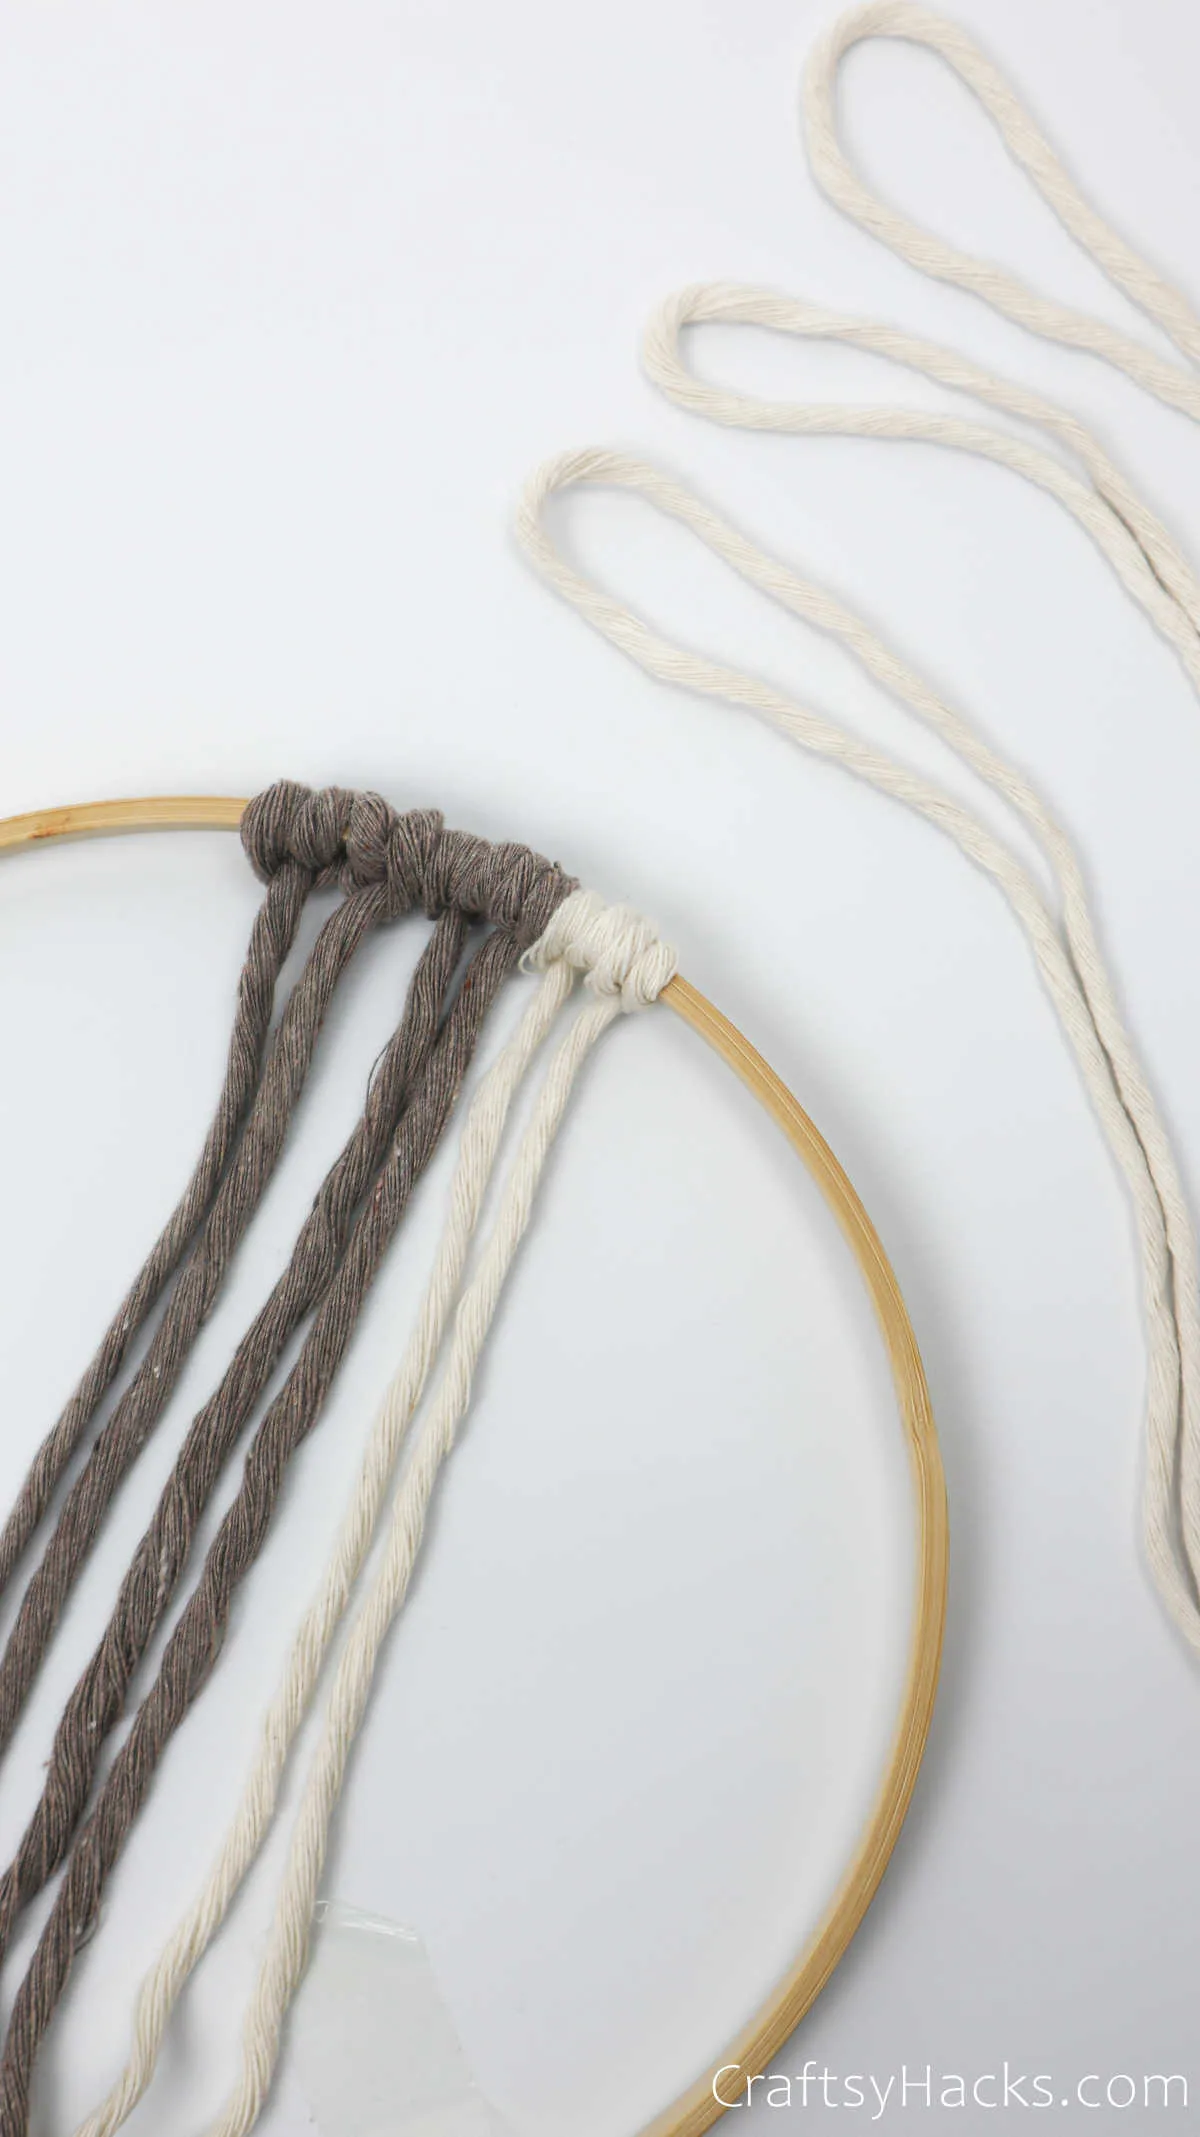
So, as you can see, you’ve worked with two cappuccino cords and four cream cords.
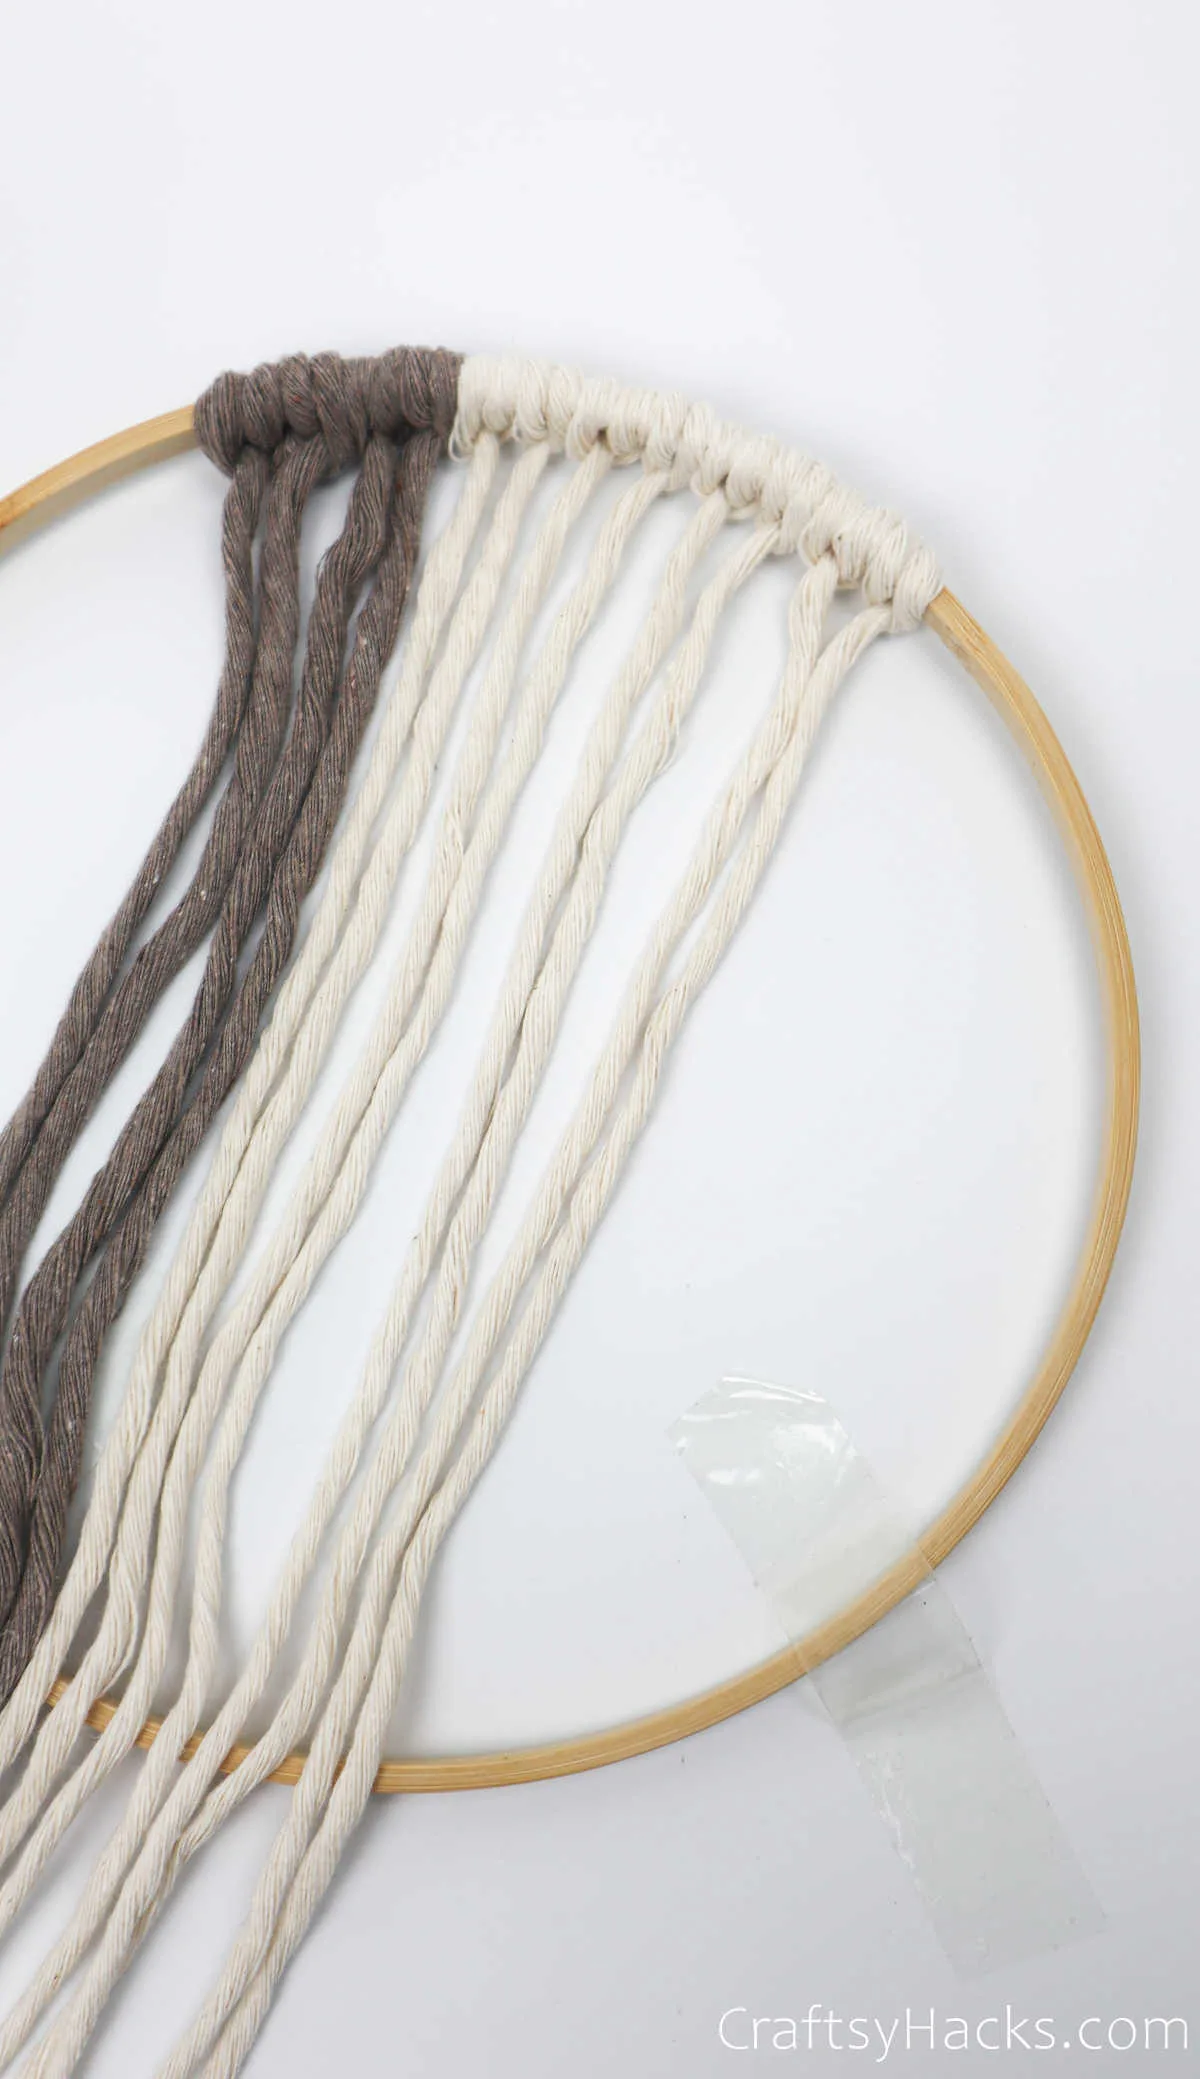
Step 9
Now, repeat the same steps and make your knot heads with two sets of cappuccino cords.
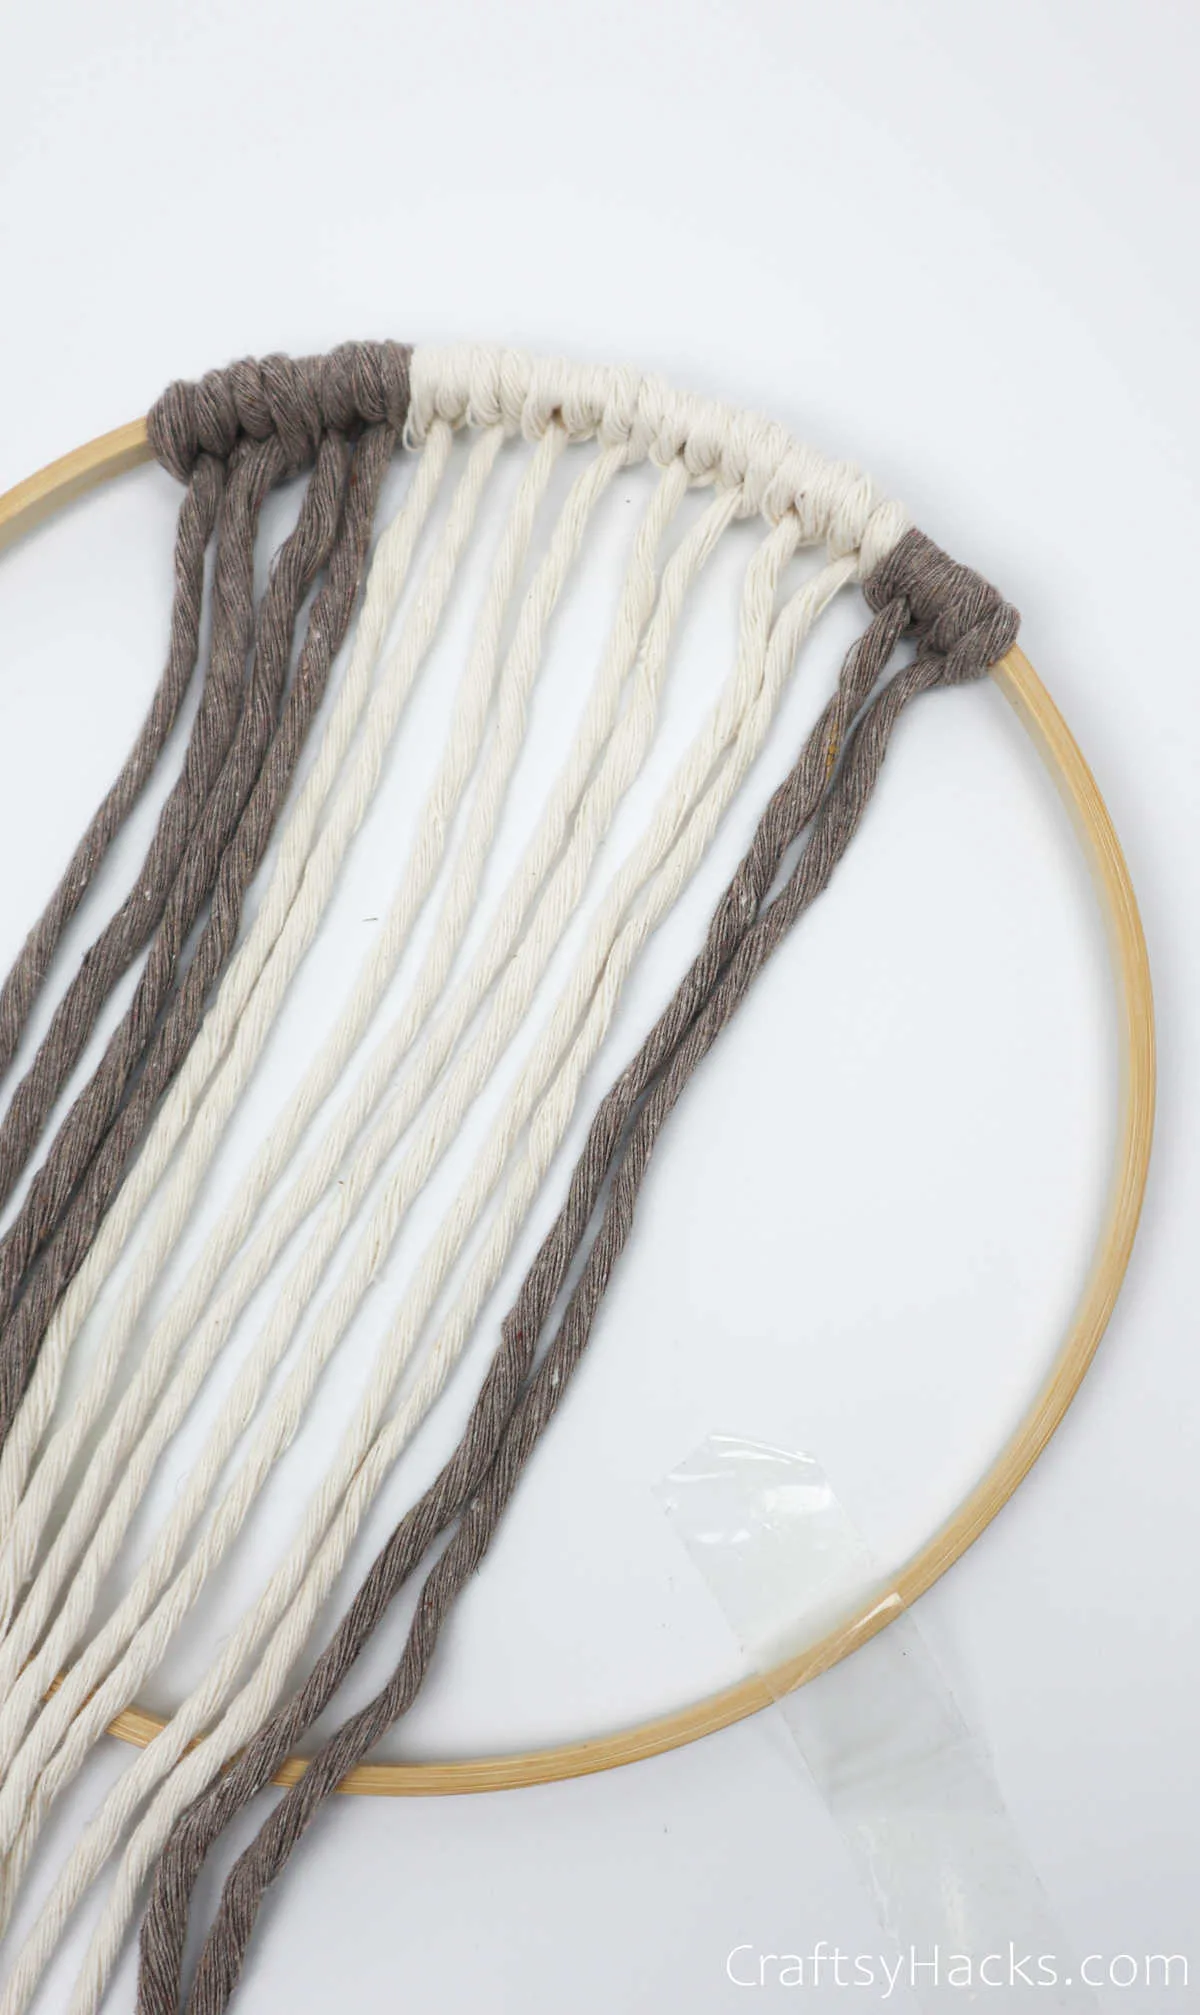
You should have the following pattern:
2x cappuccino cords, 4x cream cords, 2x cappuccino cords.
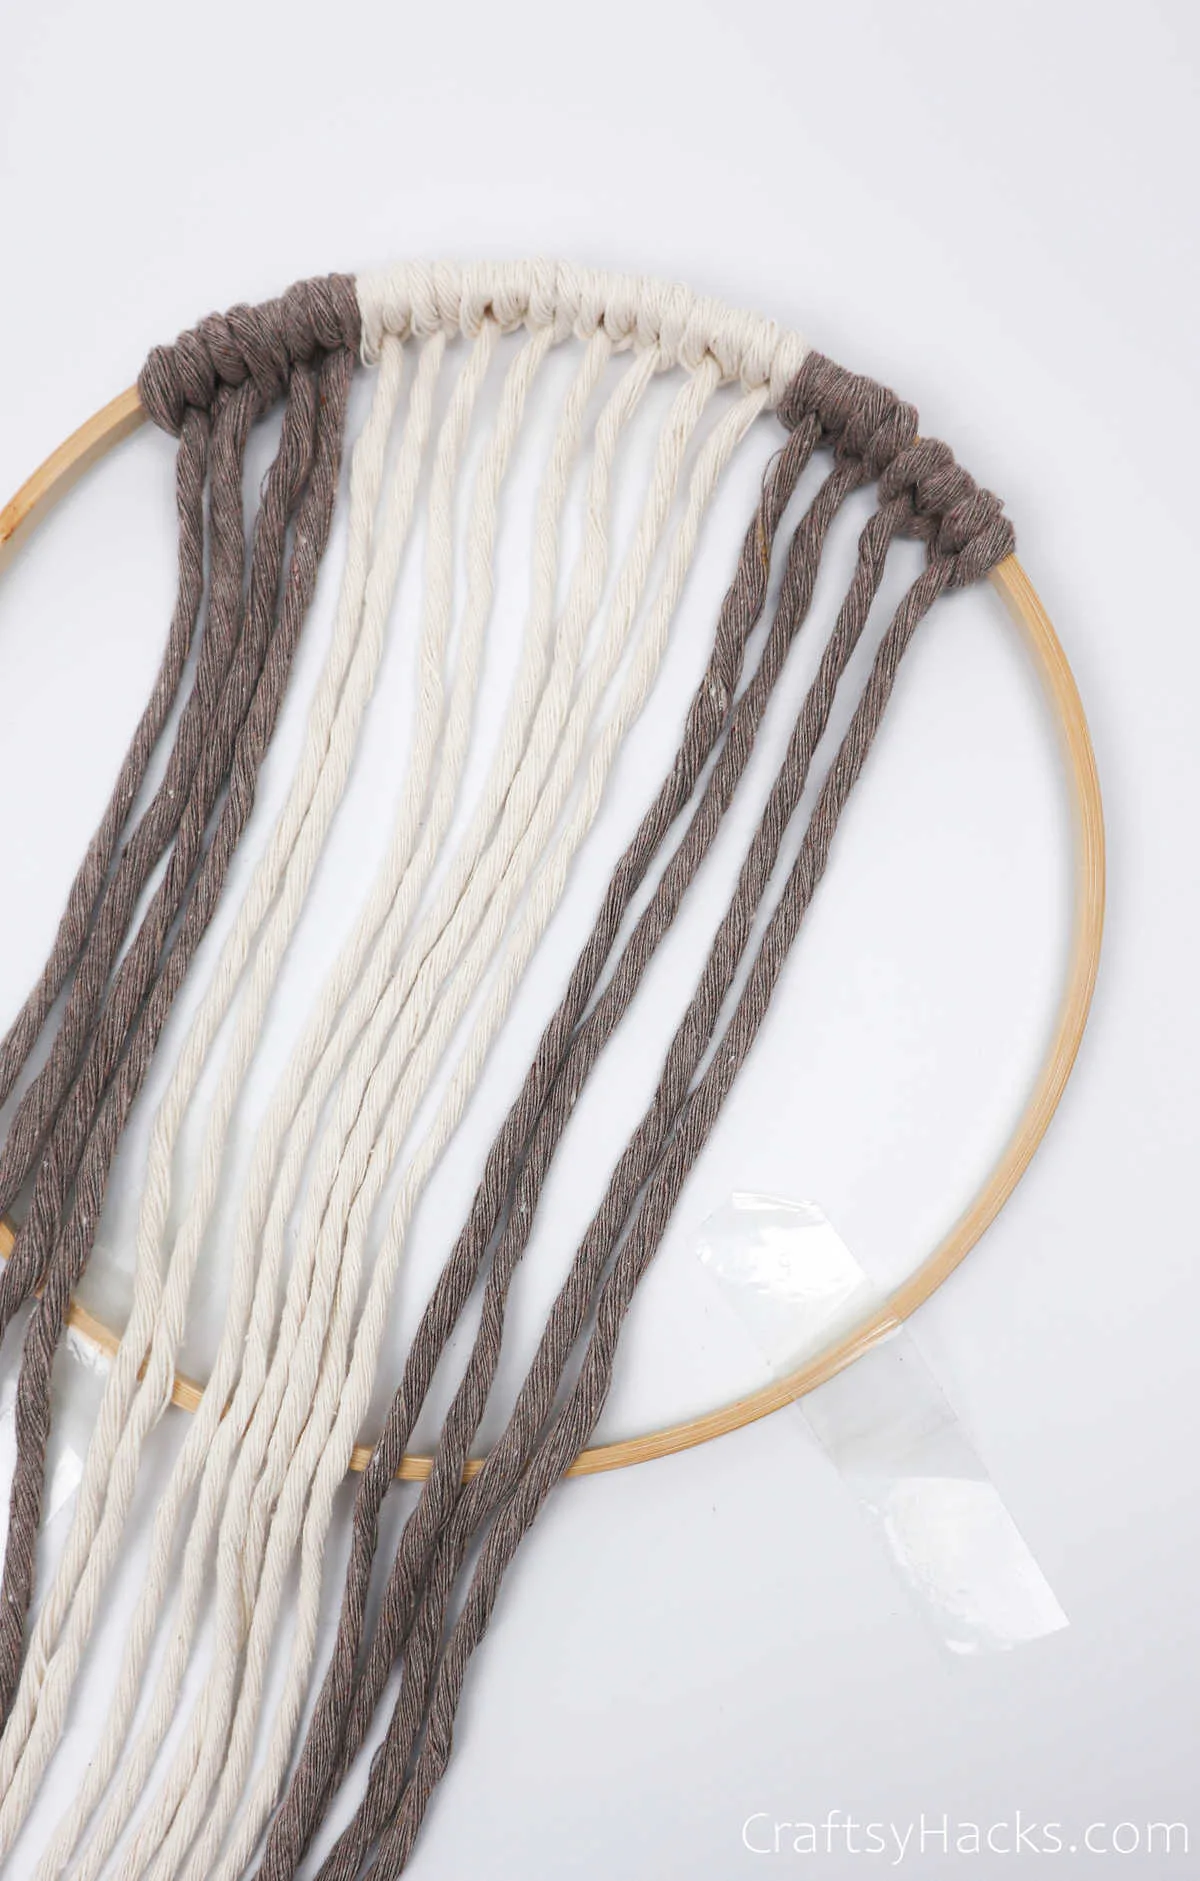
There’s one thing left to do, and that is to carefully pull all your strings through and under the hoop so that the hoop rests over them. You should have something like the picture below when you’re done.
All good? Awesome! You’ve successfully worked through one batch on knot heads to the ‘right’ side of the hoop. Now, it’s time we move over to the left.
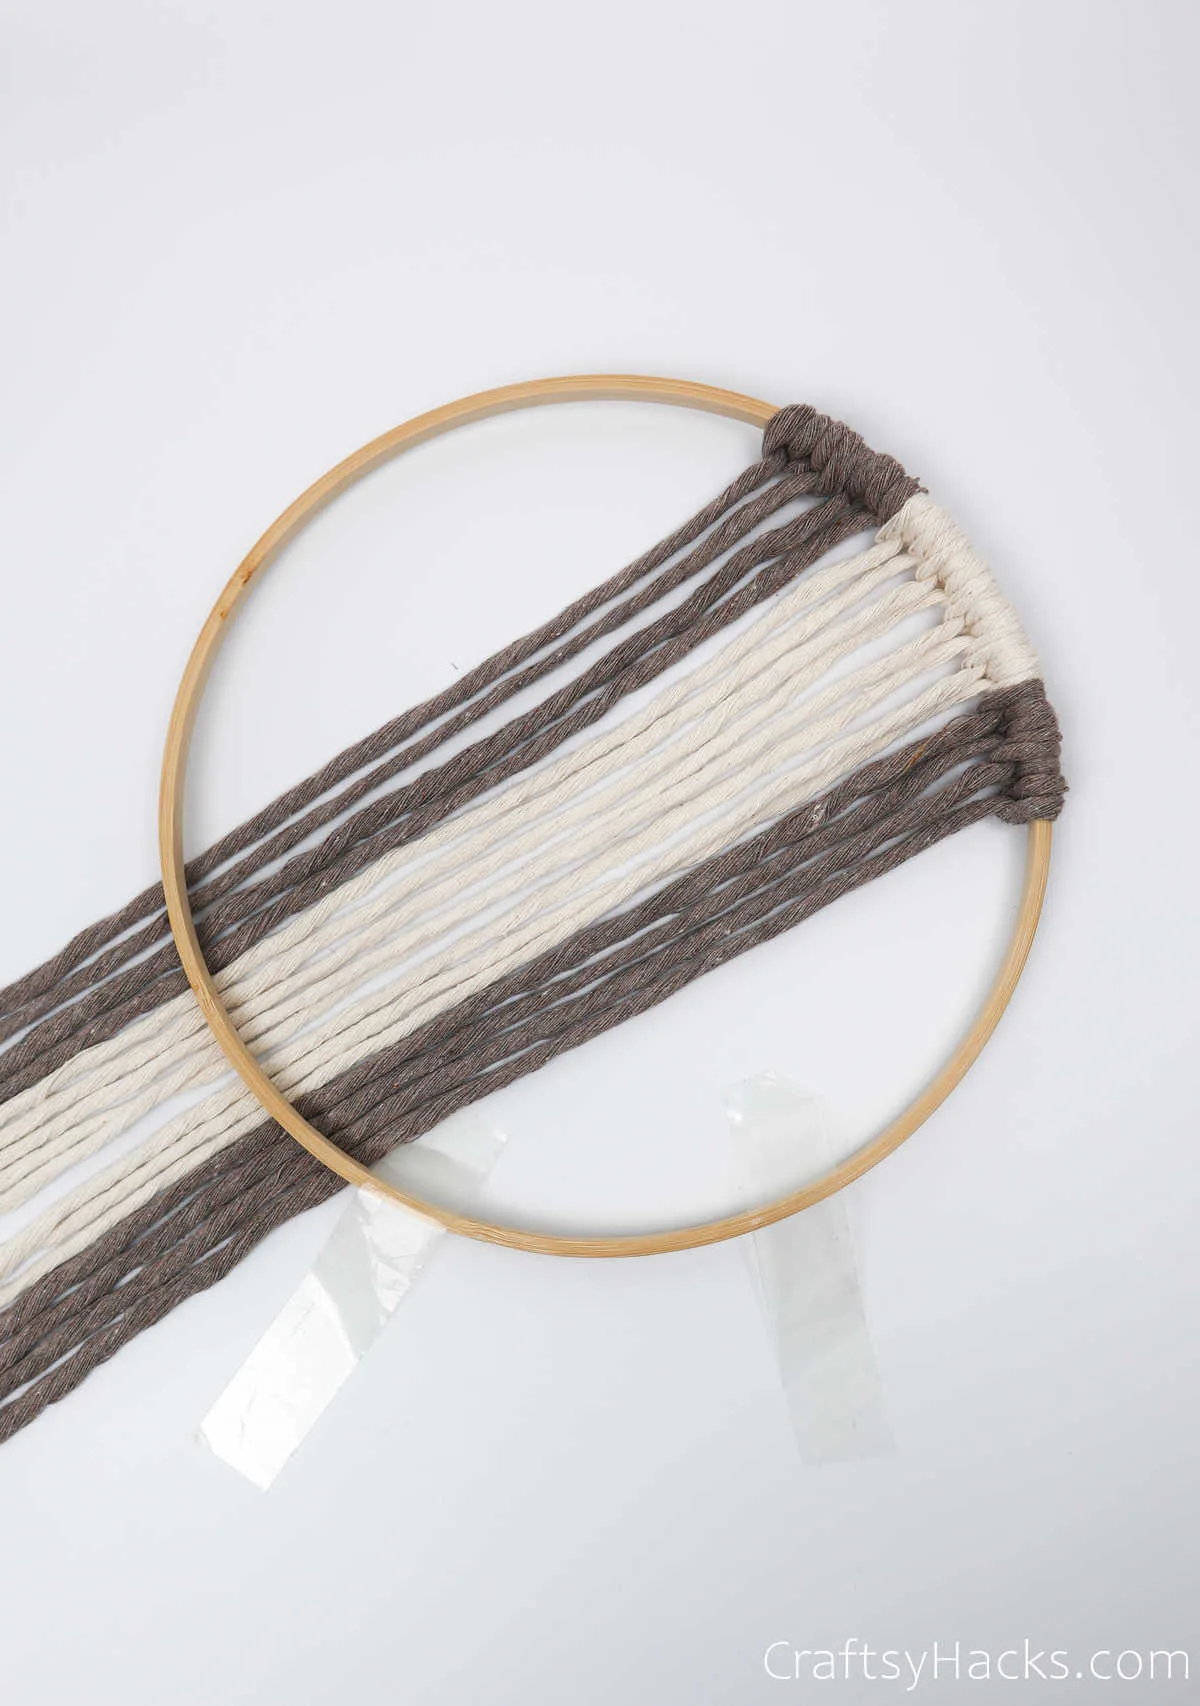
Step 10
Just like before, you start with your cappuccino-colored cord and work in a set of knot heads.
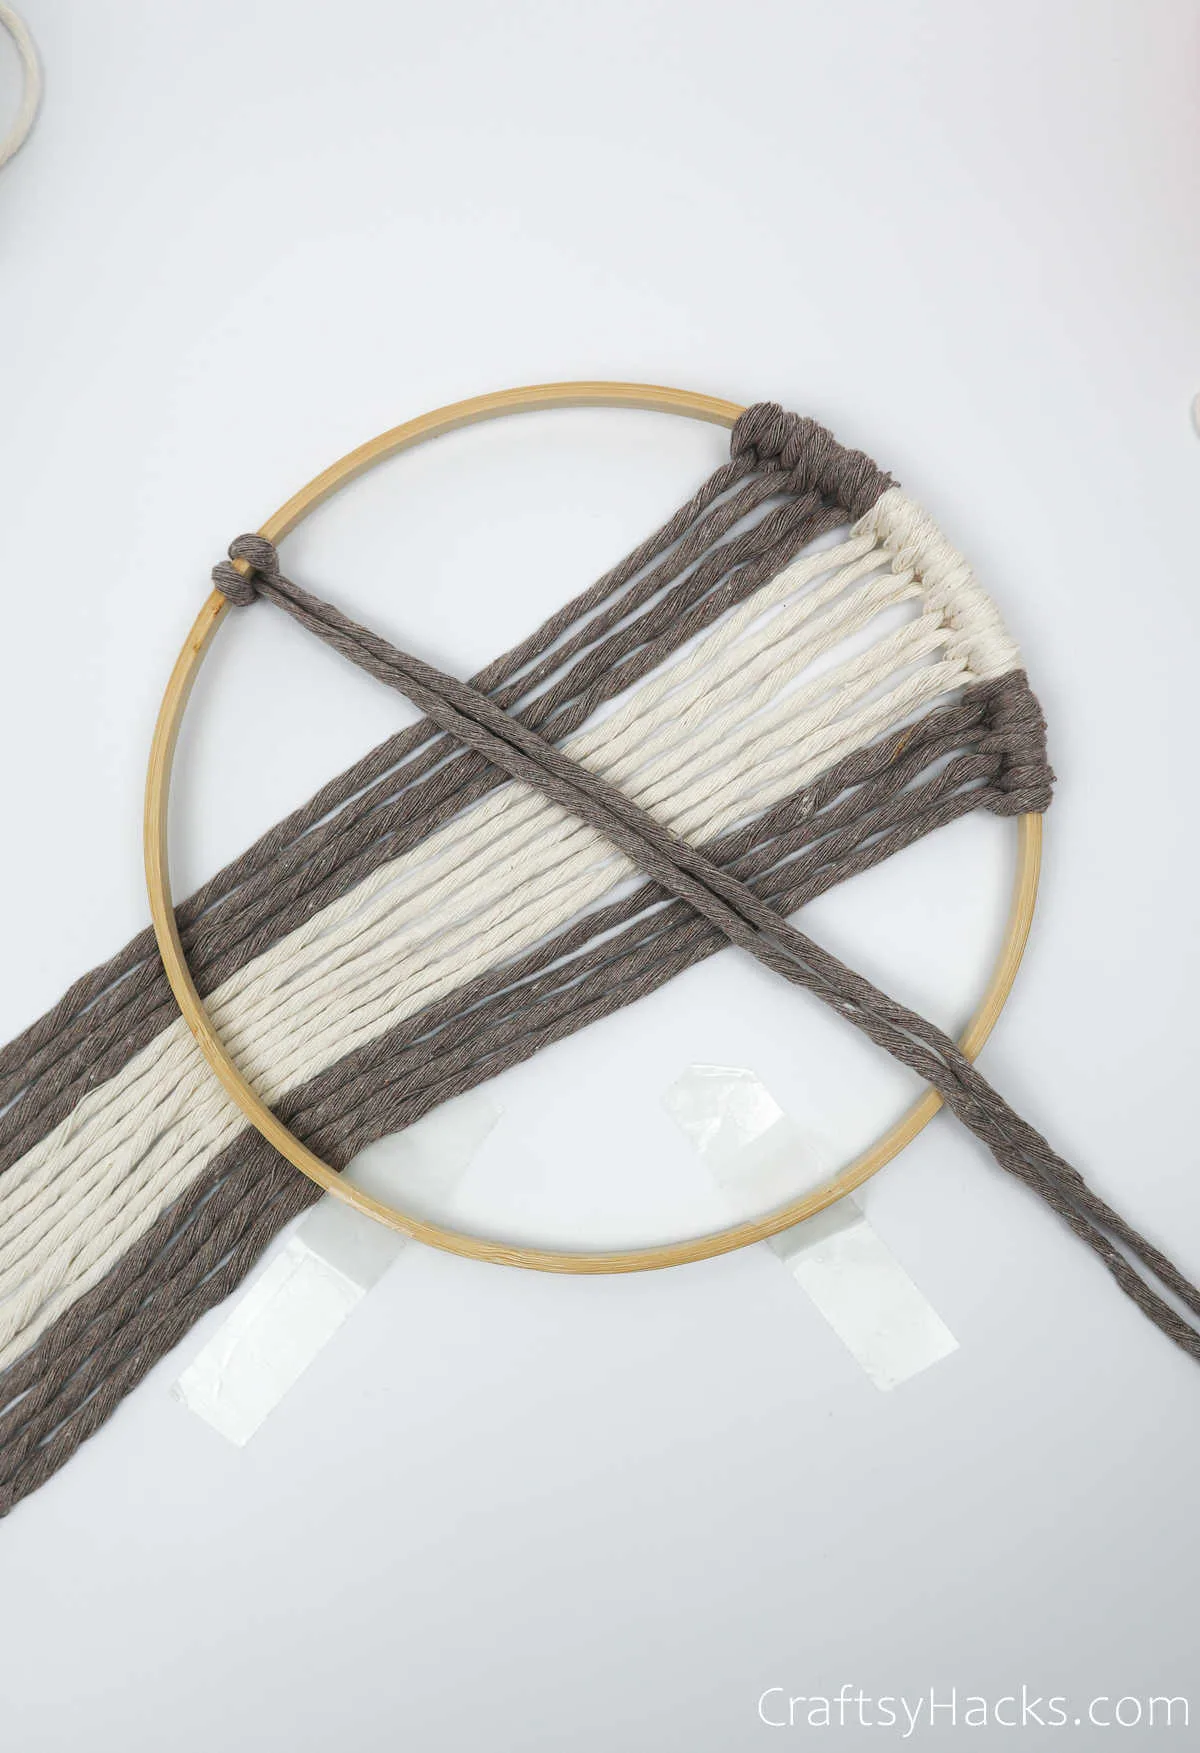
Just repeat the exact same thing you did on the ‘right’ side of the hoop, and work the knots into the hoop in the same color scheme.
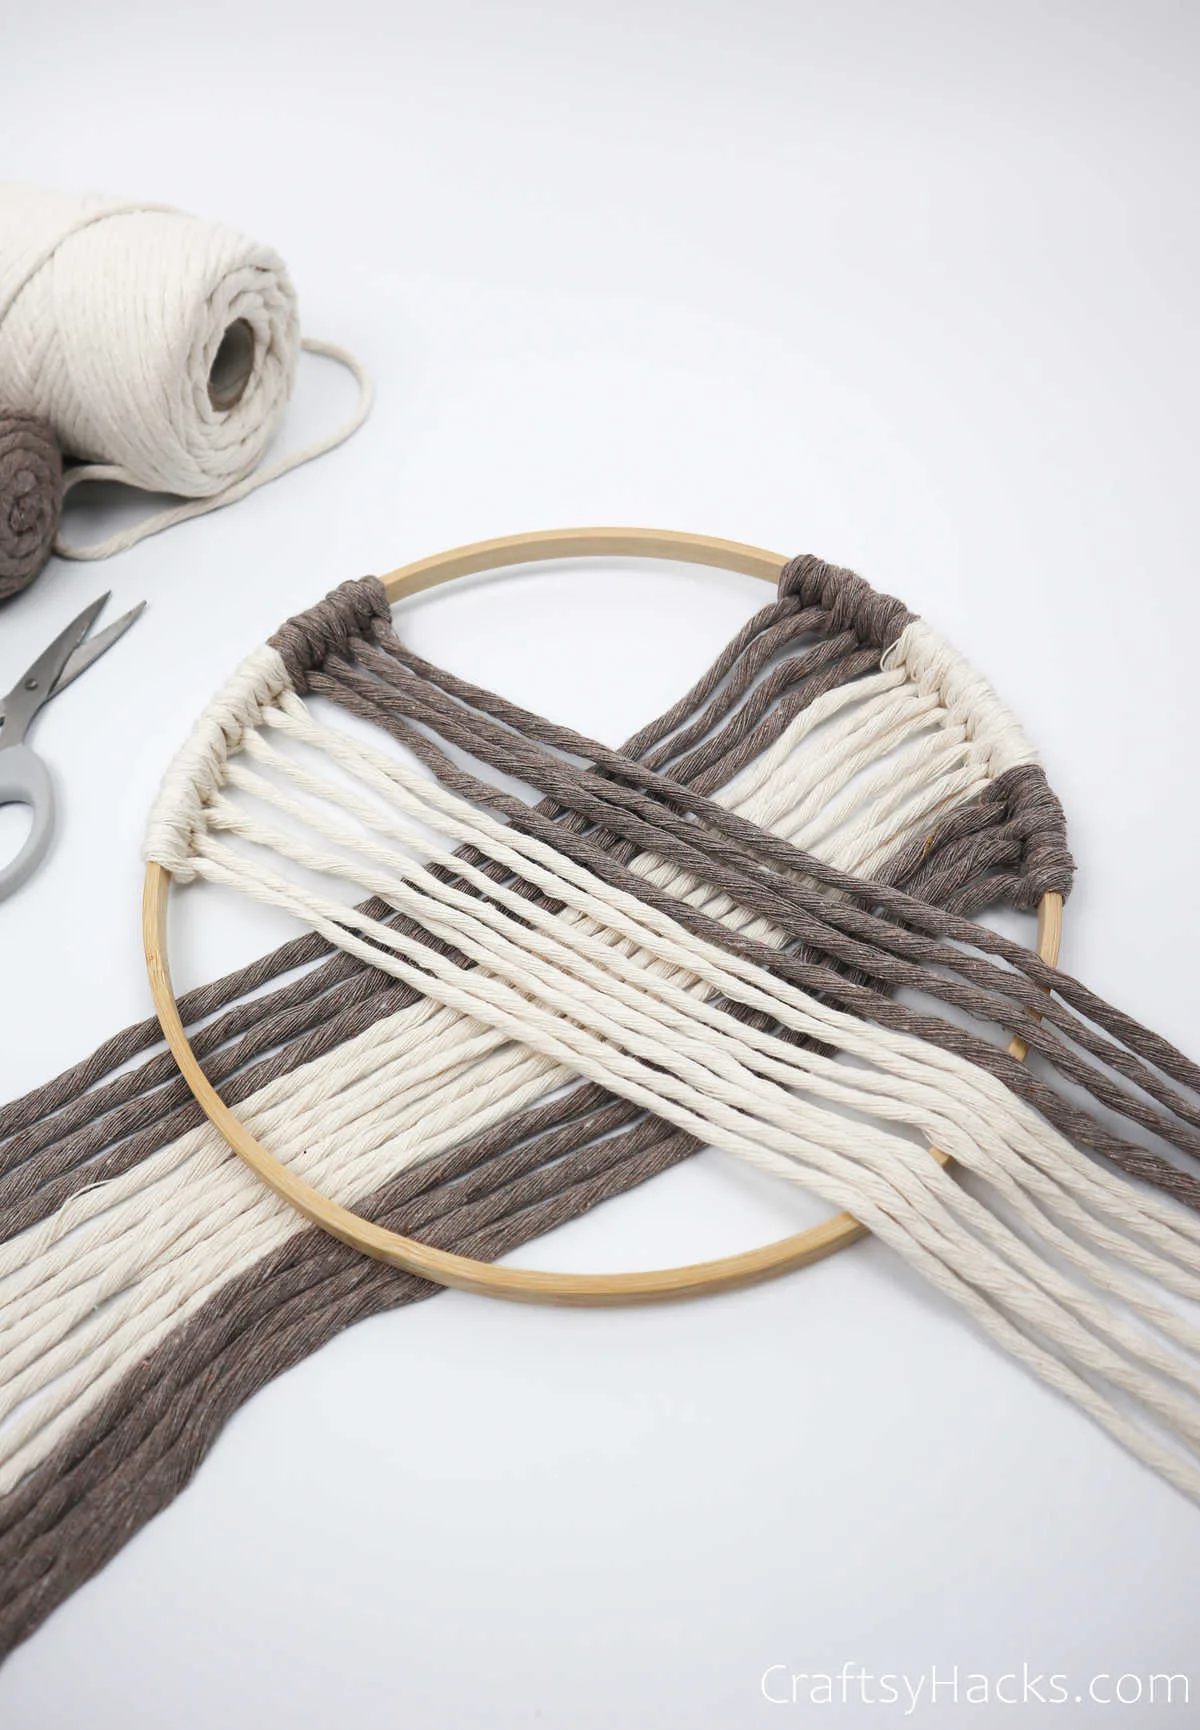
So, once again, make sure you’ve got this pattern in place: 2x cappuccino cords, 4x cream cords, 2x cappuccino cords.
Unlike the previous time, where you gathered all the cords and pulled them under the hoop, this time, they stay over the hoop. You’ll see why in just a bit!
Step 11
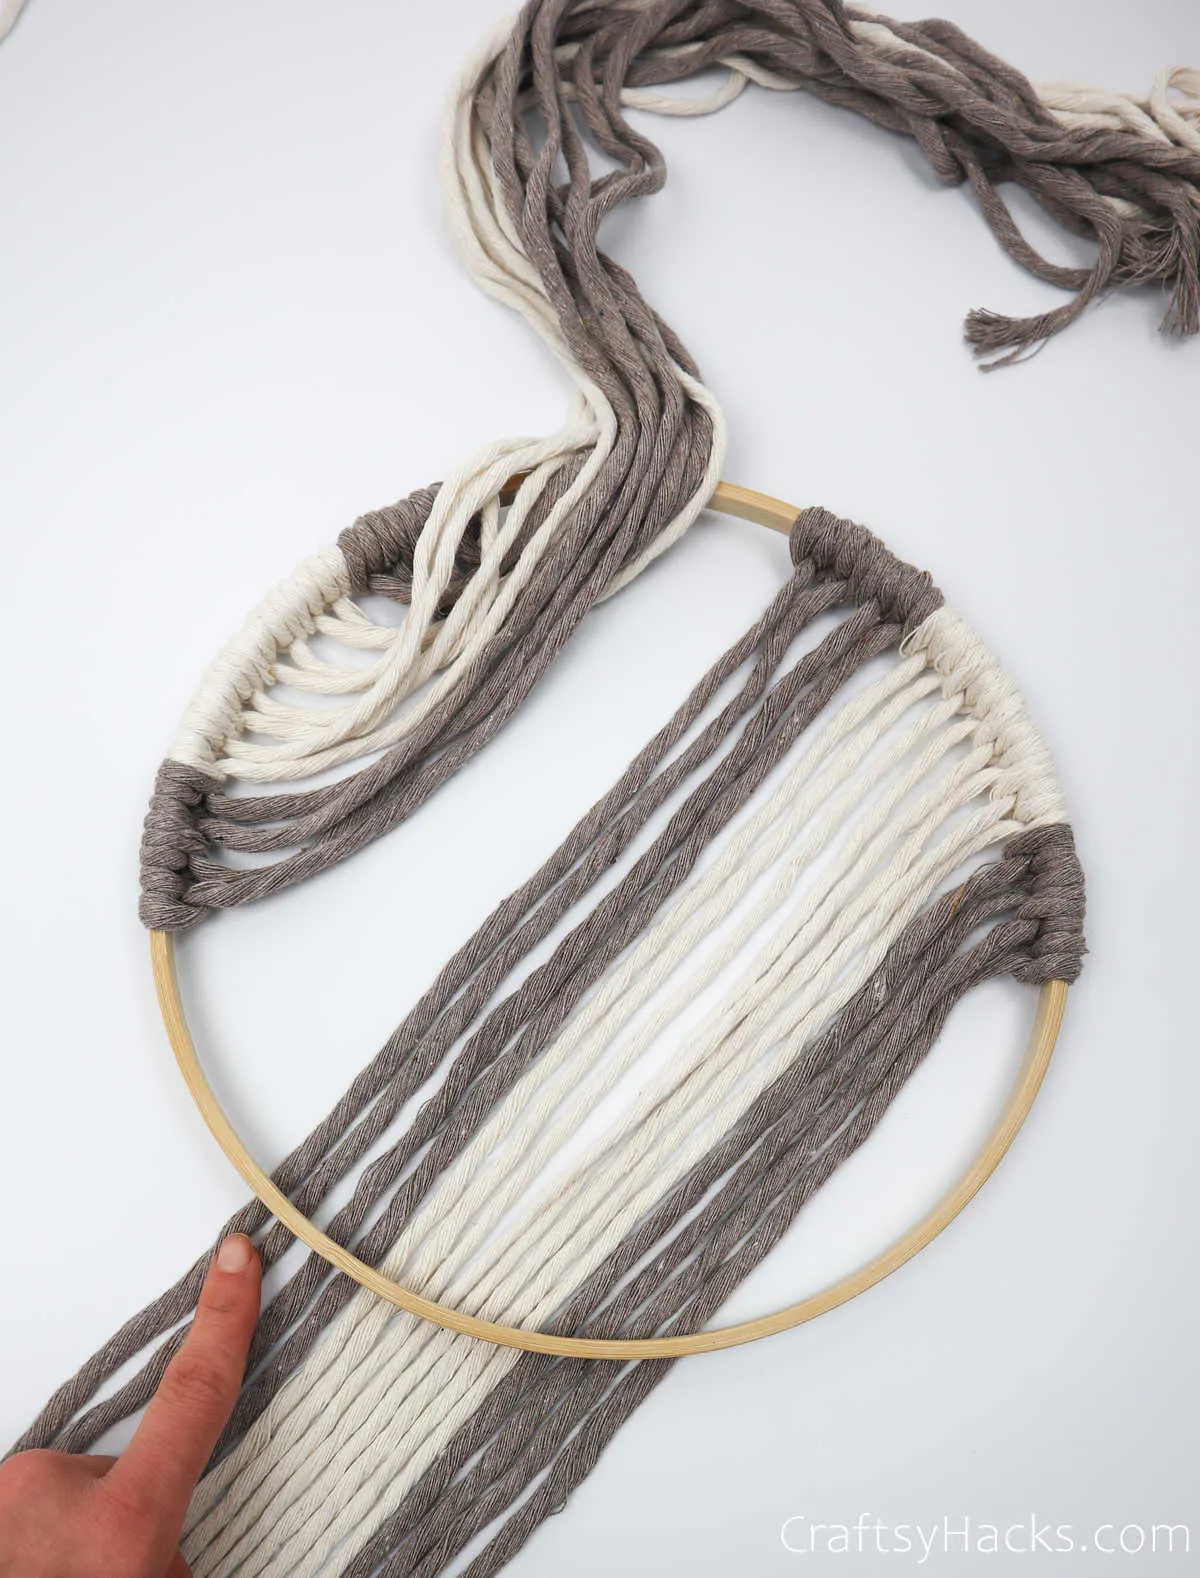
Carefully—so as to not tangle the cords—gather the ends of the strings on the ‘left’ side of the hoop and lay them away so you have access to the ‘right’ side.
Step 12
Next, we’re going to tie all the cords to the bottom of the hoop. You’ll be working diagonally, so that means that the cords on the top right part of the hoop will be knotted to the bottom left of the hoop.
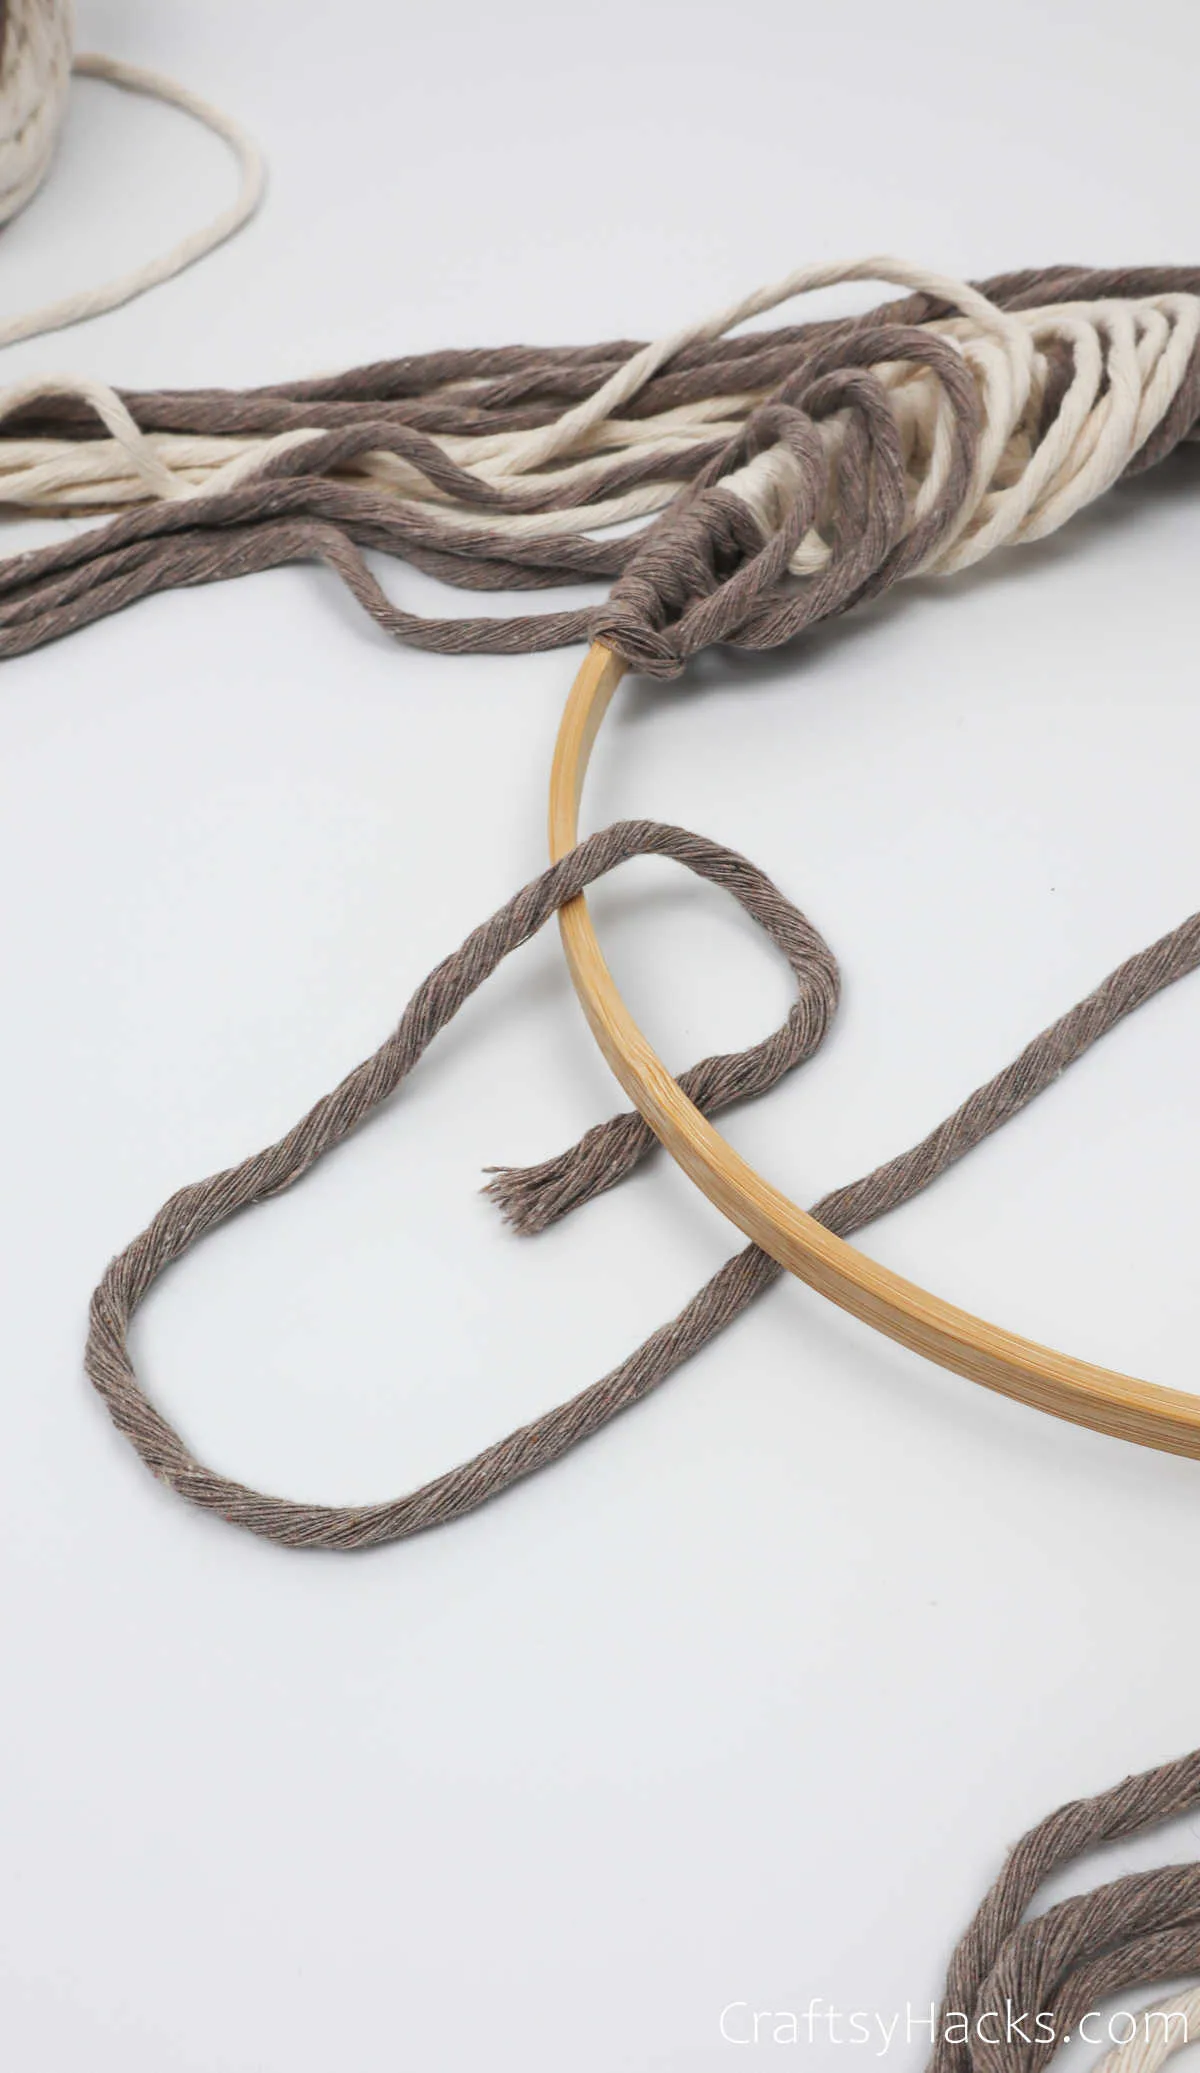
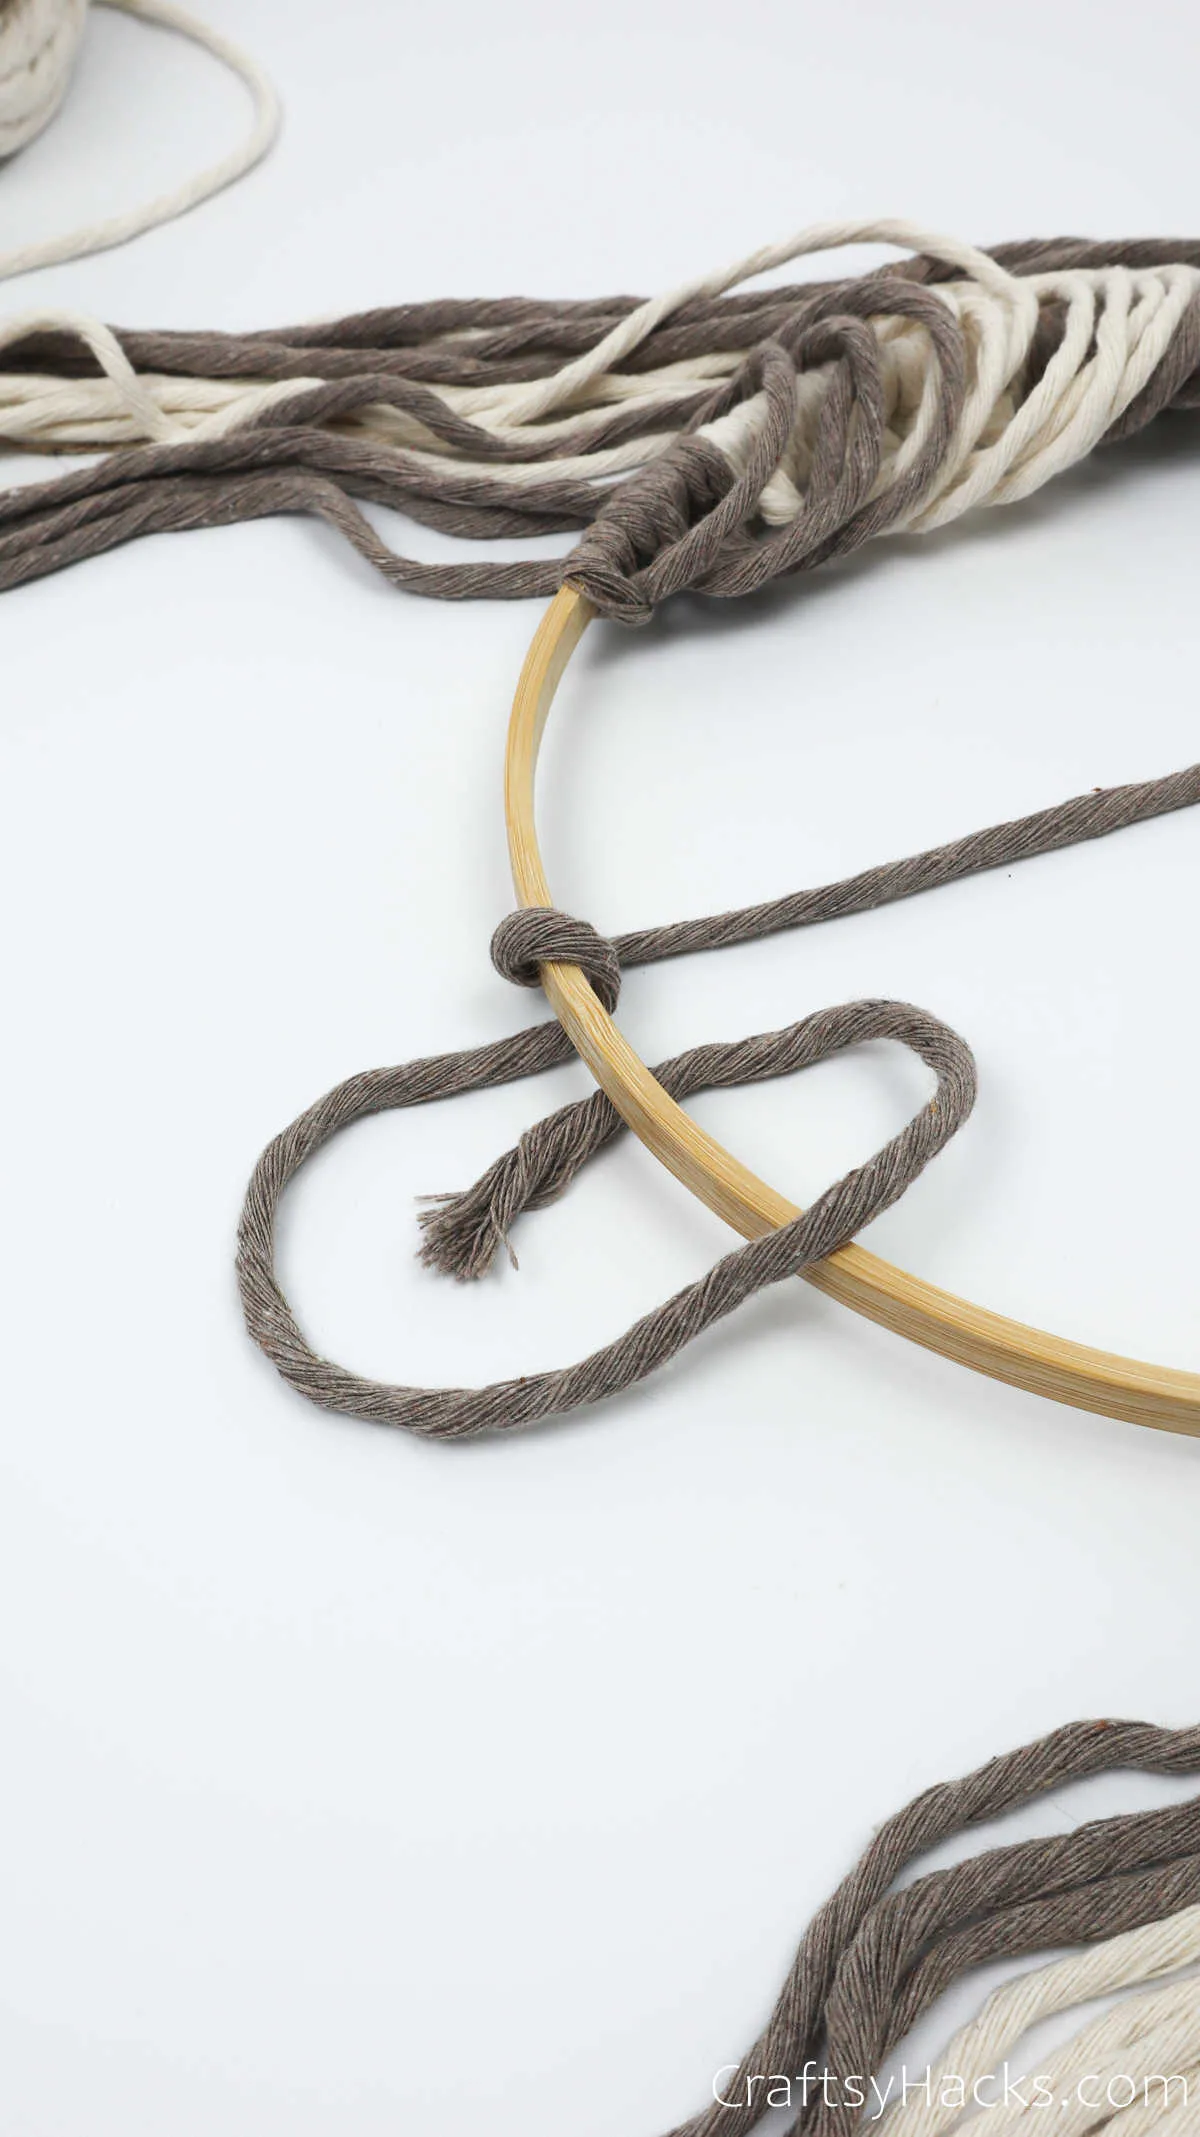
Take the first cappuccino cord you made and pull it over the hoop, then once again under it to form a loop. The end must be under the hoop, as seen here.
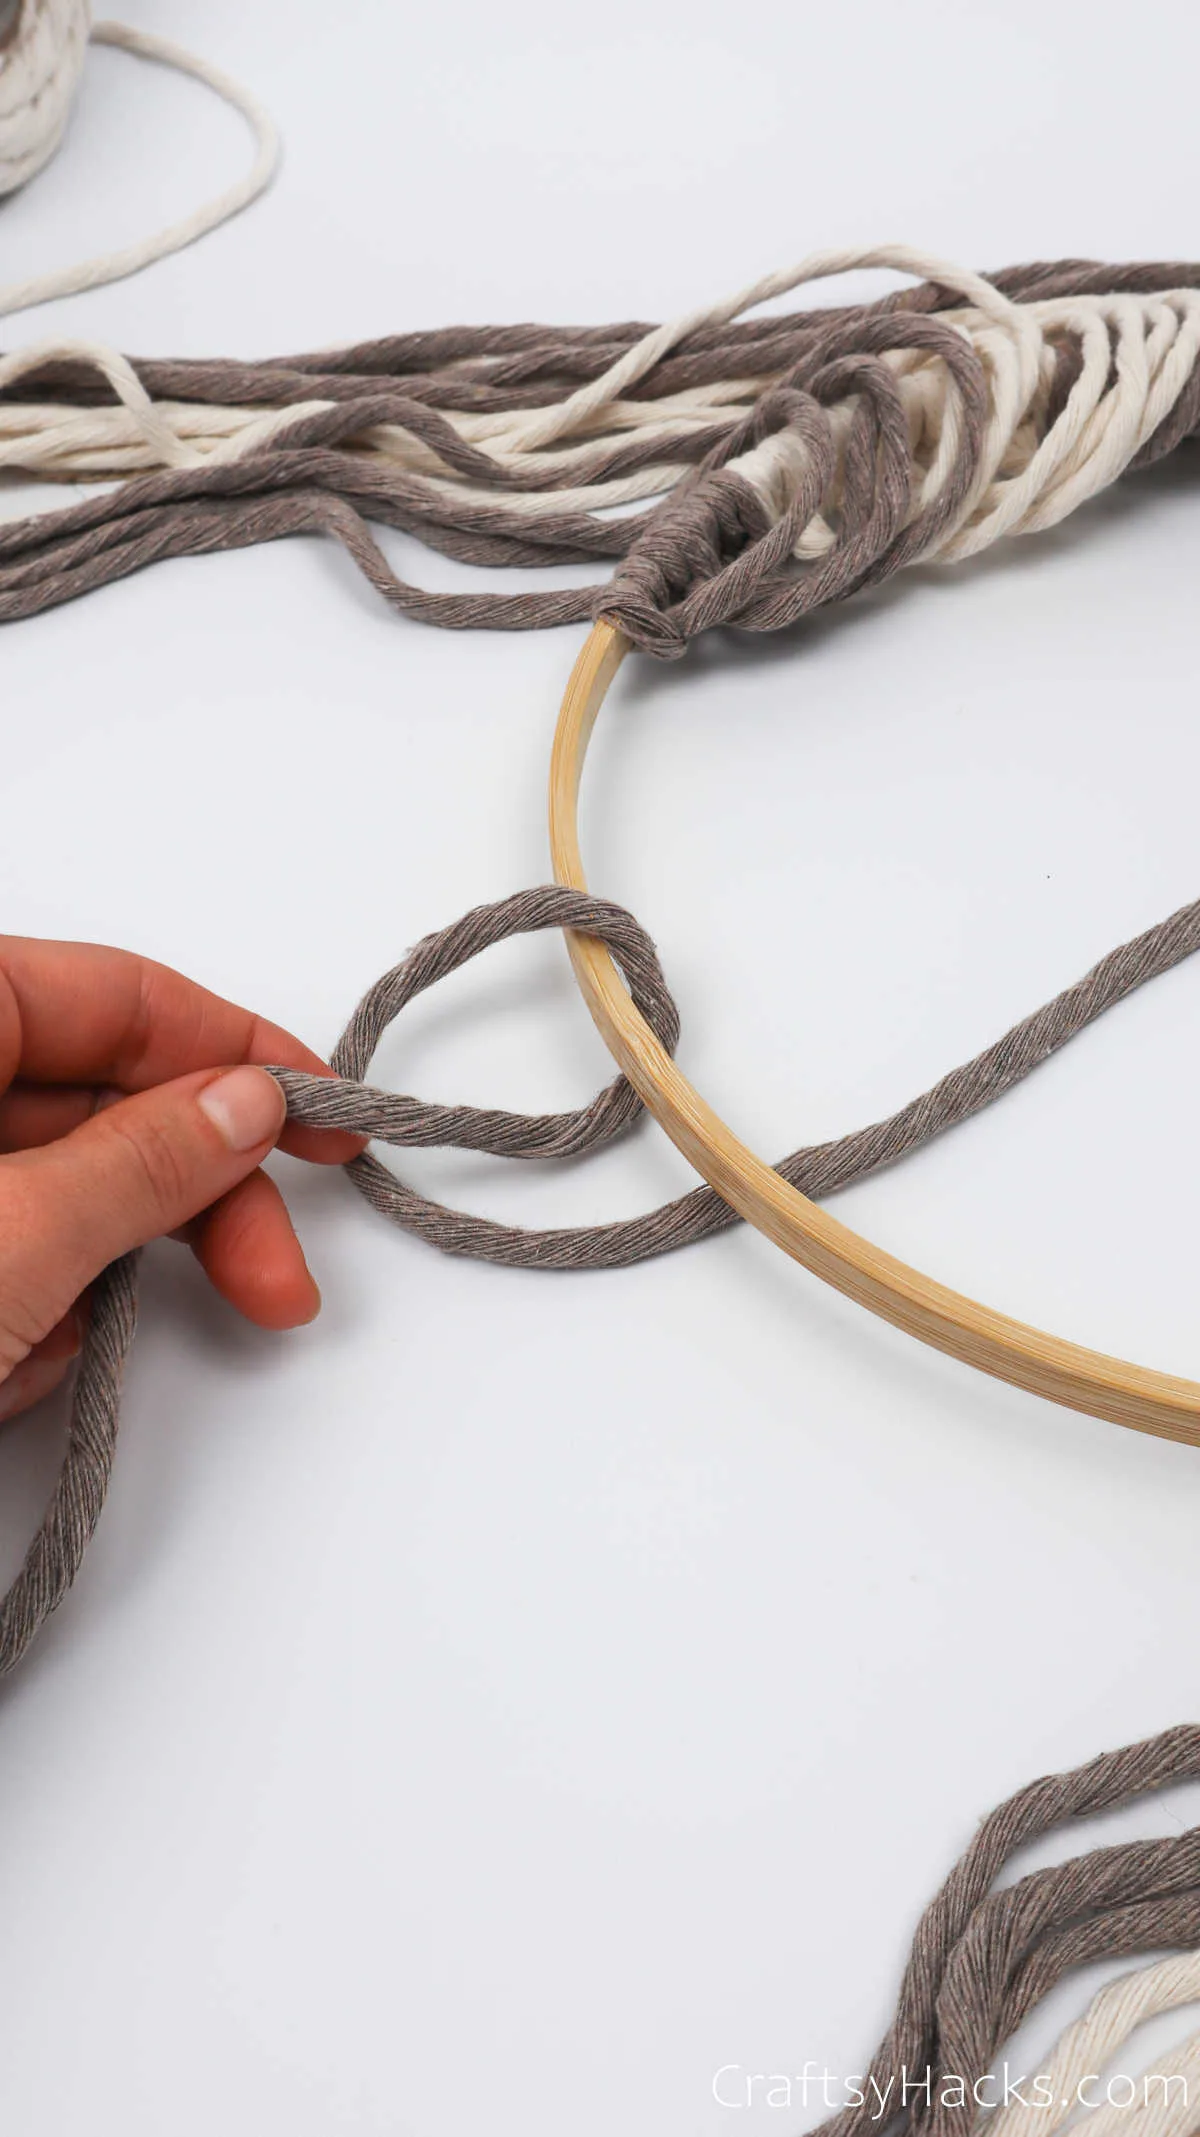
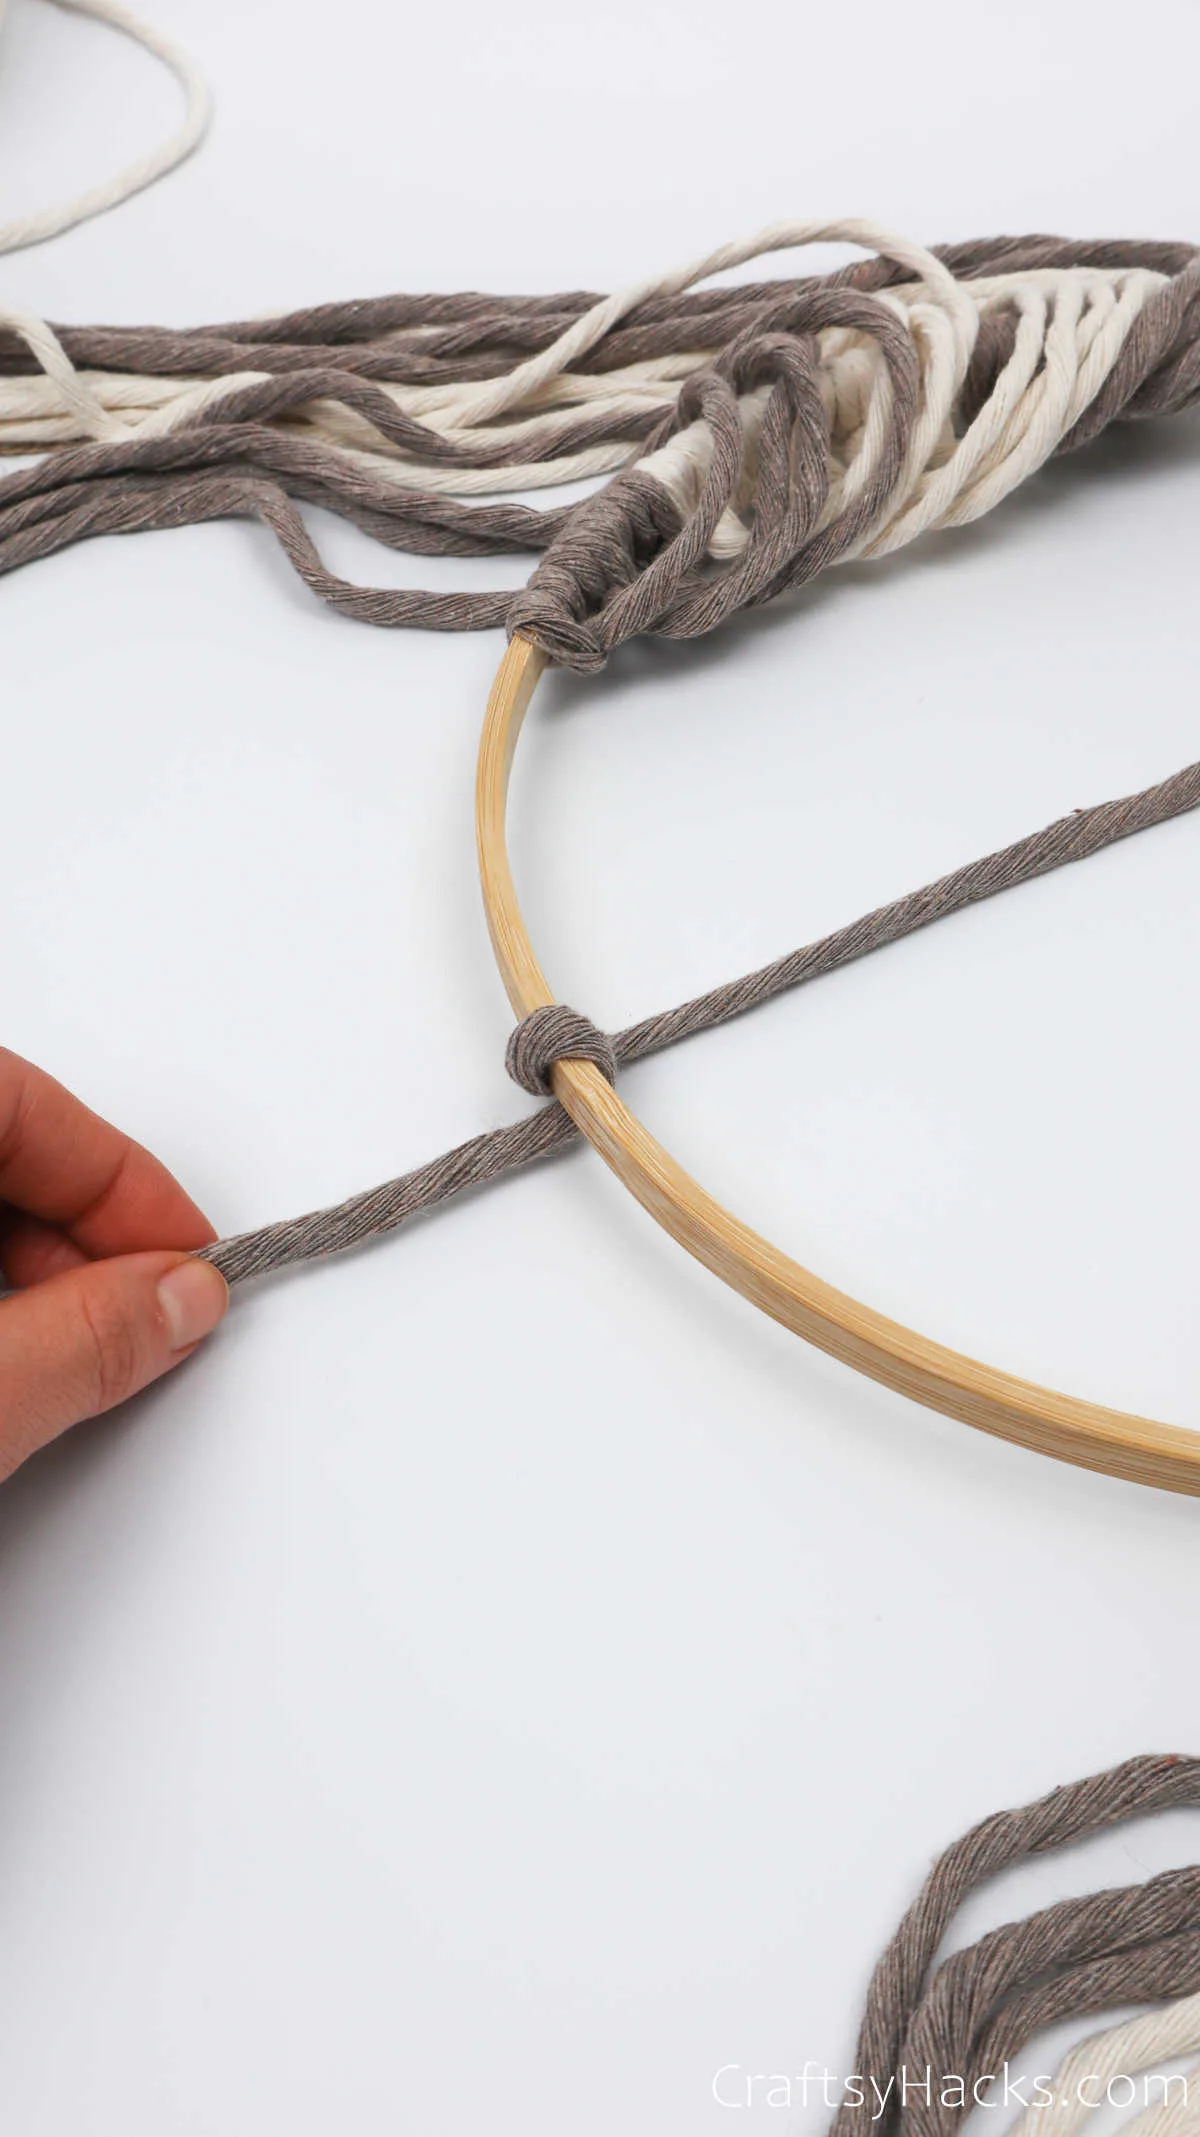
Then, take the end and pull it through the loop you just made. You’ll have a half knot.
Step 13
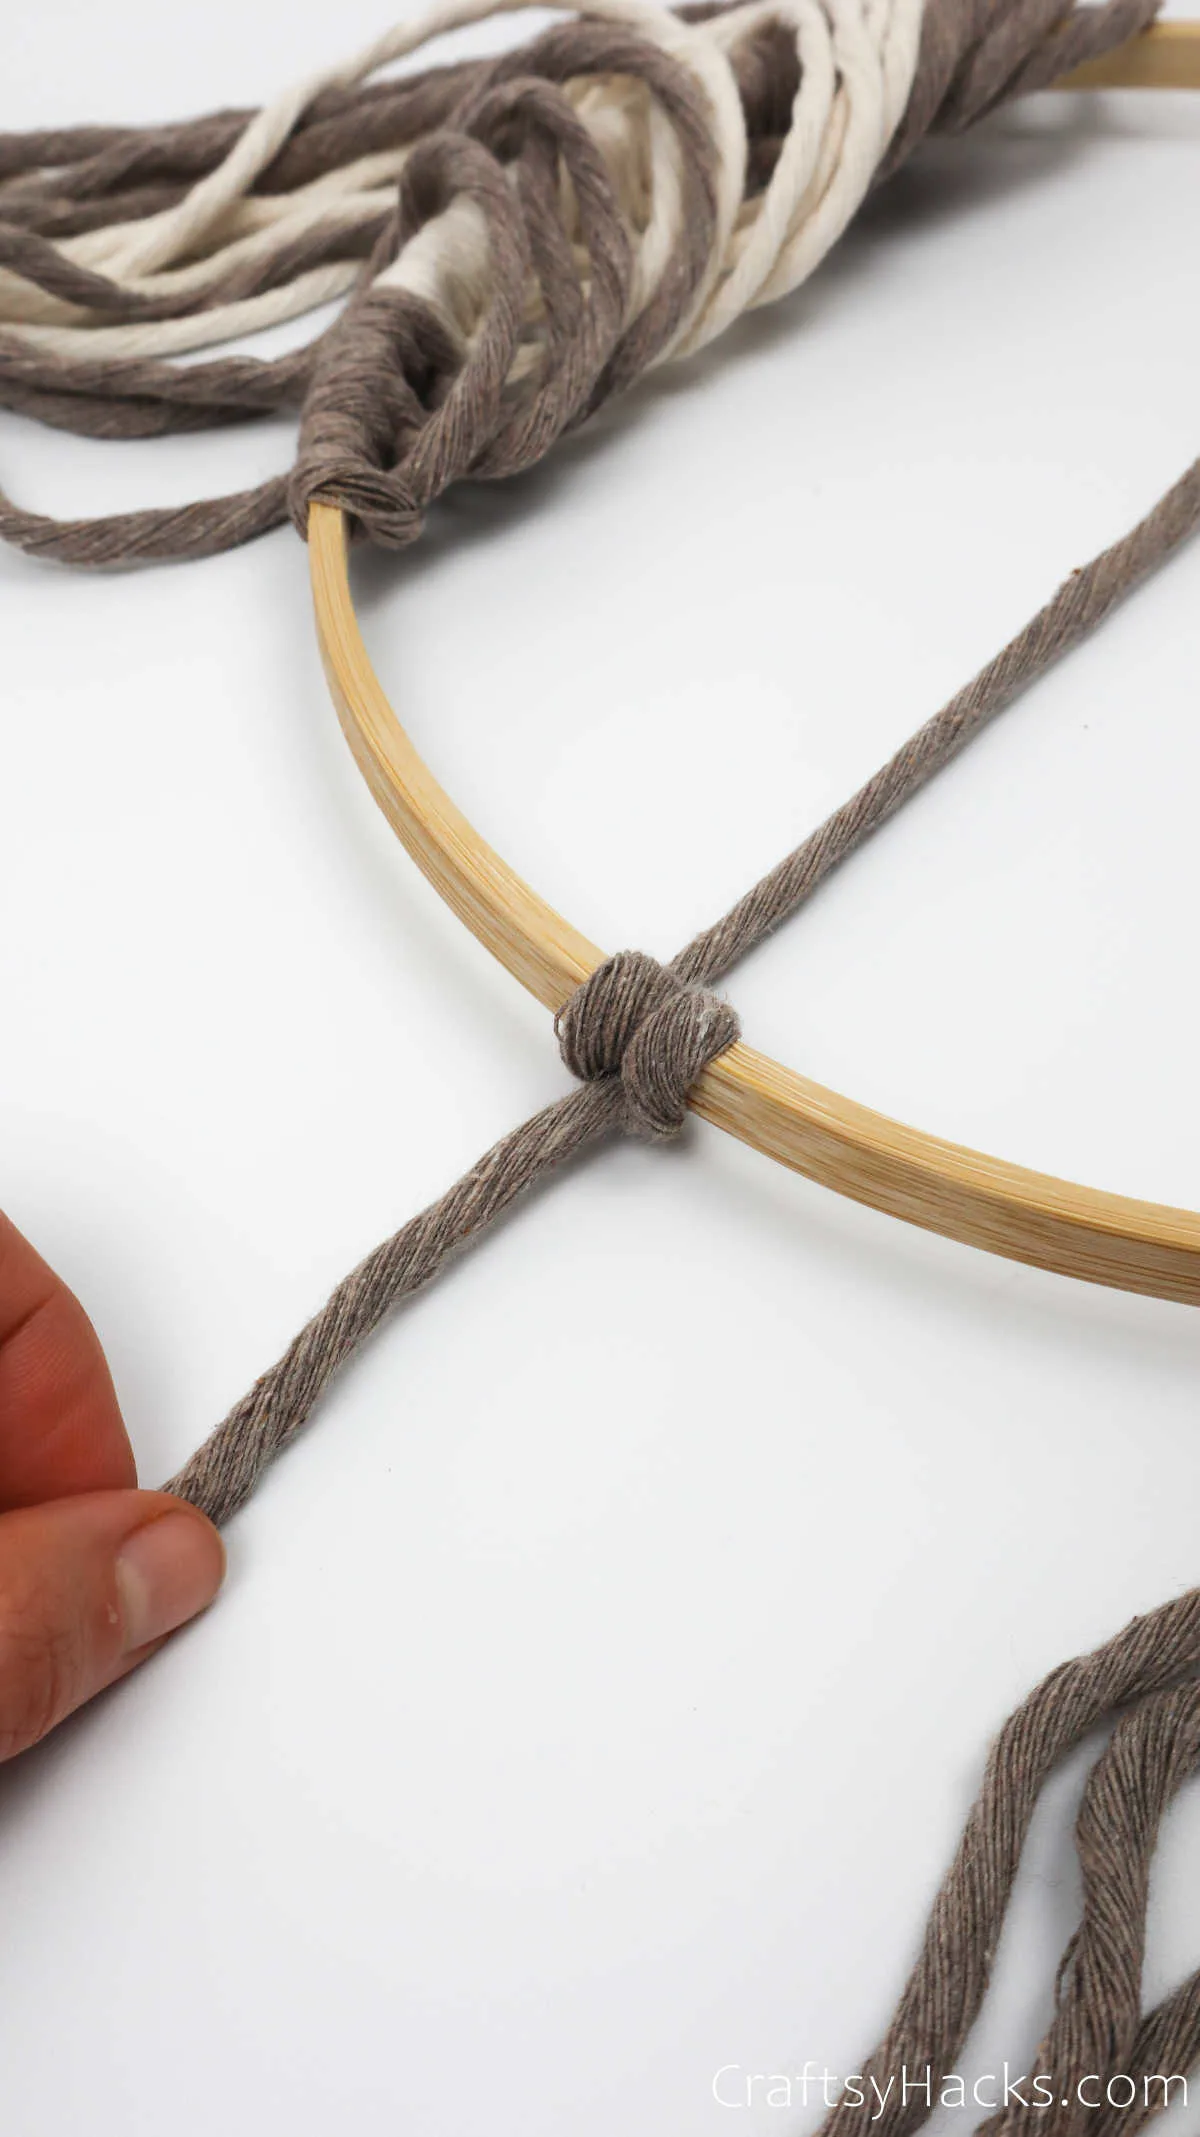
Repeat this step once again with the same string and to the right of the half-knot you just made. Now, you’ll have one complete knot, as you can see.
Step 14
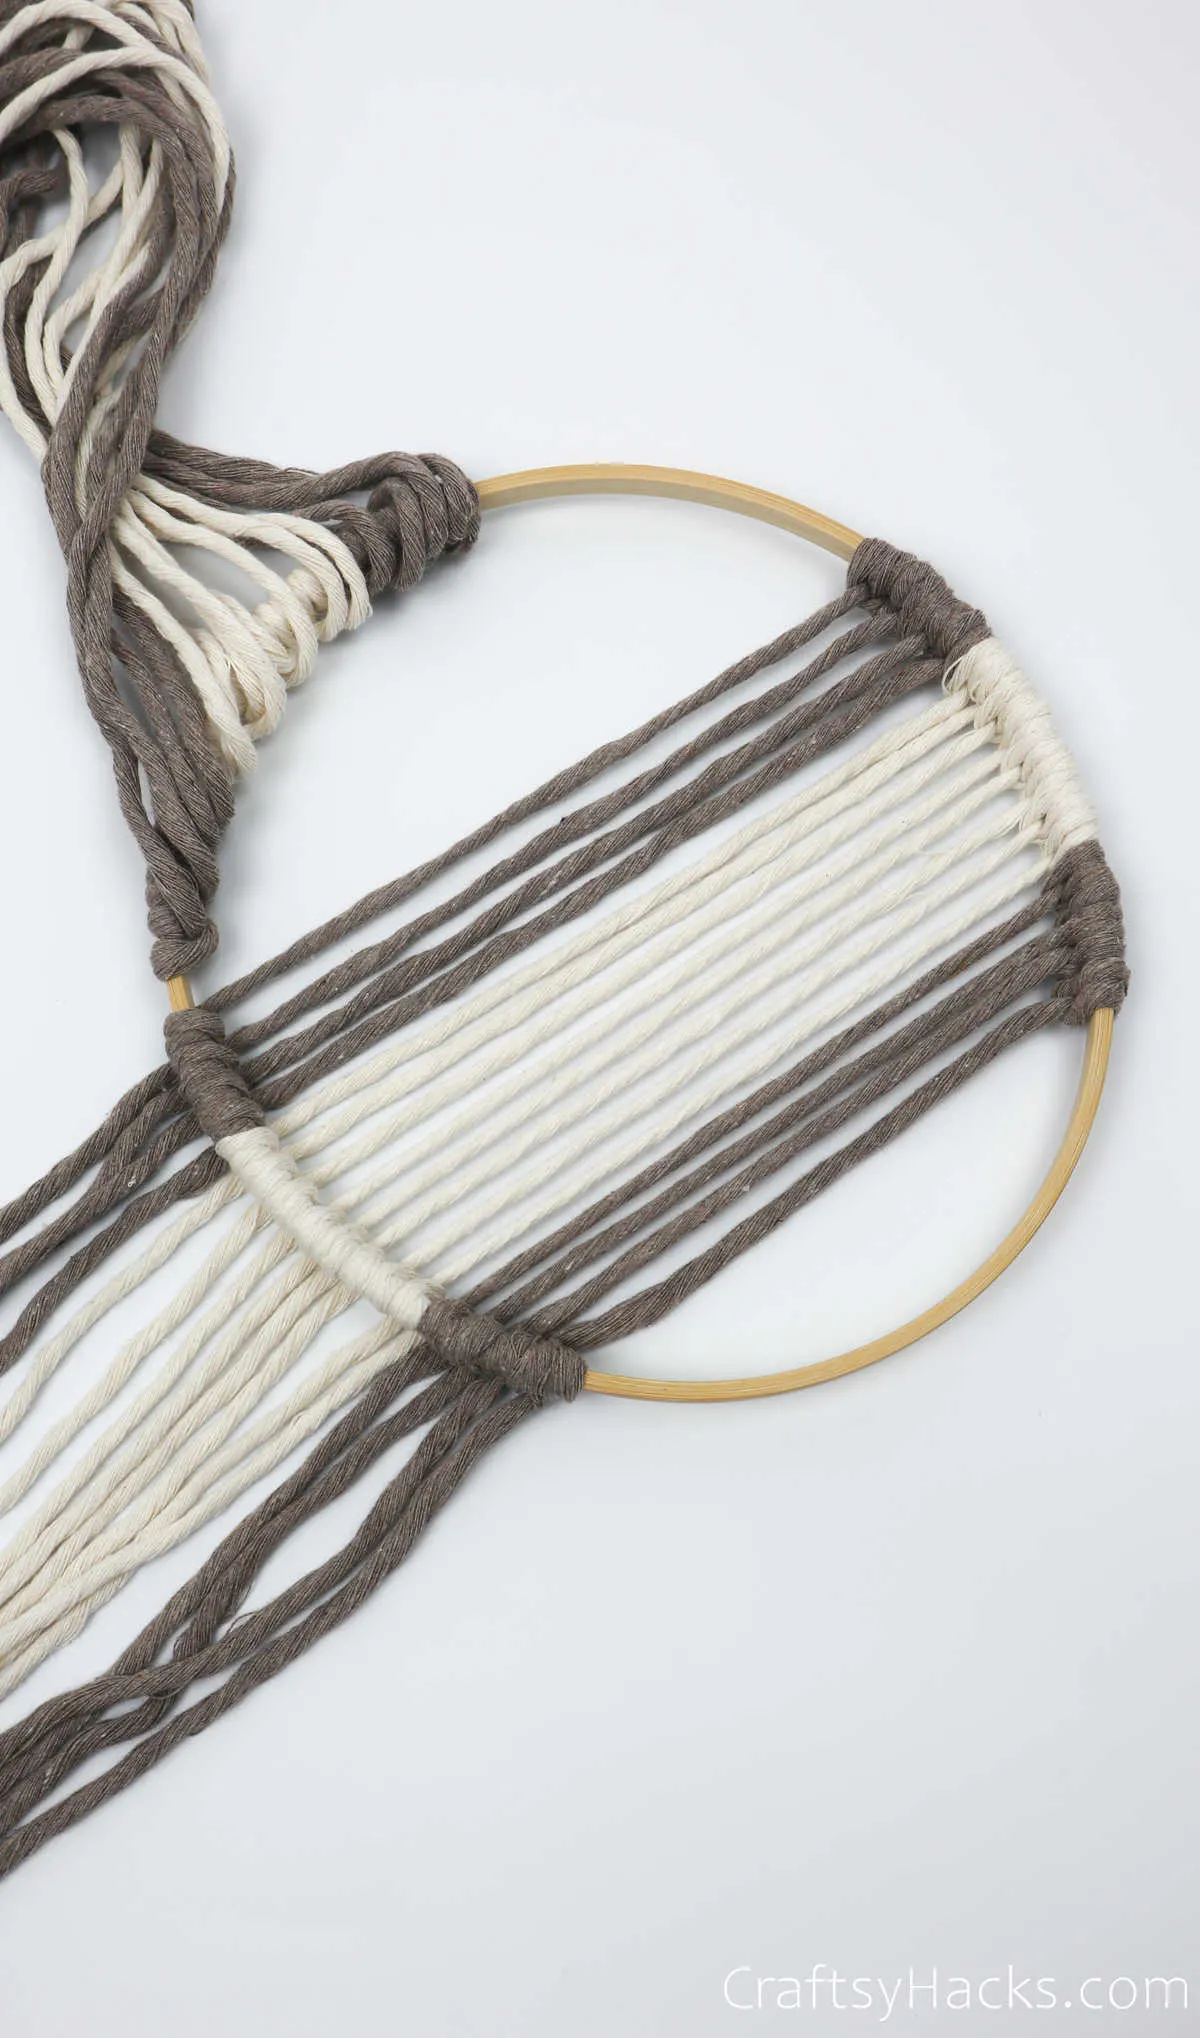
You know the drill: grab the next cappuccino-colored cord and repeat steps 12 and 13 to make another two-part knot. Repeat these two steps all the way through with all the cords.
Step 15
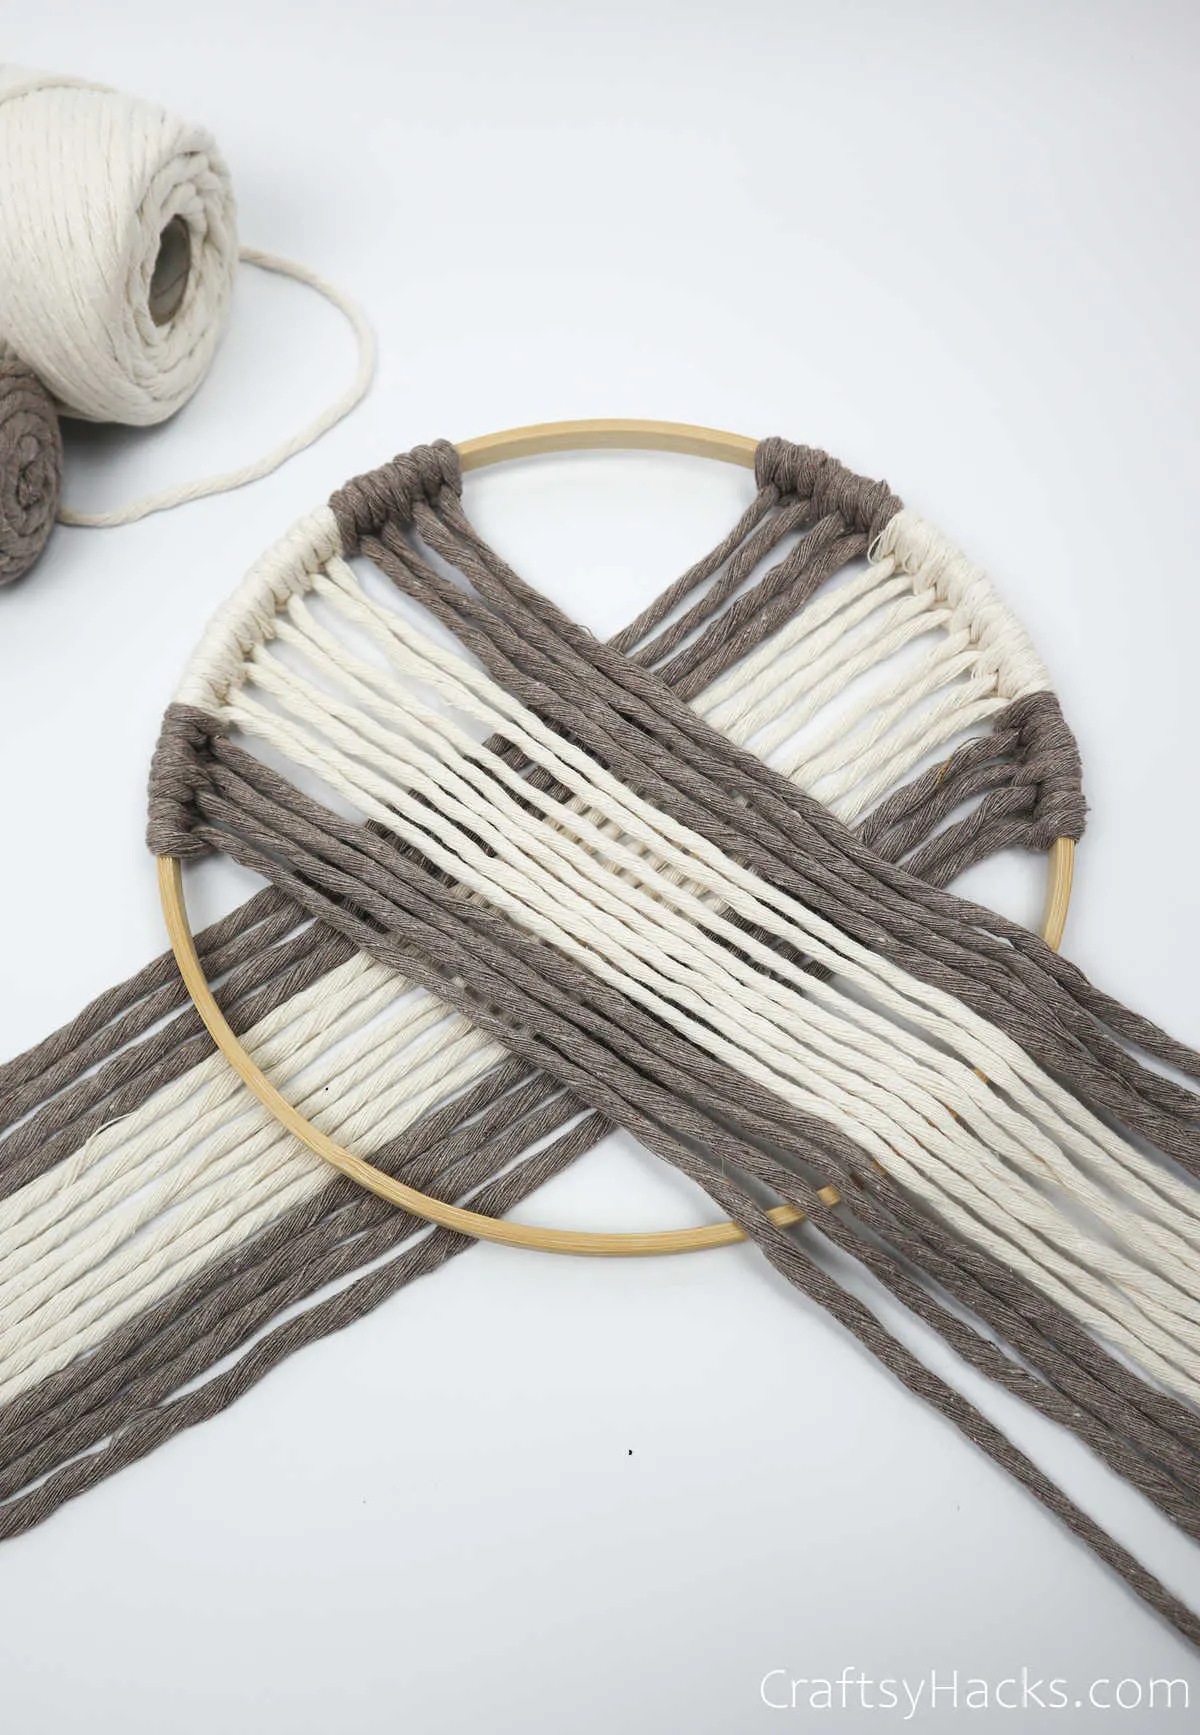
When you’re done with the cords on the ‘right’ side of the hoop, you can move on the ‘left’ side. Just like before, you’ll need to carefully pull all 16 strings under, to the bottom right of the hoop.
The hoop should sit over the strings.
Step 16
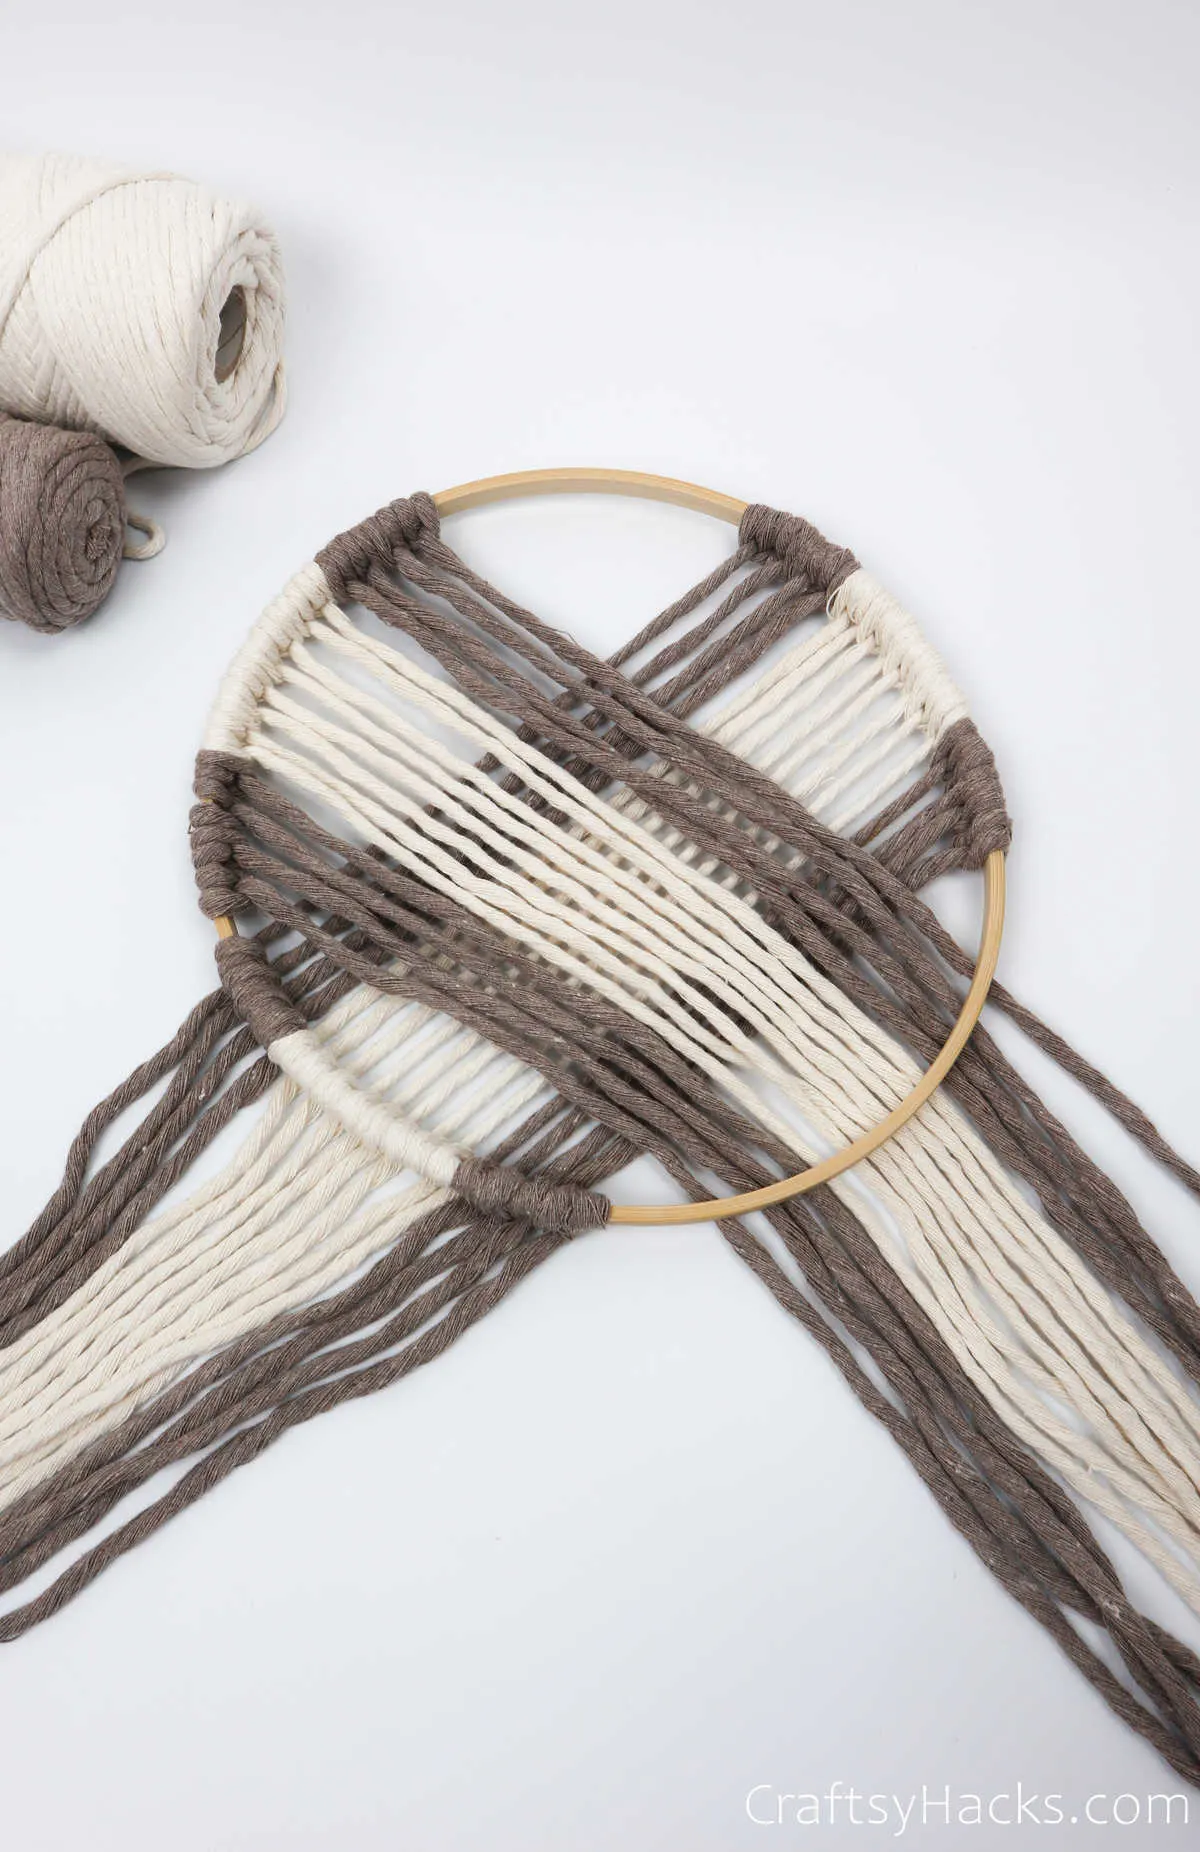
Repeat steps 12 and 13 and work your cords into knots on the bottom right. Your dream catcher should look like this when you’re done. Doesn’t it look dreamy?
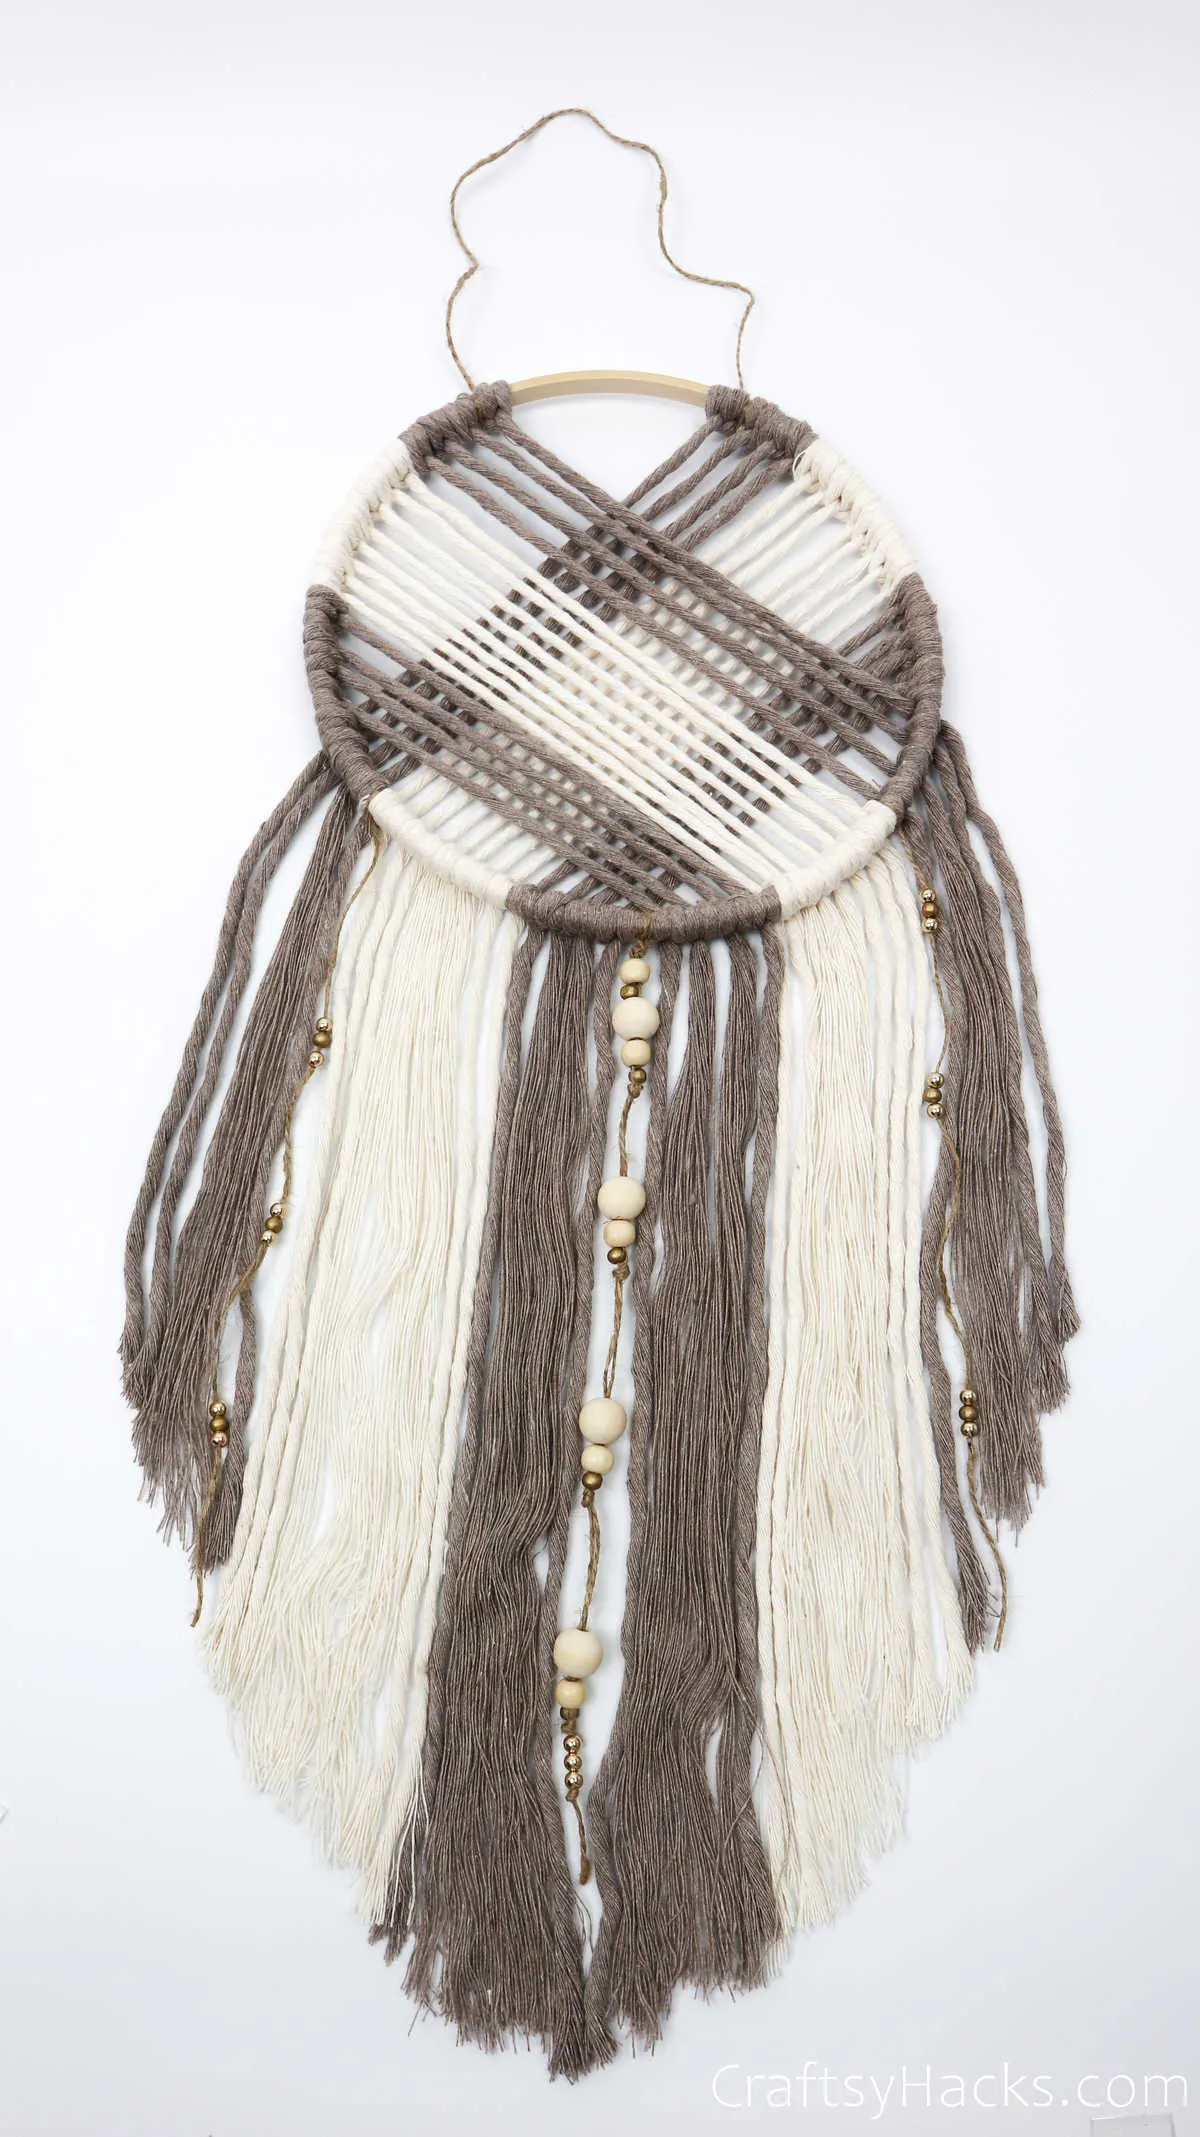
Remember to carefully arrange the cords hanging over the ends in the right color scheme(4 cappuccino cords, 8 cream cords, 8 cappuccino cords, 8 cream cords, and 4 cappuccino cords).
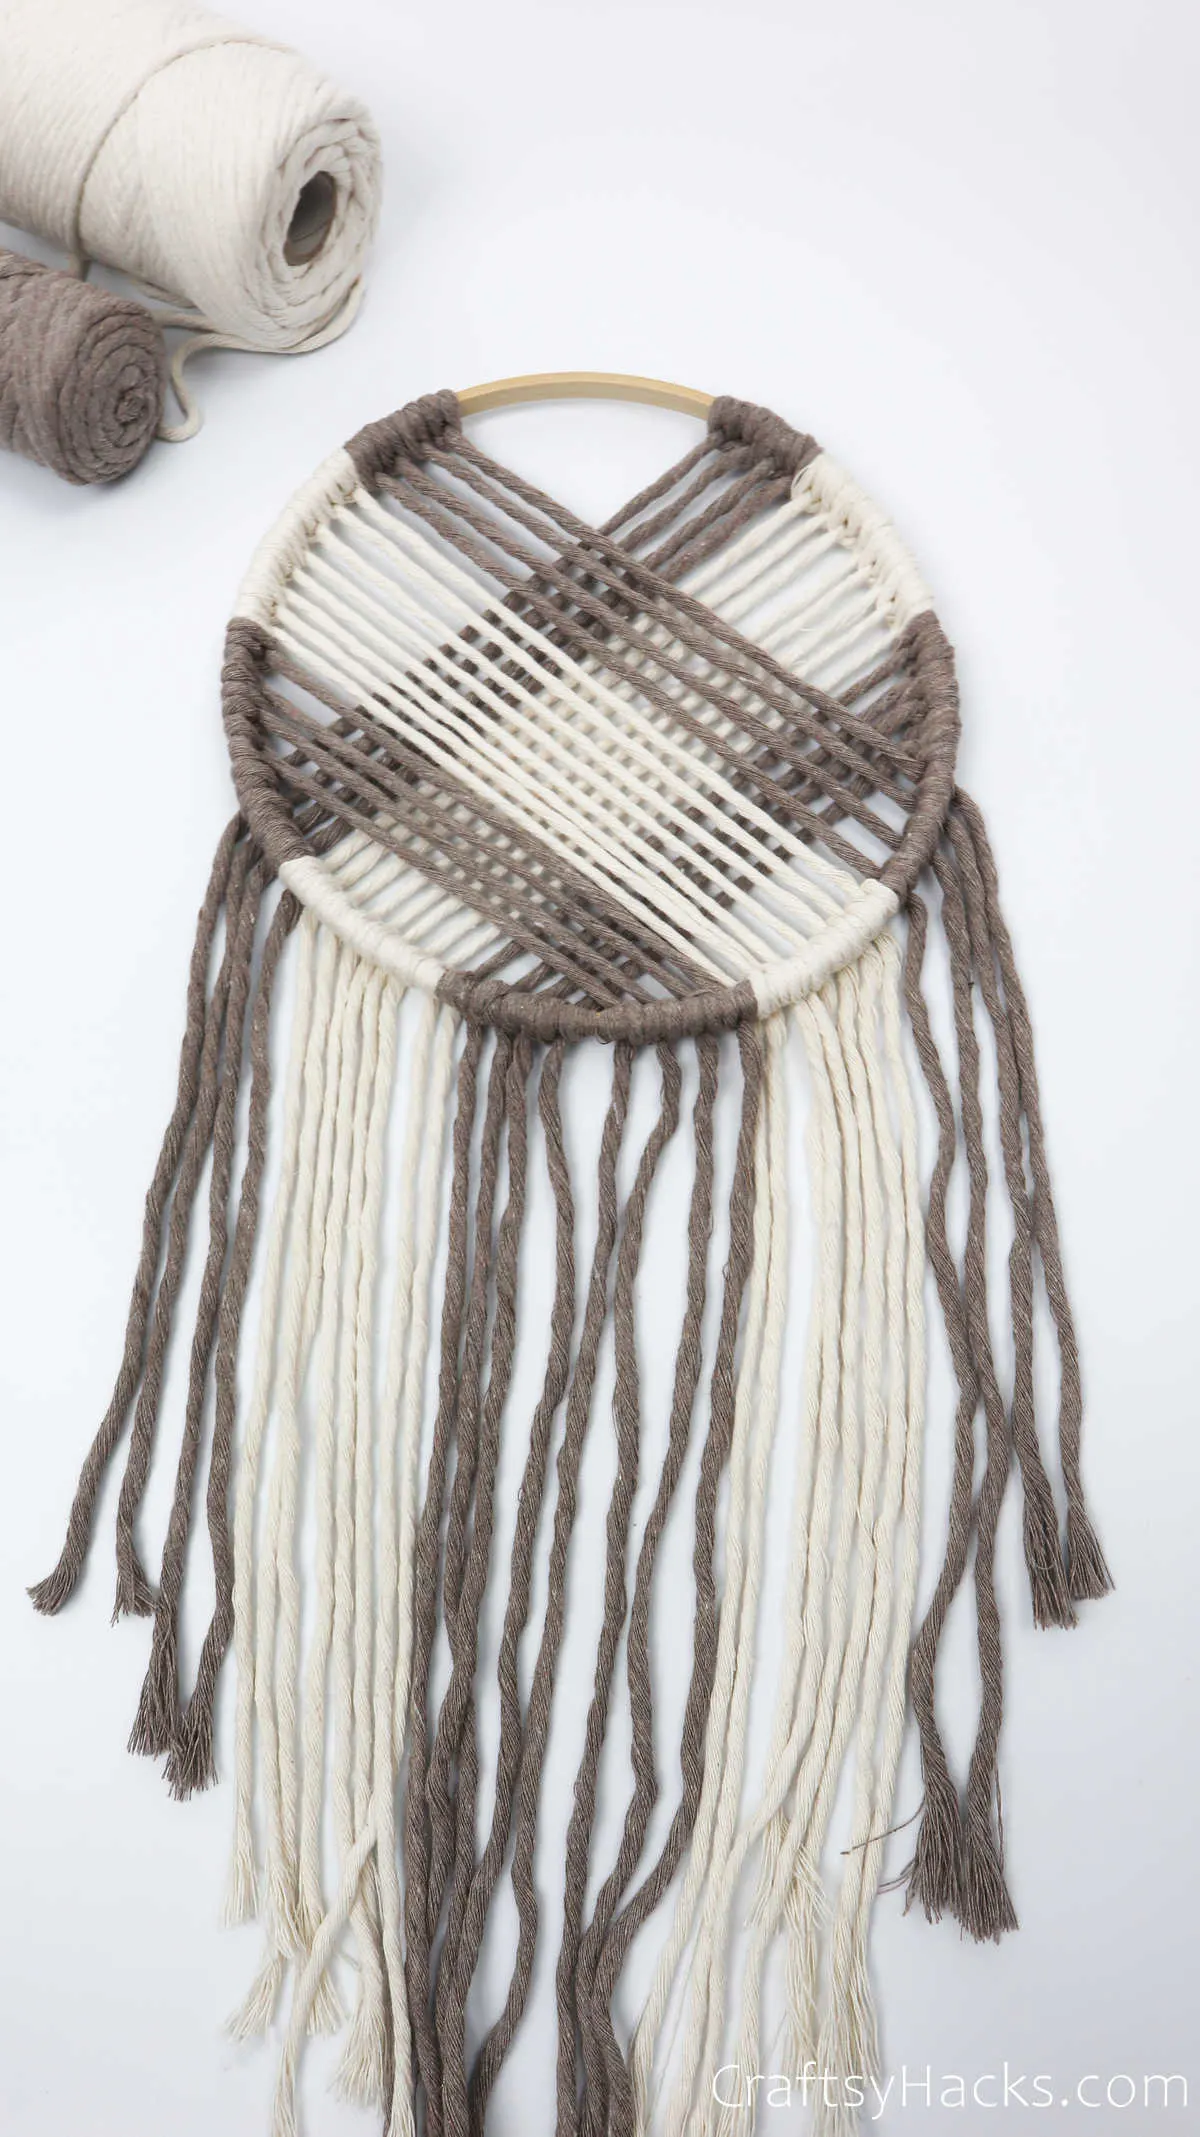
Step 17
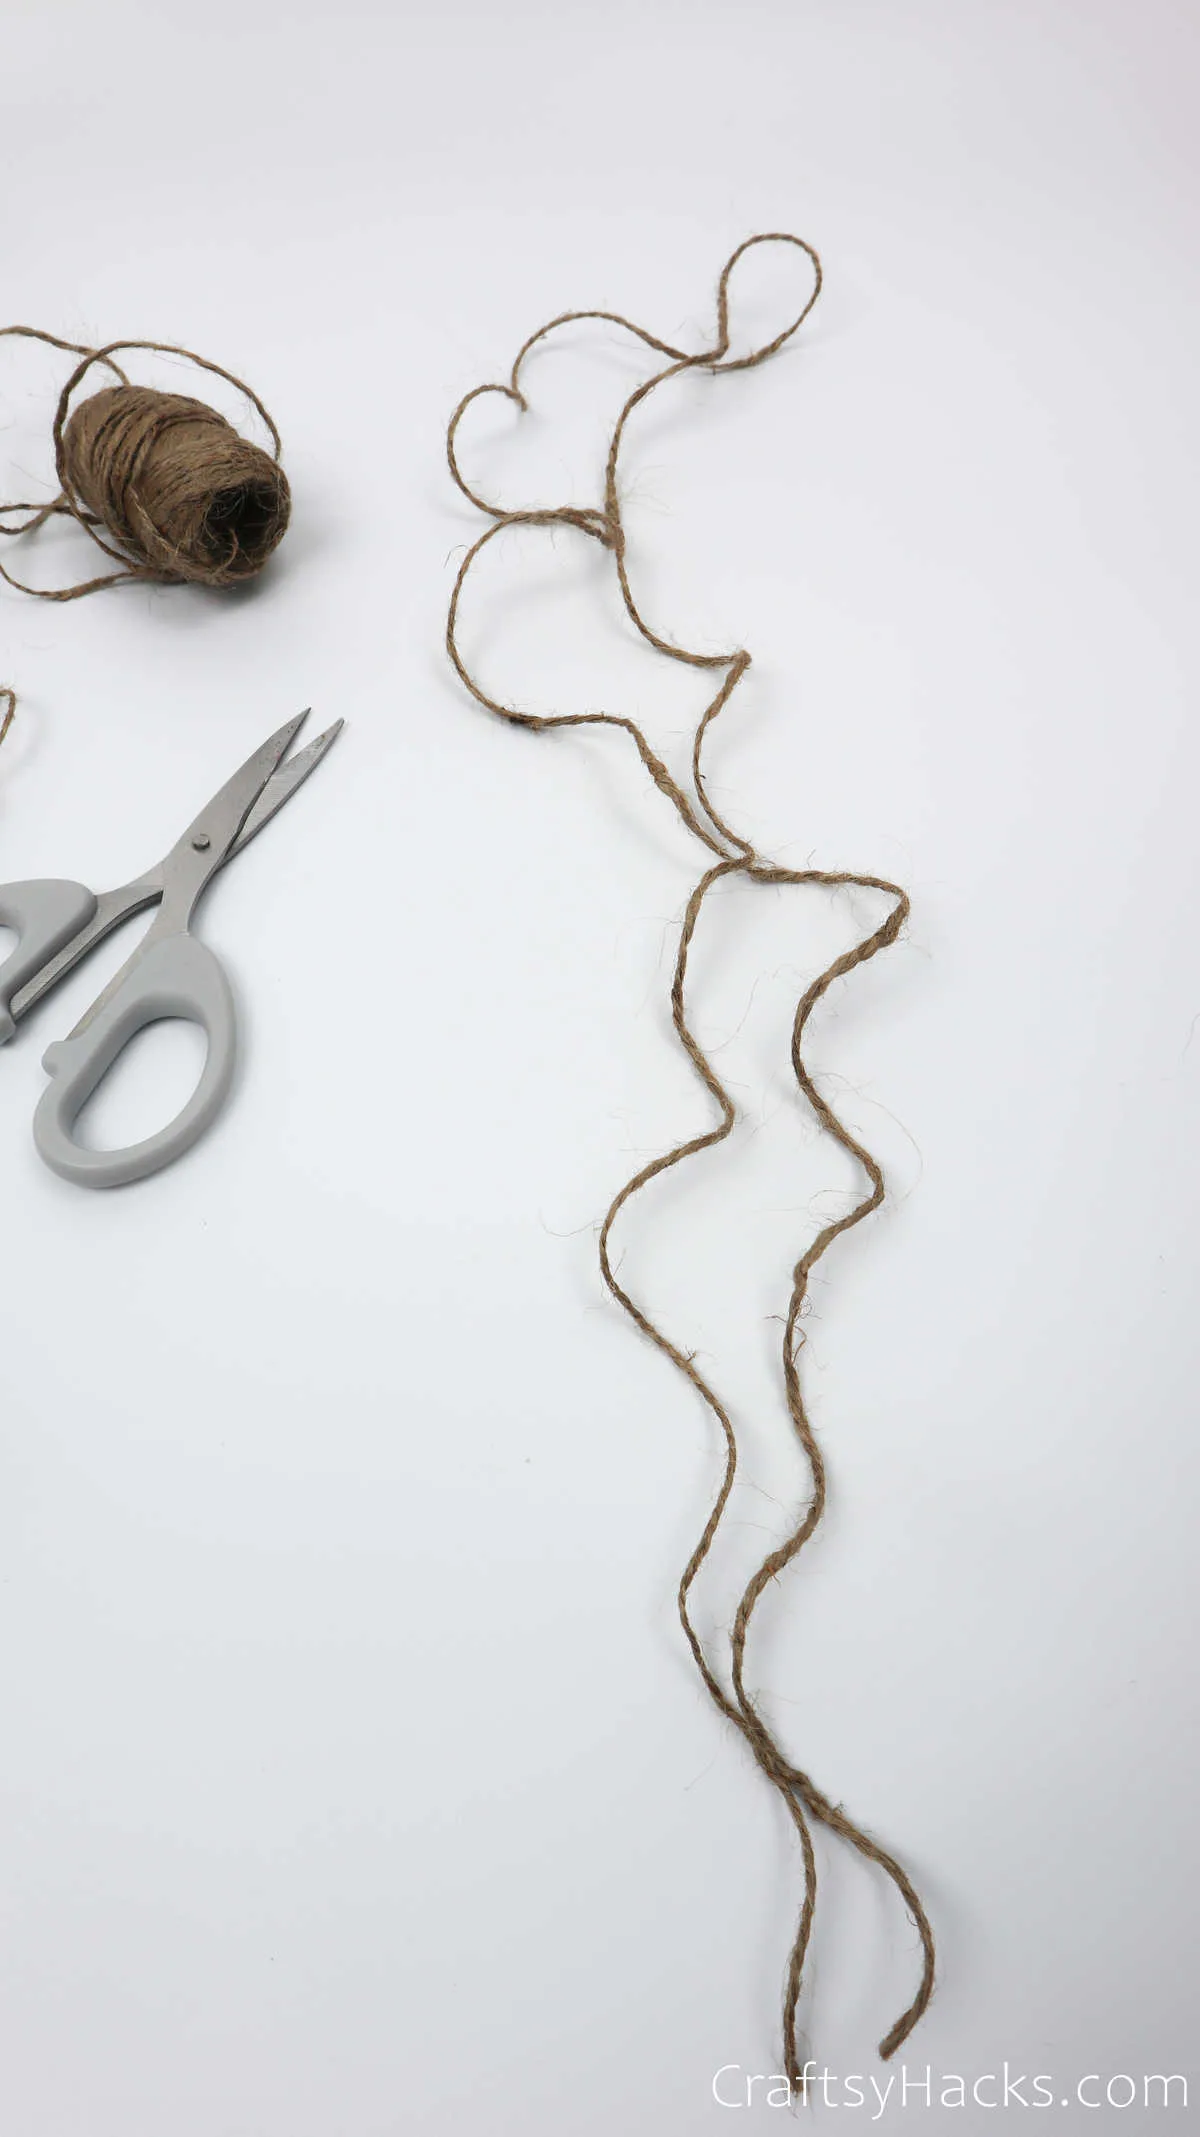
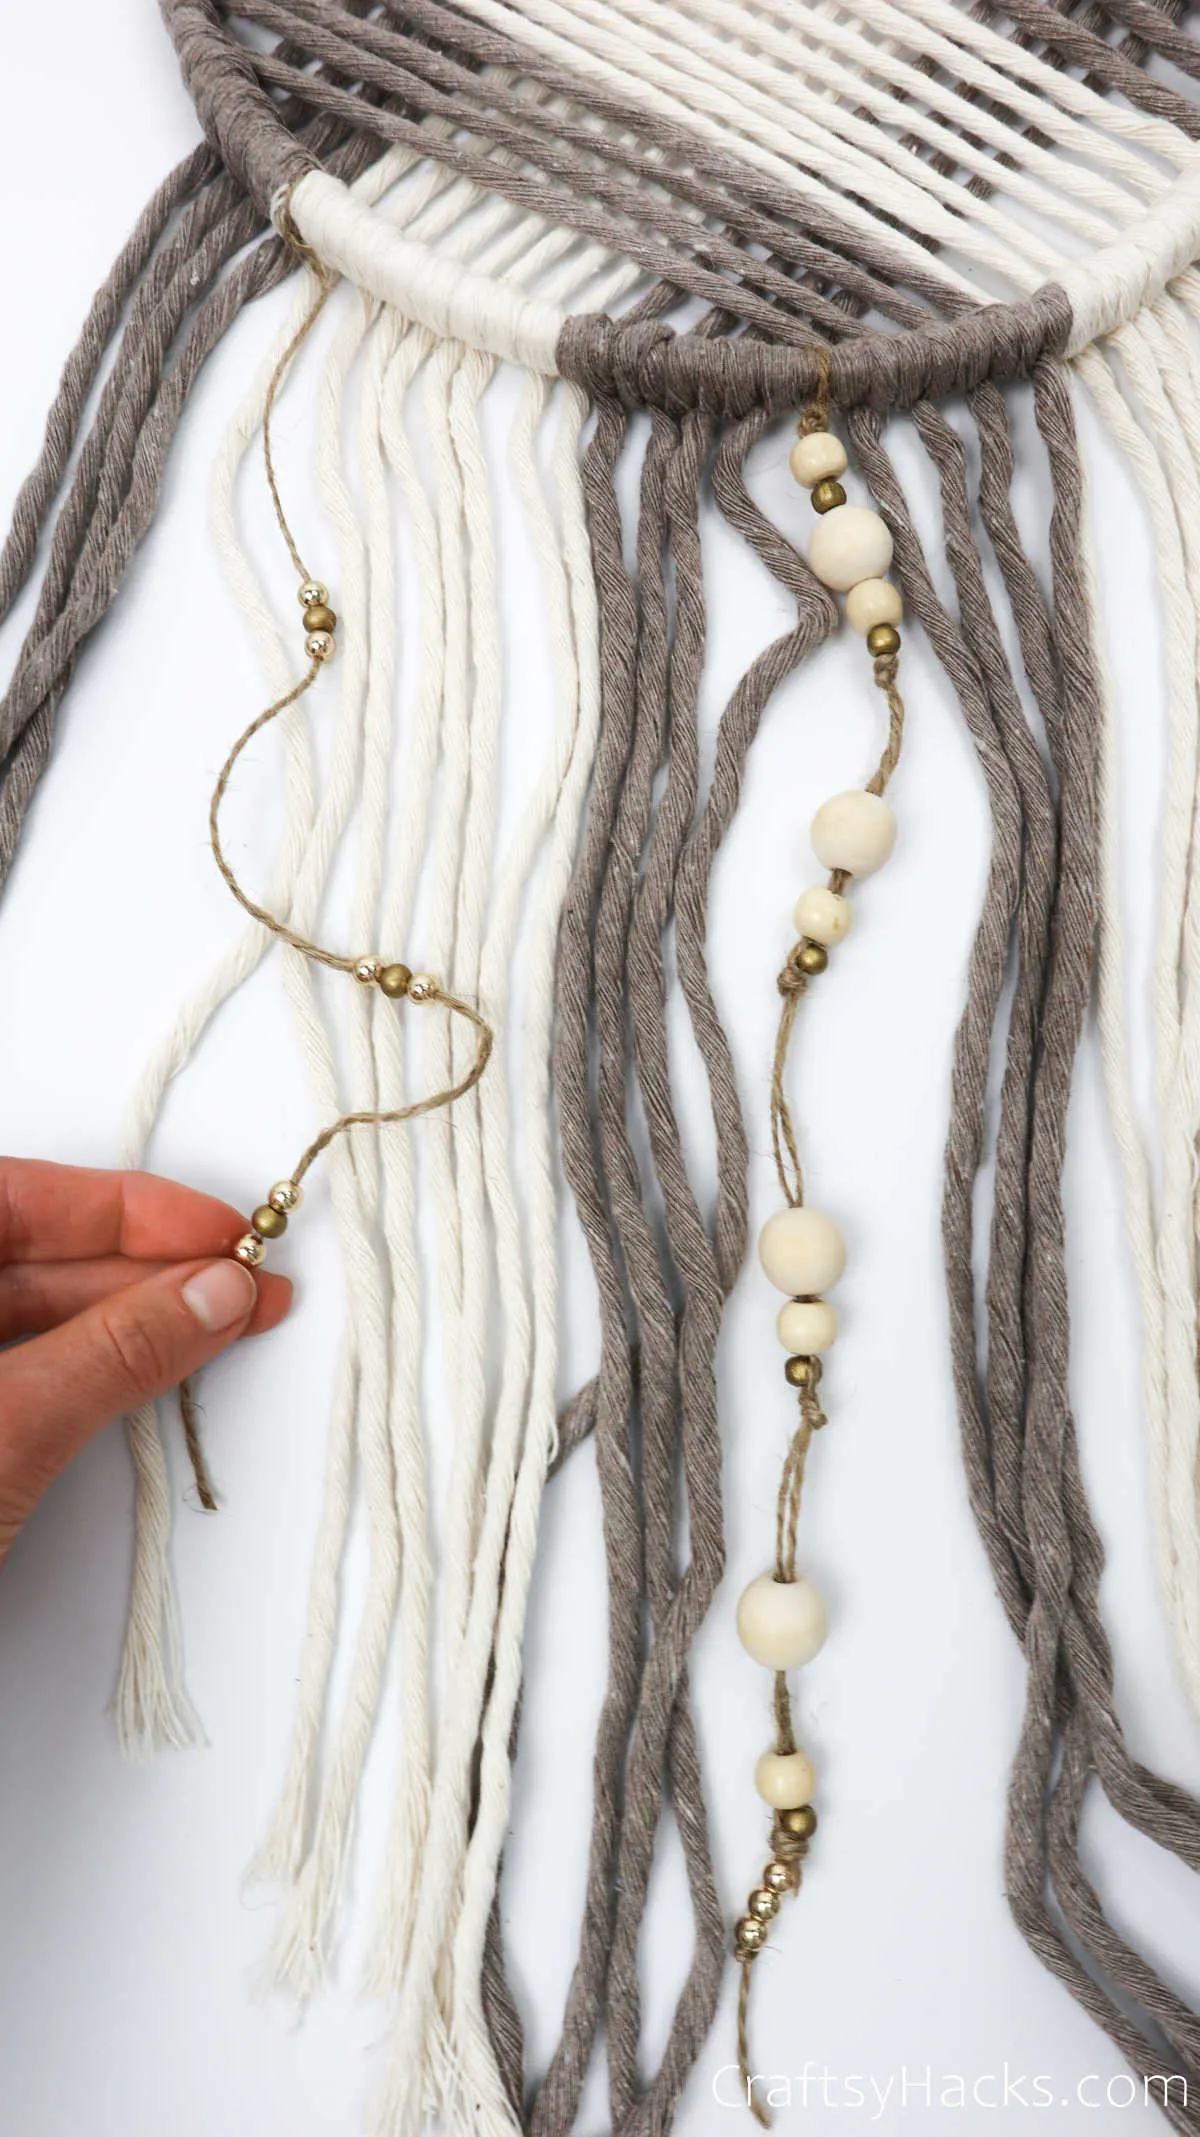
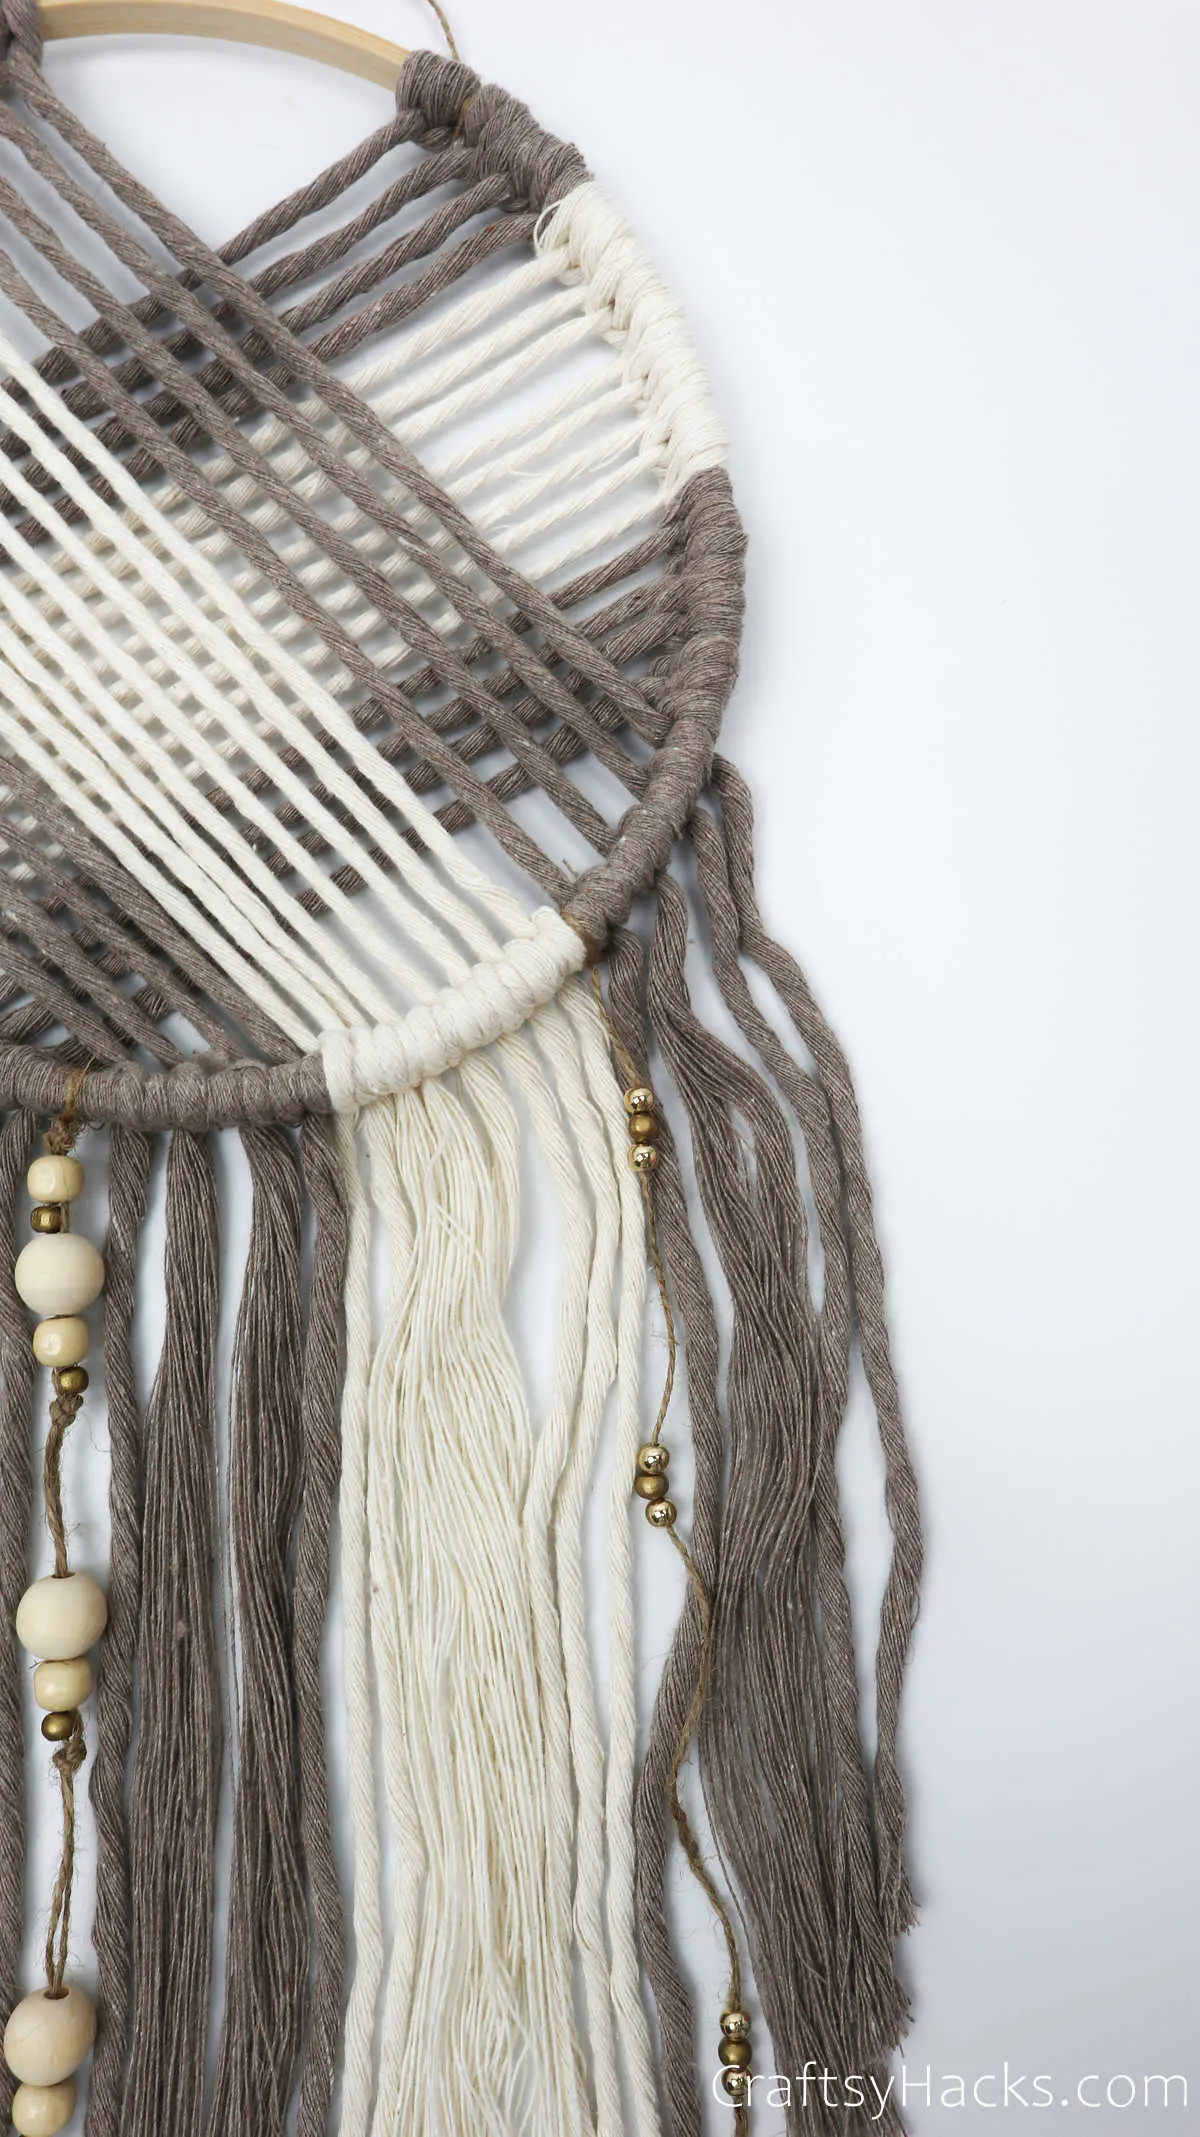
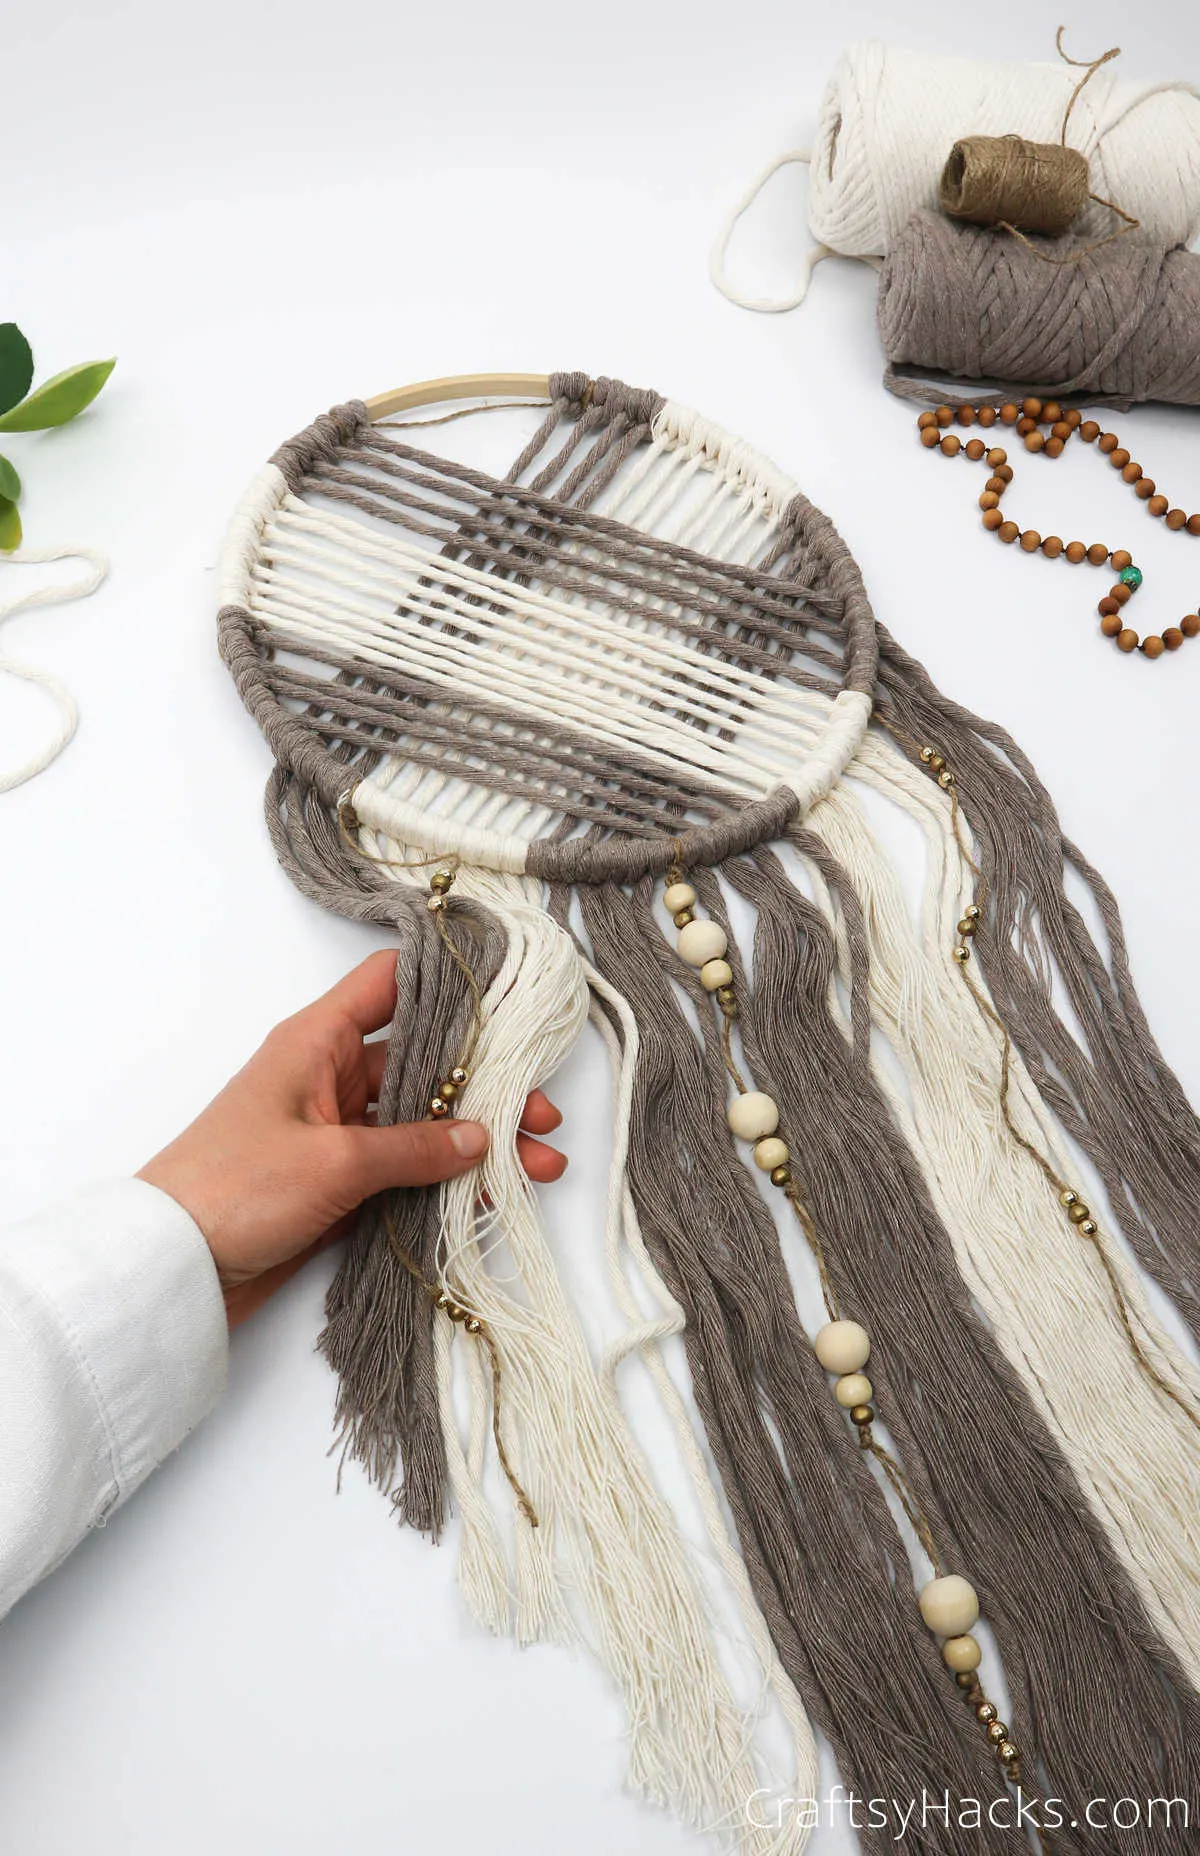
This step is completely optional, but I always did think that beads really jazz up dream catchers, so why don’t you give it a try? Grab some jute twine and string some beads into it with knots in place to hold the beads in place.
Just tie the beaded jute twine between the cords and let the beads hang down, as seen here. Also, at this juncture, knot some twine at the top of the hoop in a loop—this will help you hang the dream catcher.
Step 18
Finally, just before you trim the cords, you can comb them out. Again, this is completely optional. If you prefer the chunky look that the cotton cords naturally have, just let them be. Or, you could comb them out for a smooth finish.
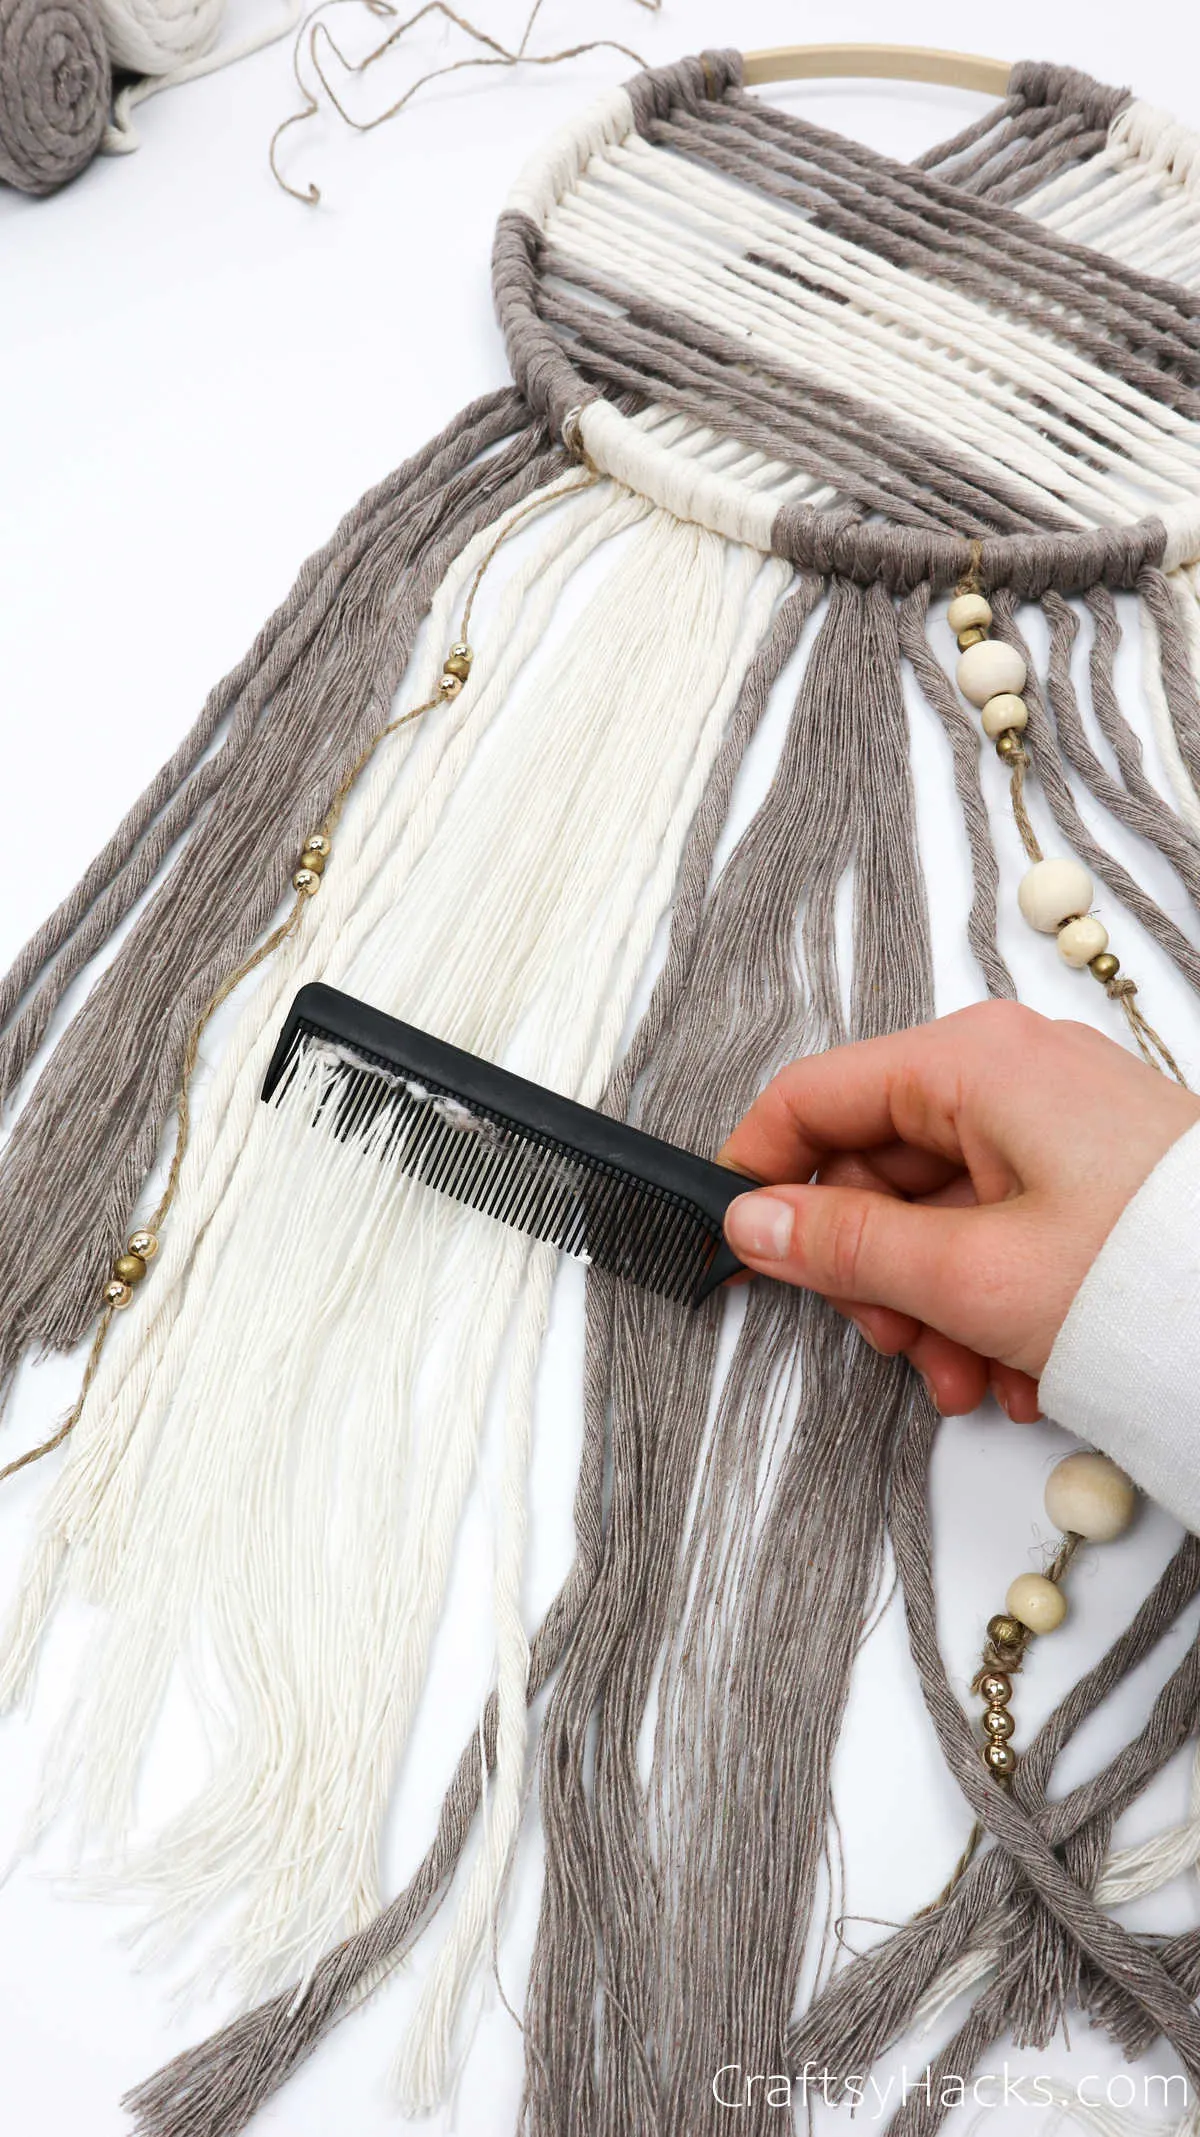
Step 19
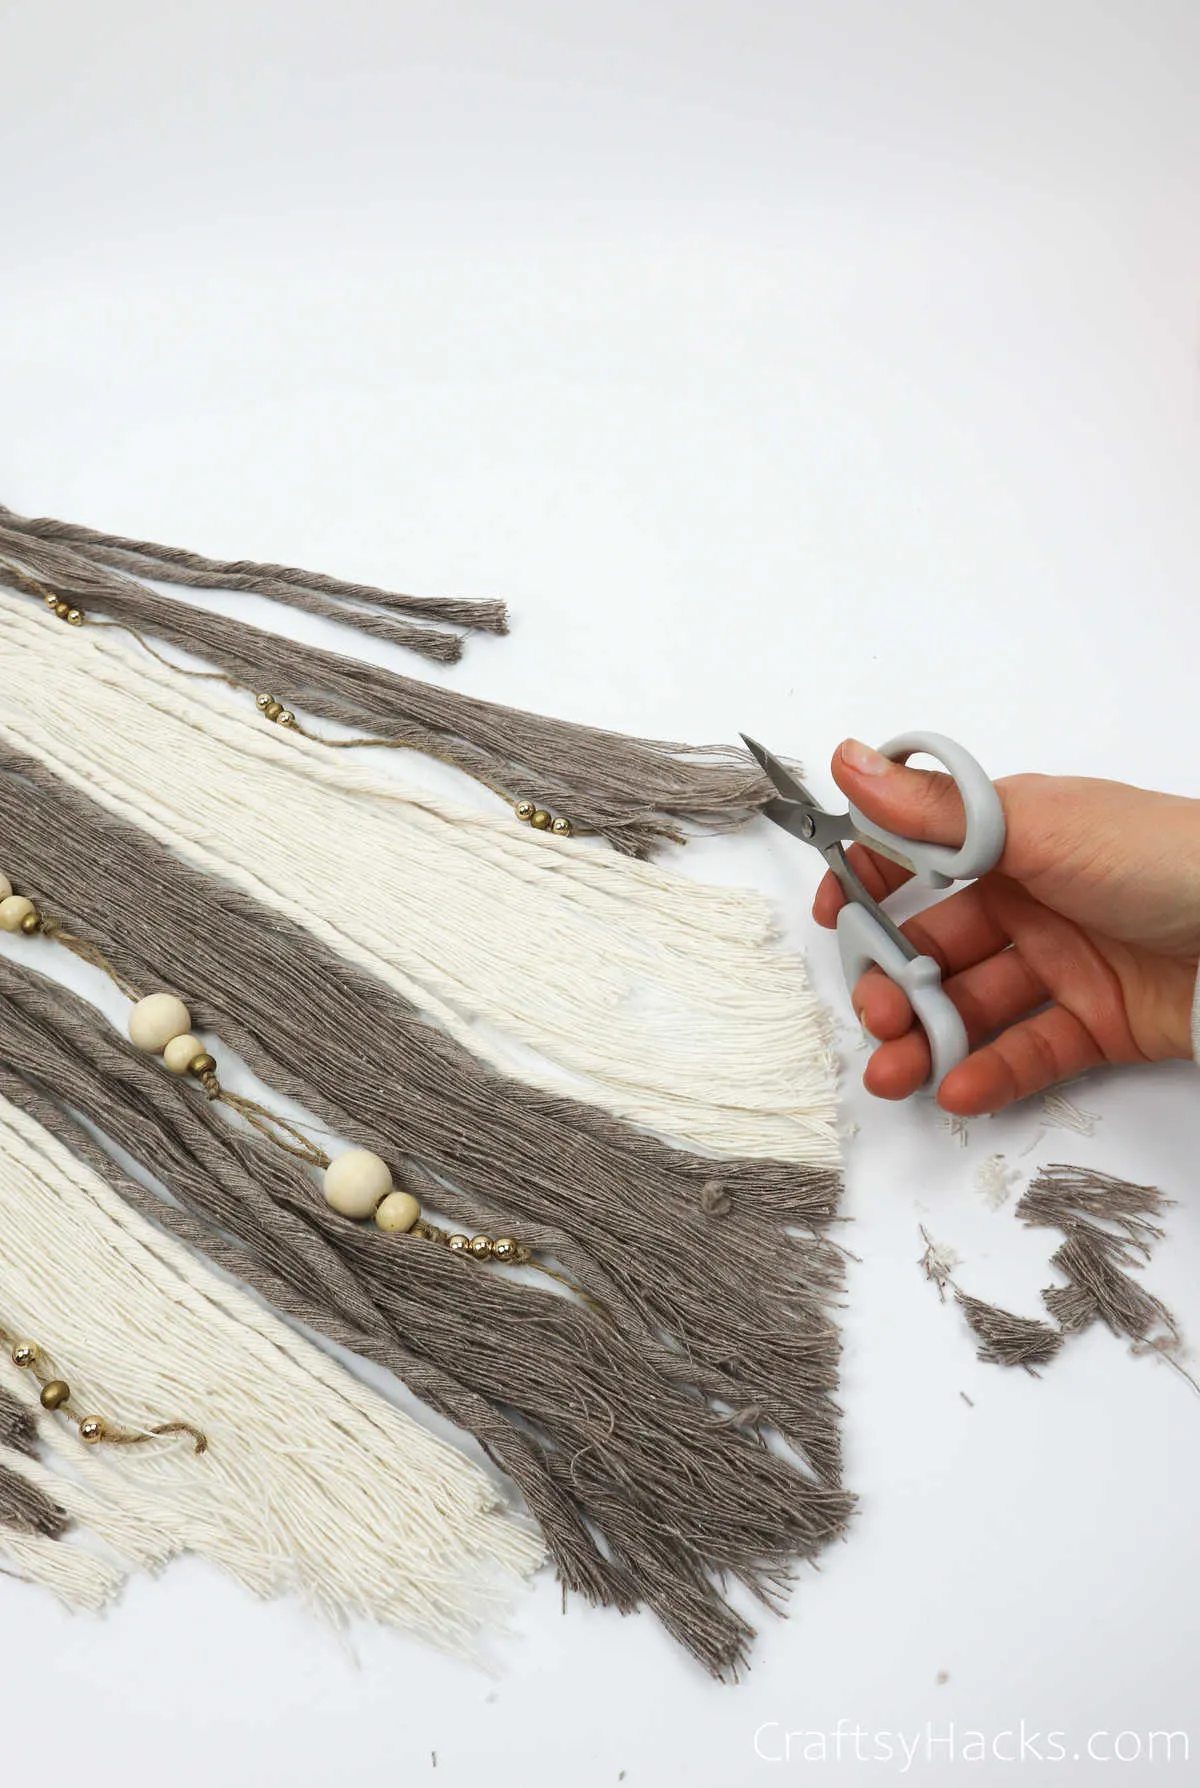
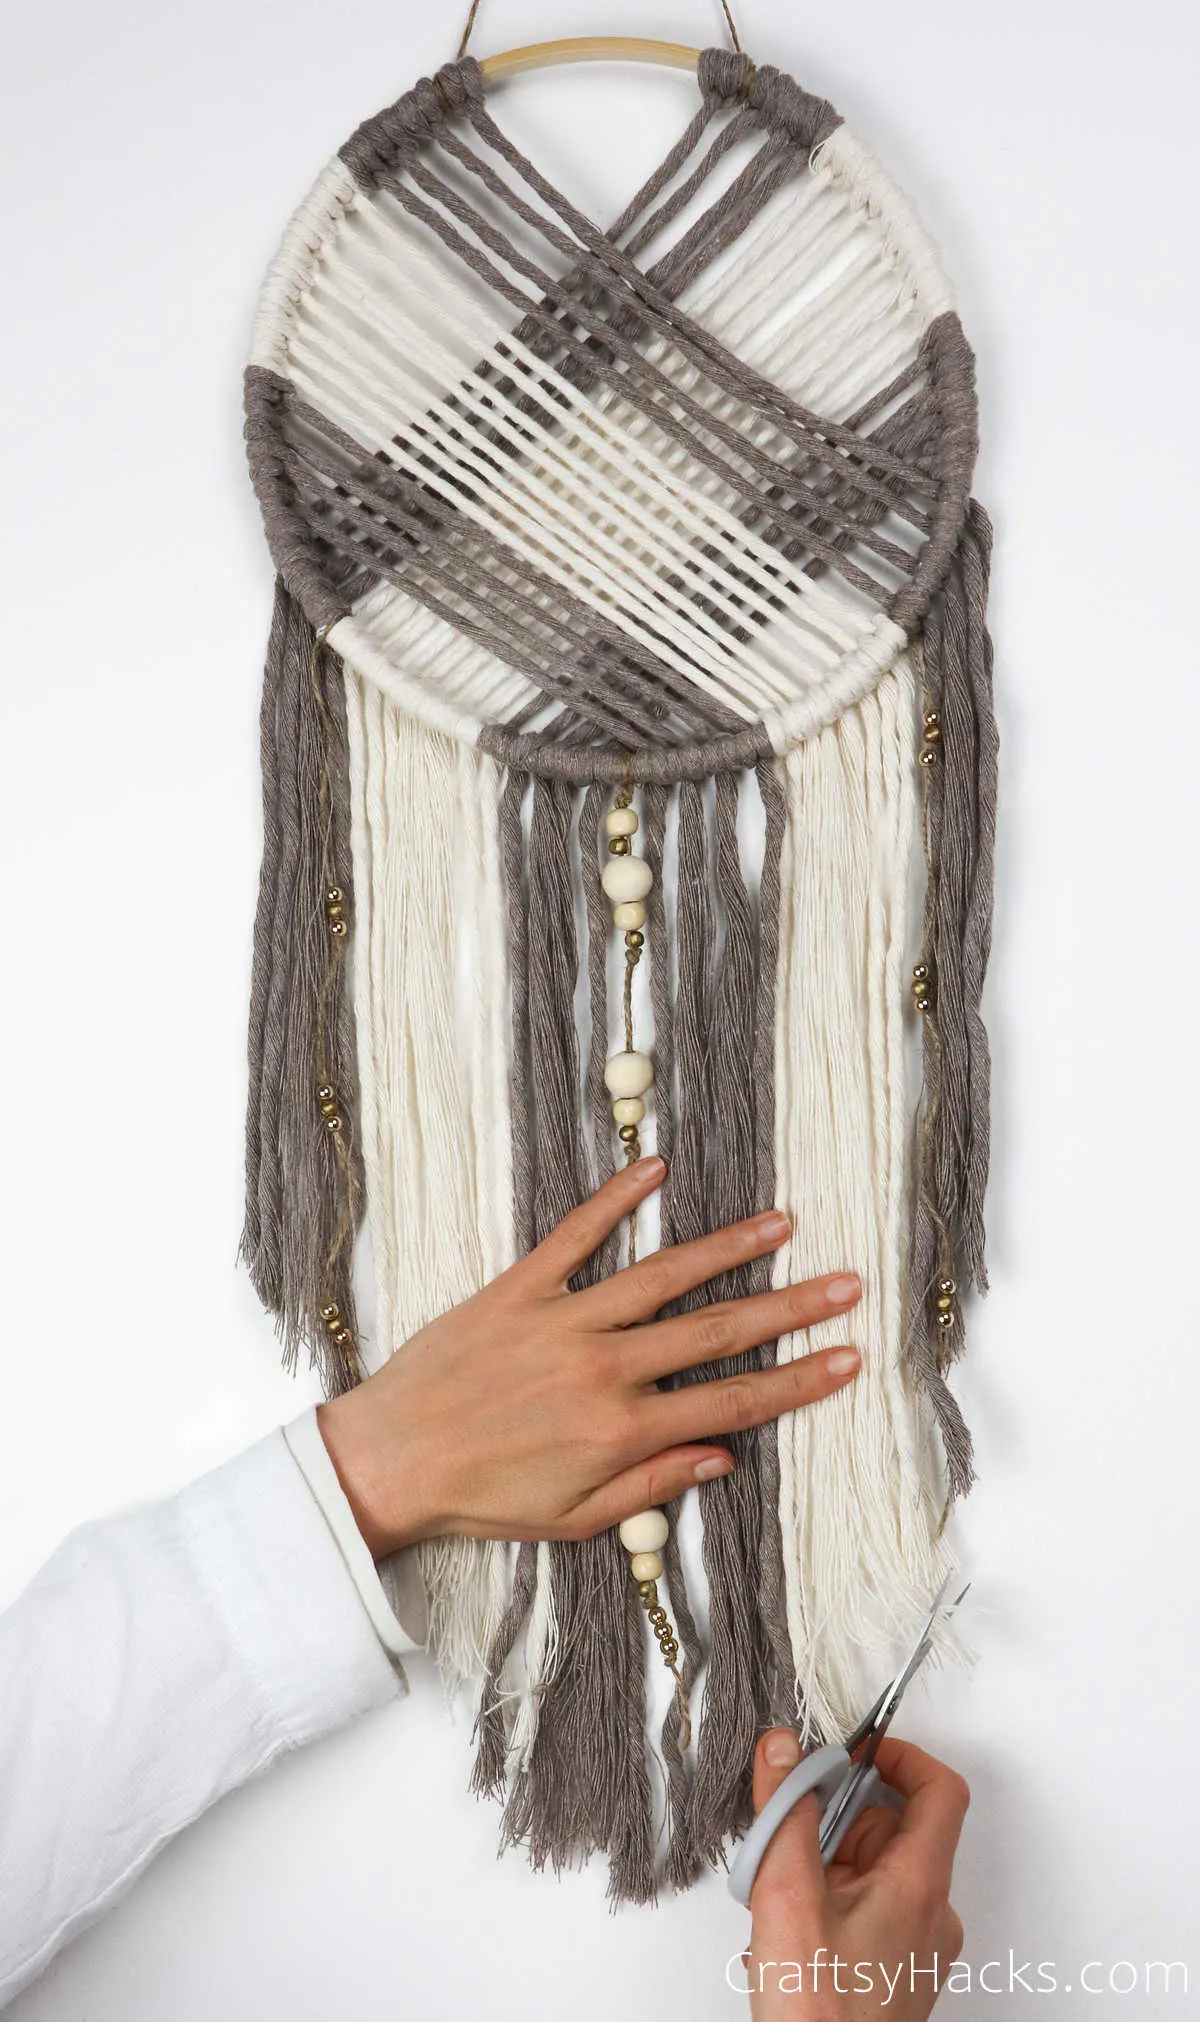
Grab a pair of scissors and carefully trim the ends. You can trim the ends so that they taper down from the sides to the middle, as seen here. Here’s a tip: smoothen out all the cords before you start trimming them so your ends are even.
How to Customize Your Dreamcatcher
Here are a few ways to customize your dreamcatcher and make it truly your own.
- Use a different sized hoop or made out of a different material
- Use different colored jute twines to create the look you like
- Add ribbons, feathers, different beads, gemstones and more
Do Dreamcatchers Really Work?
Now that’s the question, isn’t it? Well, just like any other talisman, dreamcatchers, too, are only as powerful and as effective as our belief in them is.
Do you believe they work? Do you believe they have the power to filter the bad dreams and allow only the good ones to pass through? If you do believe that, then yes, dream catchers really do work.
I also believe that when you work on making something—like this dreamcatcher—from scratch the object in question is even more significant, don’t you think?
Where Do You Hang a Dreamcatcher?
Depending on what purpose the dream catcher serves, you have a ton of choices on where to hang them.
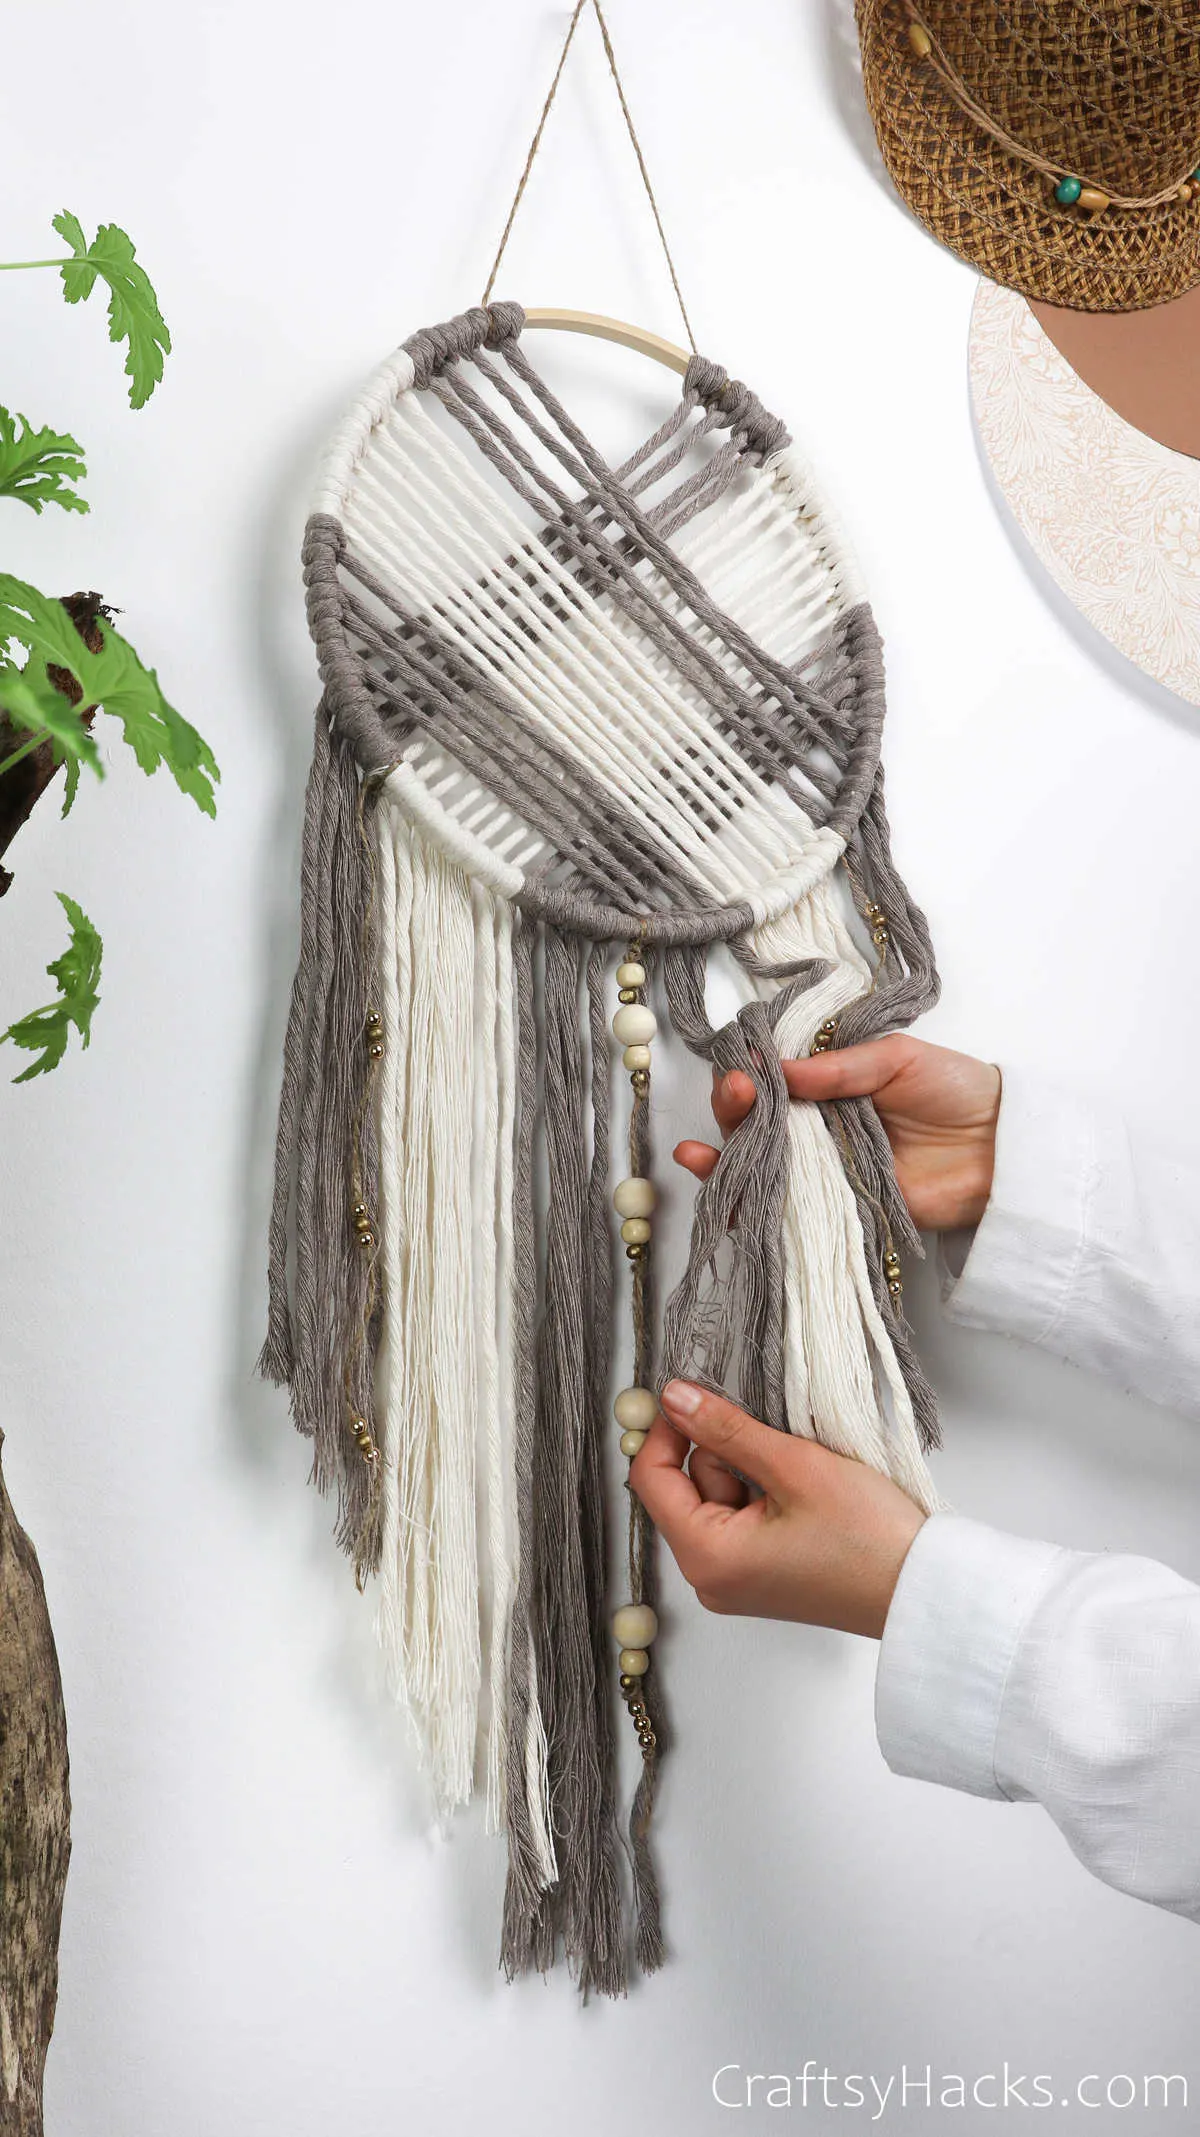
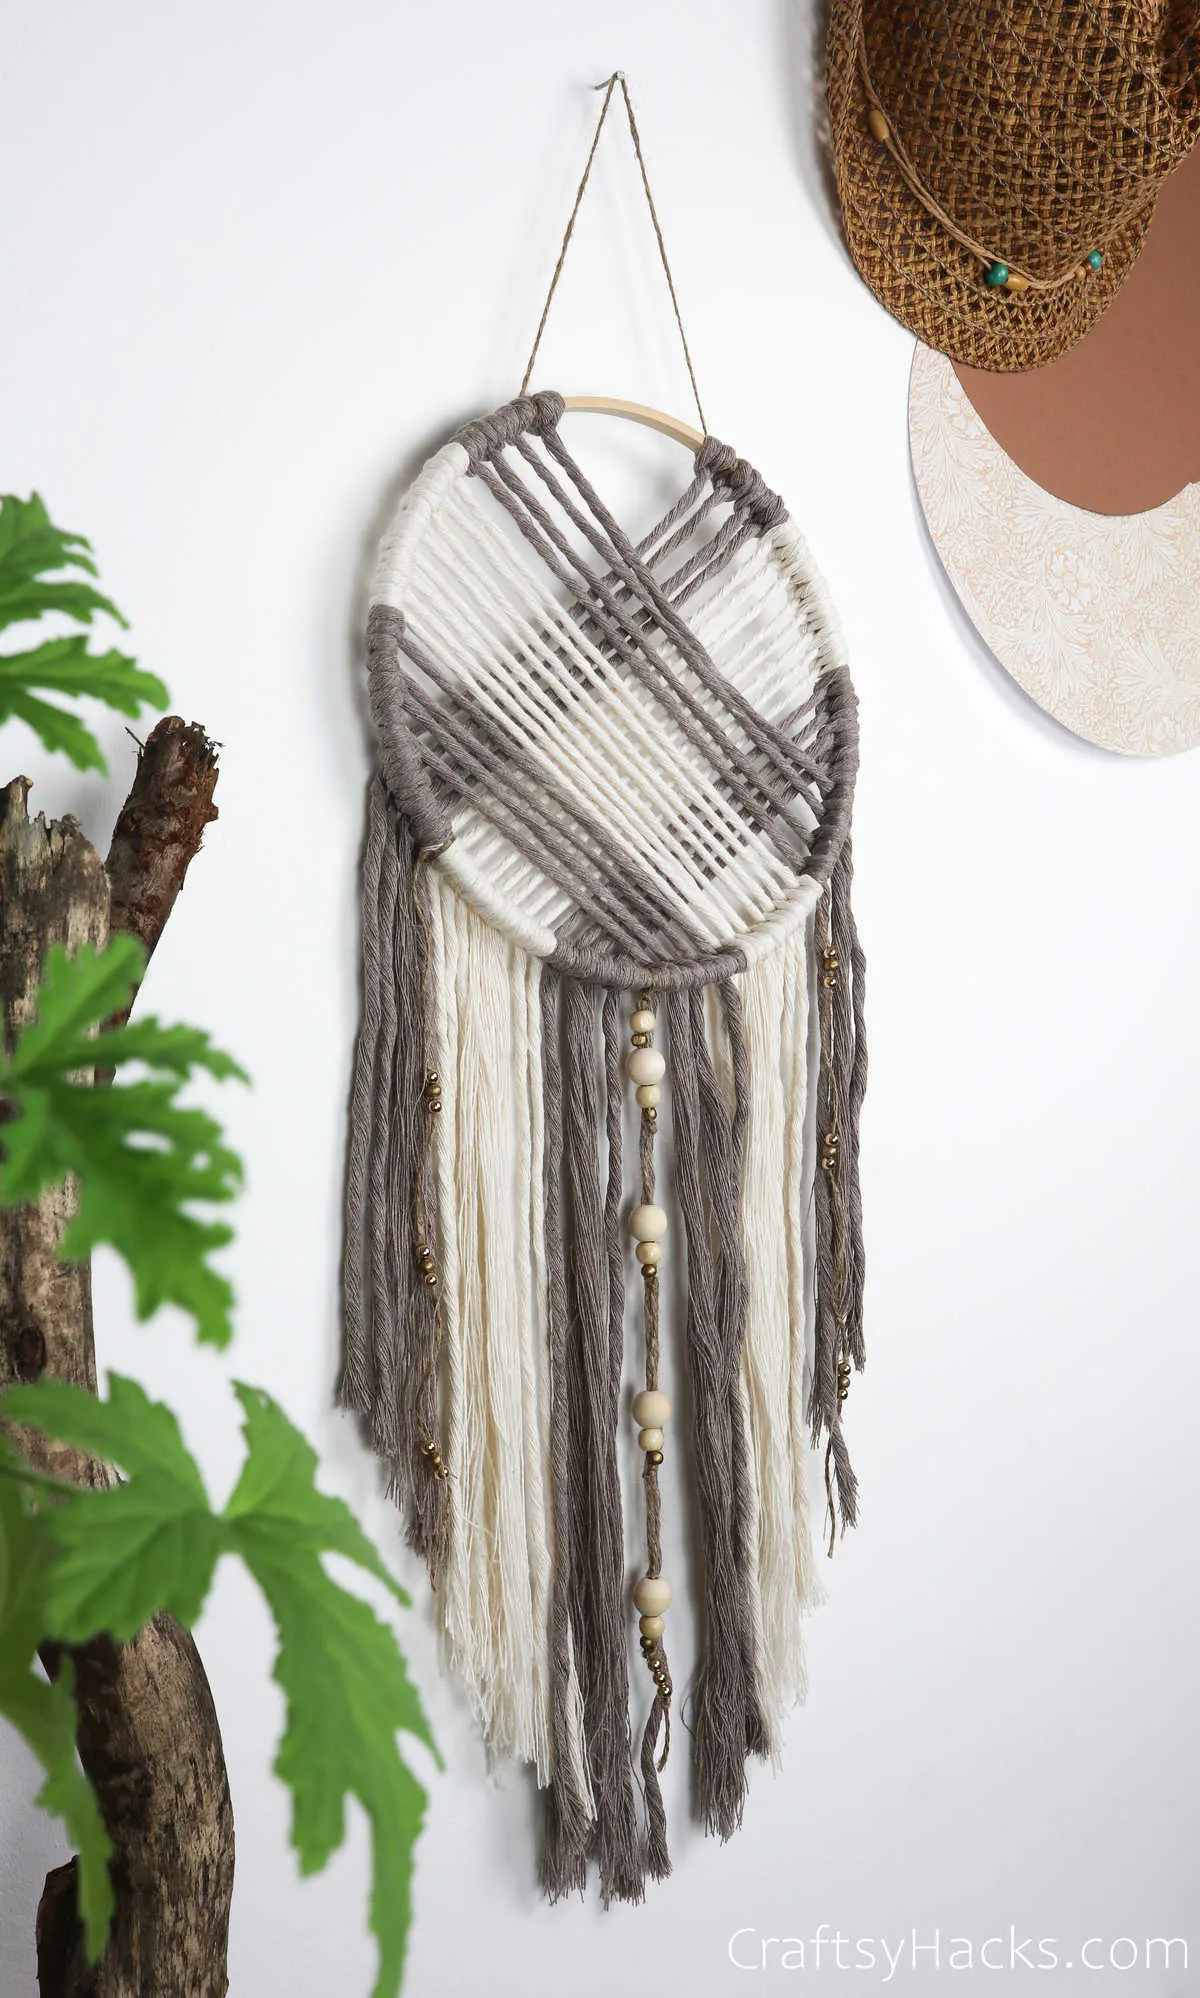
If it is for the sake of art and home decor, then you can use your dreamcatcher as a wall hanging, outside on your porch or deck.
Do you want to use them as accessories? Then you can hang them on your handbag, purse, or even from the rearview mirror of your car.
If you decide to hang them up in your rooms as a protective charm, then here’s a list of places to consider:
- Your bedroom window— or any large window.
- Your headboard or from a post on the top of your headboard.
- Above a doorway.
- In your basement or attic—because we all know how spooky they can be.
What Do the Colors on a Dreamcatcher Mean?
It’s natural to associate symbolism with colors when you’re picking out the different colors you want to use on your dreamcatcher. Here’s a list of colors you can choose from and what they mean on a dreamcatcher:
- White: White symbolises all things pure and good. It is indicative of light, innocence, and purity. Mothers who make dream catchers for their children often pick this color.
- Black: Black is associated with mystery, power, and sometimes, a negative connotation of evil, grief and death. But, if you’re using your dream catcher as a decor item, then black is a pretty elegant color to use, as is dark grey(which often signifies stormy days and ambiguity).
- Blue: A blue dreamcatcher is often indicative of stability, peace, faith, and piety. Blue is a very calming color to the human mind.
- Red: Red is the color of passion, love and intense emotions. In a dream catcher, red is indicative of courage. Mixed with orange and yellow, it can be balanced out as the latter are all about joy, creativity, happiness and energy.
Other Crafts You Might Love Making
- 47 DIY Projects
- 37 Yarn Projects
- 37 Upcycled Tin Cans
- How to Make Hair Bows
- 37 Brilliant Crafts to Make and Sell
- DIY Dollar Treen Lantern
- 47 Crafts for Adults
How to Make a Dreamcatcher (Step-by-Step)
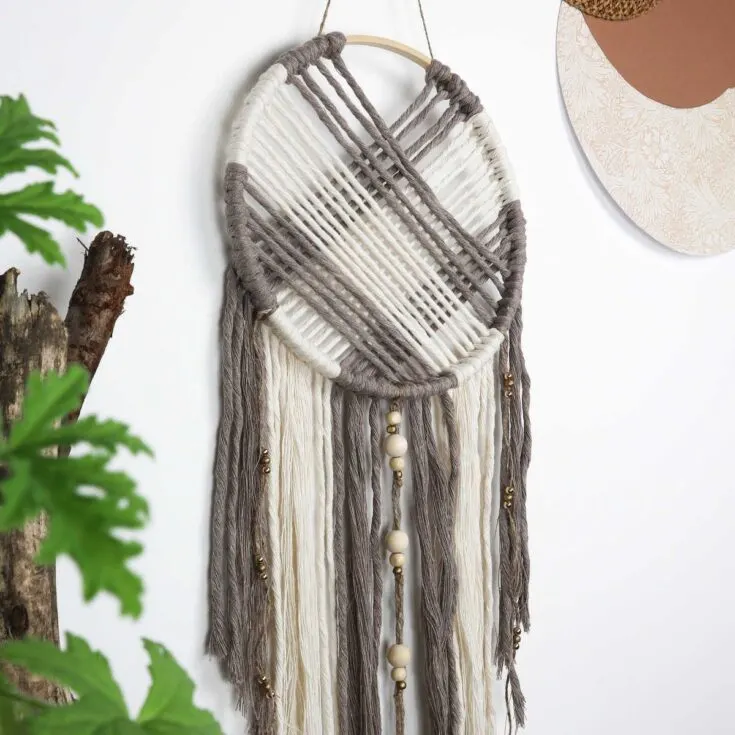
Make your very own DIY dreamcatcher. It's a beautiful DIY decoration for adults and teens to make! Let it catch bad dreams and bring good ones.
Materials
- Wood hoop (10"-11")
- 0.15’’ thick single twist cotton cord (cream and cappuccino)
- Beads
- Tape (optional)
- Jute twine (optional)
Tools
- Scissors
- Hair combs
Instructions
- Gather your supplies to get started on making your dreamcatcher.
- Measure and cut your colored cotton cords into strings of 60 inches. You will need 8 of each color.
- Tape your hoop in place to ensure that it doesn’t dislodge when you’re working. You will start working on the top left side of your hoop.
- Starting with the cappuccino cord, fold it in half and place it under the hoop to form a loop. Bring the loop over the hoop. Then, pull both the loose ends through the loop, tugging firmly to create a knot.
- Grab the left end of the string and pull it over then under the hoop to form a loop to the left side of the previous knot. Pull the end through the loop and firmly make another knot. Repeat this with the right end of the string, too. This will be your first set of knots.
- Repeat this process with the other strings and switch colors when required. You should have the following pattern in place when you’re done: 2x cappuccino cords, 4x cream cords, 2x cappuccino cords.
- Ensure that all the ends are under the hoop, with the hoop sitting over them.
- Once you’ve worked the top left part of the hoop, proceed to the top right part. Repeat all the above steps on this end as well. Only, this time, make sure the ends are over the hoop so you can move them aside to start working on the next set of knots.
- You’ll be knotting the top right strings in the bottom left and the top left knots in the bottom right.
- Grab one individual string and pull it over the hoop and through the loop. Do this once more with the same string and you’ll have your first knot. Repeat this with all the other strings on the bottom left end.
- Then, work on knotting the strings from the top left to the bottom right.
- You should have the following pattern in place when you’re done with both sides: 4 cappuccino cords, 8 cream cords, 8 cappuccino cords, 8 cream cords, and 4 cappuccino cords.
- At this juncture, string some beads through some jute twine and hang them down to jazz up your dream catcher. Also, loop some twine at the top to hang your dream catcher.
- Additionally, you can comb the ends of the cords if you want a smooth finish or leave them be.
- Finally, trim the ends so that they taper down naturally from the sides to the middle.
Darr
Thursday 18th of November 2021
make a nun or priest puppet killing children instead, that's more acceptable
Karo @ CraftsyHacks.com
Tuesday 30th of November 2021
;D Not sure about that!