DIY Zipper Pouch (Step-by-step Tutorial)
This post may contain affiliate links: full affiliate disclosure.

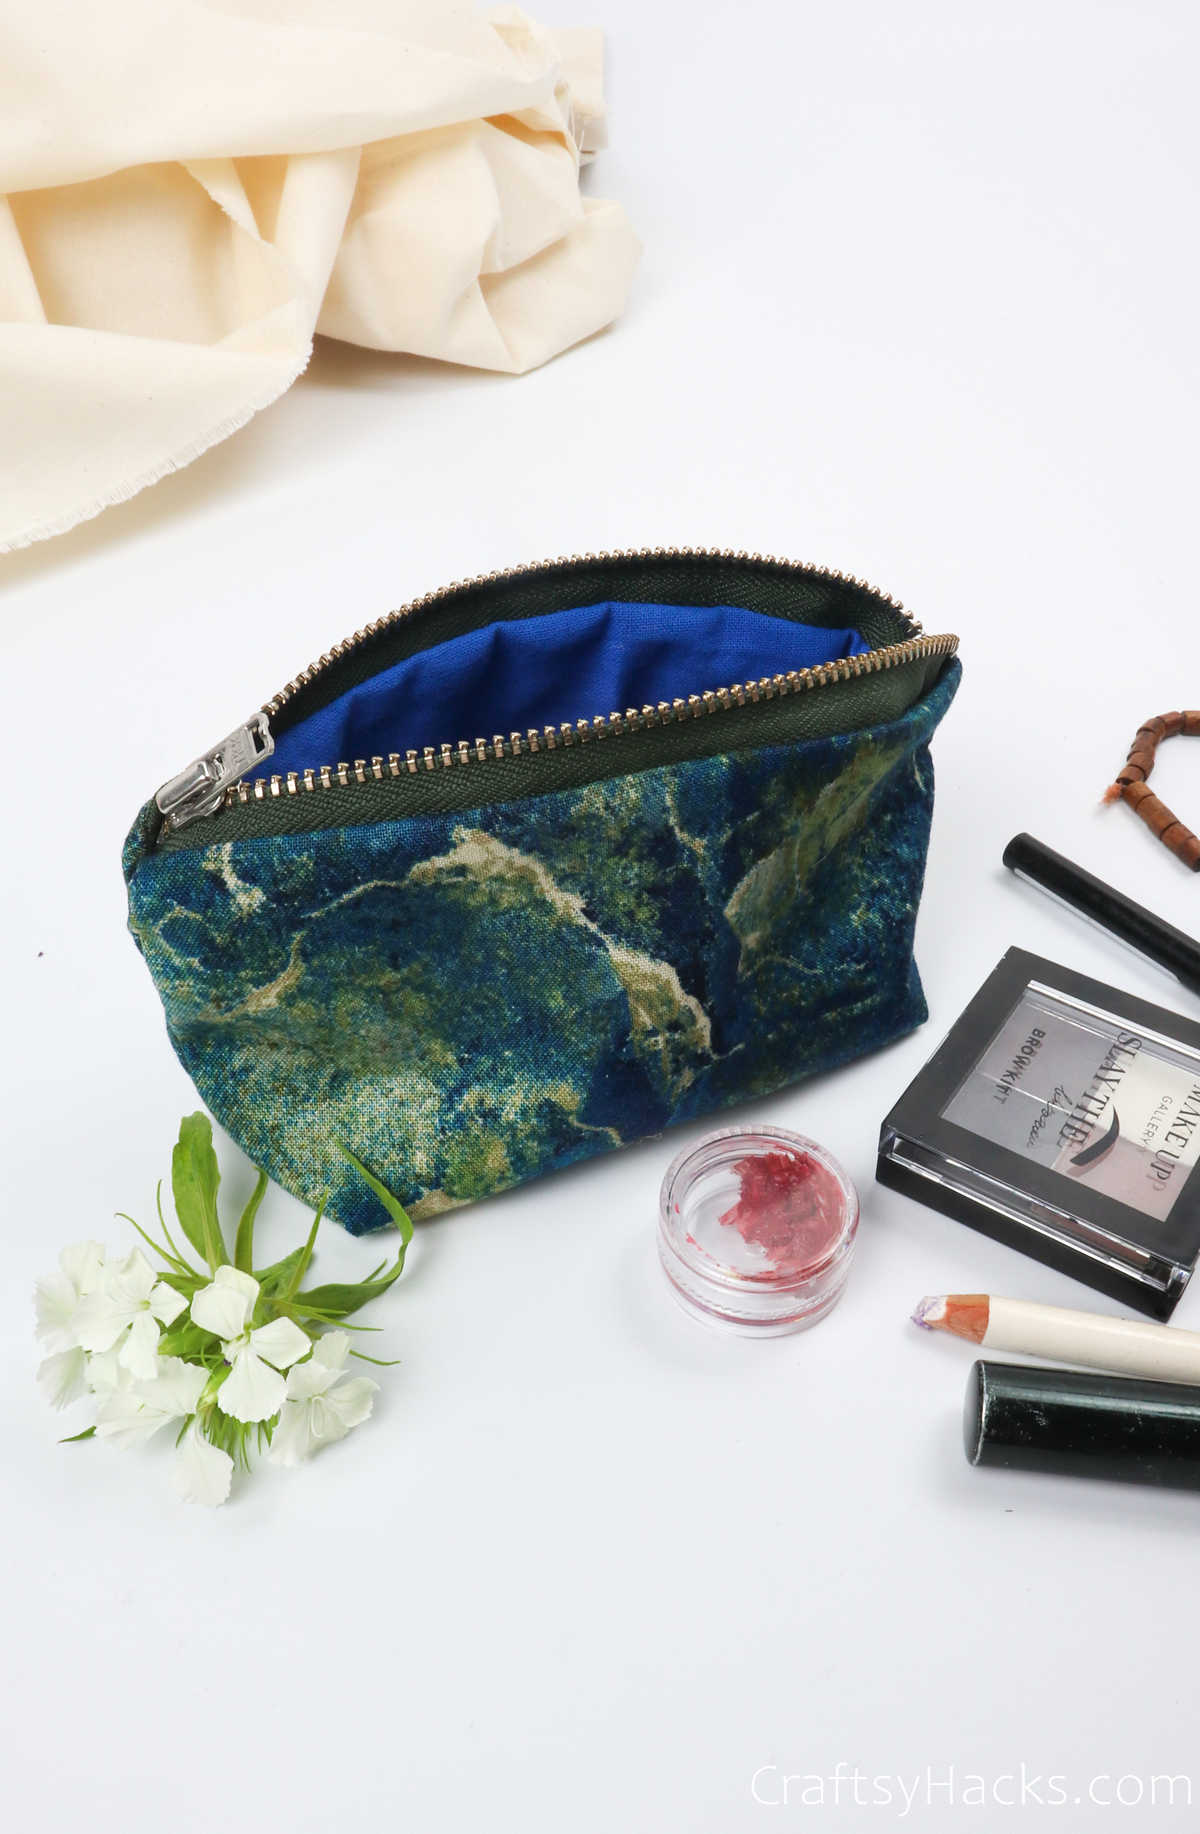
An easy DIY zipper pouch great for adults and teens to make. Great for storage and as a DIY gift that you can easily make from fabric.

You could never have too many zipper pouches, and anyone who tells you otherwise is clearly lying. Just think of how useful these pouches are and also how fabulous!
There are so many ways you can use this pouch. You can fill it up with your makeup, office supplies, and craft supplies. If you’re traveling, you can carry them along with all your travel essentials, like a kit bag of sorts.

You can make an entire set of these zipper pouches and use them as a themed set, too. Really, the opportunities and choices are endless. Just take a look at the supplies you’ll need for this project, and you can get started right away.
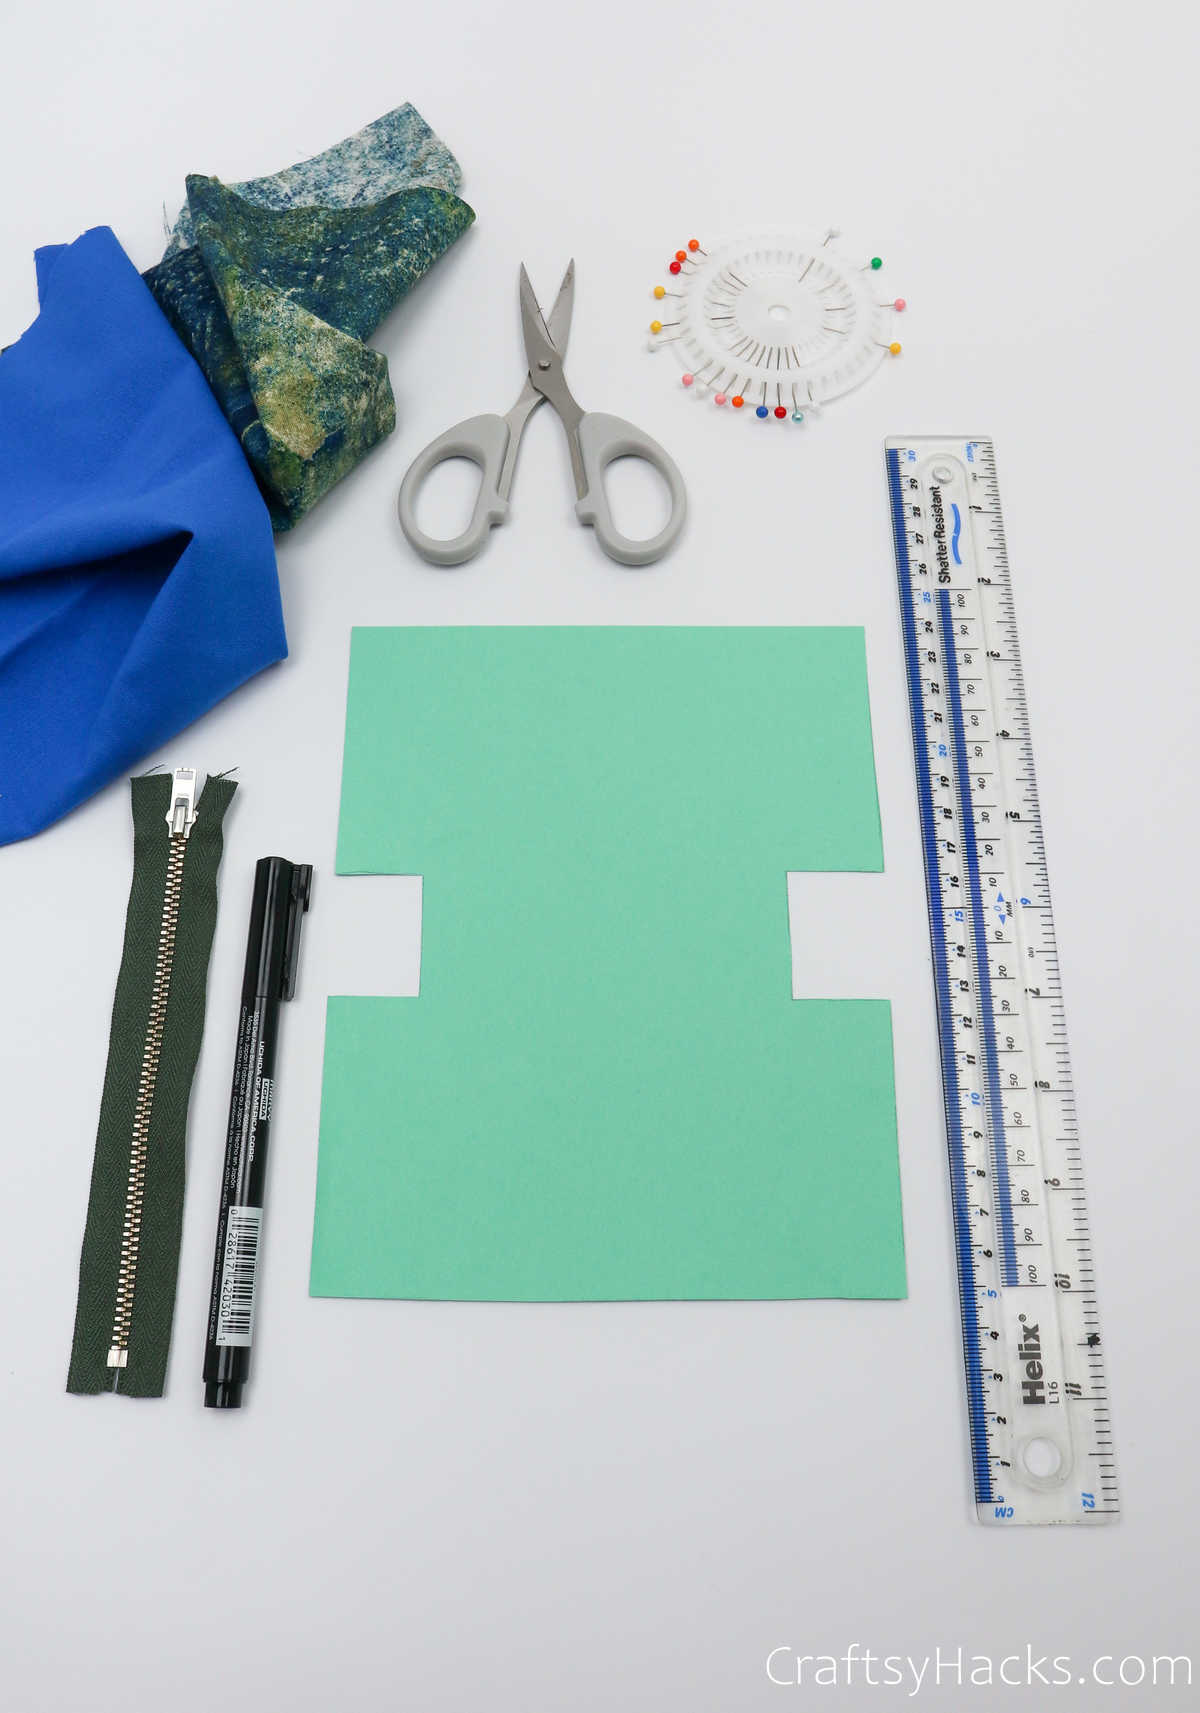
Supplies and Tools You’ll Need
Here’s a list of everything you’ll need:
- 2x pieces of cotton fabric (10″x 10″)
- Zipper (6″ long)
- Paper pattern (shown in Step 1)
- Scissors
- Ruler
- Marker
- Sewing pins
How to Sew a Zipper Pouch
Since you’re going to be sewing your zipper from scratch—scrap—you’ll have to set up your sewing machine. While you can use a needle and thread, you’ll need to make sure your stitches won’t give, especially when you’re sewing the zipper in.
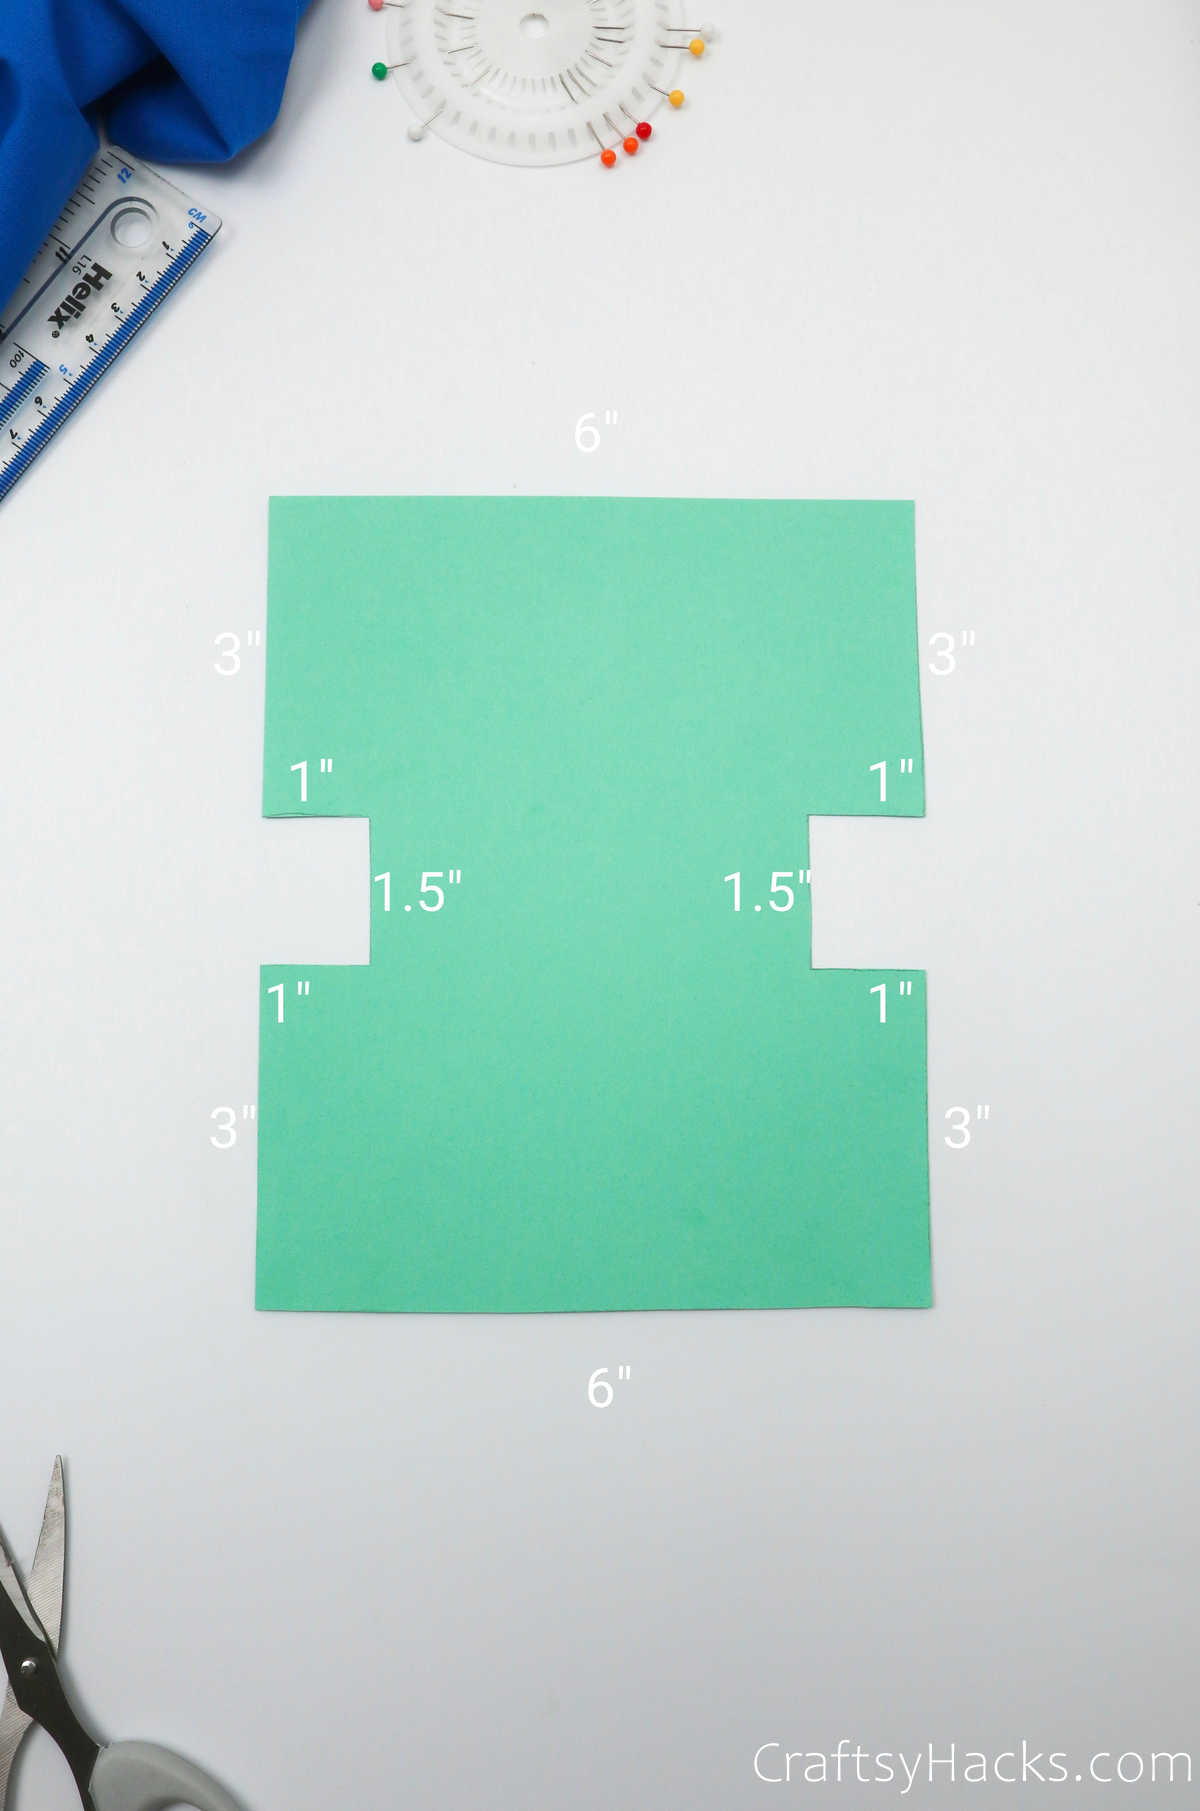
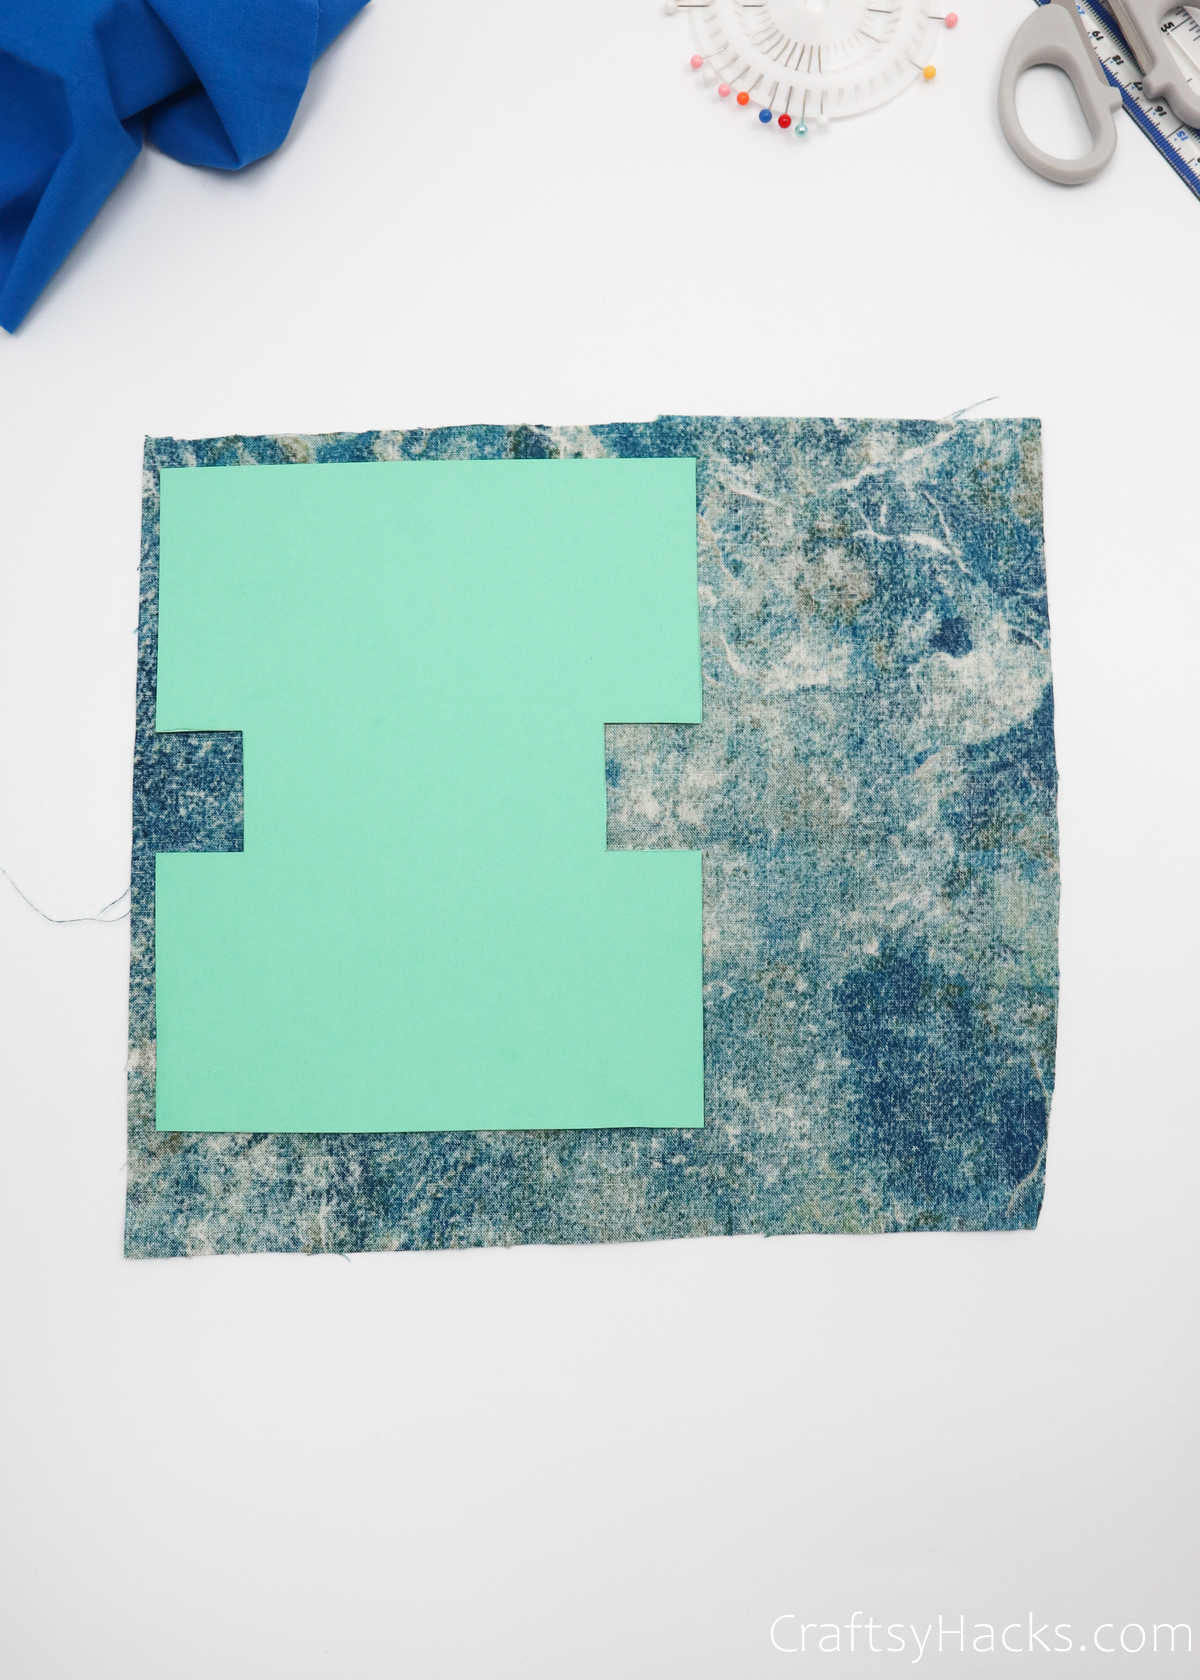
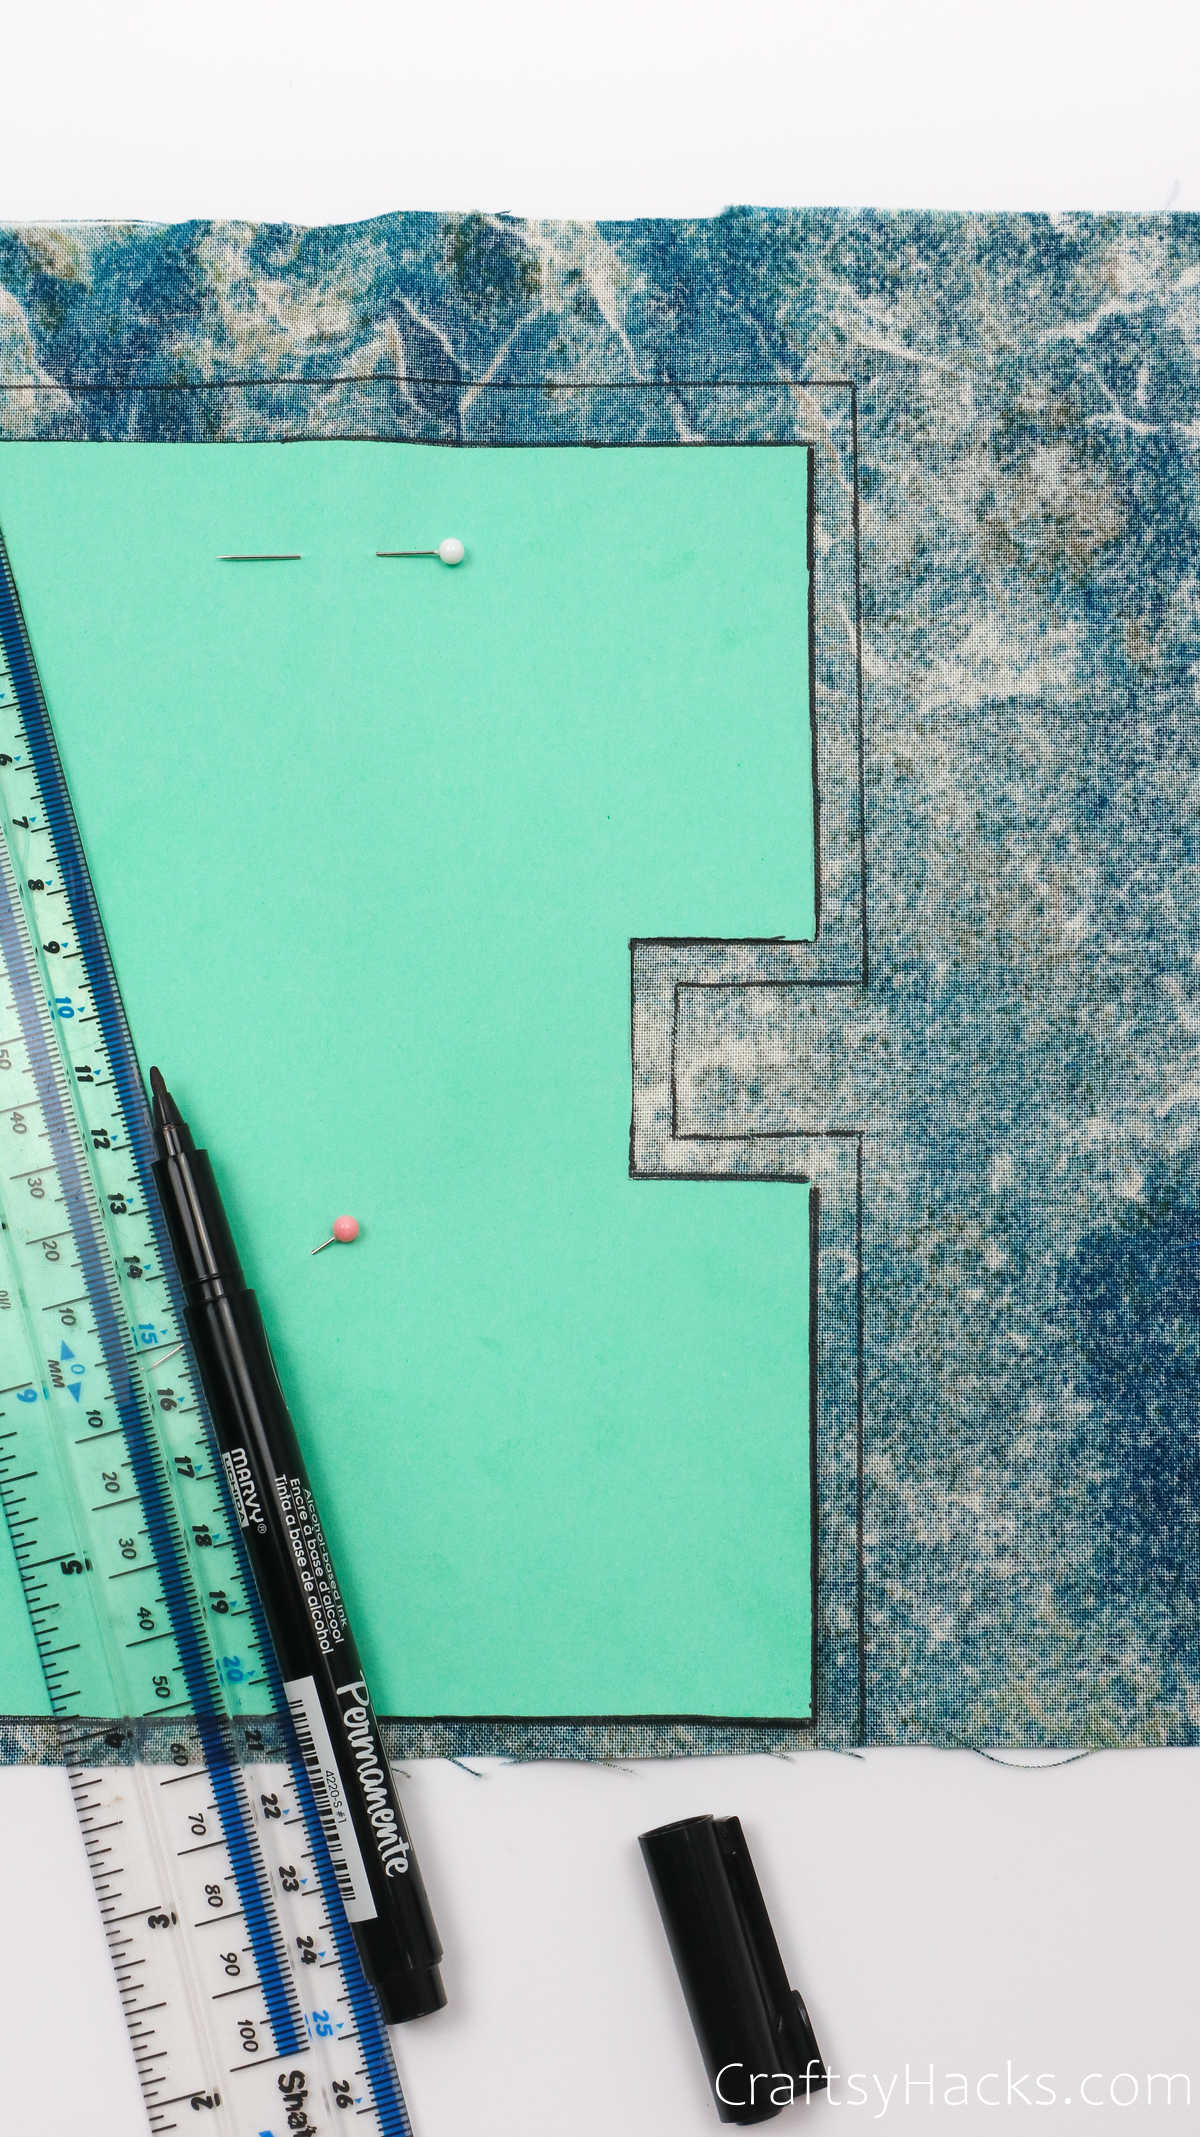
Step 1
This is a paper pattern that you can make to help you cut the fabric easily. If you’ve worked on sewing projects before, then you know just how important it is to cut the fabric properly.
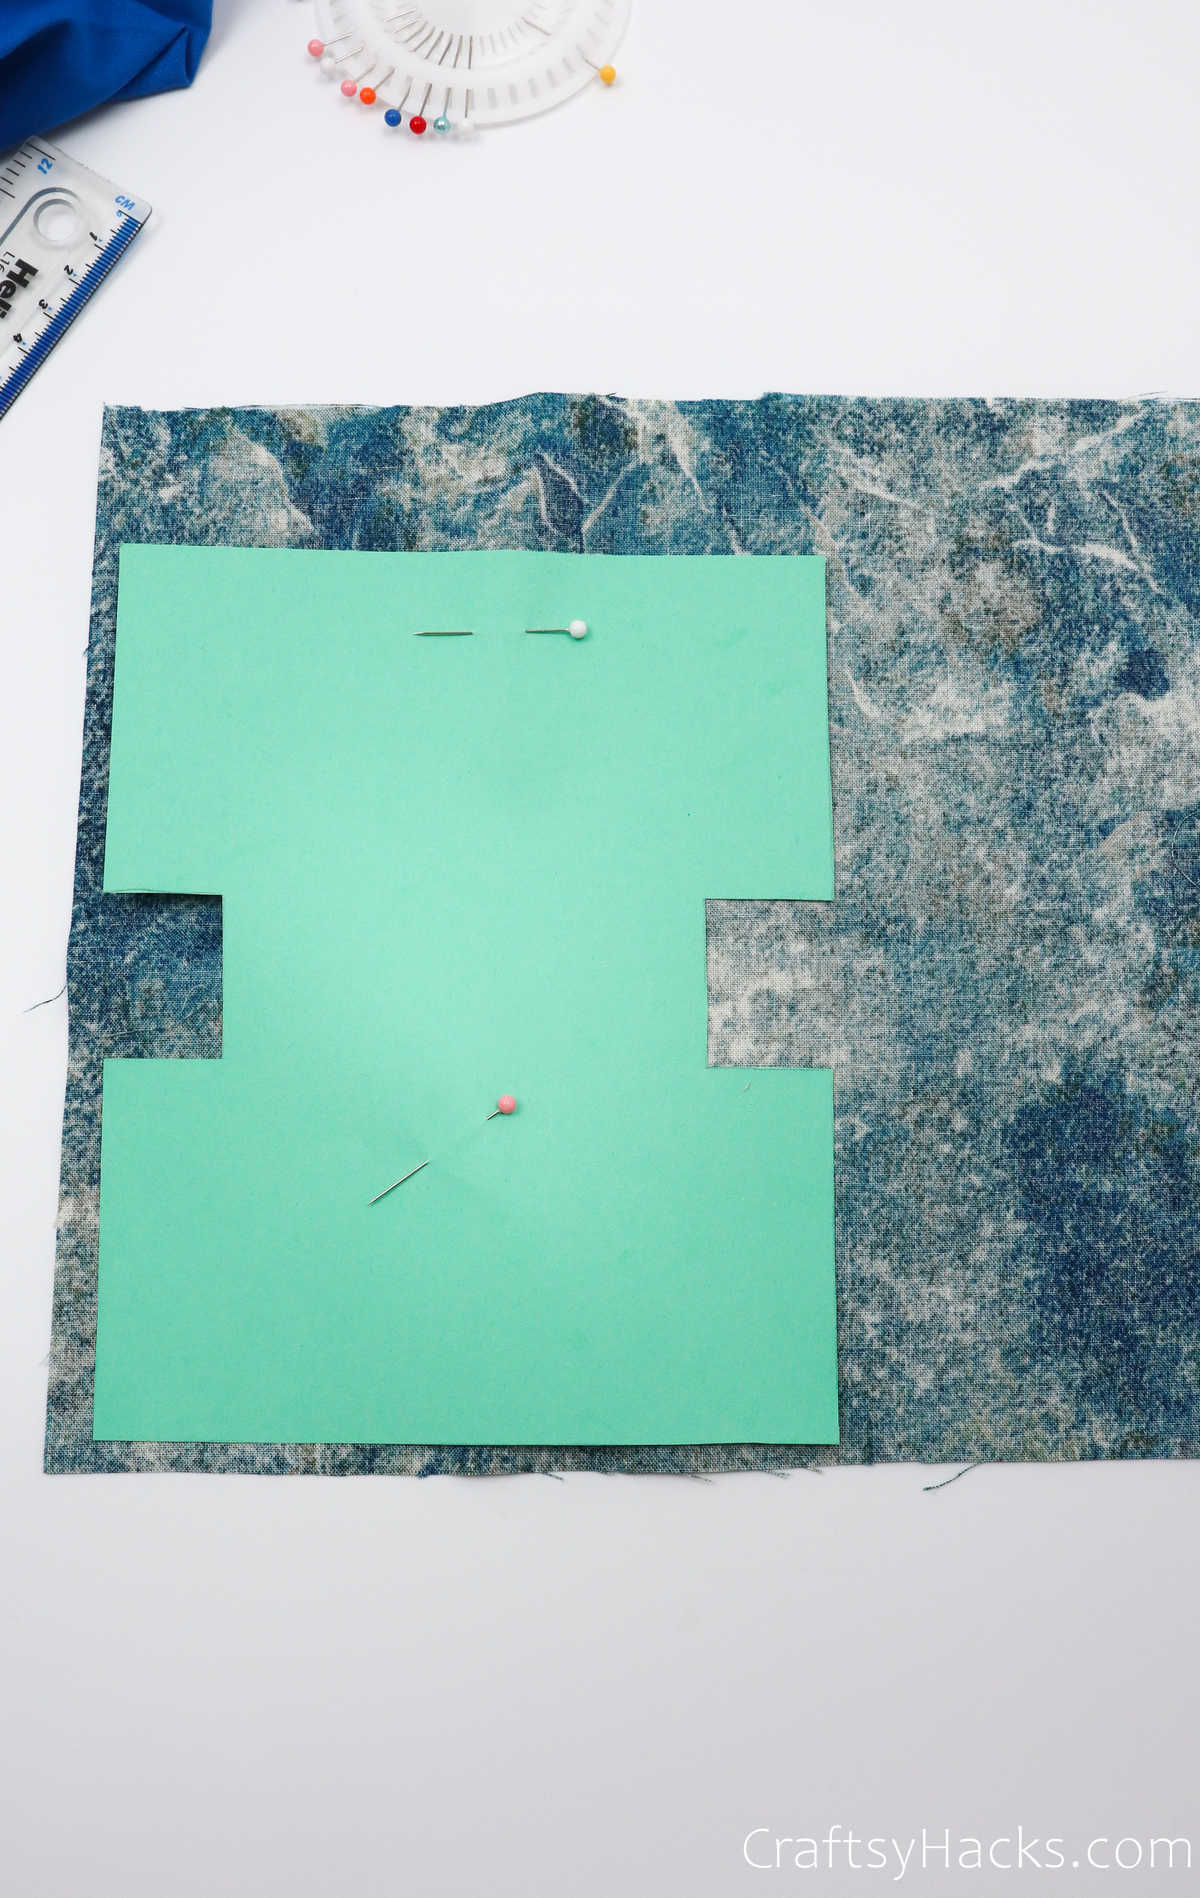
So, grab your fabric and lay it down on your work surface with the wrong side facing up.
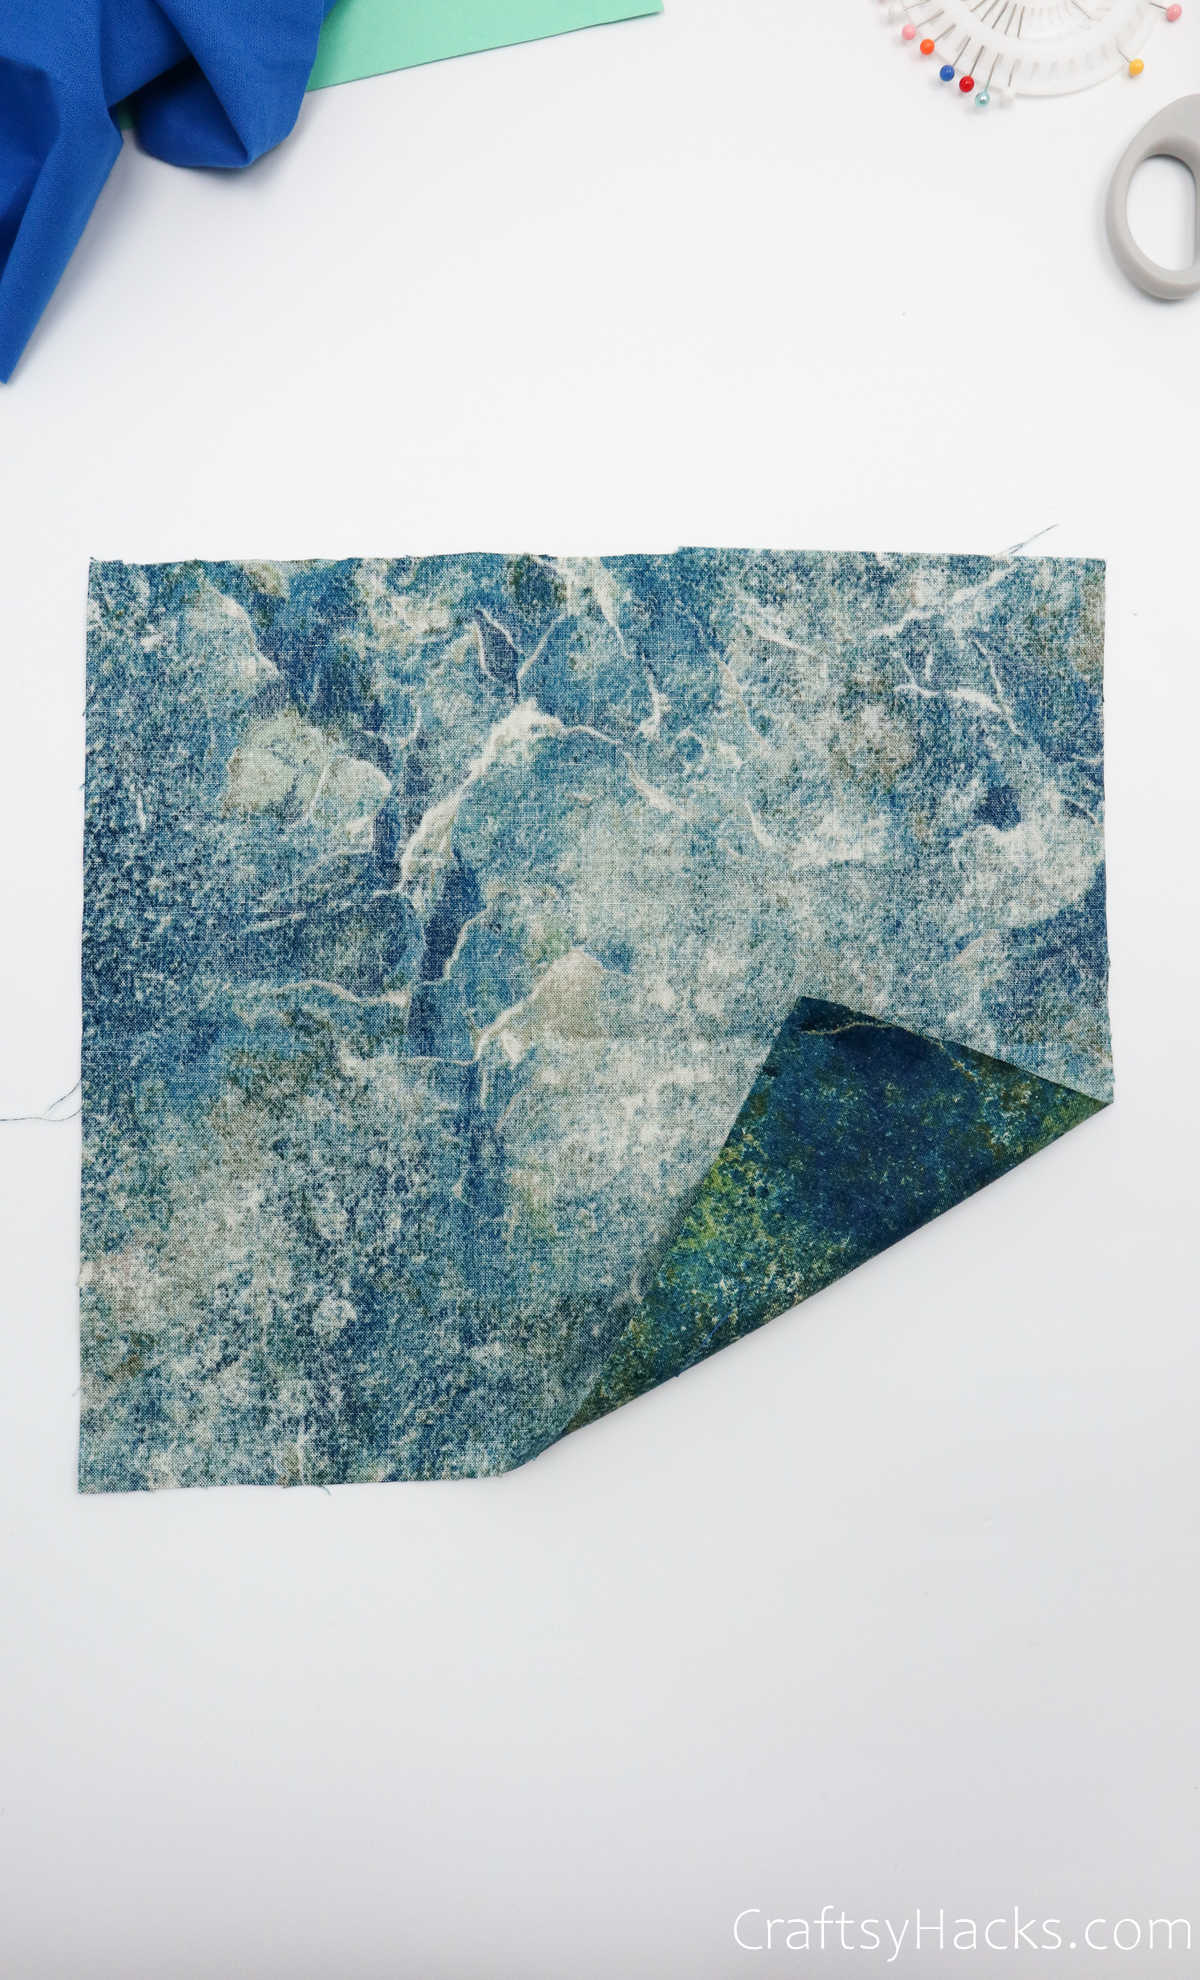
Then, lay the paper pattern you cut out over it before pinning it down in place with a few sewing pins.
Step 2
Grab a black marker and trace the outline of the paper pattern onto the fabric. Make sure that you draw the lines just right, and feel free to use a ruler, too, for straighter lines.
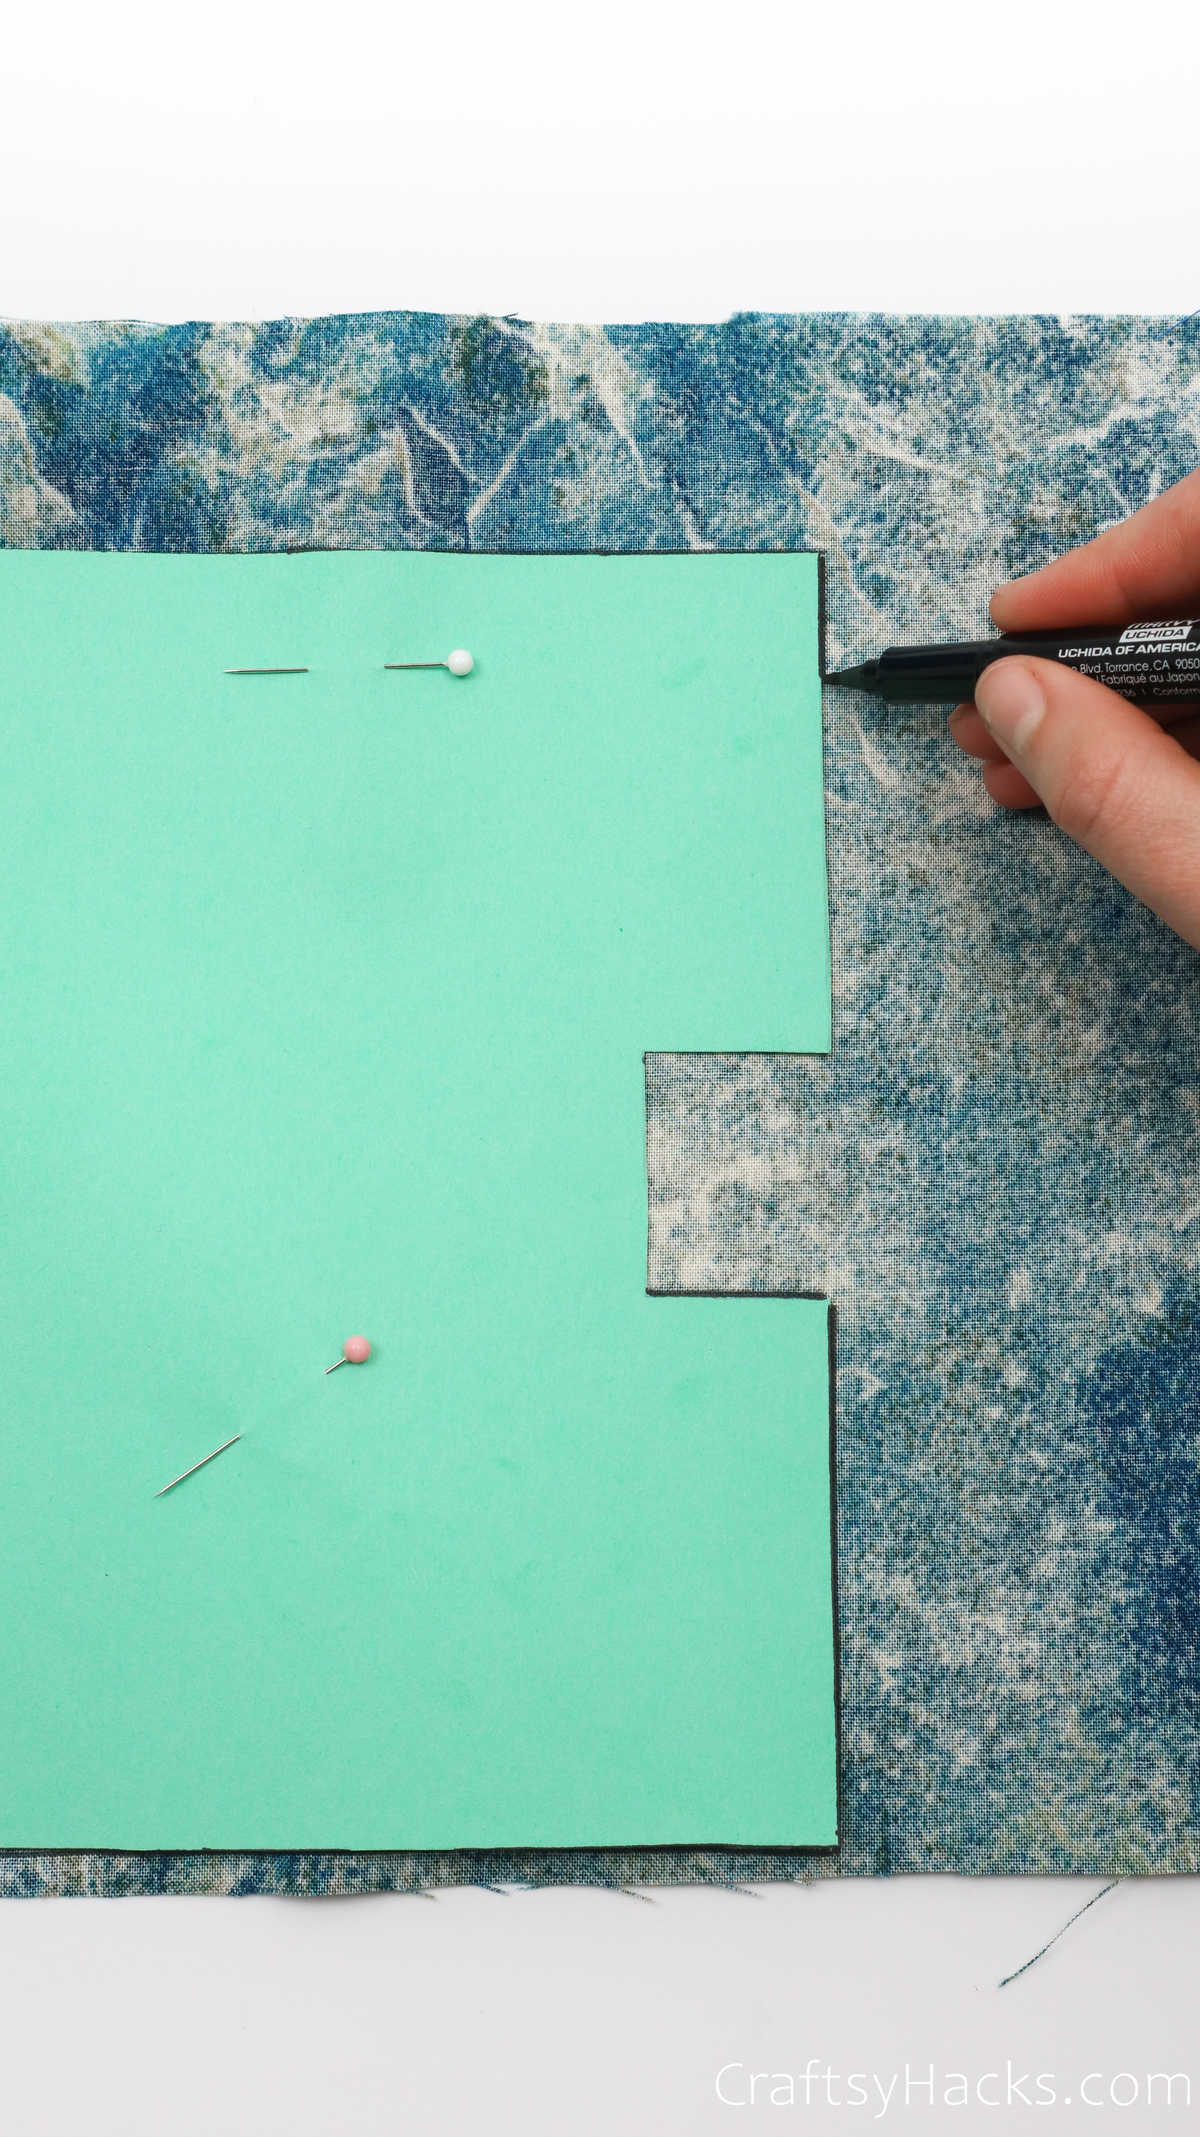
You can lift the paper pattern up to check if your edges are marked properly.

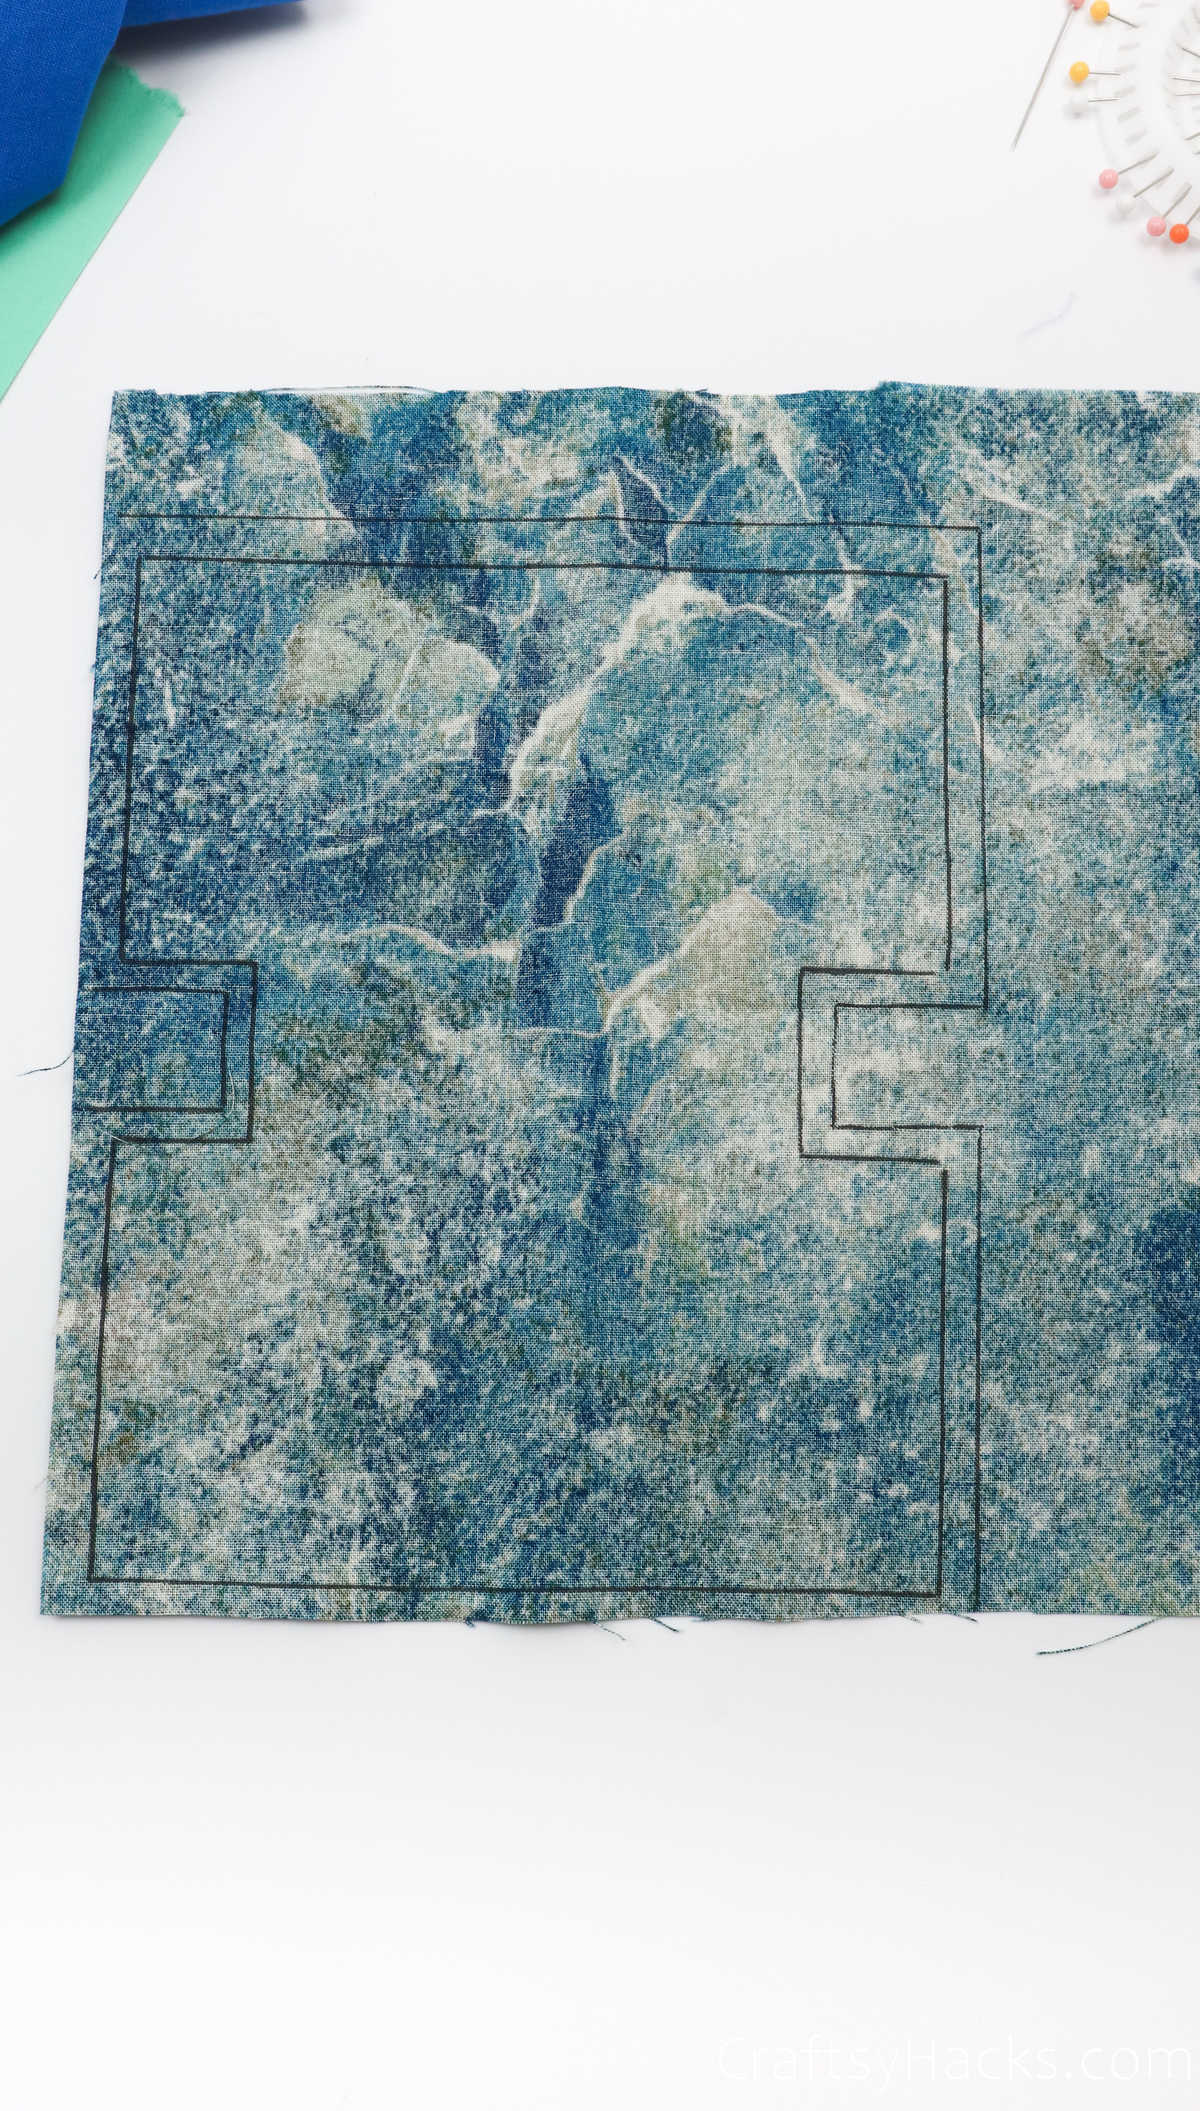
Step 3
For this next step, you’re going to draw another outline all the way around the pattern. Only this time, you’re going to draw this edging a quarter of an inch away from your initial outline.
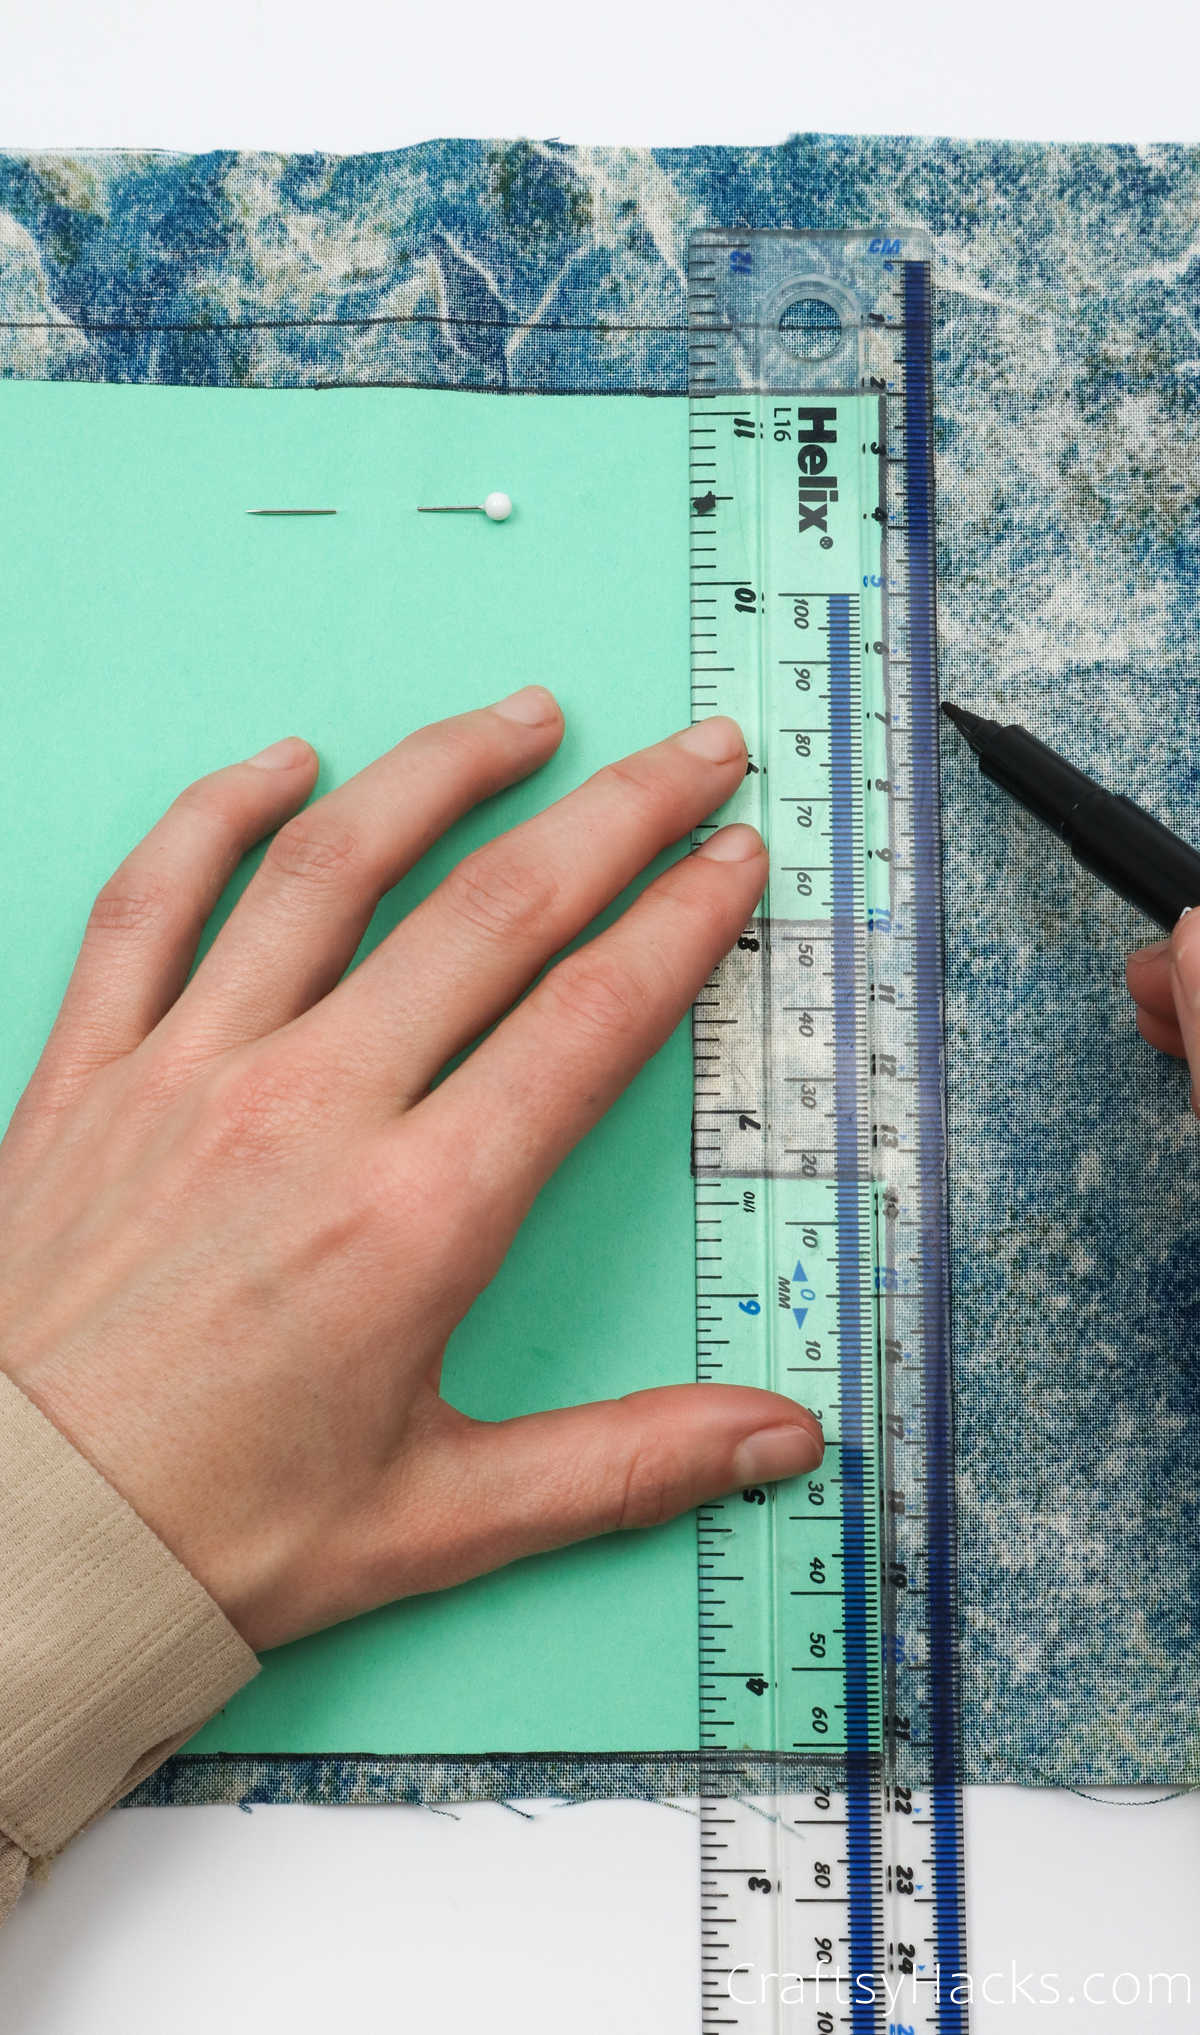
This is your seam allowance, and it will help you join your fabric together more effectively and hide the edges.
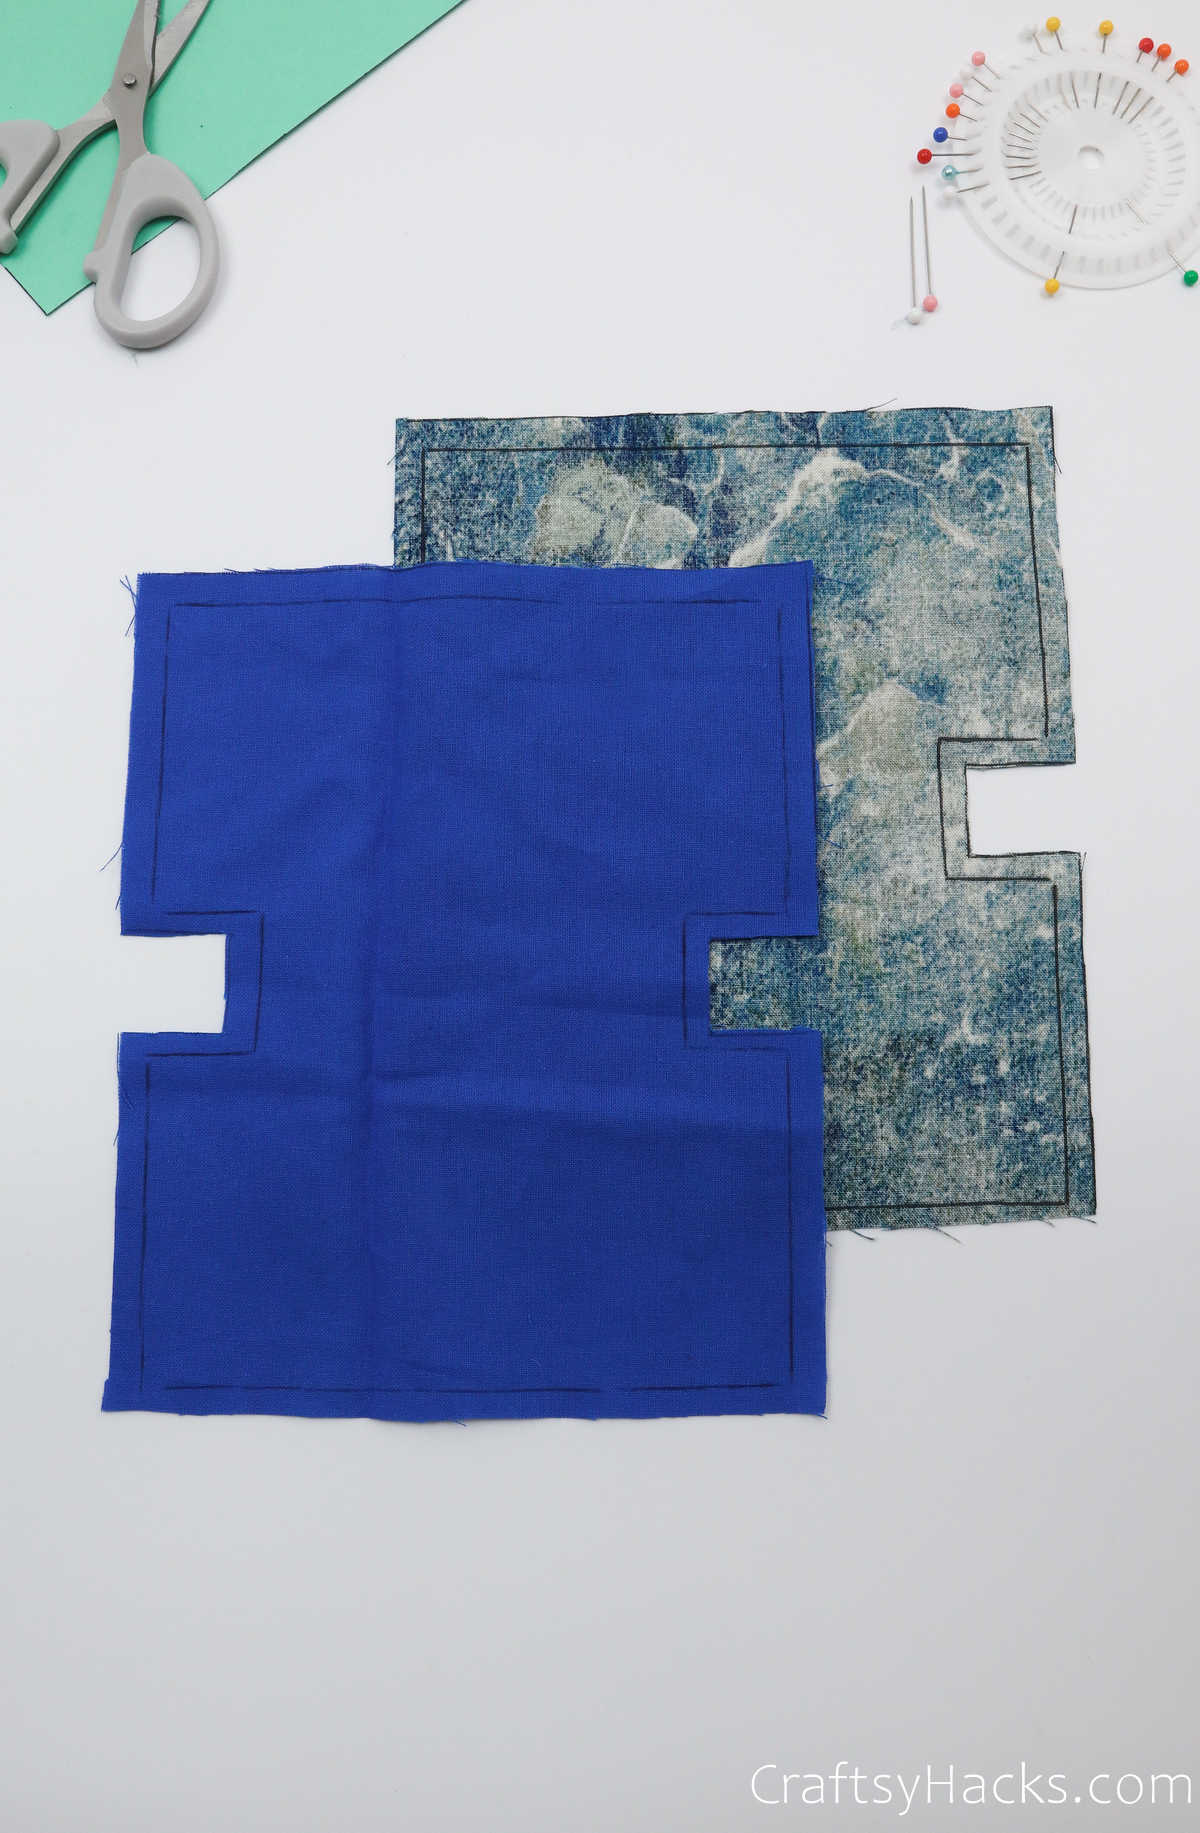
When you’ve drawn the edging around the fabric, you can unpin it and set it aside. Your marking on the fabric should look somewhat like this.
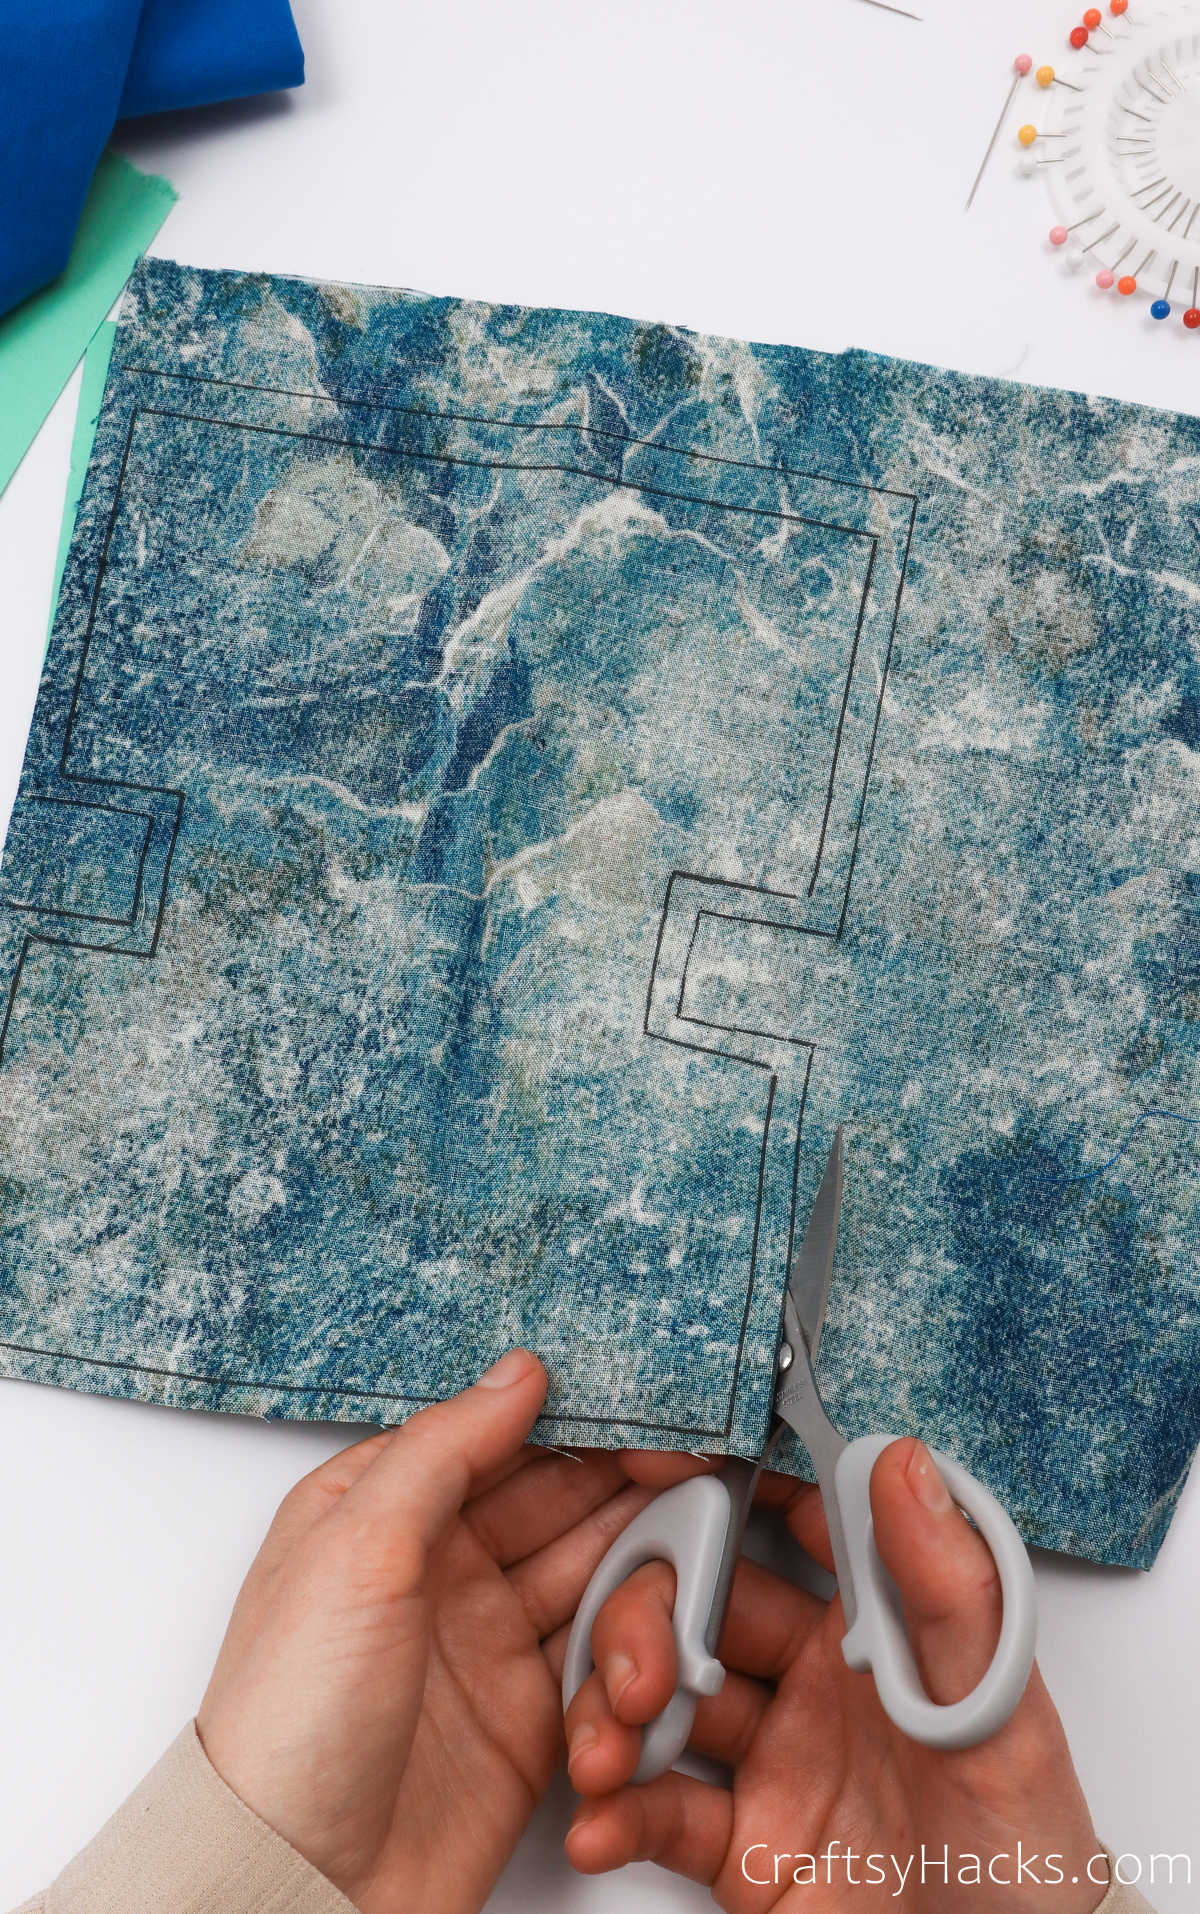
Step 4
Grab a pair of scissors—preferably cloth scissors, as they will give you clean edges—and cut the fabric. You’ll be cutting the fabric along the outer outline you drew (the edging).
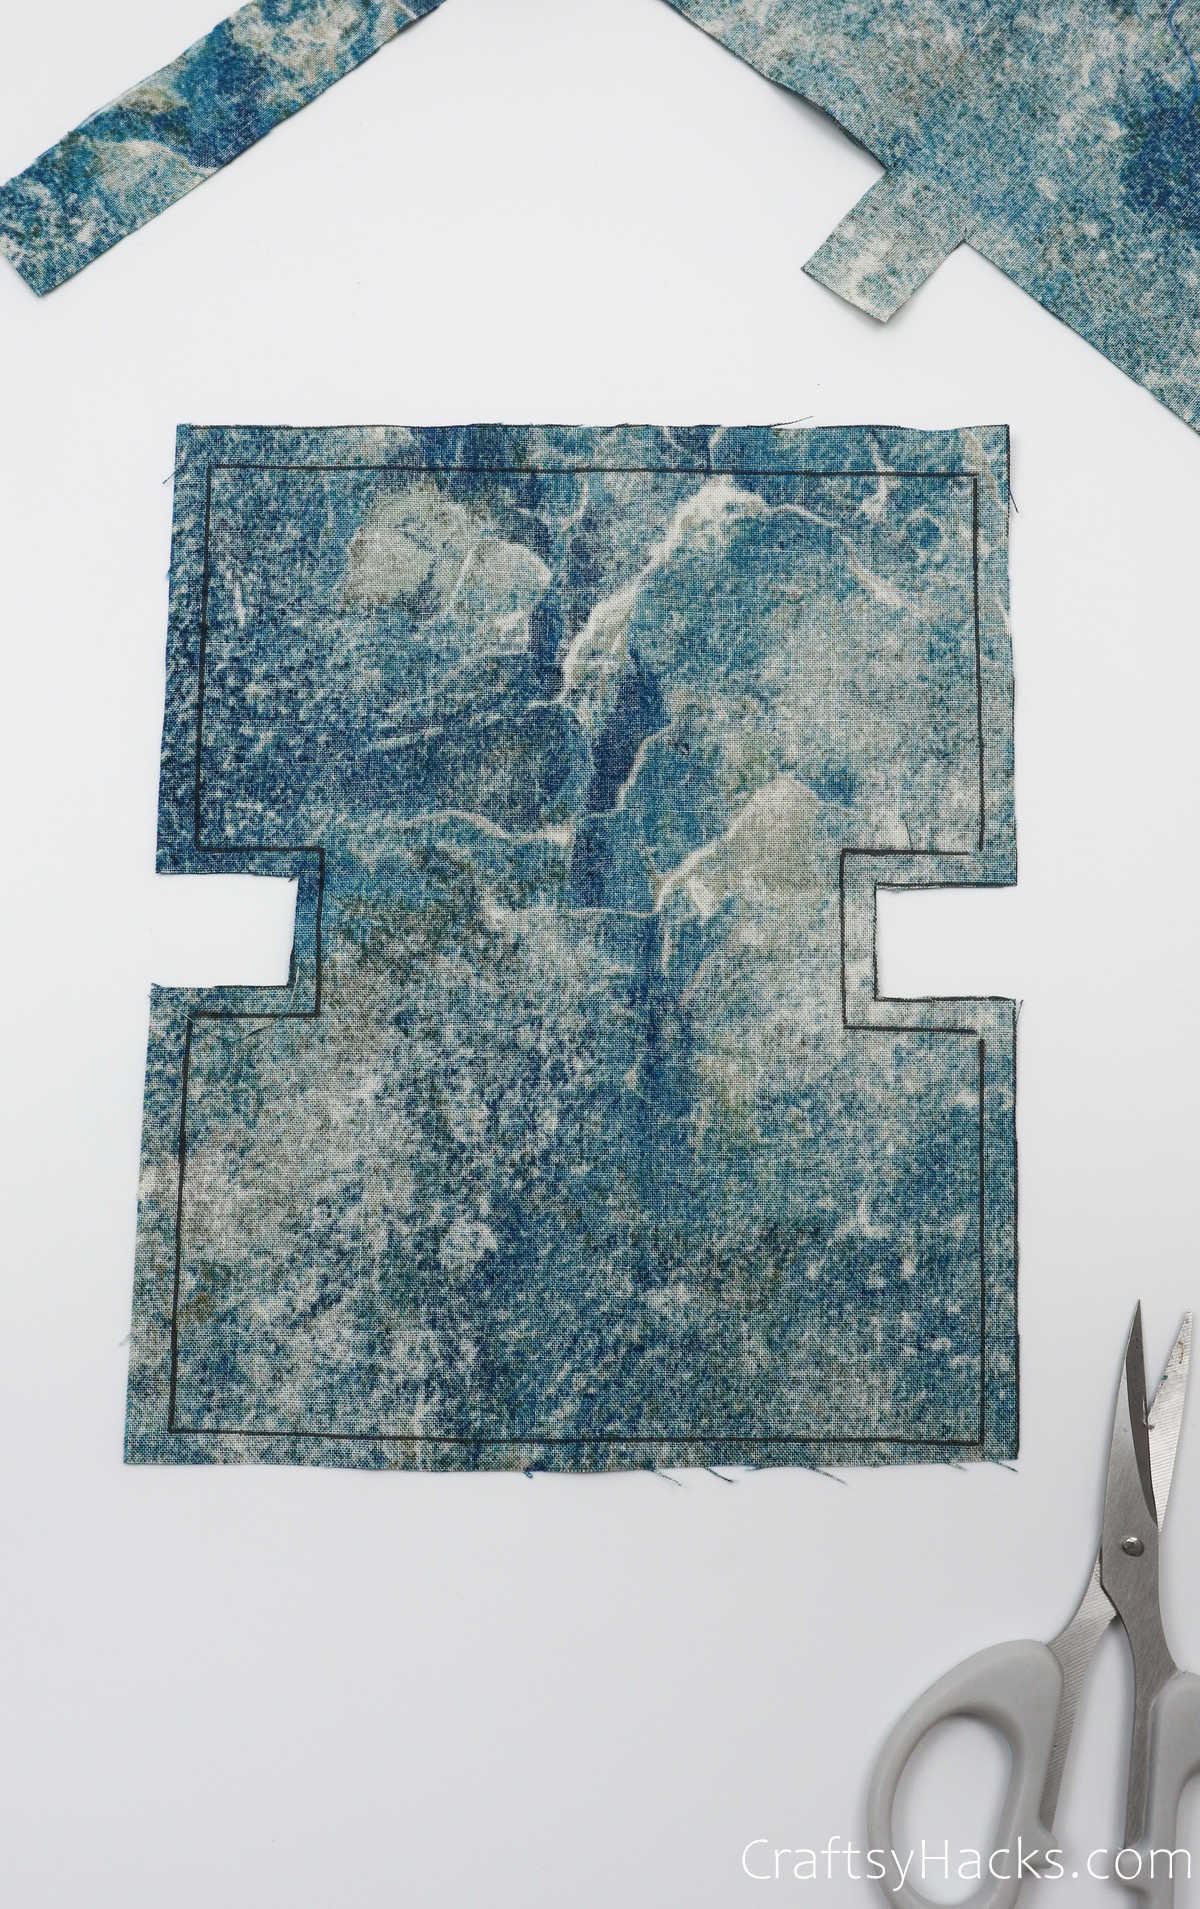
Step 5
Repeat steps one through four for the second swatch of fabric, too.
Step 6
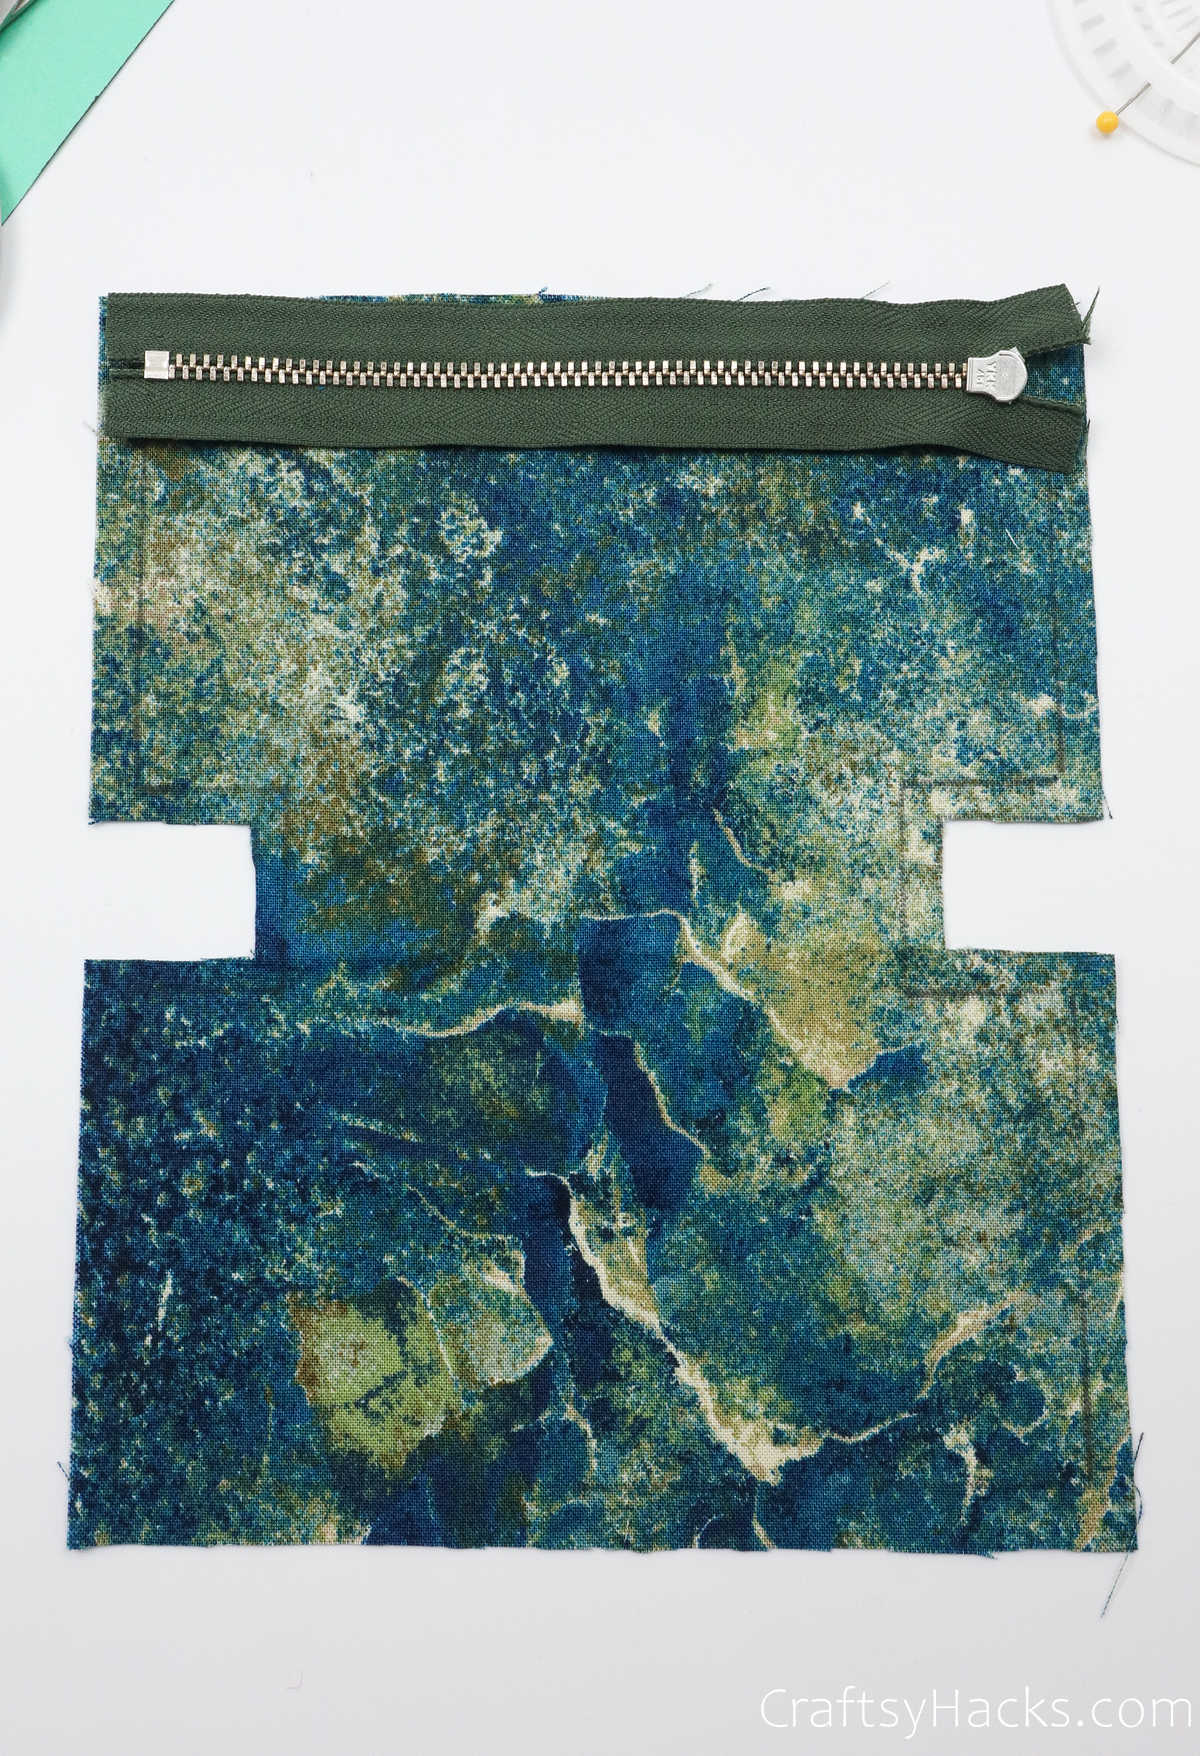
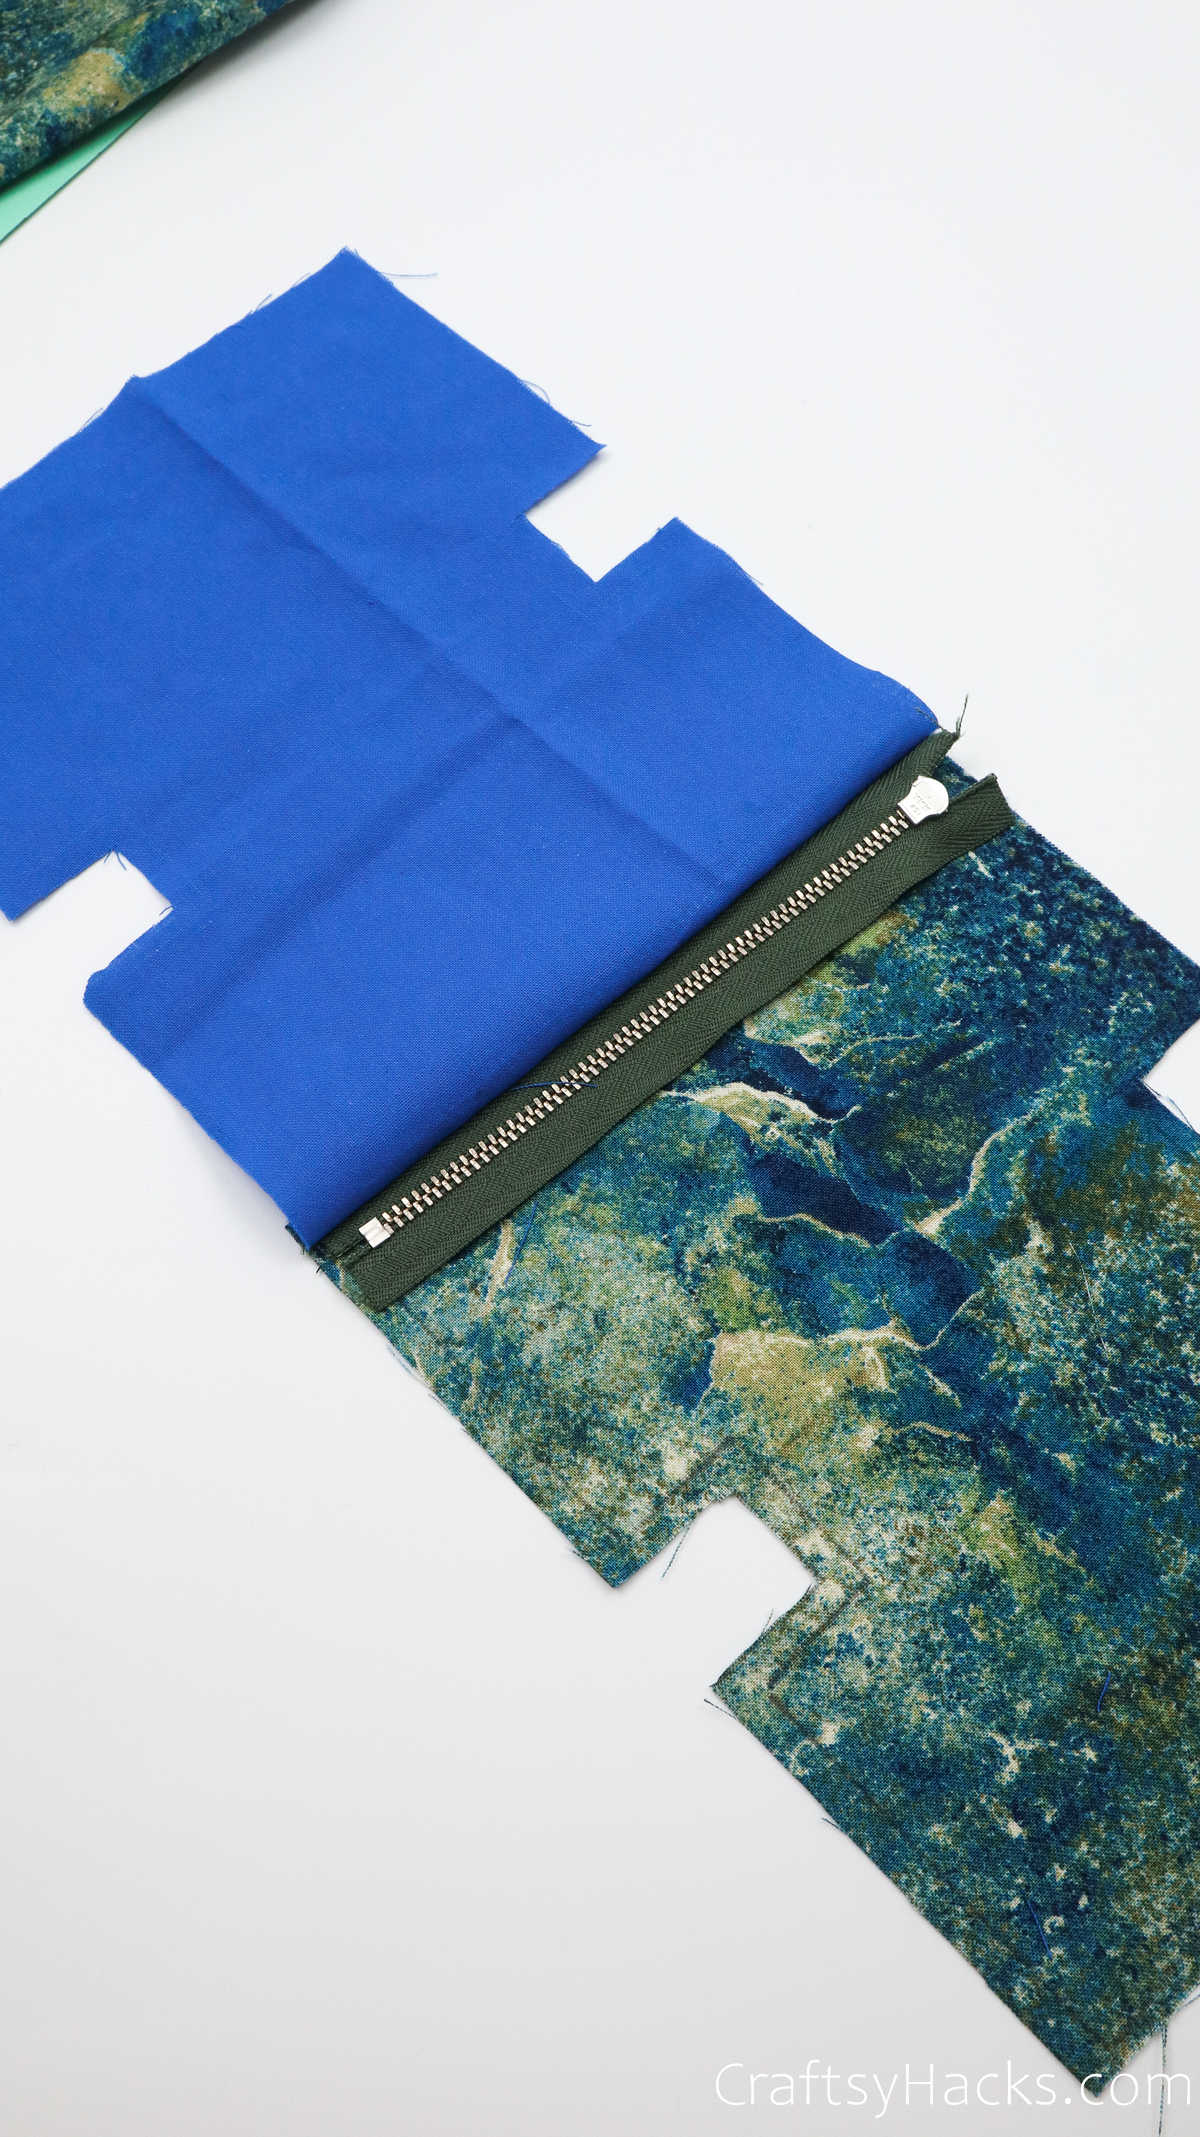
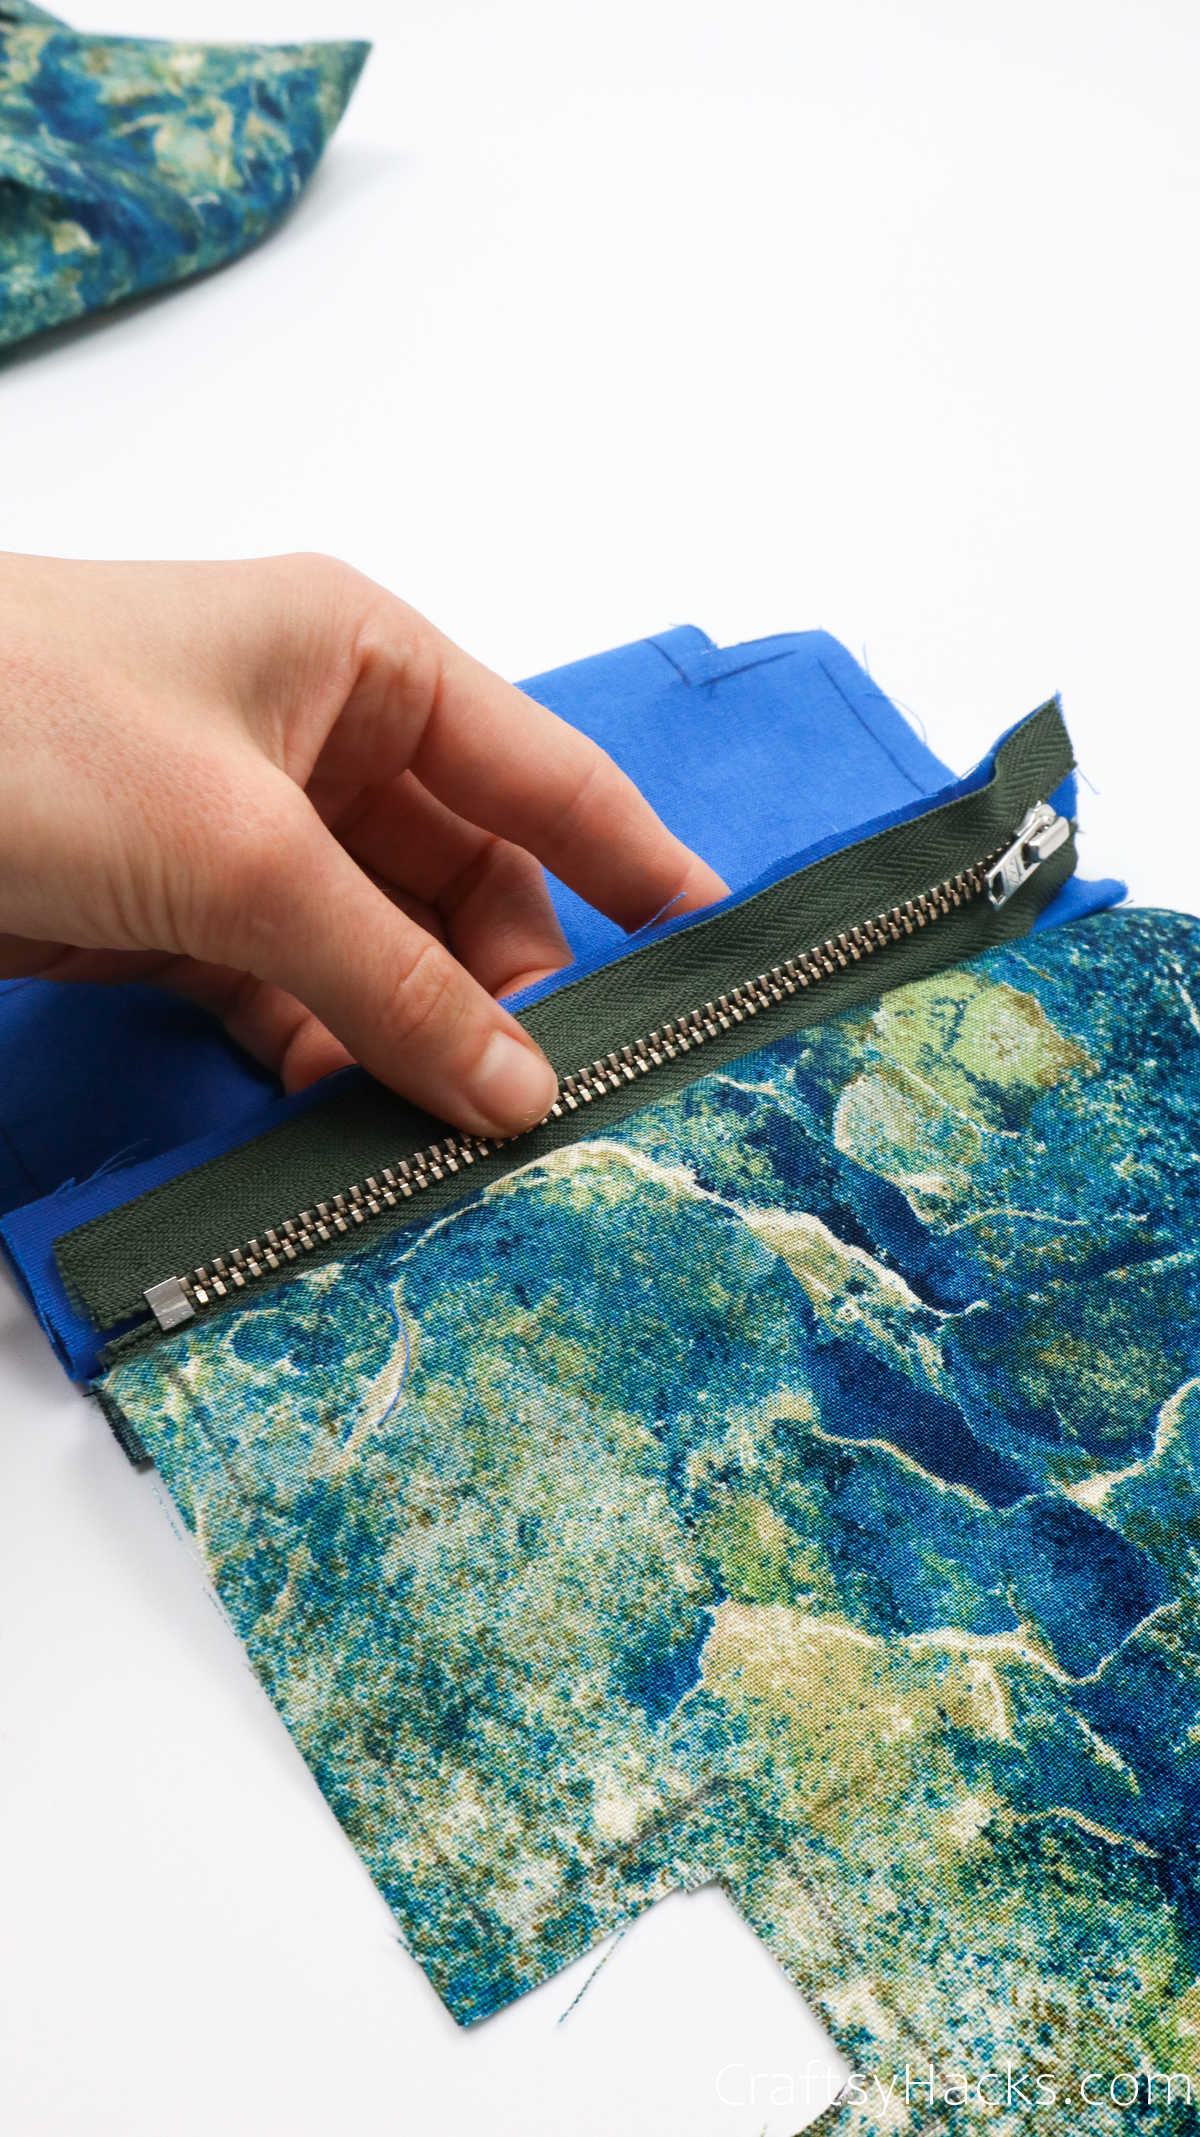
It’s time to assemble the different components of your project and lay them out on your work surface. Take the outer fabric and lay it down with the right side facing up.
Then, place the zipper over it on the top of the fabric, with the zipper facing down, as seen here.
Then, grab your second fabric cutout and place it over the zipper. Make sure that the edging you outlined is visible. That means that the right sides of both the fabric swatches will be facing inward towards each other.
Also, before you start sewing, make sure that all the edges are aligned neatly and smooth the fabric down as required.
Step 7
When you’ve aligned the edges, make sure you pin them in place. Then, do you remember that first inner outline you drew? You’re going to sew right along that line, over the teeth of the zipper.
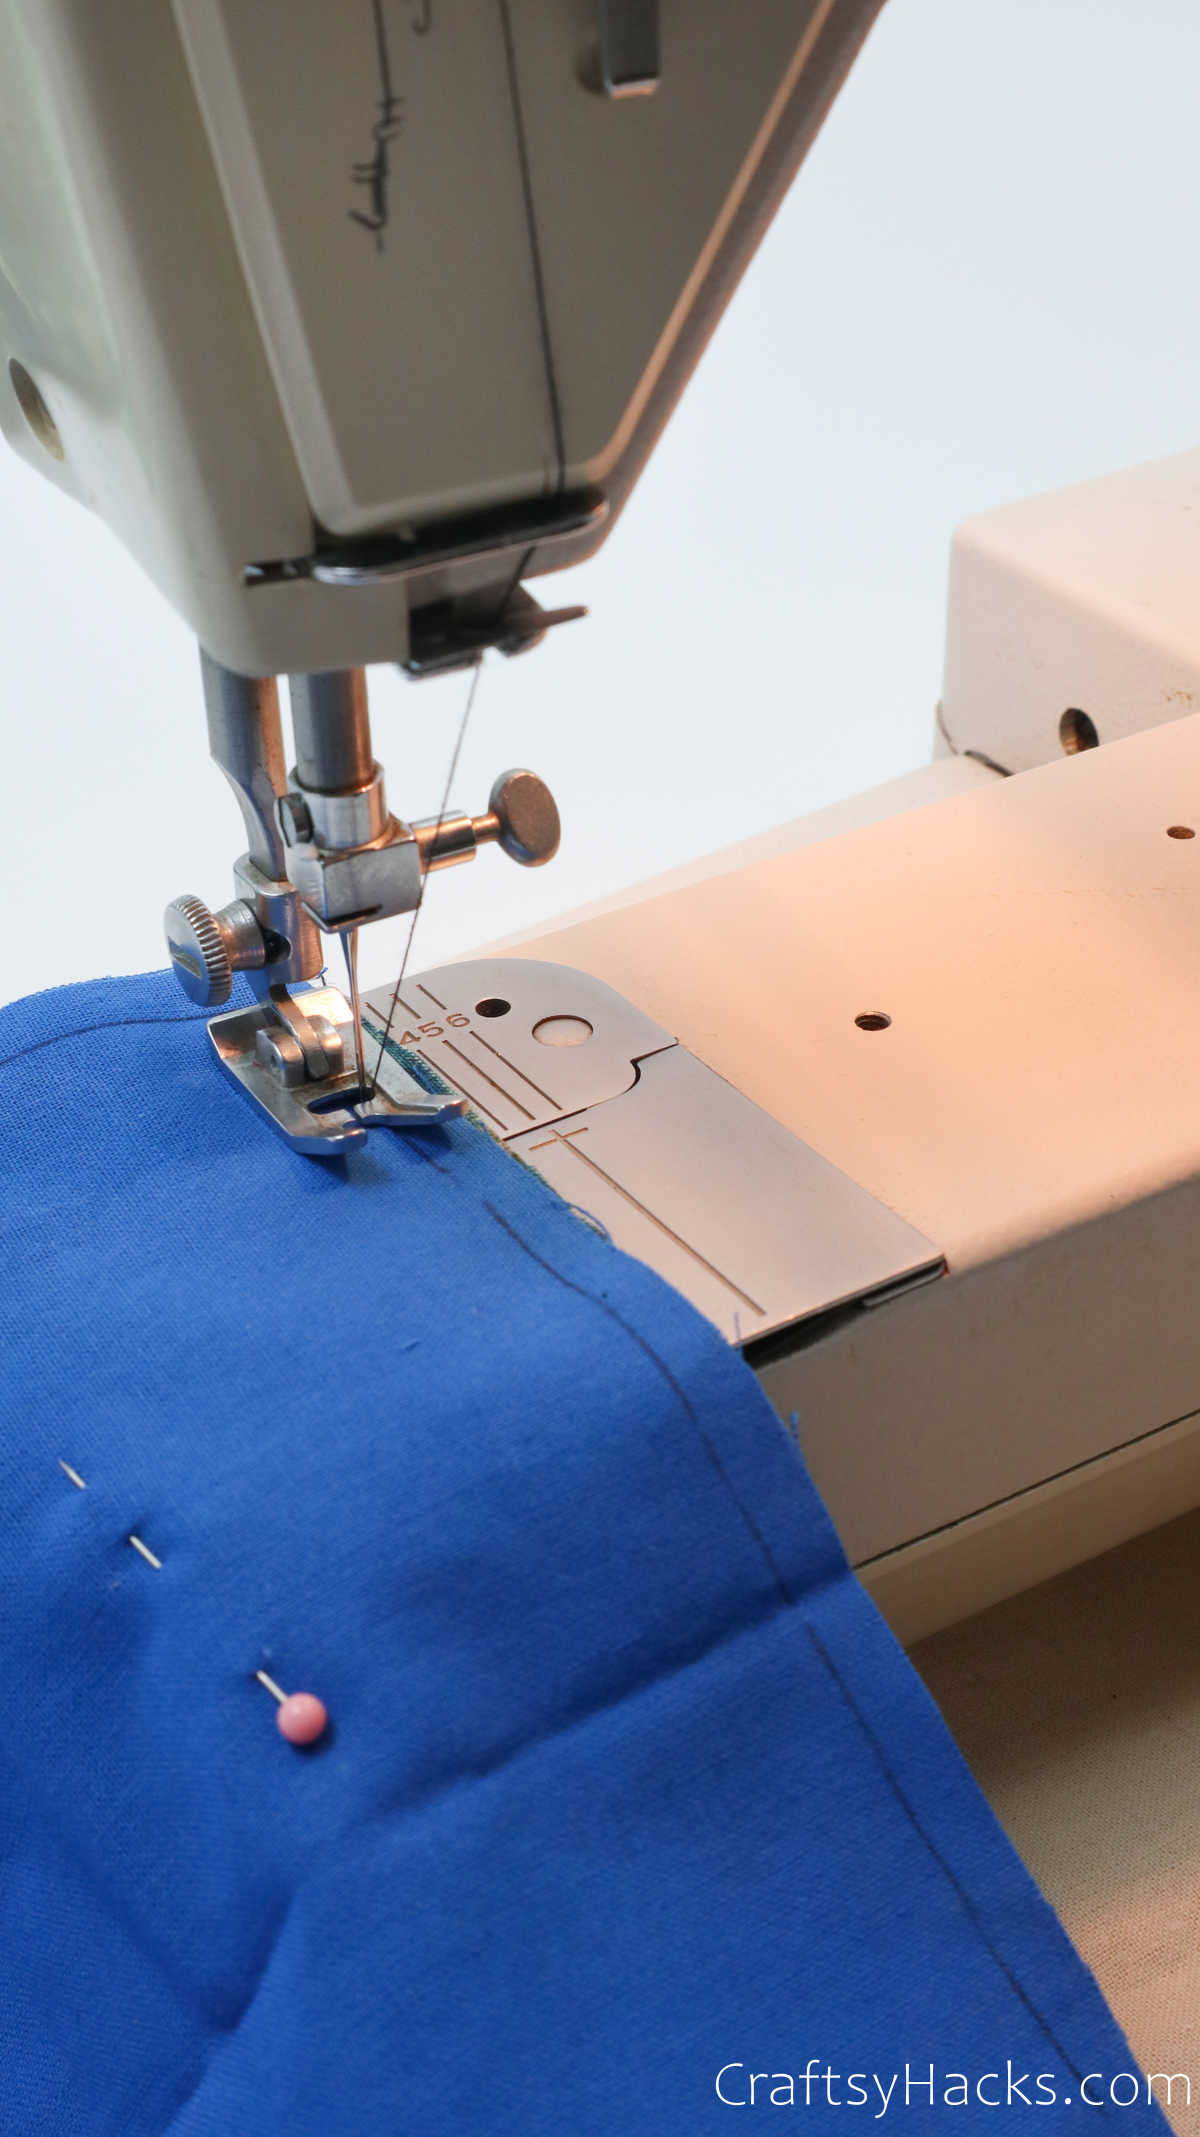
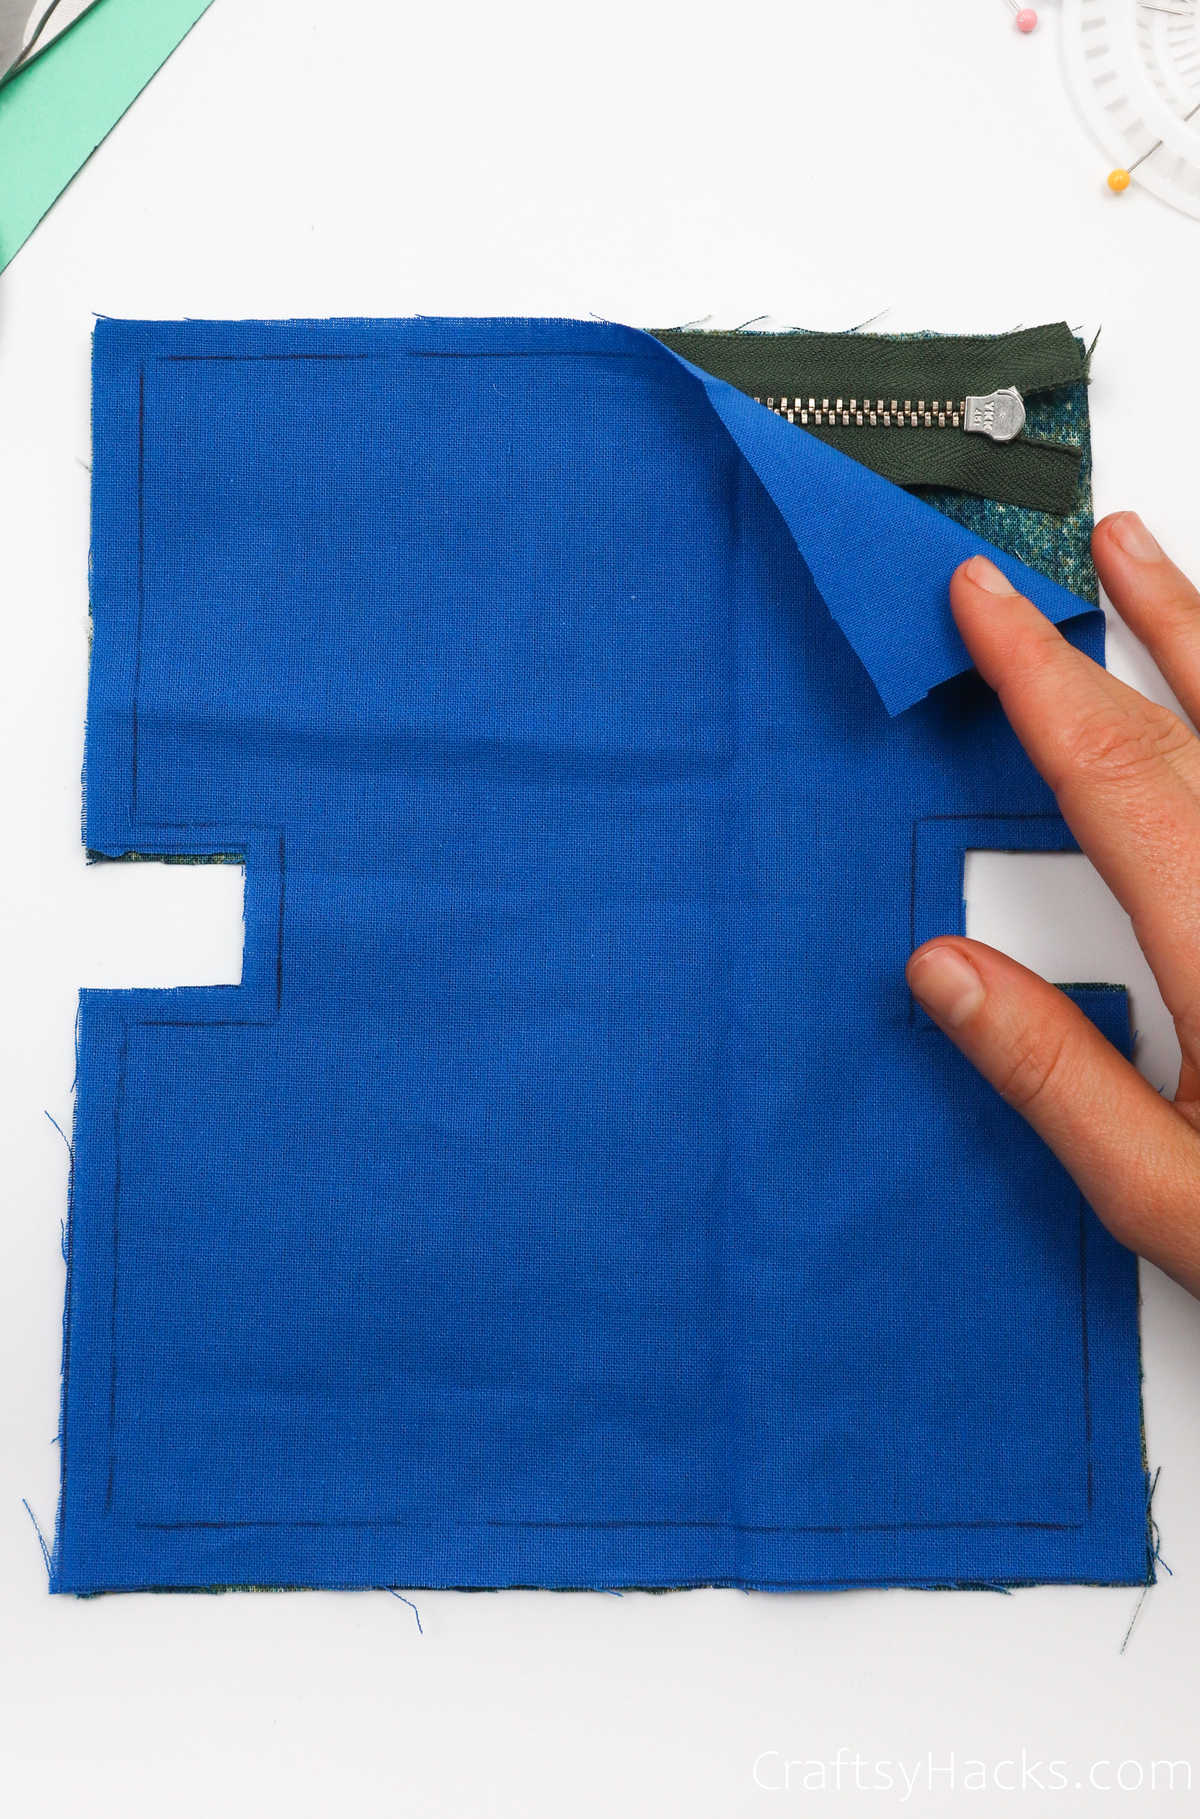
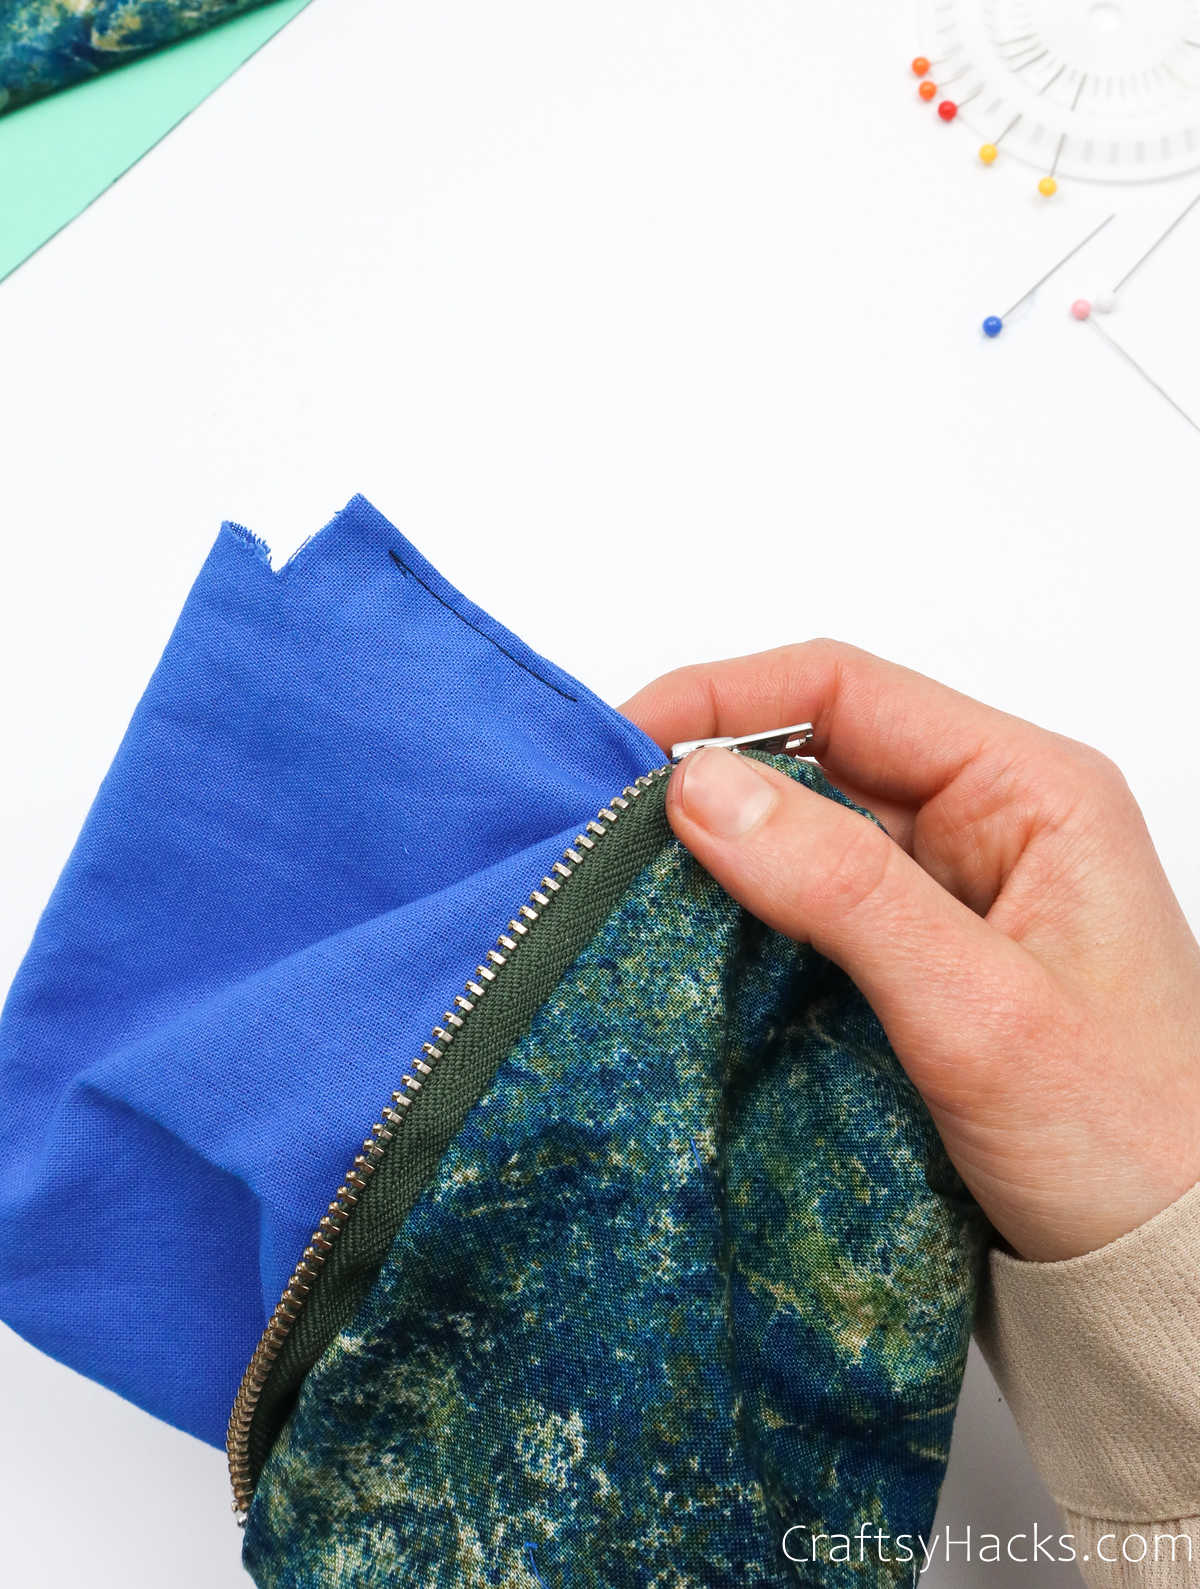
You’re only going to sew that one side for now, so you should be able to pull up the other side like this.
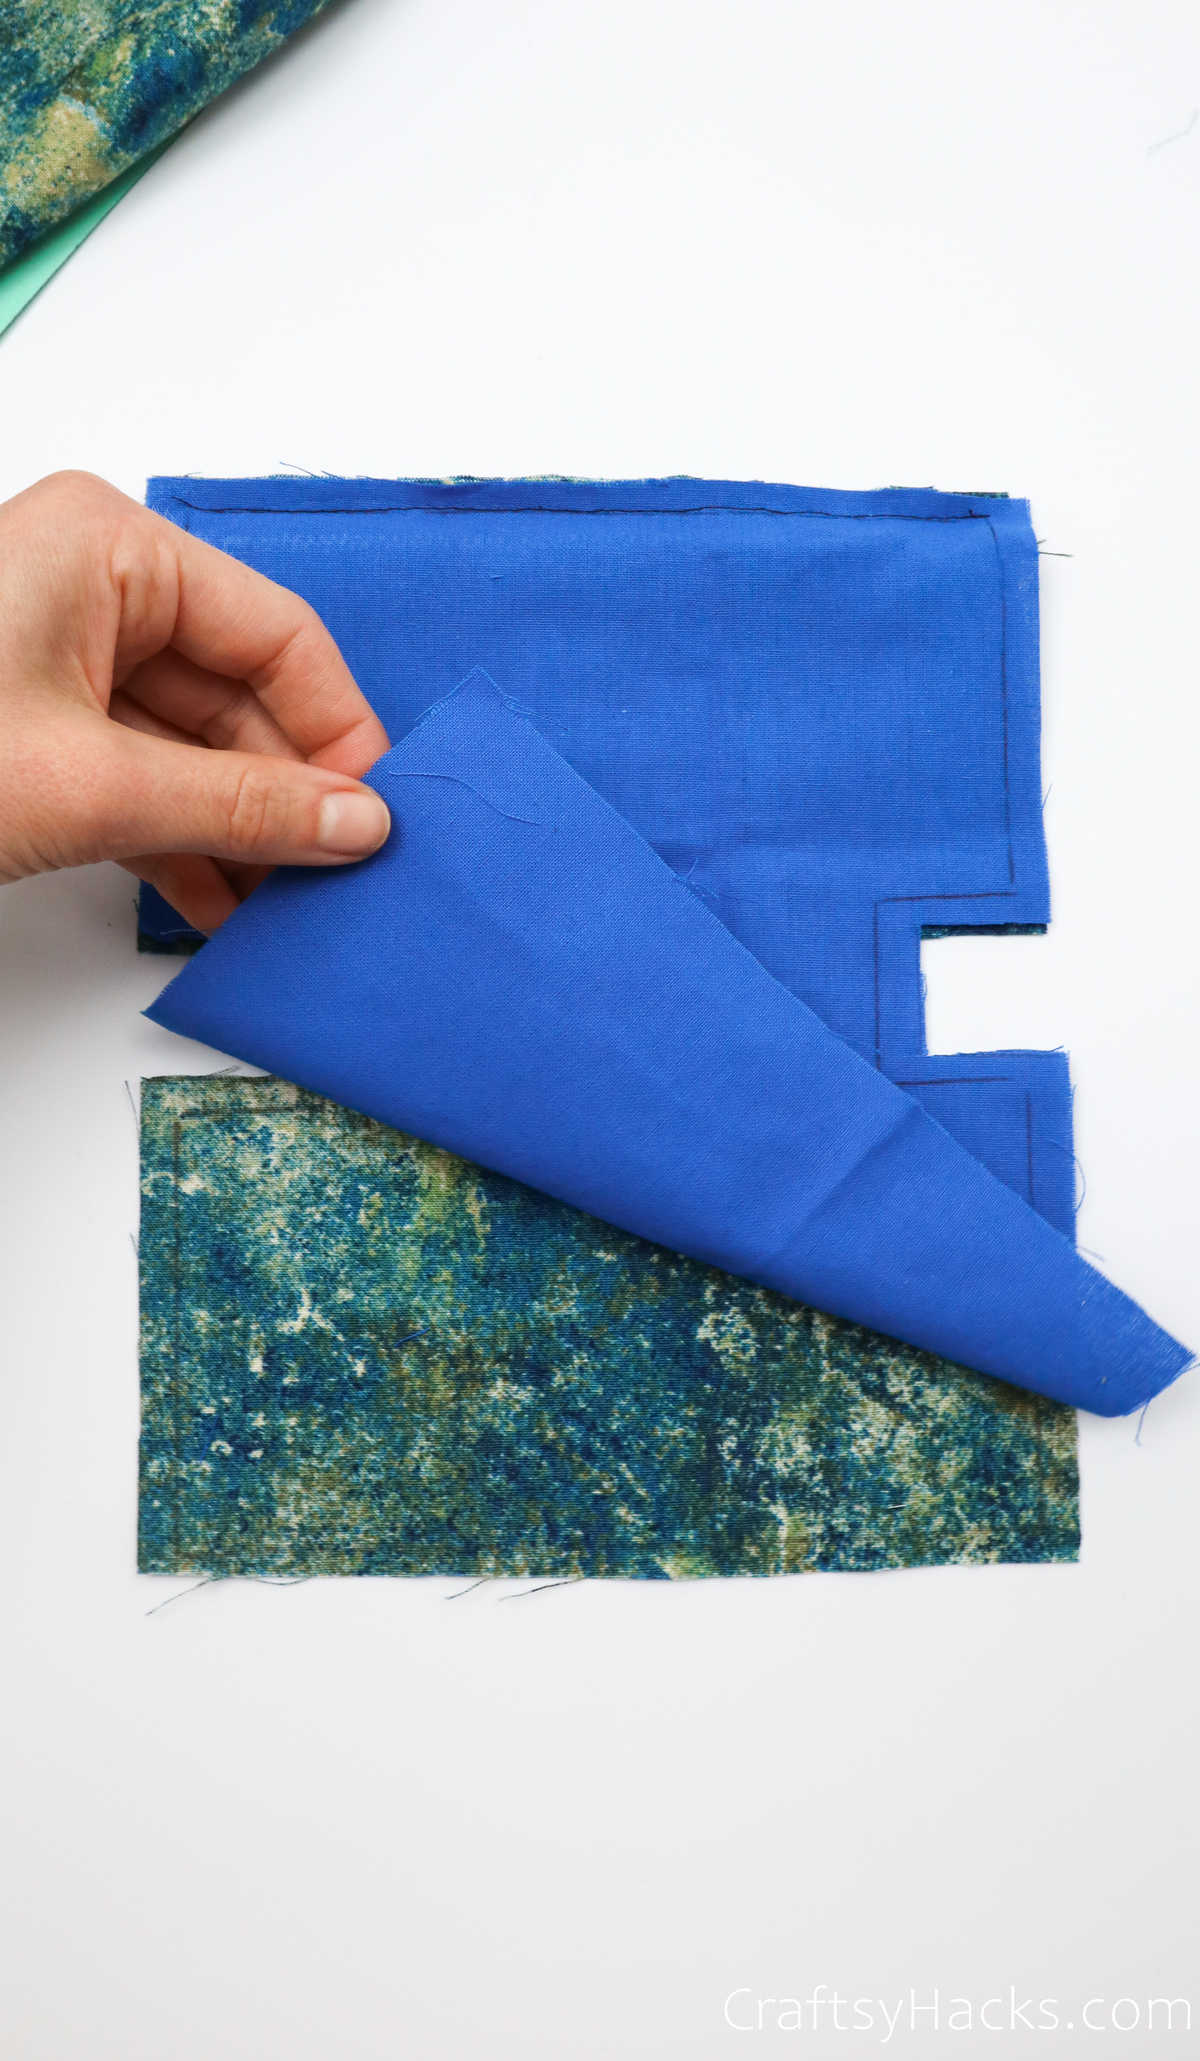
Pull the upper fabric up and over the zipper you just sewed in place and lay it down, as you see here.
Step 8
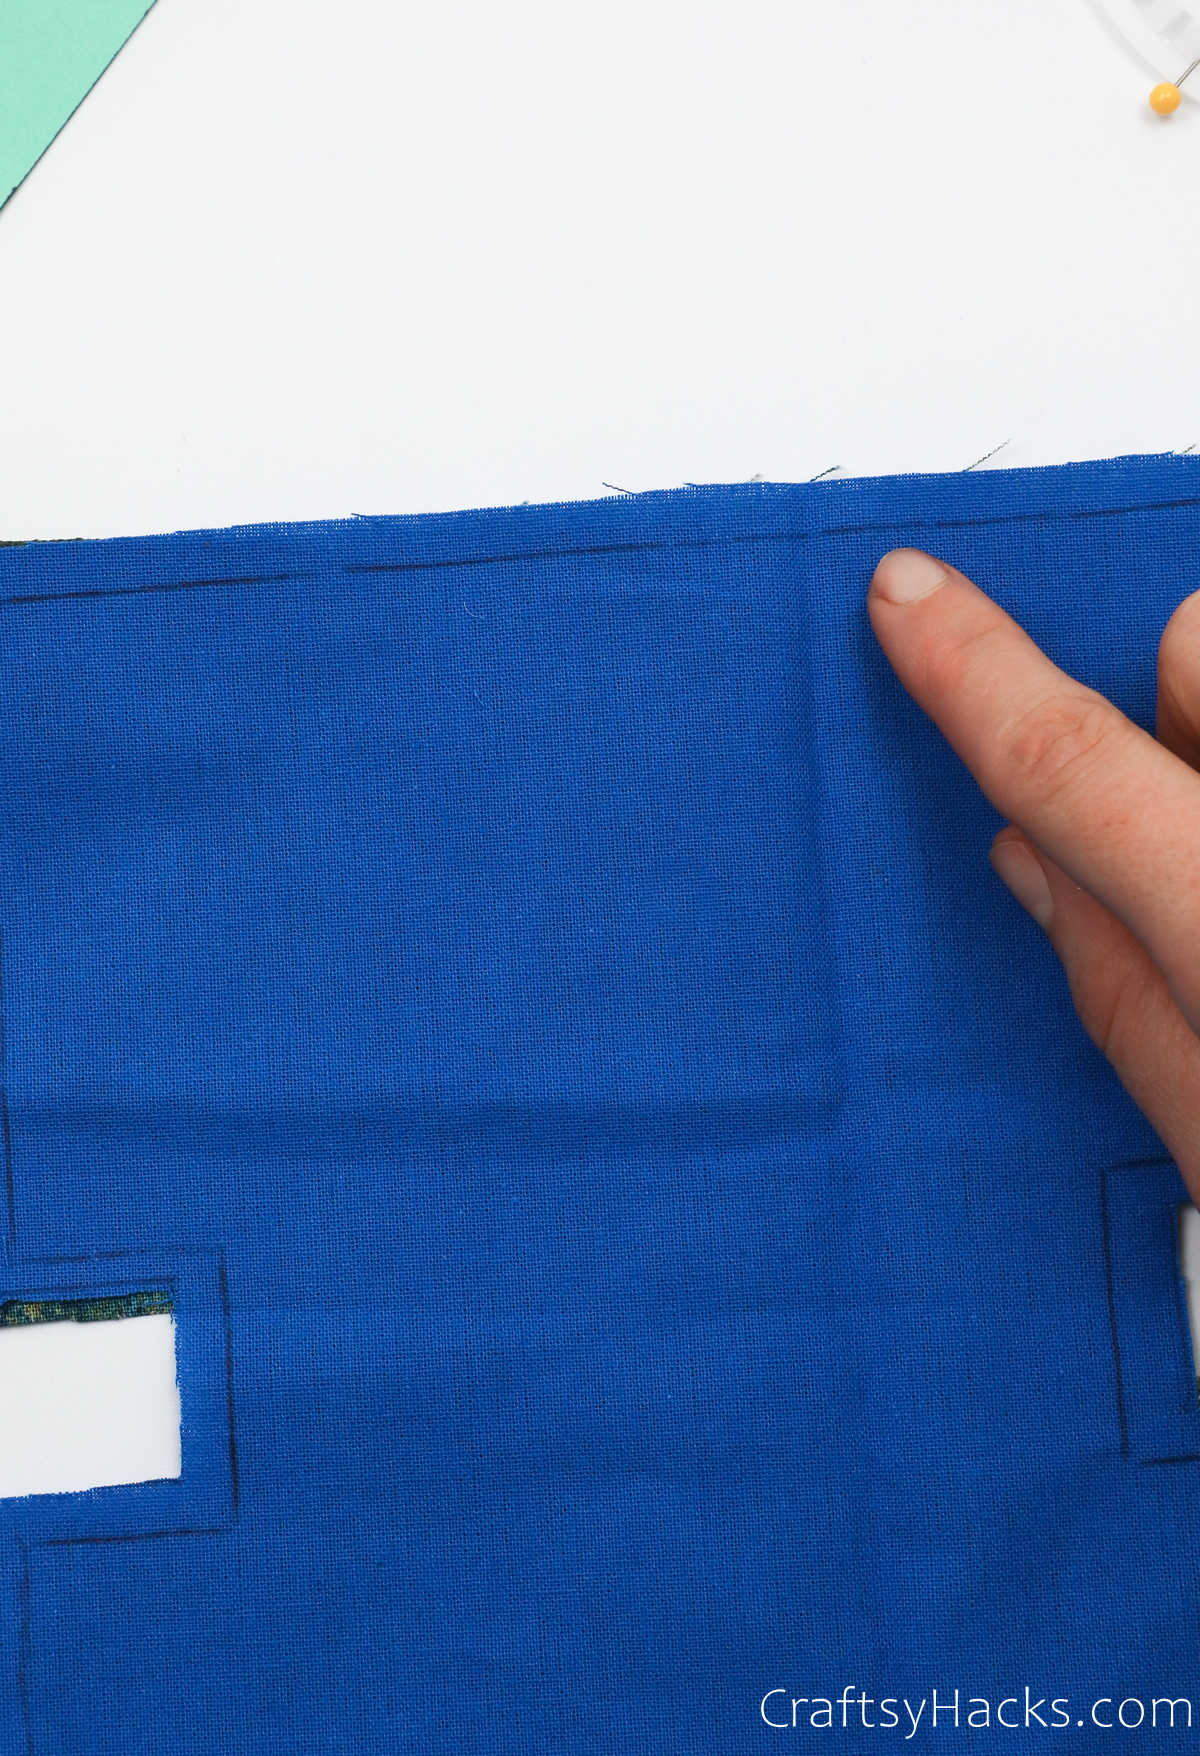
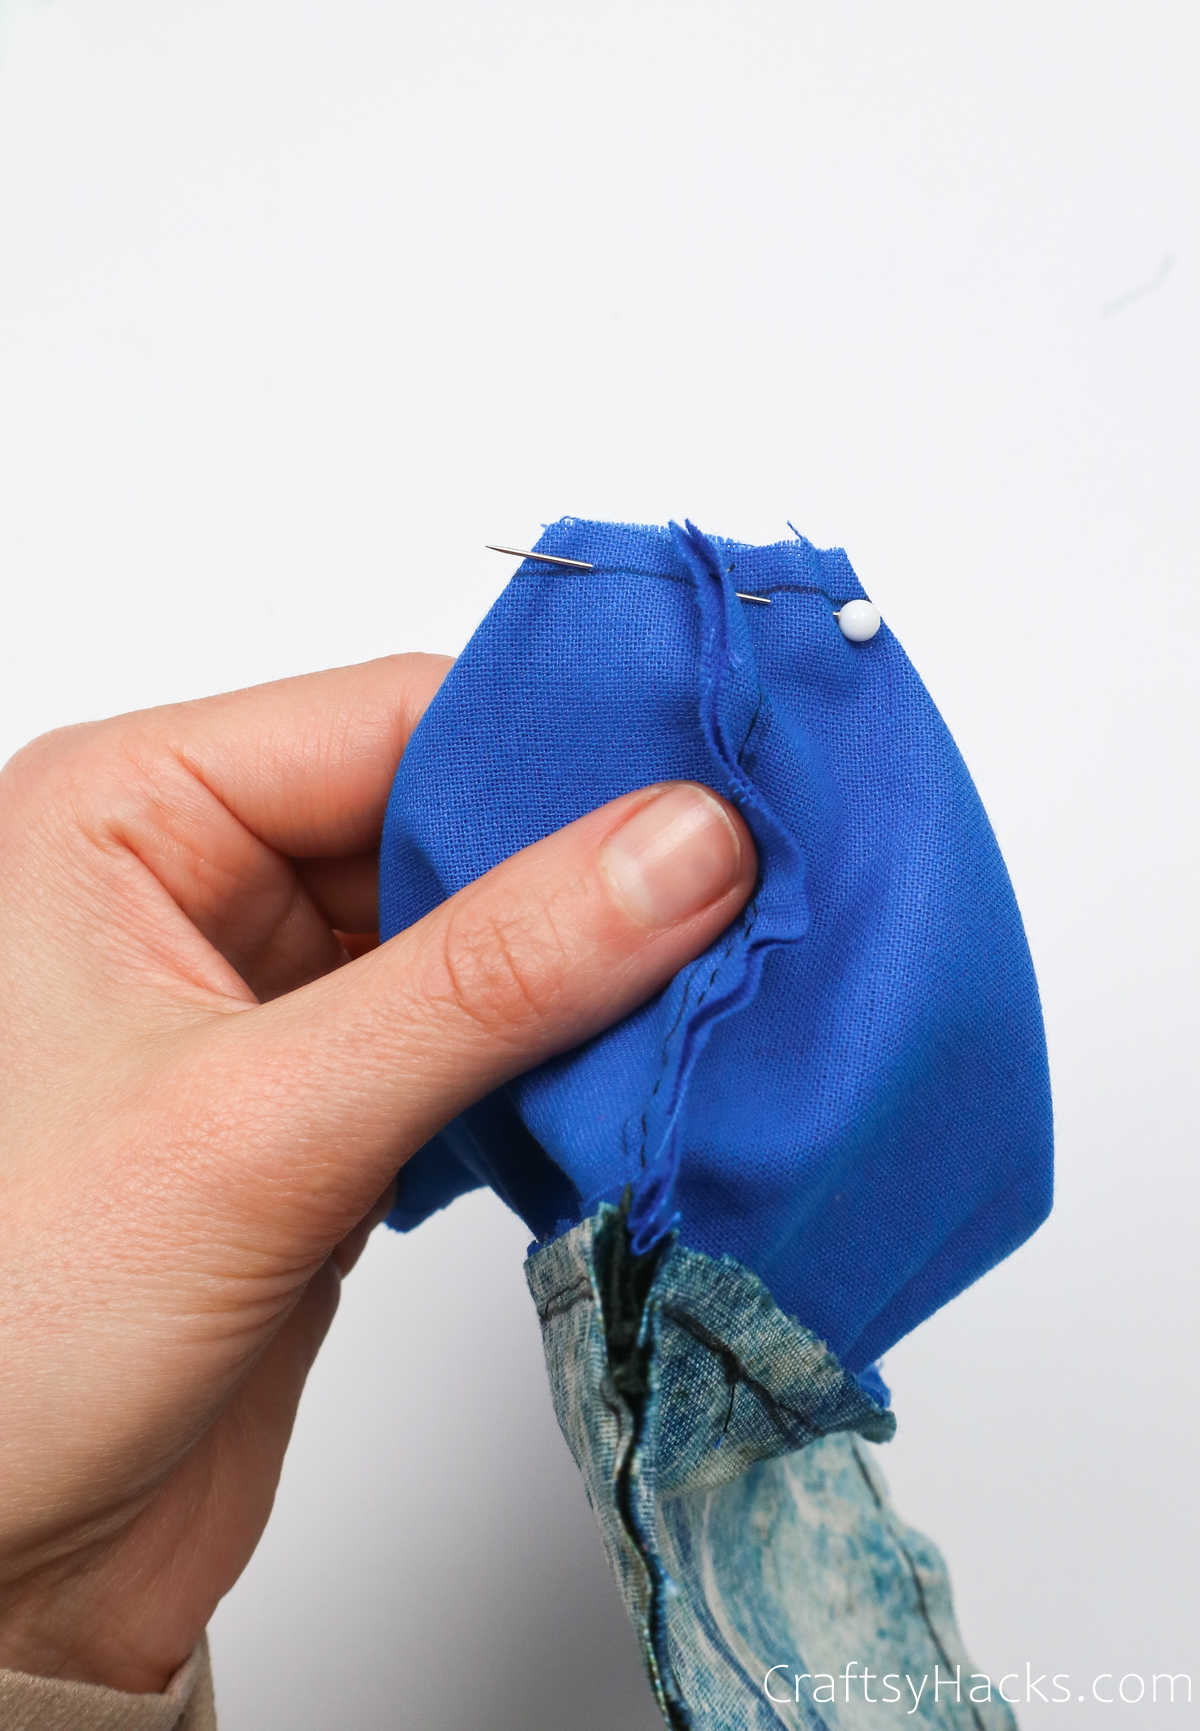
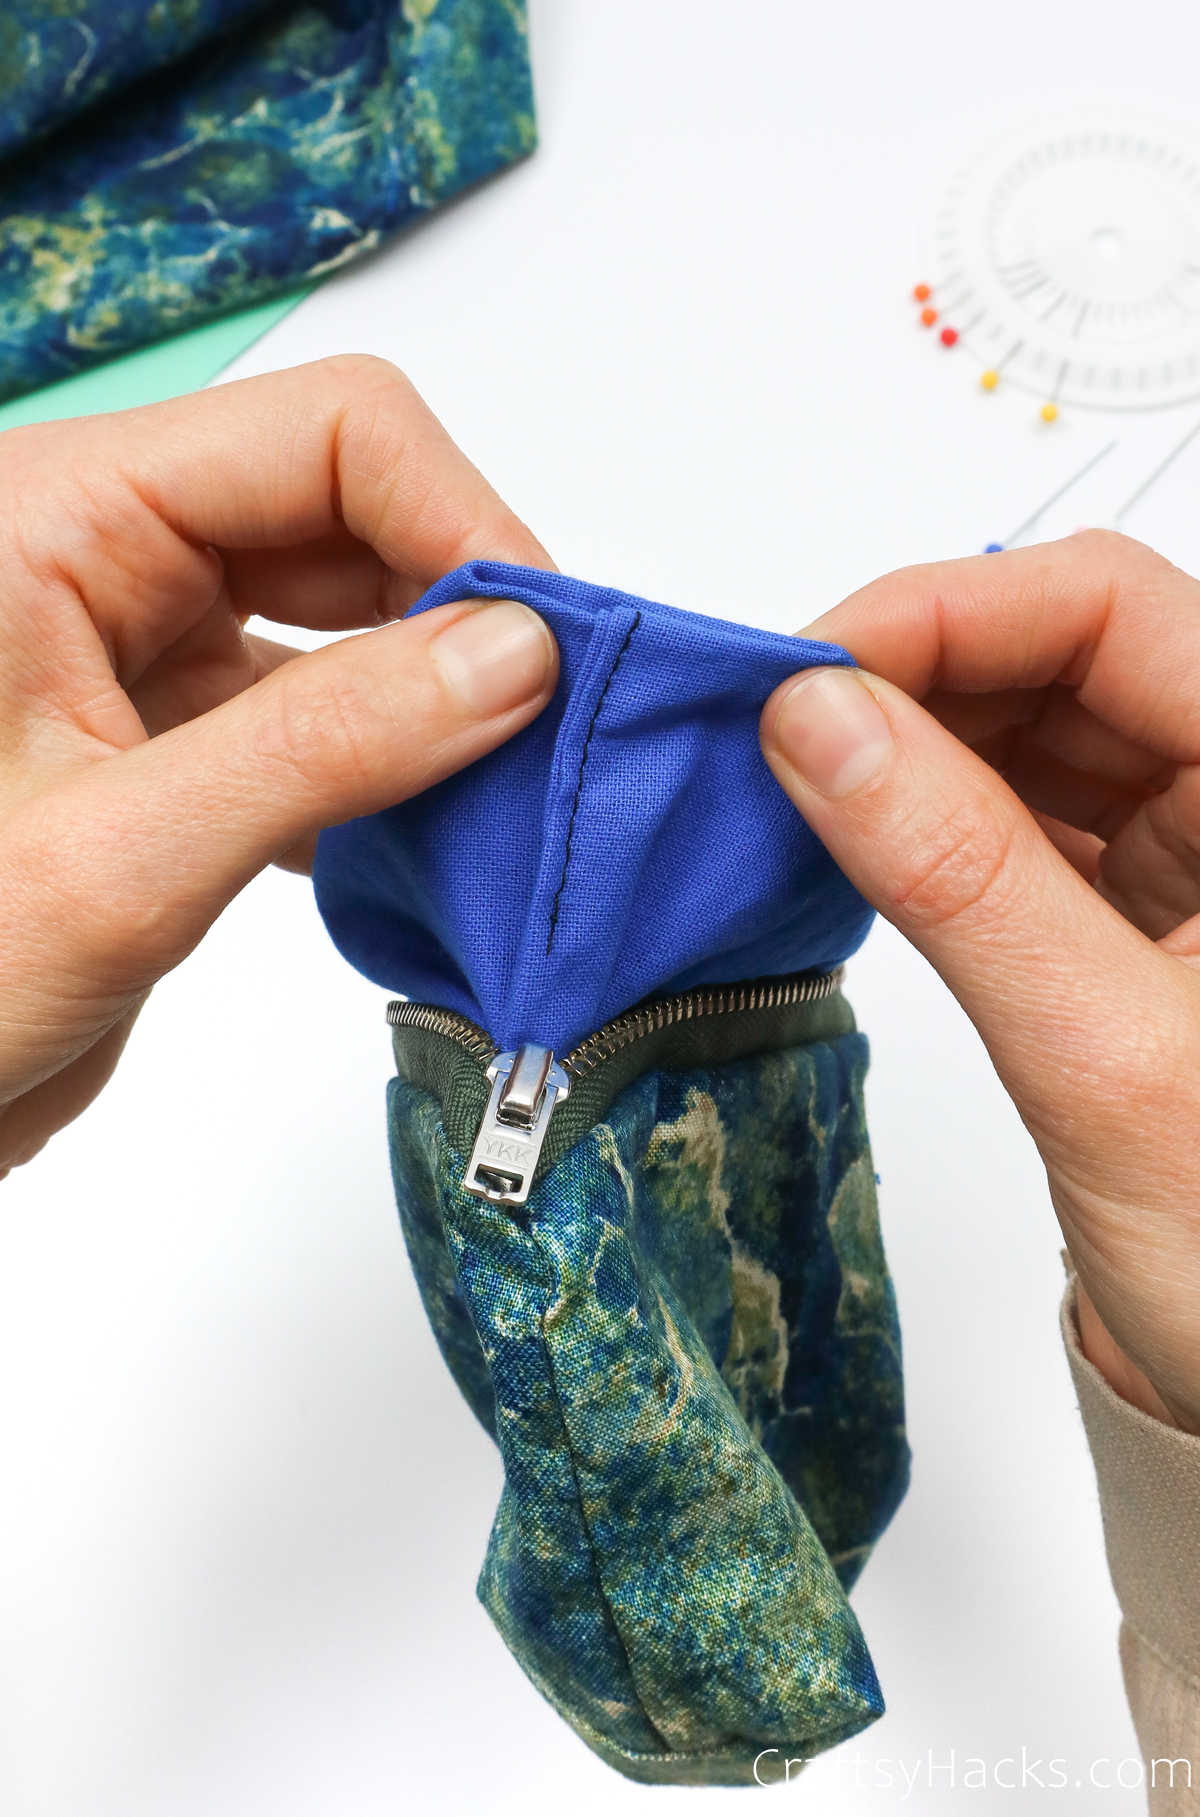
Grab the end of the fabric on the opposite side of the zipper and pull it over. Line the edges together, creating a fold of sorts. Use a couple of sewing pins to pin the edges in place.
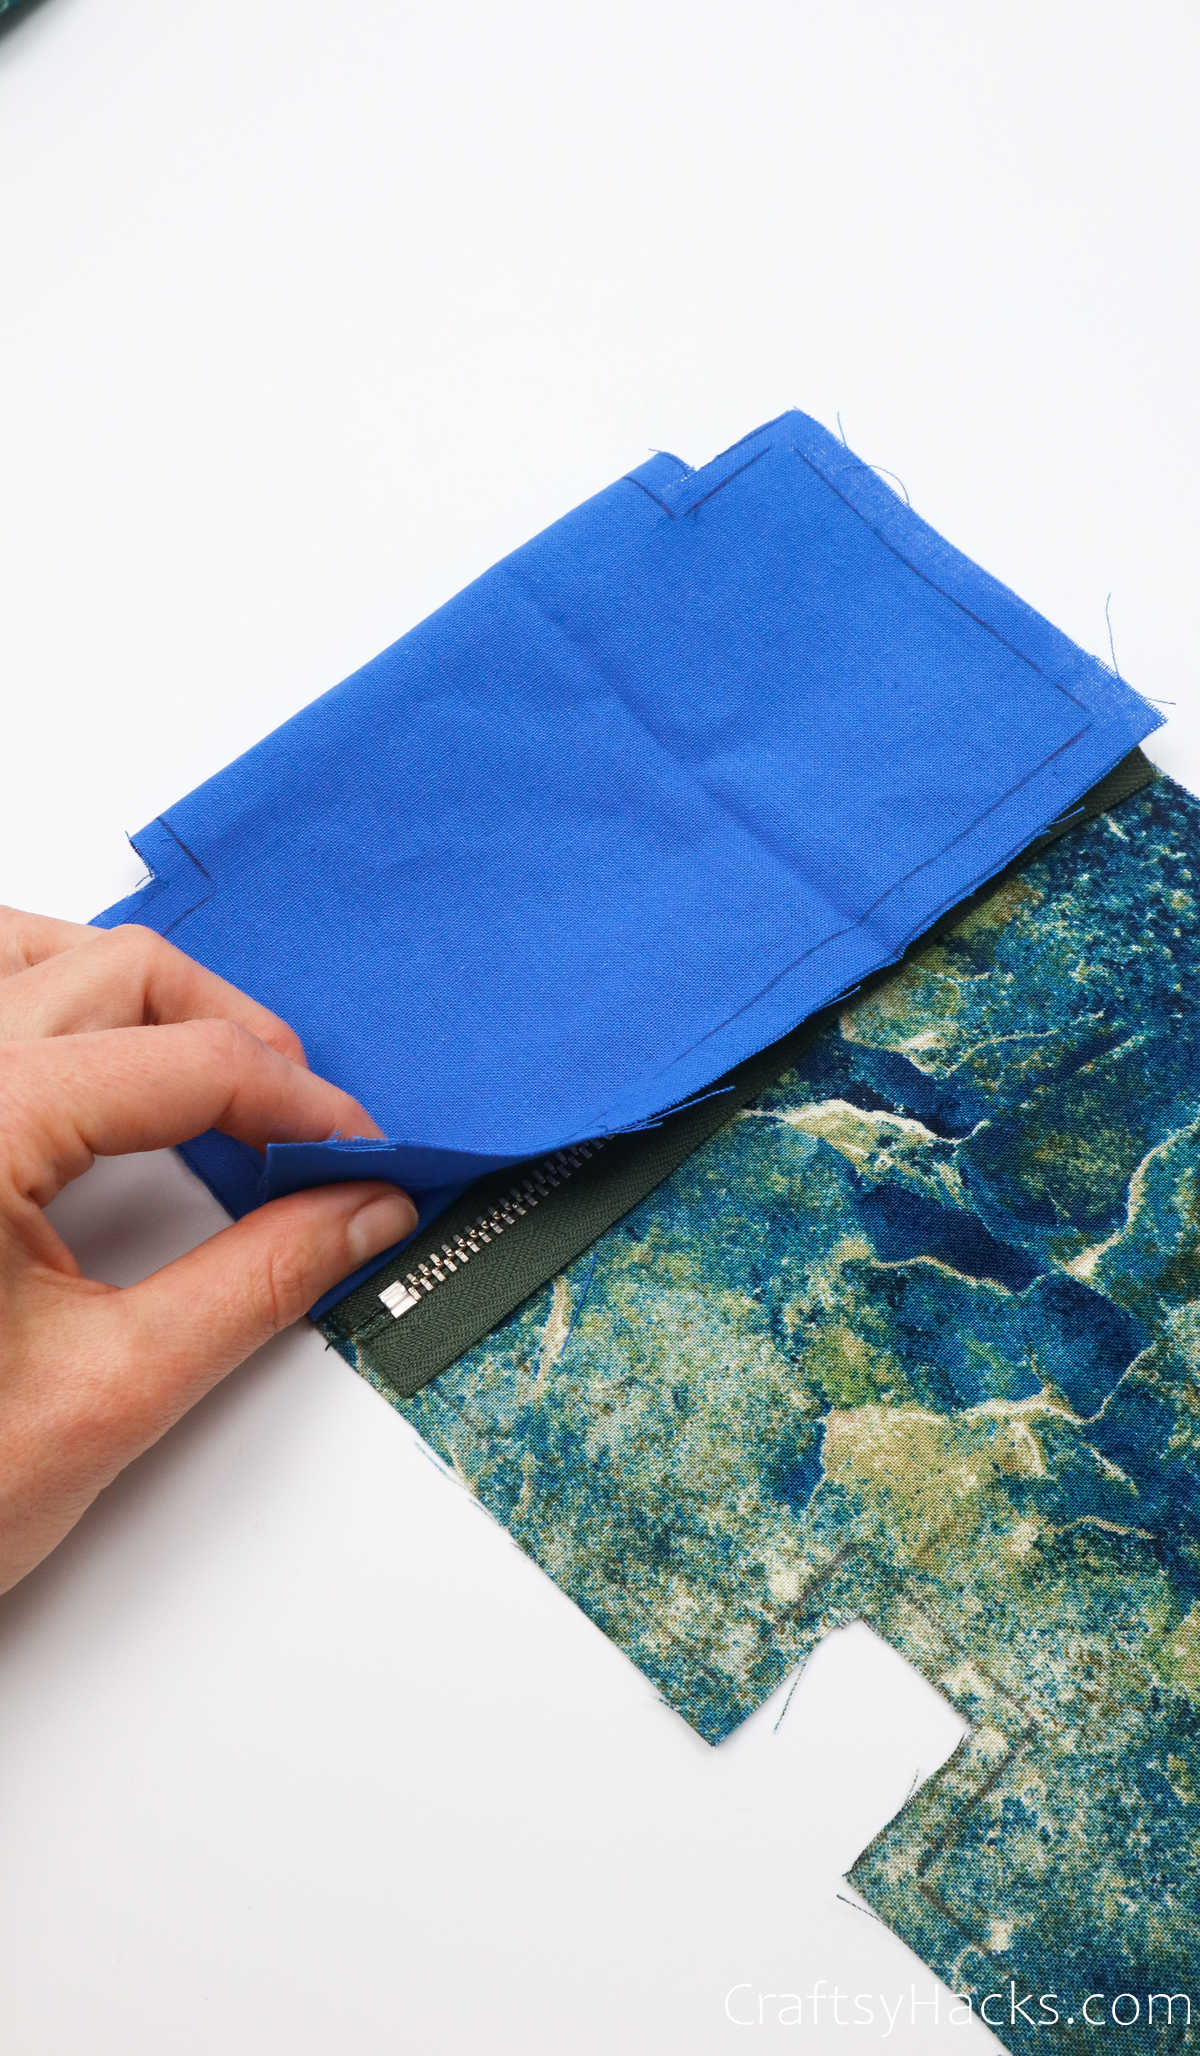
Then, repeat this with the other fabric cutout, as well. Bring the opposite side of the fabric up and line the edges along the zipper. You should have a sandwich-like swatch with both ends of the fabric pieces sandwiching the zipper’s edge.
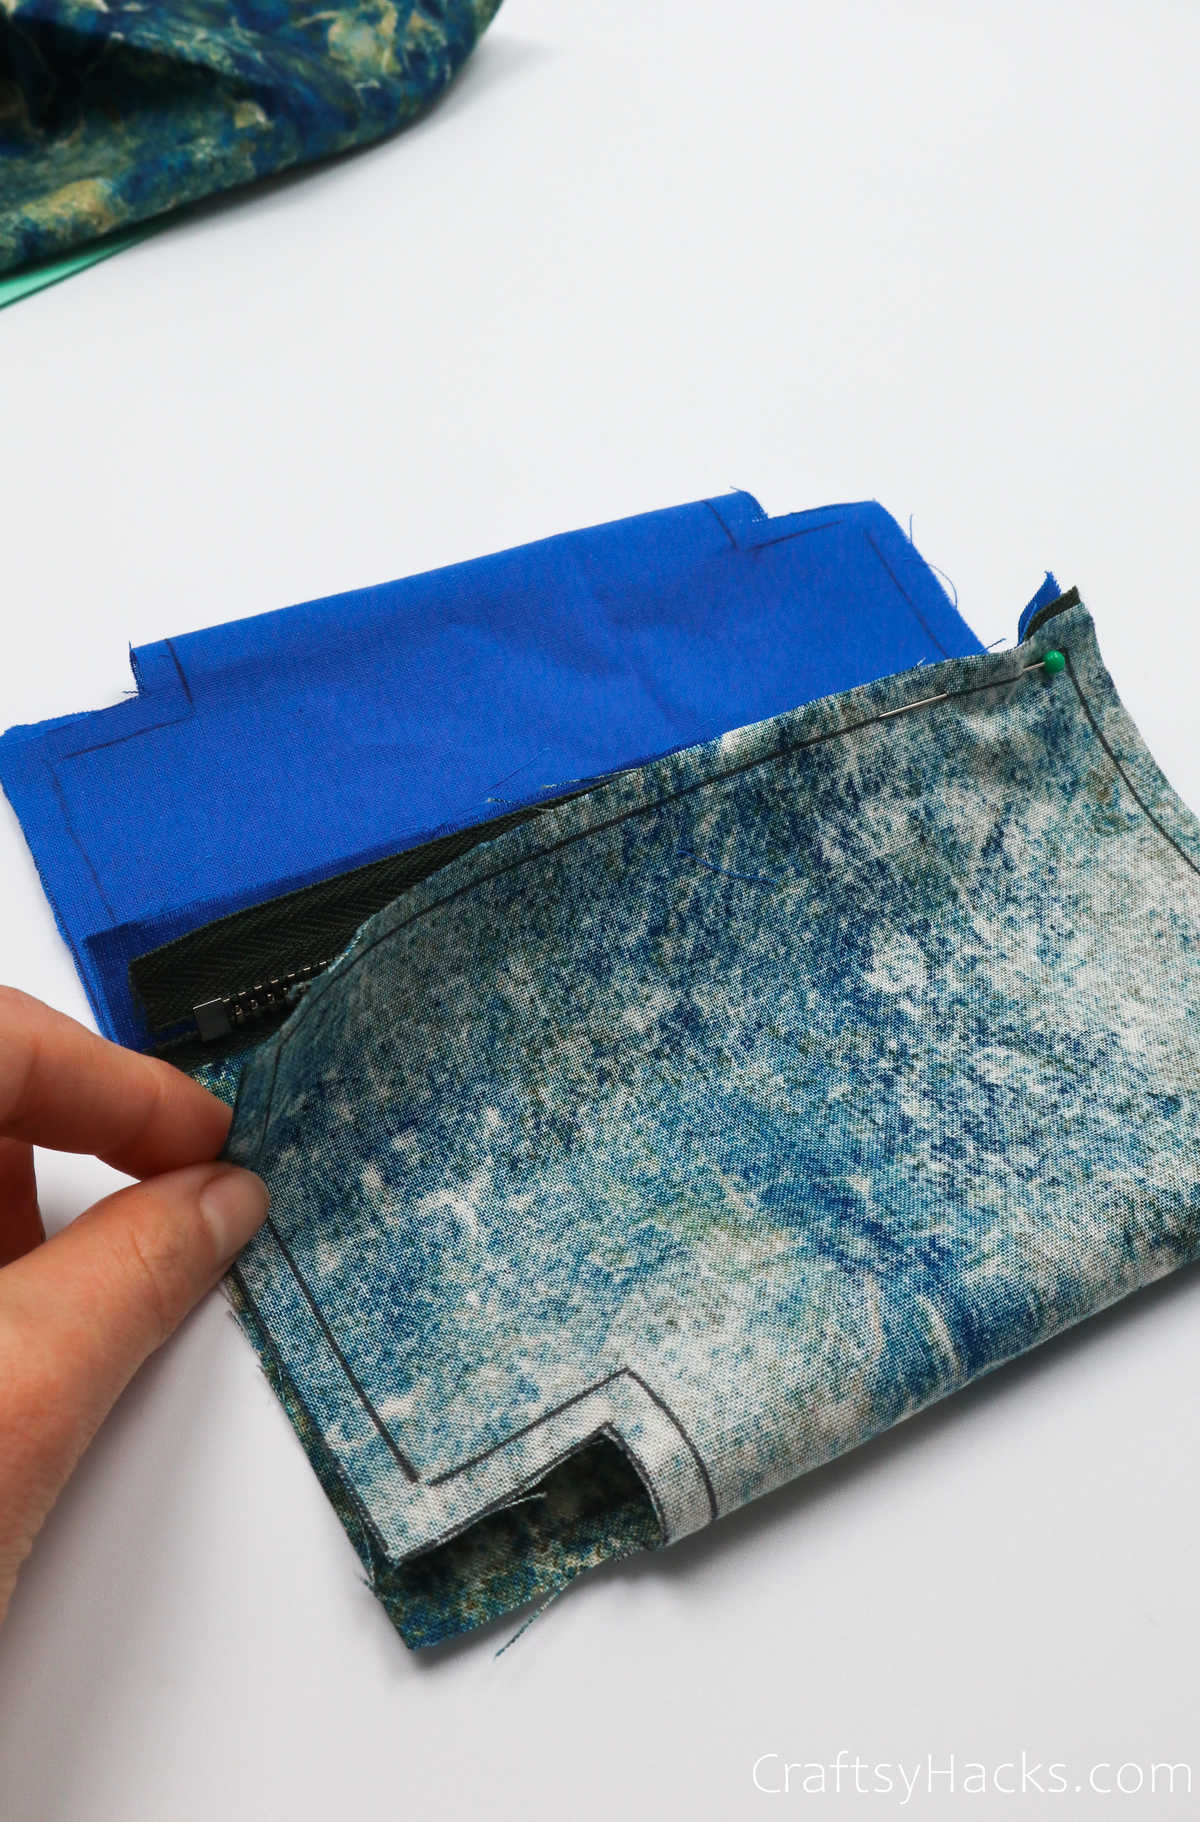
Pin them in place to secure all three components till you’re ready to sew them.
Step 9
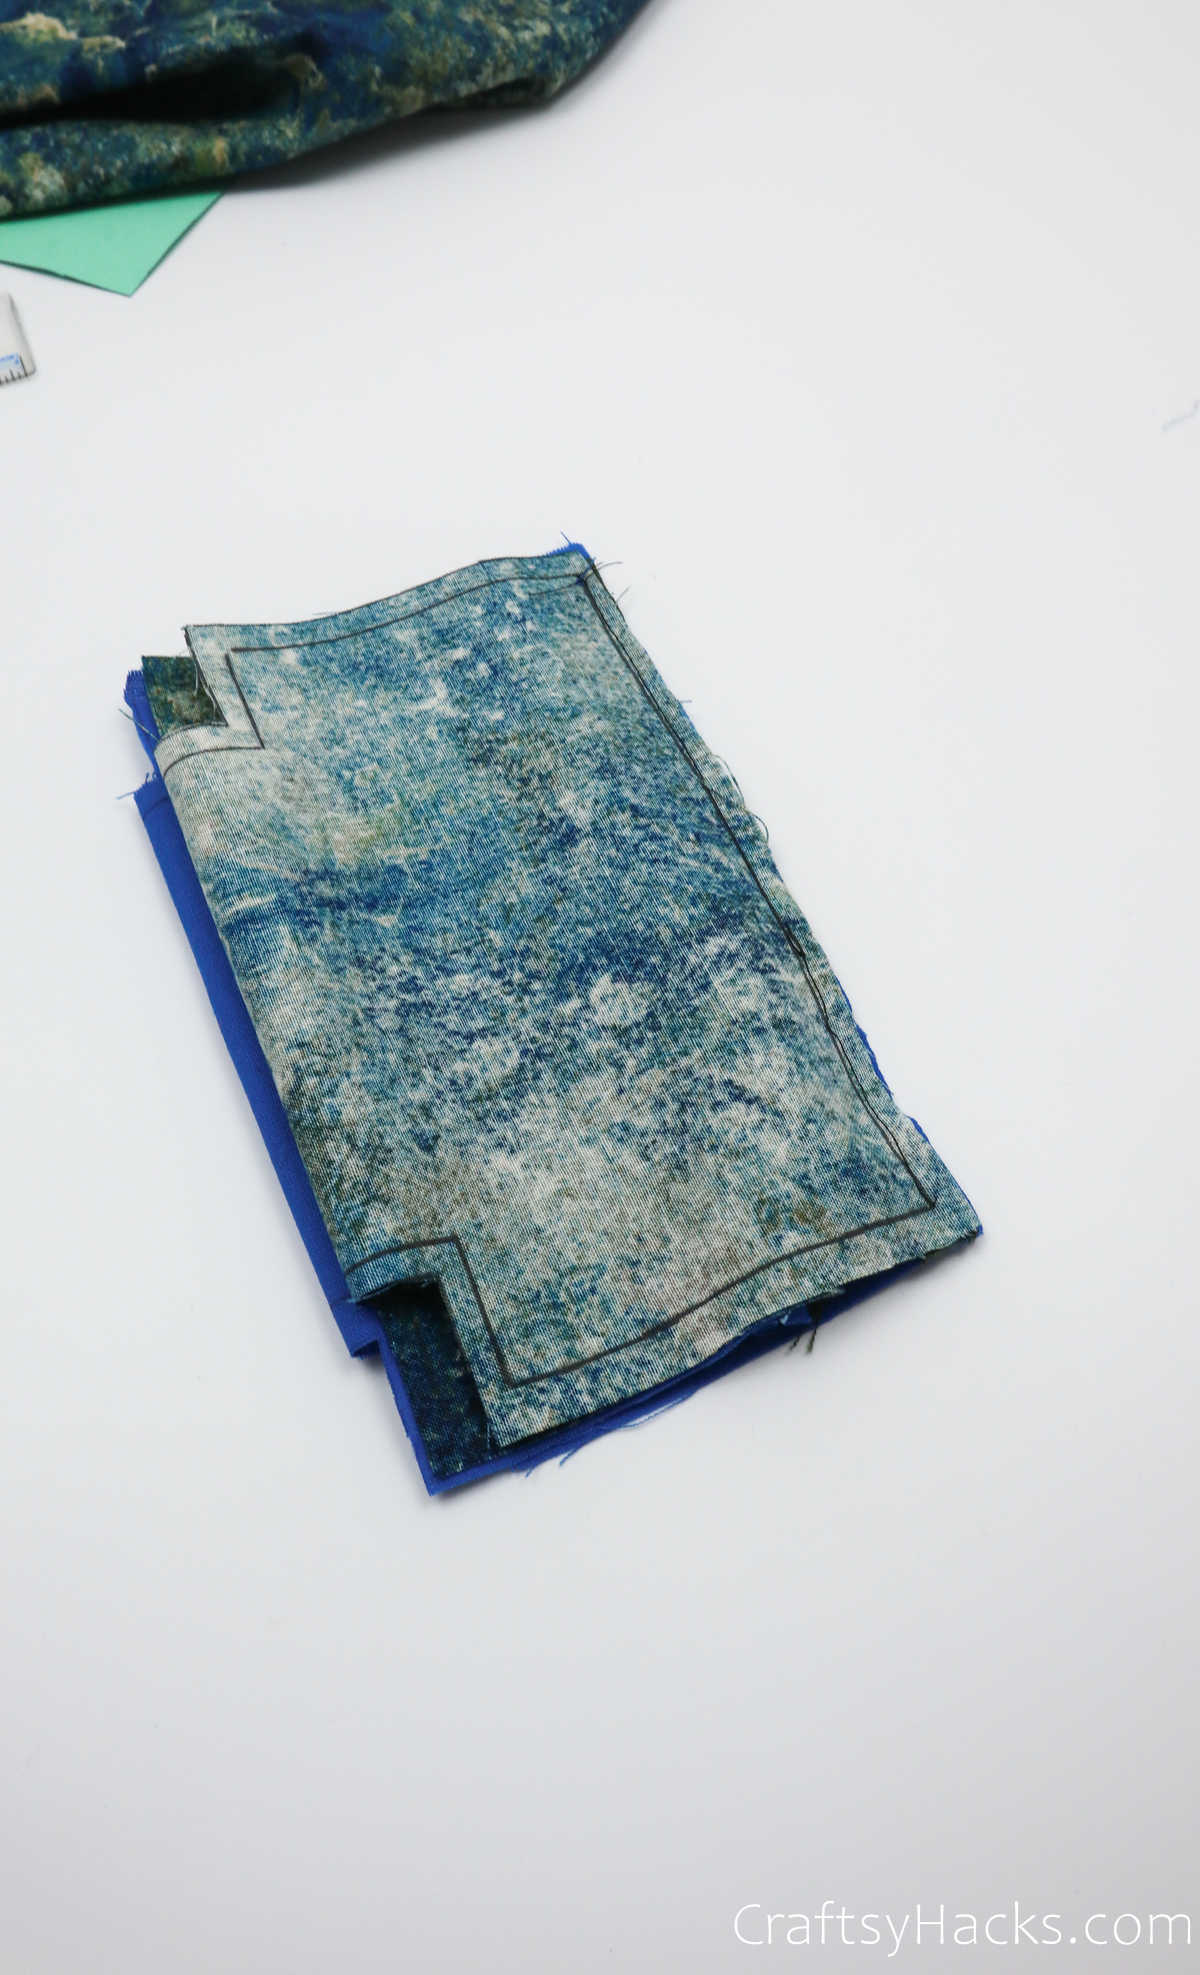
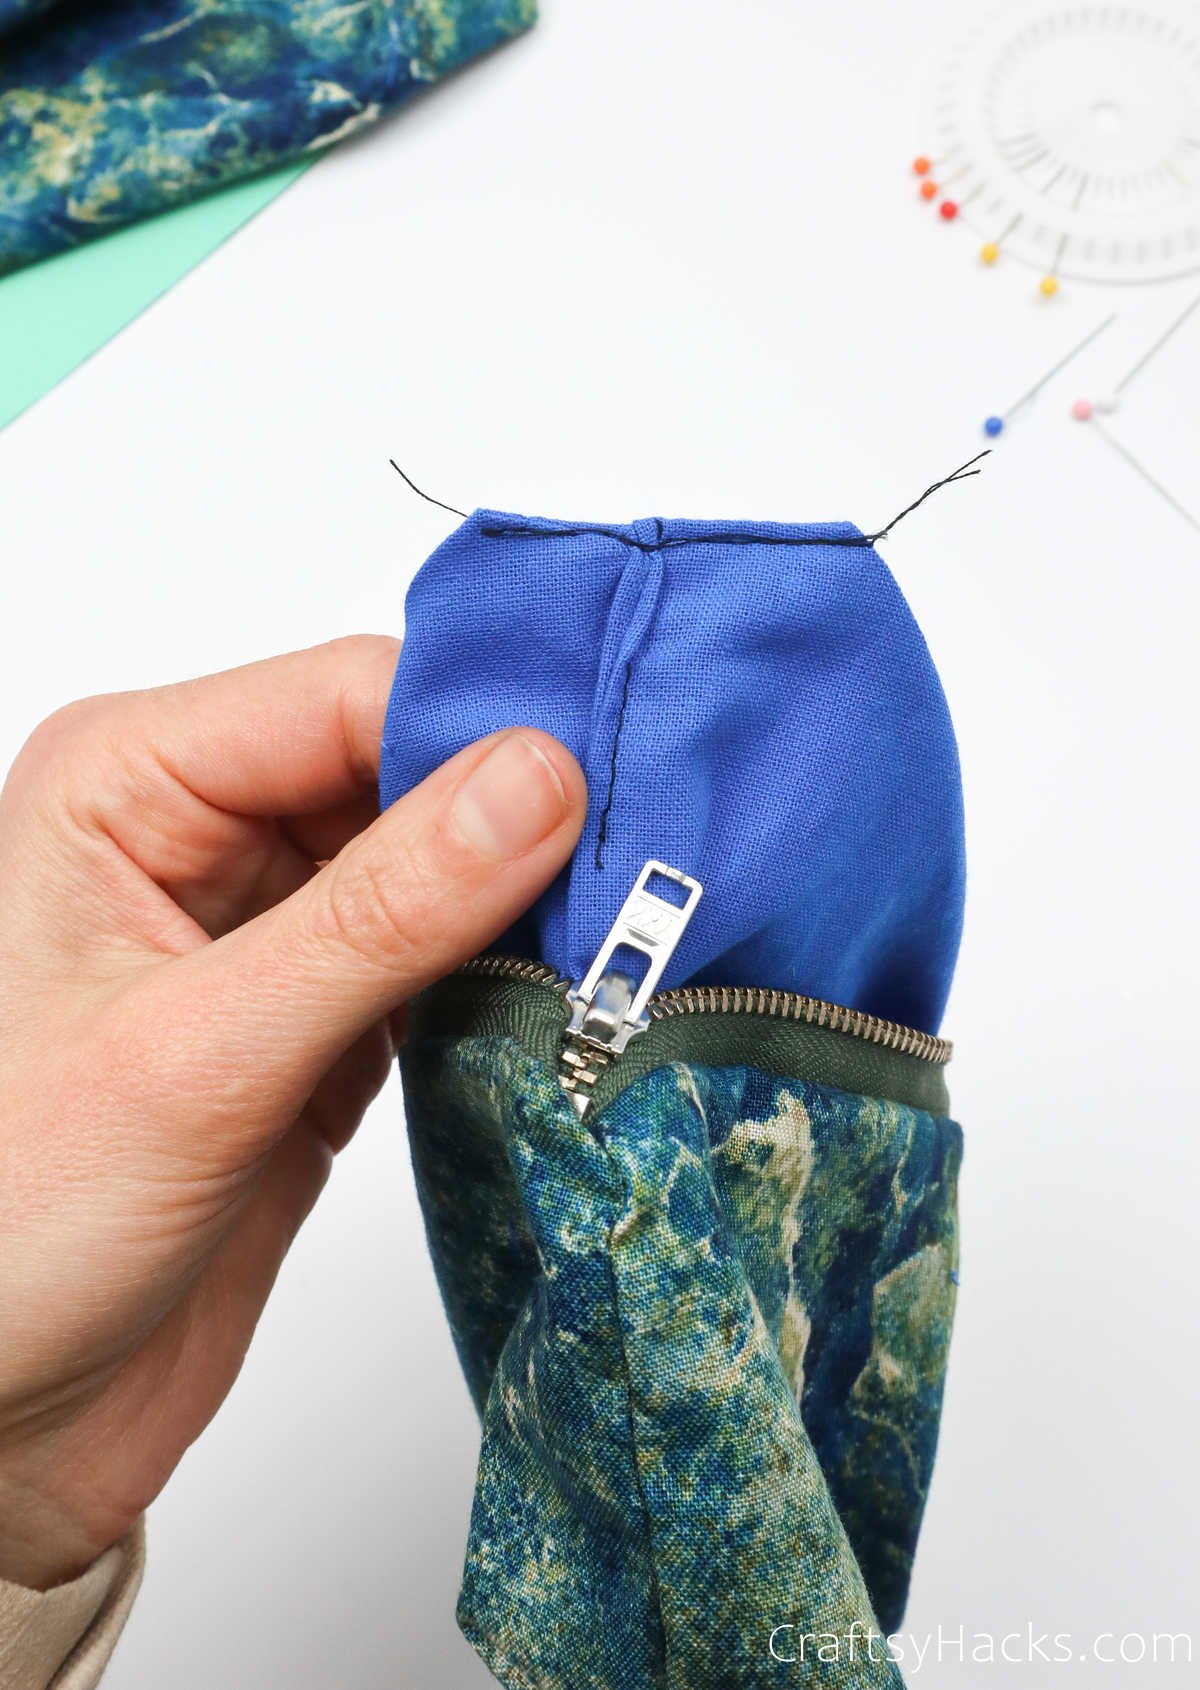
Sew the edges that you just pinned together along the outline you drew earlier, stitching along the zipper’s teeth.
Your pouch should look something like this at this stage of the project.
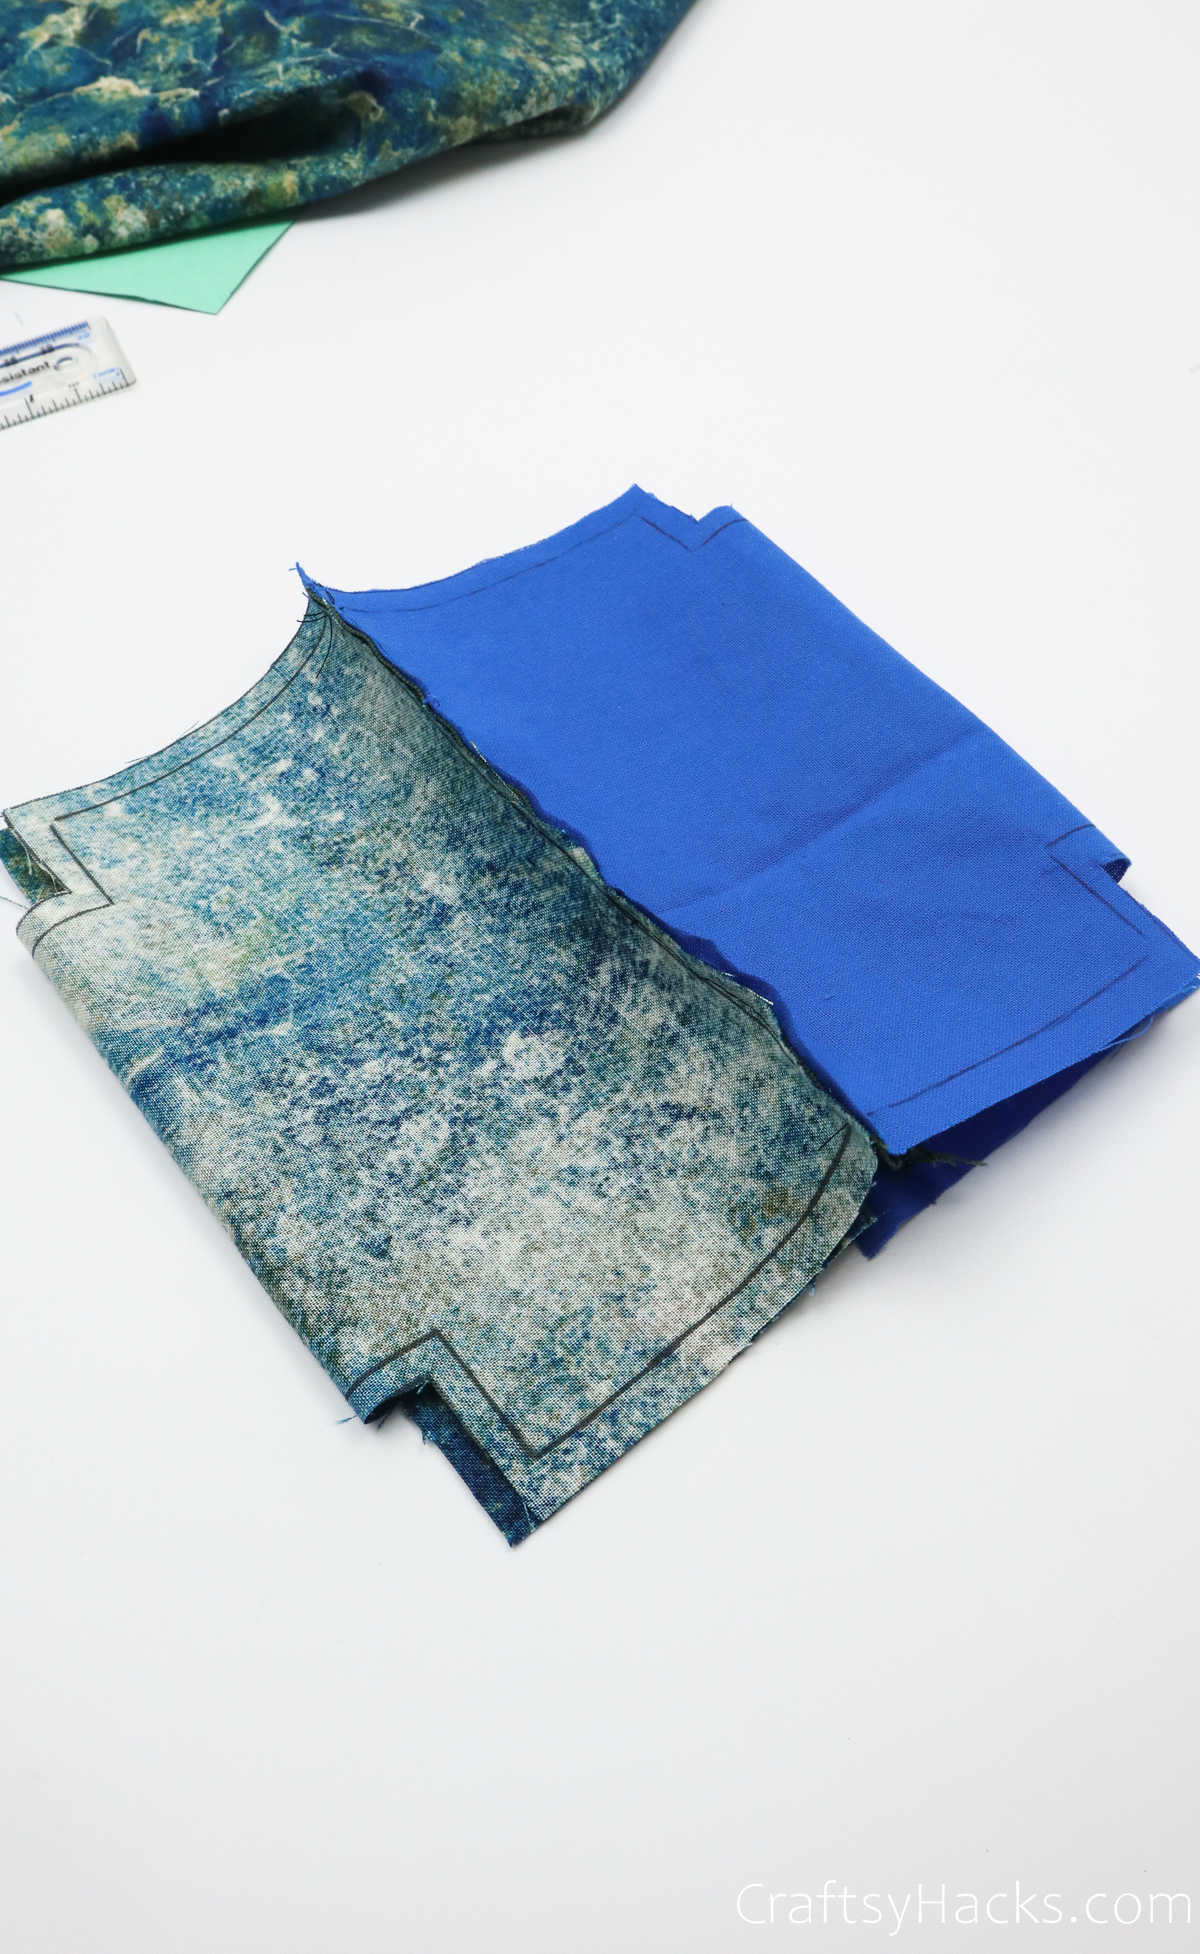
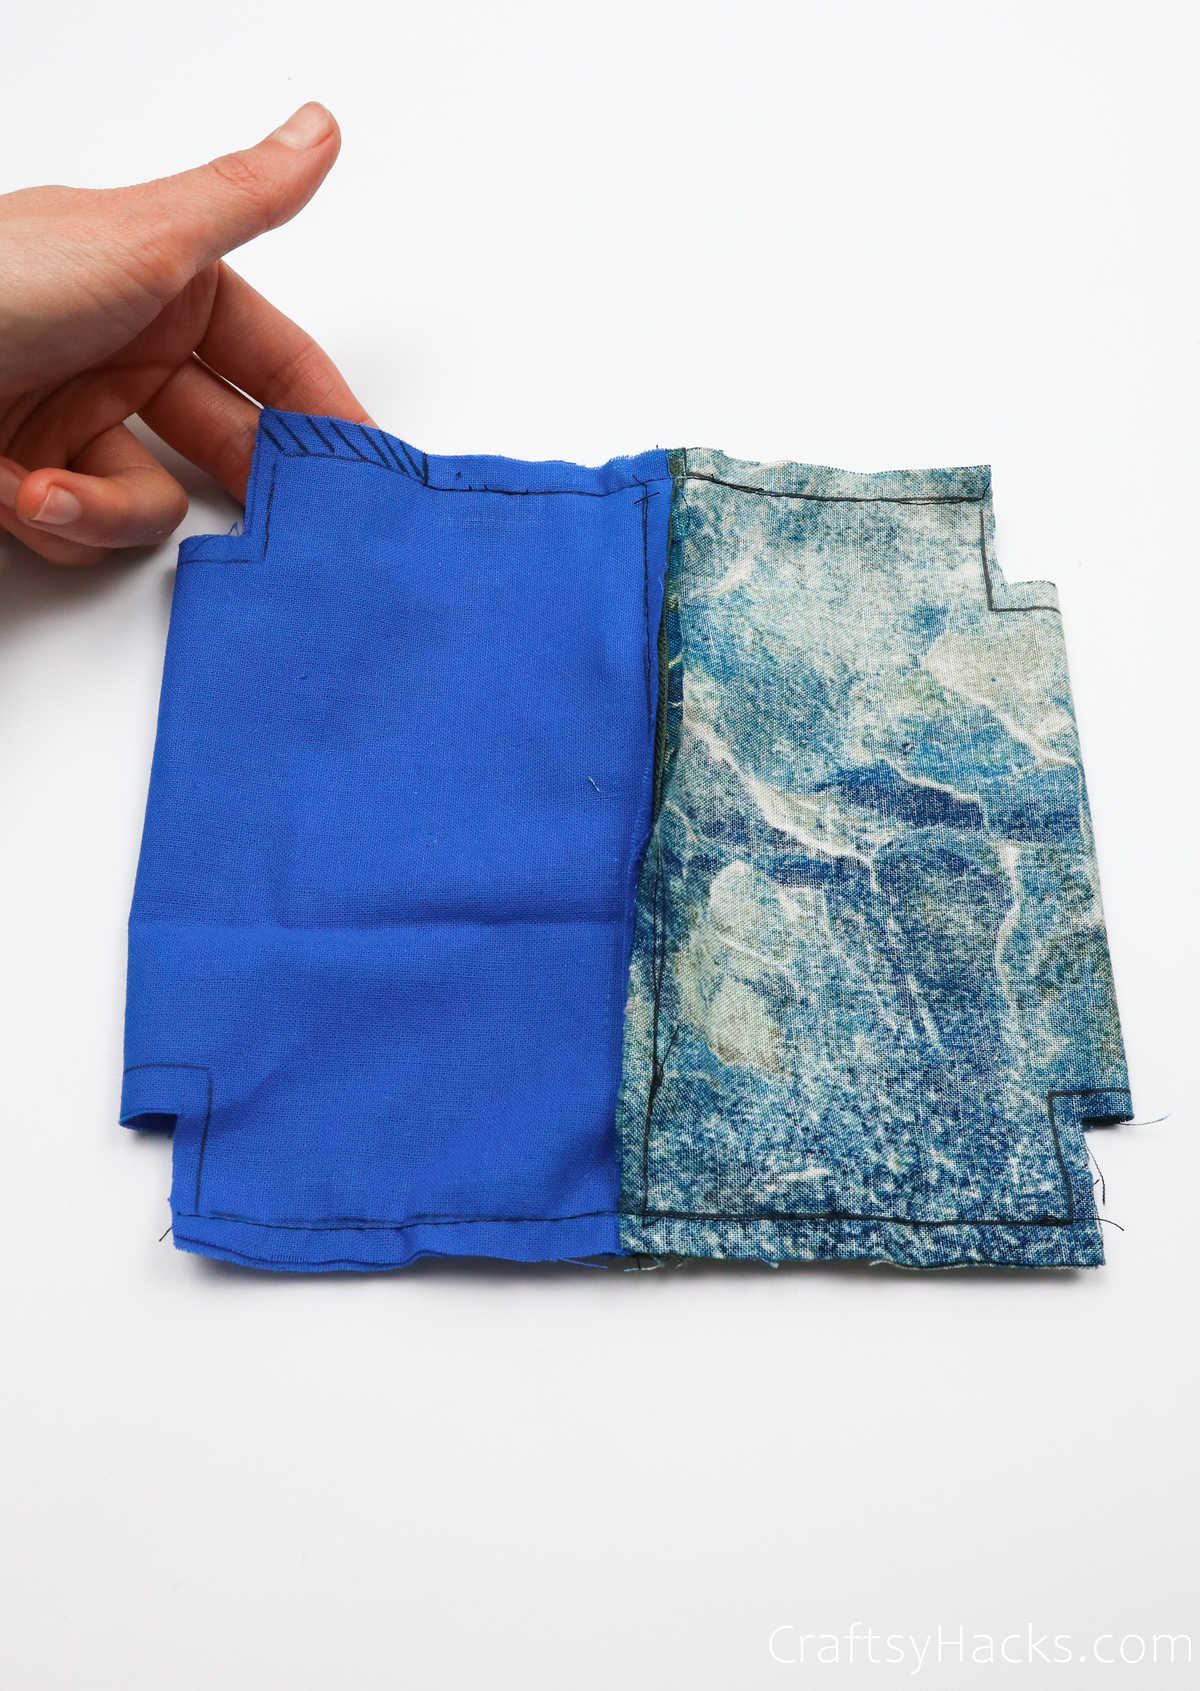
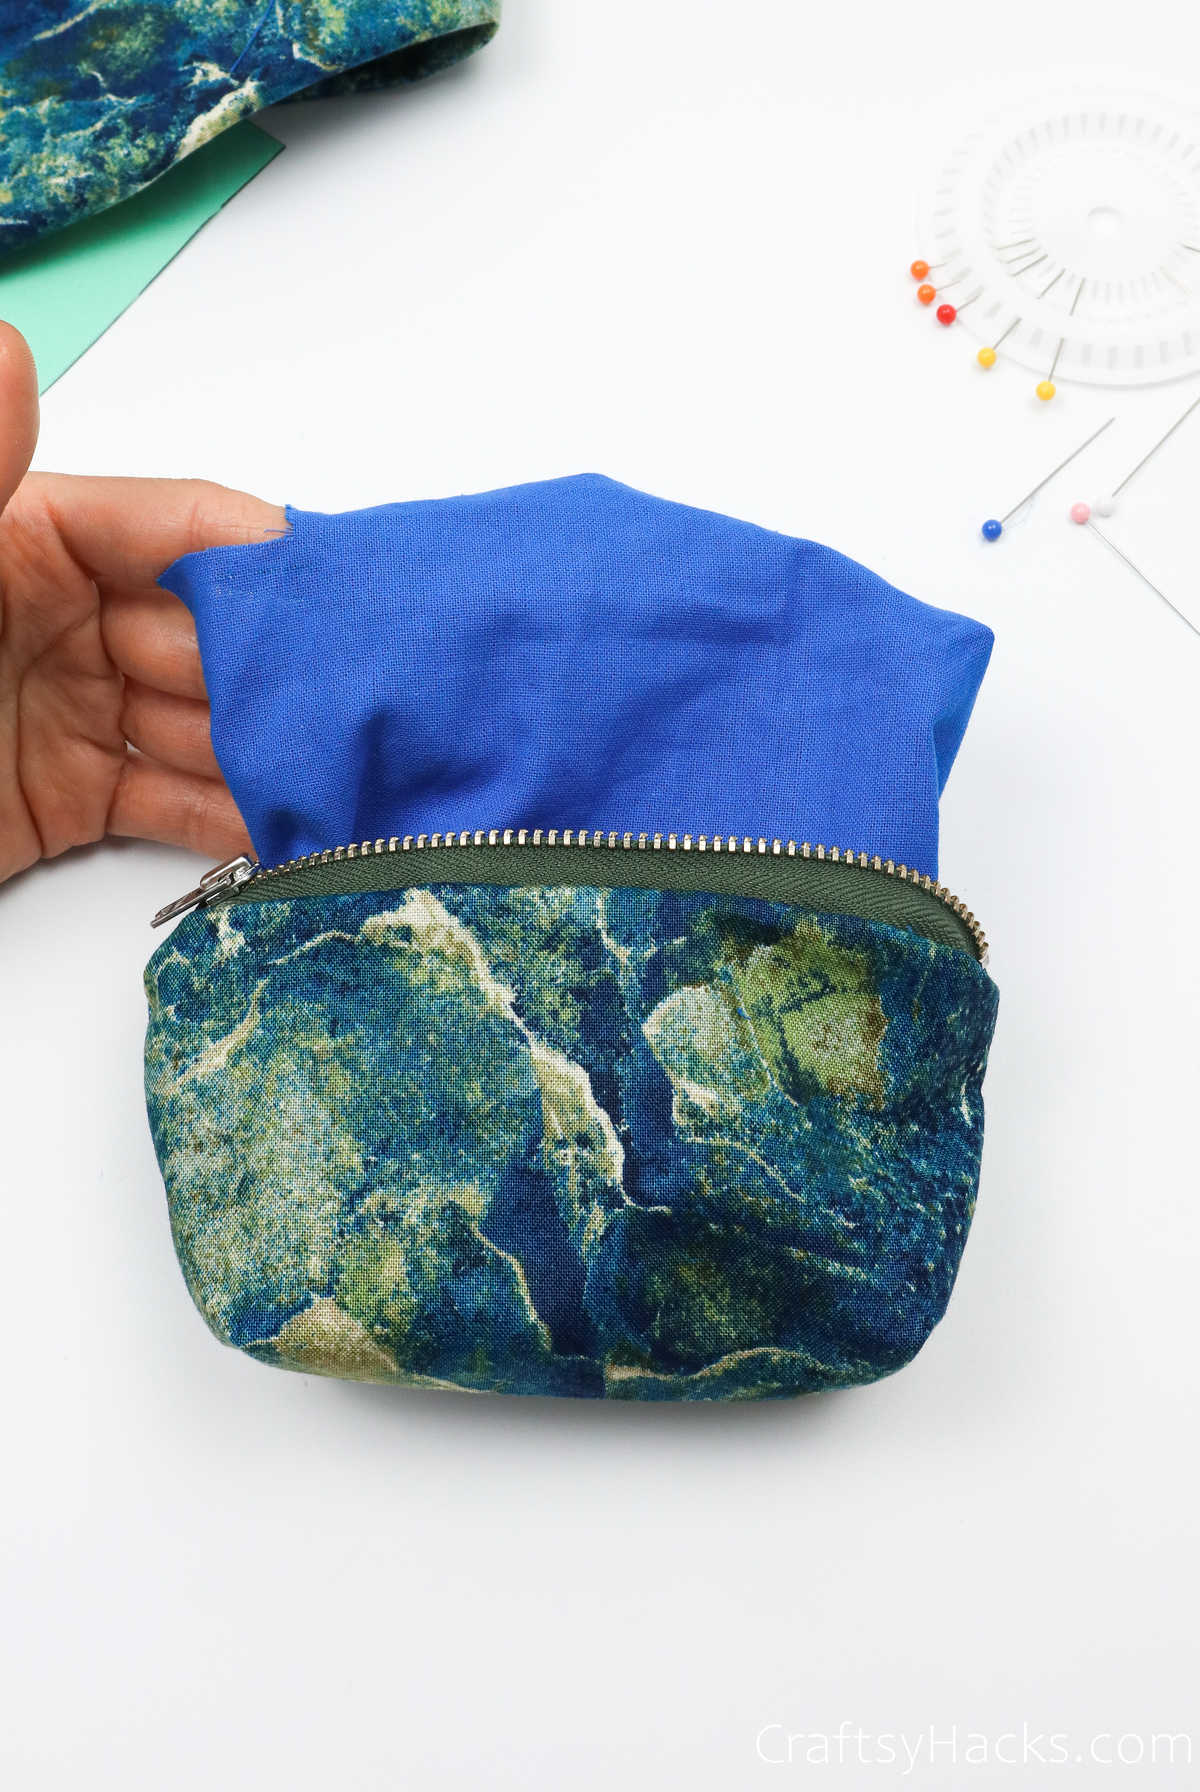
Step 10
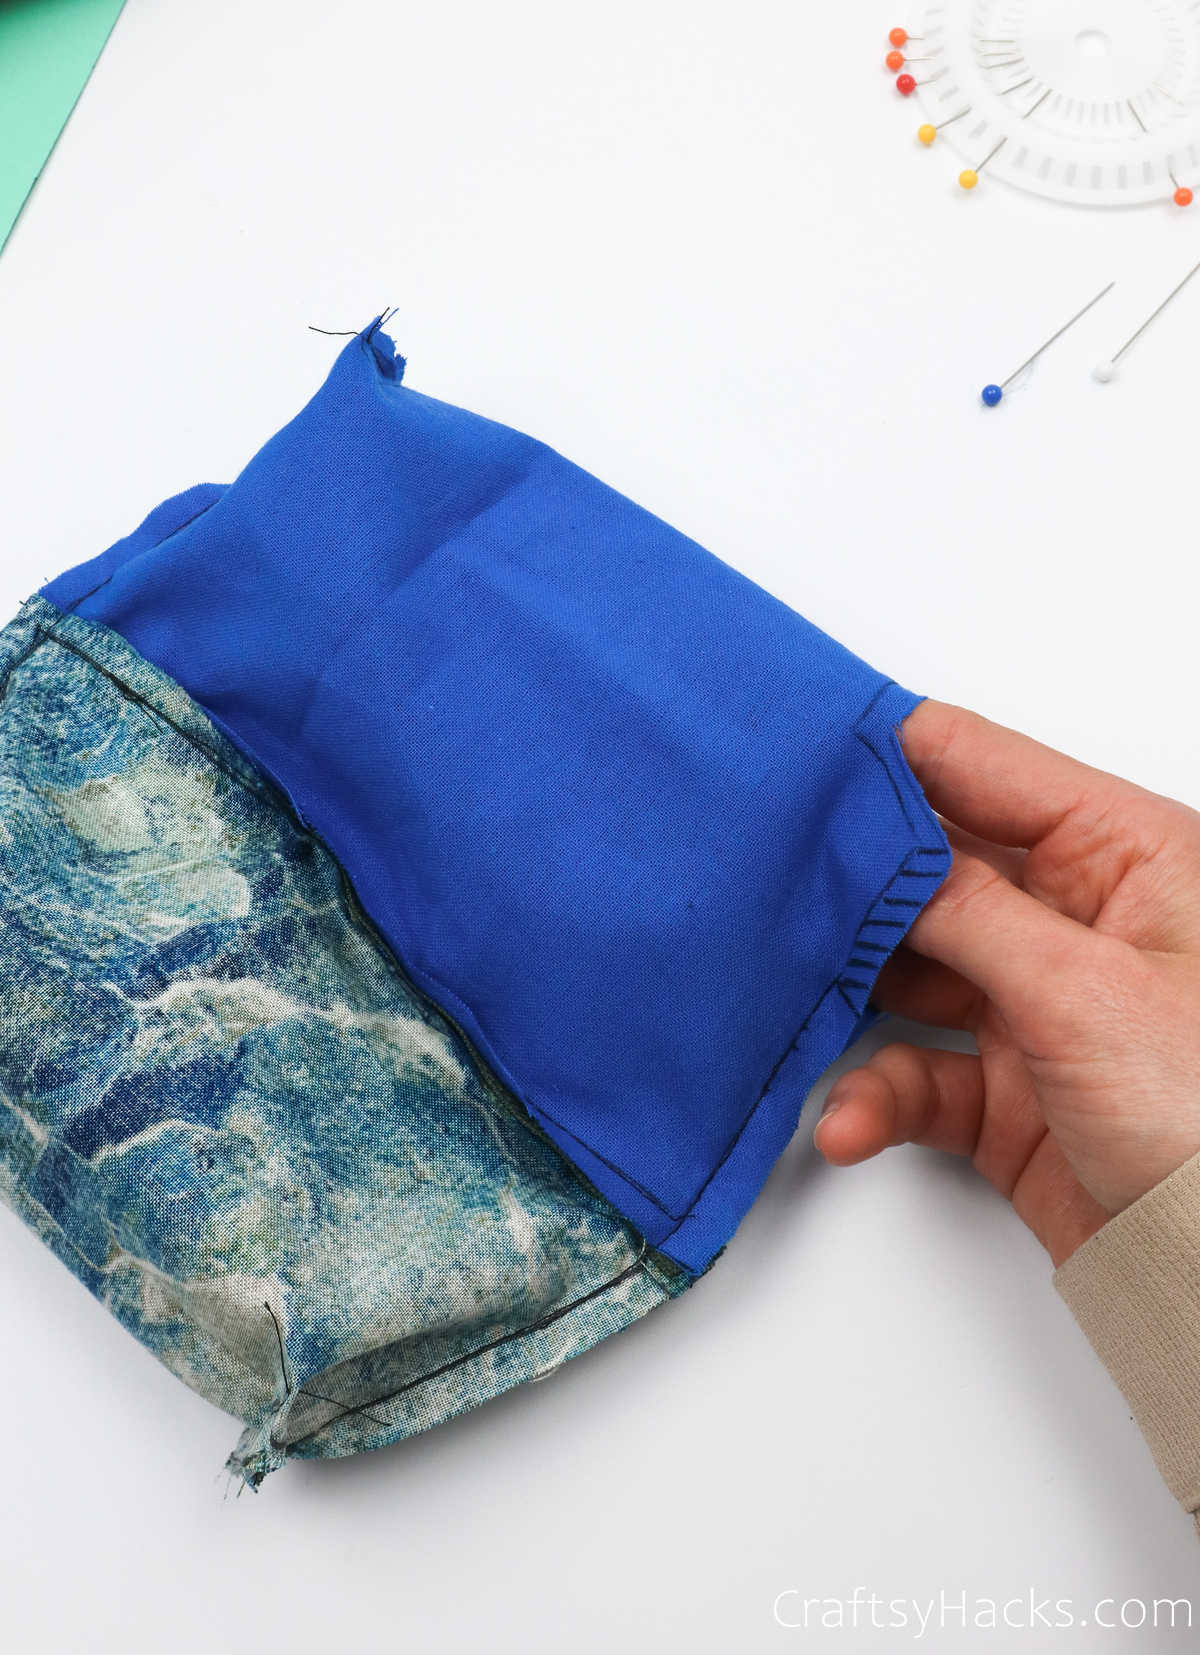
Next, pull apart the fabric and spread it out with one fabric cut out on one side and the lining fabric fanned out on the other side like this. Your corners and the edges should be aligned once again so they are neatly folded over each other.
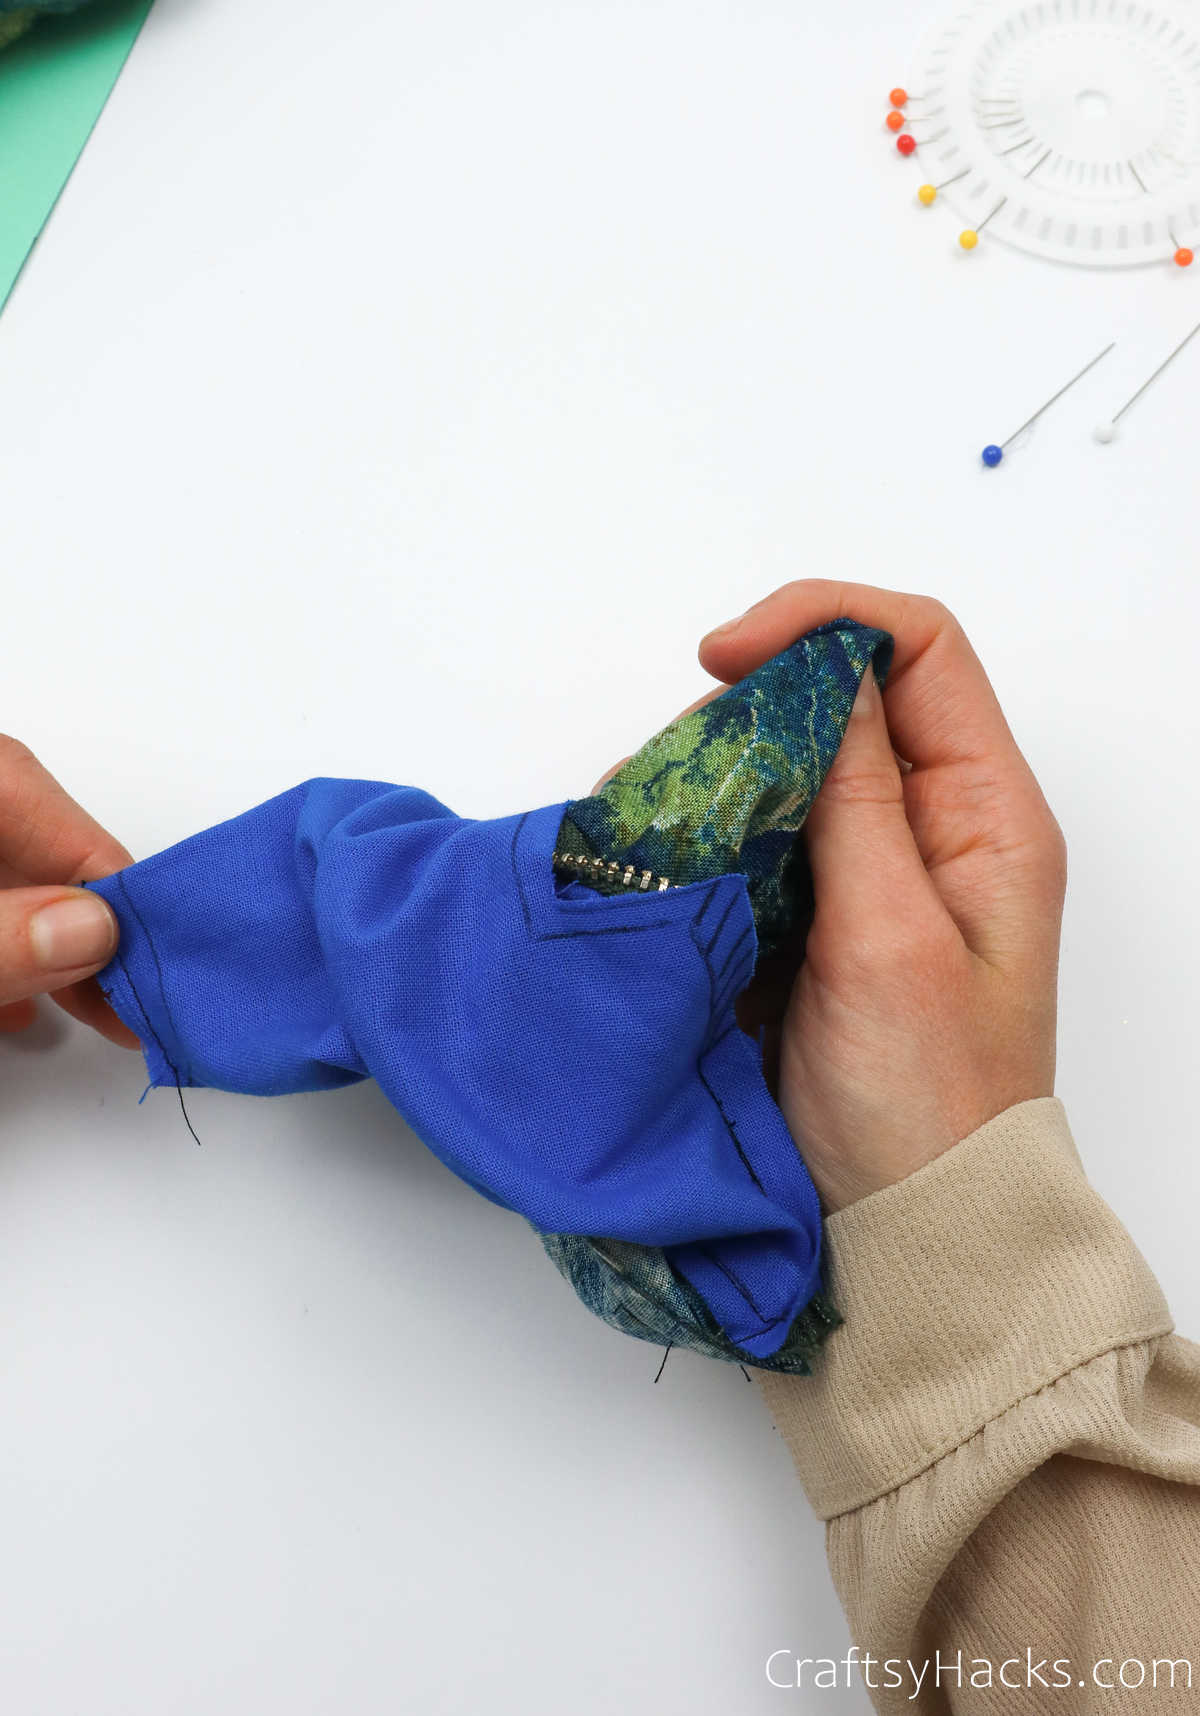
Step 11
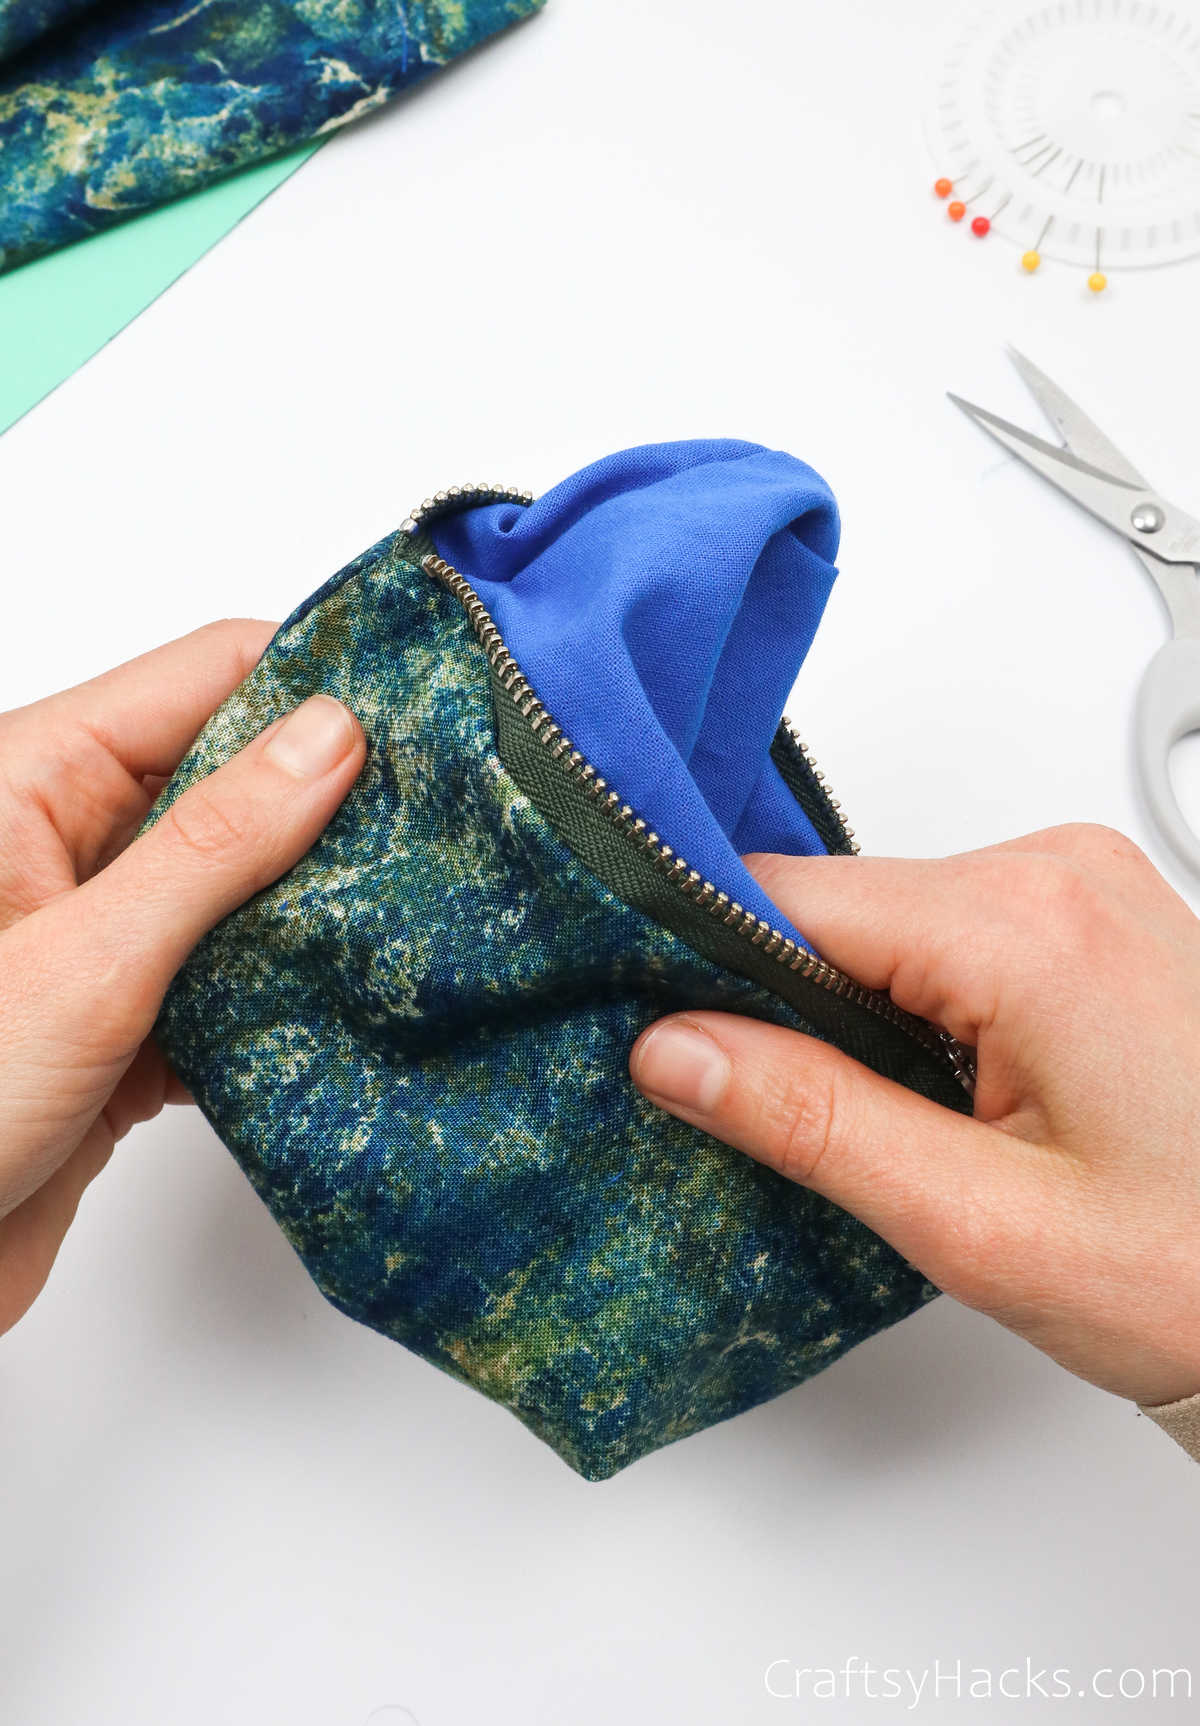
Put your hand in between the fabric and find the zipper. Pull it open just about halfway through. You’ll find that you have two corner pieces on both the exterior fabric and the lining fabric, too. You’re on the right track!

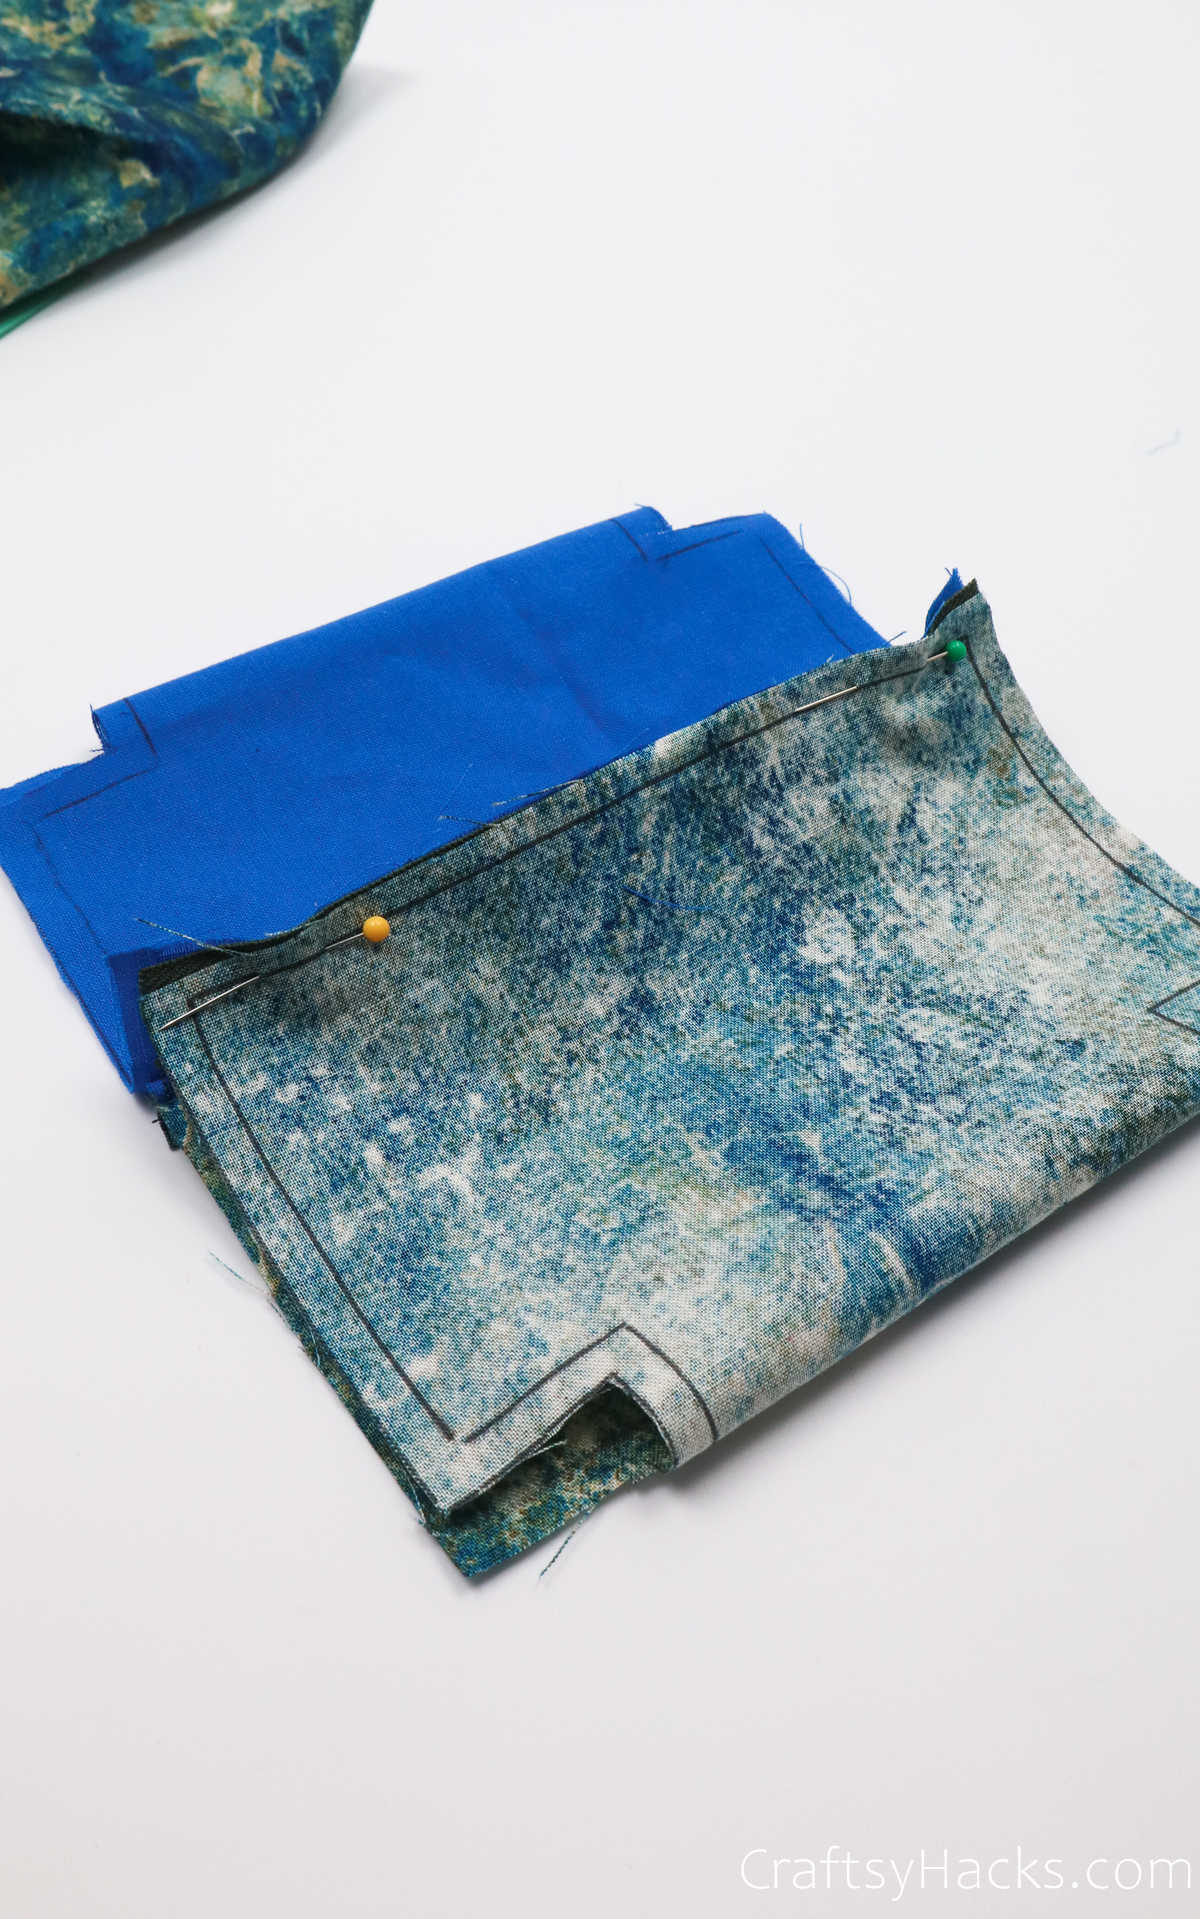
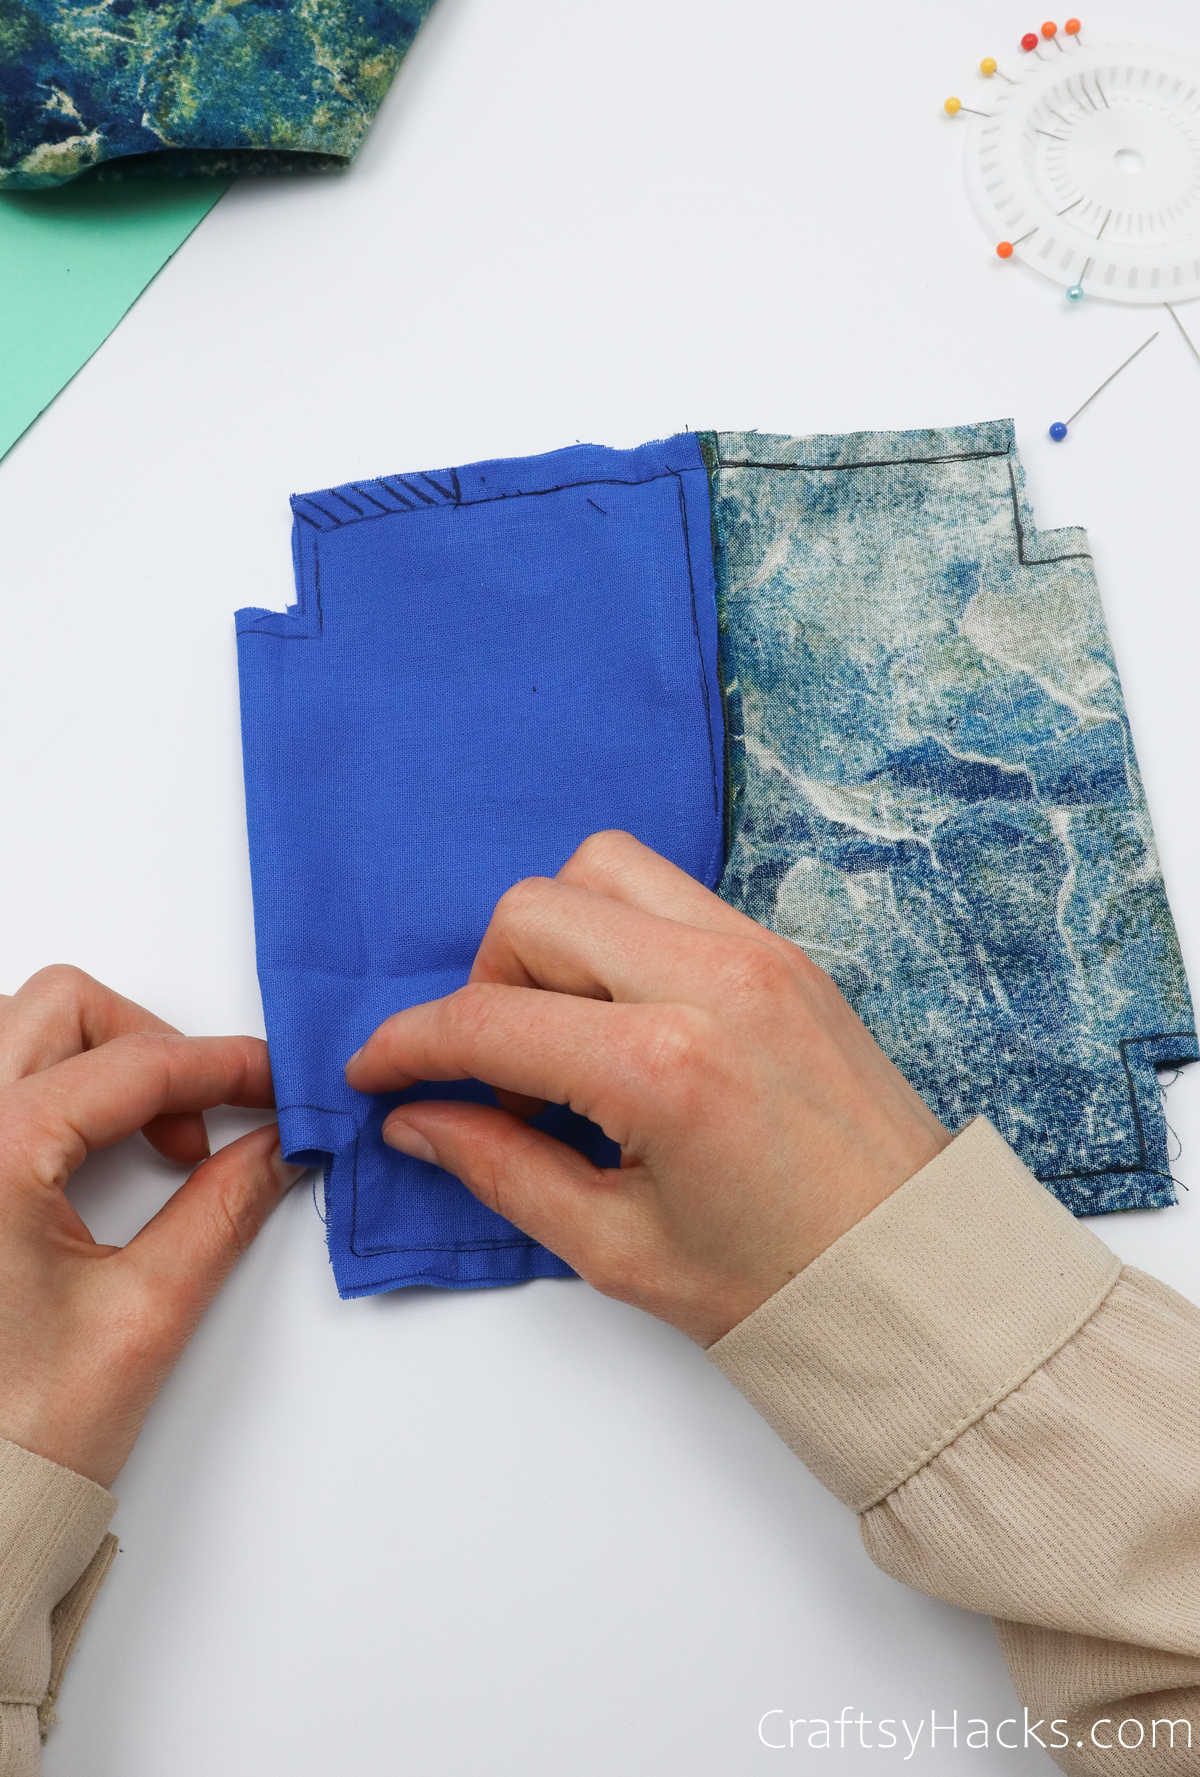
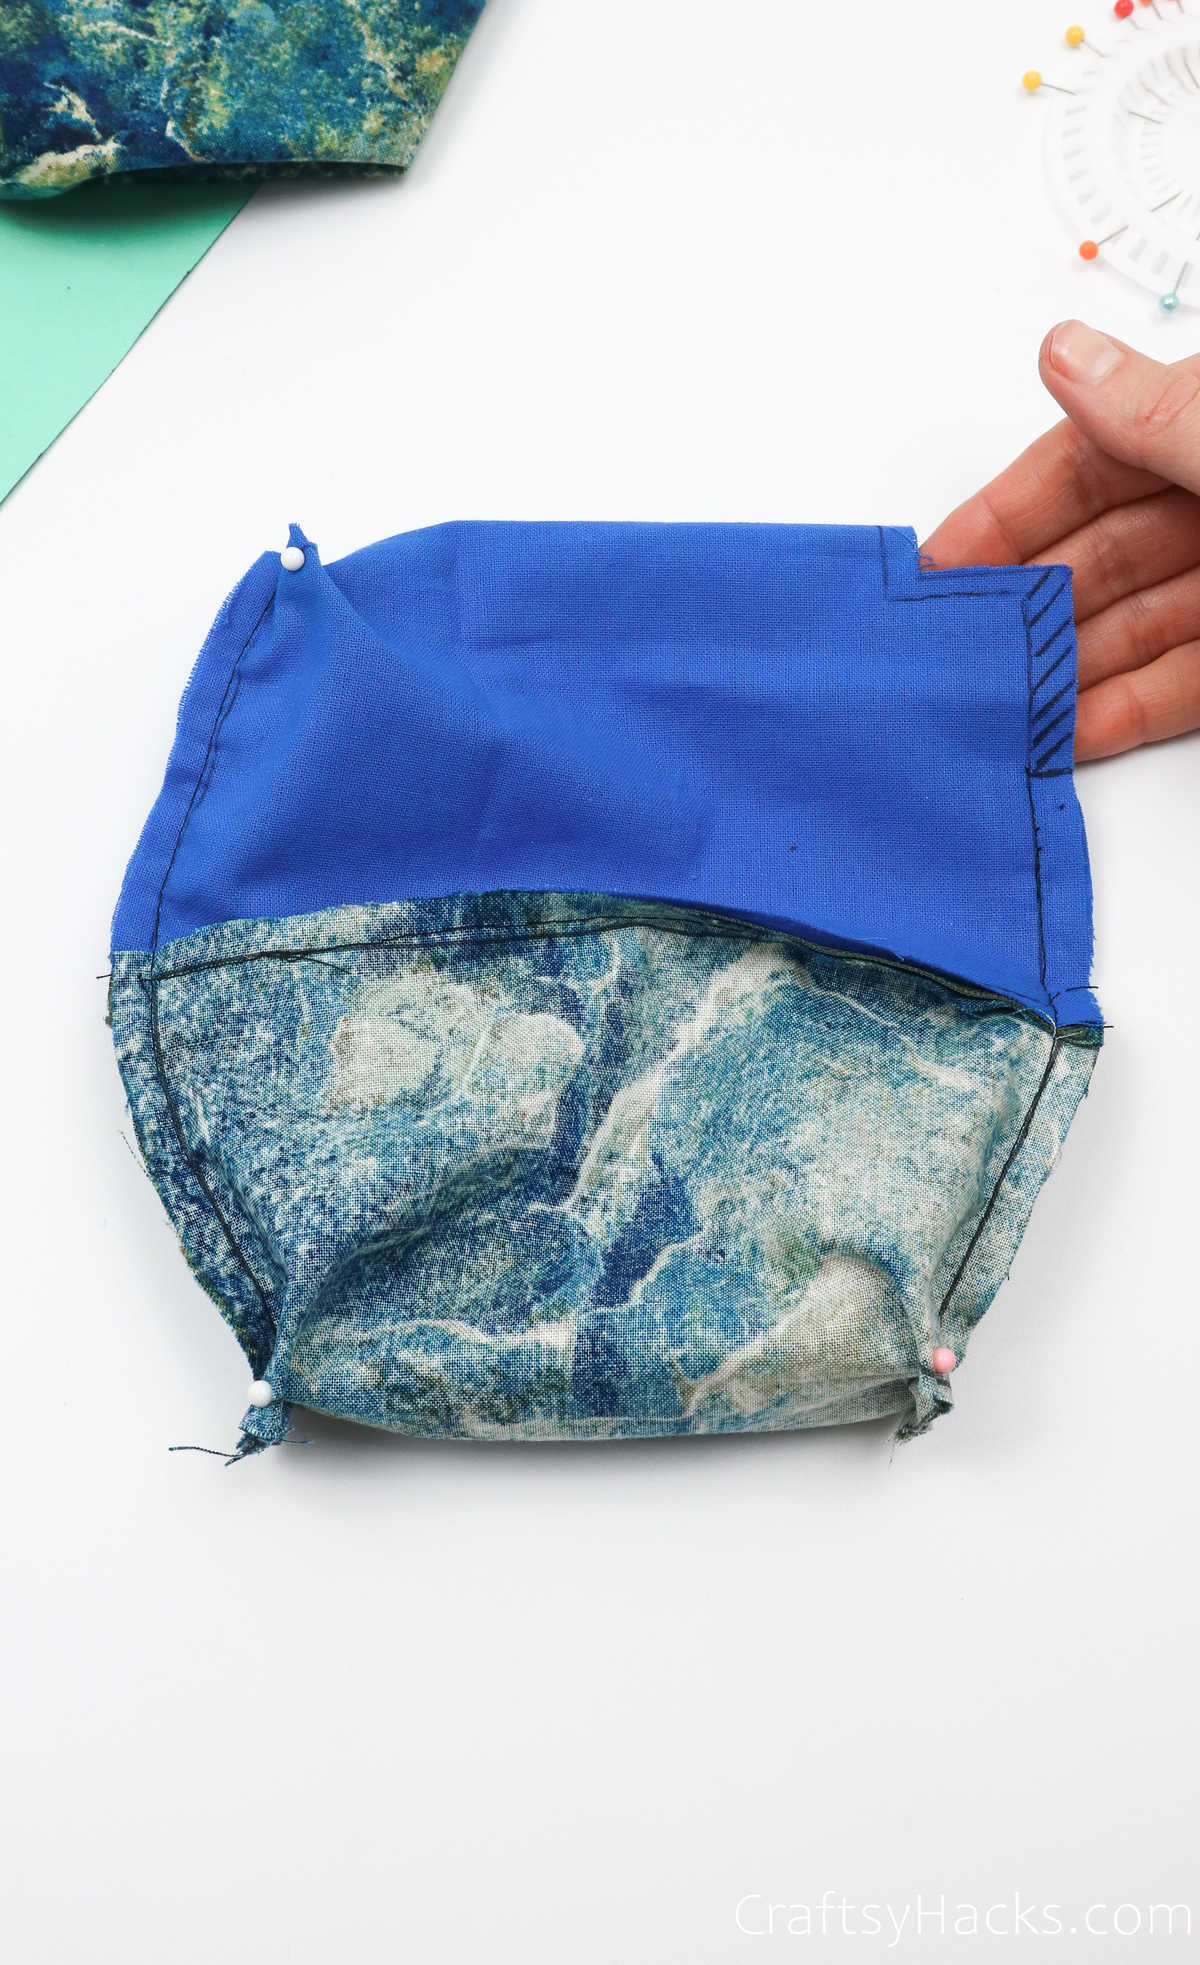
Step 12
You’re almost ready to start sewing the entire project together, but first, grab a fabric pen or some tailor’s chalk. Then, you’re going to section off around an inch gap in one corner—the top left corner along the lining fabric, as seen here.
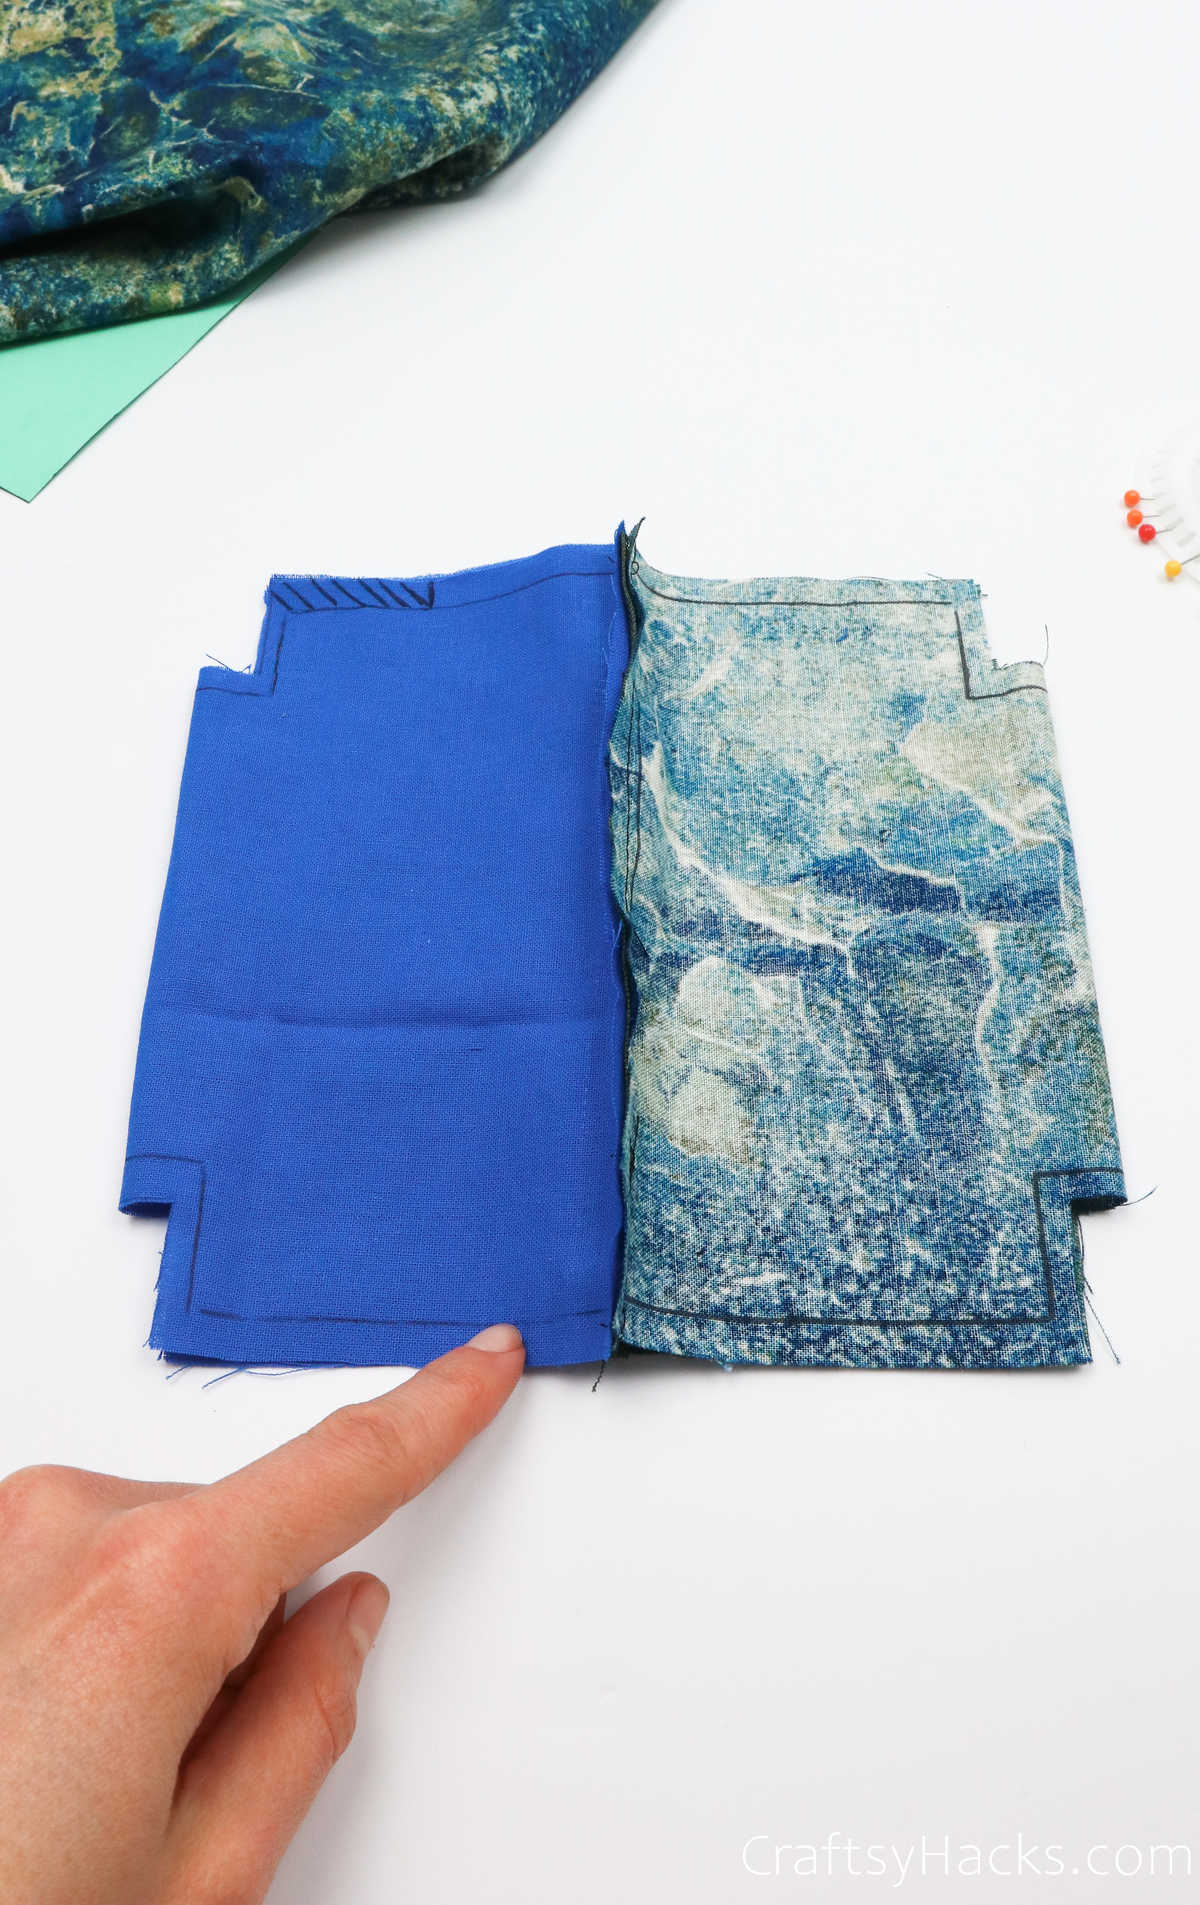
You will not be closing this particular gap, so please bear that in mind when you’re sewing around the edges.

Step 13
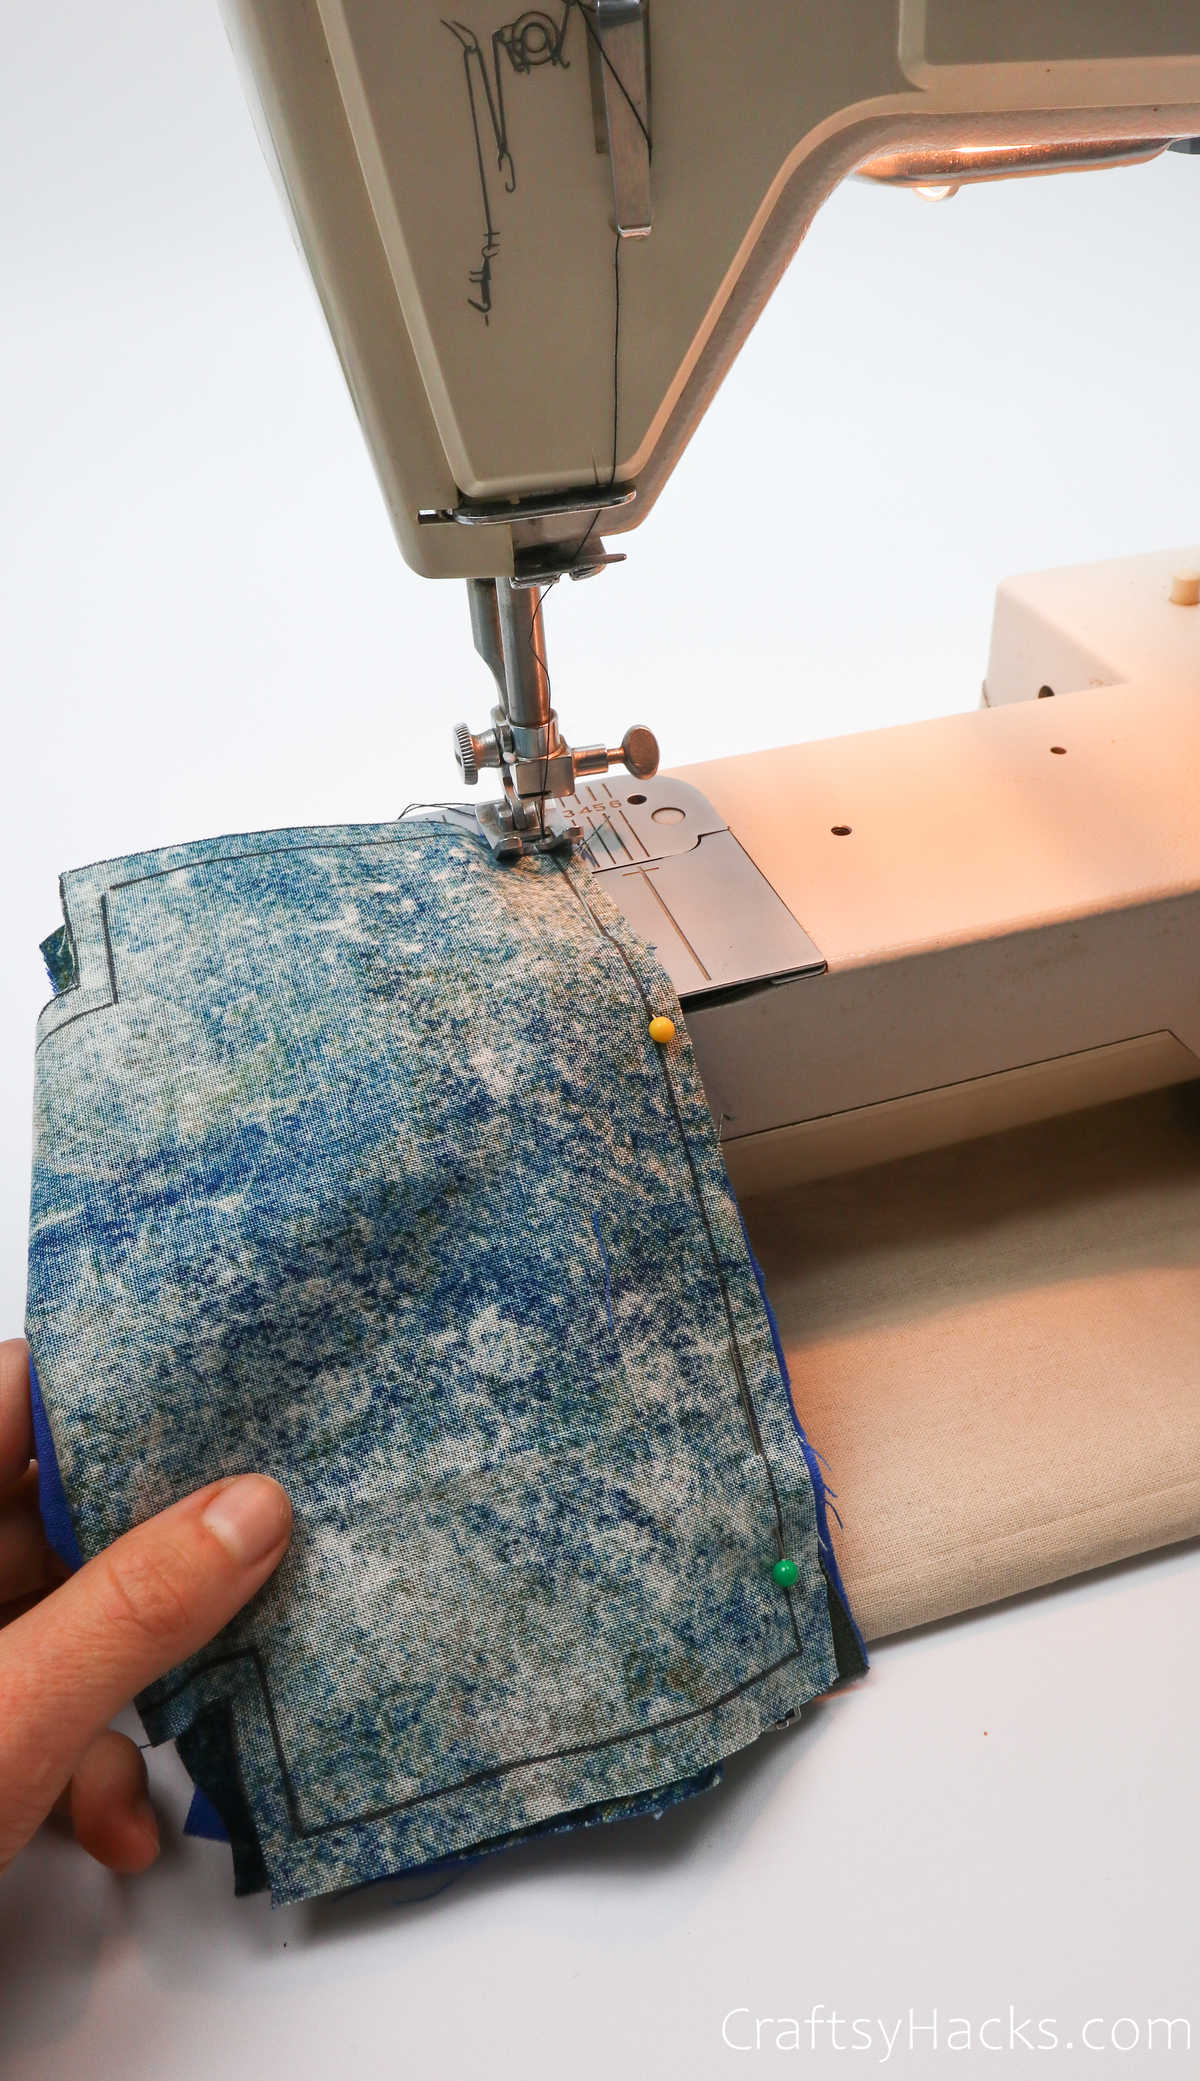
It’s back to your sewing machine, and this time, we’re going to finish making our pouch! Sew along the outline you drew, going around all three corners, except that fourth one where you sectioned off that one-inch gap.
Your pouch should look like this.
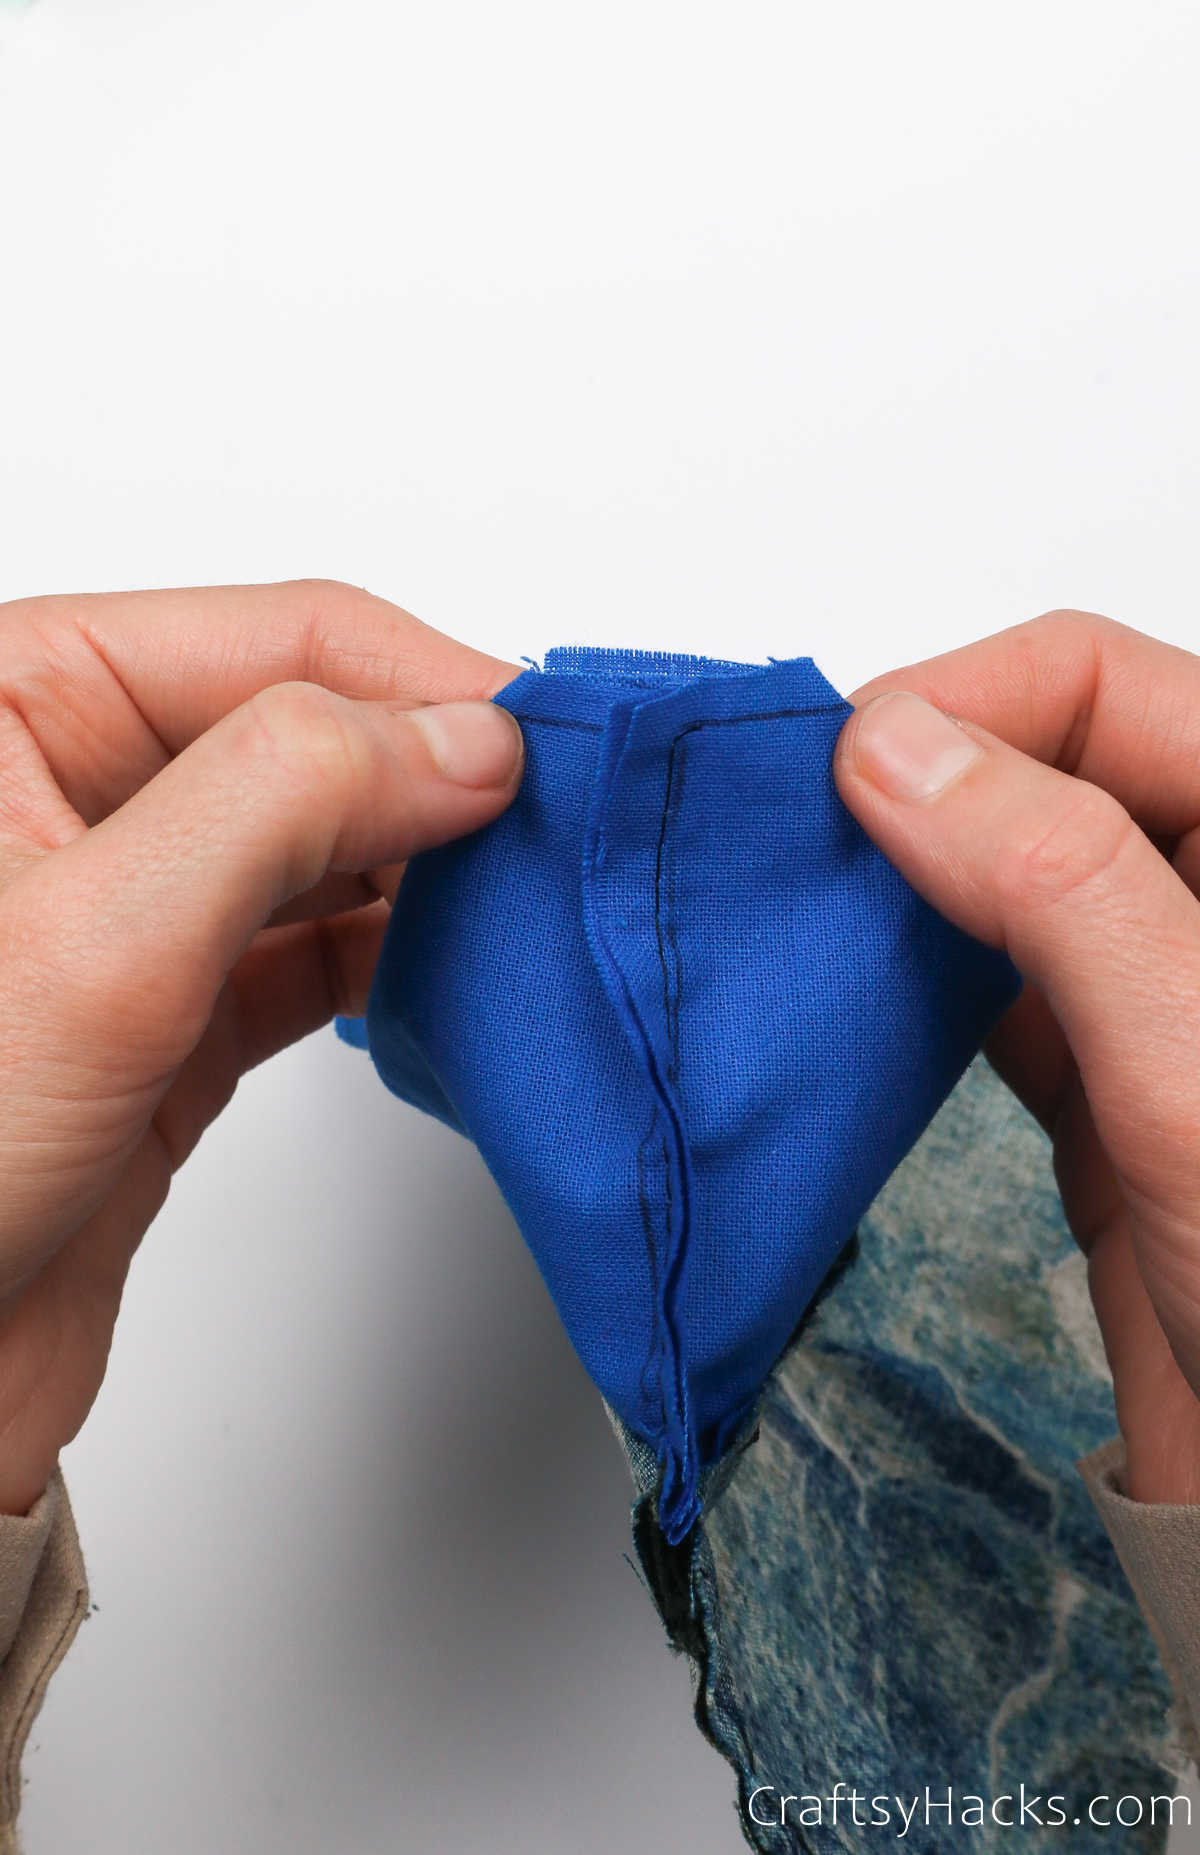
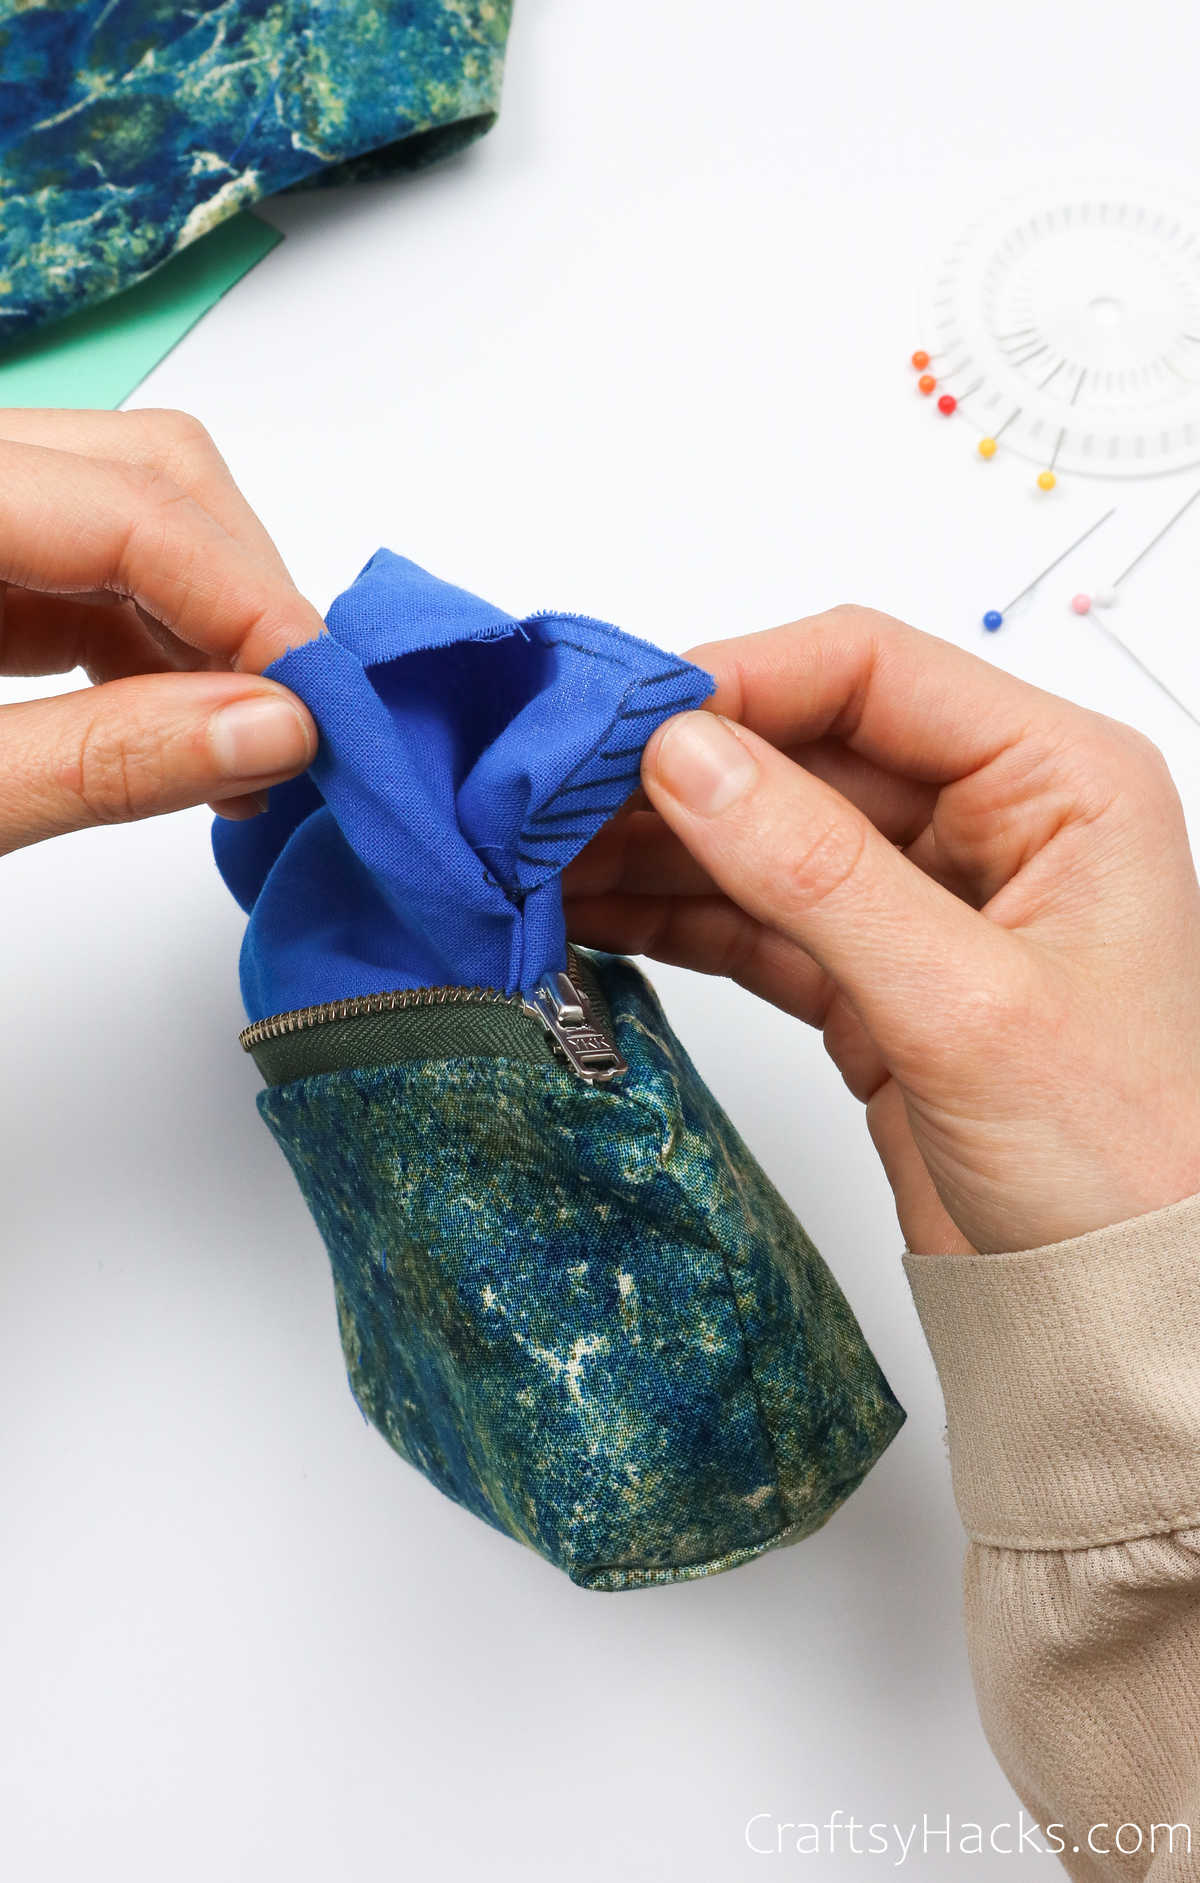
Step 14
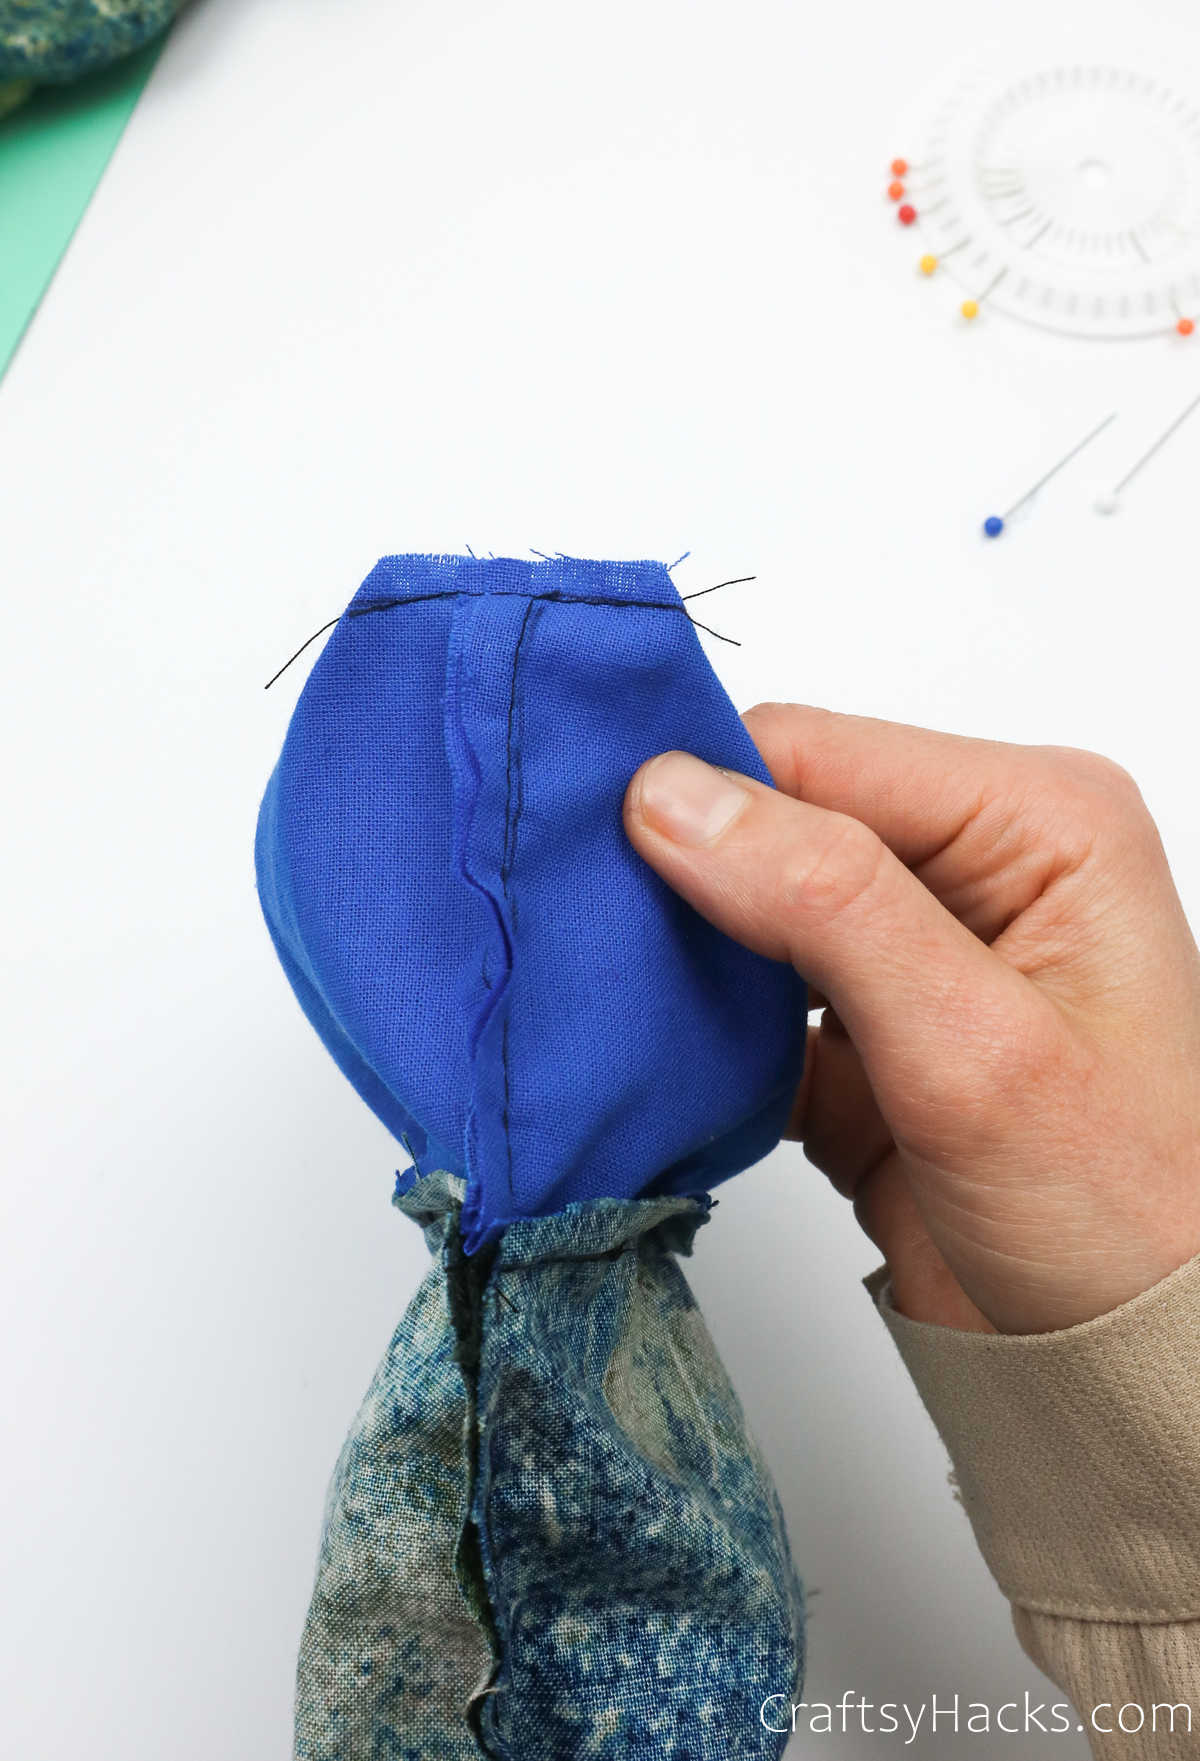
Next, you’re going to box the edges. To do this, first, grab the indented ends on one corner.
Pull the ends apart and flatten them out before you secure them in place.
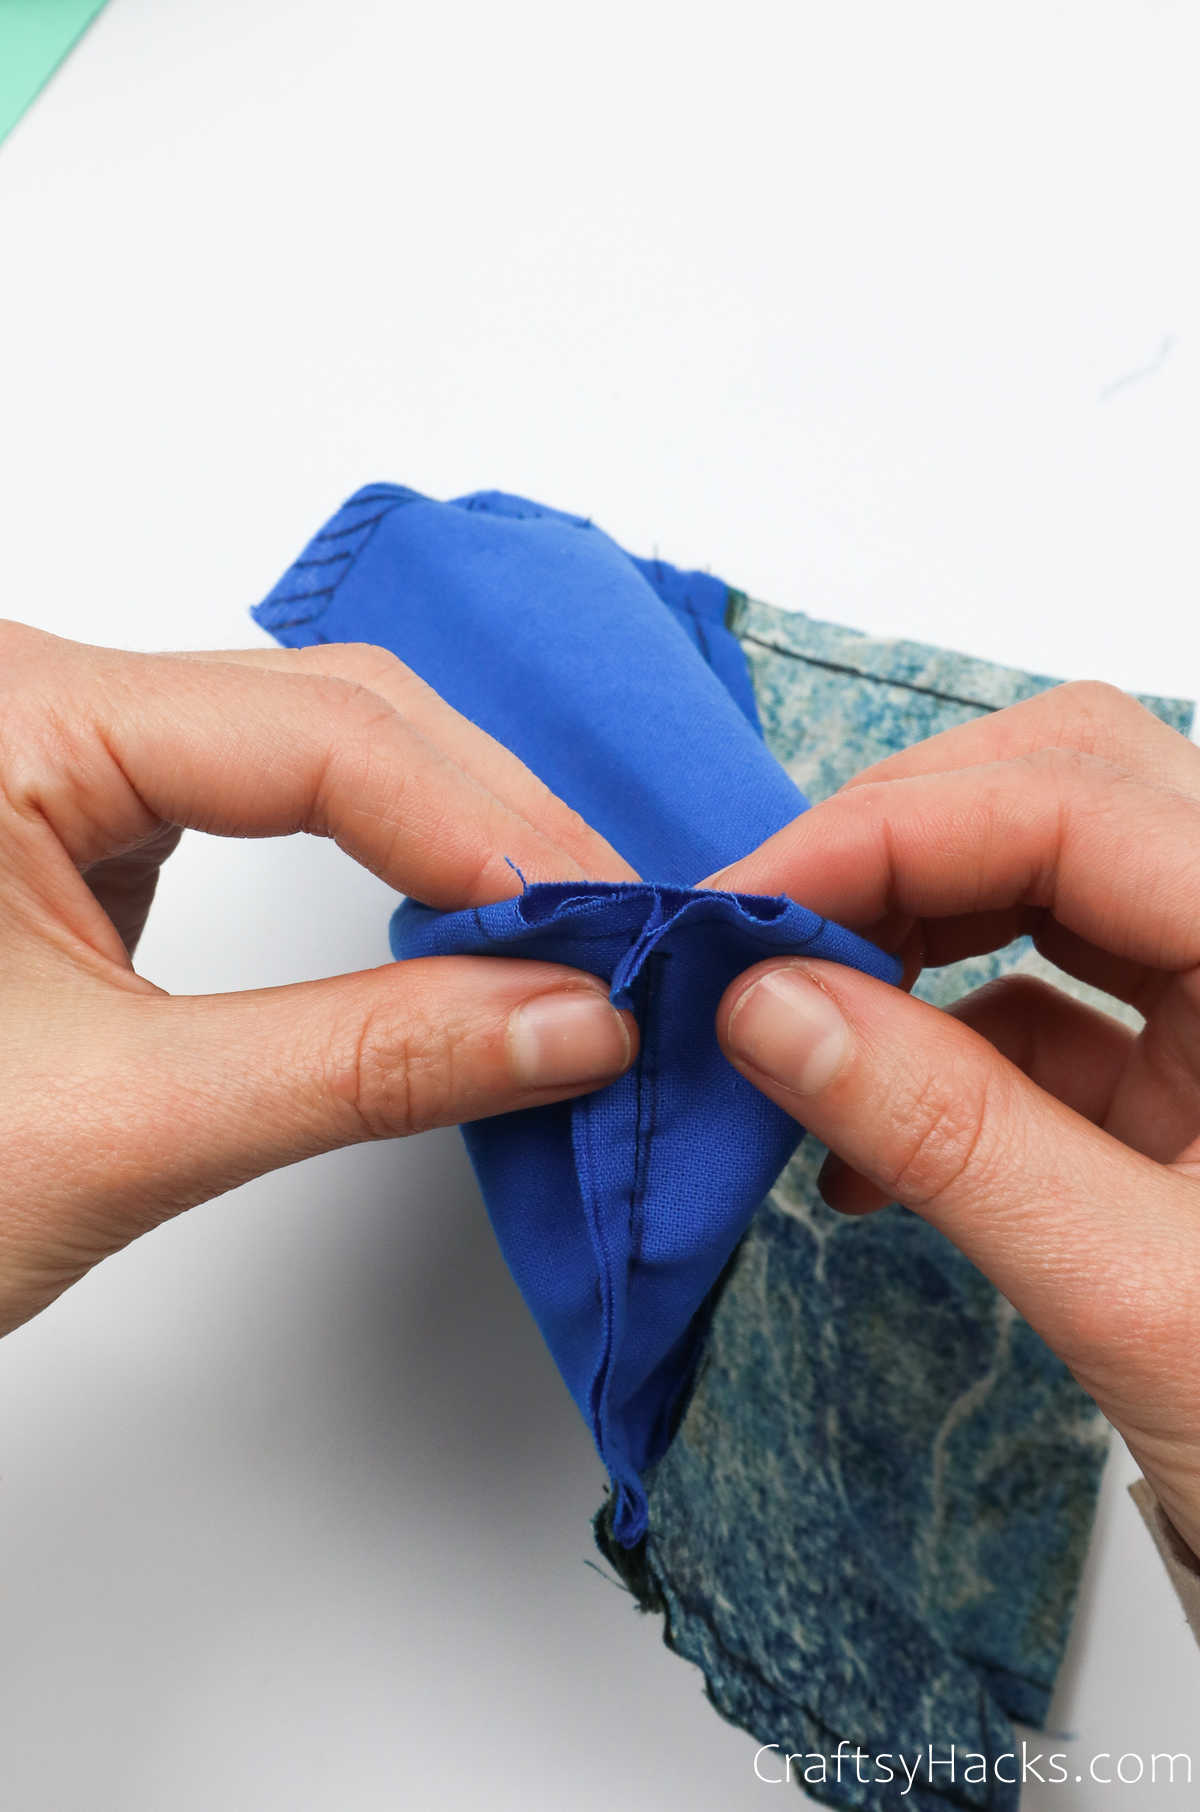
Repeat this with the other two indented ends of the other two corners. Once again, you should avoid the fourth corner where you left that one-inch gap.
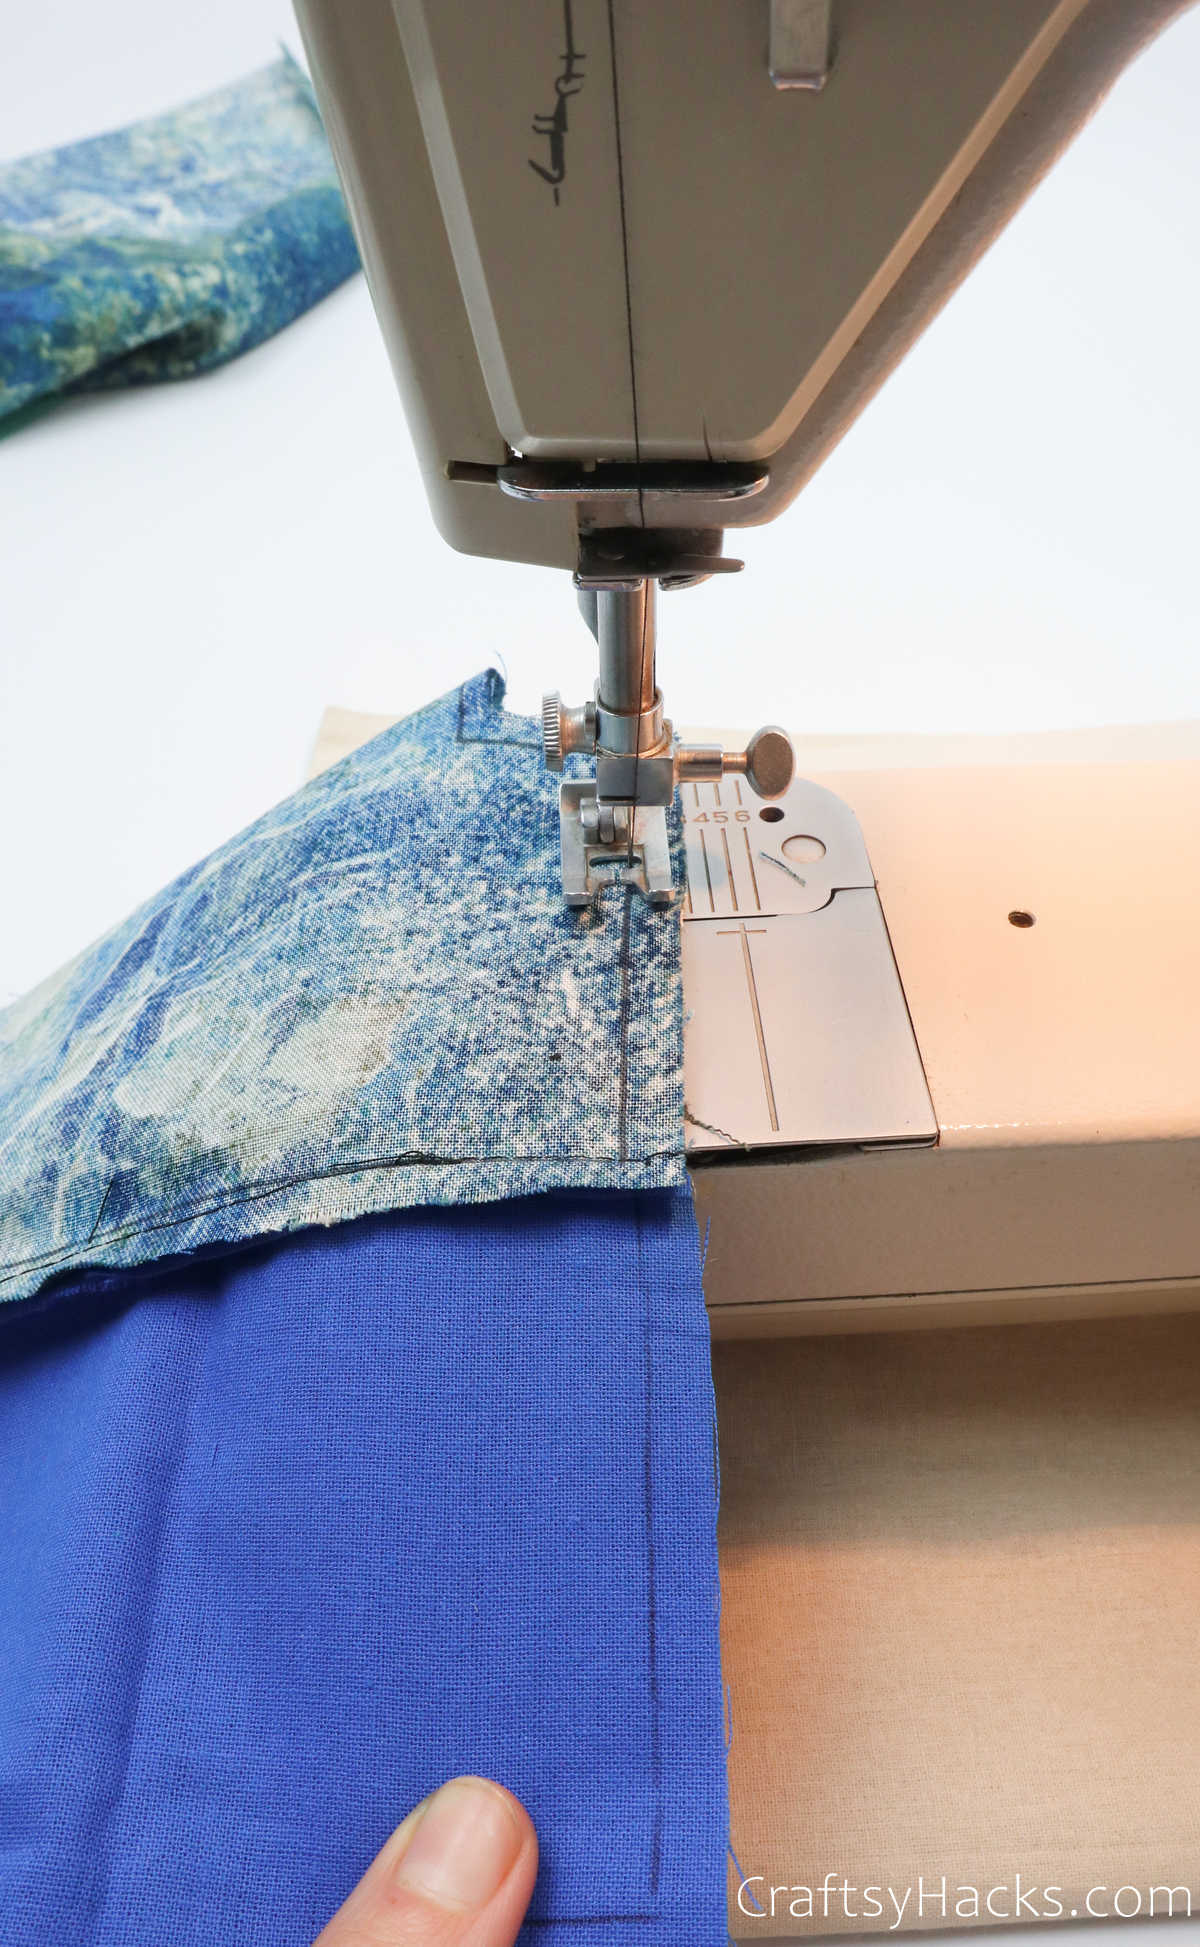
Step 15
Head over to your sewing machine and stitch the indented ends, as shown here. Are you wondering why you need to box the ends? It’s pretty useful to do this, actually.
When you have boxed ends, the bottom of your pouch won’t be slouch and shapeless. Instead, it will sit straight and balance out the entire pouch, giving it structure and shape.
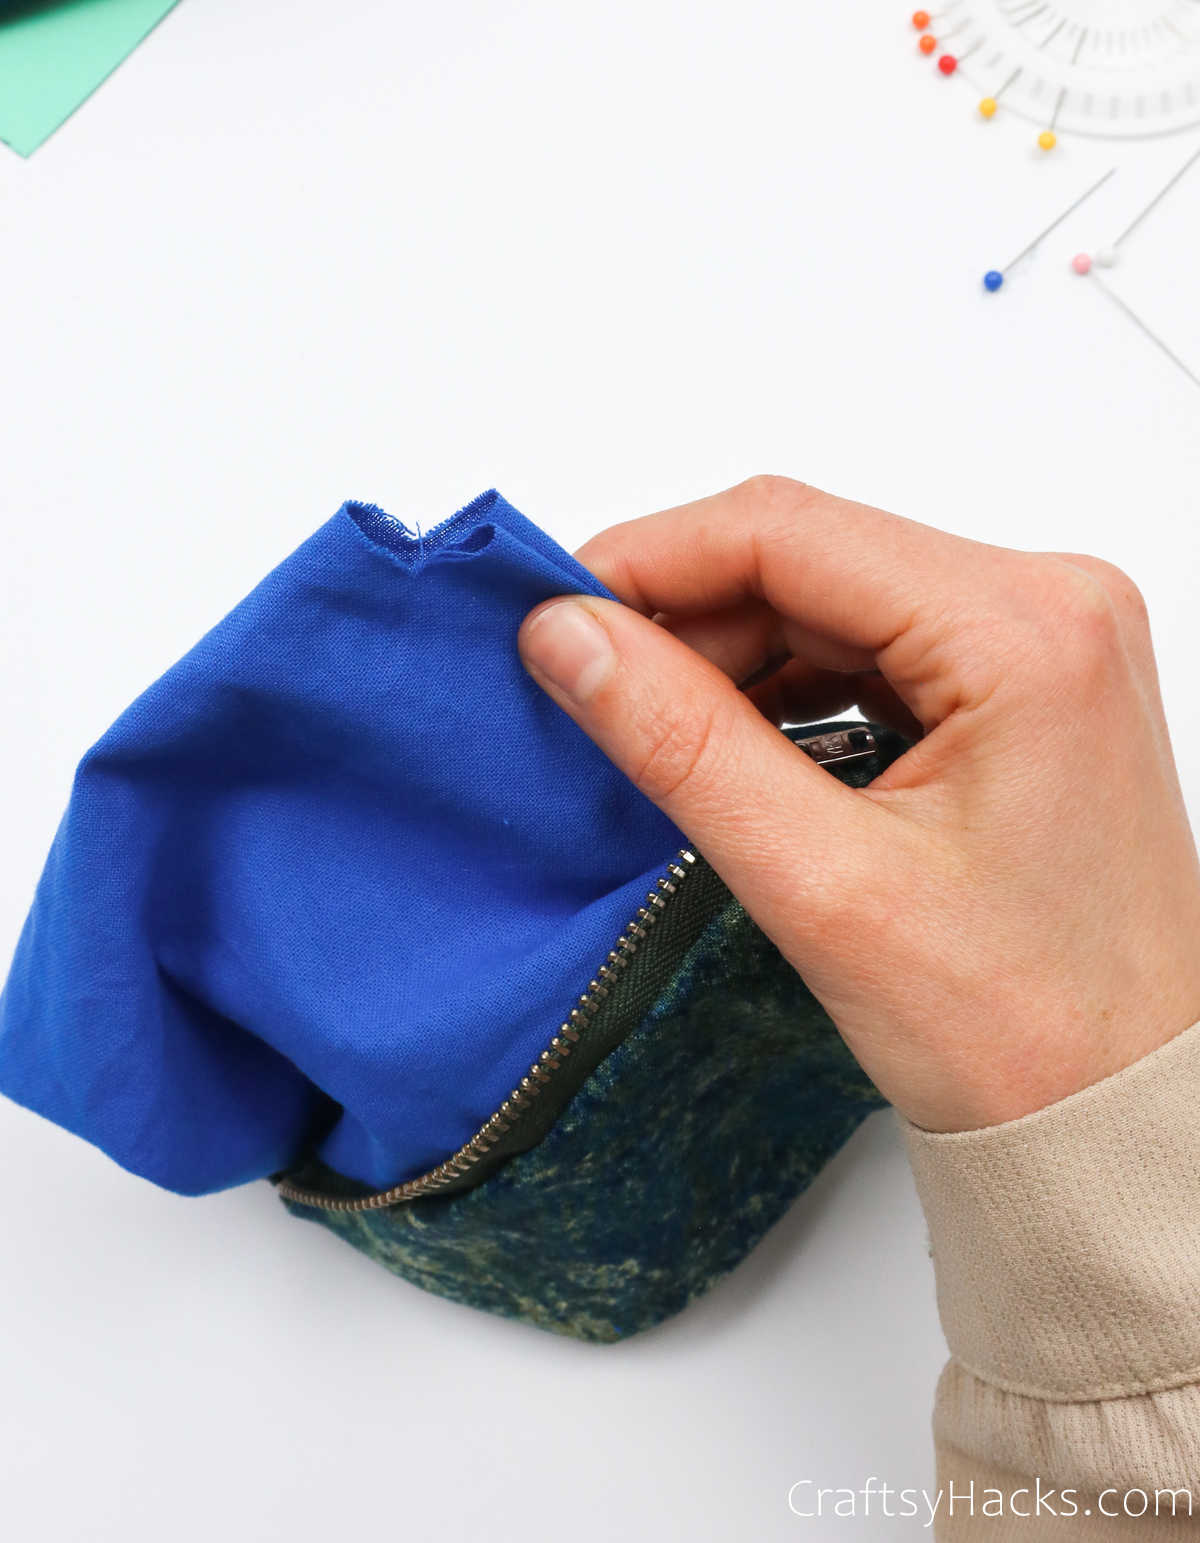
Step 16
I also bet you were wondering why you needed that inch gap on one corner. Well, you’ll be turning the pouch inside out by pulling all the fabric through that gap.
Step 17
When you’ve turned the fabric out, and it’s now facing the right way, you’ll find that the gap is still open.
Fold the flaps of the fabric inward and line them up against each other. Press the folds and pin them in place.
Sew a neat line across the folds you just pinned in place to close the gap.
You’re almost done! You still have to box up the indented edge of this corner, so just fold the fabric once more, align them evenly, and sew across the top.
Step 18
Now, push the lining fabric into the pouch and use your fingers to line them along the inside.
Use your fingers to tweak the boxed ends so they’re just right.
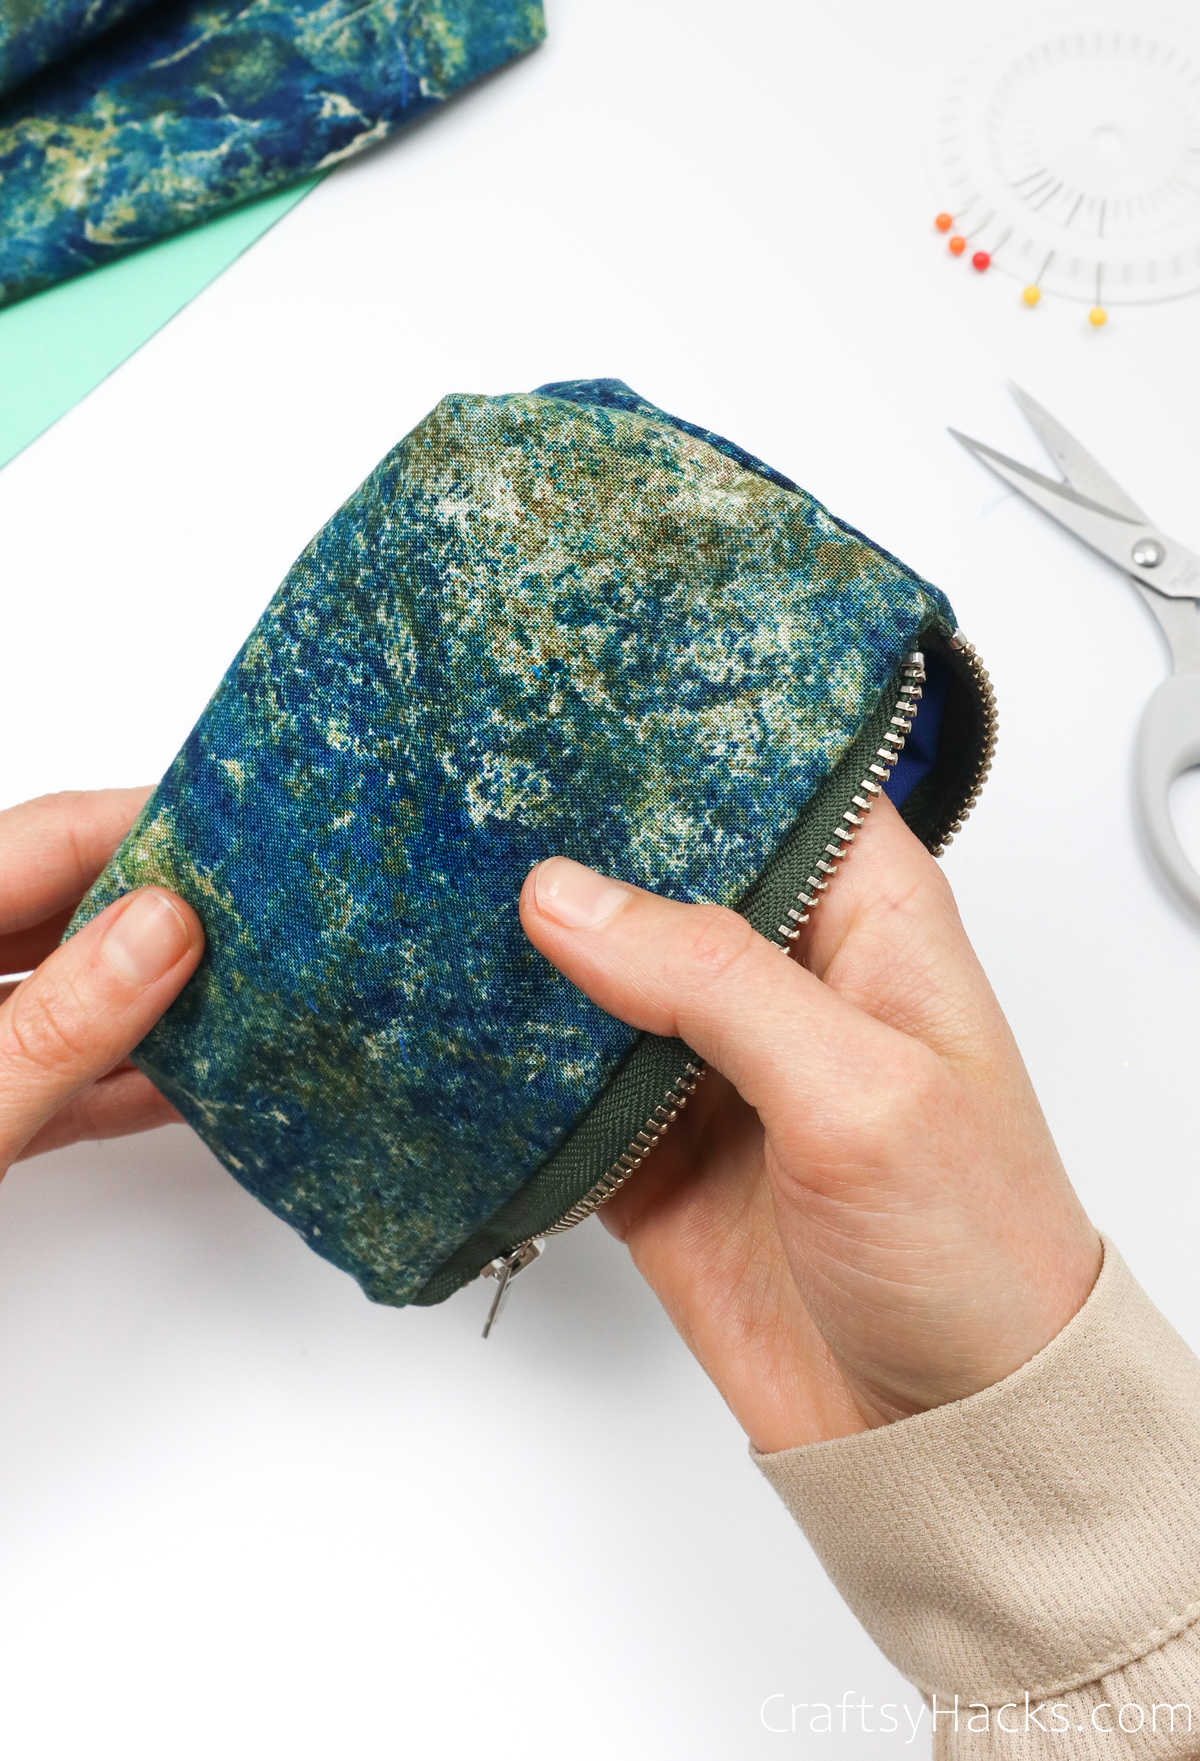
And there you go! Your DIY pouch with a zipper is all done and ready to use! An amazing craft for adults.

Watch Full Tutorial
For visual learners, it might be much easier to follow the tutorial on the video!
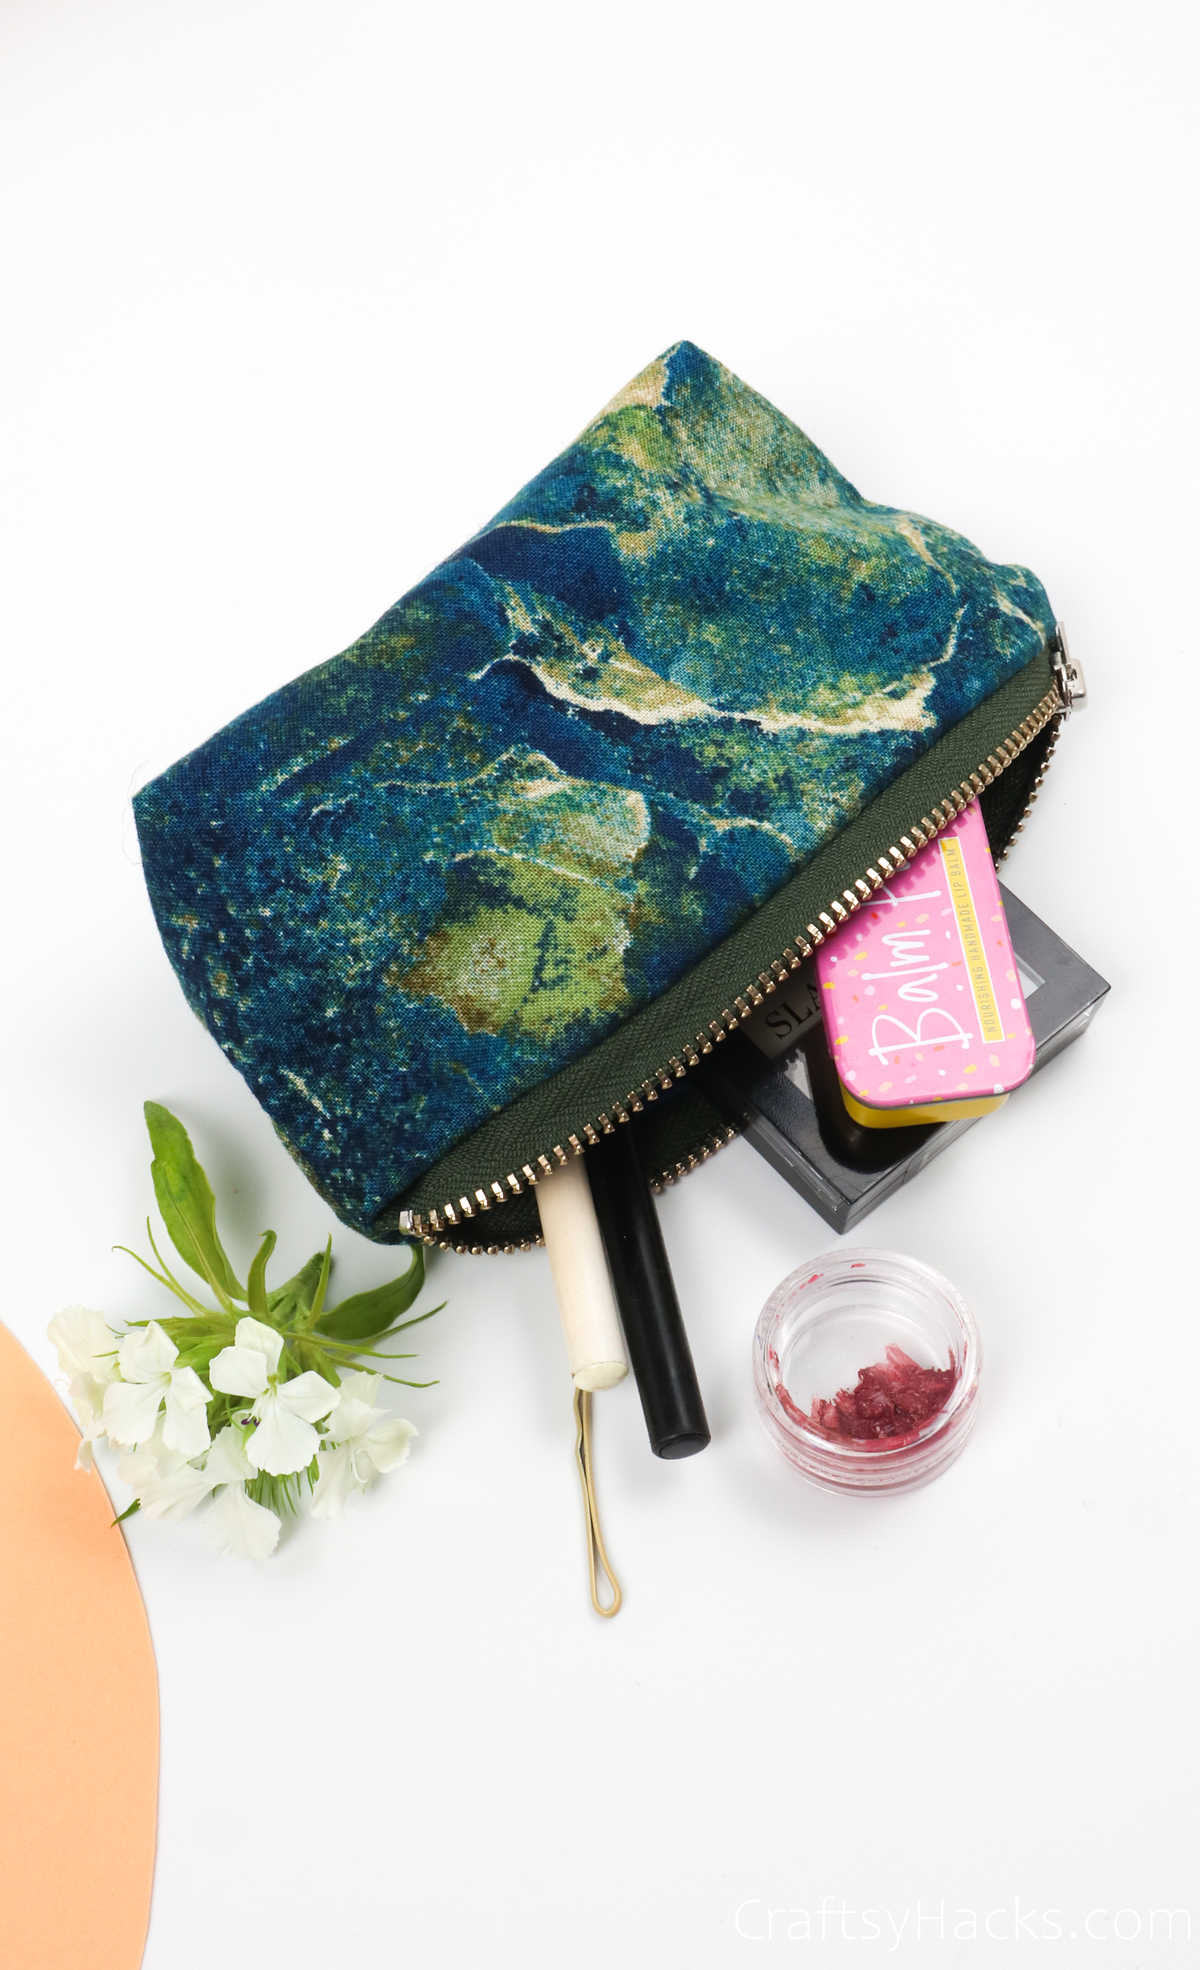
What Can You Store in This Zipper Pouch?
The question is: what can you not store in these pouches? Depending on the size of your pouch, you can store an array of things, from makeup and cosmetics to pencils and pens.
Here’s a list of things you can keep in these pouches:
- Keys, wallet, phone, cards, and cash
- Passport and travel documents
- Makeup, cosmetics, and toiletries
- Accessories and hair clips
- Chargers and headphones
- School and office supplies, stationery, and craft supplies
Who Can Make This Pouch?
This zipper pouch is a perfect project for beginners and experts alike. It’s a great mini-project for beginners to practice their cutting and sewing.
At the same time, it’s super easy, so seasoned seamstresses can whip a few up in no time at all.

Other Crafts You Might Like
- How to Make Air Dry Clay Bowls
- 47 Easy Sewing Projects
- How to Make Paper Lanterns
- DIY Boho Succulent
- DIY Stone Necklace
- How to Make Scented Candles
- DIY Rope Coasters
- 47 Upcycling Ideas
- How to Make Hair Bows
- 47 Fabric Crafts
- 31 Paper Crafts for Adults
- 37 Crafts to Make and Sell
- DIY Headband
- 47 Sewing Gifts

DIY Zipper Pouch (Step-by-step Tutorial)
Video Tutorial
Equipment
- Scissors
- Ruler
- Marker
- Sewing pins
Materials
- 2 x pieces of cotton fabric 10″x 10″
- Zipper 6″ long
- Paper pattern shown in Step 1
Instructions
- Gather all your supplies to get started on this project.
- Make a paper pattern to help you cut the fabric.
- Place the pattern over the outer fabric first and then the lining fabric. Then, draw an outline all around the different sides. You can use sewing pins to help you keep the pattern from moving around.
- Next, grab a ruler and, leaving a gap of around a quarter of an inch, draw another outline around the first one you drew earlier. This quarter-inch gap is your seam allowance.
- Remove the paper pattern and set it aside. Now, grab a pair of scissors and cut both the fabric swatches along the outer outline.
- Place the outer fabric down with the right side facing upward and line the zipper across the top. The zipper should be facing down.
- Then, place the lining fabric with the right side facing inward. So, effectively, the right sides of both fabric swatches will be facing each other on the inside.
- Sew the top side of the fabric where the zipper is, along the inner outline.
- Once you’ve done that, pull the lining fabric over the zipper and flatten it out on the table so that both fabric swatches mirror the other, connected at the zipper.
- Pull the lining fabric inward and line it up against the edge of the zipper. Pull the outer fabric in the same way, lining the edge against the zipper, too, so that the zipper is sandwiched on both sides by either fabric.
- Sew this side shut, once again along the inner outline.
- Open up your fabric and lay them out. Reach in and open the zipper halfway; you’ll see that you have two corners each, of both the outer fabric and the lining fabric.
- Now, it’s time to sew the corner shut, all except one corner. Grab a pen and mark an inch-wide section on one corner of the lining fabric.
- Leaving that one corner aside, sew all the other corners shut.
- To box the indented corners, pinch the fabric and flatten it with your thumb. Then, pin it in place before you sew across that corner. Do this for all three indented corners except the one you marked off earlier.
- Pull the fabric through the gap so that the pouch is now the right side up.
- Sew the gap shut, and also remember to box it.
- Finally, push the lining fabric back into the pouch. Your DIY zipper pouch is ready!


