Easy DIY Stone Necklace (Step-by-Step)
This post may contain affiliate links: full affiliate disclosure.
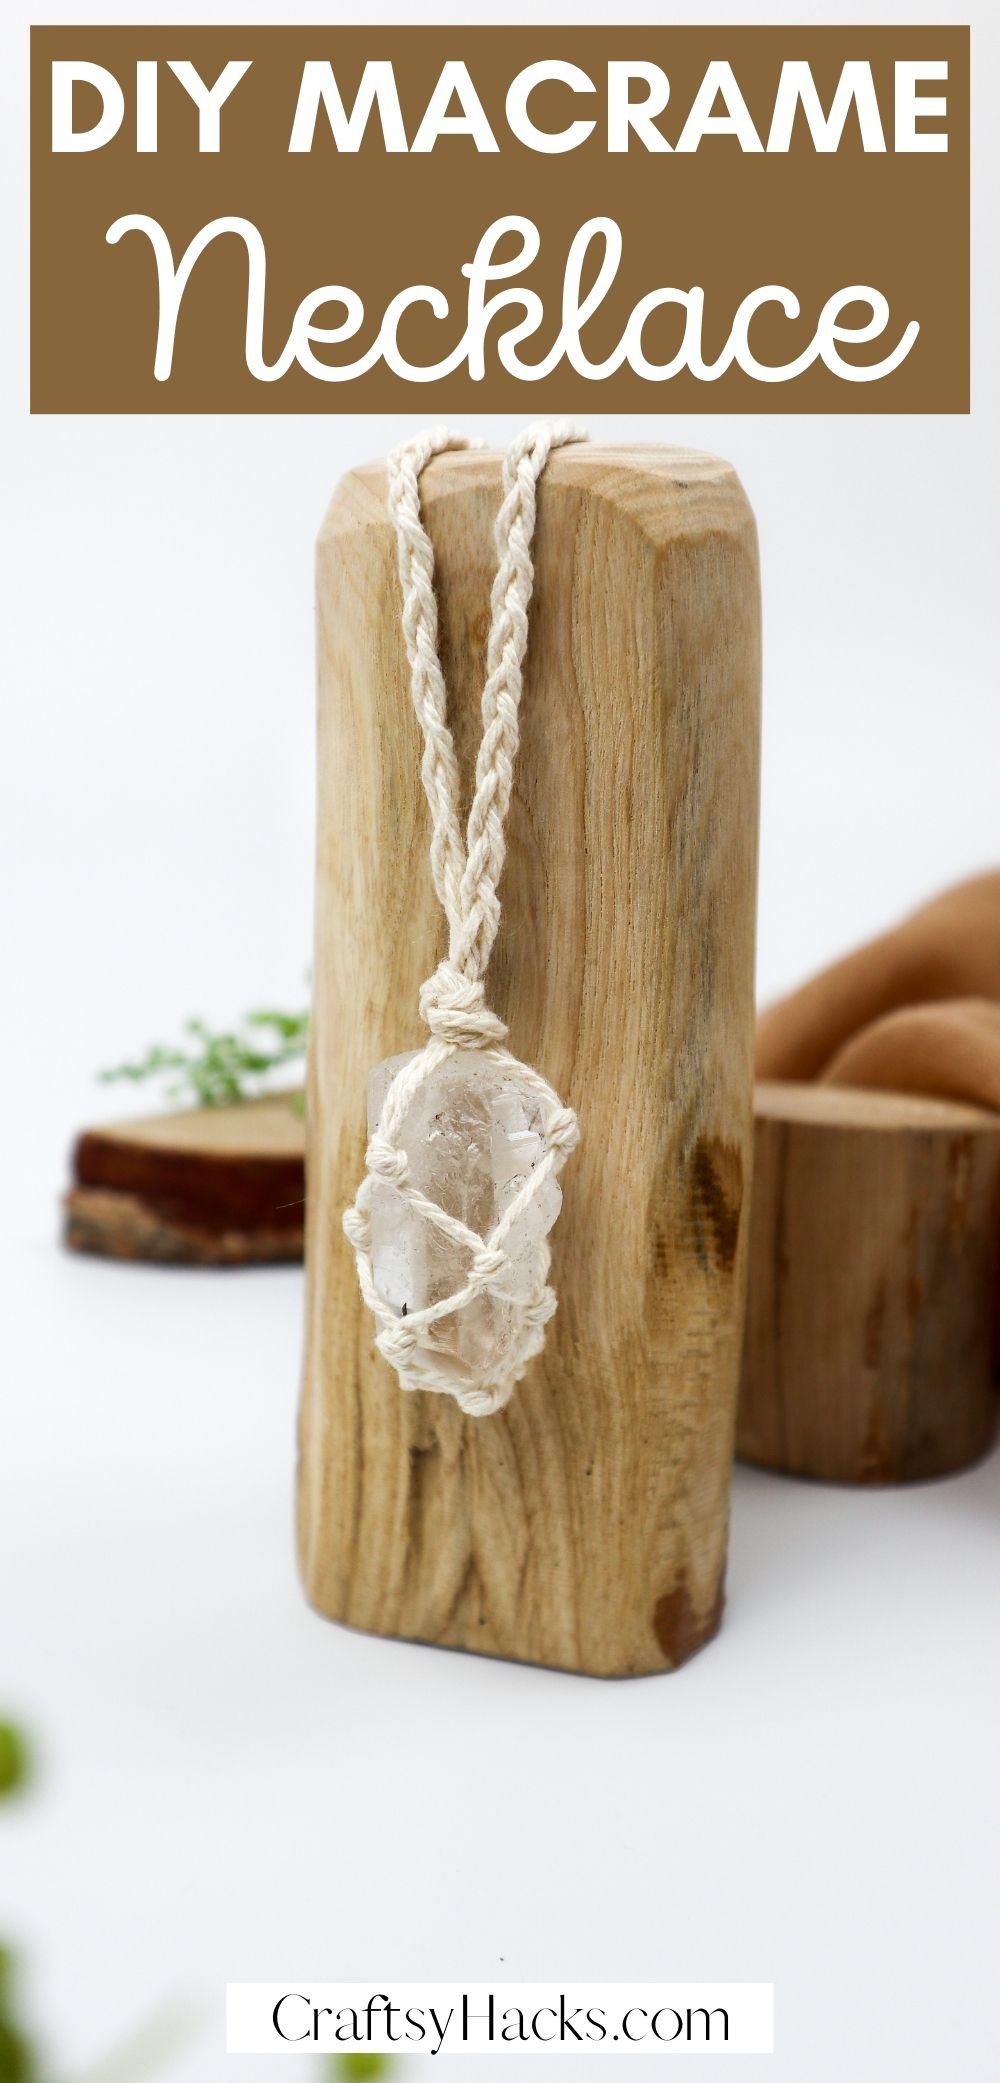
Need an easy but beautiful macrame project? Make this DIY macrame necklace – a beautiful jewelry item you can make for your loved ones or yourself.
I love a good macrame DIY project; I really do. I’m always game whether we’re making macrame wall hangings, decorative pieces to go around the house, little coasters, or this gorgeous DIY macrame necklace.
So let’s take a good look at this macrame necklace with that earthy-looking crystal. If you think it looks pretty easy to make, you’re absolutely right.
That’s what makes them amazing gifts you can make ahead of time to give to your friends. You can switch out the crystal for something more personalized for the friend(s) in question, too.
So, without further ado, let’s take a look at what you’ll need for this project and how you can make it.

Supplies and Tools You’ll Need for the Necklace
I told you, didn’t I, that this was a really easy project? Well, it only needs three simple things to help you get started. Take a look:
- A rock/crystal/gem
- 1mm cotton twine
- Scissors

Watch: DIY Stone Necklace
Not much of a reader? Check out this necklace tutorial on video!
How to Make a Stone Necklace
So, once you’ve got what you need, you’re ready to get started. Feel free to use whatever colored cord you prefer or have at hand, as long as you have enough of it, as specified in the instructions below.
Step 1
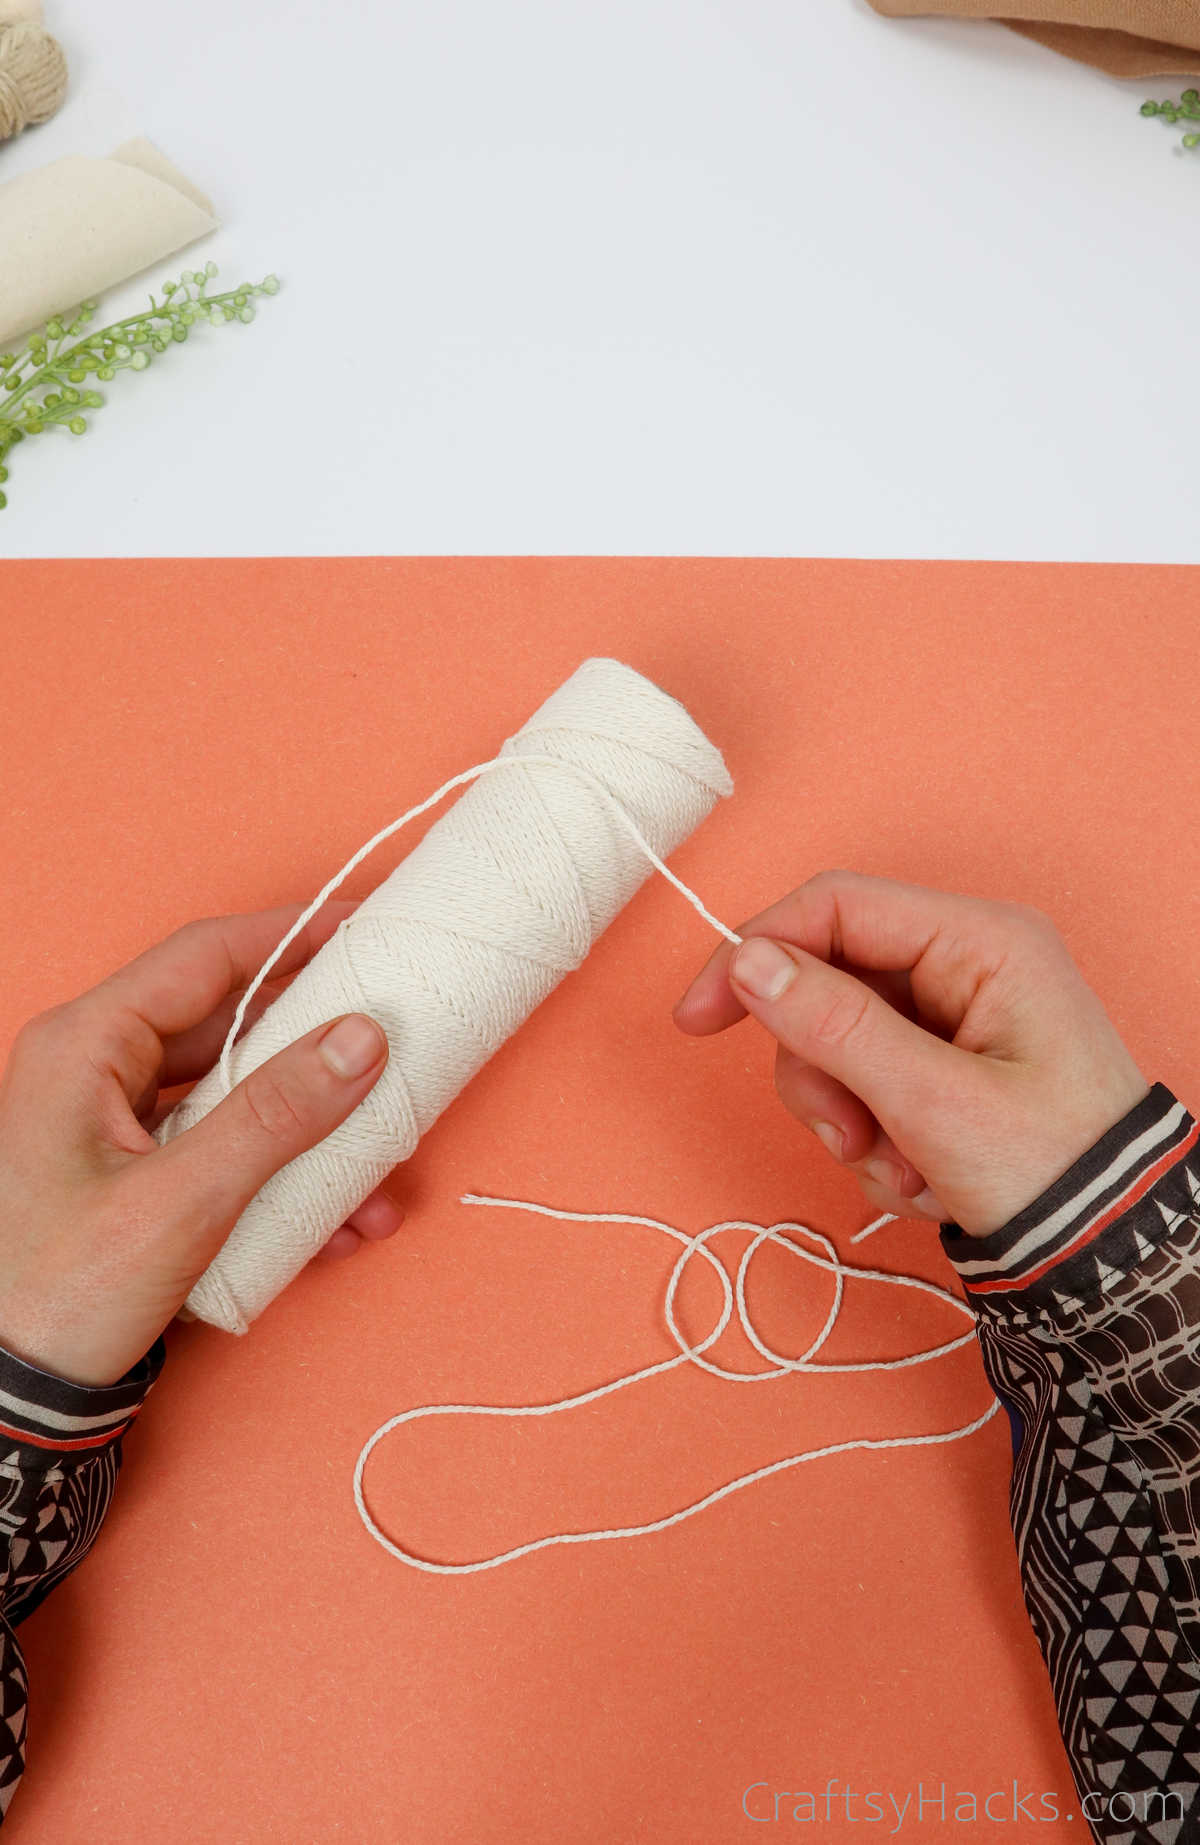
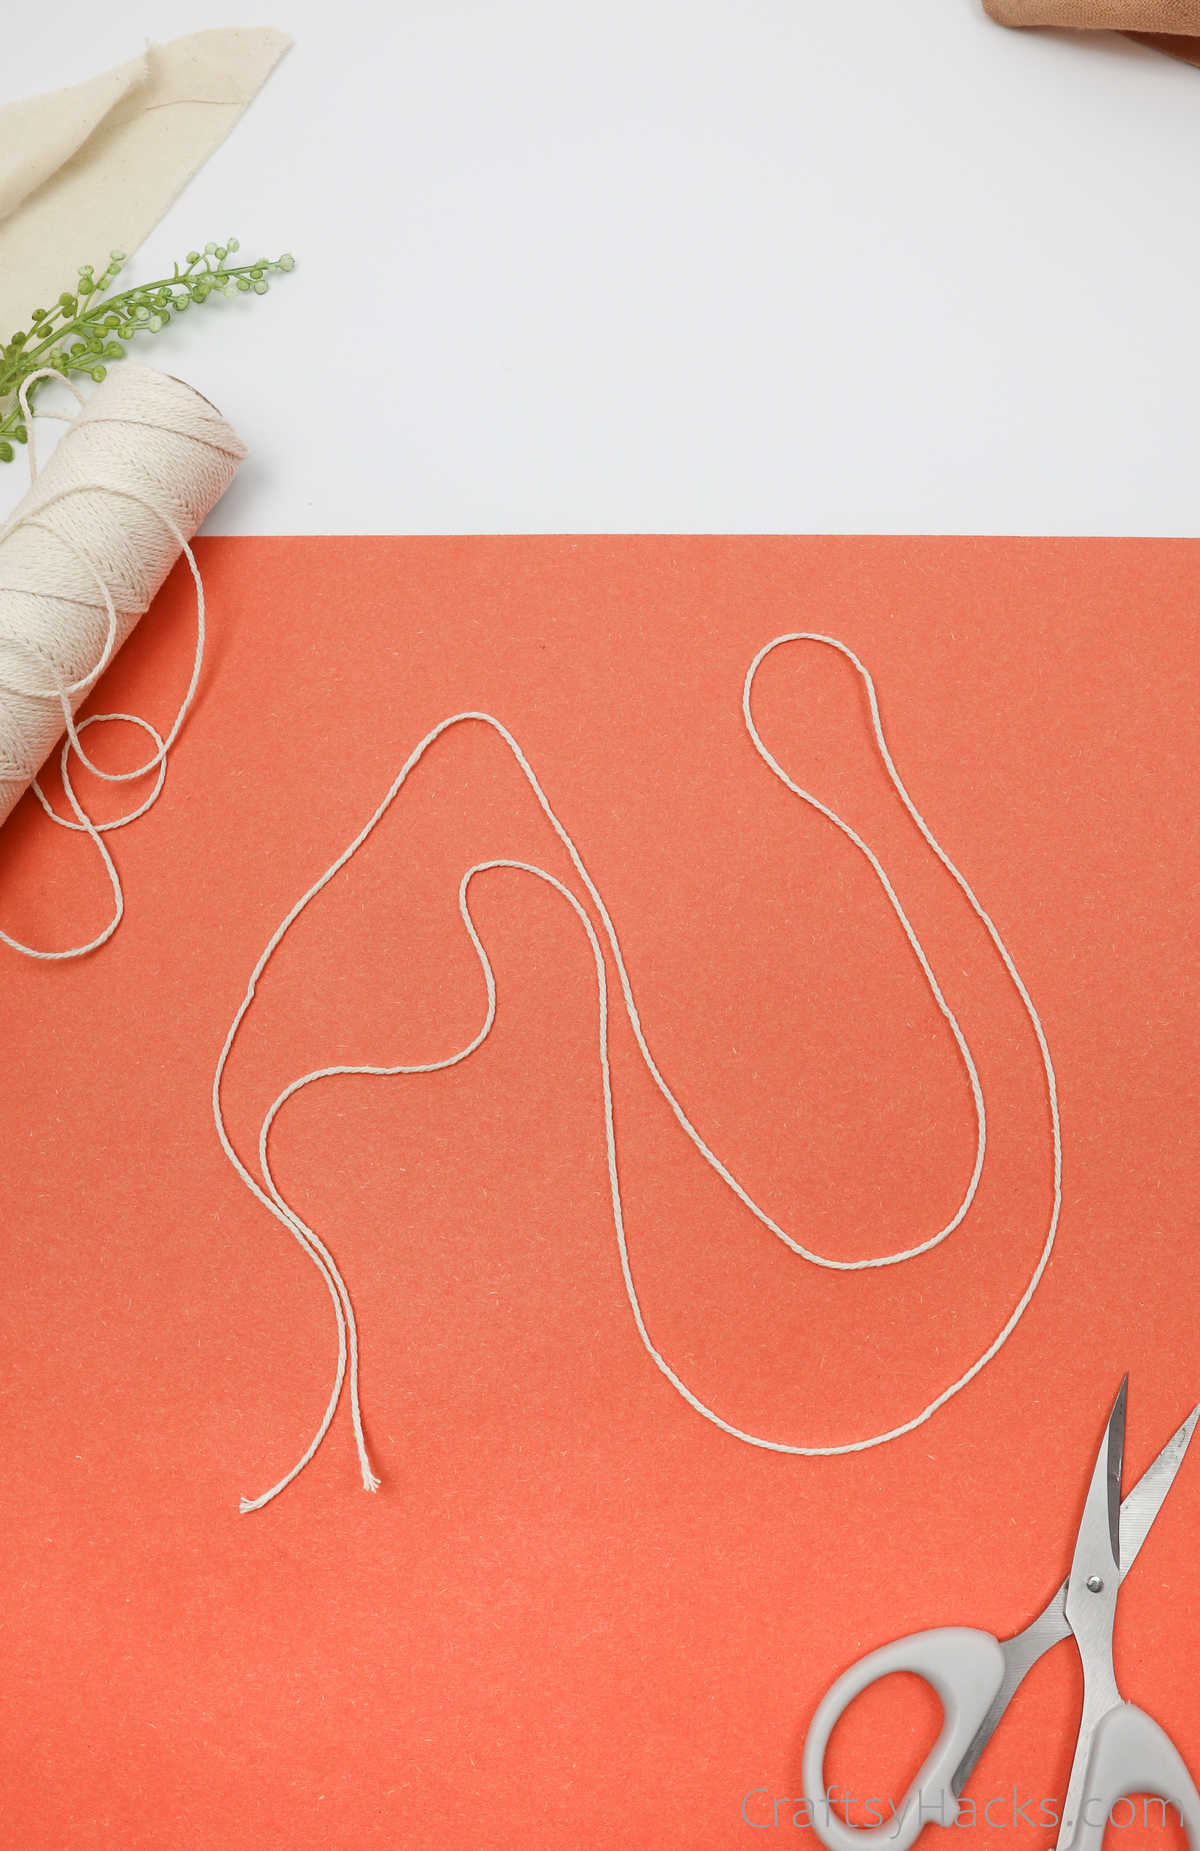
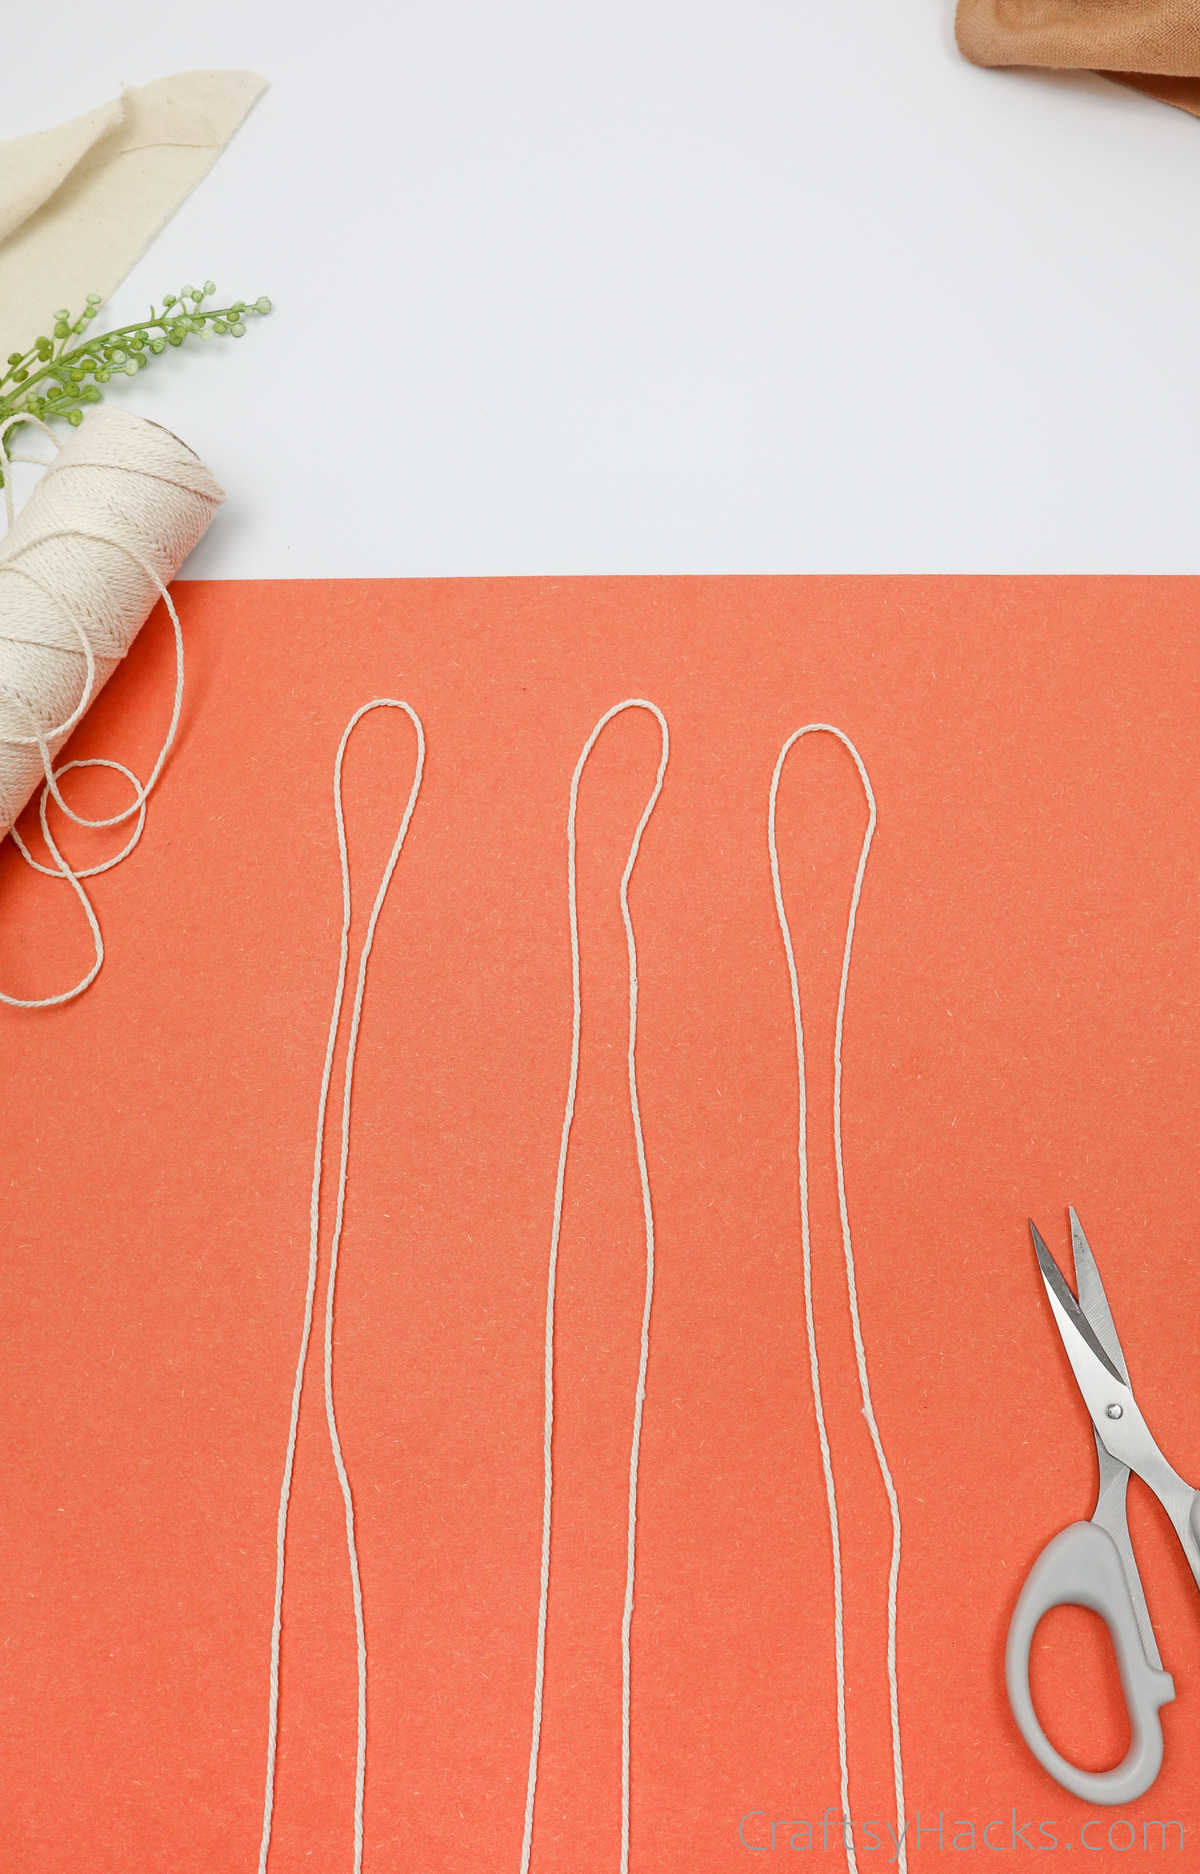
The first step would be to unravel your cord and cut it off at around 32 inches. This measurement depends not just on how long you want the necklace to be but also on how big your stone is.
Step 2
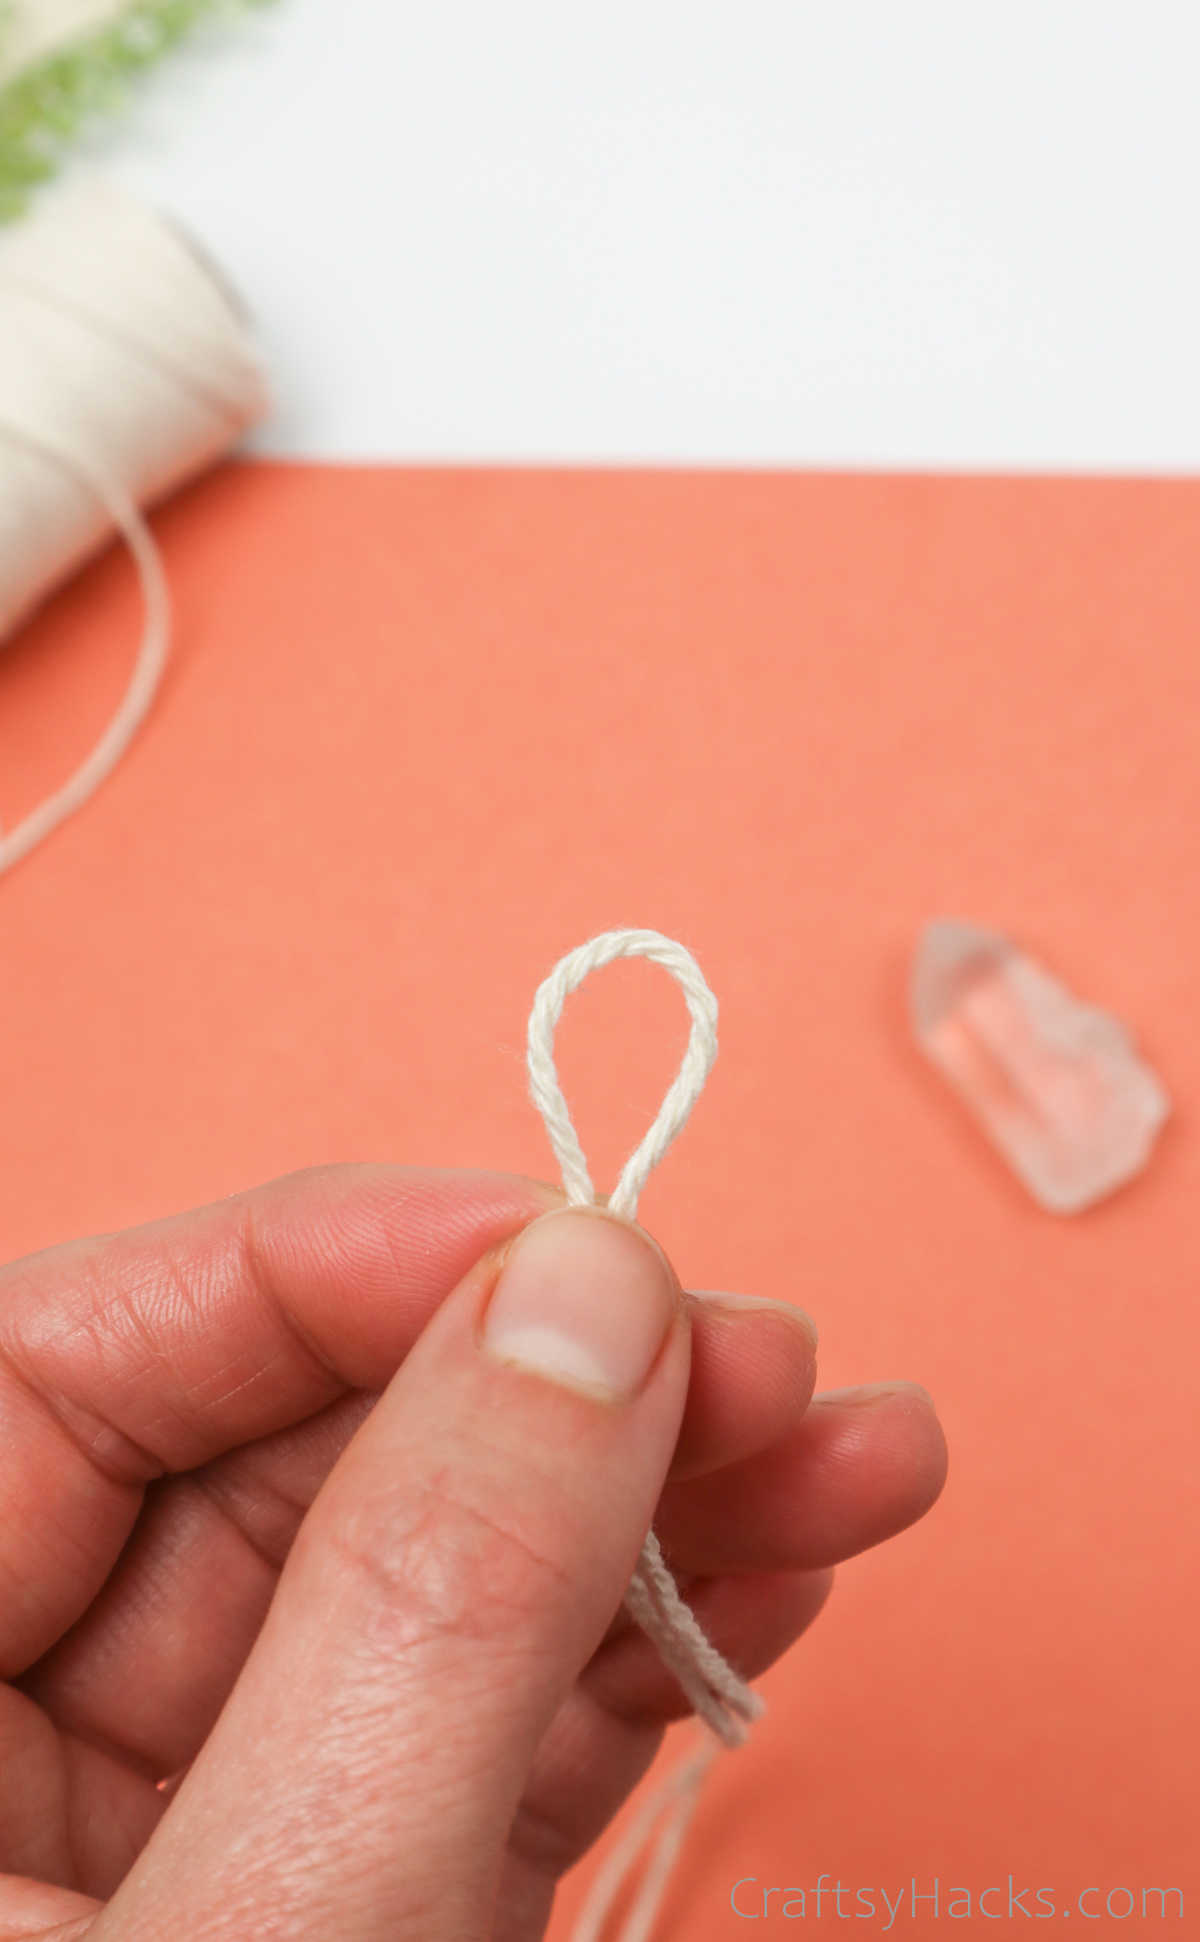
Bend the cord so that it’s folded in half, with the loop at one end and the loose ends at the other.
Step 3
Cut out two more strips, both of the same measurements. Lay them out as you did with the first cord. You’ve now prepared your cords, and you can start working on the best part of this project: the knotting!
Step 4
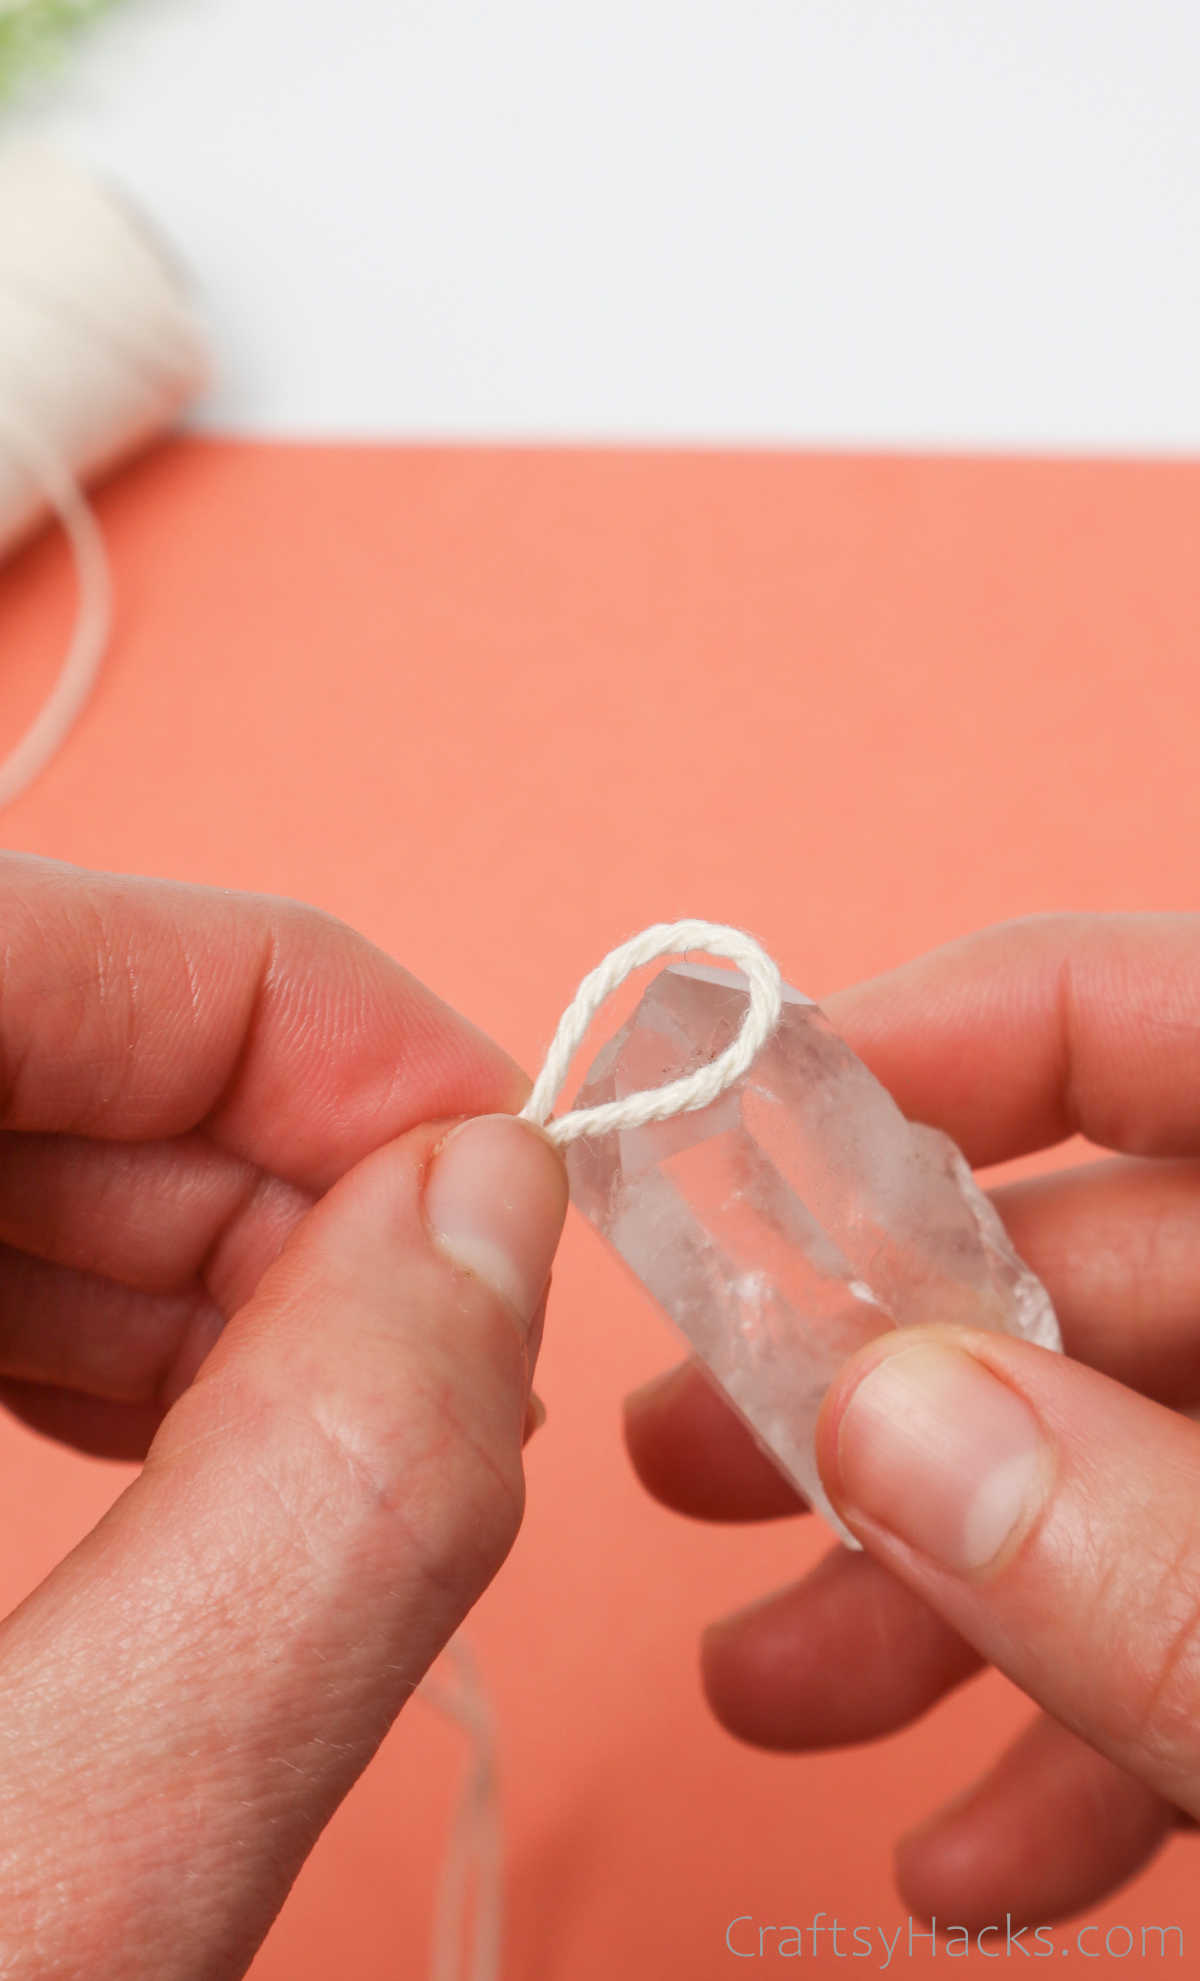
The next step is to take a look at the stone, rock, or crystal you’ve picked and figure out how you want to place it.
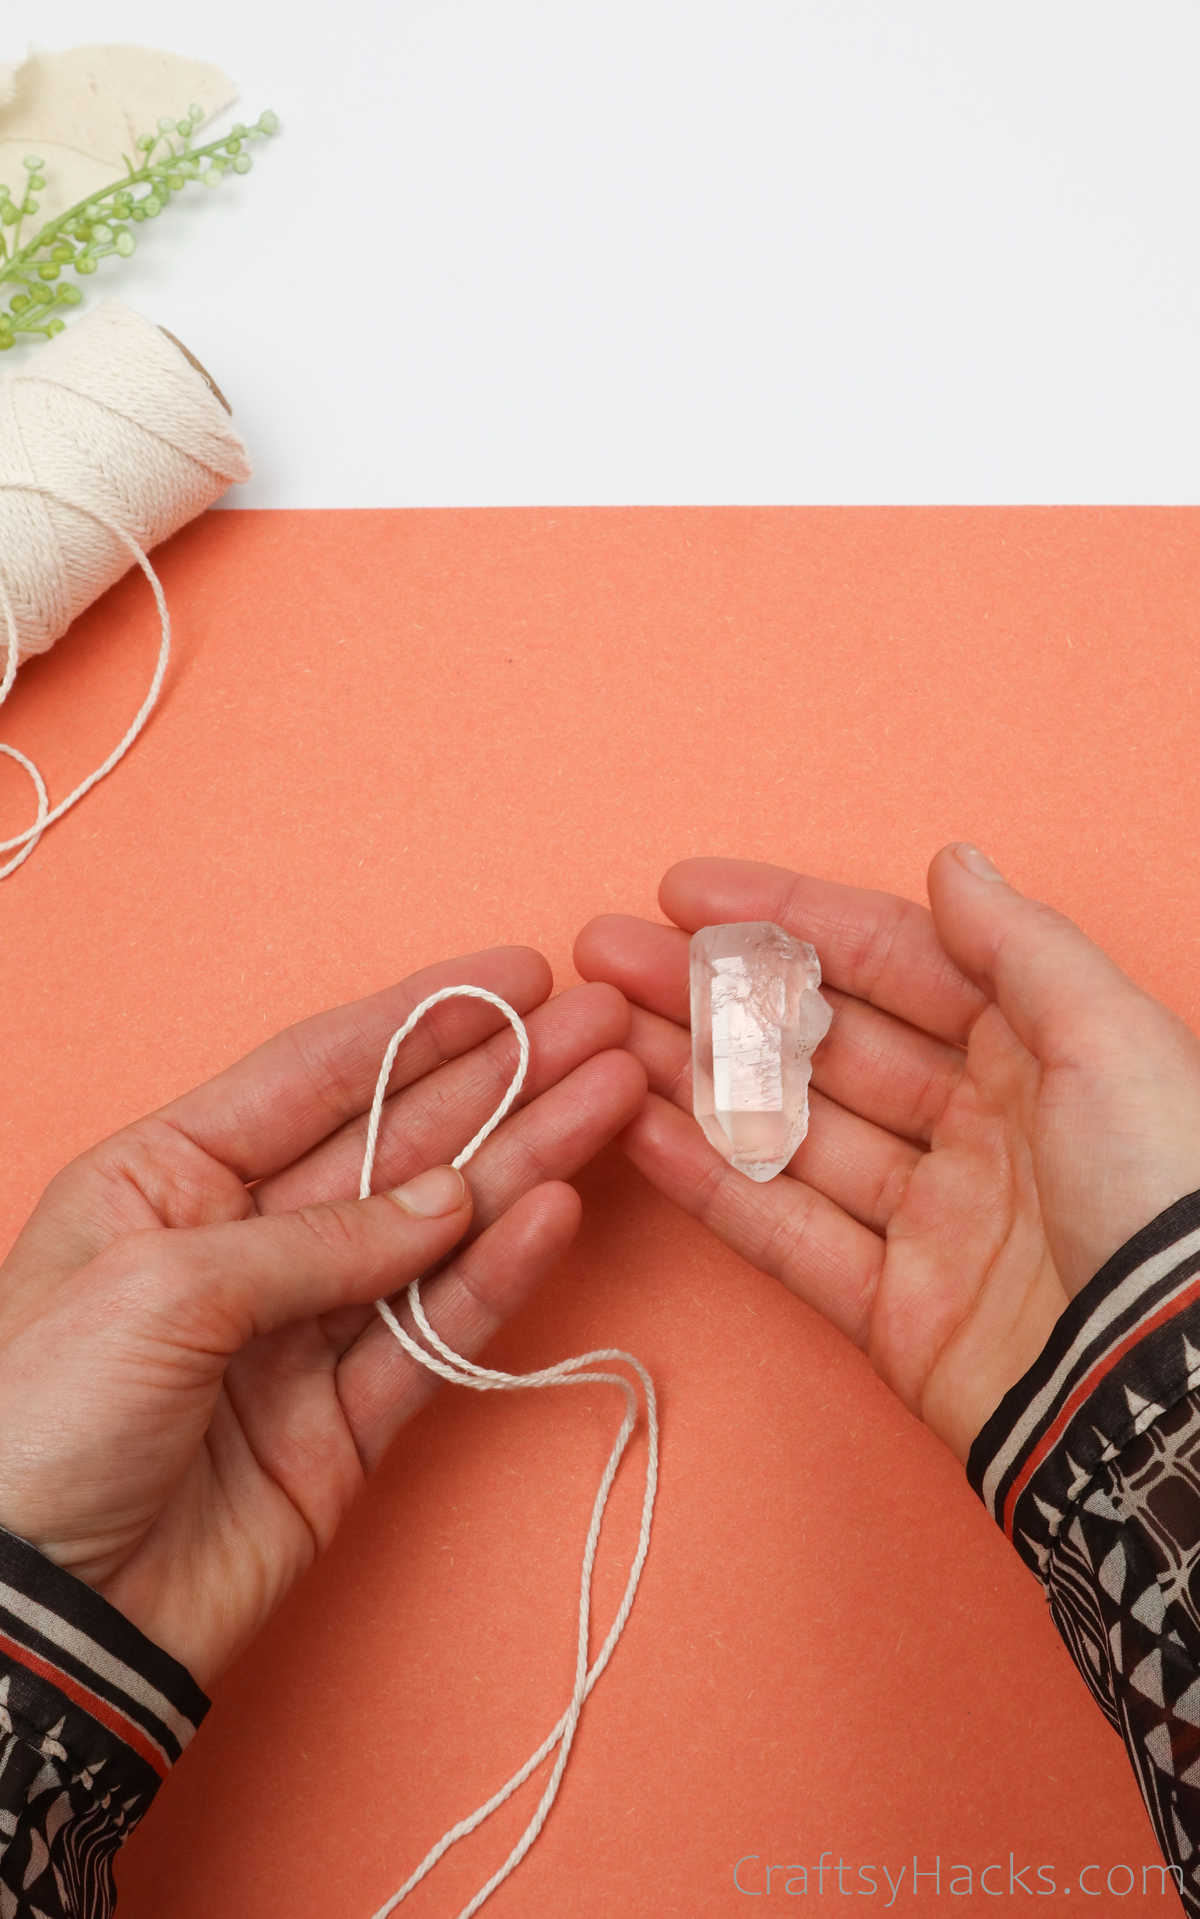
Once you know which part of the stone you want facing downward, grab your cord and loop it around the bottom of the crystal.
At this point, just be careful to size the loop just right. You don’t want to make it too big that the crystal falls through or too small to fit in.
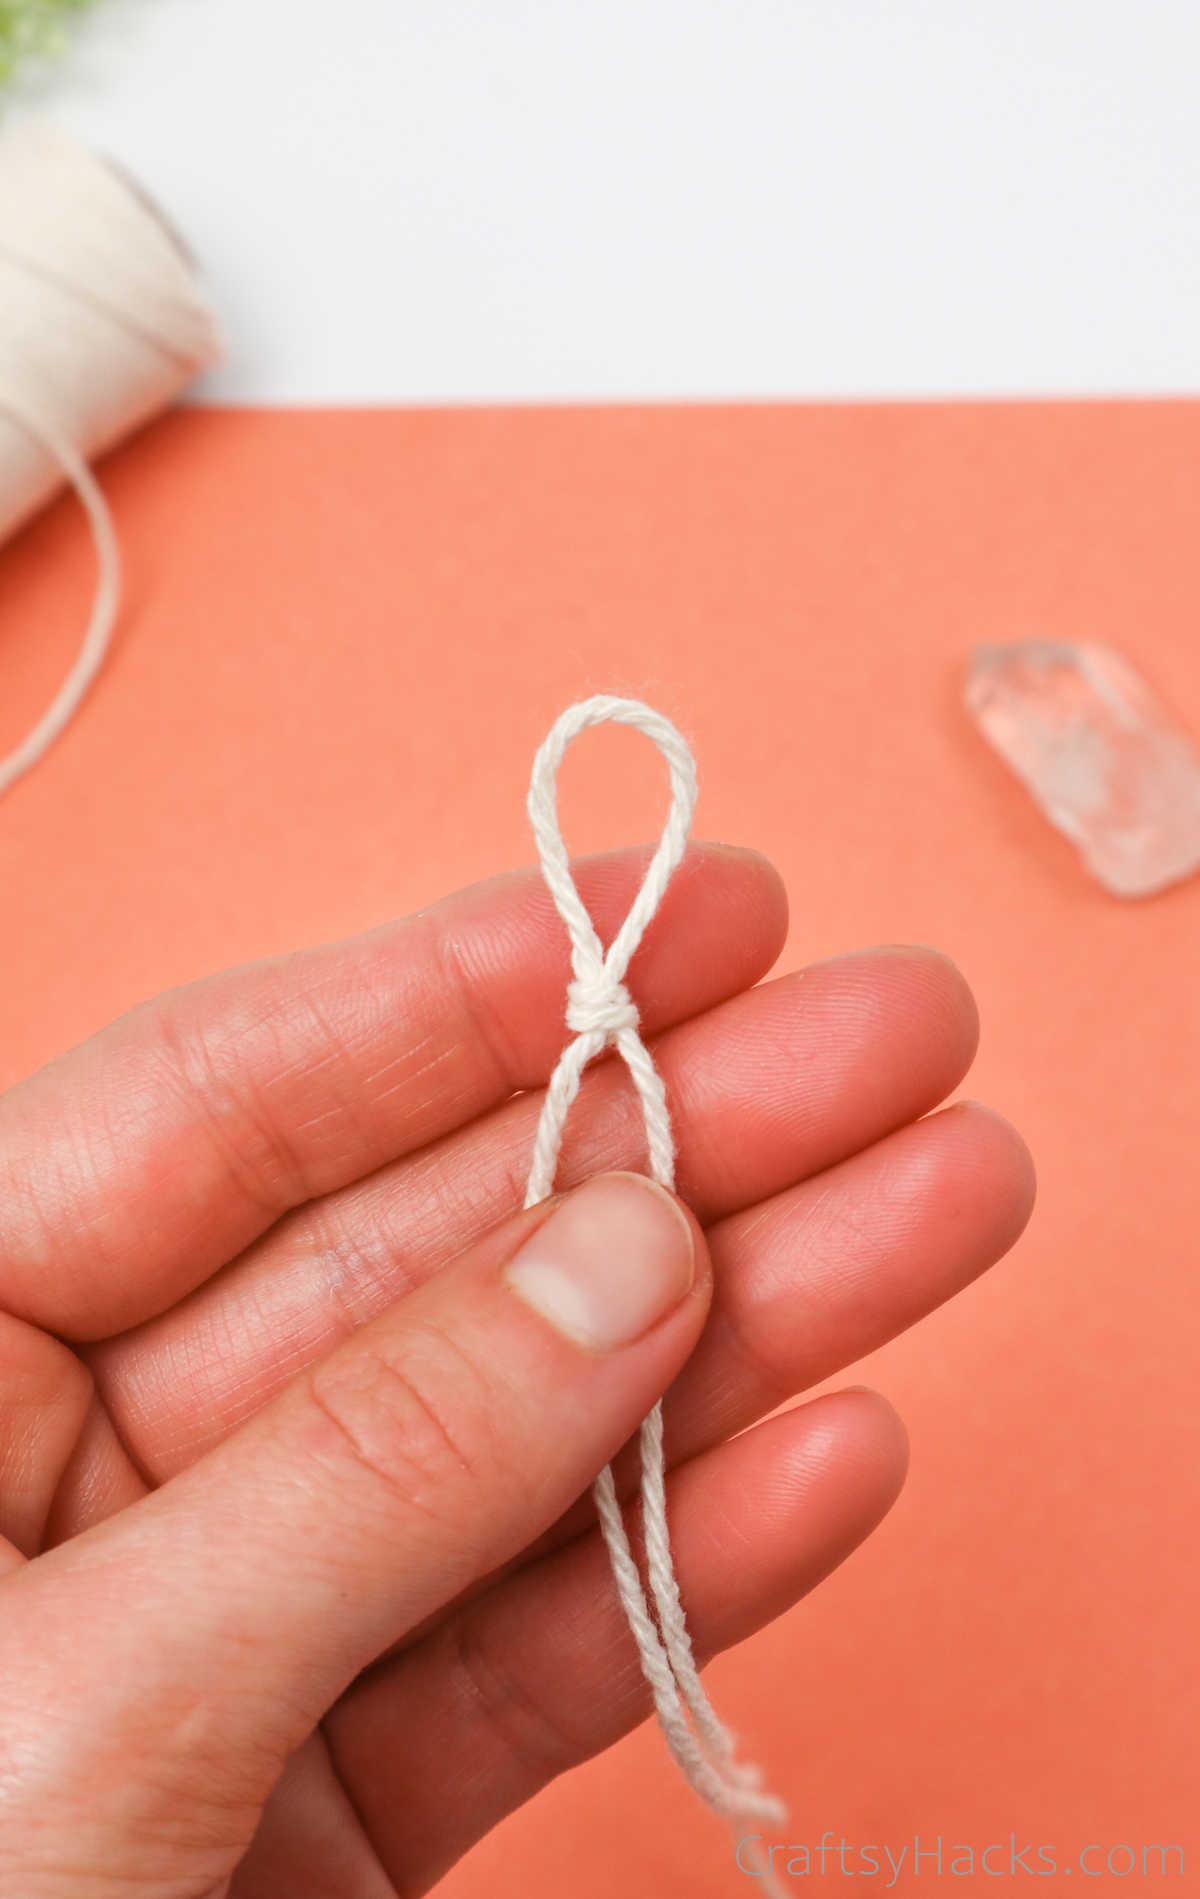
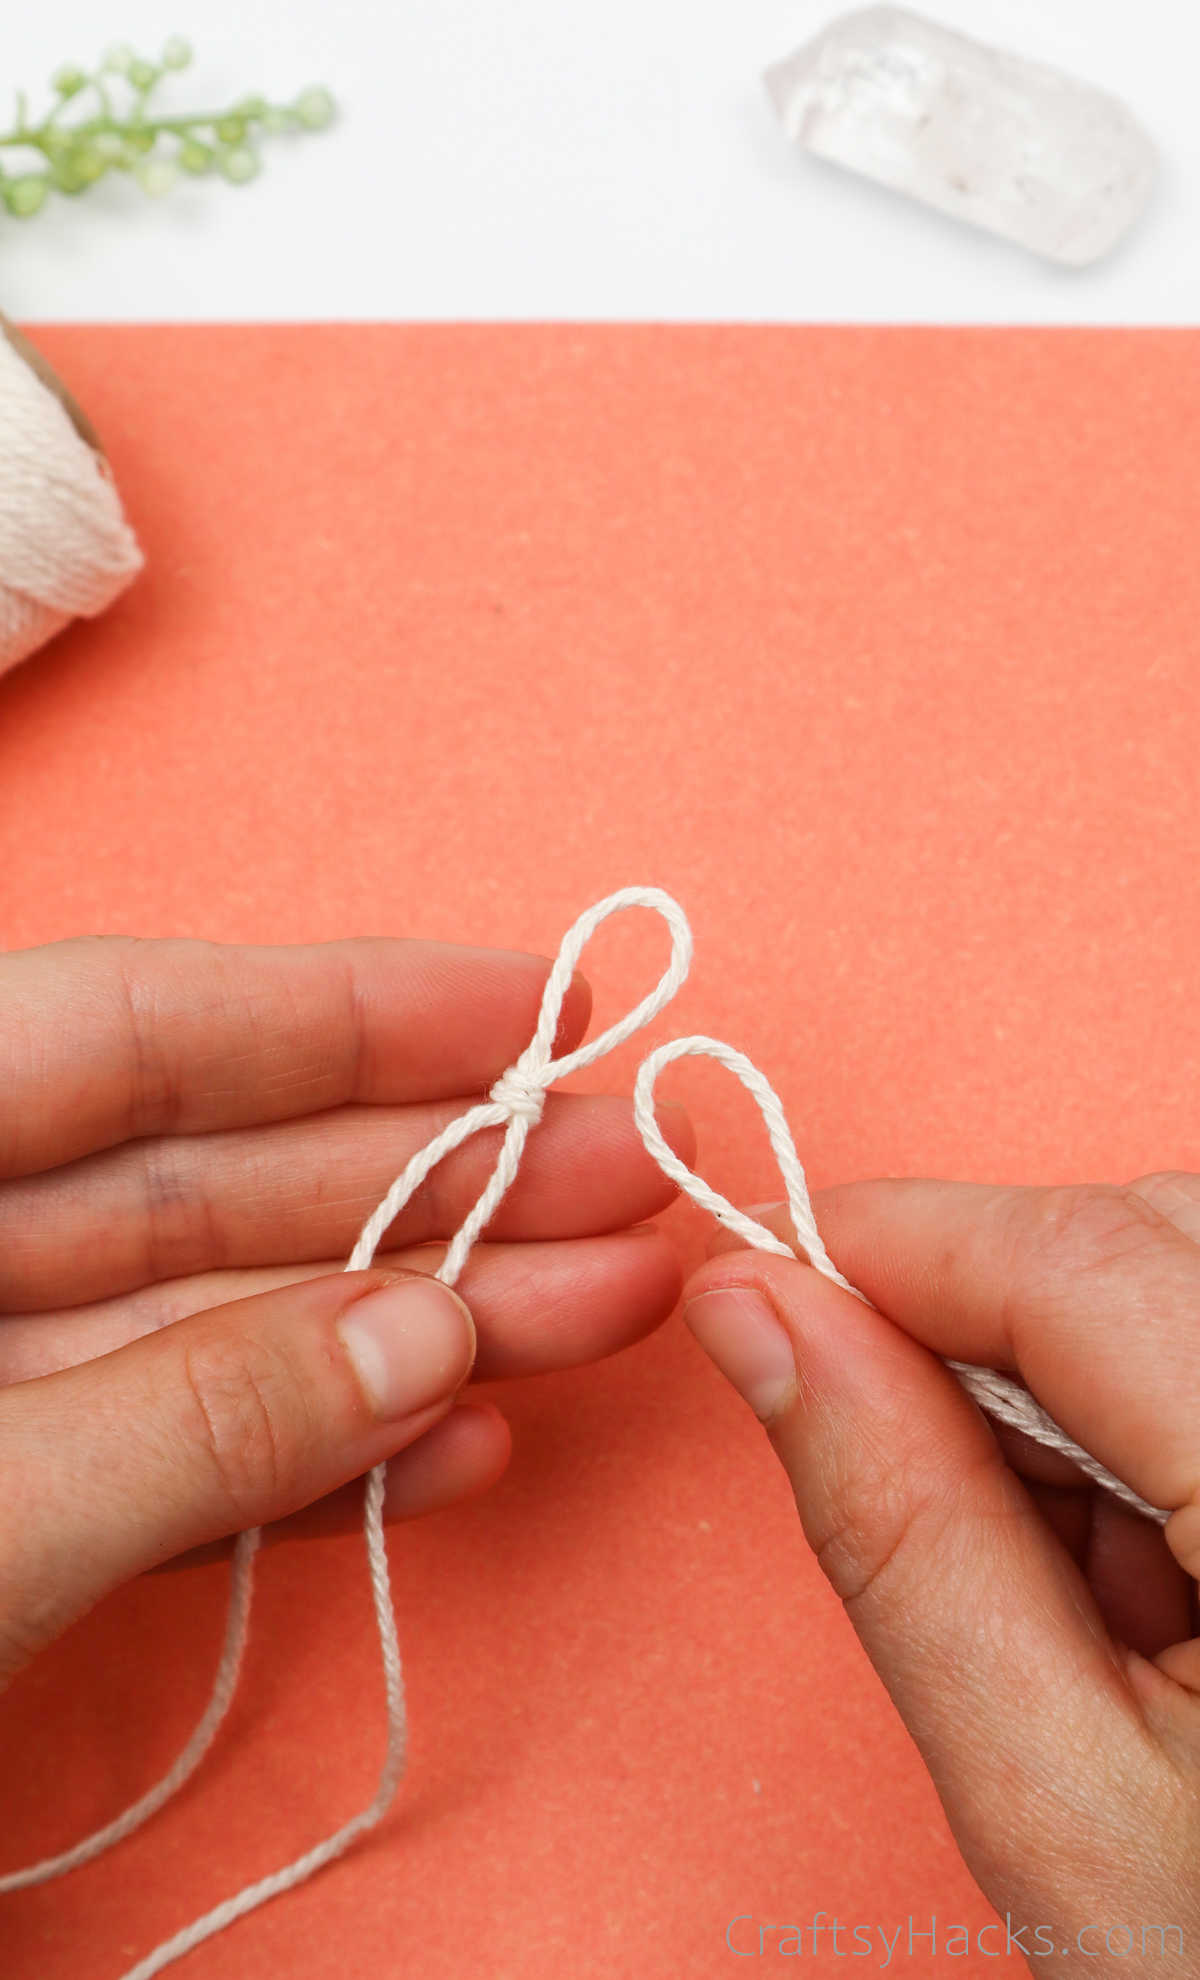
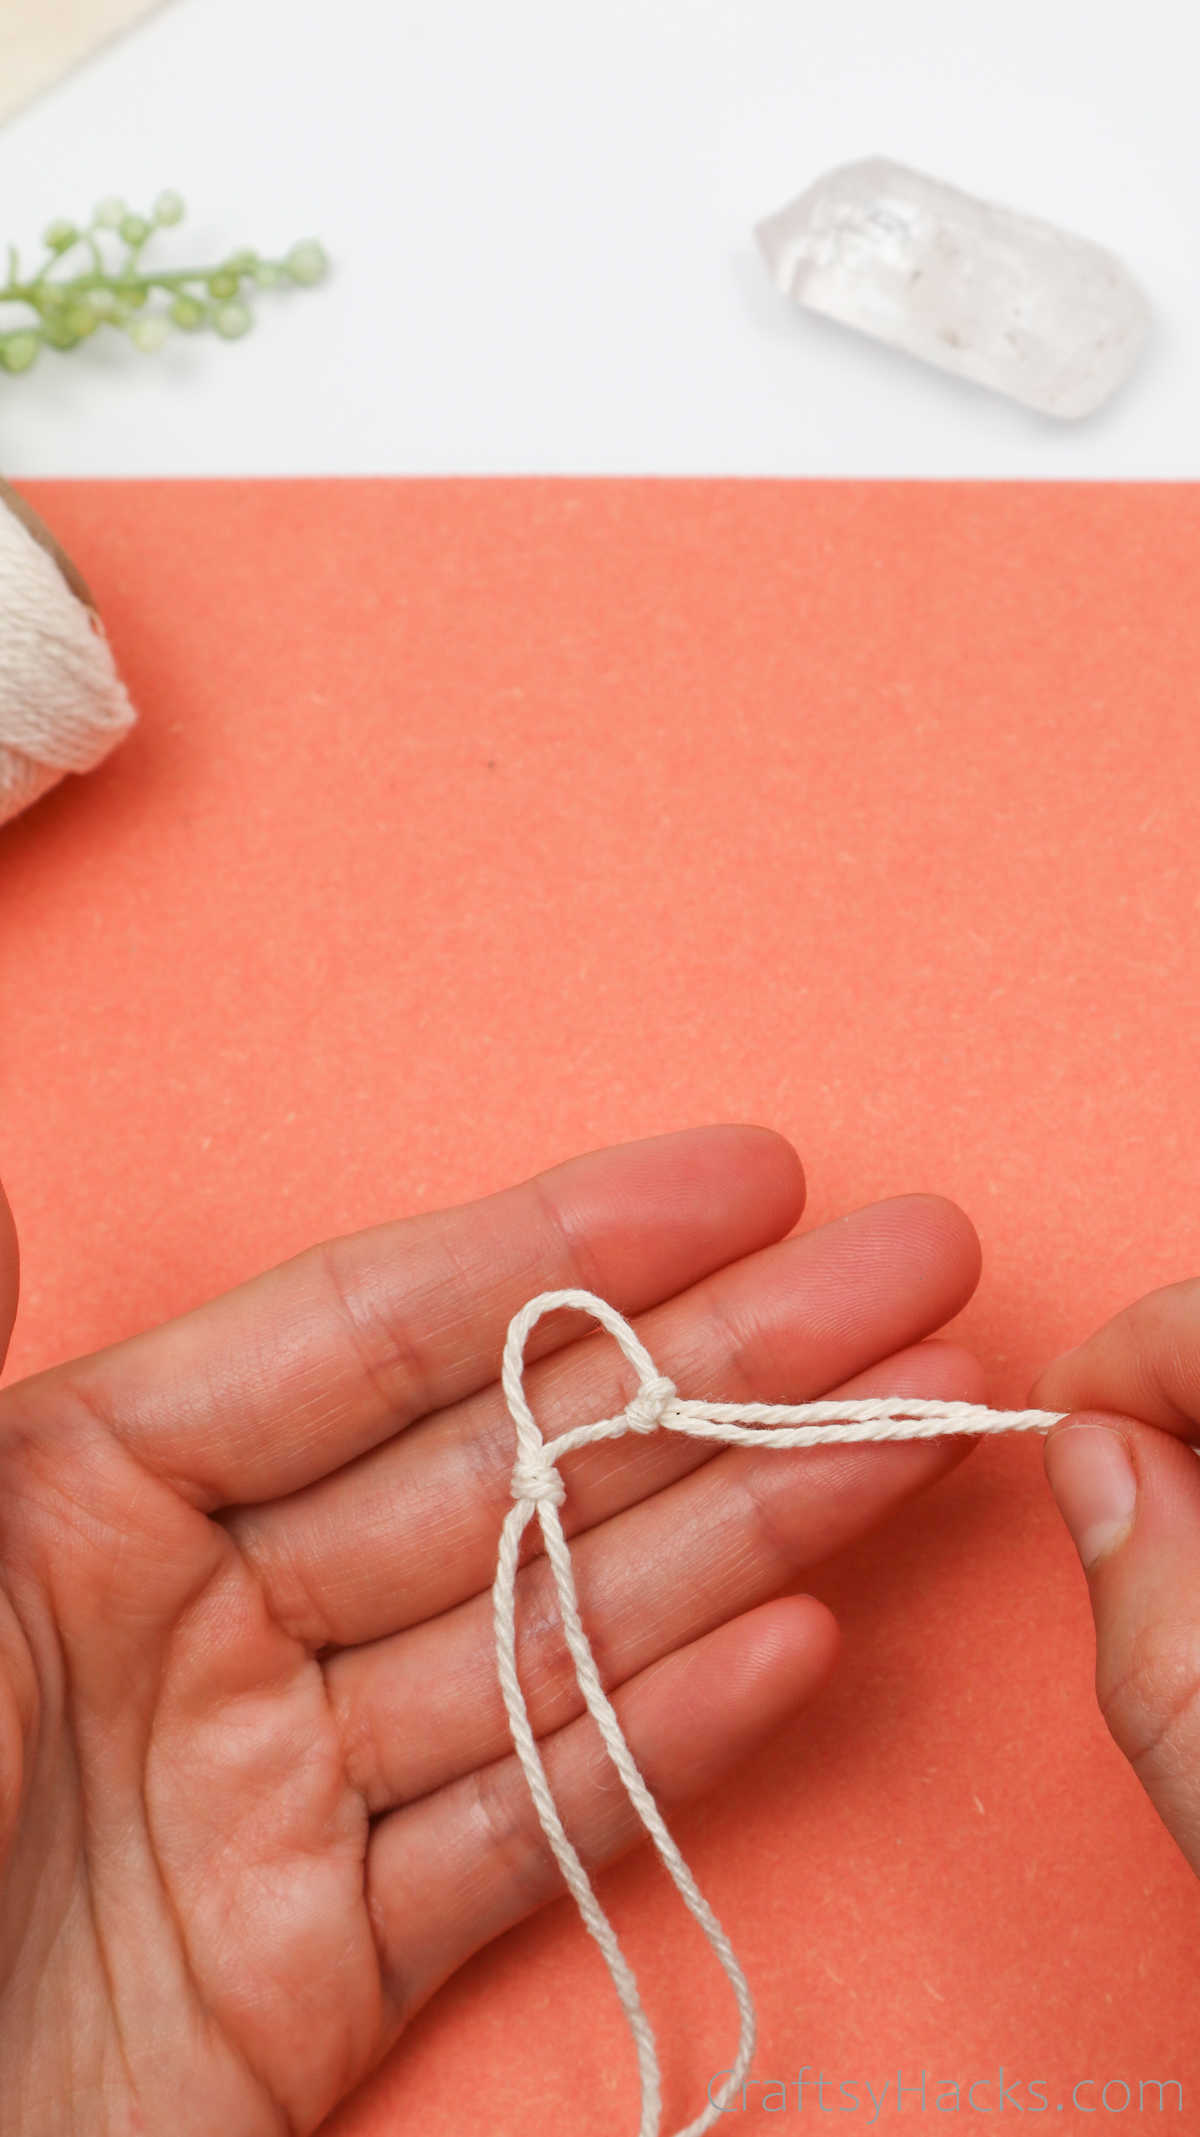
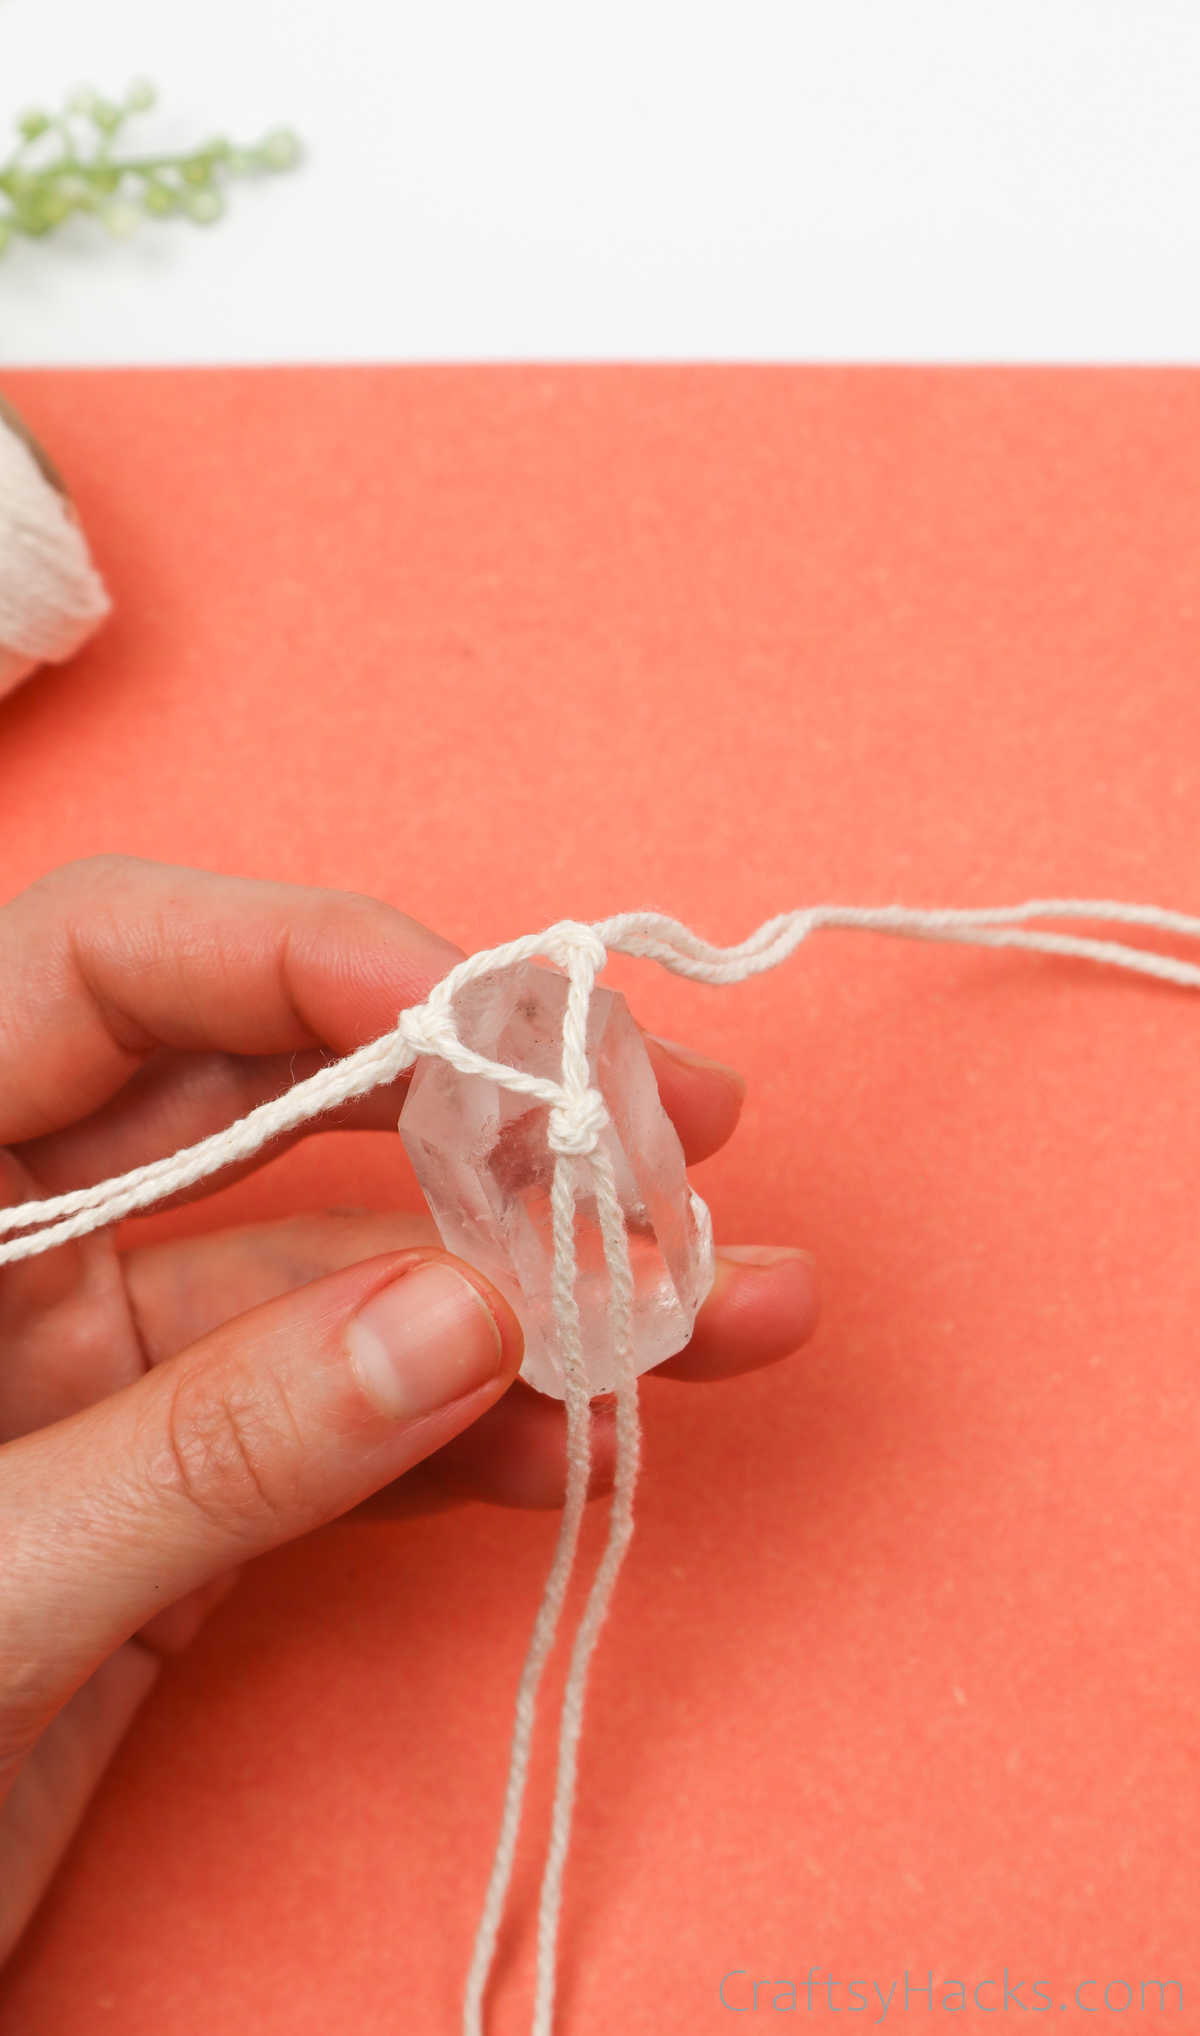
Step 5
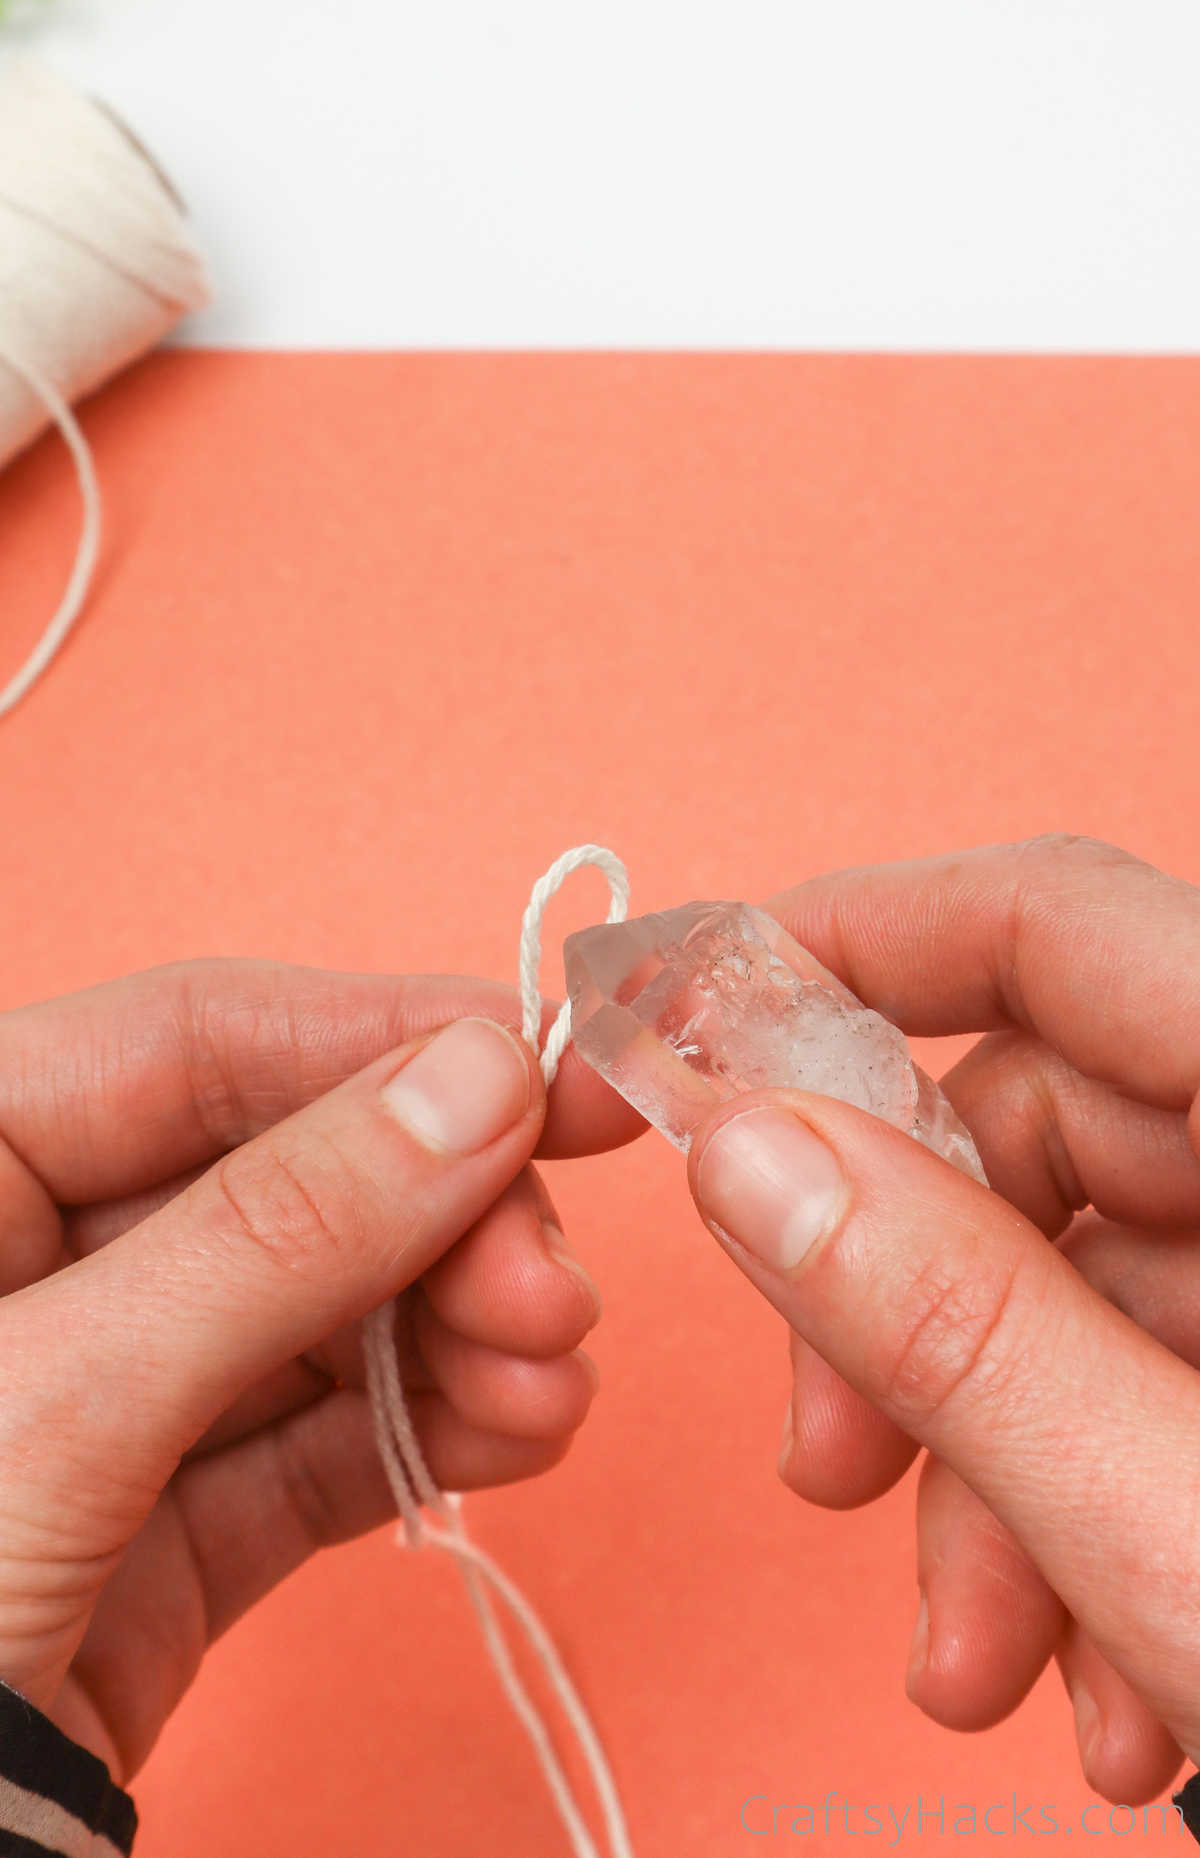
Make a simple knot—your run-of-the-mill overhand knot that you typically make, but with both the cords.
Fit the crystal in there to make sure you’ve got the measurement right, and then set it aside for later.
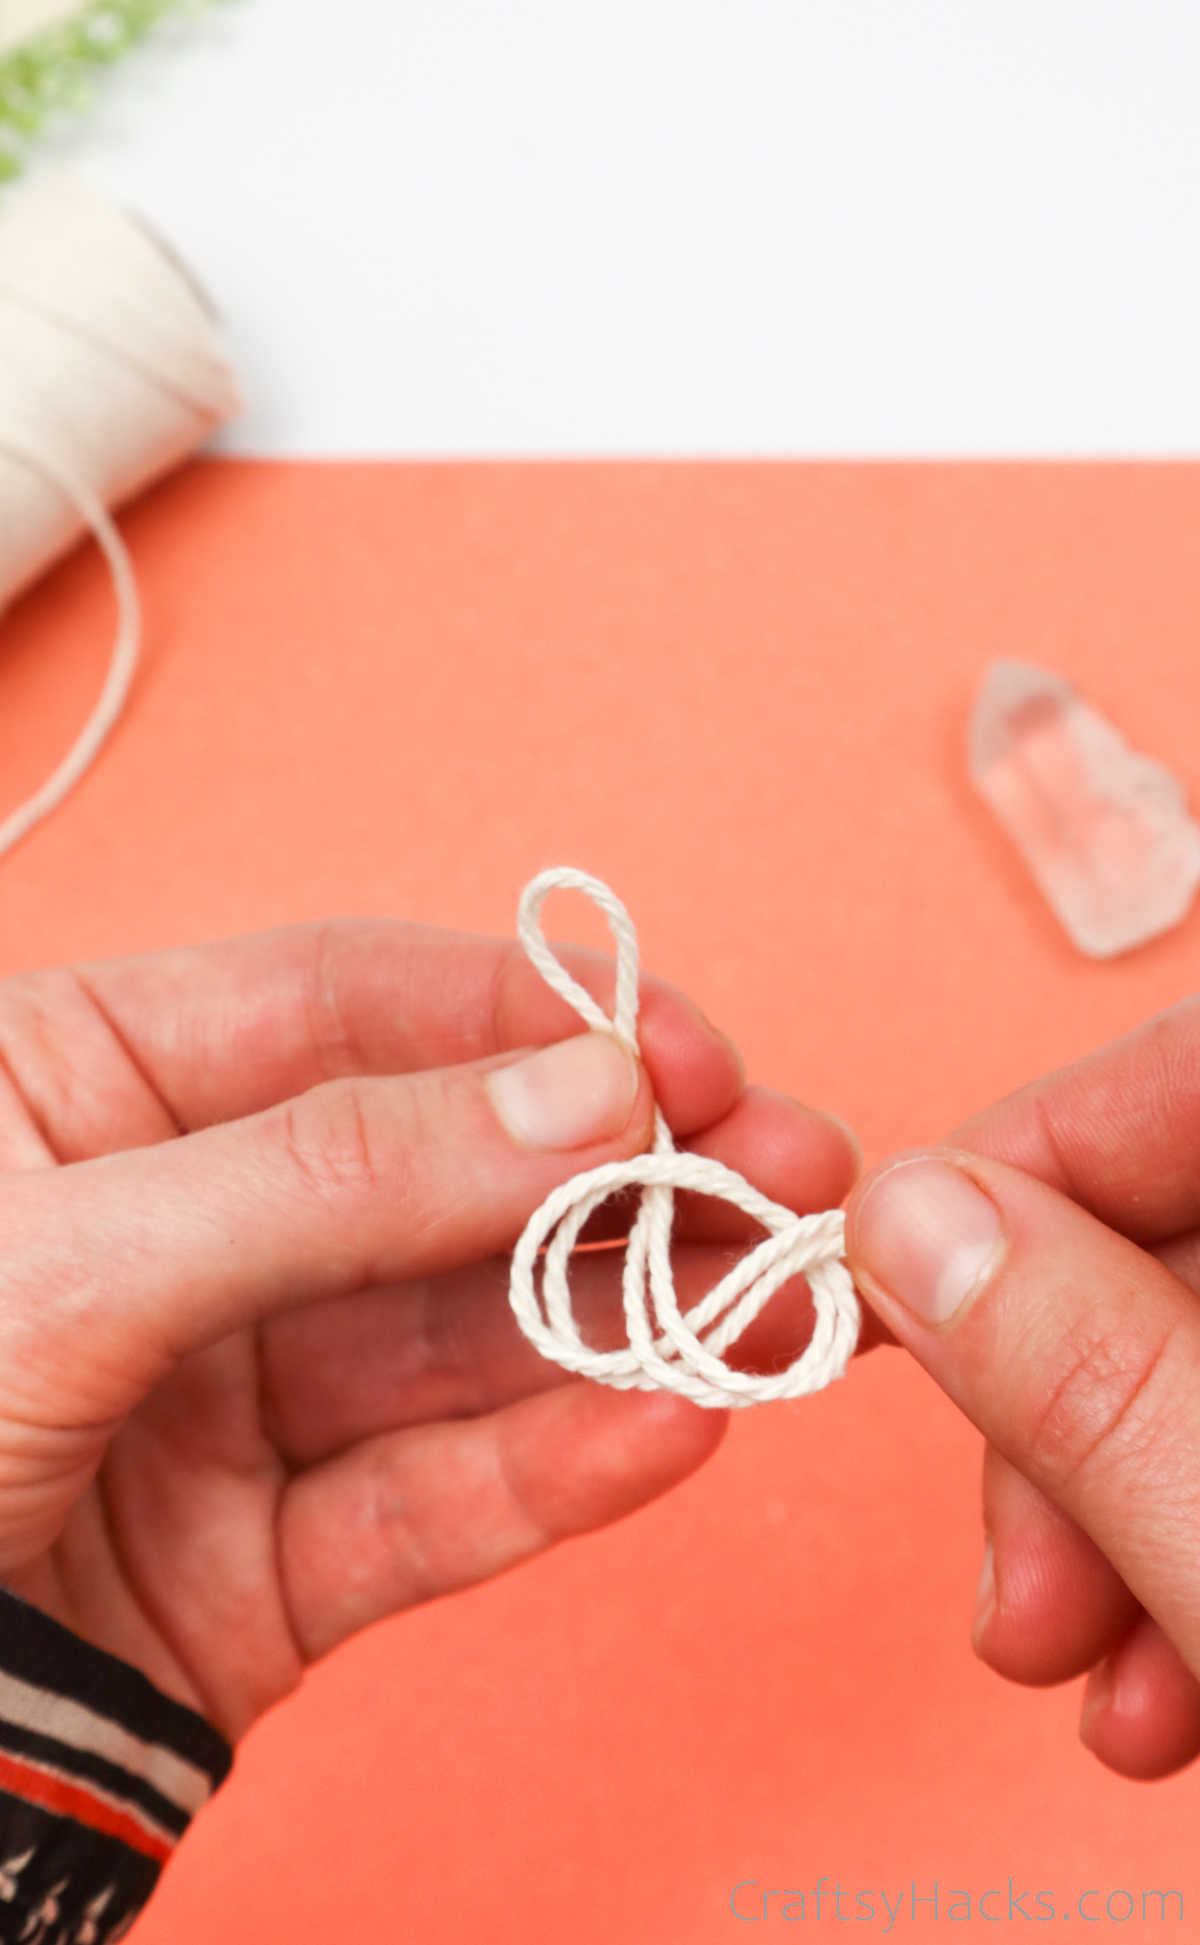
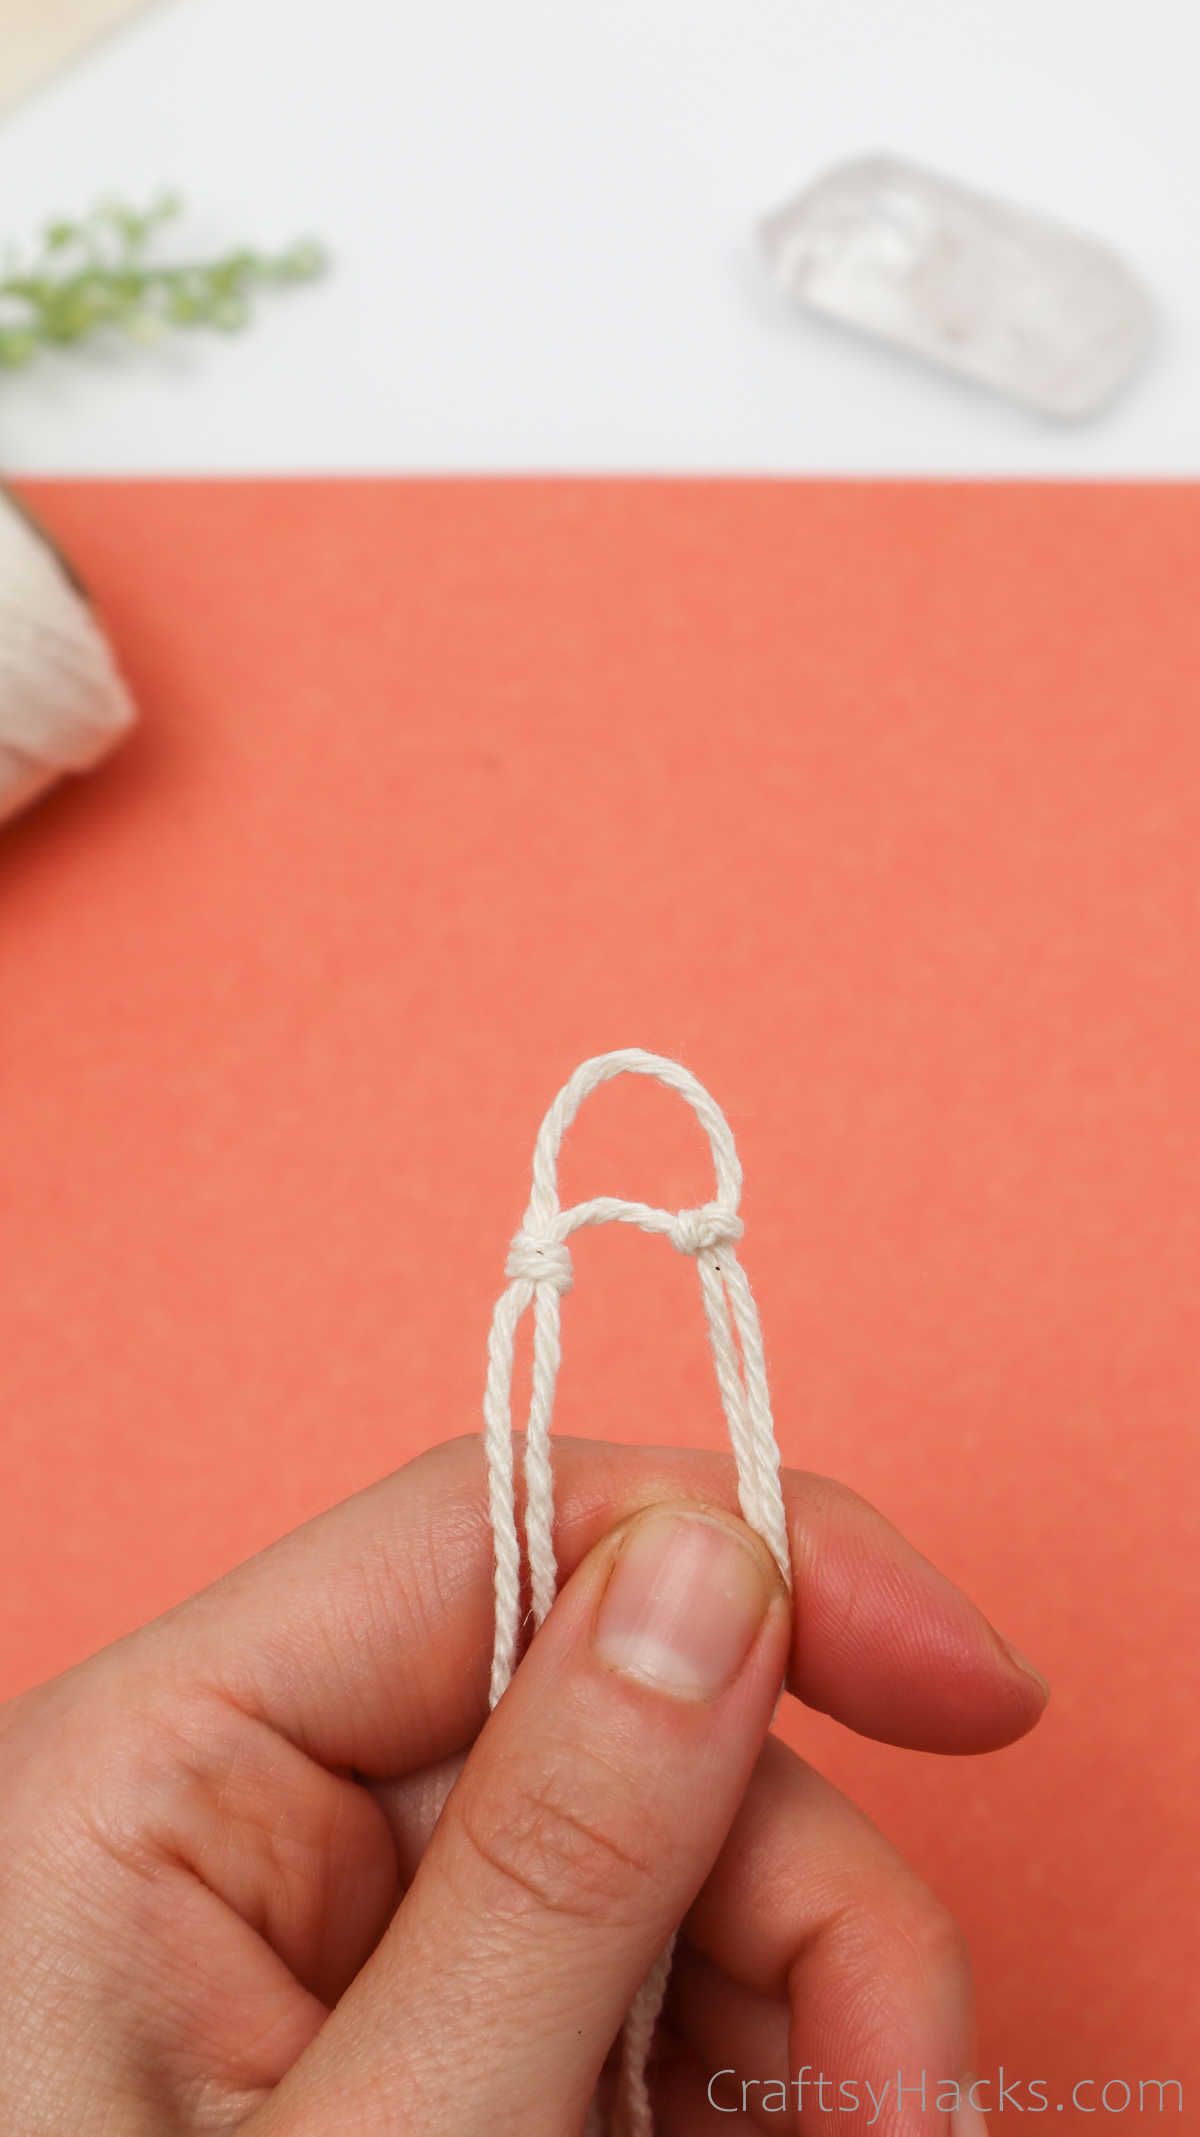
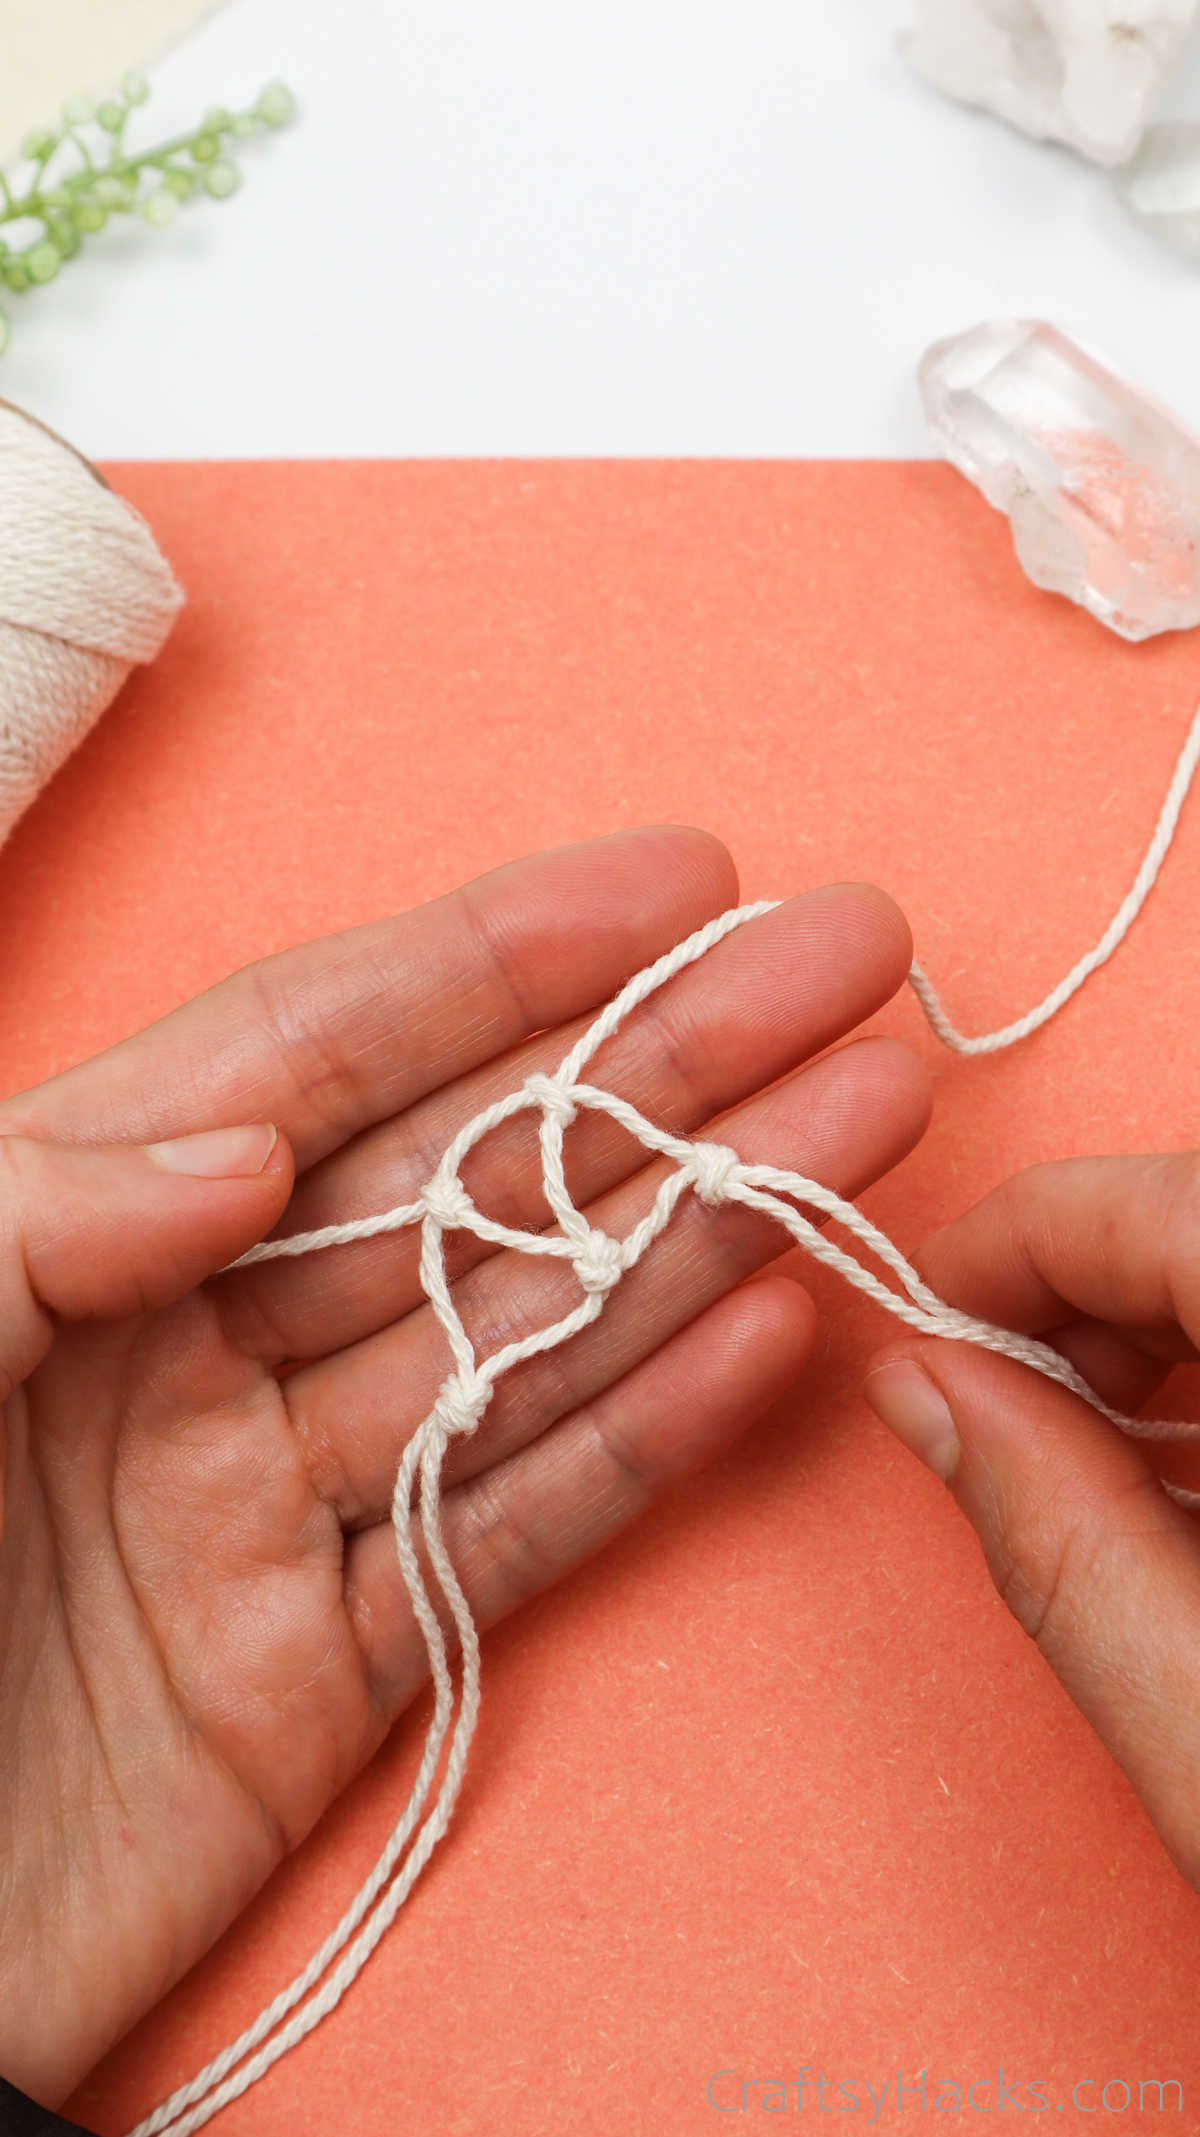
Step 6
Next, grab your second cord—the second of the three you cut earlier. Pull the loop of the second cord through the loop of the knot you just made, as seen below.
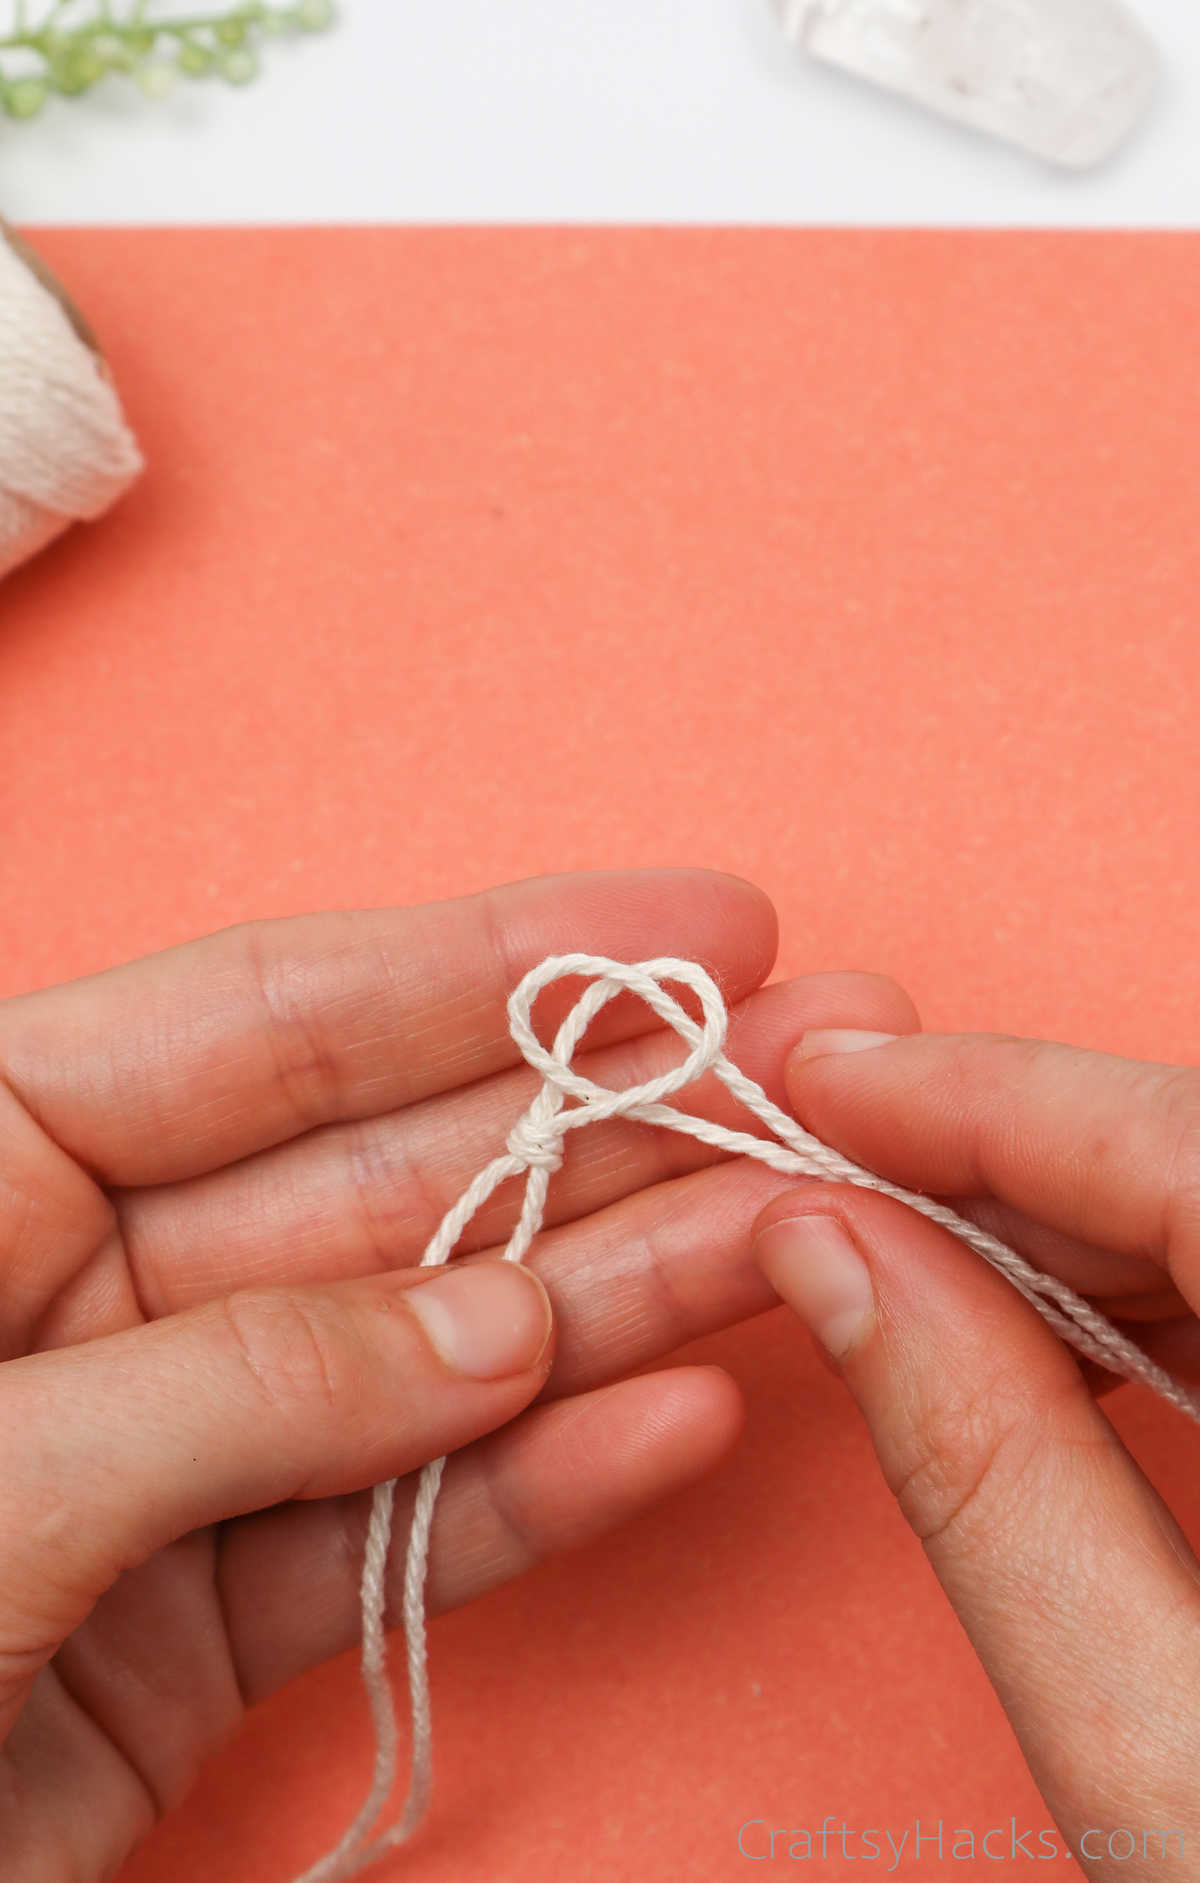
Then, grab the loose ends and pull them through the loop to create another knot.
Make sure you leave enough space to fit another knot on the loop. The space between the three knots should ideally be even, so keep that in mind before you tug the second knot in place.
Tug firmly to secure the knot on the first loop firmly in place. You should have something that looks like this picture when you’re done.
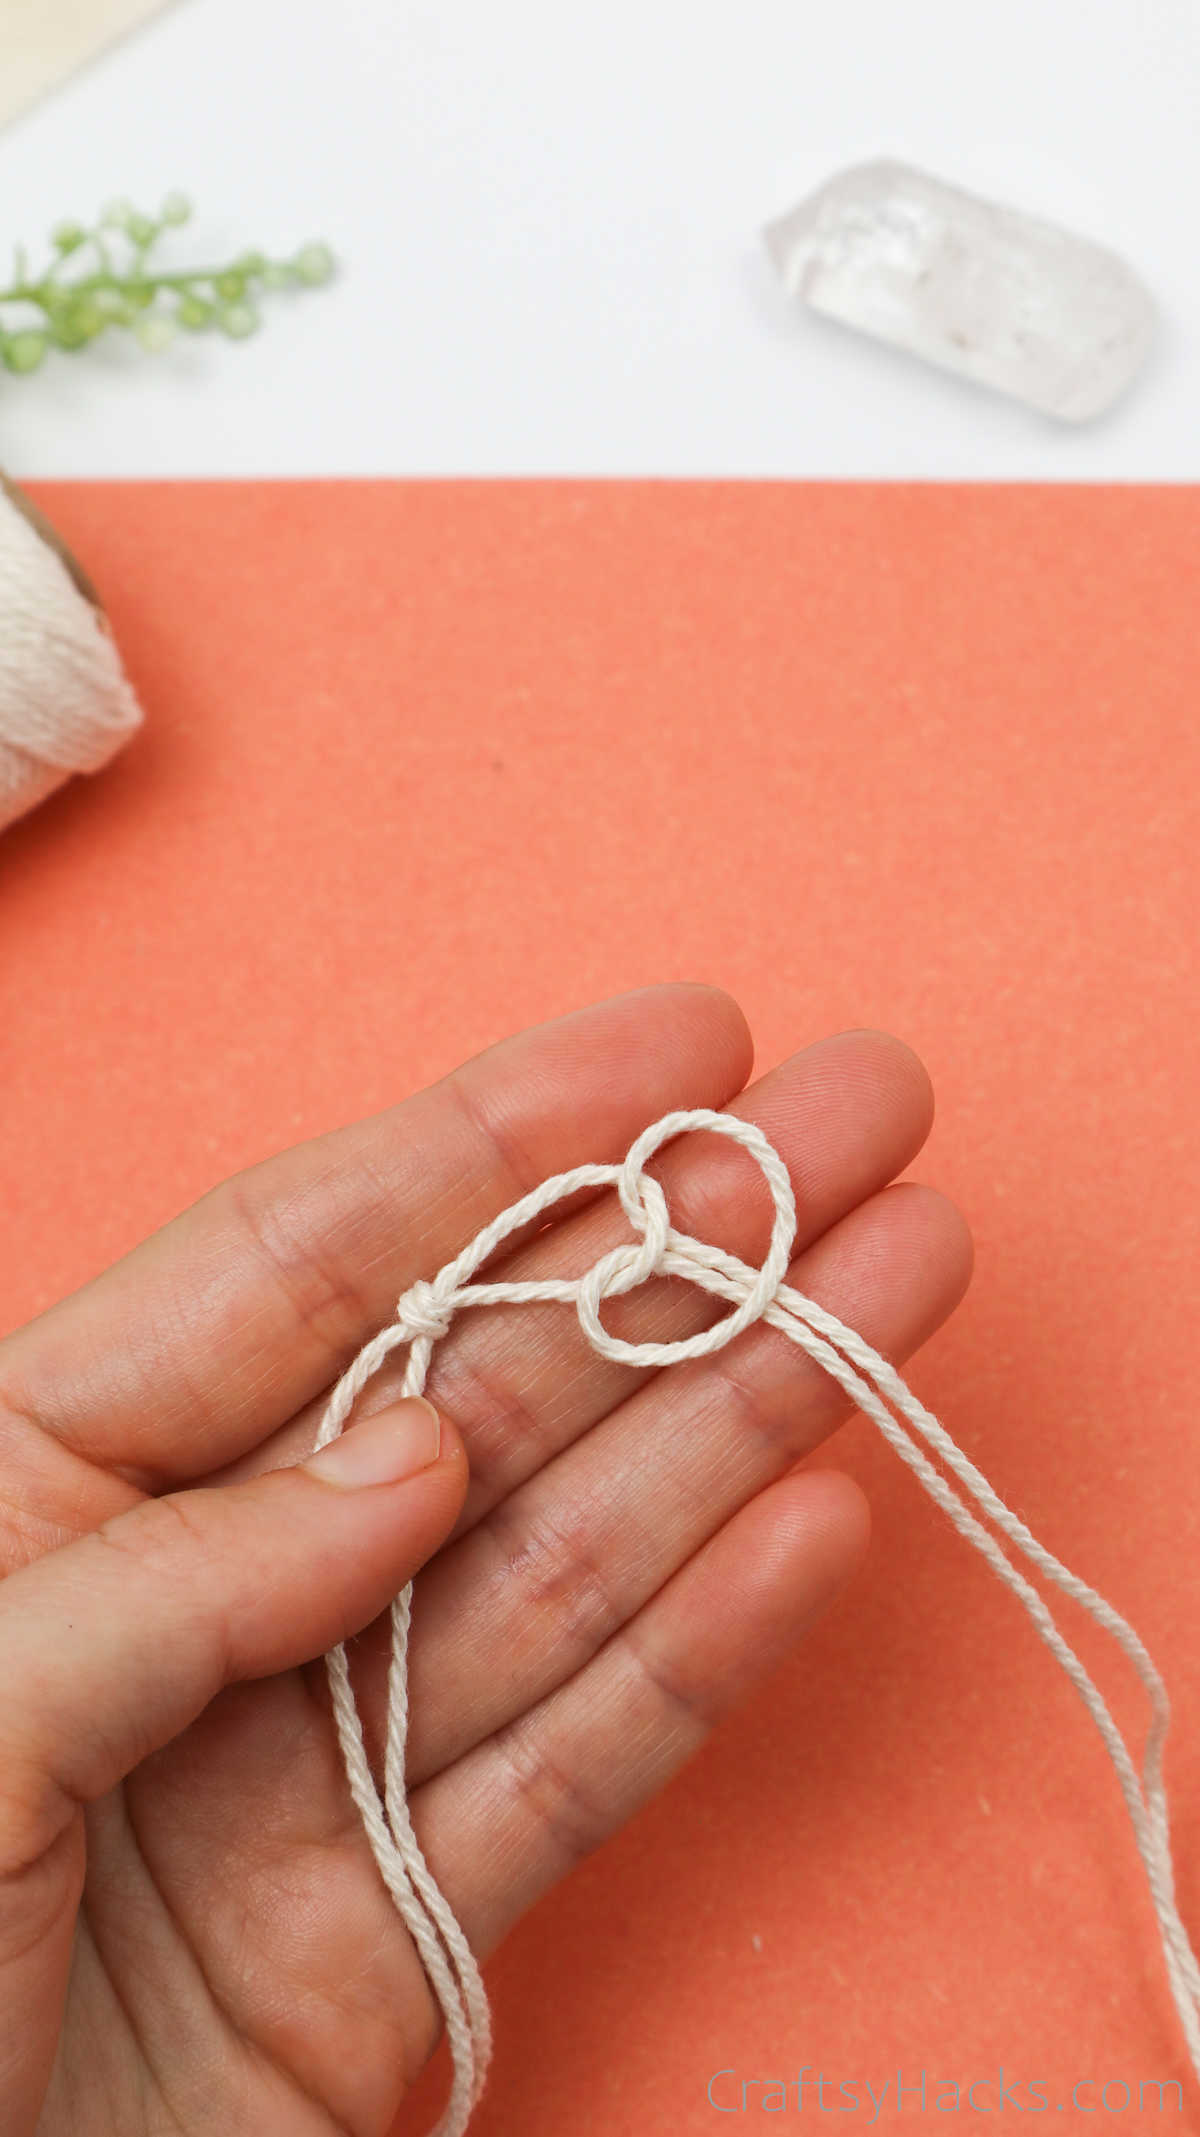
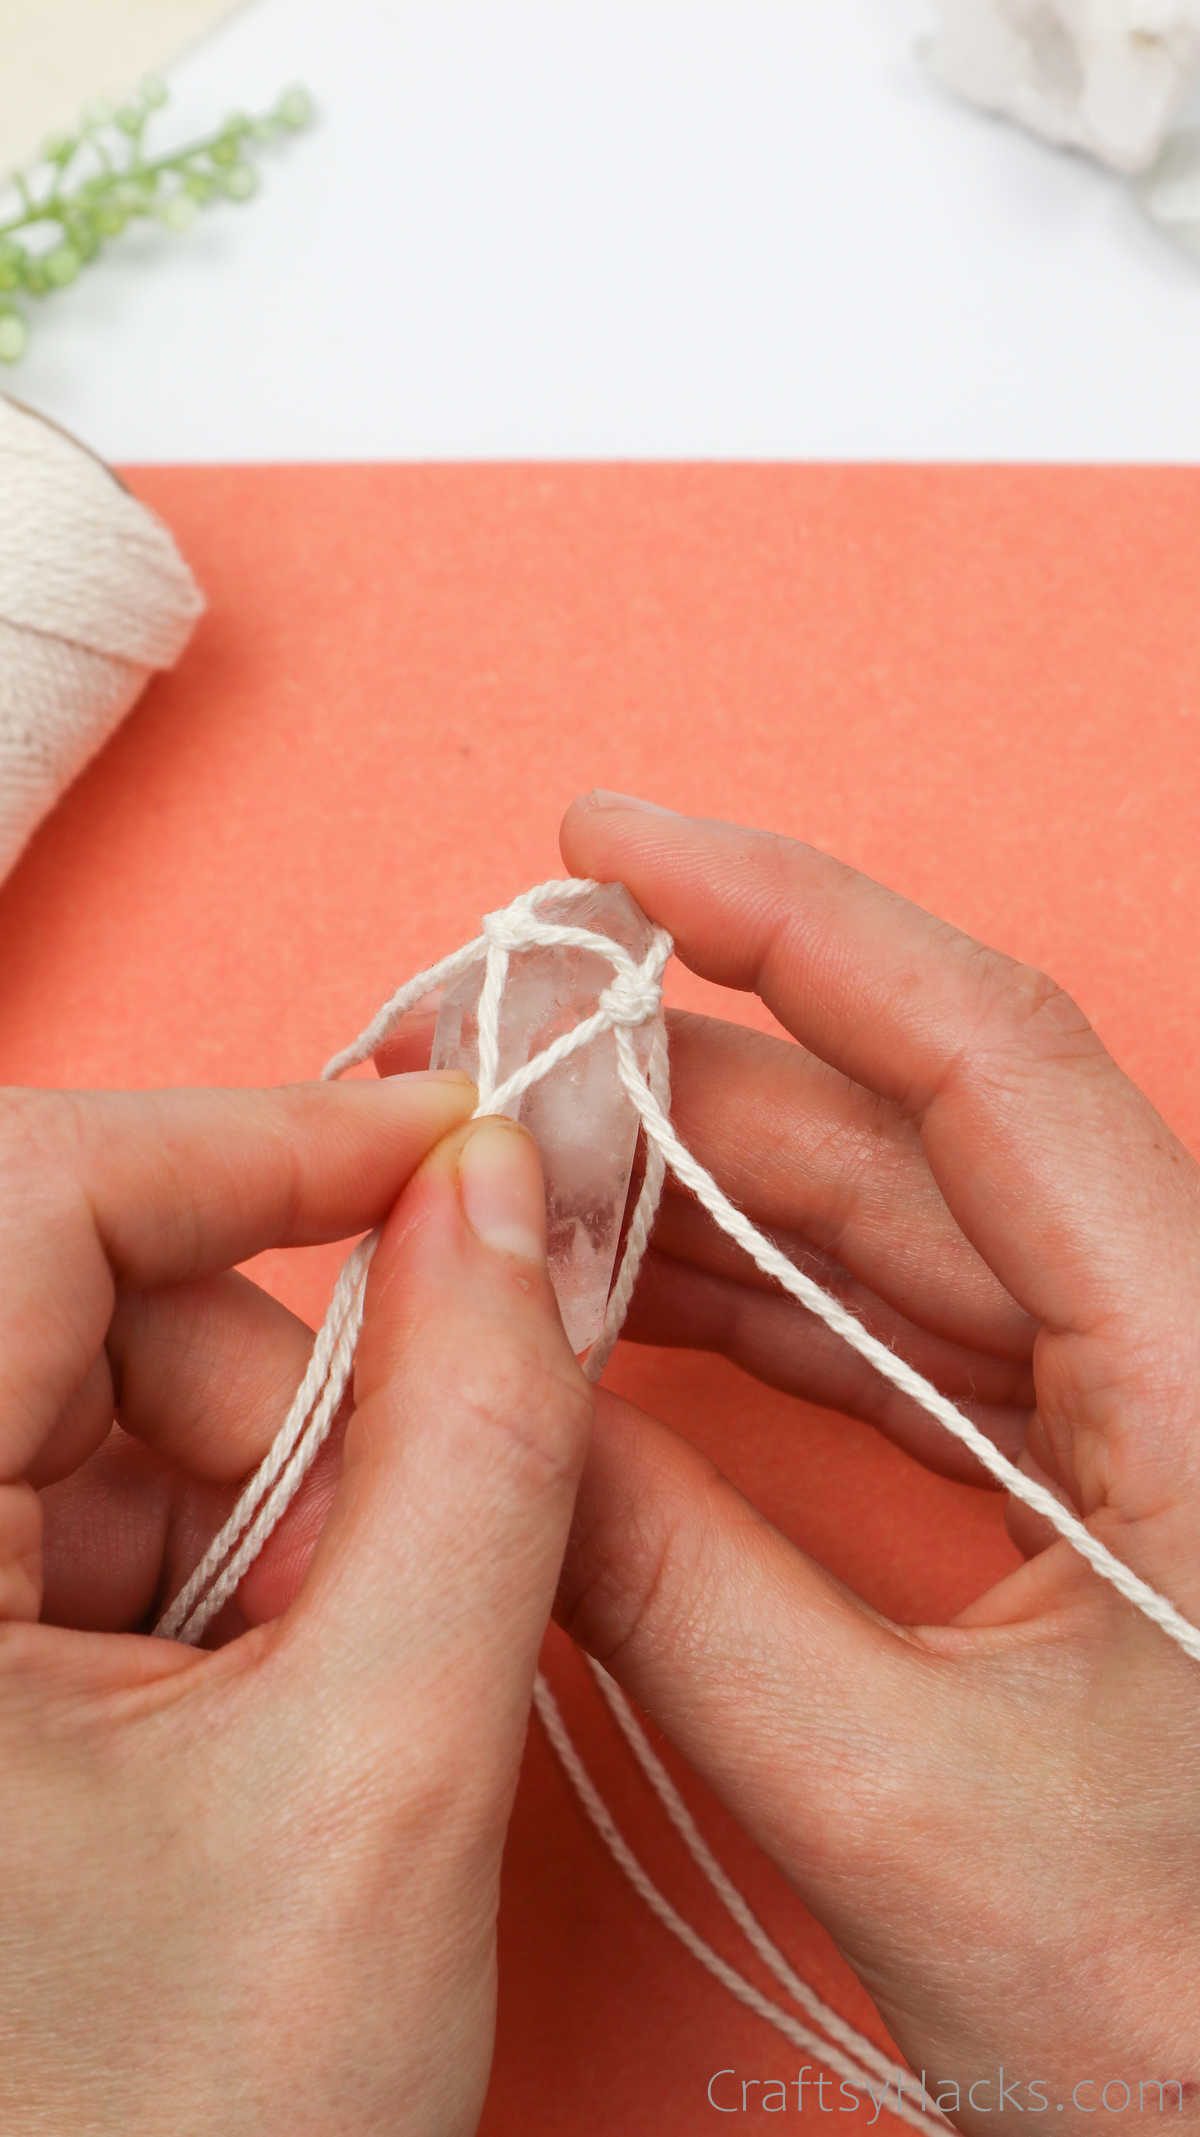
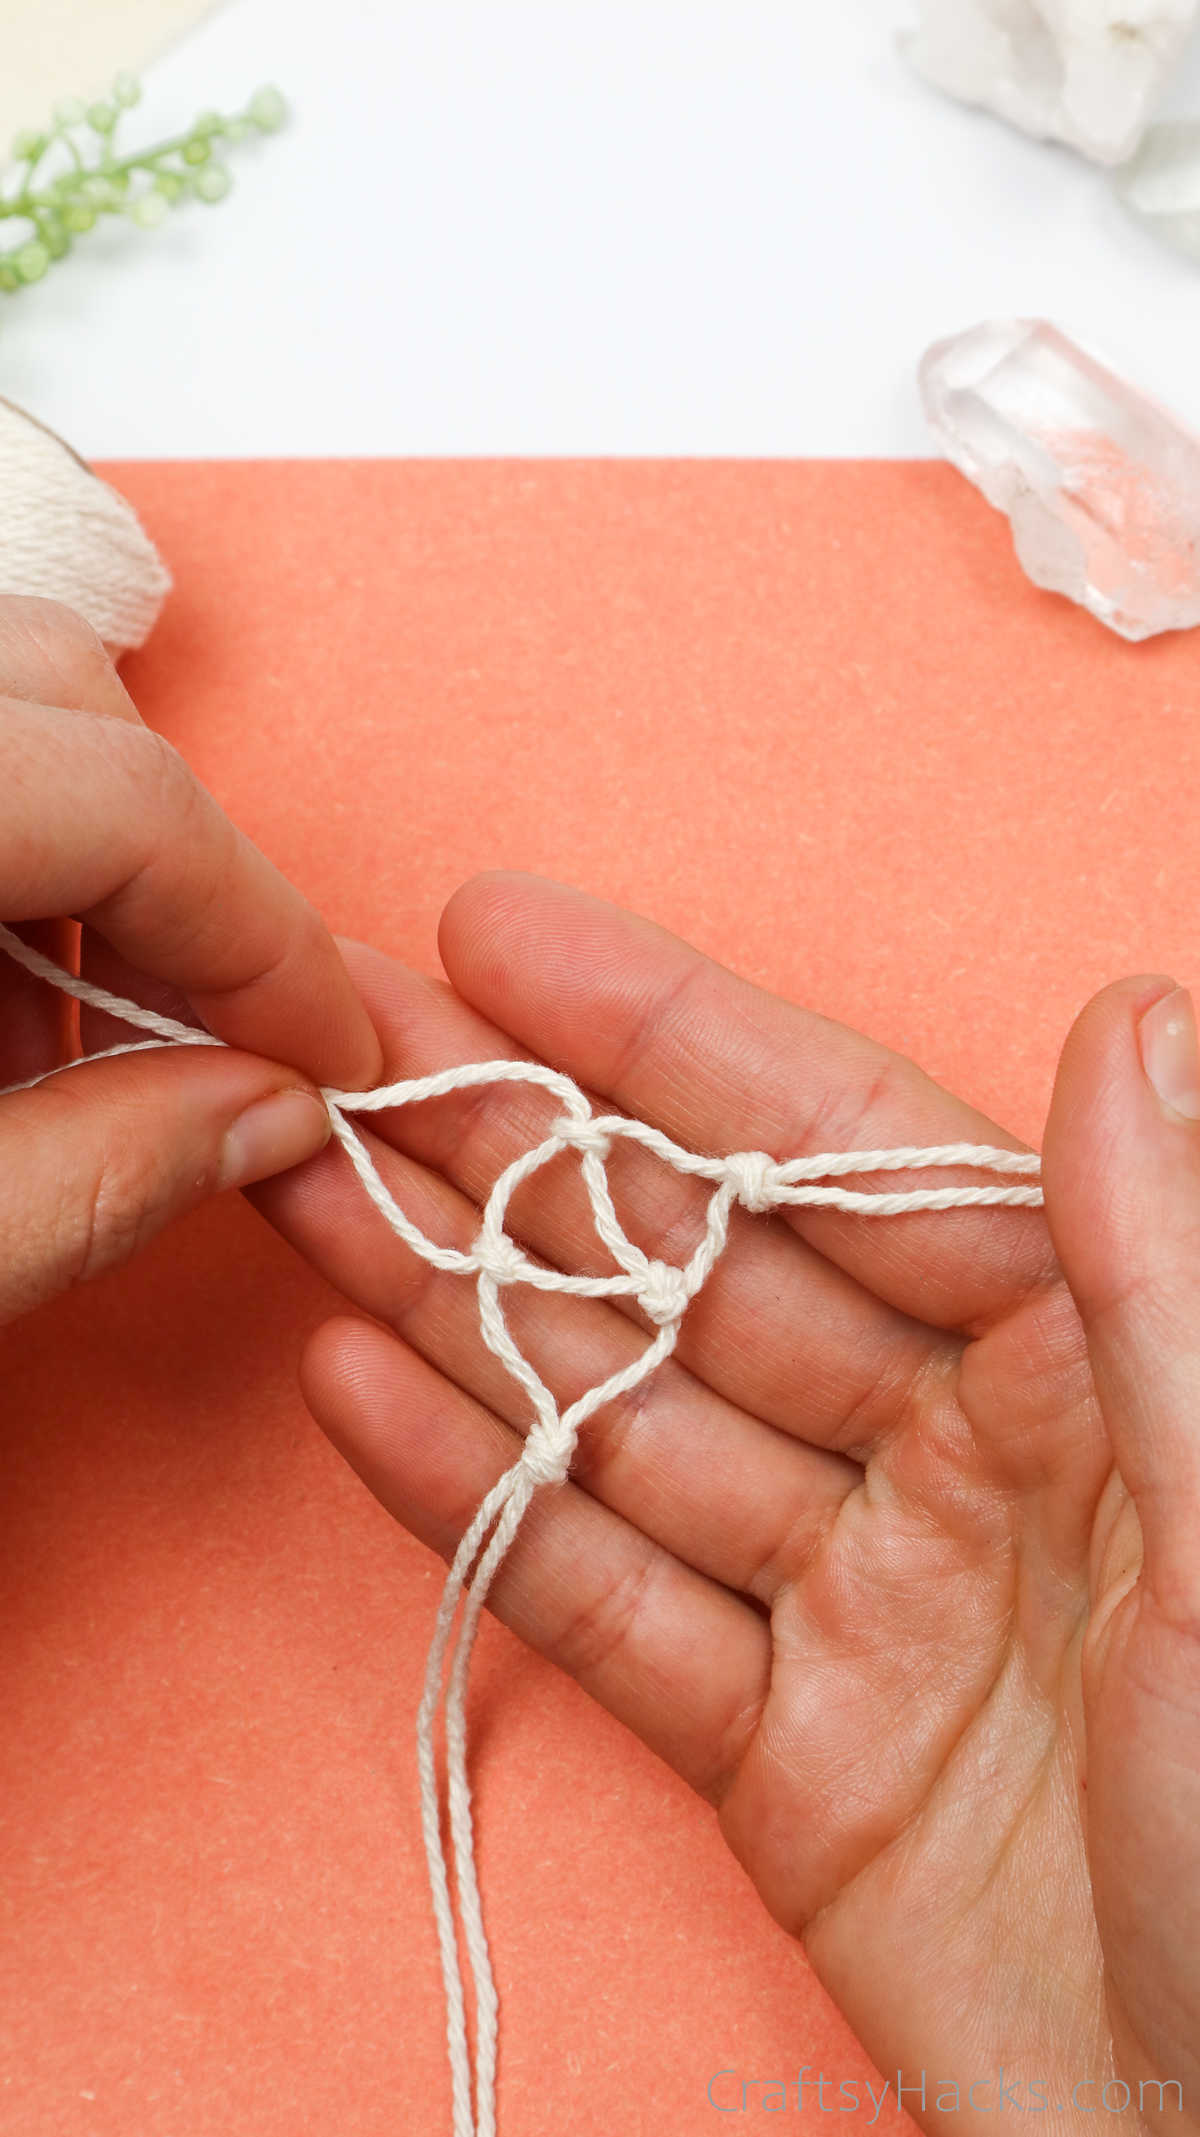
Step 7
Take hold of the third cord and repeat step 6 in the space you allocated for this third knot.
The three knots you just made should form a triangular base for the crystal. This is how it should ideally look.
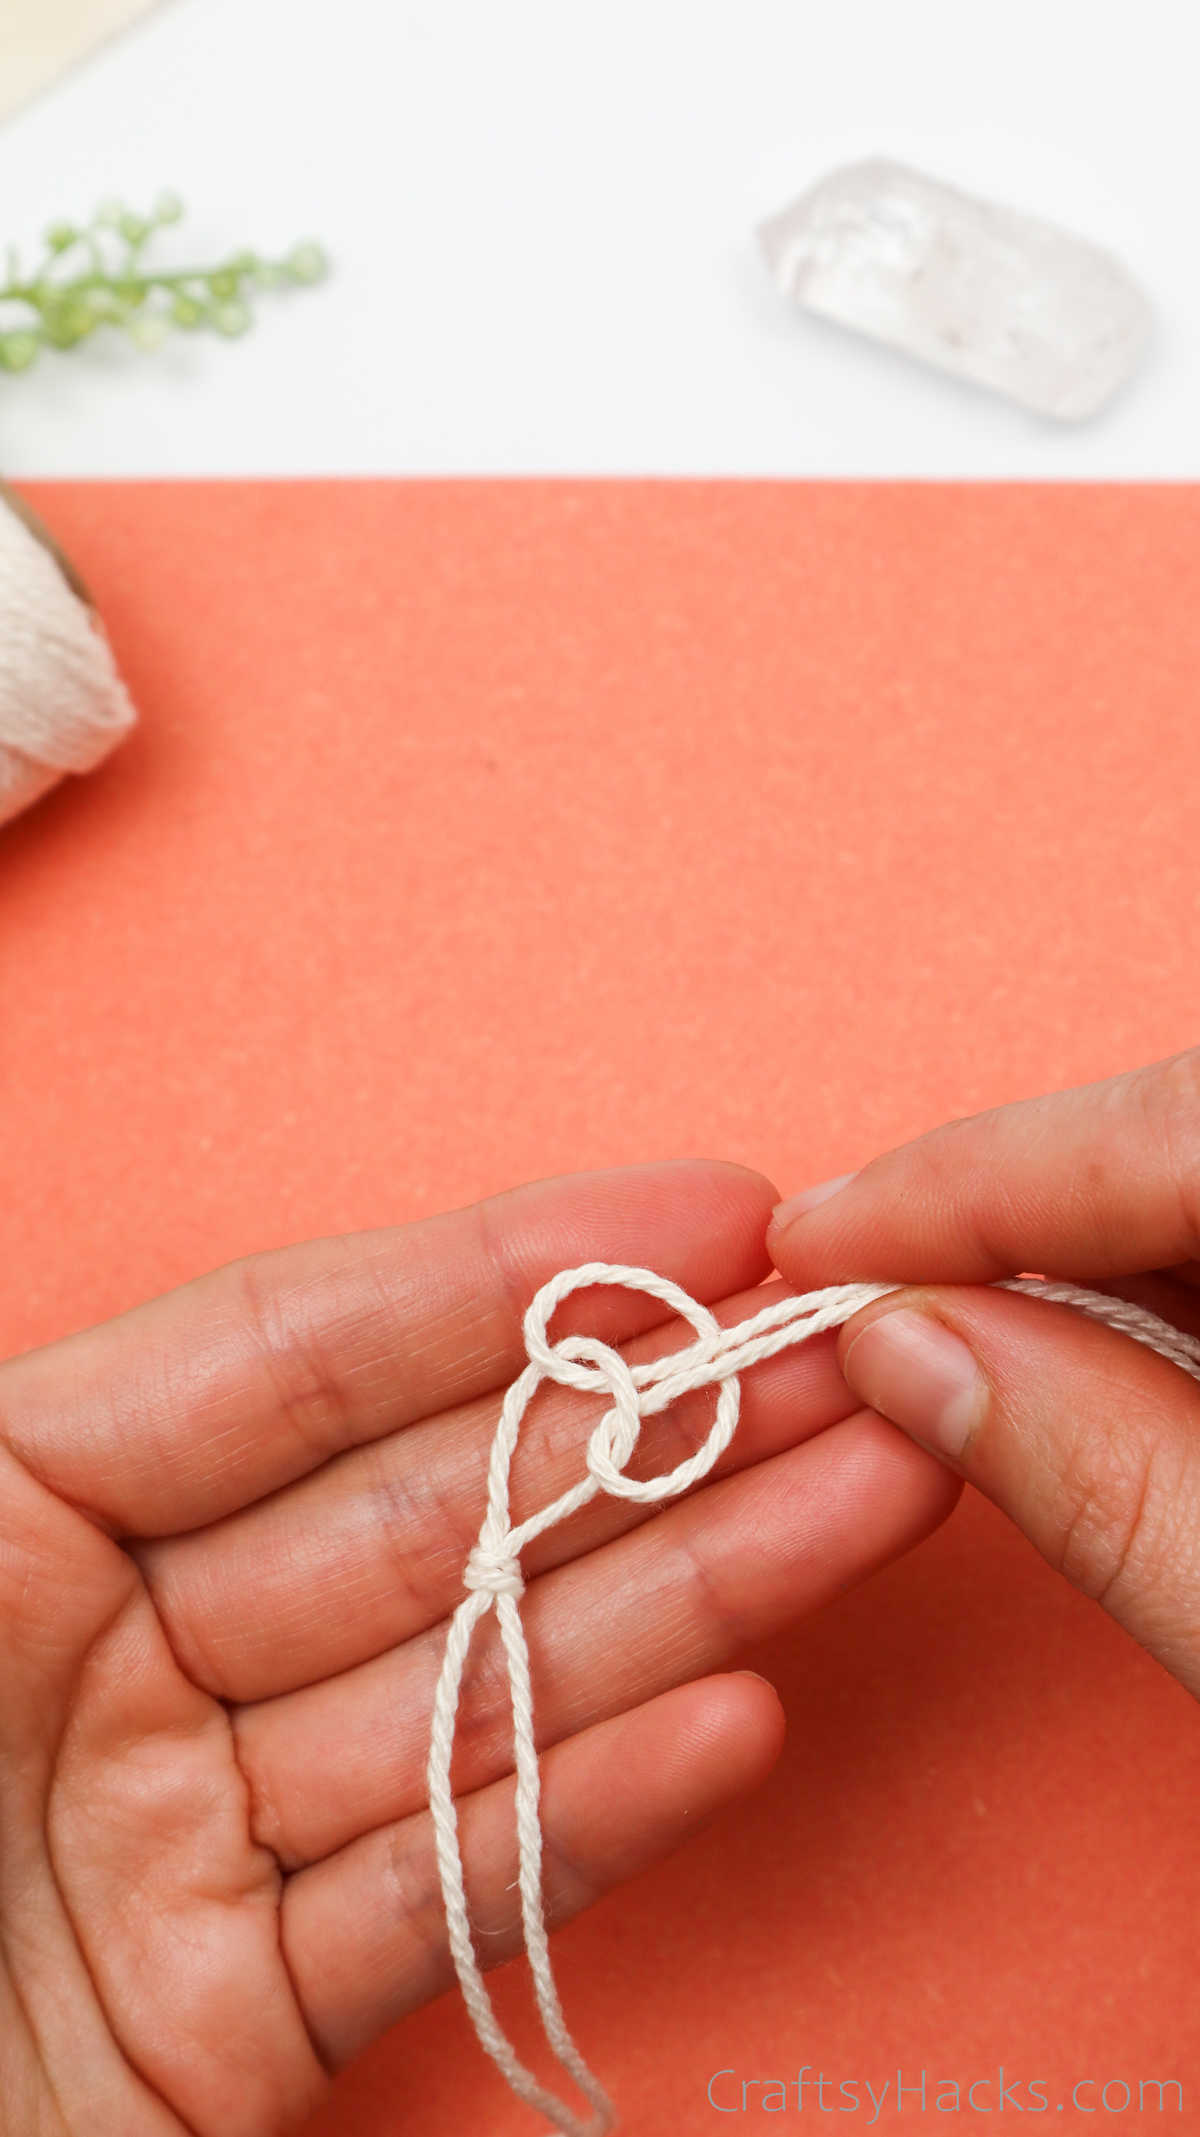
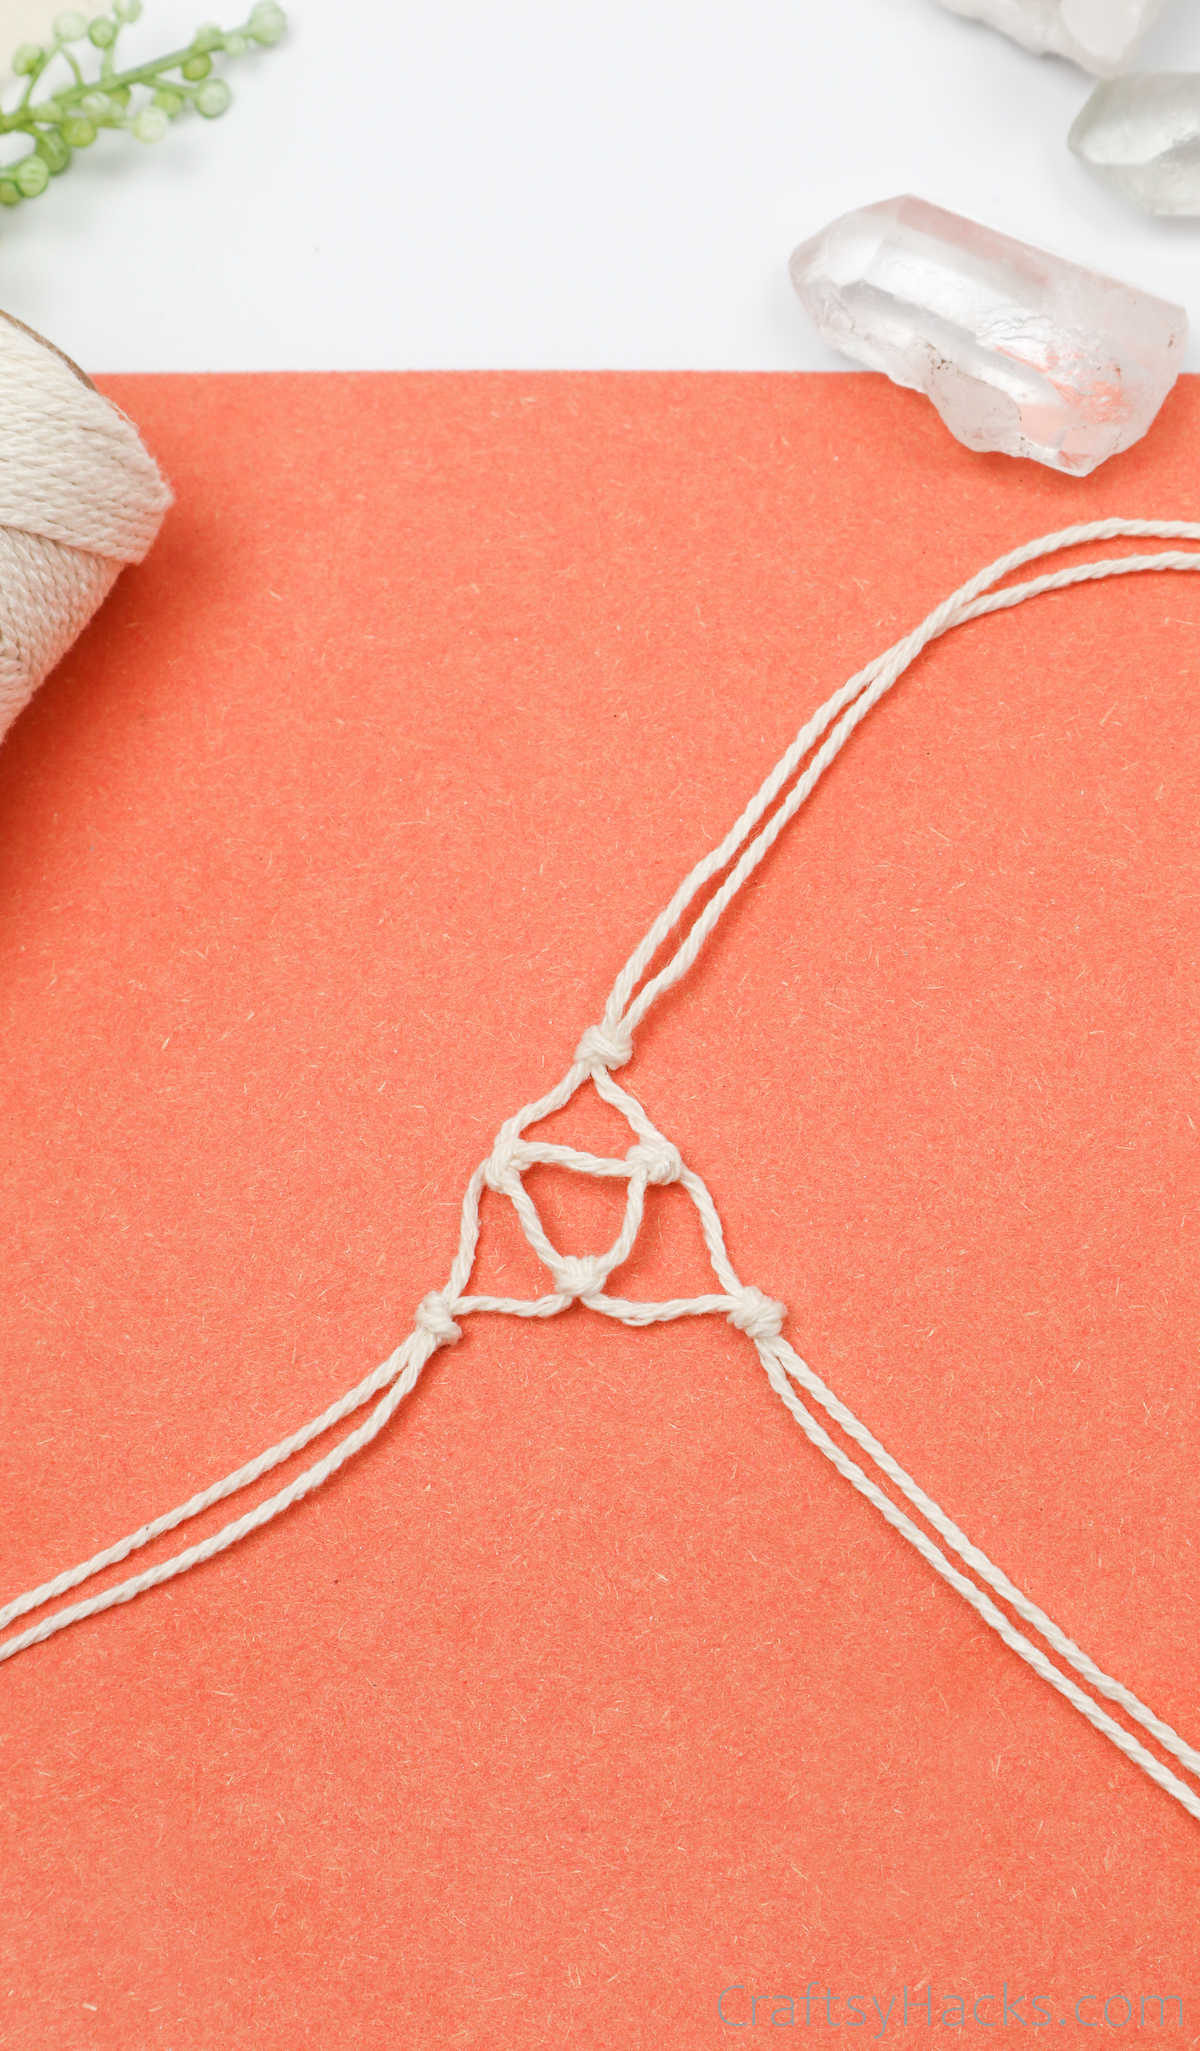
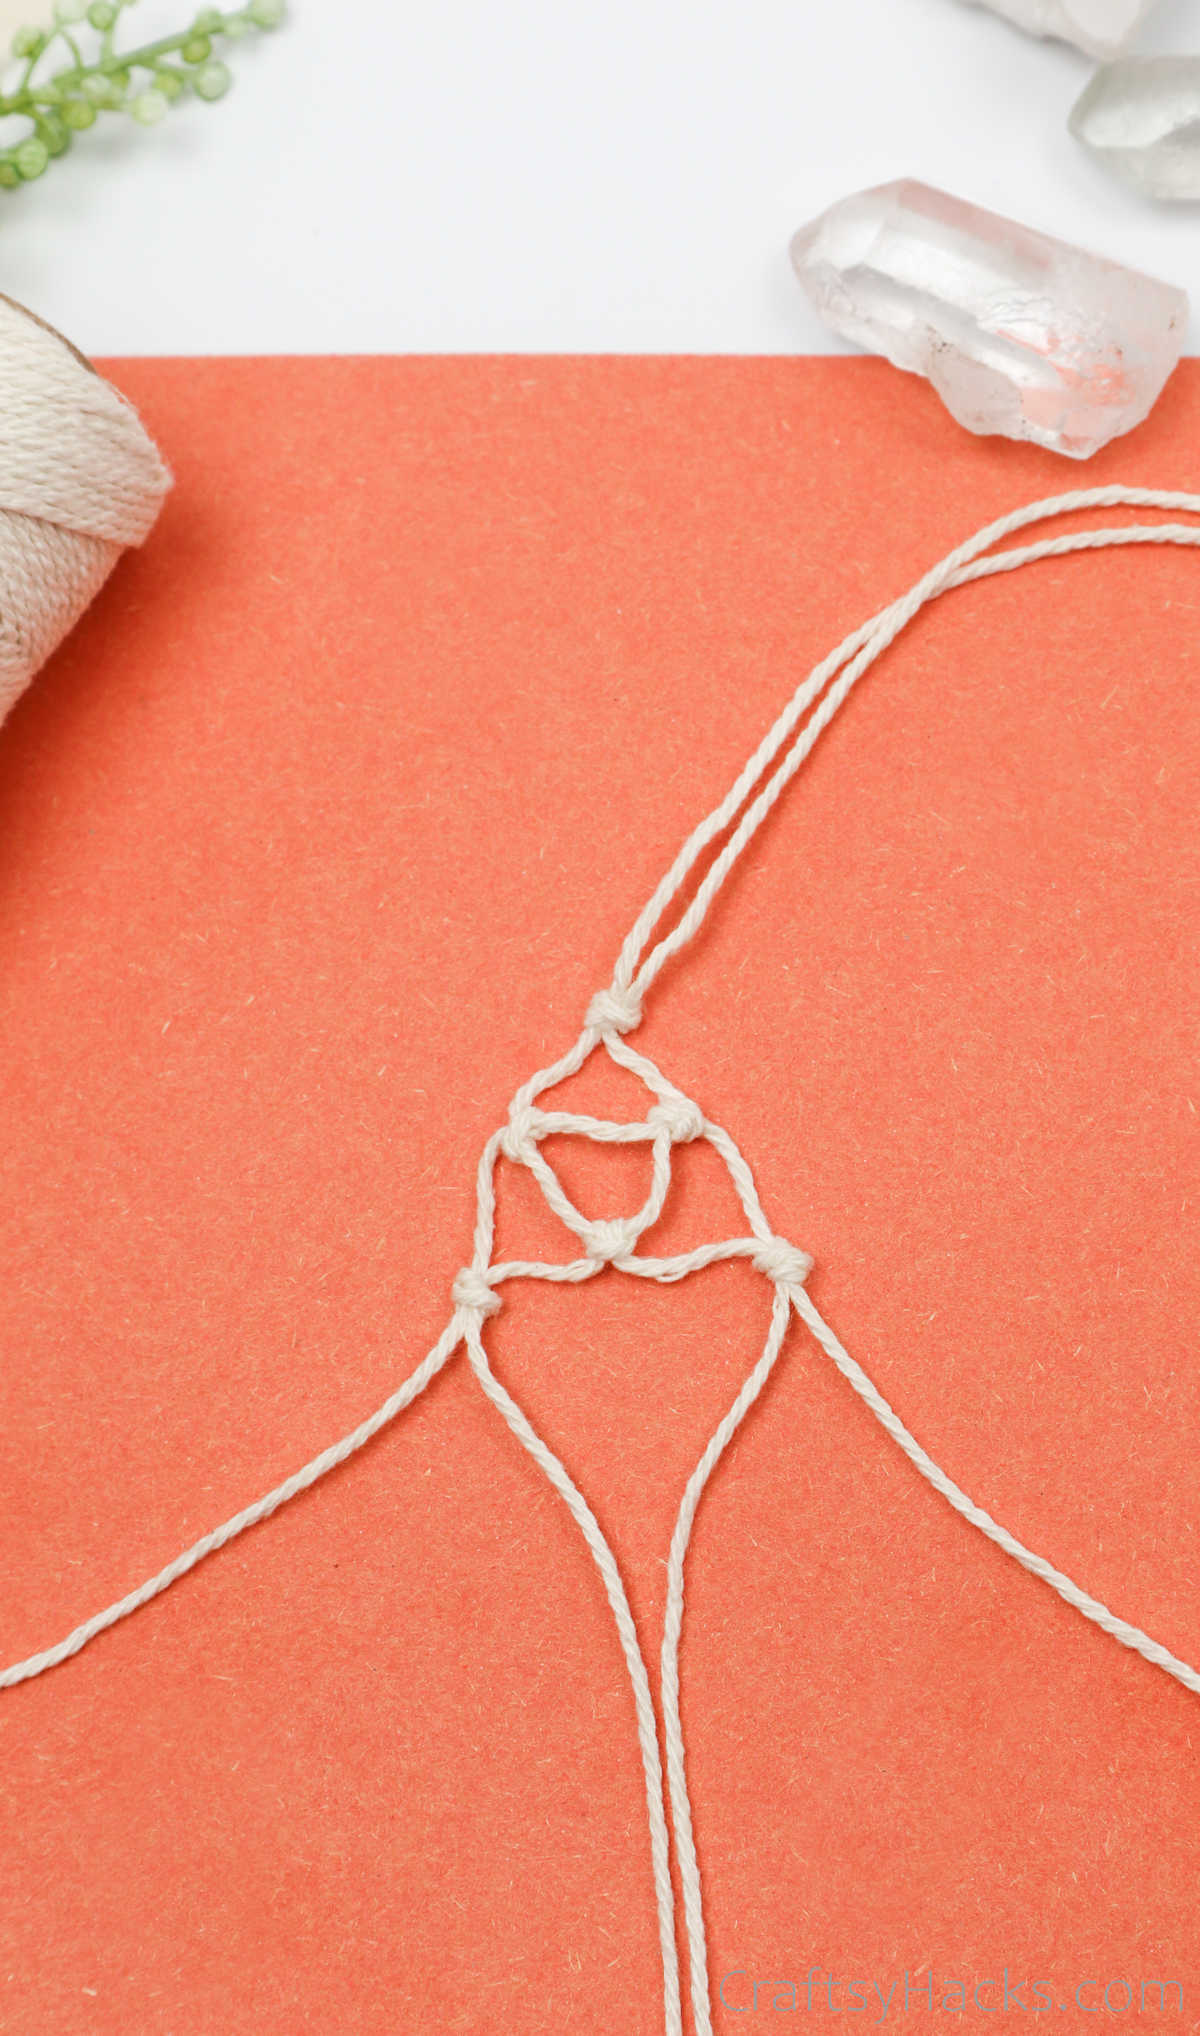
Step 8
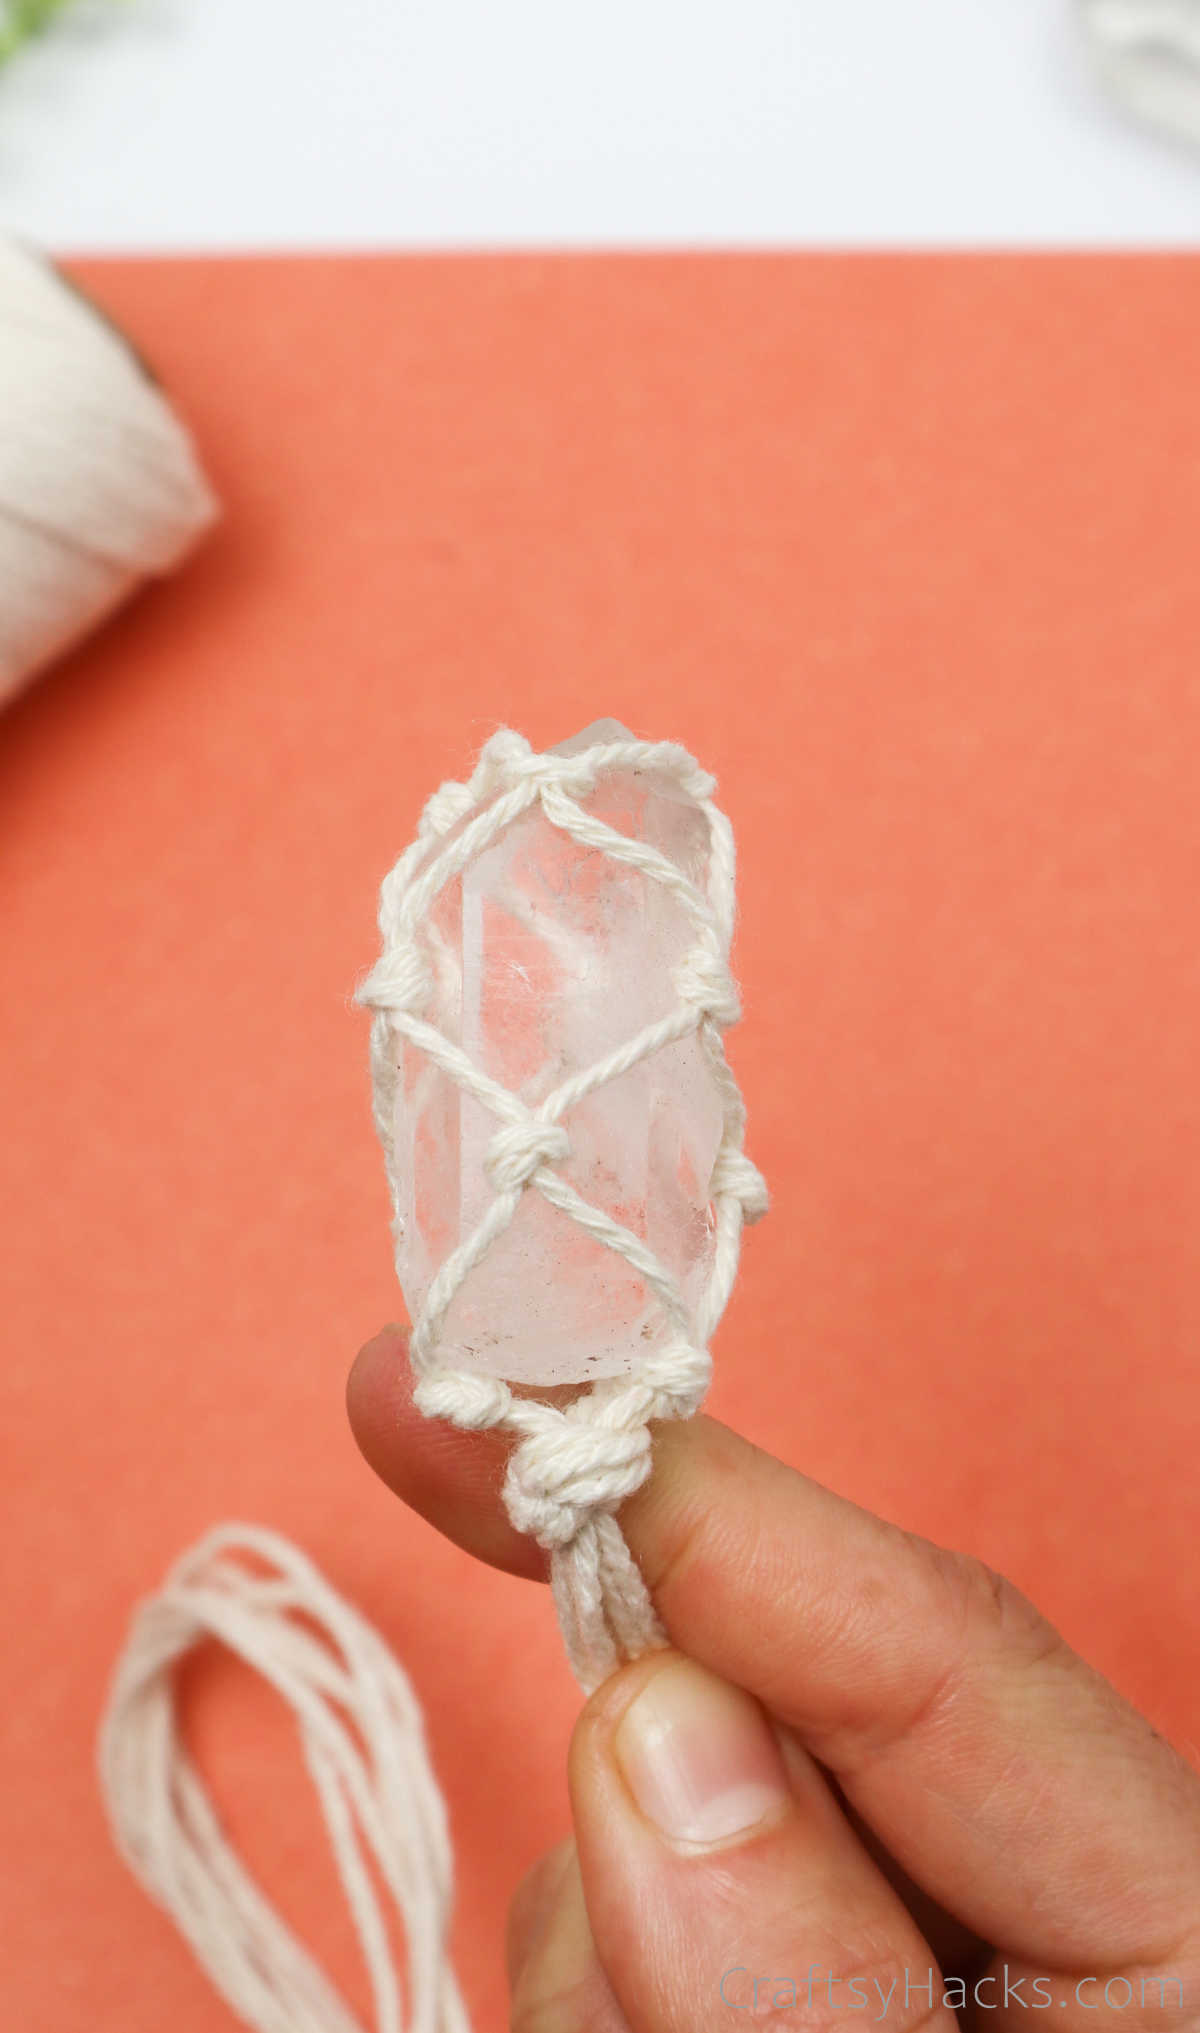
When you’ve tied the three knots, grab the bottom of your crystal and place it in the loop to ensure that it sits snugly. Always remember to keep checking just how snug your crystal is placed as you work your way up.
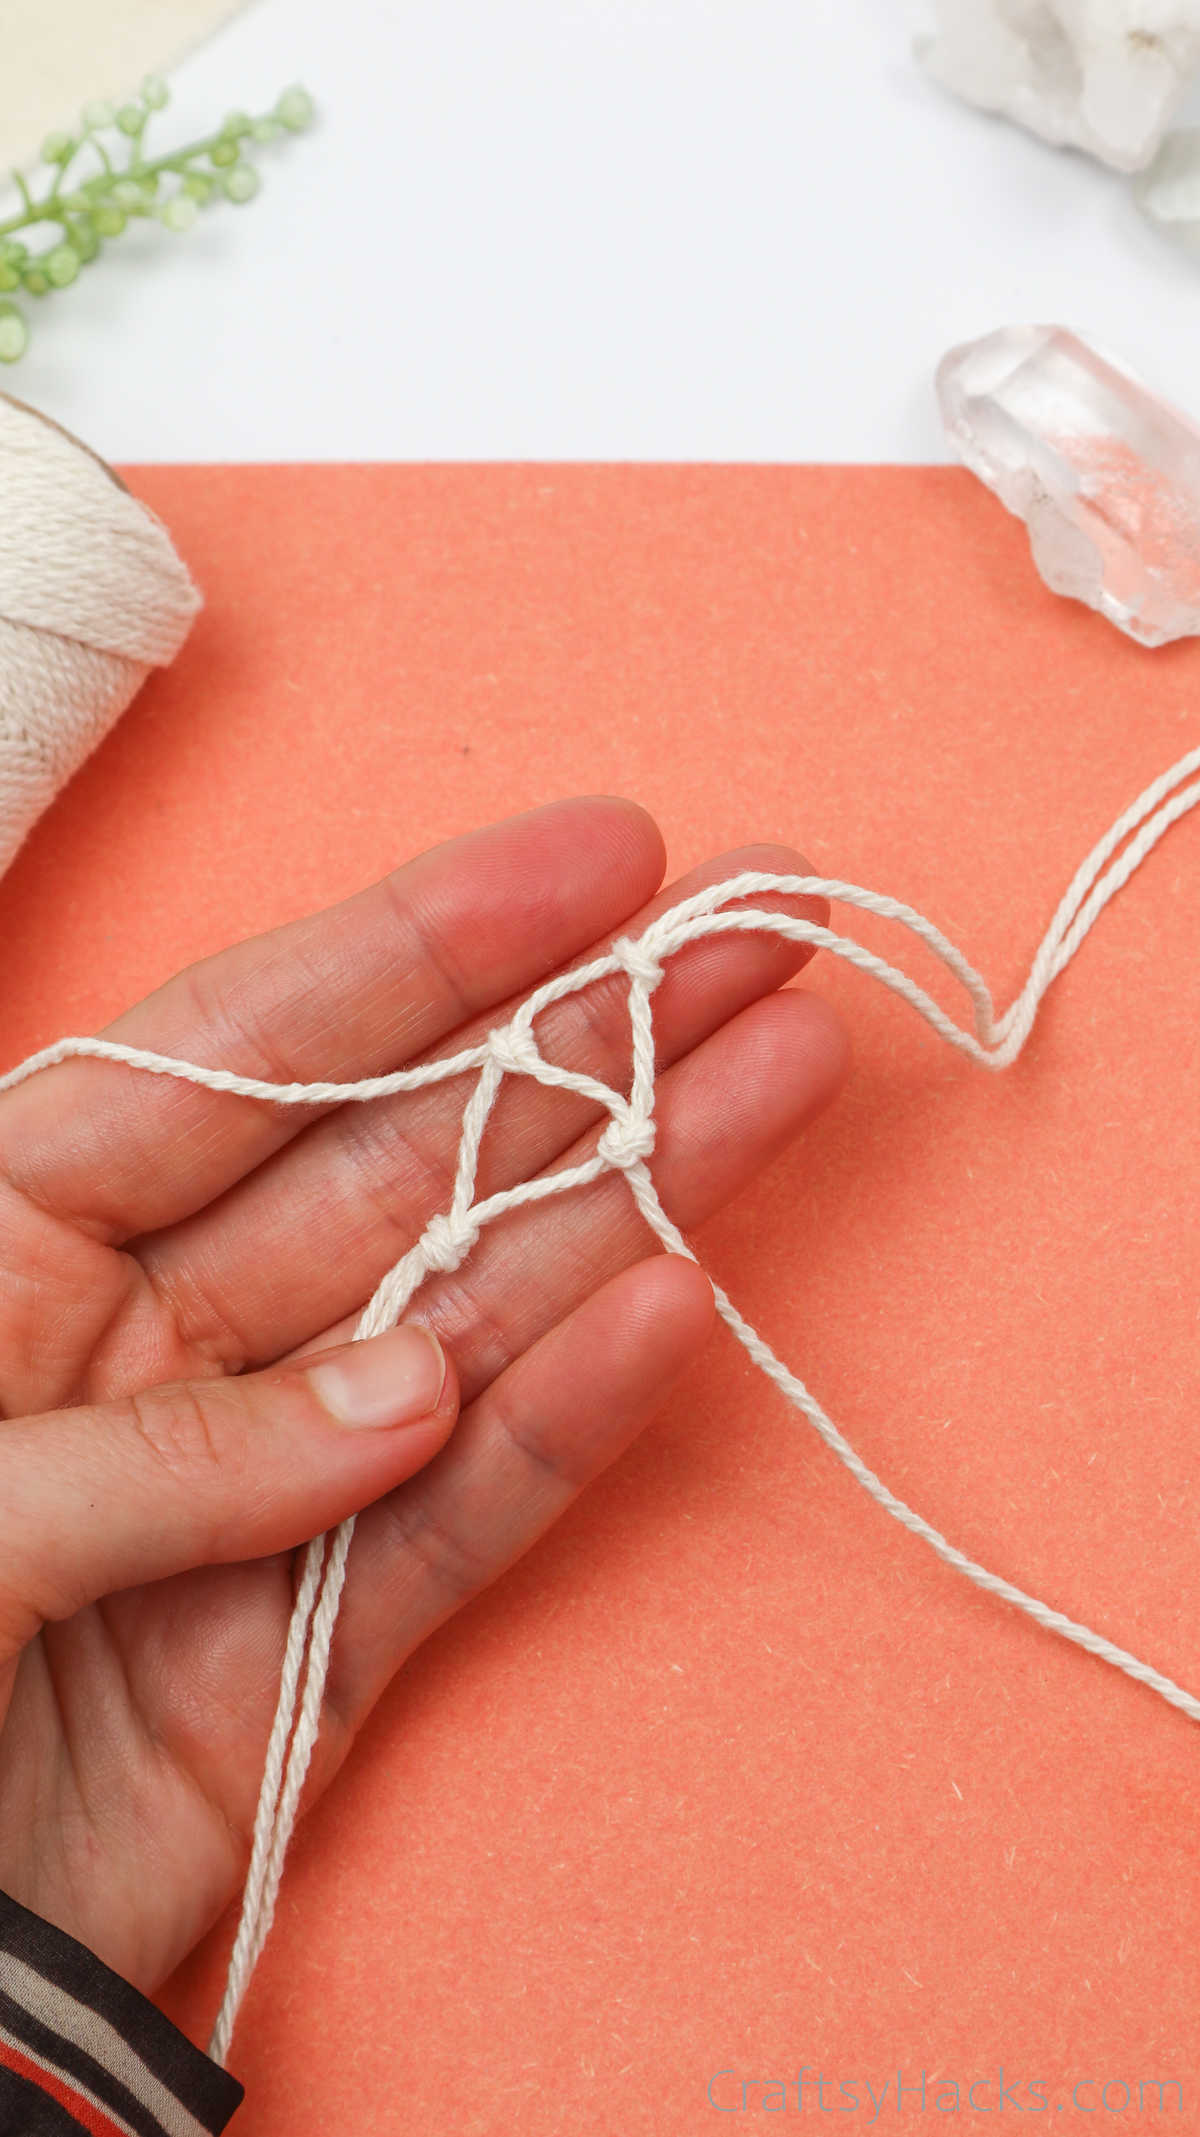
Step 9
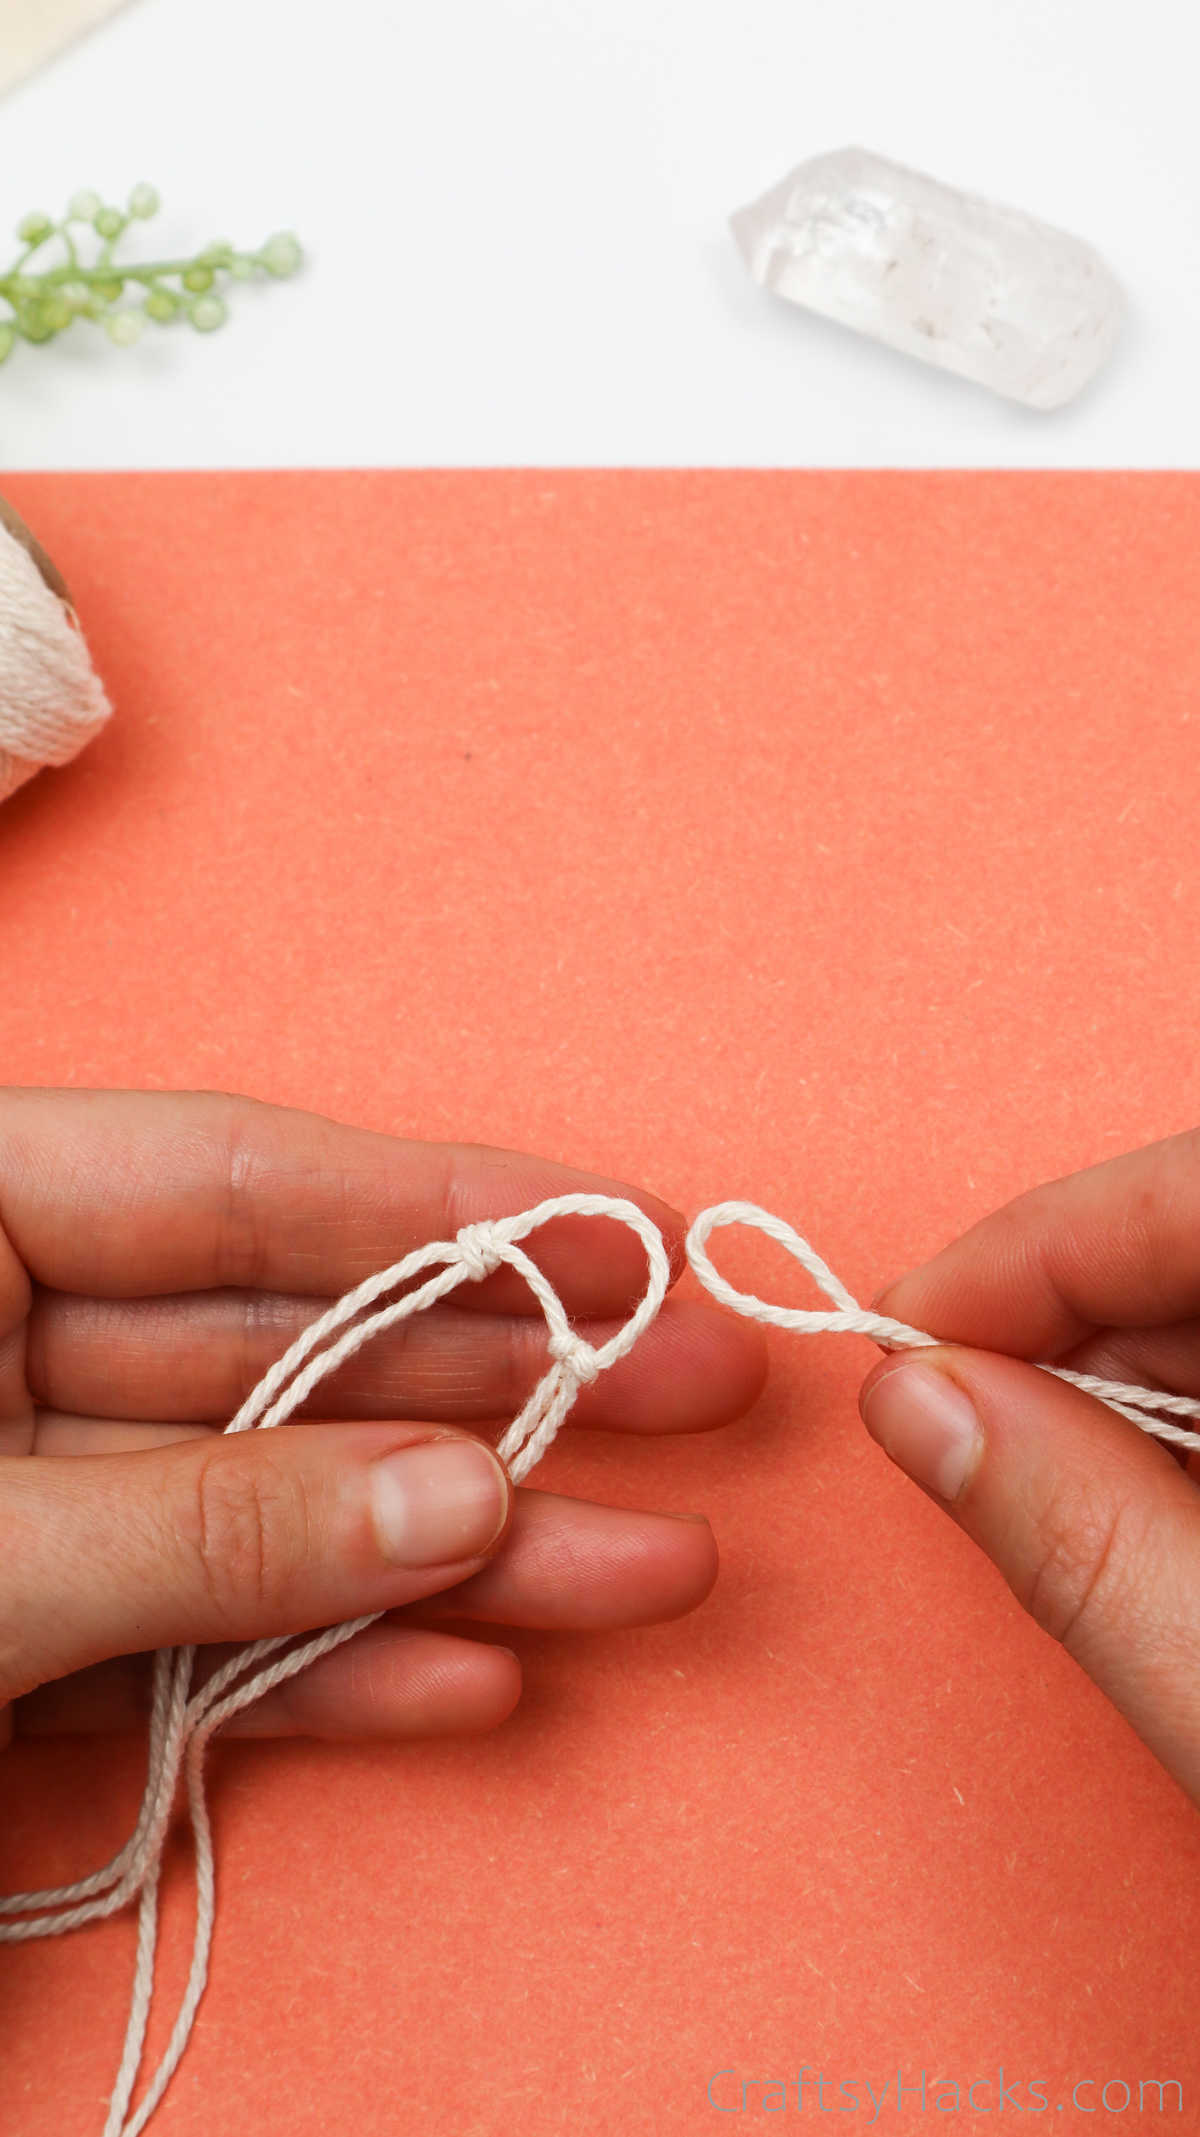
It’s time to start working on the netting around the crystal. Take one strand from the first cord and another strand from the neighboring cord.
Bring them together just so.
Tie these two cords into a knot—just a regular overhand knot like you’ve been working with so far. The knot should make another triangle the same size as your original triangle.
So, make sure you make the knot about midway between the knots at the base of the two cords you brought together. Look at this picture to get an idea of how big the triangles ought to be. Keep referring to your crystal for sizing, too.
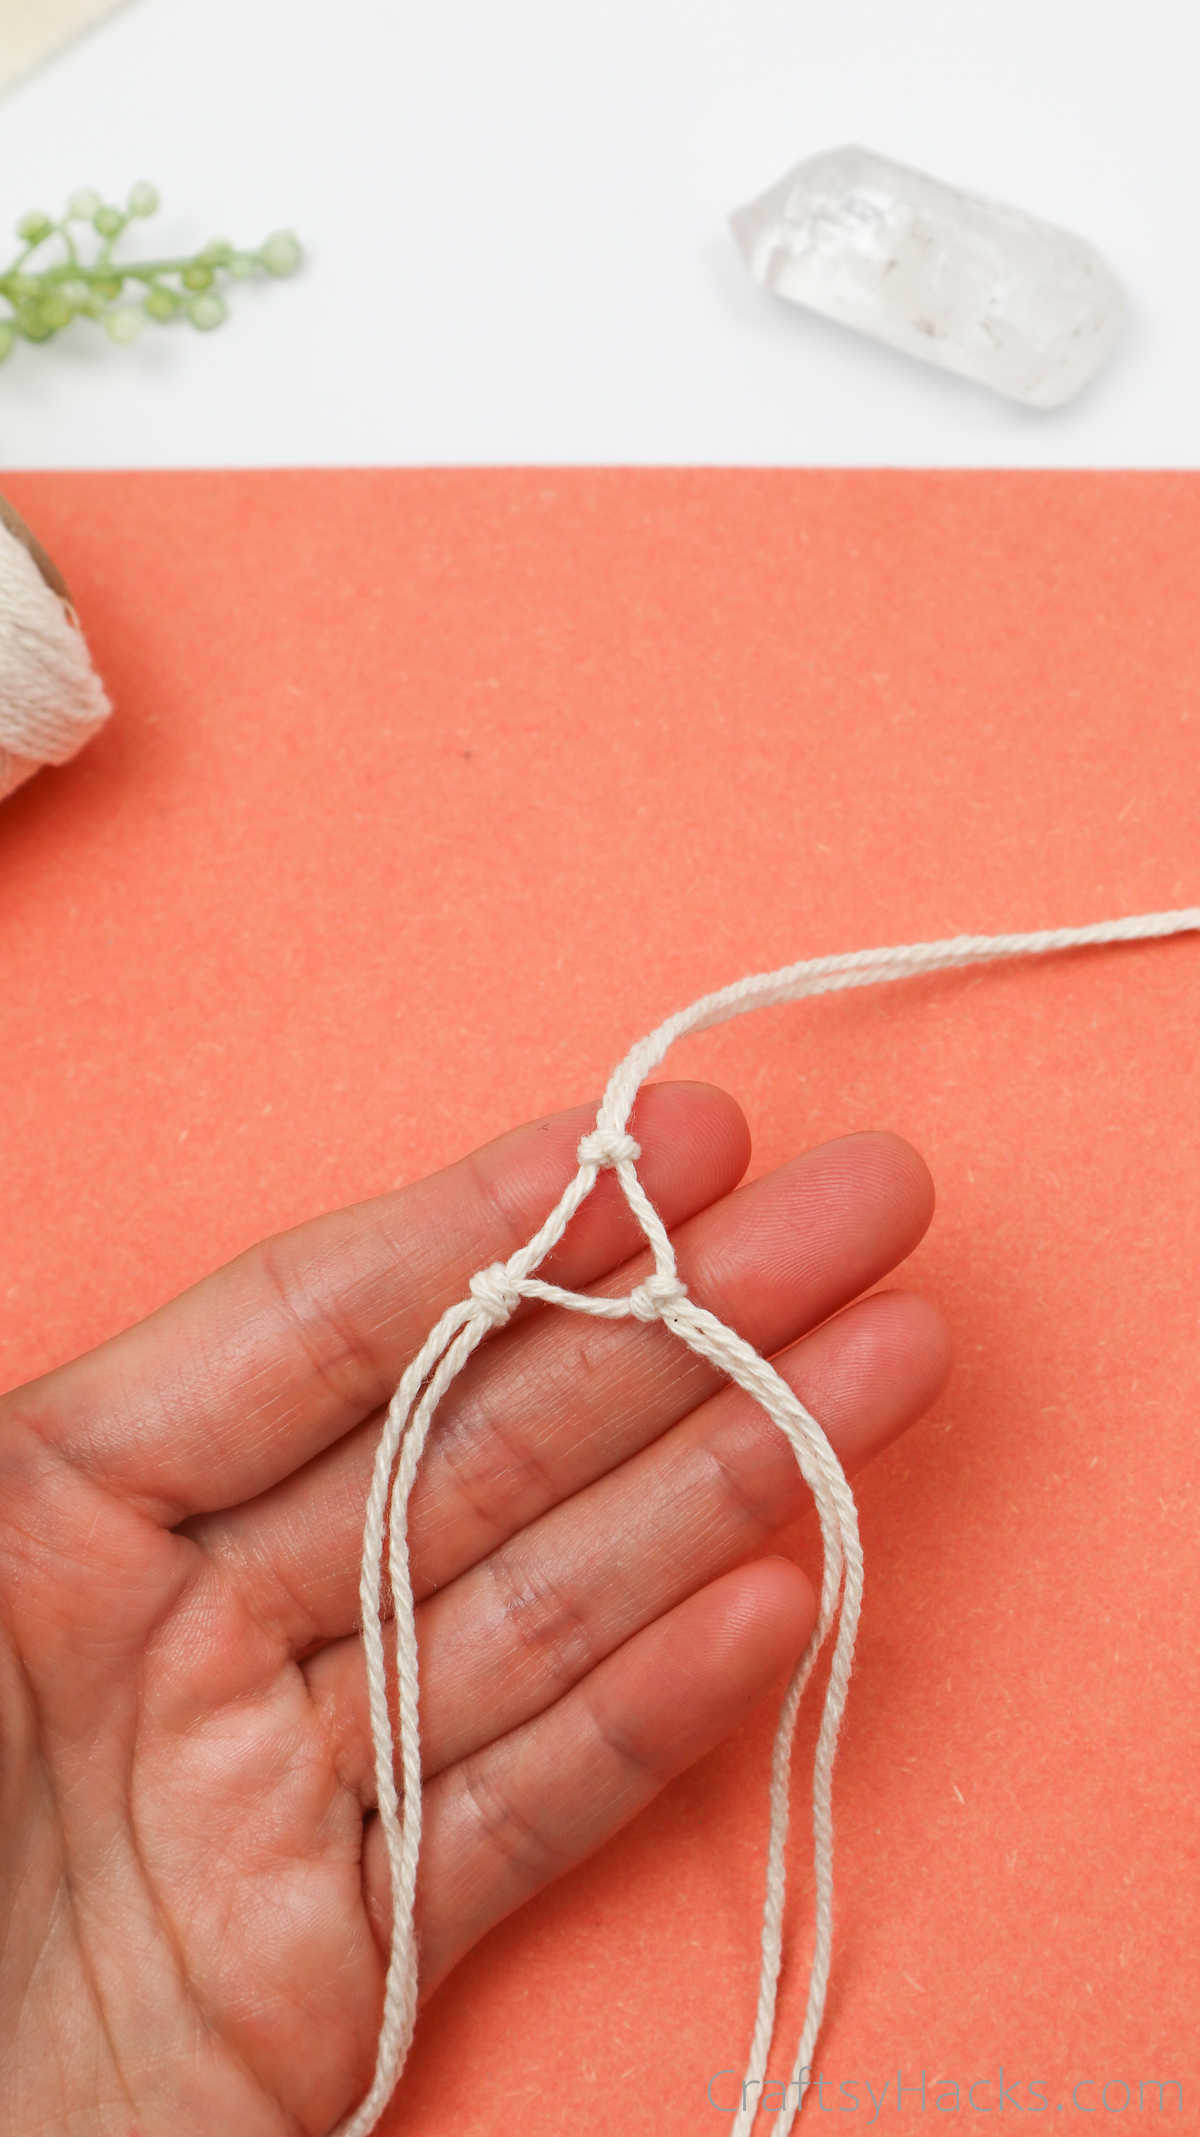
Step 10
Always remember where your original triangle is, as you’ll be working your way around it. Now, grab the subsequent cords from the subsequent sections and make a third knotted triangle.
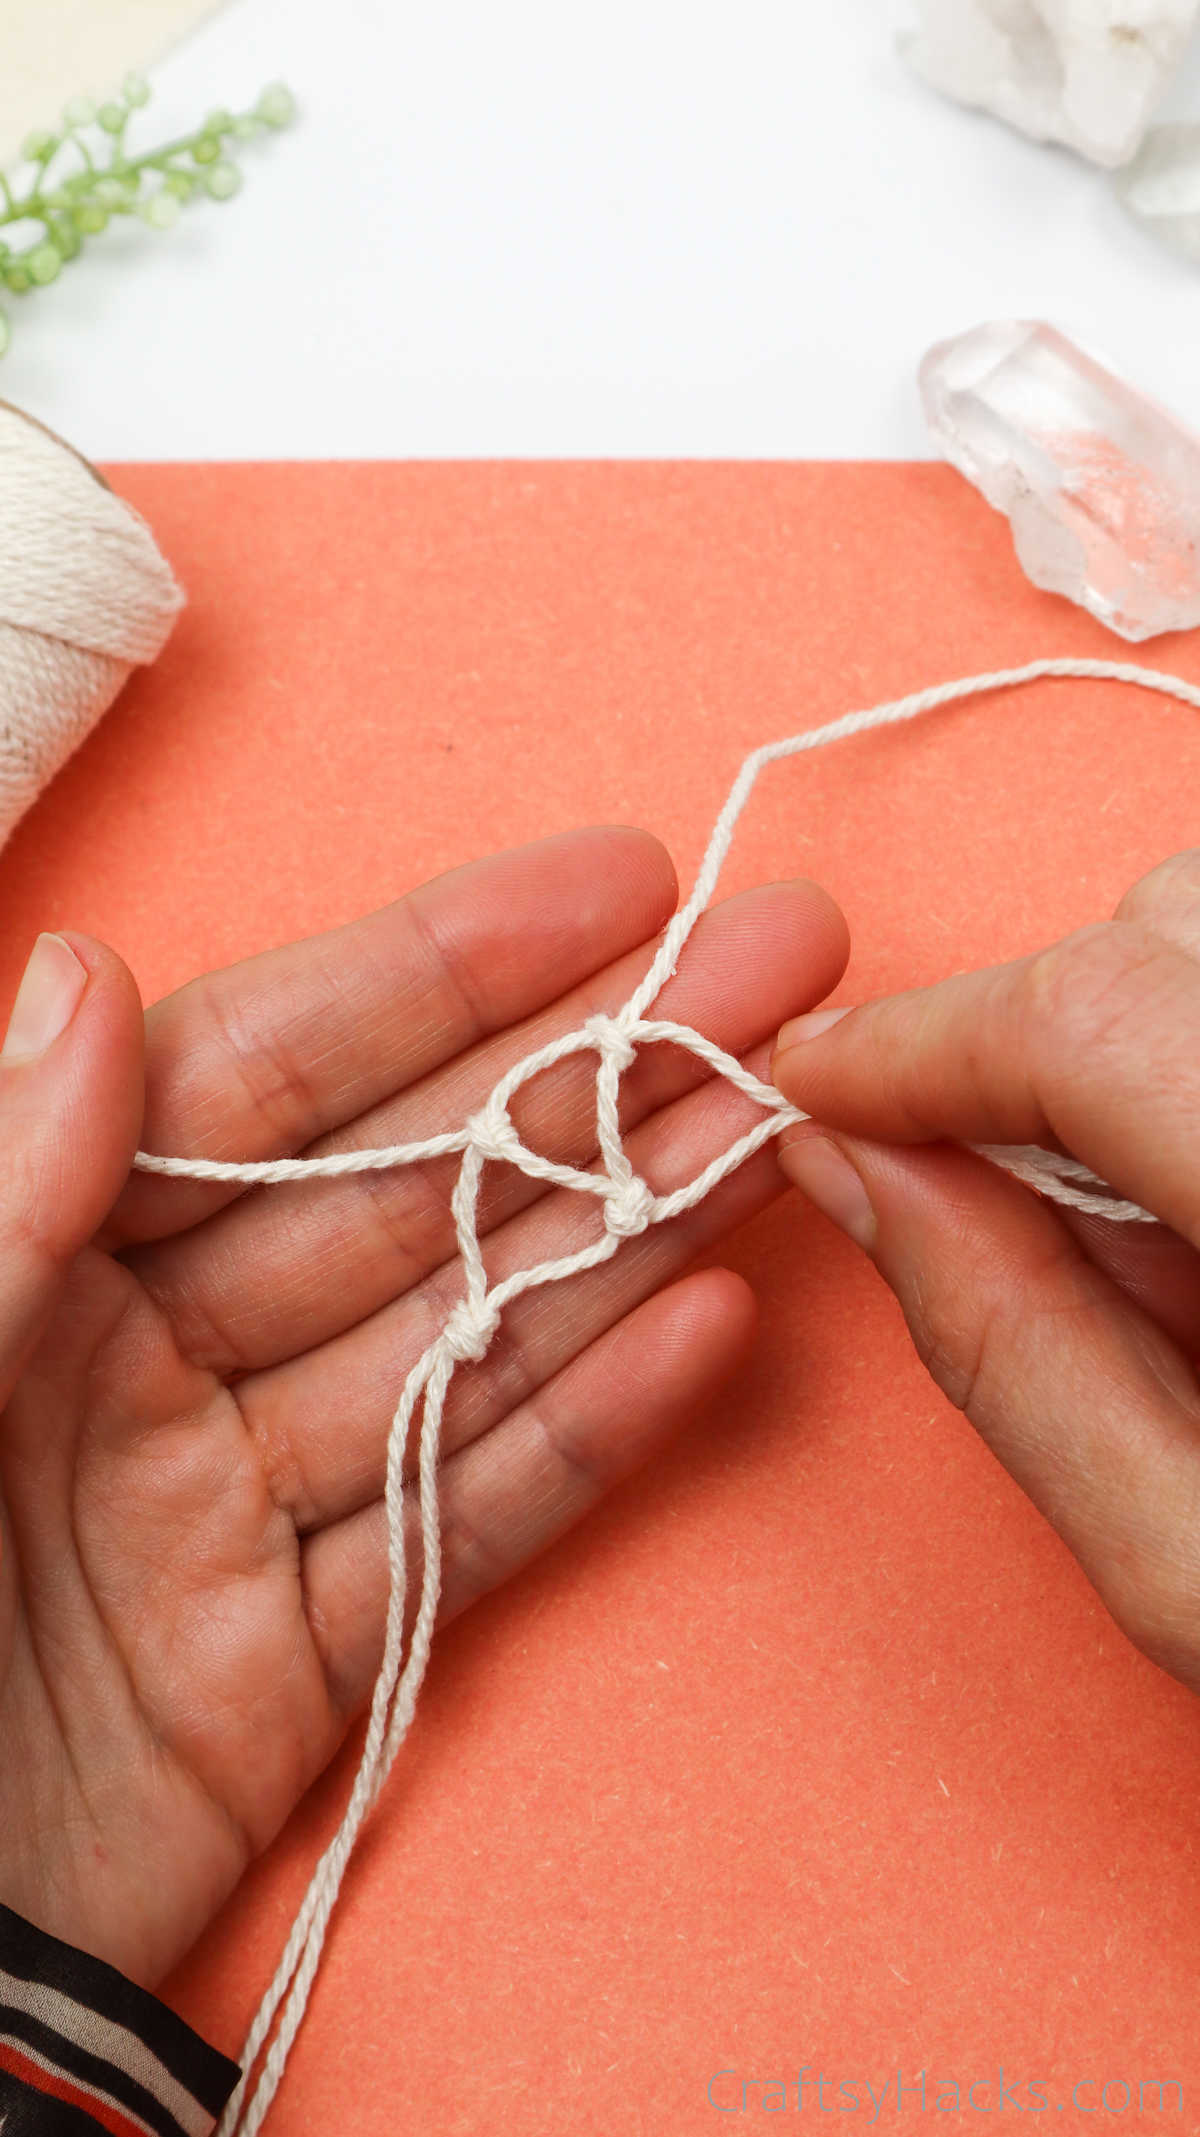
Step 11
Repeat step 9 and keep working knots into your design as you work your way around and up.
Remember to work on a flat surface so that it will be easier for you to know where each triangle is.
It also makes sectioning the cords an easier task.
Your pattern will not always be flat, but that’s completely normal. As you work your way around and up, the design will rise up, as indicated.

Always keep placing the crystal in place to ensure you don’t make the cords too tight or loose.
It can help if you simply hold the crystal in place and work the knots around it. Once you’ve got one round underway, it’ll be much easier to hold it in place as you knot the different cords.
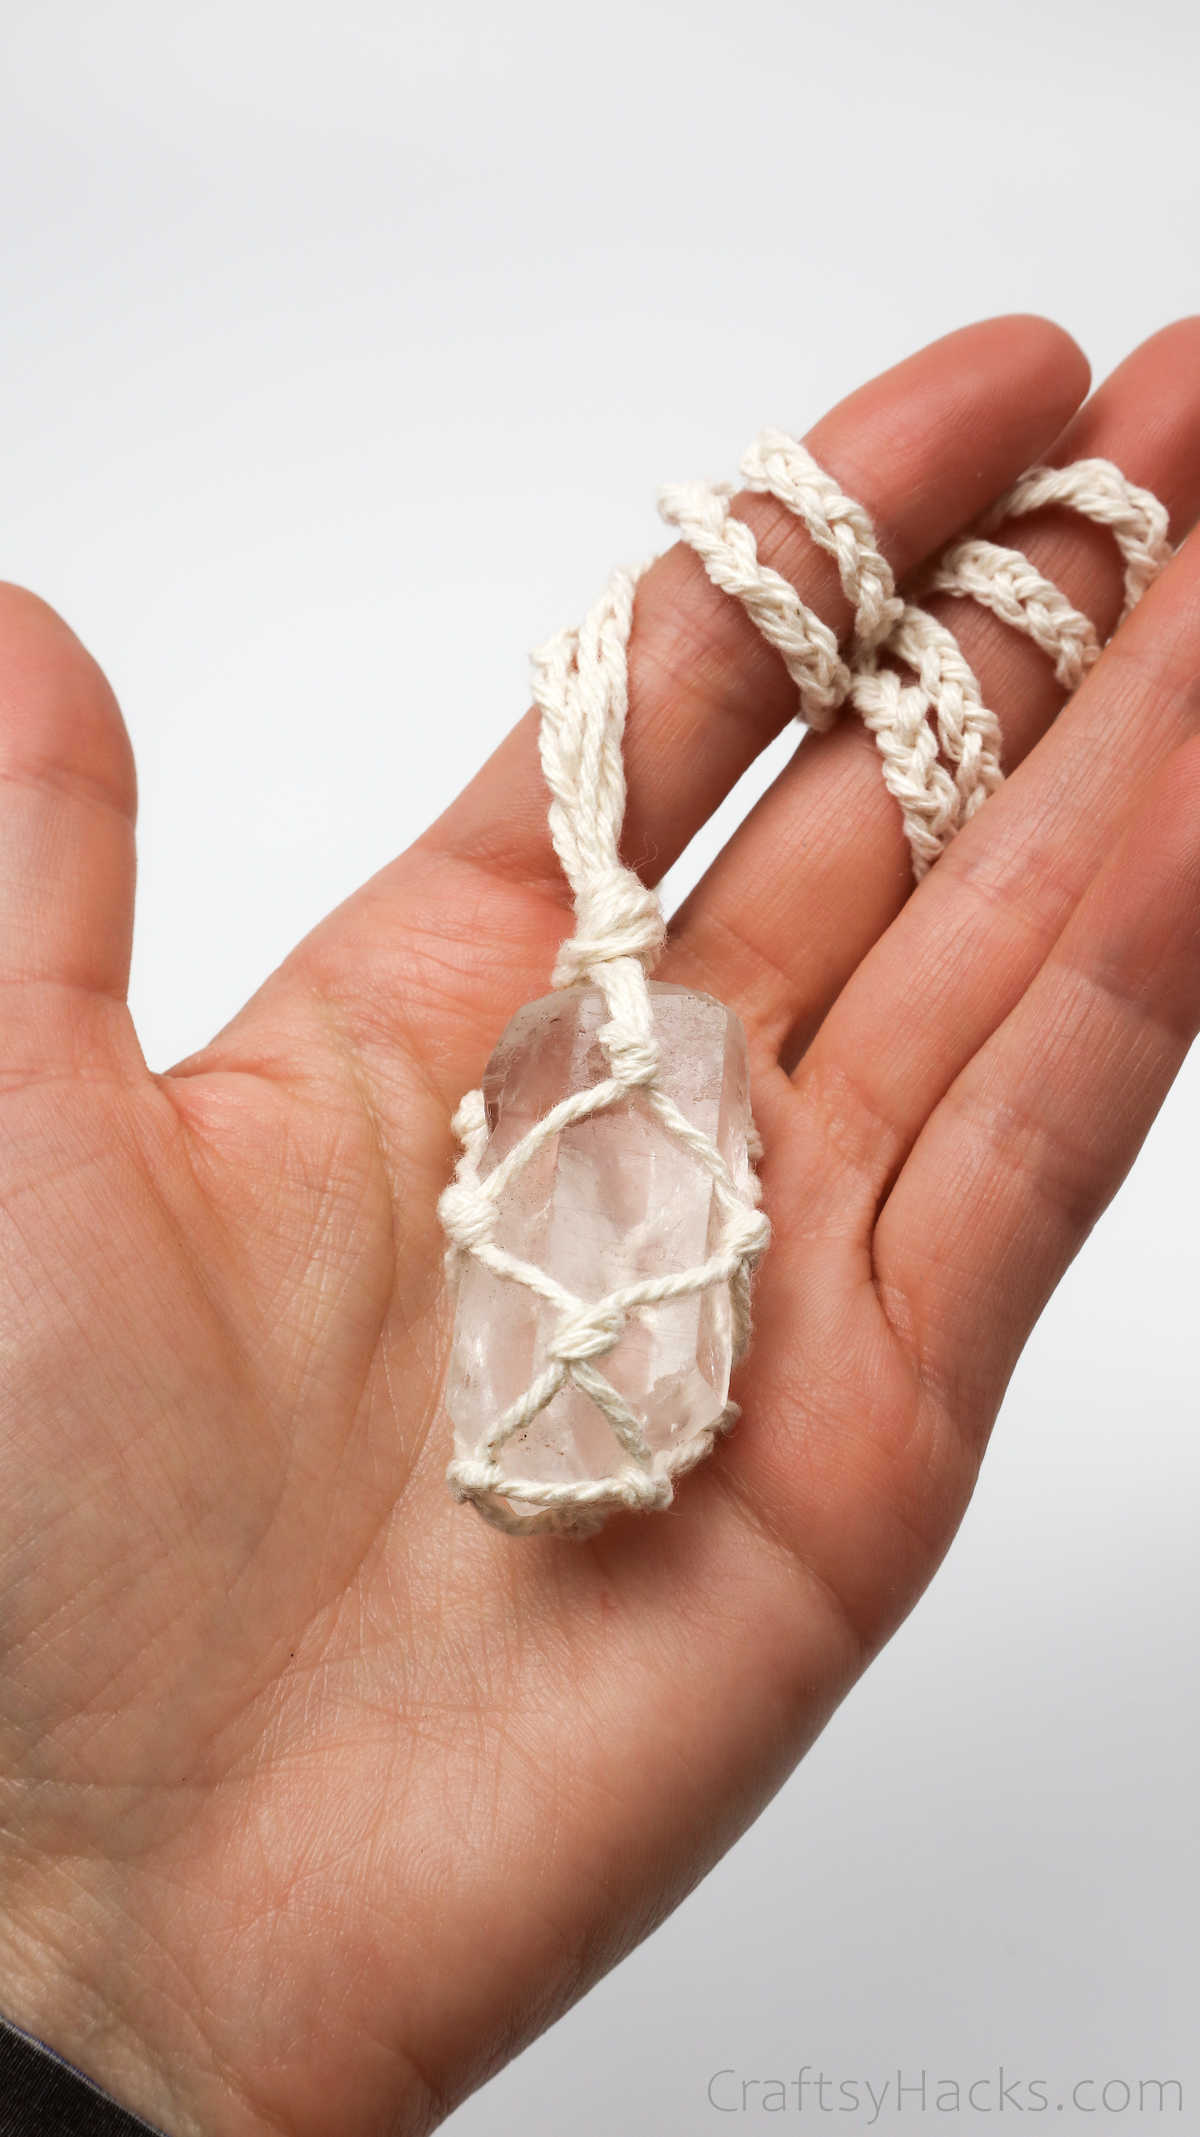
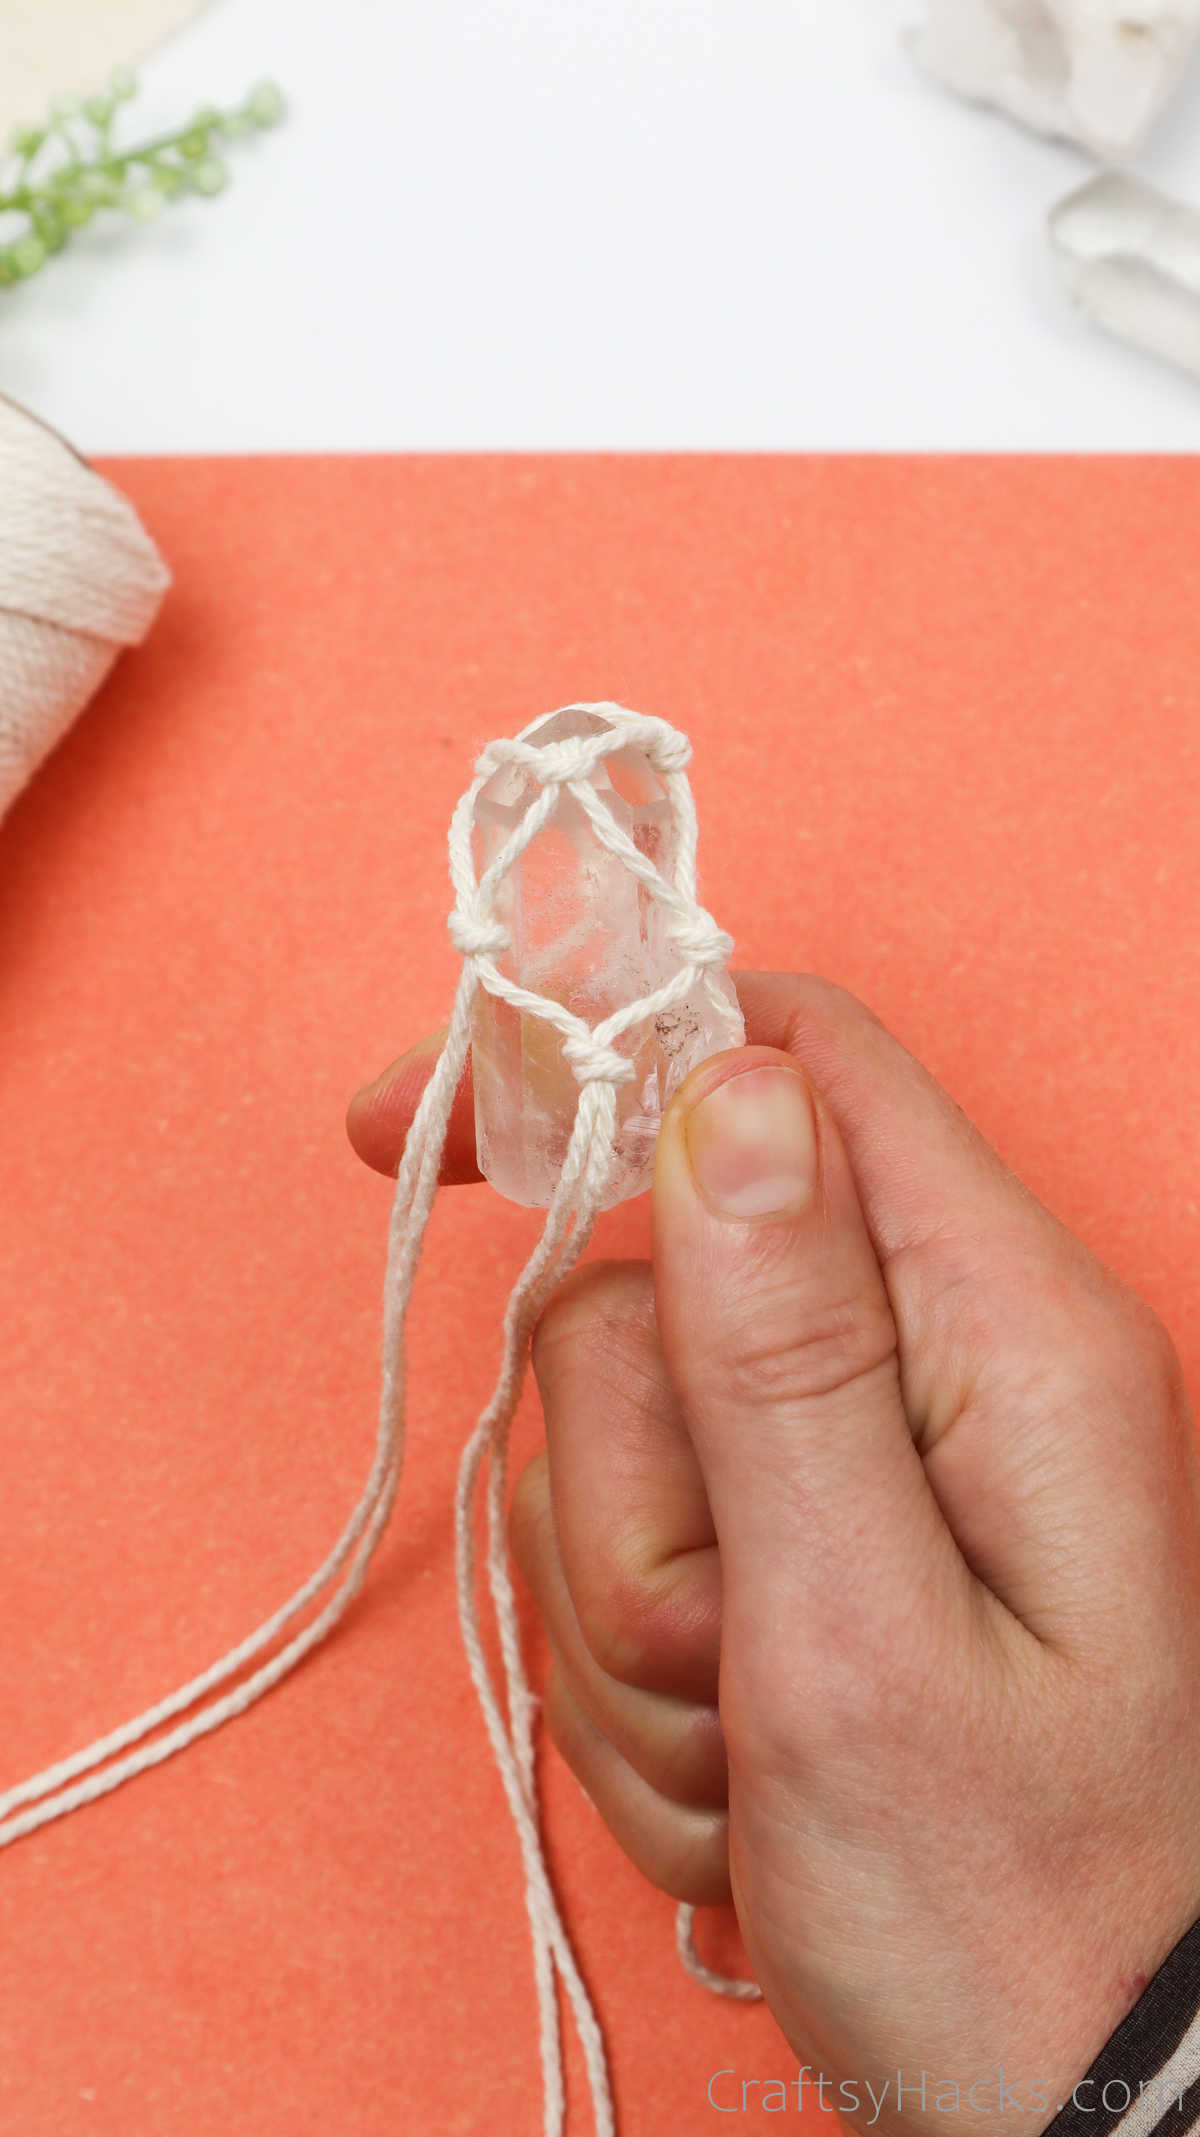
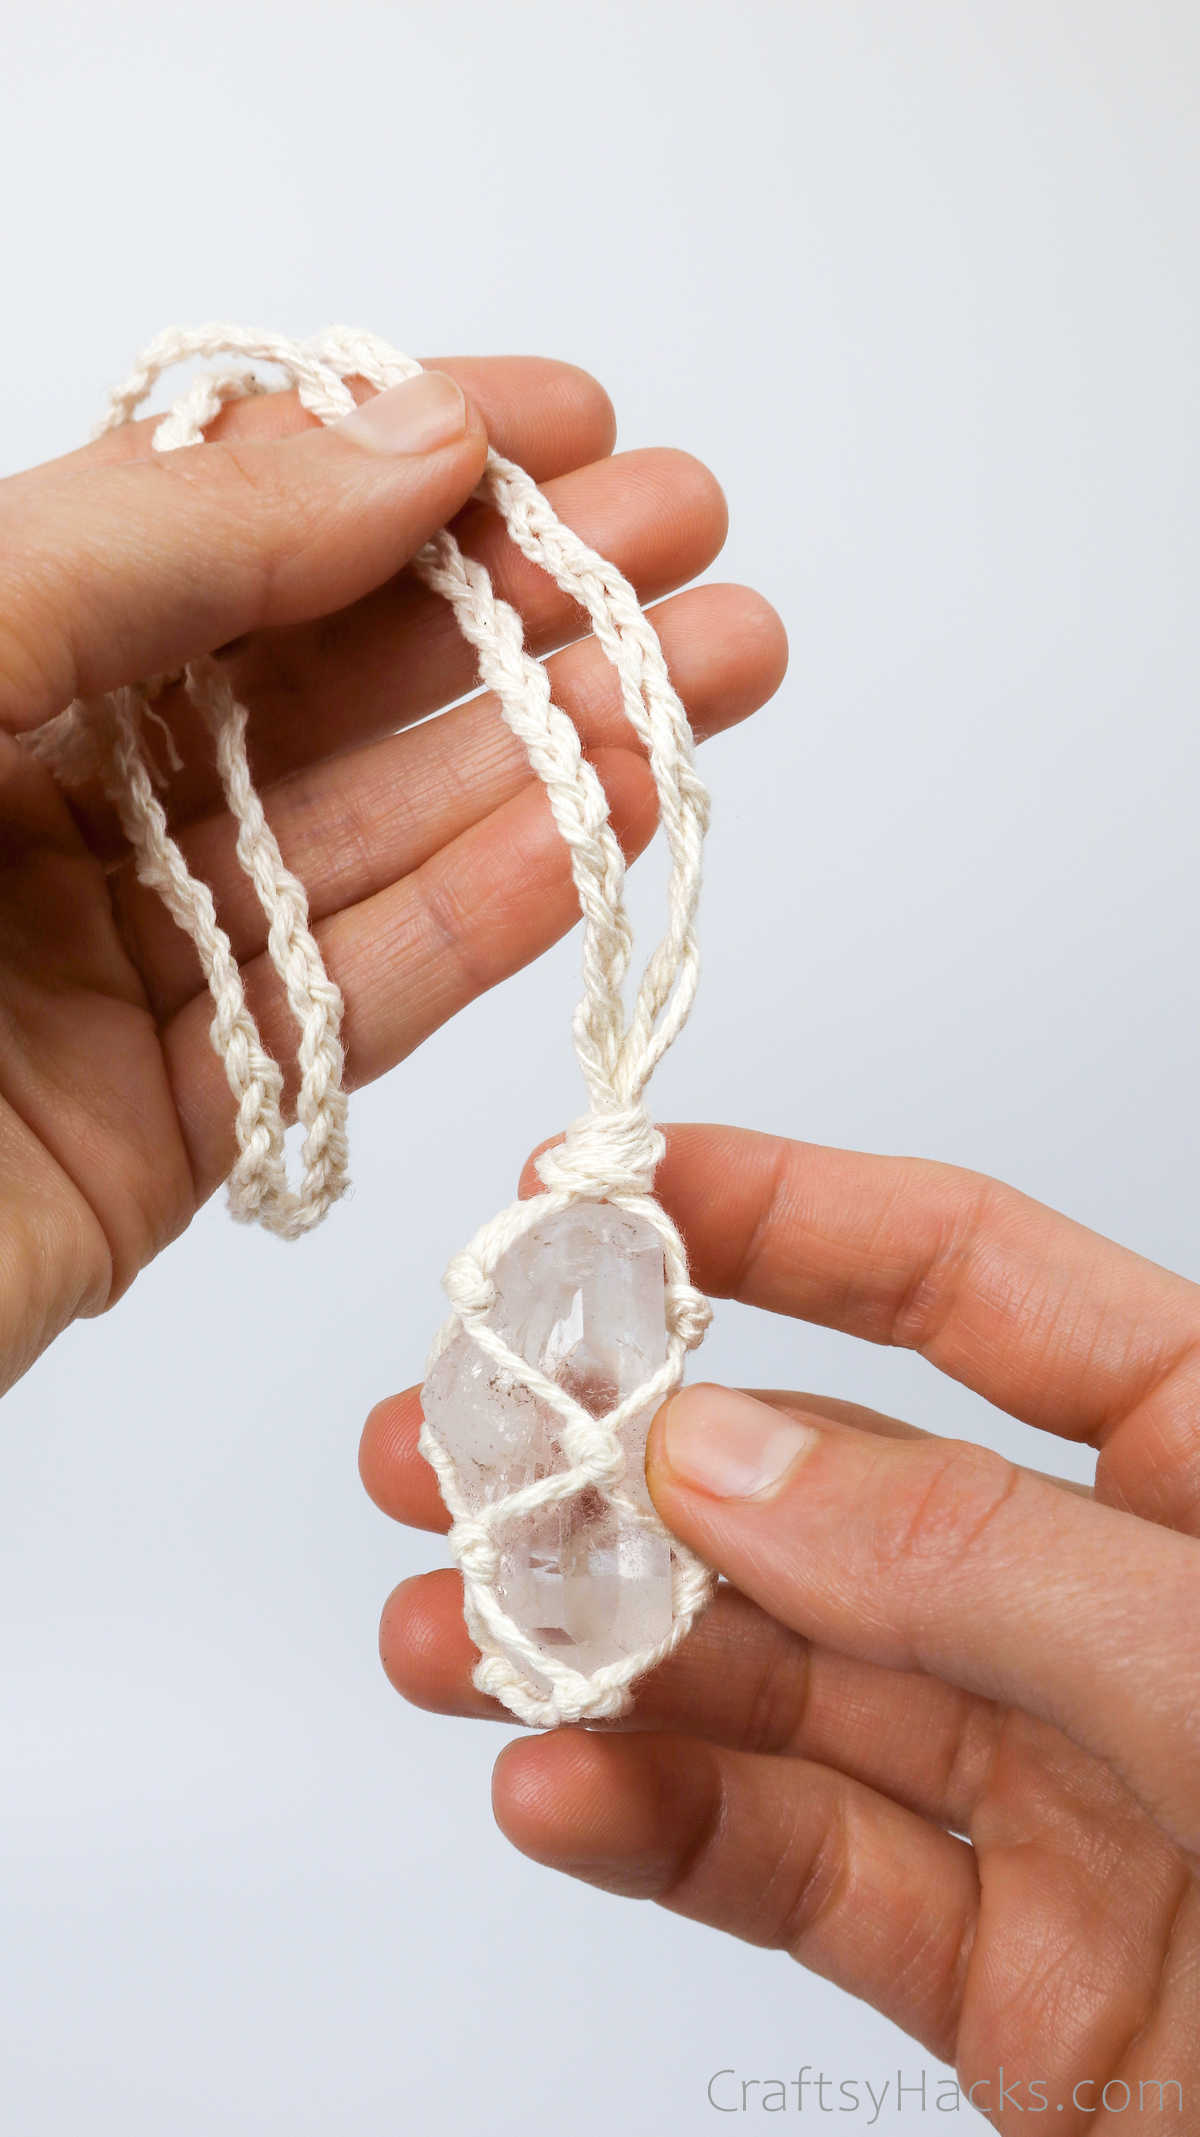
This is how your netting will look when you work your way up and reach the top of the crystal.
Step 12
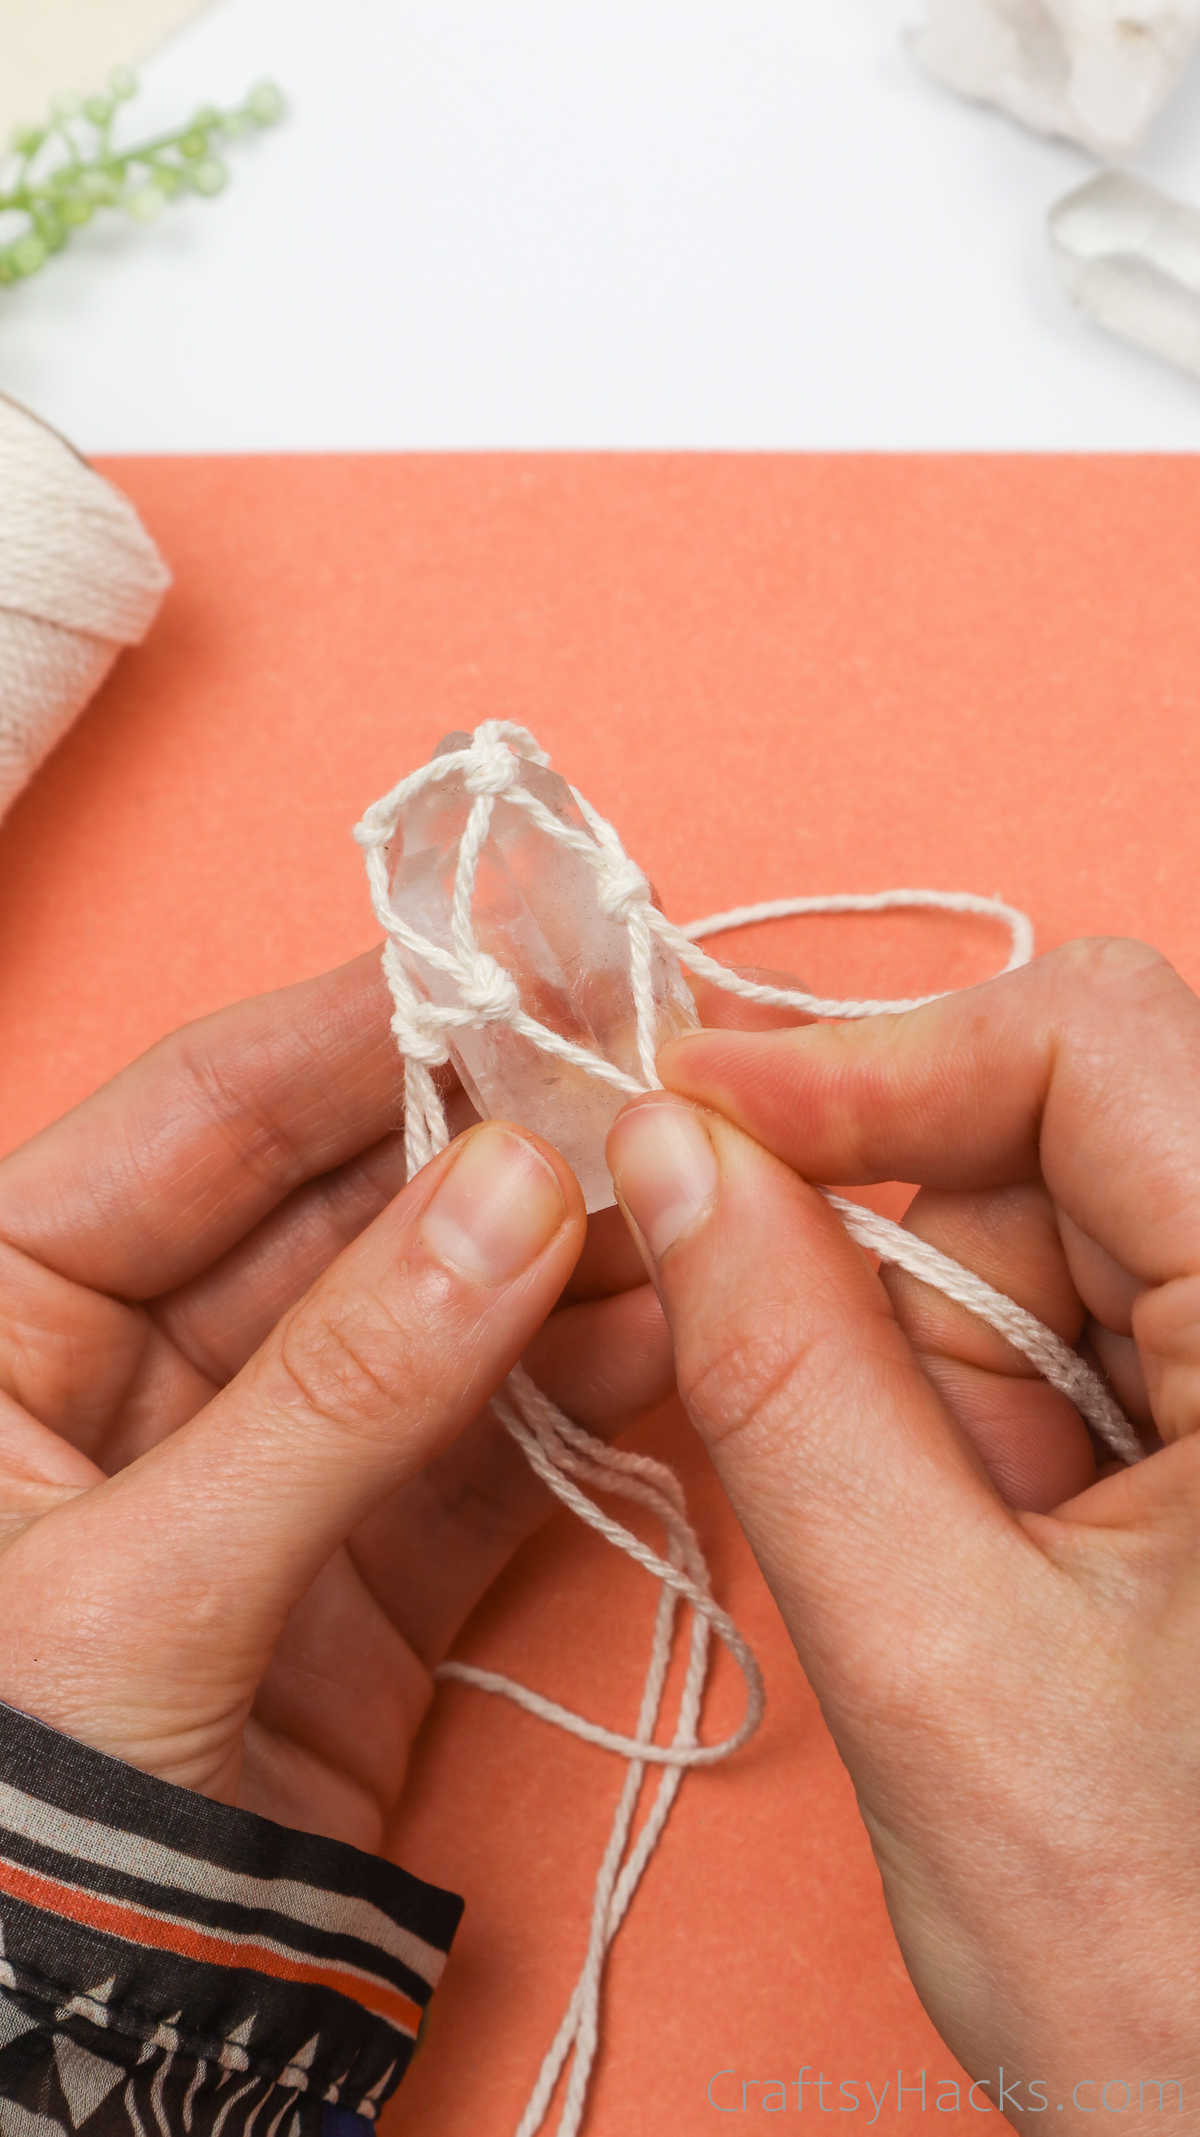
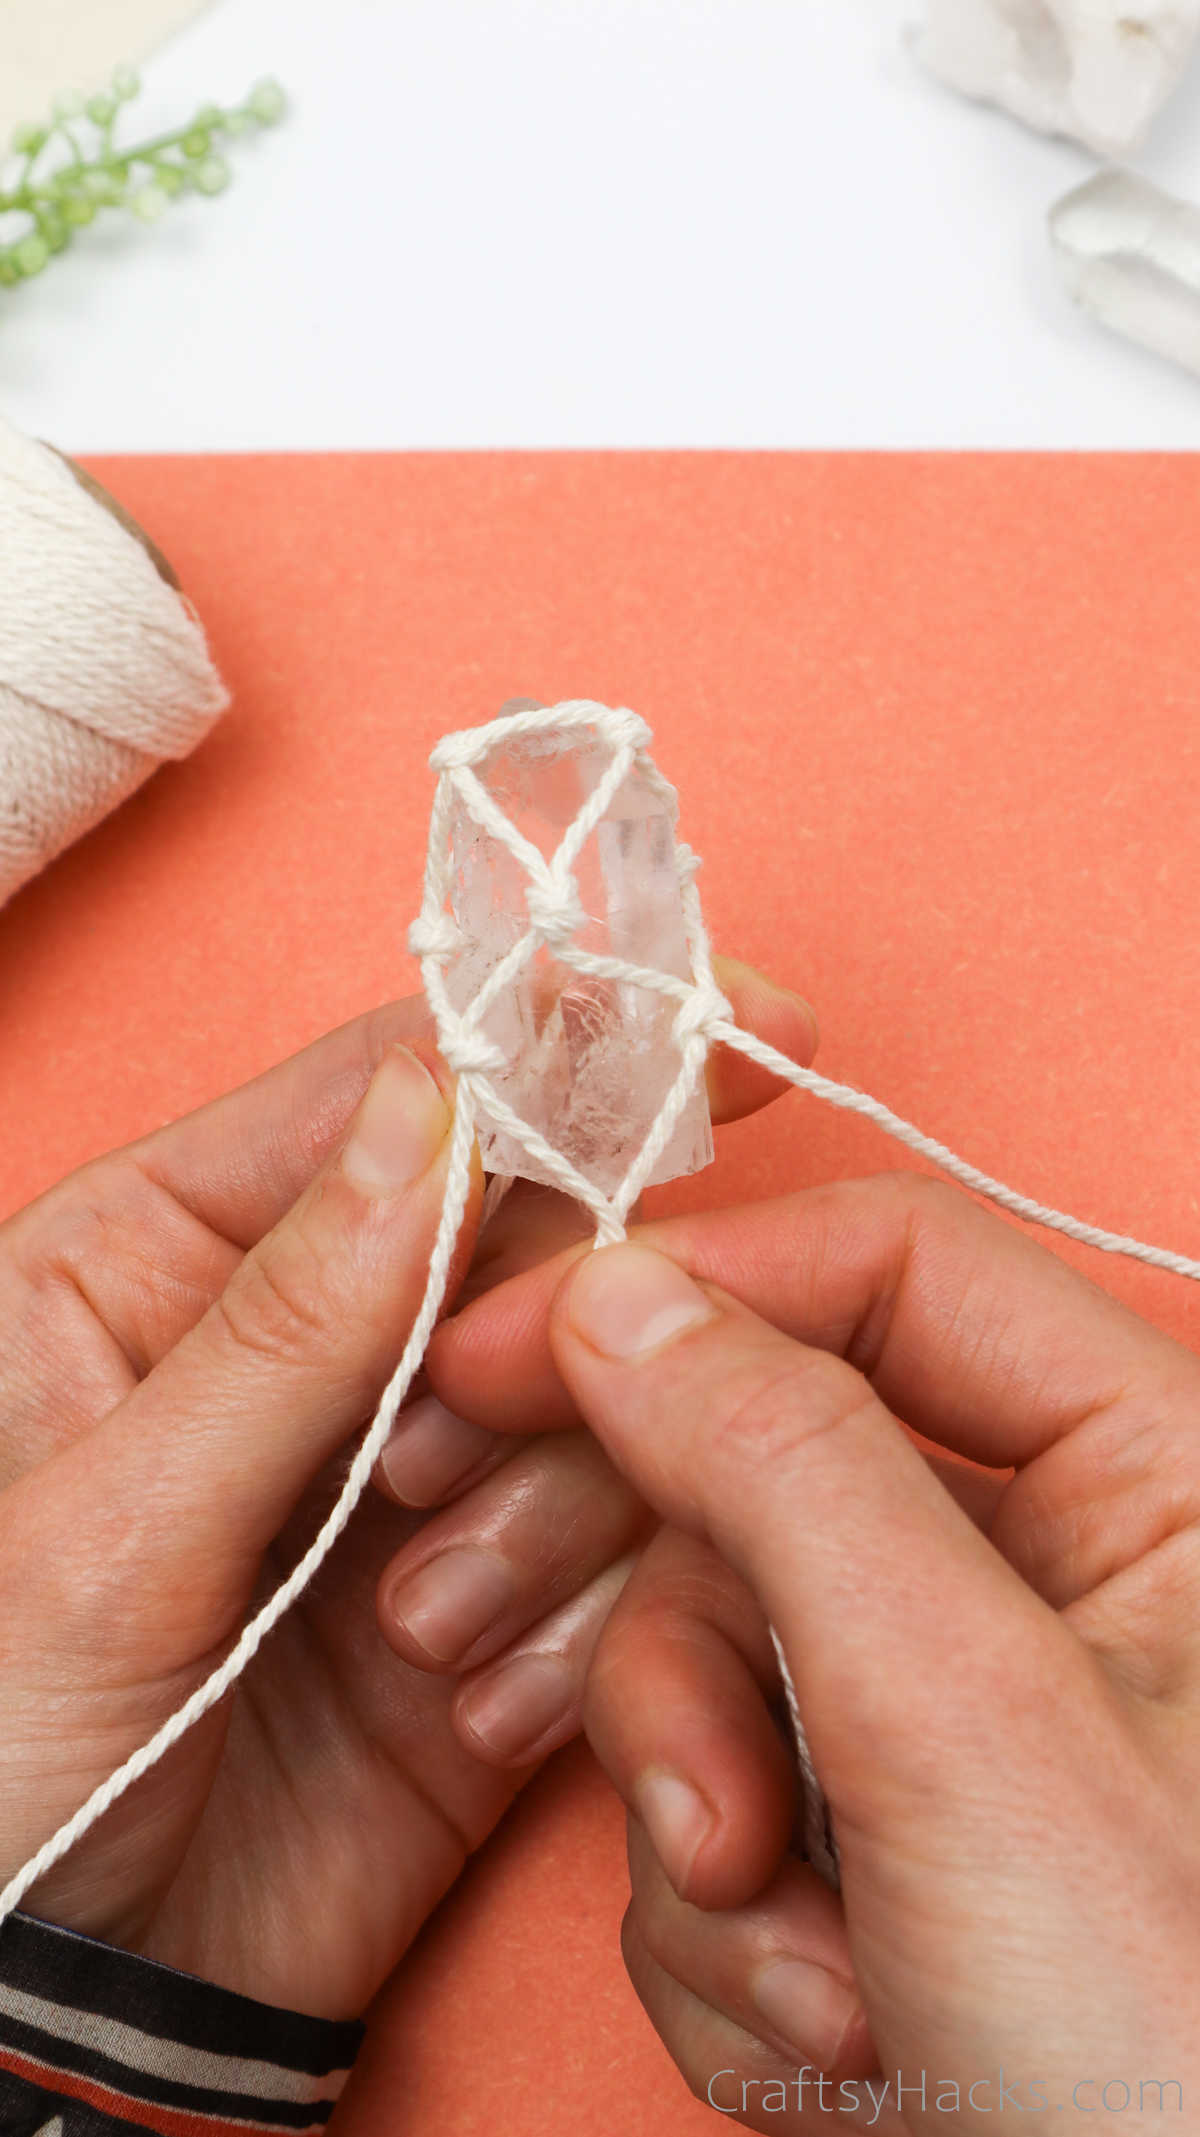
Finally, grab all the cords and make one final overhand knot right at the center of the top of the crystal.

Push the knot towards the center of the stone and tug each individual cord to even out and tighten the knot as a whole.
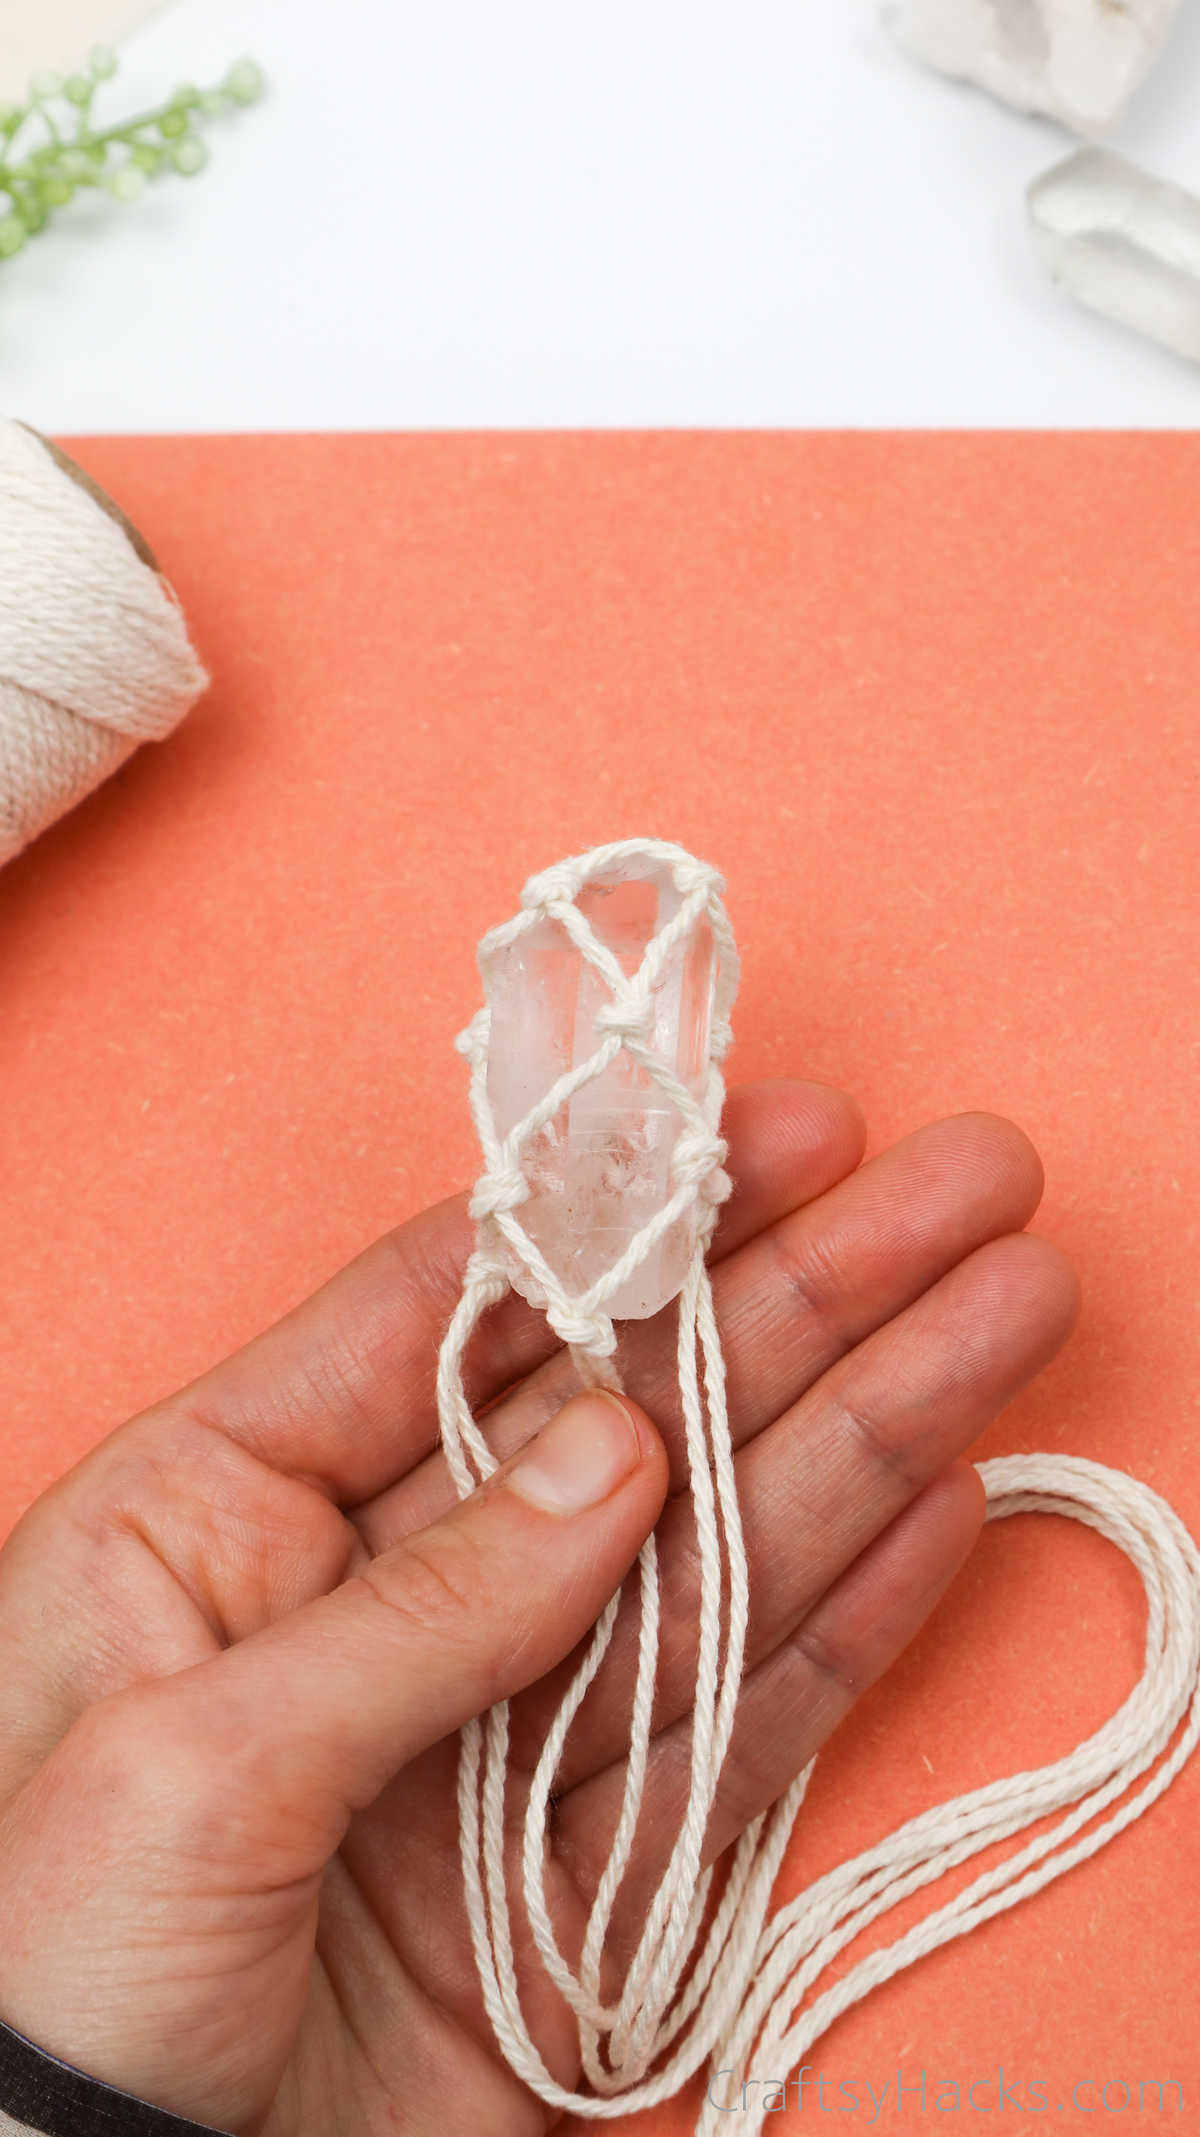
Step 13
The next step is to start working on the necklace. Divide the six cords into two sections of three cords each.
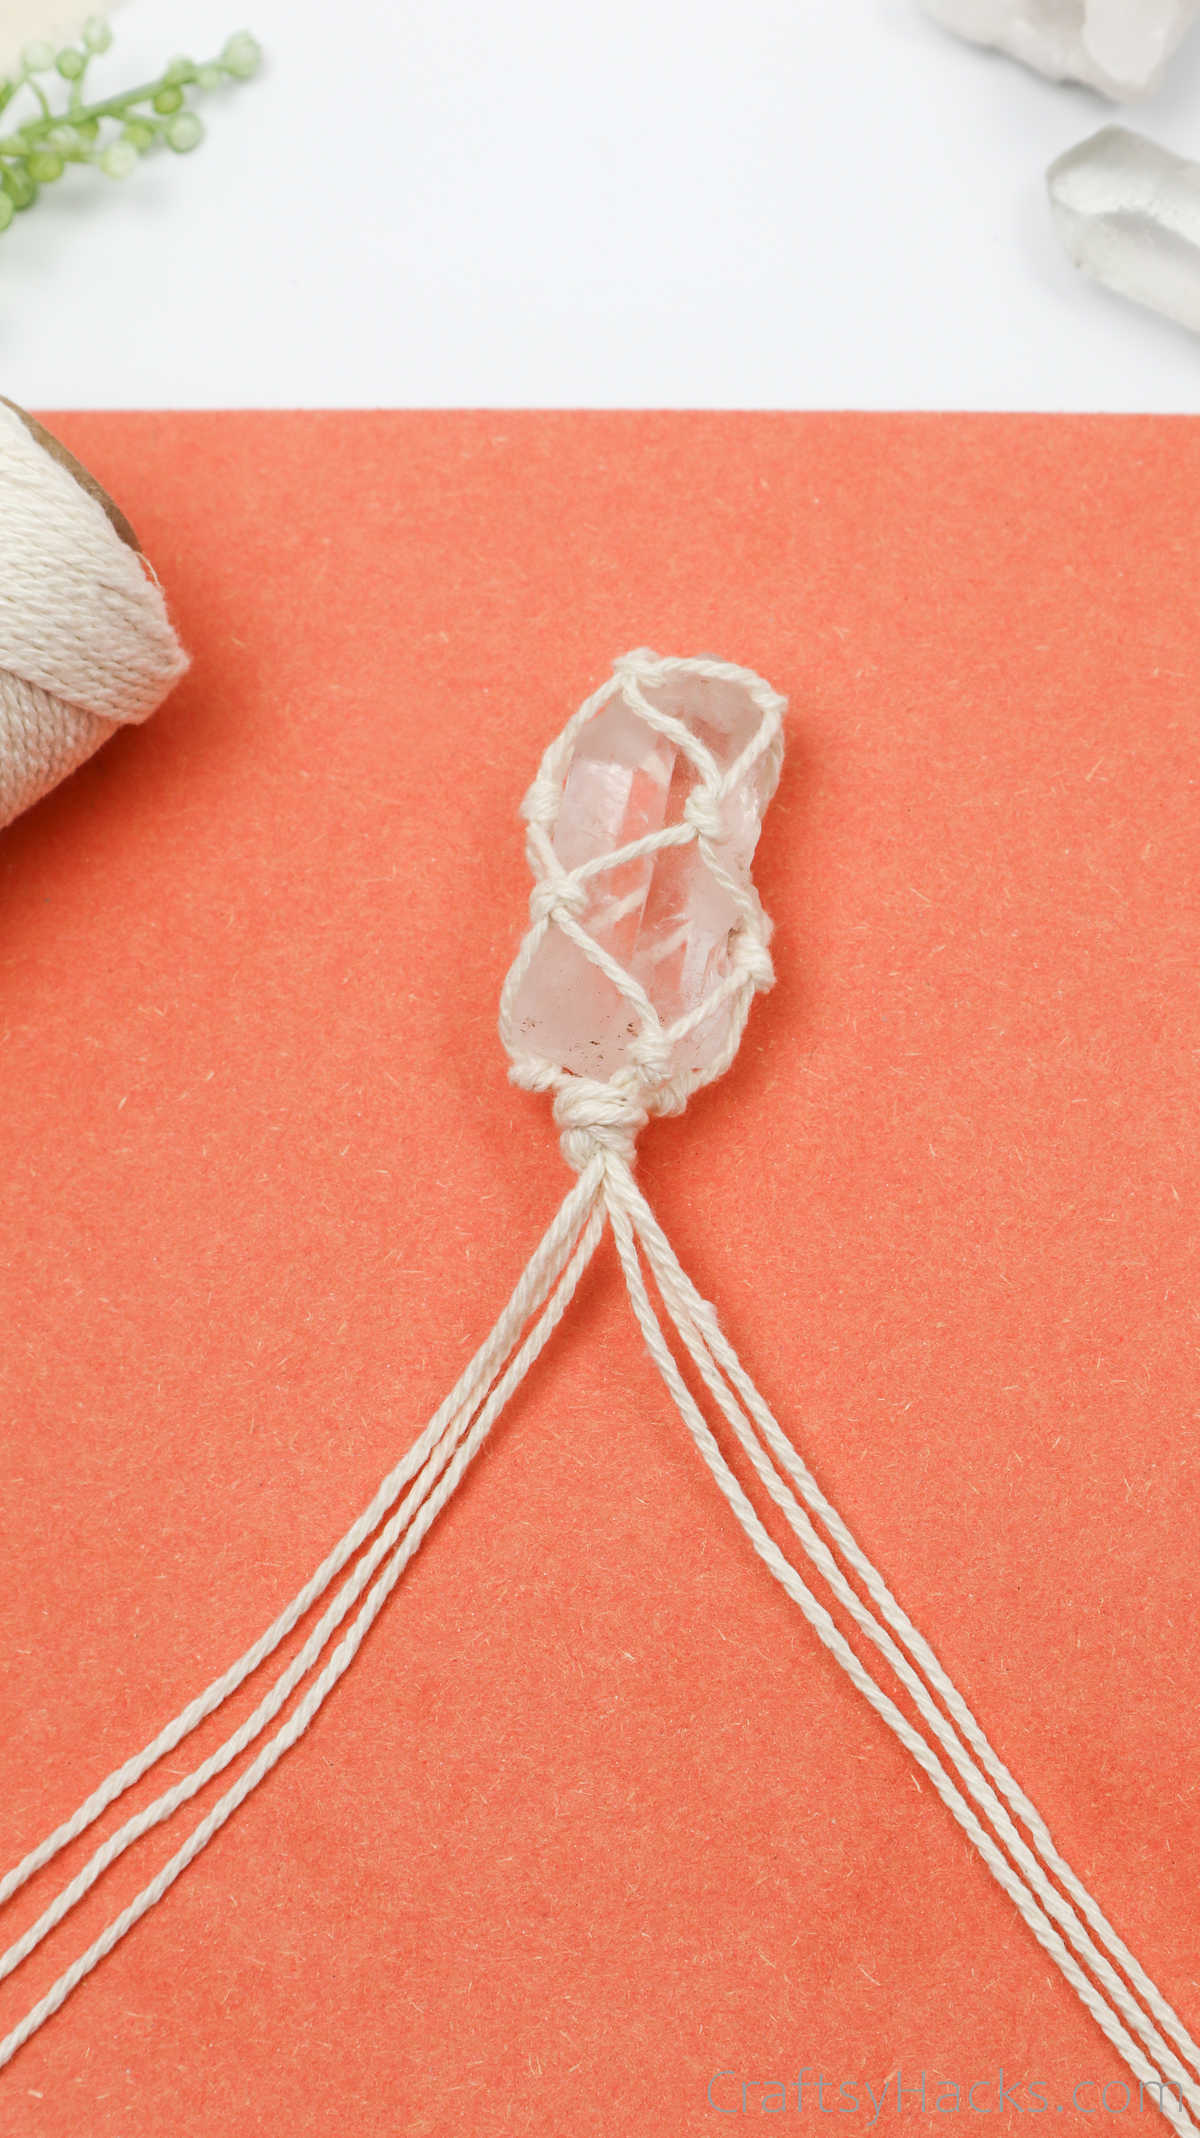
Start braiding each section and work your way down both sections.
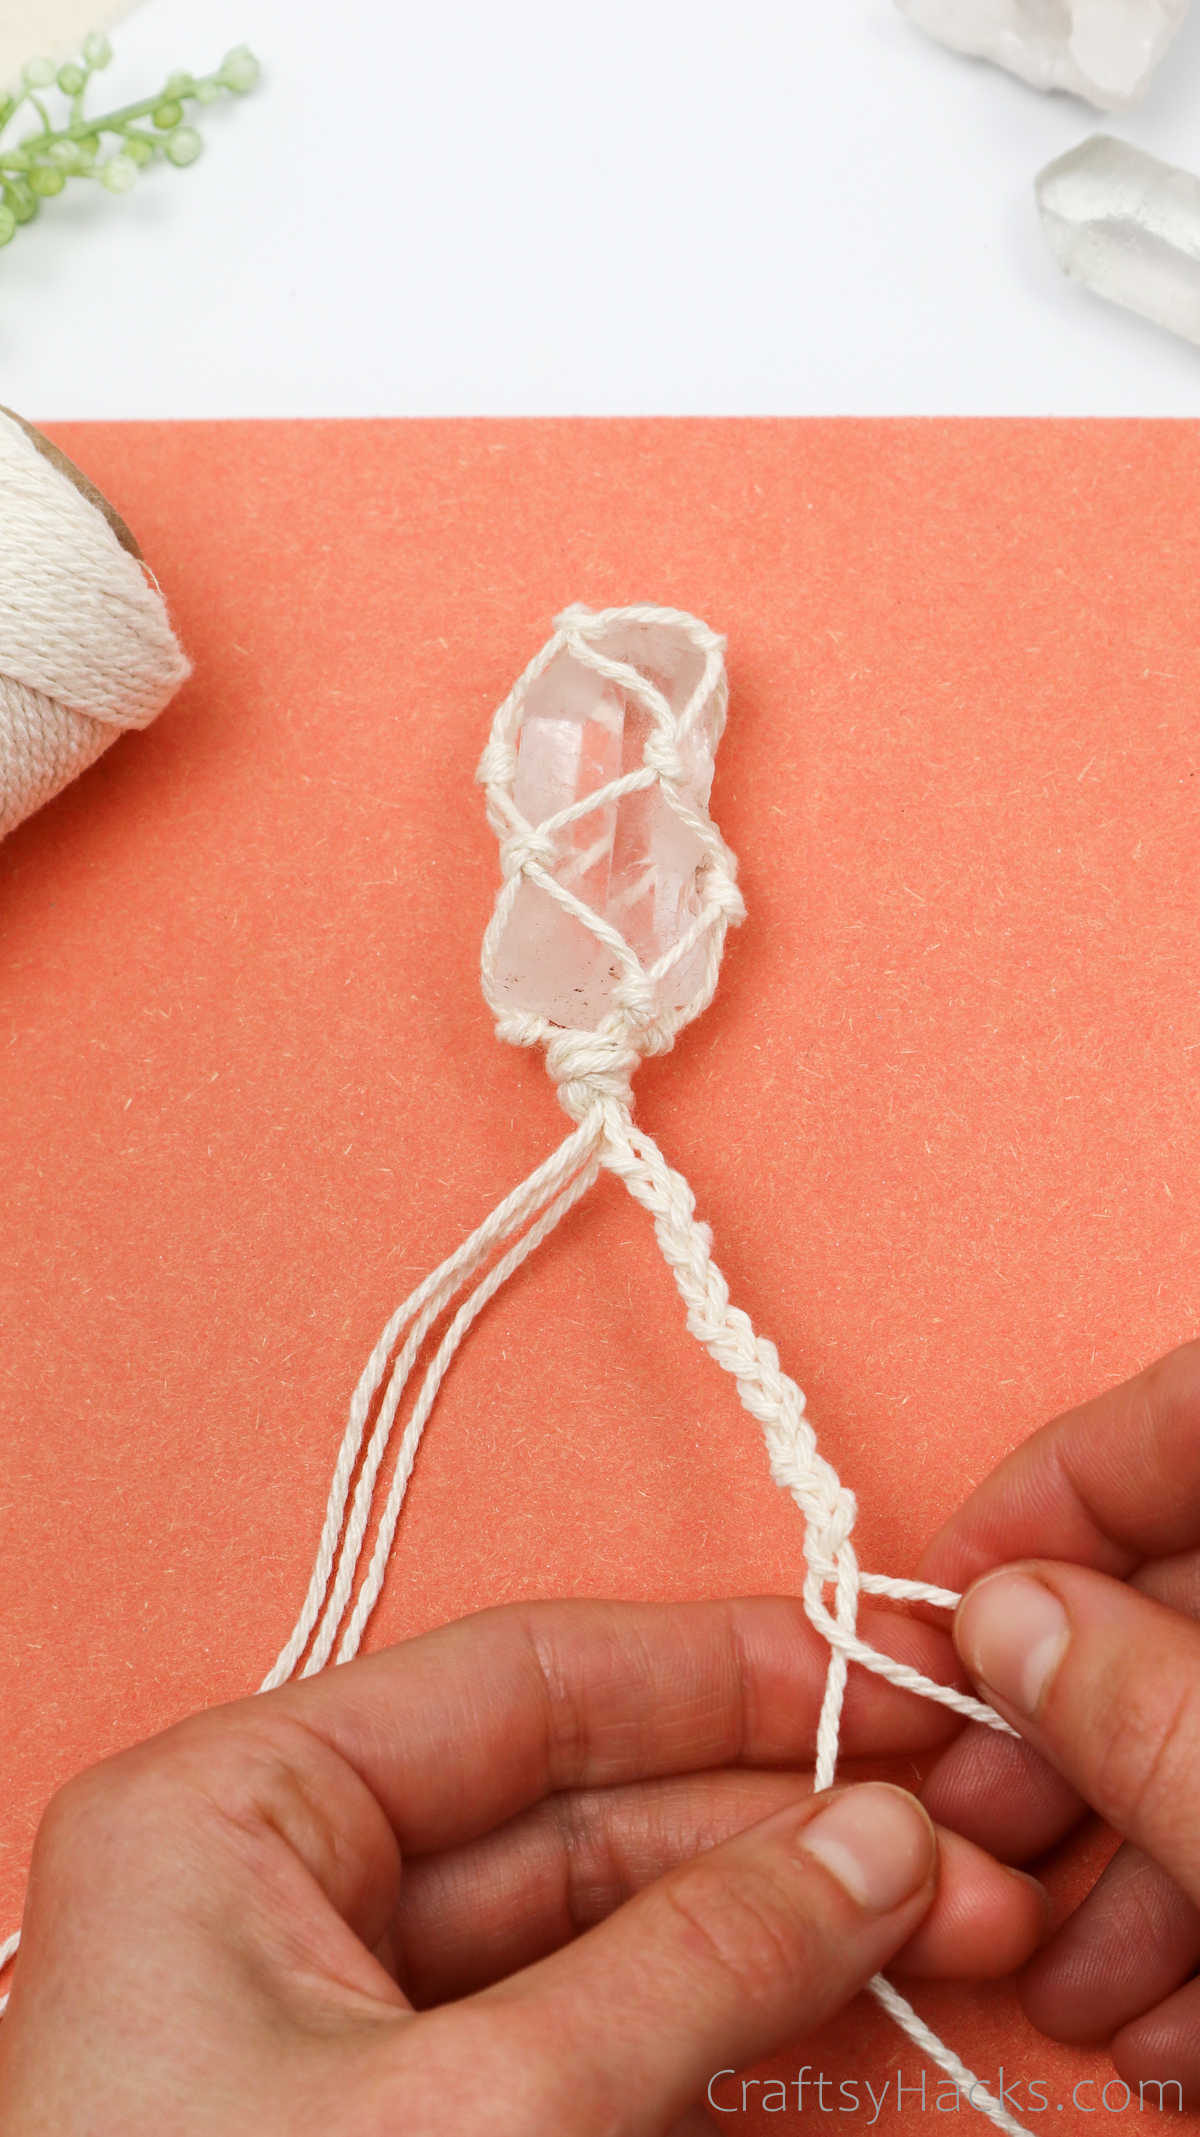
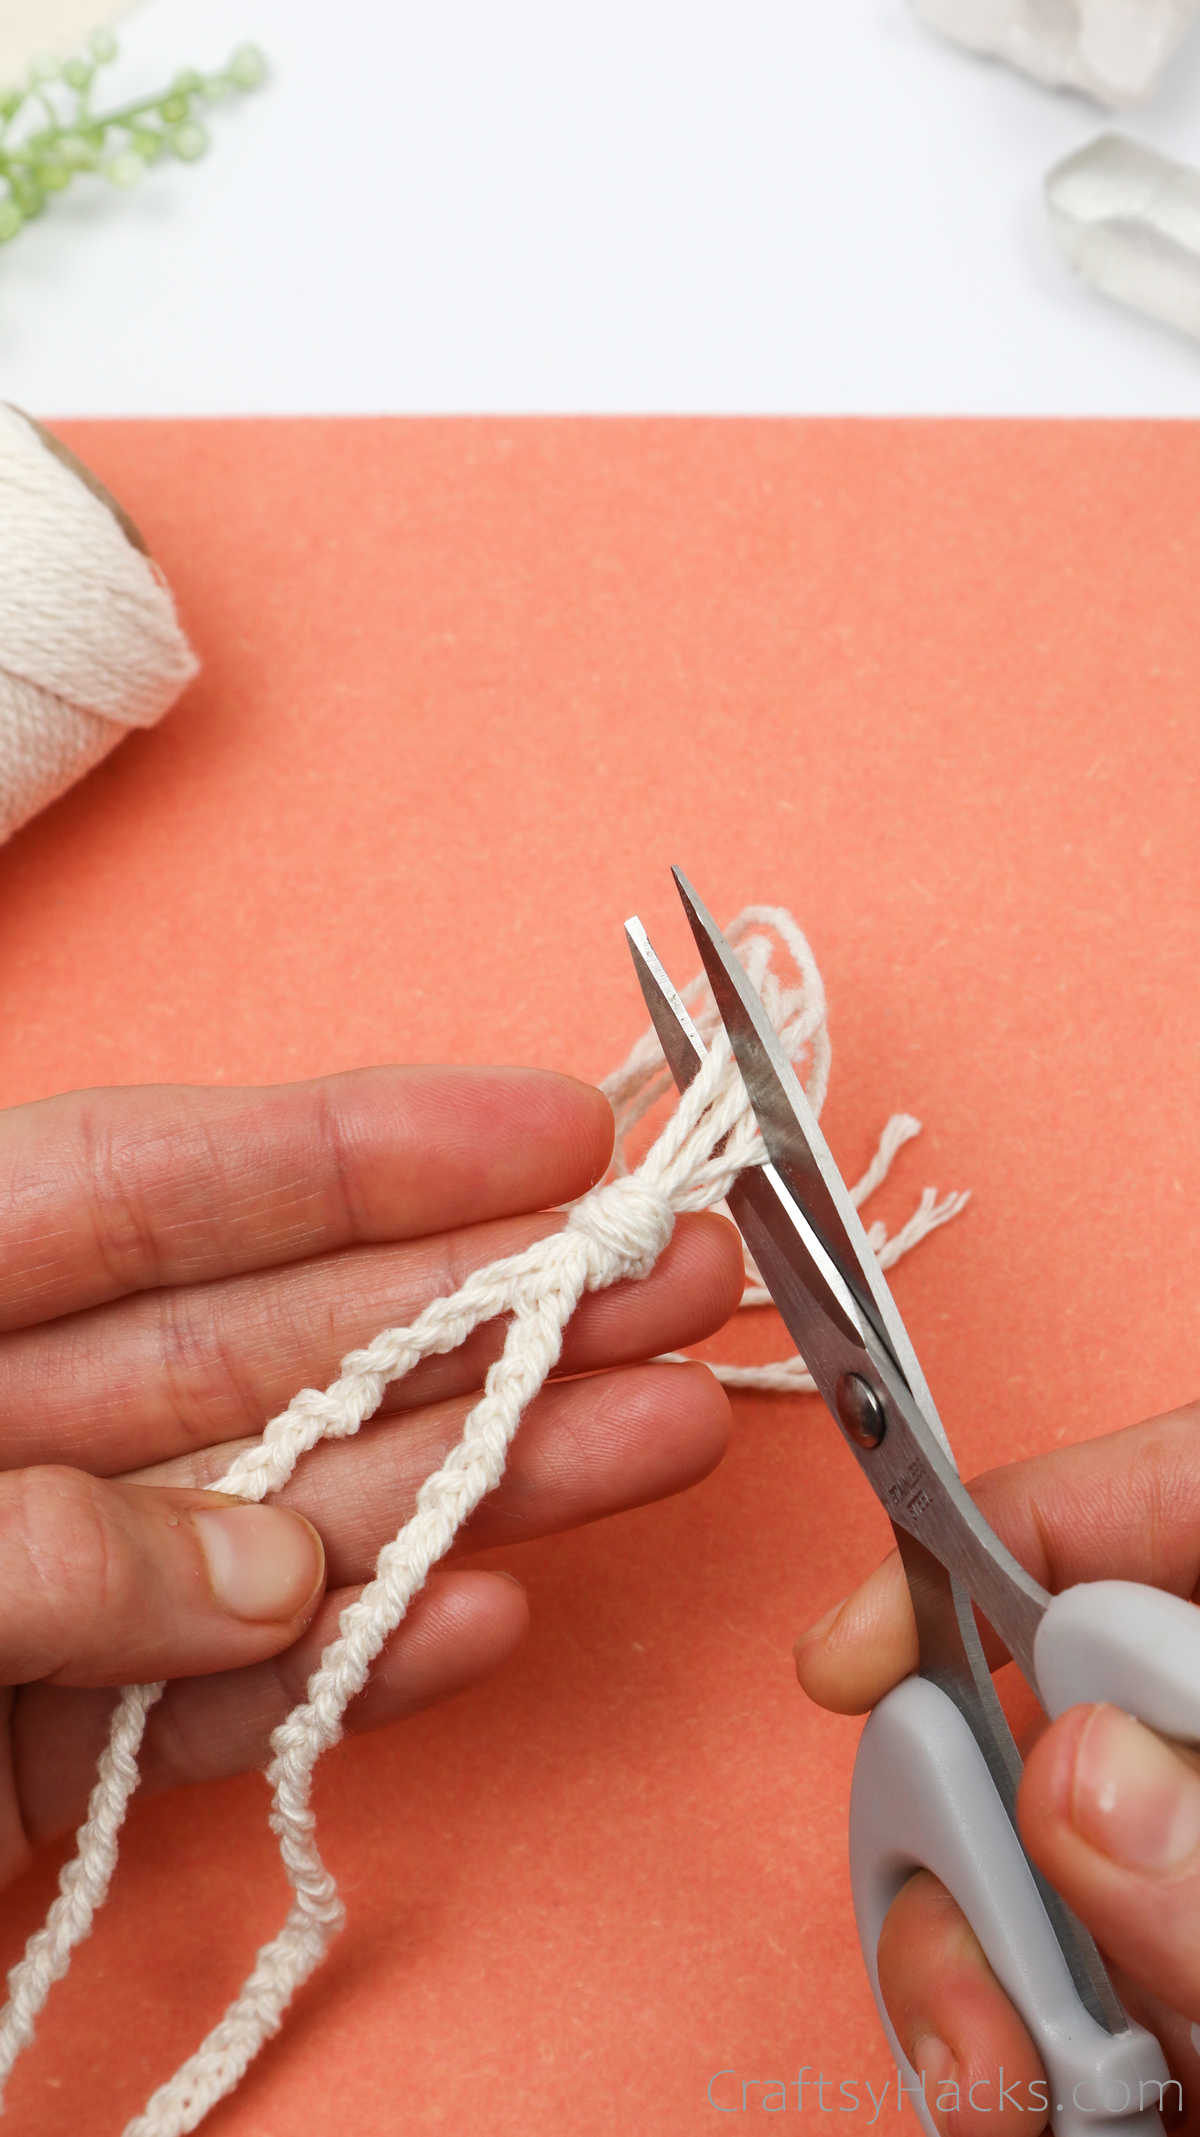
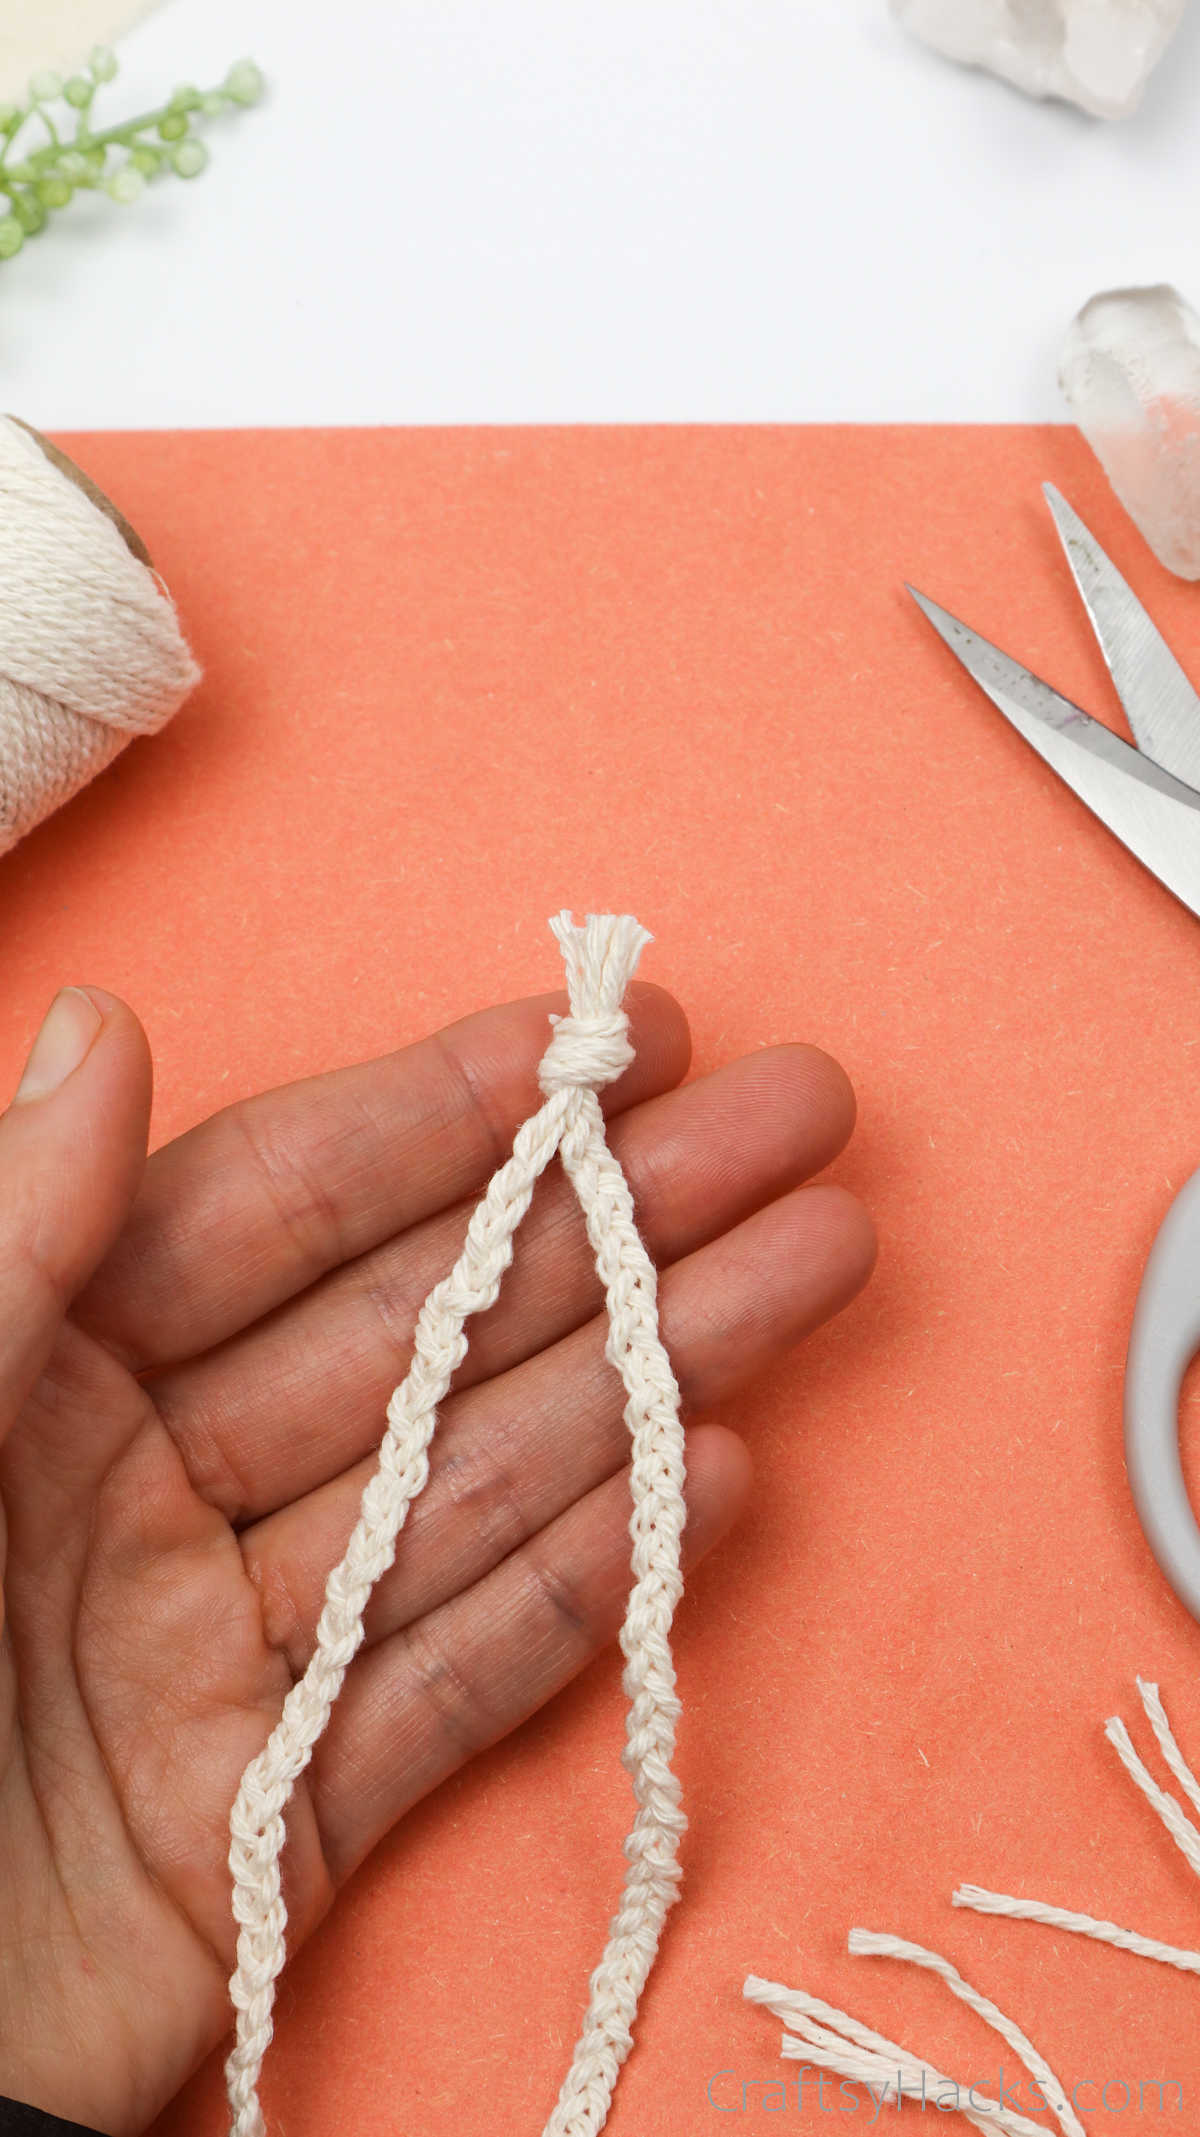
Step 14
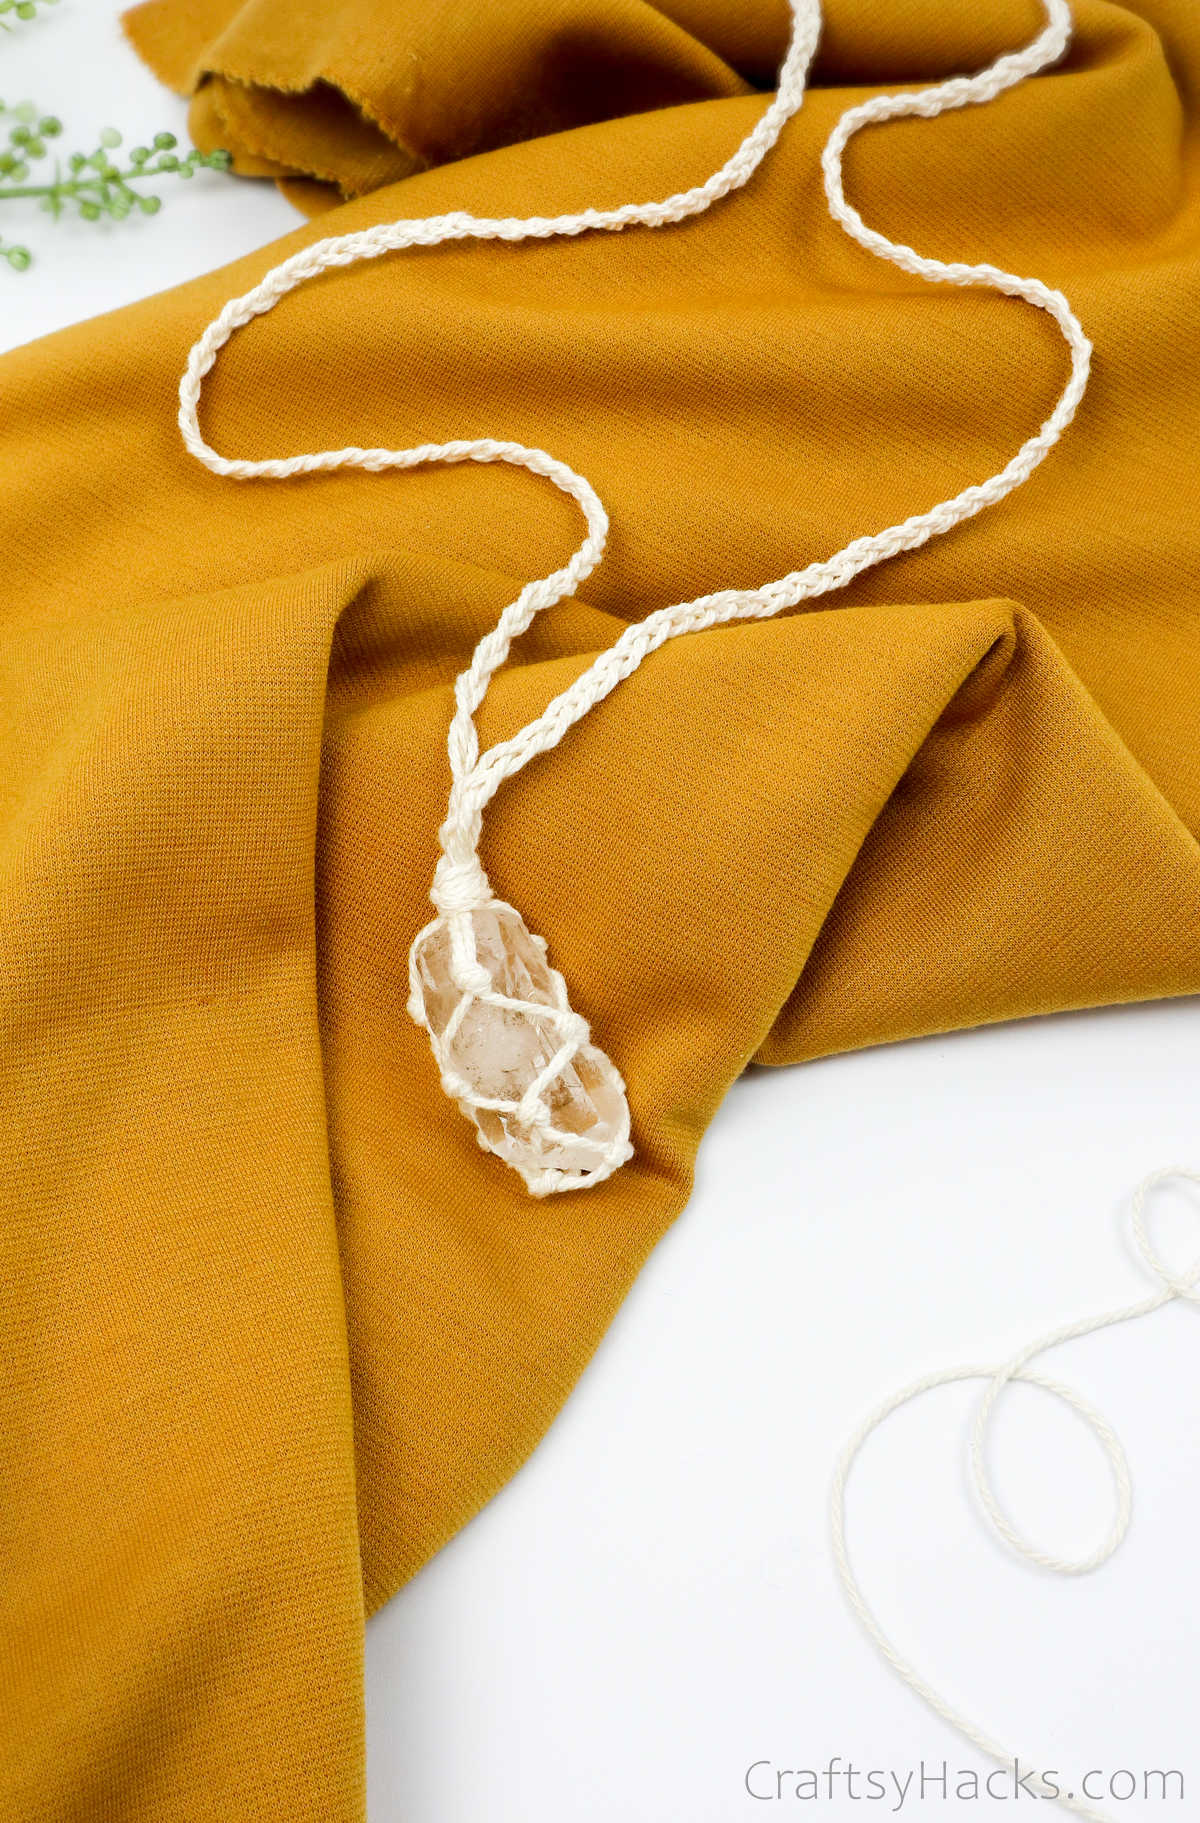
When you’re happy with the length you’ve braided, pull both braided sections together and fasten them together into a knot. Trim the ends off, as shown below, but only after you’re tugged at them to secure the knot.
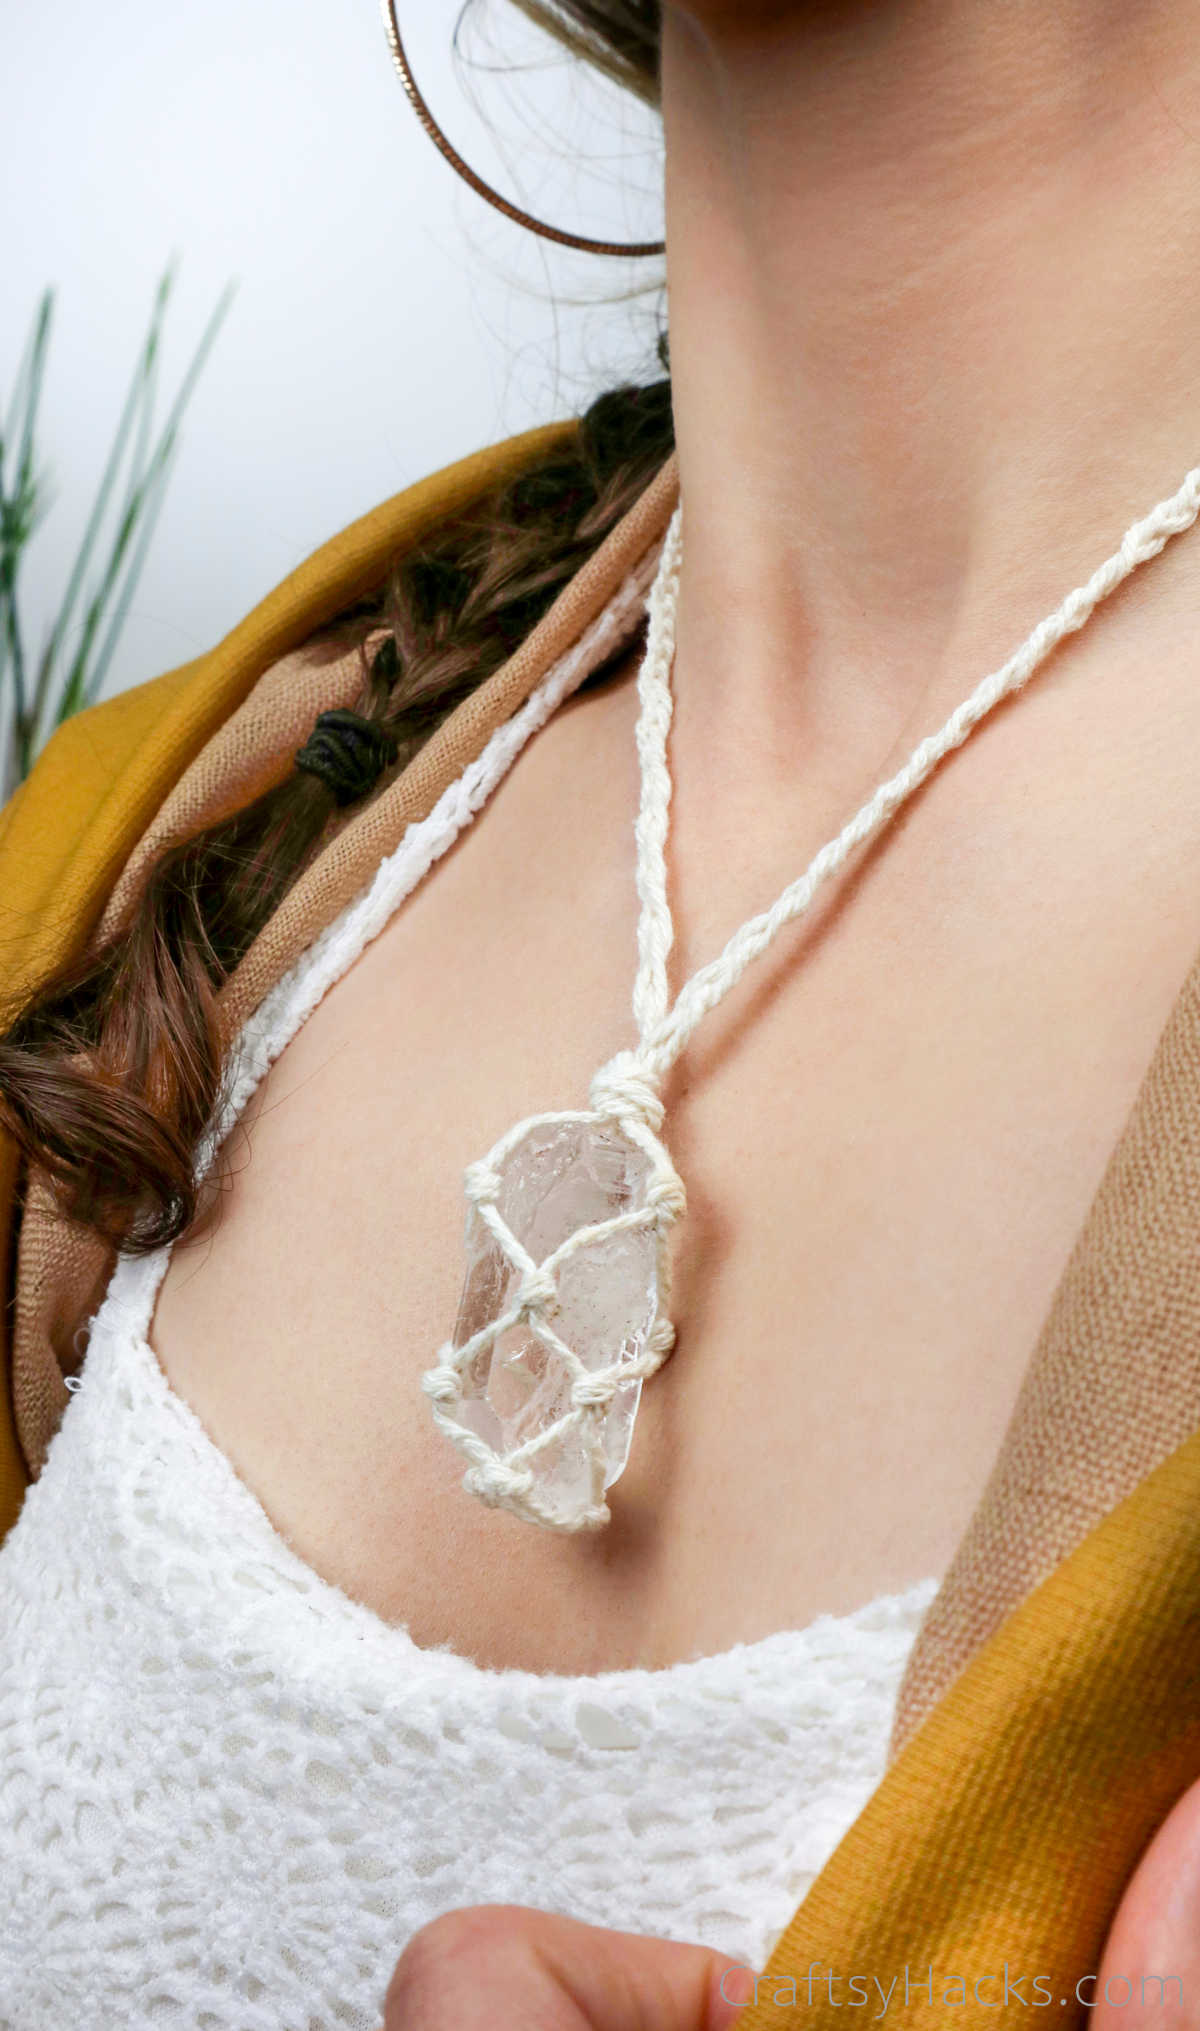
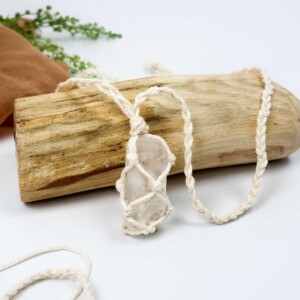
And there you have it, your very own DIY macrame necklace!

Who Can Make This Macrame Stone Necklace?
Seeing how easy it is to make this necklace, I’d say that it would be a breeze for teens and adults alike. With just a little supervision, I bet that even kids will get the hang of it in no time at all.
A Perfect Craft to Sell and Gift
Another really wonderful thing about this project is how customizable it is. Not just the size of the necklace—although that comes in handy when you’re making one for adults and children.
I’m talking about the different ways you can customize it. You can pick out a ton of crystals and stones, for instance, all differently colored and sized. On top of it, you can make a birthstone necklace or even pick out crystals that have different healing properties.
You can also always add beads and other embellishments, use different colored and textured cords too.
The fact that it is so customizable makes this necklace a great gift item, yes. But it also makes it a great craft to make and sell on, say, Etsy, or at a local fair or market!
Other Crafts You Might Like to Make
- DIY Earrings
- DIY Paper Rings
- Crafts for Girls
- Yarn Projects
- DIY Hair Bows
- Rock Painting Ideas
- DIY Bracelet Out of Shoelaces
- Pinecone Crafts
- DIY Wire Rings
Easy DIY Stone Necklace (Step-by-Step)
Video Tutorial
Equipment
- Scissors
Materials
- A rock/crystal/gem
- 1 mm cotton twine
Instructions
- Grab the three items on the list of materials to get started.
- Measure out 32 inches of the cord and cut it out. You’ll need a total of three cords for this project. The length depends on the size of the stone, as well as the length of the necklace.
- Fold the cords in half. Place the stone or crystal you’re using in the loop of the first cord and measure it.
- Then, make a simple overhand knot, ensuring that the bottom of the crystal sits snug in this first loop.
- Grab the second looped cord through that first loop. Then, pull the ends of the second loop through and knot it in place around the first loop.
- Make sure you leave enough room for the third knot to be made. The three knots should be evenly spaced. Now, grab the third loop and make your third know, just like you did with the second one.
- This is your base triangle and always keep an eye out for it as you’ll be working around this base.
- Grab two subsequent cords—one from neighbouring sections—and knot it about halfway between the two knots at their base. The new triangle you just made should be the same size as your base triangle.
- Place your pattern on a flat surface and continue to section and knot the cords the same way all around, working your way up. Remember to repeatedly fix the crystal into the base to make sure the knots in question sit perfectly around the crystal.
- Keep knotting the cords.When you reach the top of the crystal, gather all the cords and pull them into a knot at the center of the top of the crystal. Tug the cords to secure the knot and the crystal in place.
- Divide the cords into two sections of three cords each. Start braiding the three cords of each section and work your way up.
- Once you reach the desired length, fasten off with an overhand knot and trim the edges.
- Feel free to customize with beads and embellishments


