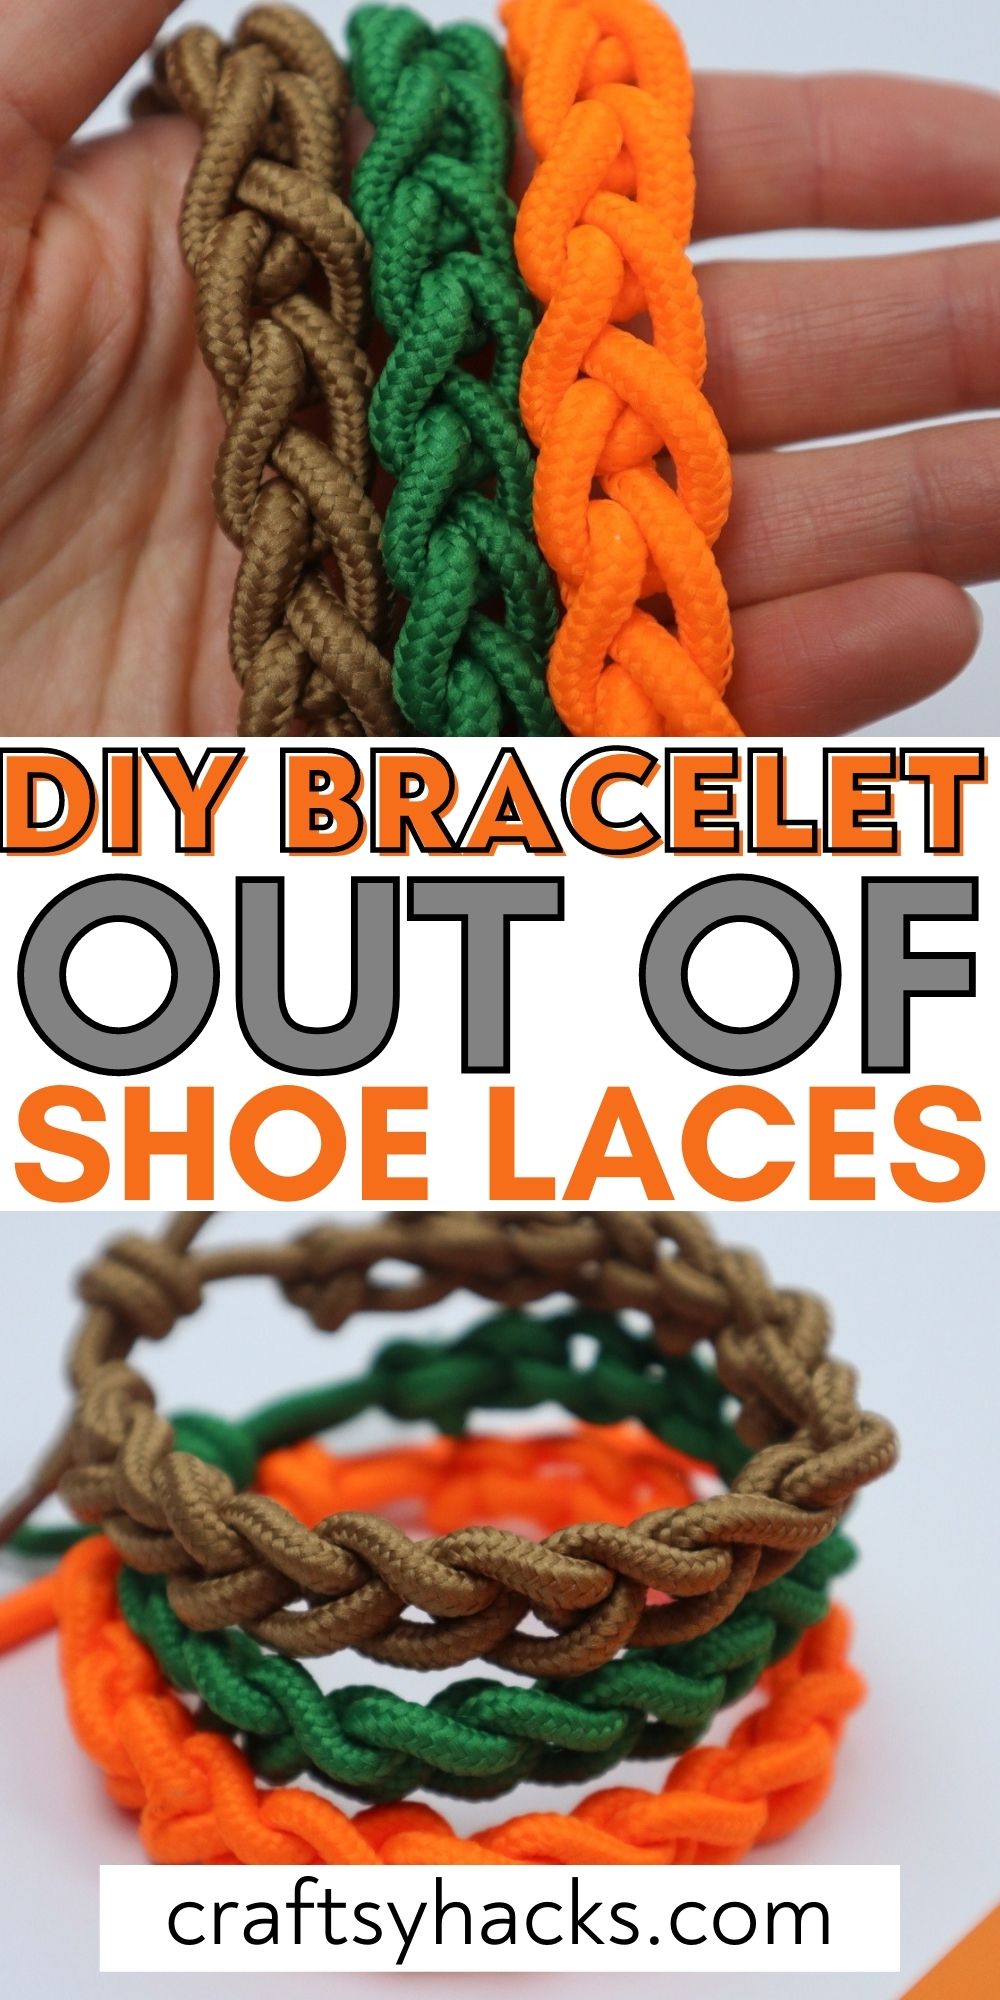
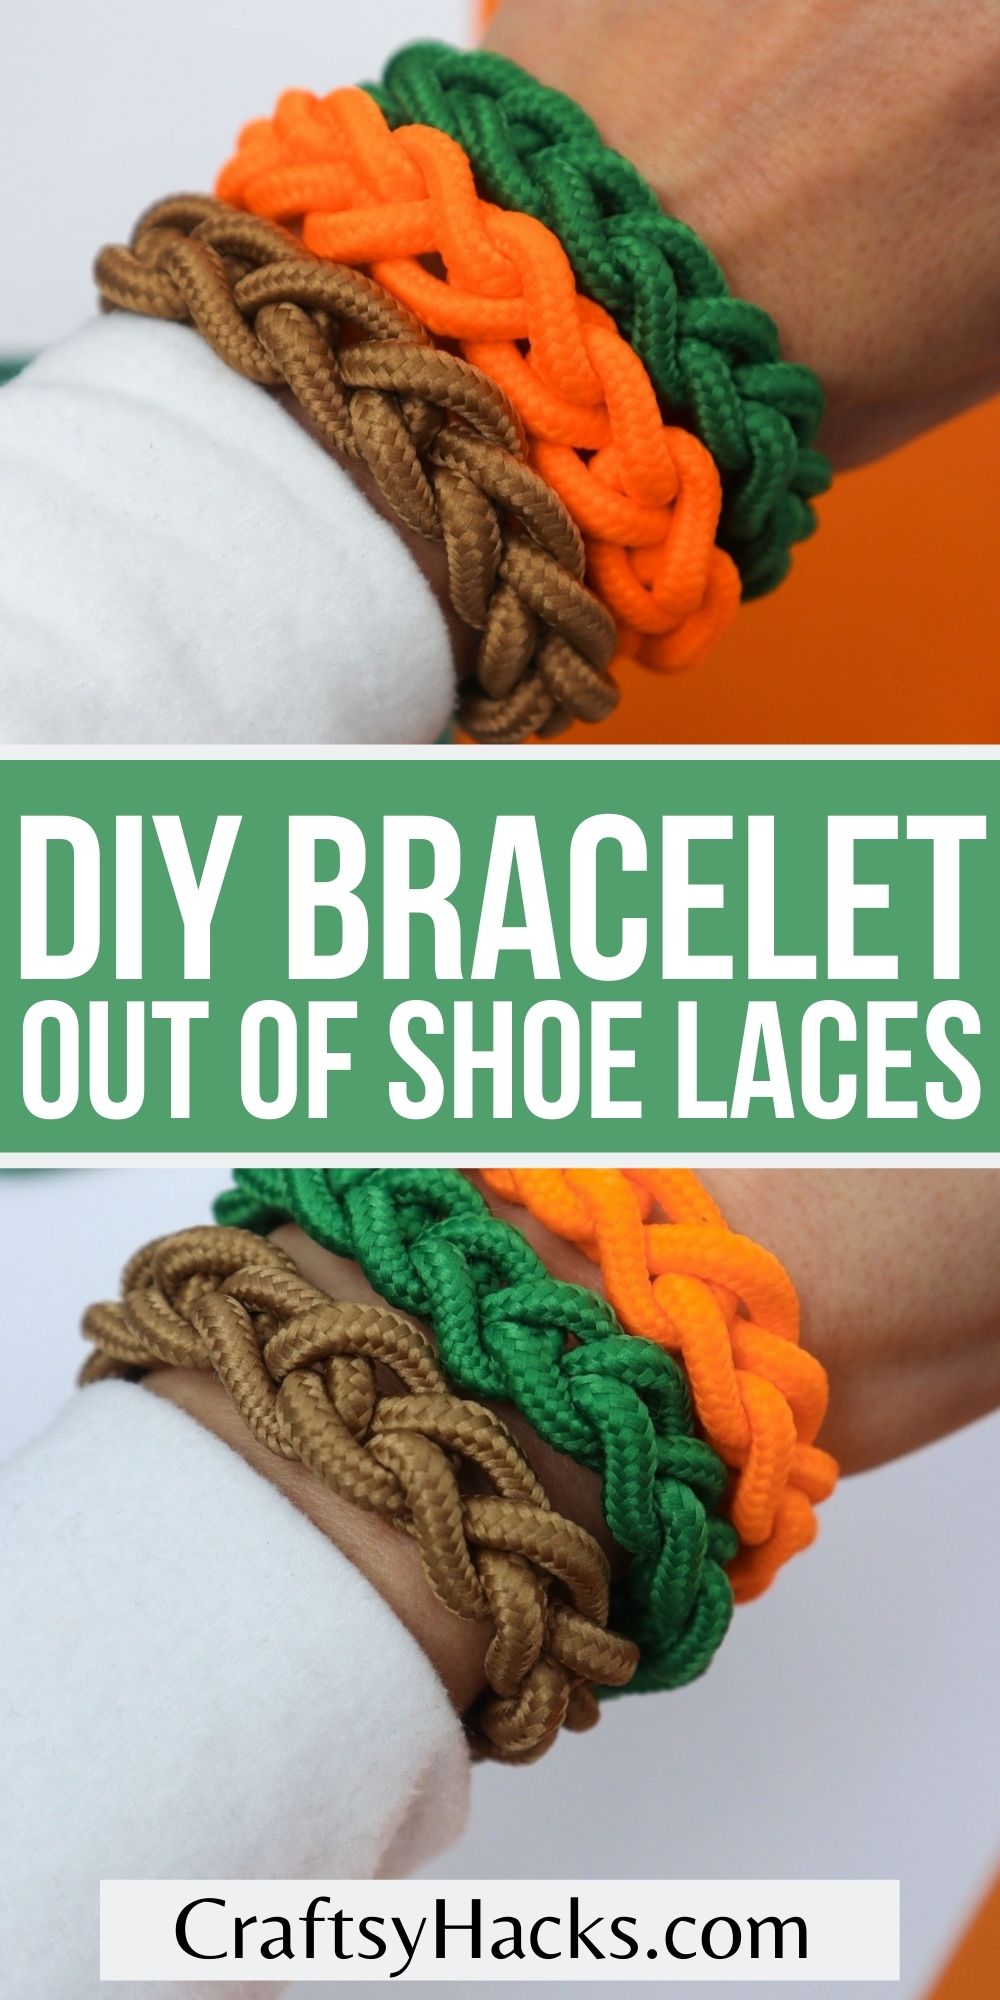
DIY Bracelet Out of Shoelaces
This post may contain affiliate links: full affiliate disclosure.
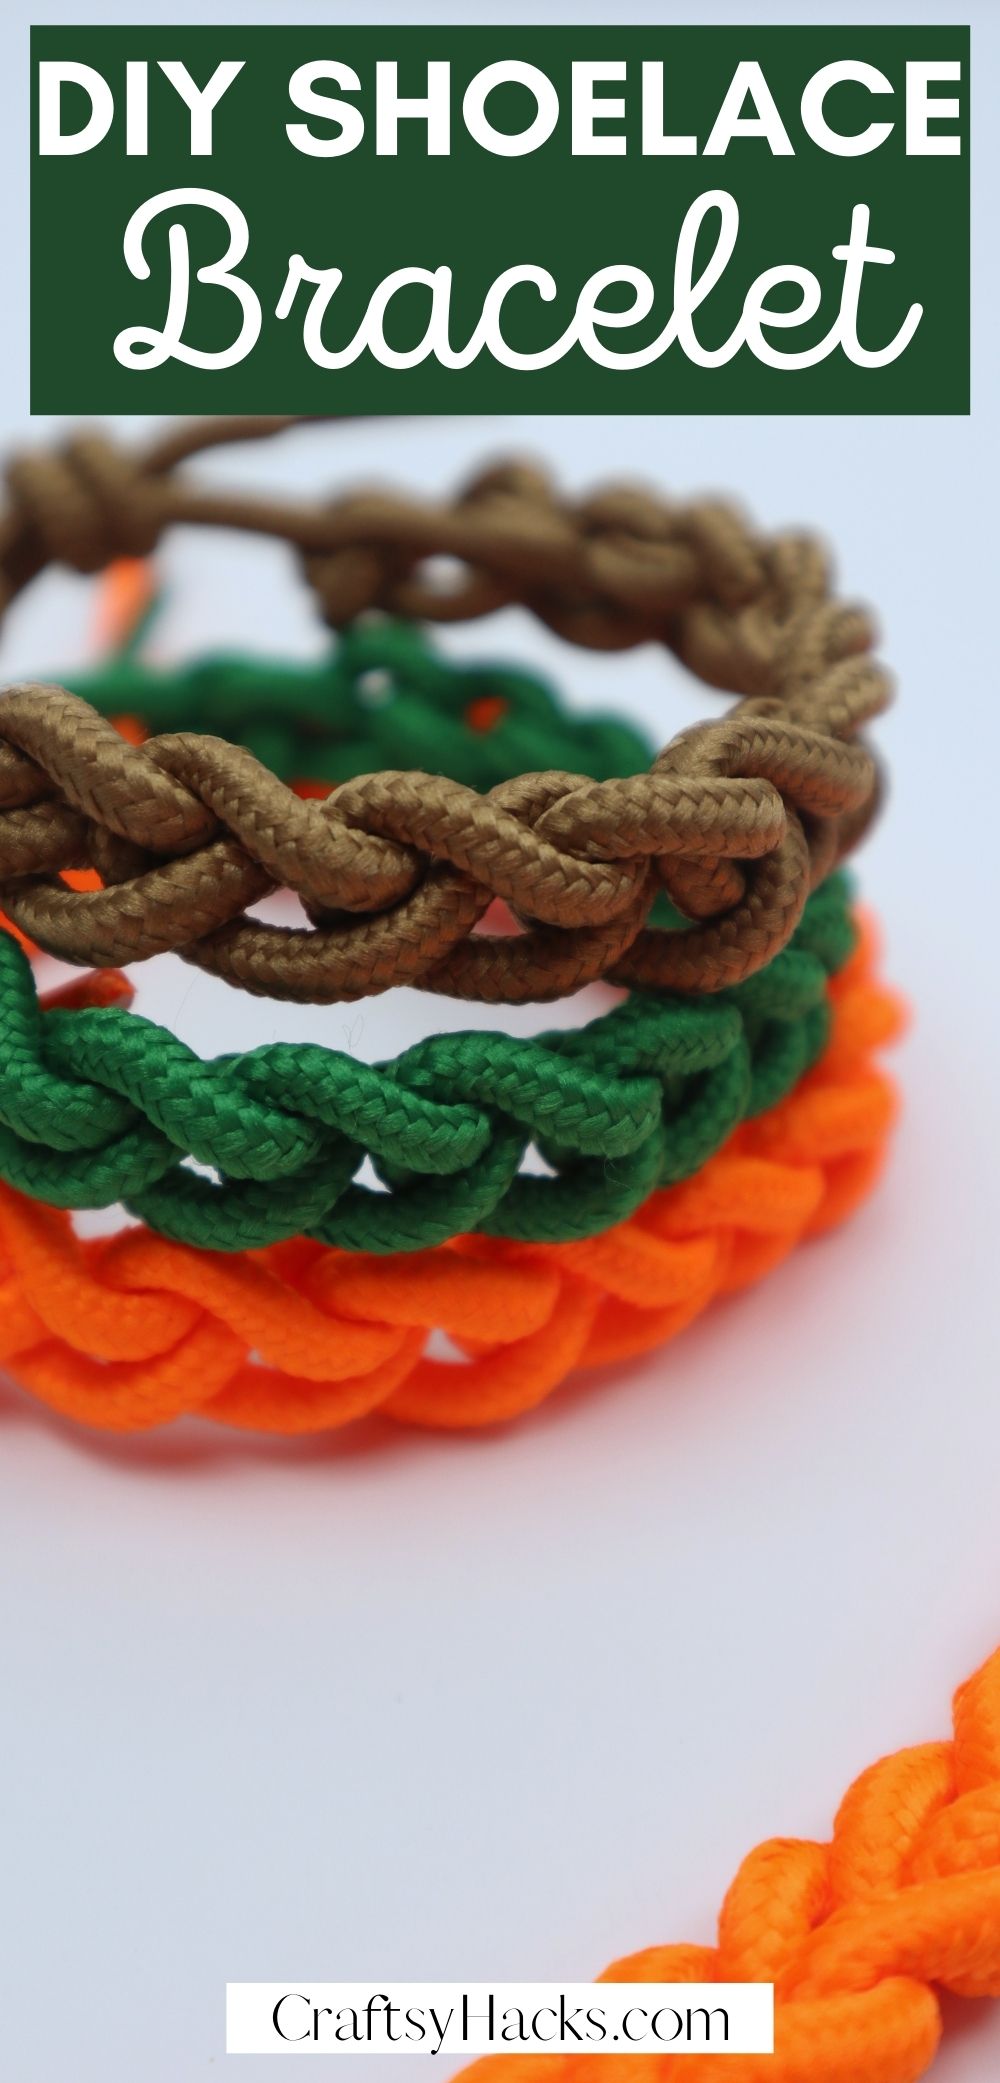
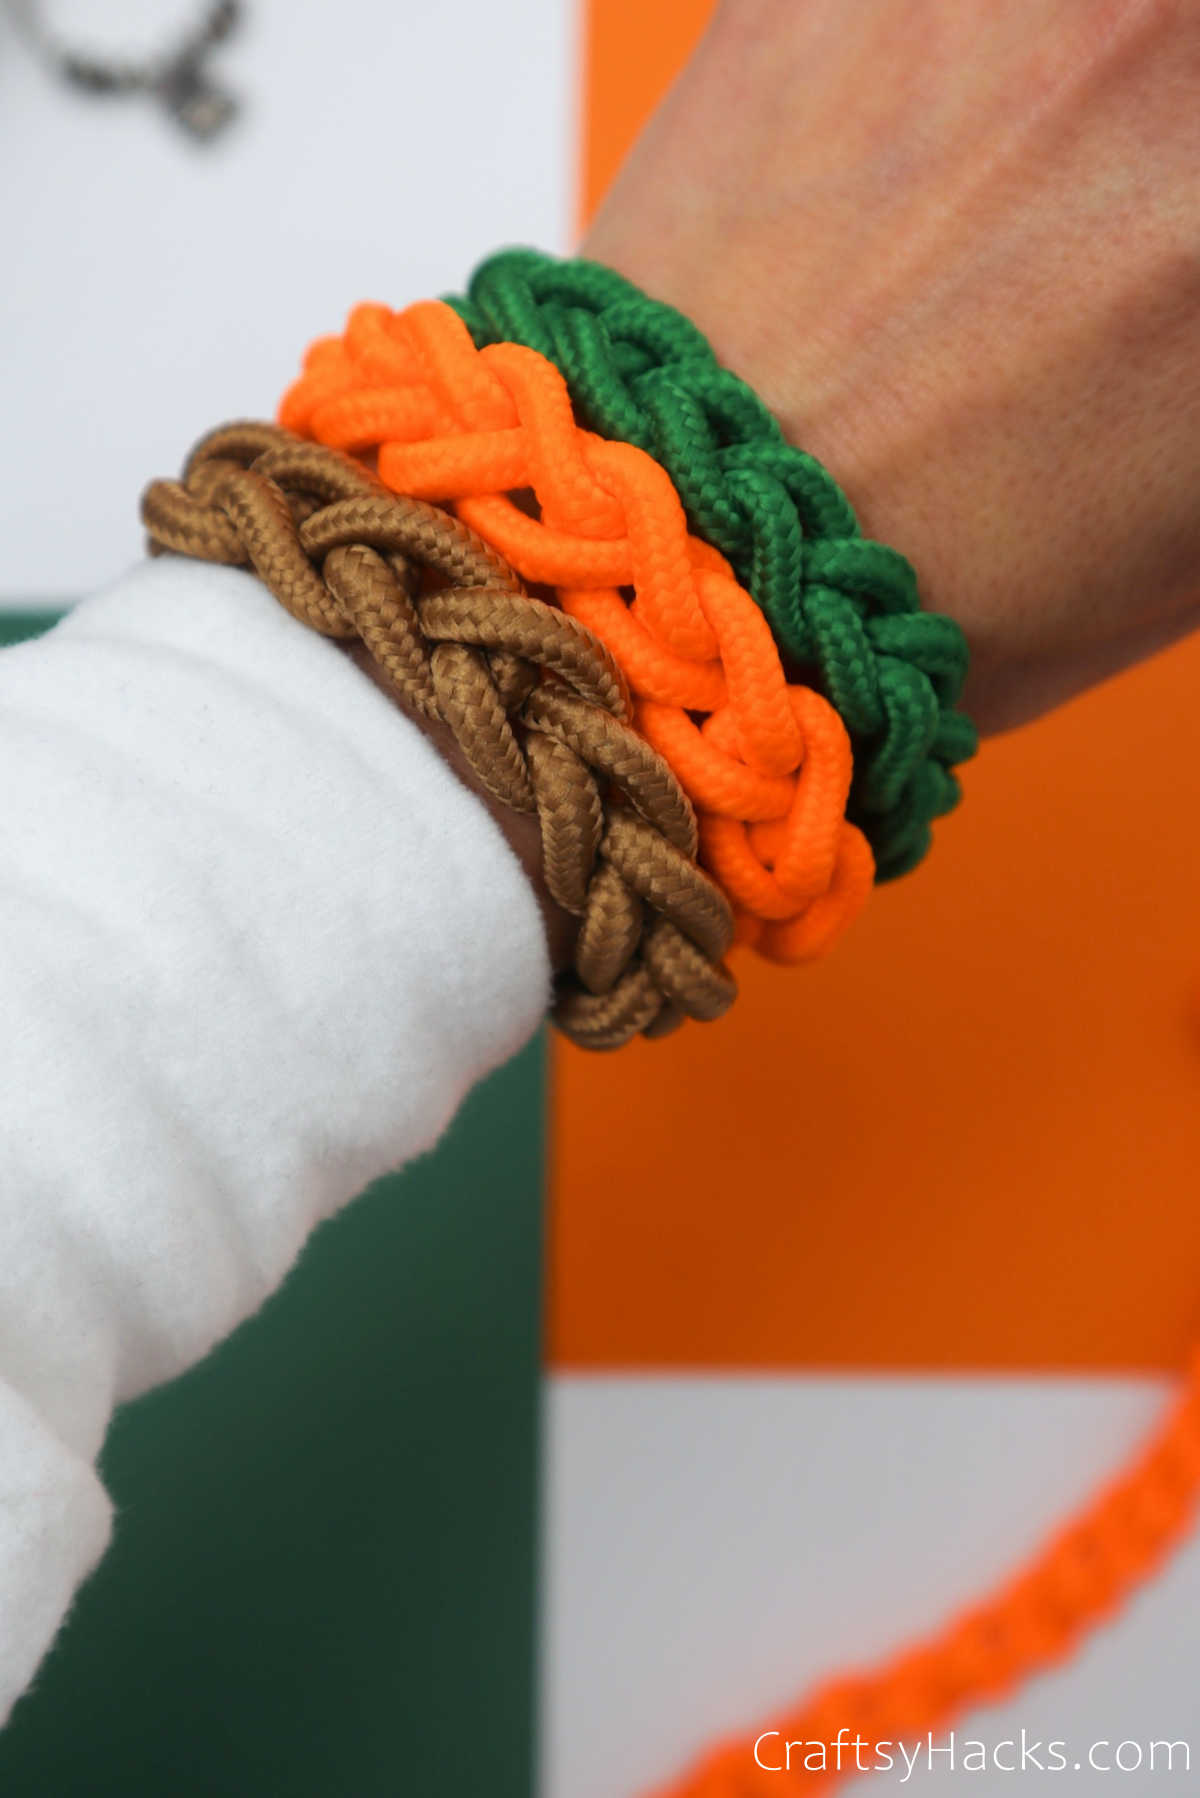
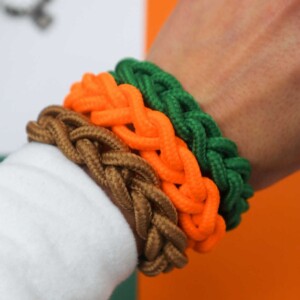
Use those shoelaces to make your very own DIY bracelet! It’s an easy craft for teens, adults and even kids. Fun, cute and creative!
Do you remember when aglet-crafts were all the rage? Don’t you think it’s time we brought them back? Think about it! There’s a ton of creative craft projects you can try out with shoelaces.
Check out this DIY bracelet out of shoelaces, for example.
It’s easy to make, and you hardly need anything by way of craft supplies other than the shoelaces of your choice and color.
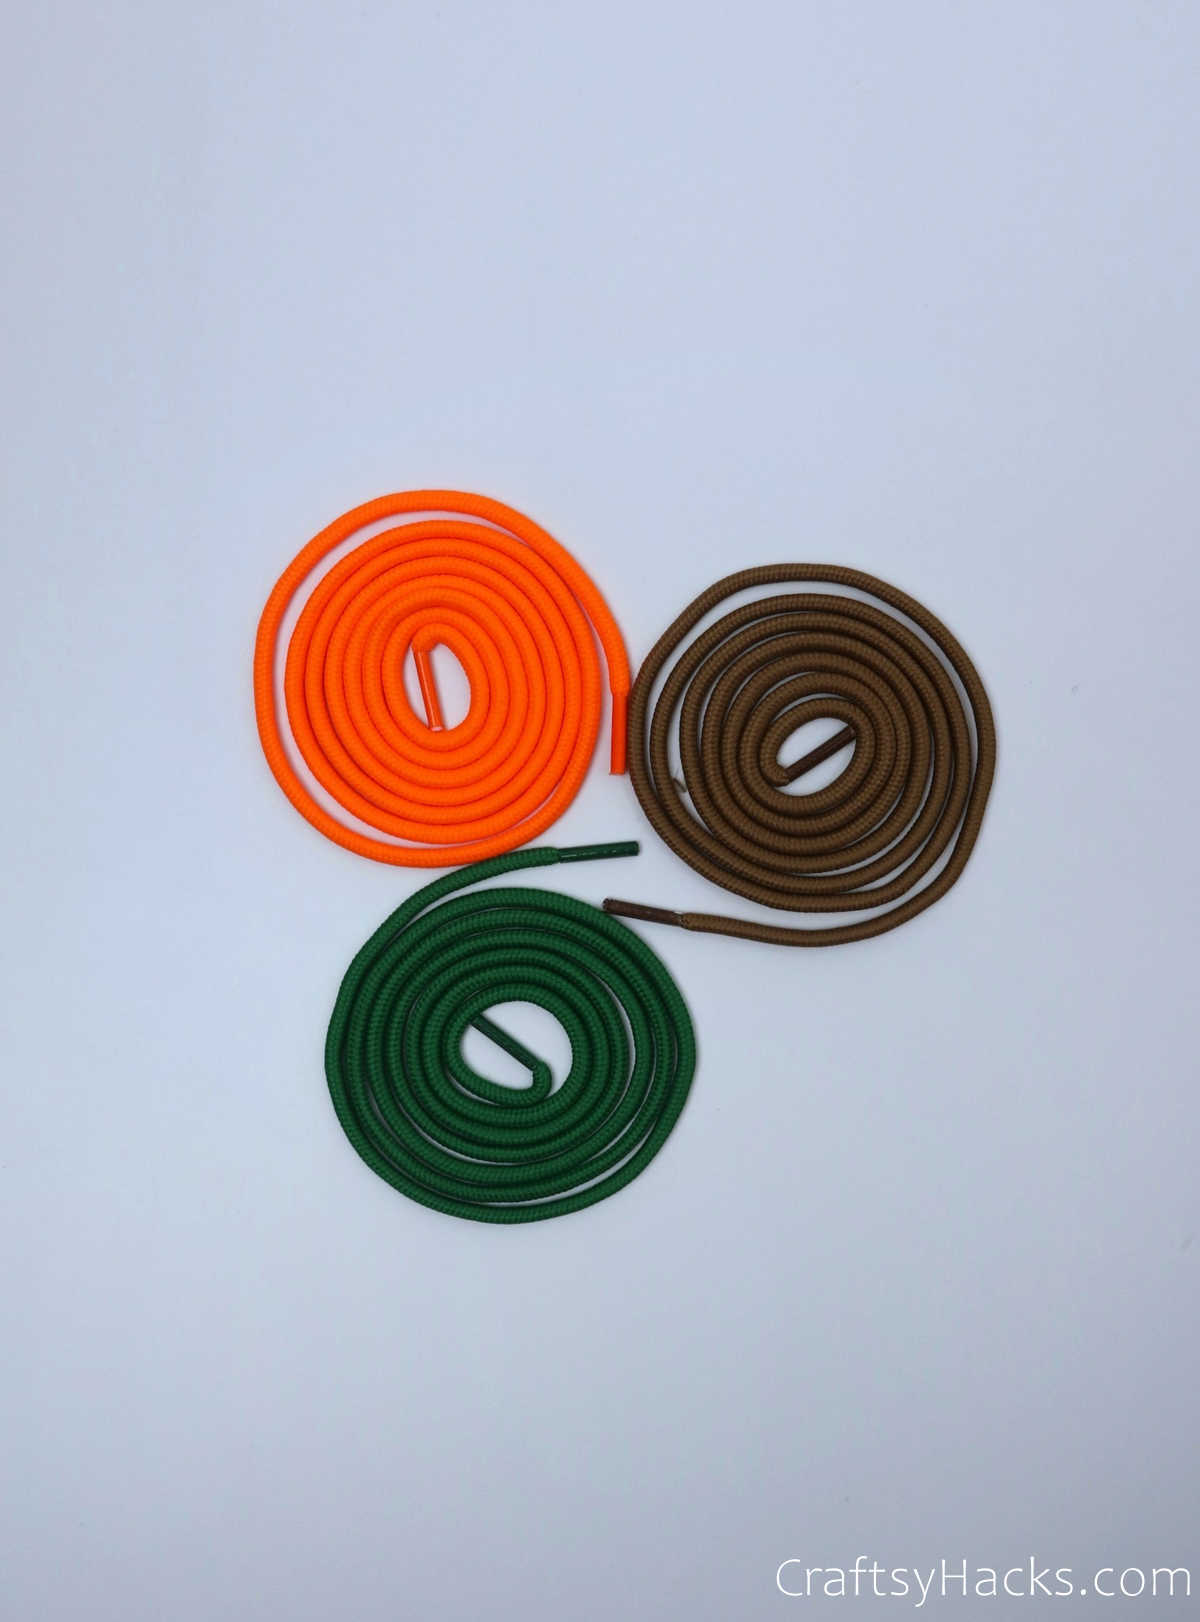
Supplies You’ll Need
- shoelaces (choose whatever colors you like).
That’s literally all you need for these super cool DIY bracelets. So let’s get right down to it and start making the bracelets.
How to Make Bracelets Out Of Shoelaces
Here is the full tutorial!
Step 1
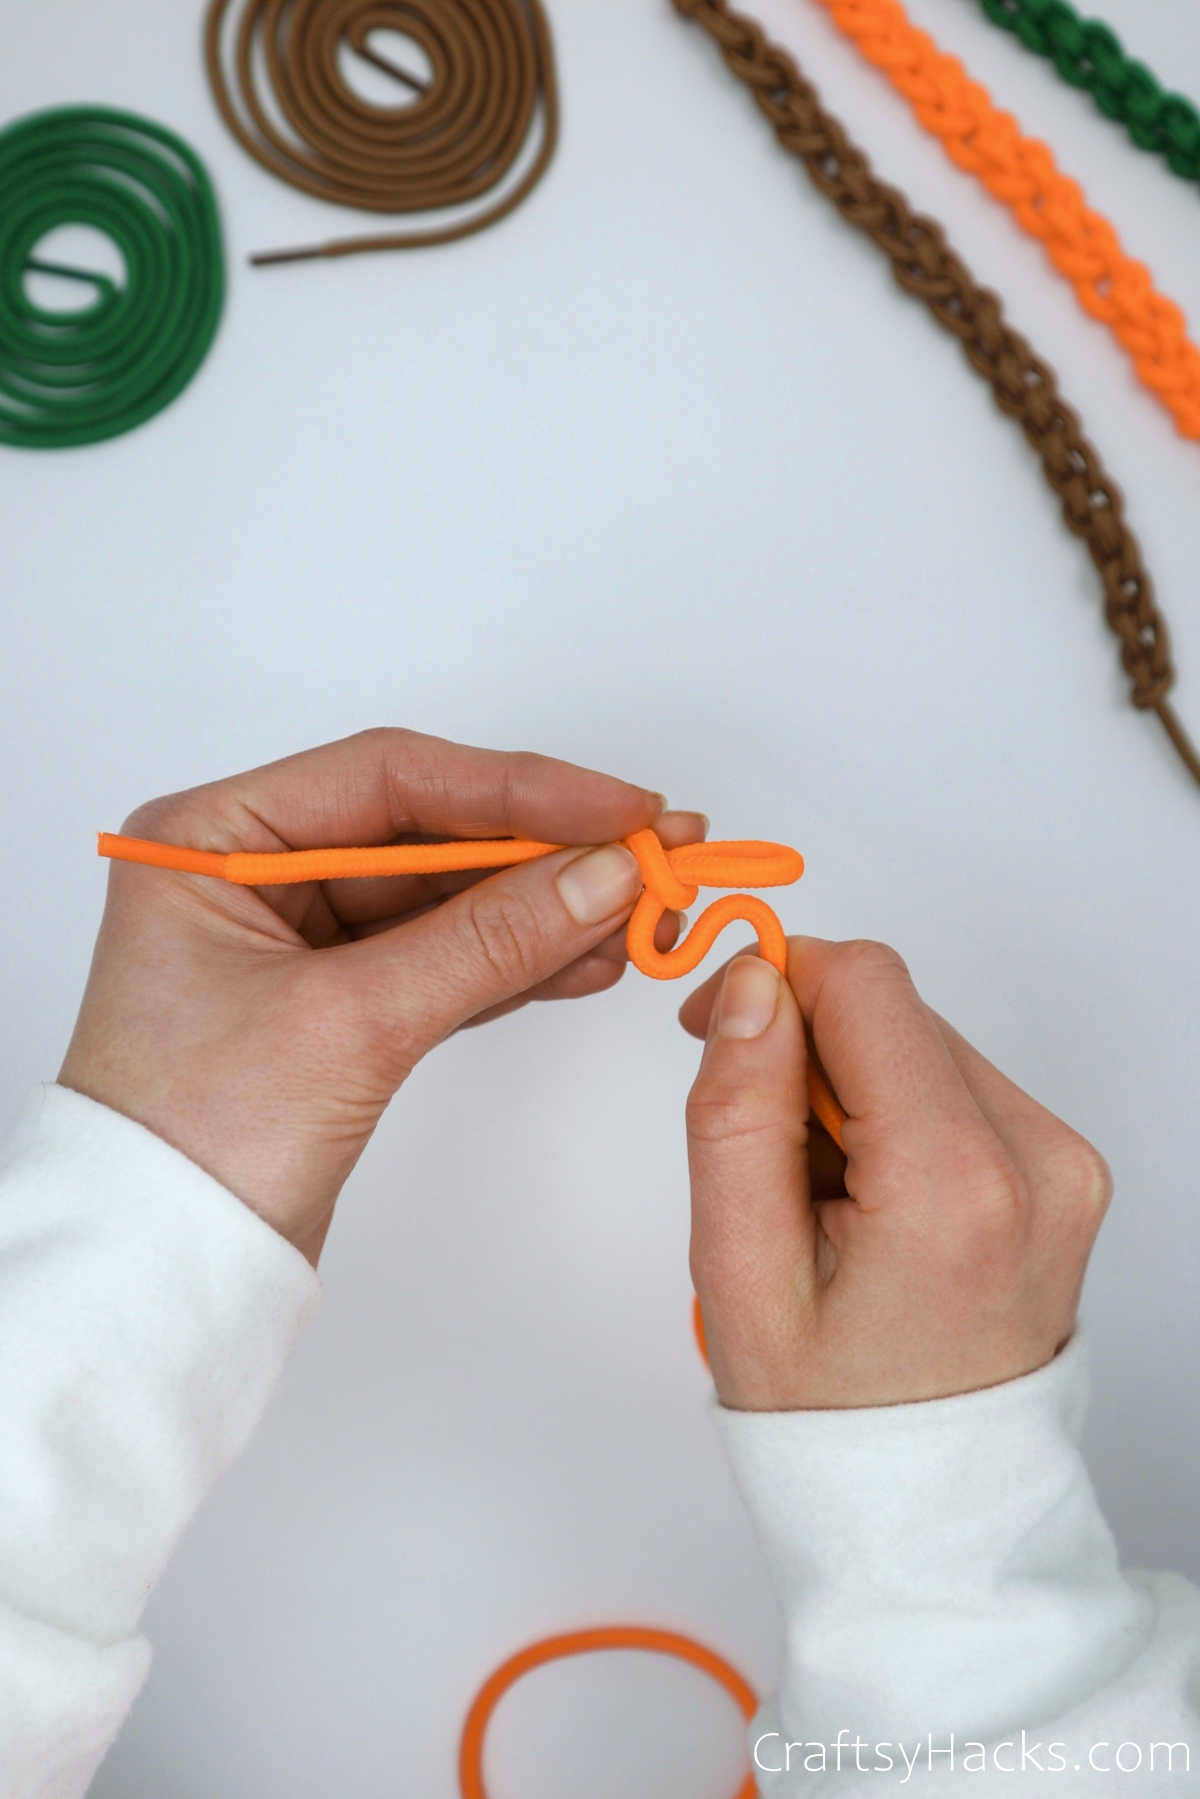
Grab your shoelace. This project calls for one shoelace, around 80cm to one meter in length, depending on how wide your wrist is.
Make a loop with the left end being the shorter tail. You will be working your way around the right tail.
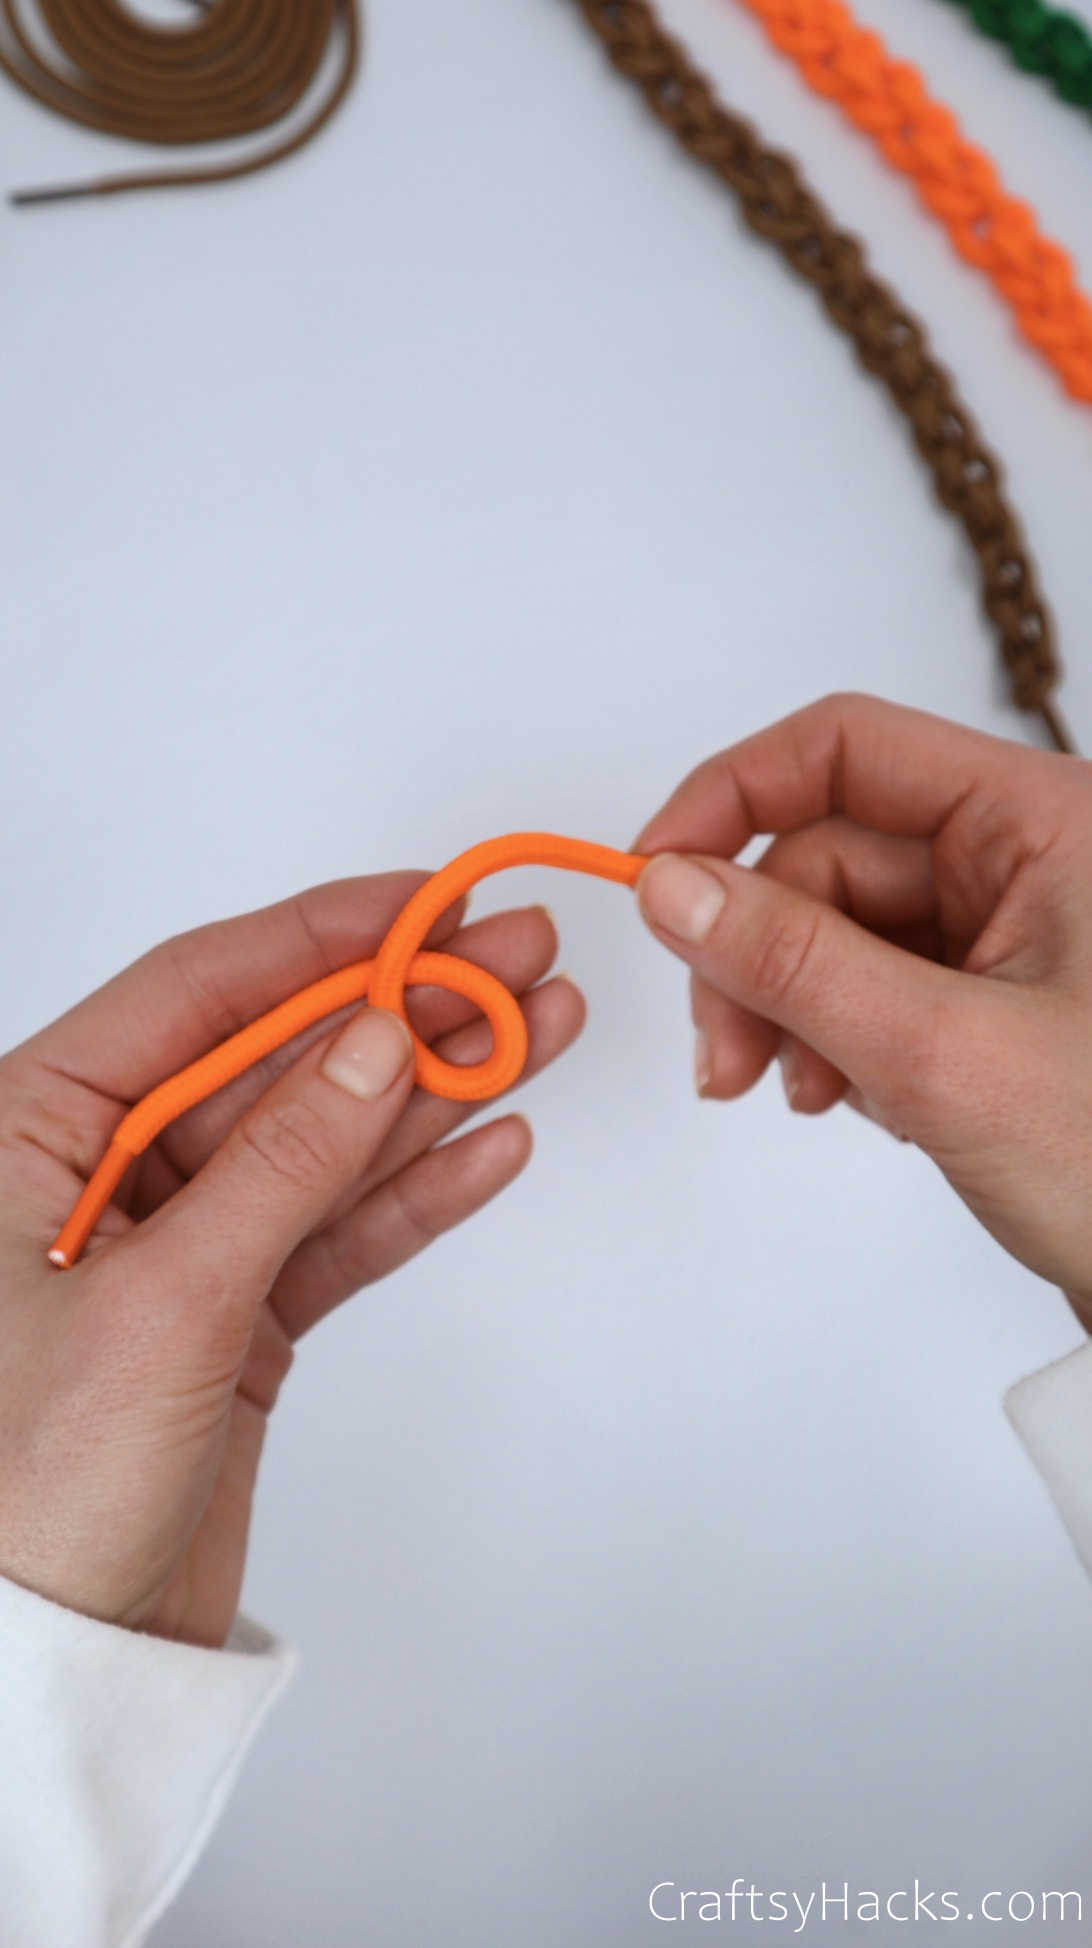
Step 2
Pull the right tail over and then behind it. Don’t you think it looks a little like a Celtic knot pattern?
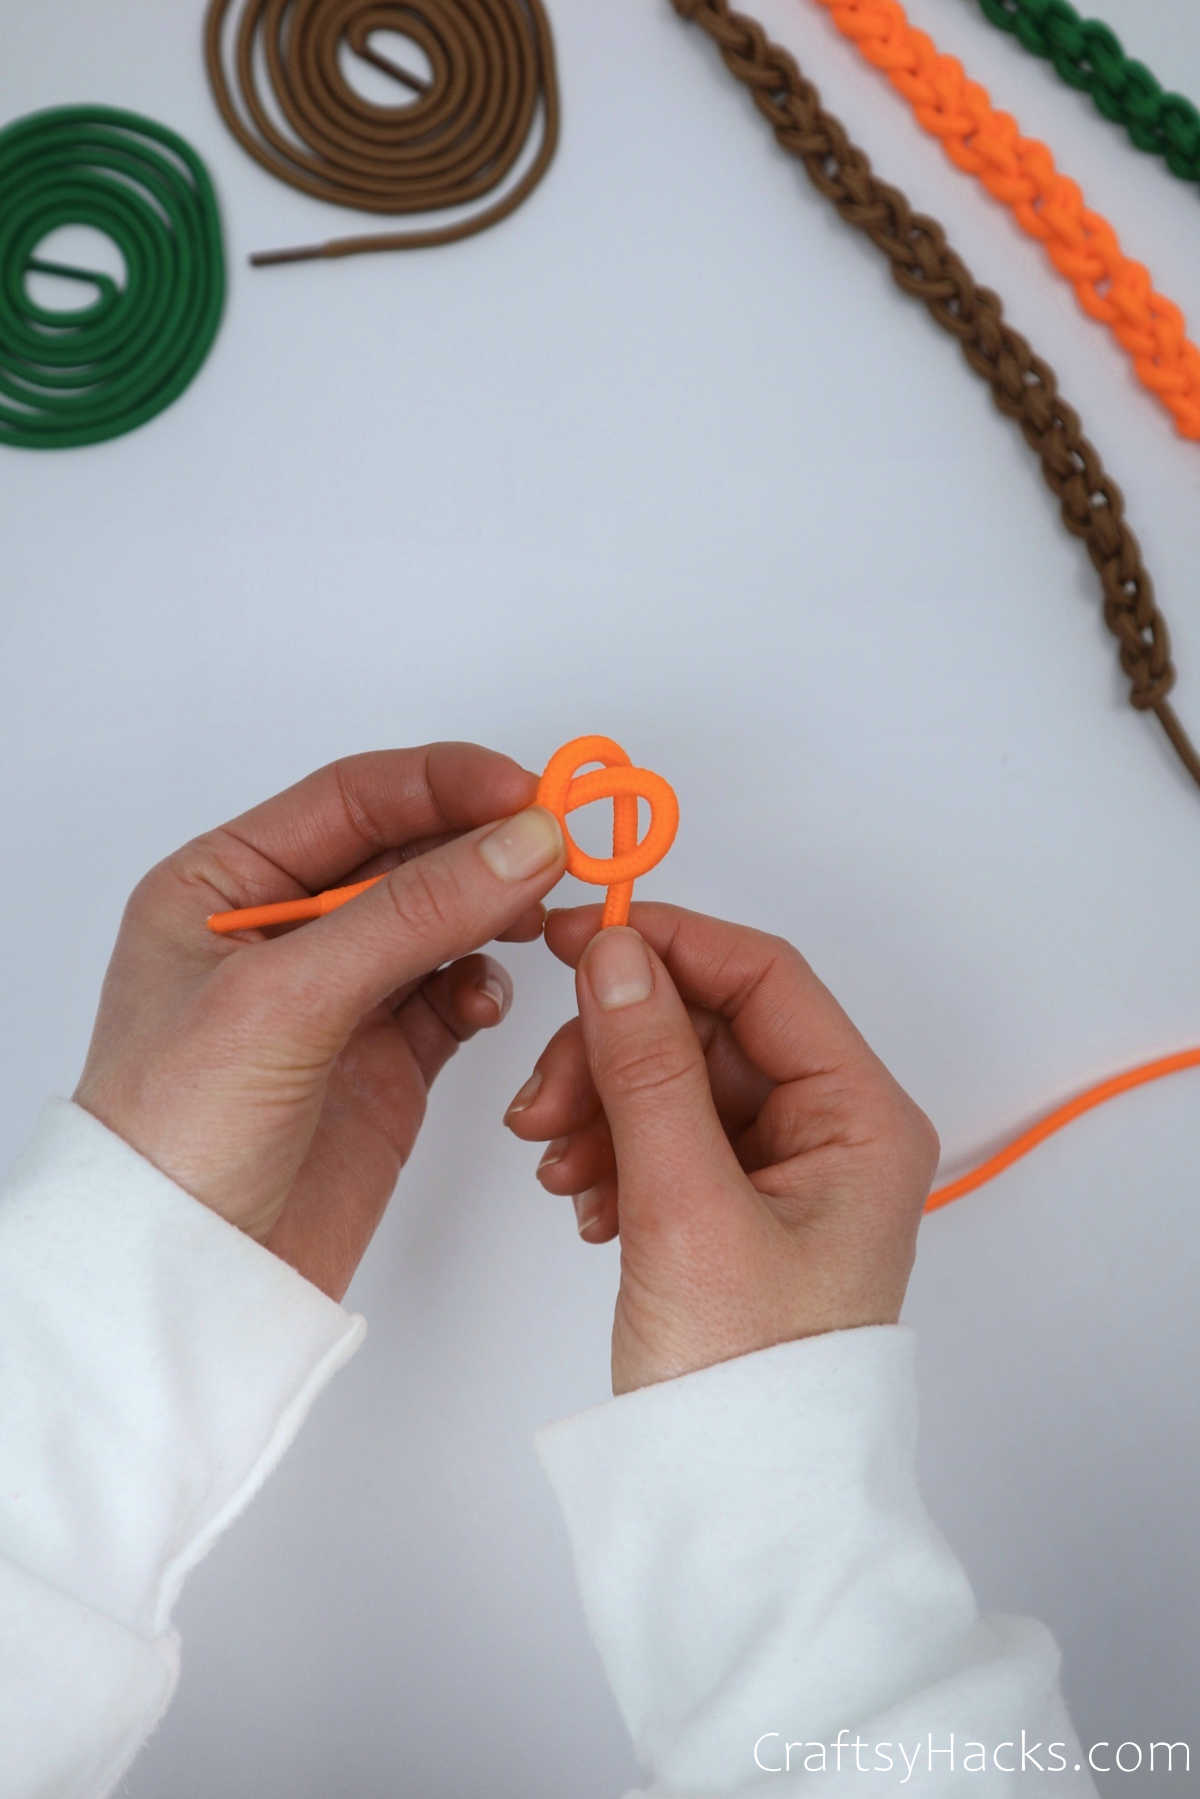
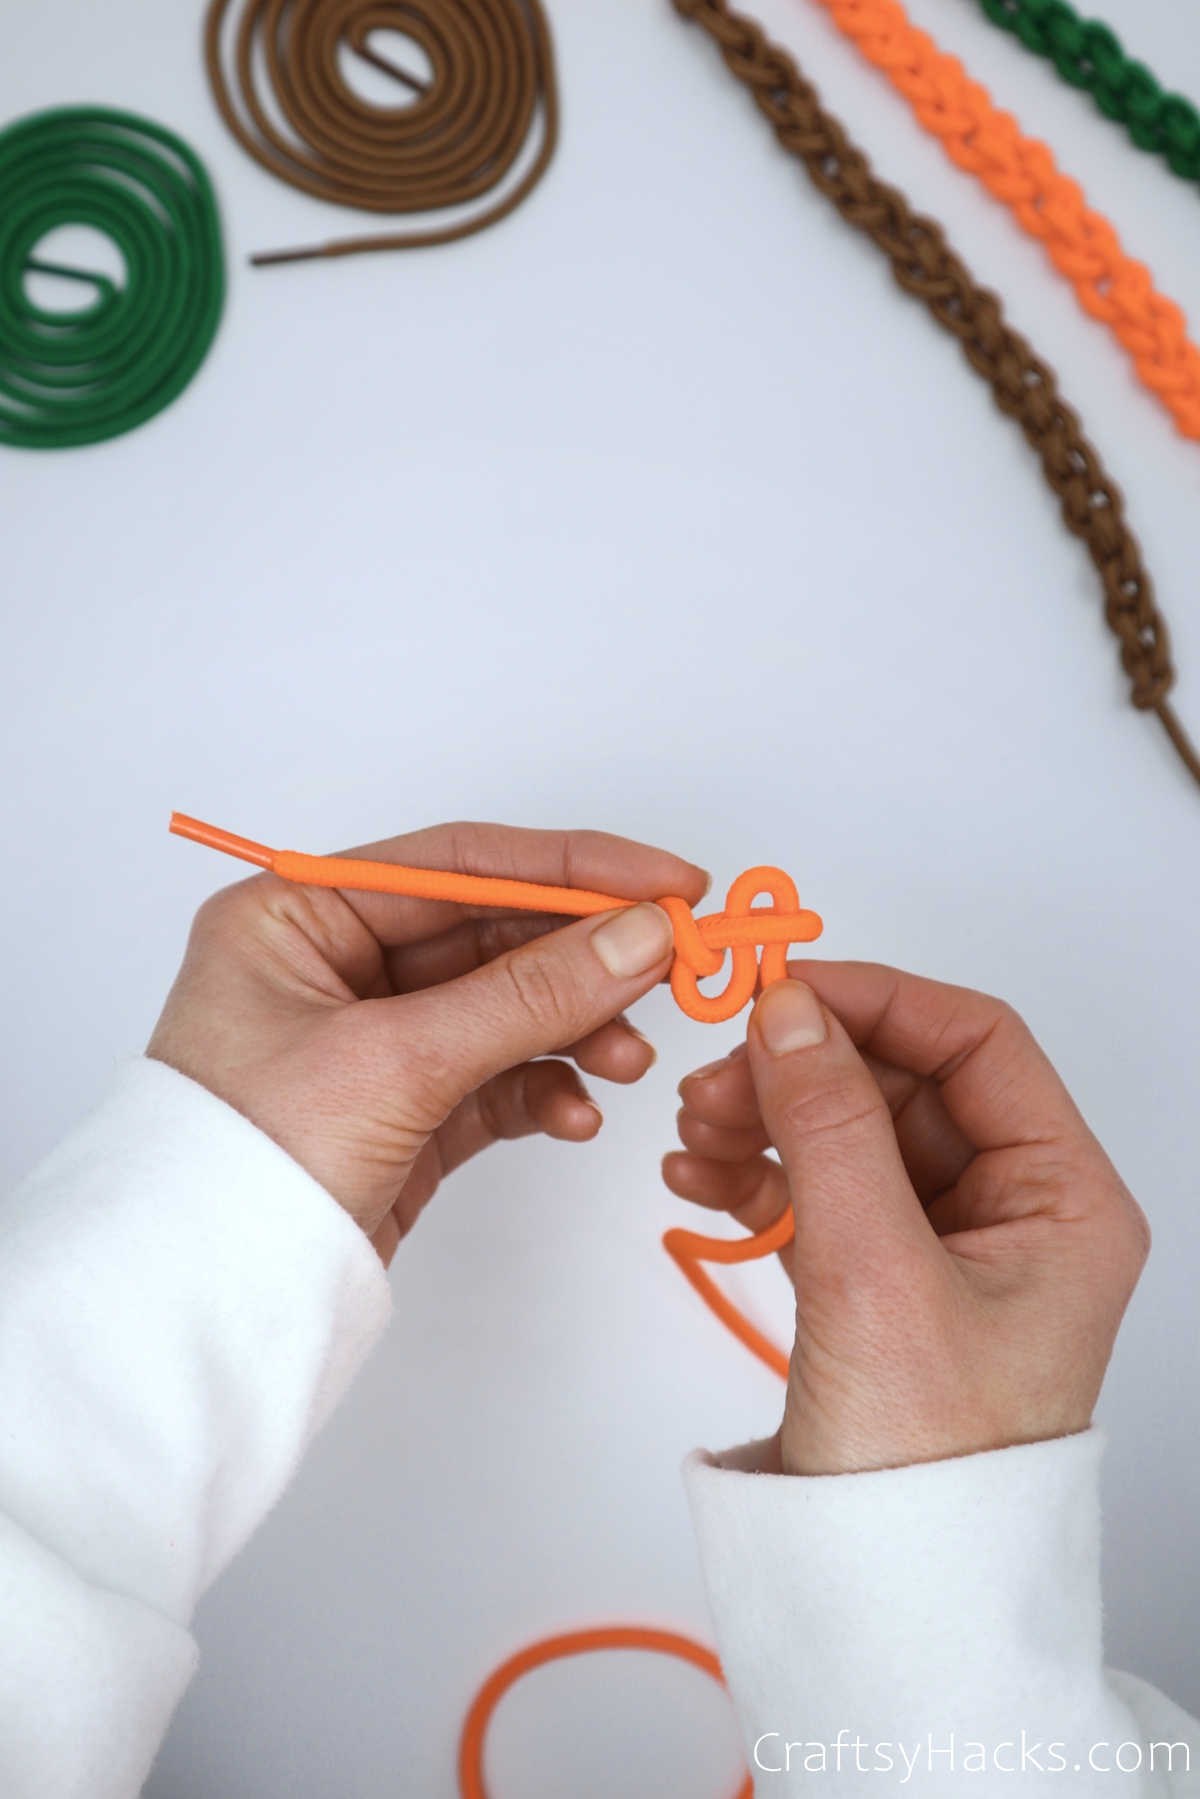
Step 3
Pull the right tail end through the loop, as seen below.
Pull the tail through and tug it firmly into a knot. For the rest of the bracelet, you will be working loops into and around this knot.

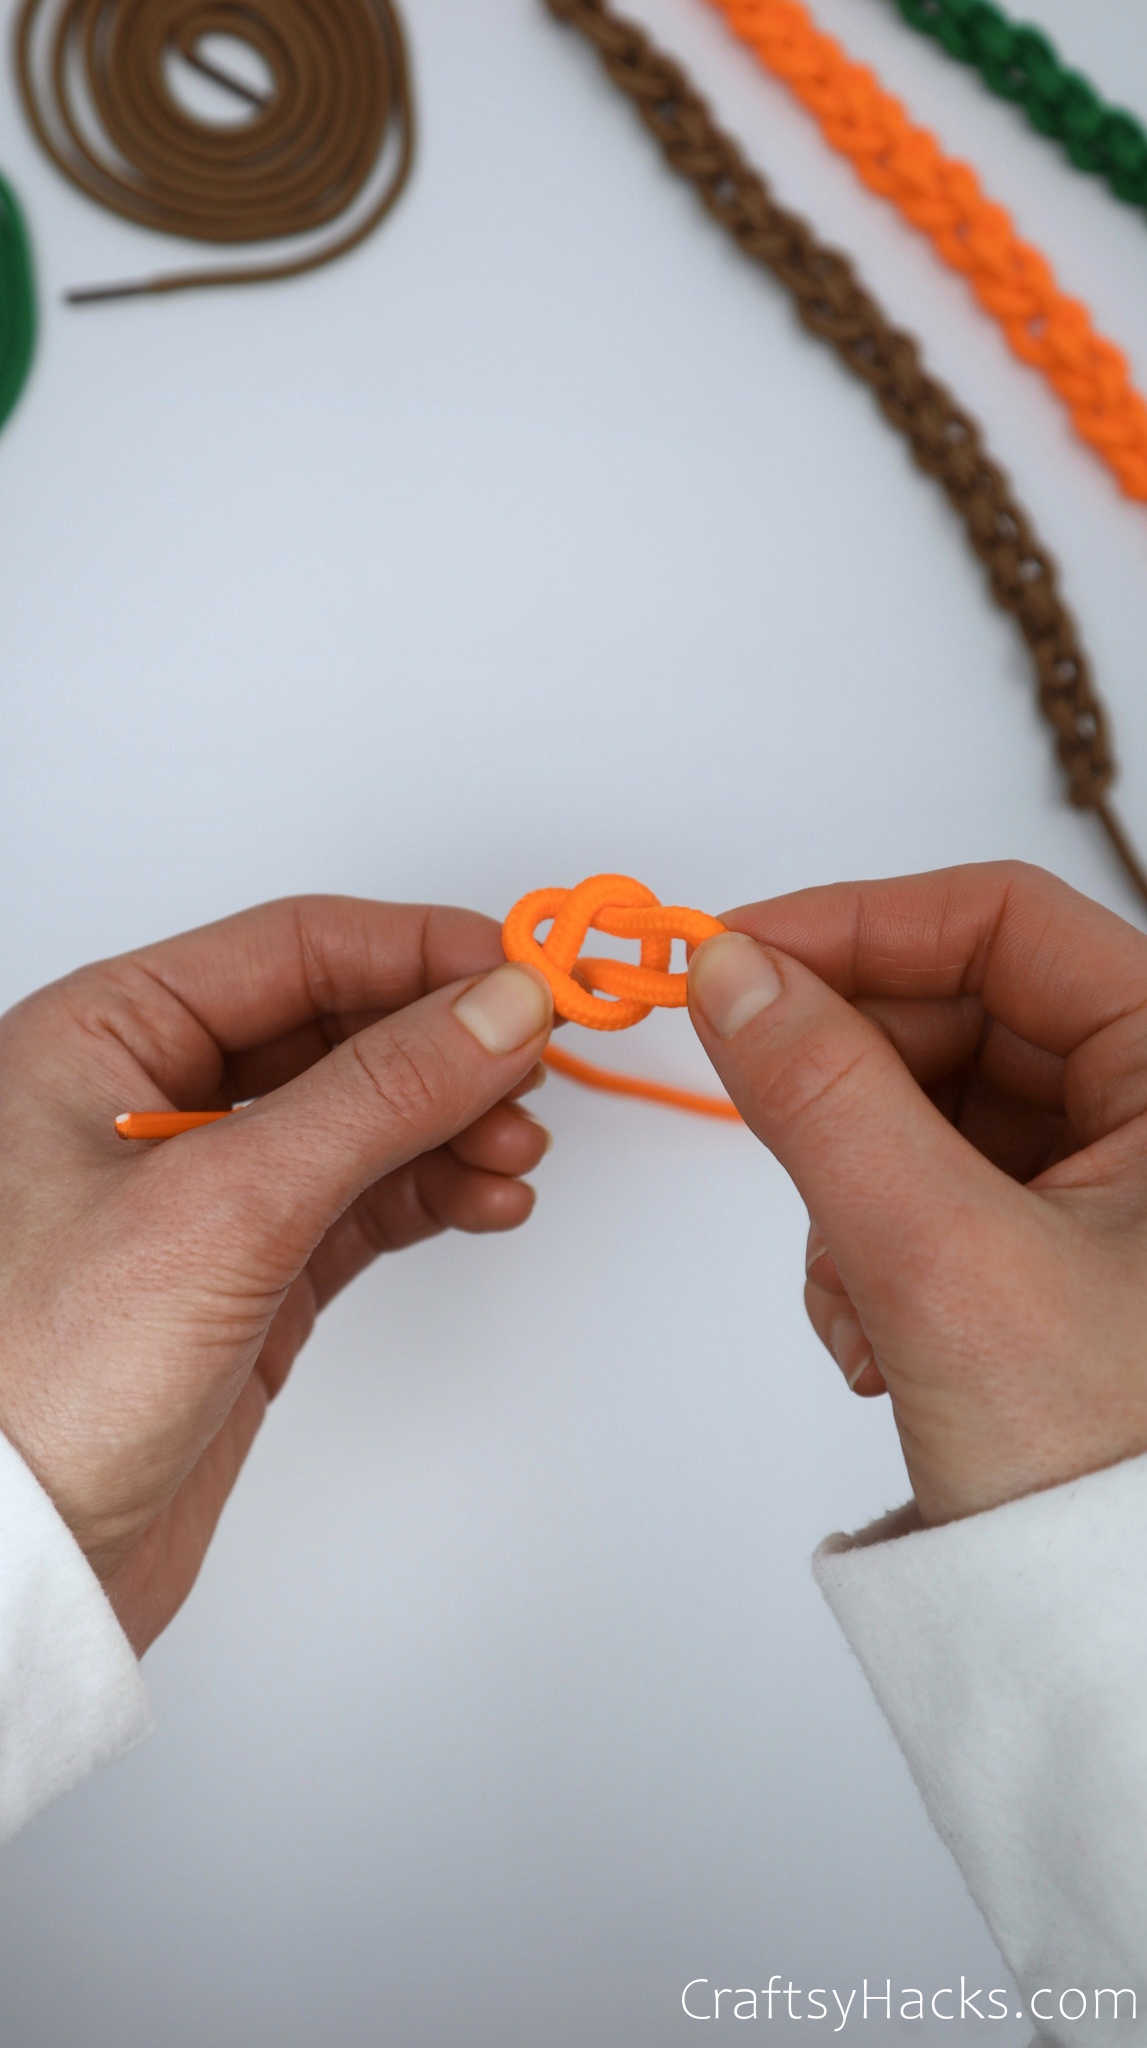
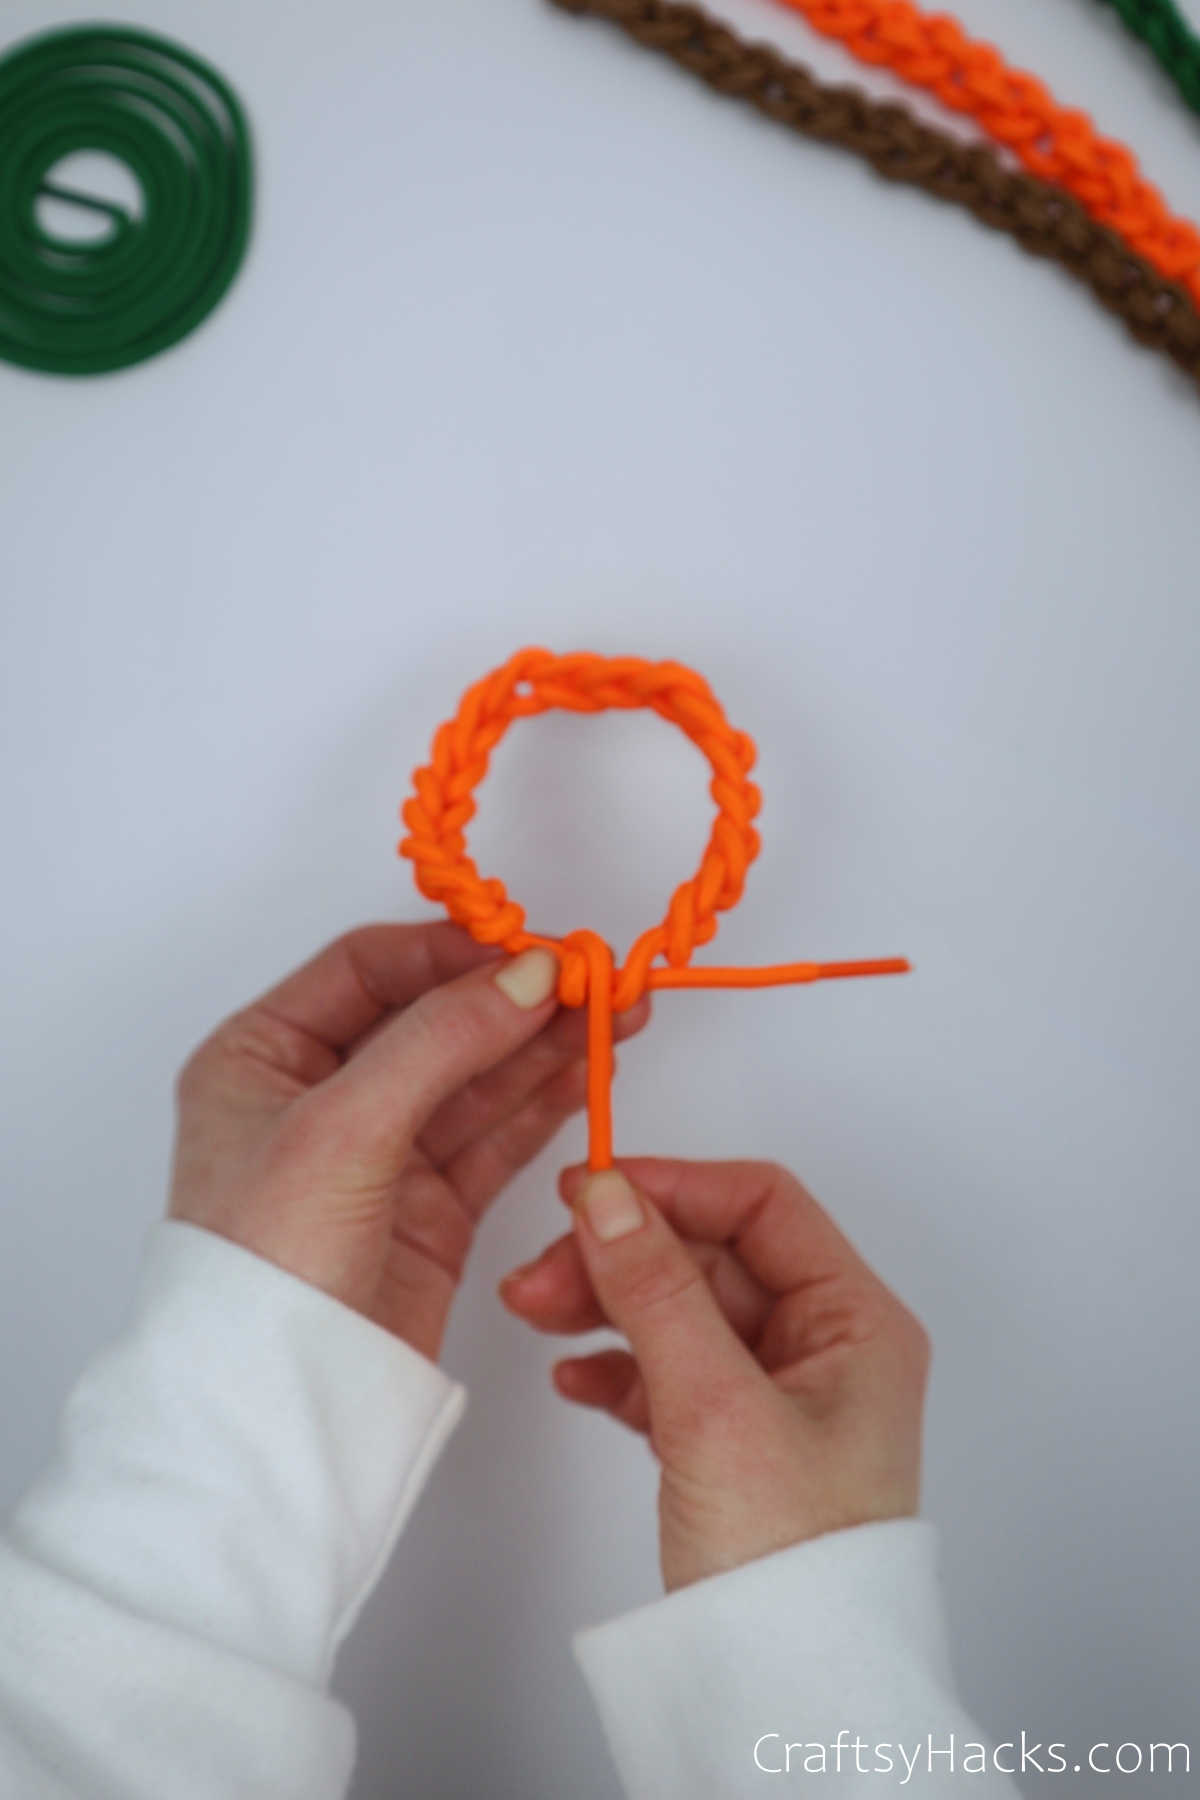
Step 4
Grab the right tail, about two inches away from the center of the knot, and pull it into the loop, but not completely.
Tug it firmly into a knot, as shown below.
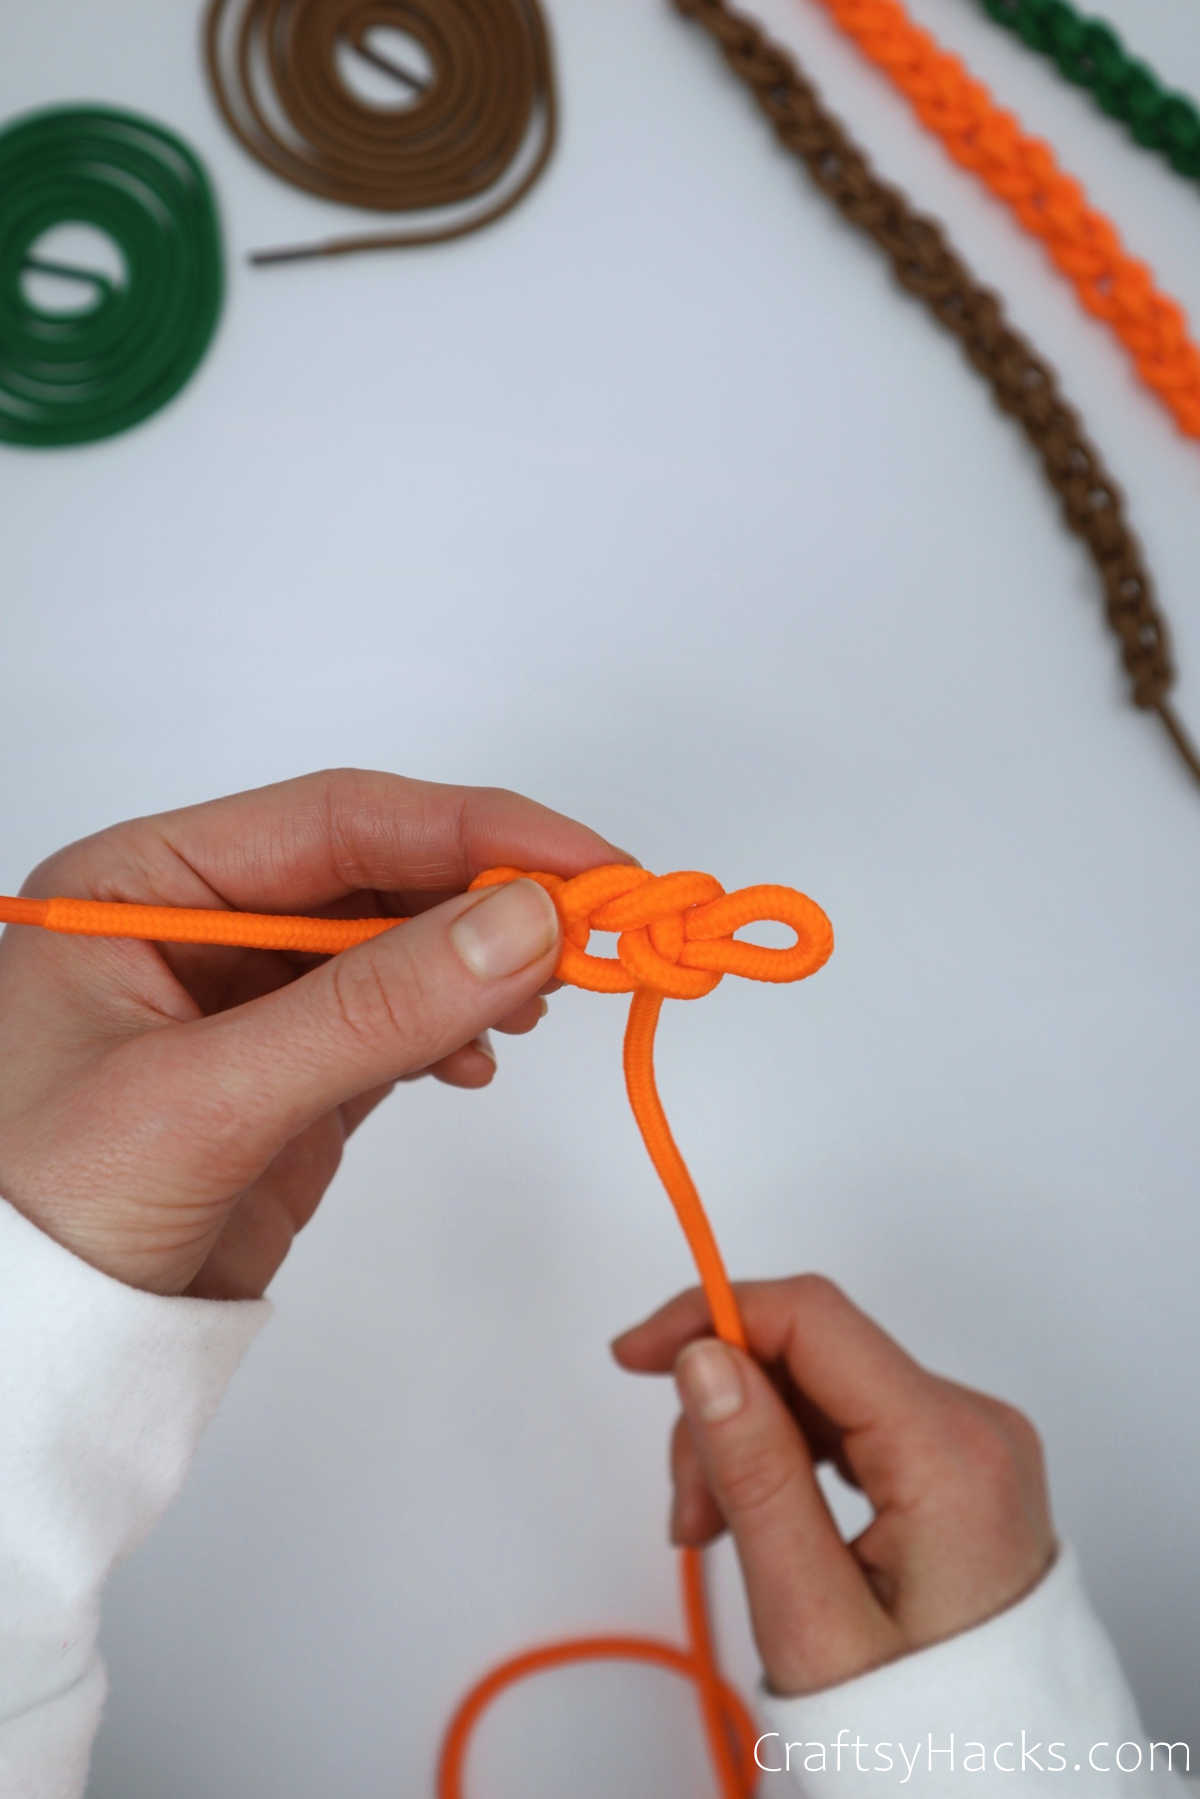
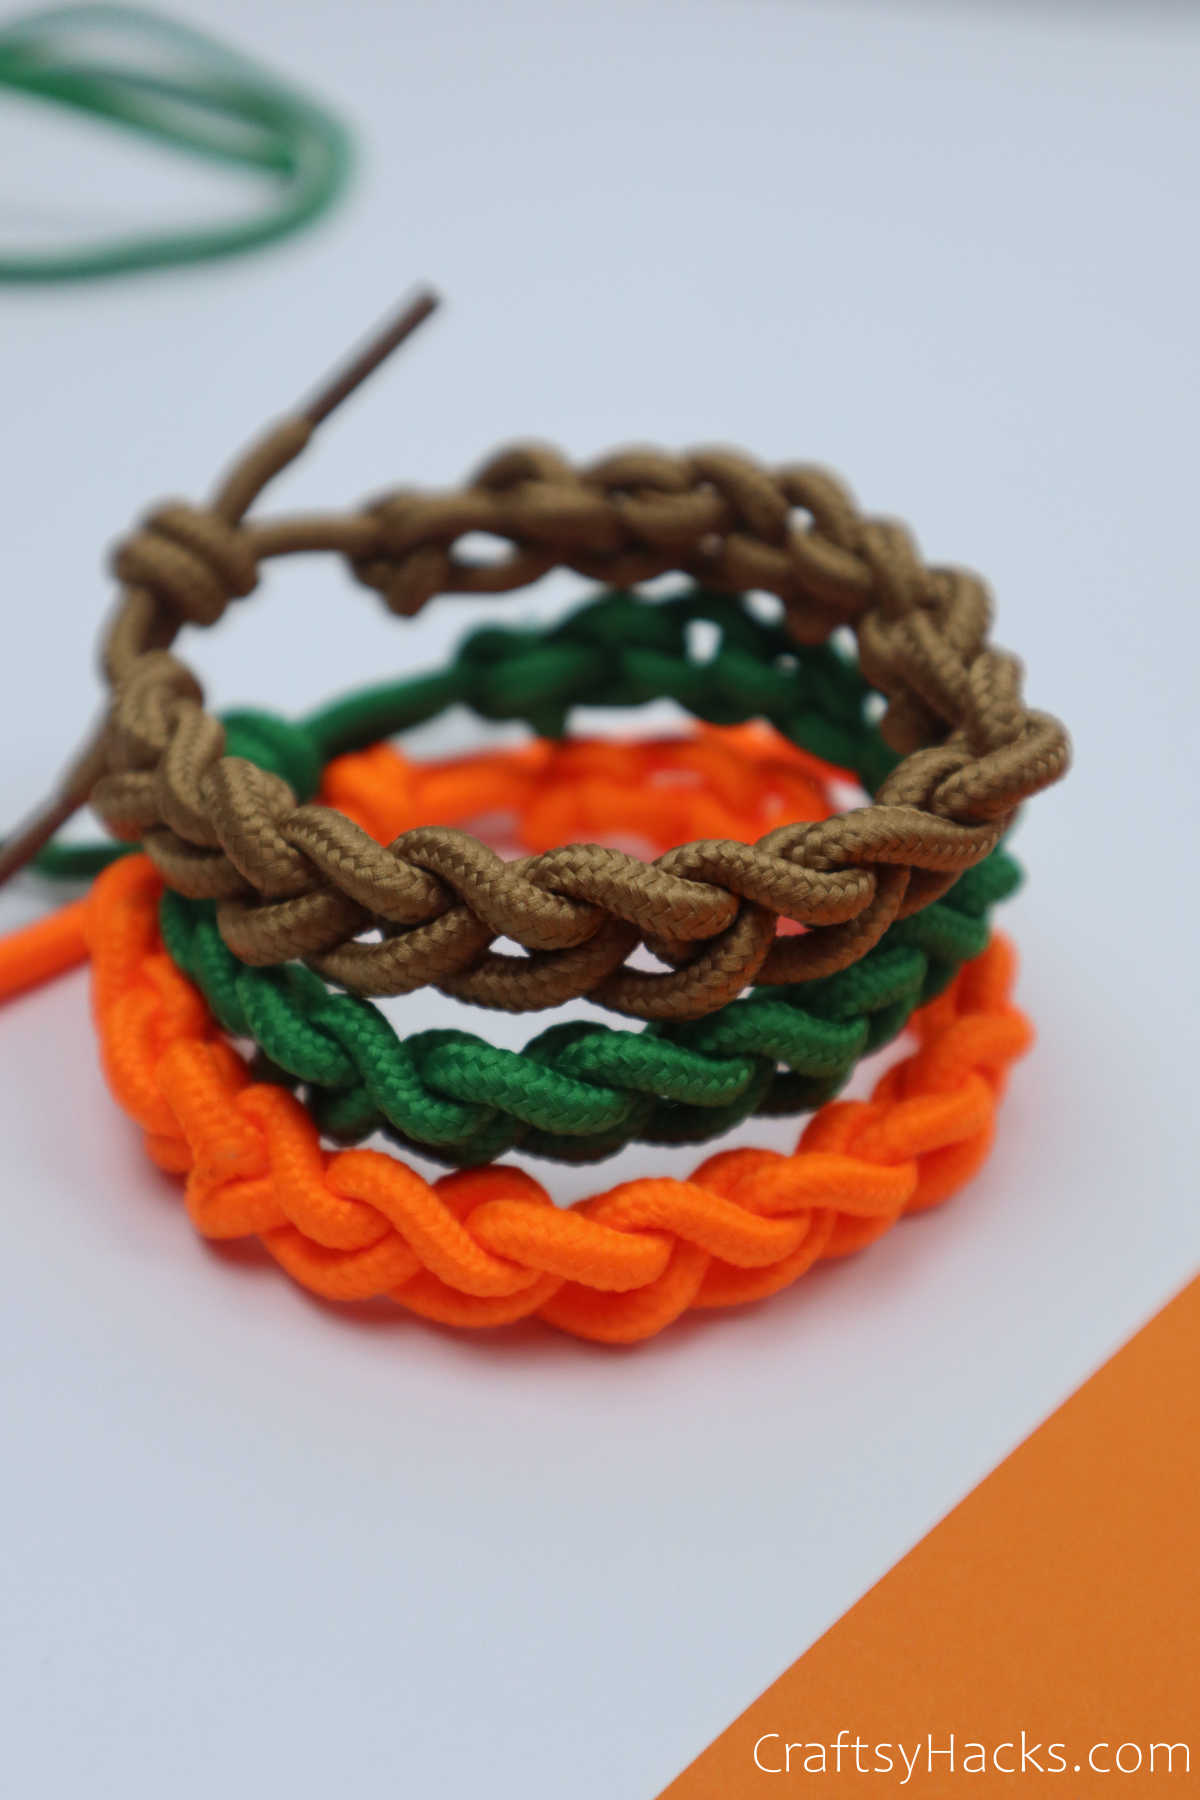
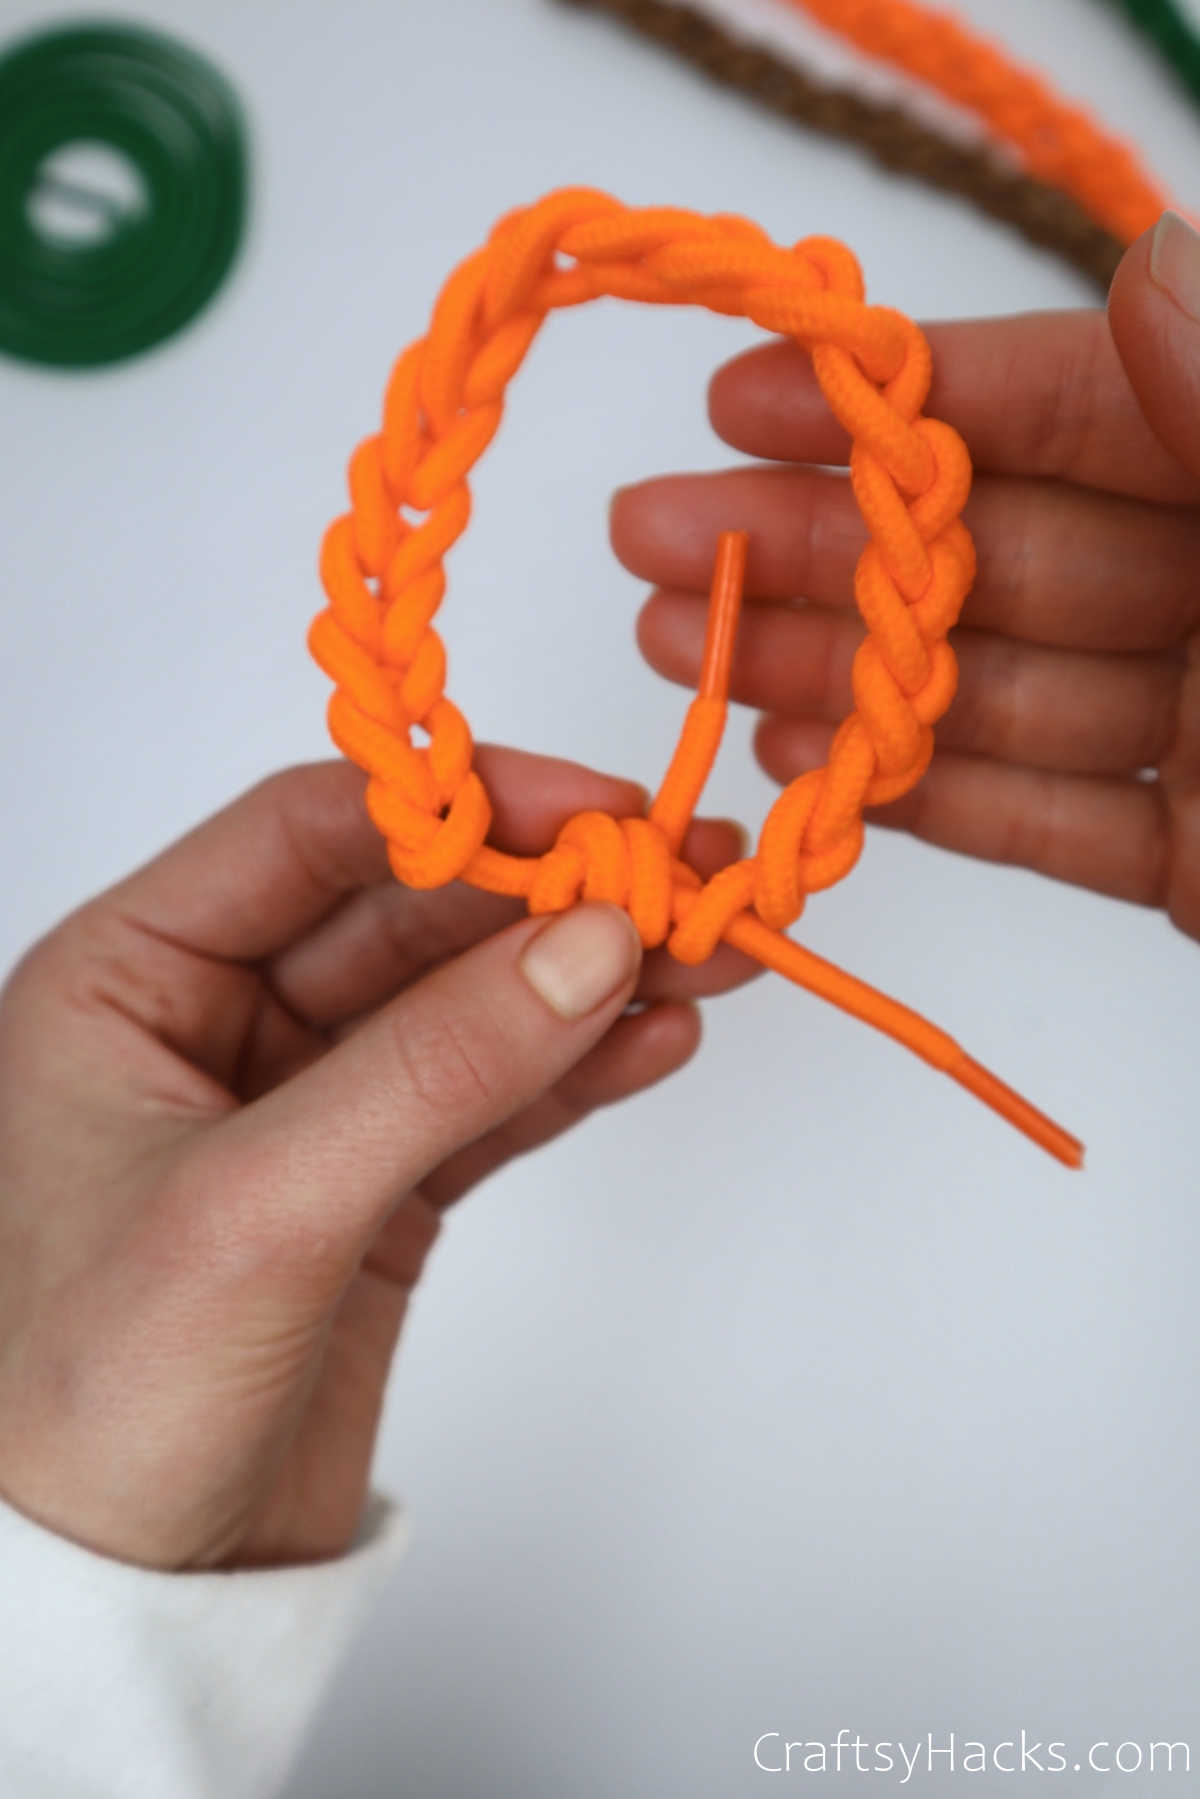
Step 5
Continue to pull the right tail through the loop and tug it in place as you work around the bracelet. You can continue to do so until you reach the end of the shoelace or until you have the desired length.
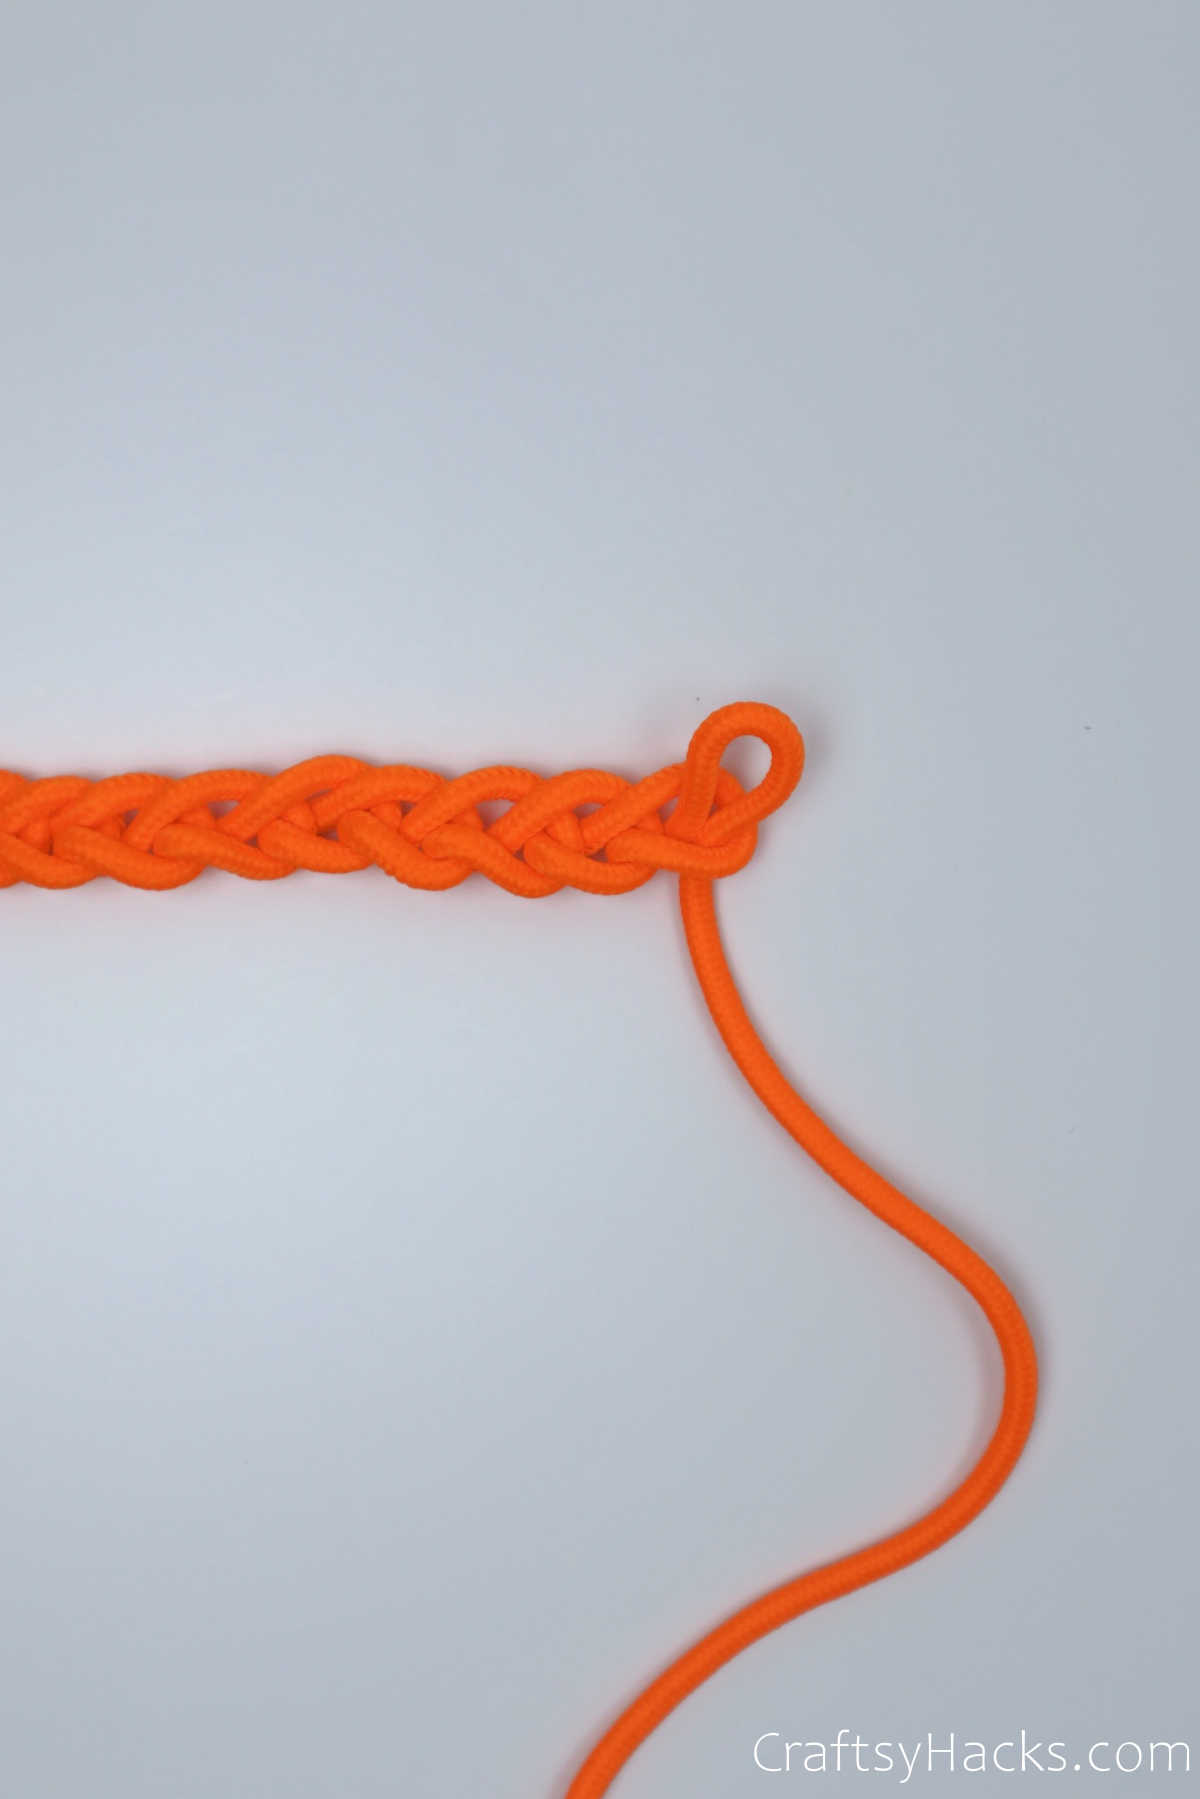
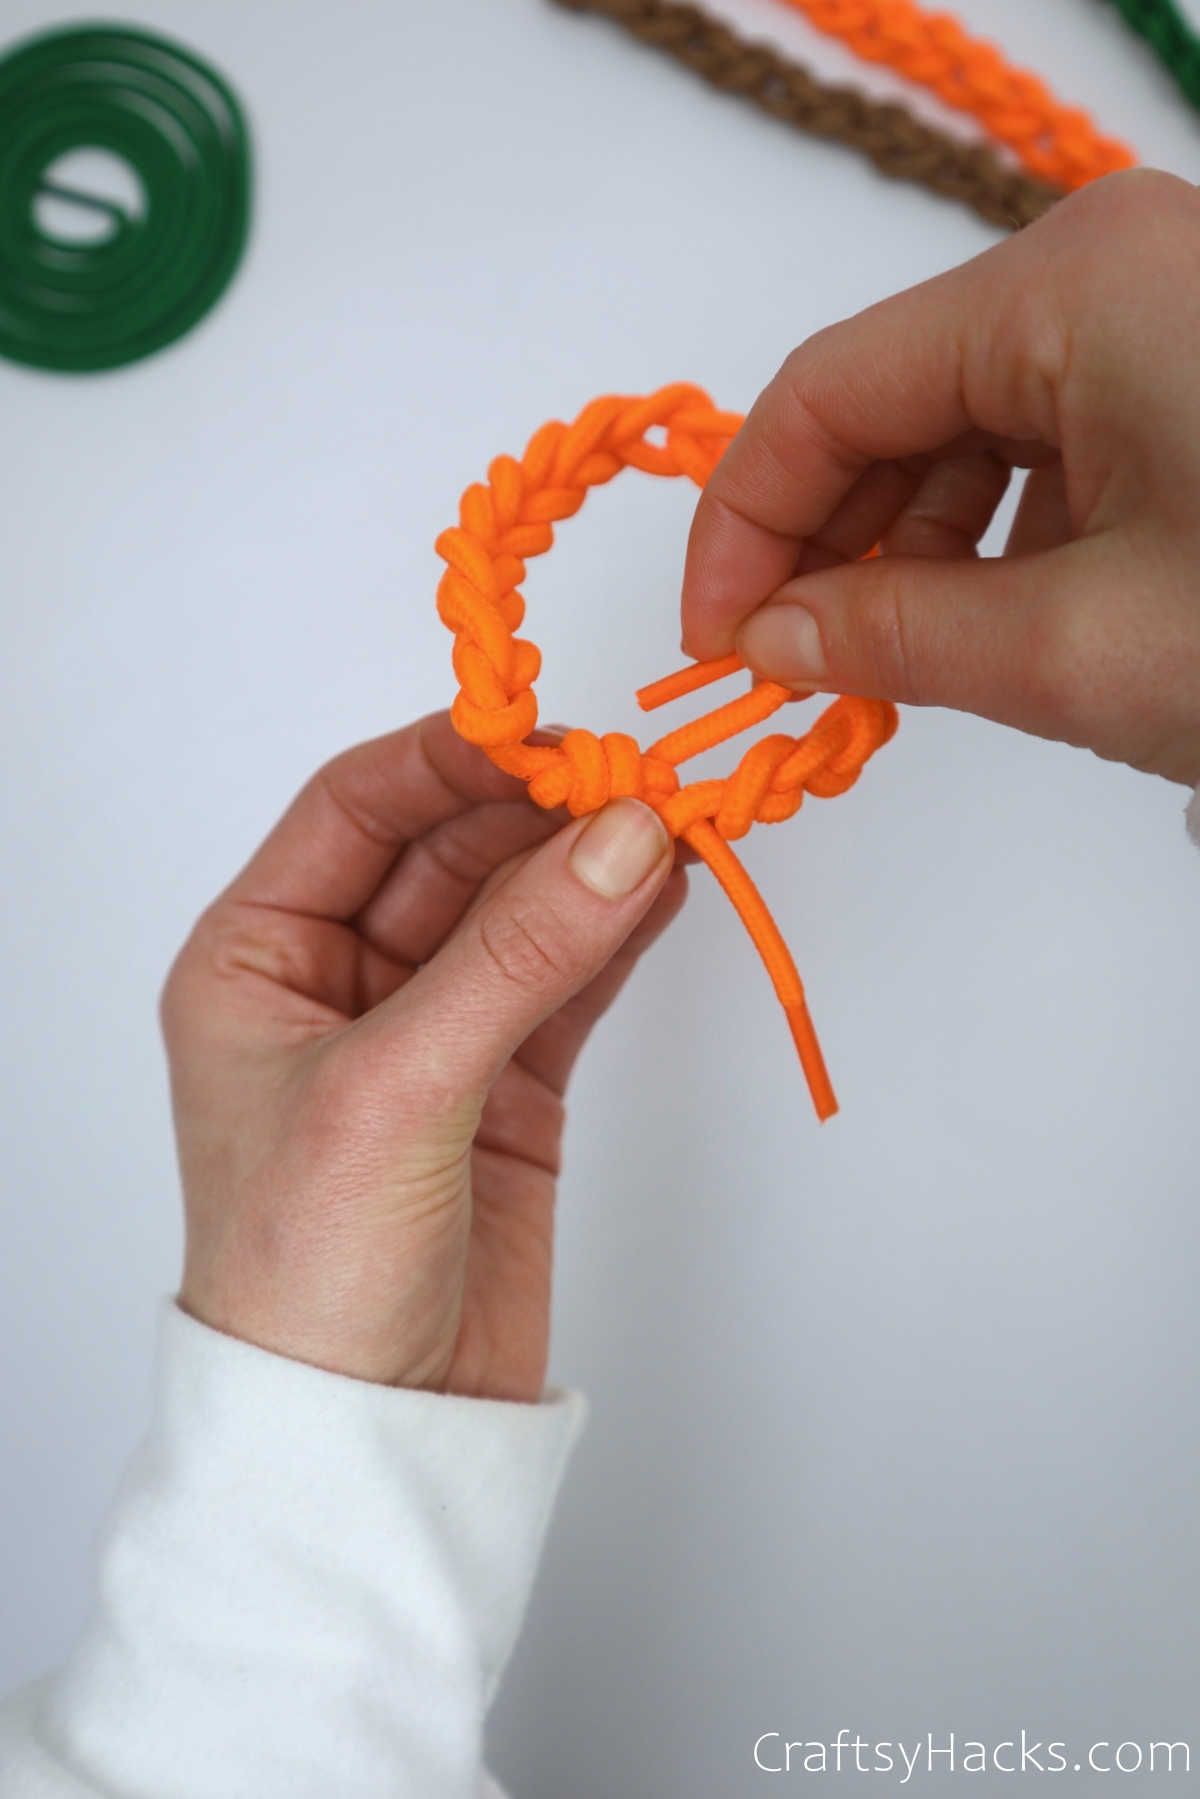
Step 6
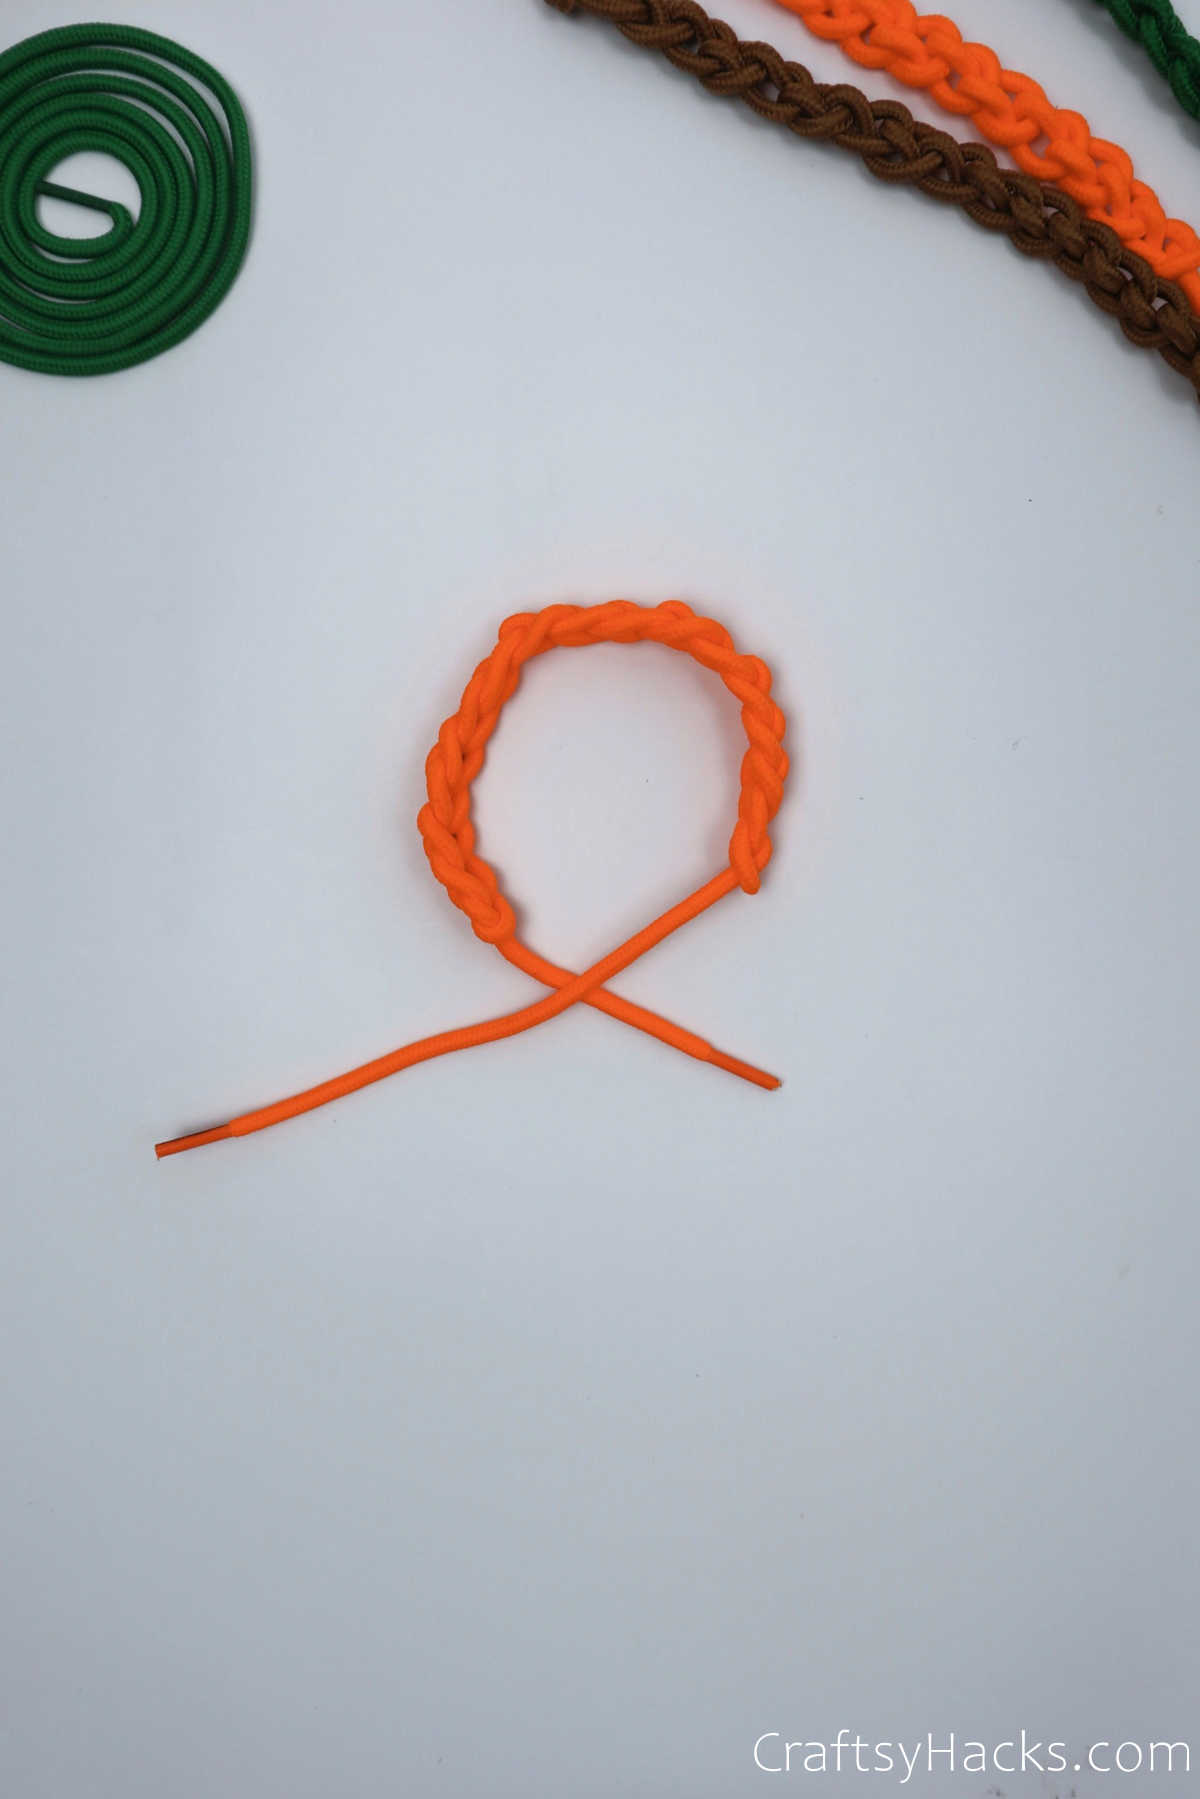
Whether you reach the end, or your desired length, remember to leave a couple of inches of shoelace on the right tail. You will need to have enough space to pull the end through the loop.
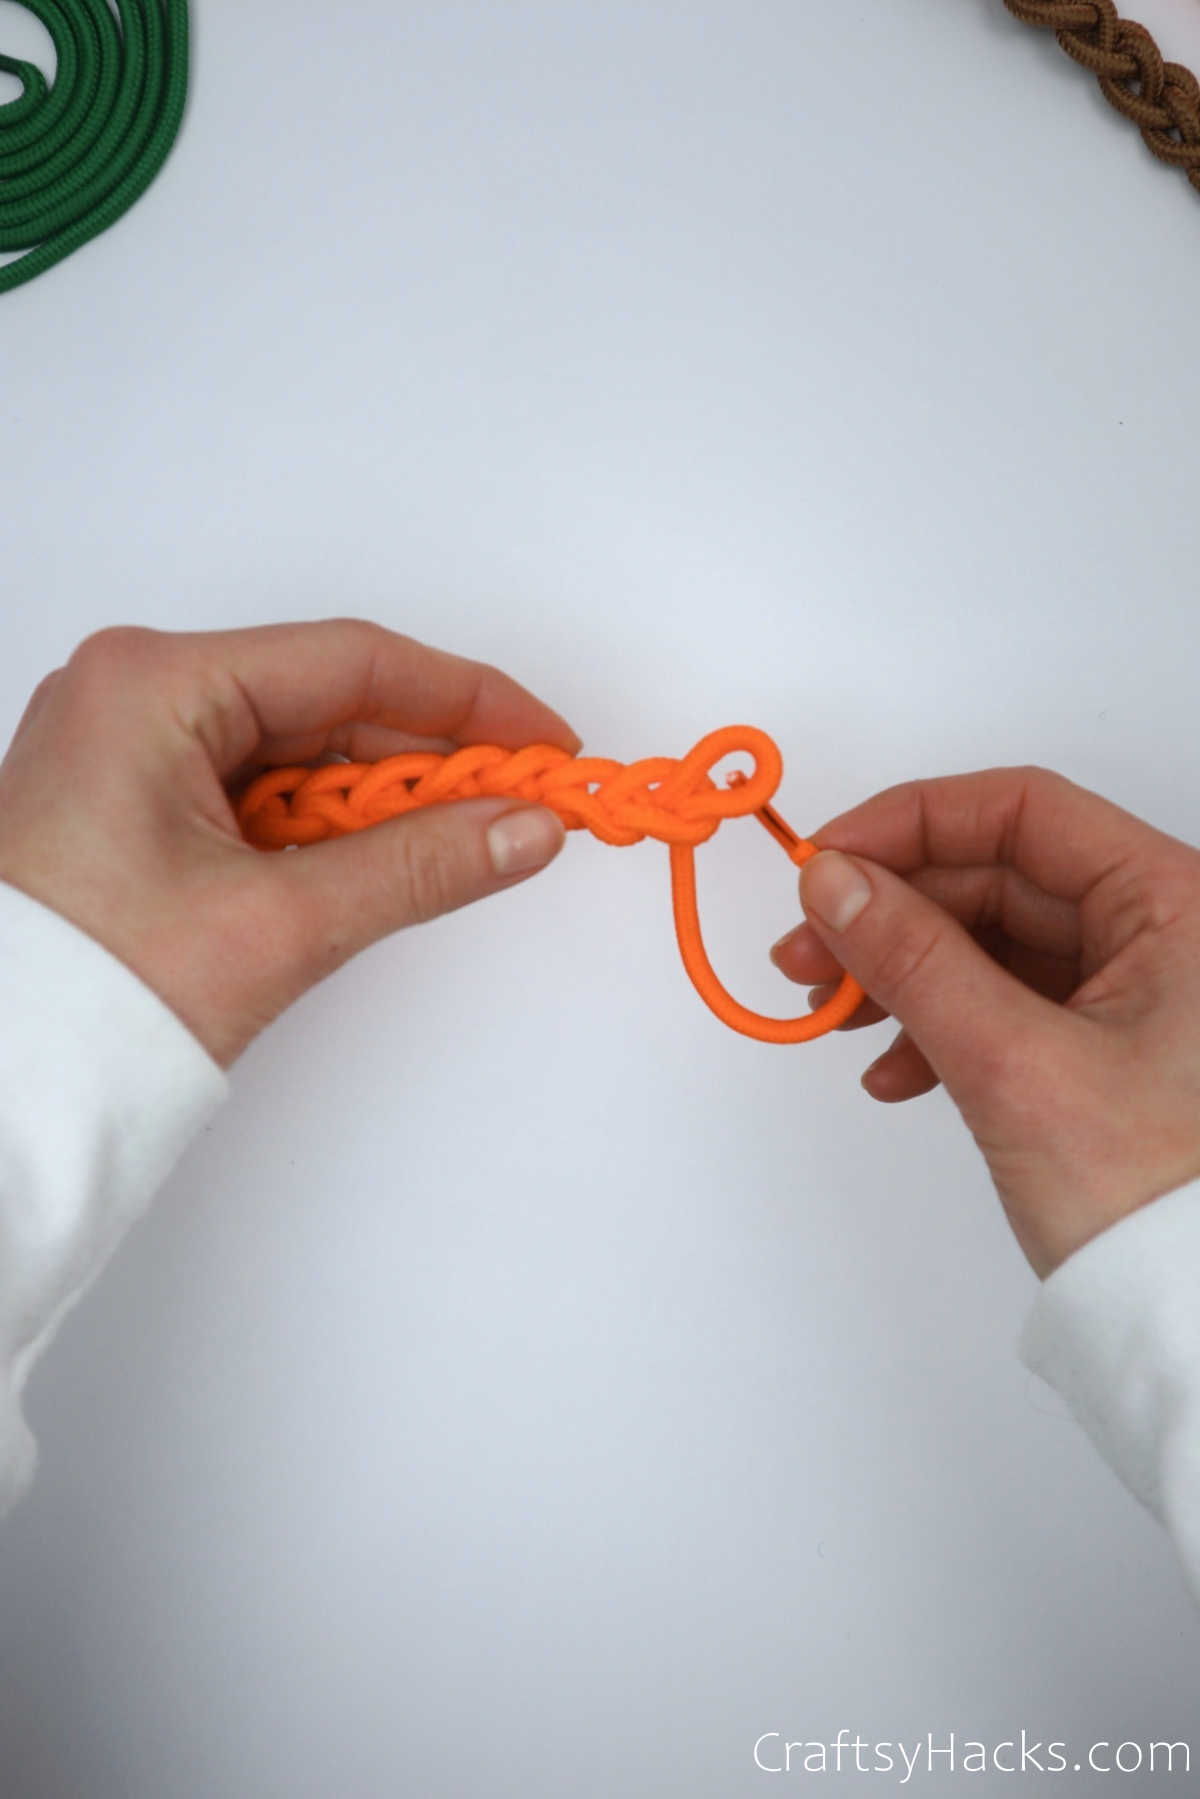
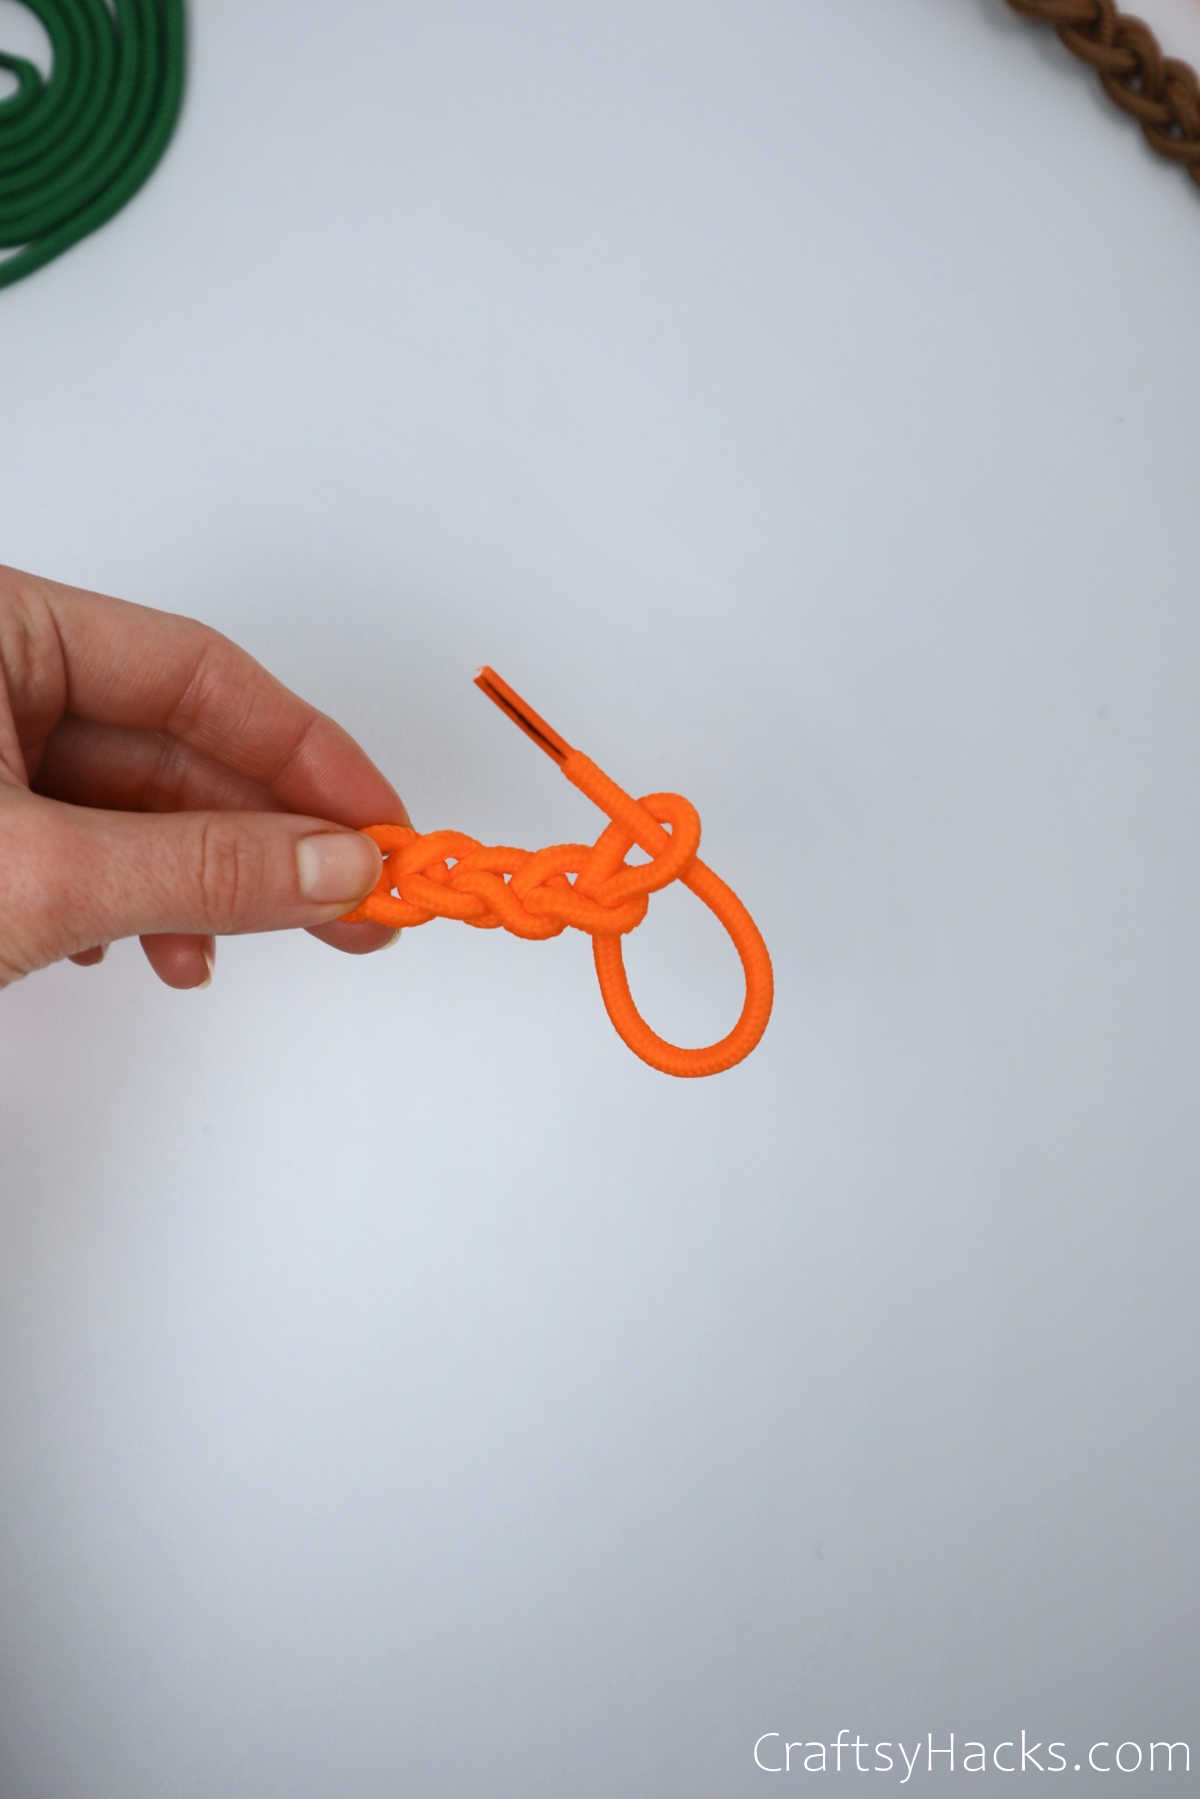
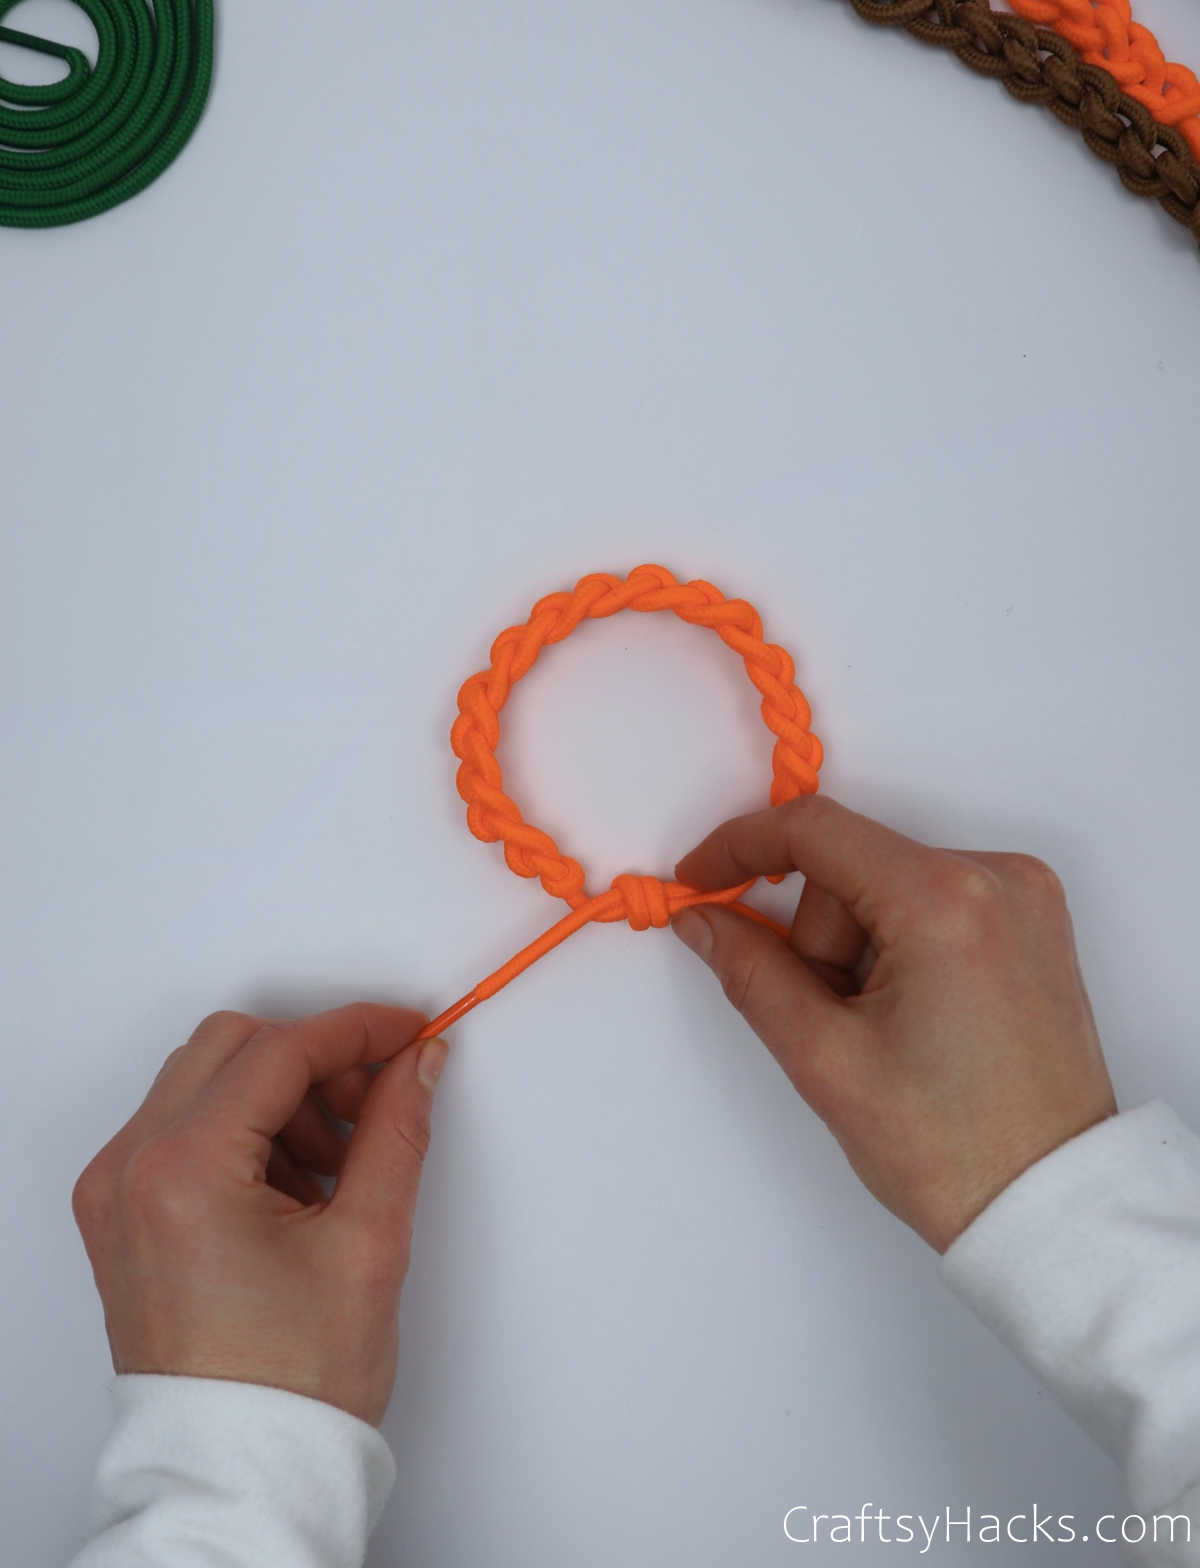
Step 7
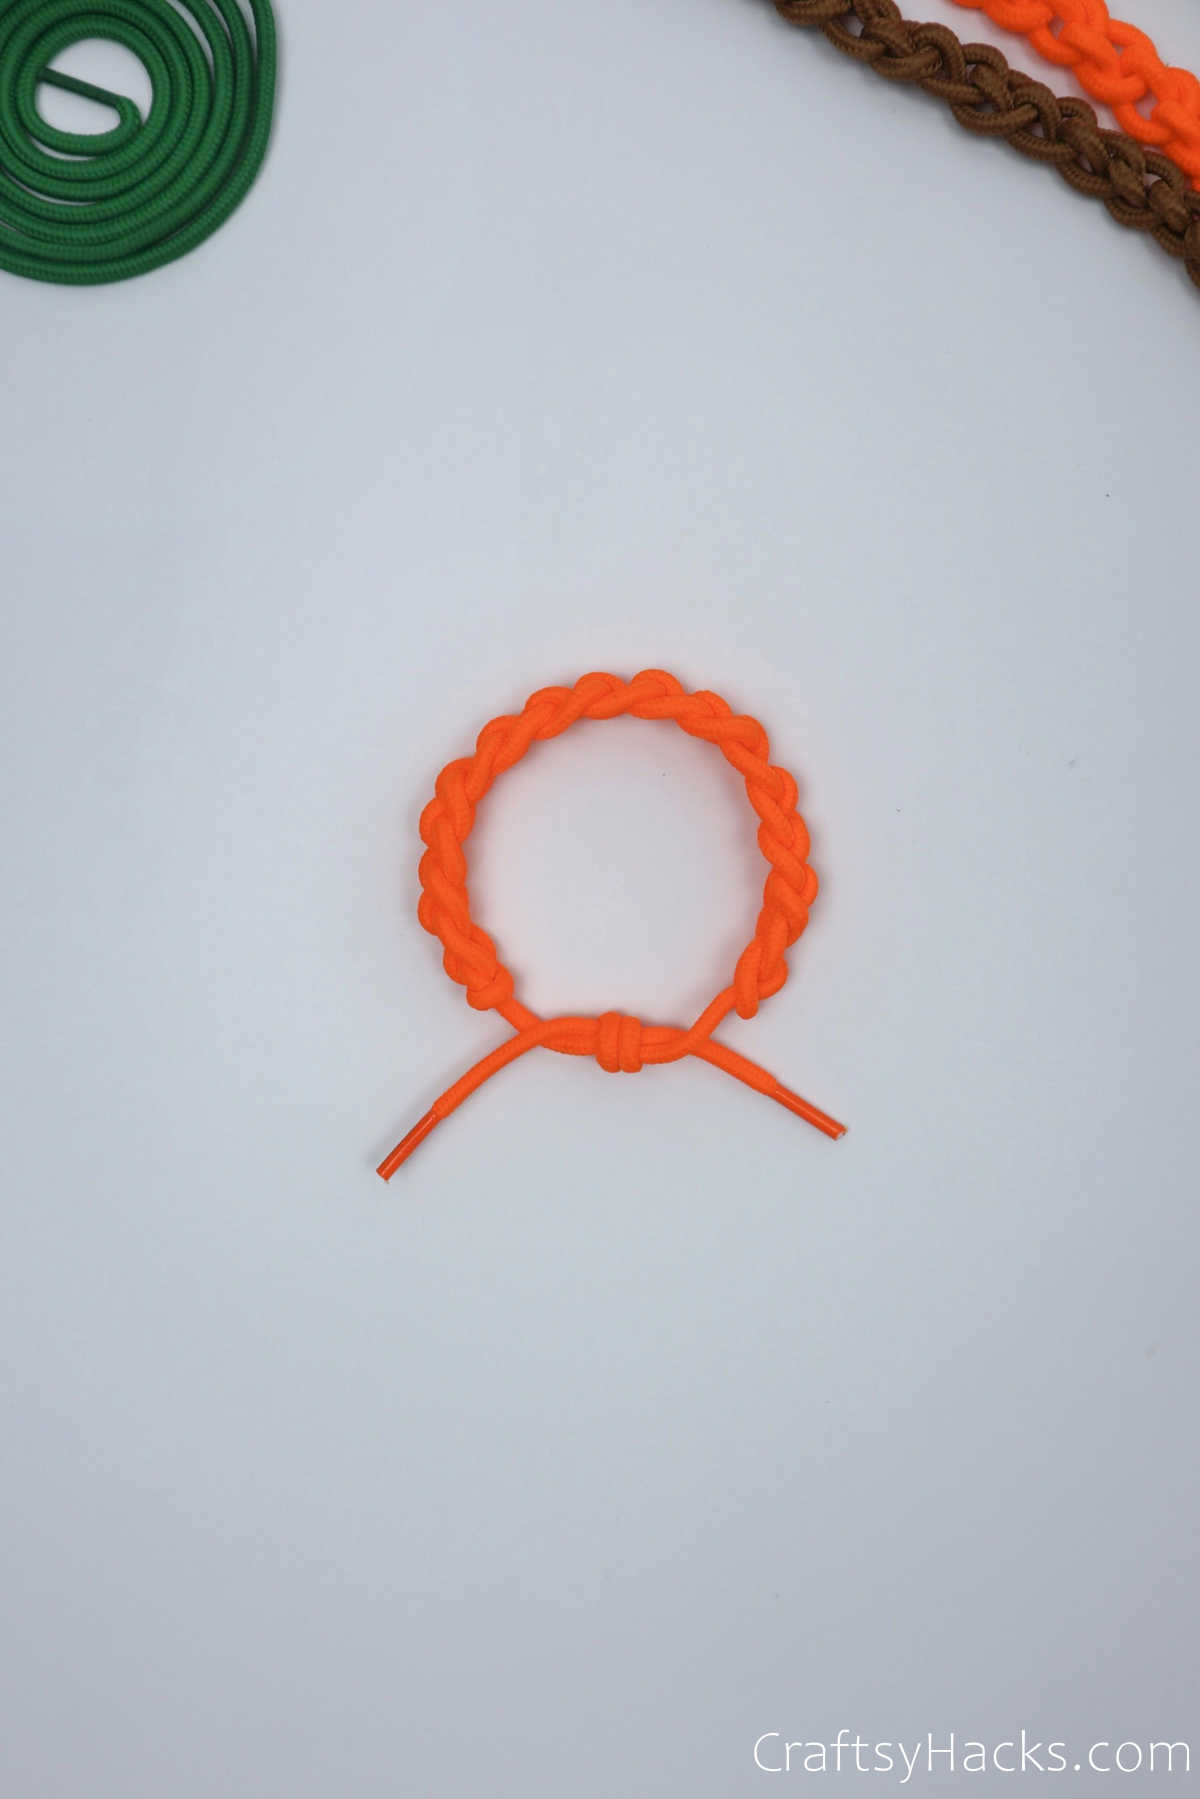
Tug the end firmly outward and pull it into a secure knot.
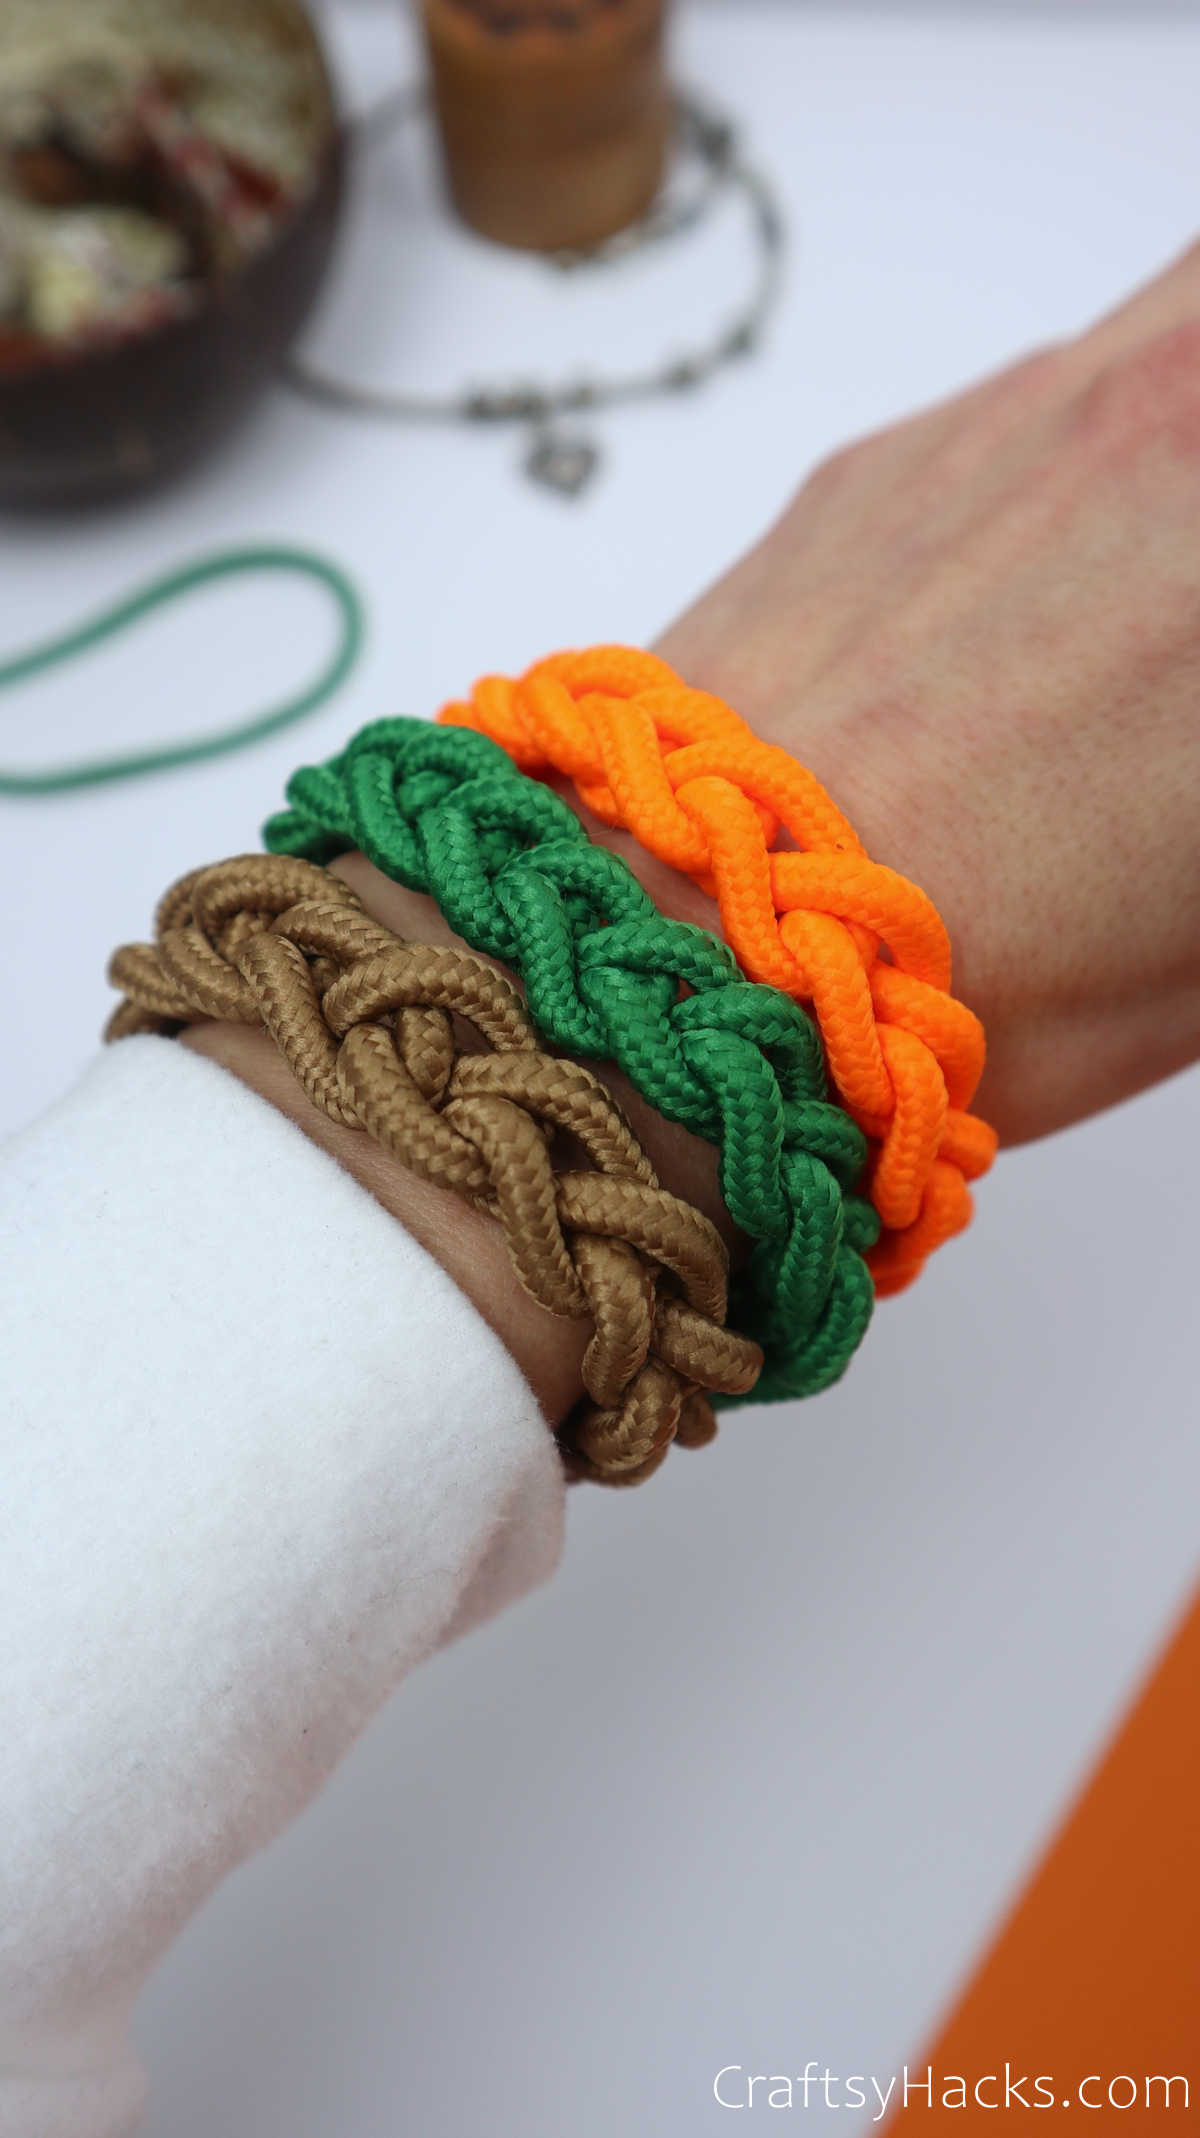
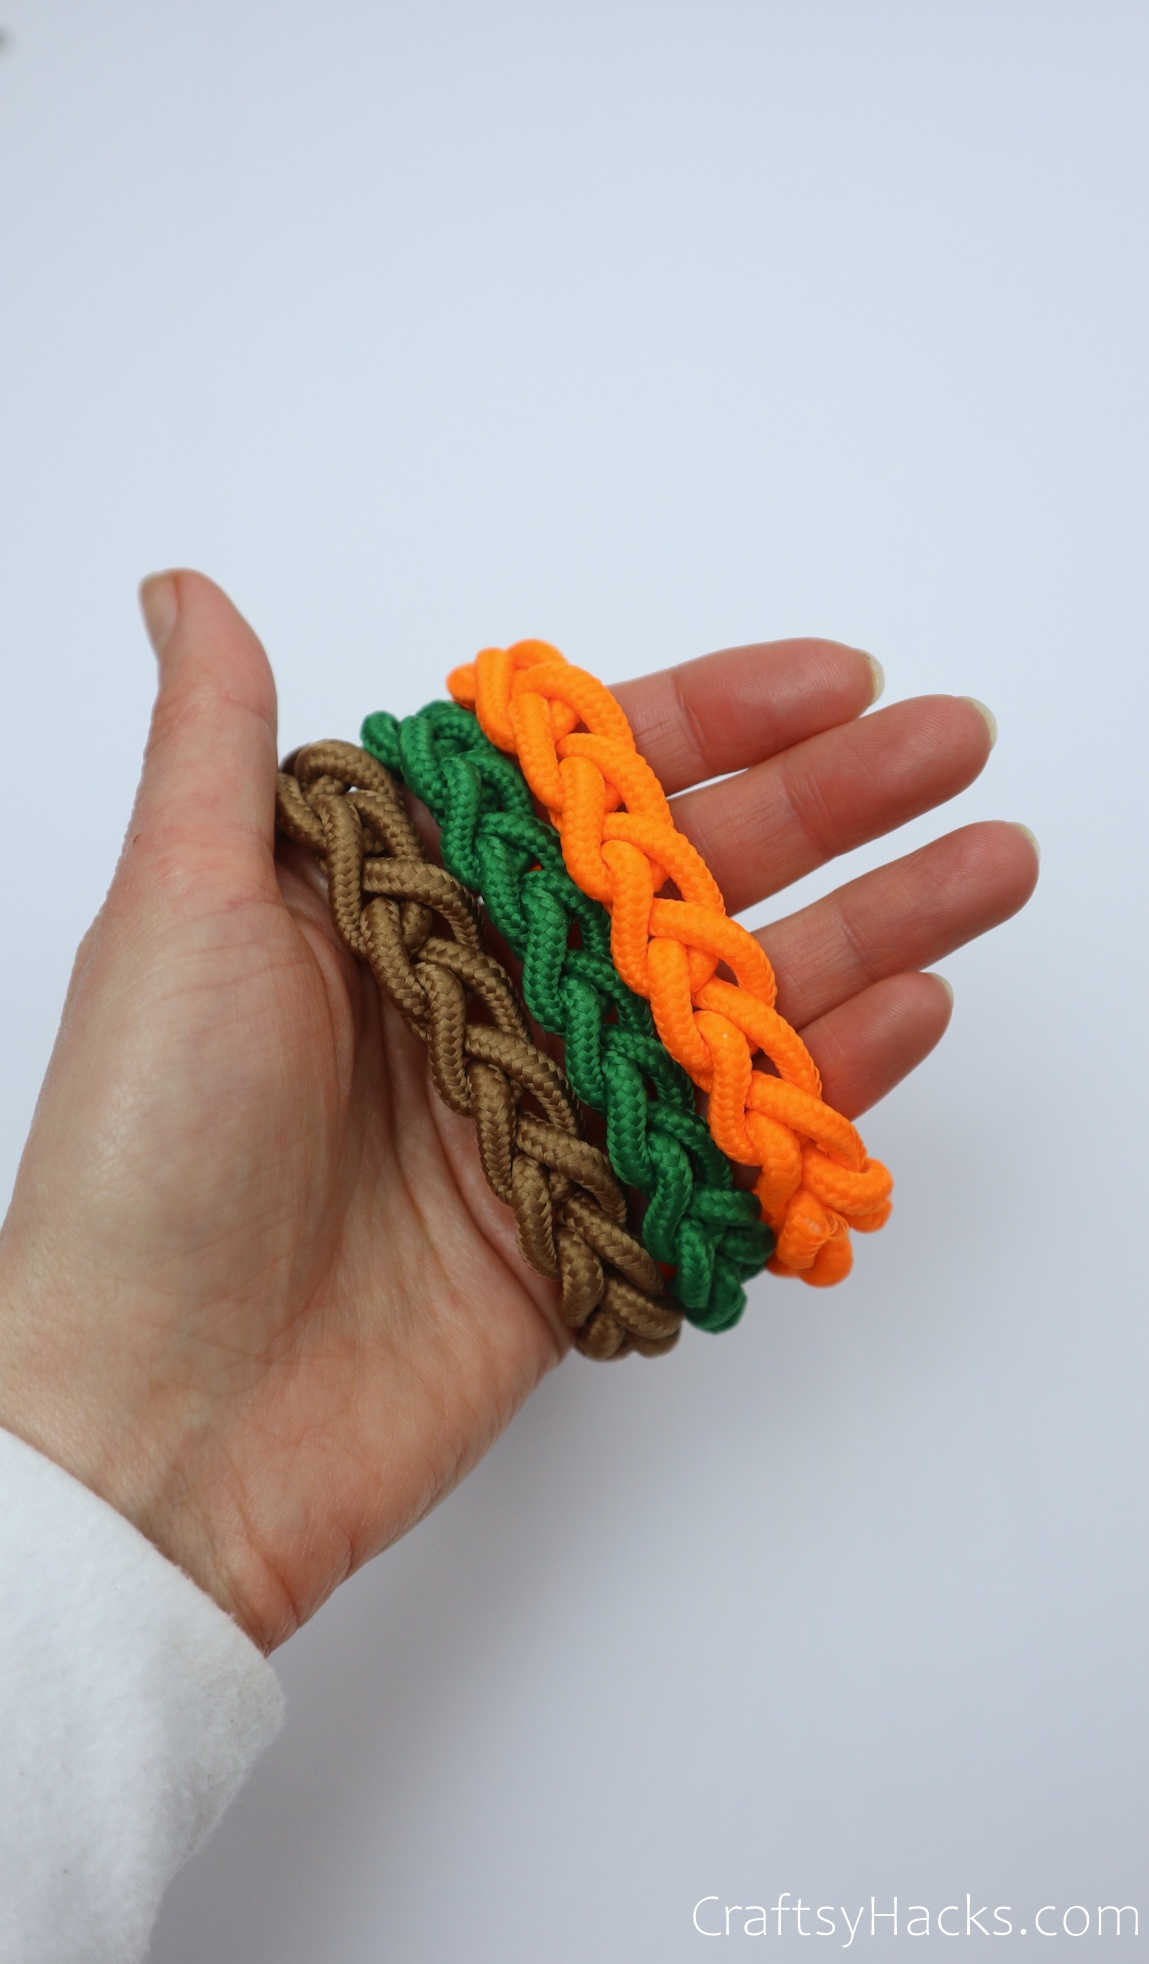
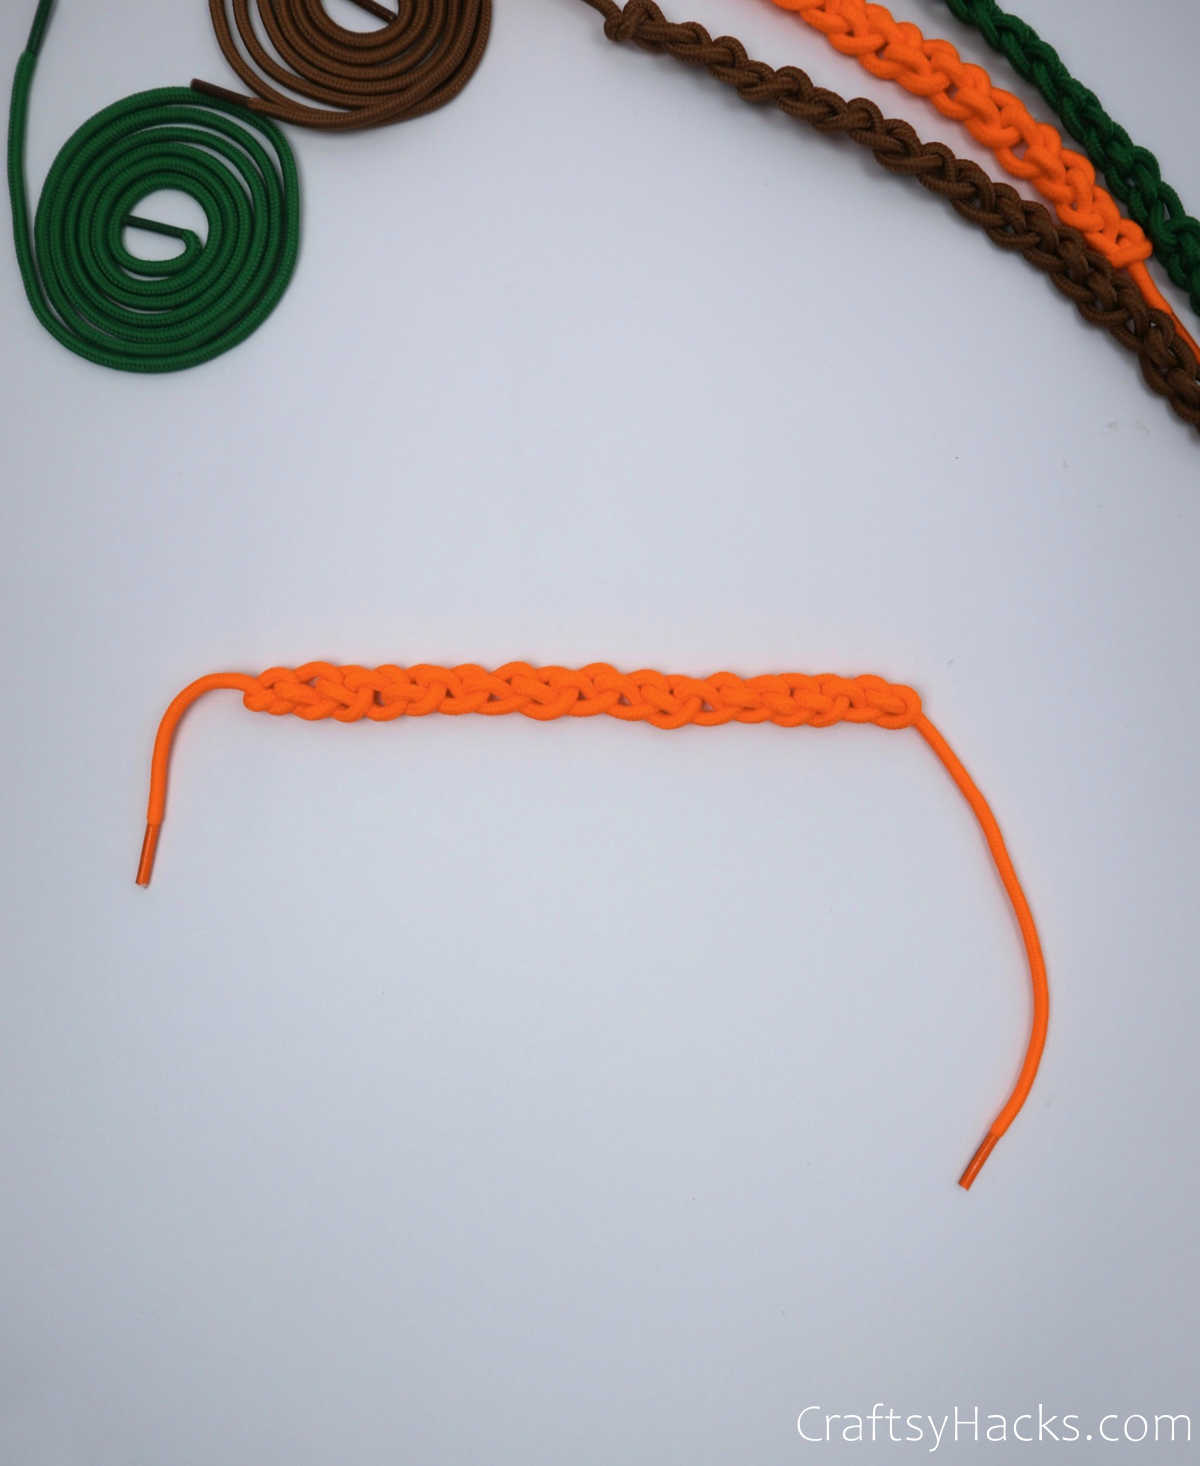
Voila, your super easy and super quick DIY bracelet out of shoelaces is ready to adorn your wrist!
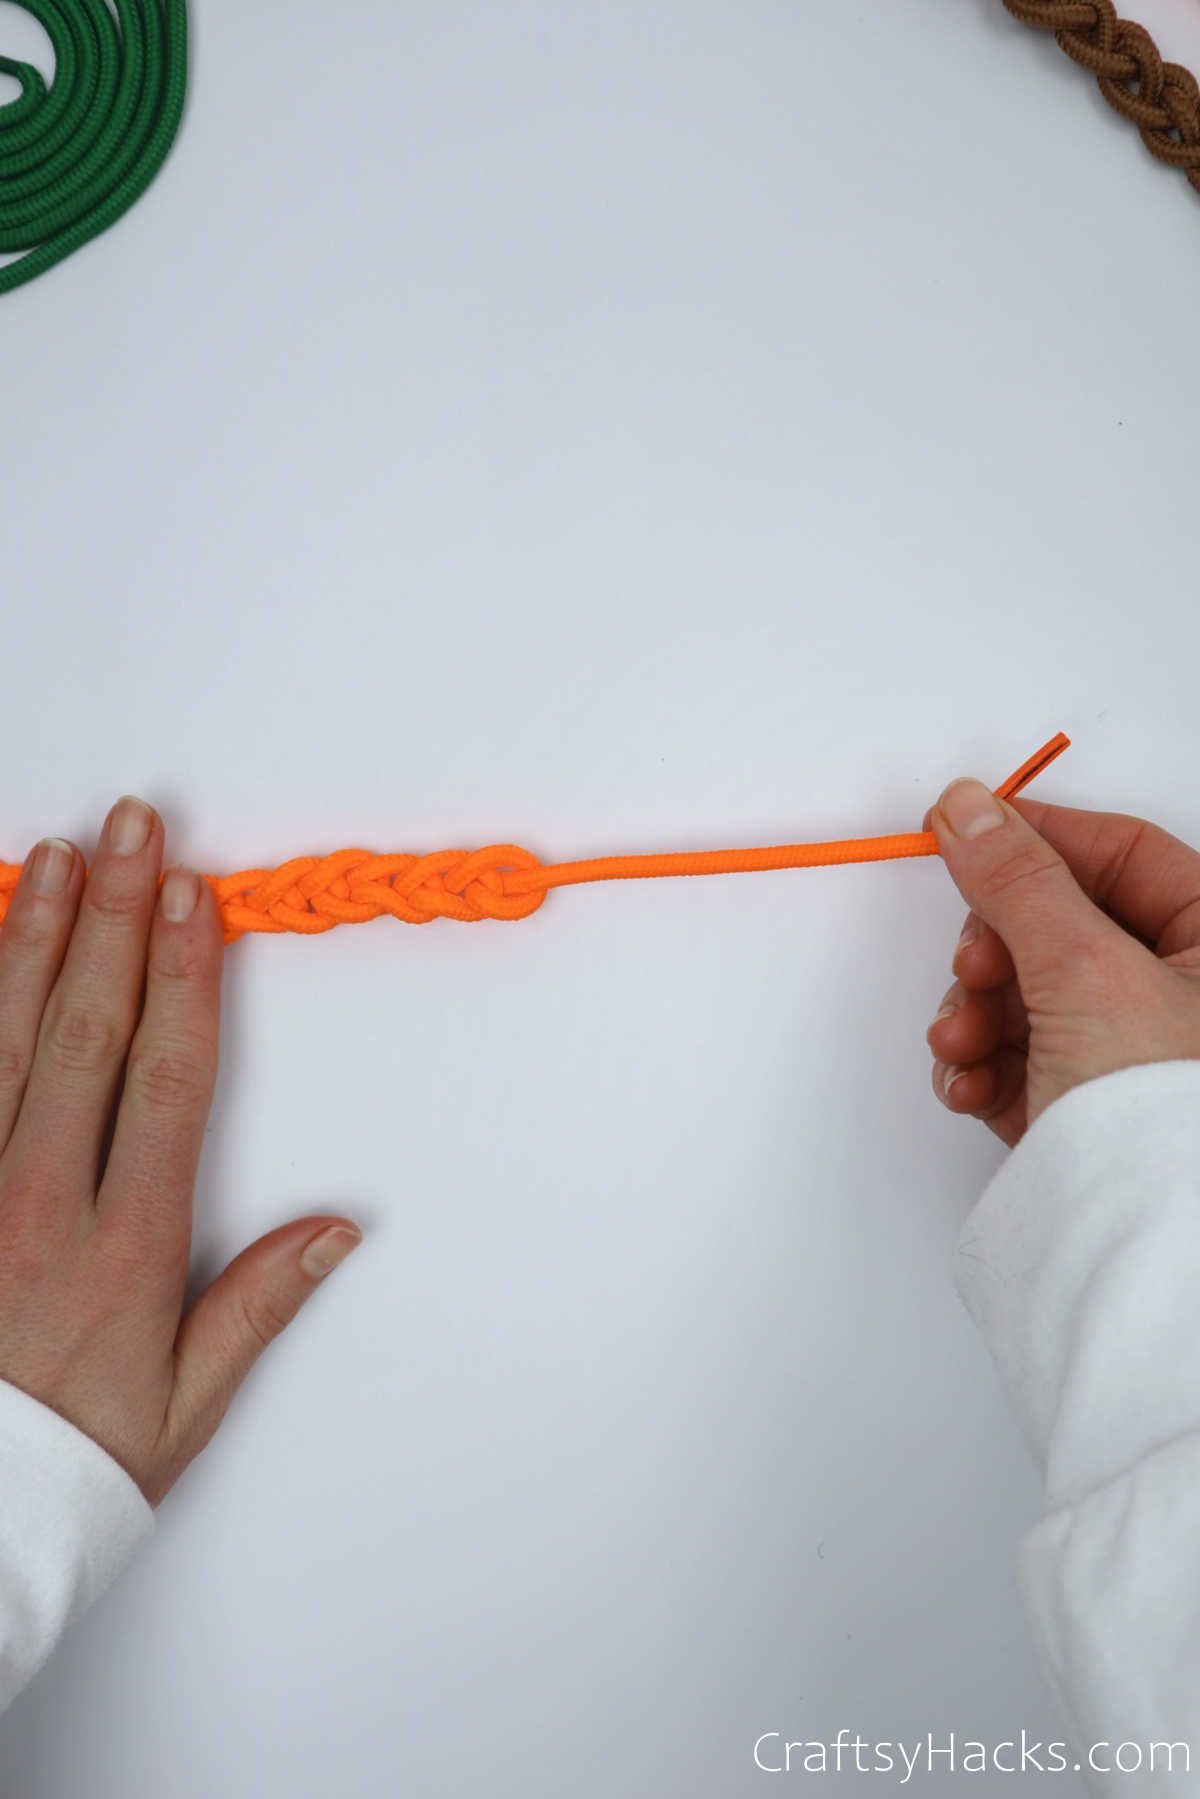
You can either leave the tails hanging until it’s time to wear the bracelet, or you can tie them together to form a knot.
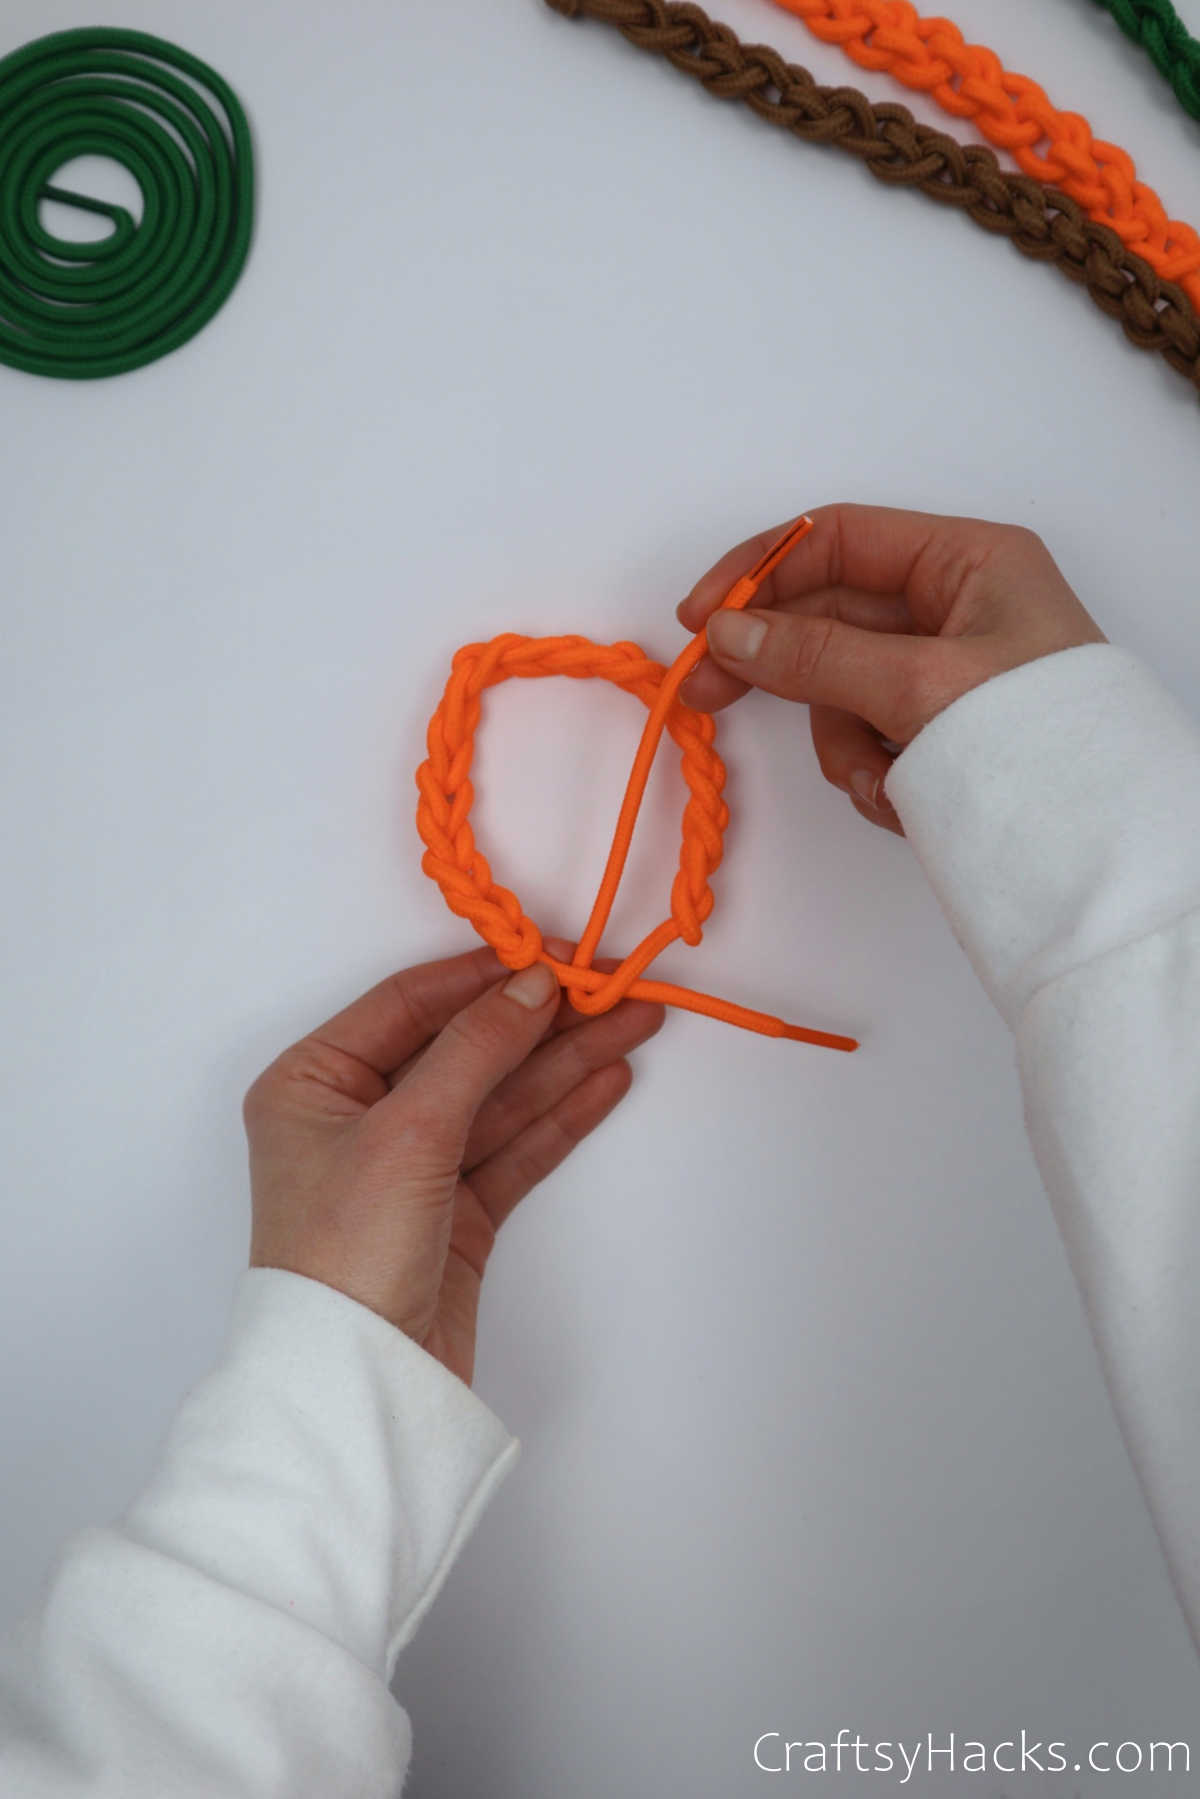
If you do decide to tie the ends together, then loop one tail around the other twice as seen below.
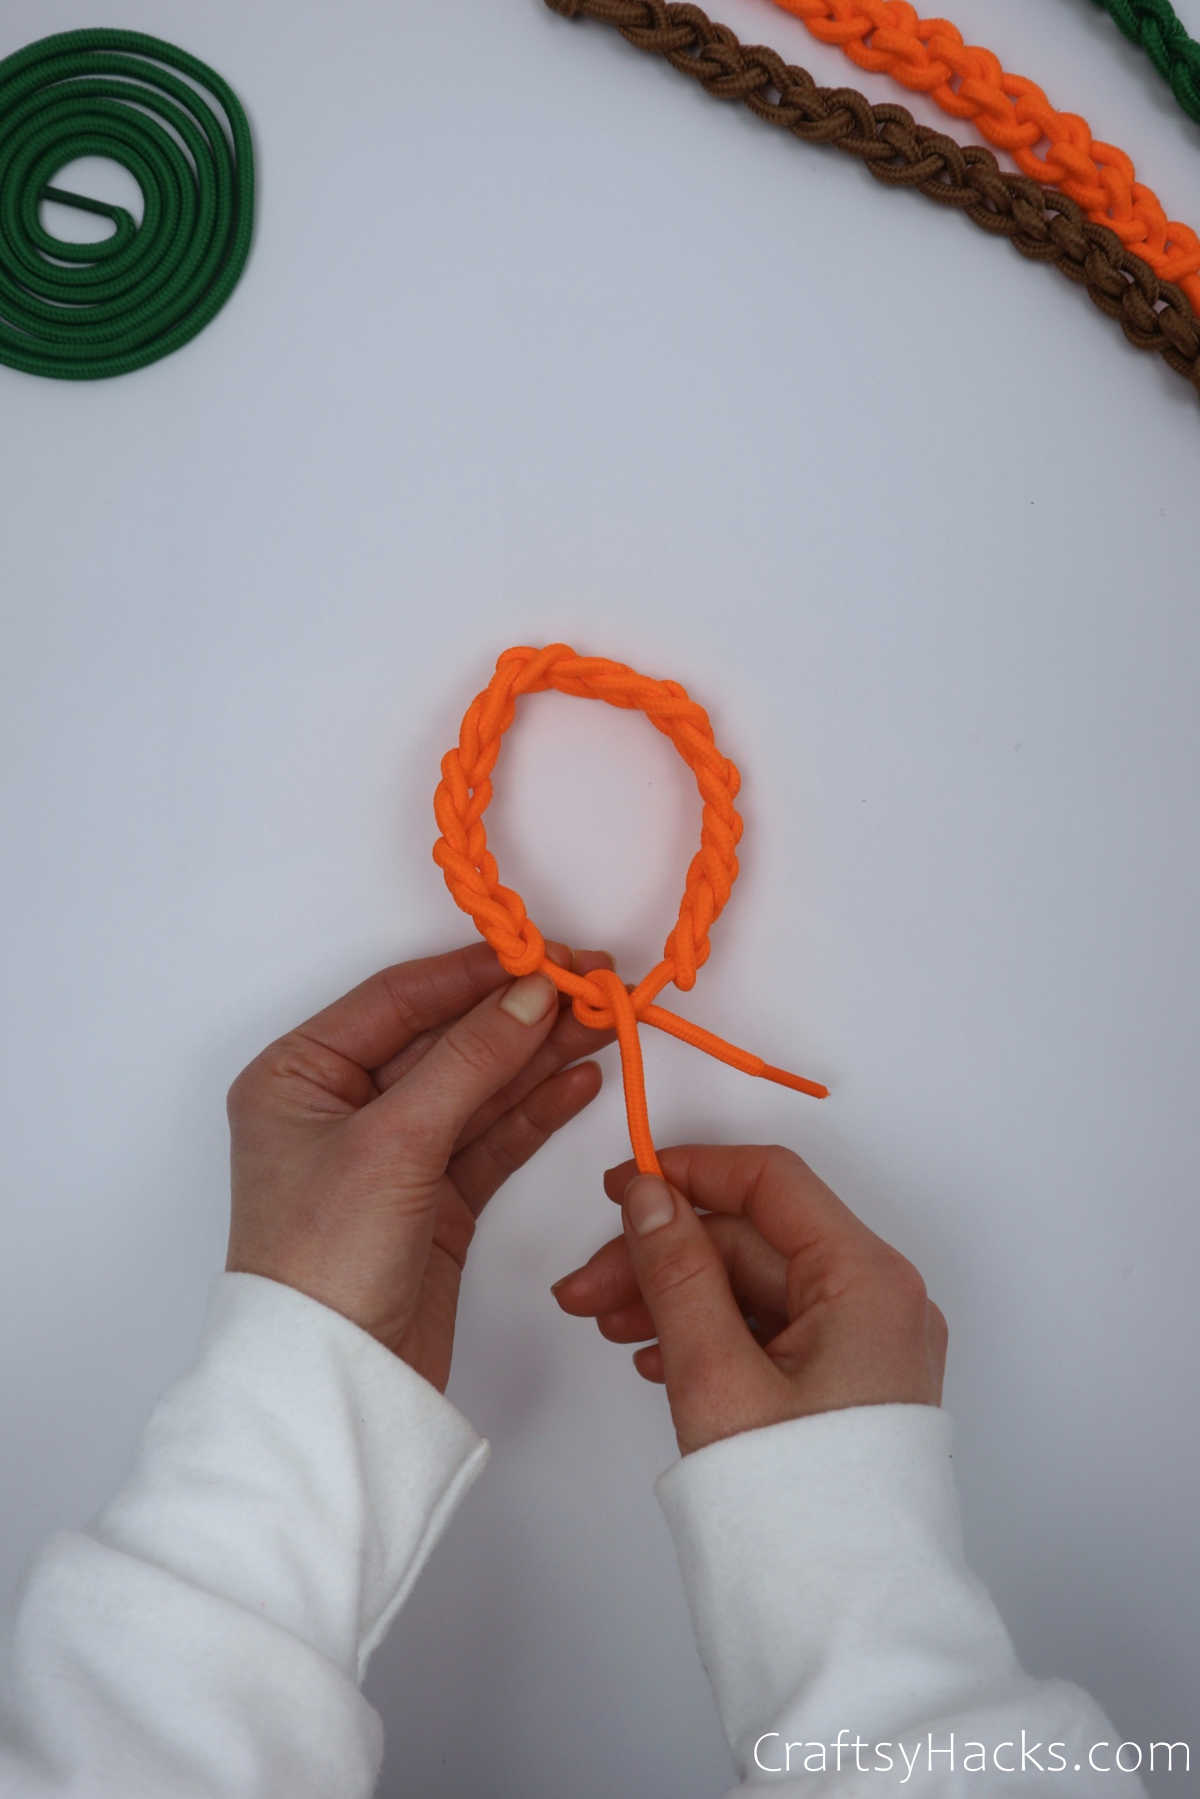
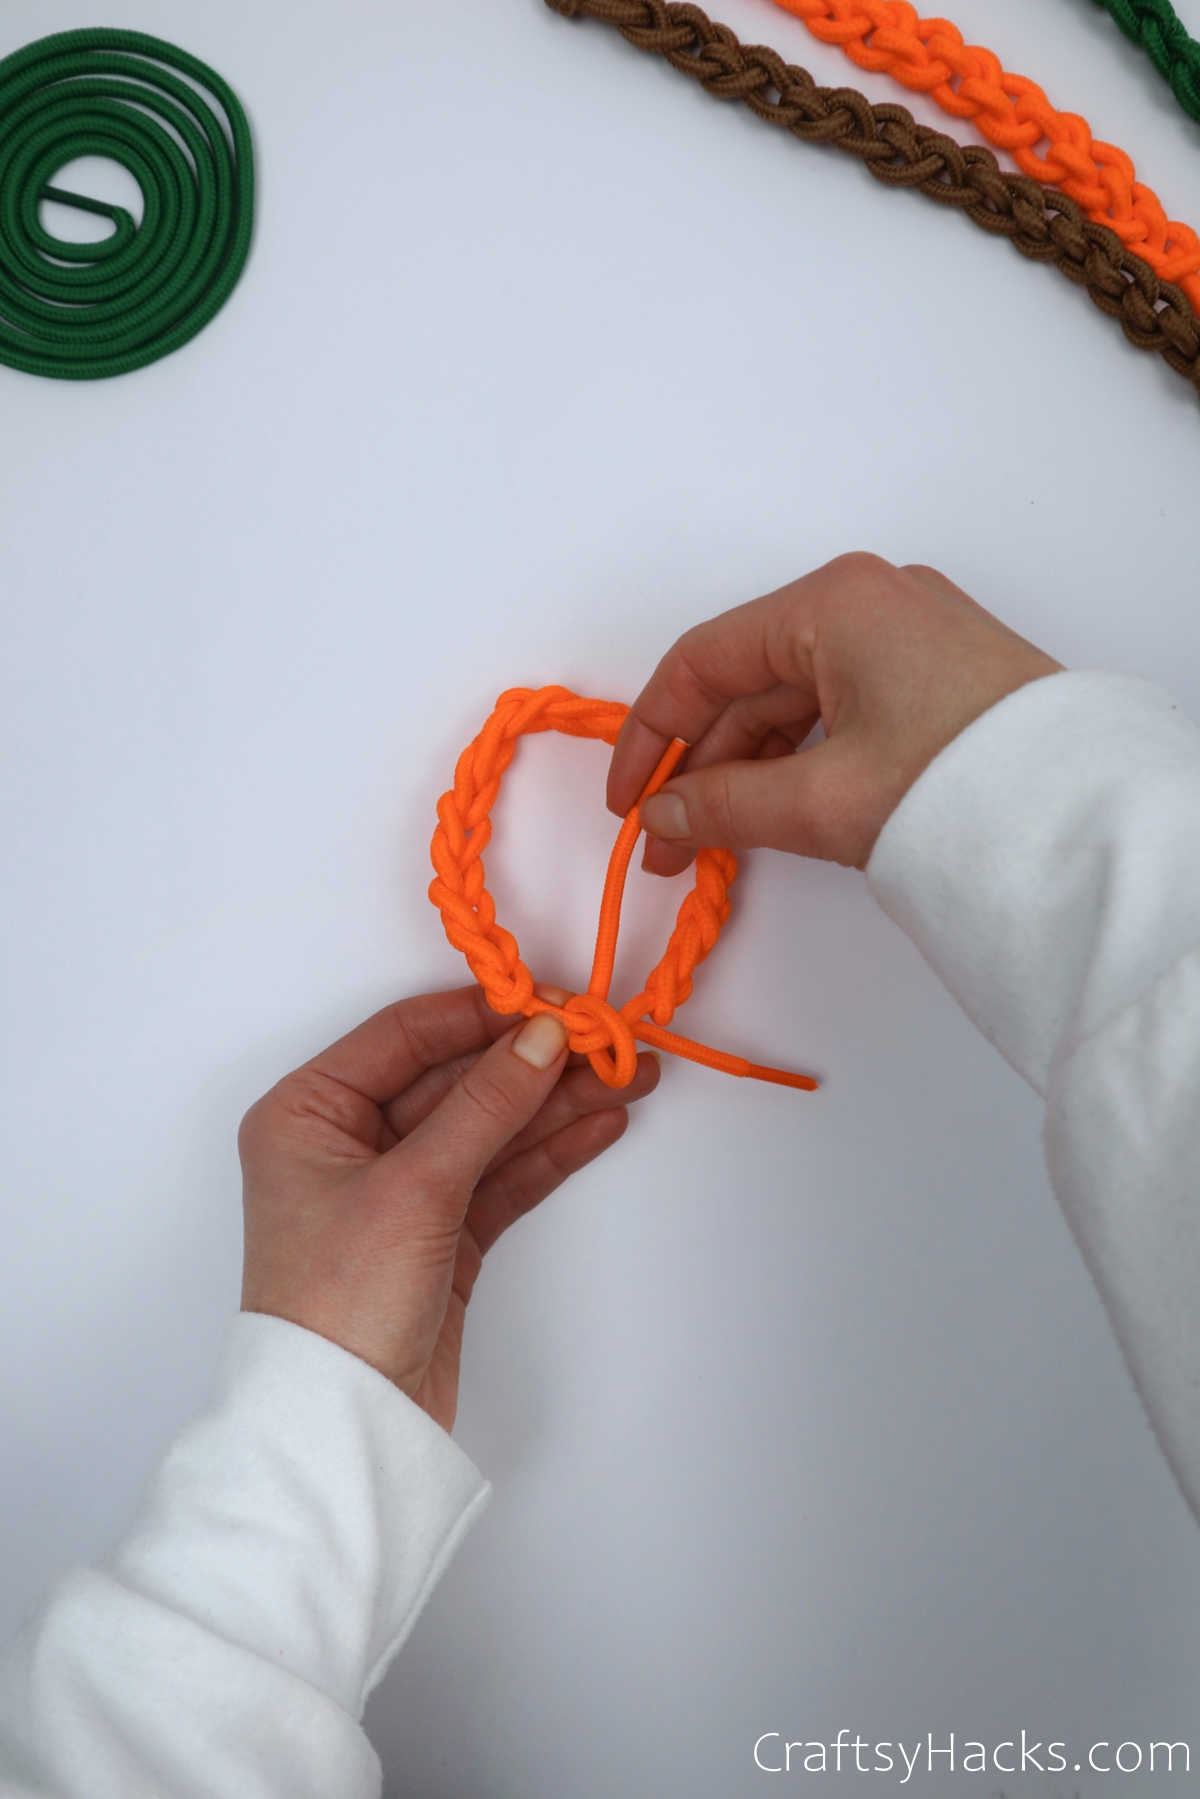
Once you’ve wrapped the tail around two to three times, pull the aglet through the two loops. Tug it in place to secure the bracelet.

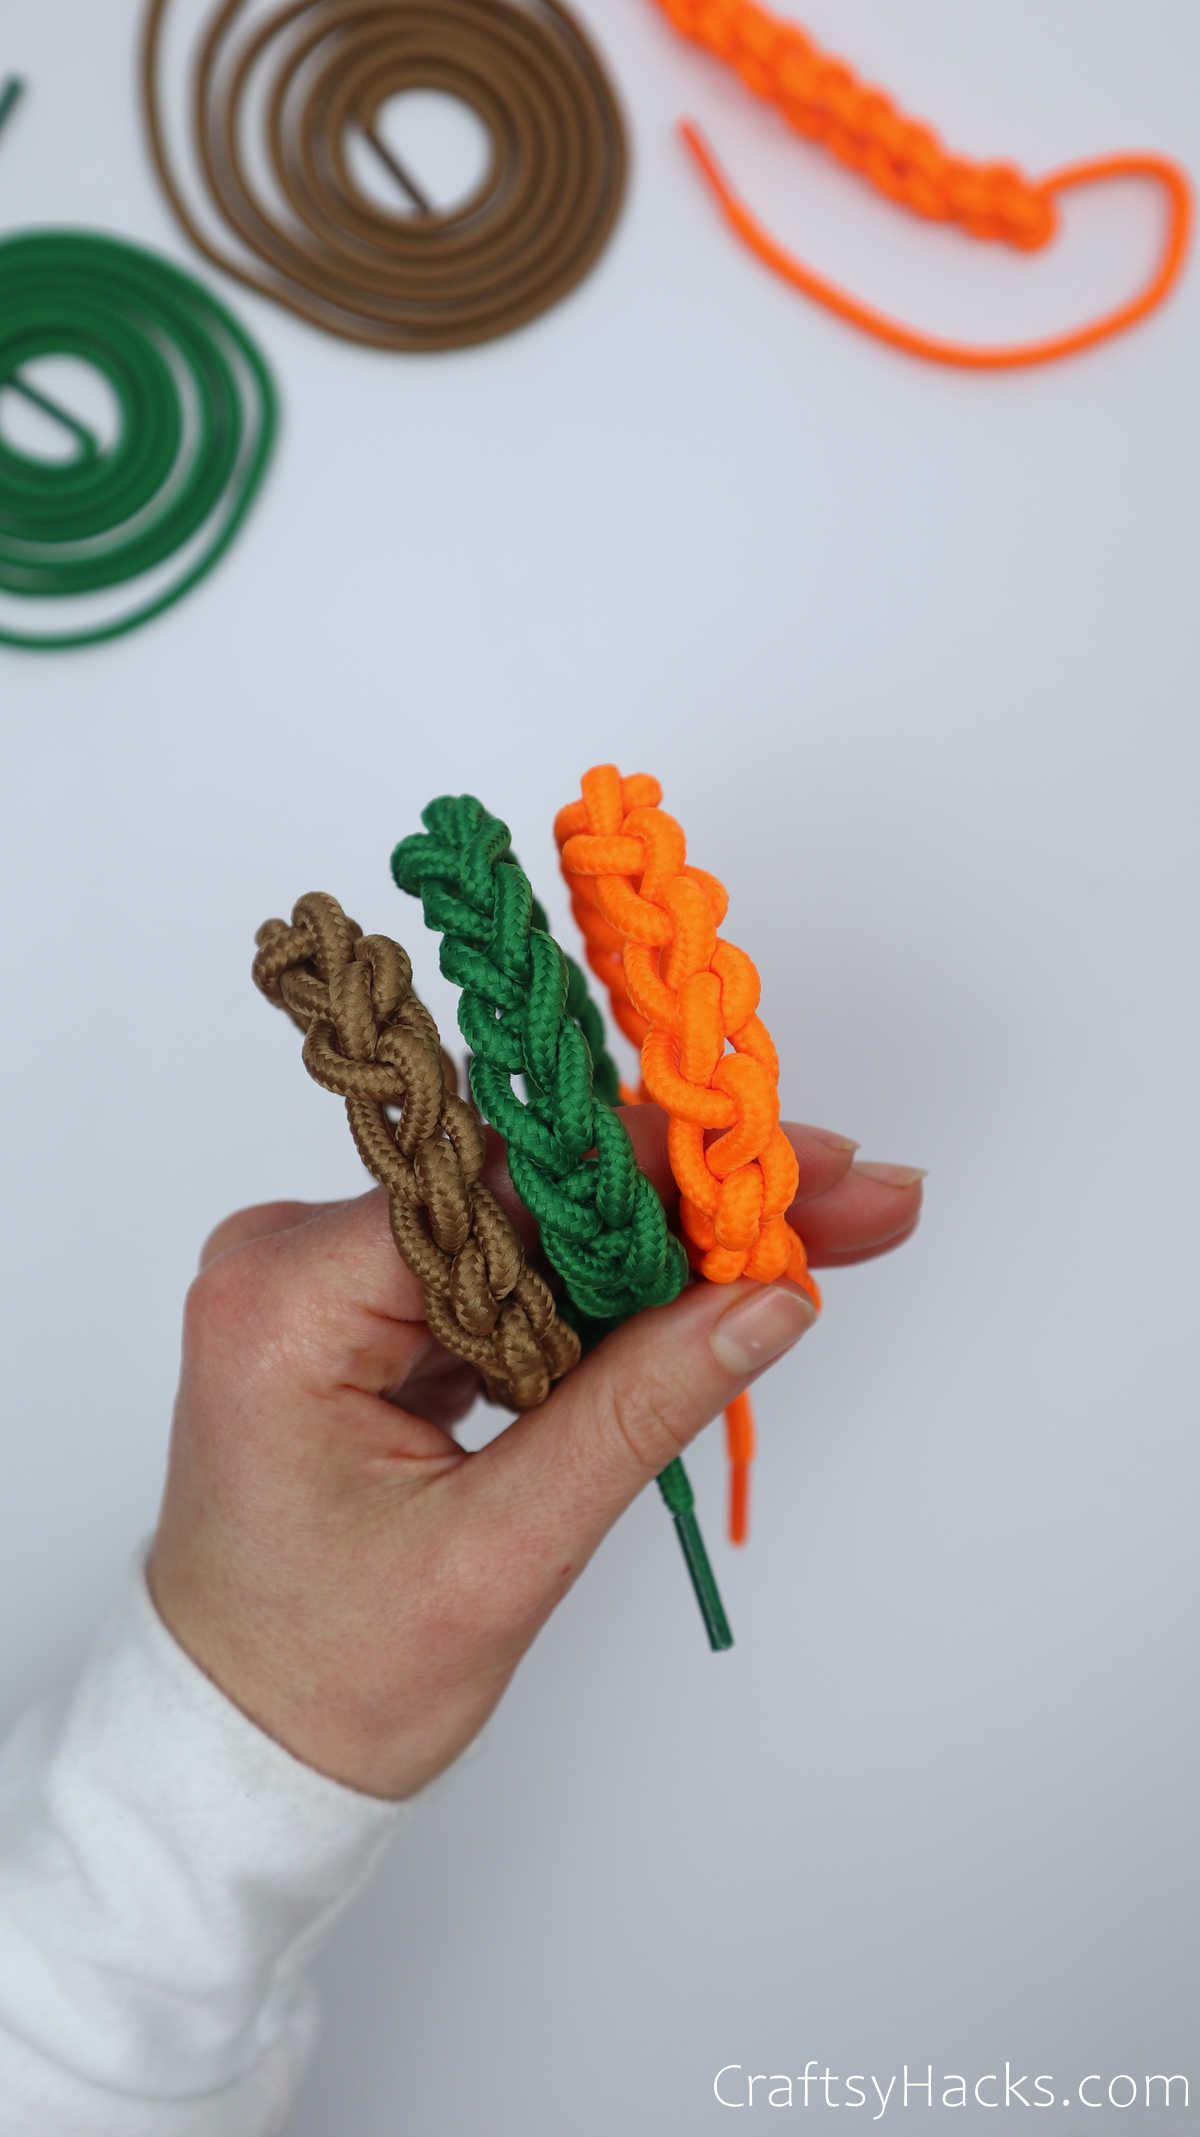
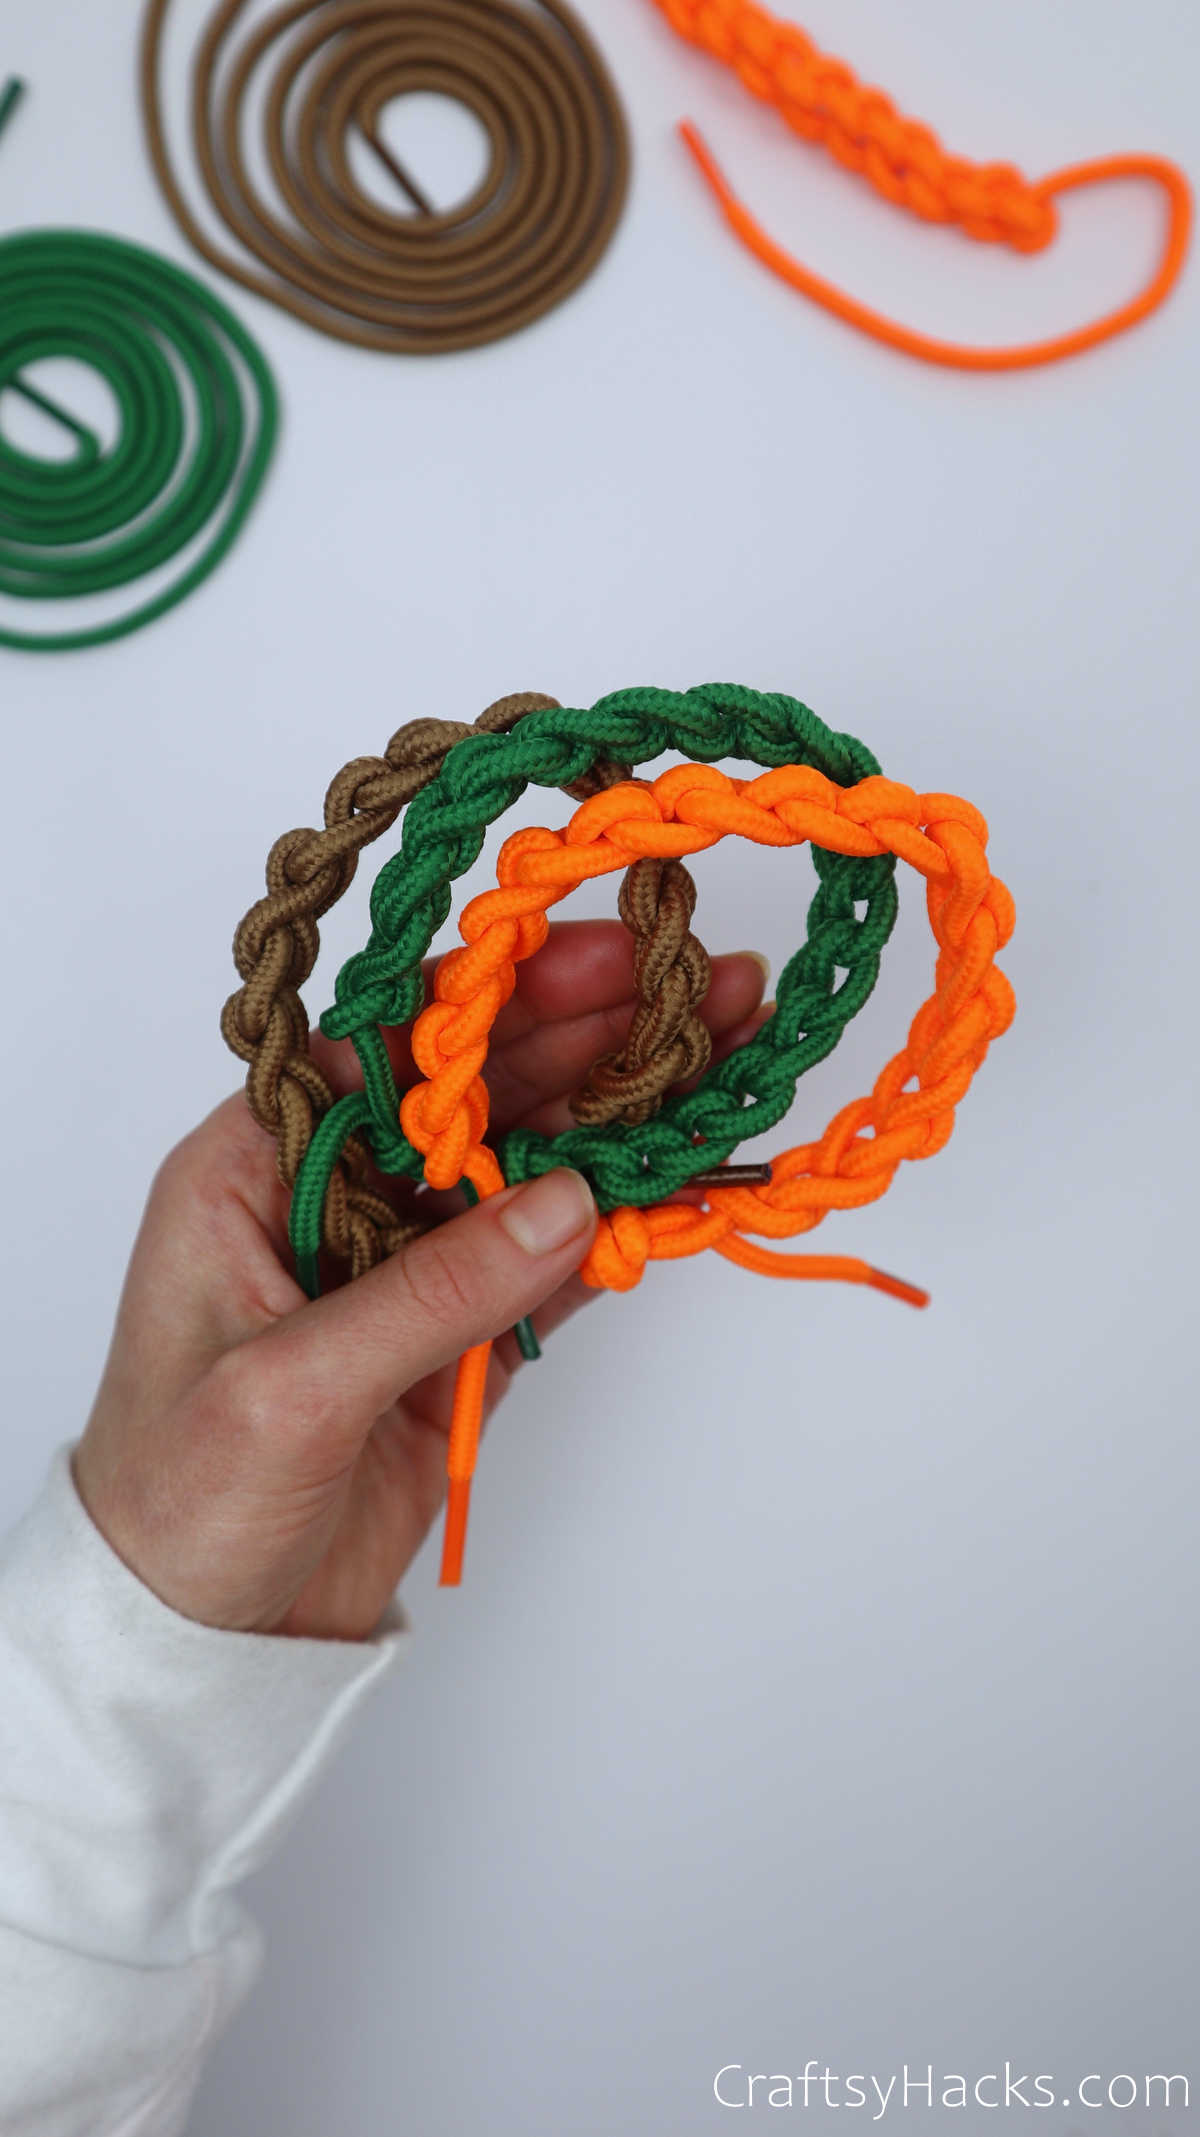
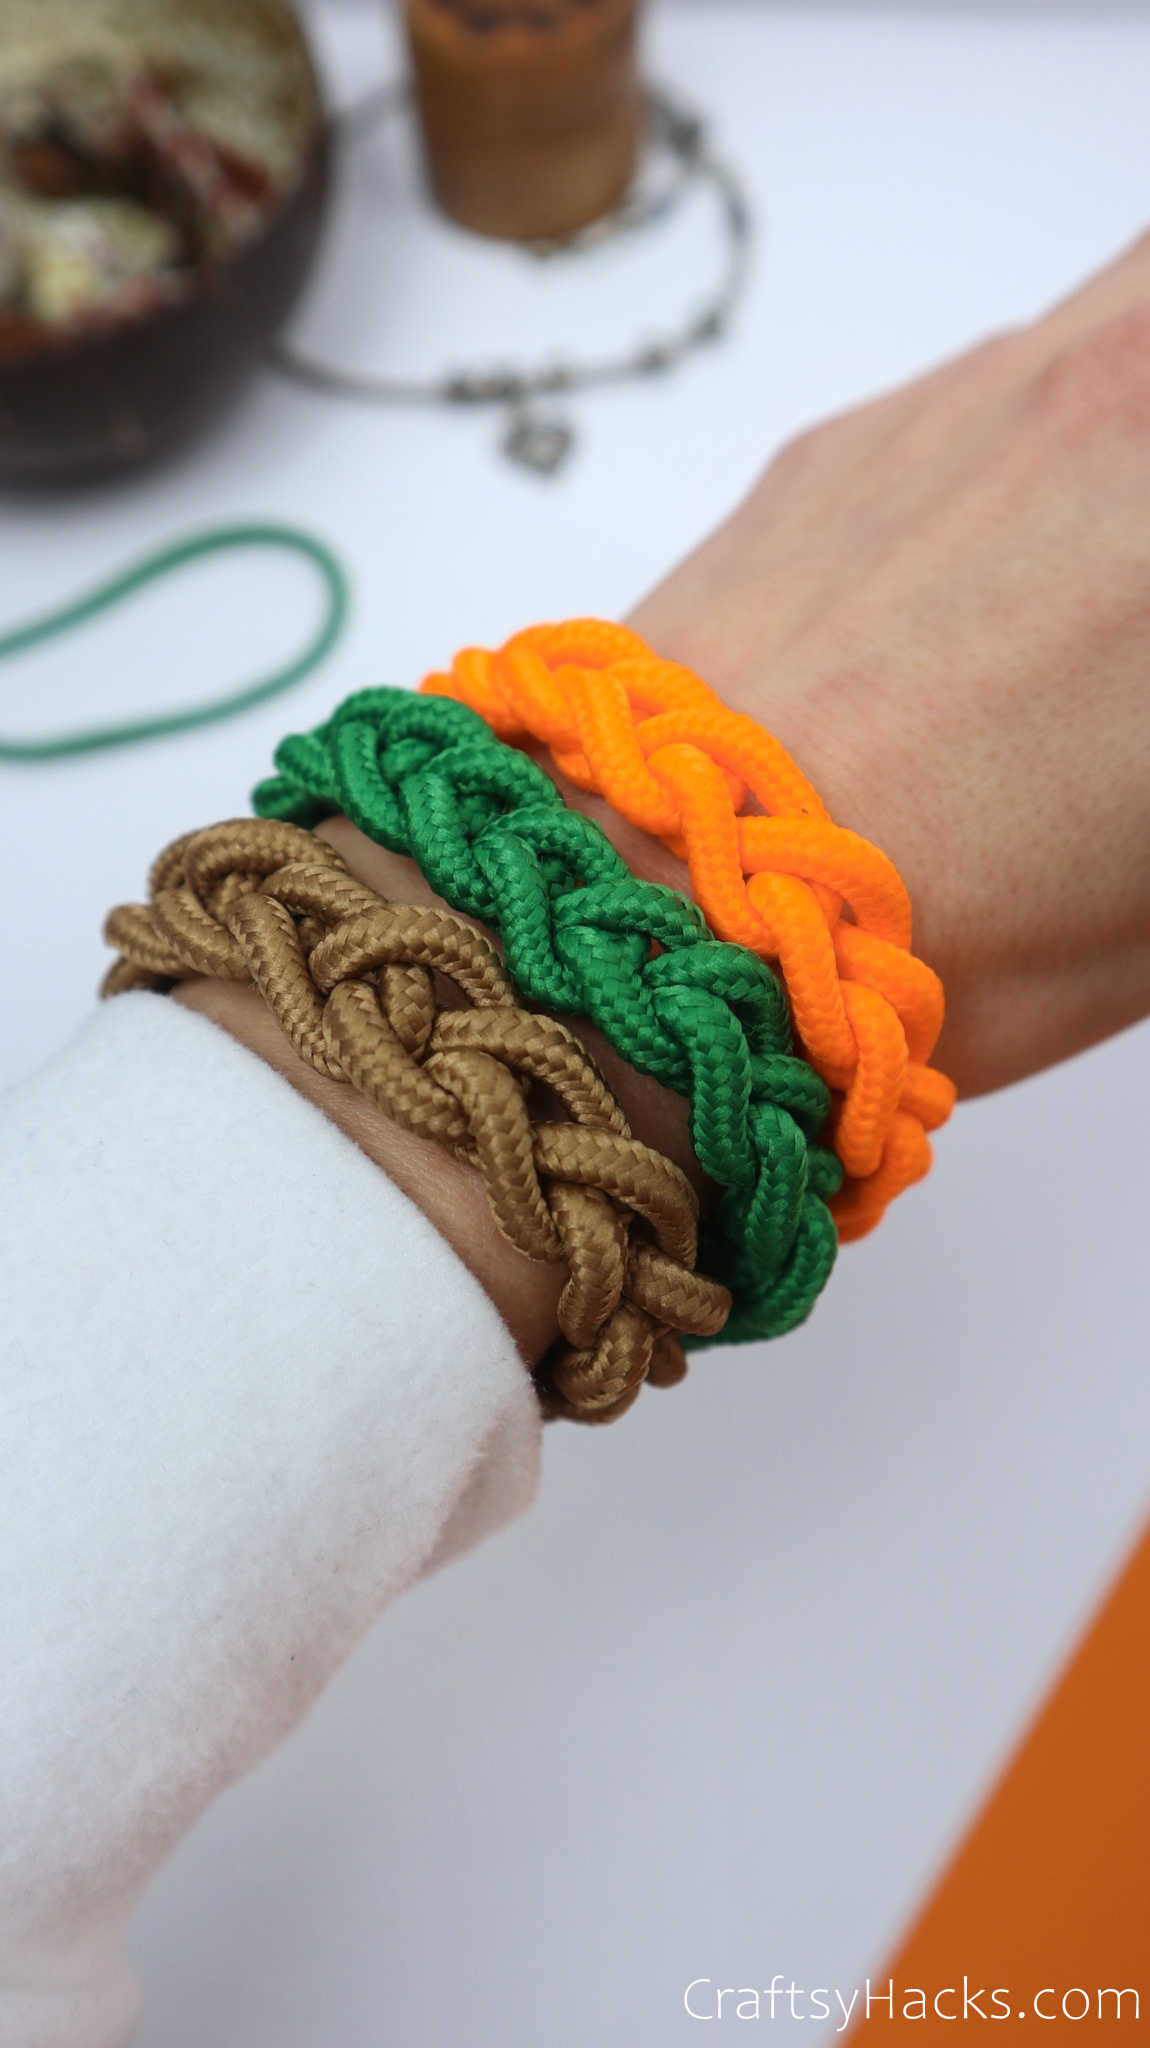
I bet you can’t just stop at one bracelet. You can make a dozen of these in under an hour! They’d make amazing party favors or friendship bracelets, too!
Your DIY bracelets out of shoelaces are ready!
You can also make some funky DIY accessories(check out these 37 DIY earring ideas or these 27 DIY rings for inspiration) and give them to friends on their birthdays. The possibilities are endless!
Other Crafts You Might Like Making
- 37 Girl Crafts
- 20 Projects for Teens
- DIY Macrame Earrings
- 20 DIY Crafts for Teens to Make Money
- 40 Crafts for Teens
DIY Bracelet Out of Shoelaces
Video Tutorial
Materials
- 80 cm to 1m length of shoelace—you can pick out any color you like.
Instructions
- To make this bracelet, start by making a loop with the left tail shorter. You will be working your way through using the right tail.
- Bring the right part over and then behind the loop.
- Pull the right tail through the loop to create a smaller loop. Tug the shoelace to tighten the knot.
- Repeat this process of pulling the shoelace above, behind, and then through the loop.
- Continue until you have reached the end of the lace or the desired length. These steps are repetitive, so all you need to do is to make sure that the loops you make every time are secure in their knots.
- However, they should not be fastened too tight, or the bracelet could curl under the pull.
- Pull the final loop through and tug it into a knot to complete your bracelet. You can either leave it as it is and just tie it in place when you wear it, or you can close the loop.
- To finish the closed-loop of the bracelet, you need to bring both tails together and over each other.
- Wrap the right tail around the left a couple of times, firmly yet not too tight. Pull the right tail through and under the loops you’ve wrapped and secure it firmly in place.


Wow wow this is Soo Soo amazing