DIY Boho Succulent Planter (Step-by-Step)
This post may contain affiliate links: full affiliate disclosure.
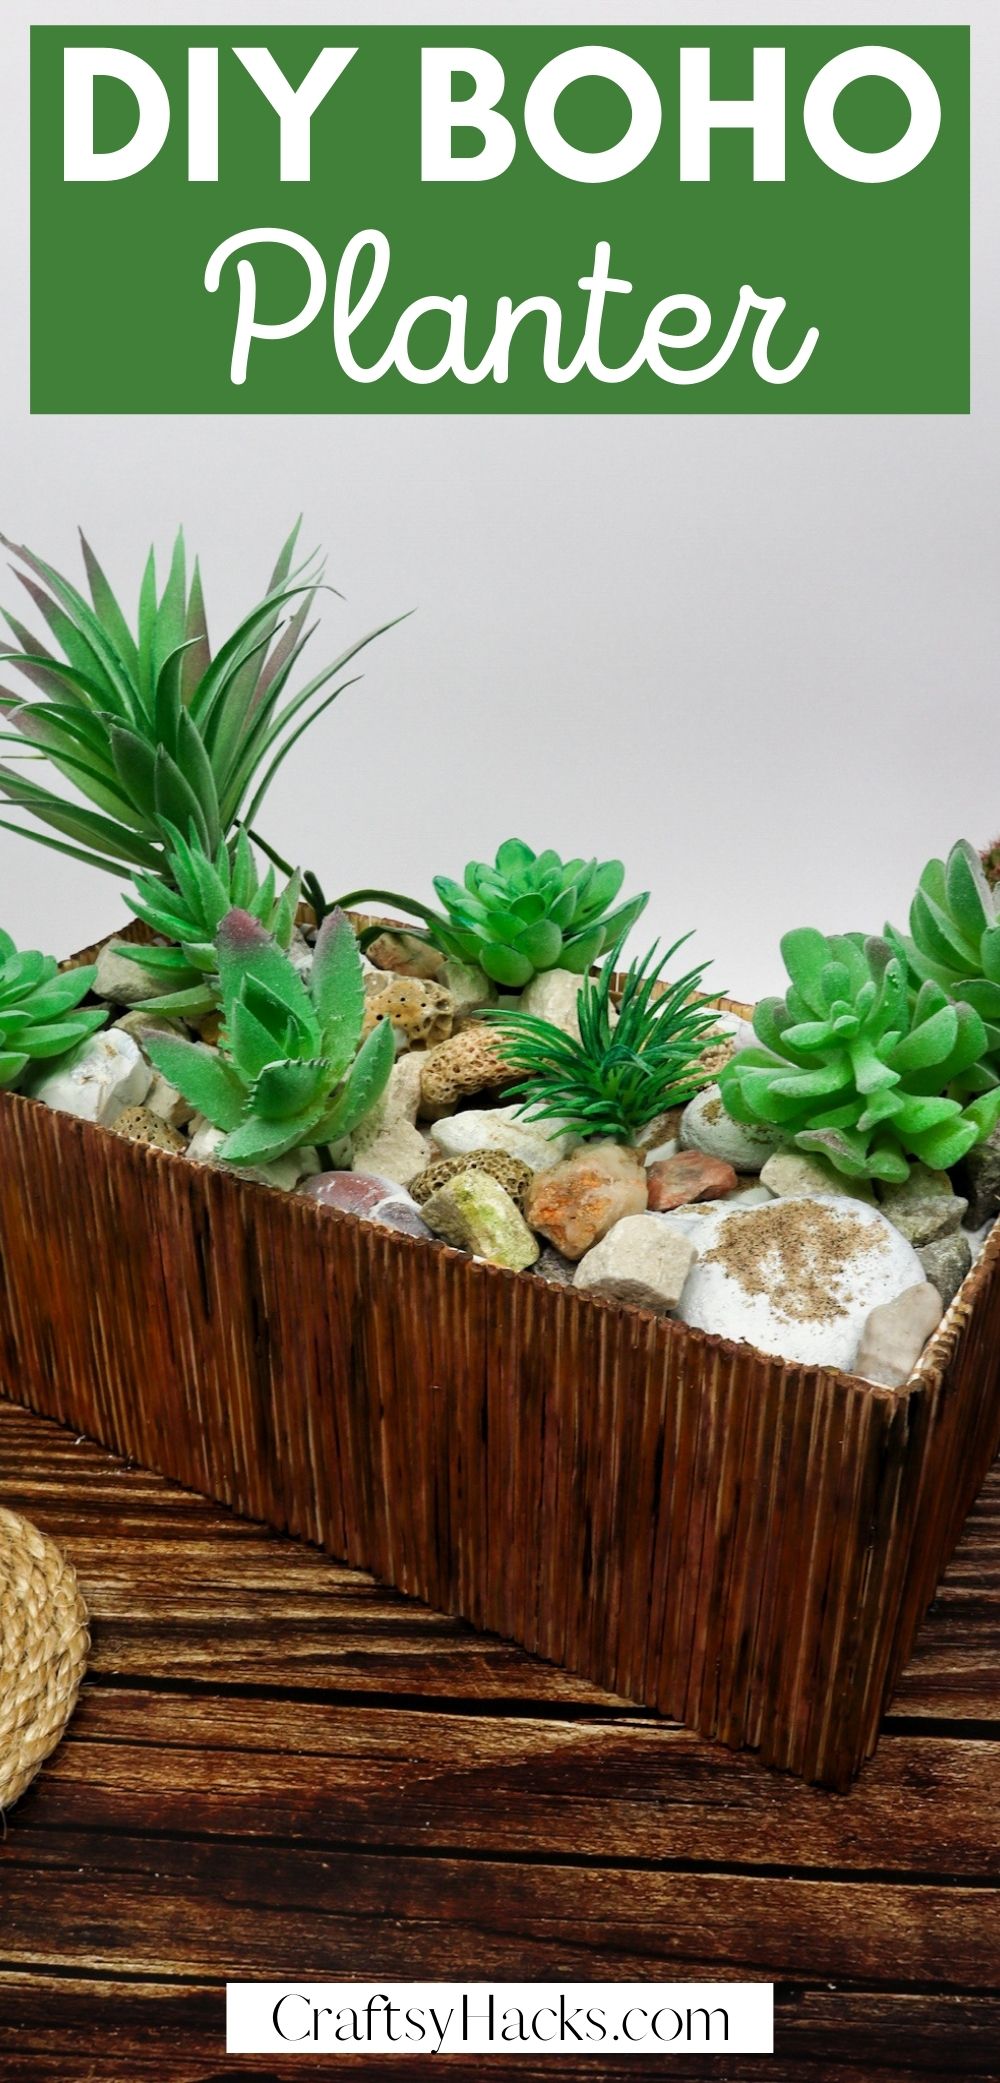
Get creative with your very own DIY boho succulent planter. It’s a beautiful centerpiece for your home and just a great project for teens and adults.

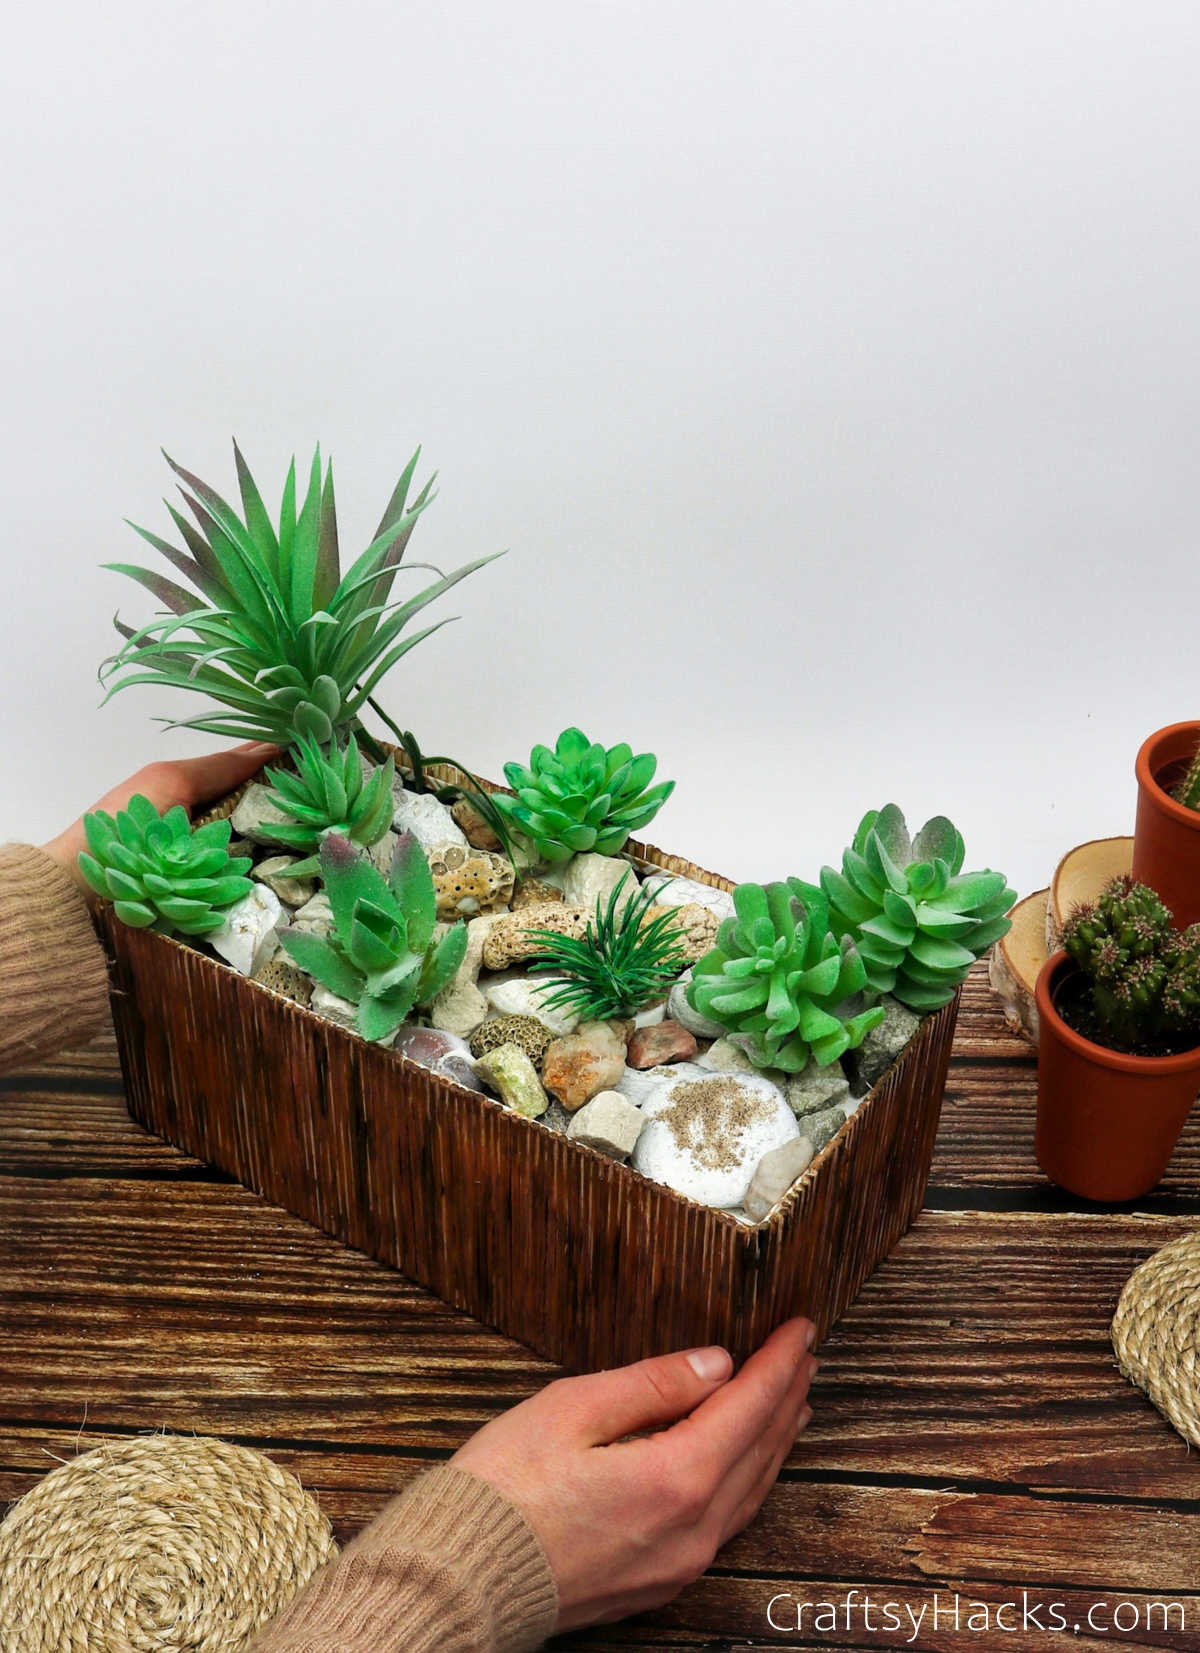
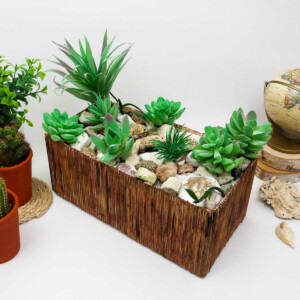
Just take a look at this gorgeous planter. It’s not just any old, plain, or boring planter, no. This one’s like a little terrarium in one single pot.
What I love about it is the bohemian vibe that it throws off in spades. There’s a lovely touch of rusticity, too. But all those textured rocks and succulents just scream earthy boho-chic, don’t they?

What if I told you that this planter was actually super easy to make, and you can make one—or three—all on your own for your home? No, really, you can recreate this planter, too, if you’ve a mind to.
Go on and take a look at the supplies you’ll need, and then read ahead to find out exactly how you can make this DIY boho succulent planter.
Supplies and Tools You’ll Need
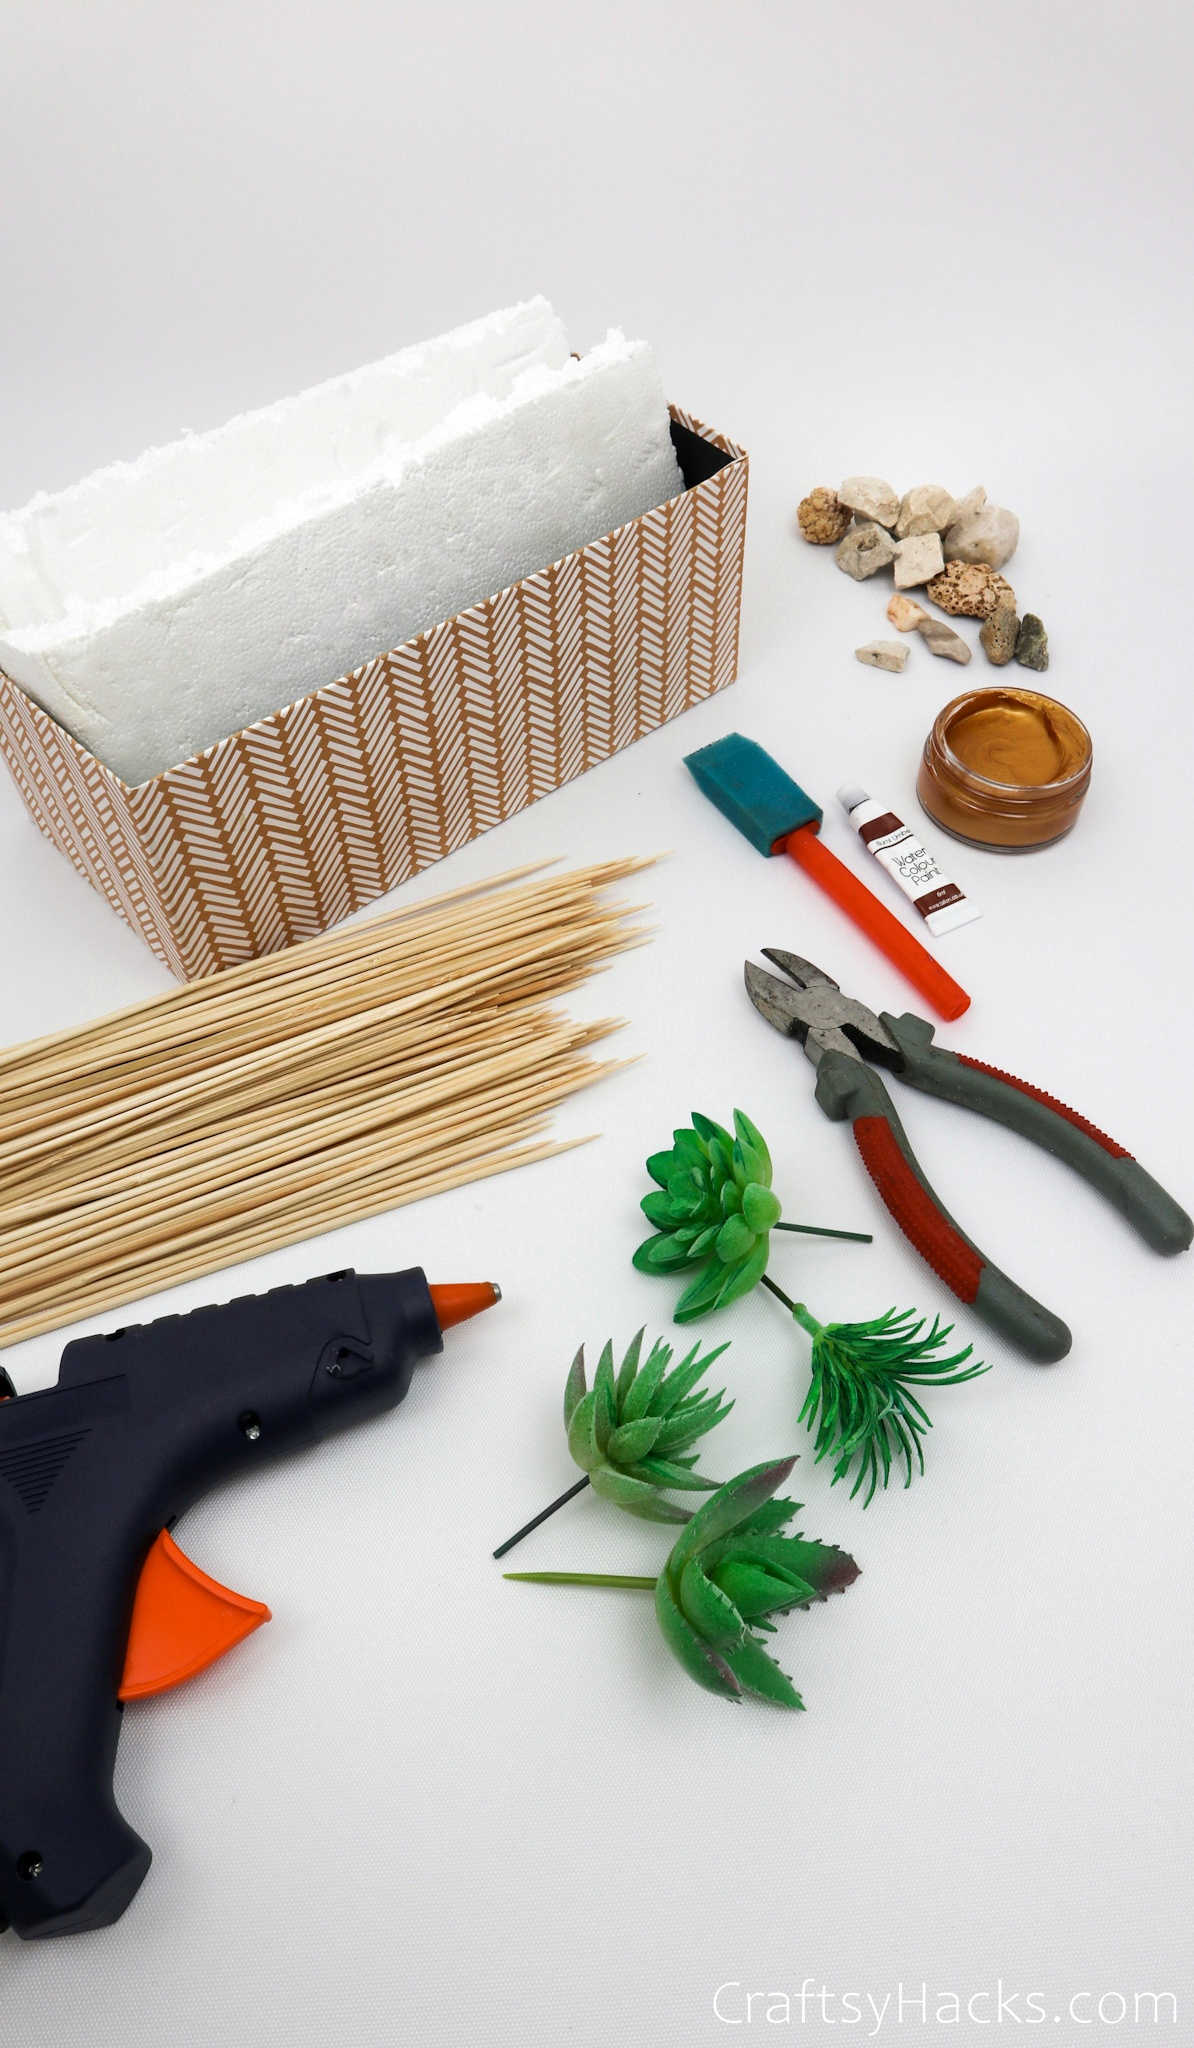
Here’s an exhaustive list of everything you’ll need for this project:
- 1x cardboard box
- Styrofoam sheets
- White napkin
- Pliers
- Artificial succulents
- Stones
- 100x skewers (more for a bigger box, fewer for a smaller one)
- Hot glue gun
- Paintbrush
- Acrylic paints (brown and metallic gold)
- Foam brush
Watch: DIY Boho Succulent
Would love to watch a video for this instead? Check full tutorial here!
How to Make a Boho Succulent
Now you know what you’ll need, so go ahead and gather all the materials. You will have noticed by now that we’re not going to be using real succulents. That’s because this planter is essentially a display piece.
Step 1
It seems like a shame to cover up such a pretty cardboard box, doesn’t it. But, if you’re using one of those generic ones, then you’ll be glad for the make-over. You can also use a plastic or a metal box to the same effect.
So, grab your hot glue gun to get started. Line the board with glue starting at one end from the bottom and lining up to the top.

Step 2
Take a skewer and press it into the line of glue to adhere it. Hold it in place for a few moments while the glue dries.
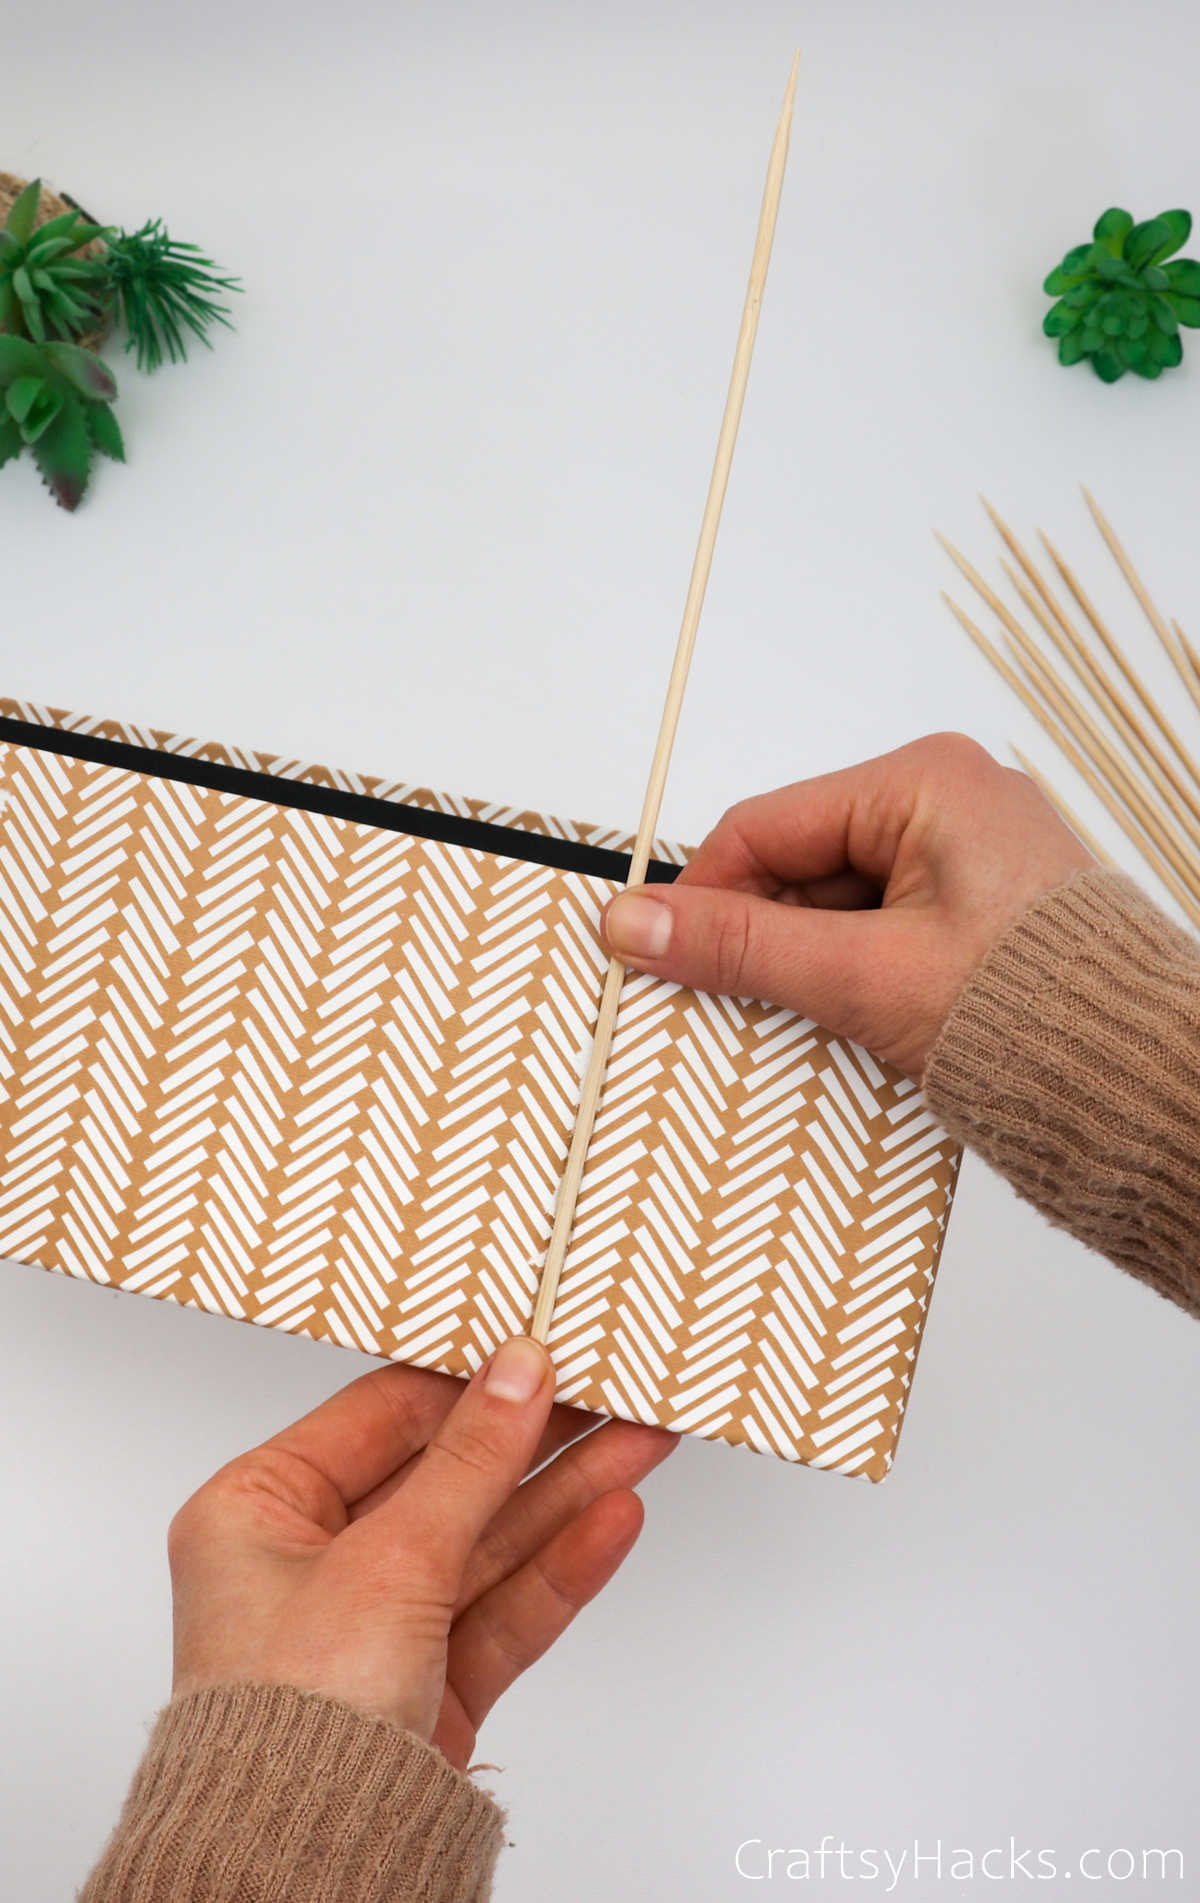
It might be easier to apply multiple lines of glue at a time and stick the skewers in place. The process will be quicker that way.
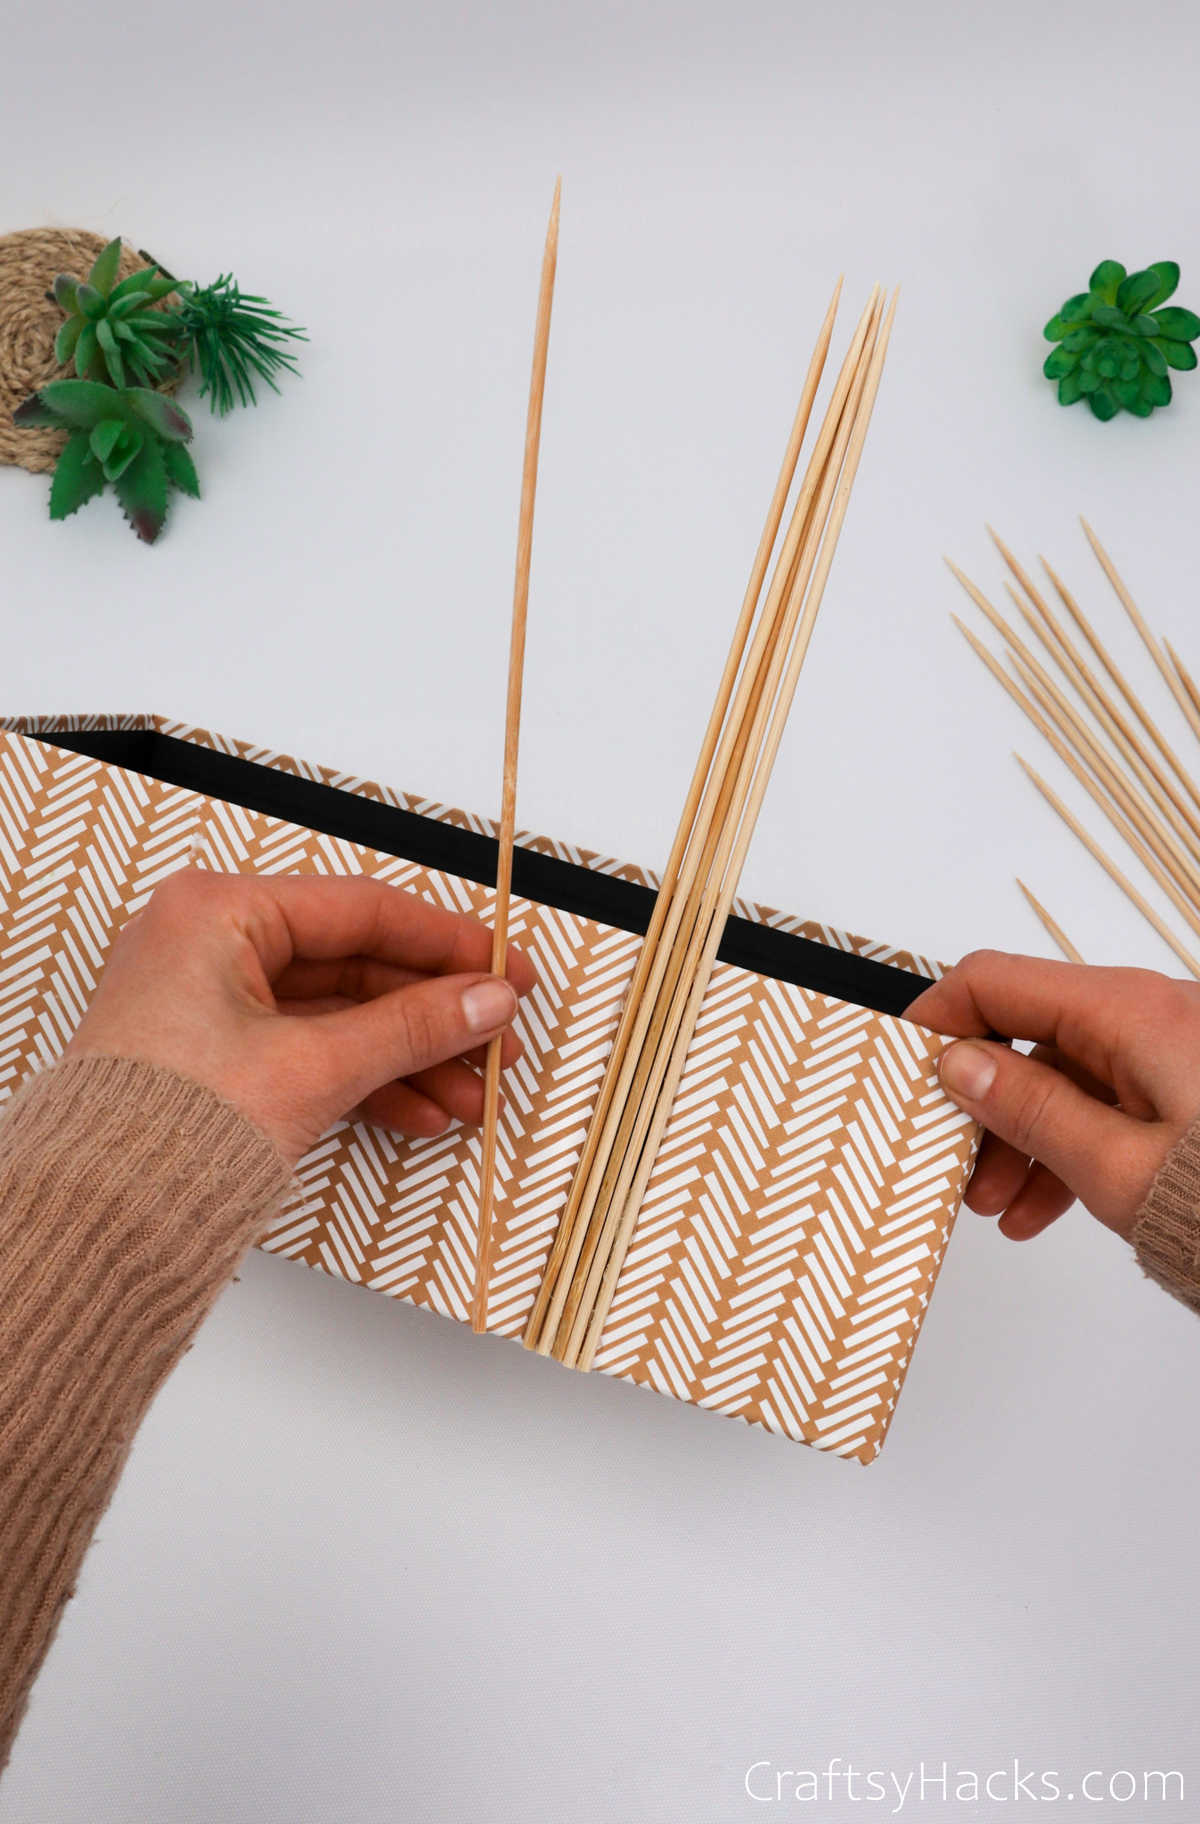
Just keep an eye out for the glue—you don’t want it to cool down while you’re working your way across the board.
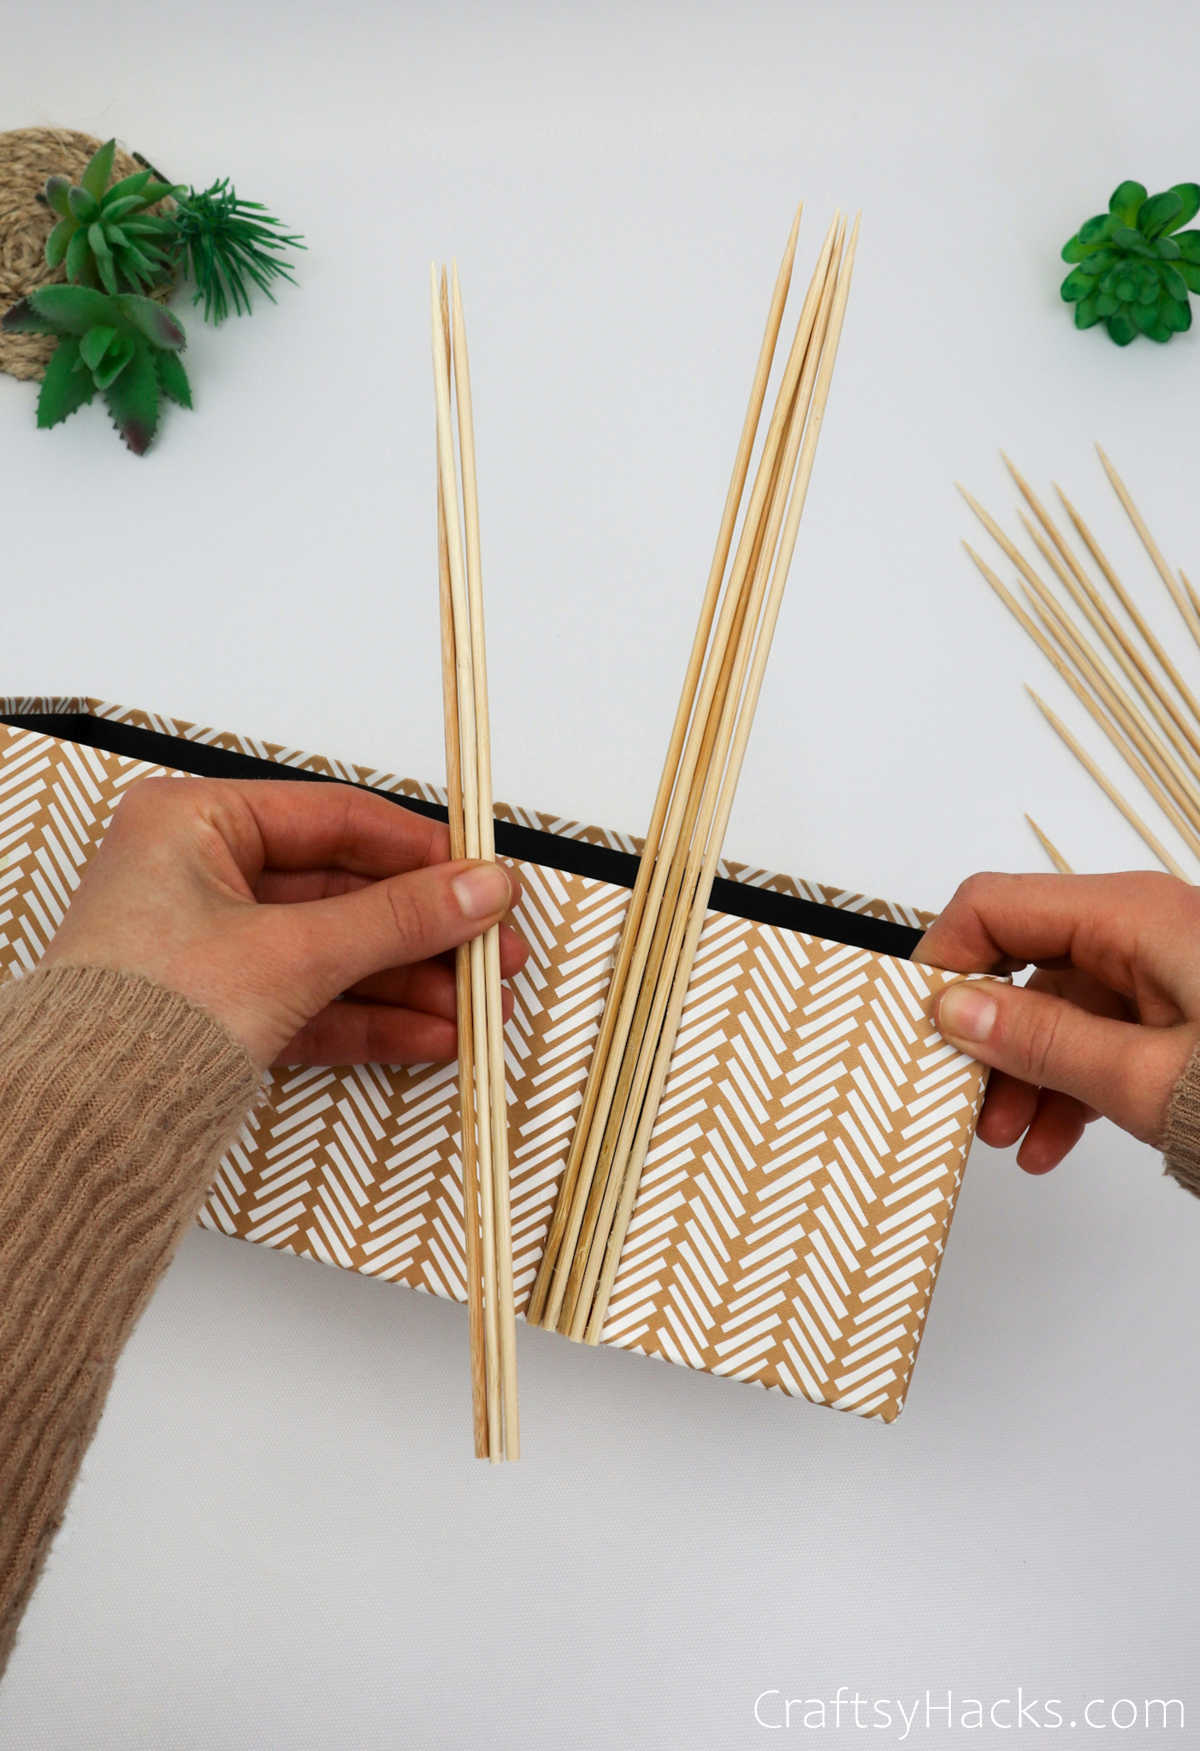
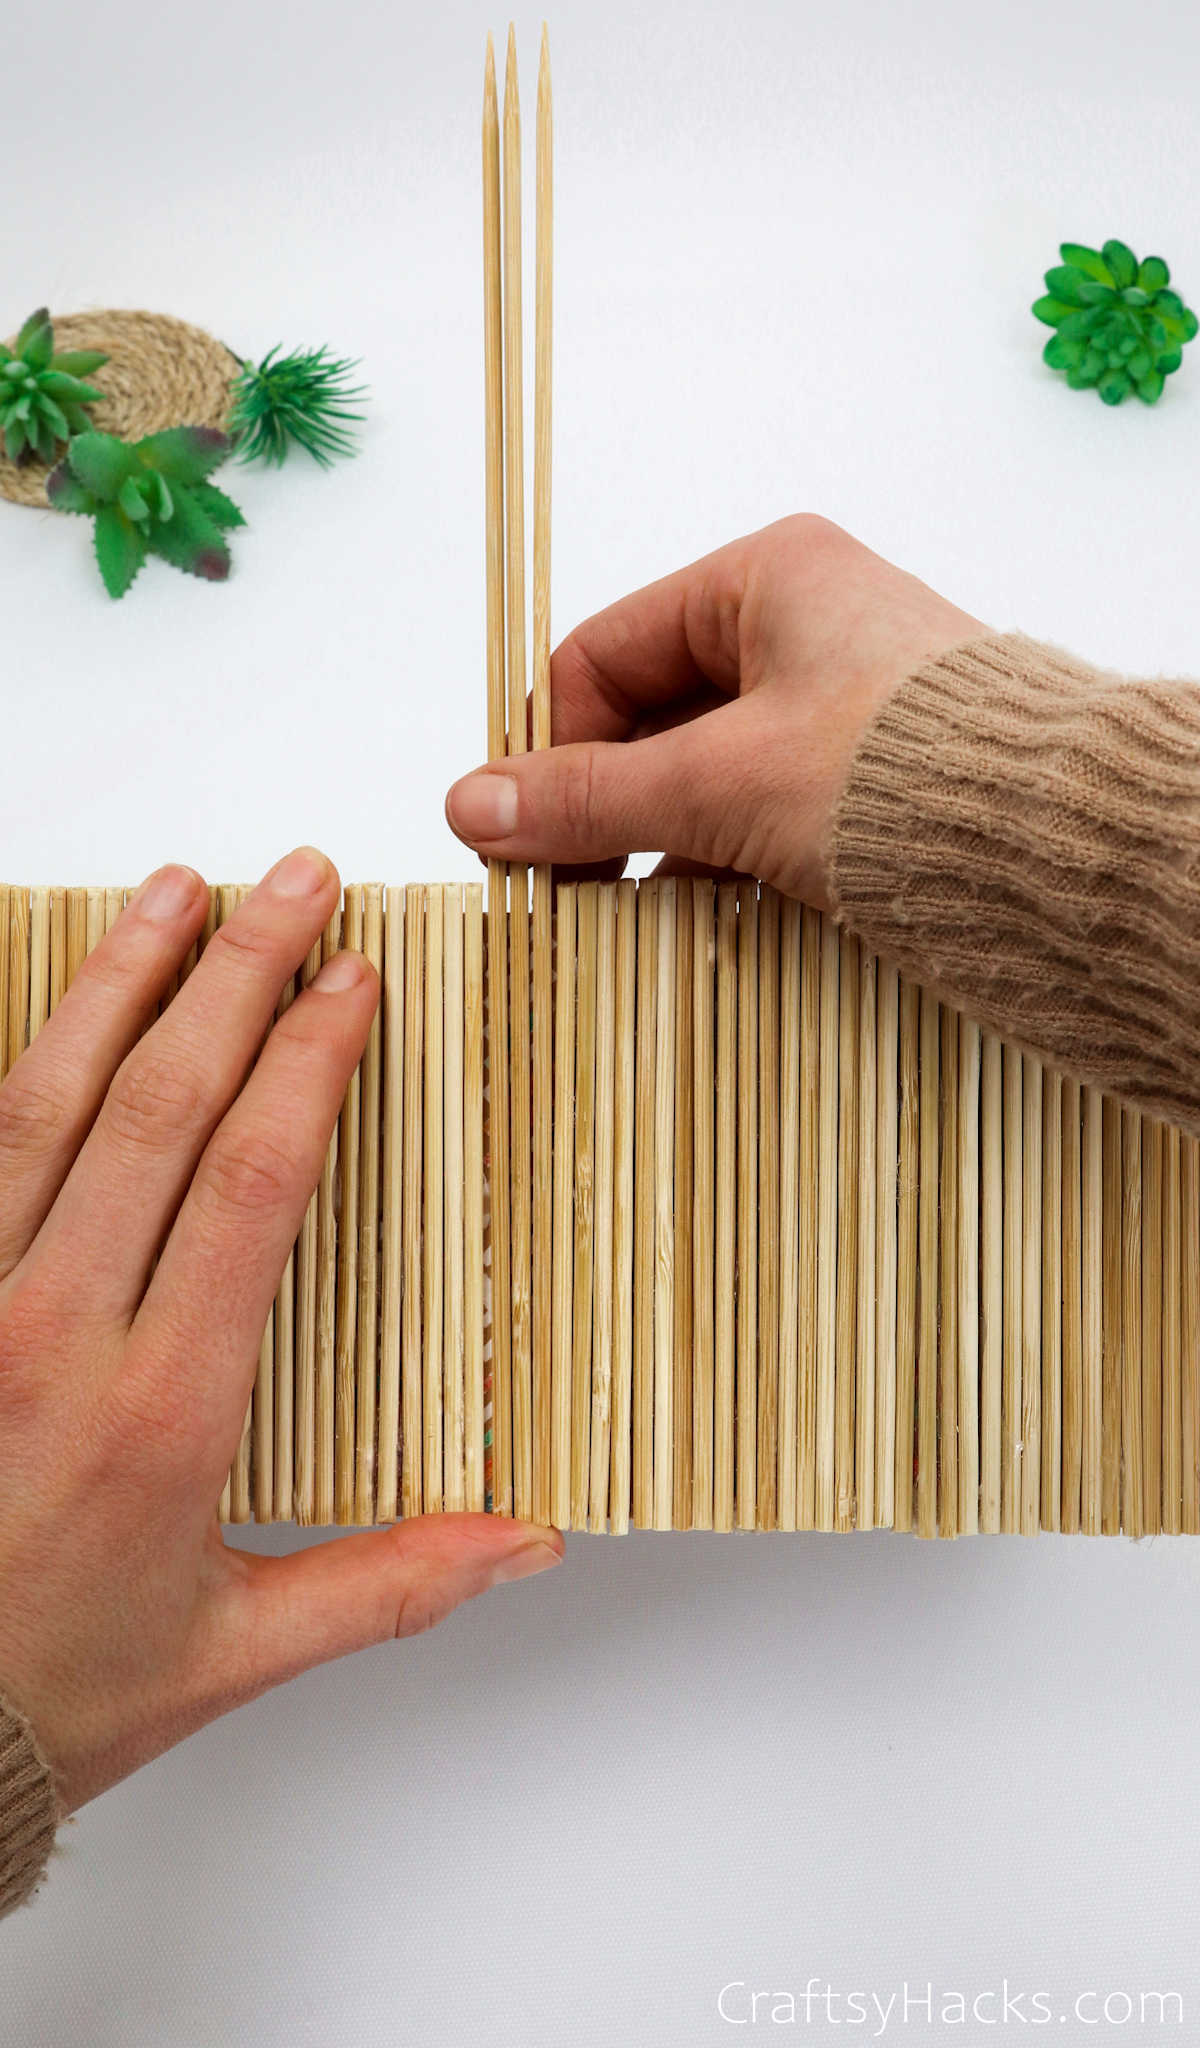
Step 3
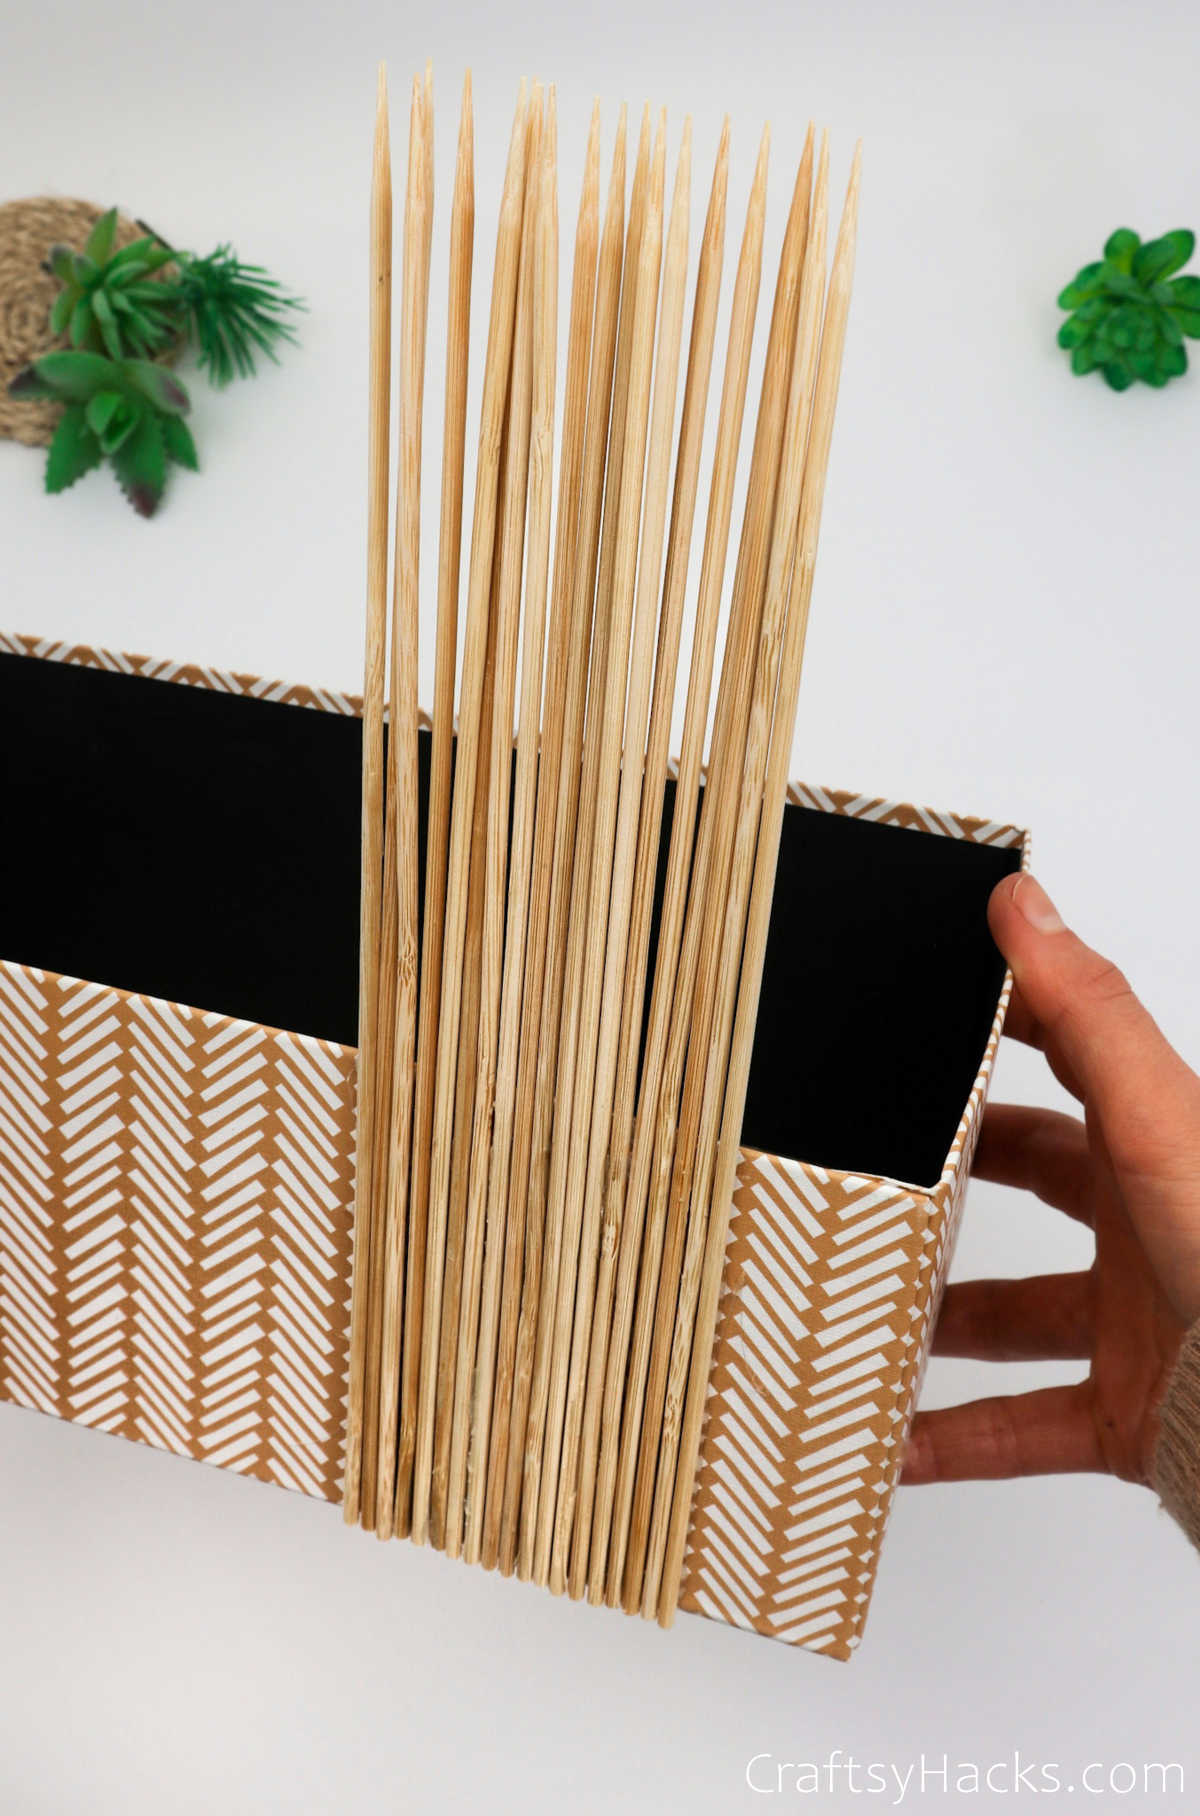
Grab a pair of pliers and clip the skewers as evenly as possible. The ends should not be longer than the height of the box.
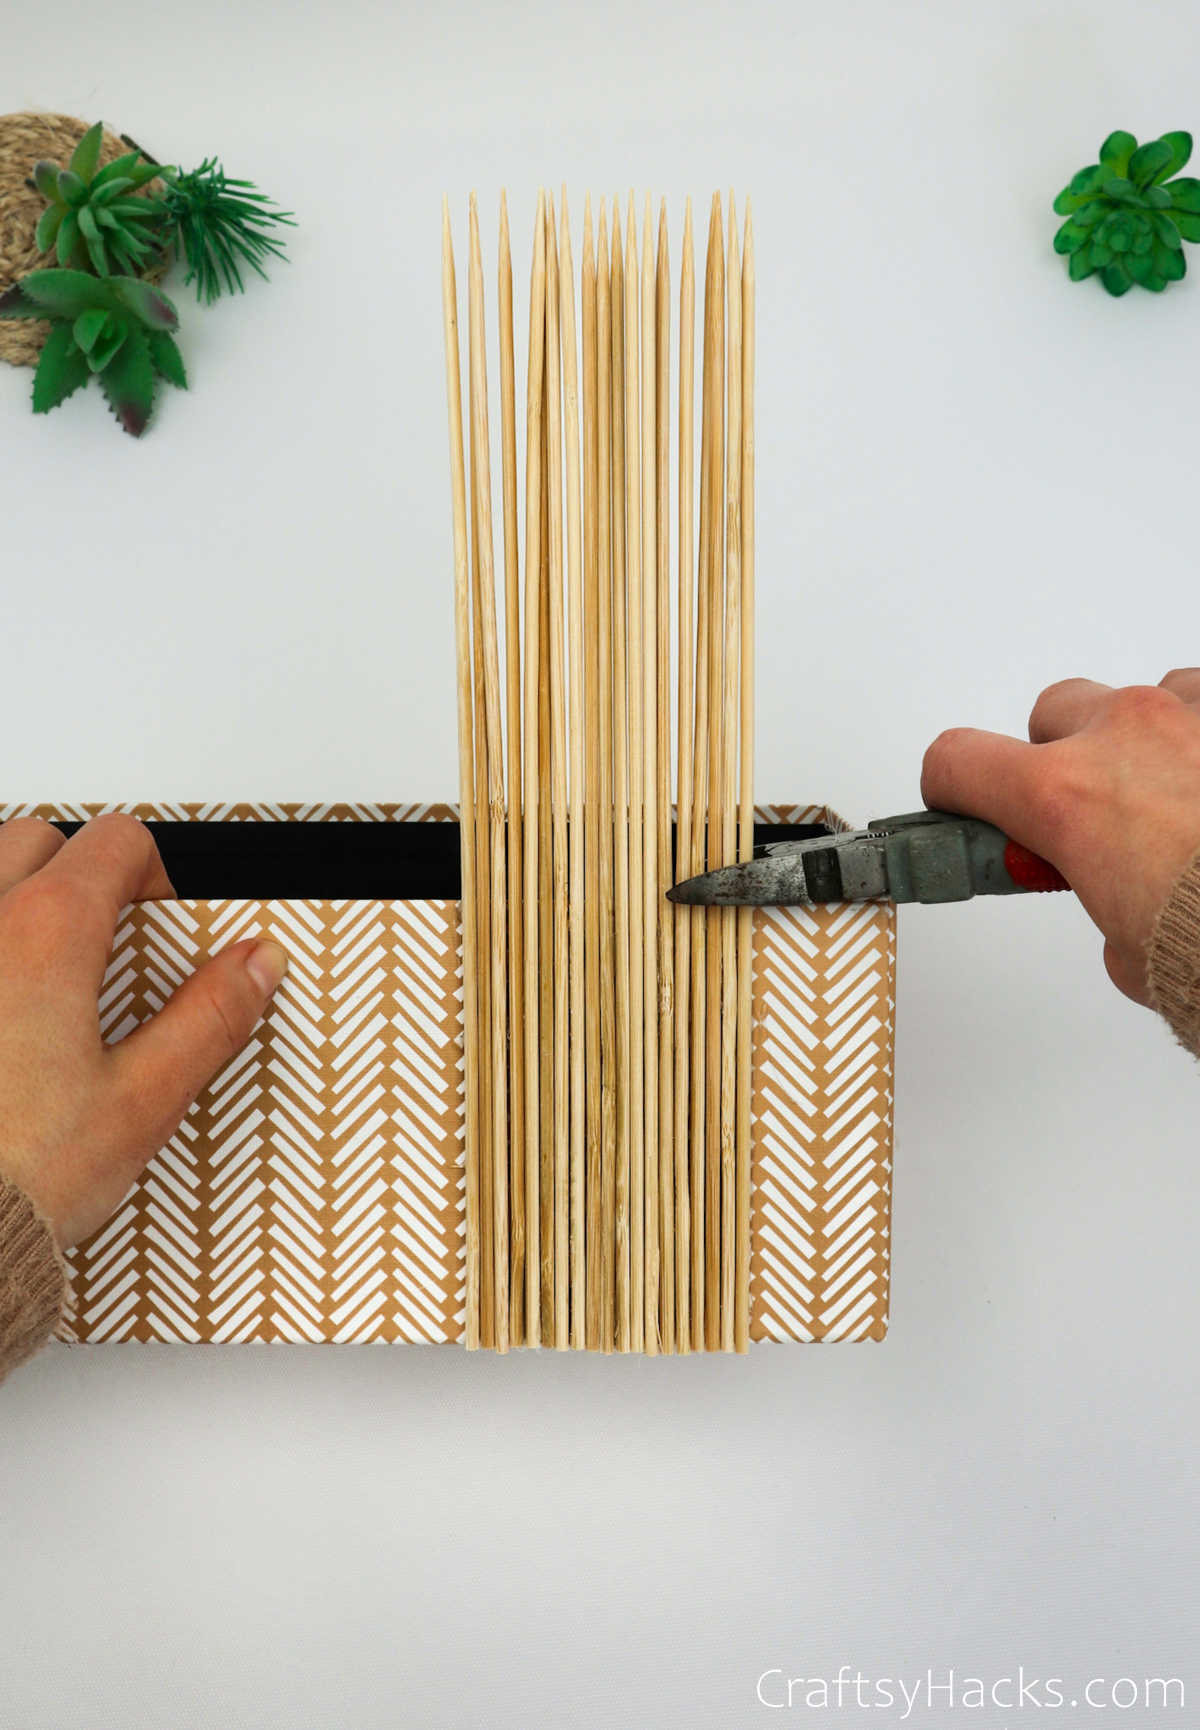
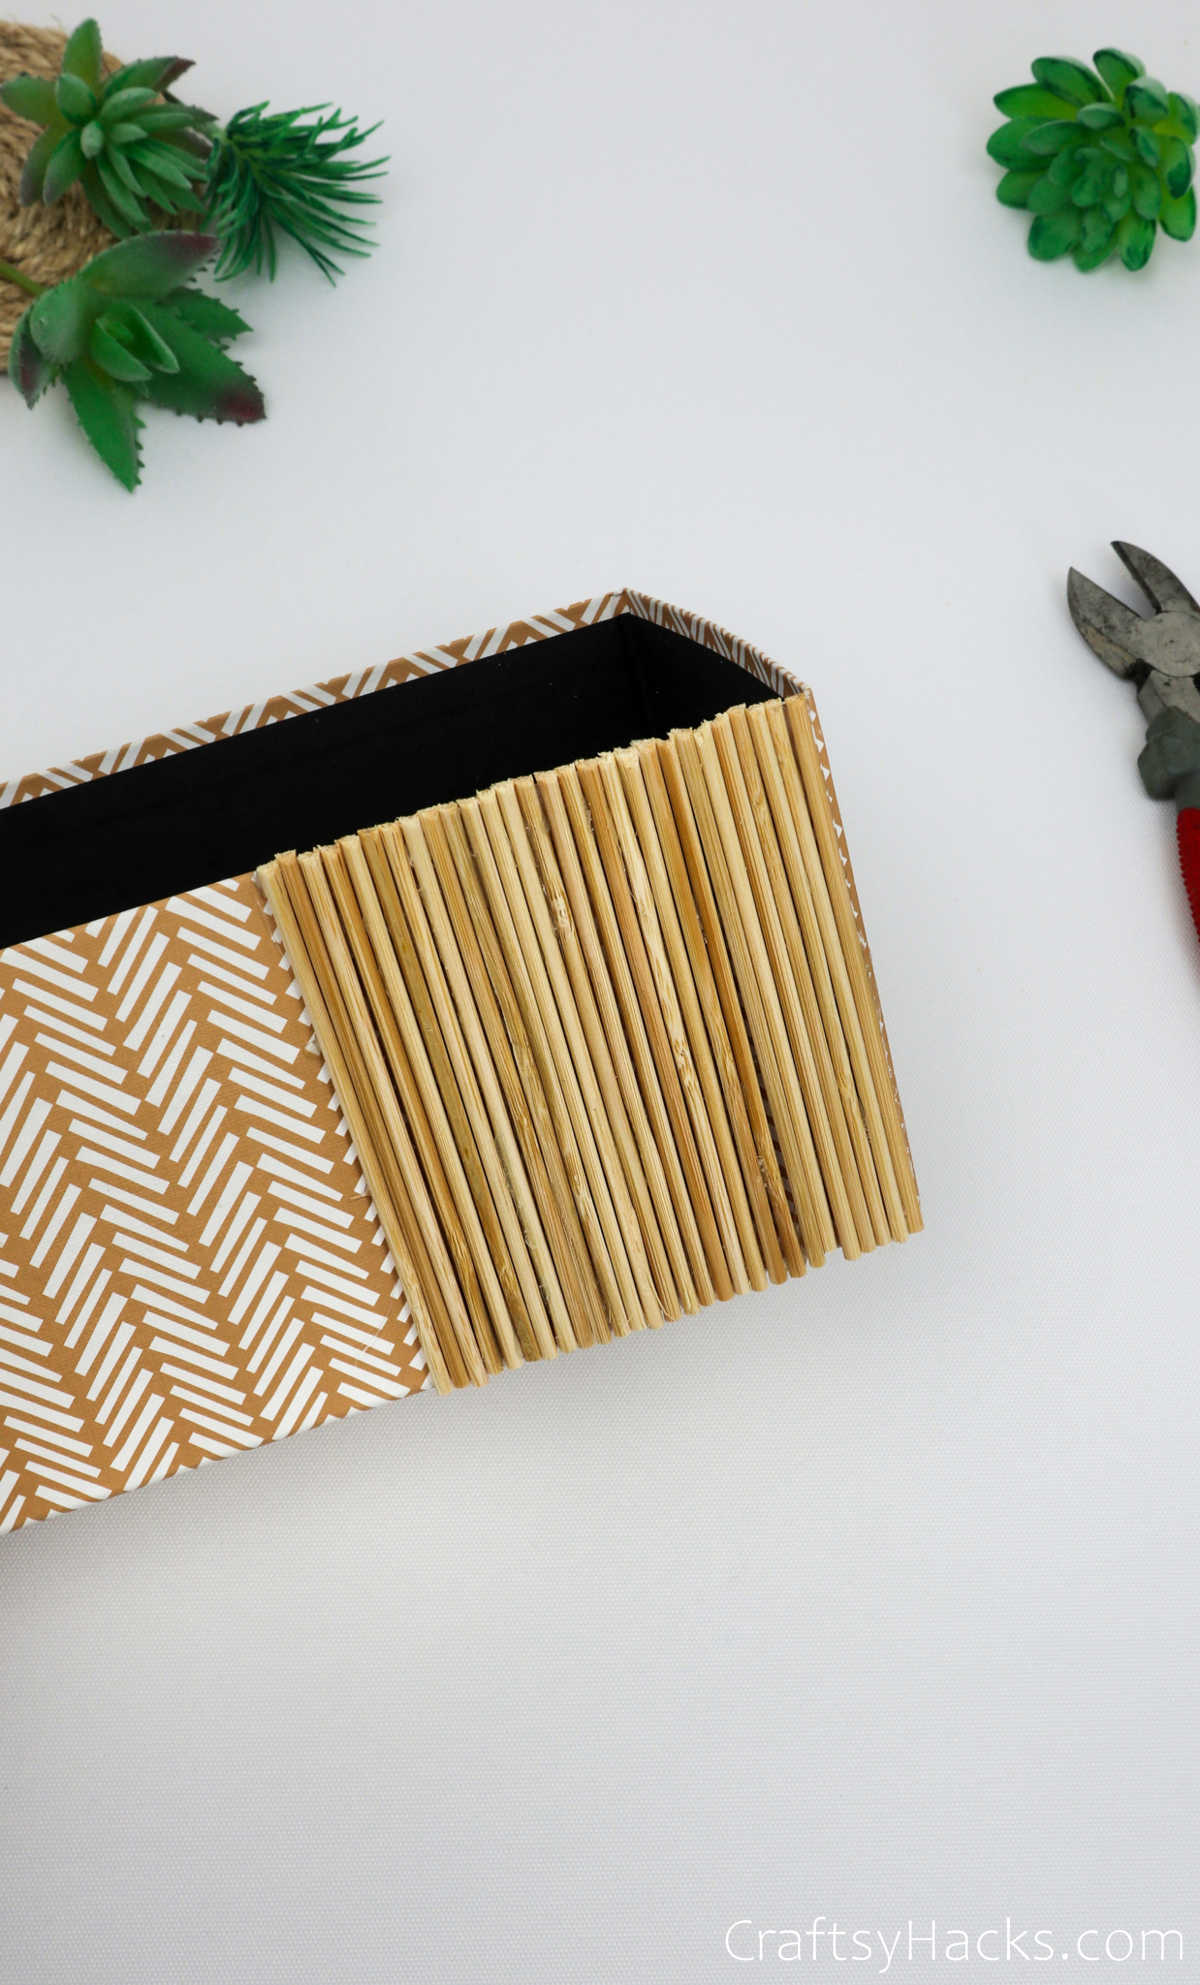
Continue to work your way through the entire box alternatively gluing and clipping the skewers.
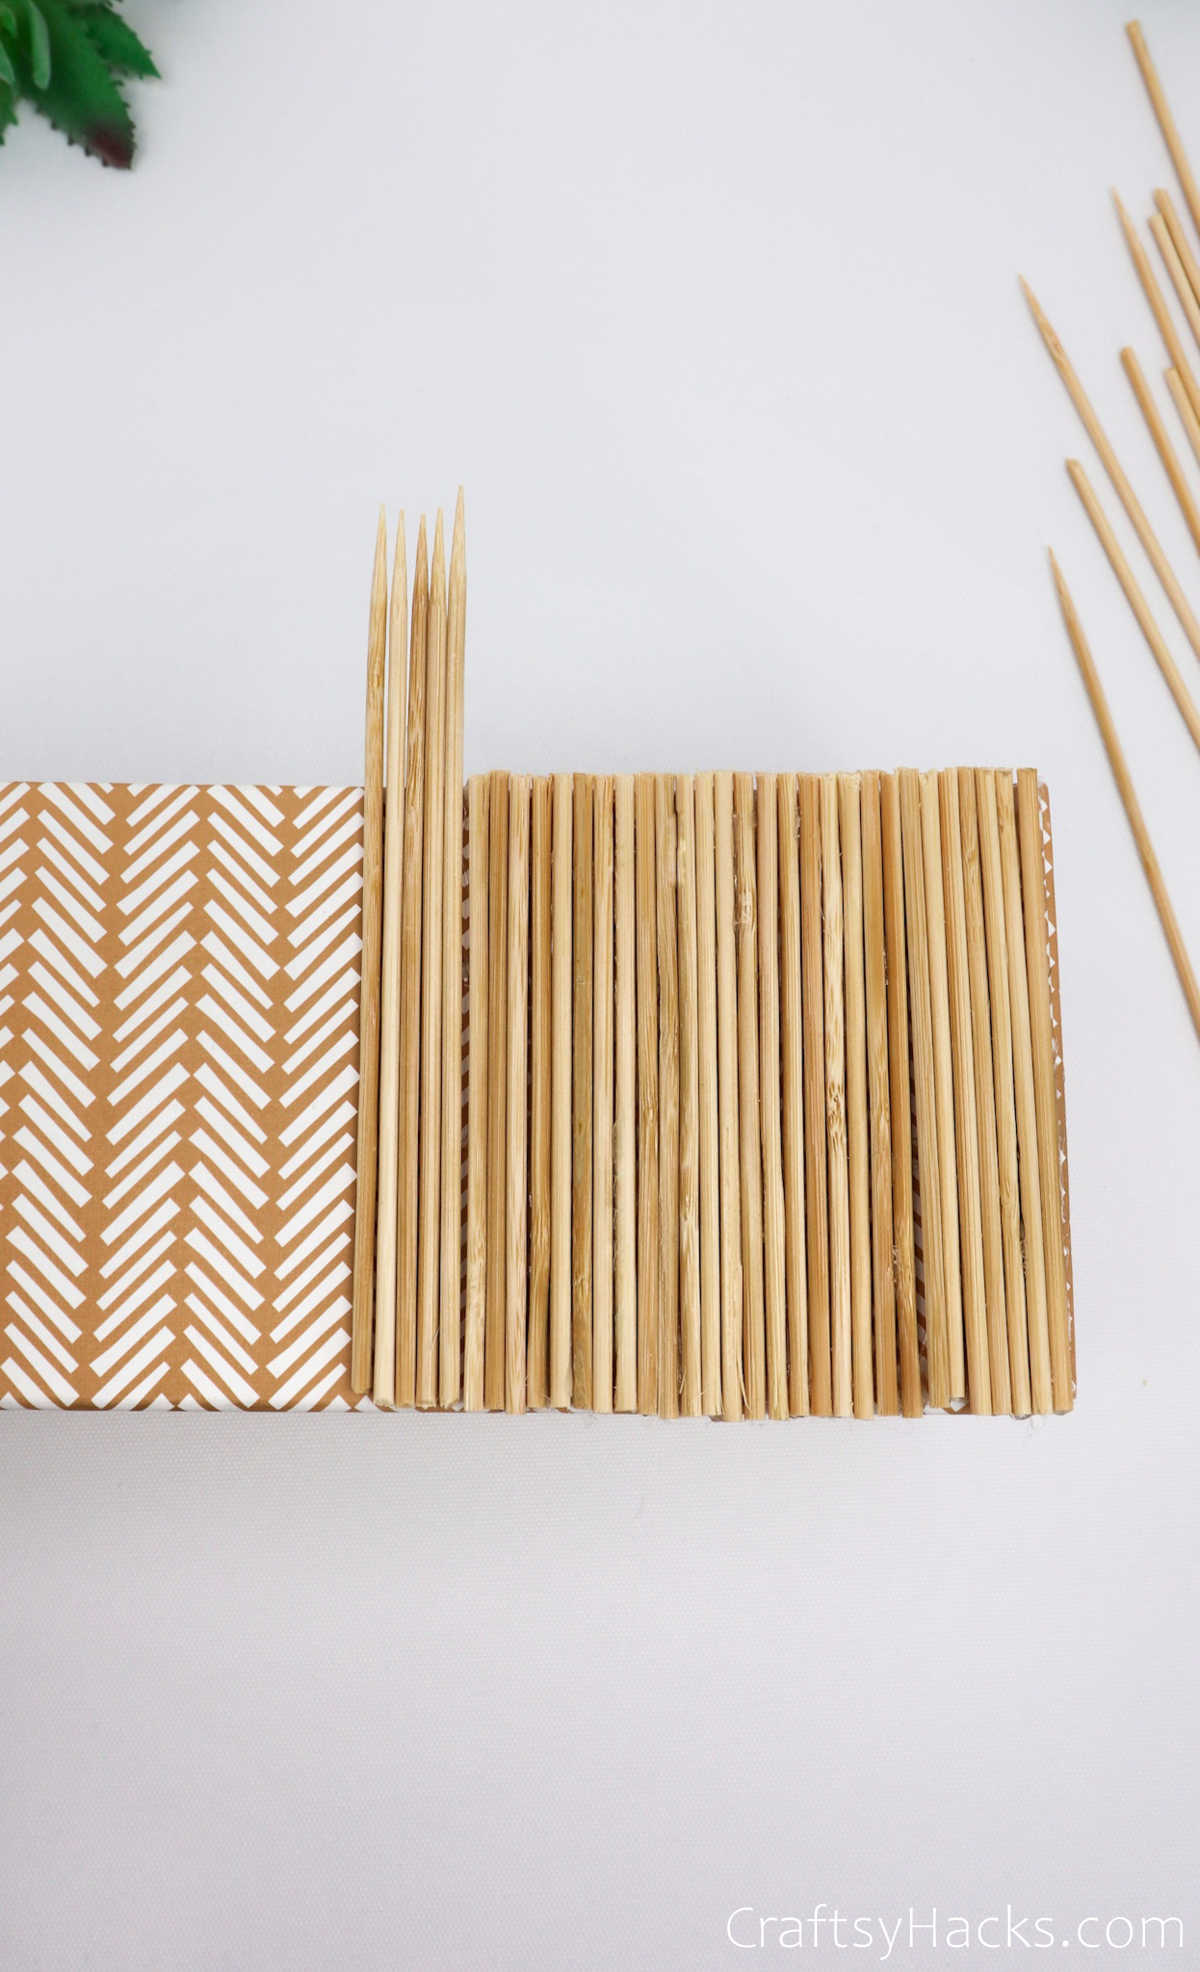
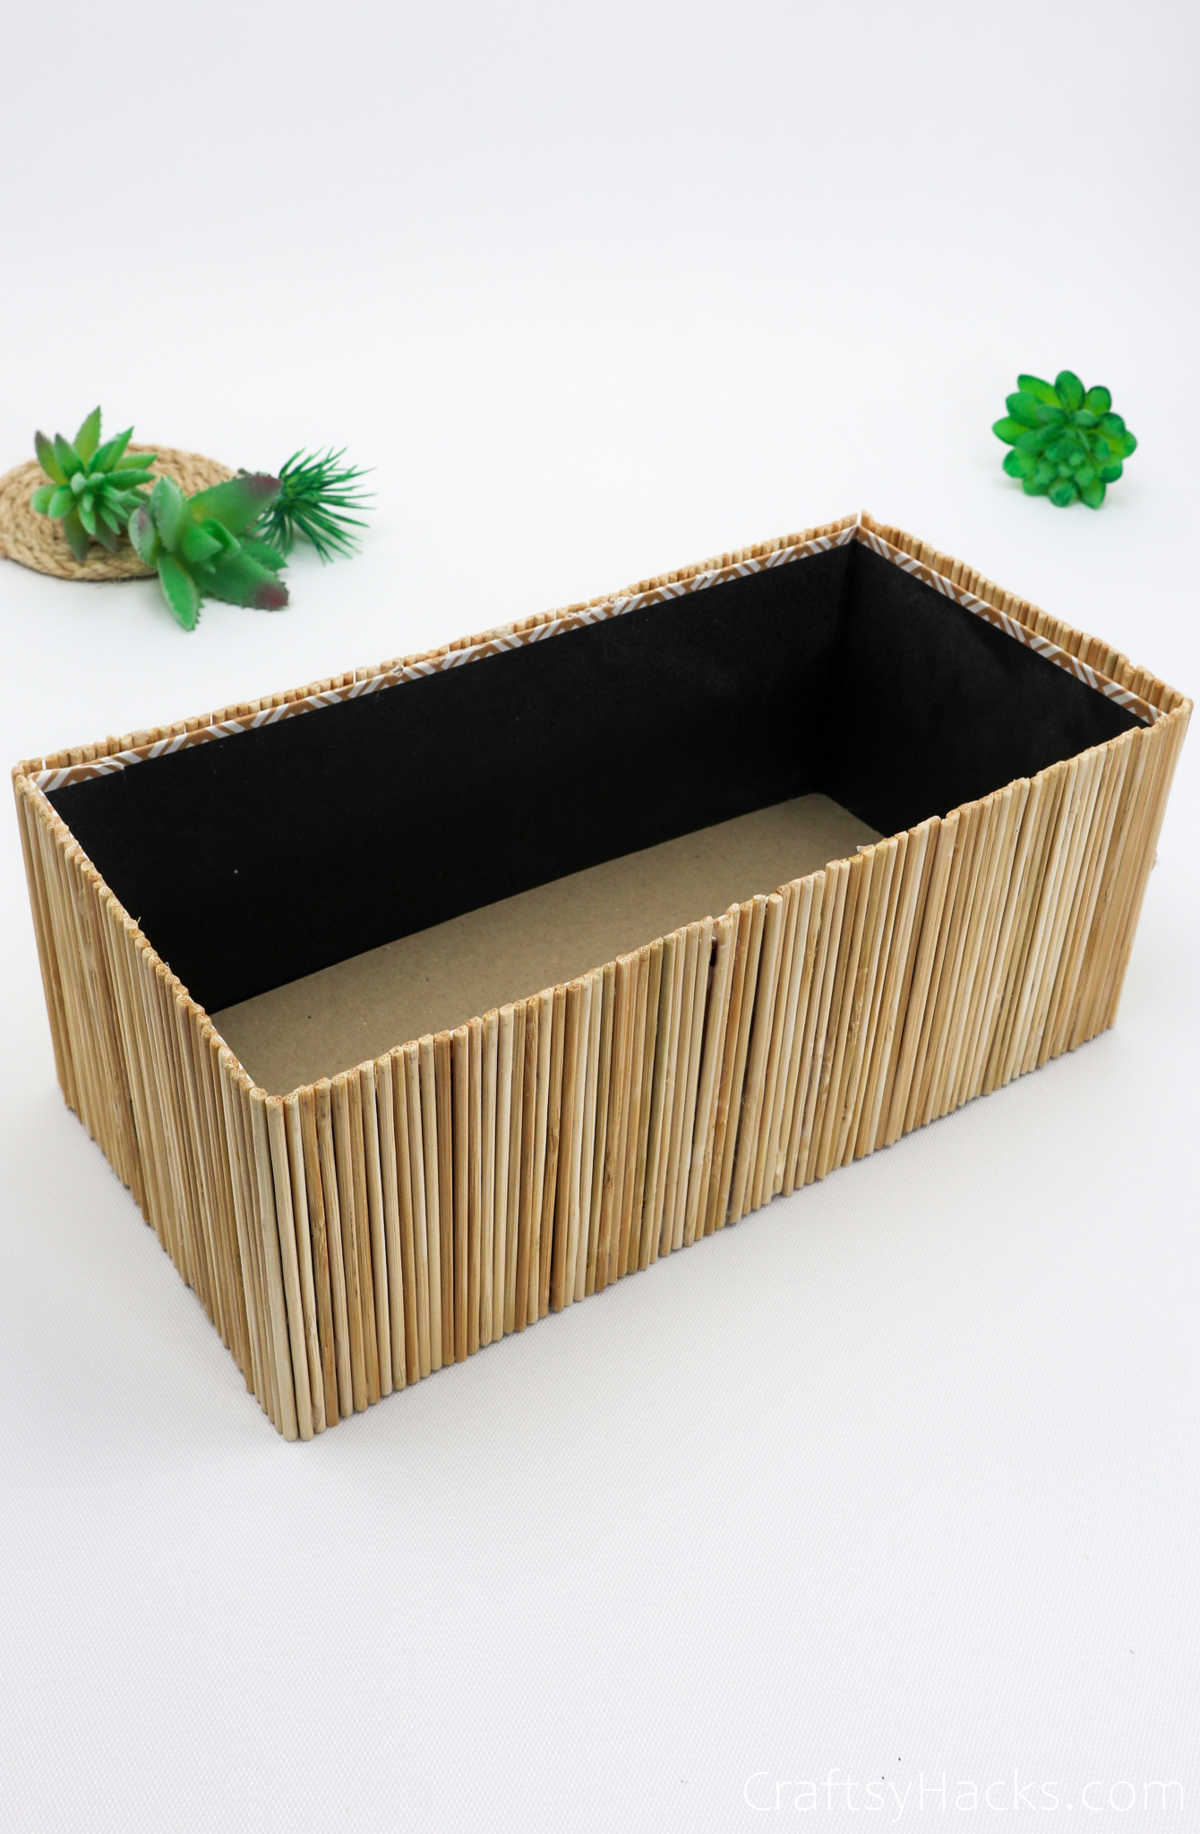
When you’re done, your box should look something like this. It’s already so pretty, isn’t it?
Step 4
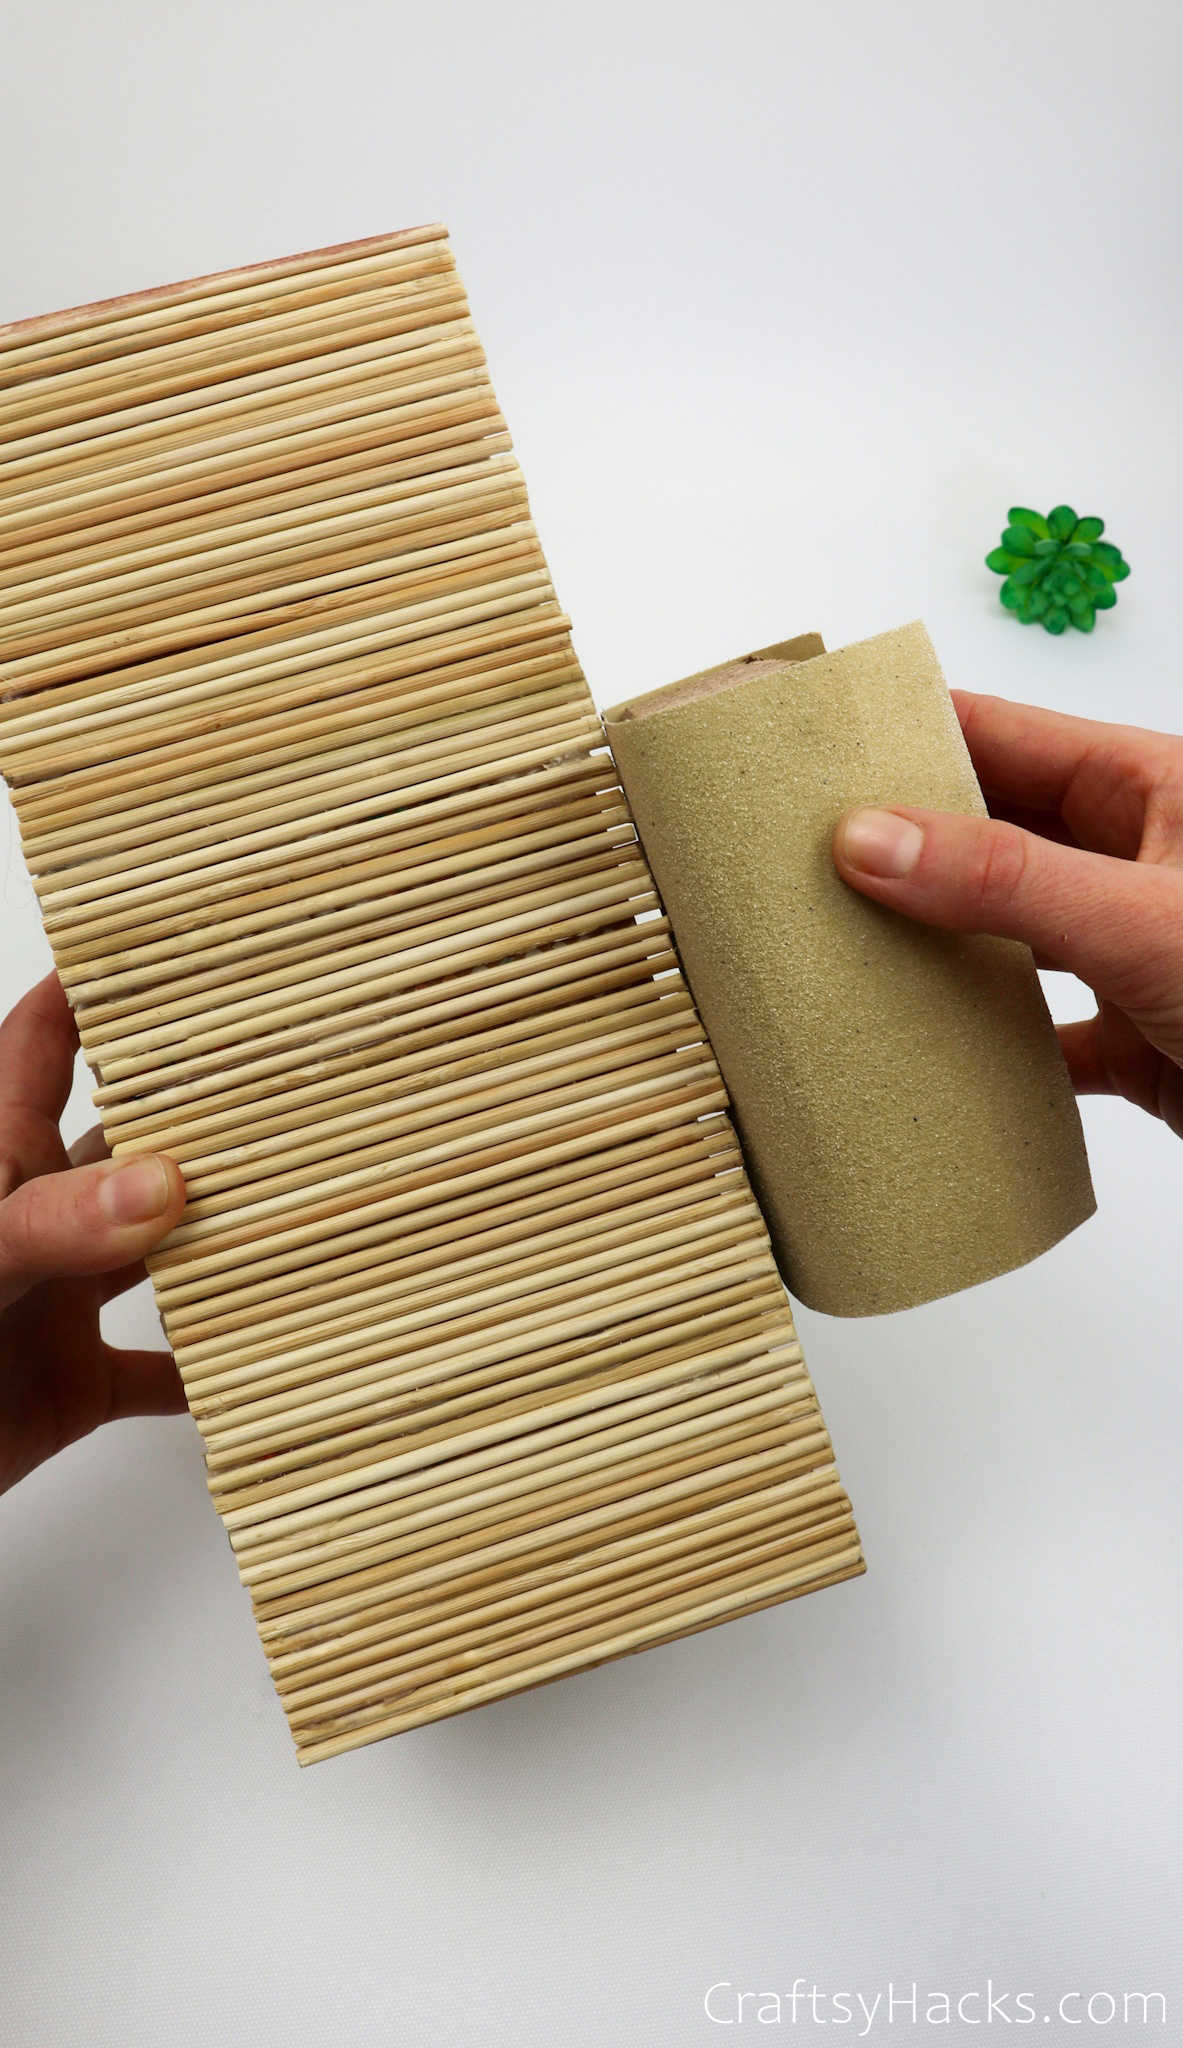
Now, it’s time for sandpaper to come to the rescue. You remember when you clipped the skewers? Well, we need to even the ends out so they don’t look too jagged.
Grab a bit of sandpaper and scrub the ends as much as you like. You can even skip this step if you like the rusticity that the uneven ends add to the box.
Step 5
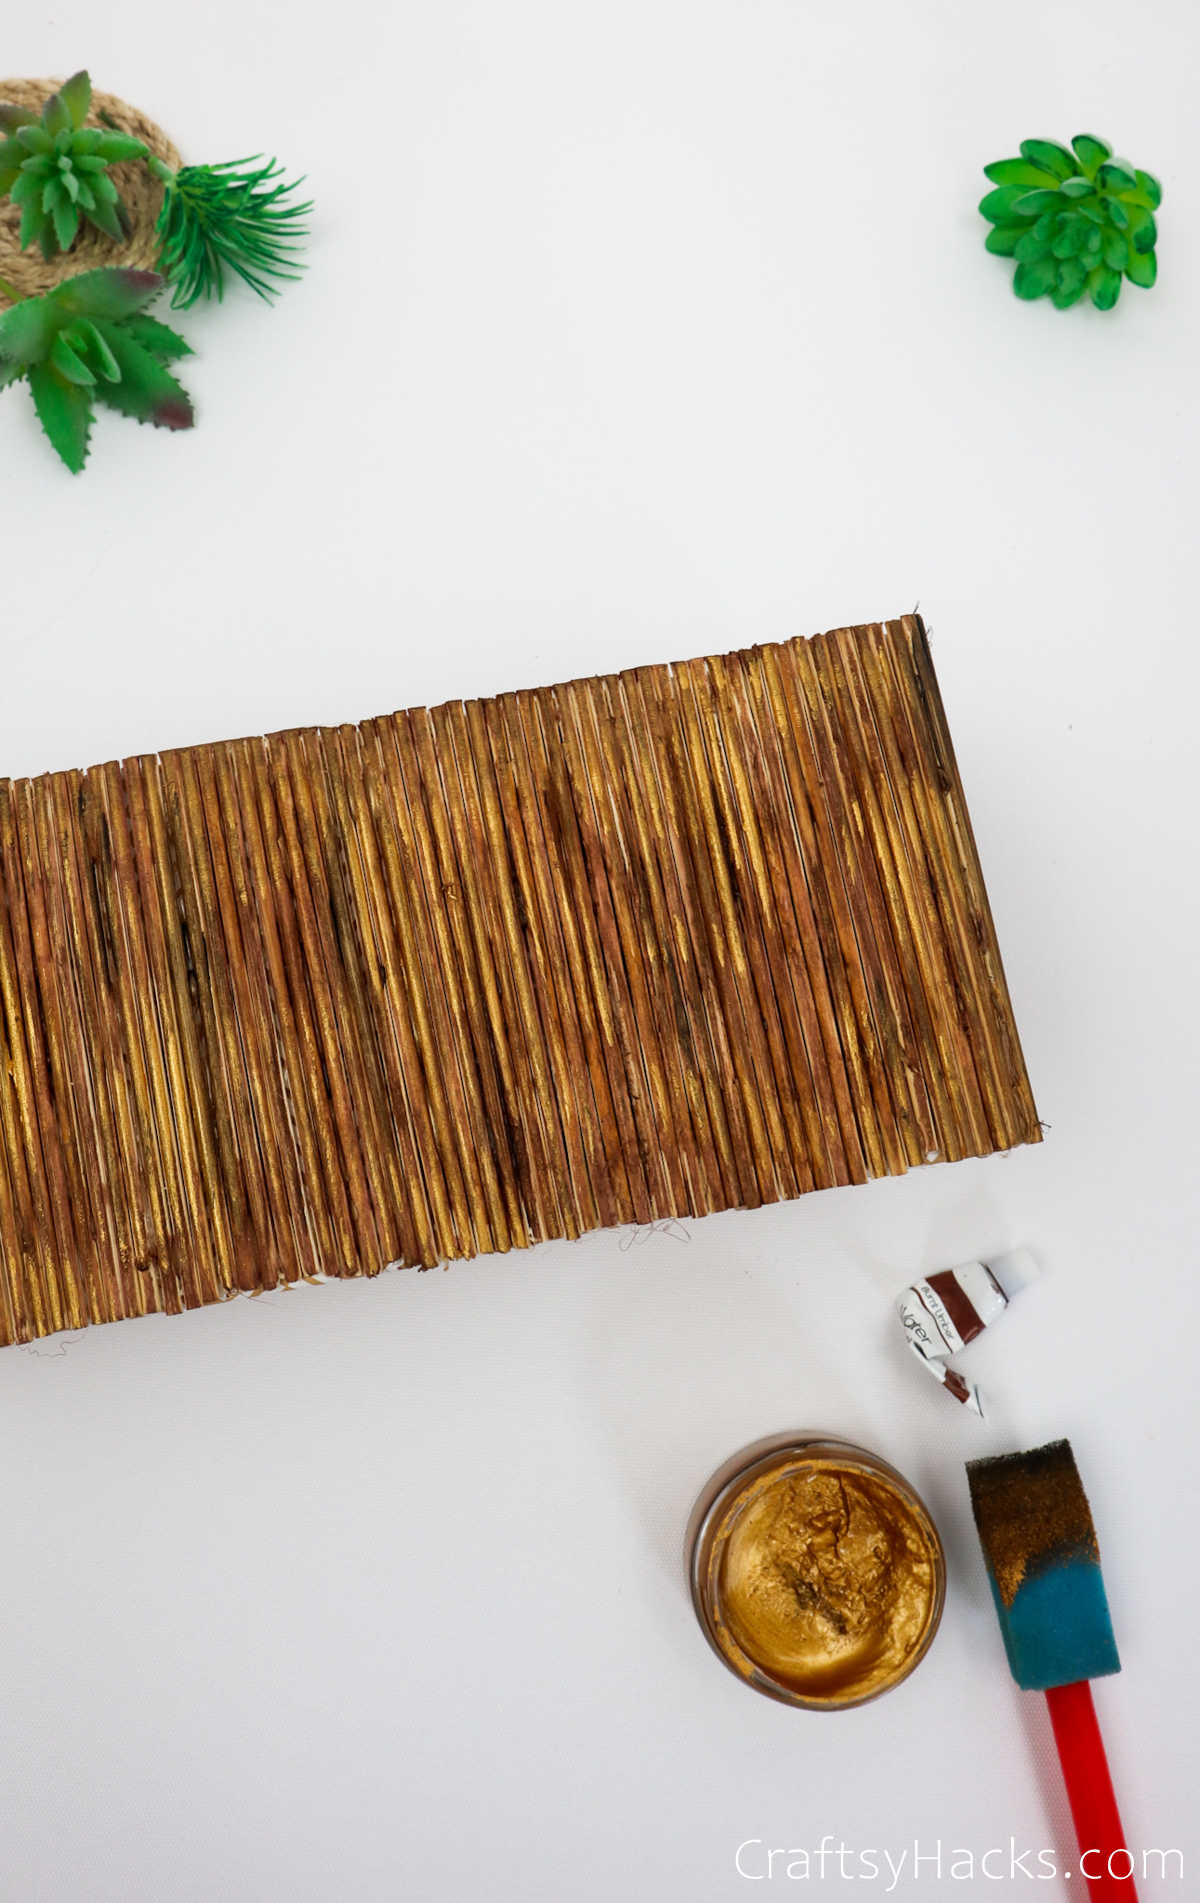
Grab your paint and brushes and start painting the skewers. You can start by applying a nice base coat.
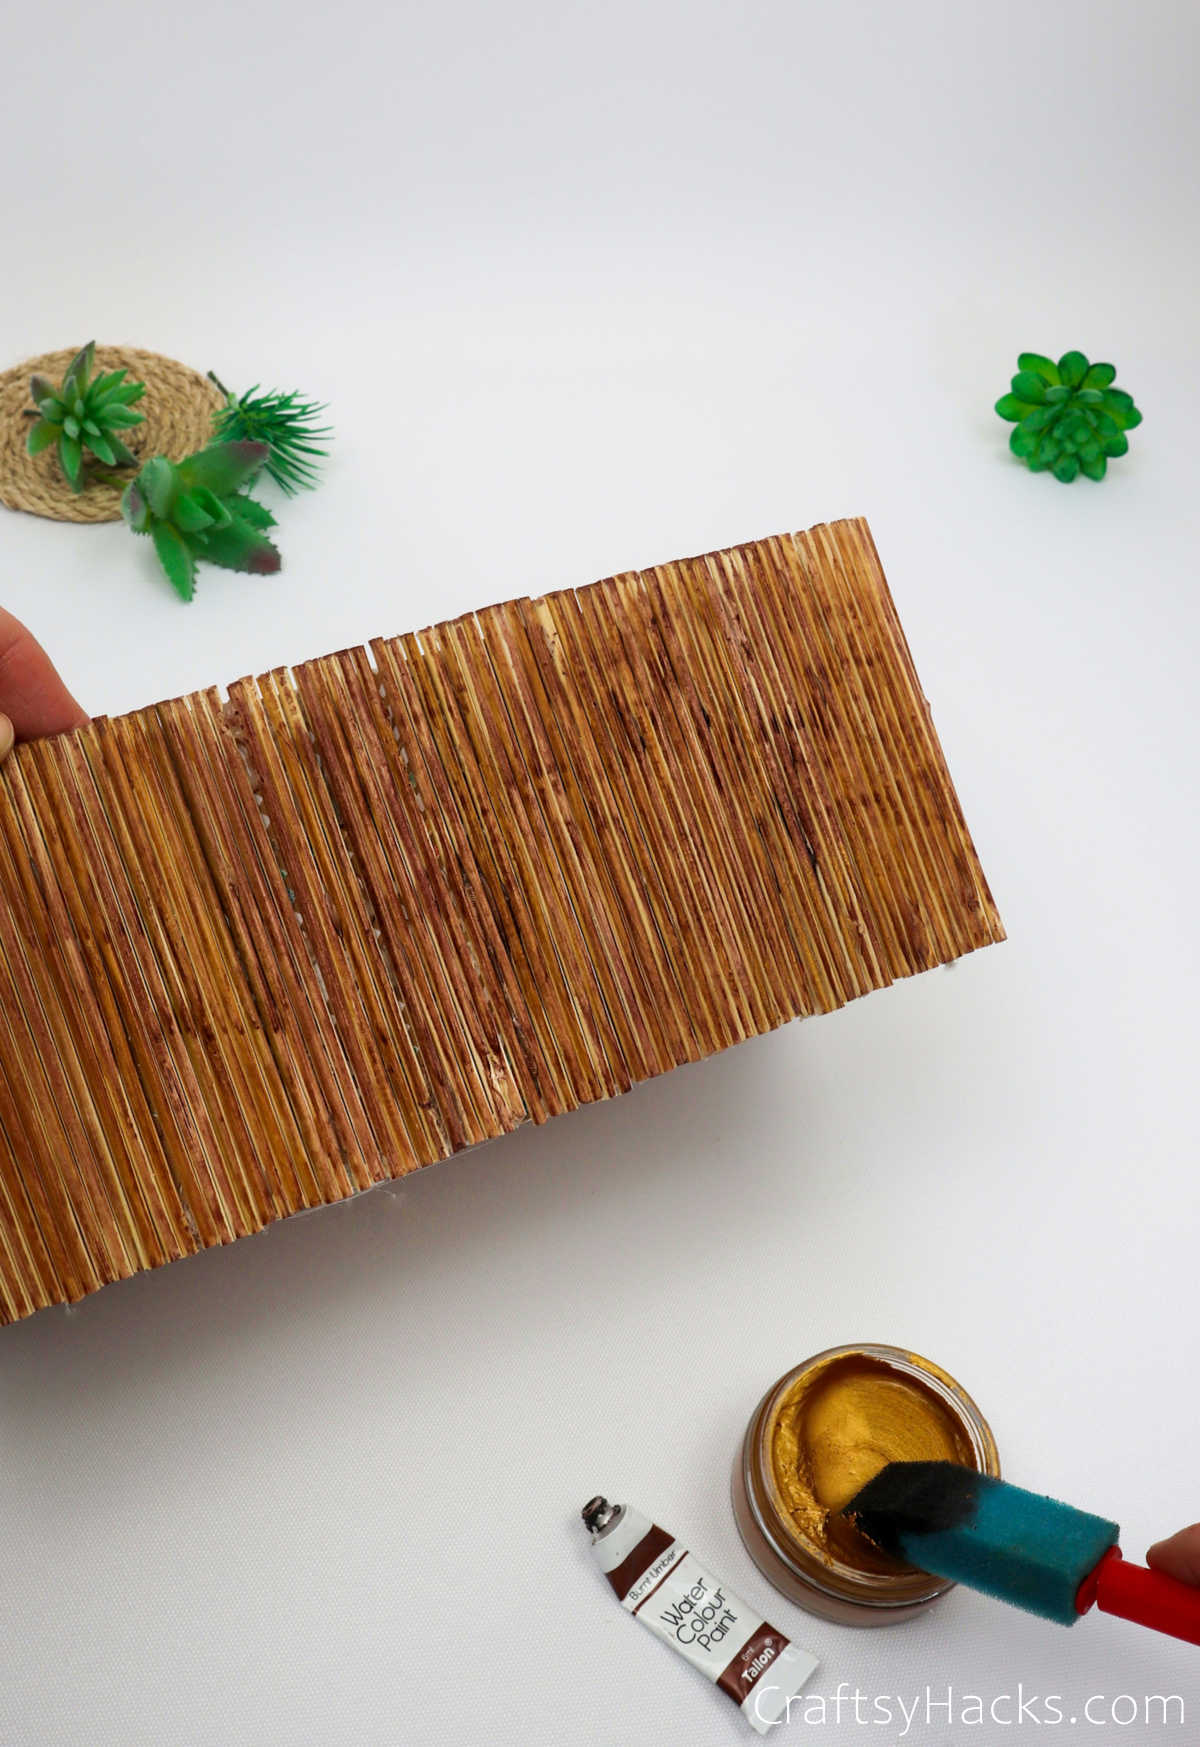
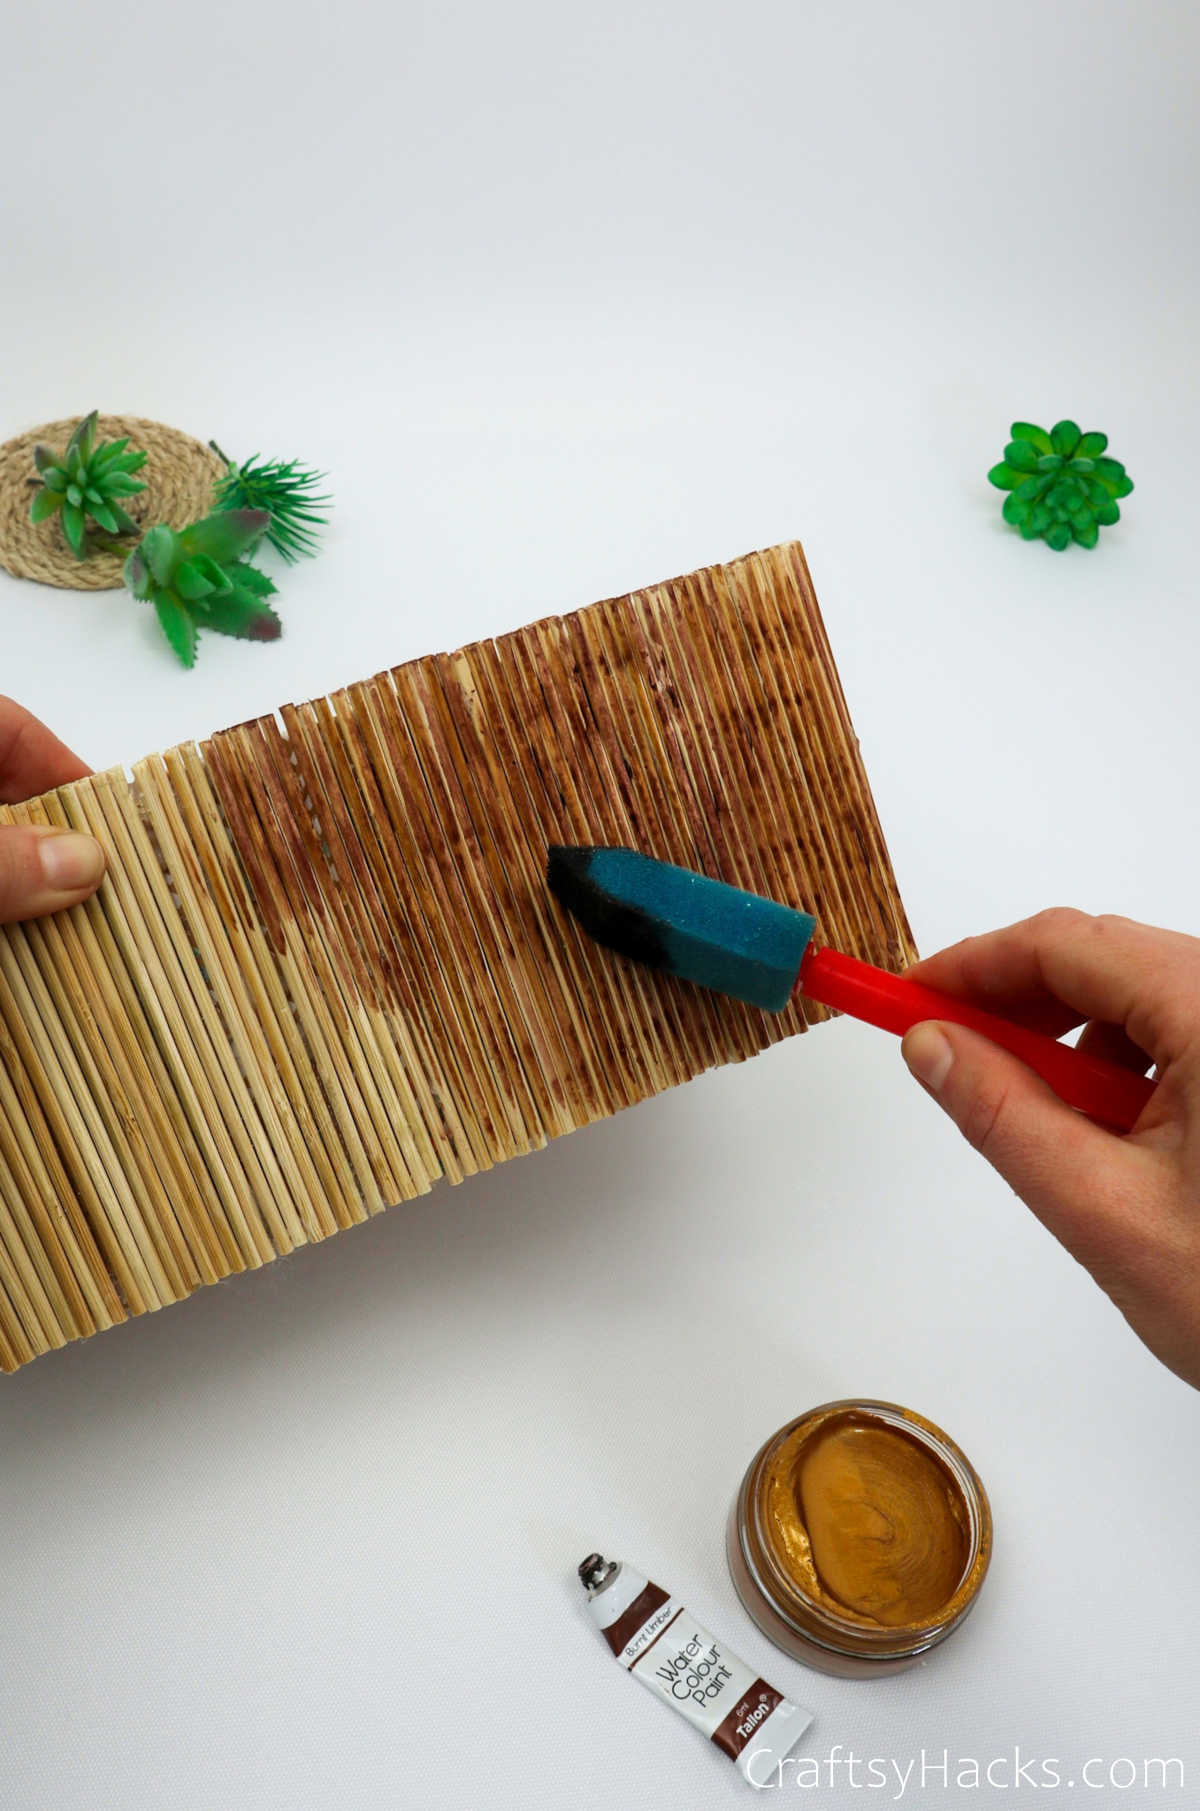
Once that coat has dried completely, proceed to add another coat or two till you’re happy with how it looks.
Step 6
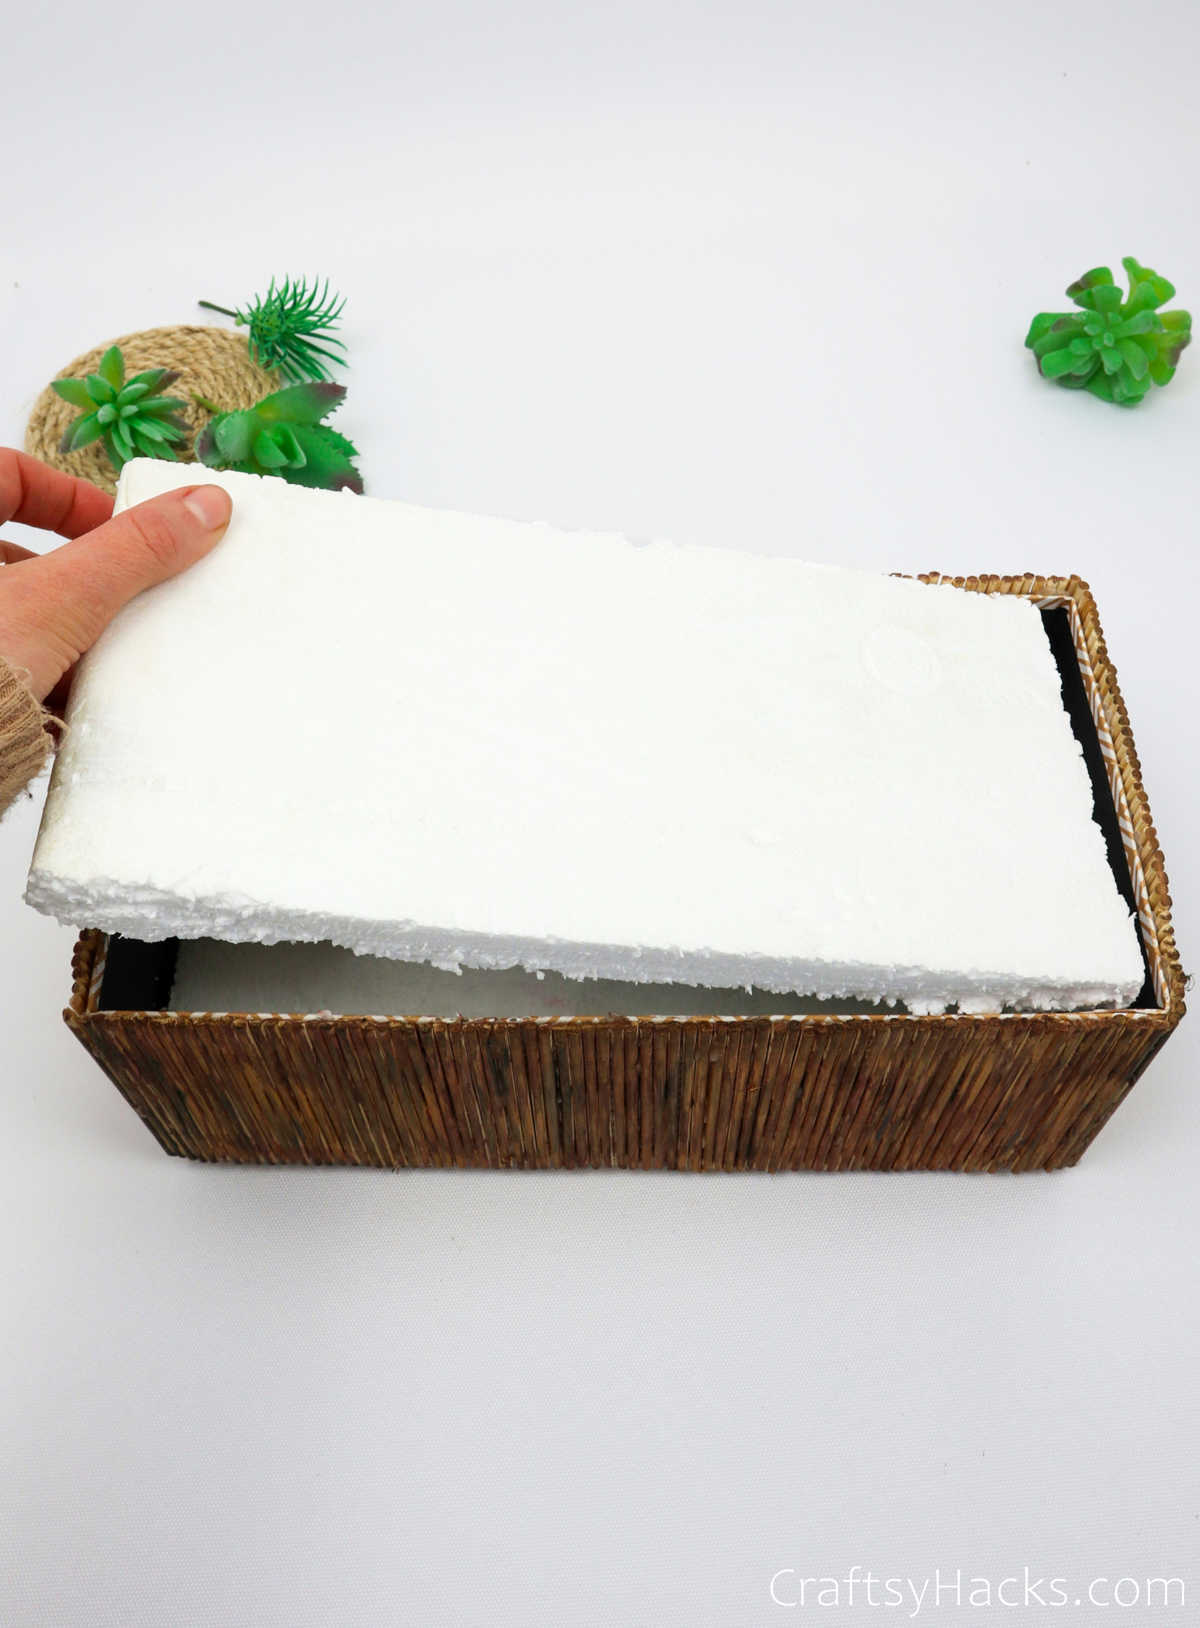
It’s time to line the bottom of the box with a sheet of styrofoam. You can use ready-made sheets or even buy an entire block. Then, just cut either of them down to size to fit the bottom of the box.
Tuck the styrofoam in there, as seen here.
Step 7
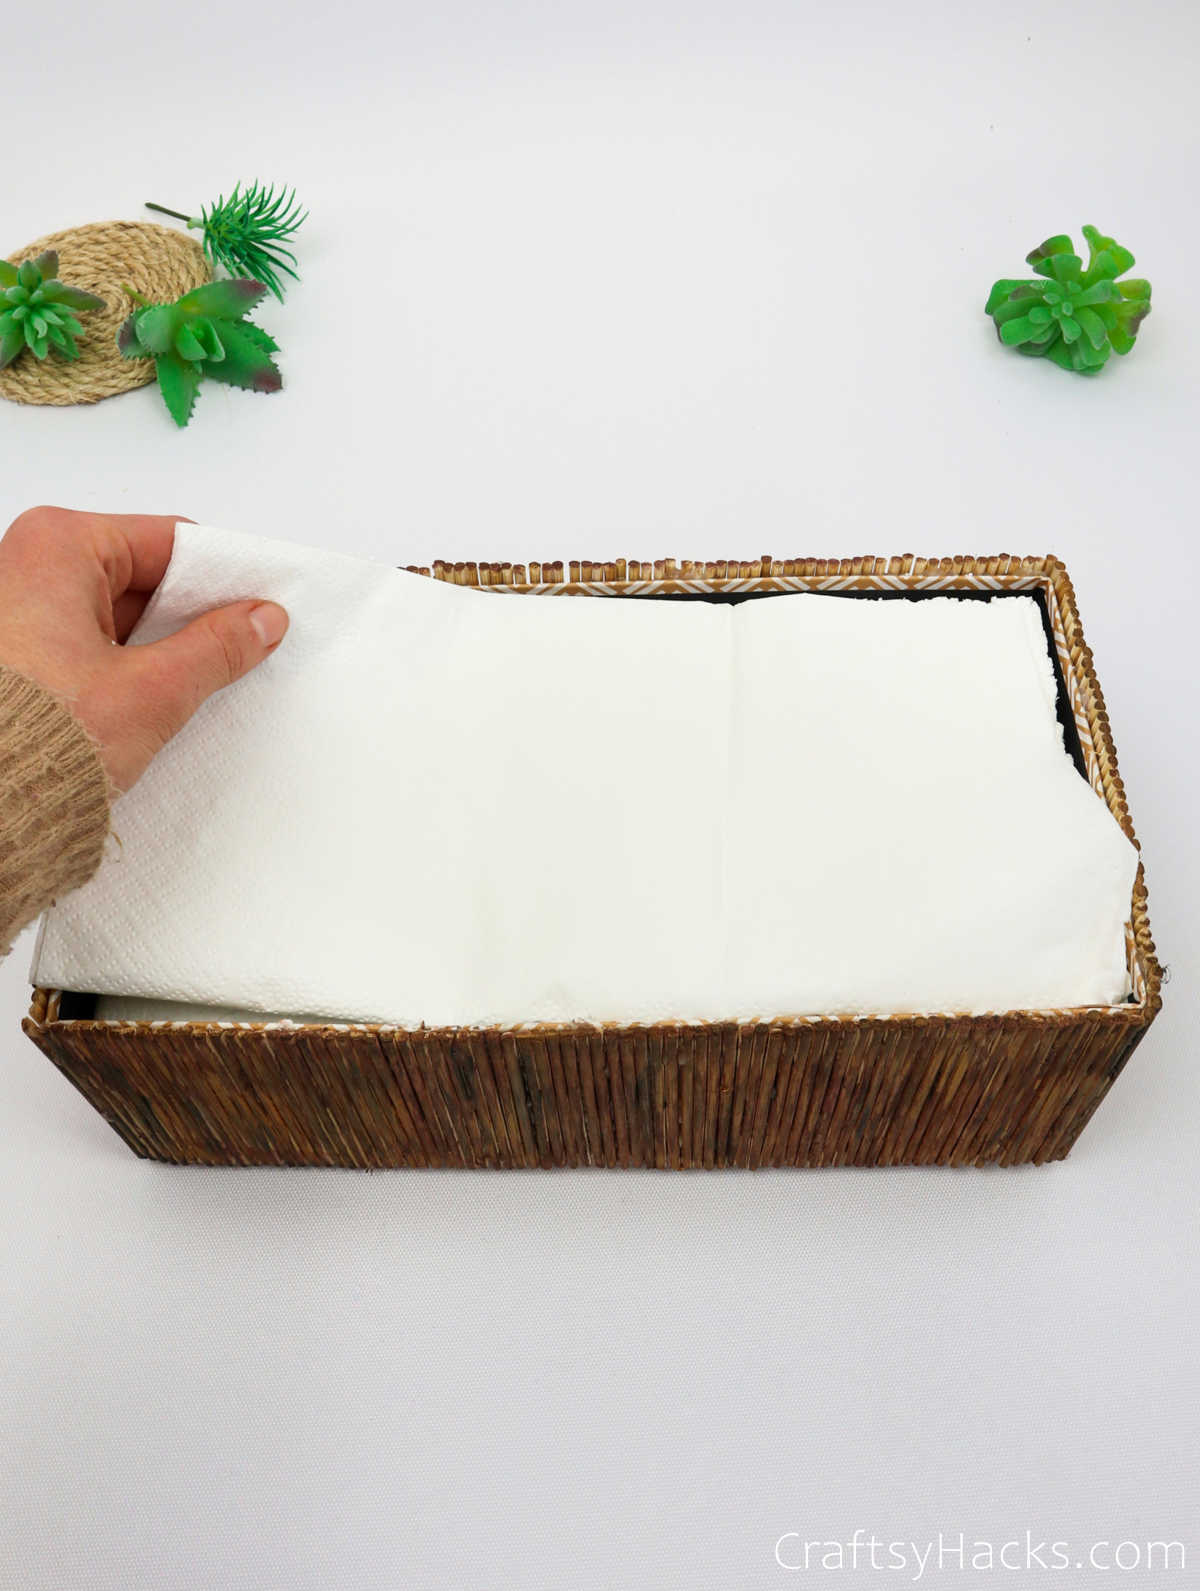
Next, layer the box and line the styrofoam sheet with a white paper towel or napkin. You can also use fabric if you like.
Step 8
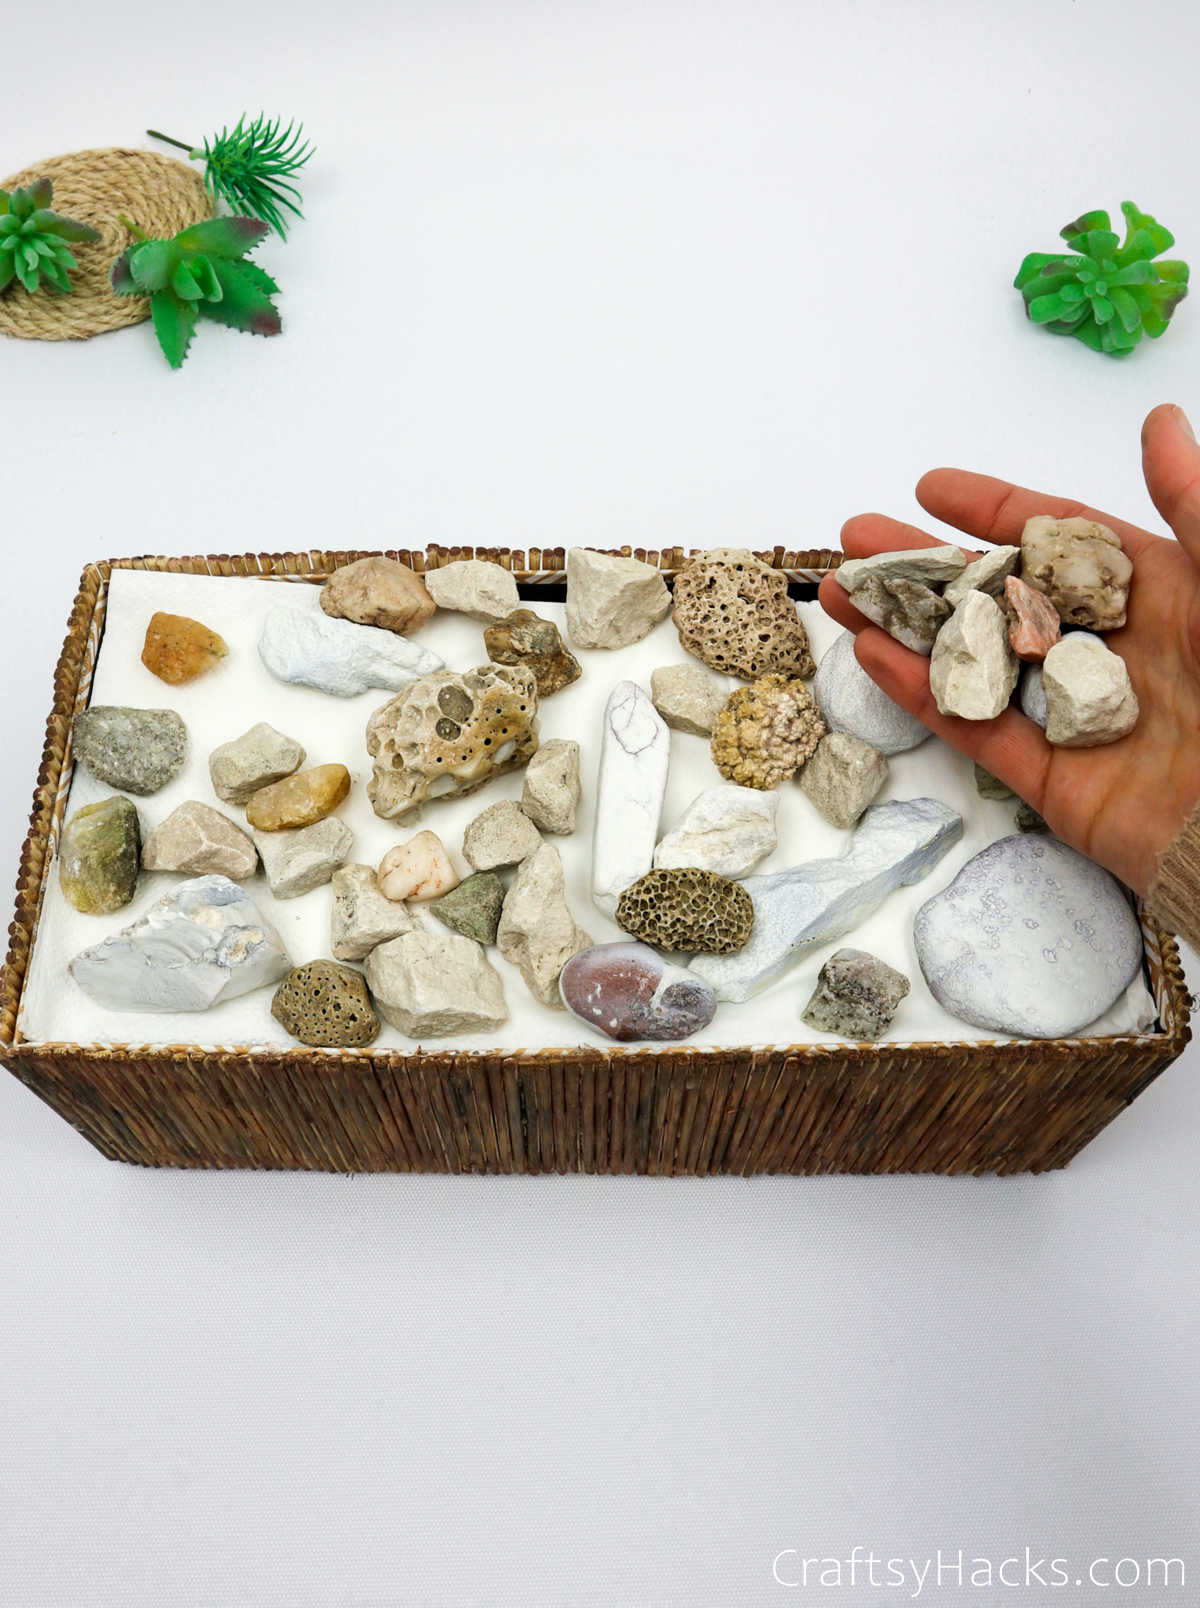
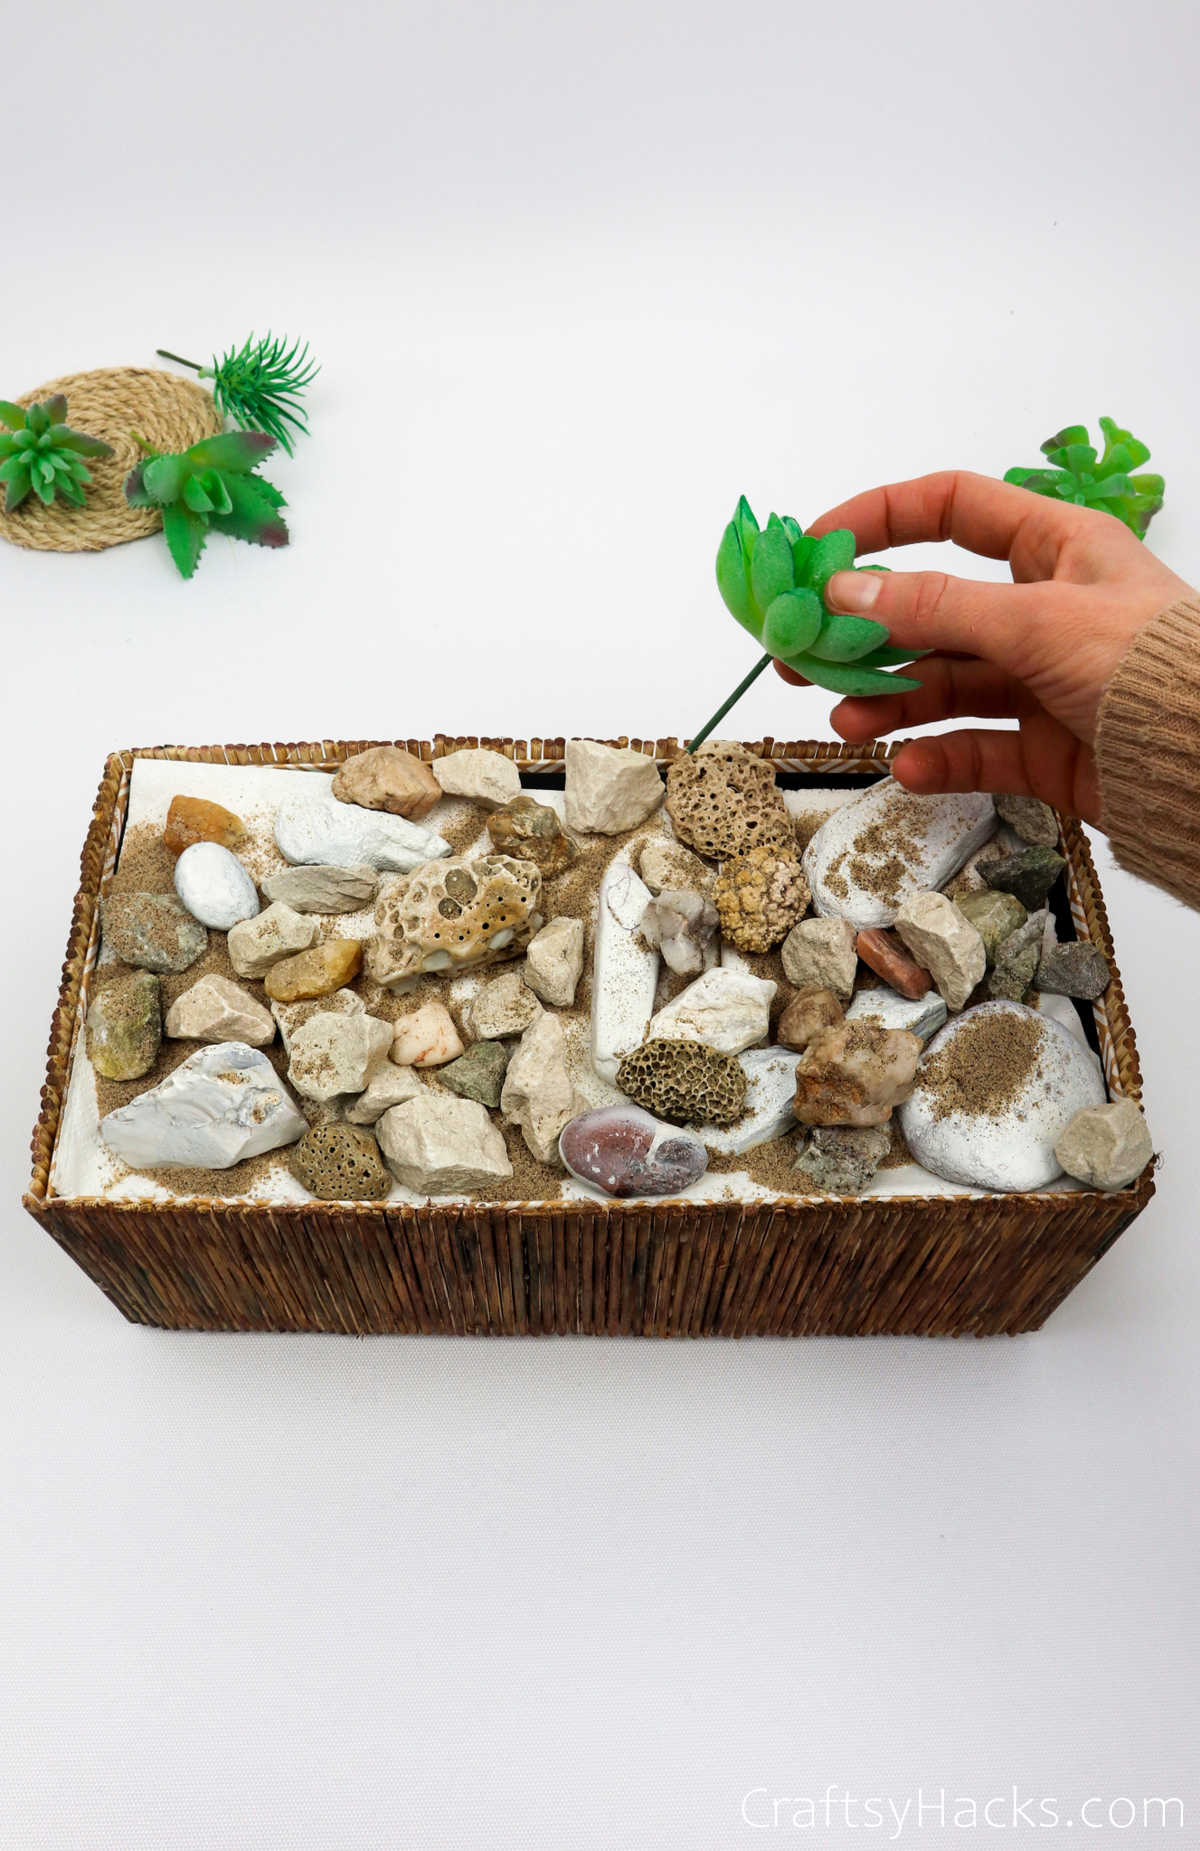
Next, decorate the inside of the box with different stones, pebbles, rocks, and more. You can even add a few bits of pumice stone in there for added texture.
Step 9
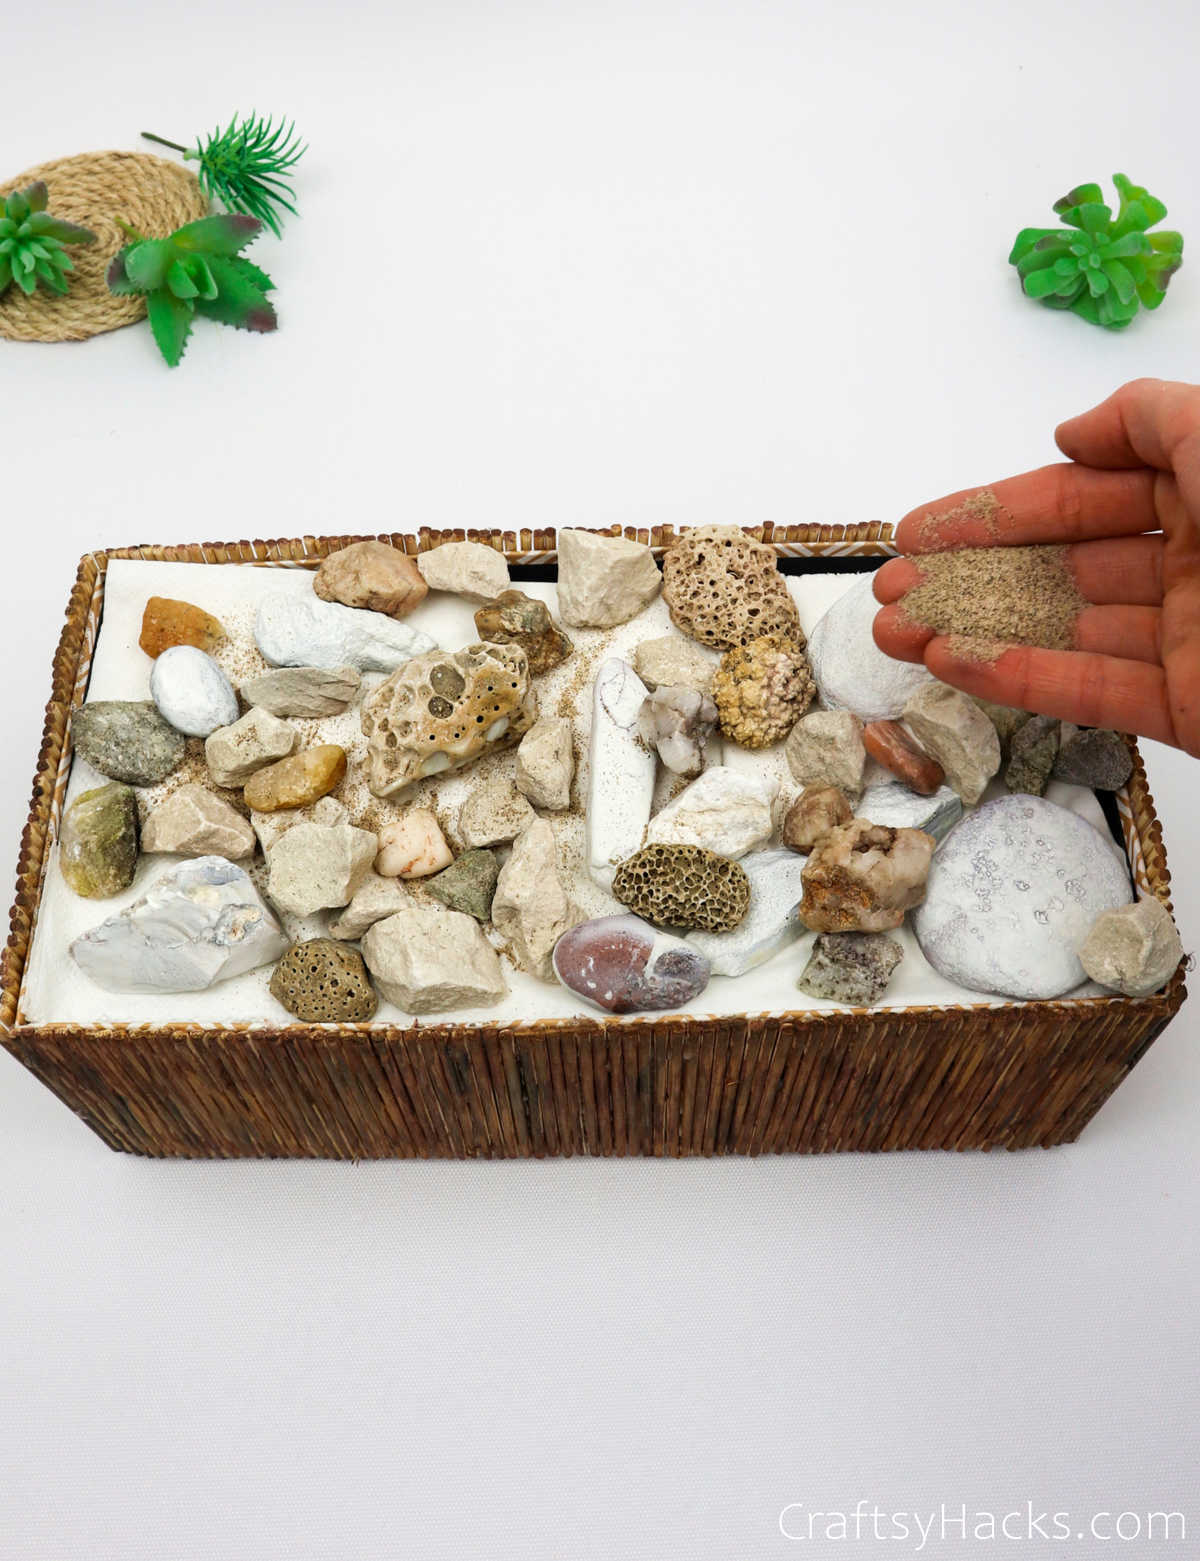
Sprinkle some sand between the gaps to fill them up. You don’t want the white bits from the napkin underneath to show, do you? You can also add in a few seashells and other embellishments.
That can add a bit of a beachy-vibe to your bohemian box.
Step 10
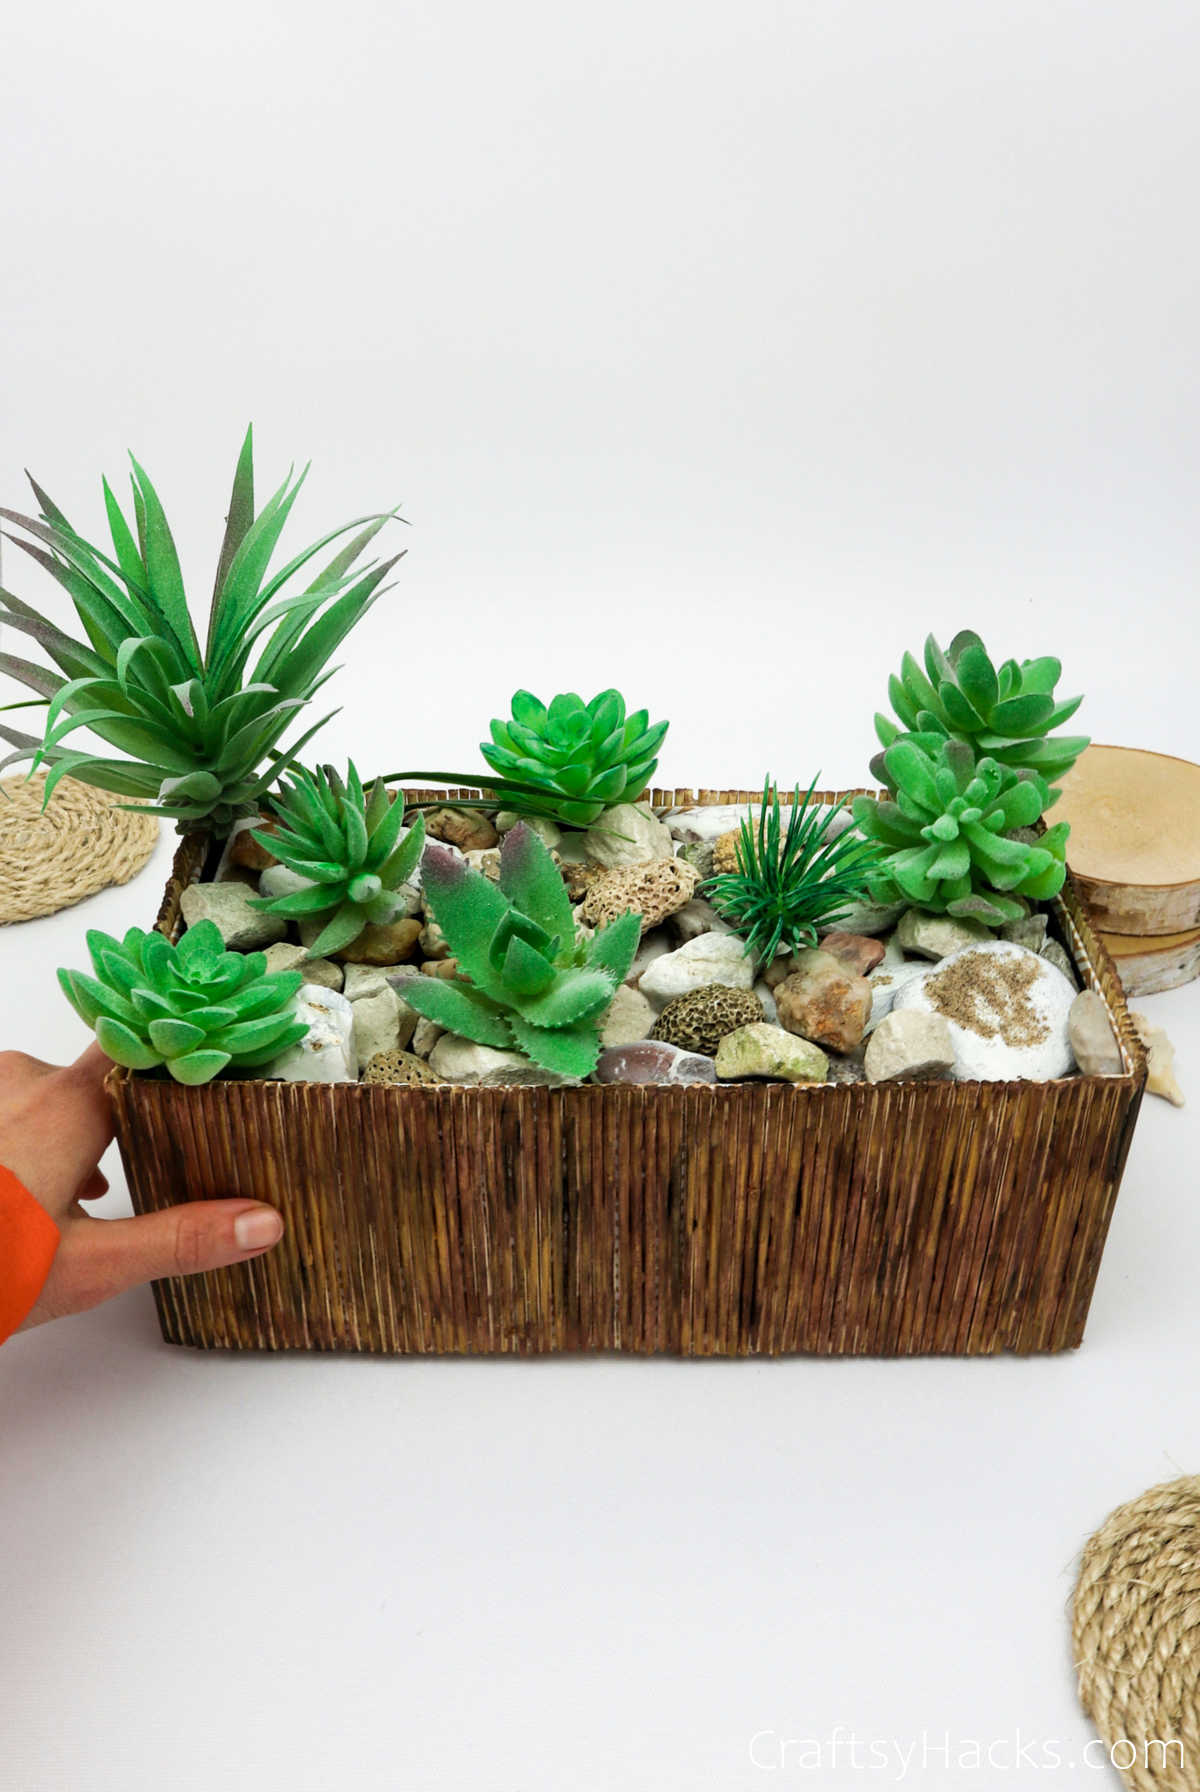
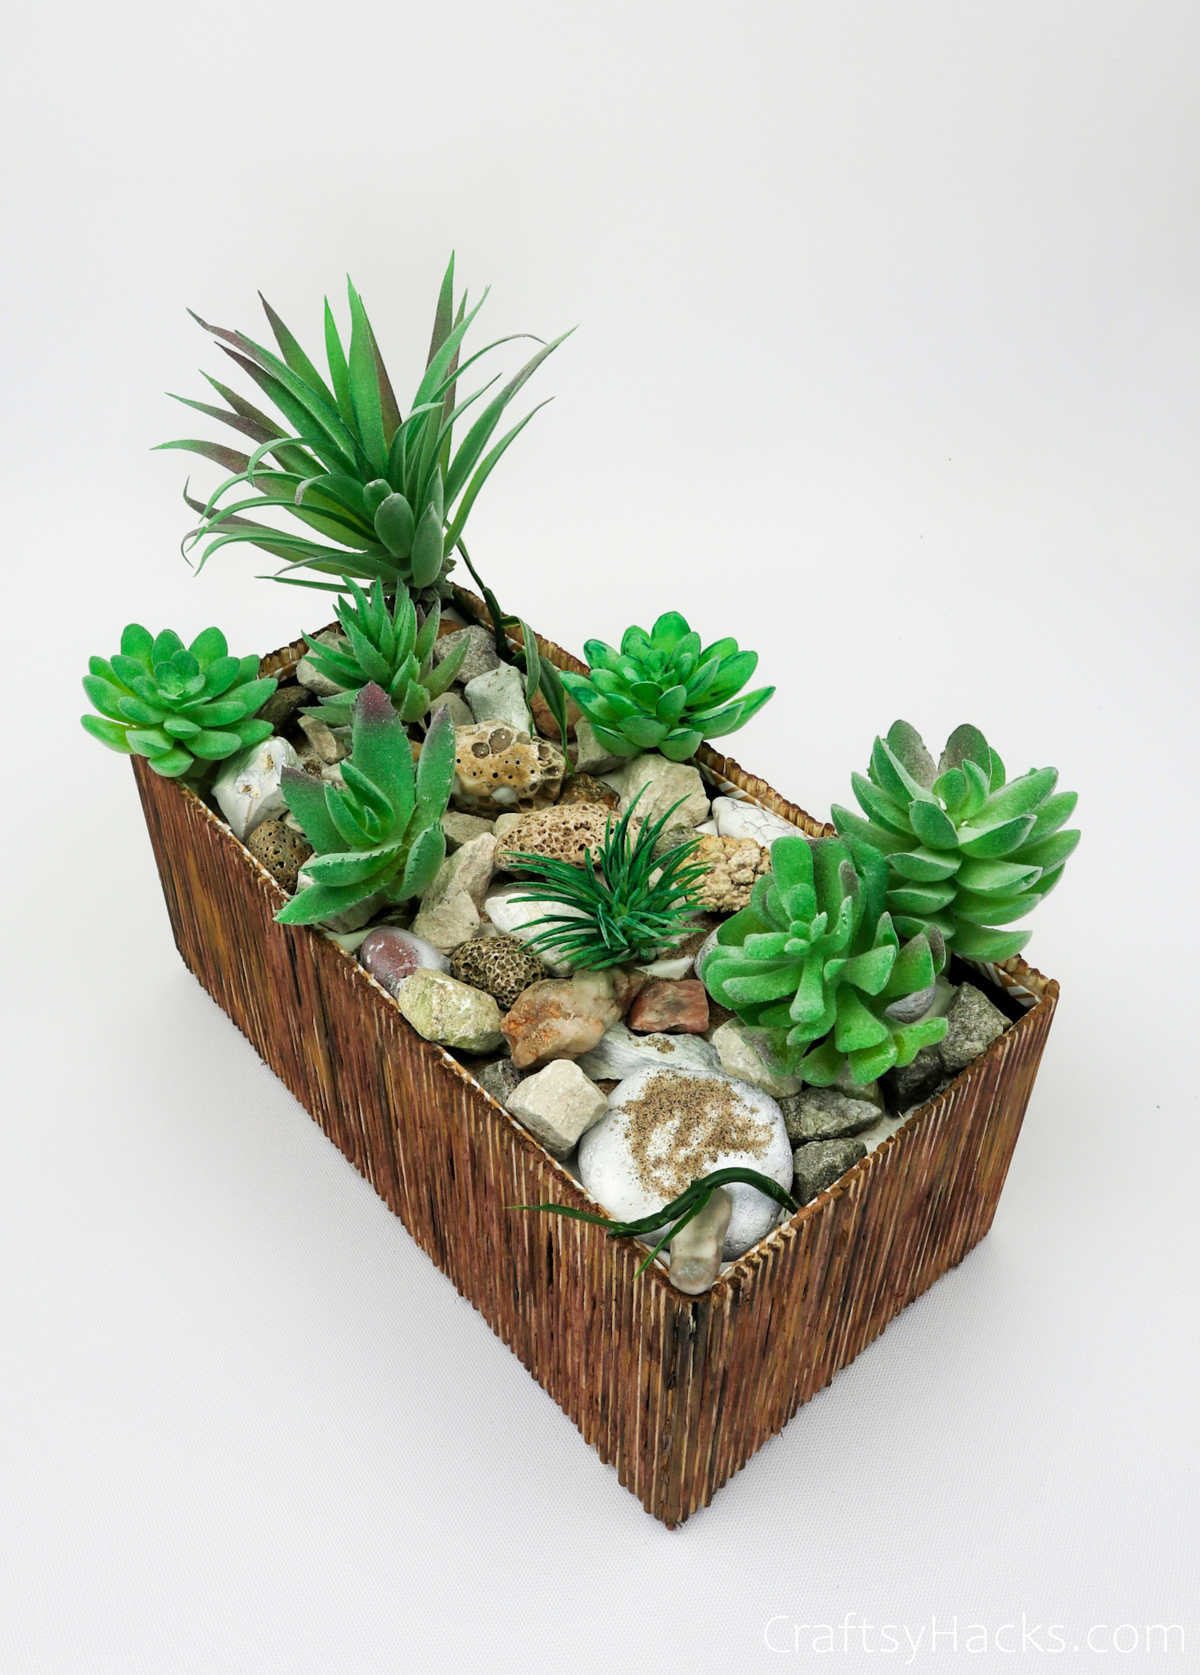
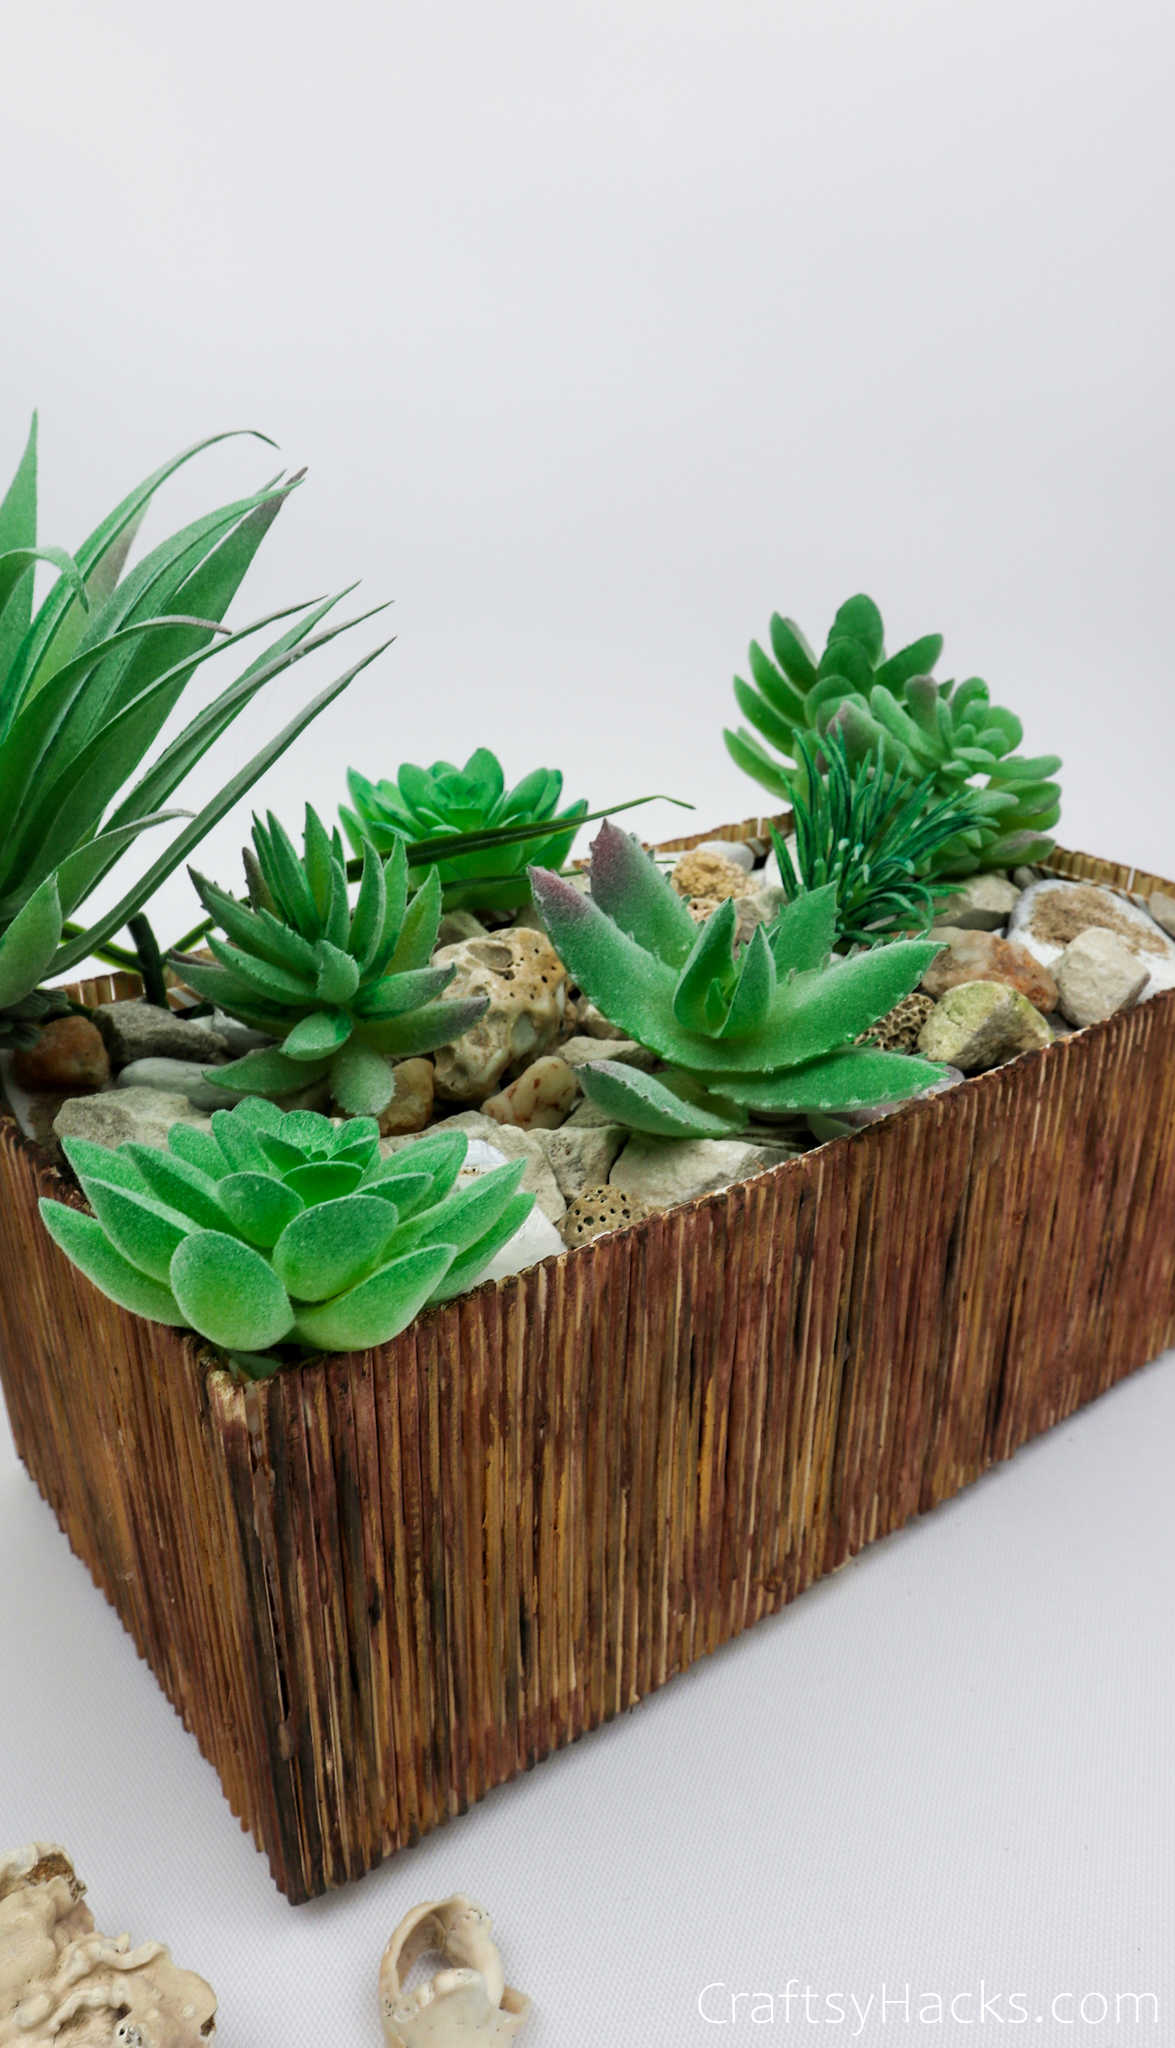
Finally, grab your faux succulents and place them around the stones, tucking them in place as you see fit.
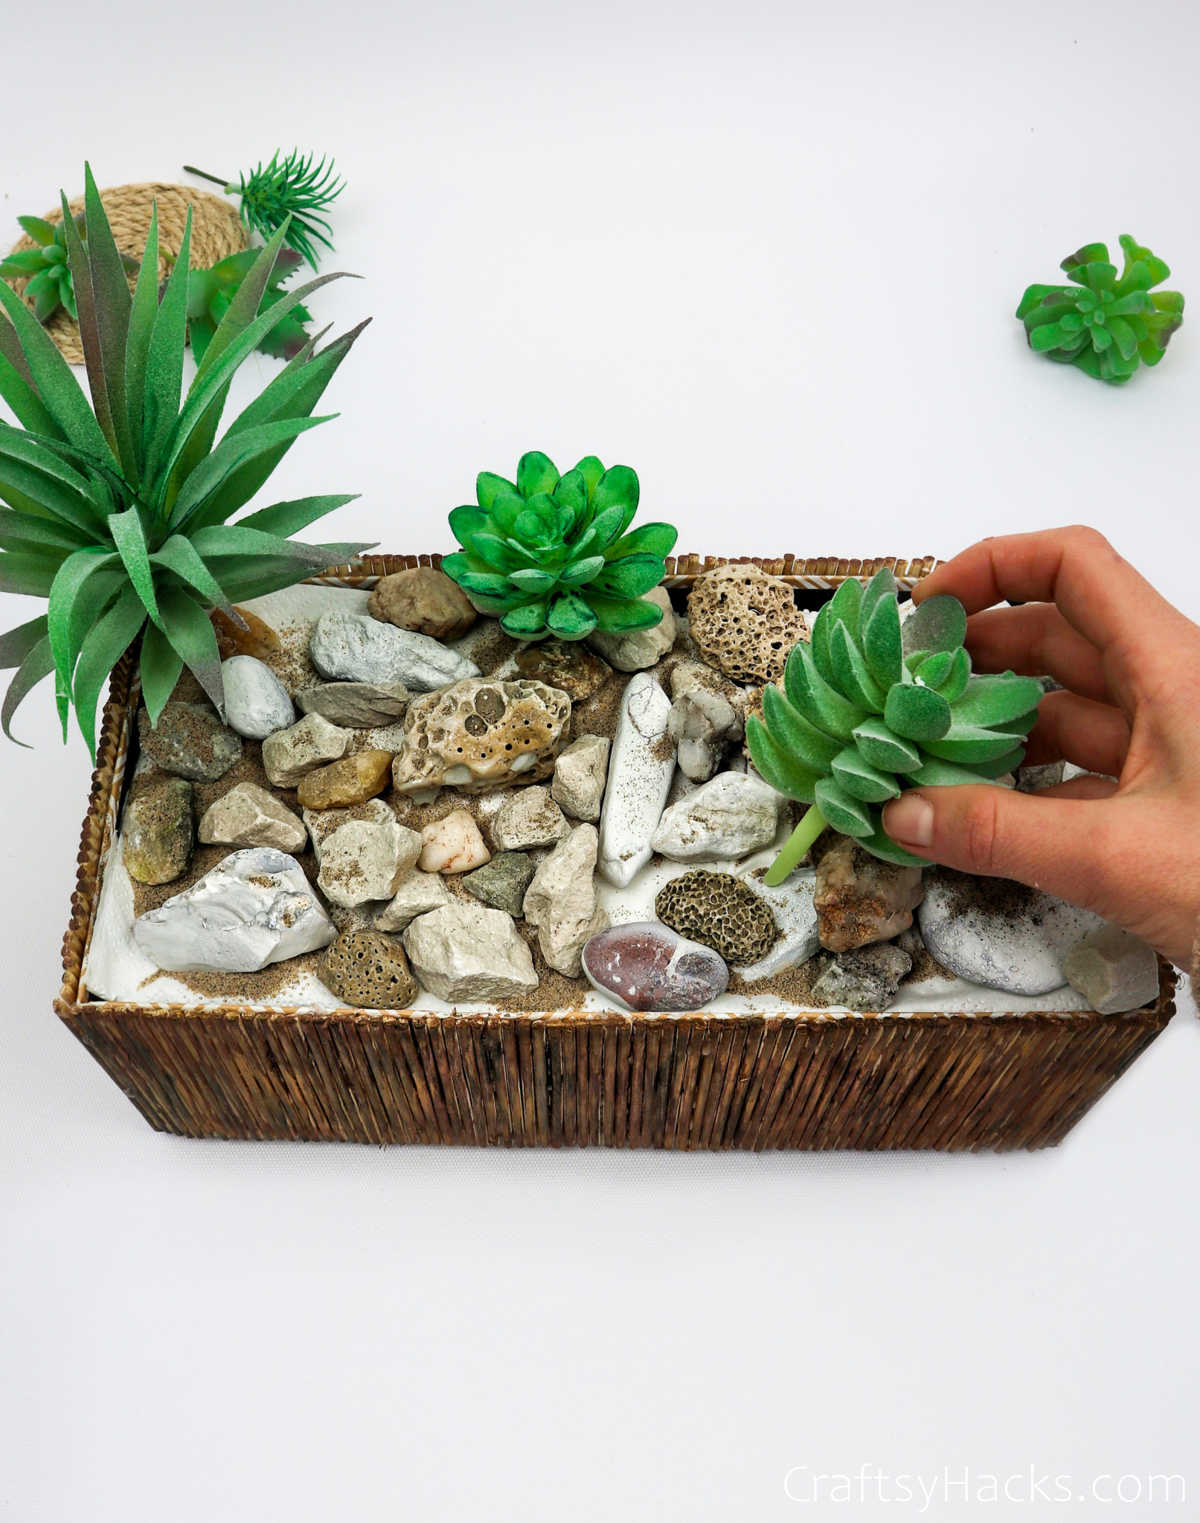
There you go—looks like something you bought from a shop, doesn’t it?
Who Can Make This Boho Succulent?
While younger kids can help you decorate the planter—I bet they’ll love filling the box with sand and shells—this project might be more suitable to an older crowd.
It can be a little risky working with all those skewers, so if younger kids are working on this project, parental guidance and supervision is a definite must.
Where Could I Place the Succulent Planter?
This planter would look pretty amazing just about anywhere around your home. Here’s a few ideas about where you might consider placing your bohemian planter:
- On the deck
- As a centerpiece
- On a coffee table or sideboard
- Up the front porch steps or
- On the front porch
- Around the garden path
Other Crafts You’ll Love
- 20 Farmhouse Dollar Store Christmas Ideas
- 47 DIY Projects
- How to Make Hair Bows
- DIY Rope Coasters
- Upcycled Tin Cans
- 30 Wood Crafts
- DIY Dollar Tree Lantern
- 37 Crafts to Make and Sell
- 37 Crafts for Girls
- DIY Leaf Candle Holder
- 20 Dollar Store Decorating Ideas
DIY Boho Succulent Planter
Video Tutorial
Equipment
- Pliers
- Foam brush
Materials
- 1 x cardboard box
- Styrofoam sheets
- White napkin
- Artificial succulents
- Stones
- 100 x skewers more for a bigger box, fewer for a smaller one
- Acrylic paints brown and metallic gold
Instructions
- Gather all your materials to get started on this project
- Grab your hot glue gun and vertically line the box with glue. Carefully adhere a skewer to the glue and hold it in place for a moment or two.
- You can apply multiple lines of hot glue and adhere multiple skewers along the box at a time to speed up the process.
- Grab a pair of clippers or pliers and clip the ends of the skewers off at the rim of the box. Try to clip them as evenly as possible.
- When you’ve worked your way around the box and have clipped off all the ends, grab a piece of sandpaper and scrub the ends till it becomes smooth. Alternatively, you can choose to leave it as it is if you like the ruggedness it provides to the planter.
- Next, paint the planter with two-three coats of paint, allowing enough time for each coat to dry before applying the next.
- Layer the inside of the box with a sheet or block of styrofoam that has been sized to fit the box.
- Next, fold a paper towel, napkin, or cloth and place it on top of the styrofoam.
- Decorate the box with stones, pebbles, rocks and shells. You can also use sand to cover up any open spots where the napkin peeks through.
- Finally, artfully arrange the faux succulents between the rocks and tuck them in place firmly.
- Your DIY boho planter is ready and you can set it up wherever you like!


