How to Make a Scrunchie (Step-by-Step)
This post may contain affiliate links: full affiliate disclosure.
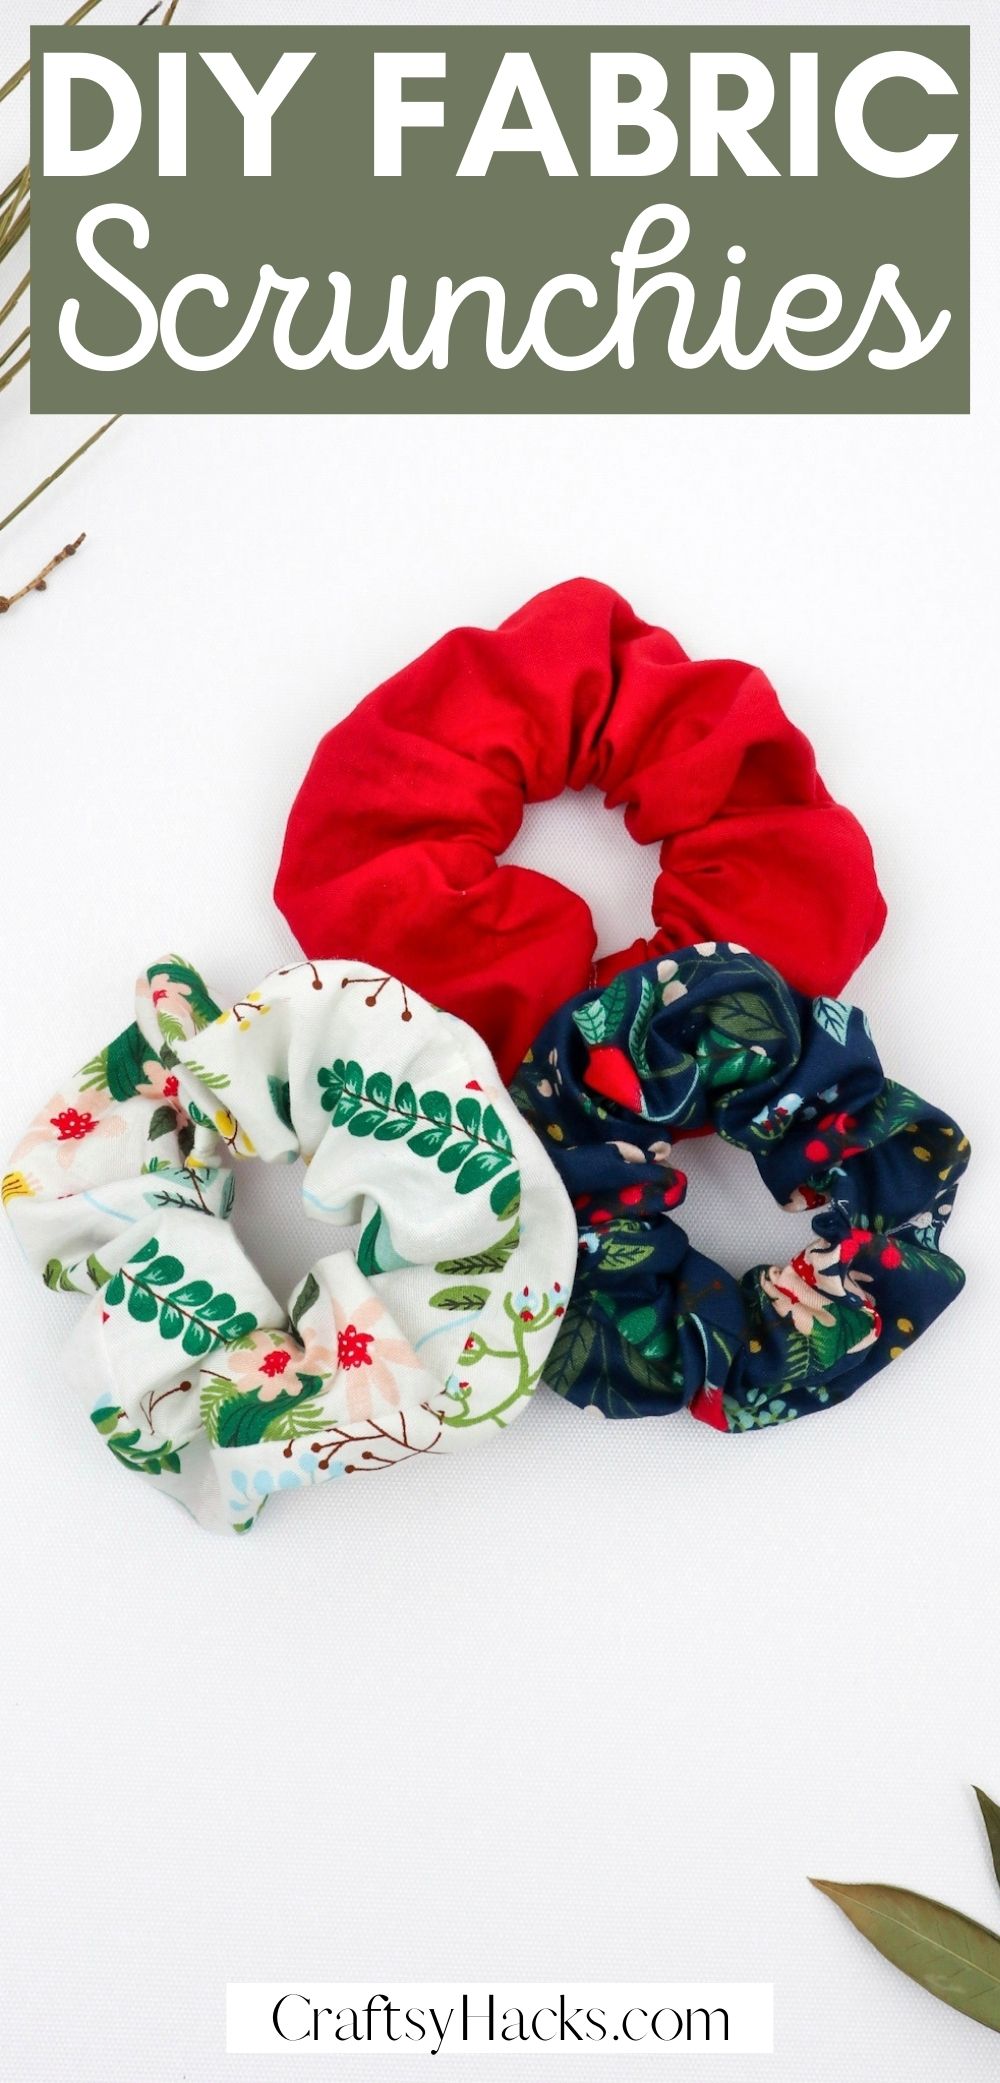
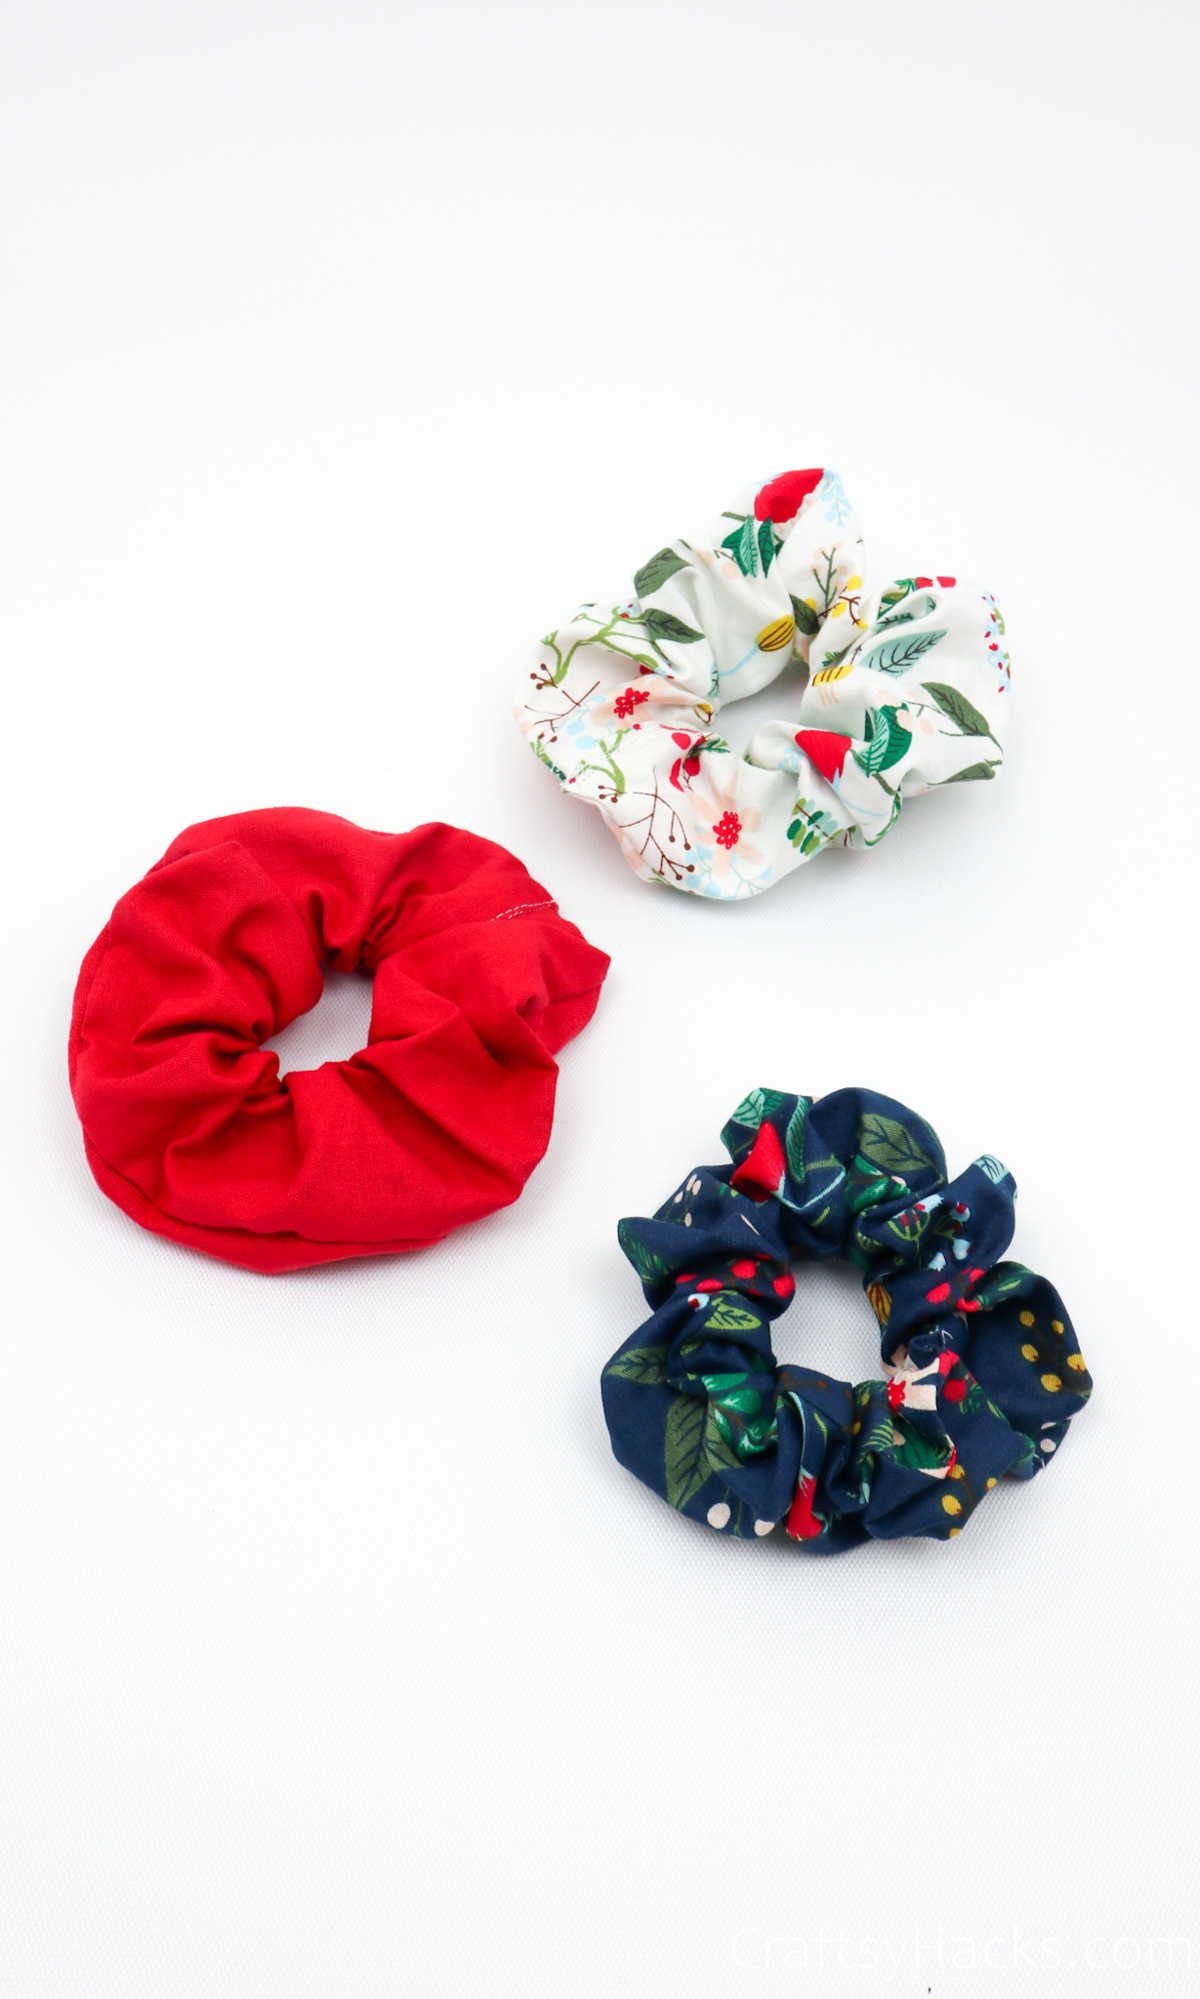
Got some scrap fabric left? Here is a full tutorial on how to make your very own scrunchies that you can gift, wear and just have fun making.
Every girl out there knows just how important scrunchies can be. They’re also ridiculously easy to misplace—notoriously, so, in fact.
The right scrunchie can make any outfit look complete and put together. But the wrong one can just as easily put a damper on it.
Just imagine pairing a red and white polka dot outfit with, say, a purple scrunchie. Nope…just, no.
Imagine never having to worry about whether you have the right scrunchies in your stash to match your outfits. Imagine having just the right one for the outfit you need and not having to pay a pretty penny to get all those scrunchies.
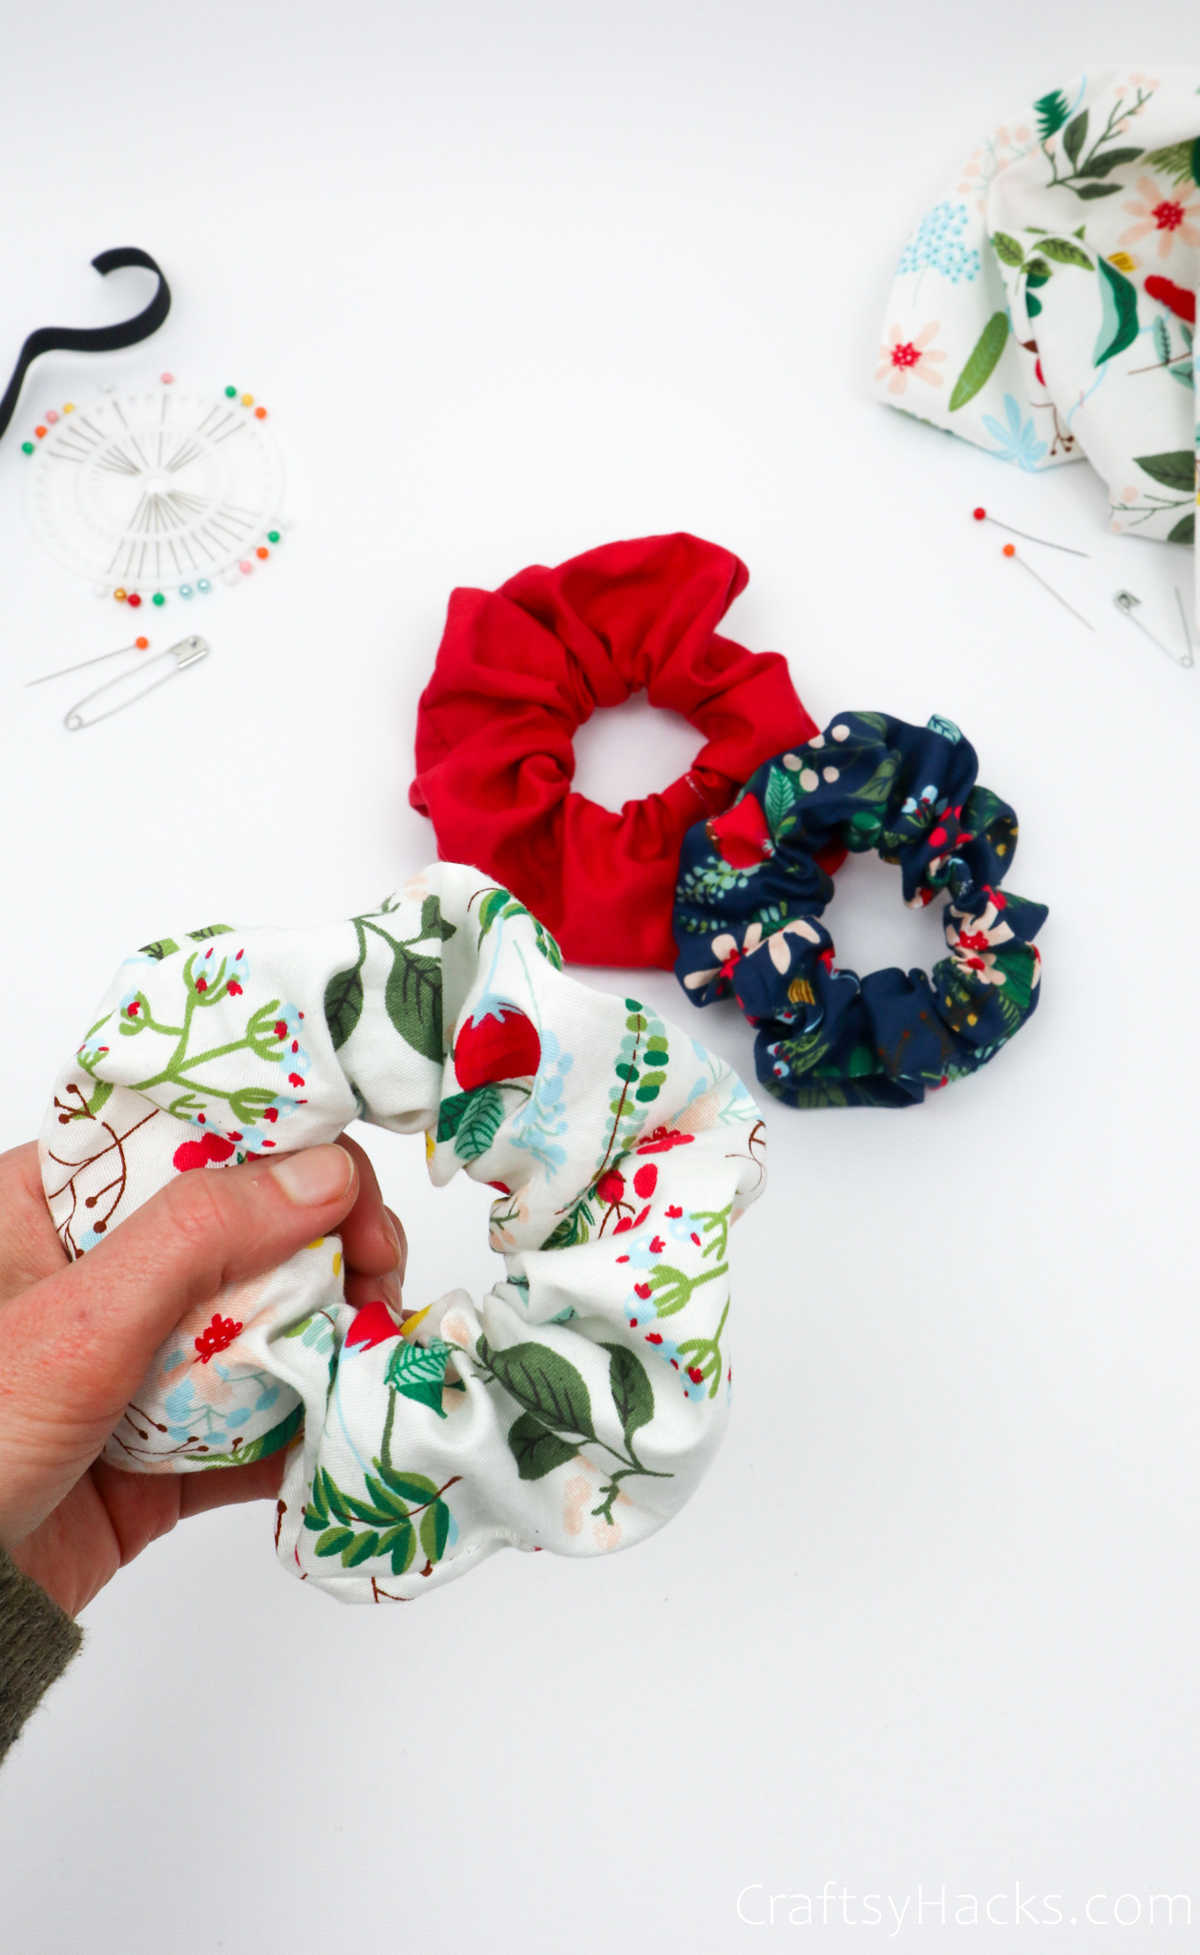
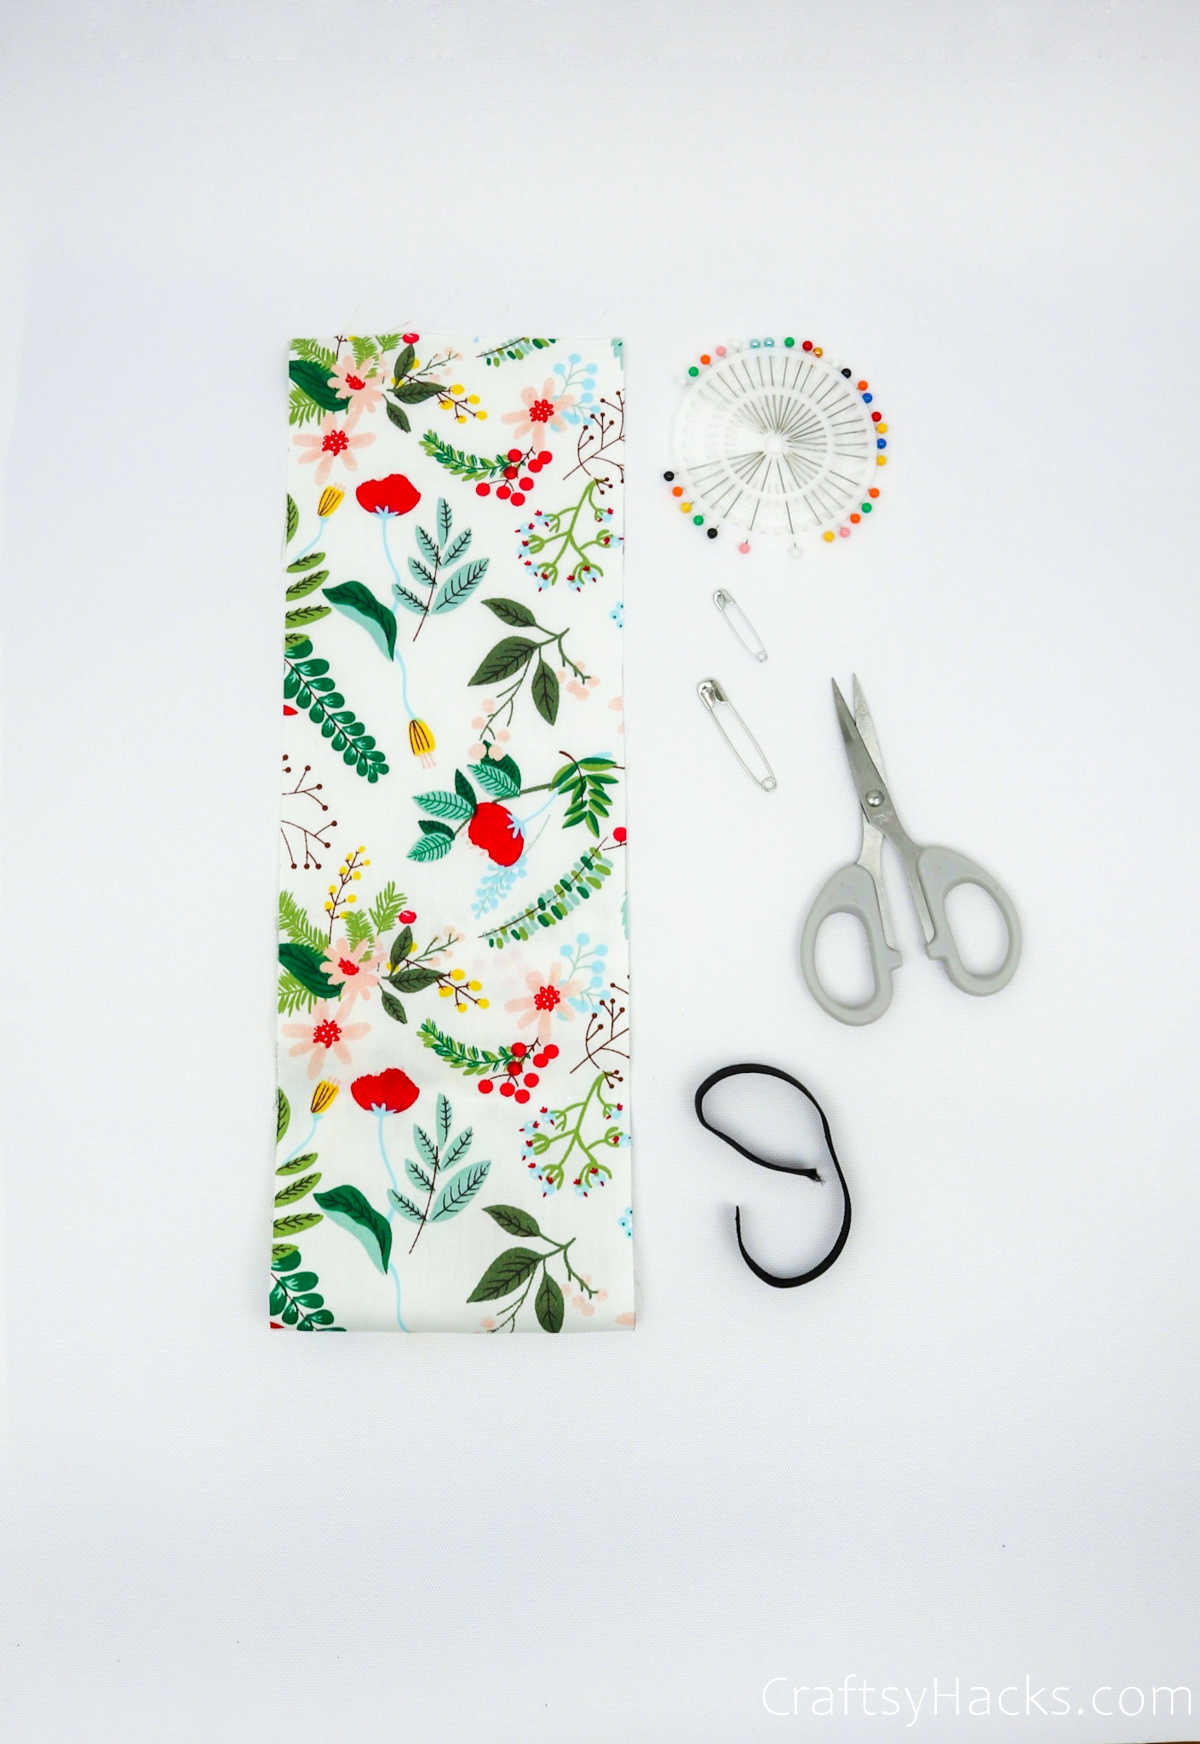
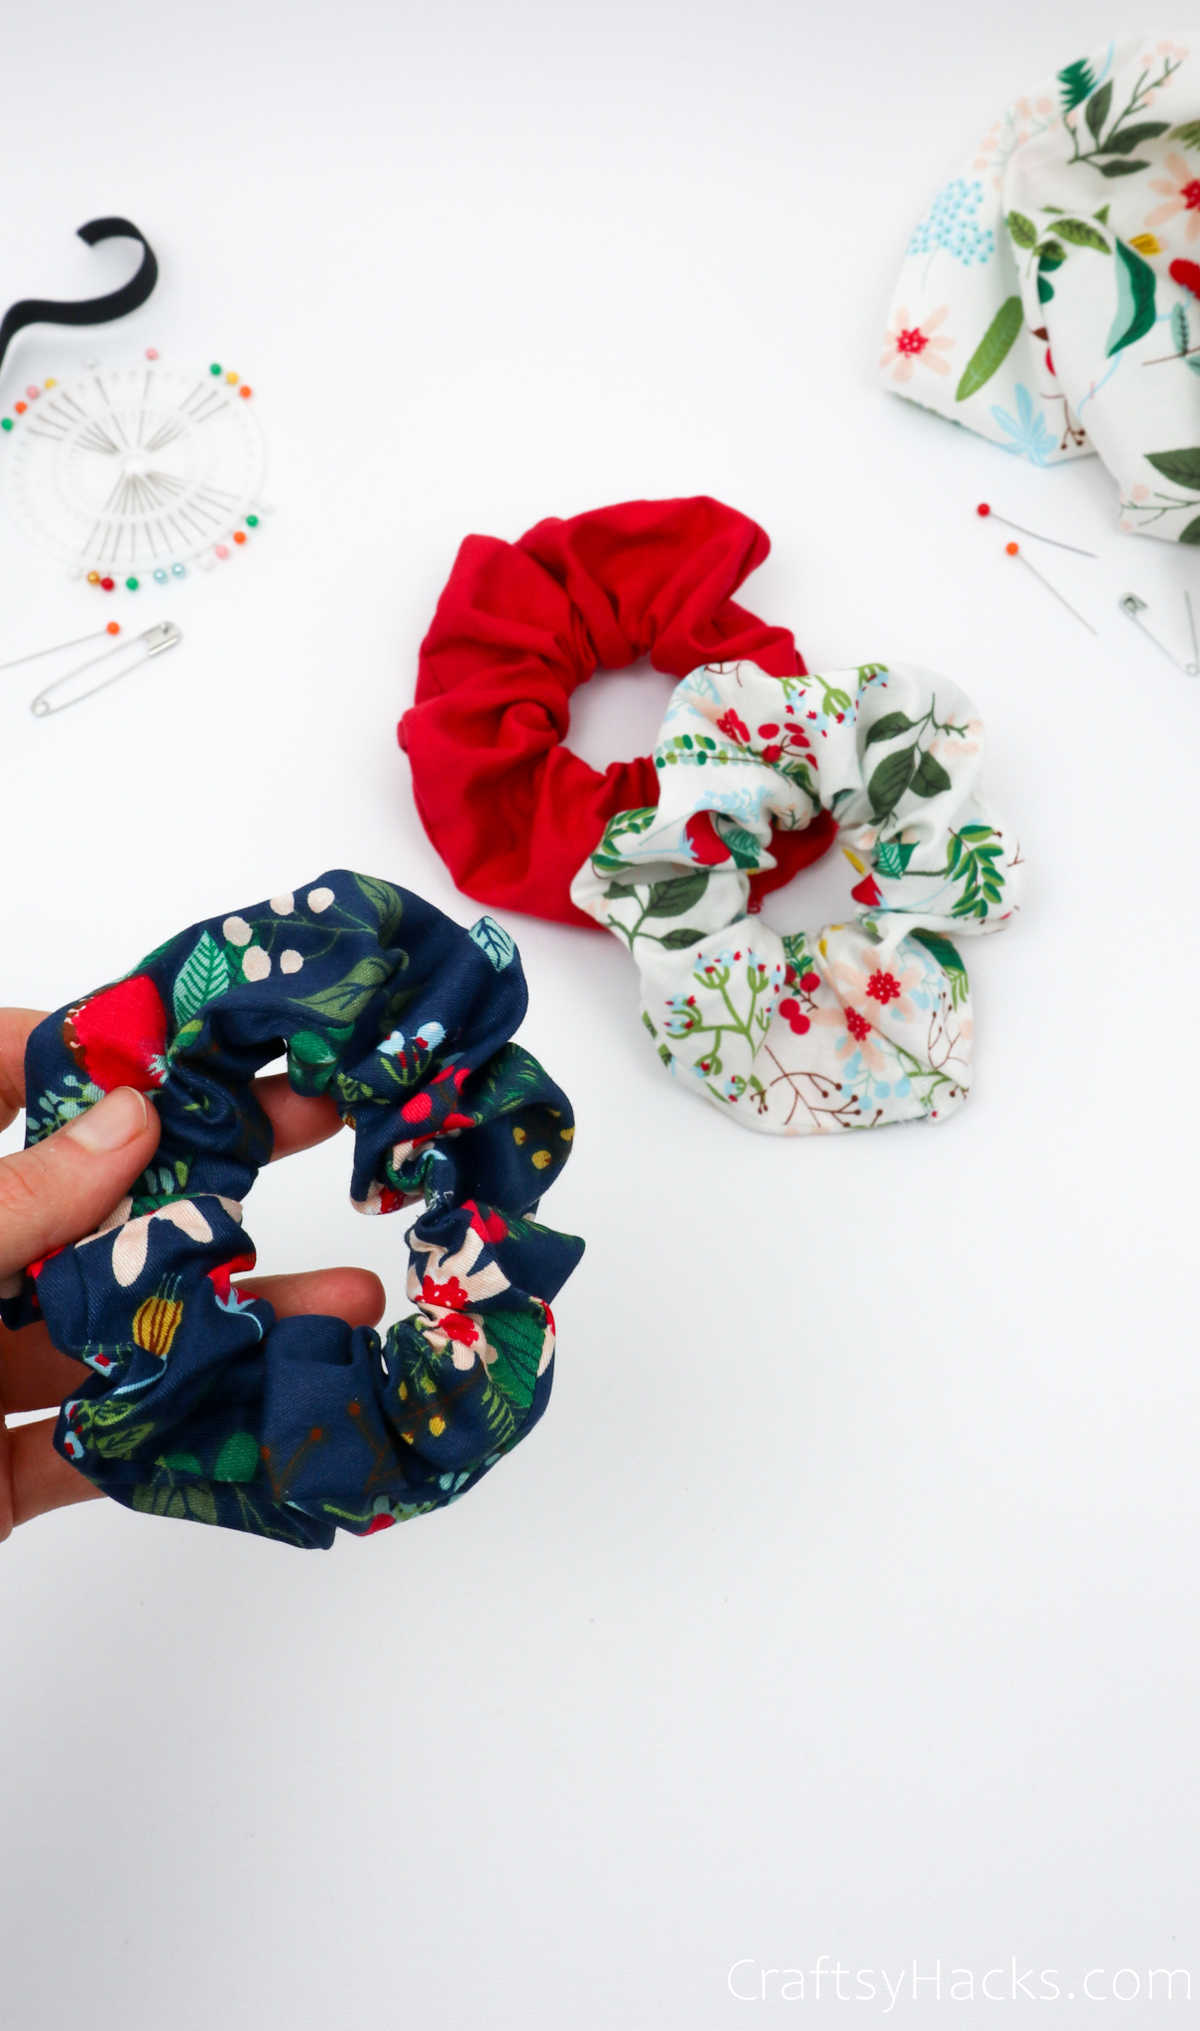
Supplies and Tools You’ll Need
To make all the scrunchies you could ever want or need, you’ll need to gather a few simple materials. Take a look:
- Fabric (5″ x 24″)
- 8″ elastic ribbon
- Sewing pins
- 2x safety pins
- Scissors
- Sewing machine (optional)
How to Make a Scrunchie
You can easily hand-sew your scrunchie if you don’t want the hassle of setting up your sewing machine for such a small fabric project. And, for the fabric, I’m sure you have plenty of fabric in your stash that is too pretty to not use for this project!
So, let’s get started right away!
Step 1
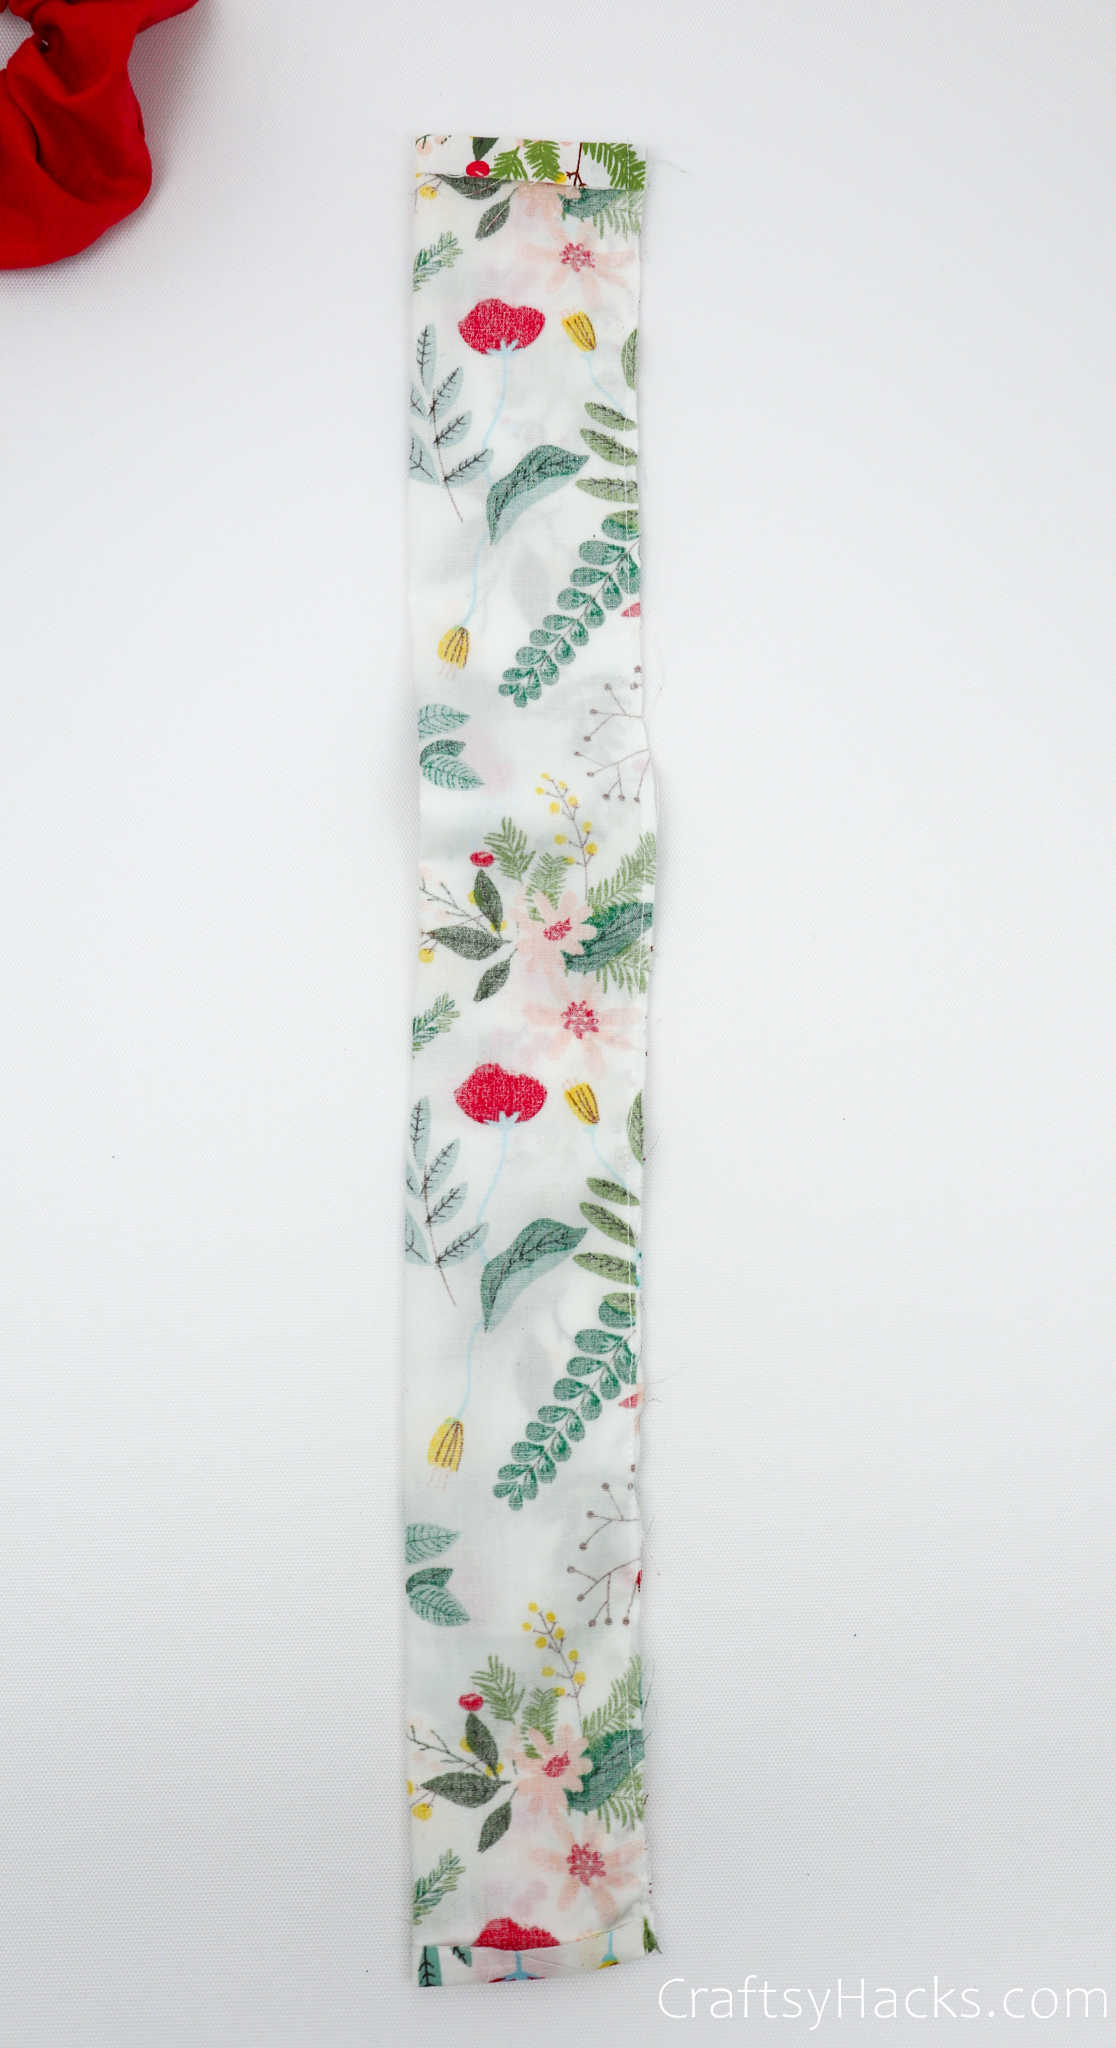
The first step is to lay your fabric down on your work surface with the wrong side facing up. Then, pull the edge of the fabric down—just one centimeter just do—and fold it. This is your seam allowance, so grab a couple of pins and pin it in place.
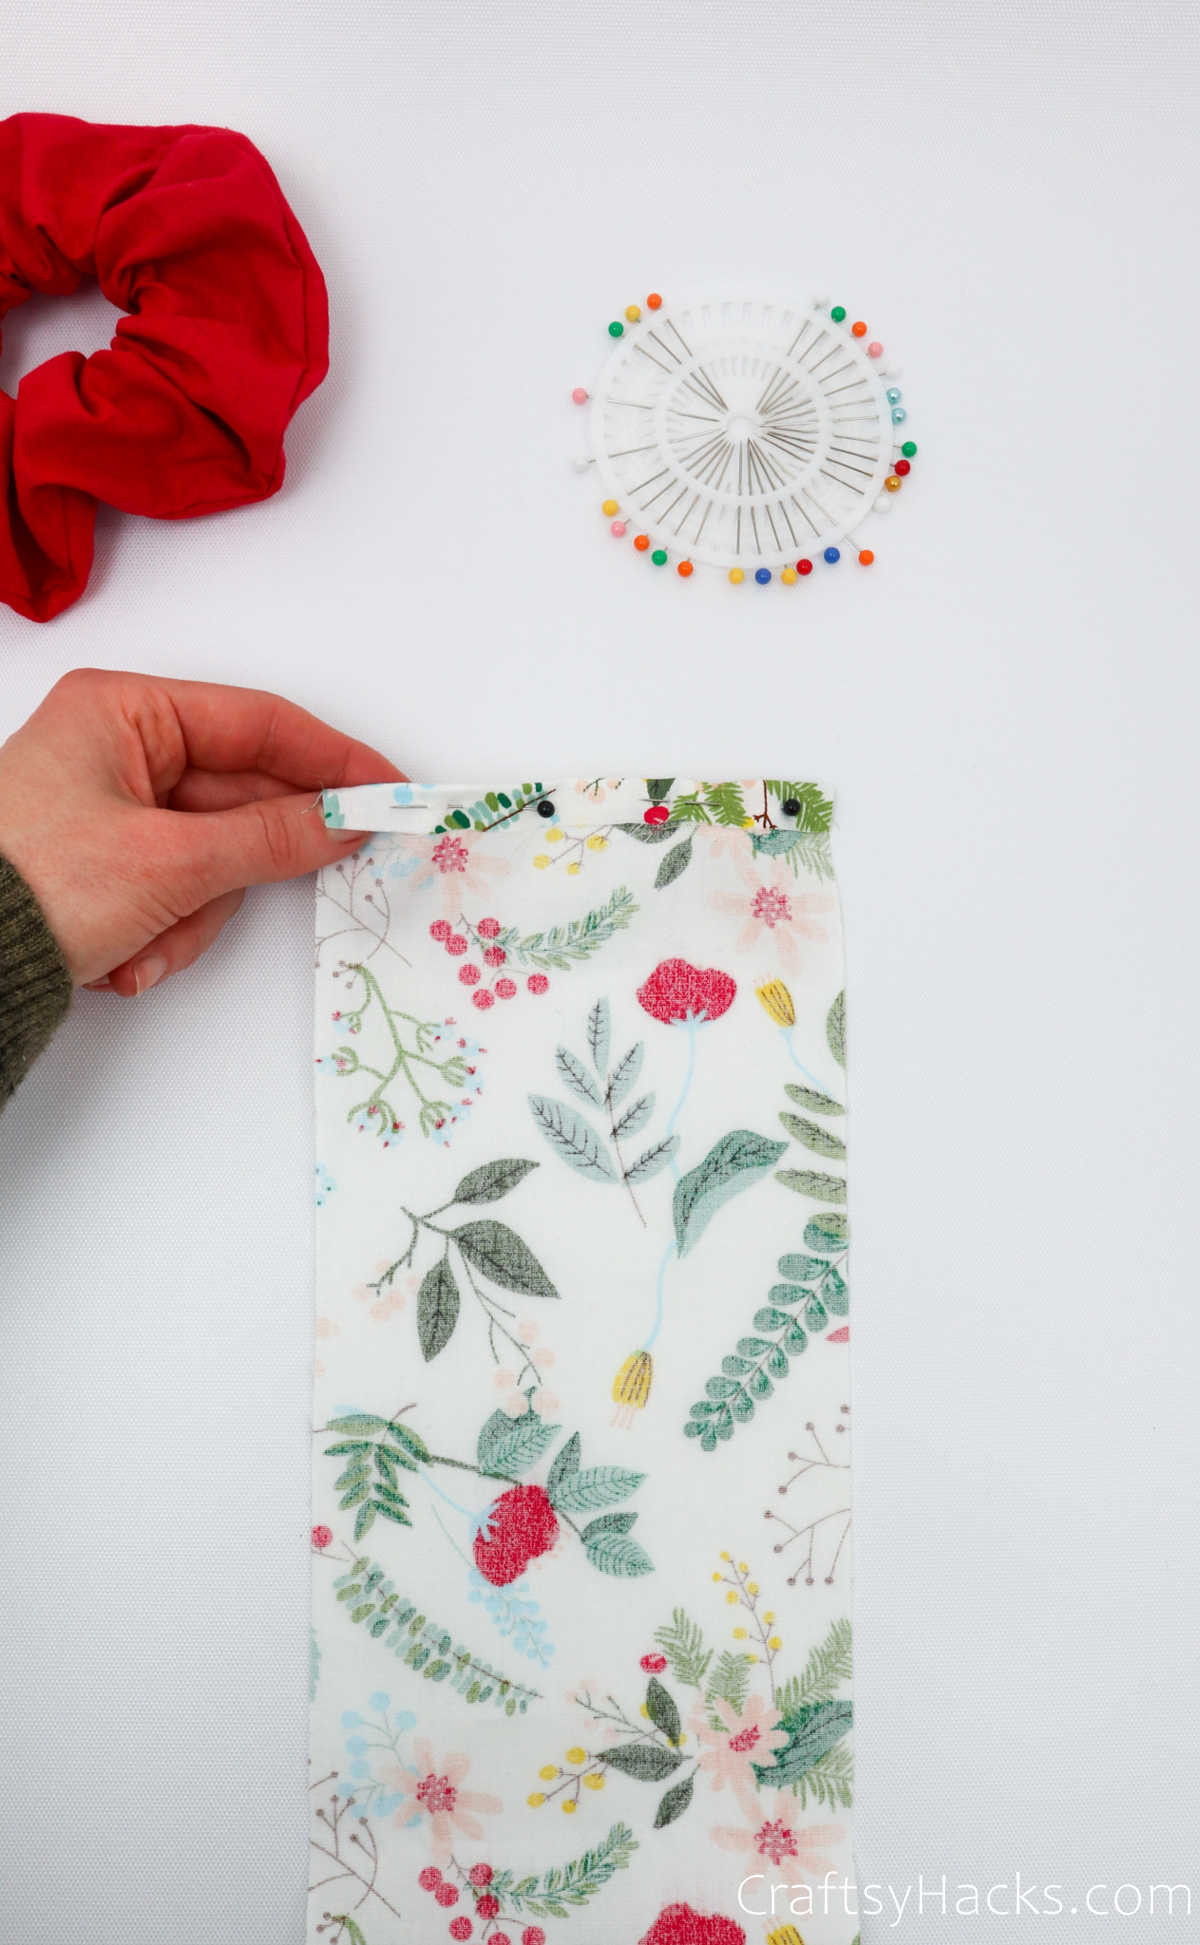
Next, make another seam allowance at the bottom of the fabric, too.
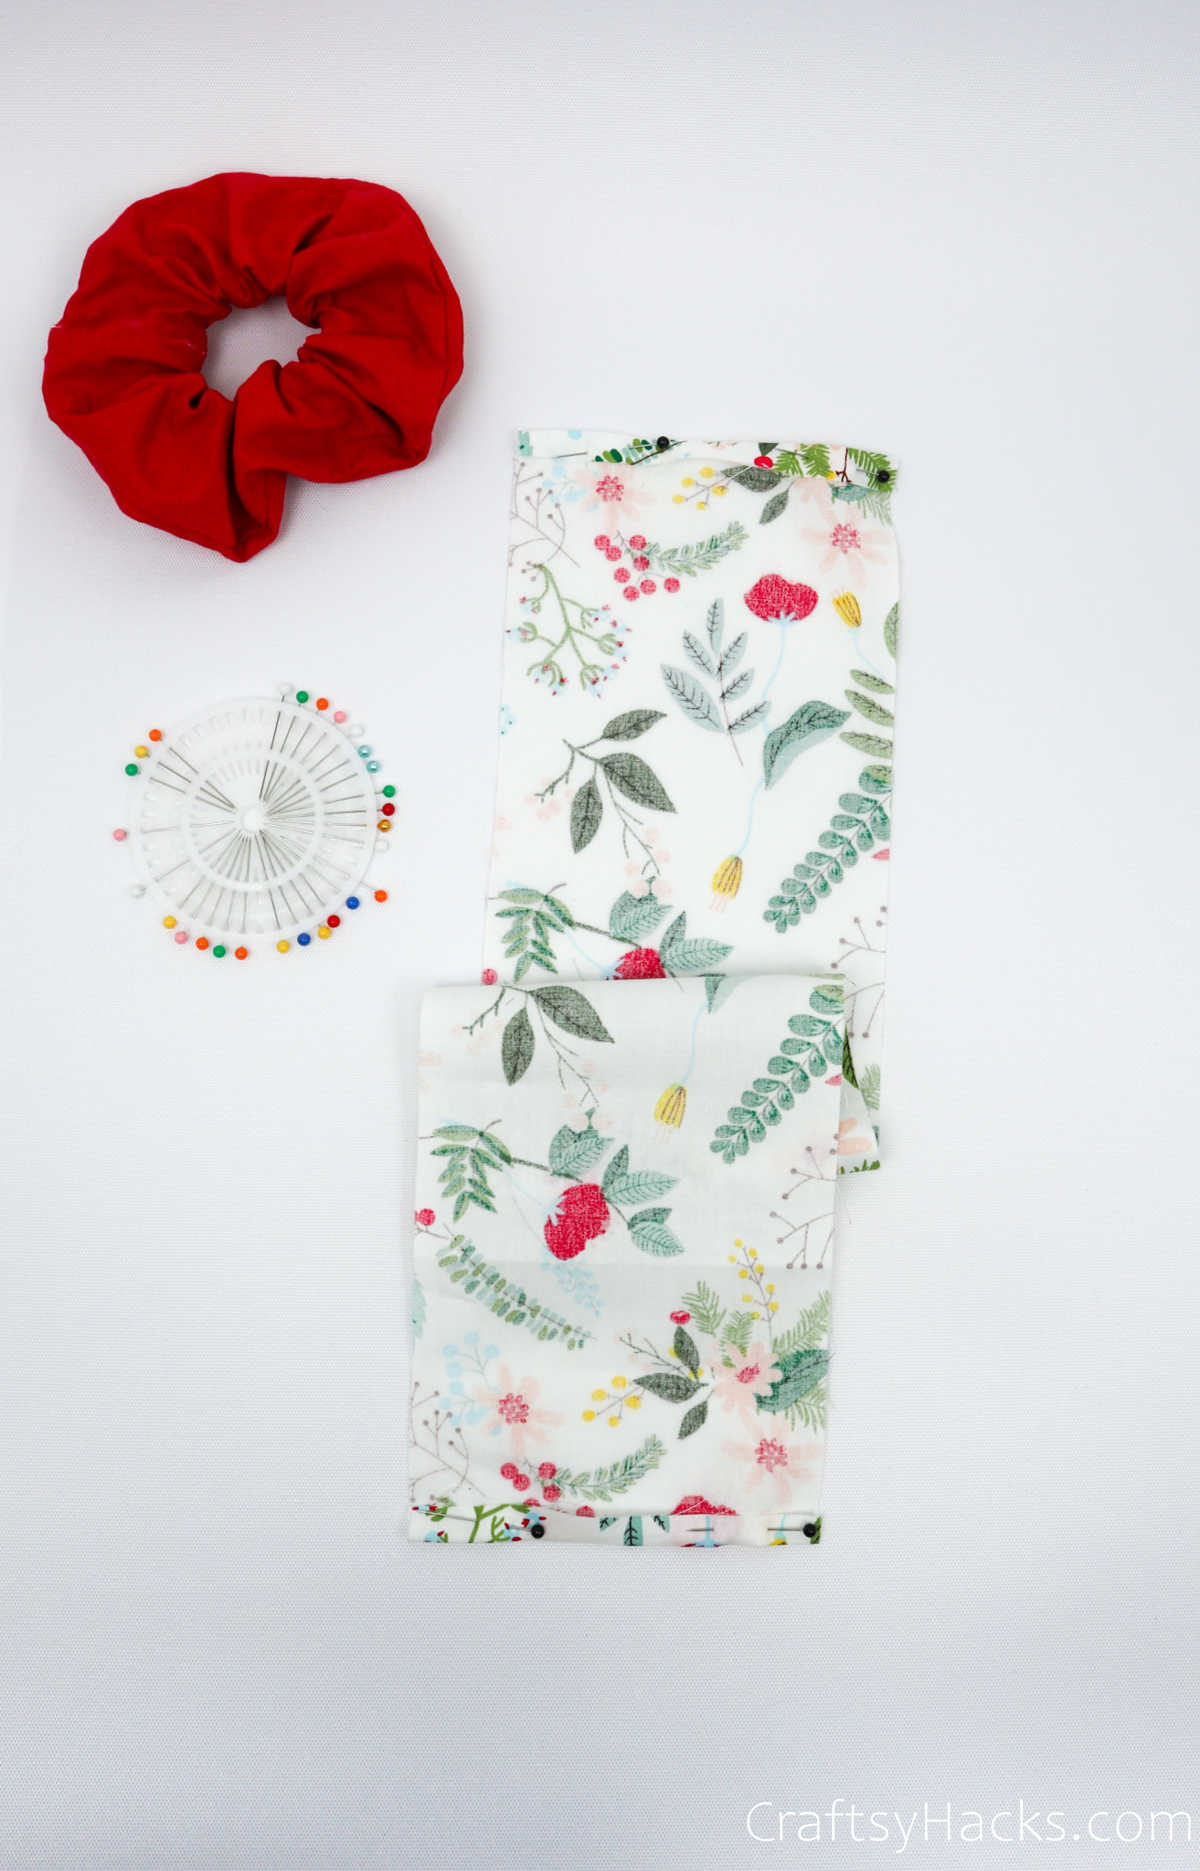
Step 2
Fold the fabric in half down the middle. You’ll be folding it along the longest side, so once you do, line both the edges and pin them in place.
When you pin them in place, you won’t have to worry about the fabric pulling away unevenly while you’re sewing.
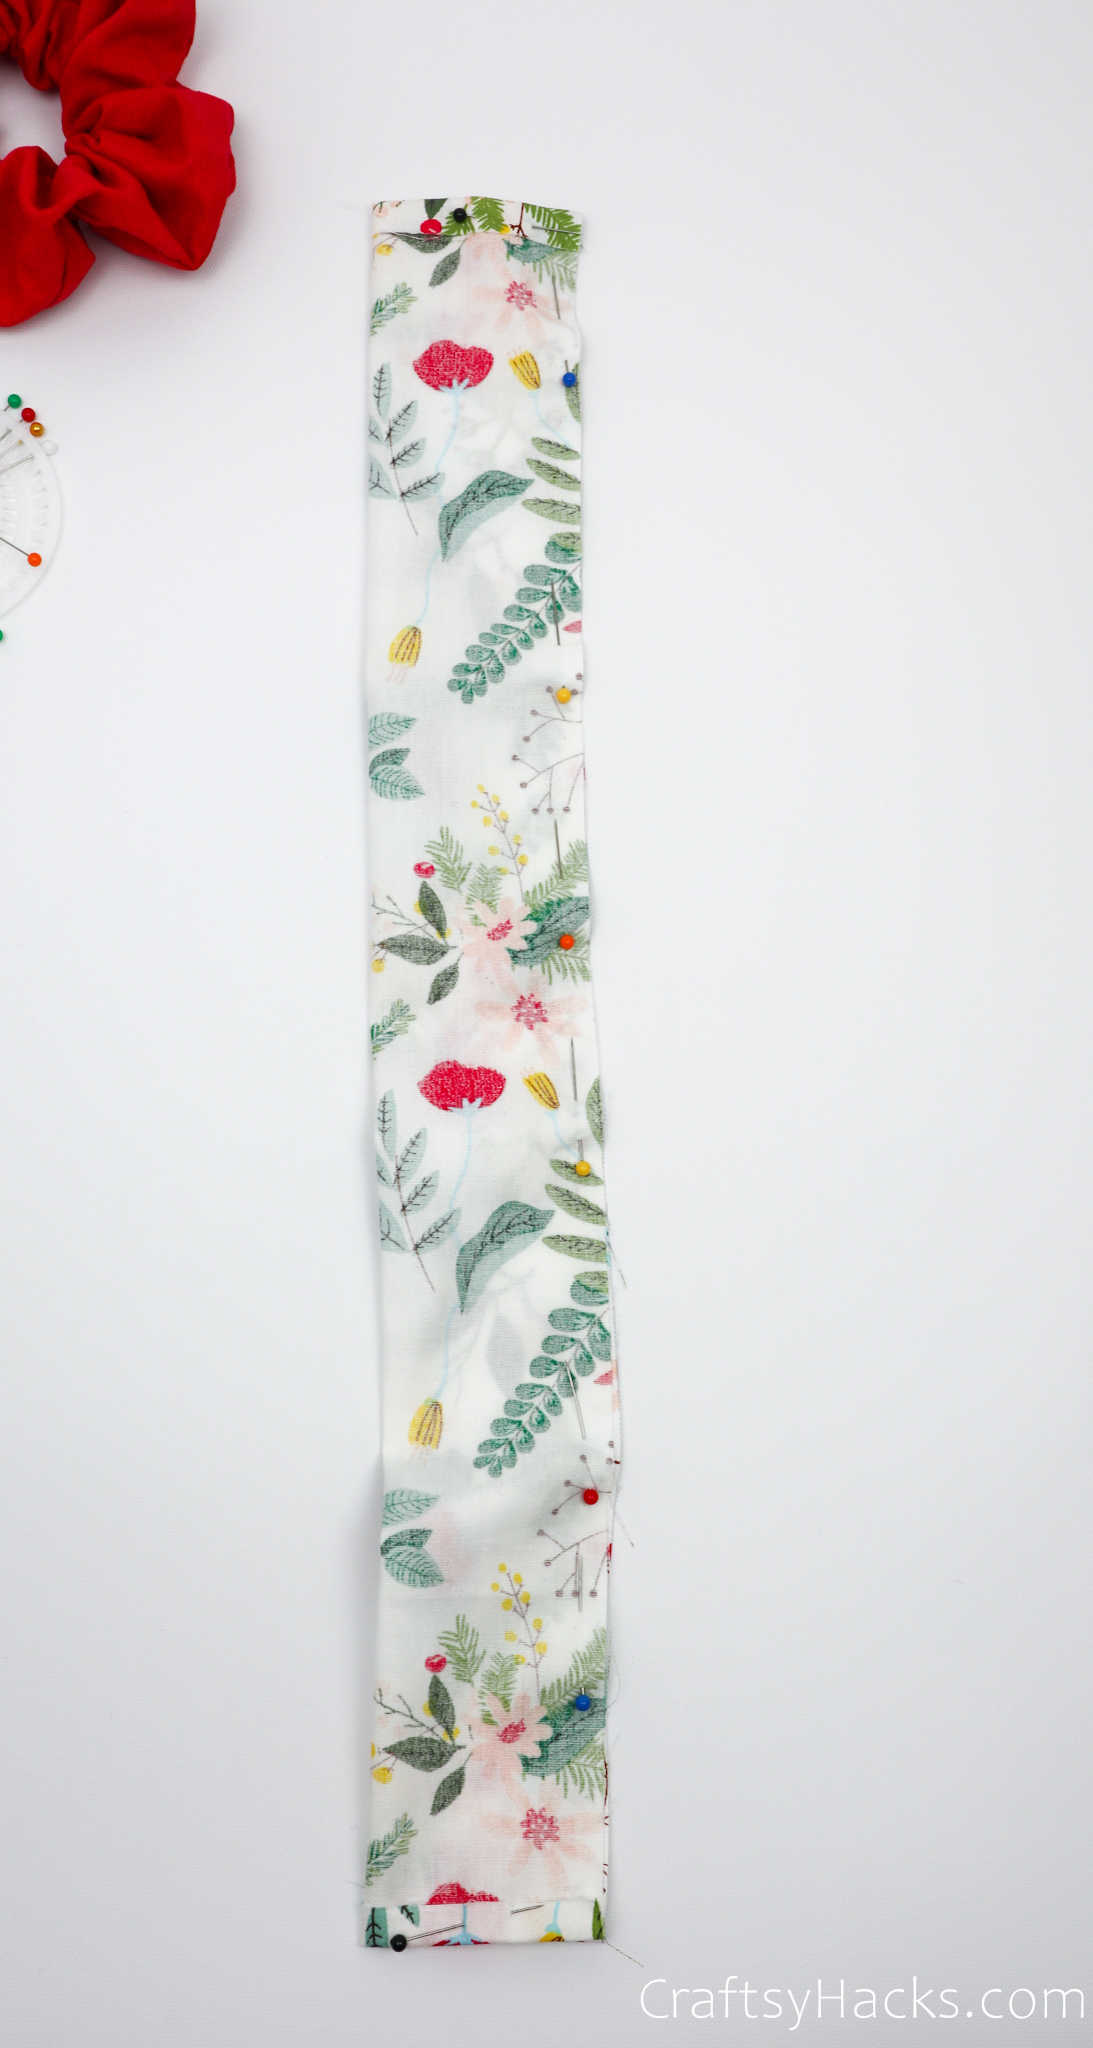
Step 3
Grab your needle and thread, or head over to your sewing machine. Then, sew the edges shut all the way down the length of the fabric.
Remember, you’ll only be sewing down the length of the fabric, so the short ends on either side should remain open.

Step 4
When you finish sewing the edges, turn the scrunchie inside out so that the right side is now facing outward.

Step 5
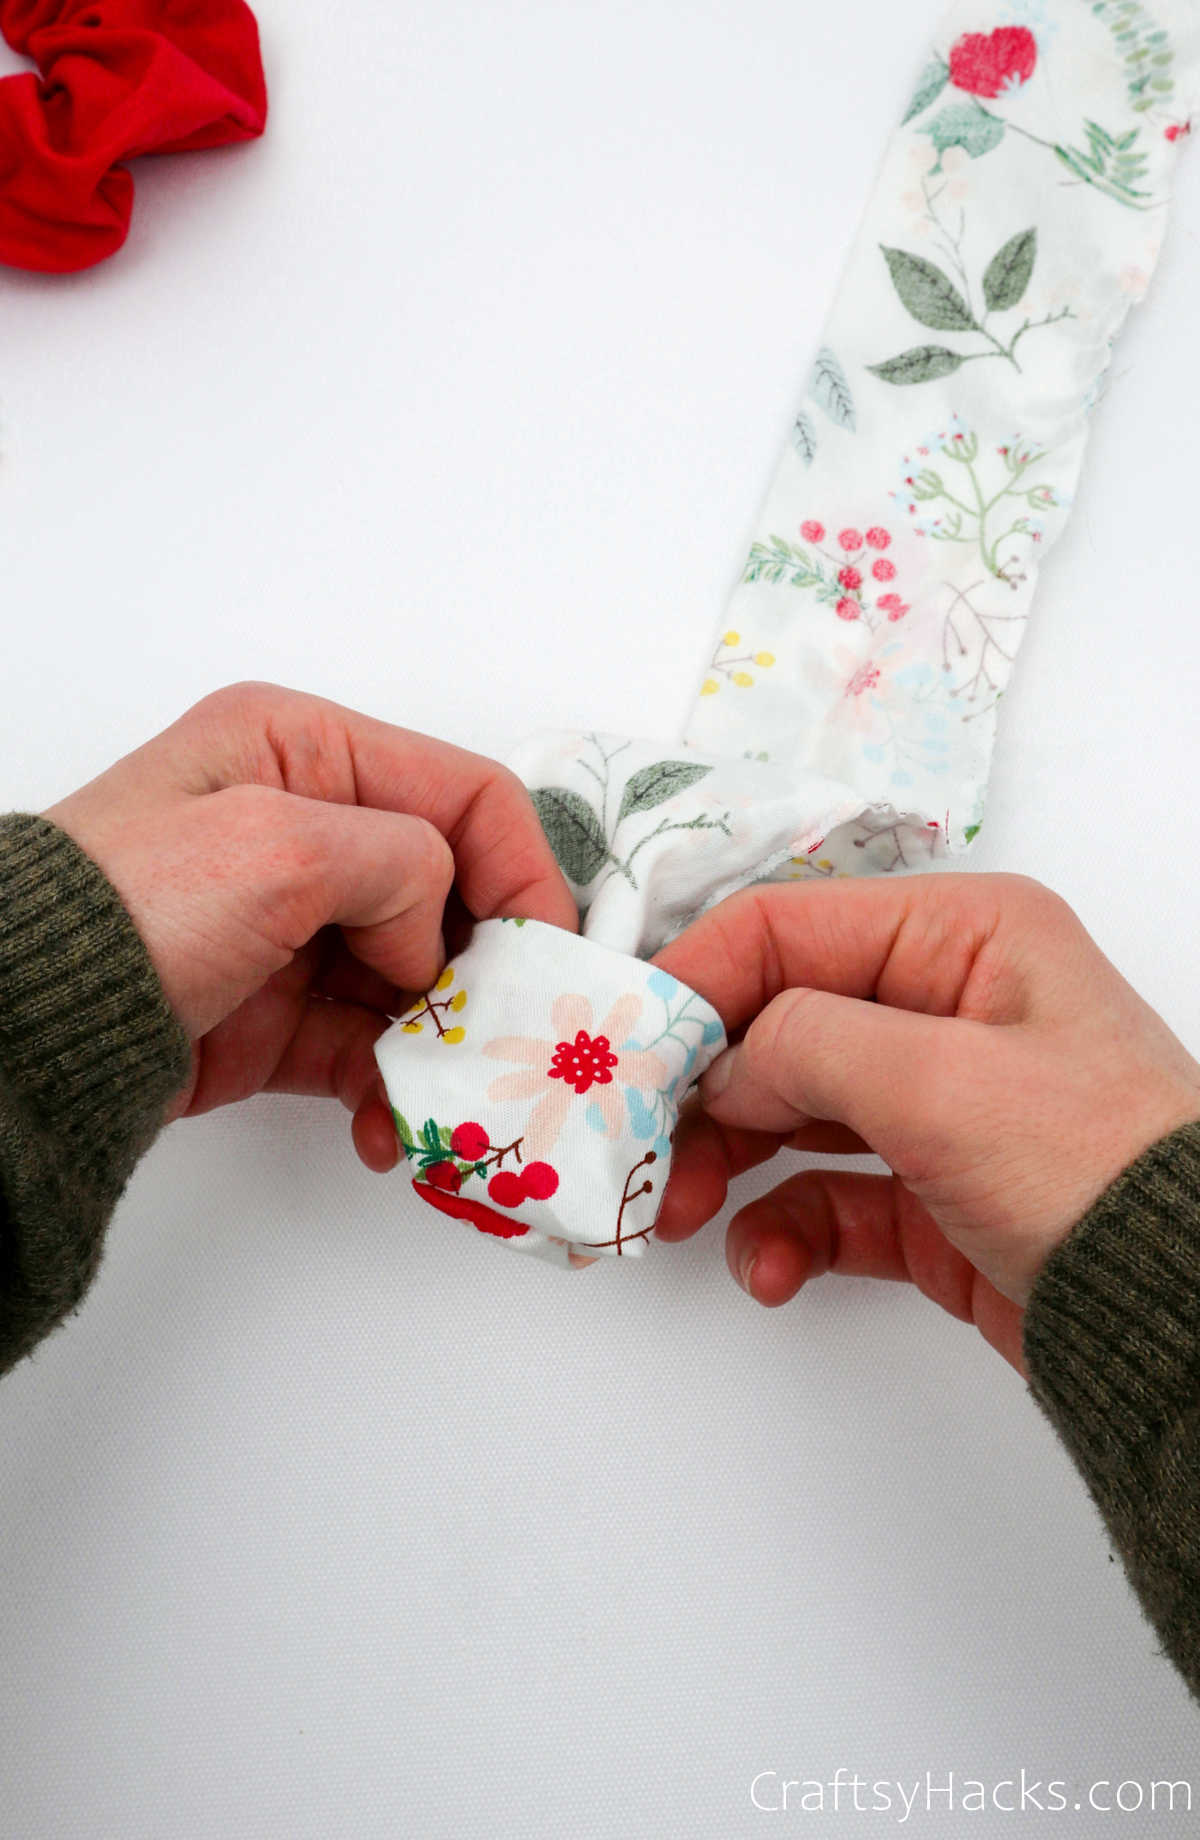
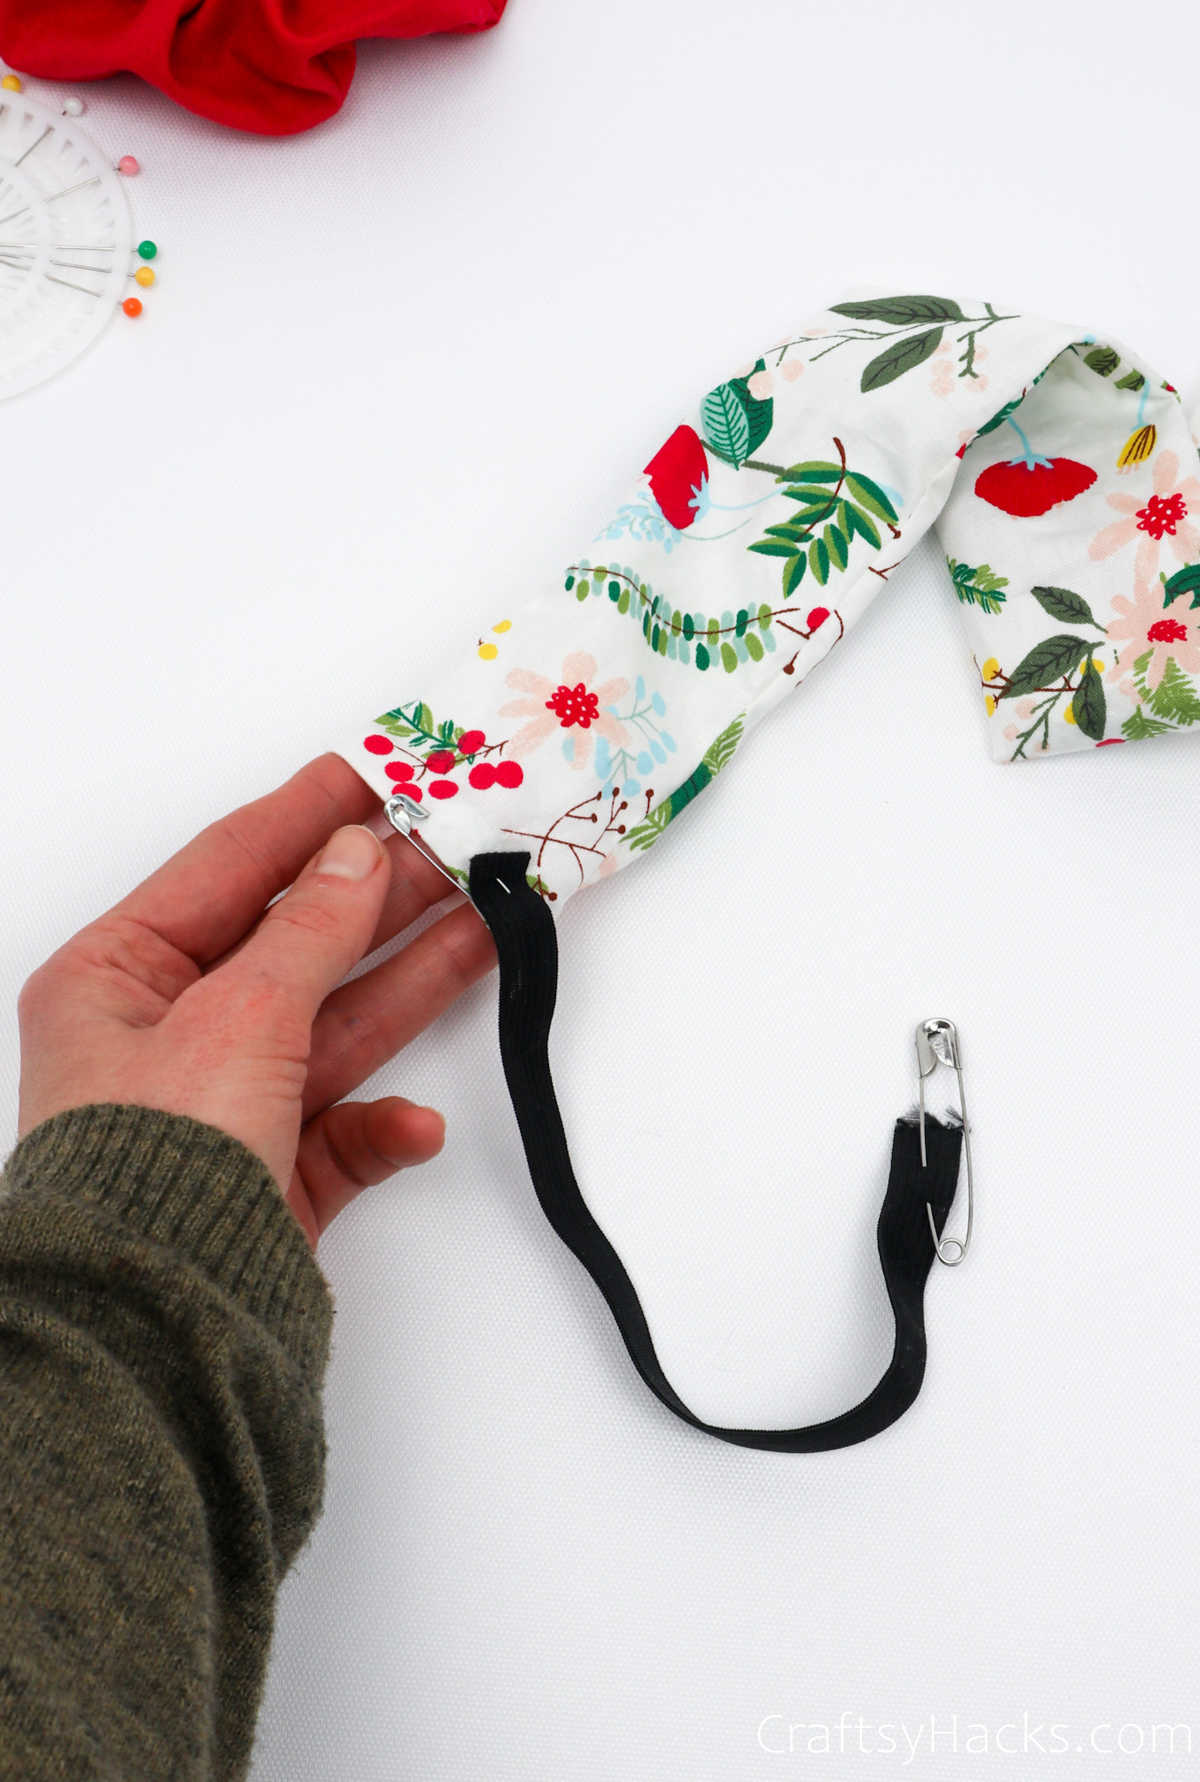
The next step is to get the elastic inside the scrunchie. Grab a safety pin and attach the end of the elastic strip to the pin.
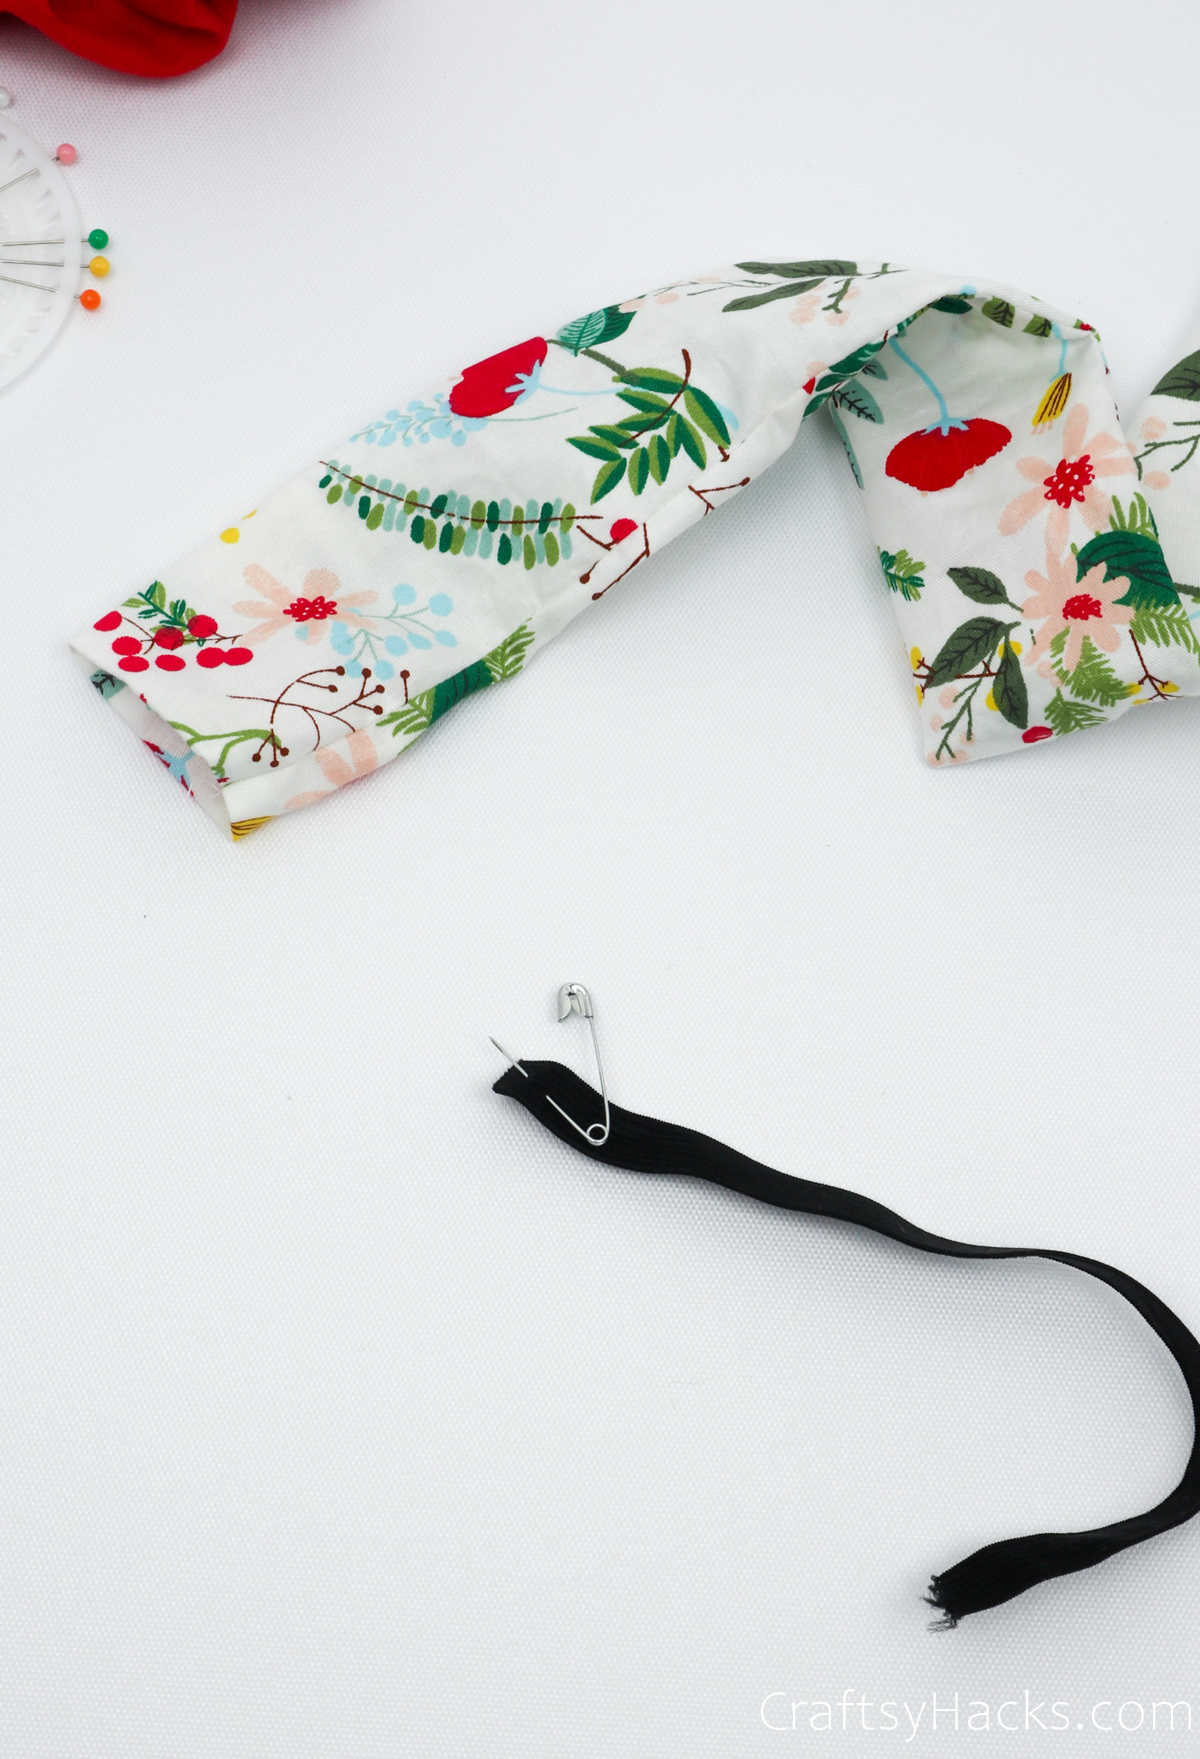
Fasten the safety pin to one end of the scrunchie.

Next, attach another safety pin, this time to the other end of the elastic.
Step 6
You will be using the safety pin attached to the fabric as an anchor of sorts while you pull the second safety pin—and the adjoined elastic—through the hold in the fabric all the way to the opening on the other end.
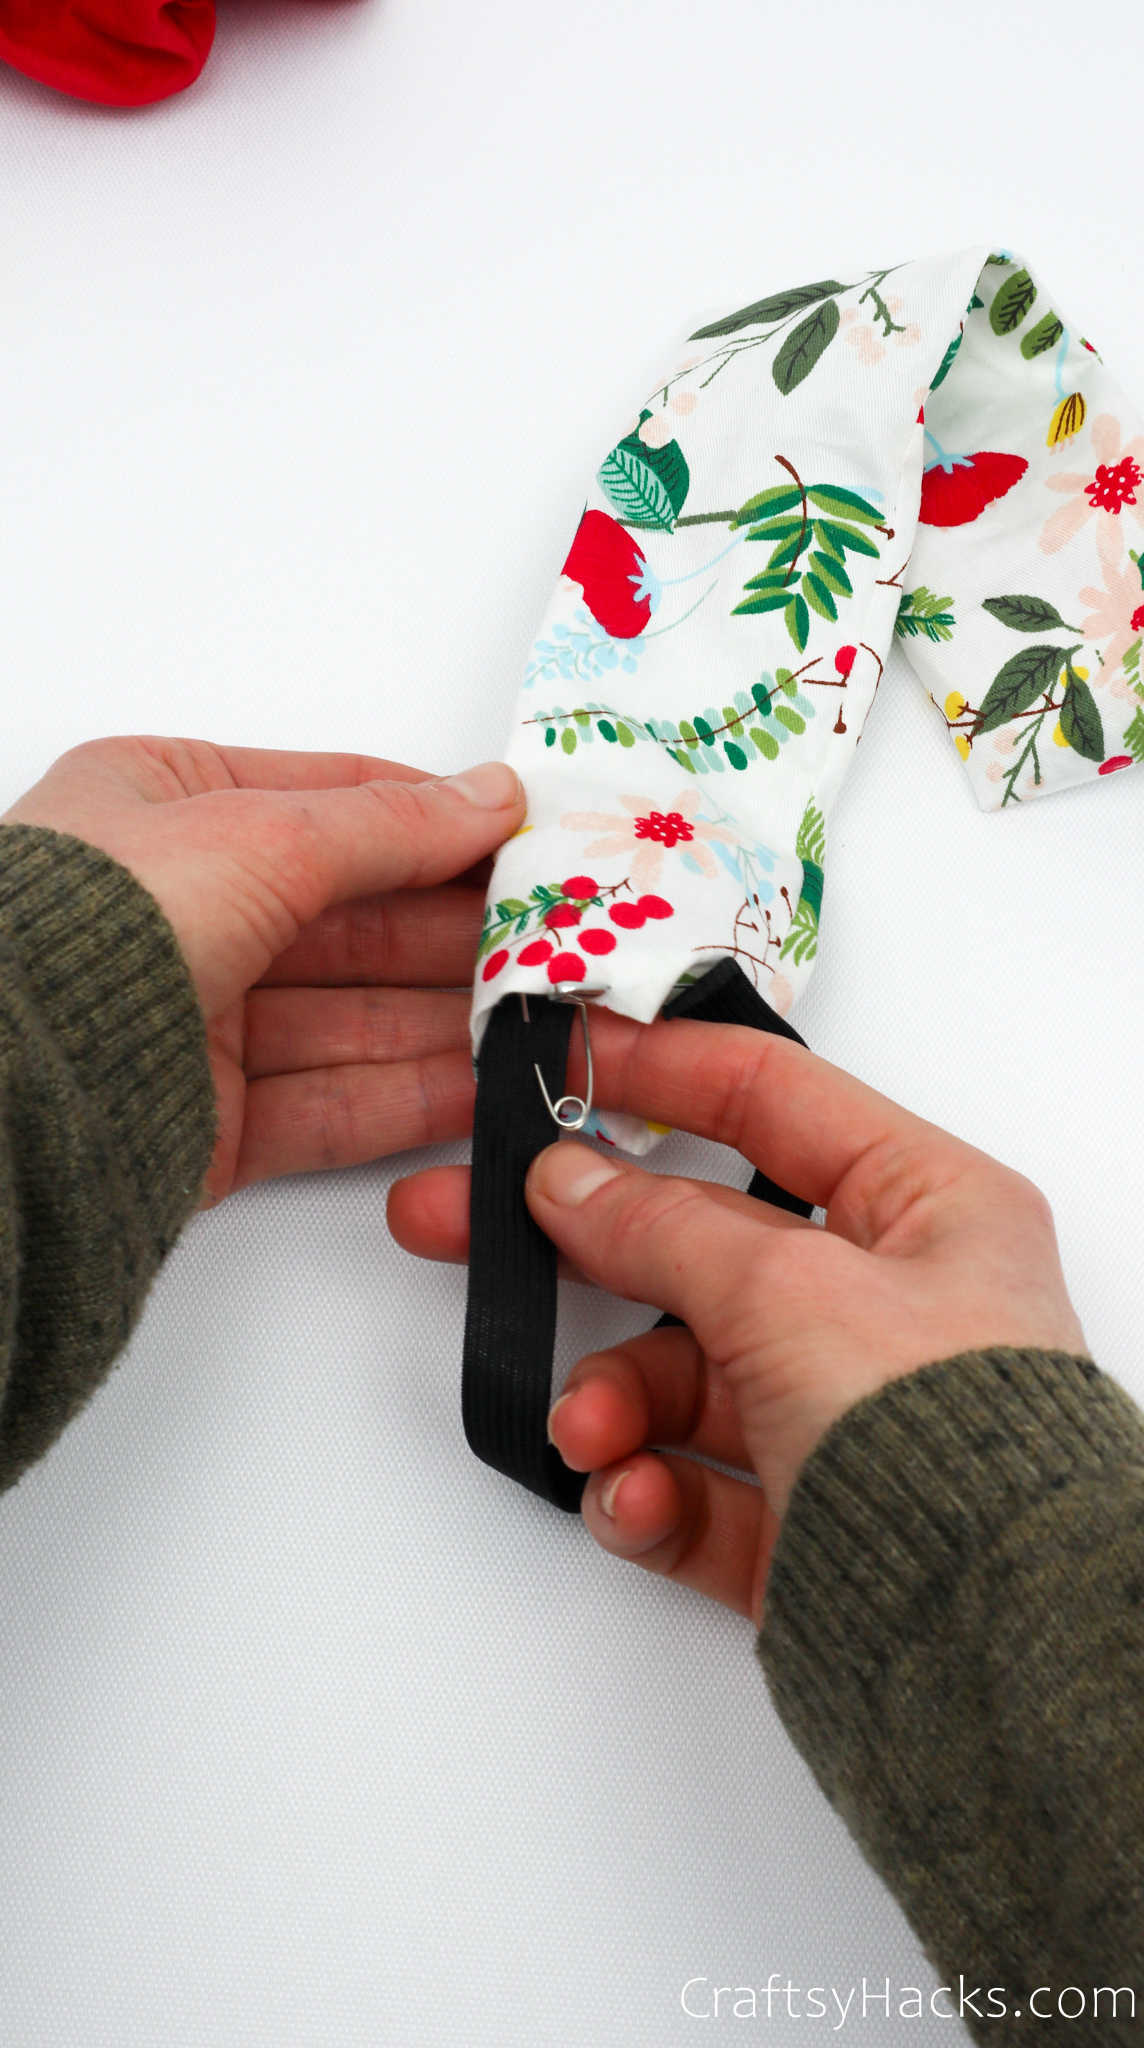
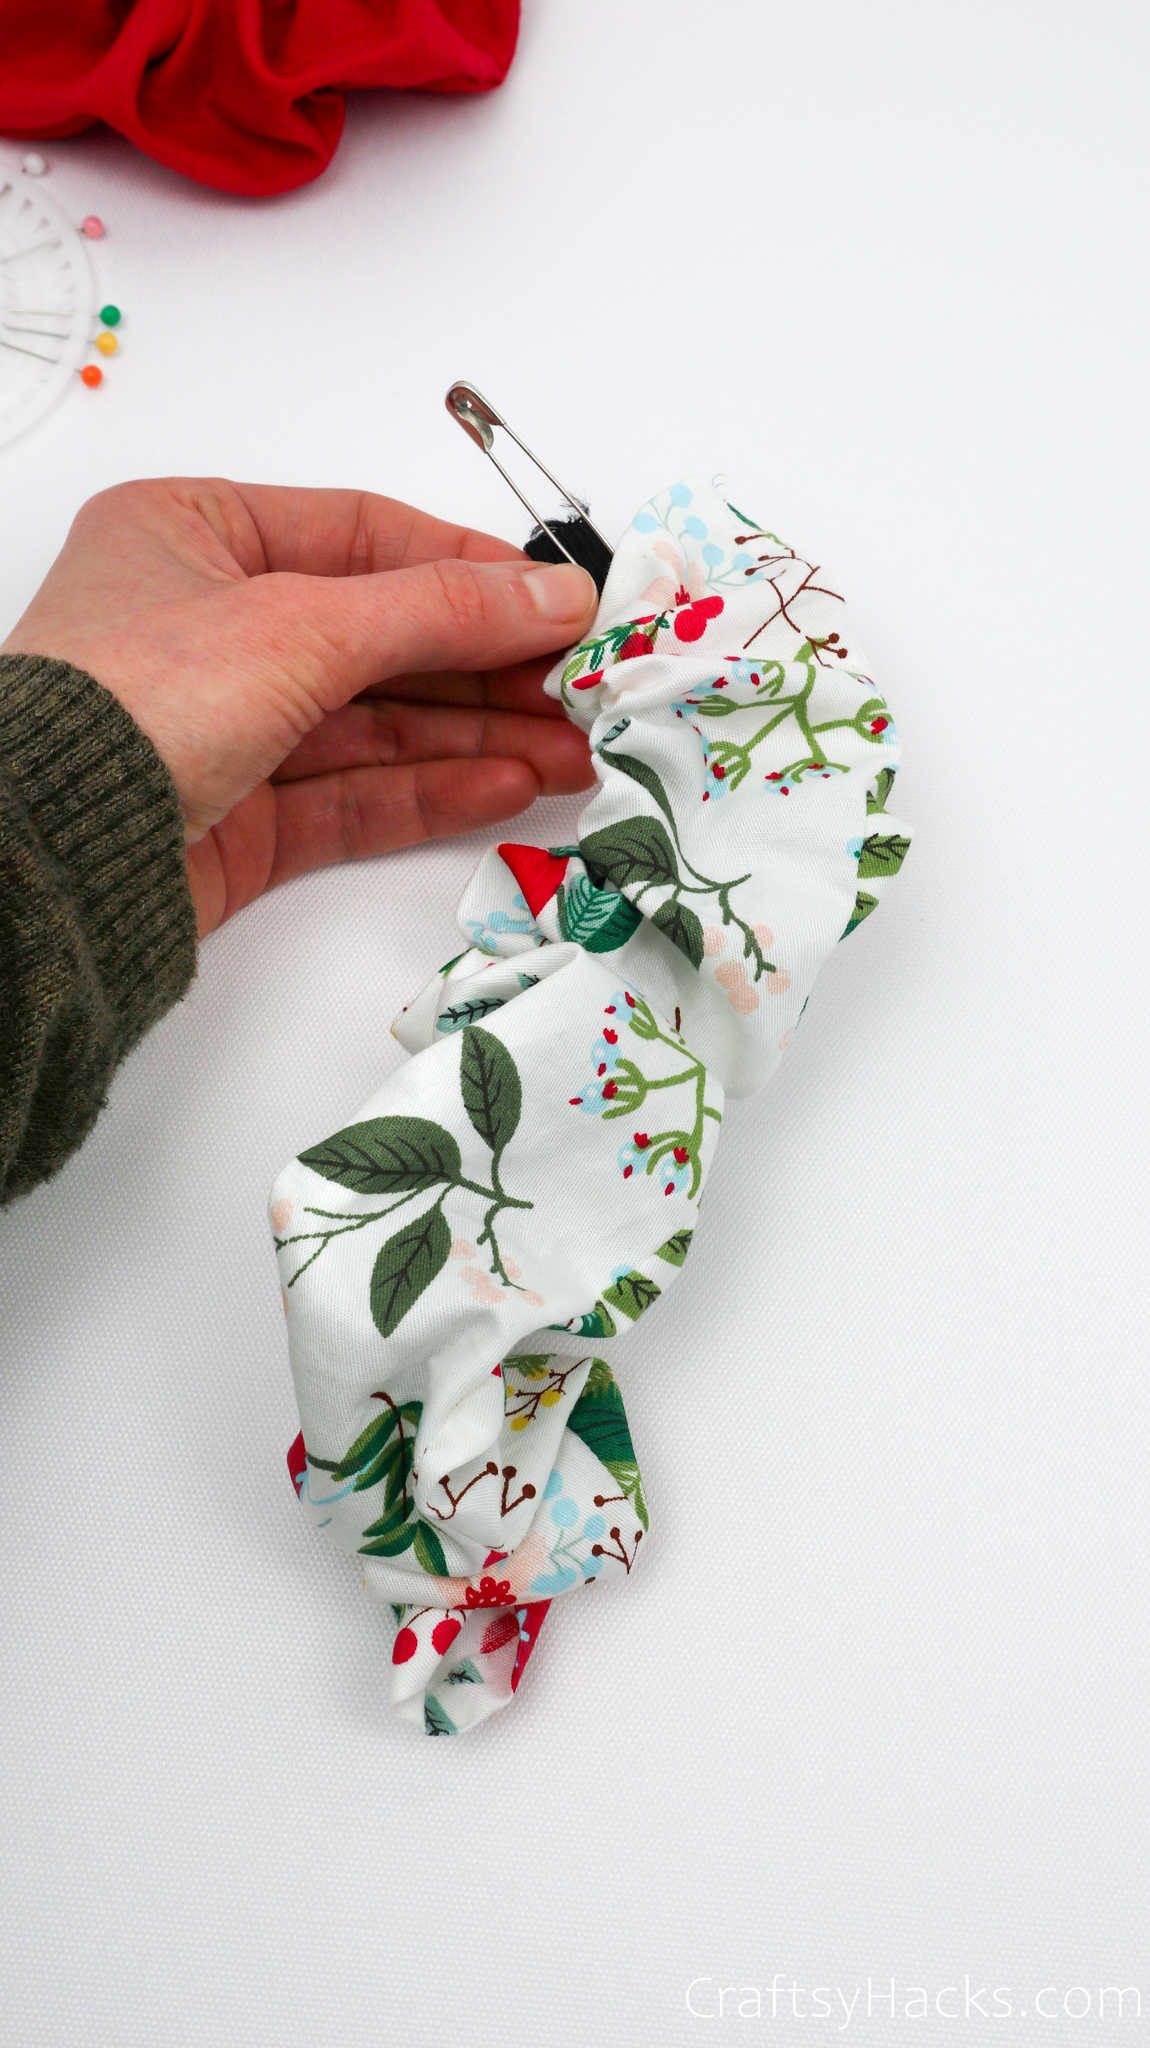
As you maneuver the second safety pin through the folds of the fabric, you’ll also be ‘scrunching’ it as the elastic stretches.
When you’ve bought the safety pin out through the other end, and consequently the elastic band, remove both the pins.

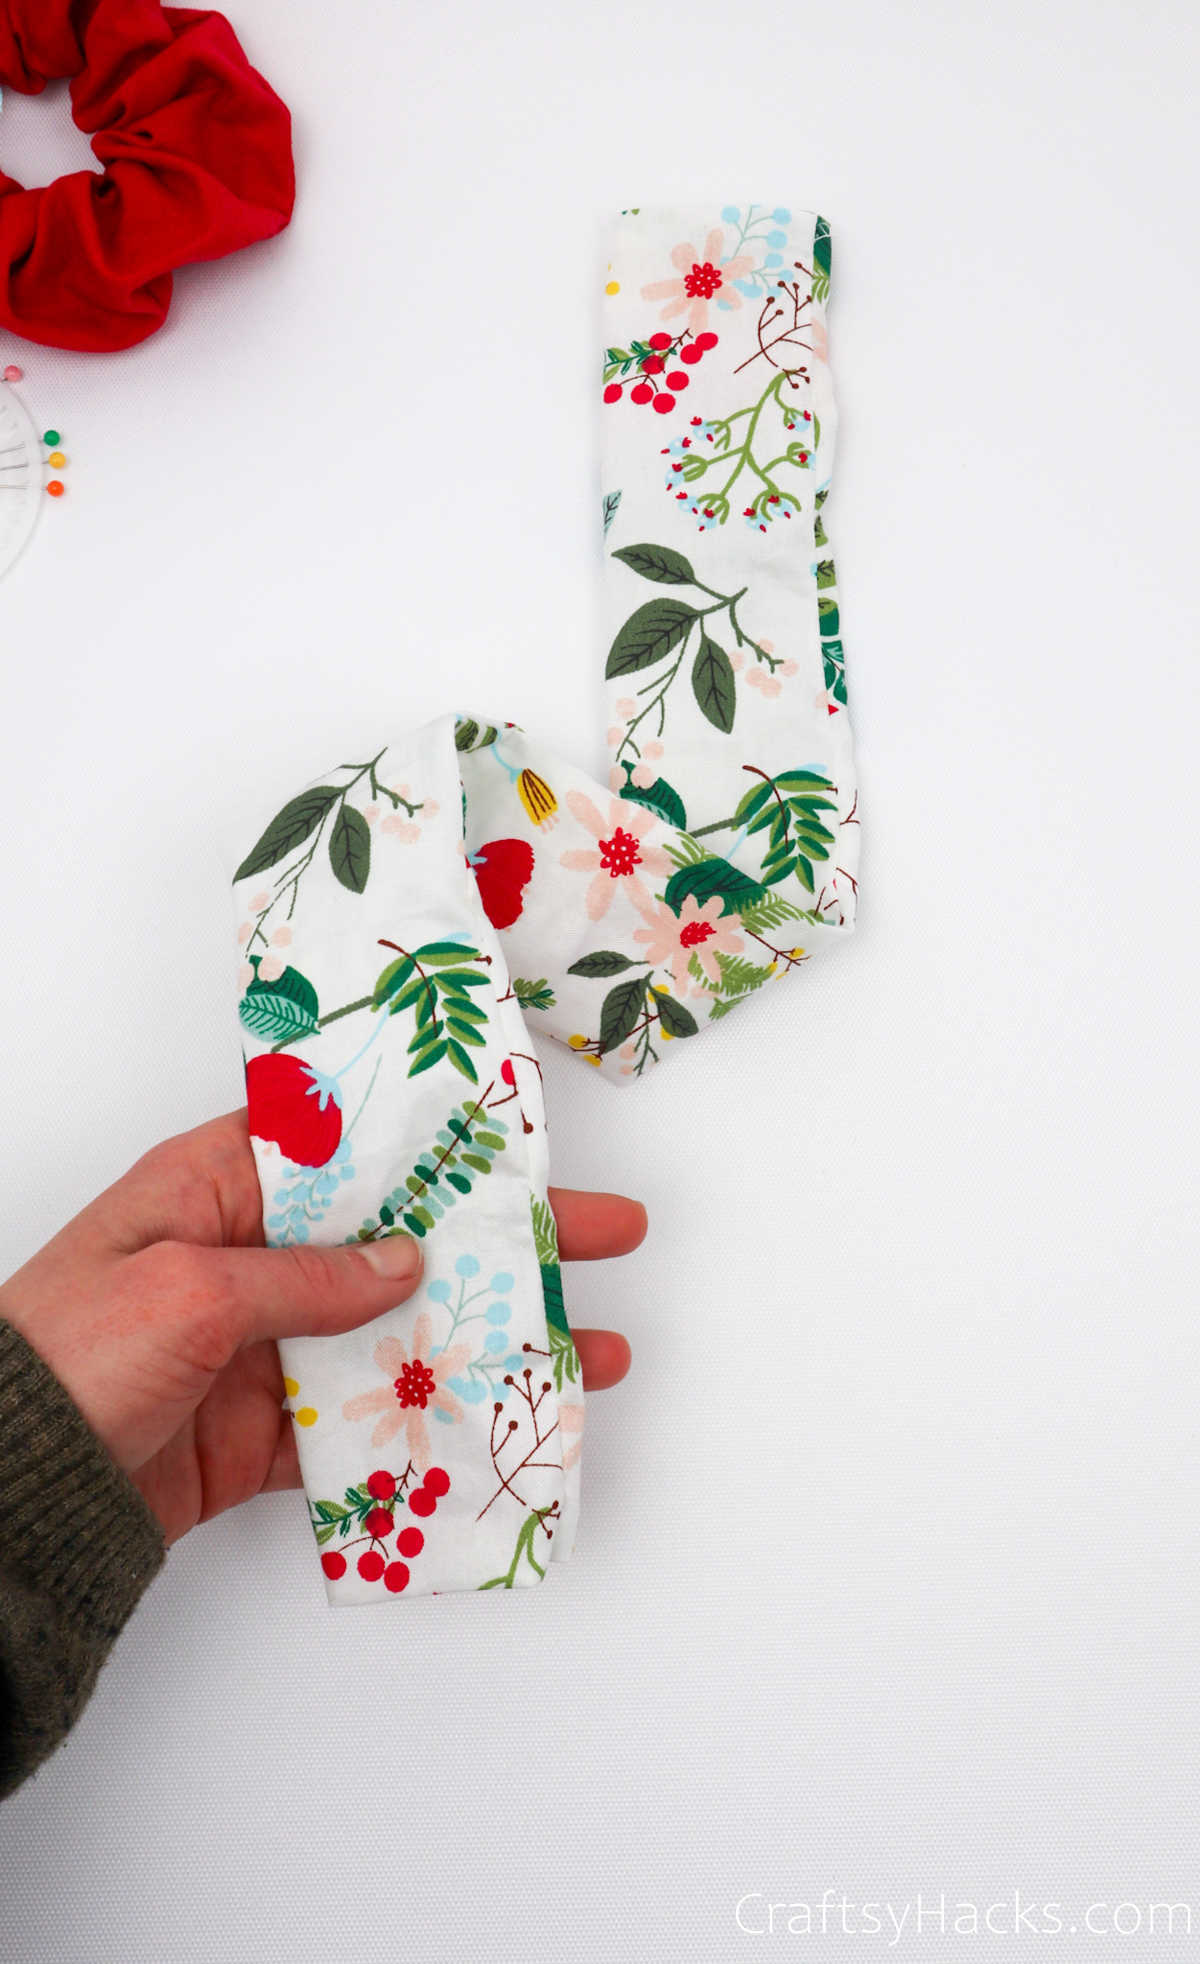
Secure the elastic in place with a pin so it doesn’t snap back or release the fabric.

Step 7
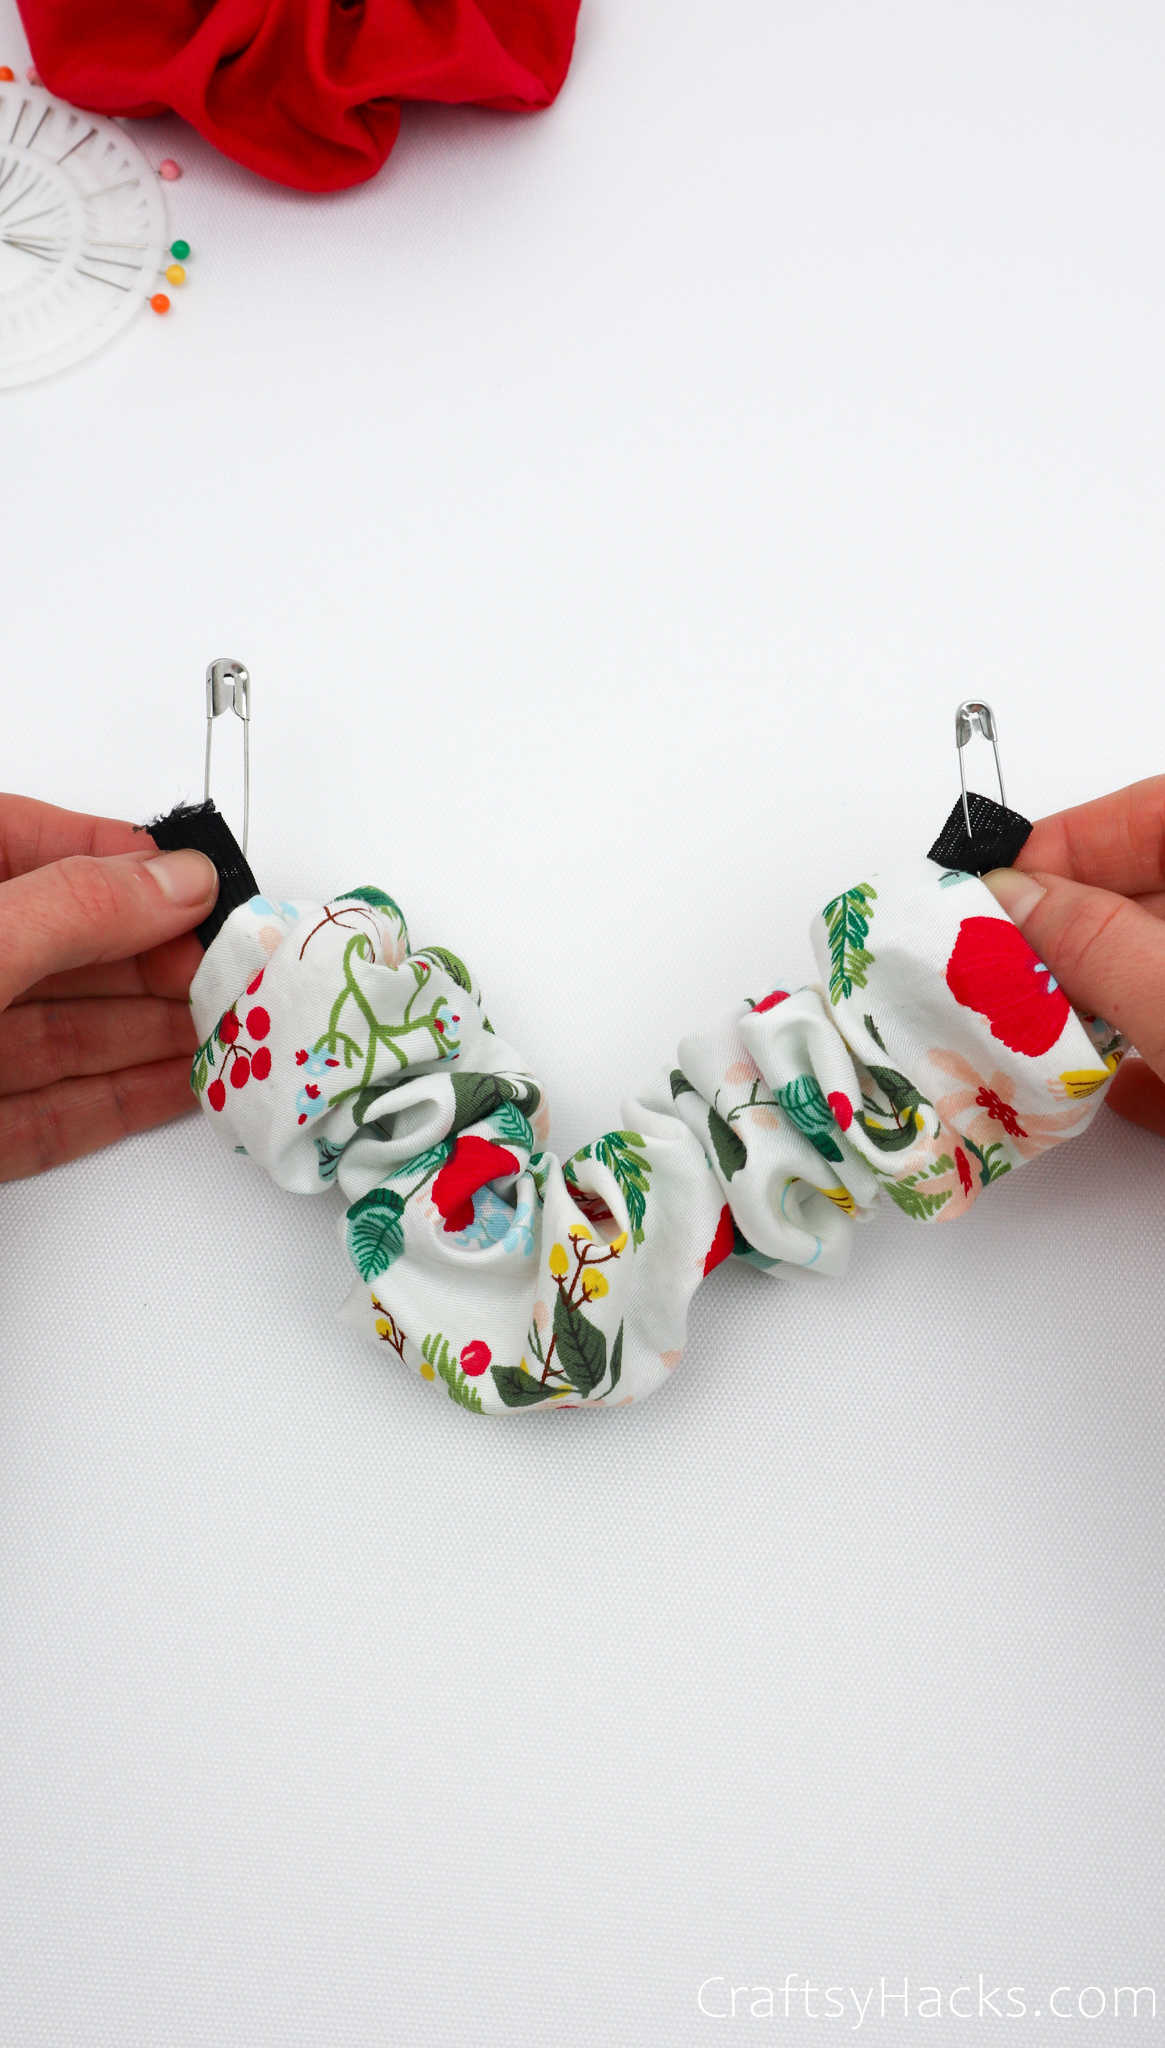
Now it’s time to attach both ends of the elastic band together. You can either knot it together and secure a firm knot, or, to be extra careful, you can just sew the ends together.
If you knotted the elastic, grab a pair of scissors and snip off the excess bits.

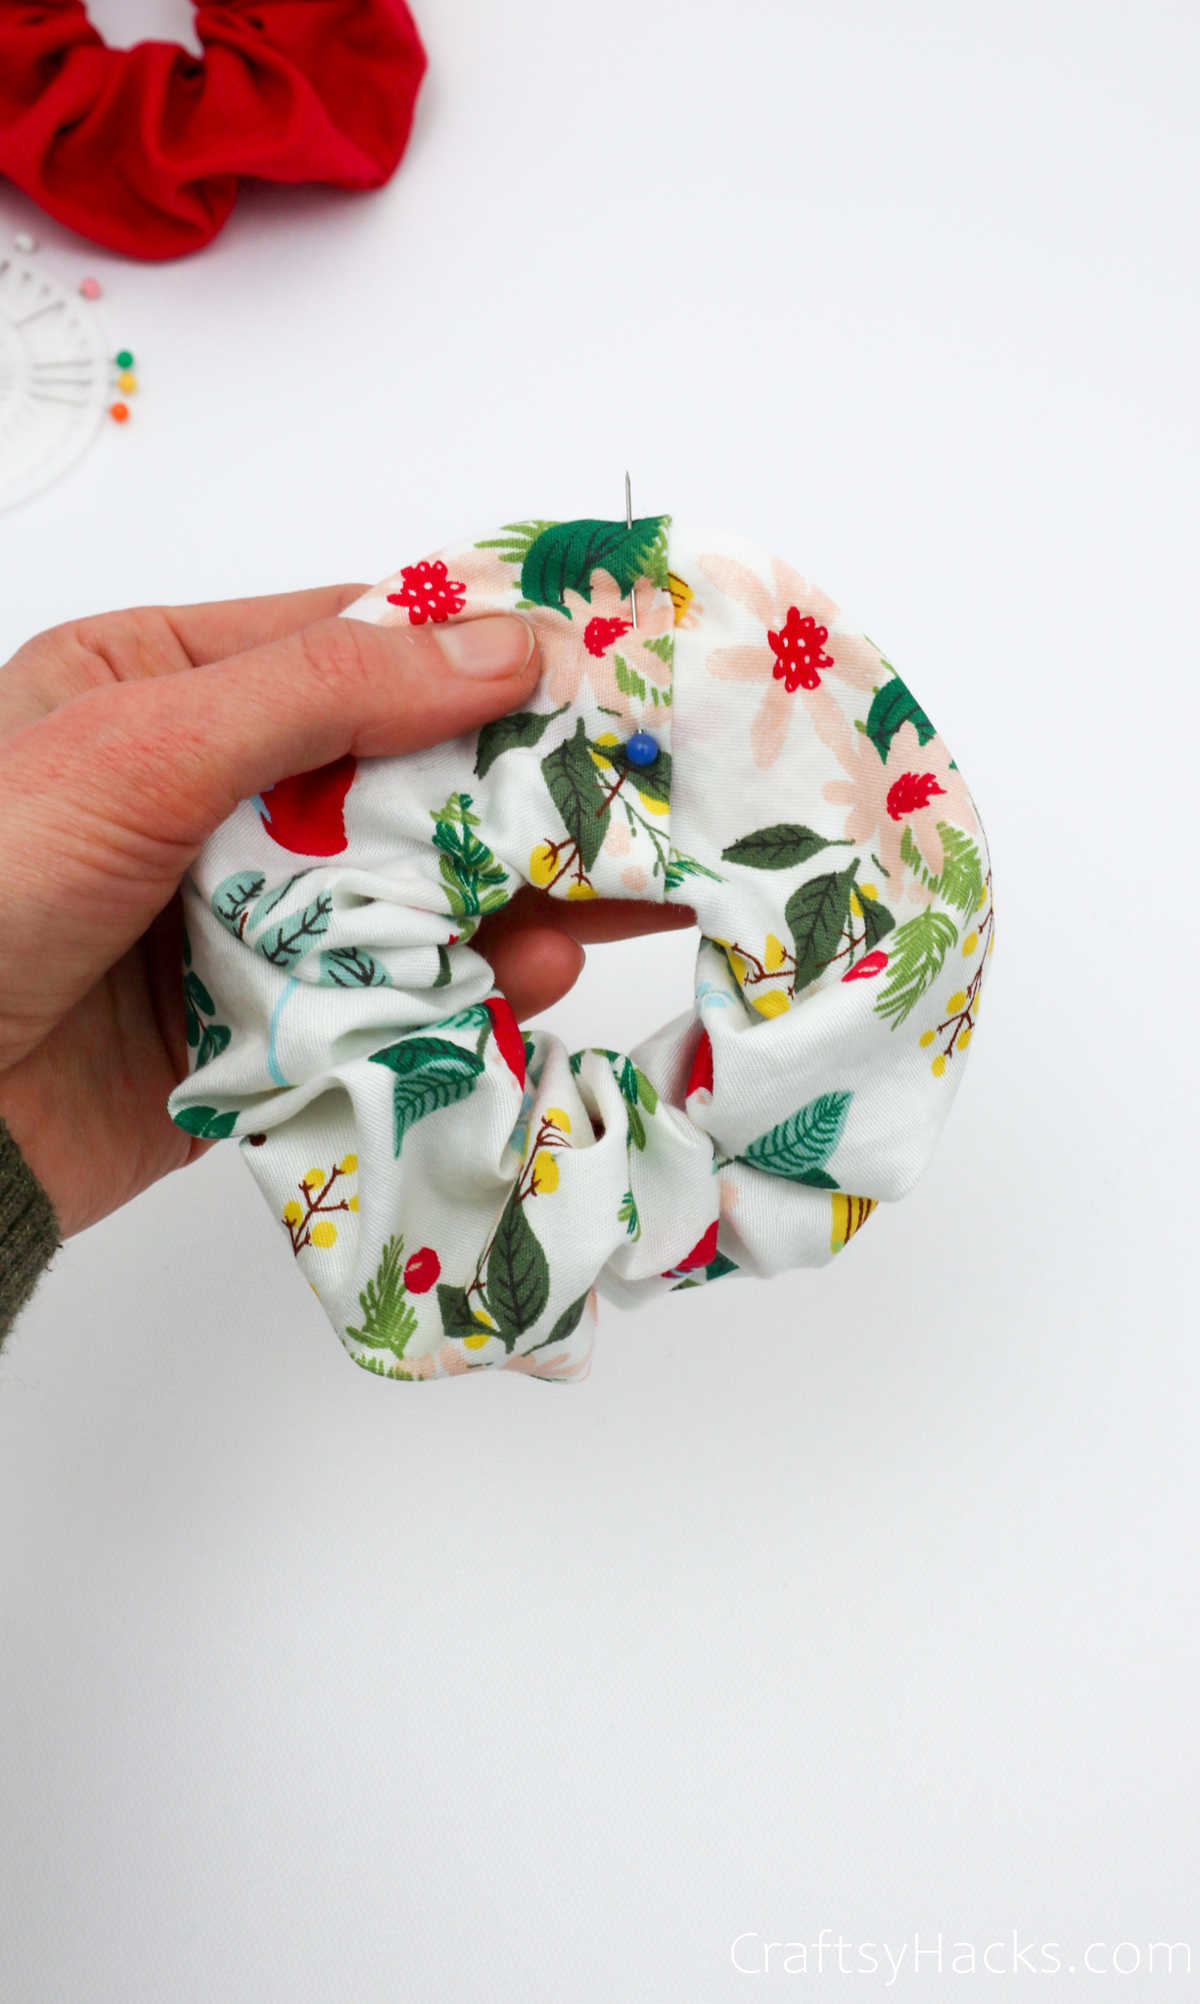
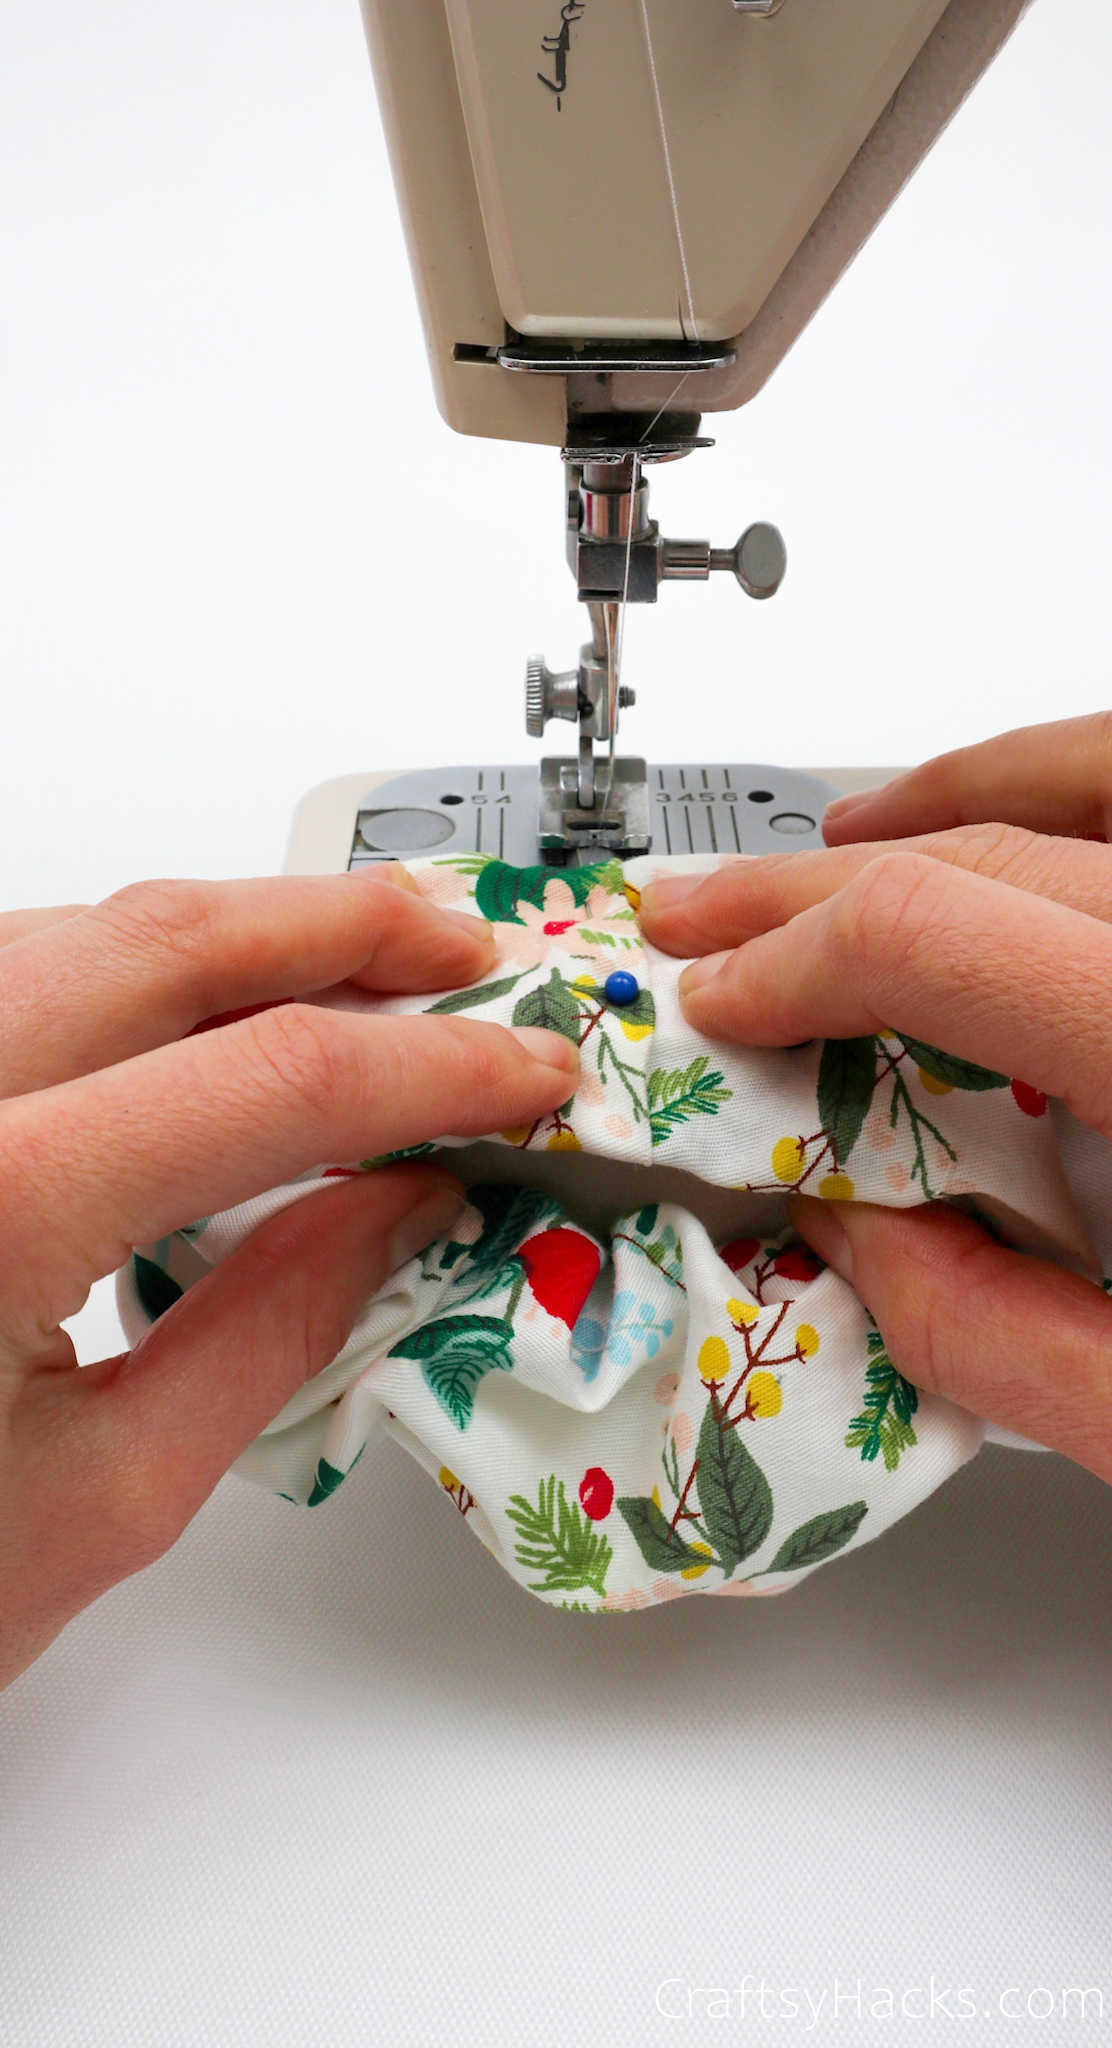
Step 8
Finally, you’re going to pull the ends of the fabric together and pin them in place.
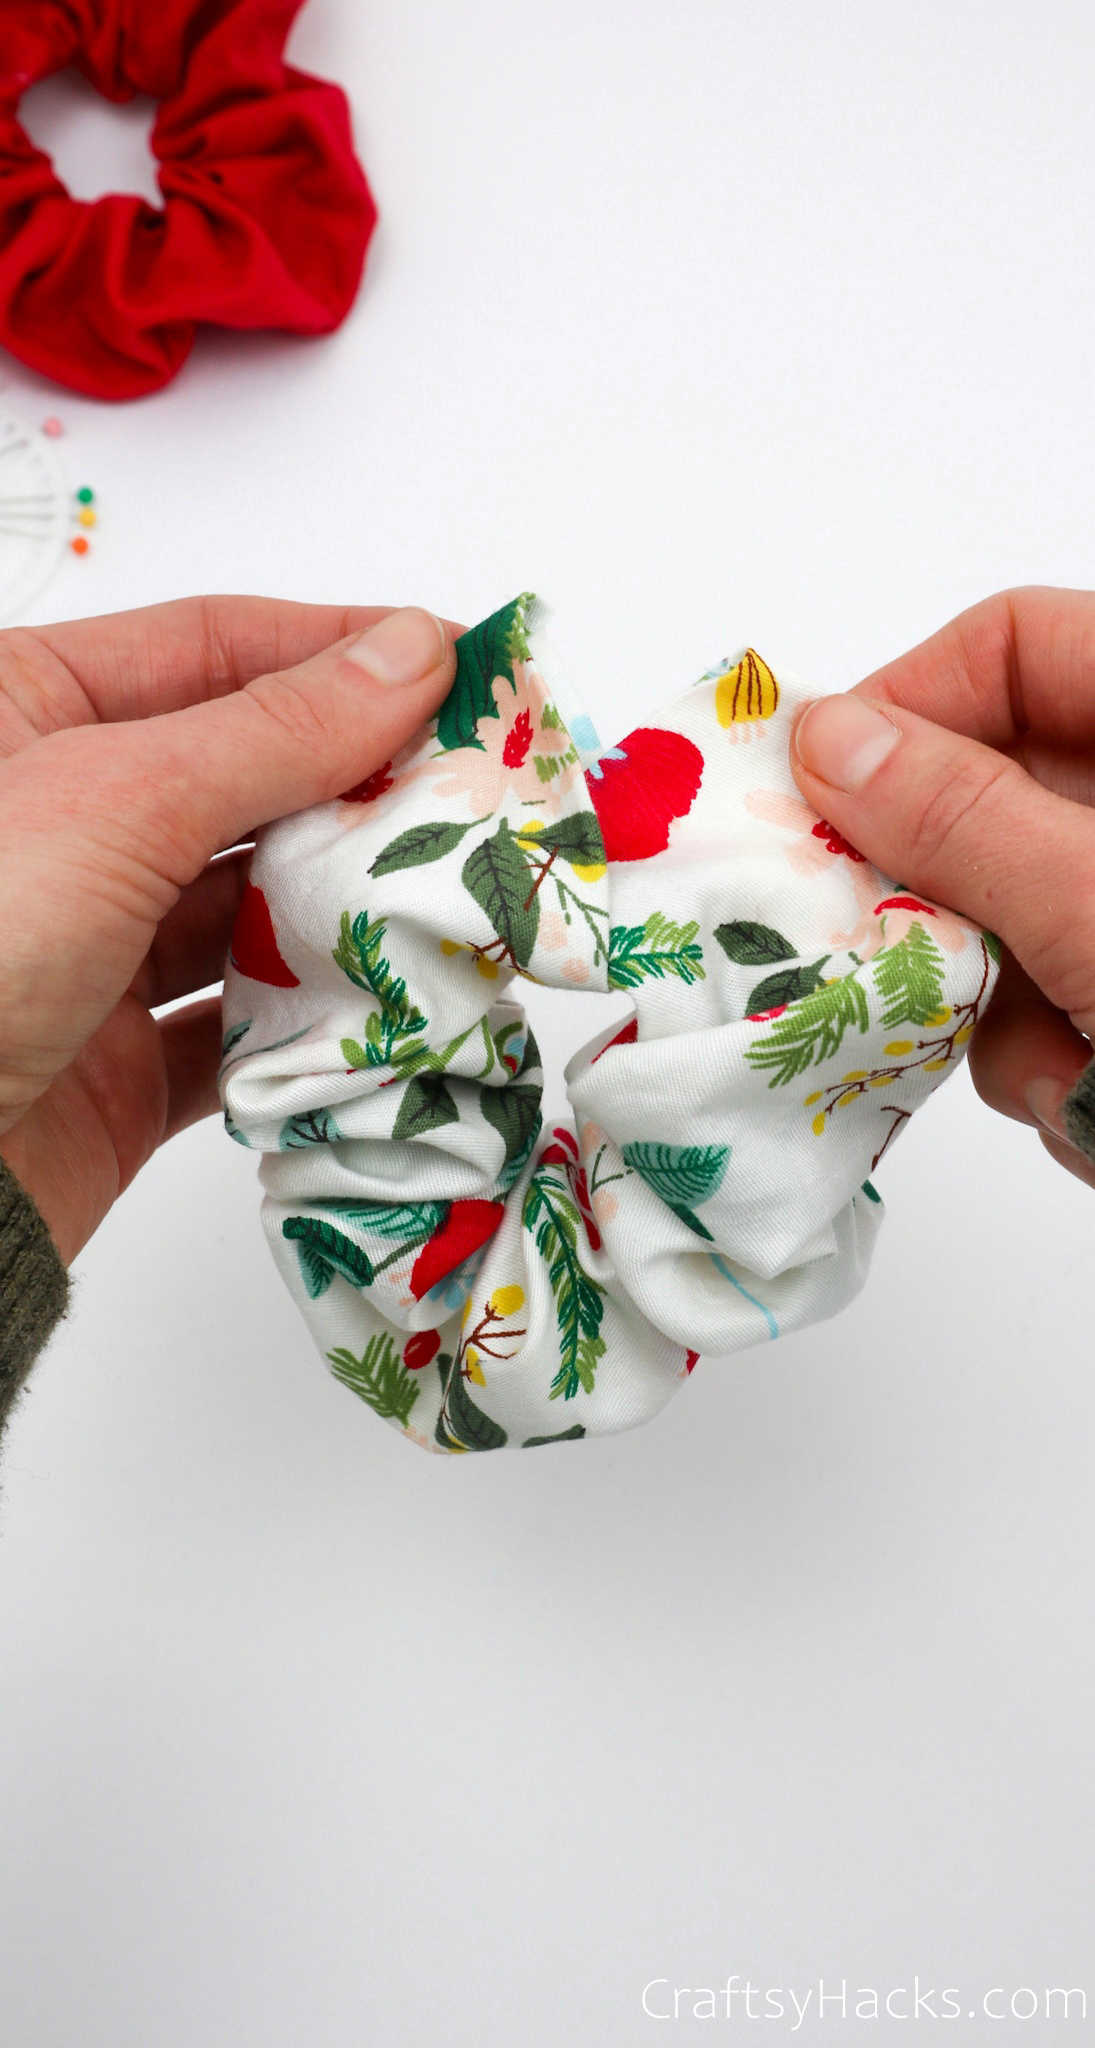

Make sure that they are folded or lined up neatly before you pin them; it will make it easier to sew the ends shut, and it will look better when you’ve finished.
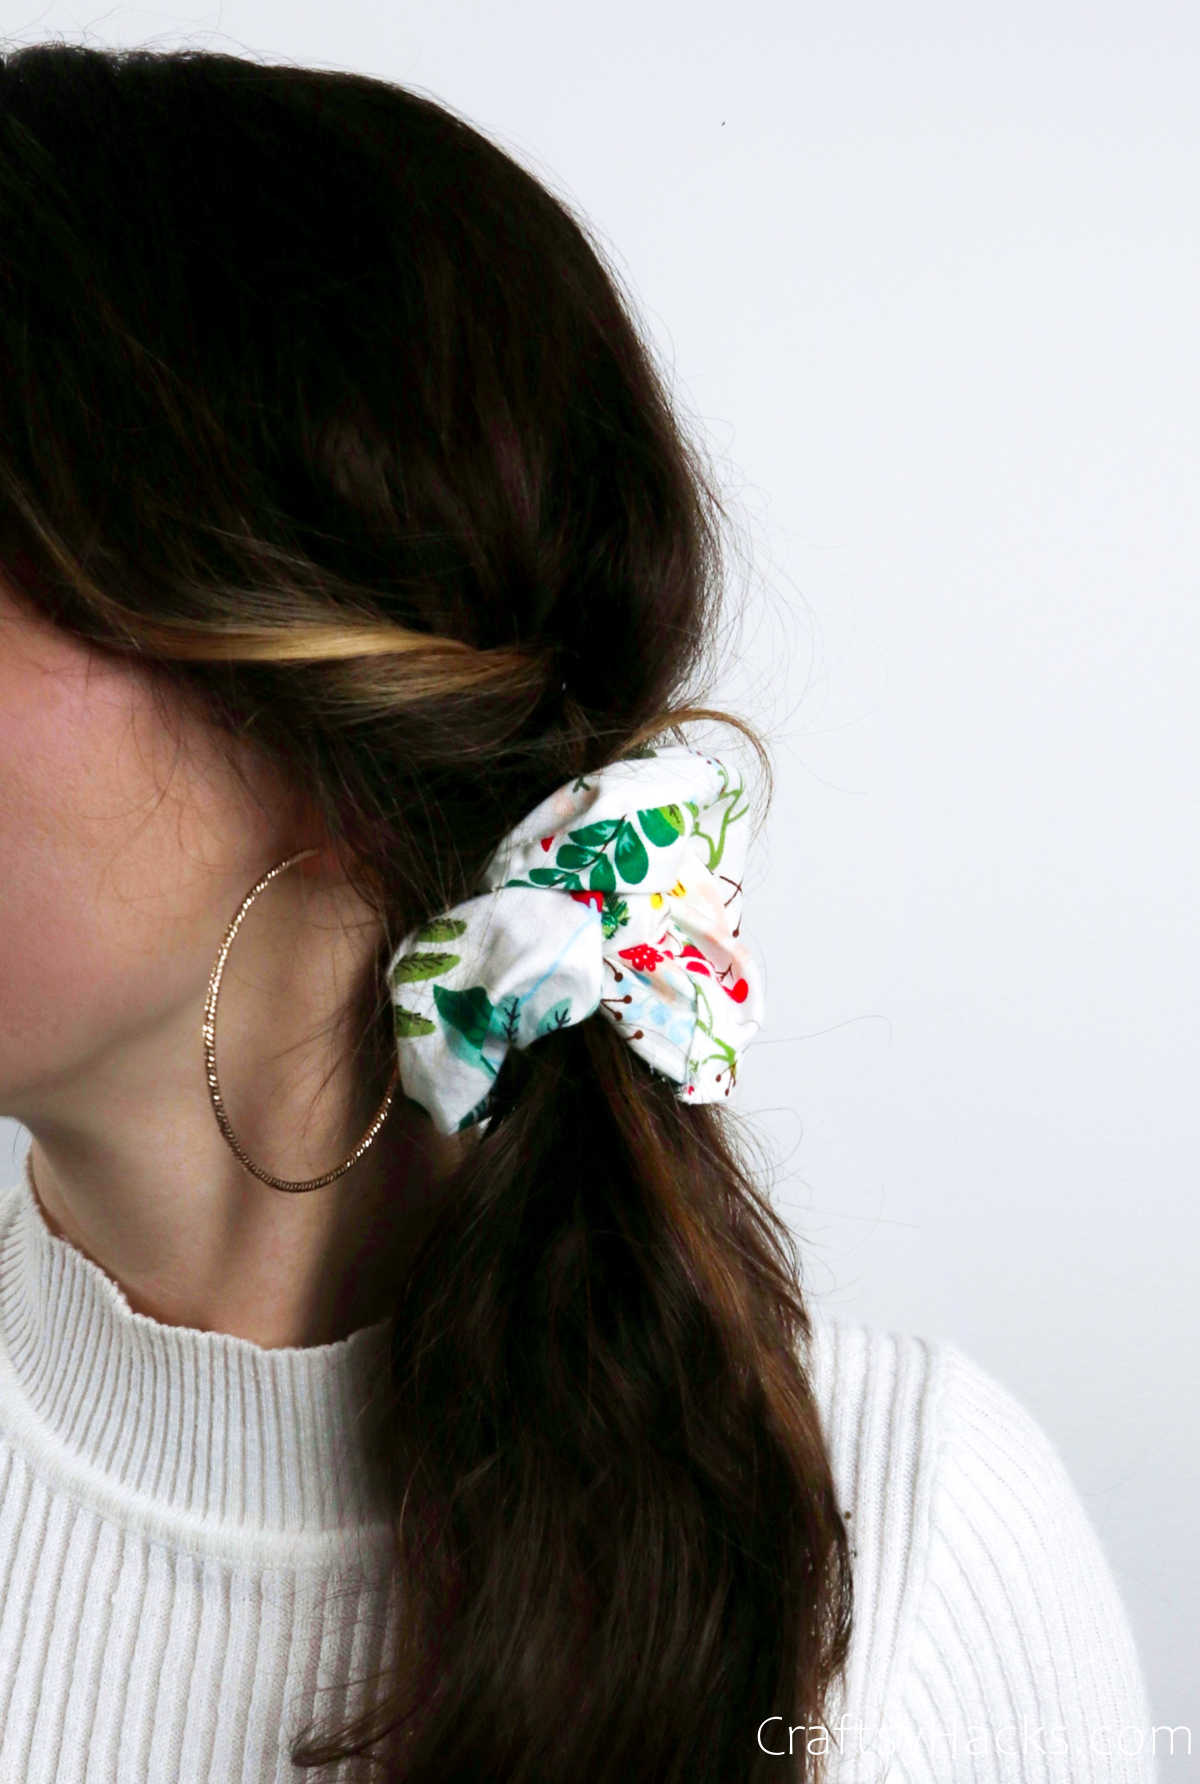
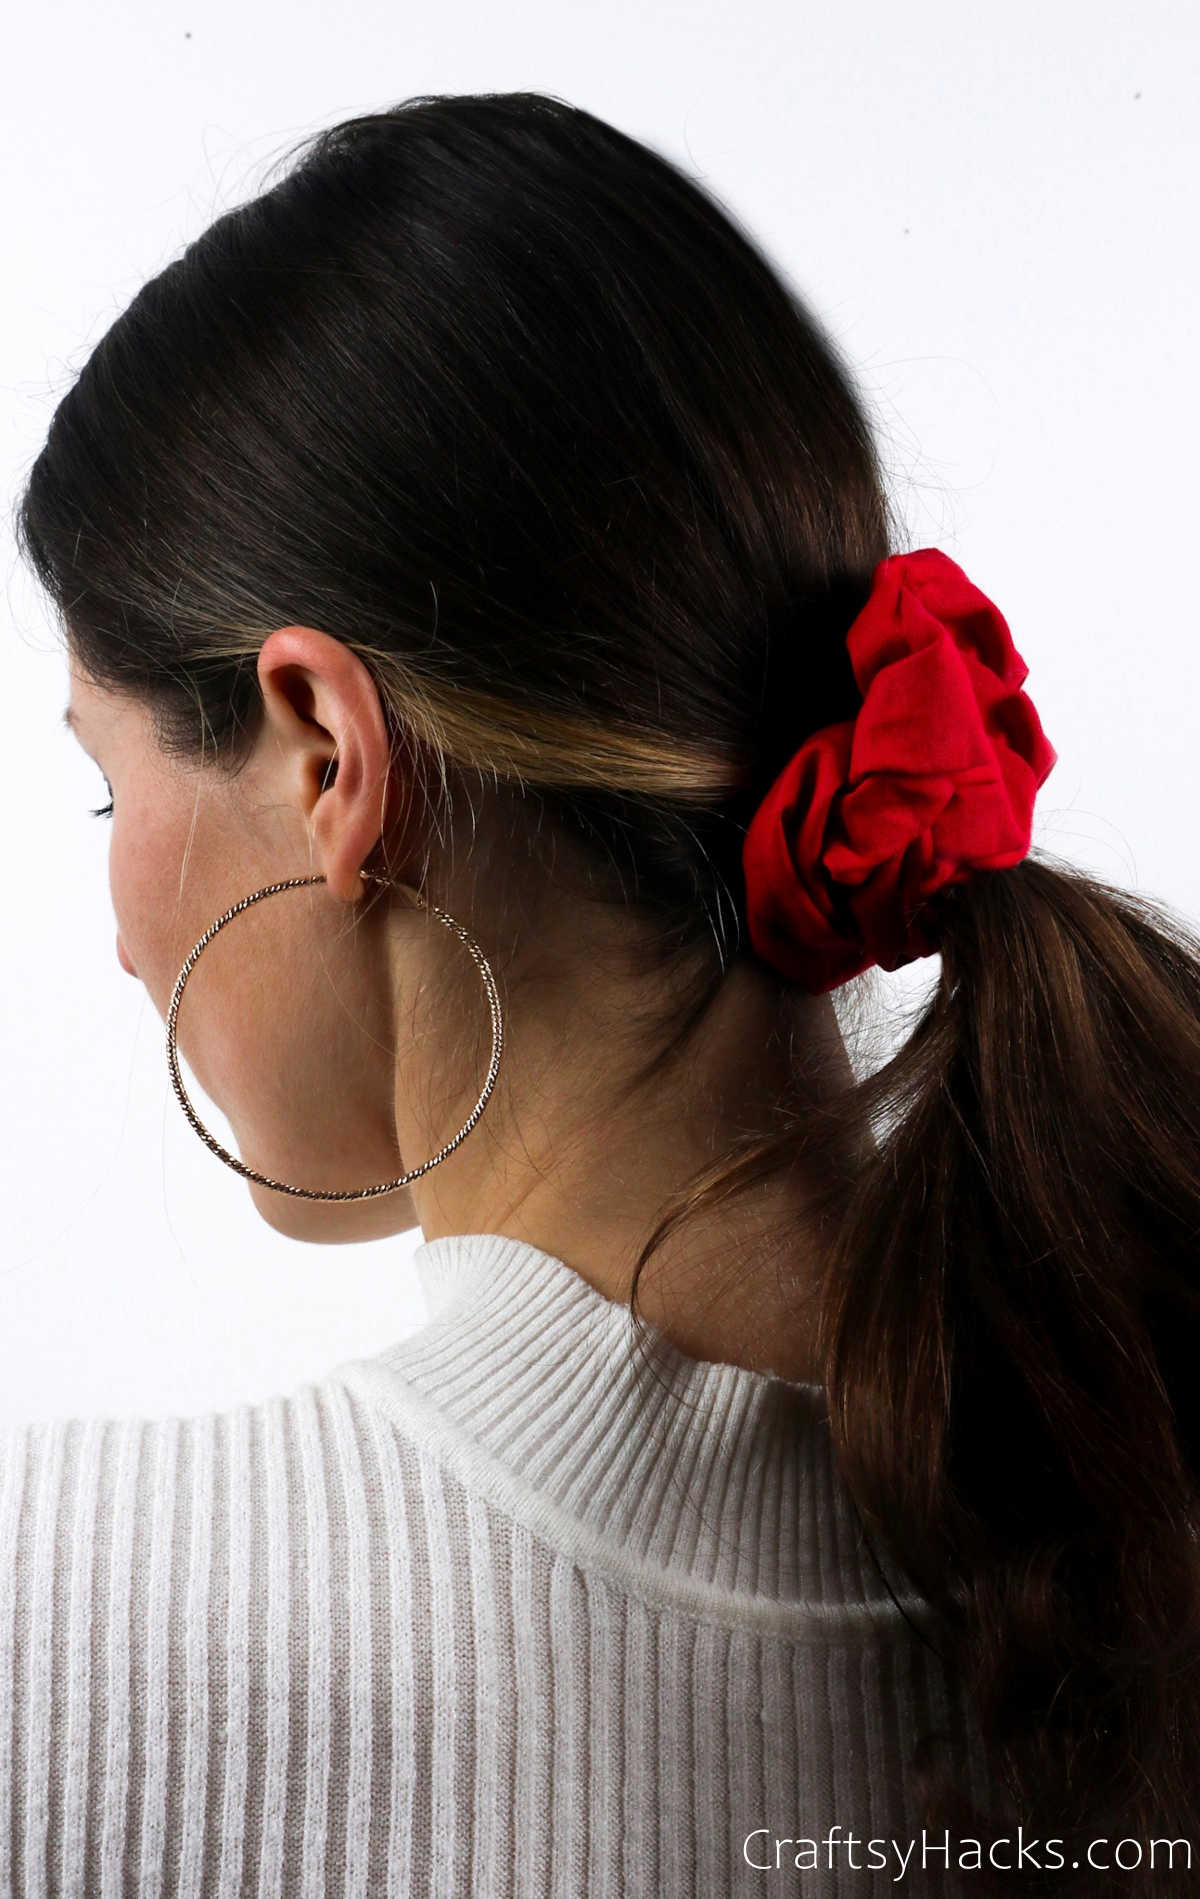
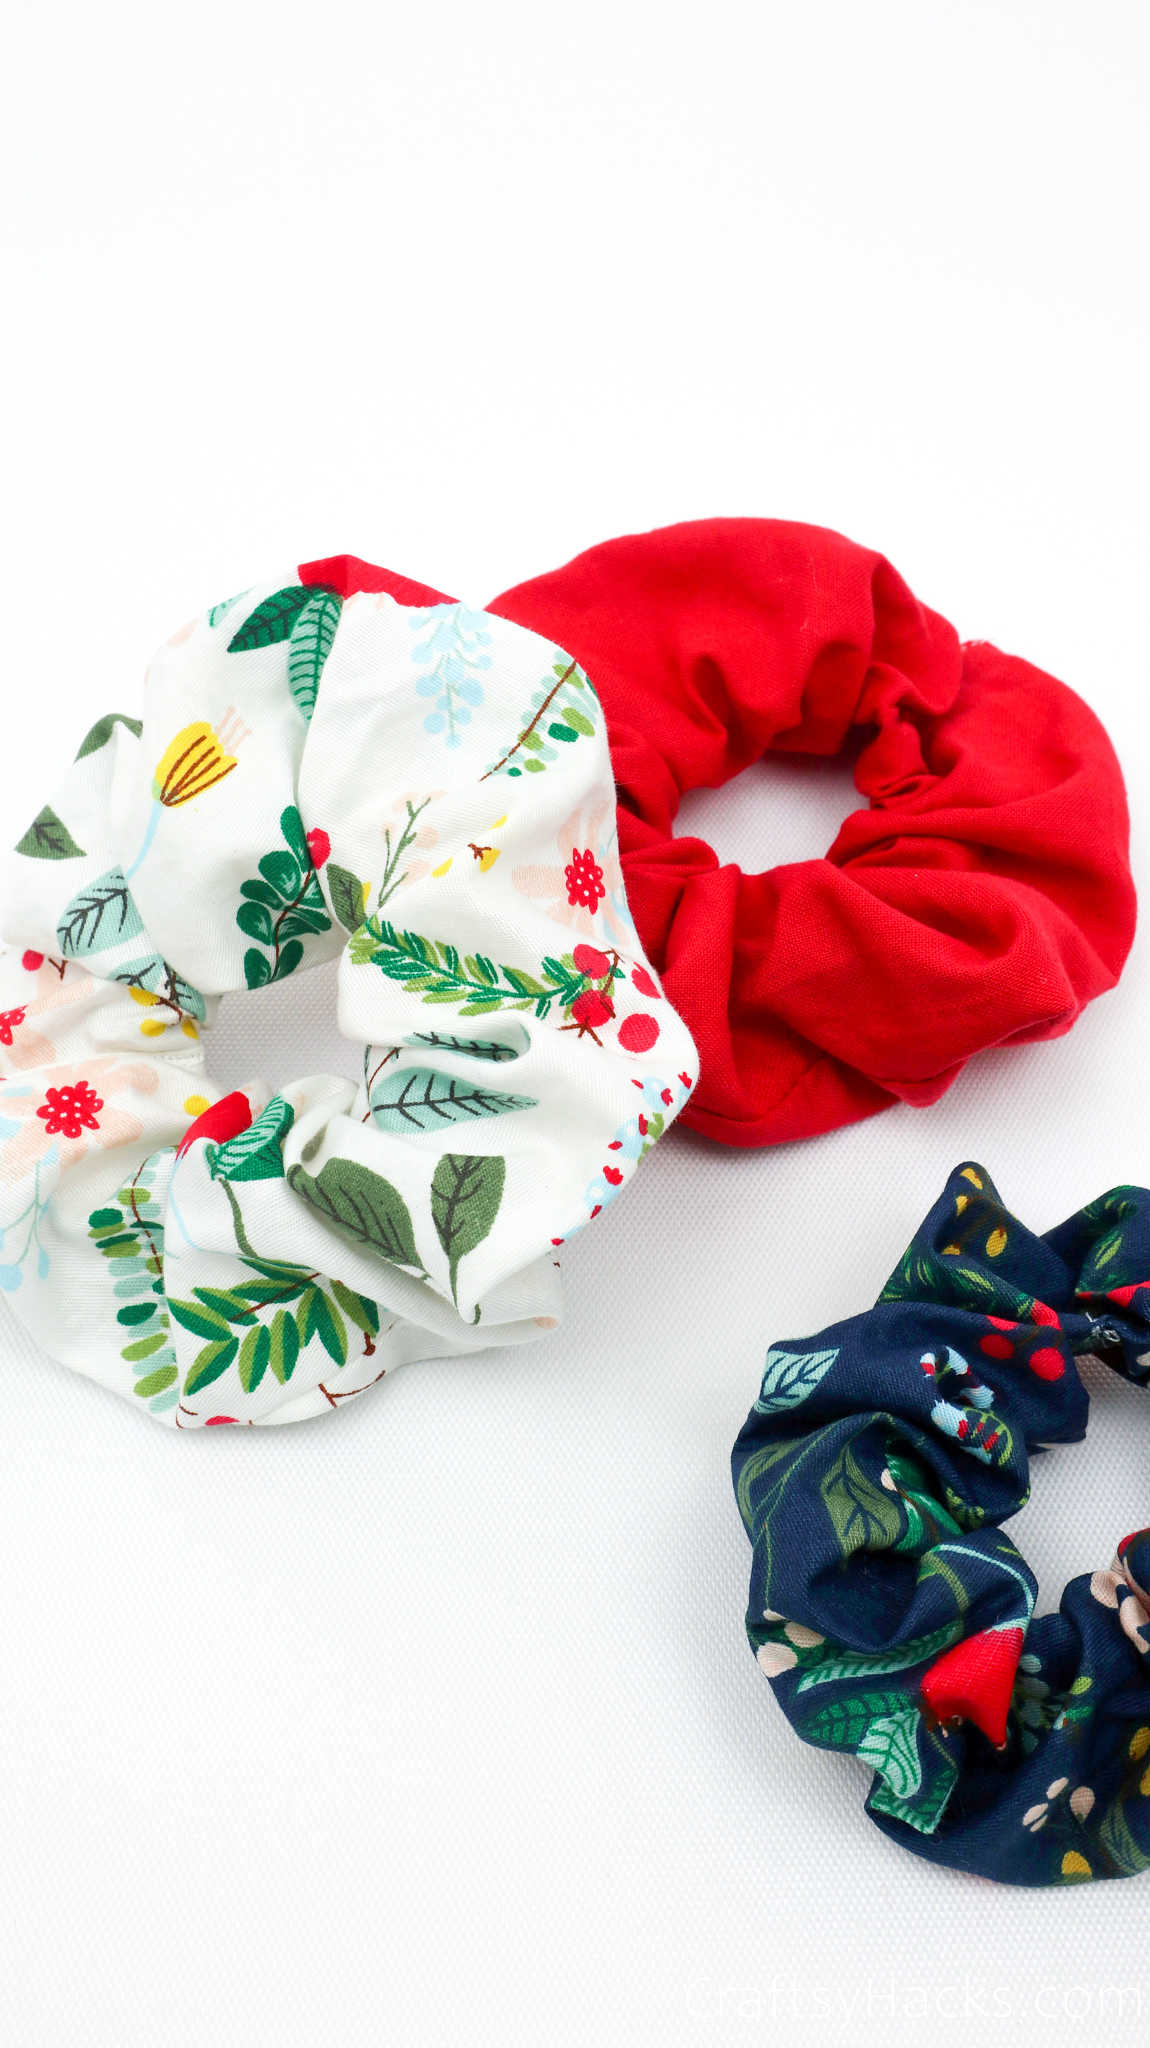
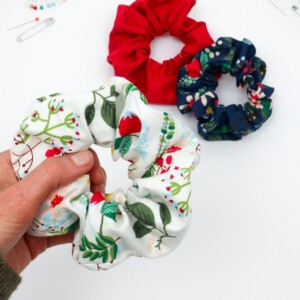
And, there you go! Just look at your fabulous scrunchie. I can already tell that you’re going to be making scrunchies by the dozen!
Watch Full Video: DIY Scrunchies
If you’re more a visual learner, check out the full tutorial on how to make these scrunchies right here.
What is the Best Material to Make Scrunchies?
Well, while you can make scrunchies out of most fabrics, the best fabric to use would be silk, satin or velvet. Why? Well, silk or satin scrunchies will not tug at your hair and pull out the strands. They’re softer and will slide off easily.
But, that being said, cotton is also a great fabric to make scrunchies from. It’s much easier to handle than silk, so it’s a popular choice for beginners.
How to Make Different Sized Scrunchies?
Scrunchies are not universally sized. Factors that determine the size of your scrunchie can include:
- Thickness of hair
- How many twists you prefer to make
- The number of ruffles in your scrunchie
Depending on all those factors, the size of your scrunchie will vary. A rule of thumb commonly applied is this: if it sits snugly on your wrists, then it’s going to be comfortable in your hair.
But, to be a little more precise, here are seven different sizes that you can sew your scrunchies and the length of fabric/elastic you’ll need for each of them:
- Skinny: 18″ x 3″ (46 x 8 cm)/ 6″ (15 cm)
- Regular: 18″ x 4″ (46 x 10 cm)/6″ (15 cm)
- Fluffy: 18″ x 5″ (46 x 13 cm)/ 6″ (15 cm)
- Super Fluffy : 20″ x 5″ (51 x 13 cm)/ 7″ (18 cm)
- Kid-Sized: 14″ x 3″ (36 x 8 cm)/ 5″ (13 cm)
- Jumbo: 35″ x 5″ (89 x 13 cm)/15″ (38 cm)
- Thick Hair Regular: 20″ x 4″ (51 x 10 cm)/ 8″ (20 cm)
Other Crafts to Make
- 41 Rock Painting Ideas
- 37 Yarn Projects
- How to Make Hair Bows
- 47 Upcycling Ideas
- DIY Bracelet Out of Shoelaces
- 37 DIY T-shirt Ideas
- 47 Sewing Gifts
- 37 Brilliant Crafts to Make and Sell
- Crafts for Girls
- 47 Easy Sewing Projects
How to Make a Scrunchie (Step-by-Step)
Video Tutorial
Equipment
- Sewing pins
- 2x safety pins
- Scissors
- Sewing machine (optional)
Materials
- Fabric 5″ x 24″
- 8 ” elastic ribbon
Instructions
- Assemble all the supplies you’ll need for this project.
- Lay the fabric on your work surface with the right side facing down.
- Fold the edge of the fabric about a centimeter to create a seam allowance and pin it in place. Repeat this for the opposite end as well.
- Using a sewing machine or a needle and thread, sew the ends you just pinned.
- Turn the scrunchie out so that the right side is now facing out.
- Grab some elastic and attach one end of it to a safety pin. Then, pin the safety pin to the edge of one of the openings in the fabric.
- Next, attach the other end of the elastic to another safety pin. Use the first safety pin you attached to the fabric as an anchor of sorts. Now, pull the other safety pin through the opening and out through the other opening.
- The elastic is now looped through the fabric so pin the ends together to prevent them from snapping back. You’ll see that the fabric is now ruffled as it stretches over the elastic.
- Next, either sew both ends of the elastic together or knot them together before snipping the extra bits off.
- Then, pull the ends of the fabric together. Fold them and line them up so that they overlap neatly over each other and the elastic is hidden.
- Finally, sew the ends of the fabric together and voila, your scrunchie is ready!


