DIY Salt Dough Ornaments to Make with Kids
This post may contain affiliate links: full affiliate disclosure.

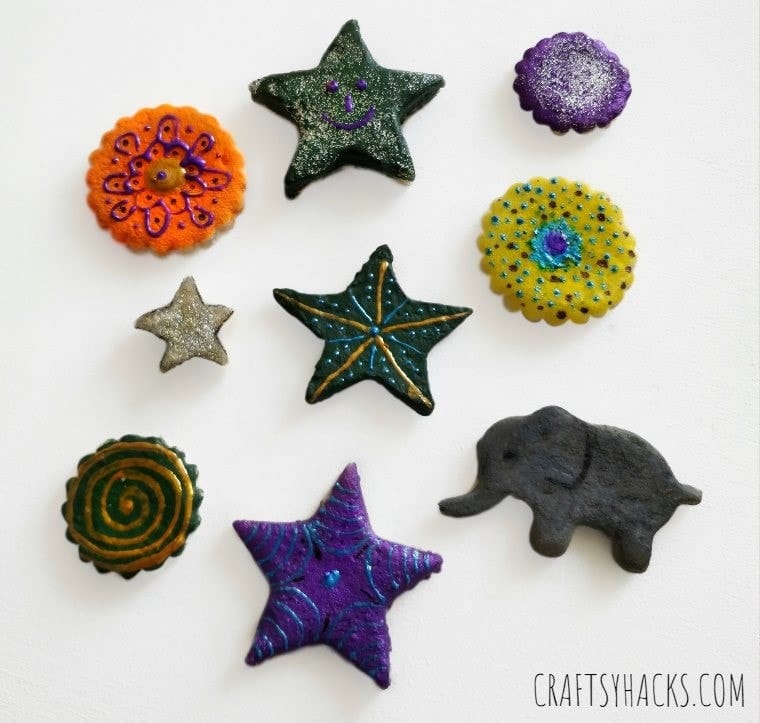
DIY salt dough ornaments are fun to make with the kids. It’s a creative craft that can be transformed into anything you want.
Are you one of those parents who find themselves busiest during the weekends or on school breaks? It’s not because you have so much more to do, but because you are continually finding ways to keep the kids engaged.
If this sounds like you, here’s a thought: arts and crafts are a brilliant way to engage your kids with fun-filled activities that enhance their skills. It keeps them engaged, allowing you to get some time to do other tasks at home finally.
Start with these DIY salt dough ornaments. They’re one of the most uncomplicated DIY projects which kids can pretty much do on their own (post the baking stage).
This project will enhance your child’s creative mind, and the beautiful finished products make as great decors for their rooms.
Learn how to make this craft, get the kids to do it, and win yourself some free time. Win-win!
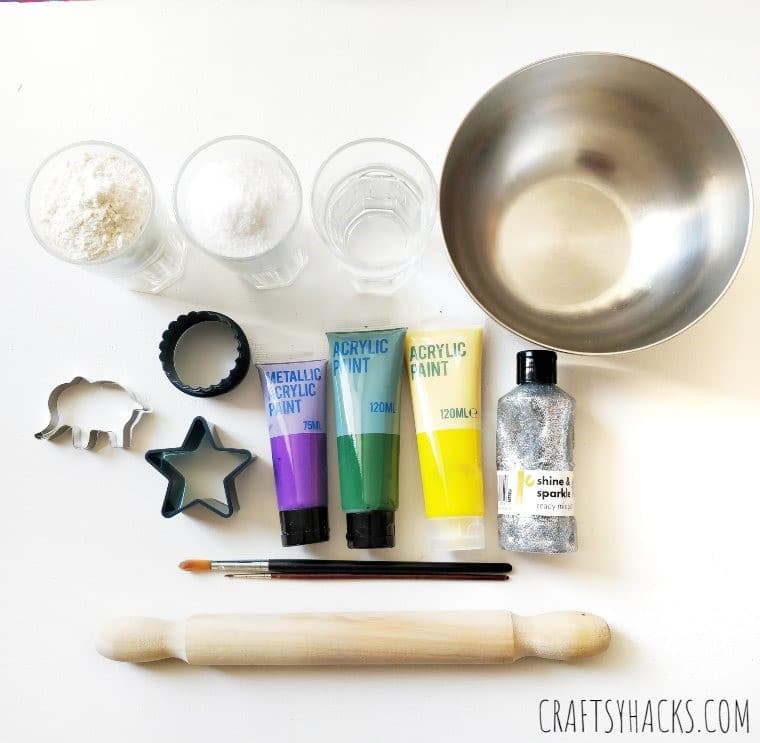
Supplies You’ll Need for Salt Dough Ornaments
1 large glass (250 ml, 9 oz) of all-purpose flour
1 large glass (250 ml, 9 oz) of salt
A cup (230 ml, 8 oz) of warm water
Tools You’ll Need
Baking sheets
Parchment paper
Rolling pin
A bowl
How to Make Salt Dough Ornaments?
Making these salt dough ornaments is the perfect activity for your kids, especially if you want to introduce them to baking, painting, and craft. These ornaments are very easy to create and engage the kids for a long time, making it a fun project for weekends or school breaks.
Once you’ve completed the adult-part of baking the dough, the rest is easy for the kids to do. They should require little to no supervision past the baking stage. Let’s get going and make this craft for toddlers and kids!
STEP 1
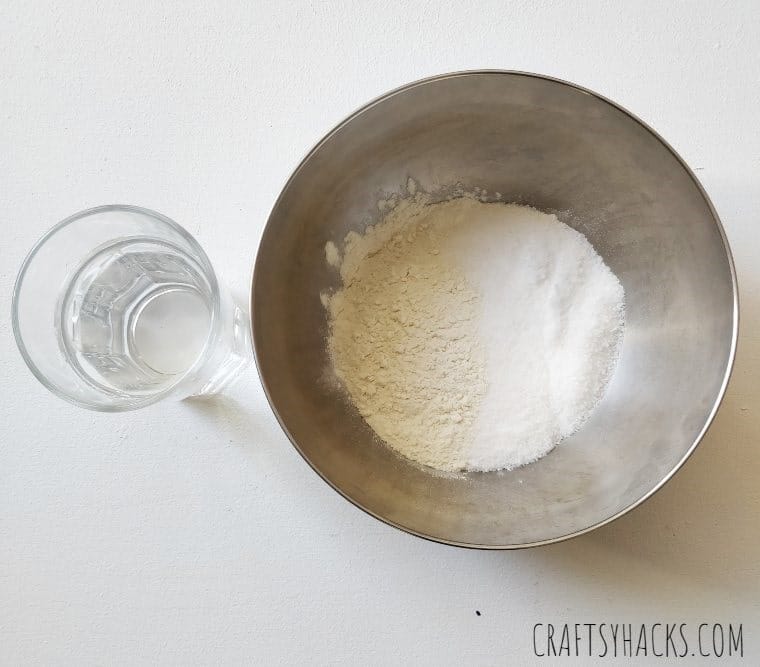
After collecting all the things you need (I’m sure most of them were already available at home), take a big bowl and pour 250 ml of all-purpose flour in it. Follow through with 250 ml of salt.
STEP 2
Add 230 ml of warm water to the bowl to create the dough. Make sure the water is not too hot. You want it to be a warm temperature as warm water makes it easier to knead the dough.
Parent tip: Let your kids do the mixing and pouring of ingredients in. This teaches them about measurements as well as how to follow instructions well.
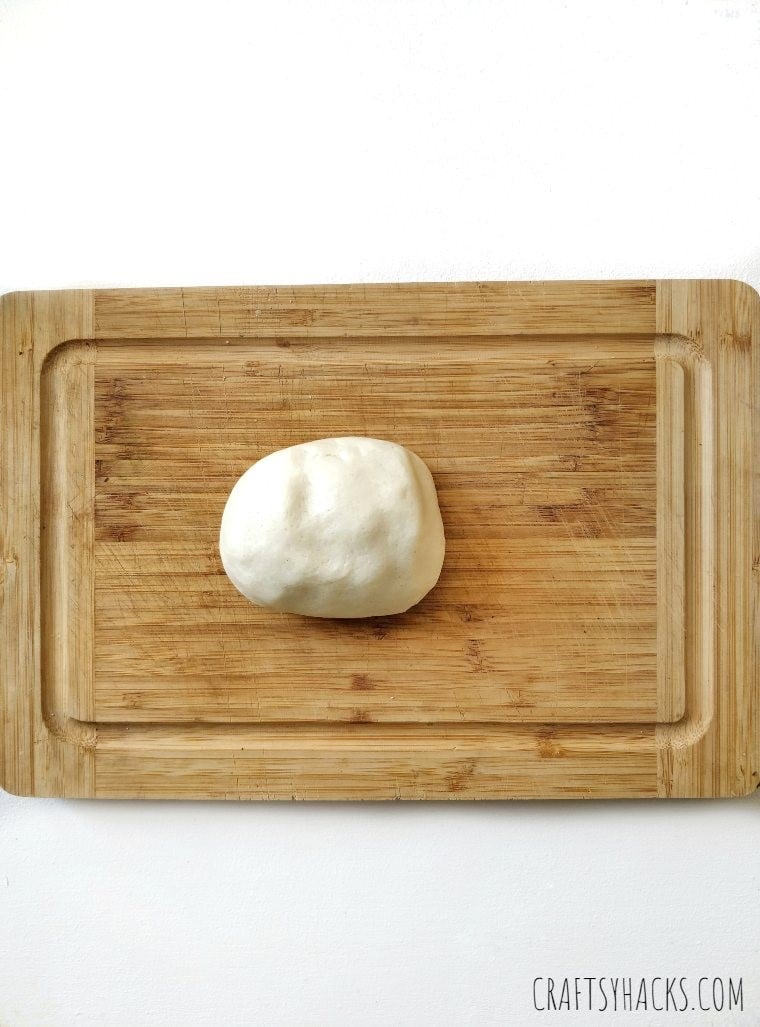
STEP 3
Once the dough is ready, pop it on parchment paper and roll it out. In terms of dough thickness, this is totally up to you.
Craft tip: Thinner dough bakes quicker, but the end product is more fragile and delicate. Thicker dough, on the other hand, takes longer need to bake, but the finished product tends to be more resilient.

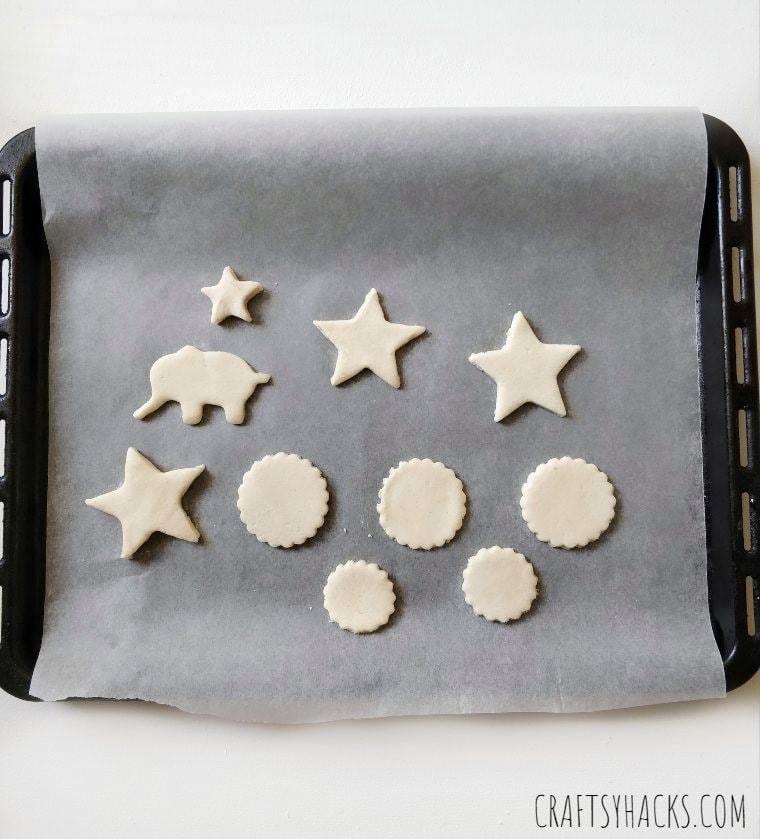
STEP 4
Once you have rolled out, cut the shapes of your choice using a cookie cutter. You can cut as many shapes as you want.
Use parchment paper to line your baking tray and carefully place your cut shapes on this. Bake the shapes in the oven for three hours at 210F (100C) degrees.
Craft tip: If the shapes still seem doughy, allow it to bake for some more time. If the dough is still not firm enough, let it dry in the sun for a day before you paint on them, as any moisture will ruin the ornaments.
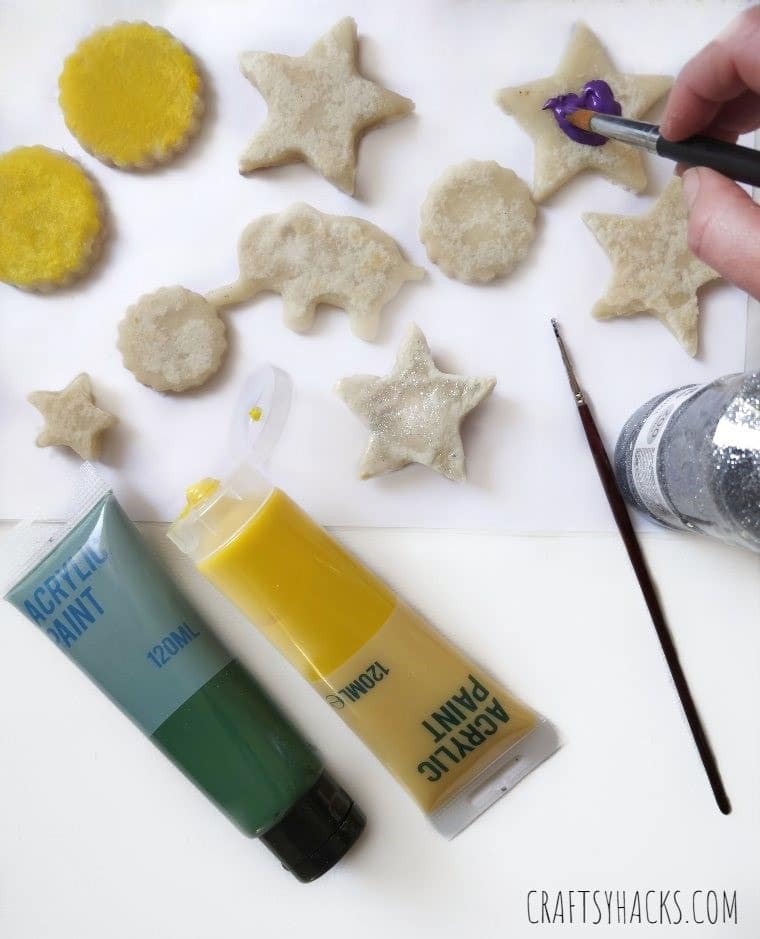
STEP 5
Once the shapes are adequately baked (they should be firm enough and not doughy), allow them to cool before you start painting them.
You can use acrylic paint or oil paint. However, if you are using oil paint, it might take 2-3 days to dry out.
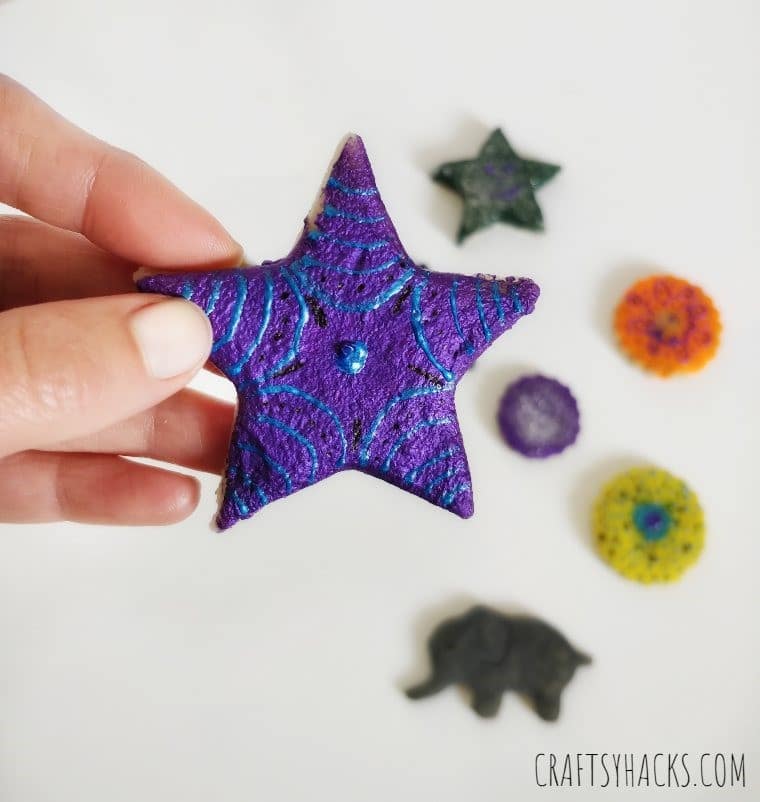
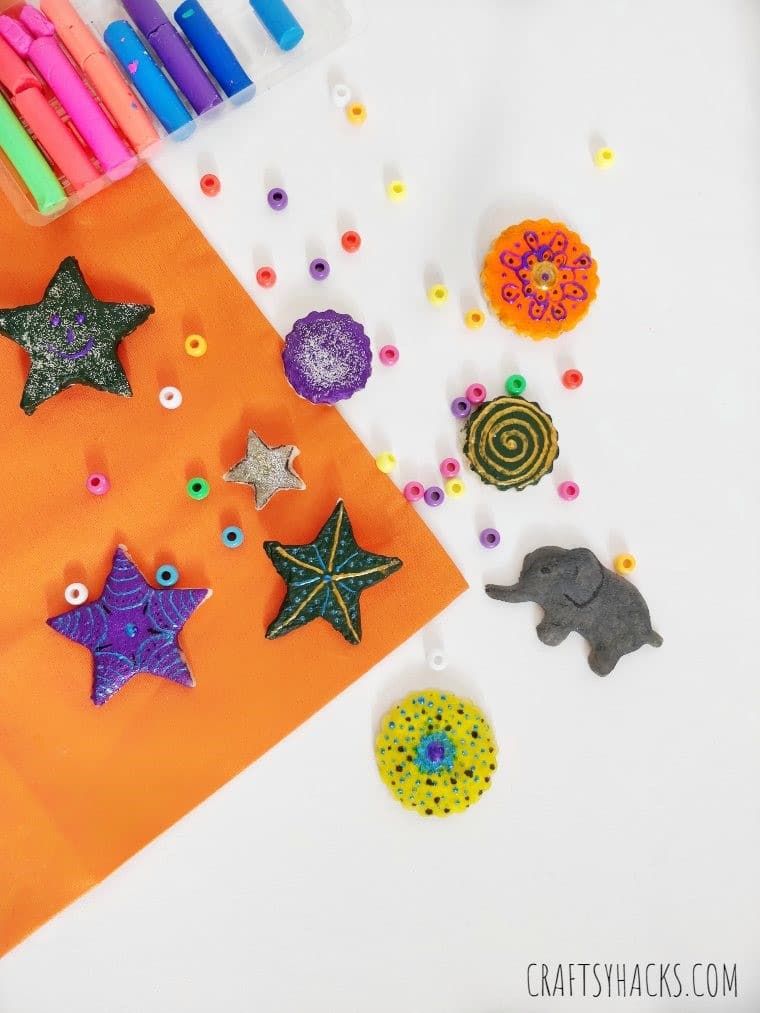
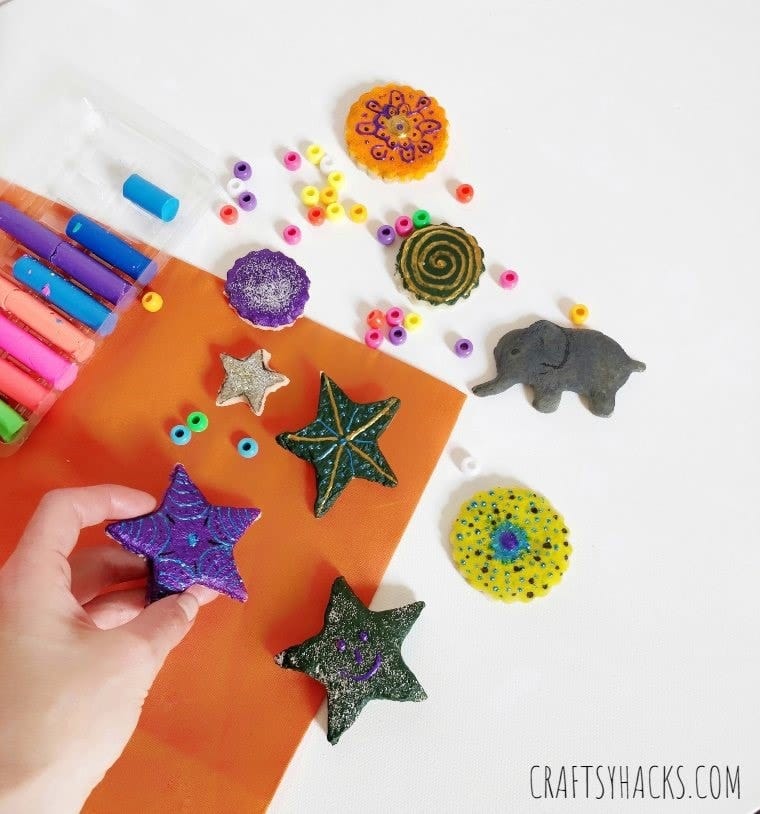
Use the colors of your choice to paint the shapes and add glitter paint to make brighter ornaments. You can also add some beads to make it more appealing.
There is so much you can do with these salt doughs to make them more attractive and vibrant. Let your child’s creative geniuses do the work and be impressed with the product of their creativity later on.
How Long Do Salt Ornaments Last?
Salt ornaments can last you for years if preserved properly.
If you want to use them year after year, seal all sides with an even layer of mod-podge or clear glaze. Keep them wrapped in a bubble wrap and put it in a box when not in use to preserve them for even longer.
Why Did Your Salt Dough Ornaments Rise?
There may be a number of reasons to explain why your ornaments rise.
The first one can be that the dough is too thick. To avoid this, try rolling out thinner ornaments the next time.
Another reason is that your oven temperature may be too hot. Try reducing the temperatures to avoid rising.
Also, be particularly careful in ensuring you use all-purpose flour and not self-rising flour.
Do Salt Ornaments Last Forever?
If not forever, they still last you for a really really long time. The salt we added to it is an excellent preservative, making it immune to any fungi or yeast that might form because of moisture.
Adding a layer of mod-podge or clear glaze will increase their lasting capacity. If you store them cautiously, you can use them year after year (or decades after decades if you’re very careful).
What Kind of Paint Do You Use on Salt Dough?
You can use both oil paint or acrylic paint to color the ornaments. It is advisable to use acrylic paint as oil paint might take as long as three days to dry out.
Washable paints are also a safer, mess-free alternative for younger kids.
How to Seal Salt Dough?
Moisture is a no-no for salt dough, which is why it best to have them sealed. You can seal the salt dough with a mod-podge or clear glaze.
Add a layer or two of either product to create the perfect seal. These not only seal the color but also increase the shelf life of the ornaments.
Other Crafts for Kids
- 20 Dollar Store Crafts for Kids
- DIY Paper Wallets
- Paper Picture Frames
- 20 Fun Crafts for Kids
- 20 Popsicle Stick Crafts
- 37 Tissue Paper Crafts for Kids
- 27 Beautiful Unicorn Crafts
- 25 Easter Crafts for Kids
- Rock Painting Ideas
- 47 DIY Projects
- Upcycling Ideas

DIY Salt Dough Ornaments
Video Tutorial
Equipment
- Baking sheets
- Parchment paper
- Rolling pin
- Cookie cutters
- Paintbrushes
- A bowl
Materials
- 1 large glass 250 ml, 9 oz of all-purpose flour
- 1 large glass 250 ml, 9 oz of salt
- A cup 230 ml, 8 oz warm water
- Acrylic paint
- Glitter paint
Instructions
- Prepare all ingredients.
- Add 250 ml of all-purpose flour and 250 ml of salt to the big bowl.
- Add 230 ml of warm water and mix all ingredients well.
- Knead to make a good dough.
- Roll out the dough on a parchment paper (not too thick, not too thin).
- Cut out shapes of your choice using a cookie cutter.
- Transfer them to the baking tray lined with parchment paper.
- Bake three hours at 210F (100C) degrees.
- Once completely dry, paint with colors of your choice and decorate them.
- Your beautiful ornaments are ready.
If you’ve tried this activity, like me, you may be surprised to find out that not only has it kept the kids busy, but it has also taught them a lot of important academic and life lessons.
The mixing of ingredients teaches them about measurements. Depending on your young one’s age, you can also squeeze in some maths or chemistry lessons regarding the ingredients and process.
While waiting for the dough to bake perfectly, your kids learn about patience and why some things take time and need not be hurried.
And of course the more obvious parts, painting part brings out the creativity of the young minds, and you end up having beautiful products out of it.
Products that win you and your kids some bragging rights! And because they last very long, you can perhaps look forward to the day you get to reminisce with them about the days they created such masterpieces.


