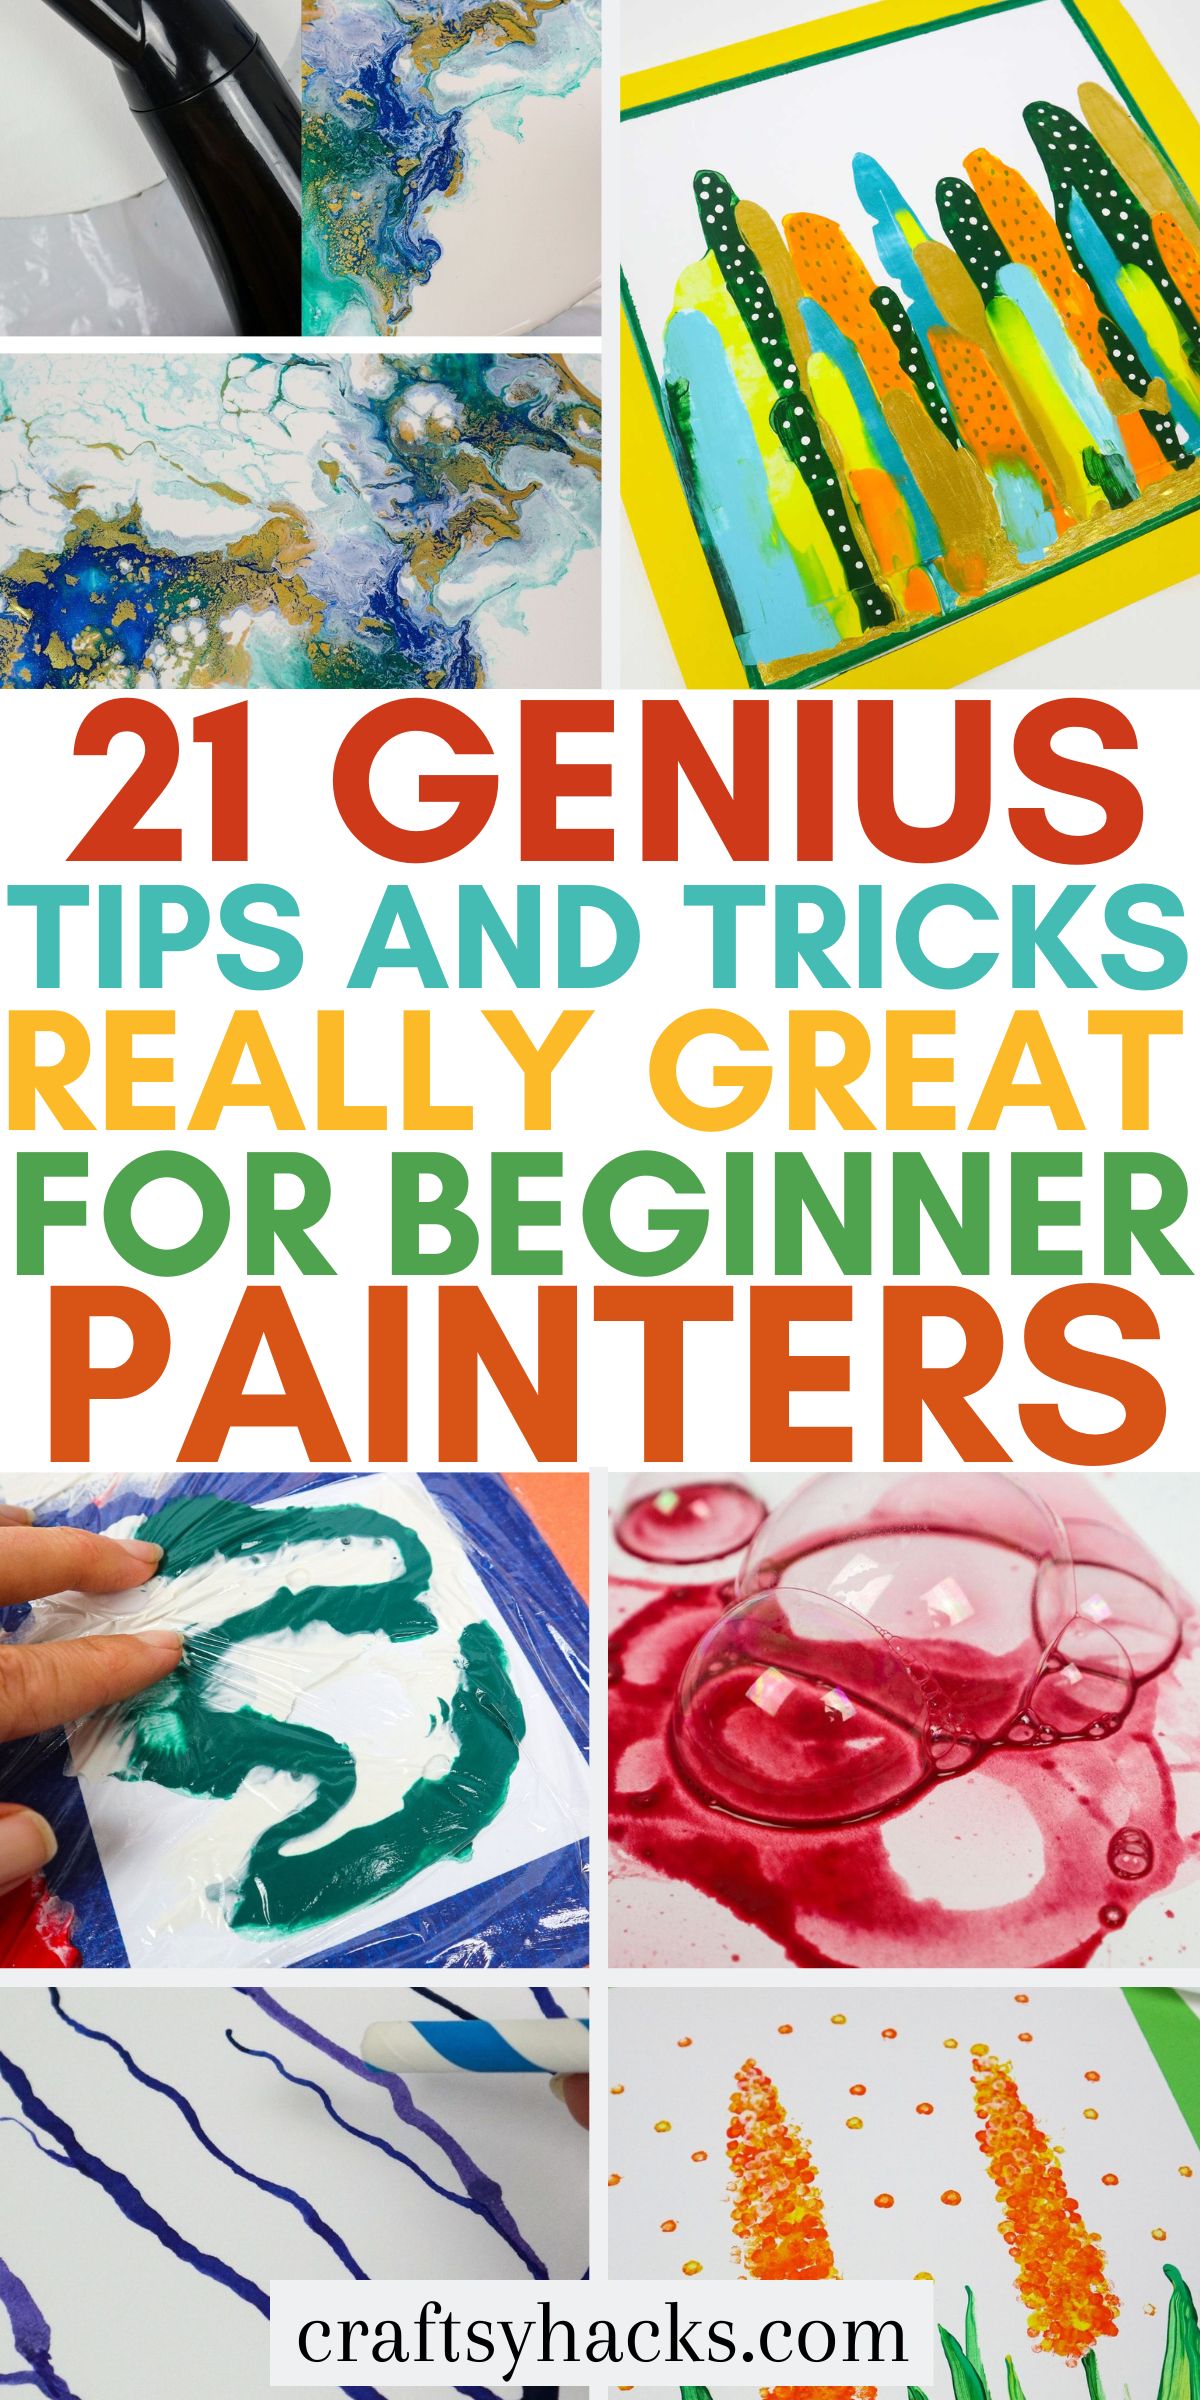
21 Genius Painting Hacks for Beginners
This post may contain affiliate links: full affiliate disclosure.
Painting can be a little intimidating to get into. Even if you’ve chosen your materials, there are many different techniques to learn. These painting tips and tricks are sure to help you get started!
Worry not–this list has easy painting tricks to experiment with as you continue your painting journey. There is no need for professional painters here!
Take note that you can try these hacks with different paints, like latex paint, oil-based paint or water-based paint, but the results may vary or be harder to execute.

Watch: Painting Hacks for Absolute Beginners!
1. User Markers with Water
There are a few different options for this hack! If you have old markers, soak them in clean water overnight–it’ll pull the remaining ink out and leave you with watercolours the next day.
Alternatively, you can use markers directly on the page over the brush strokes you plan on using by marking it up and then coming back overtop with water.
This makes the colours bleed into one another, replicating a watercolour look in the best way. Return to the image after it’s dry with any other material you’d like to layer onto your work.
If you love these painting ideas you must see these easy canvas painting ideas for beginners!
2. Use Your Ruler
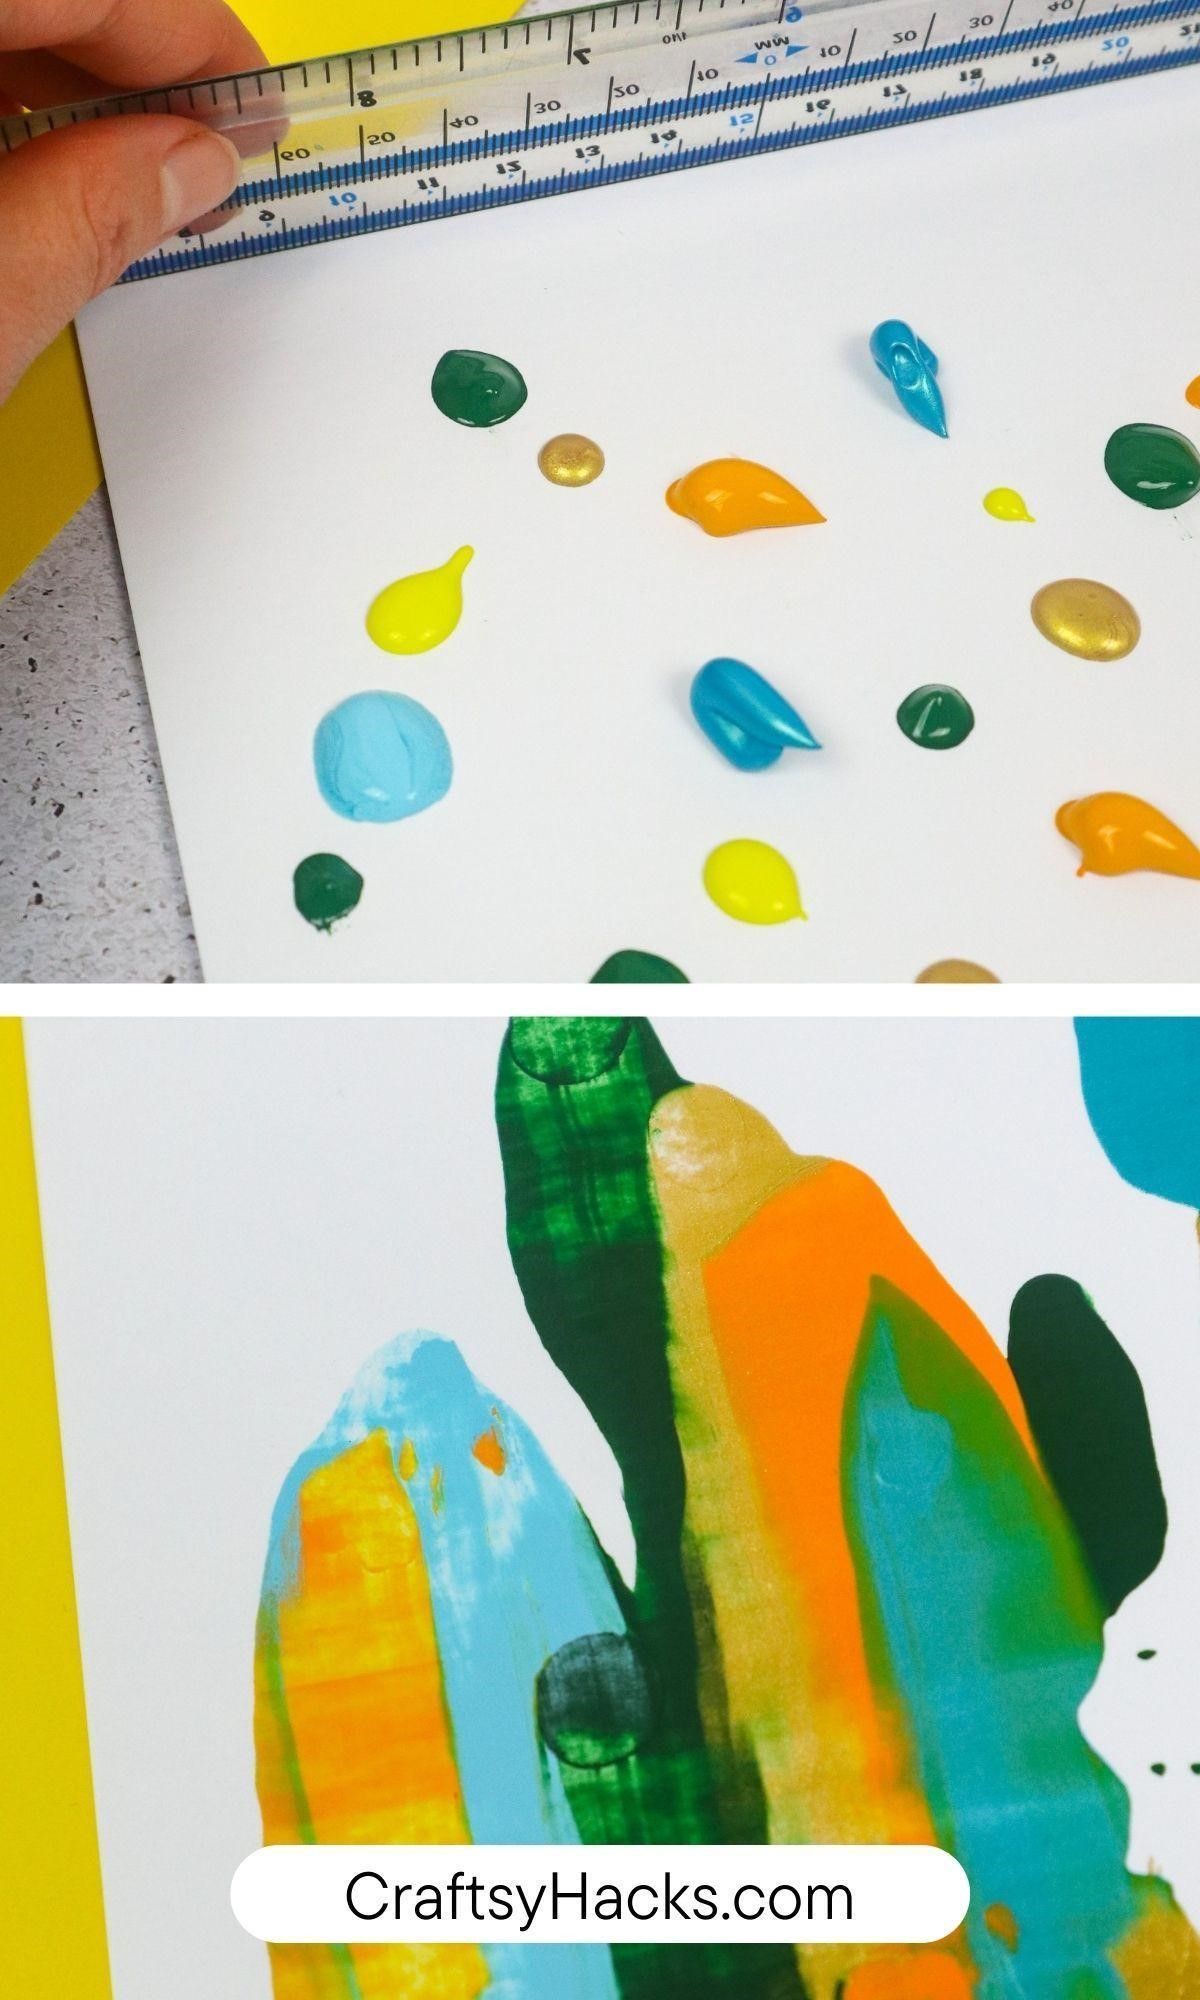
A few dabs of new paint will do for this trick, a ruler and painter’s tape, which you can all buy at paint stores. Start by taping your paper with some of this painter’s tape onto a flat surface.

Next, dab a varied amount of color and sized dollops of wet paint onto the page. When satisfied with the number of dots on the page, you’ll pull your ruler across the page.
I’ve done it in a downward motion here, but any angle and a straight or non-straight pull will do–it’s up to you! Just wipe away the excess paint if needed!
3. Create Texture with Cornstarch
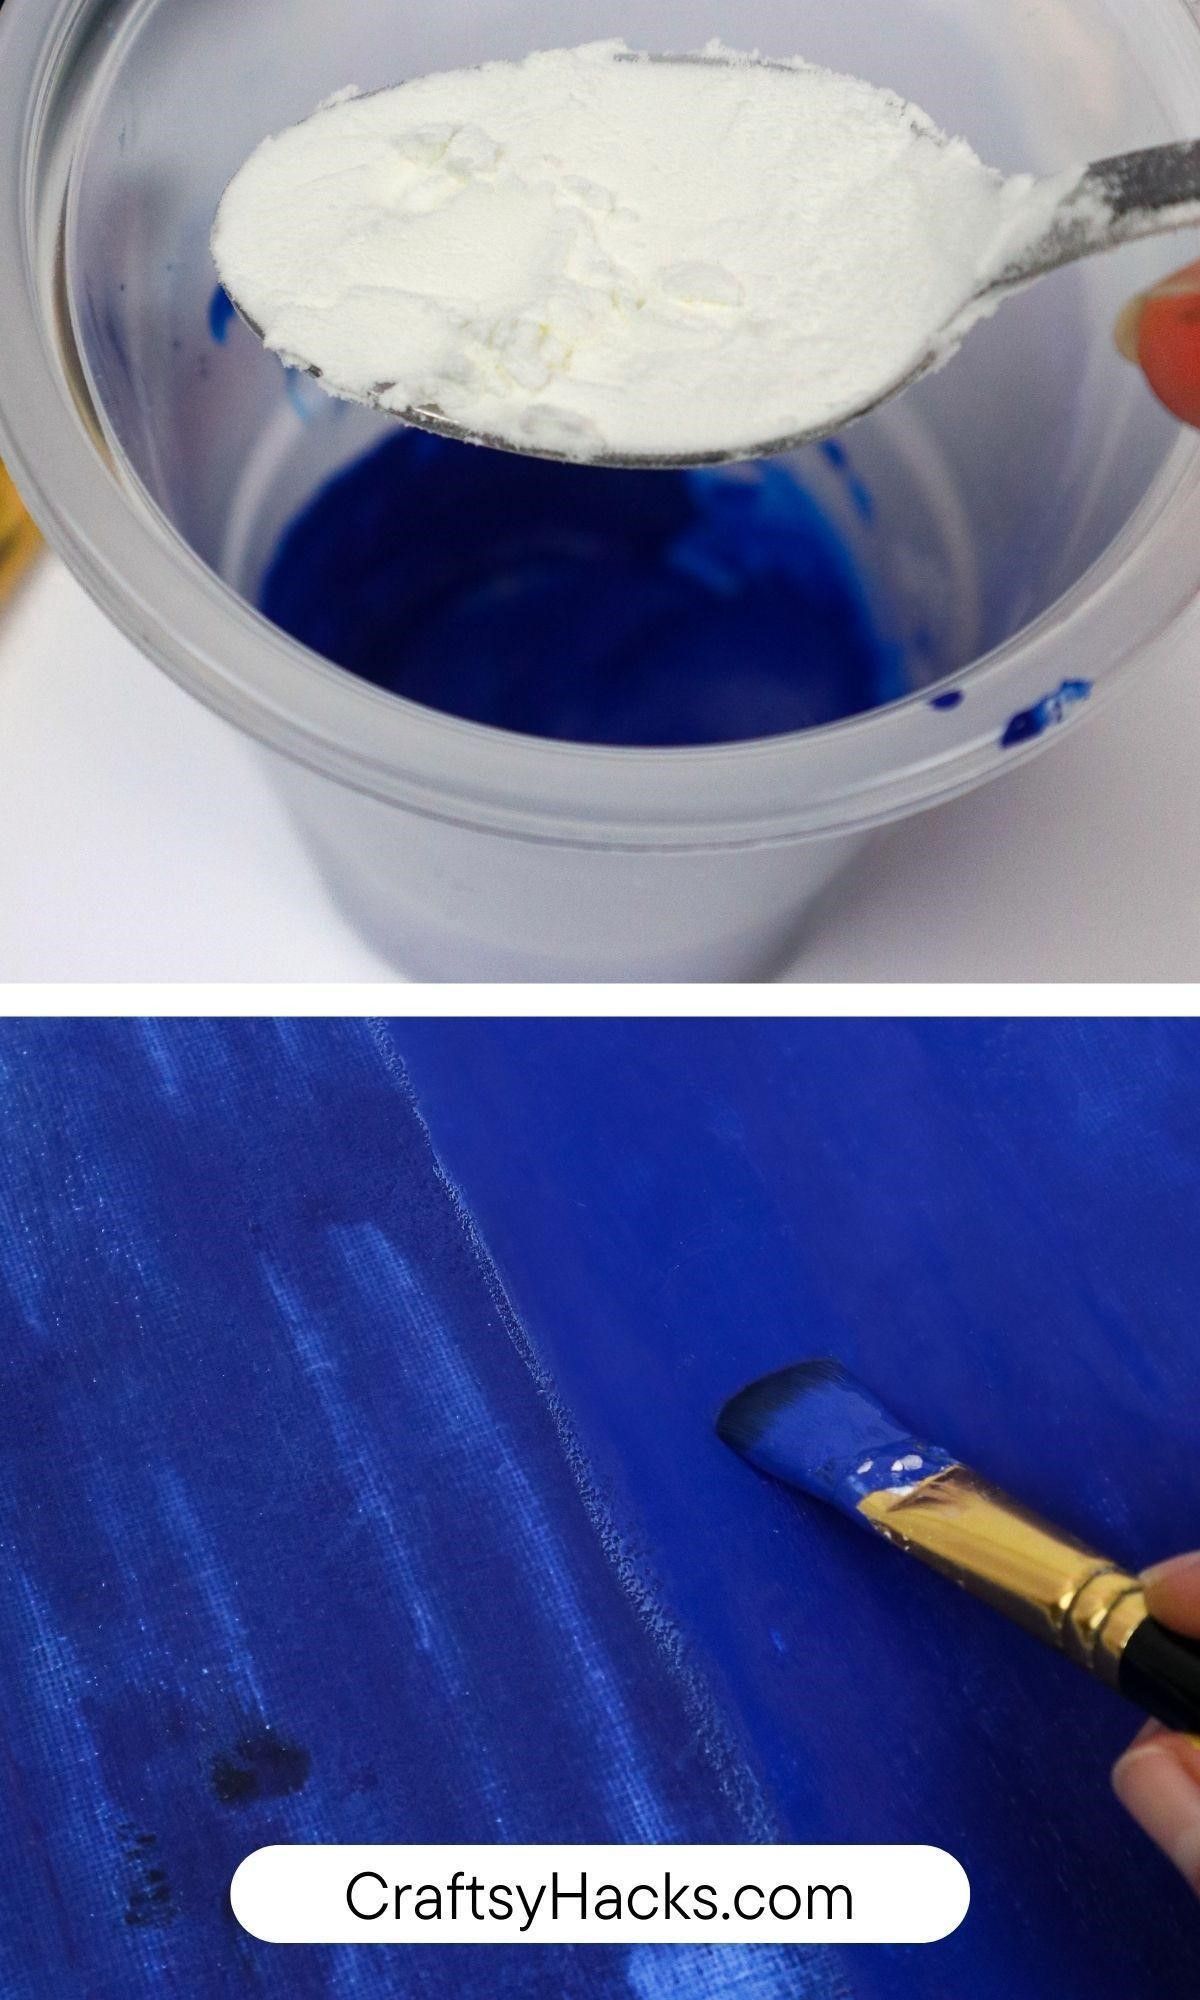
If you want to add texture to paint, try adding cornstarch to your pot or plastic bag next time.
Squeeze whatever paint color you’d like to have a slightly extra shape into a mixing pot, and add cornstarch and mix!
Play around with the amounts and different colors the first time for varying results.
4. Use Cut-out Shapes

Cut your own out to add some uniform geometric shapes that will save you loads of time.
Play around with different materials you can cut into and different grippers to attach to the back–my favorite is cardstock and a roll of duck tape on the backing.
You can even use a paint pen in a dark color and decorate the shapes with a steady hand. Wait for the wet edge to dry first!
5. Blow Your Ink with Straws
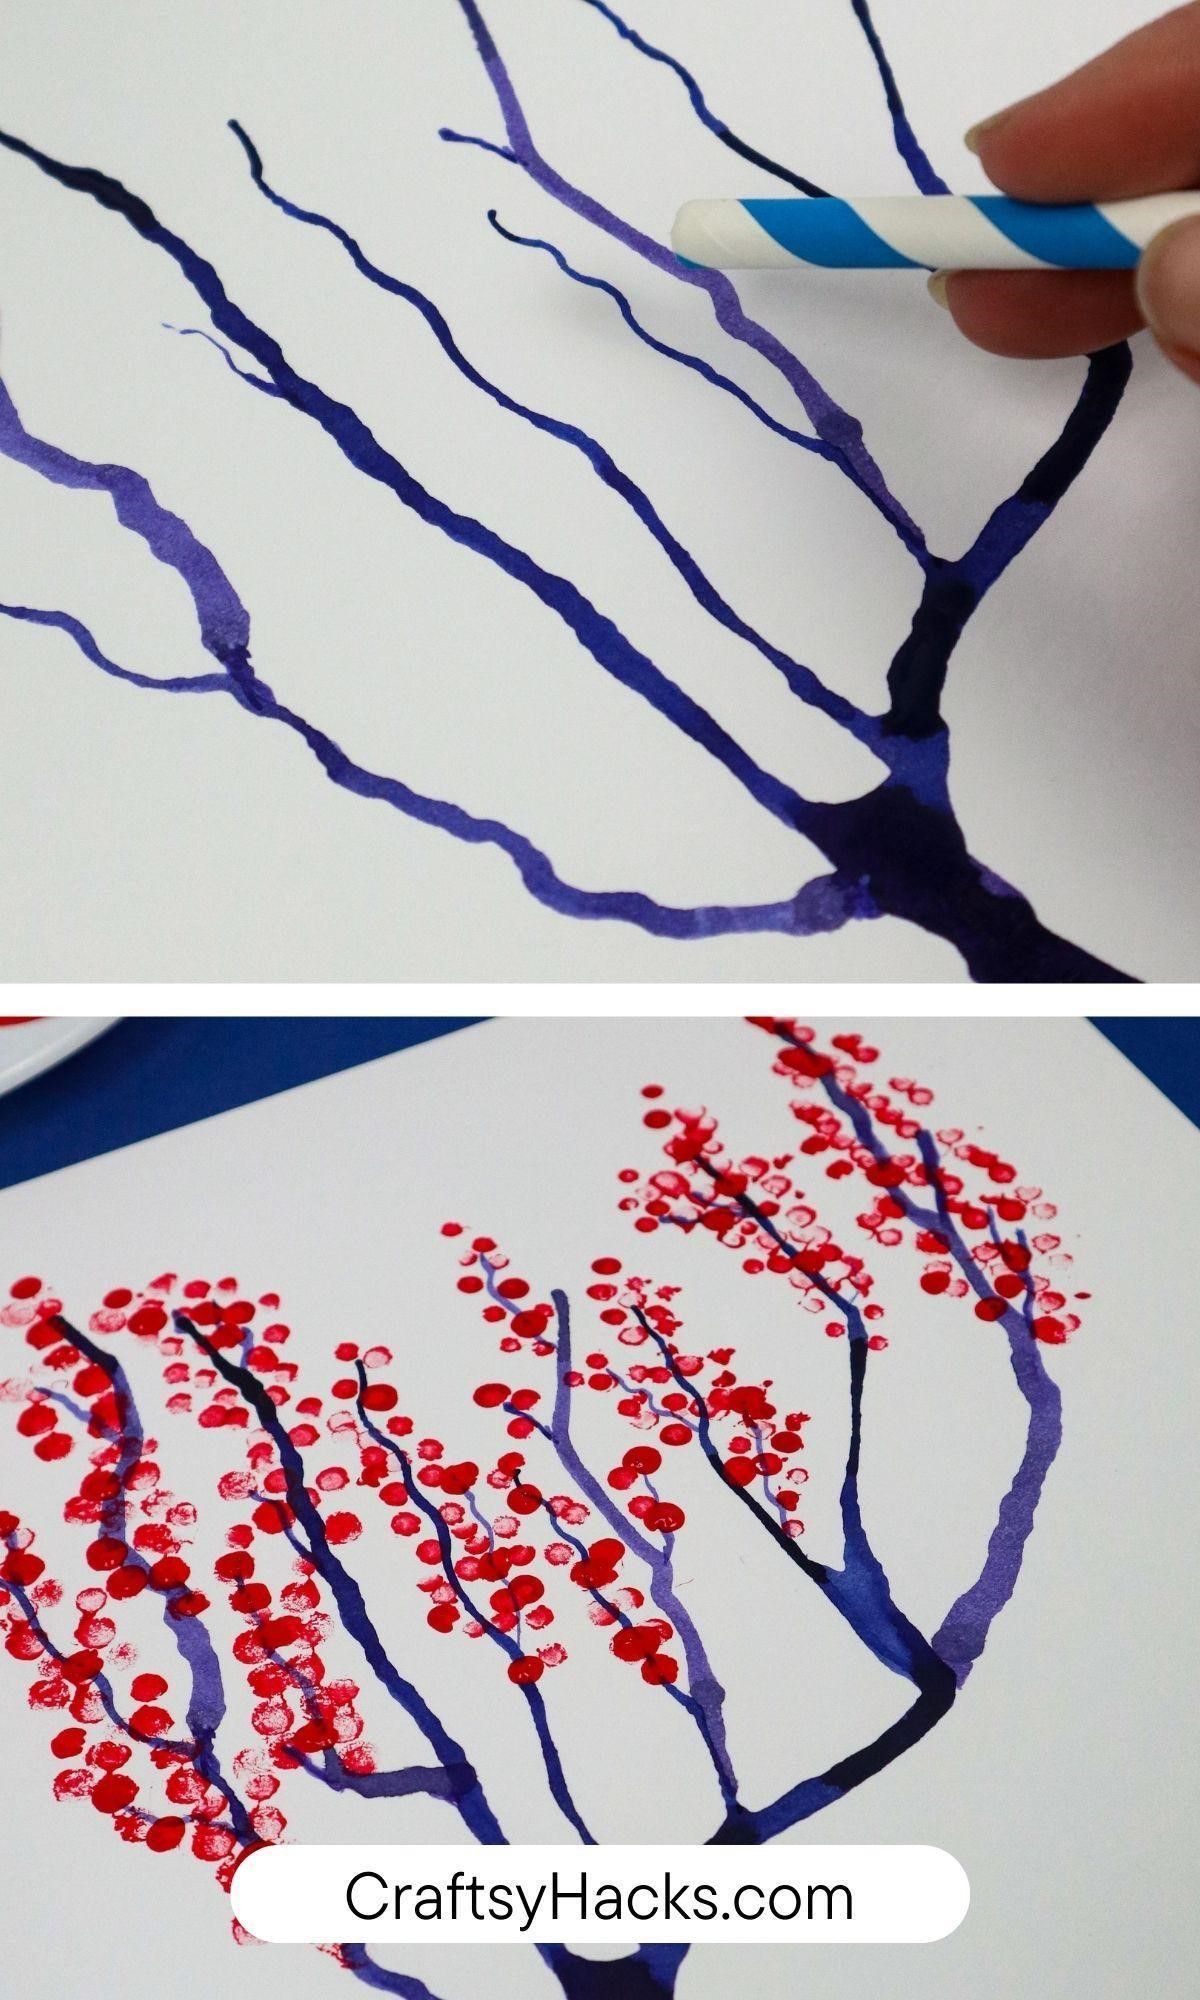
Adding details can get very touchy and complicated; try blowing ink or paint drips with a straw on a future project for a natural look using the right tools and not much paint.
I specifically like to use this hack when I’m looking for a special, extra unique look in movement.
6. Use Leaves as Stamps
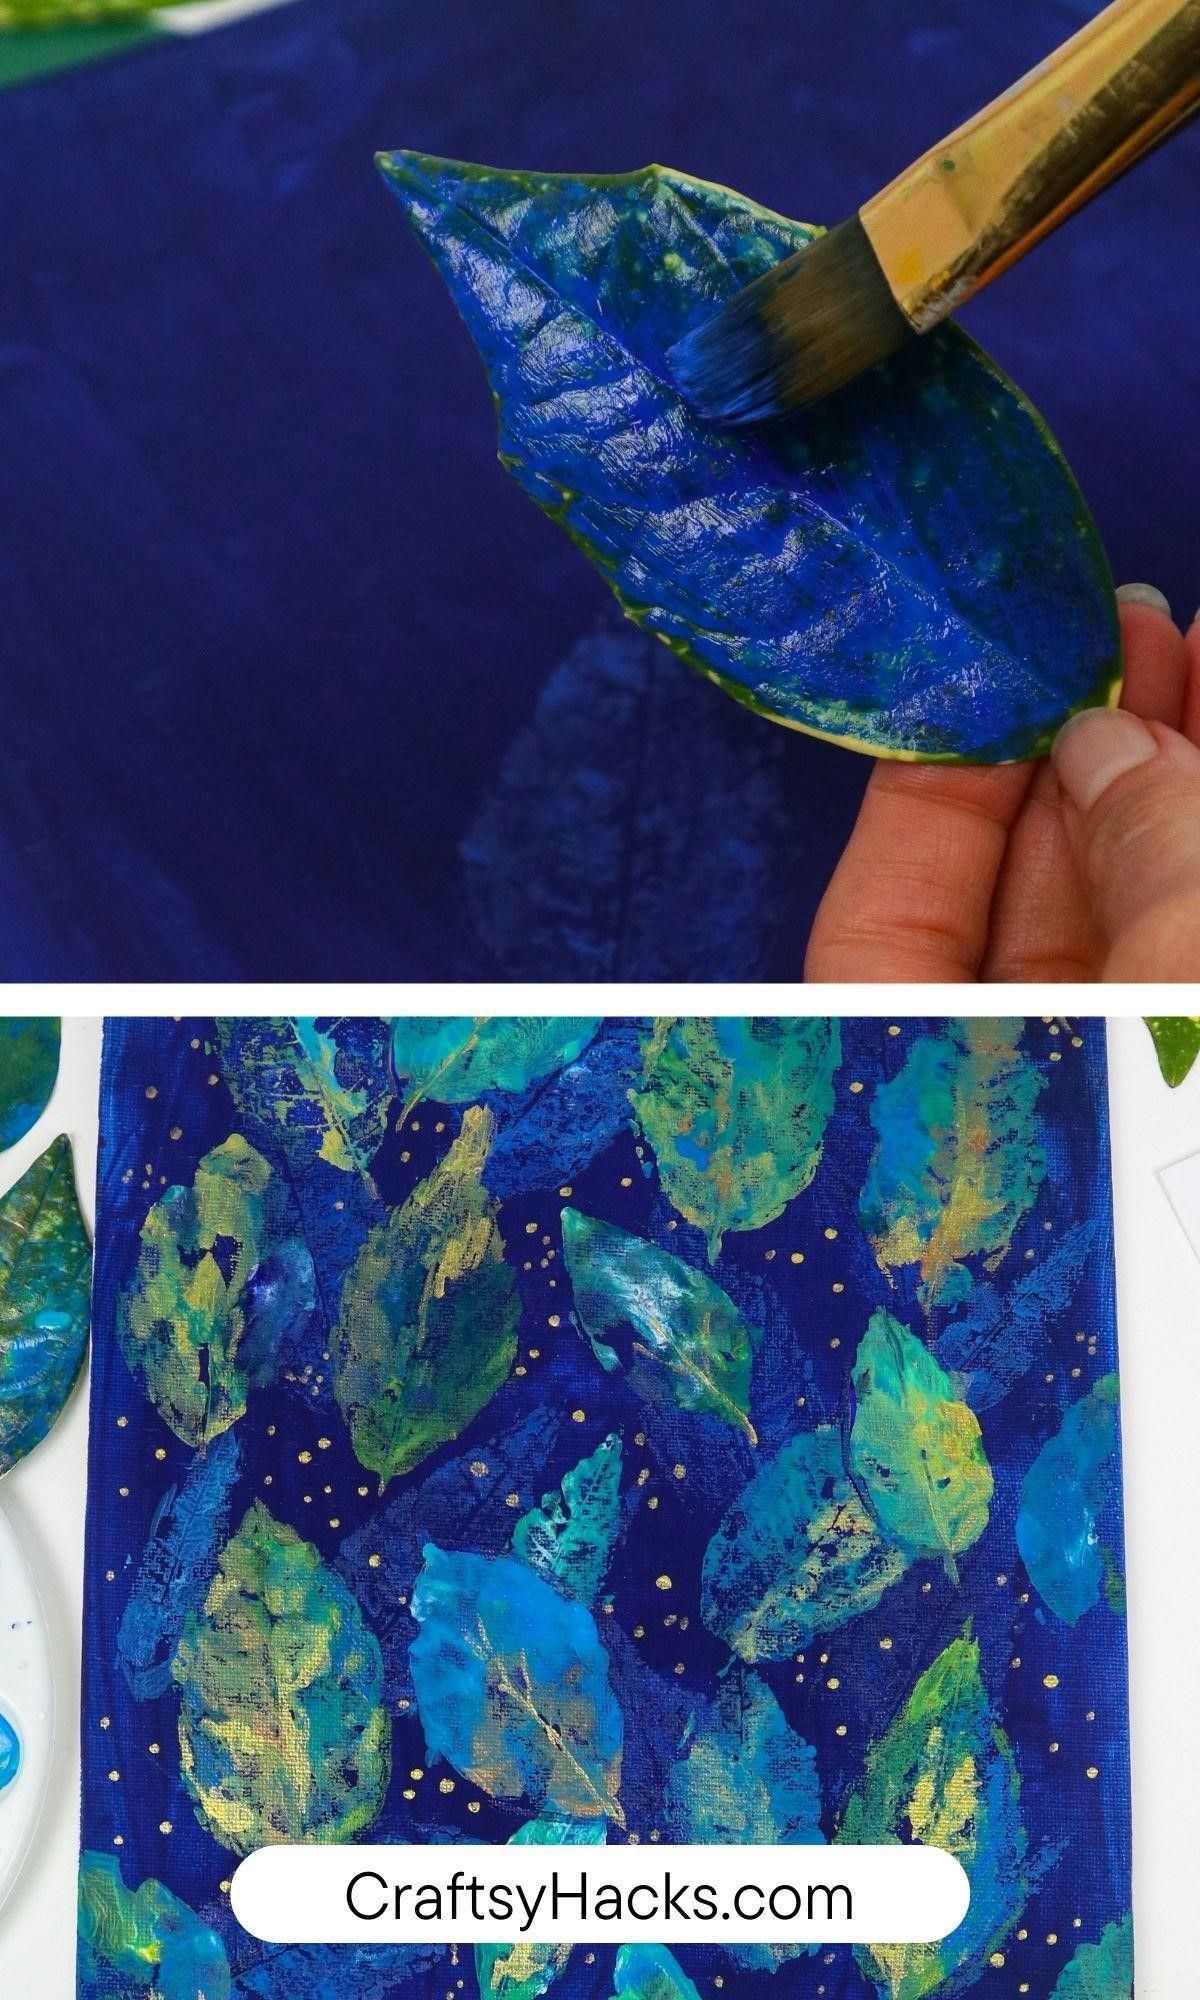
Playing with natural stampers has always been a fun activity between my children and me. I like to use them when working on a patterned project;
I want to implement different stampable elements on the page. Try using leaves. Ones that haven’t completely broken down work better than the crunchy ones.
Also, play around with different paints, inks, or other color elements to see different boldness in your results.
This painting hack would also be a cool rock painting idea!
7. Use Balloons
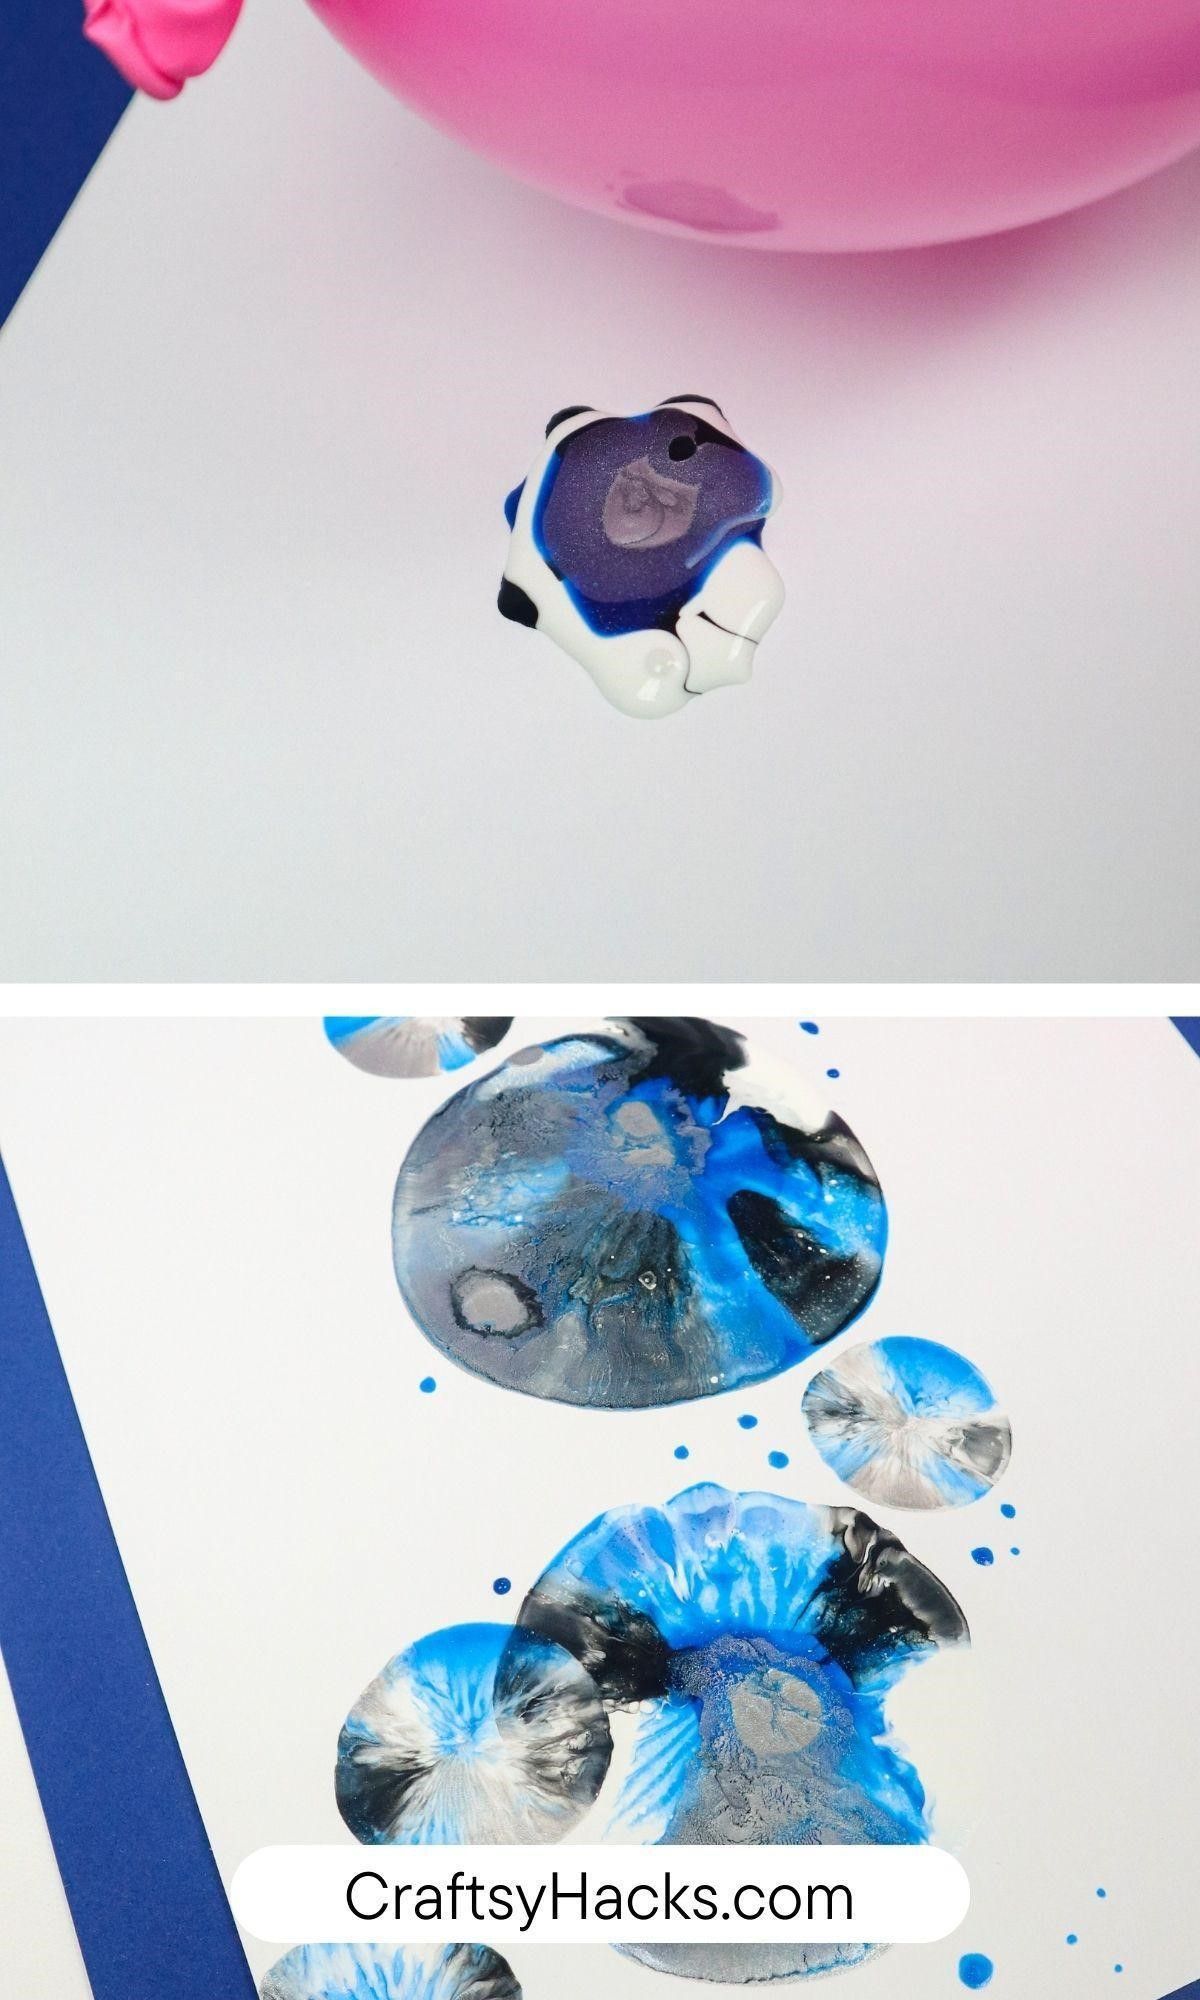
Another printing item I’ve carried into my own practice is dipping balloons into paint!
Blow them up to different sizes to yield different sizes, and there’s a lot to play around with balloons too.
8. Don’t Forget the Power of Cotton Buds
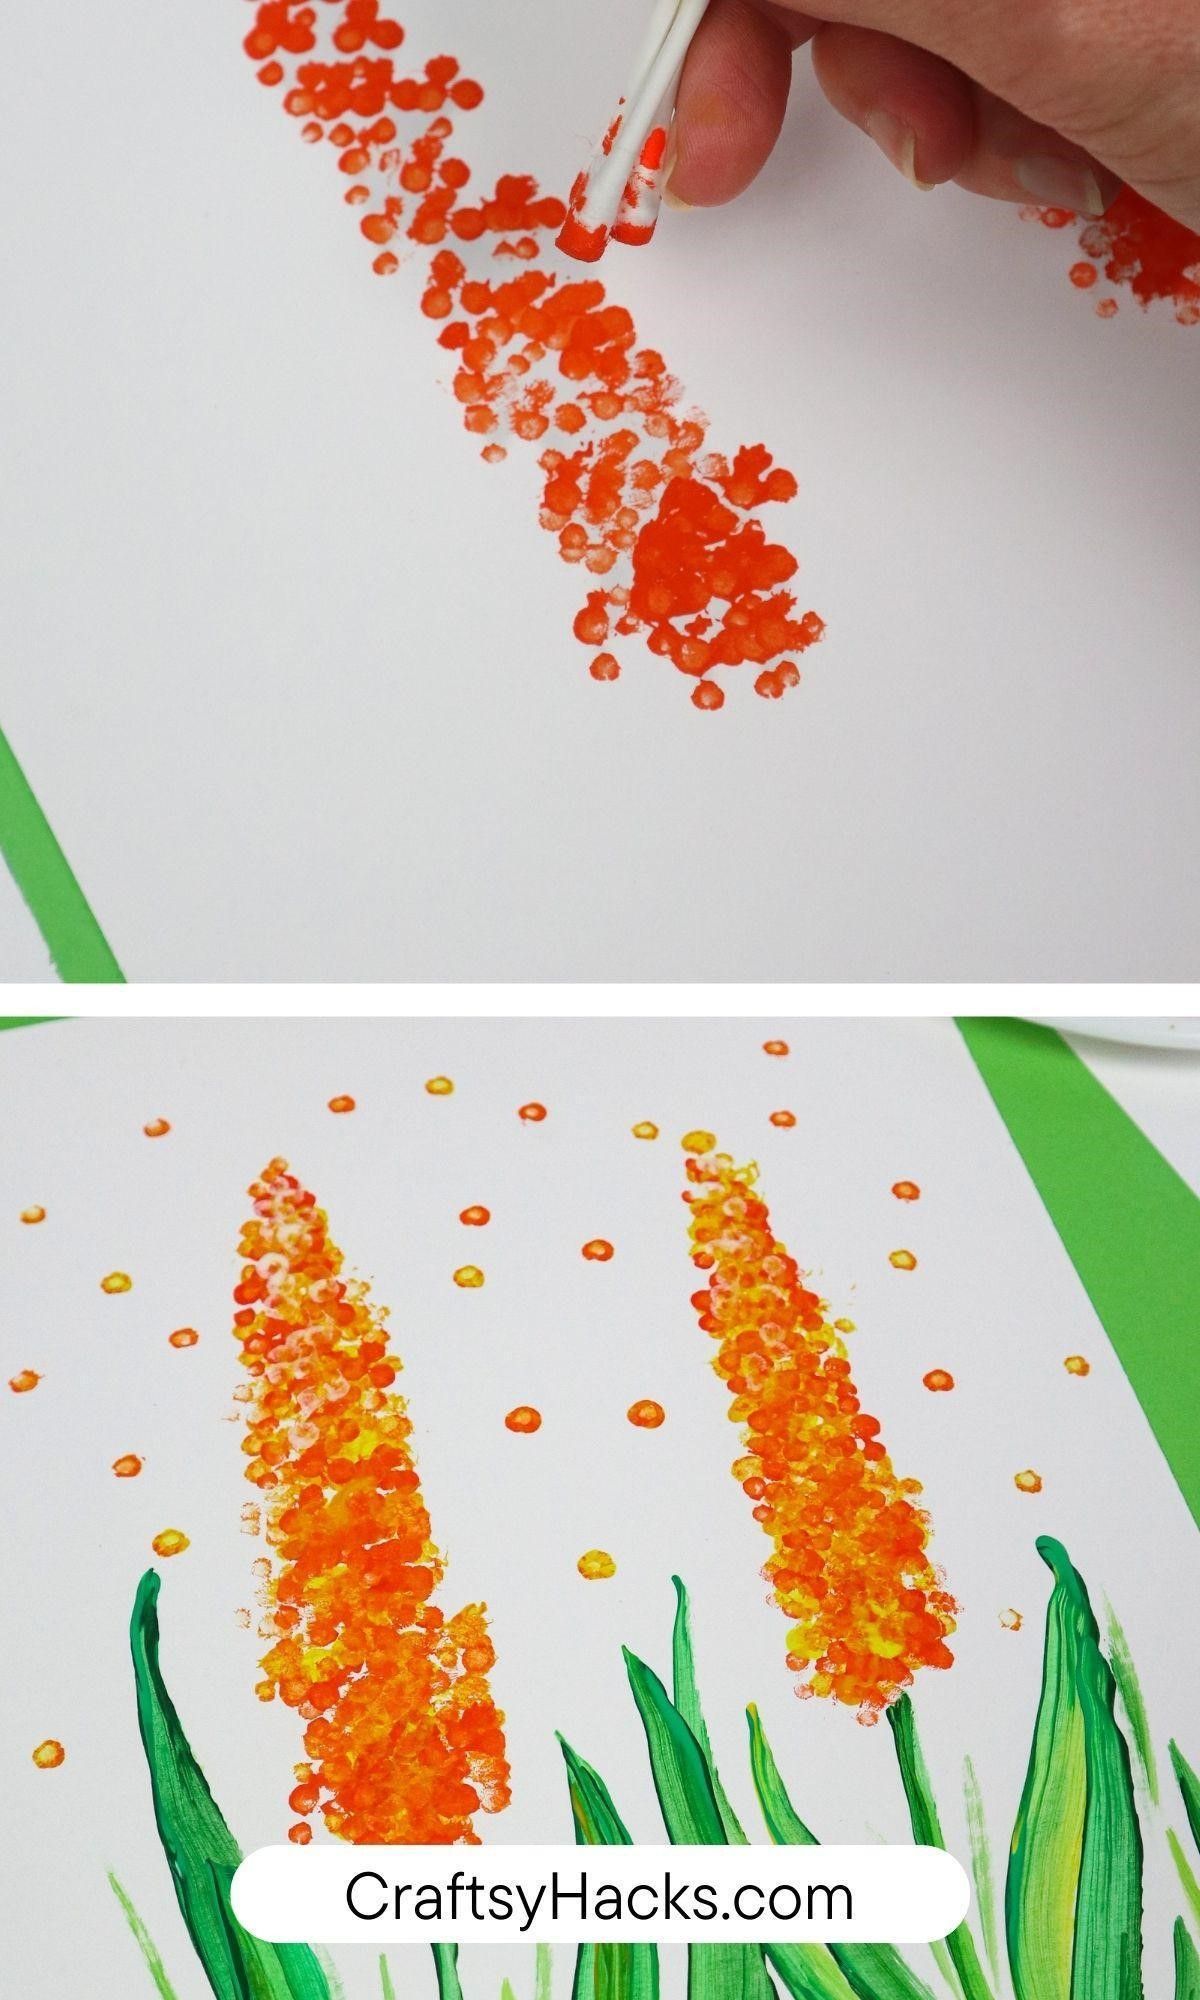
And, of course, a classic item to use while painting–Q-tips! Use the tip to accent pictures or create an absolute masterpiece from different Q-tips in different colors.
I’ve loved using different paint types in the same image with these little guys.
There’s a good balance of bold and pastel when done, and I picked these up and am looking forward to the different sizes in coming projects.
9. Incorporate Bubble Wrap
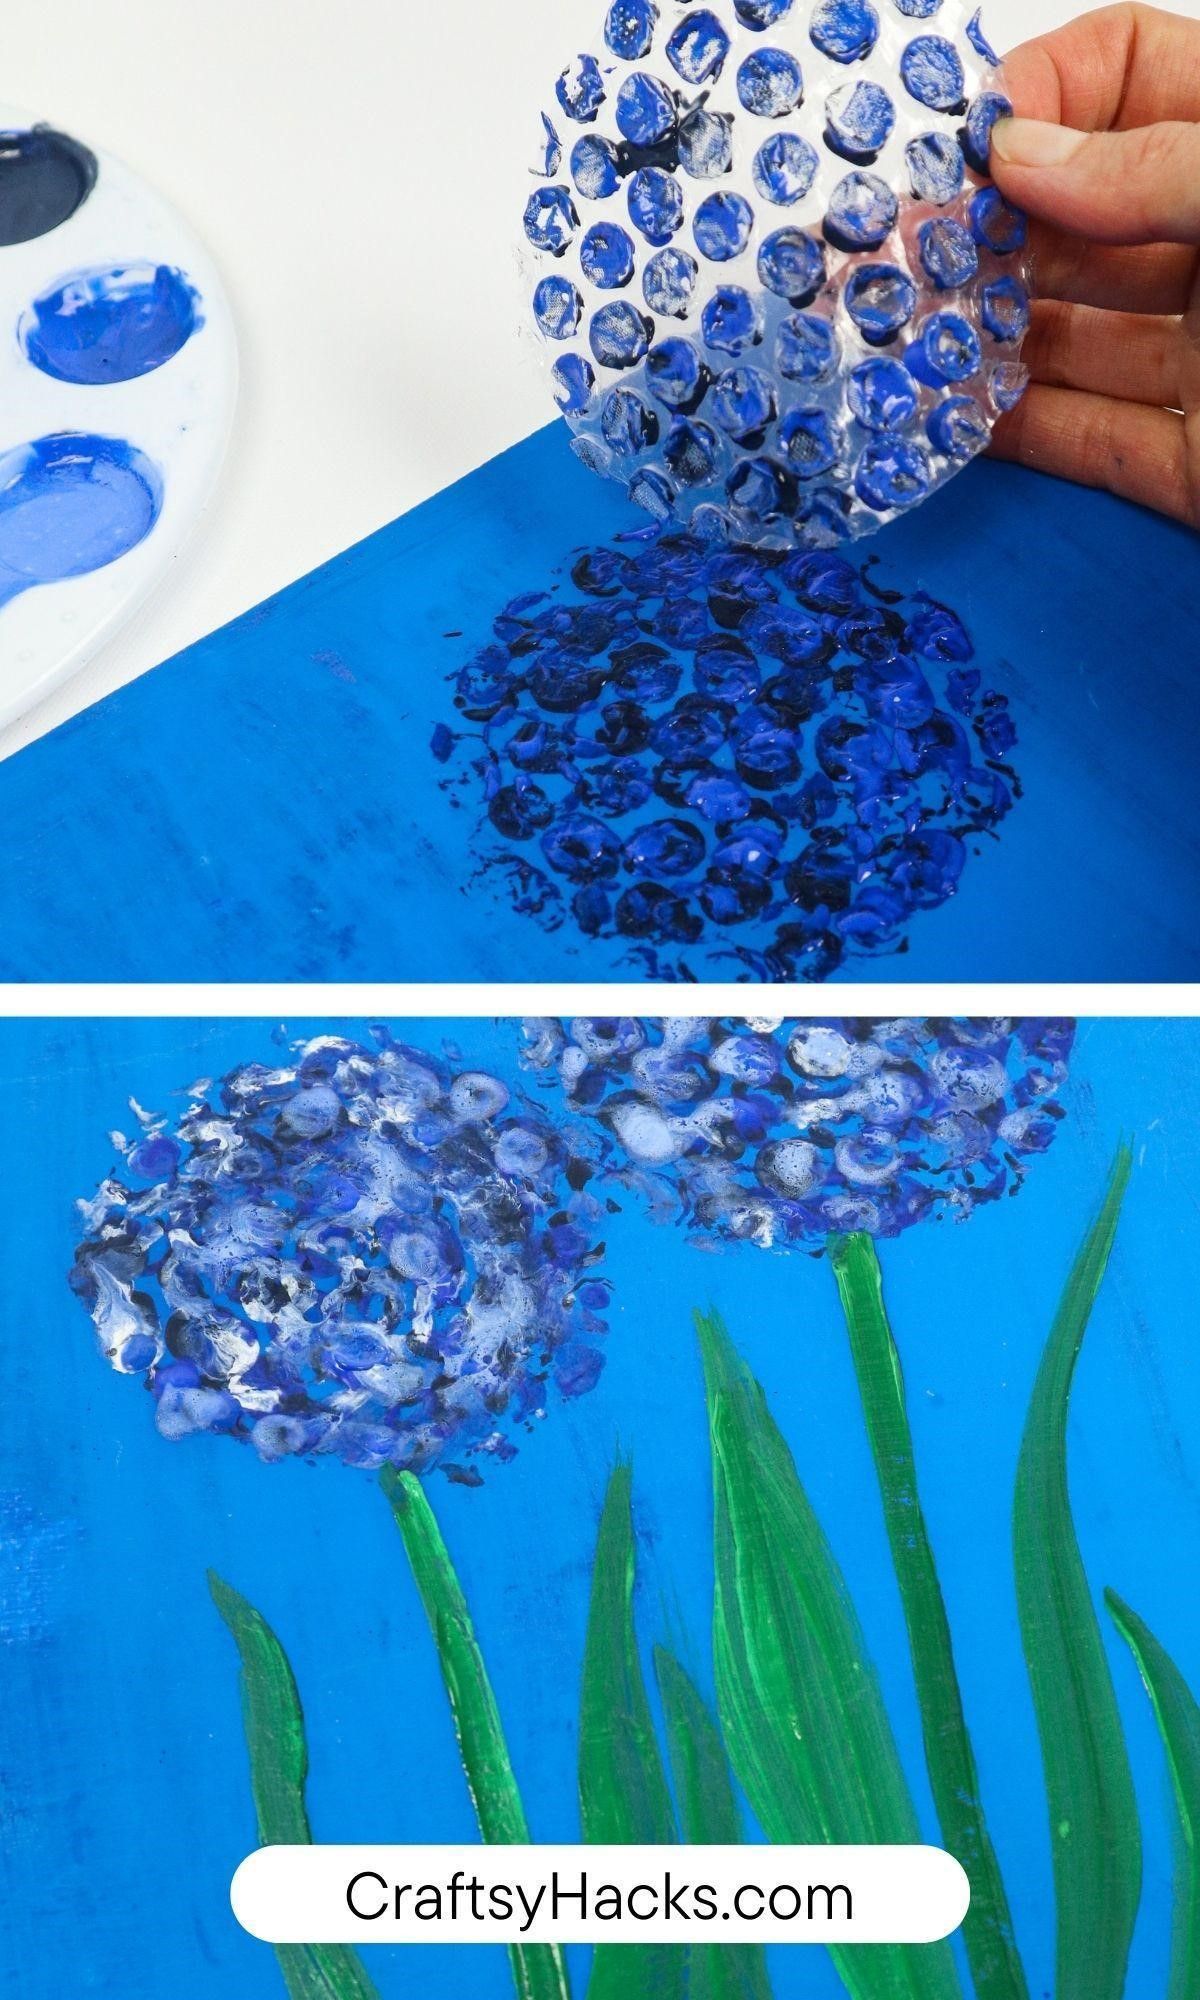
I’ve just started using bubble wrap in my projects, and it’s fun and super versatile. Depending on the project, cut the shape you need from the wrap.
After making your template, dip it into your paint gently and evenly. Pull it out, transfer it to your project, and repeat the process as needed.
The best part about the hack? Wash your templates once done, and save them with your art supplies for future uses!
You’ll also enjoy these fun flower painting ideas!
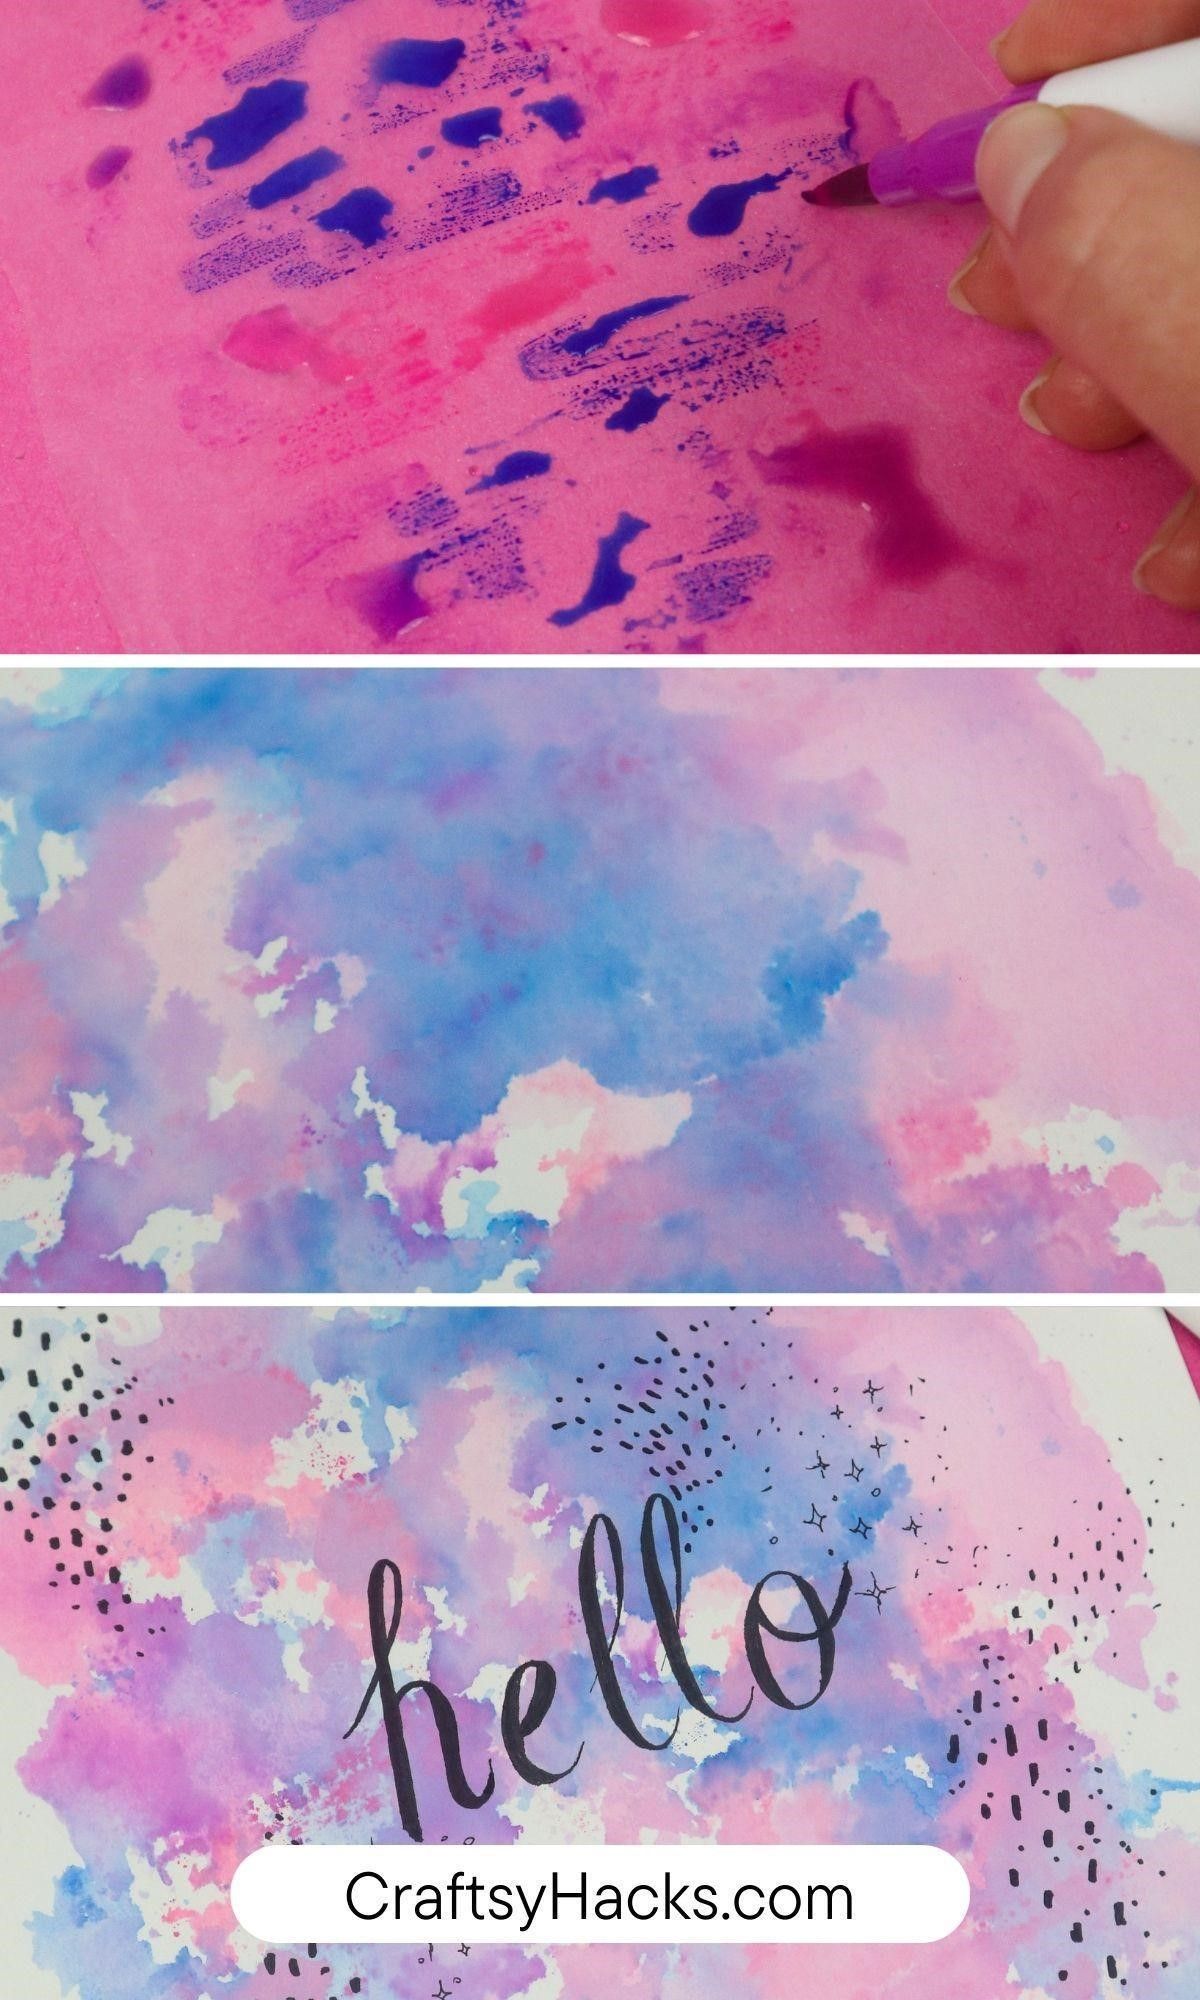
10. Use the Power of Bubbles
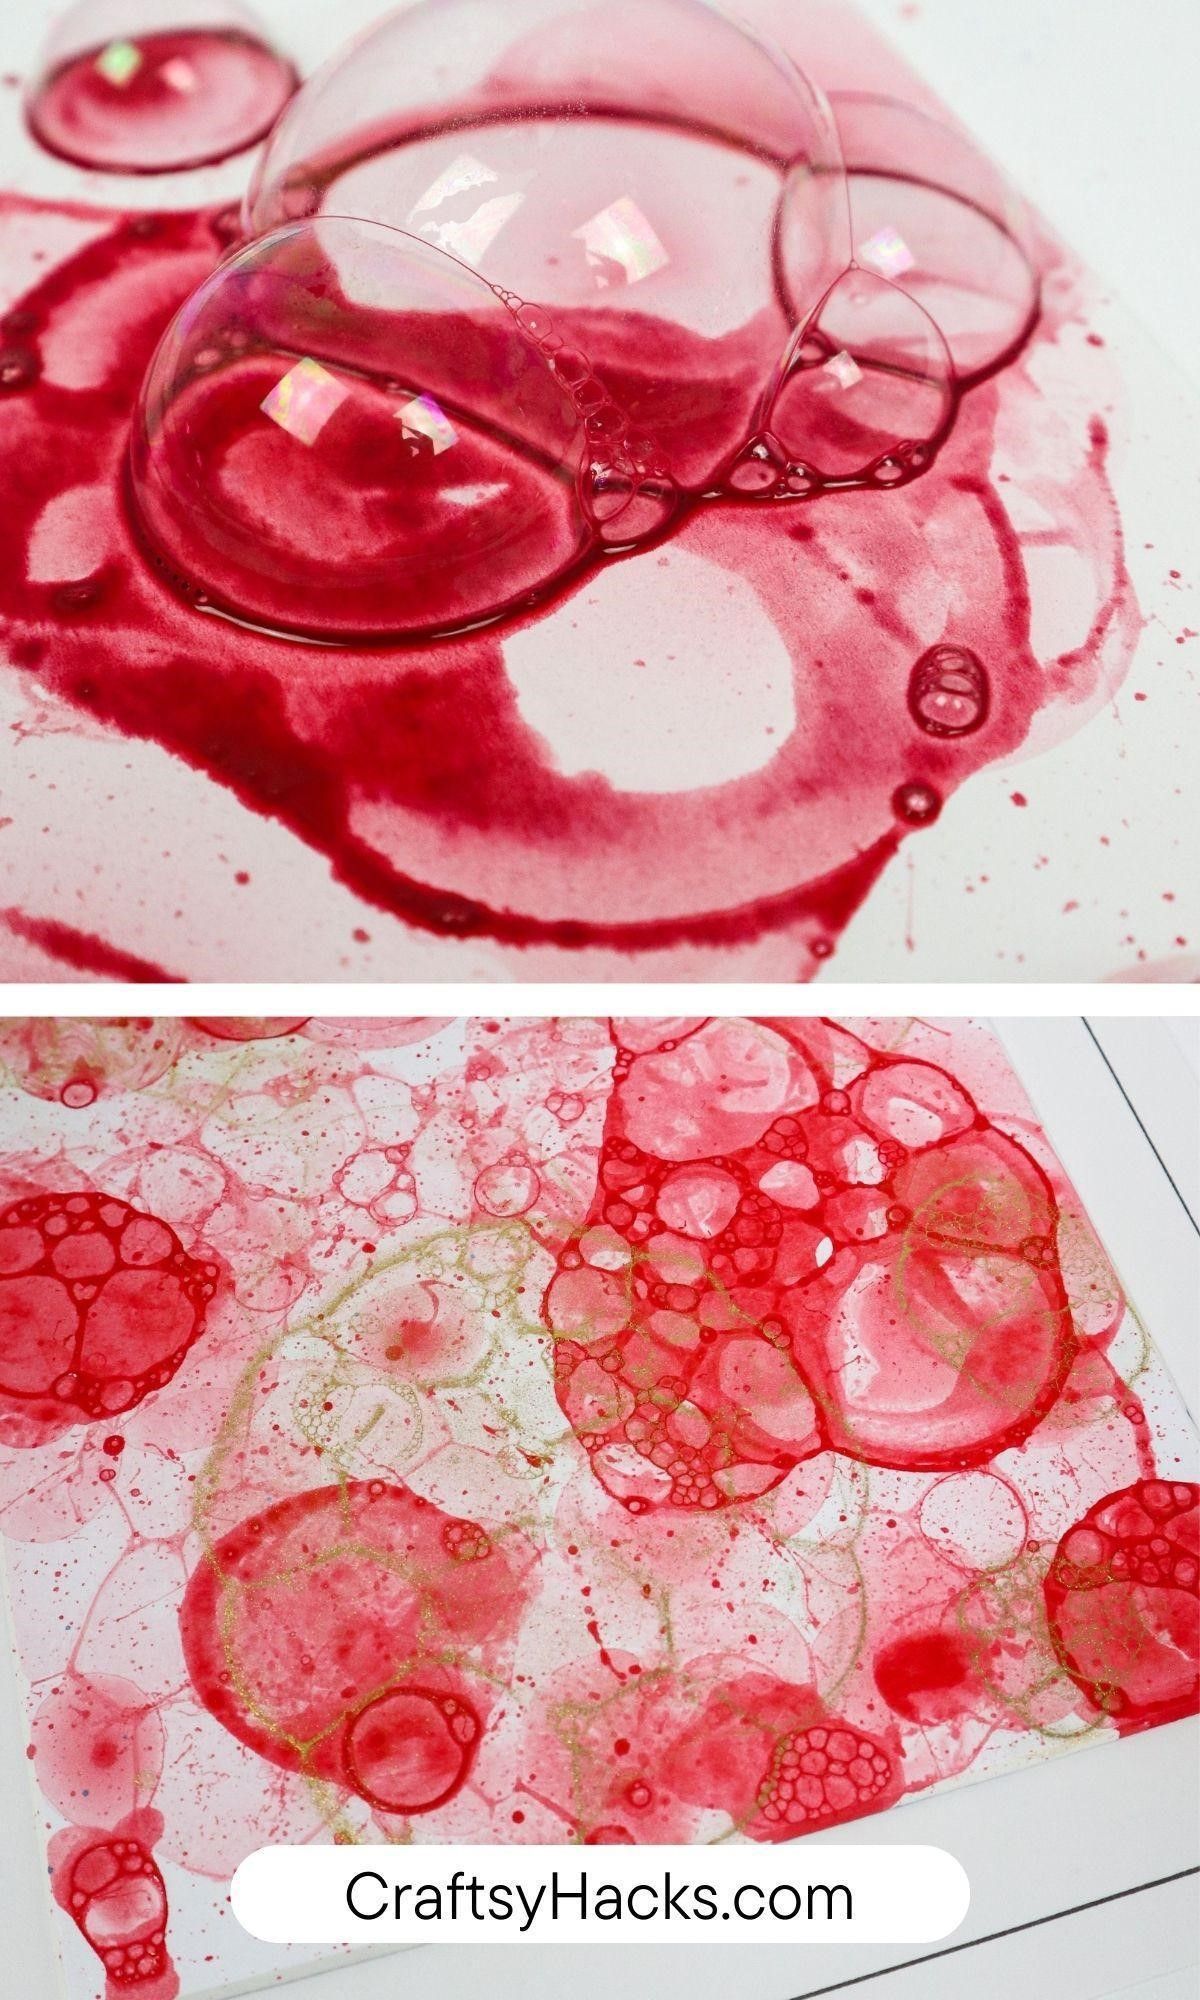
Another trick I picked up with my kids is painting with bubbles. And it sounds weird, but it’s another technique that gets used to create exciting depth in my pieces.
For this technique, there’s some prep involved.
Grab the following– tempera paint in whatever colors are needed, dish soap, and a bit of water. Play around with the ratios to get the specific shade intensities desired for your project.
Once you have everything mixed, grab a bubble blower or multiple blowers–this is a fun pack; dip it in the mixture and blow!
The pack I shared has varying widths of wands to help create different results.
11. Add Dish Soap to the Paint
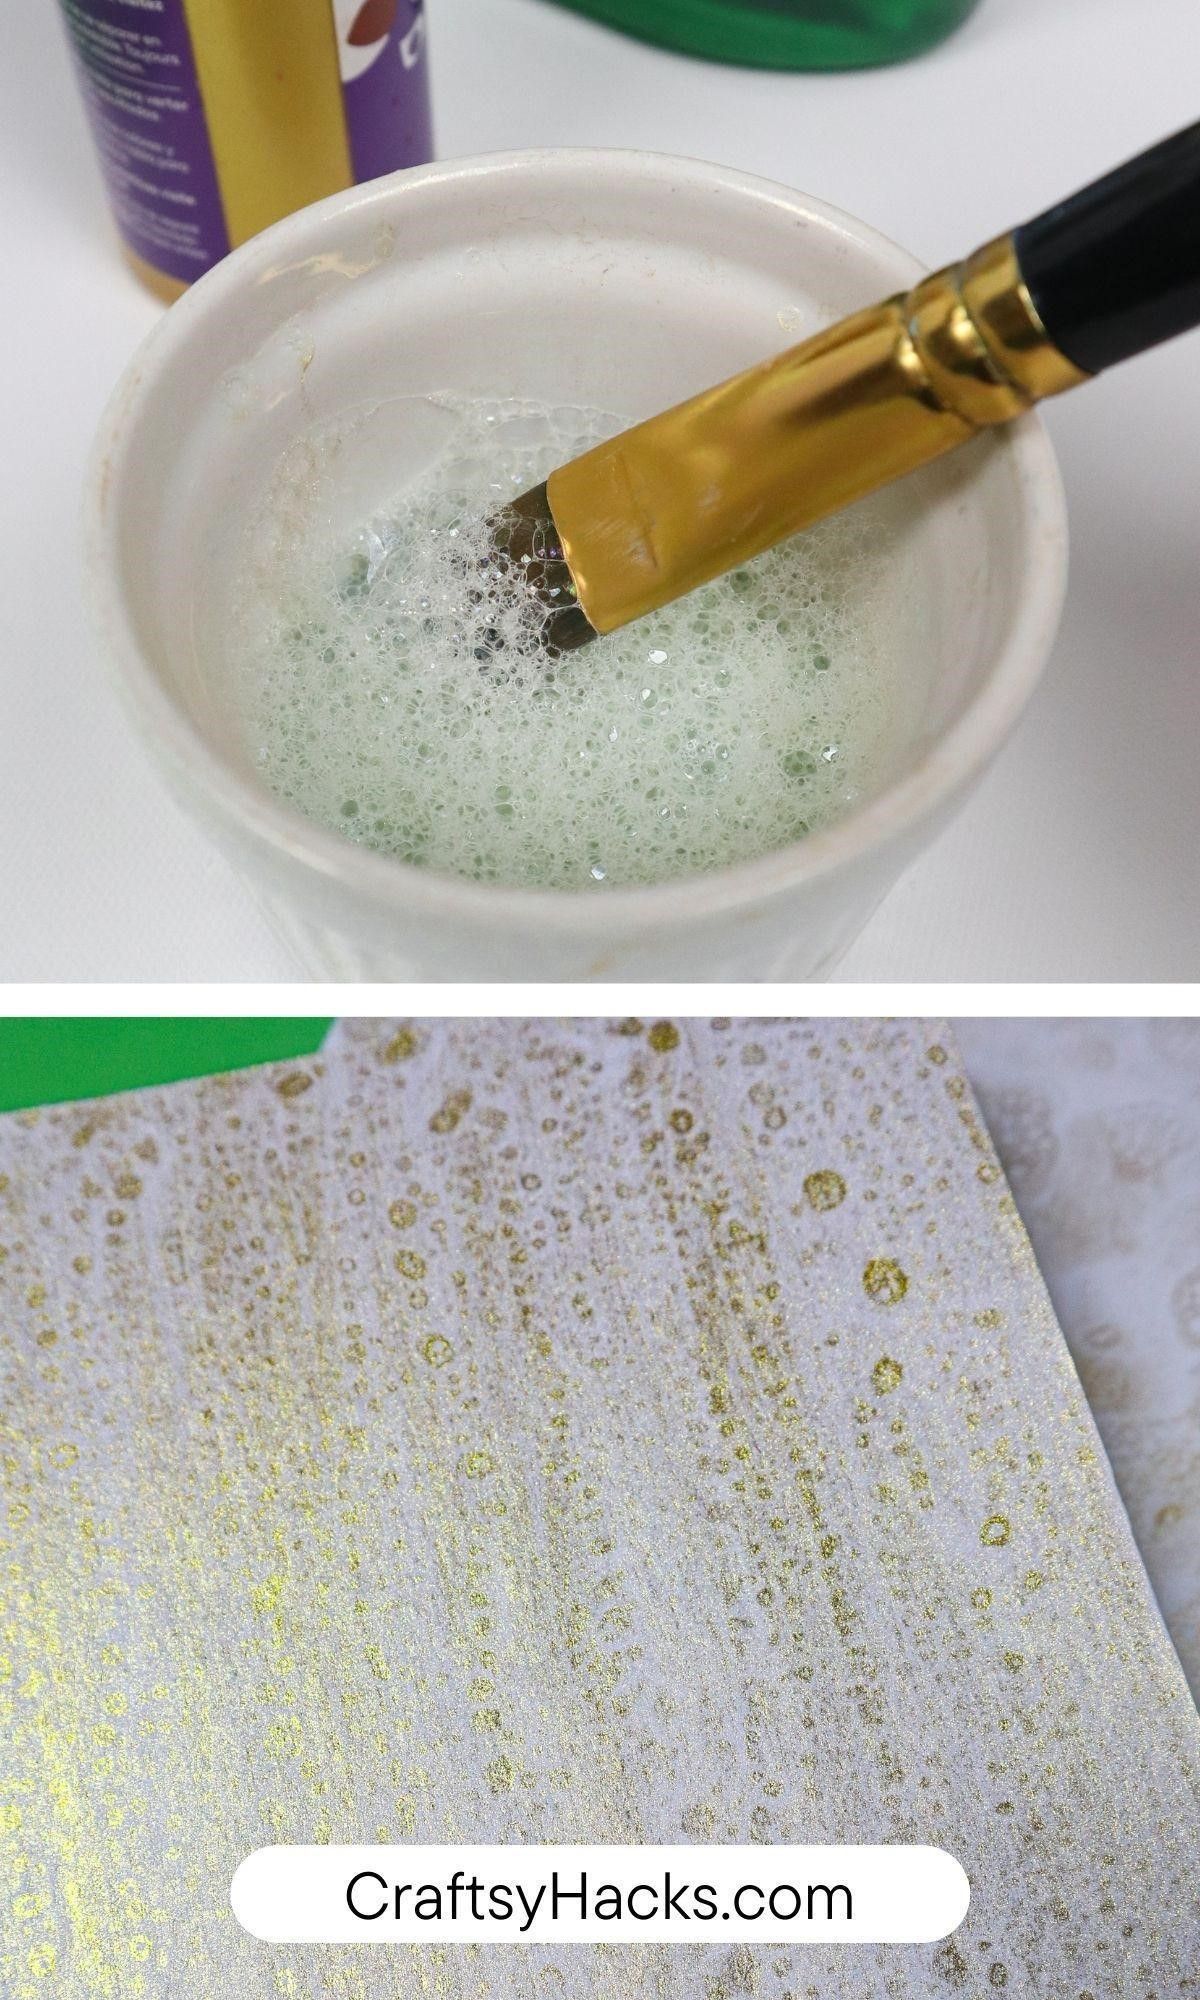
As easy as it sounds–squirt some soap into your paint! There’s, again, so much play possible here.
Mix the two in varying degrees. Try it with different types of paints and mixtures of soapy water to yield varied bubble-y looks, and the possibilities are endless.
12. Use Cling Film
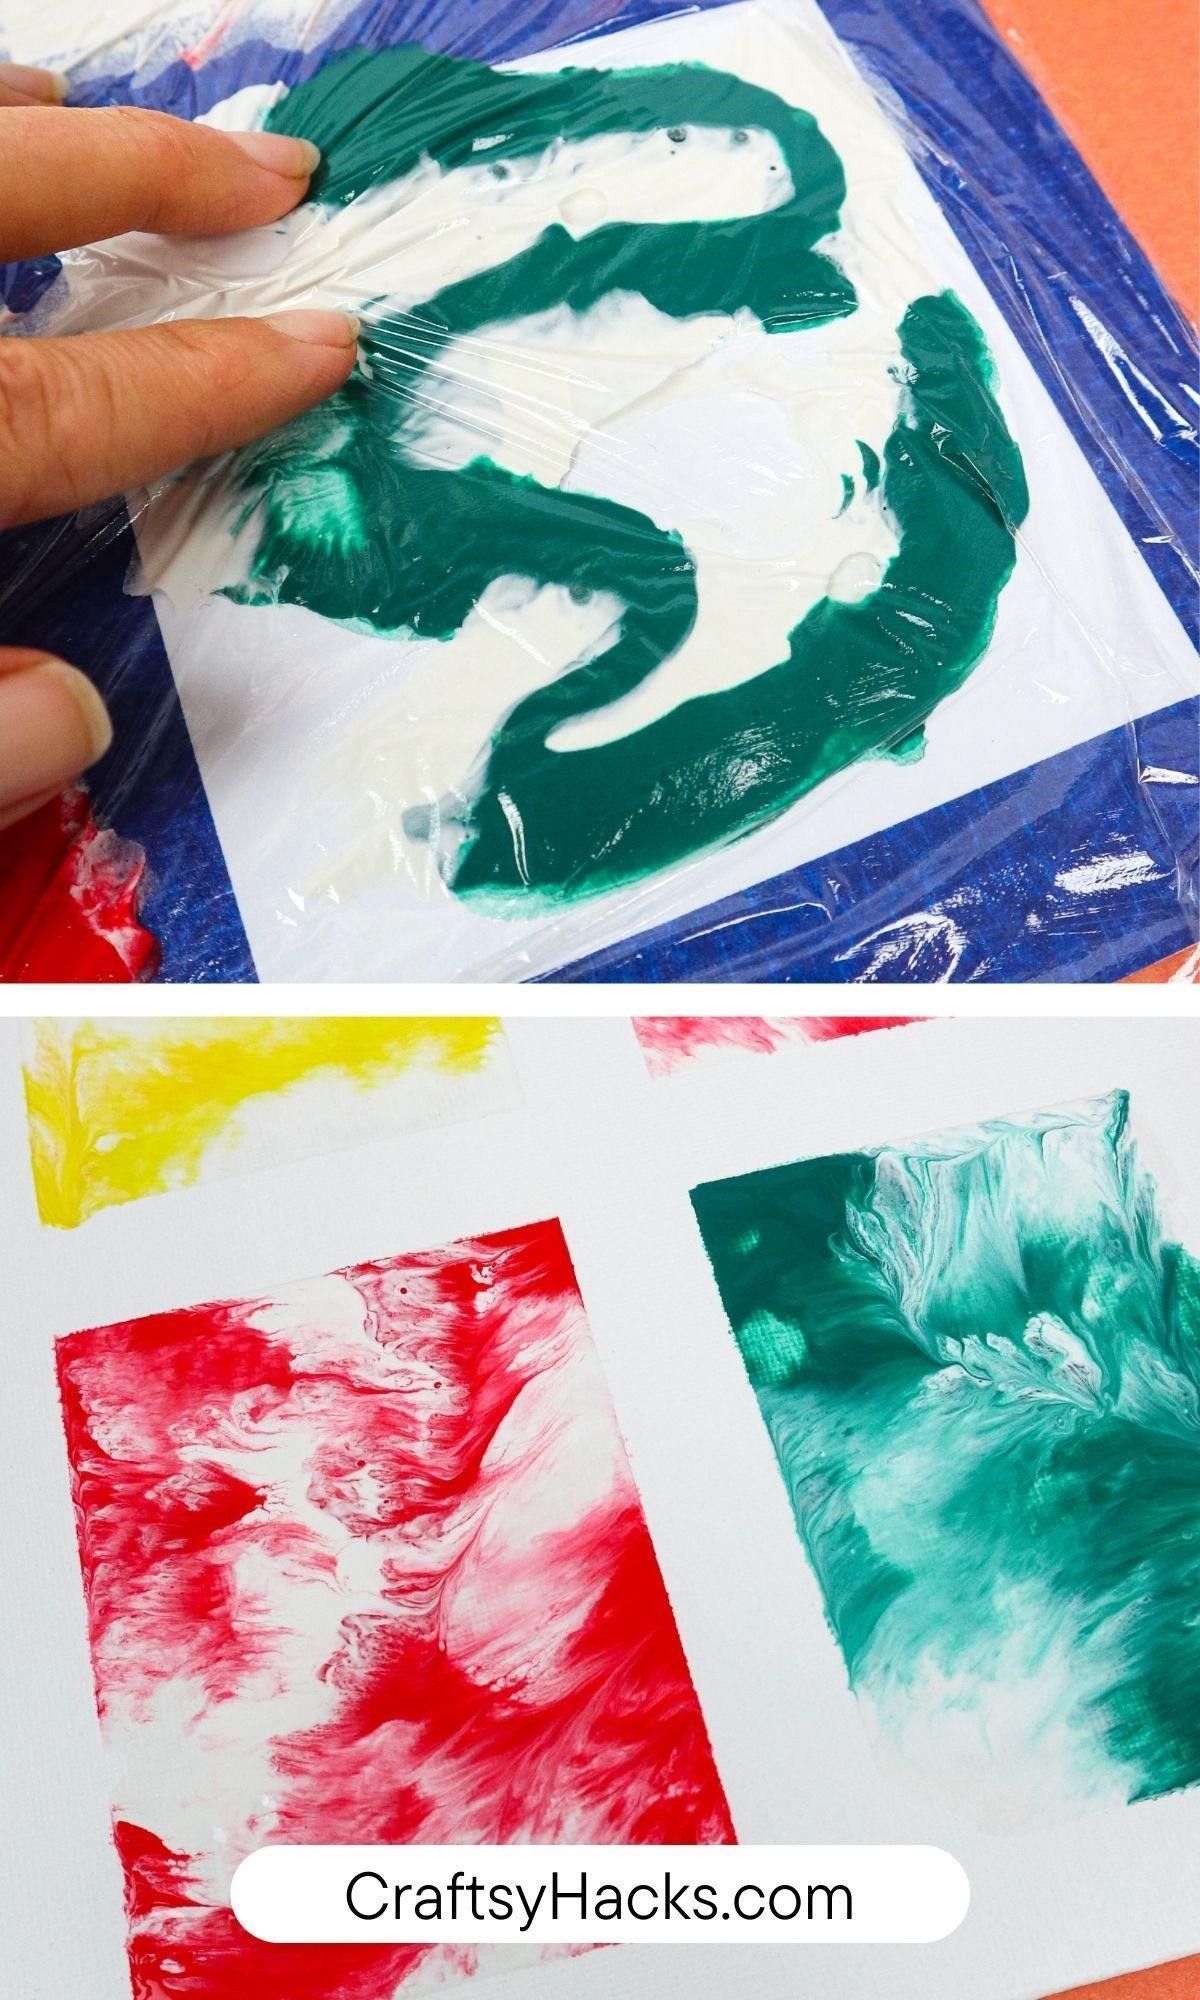
This DIY painting project hack makes my inner neatnik sing!
If you’d like a cool marbling effect, tape your page with masking tape, squirt some of the best paint on the page, and then put cling wrap or plastic wrap on top!
Use any handy tool like a paint roller or even your fingers–it’s therapeutic. When done with that segment, peel the wrap away from the image and let it dry.
If you don’t have cling wrap, you can get the same effect with a good seal on a ziploc bag!
13. Paint Flowers with a String of Beads
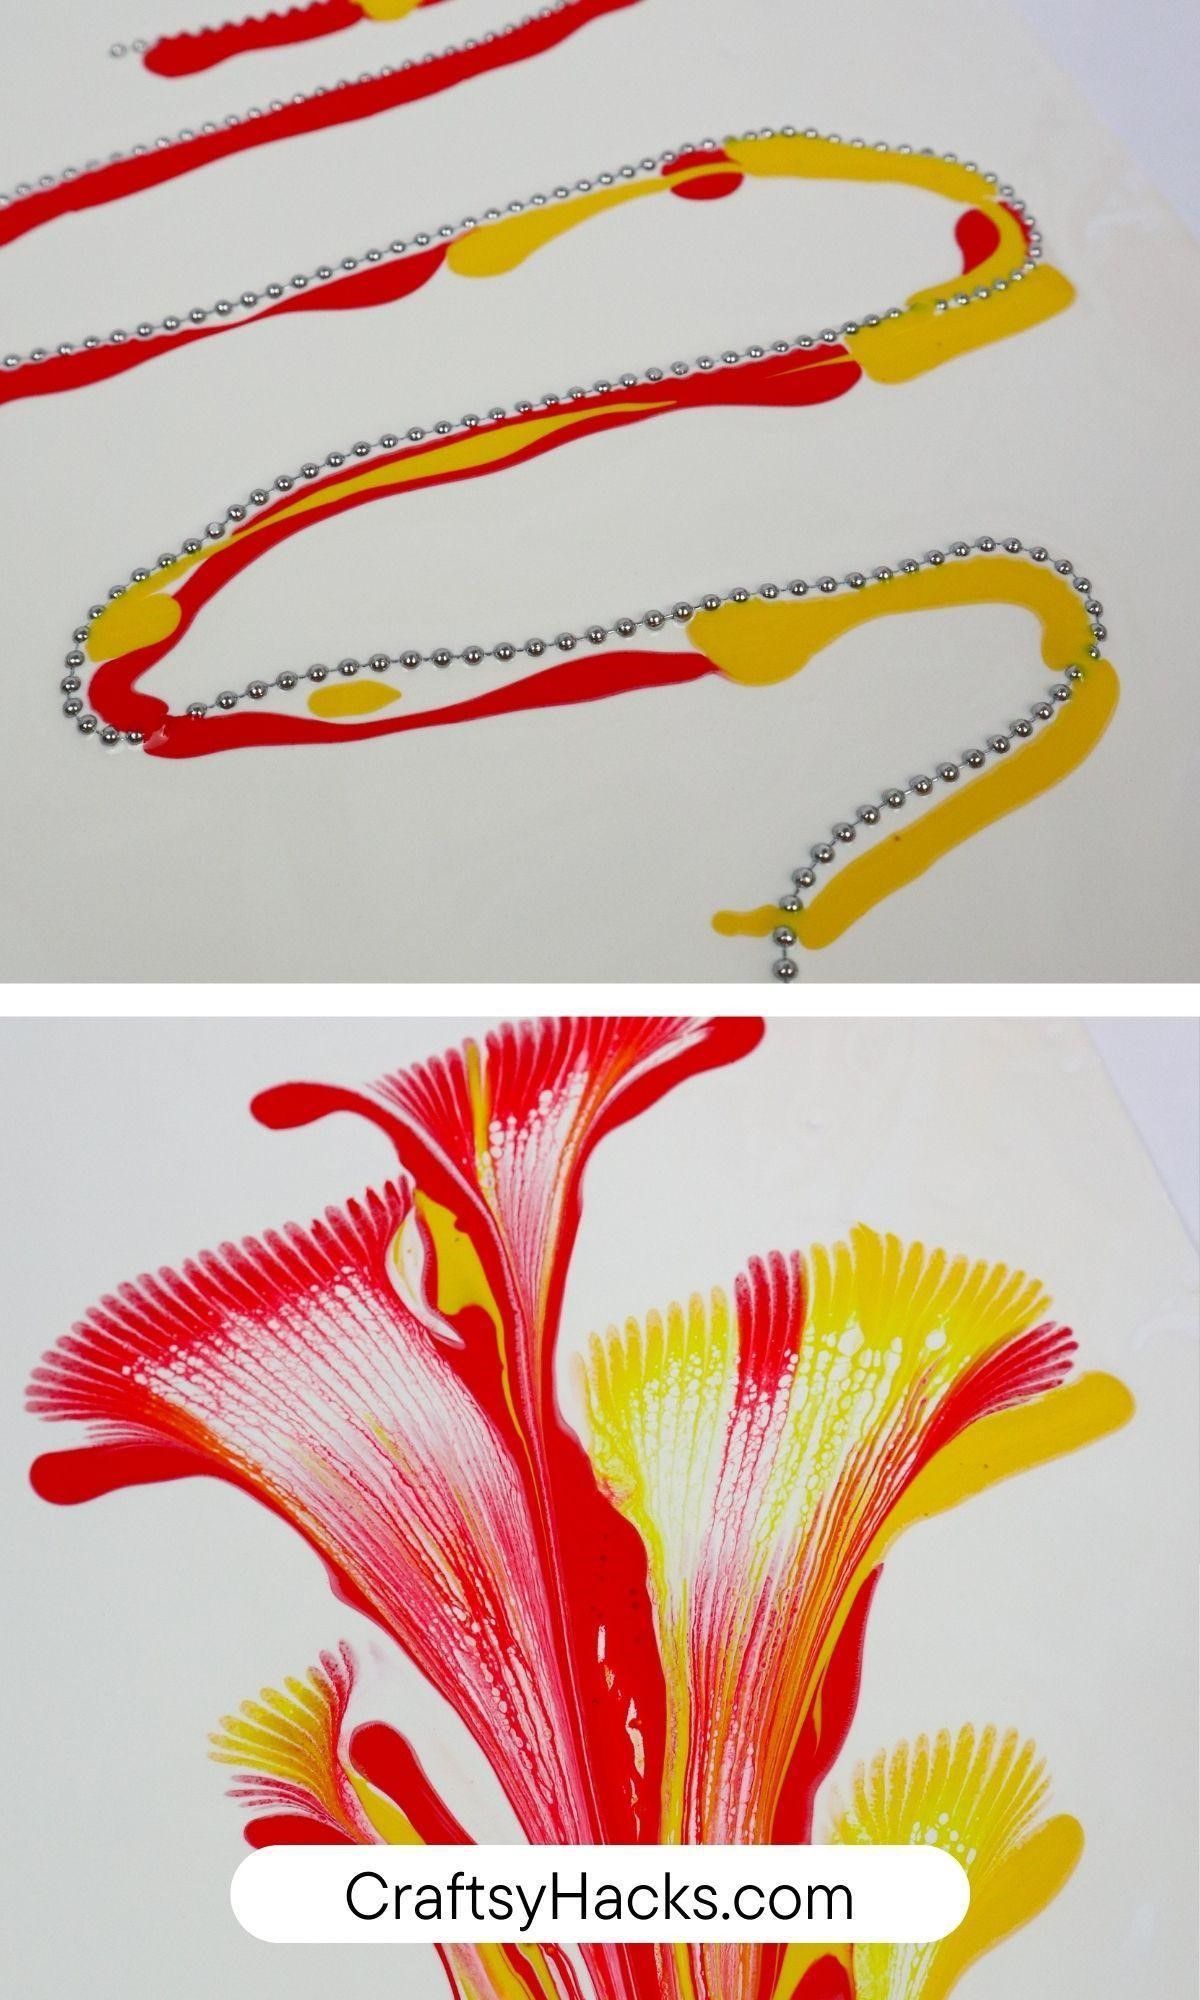
A favorite abstract method of mine is dragging something through the paint to create unexpected and unique shapes. One of my very specific items to drag through is these beaded strings.
They produce both minor and significant lines simultaneously, and I love how they run through the color.
Add paint to the page and pull the beads however you please, and once done, rinse your strings for future uses.
Try more watercolor flower painting ideas!
14. Dab Your Brush into Multiple Colors
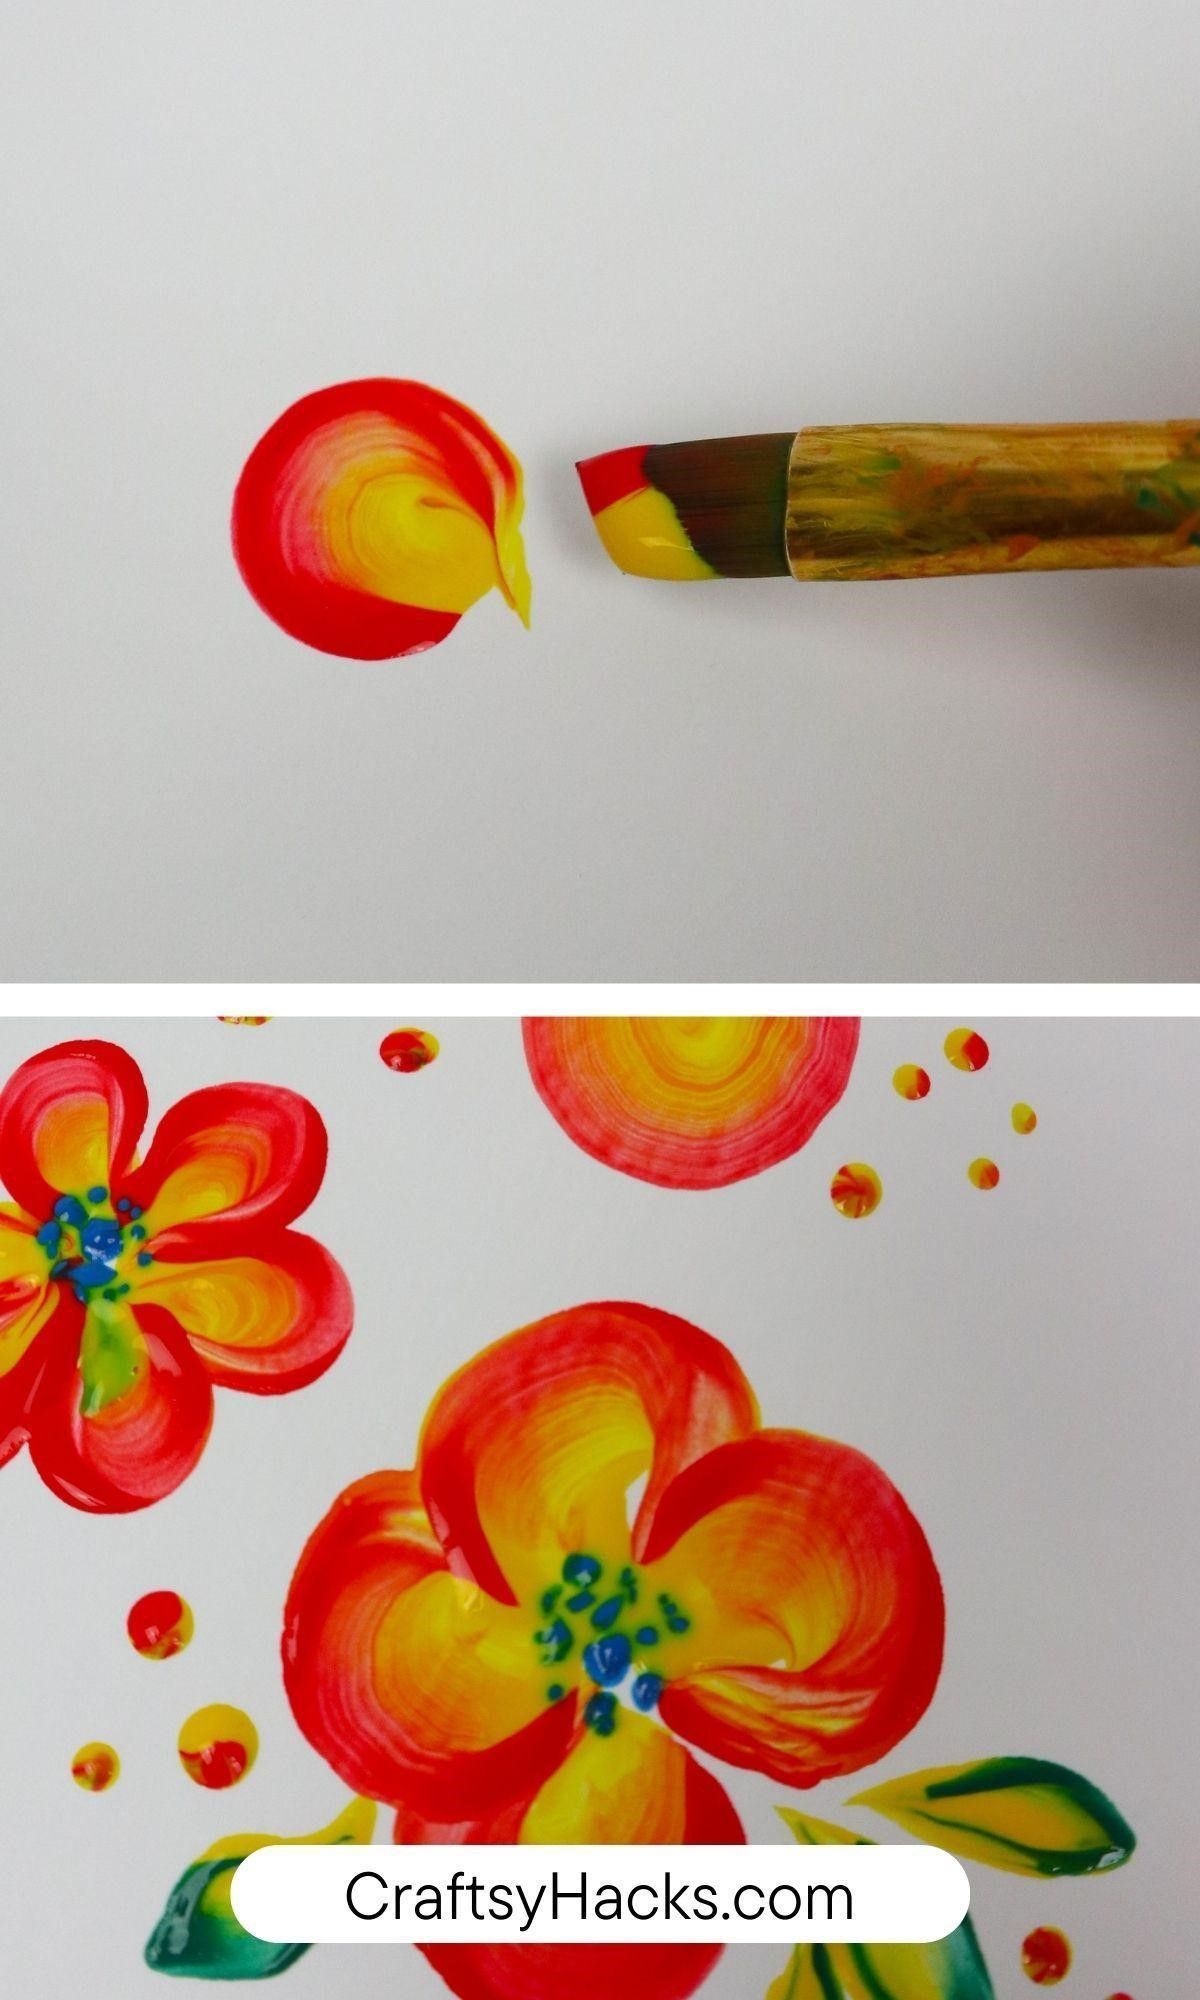
This hack can get tricky when illustrating something intentional on the page, so make sure to practice on a separate paper before trying this one out seriously.
Remember, when working with this technique, the outer colors get dipped first, and the inner color is the last one and closer to the angled part of the brush.
Note that the amount of color is also essential to test out.
15. Use Strings to Create Art of Your Dreams
As I mentioned above, I love pulling items through paints, and this is no exception. Test out different string sizes, tie a few together, or add knots into the line.
I’ve been most successful with tempera paint here, but I think dunking into some of the diluted marker water might be an exciting project to take on.
16. Pour Away
Make sure you have enough space for this hack to create fascinating pooling effects. I’ve tried this a few different ways, and it works better with tempera or acrylics.
I also will place the canvas or material I’m about to pour paint on into an oversized tub like this–it doubles as storage for various art items.
The tub also helps, after doing this hack, of tilting the poured paint around the blank area to enhance the uniqueness of the trick.
17. Layer Your Colors in a Funnel
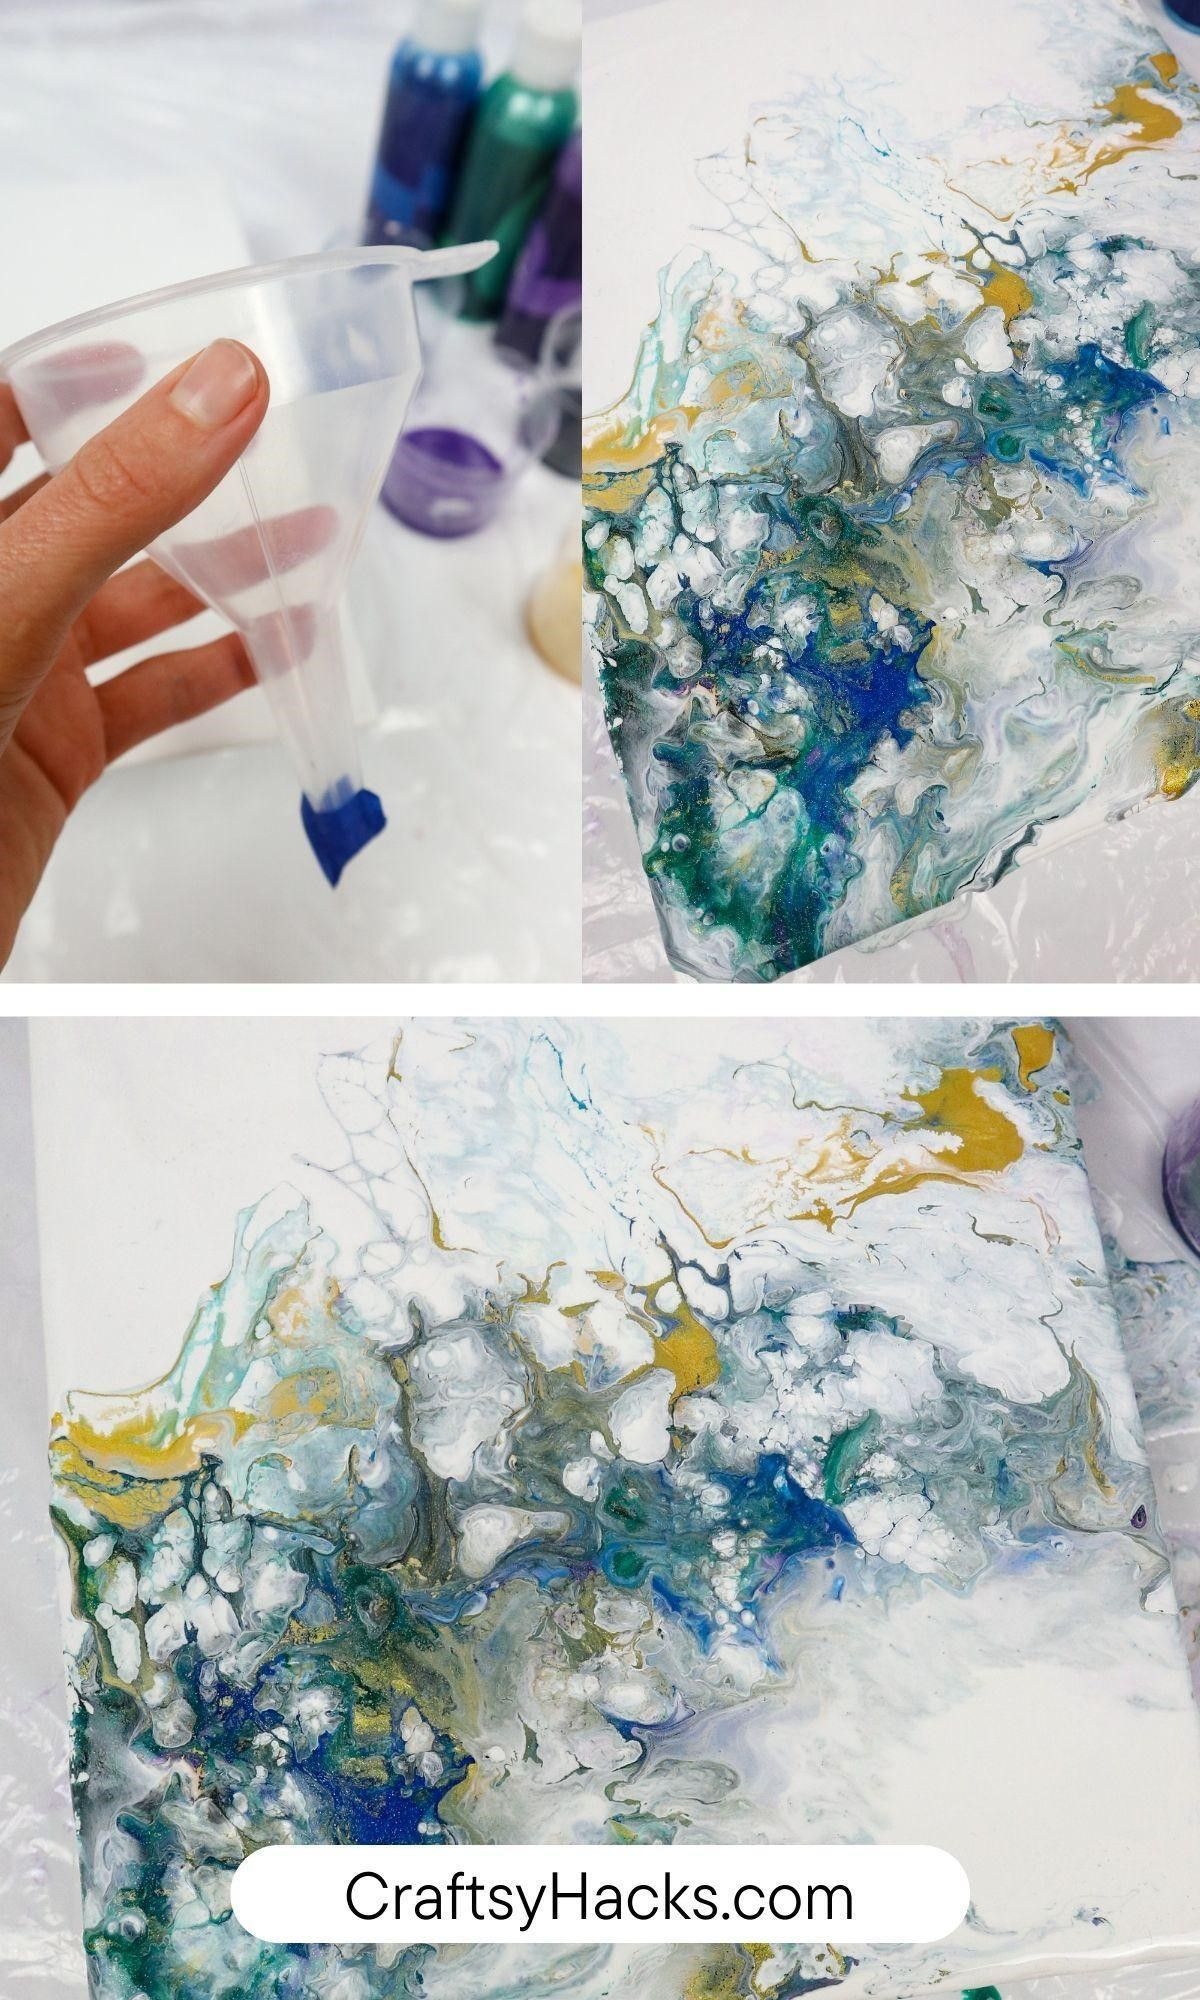
Movement in the paint has been very enticing to me the past few years, so I love this hack too. Grab a funnel, layer your paint, and release it over the canvas.
I’ve grown to love this funnel, and it has an excellent stopper at the bottom, so I don’t get too messy during this process. Stay in one spot while letting it flow, or move your funnel around as you please.
18. Create with a Hair Dryer

A blow dryer is another great tool to help with the motion in your art, which is great because most of us already have one at home! I’ve found some incredible artists because of my love of blowdryer art.
Try all the different types of materials and paints for this hack and see which one you love most. If it’s a flat, smooth surface, it’s possible, and to make it shine, add a sealant layer on top once it’s dried.
19. Make Use of Your Plastic Bottles
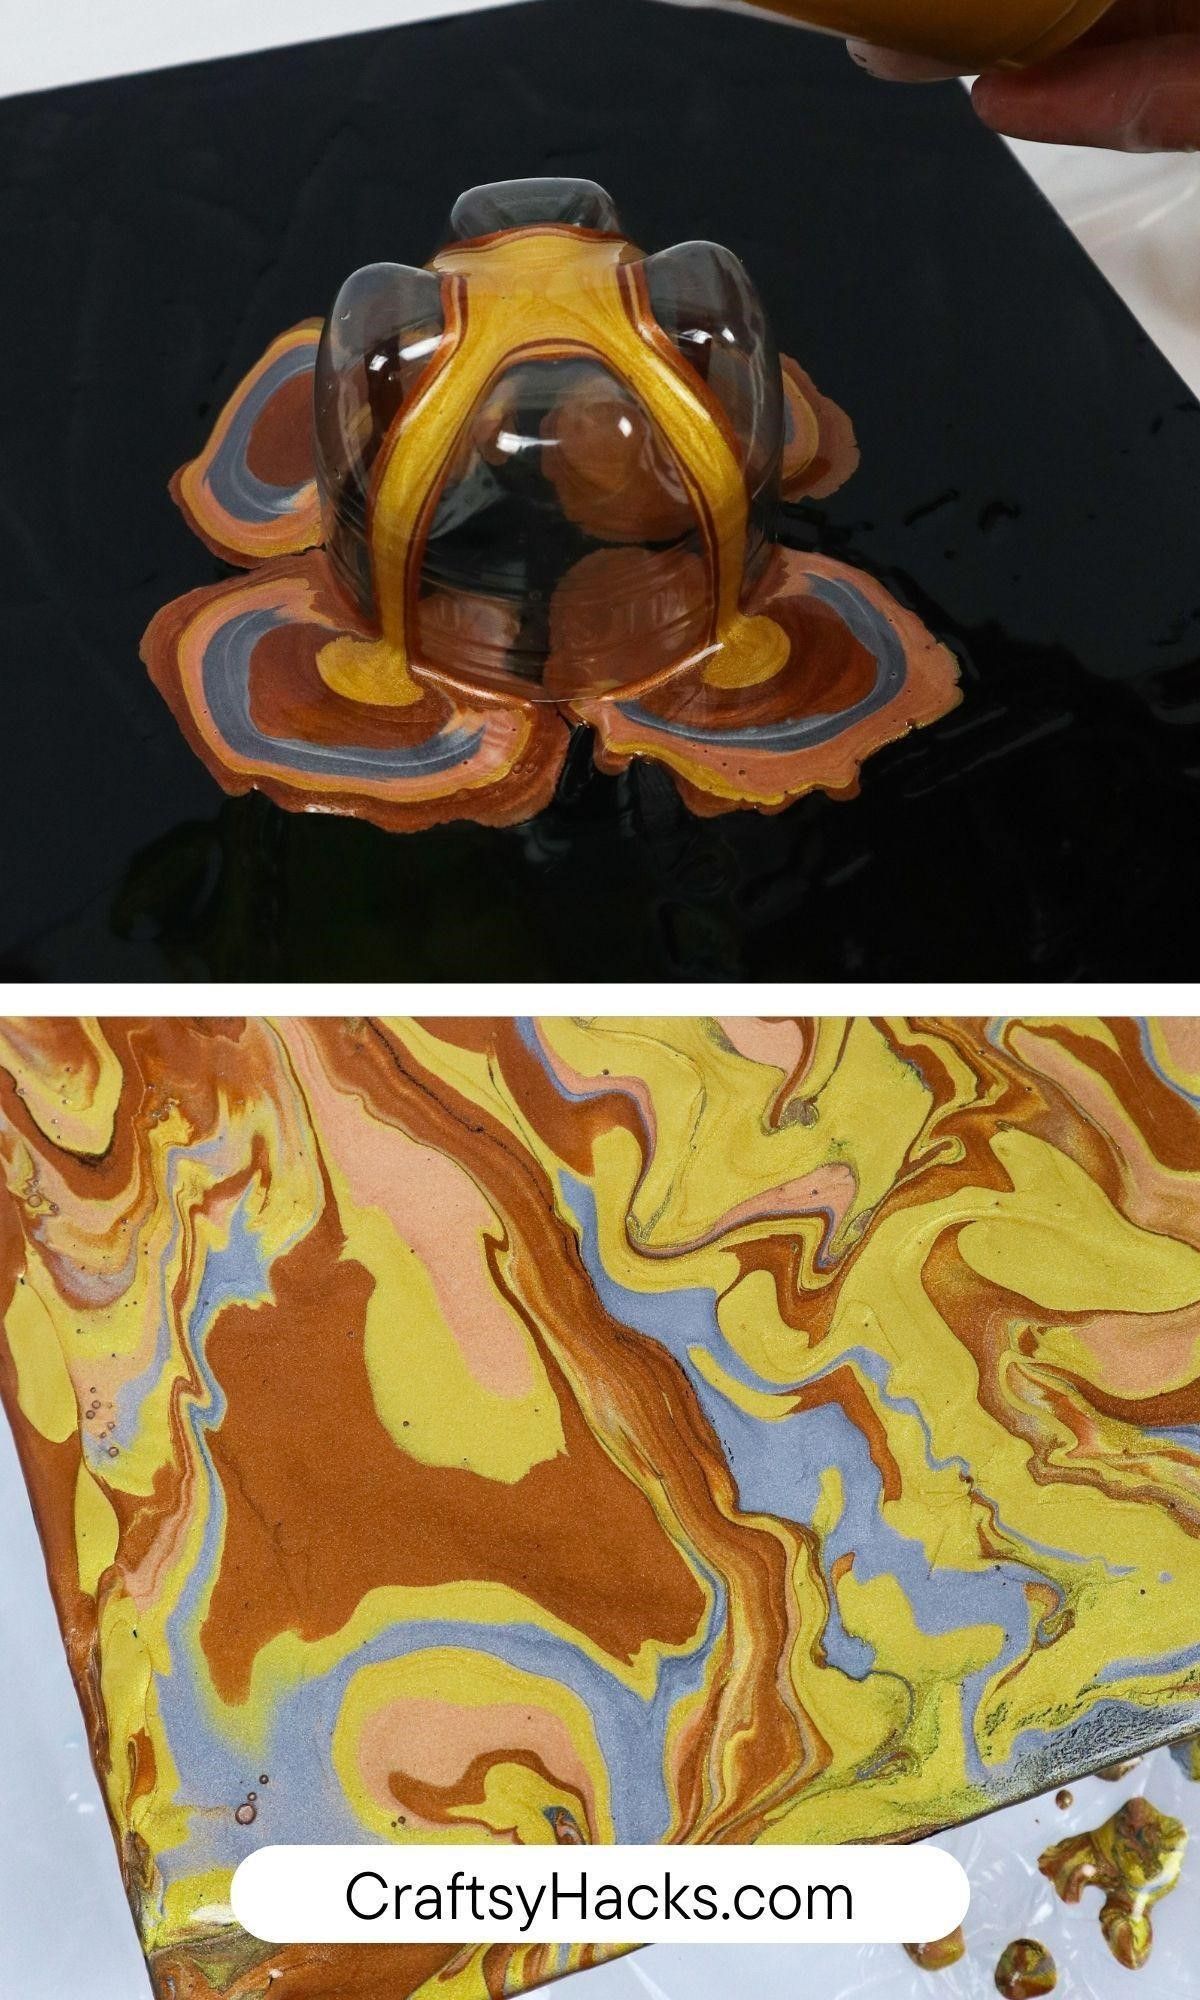
Like a funnel, a bottle’s bottom is a great way to layer paint onto the page effortlessly. Any plastic bottle size that has four points at the bottom and pourable paint will work well.
First, take the bottle or bottles that you’ll be using and cut the bottom quarter off, recycle the tops, or use the top half as another funnel.
Place the bottom you plan on using onto the surface–points pointing upward. Next, grab the paints you’d like to use for the hack and start pouring!
The colors you use first will travel farther away as you continue to work and yield a really cool marbled look once you pull the bottle.
Not sure what to paint with these techniques? Try these cute painting ideas for beginners!
20. Use Decorative Tape
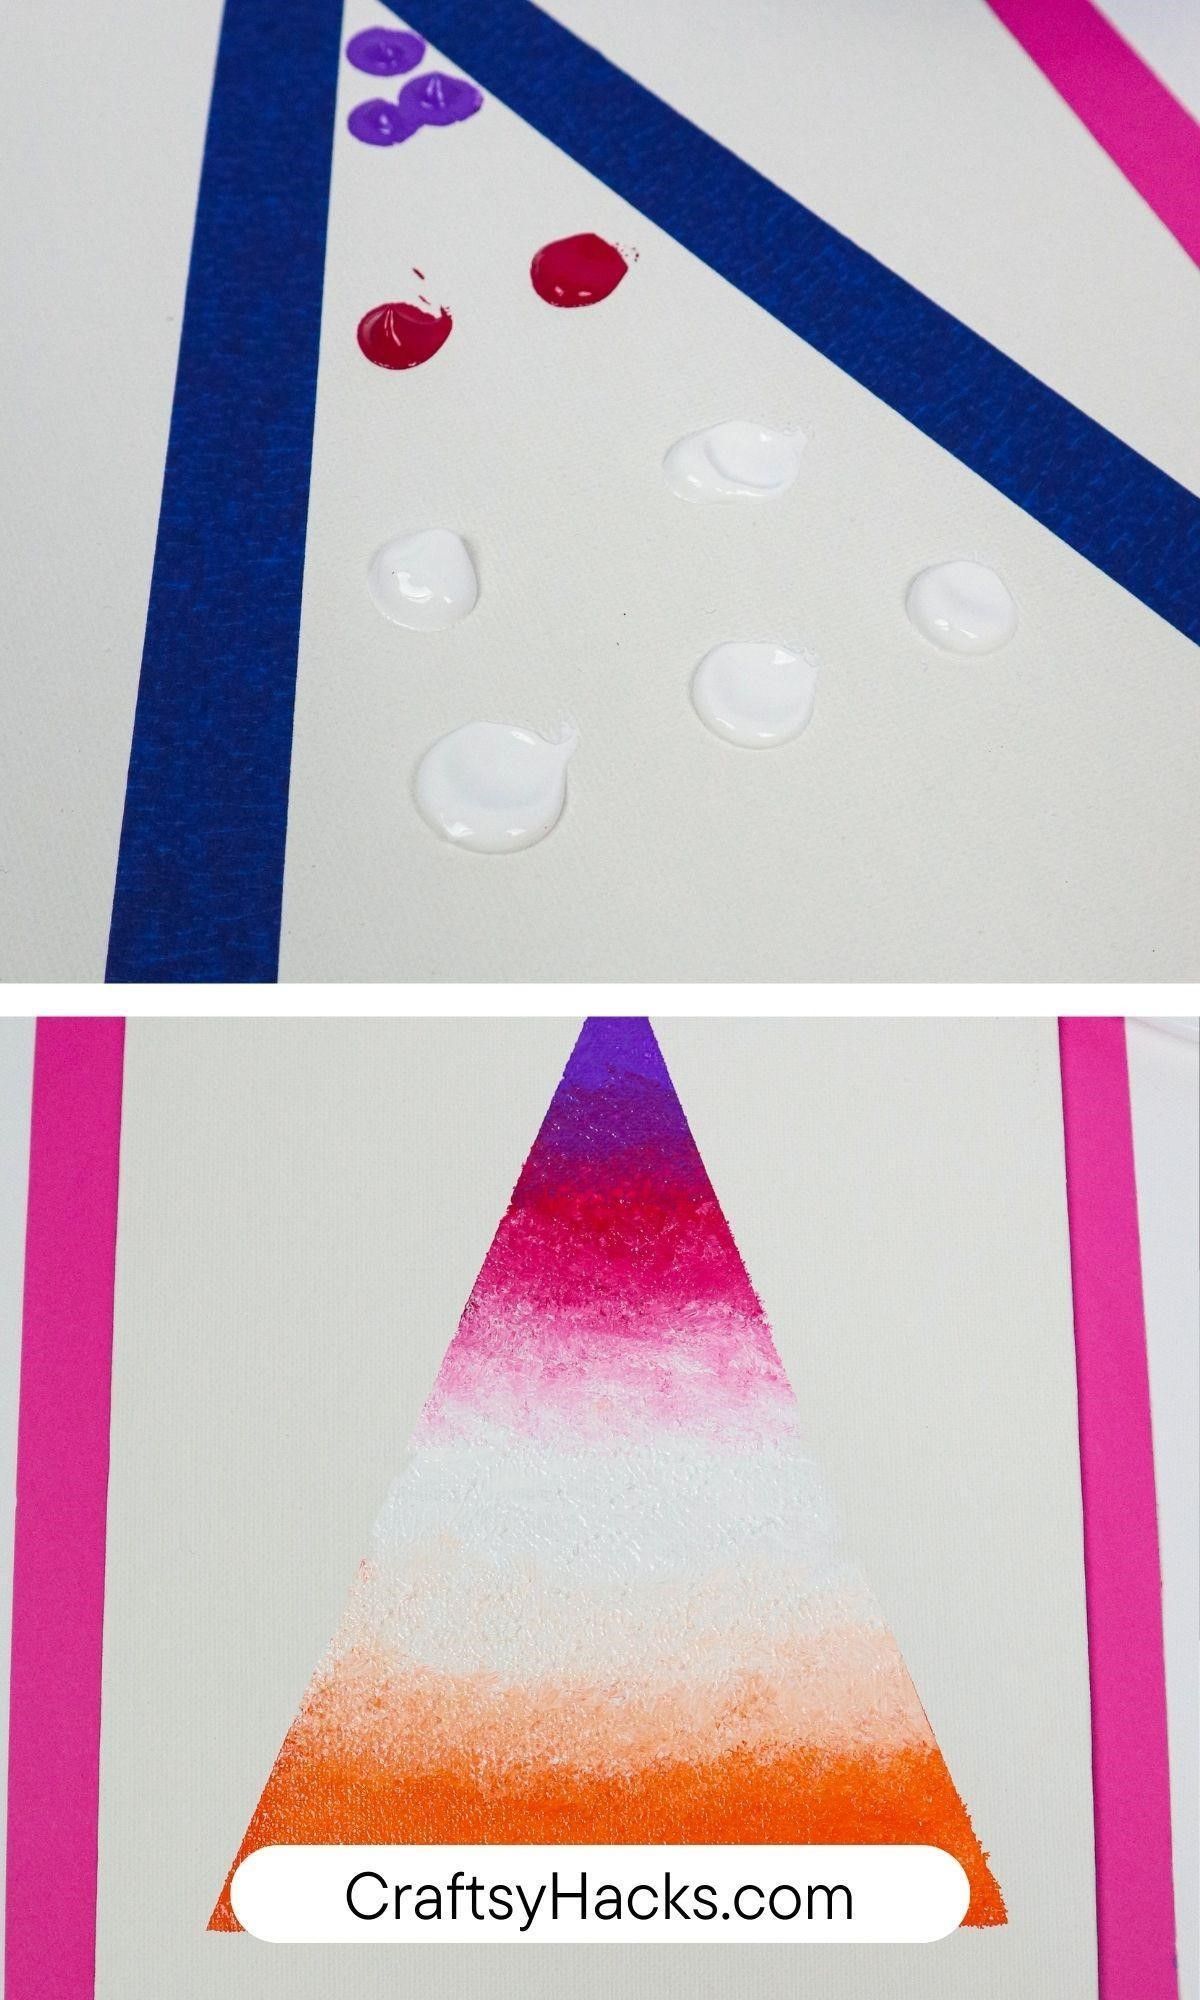
Tape, I believe, is a painter’s best friend. It helps anchor a project down, create negative space for a piece, and even create a tailor-made canvas.
In this hack, we’ll dive into creating your own personalized canvas shape with tape. I decided to make an ombre-esque triangle.
To try it out, tape out whatever form you’re interested in and then add paint dots to the area. Return with a brush, ruler, or any other tool to blend the color into one another, and let it dry.
Once fully dry, remove the adhesive to reveal a perfectly crafted image done by you!
21. Use Your Hair Brush
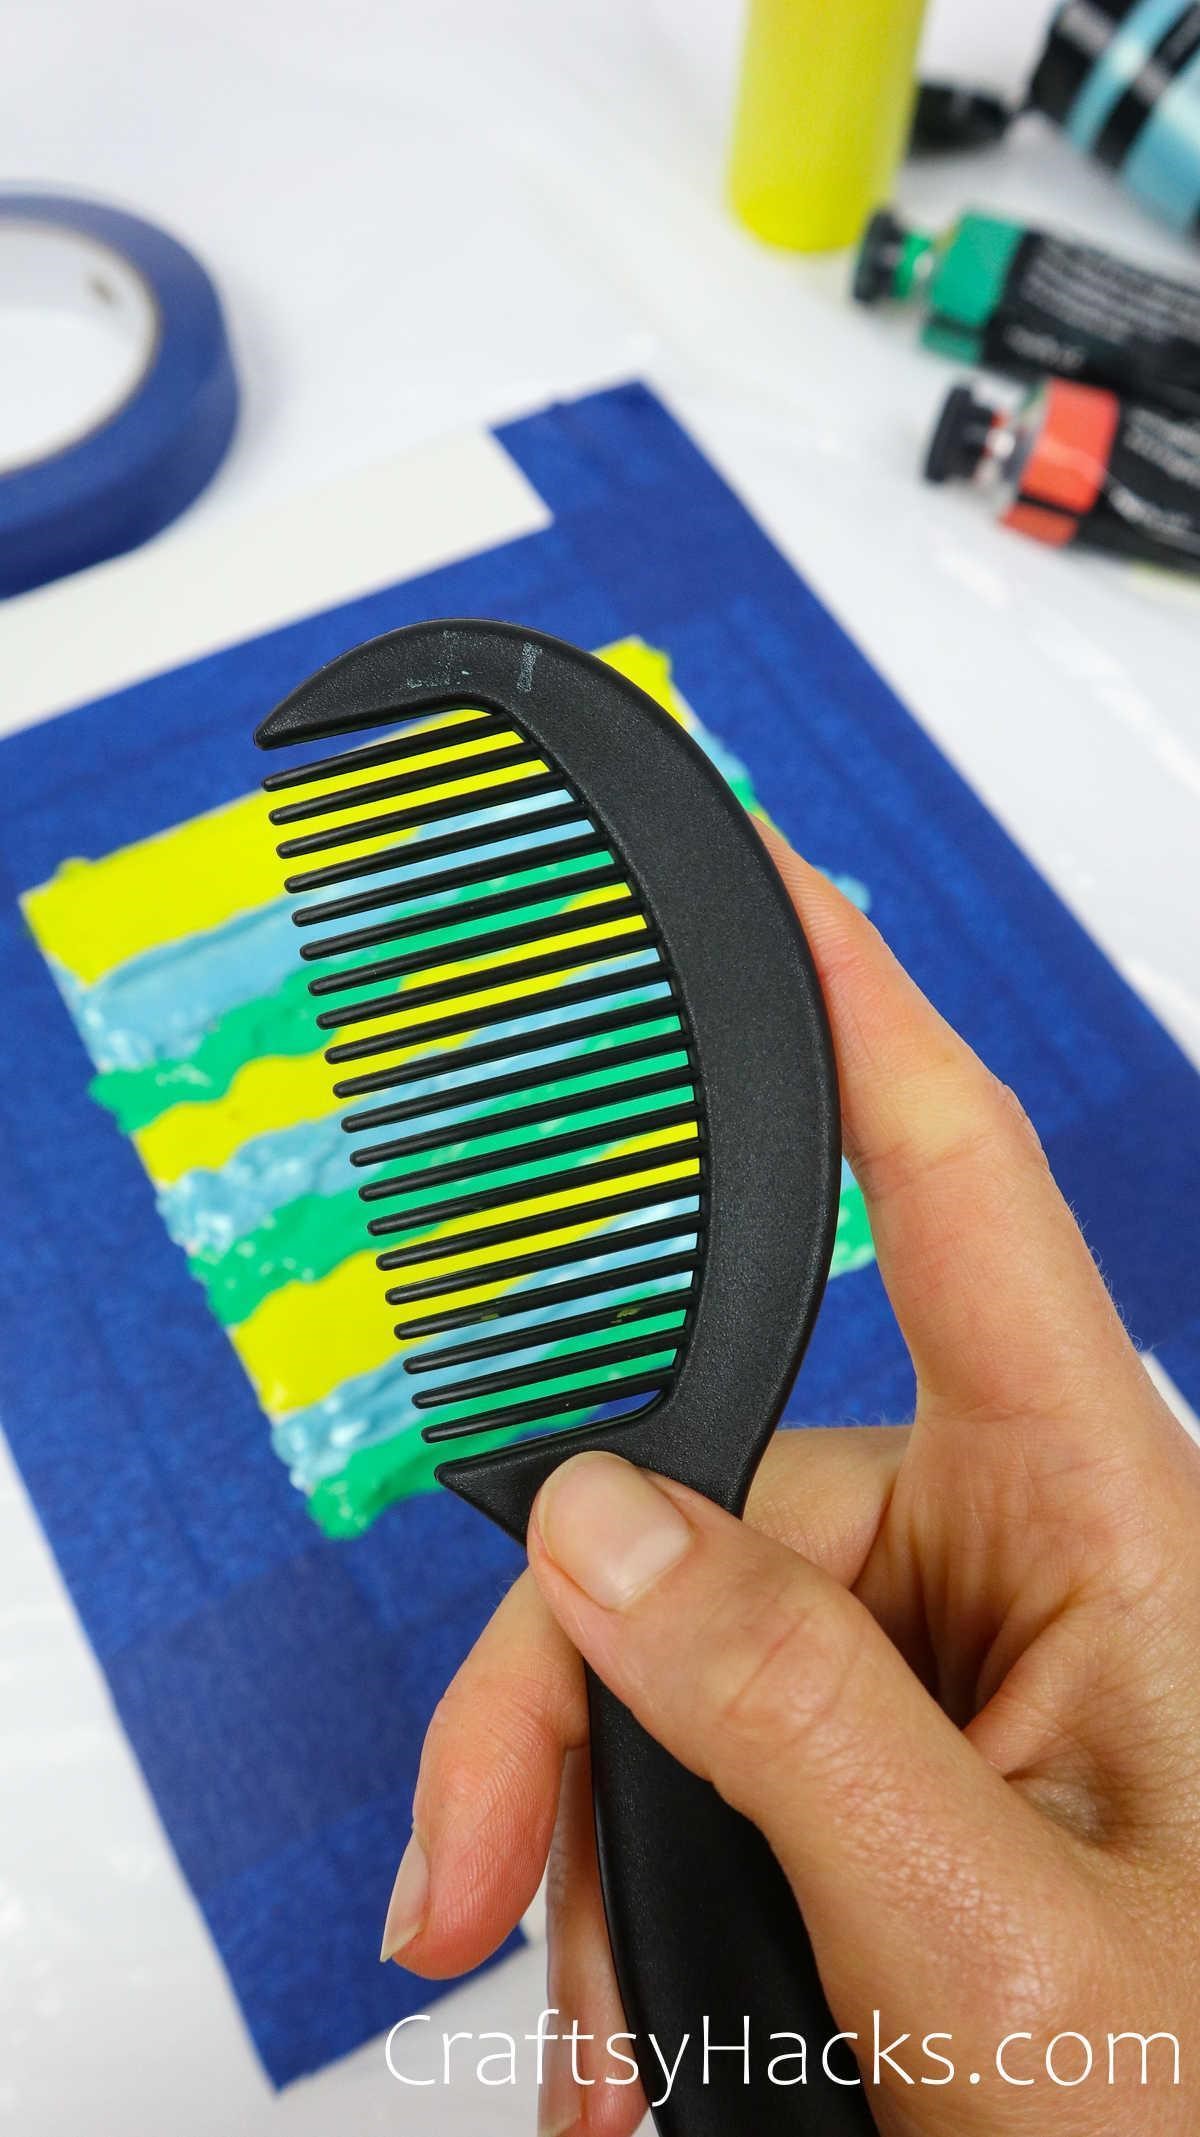
Odd, I know, but it works as a beautiful tool while creating! If you’re not ready to give up any of your brushes, this little pack has done a great job across many projects.
I’ve put paint down on the spots and drug my comb through, dipped the tines into different paints, and then taken it to the project and a few other ways–try out anything you’d like for this one!
A terrific way to test the possibilities is to grab any comb or brush you’re willing to use and get a test sheet out to see all the different results it can pull off!
Ready for more unique painting ideas? Check out these watercolor hacks for beginners.


Très bonnes idées. Merci