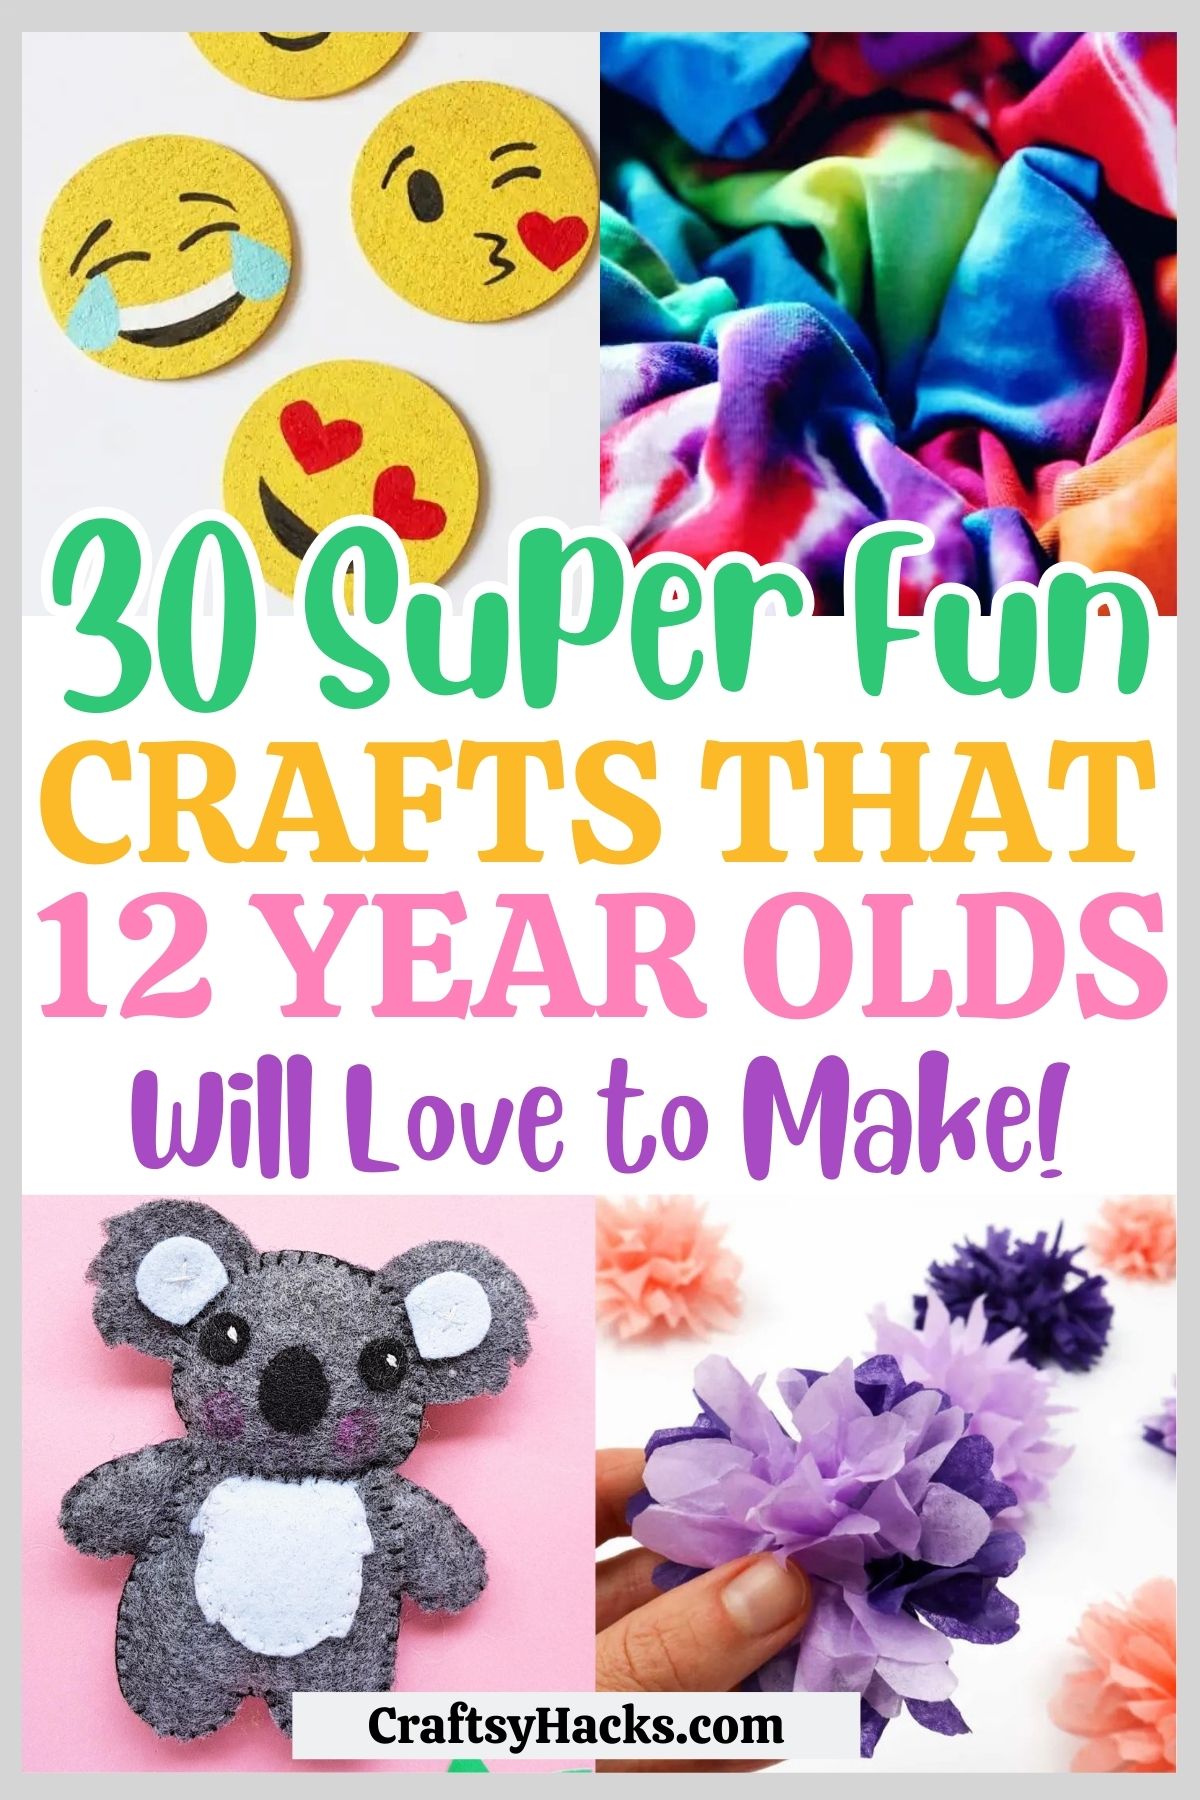
30 Fun Crafts for 12 Year Olds and Tweens
This post may contain affiliate links: full affiliate disclosure.
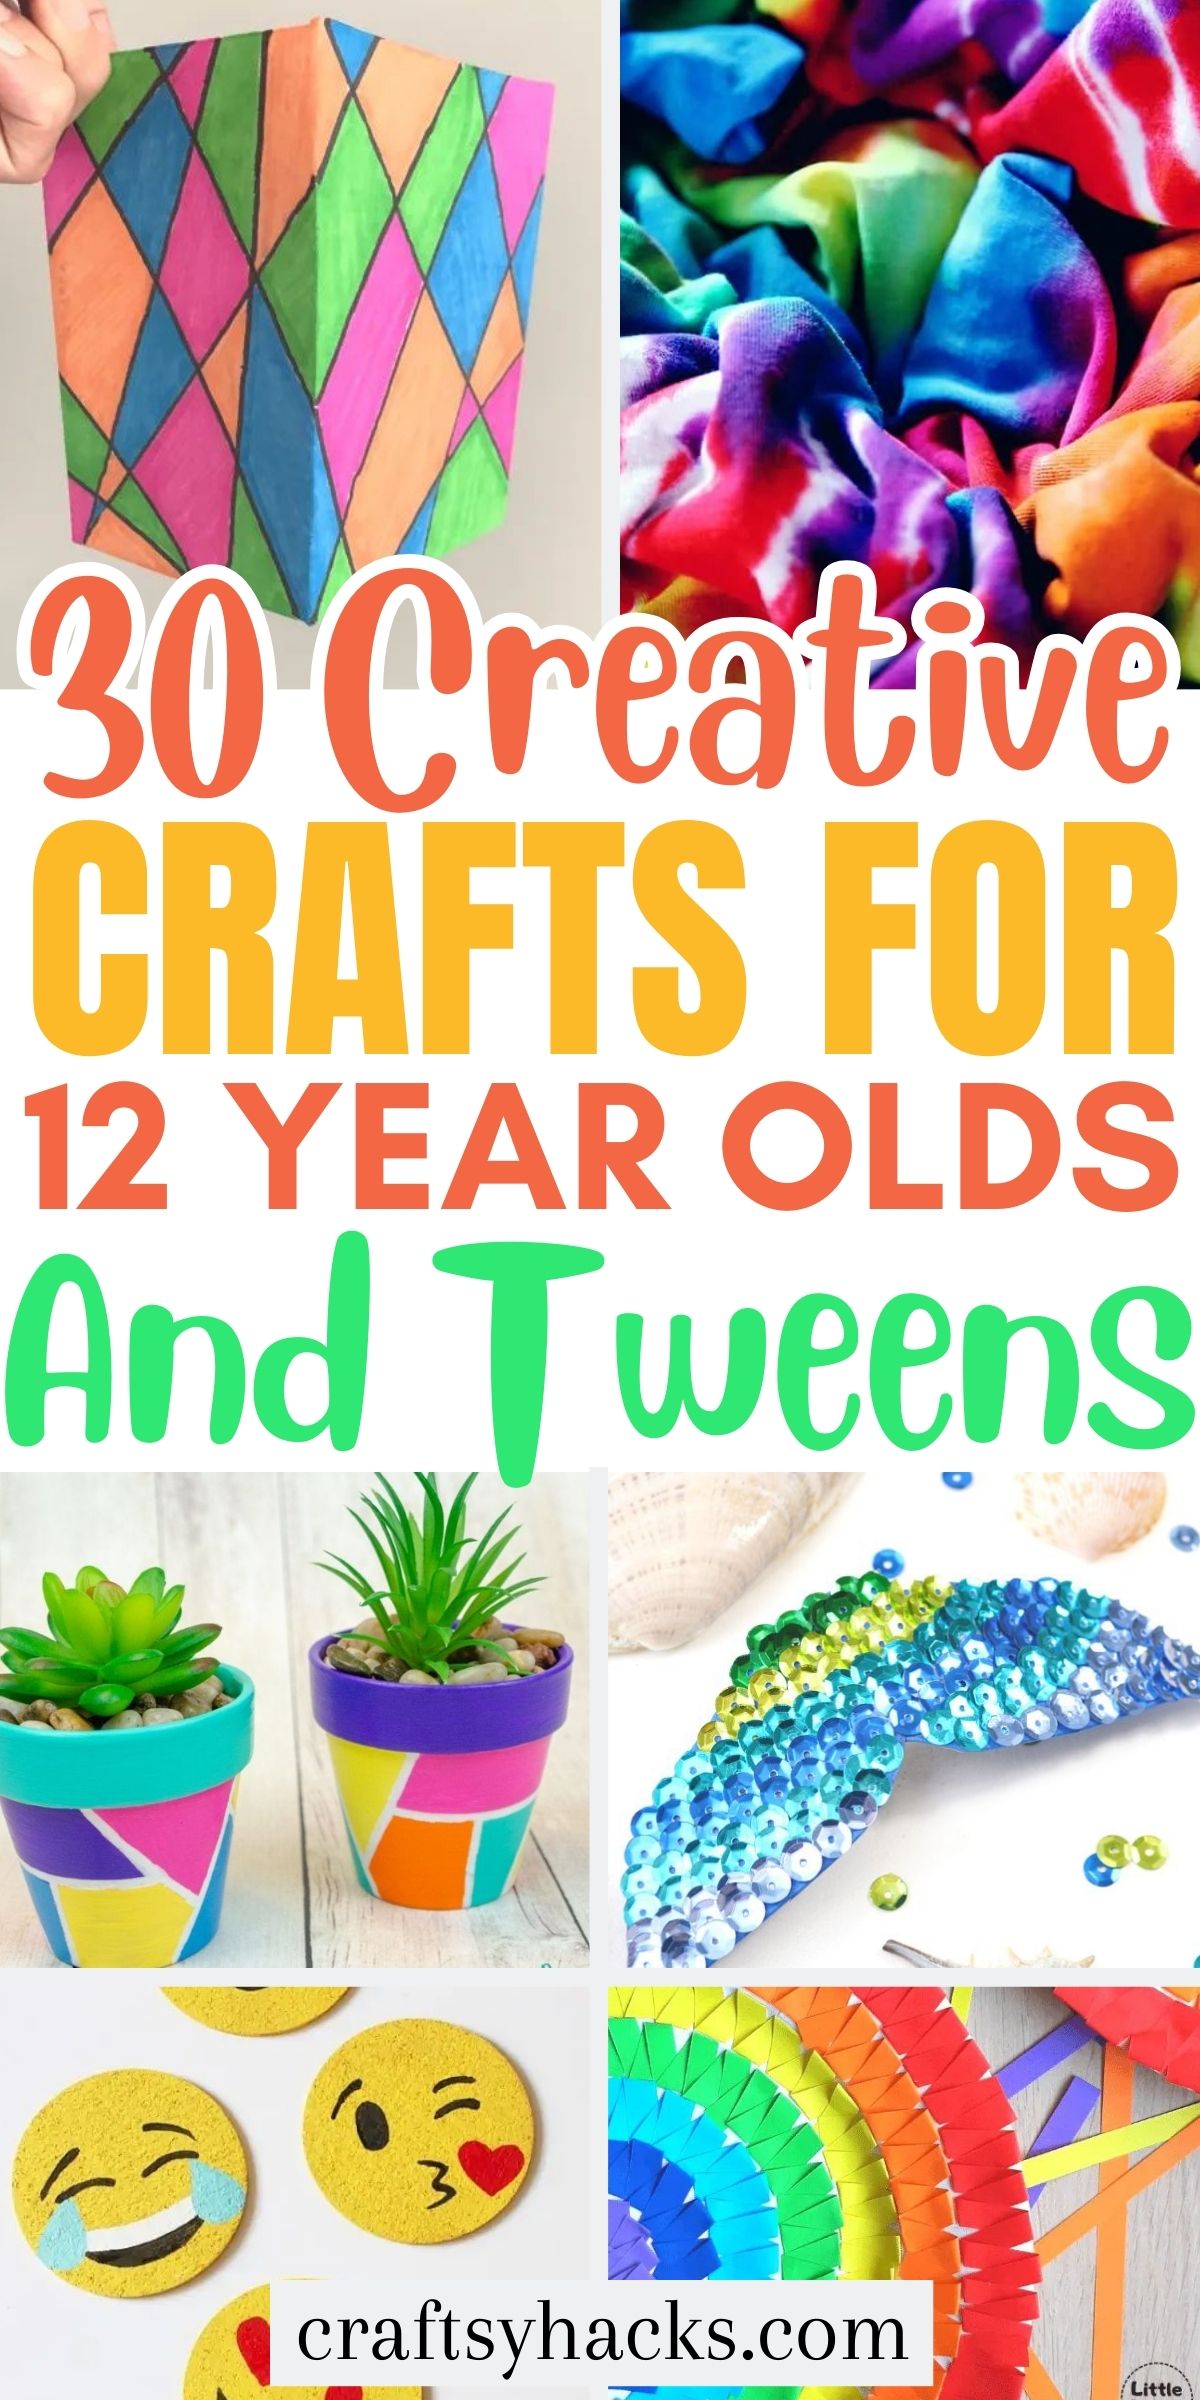
The time between childhood and teenage years can be tricky to navigate. These fun crafts for 12 year olds will help them reconnect with their creative side in more fun ways.
All tweens seem to be in different phases, holding onto some parts of childhood and starting to accept some more young adult ideas into their heads.
My list for you bridges the best it can for your youngster. The collection of craft ideas has a few more useful crafts, but with all the creative flair older kids would like to put into it.
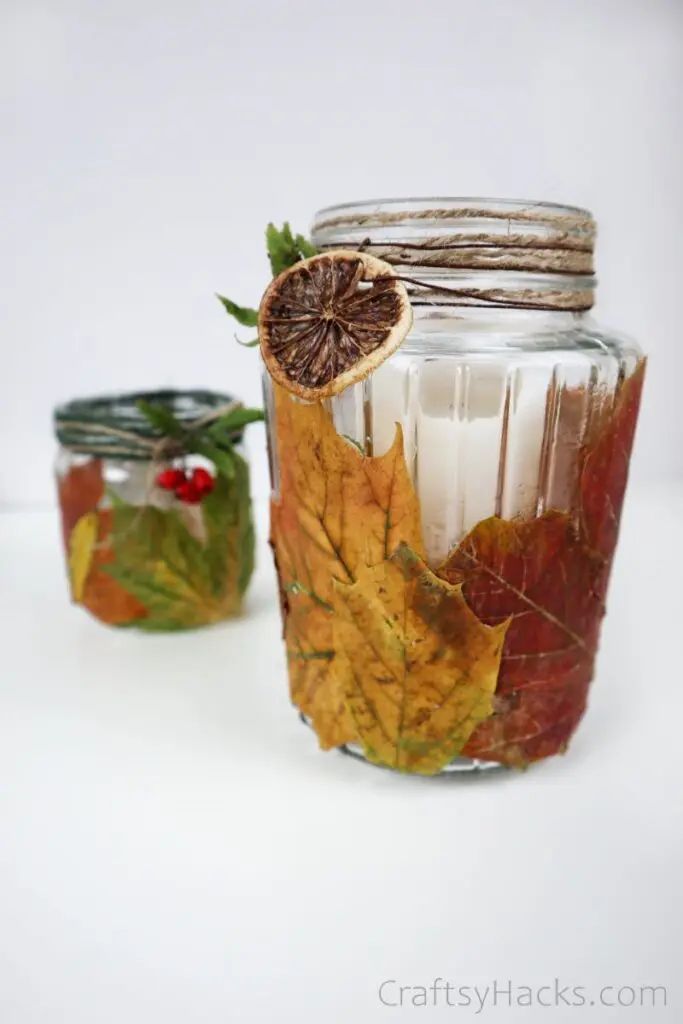
1. DIY Leaf Candle Holder
Source: craftsyhacks.com
If your older children are into the outdoors, have them try this DIY out next time they’re looking for cool crafts to do.
All you’ll need for them is a jar, leaves that are workable (real, plastic, or textile) and will lay flat against the surface, mod podge, and any decorative twine or accessories.
Have them attach the leaves lightly–in case they need to rearrange anything as they go, and once happy with the layout, put a light layer of glue overtop.
At this point, they can add twine or any other decorative detailing. These craft projects have step-by-step instructions and are so much fun for kids of all ages.
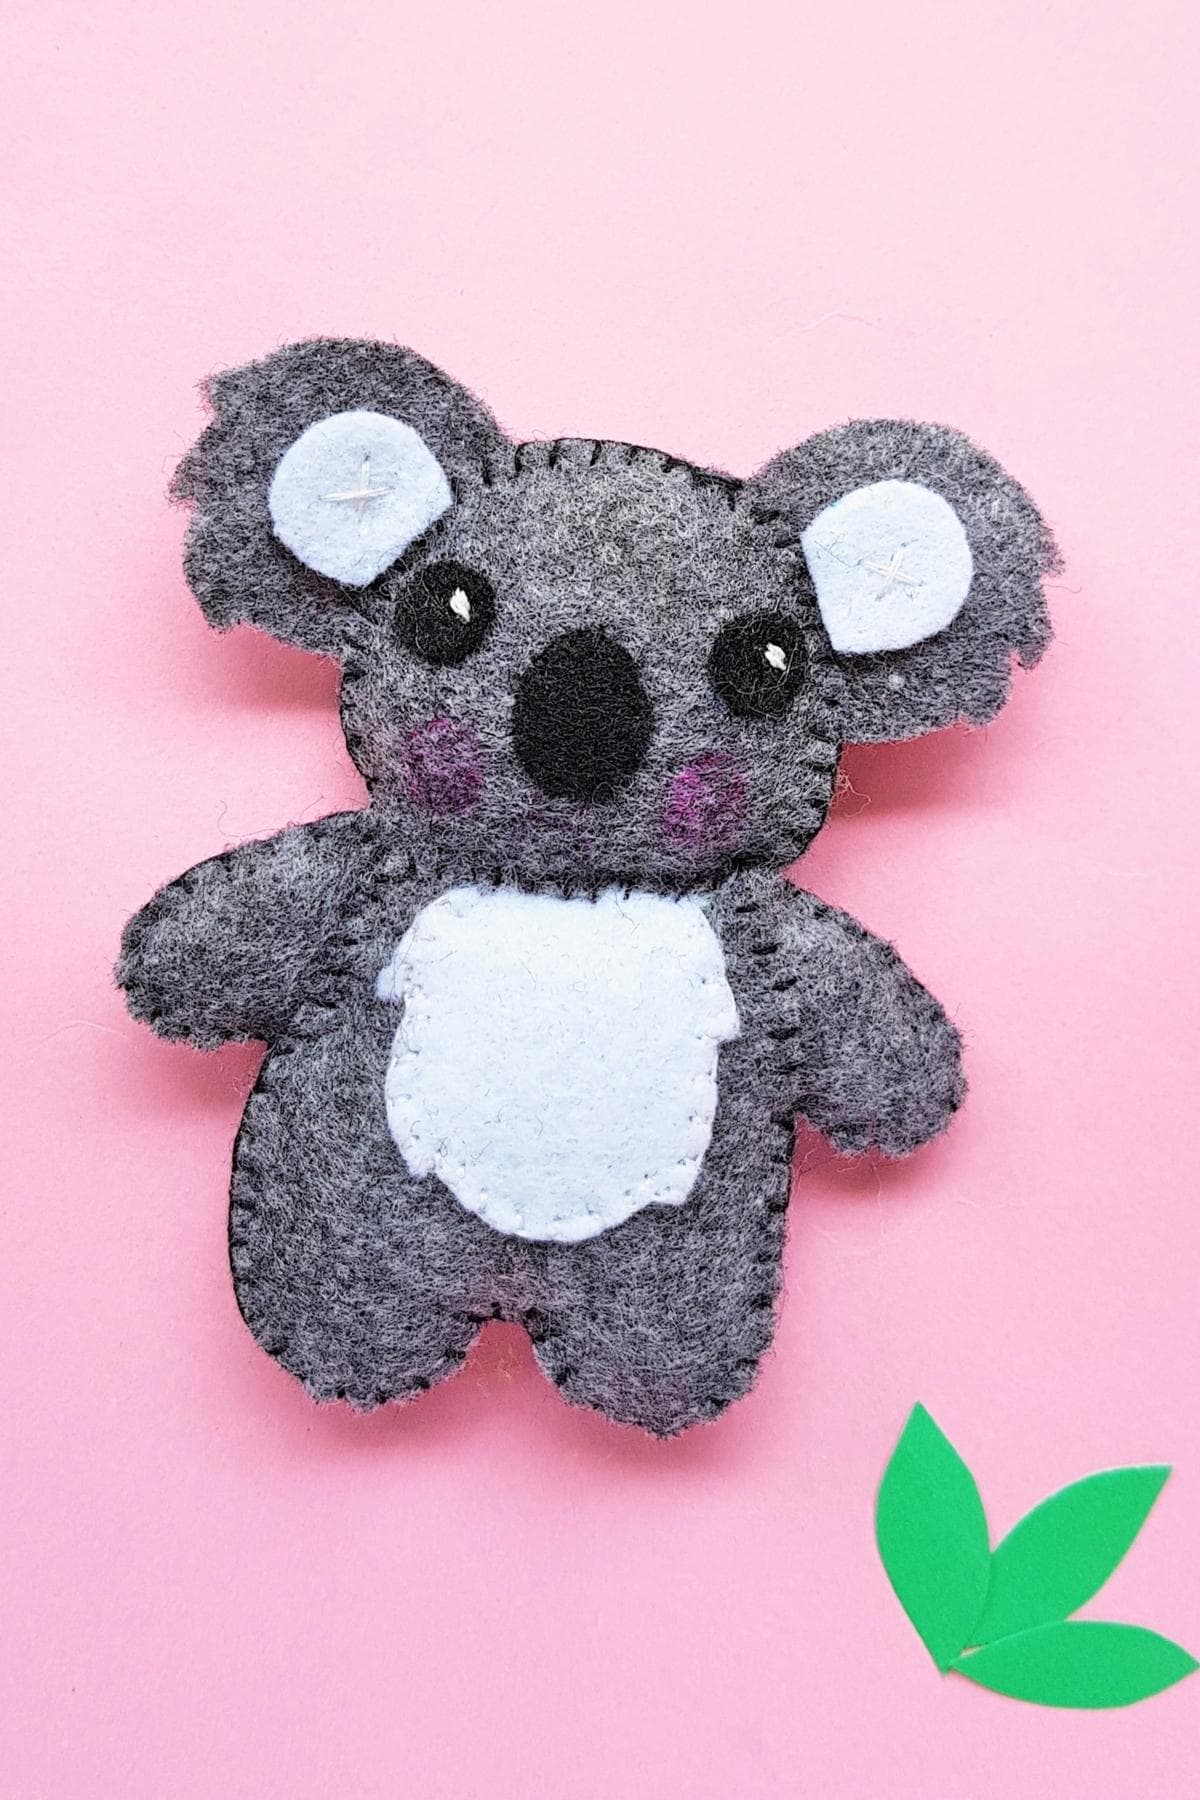
2. Felt Koala
Source: mommymadethat.com
For this fun craft idea you’ll need this pattern, this pack of felt fabric–gray, black, and white, black and white thread, cotton, scissors, pencil or fabric marker, and a needle.
Cut out the pattern and then use it to trace the outline onto the felt with the companion pieces.
Add the detailing to each piece, and then start constructing the bear, making sure to leave openings at the hands for stuffing.
After the arms have stuffing, add the belly overtop and repeat the same process for the arms–leaving a space to stuff, then sew shut.
Repeat the process with the head and make sure everything gets sewn up.
3. Macrame Keychain
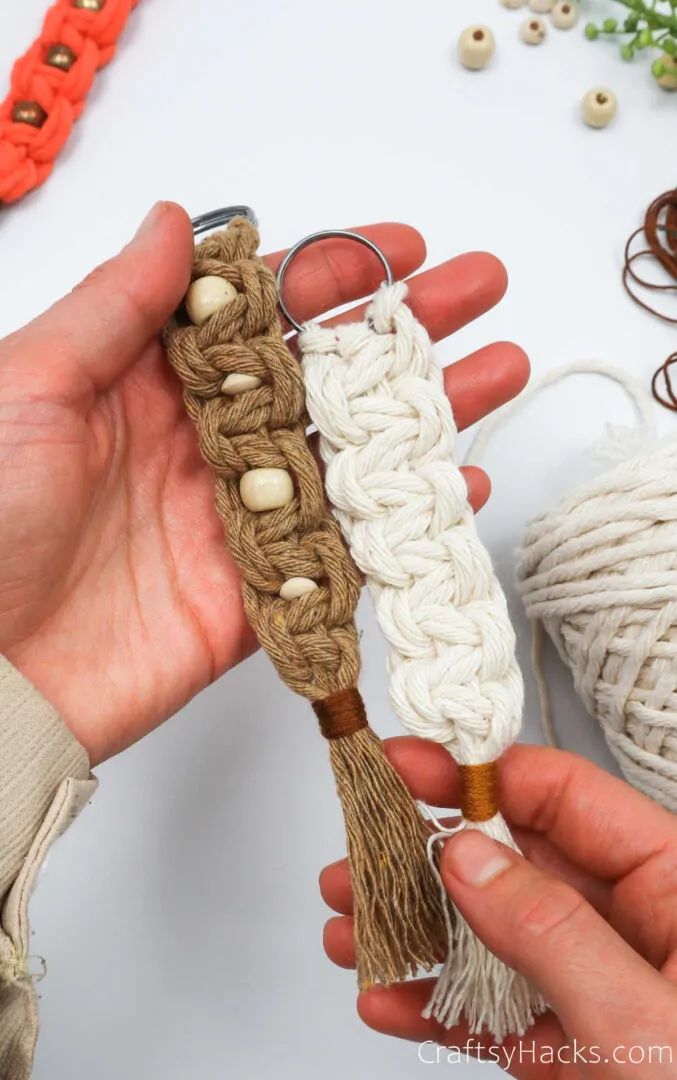
Source: craftsyhacks.com
These keychains are very simple; all you need are a key ring, 3x 4mm single twist cotton cords –many colour options here, tape, scissors, beads, and embroidery thread.
Make sure to reference my full tutorial here, with a video, but after you cut three strands of cord, we want to do a square knot around the ring with each string.
Once secured, we can start the braiding practice, and after each specific plait, it’s time to add a bead.
After completing a whole braided structure, take the embroidery floss and use it to secure the keychain’s tail.
This is one of the most easy crafts that the whole family can enjoy. All different age groups would enjoy these yarn crafts as rainy day activities.
4. Painted Fairy Houses
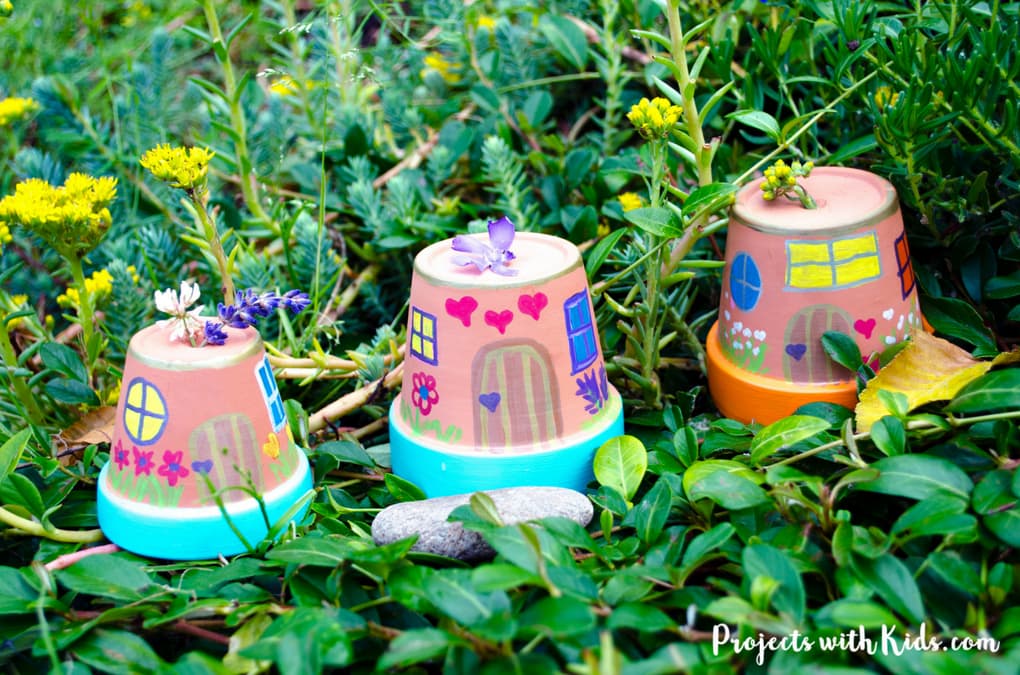
Source: projectswithkids.com
A cute addition to the garden and one of the most fun projects for all family members, fairy houses are easy to do with kids or a younger sibling.
Grab some small terracotta pots, paint pens or weather-resistant paint, brushes, and mod podge, and let the kids and little artist at it!
After the paint dries, have them put a good layer of glue overtop and let dry again before putting the enchanted houses out.
5. Paracord Bracelet
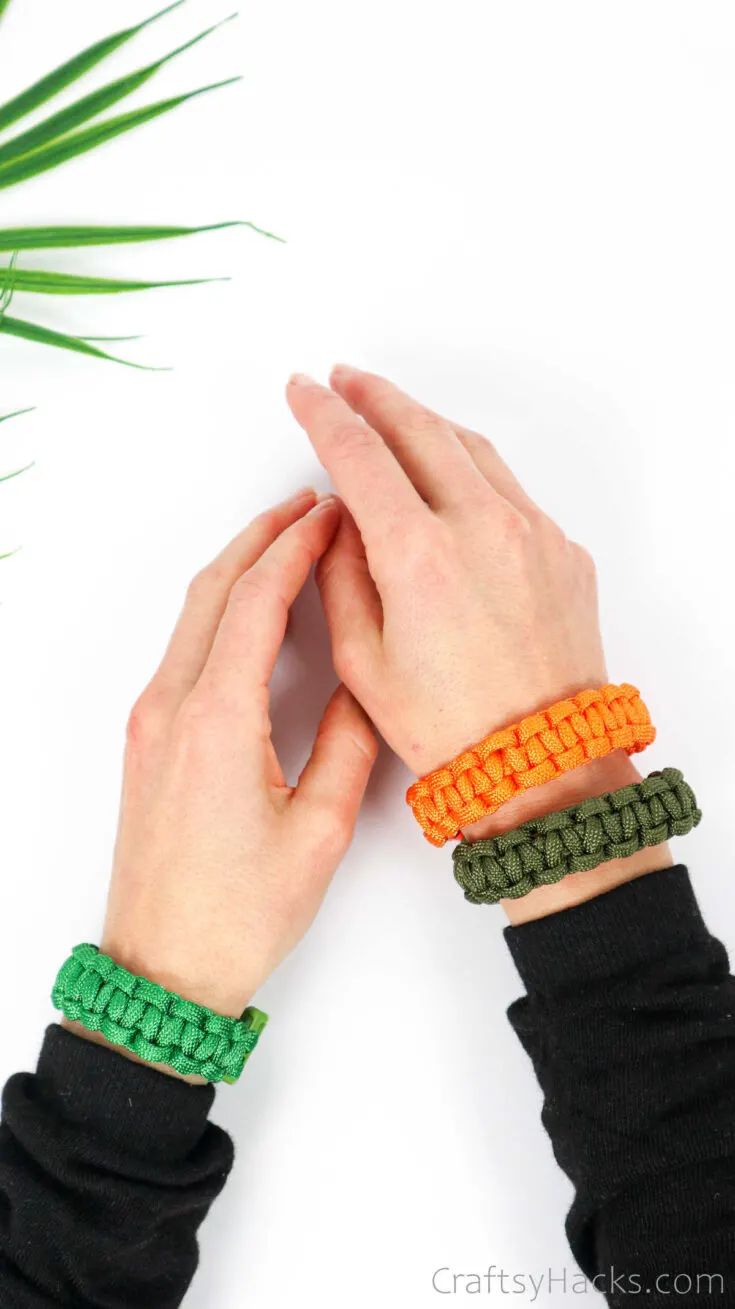
Source: craftsyhacks.com
We love paracord and use it for everything–even jewelry! These bracelets are a fun alternative to the macrame-looking ones.
The basics of what you need are a fastener like this and paracord of your choosing–check out this post for the full tutorial.
The most essential part of making the band is to knot the cord to the fastener when you start and as you finish.
6. Geometric Holder
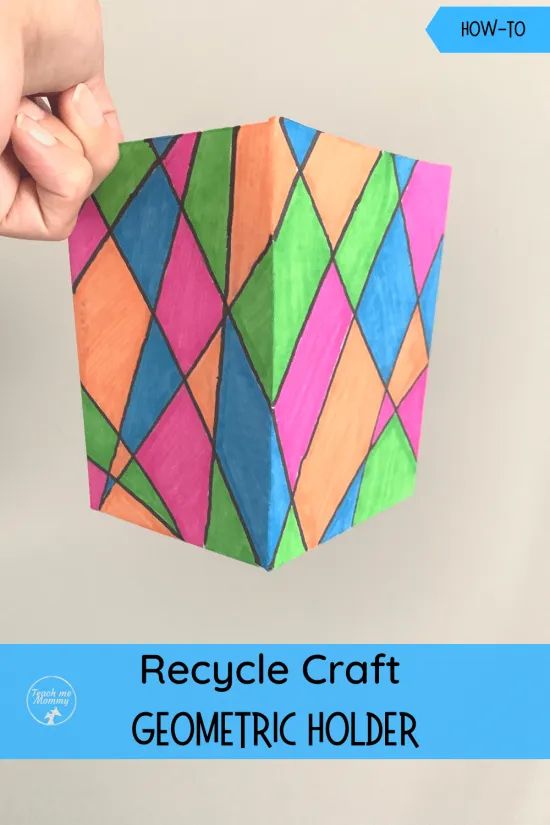
Source: teach-me-mommy.com
The next time you have so many boxes and don’t know what to do with them, have your kid design some free holders.
The container may have to be manipulated a bit, depending on the box you have, but repurpose it to be able to house an item–hair ties, writing implements, legos, whatever!
Grab a ruler, a pencil, and markers to let them design it however they please!
7. Tissue Paper Flowers
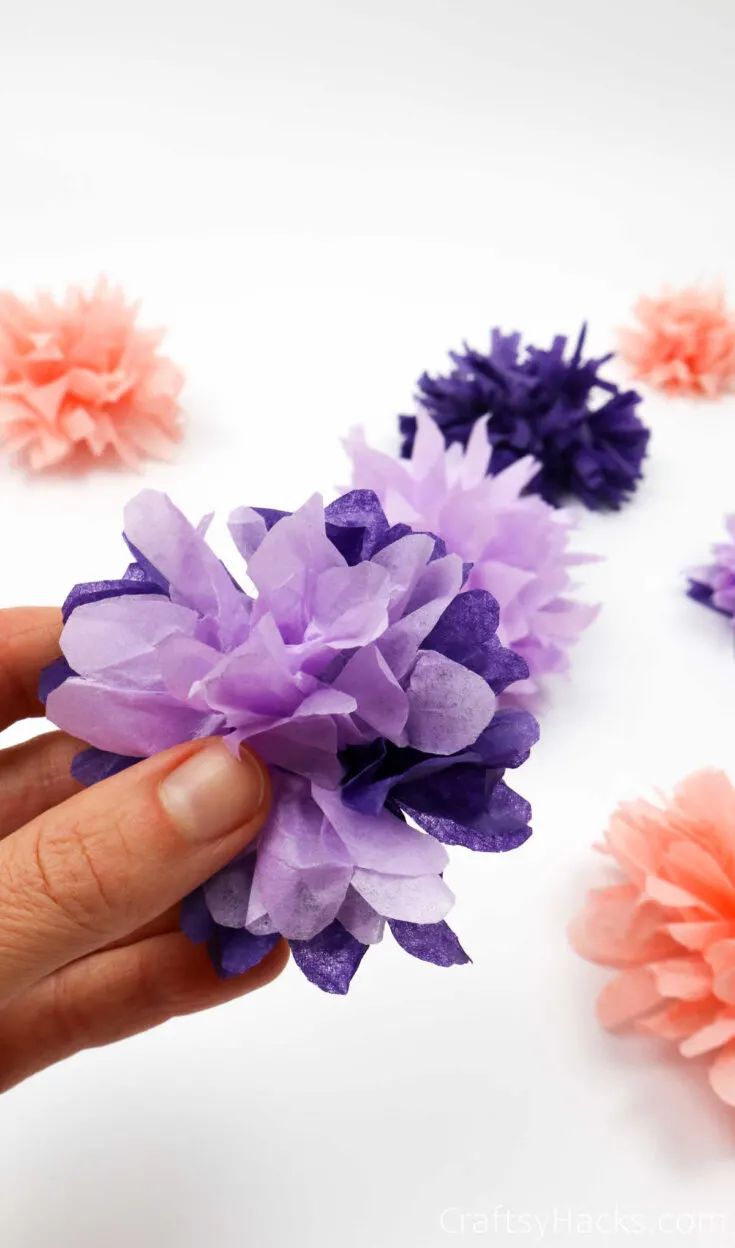
Source: craftsyhacks.com
They sound complicated but aren’t; check out my blog post for more information. You’ll need string, tissue paper (6 sheets for smaller, 8 for larger), and scissors.
Simply gather the tissue colours you’d like in your flower, stack them together, then accordion fold them evenly and horizontally in length. Once all get folded, situate a piece of string in the middle and knot it.
After knotted, cut the edges to represent flower petals and fluff once trimmed.
8. Geometric Painted Flower Pots
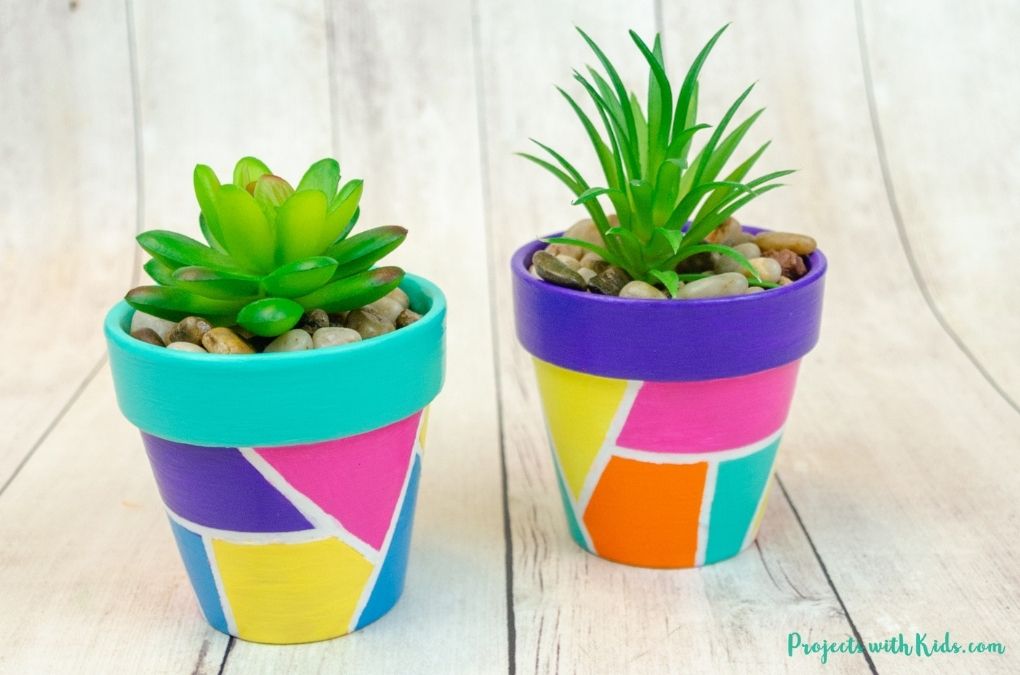
Source: projectswithkids.com
Akin to the geometric holders, this planter is essentially its outdoor cousin!
Materials needed: terra cotta pots, thinner washi tape, acrylic paint, this acrylic gesso–this one is good, mod podge, and paint brushes.
Before painting, paint your pot with two layers of gesso and let it dry. Add washi tape at angular spots on the pot–intersecting welcome; paint the pot however you’d like and let dry again.
Pull the tape off, touch up anything and let dry, or apply a layer of mod podge and let dry.
9. Paper Flowers
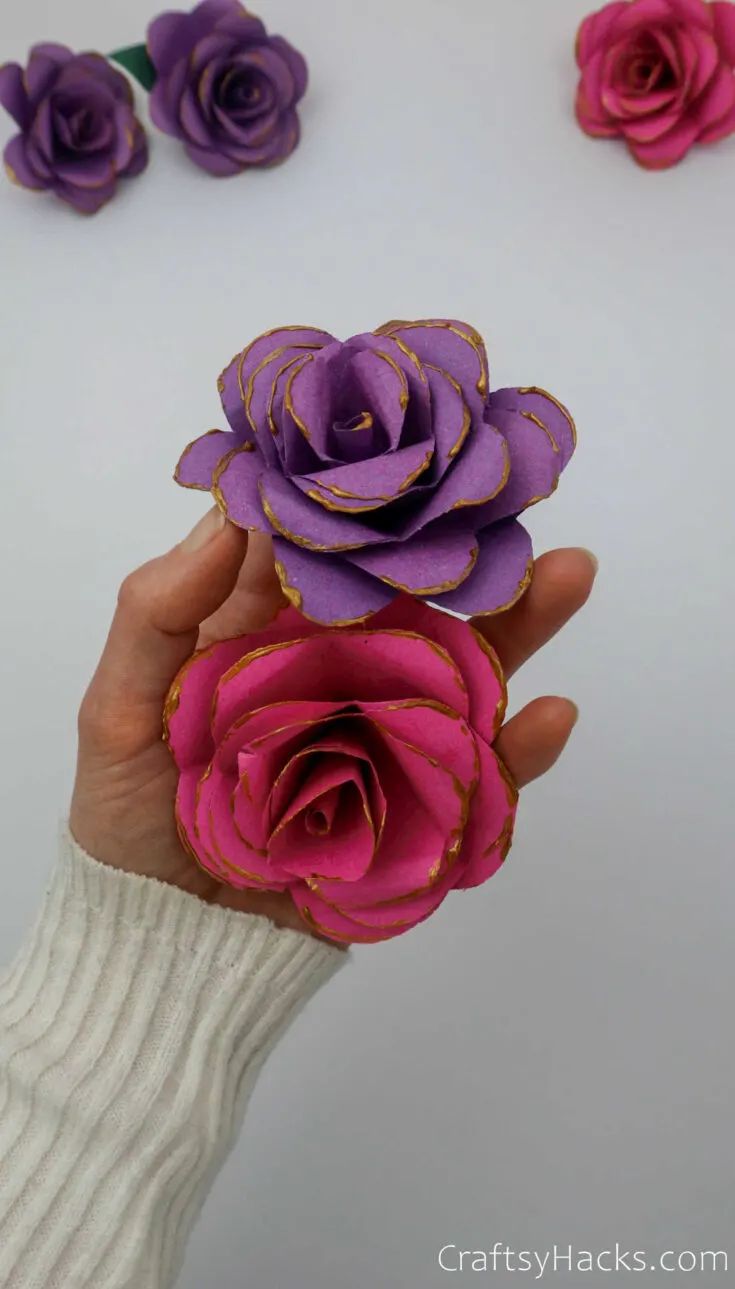
Source: craftsyhacks.com
Check the craft out here–one of my favorite ways to use leftover paper. Glue, scissors, paper, and glitter glue–if desired.
Start with the middle, build your flower outward, and glue as you go.
10. Straw Tote Bag
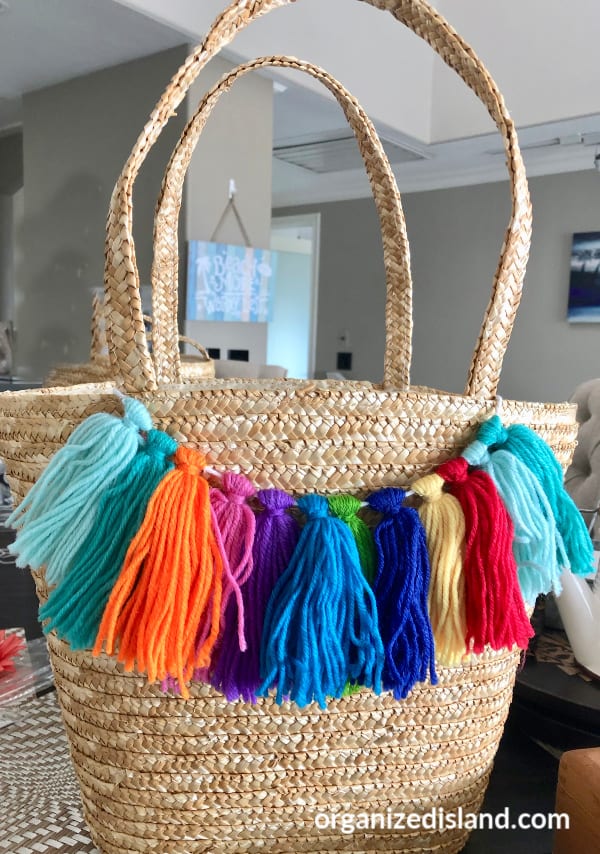
Source: organizedisland.com
This idea sounds daunting, but we’re embellishing a favorite but plain tote.
The fun is finding that perfect accessory to the bag and then just hot gluing it where you feel it fits best is all that you need for this activity.
If you had fun making this straw bag you should check out this DIY tote bag from a shirt!
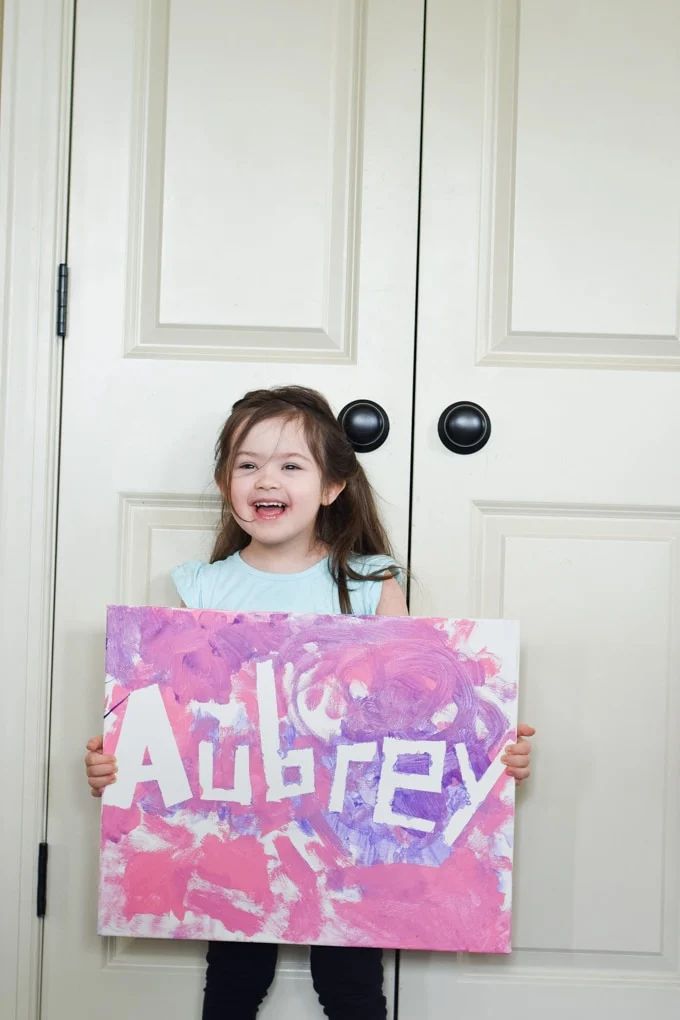
11. Name Painting
Source: thislittlehomeofmine.com
Get as creative or casual as you’d like for this activity! You need painter’s tape, paint, and something to work on (canvas, card stock, construction paper).
You spell the person’s name with tape (in whatever size you choose) and then paint over top of it, and when dry, peel the tape off to reveal the name in the negative space. Great for cards, wall hangings, etc.
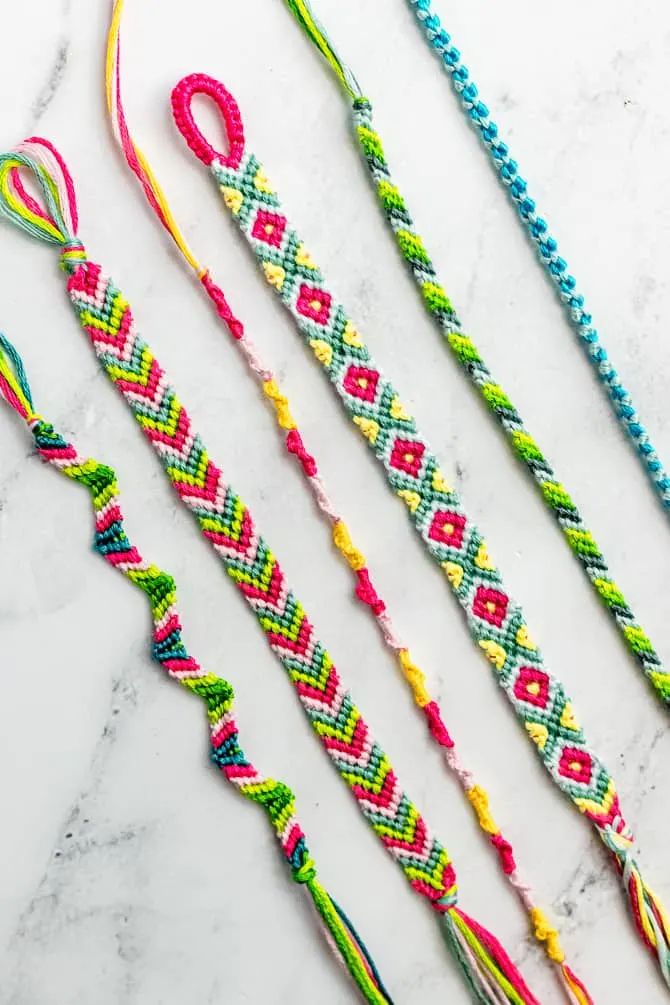
12. Friendship Bracelets
Source: sarahmaker.com
If you’re from the same generation as me, you know this craft well. You’ll need embroidery thread, tape, scissors, and something to anchor your bracelet.
I recommend just going for it through trial and error of different braiding styles or doing a mini dive on YouTube to look at all the different ways to braid.
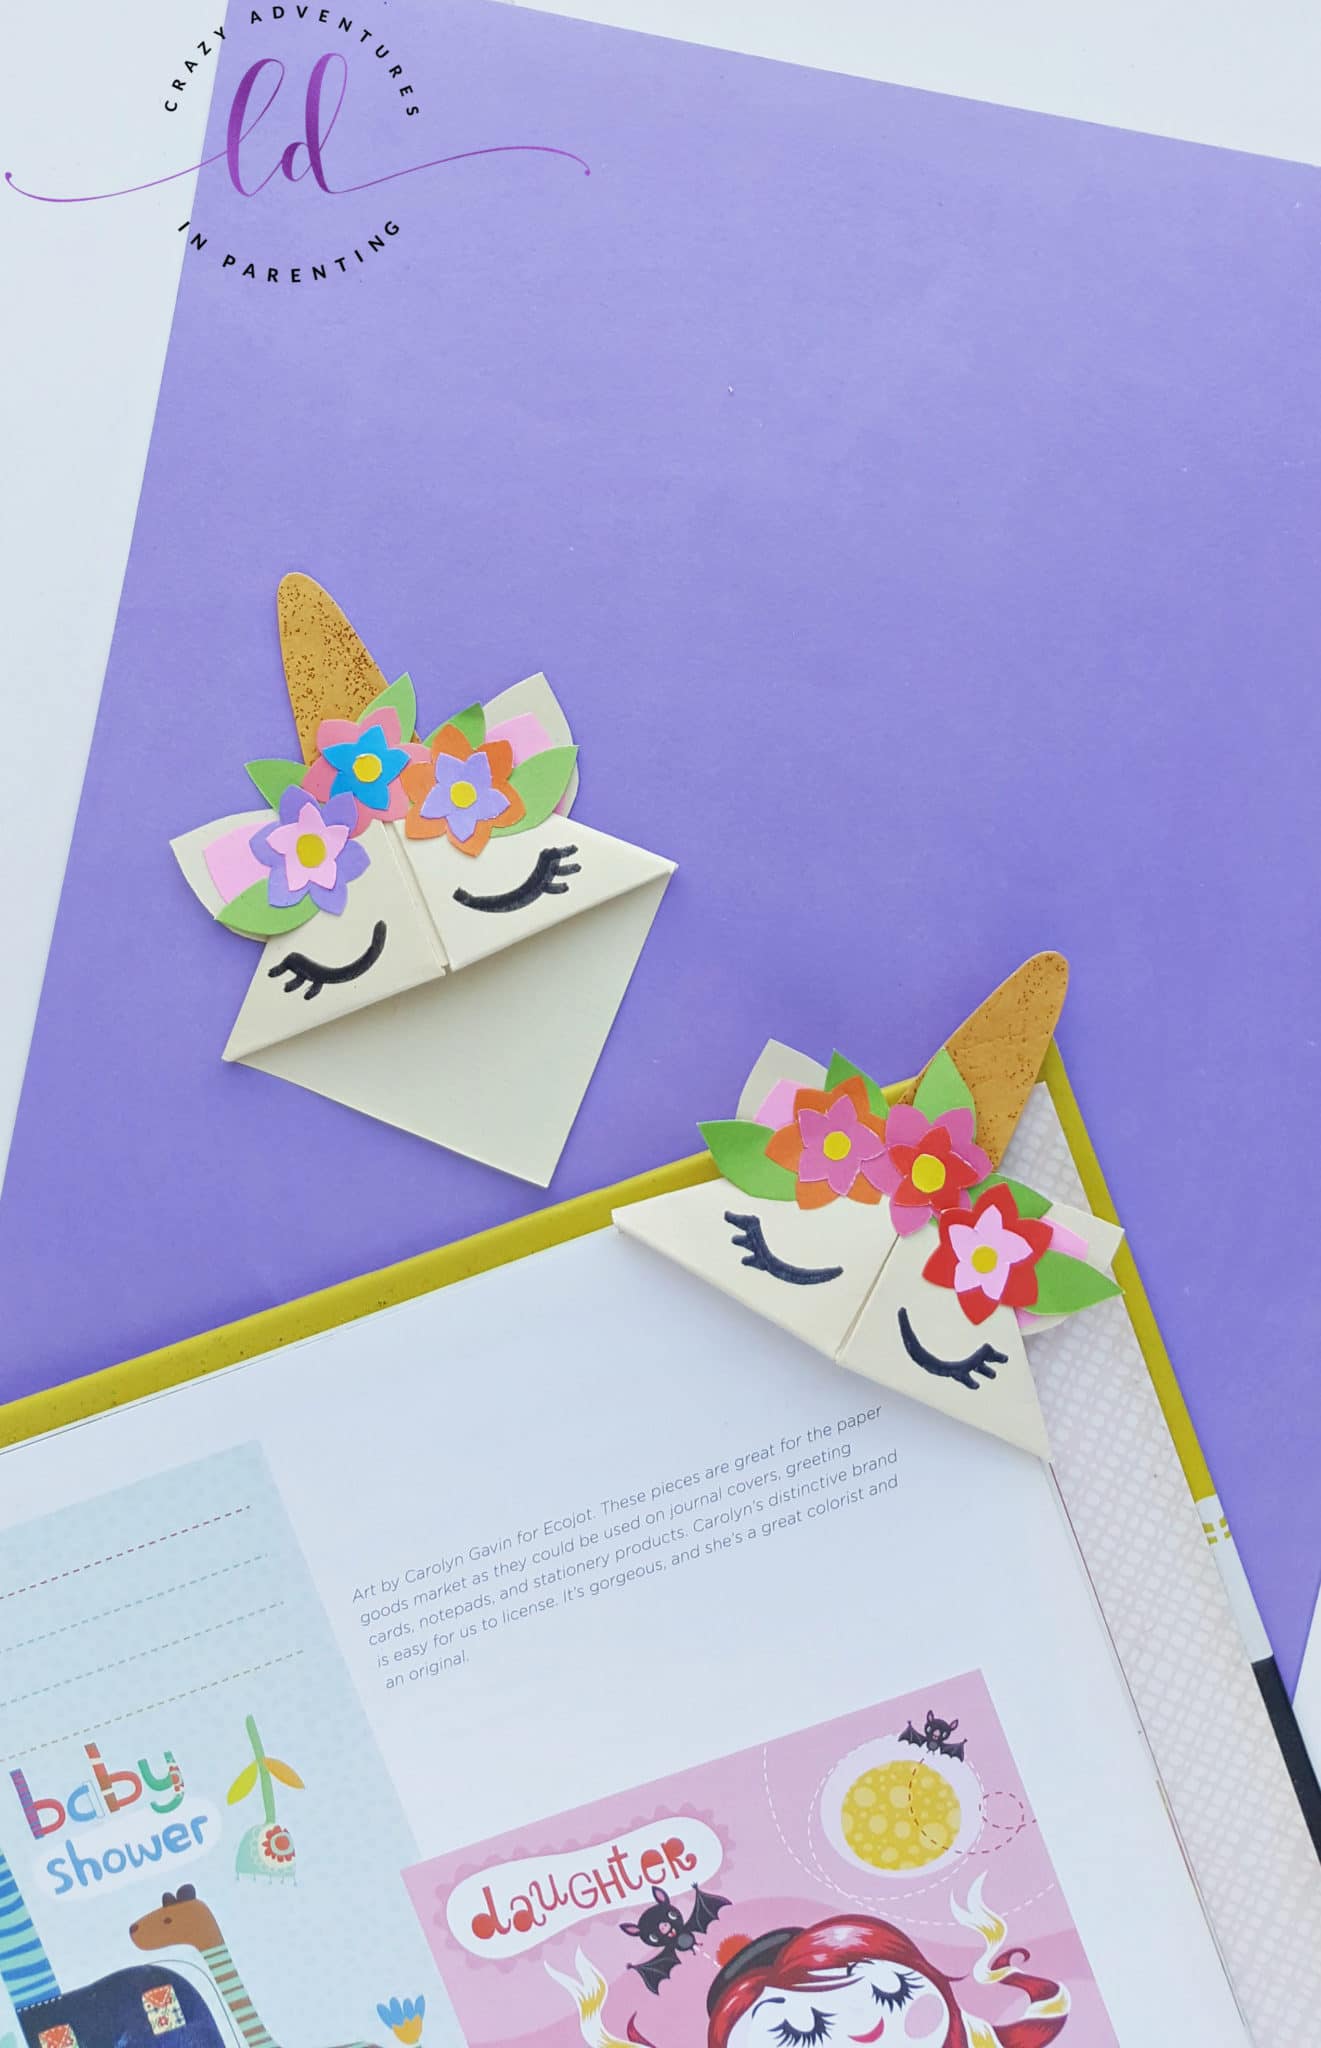
13. Origami Unicorn Corner Bookmark
Source: crazyadventuresinparenting.com
A sweet bookmark you can’t miss–start by folding your square sheet of paper point to point–it should look like a taco.
Fold one of the middle points down just beyond the bottom line, so it’s peeking a little beyond.
Next, we’ll take the right half of the triangle, fold it inwards to the midline, and repeat with the left side.
There should be two tails; both need to be tucked inward and under to form the pocketed part of the marker.
Embellish the bookmark in whatever unicorn fashion that pleases you–stickers, cut-out pieces, etc.!
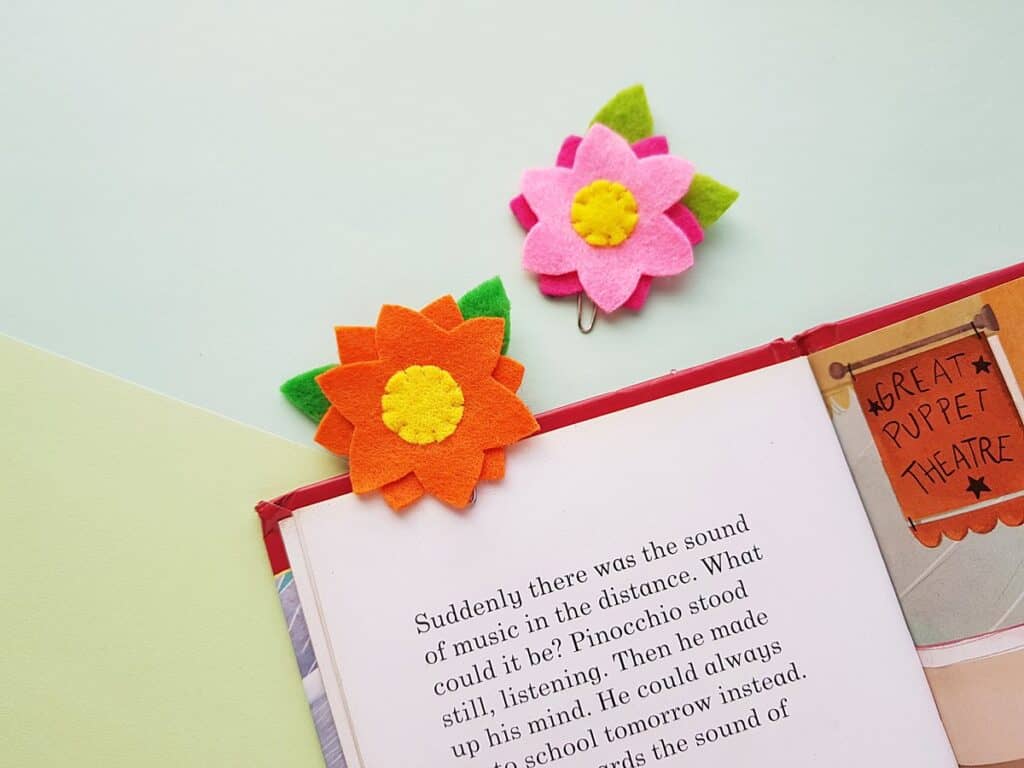
14. Felt Flower Bookmark
Source: bigfamilyblessings.com
A cute little gift for an avid reader –felt flower bookmarks. Gather any color felt scrap, thread, needle, glue (hot or craft), pencil, scissors, and a paperclip.
Draw and then cut out all parts of the flower, sew them together, adhere them to the clip and let dry!
15. Mason Jar Aquarium
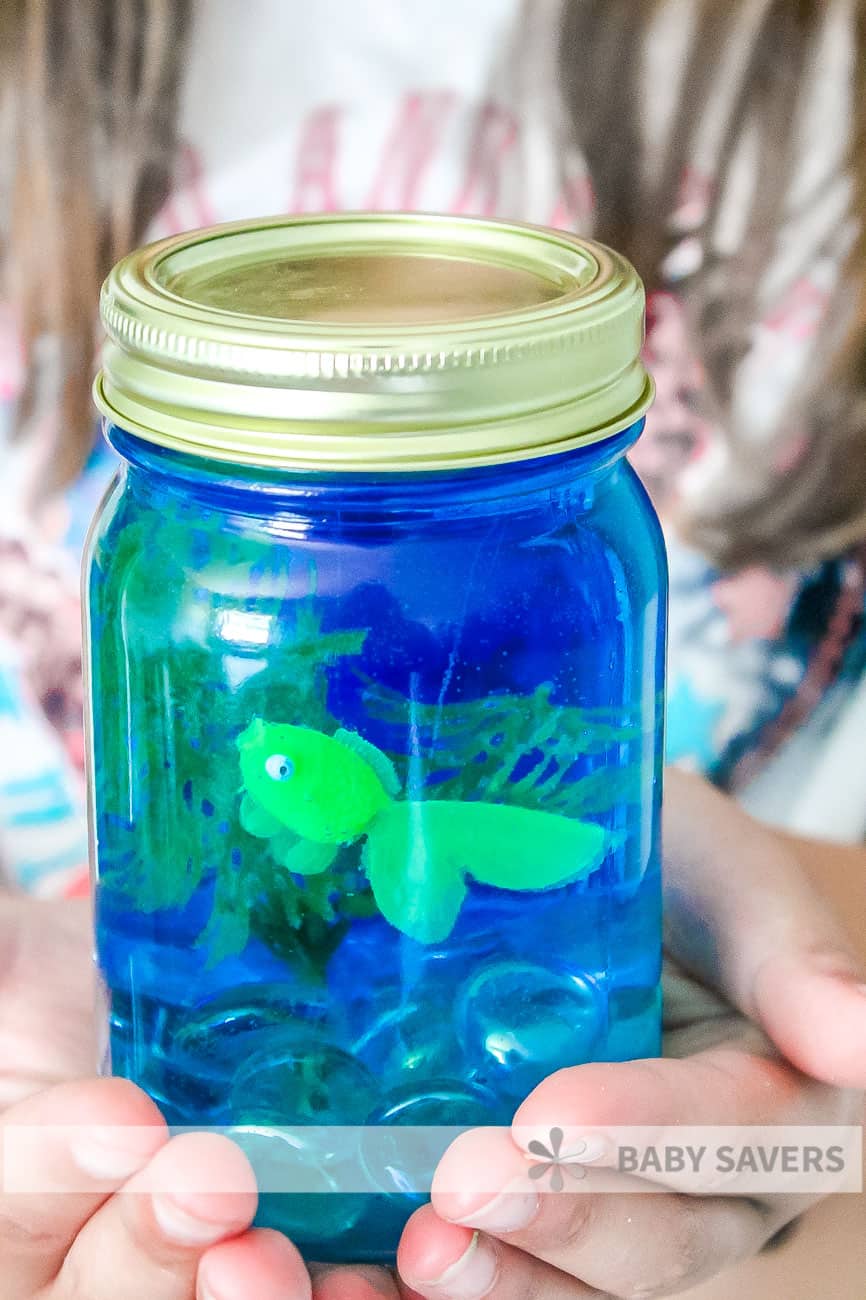
Source: babysavers.com
Think snow globe, but underwater for this next craft!
You’ll need a mason jar with a fully sealable lid, aquarium flooring (pebbles, rocks, etc.), blue food-coloured water, aquarium plants, toy fish, hot glue, and glue sticks.
Add a bit of glue to the bottom of the jar and add the plant and rocks. After, put your fish and any other additions to the jar and hot glue the lid to the jar.
16. Rainbow Earrings
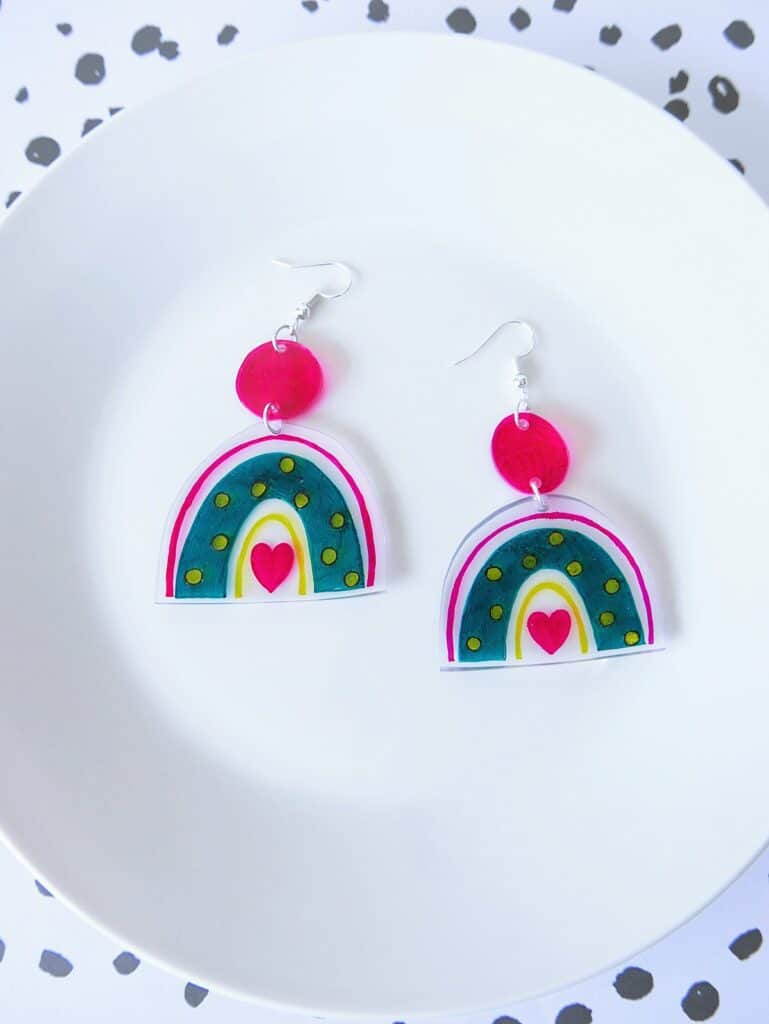
Source: bigfamilyblessings.com
Such a cute craft and a reason to use these shrinky dinks–draw a rainbow or anything you’d like and follow the directions on the box.
Grab some earring hardware and pliers, and assemble everything once it cools!
Love DIY jewelry? You must try these DIY necklace ideas!
17. Tie Dye

Source: sarahmaker.com
Another activity from my generation that I believe most of us has tried in our day! There are many easy tutorials today; why not share them with your kid?
Decide on what you’d like to tie-dye and the method you’d like to try, and grab the materials for your kid. I’ve been interested in trying ice-dying once the holidays are over.
You’ll also have fun with this tie dye shirt idea!
18. Macrame Rainbow Charm
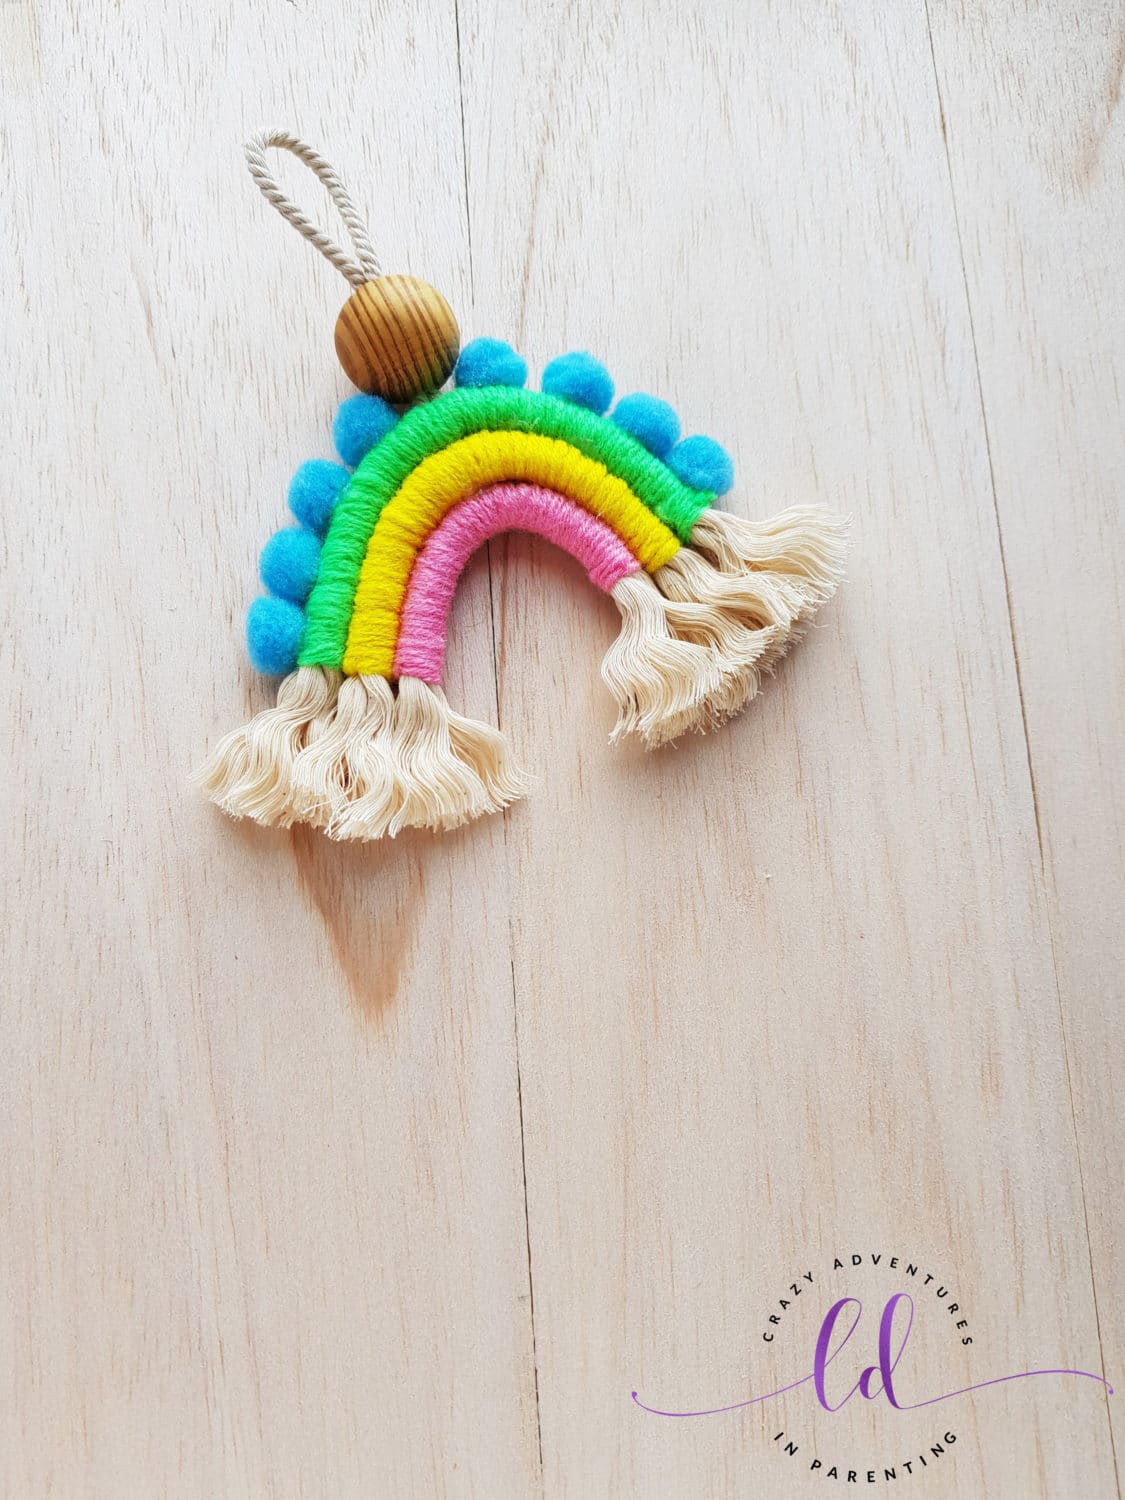
Source: crazyadventuresinparenting.com
Size this however you’d like, but the materials you’ll need: are three colors of thread, pieces of rope, a thinner piece of rope, any embellishments you’d like to add, and hot glue.
Each thicker rope gets wrapped with different yarn for a rainbow of three colors, and then the ends get hot glued to the back. Once all the yarn is on hot glue the pieces together to form a rainbow.
Before attaching the top one, add the smaller rope to create a tie for the top to hang off a wall. Add any embellishment to the knotted piece of material.
Ready to expand your macrame skills? Check out this macrame bracelet!
19. Slime

Source: findingzest.com
A kid that has grown up with slime will always love to play with some!
If you don’t have a recipe, we like to do eight oz. glue, ¼ or ⅓ cup of liquid starch (this changes the stickiness), and acrylic paint–mix with a utensil.
20. Marbled Nail Polish Mugs
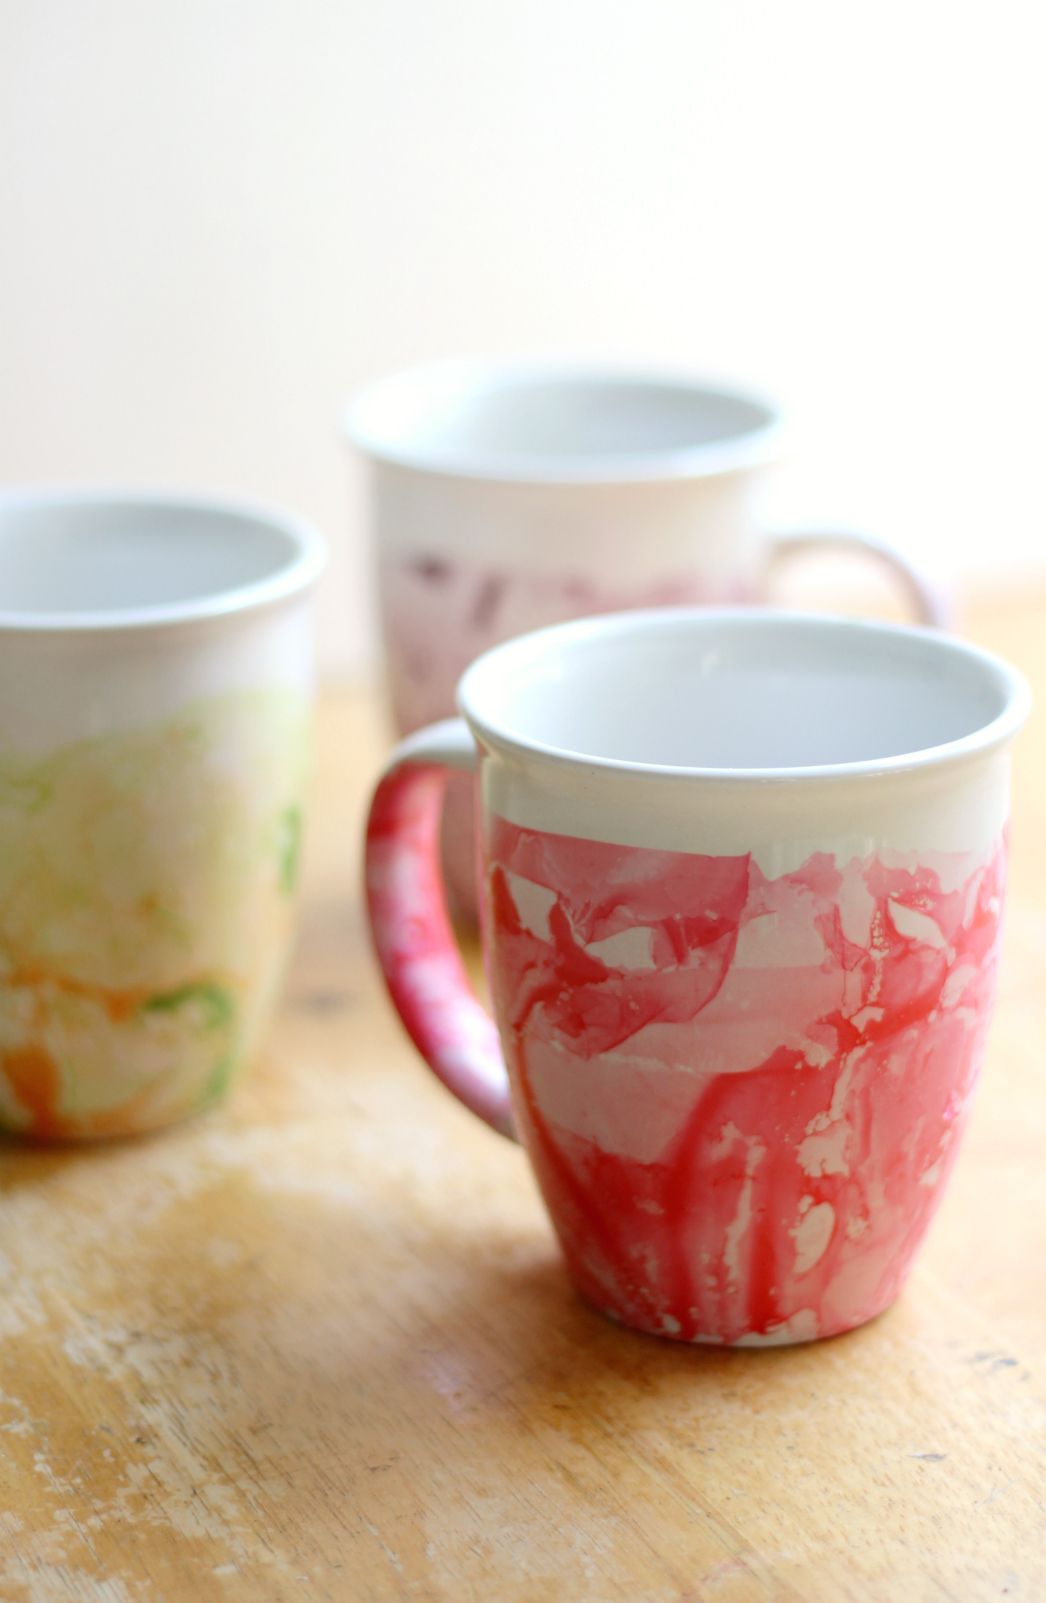
Source: strengthandsunshine.com
A super cool and fun way to use leftover nail polishes (darker shades work better), all you’ll need is dishwasher-safe ceramic mugs.
Fill a bowl with water, keeping in mind not to overflow when mugs get dunked, and drop some nail polish into the water, singular or multiple colours.
Make sure to leave the lip area clean of polish, but dip quickly in whatever way you want, and if you mess up, have some nail polish remover at the ready!
Let them dry completely upside down on a towel before using them.
21. DIY Charm Bracelet
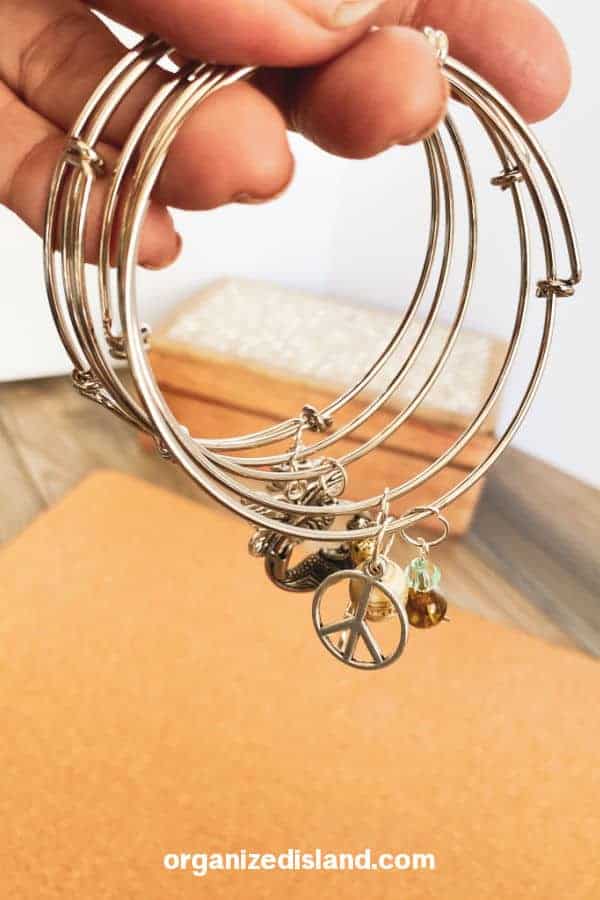
Source: organizedisland.com
These make such a special and unique gift! Grab this bracelet-making pack, and check a local craft store for even more charms.
22. Mermaid Hair Clip
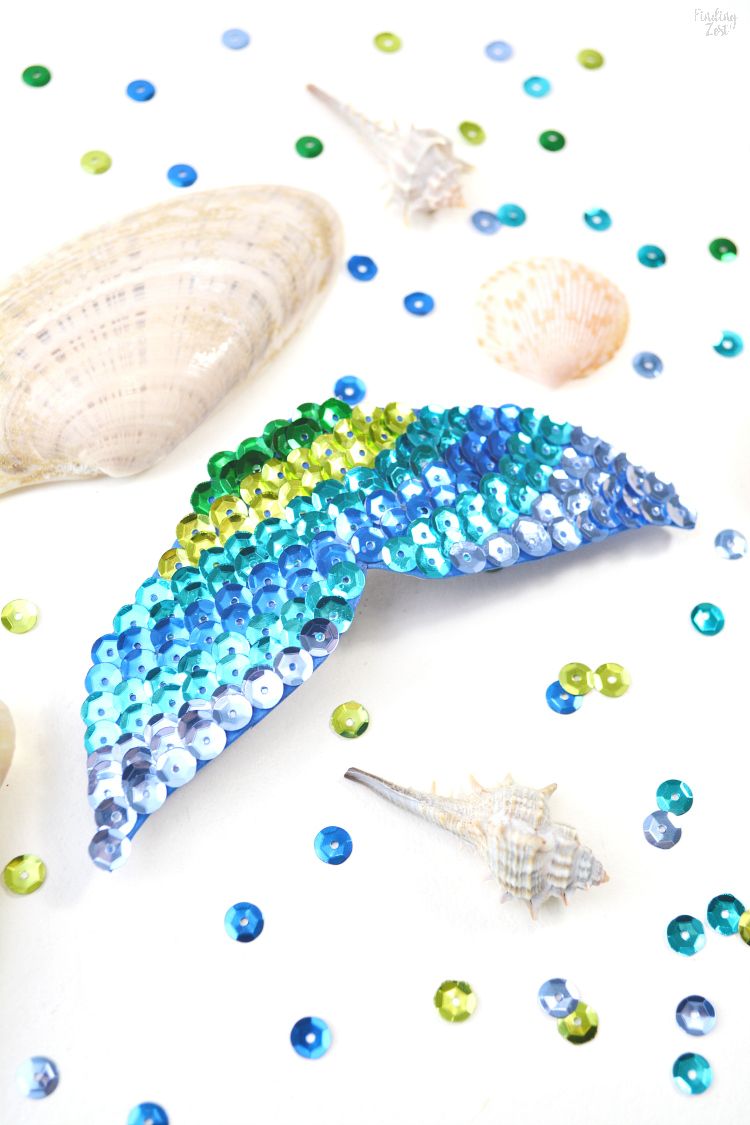
Source: findingzest.com
A little bit of elbow grease and patience for this craft–firstly, you’ll need to make a simple fishtail template; just the flippers will do.
Trace the template onto blue foam, which will attach to the hair clip with glue.
Add cool-toned sequins to the flippers with glue, and I used a chopstick to help me align them easier. Let everything dry, glue the foam onto the clip, and sit for at least 24 hours.
23. Word String Art
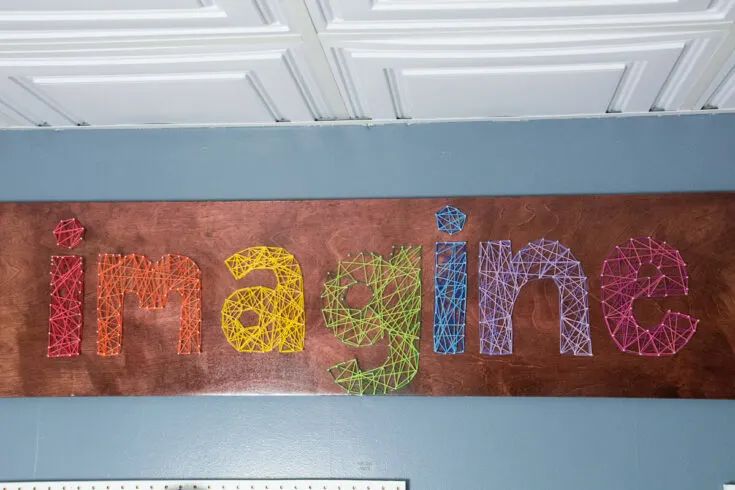
Source: thediynuts.com
Another super cute craft that works great as home decor or a fun gift for a friend is this project. Grab a piece of this crafting wood, nails that work in that depth of the wood, and embroidery string.
The fun part is planning a word out to do in bubble letters–the effect looks better this way, draft out the word and where the nails will go, and then hammer the nails into the board. Afterward, you’ll knot a beginning string from one pin, crisscross each letter with a different color, and then again knot it off when finished.
24. Clay Fish
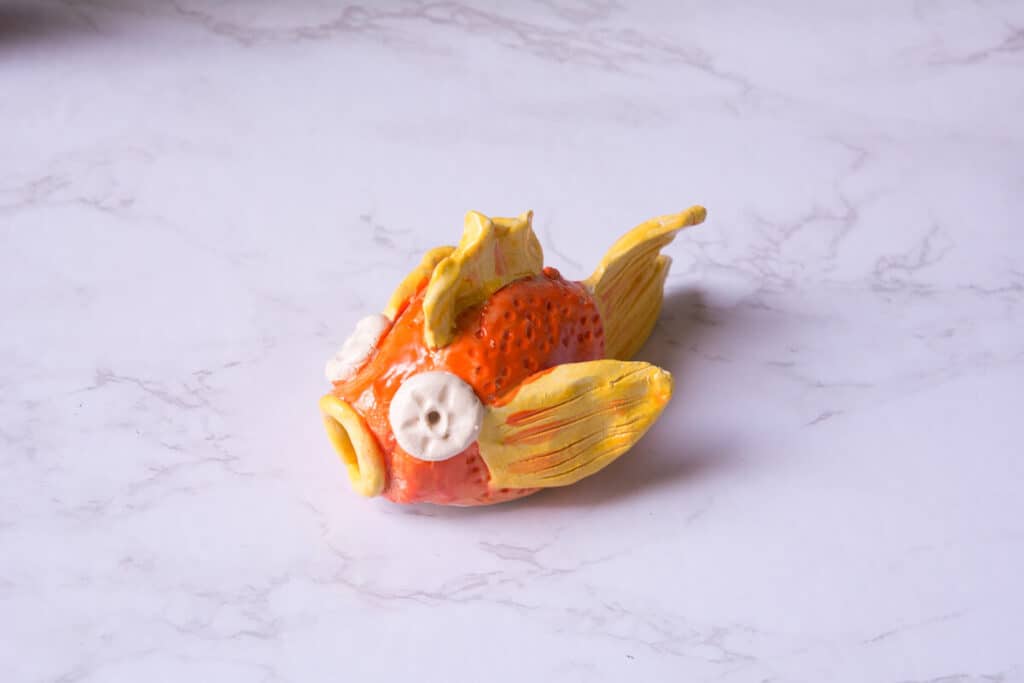
Source: craftyartideas.com
I recently discovered this air dry clay from a friend, and we love it! You’ll also need water, these scoring tools, acrylic paint or glazes, and a clay-friendly space.
Let your kid make any type of fish they’d like! Have them use the tools for the finer details, and water helps smooth out bumpy surfaces.
25. Coaster Emoji
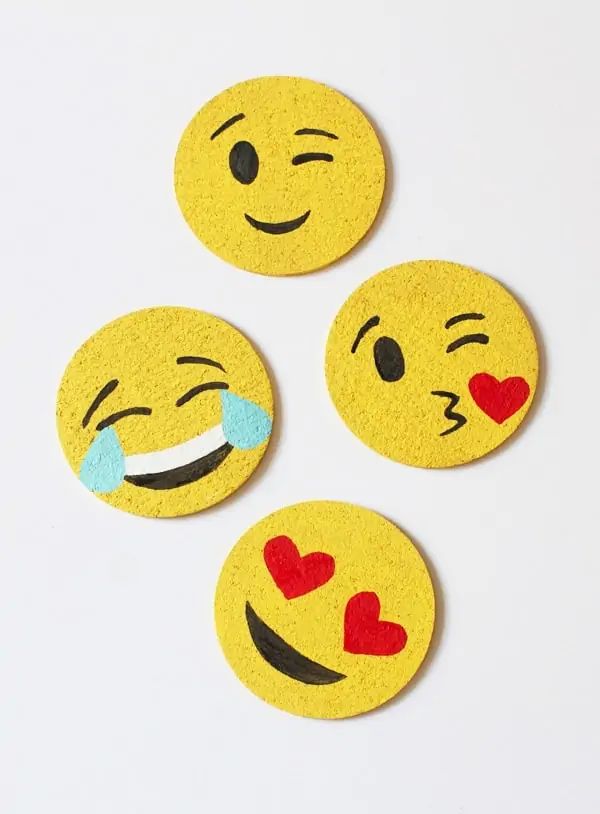
Source: lovelyindeed.com
You’ll need a set of blank coasters to start, but I think these cork ones work great! Size and print your favorite emojis to fit the coasters.
Paint the set yellow and cut out your face templates (cut the eyes, face, tongue, etc., to reveal the negative space) while you wait for everything to dry.
After they are good to go, place a different face on top of each one and paint in the details, pull off, let everything dry again, and then seal them with a mod podge.
If you had fun with this coaster, you might enjoy this resin keychain craft!
26. Melted Crayon Art
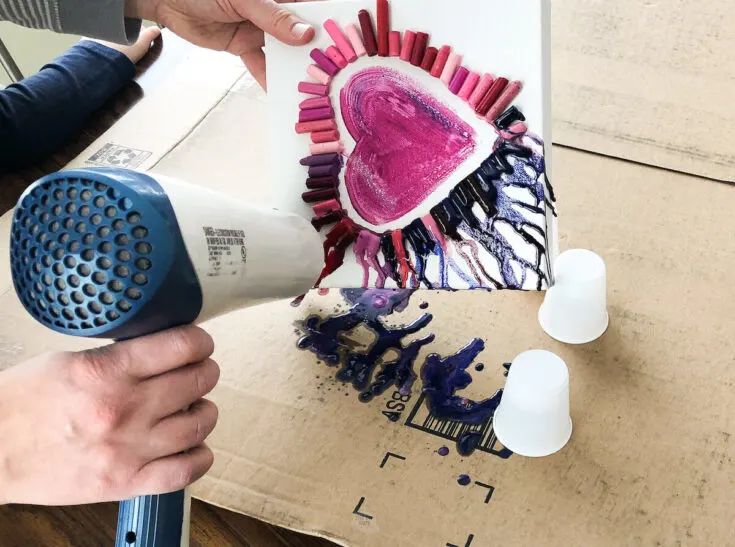
Source: thediynuts.com
We’ve all seen this project float around, but it may be fun for your child to try out! Grab some canvas, old crayons–all paper peeled off, Elmer’s glue, a blow dryer, and various acrylic paints.
Have them design their idea first, paint any additional elements, let dry, and then glue crayons onto canvas–let that dry too.
Once everything sets, have them come back with a blow dryer and let them use it on the crayons.
27. Pressed Flower Bookmark
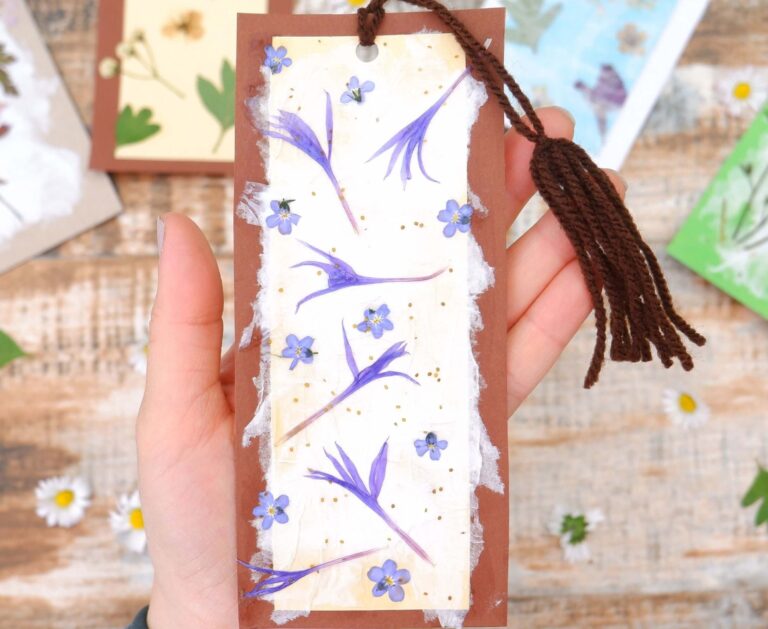
Source: liltigers.net
This DIY crafts activity does have a longer timeline to a finished product, but it’s such a lovely one, especially for the little hands.
Pick flowers and prepare them to get pressed–trim anything needed and place them between two sheets of parchment the way you want them on the marker.
Grab some books, place the parchment in one, and put the rest of the stack on top of the first–let it sit for a week to dry.
In the meantime, cut out some bookmarks from old cereal or pasta boxes; each should have two pieces glued back to back. Punch a hole at the top for a tassel.
Once flowers are dry, delicately use a brush to apply glue onto flowers to adhere to your bookmark and let dry. After everything is fully set, add a tassel or ribbon to the punched hole.
28. Paper Plate Rainbow
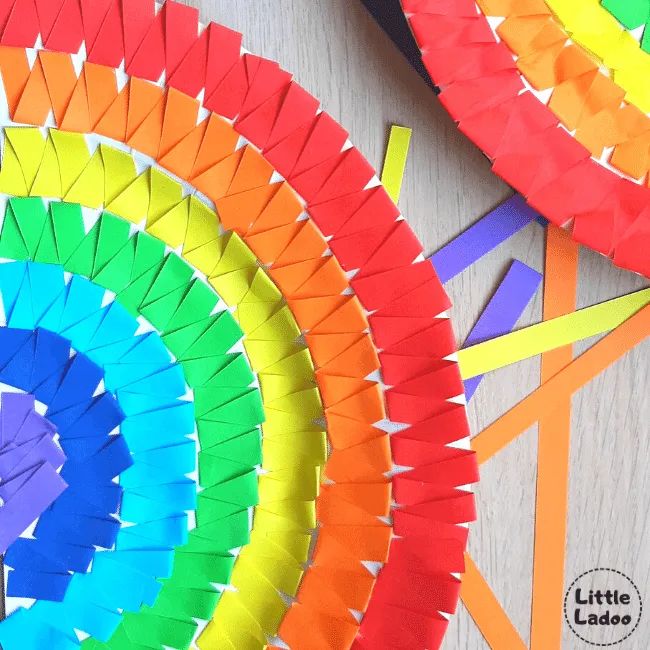
Source: littleladoo.com
An elevated variation of a classic–have them try this paper plate rainbow the next time they’re looking for something to do!
A half of a paper plate, construction paper in rainbow colours, glue, and scissors will get you started on the project.
Have them arrange each color in rainbow order, and if they’re not making a classic pattern, a gradient arrangement will do.
Instead of having small pieces for the project, have them cut out long strips and fold them in an arched way. Take your accordion paper strips and glue them onto the plate in the correct order.
29. Paper Lotus Flower
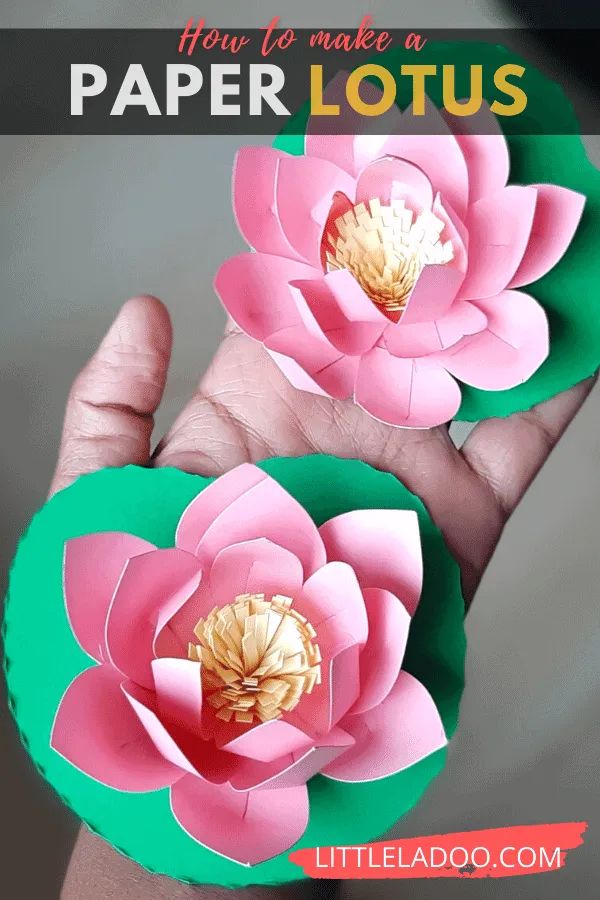
Source: littleladoo.com
These paper lotus flowers are a great way to brighten up any room that’s a little drab.
You only need a handful of different materials and supplies for the use: thick cardstock or construction paper, glue or hot glue, scissors, and a quick template that you have made.
Take note of the petals on a lotus flower, and then recreate that on a separate piece of paper.
This template will help you trace all the flower petals, making sure to cut a line in the middle to fold them into one another to create depth.
First, you will make the inner part of the flower by taking yellow paper strips and snipping halfway into them to create a shag in the strip. Roll that up together and secure it with some glue.
Next, you will trace all the flower petals you need and cut them out. Then one by one, you will glue the petals onto one another to create the full lotus.
After, draw a few green leaves, cut them out and attach the flower to the leaves and voila, beautiful summer crafts.
30. DIY Mouse Pad
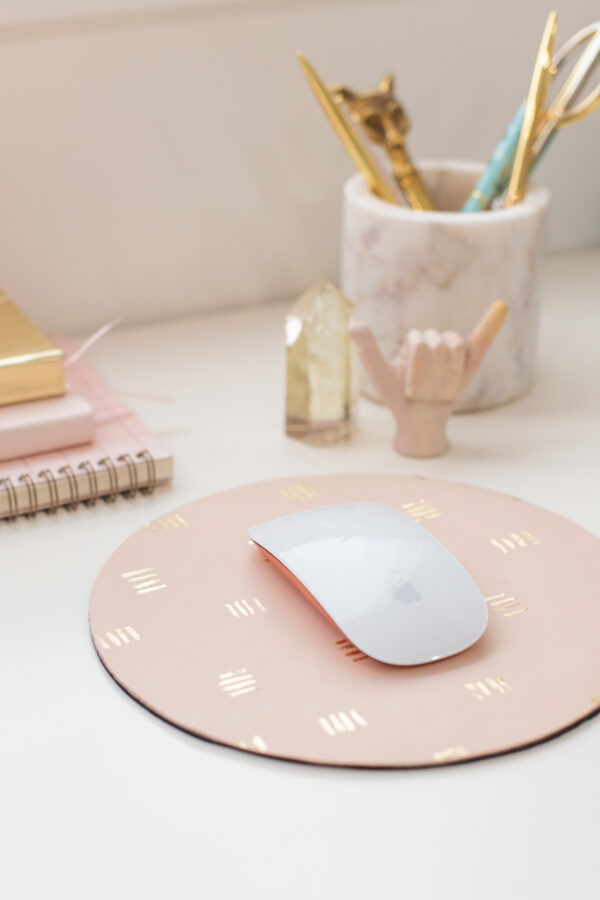
Source: lovelyindeed.com
Cute and long-lasting, a DIY mouse pad is such an easy thing to make! Grab one of these blank mouse pads, faux leather, a fine paintbrush, mod podge, gold leaf, E6000, scissors, and a pen.
Trace the mousepad, cut out the material, glue the two together, and design your own mousepad. This project cannot get easier; you really just need a creative mind to follow through with this project.


Great ideas for my grand daughters to try on our craft day! Thanks