DIY Bedside Caddy
This post may contain affiliate links: full affiliate disclosure.
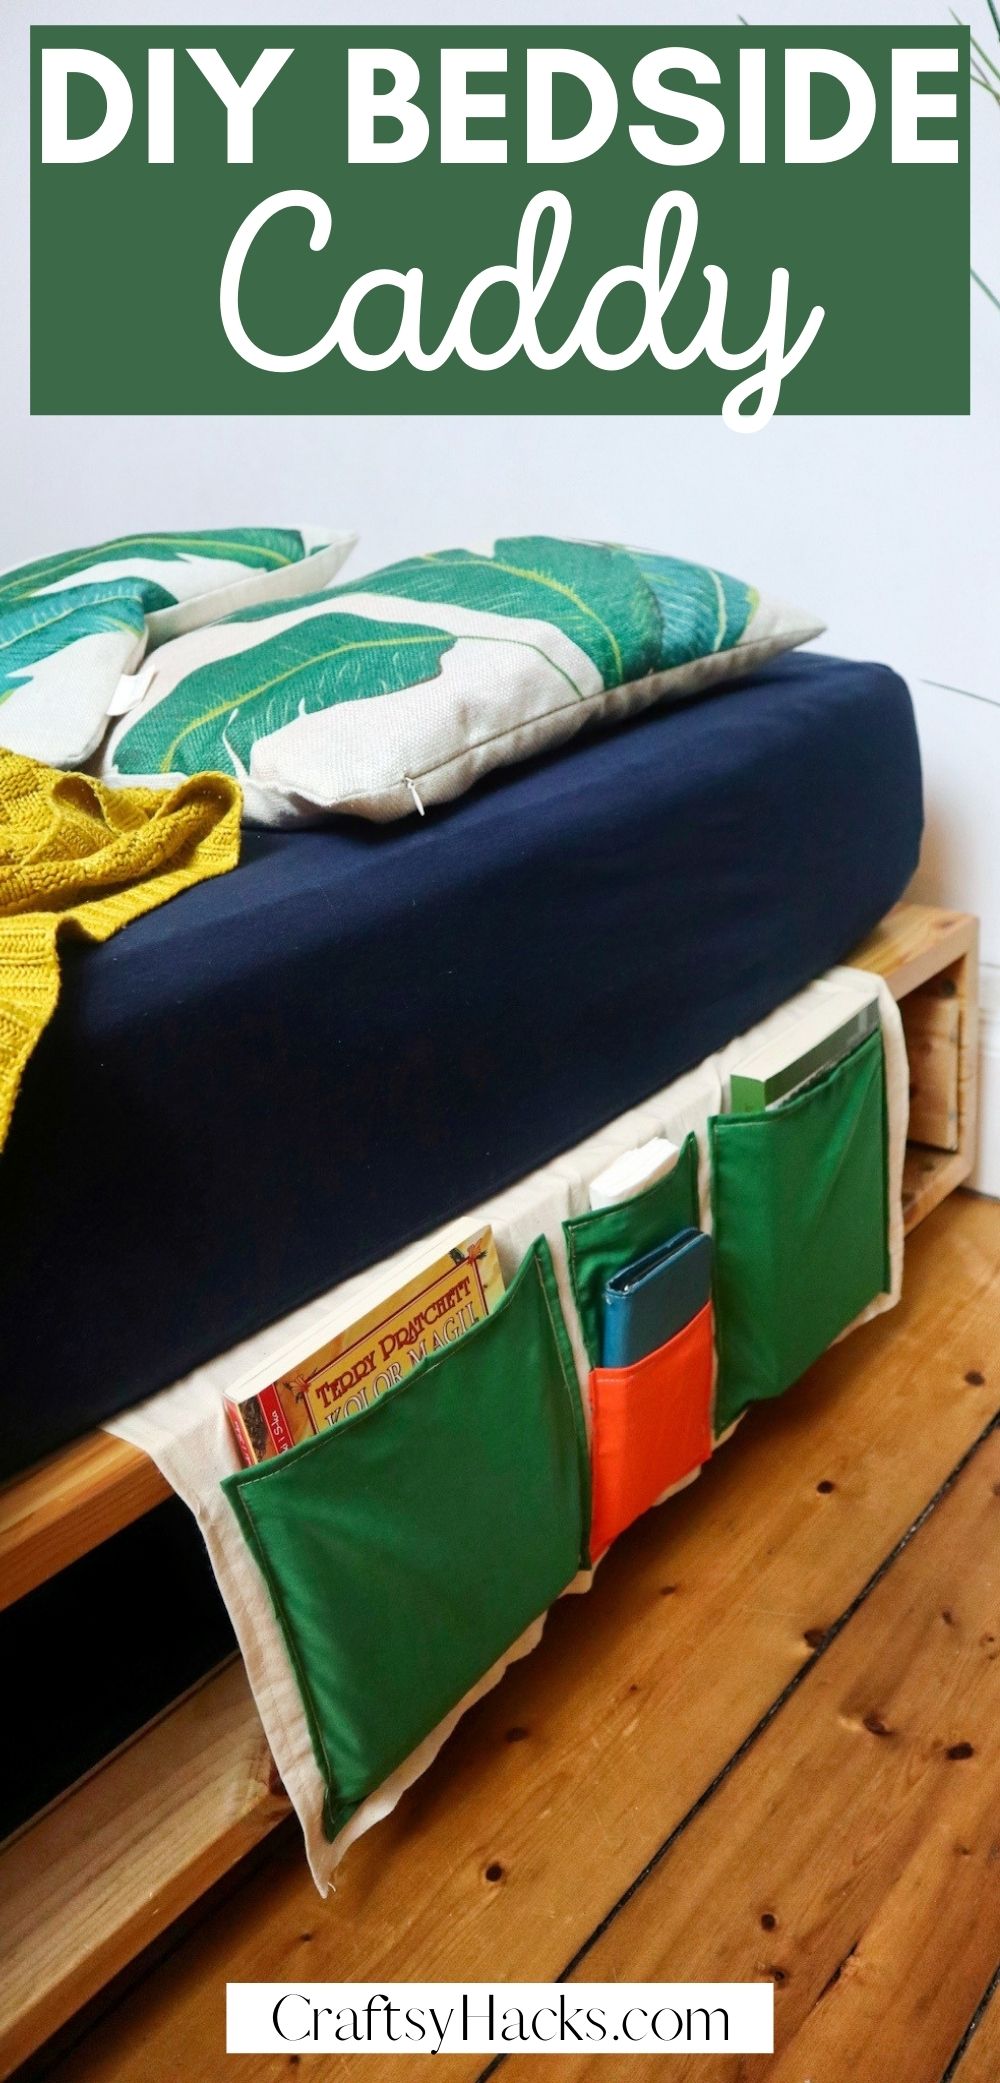
Make your very own DIY bedside caddy to increase storage in your bedroom! It’s a fun fabric craft that will help your declutter home and keep it a little more organized.
Bedside caddies are so underrated. You hardly ever hear of them, but then you use them once, and bam! Your bedroom is never the same again.
Bedside caddies are a great option to organize and store things. They help you optimize the space you have.
If you’re pressed for space in your bedroom, you can do away with them altogether and replace them with these caddies!
So without further ado, let’s take a look at everything you’ll need to make this DIY bedside caddy.
Supplies for Bedside Caddy
- Large piece of fabric
- A few pieces of fabric for pockets
- 2x piece of fabric for strips
- Pins
- Scissors
- Ruler
- Tape measure
How to Make Bedside Caddy
Have you gathered all your supplies? Then let’s get started on making the caddy. Set aside the biggest piece of fabric for the latter part of the project.
Step 1
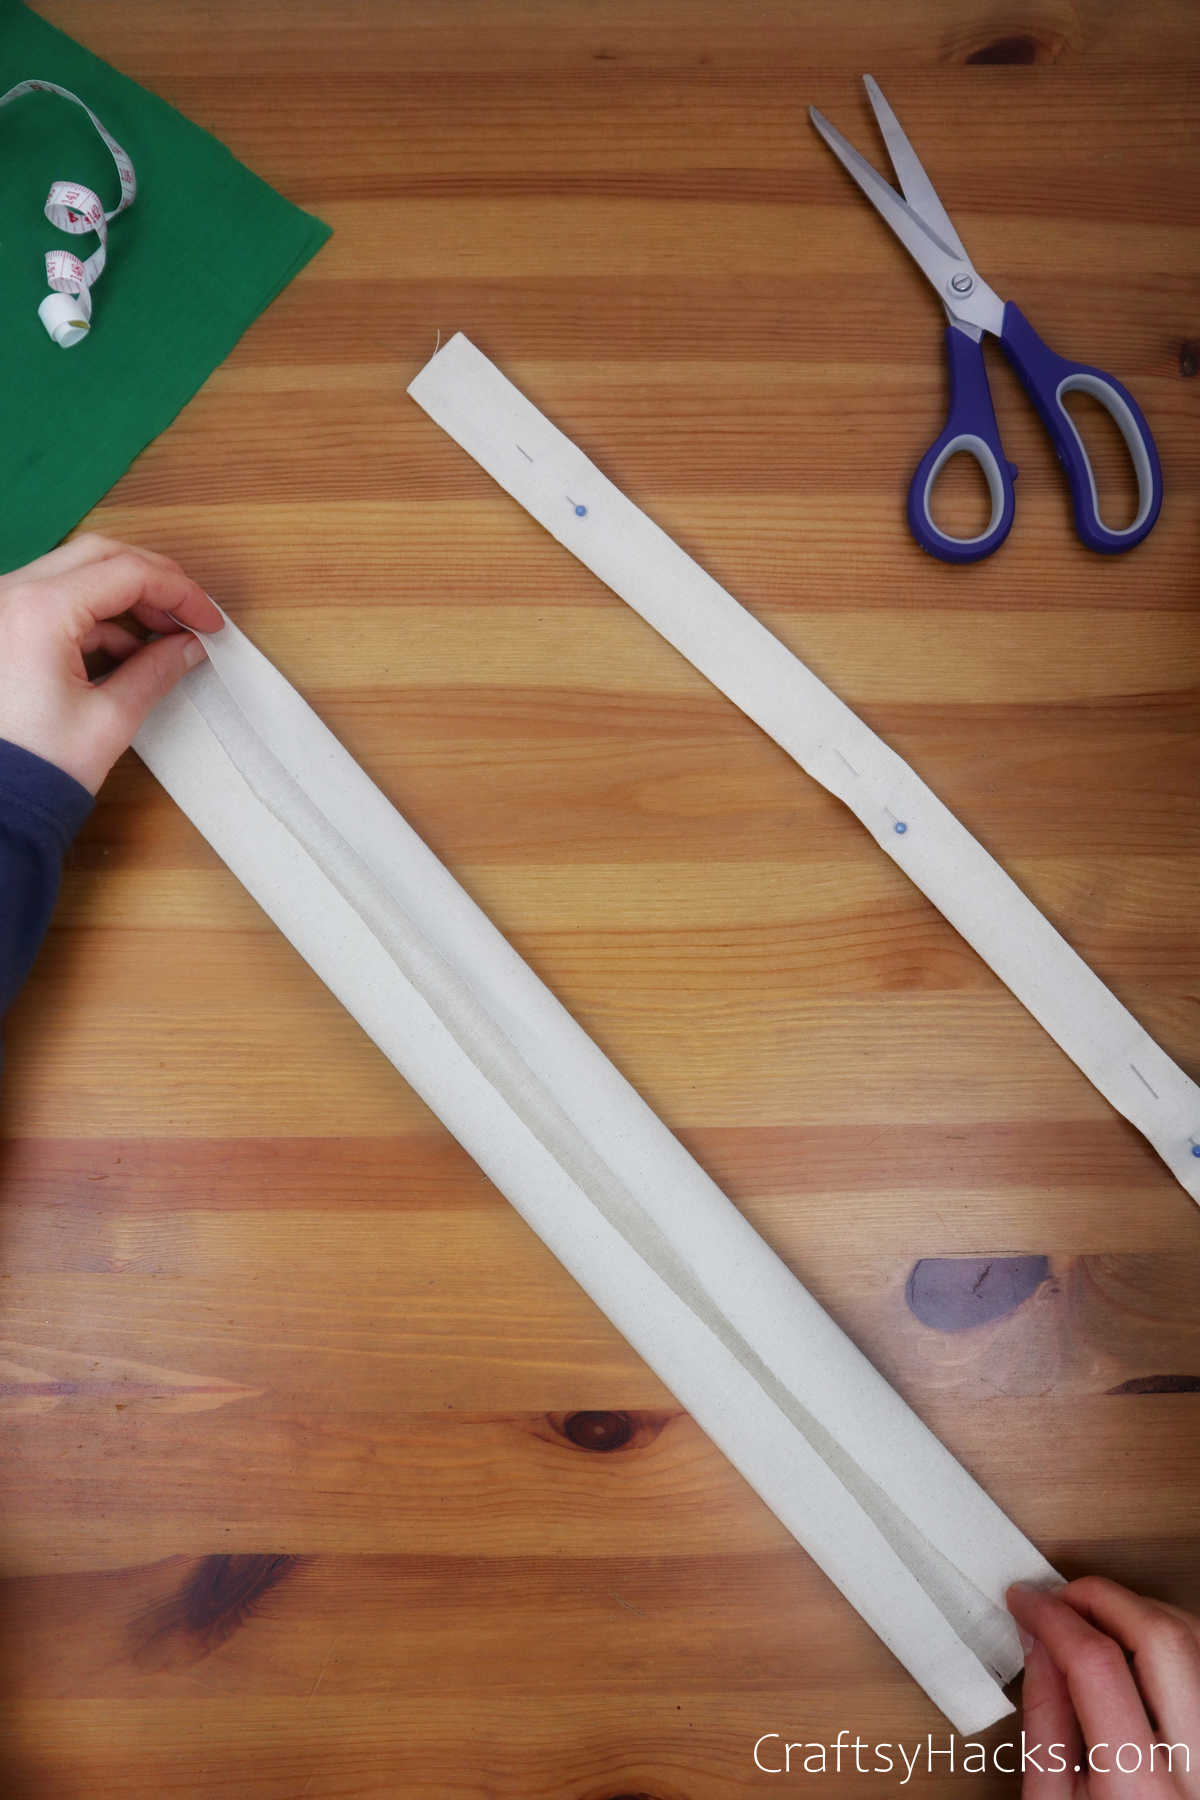
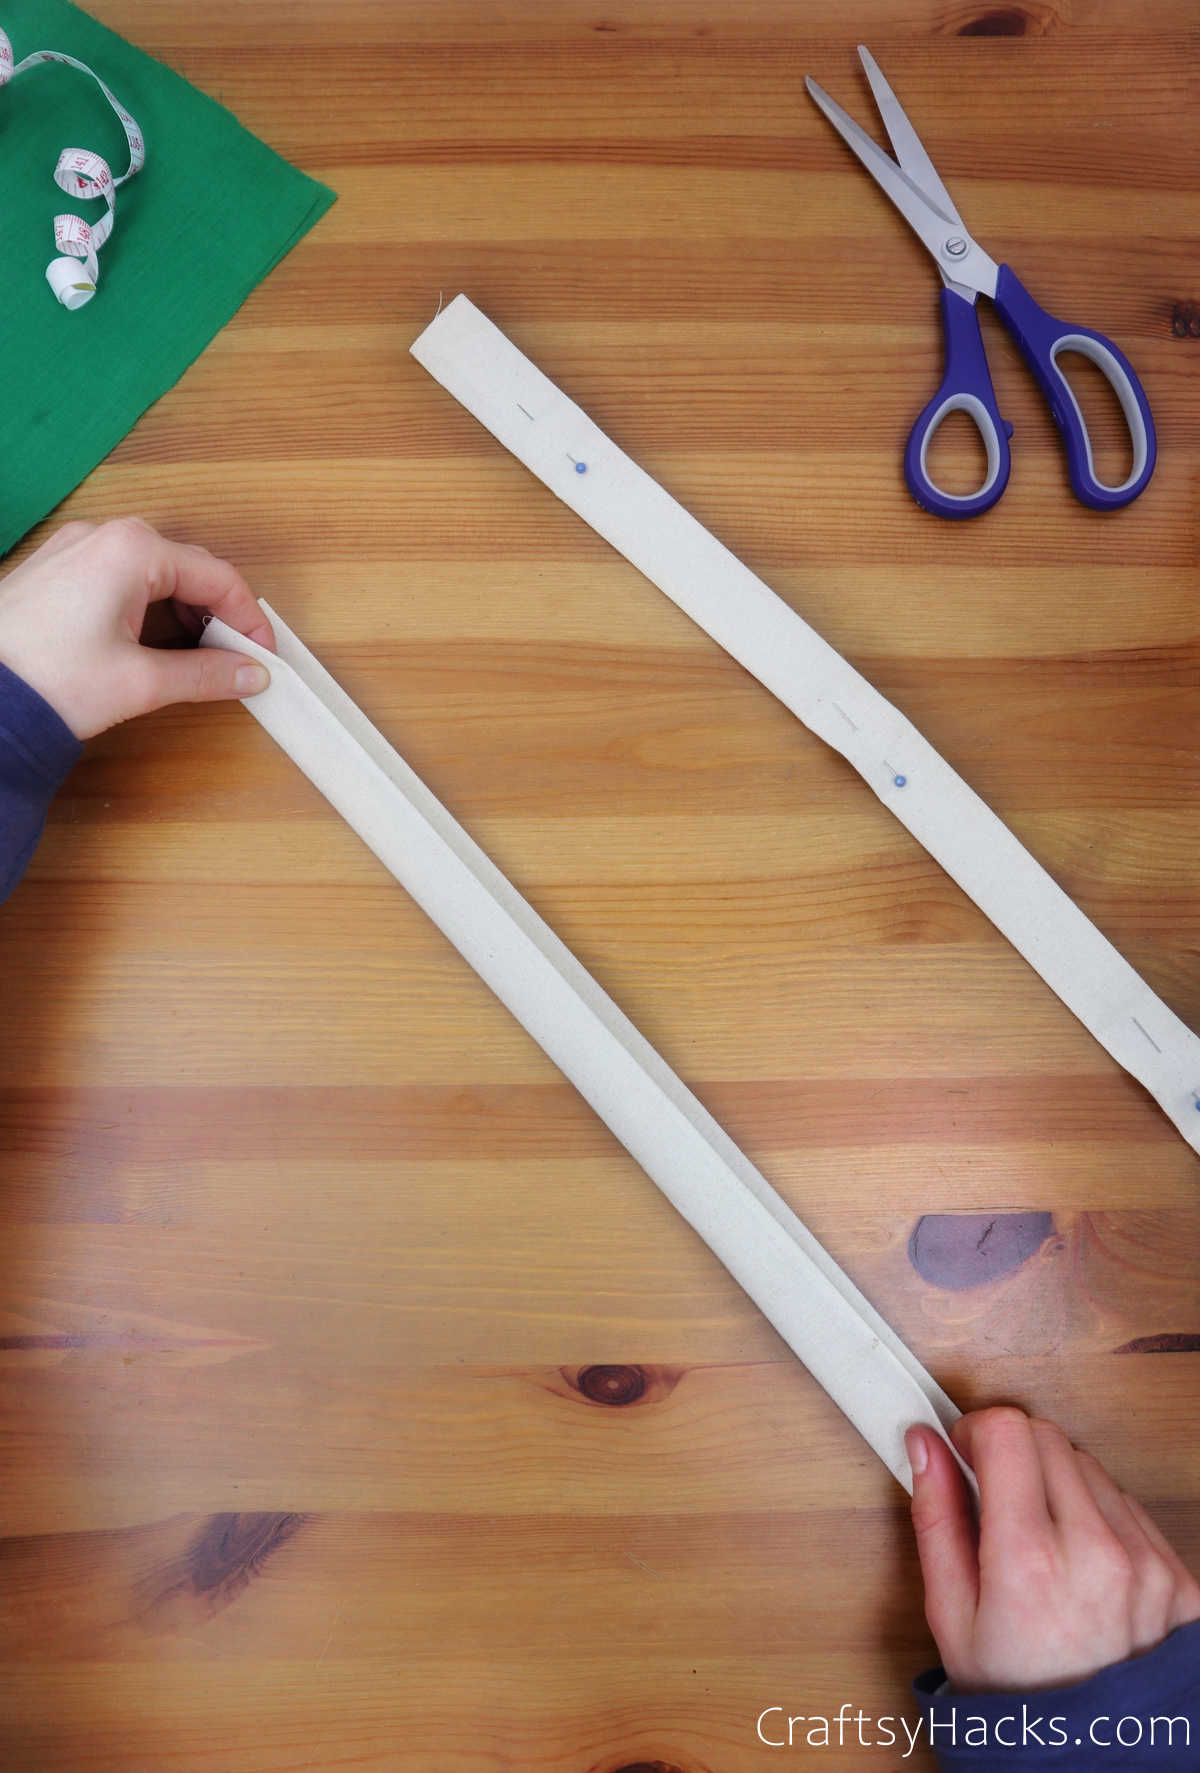
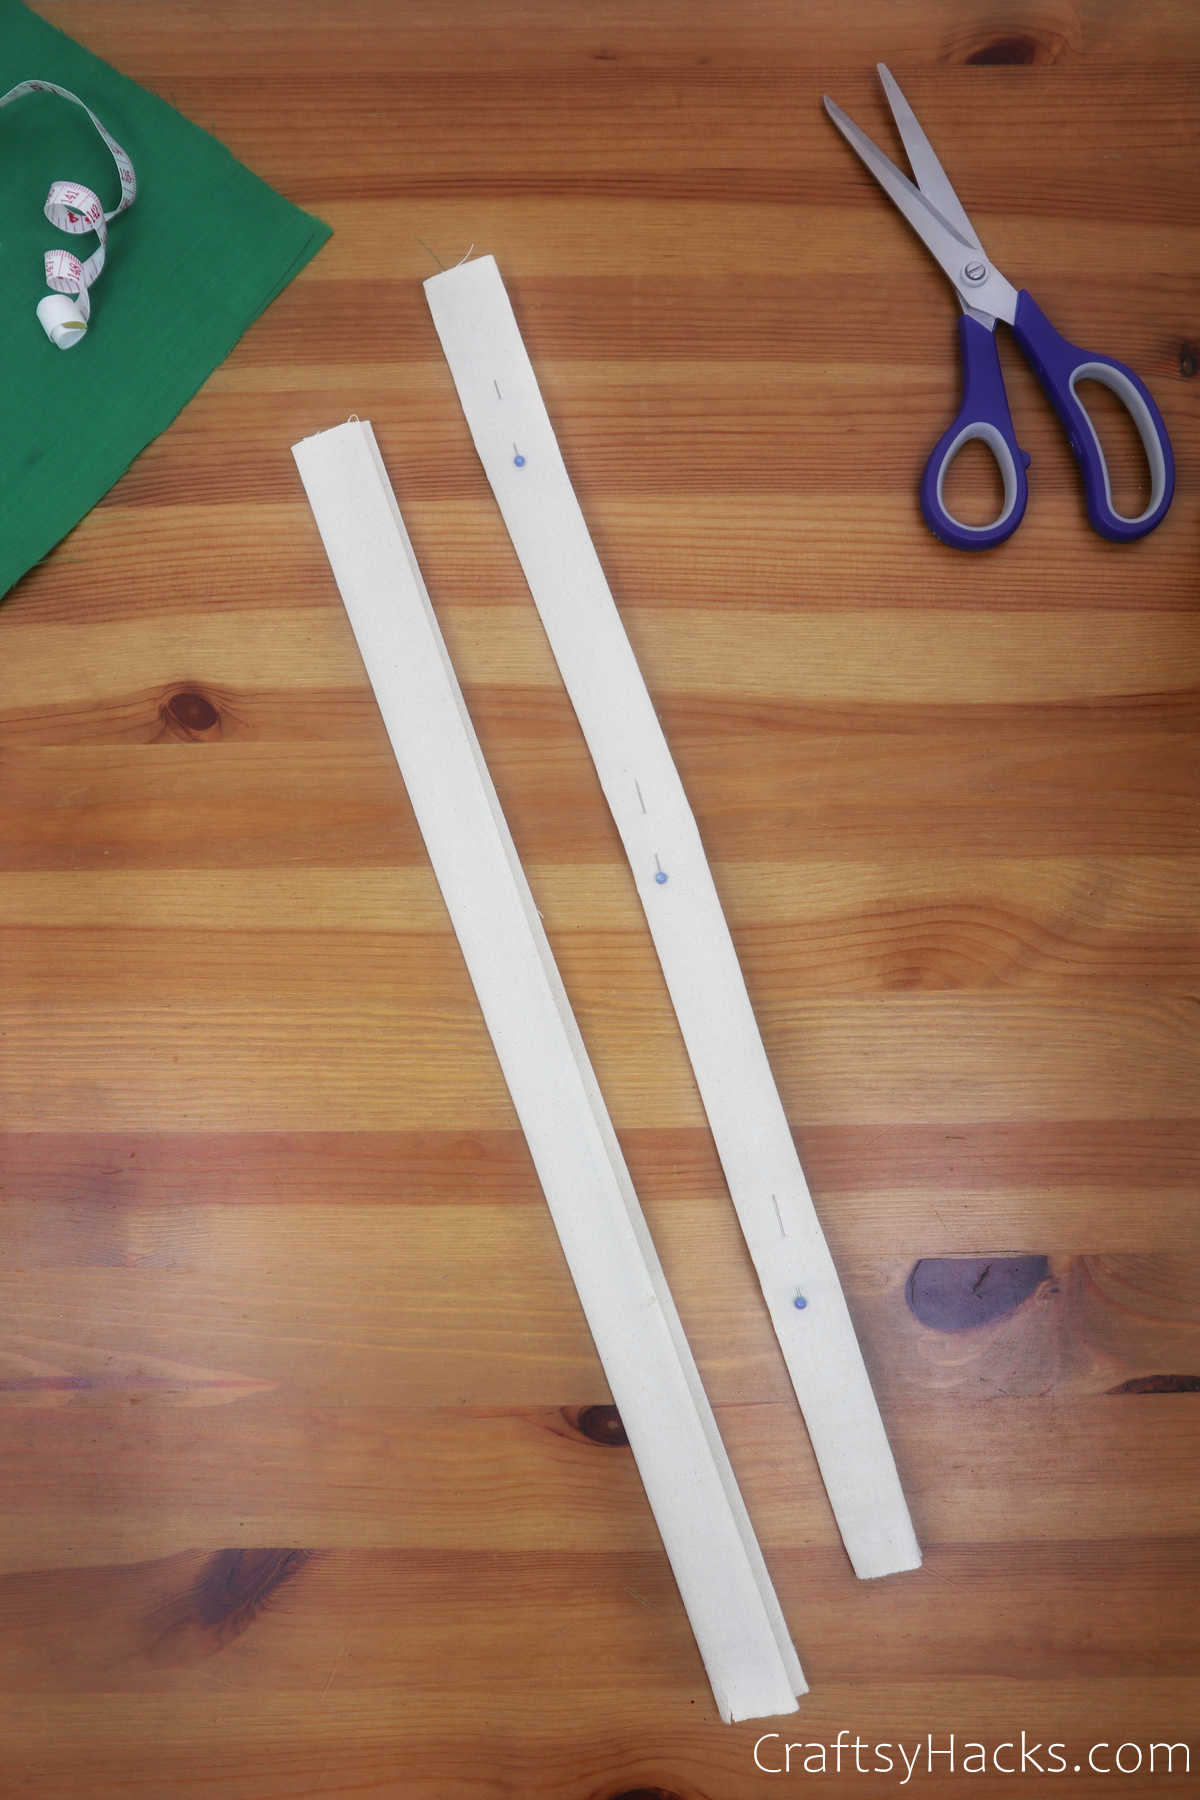
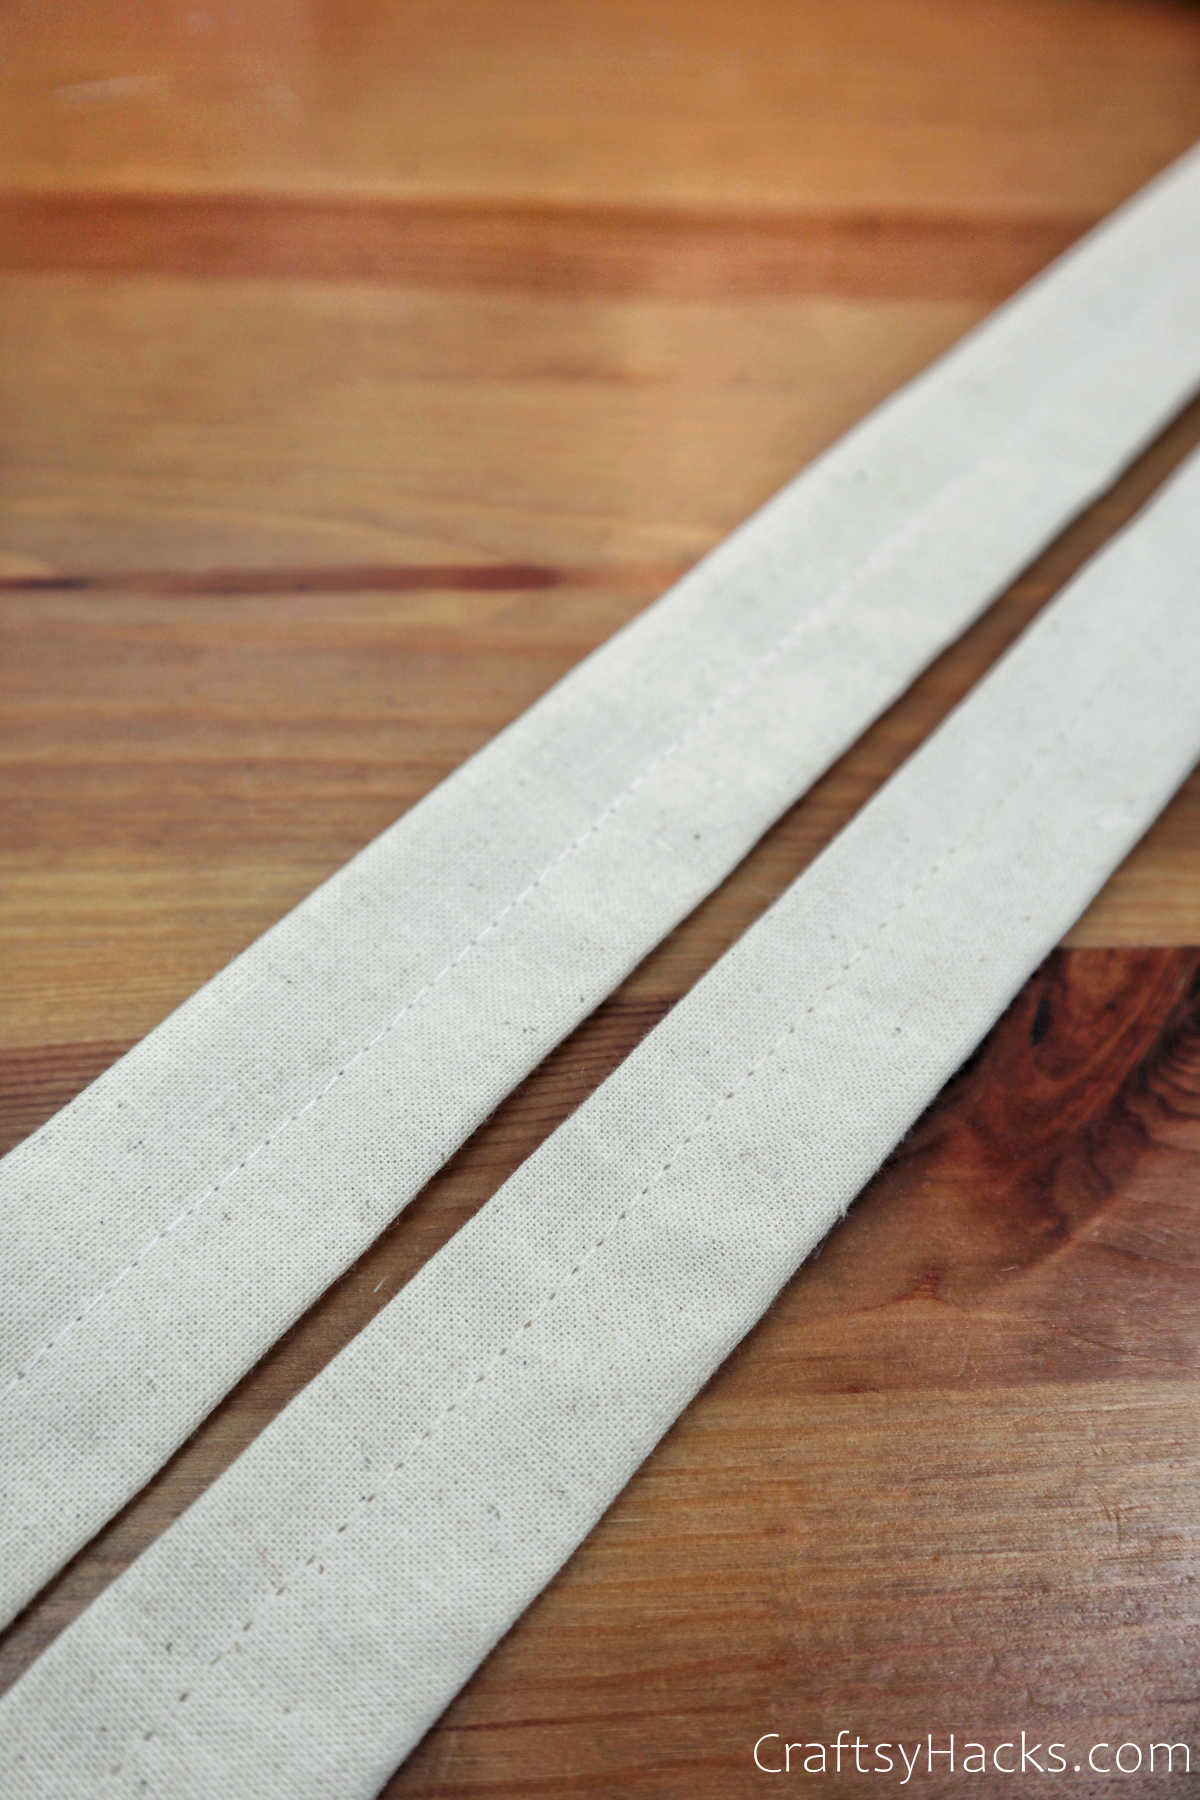
Plan your caddy’s dimensions and, accordingly, measure and cut out strips of cloth. This project calls for strips of 6-7 cm in width.
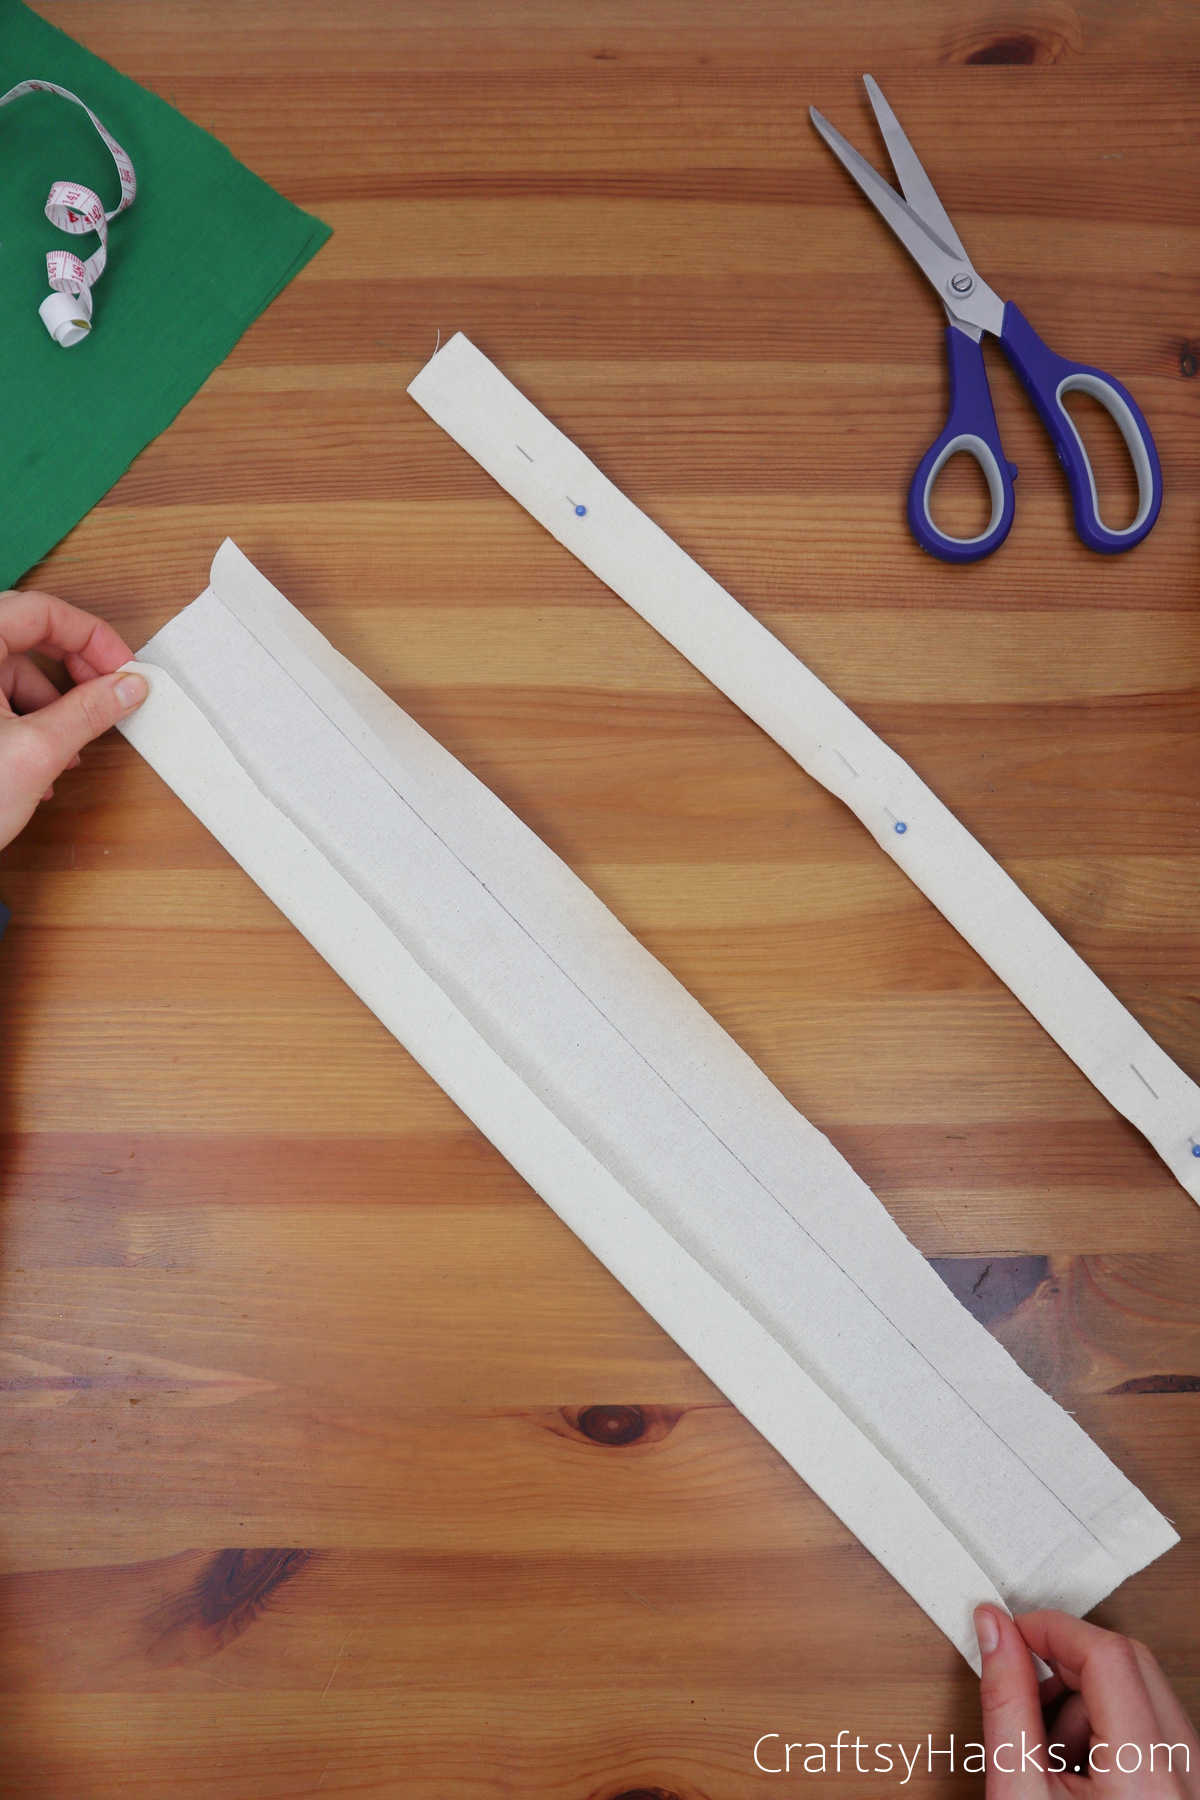
Fold the cloth three times and iron it in place to crease the fabric.
This process will help you sew the cloth better. Alternatively, you can also use sewing pins to hold them in place.
Step 2
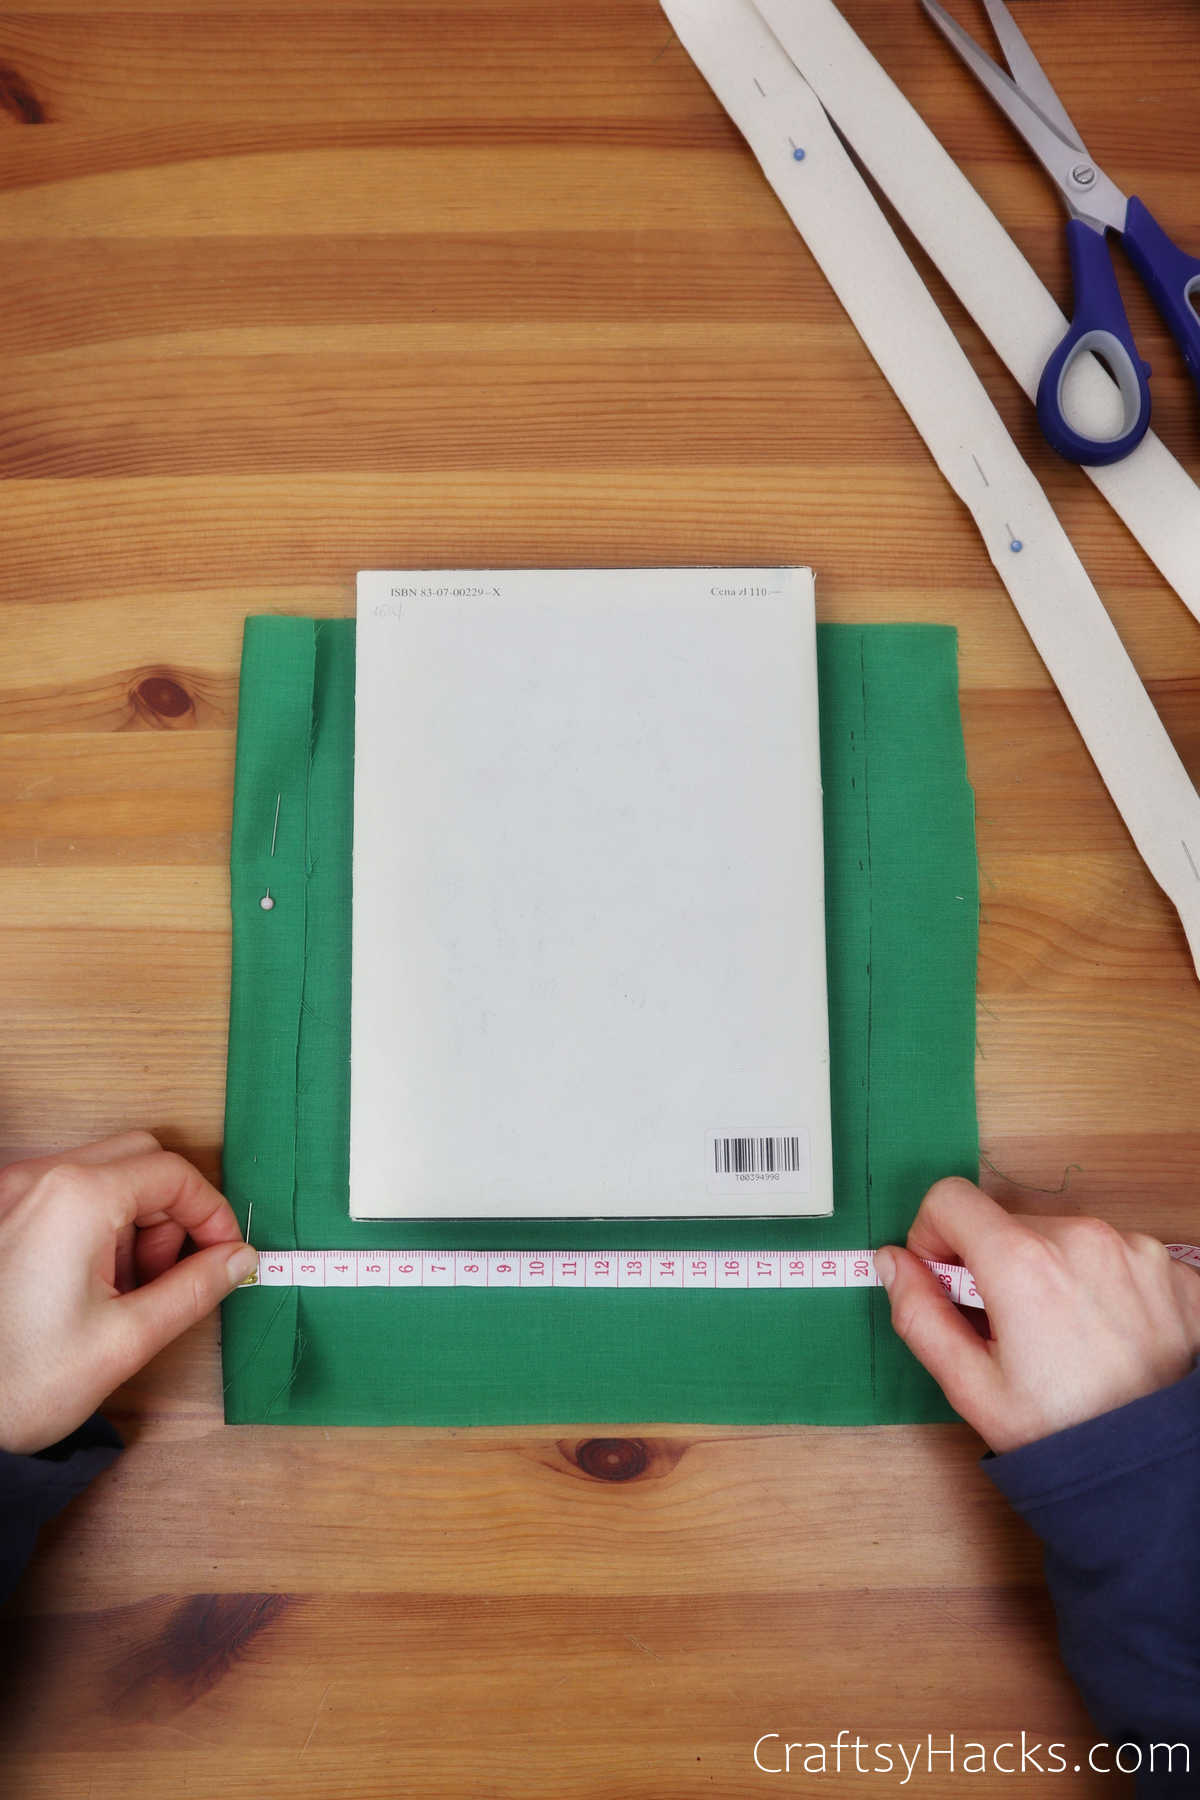
You must measure out exactly how big or small you want your caddy to be. Figure out what you want each pocket to hold—laptop, books, phone?
This will help you figure out exactly how big each pocket should be, as well as how many pockets you need.
Place your book or laptop over the cloth to help you measure. Don’t forget to leave an inch gap around all four sides to allow for sewing.
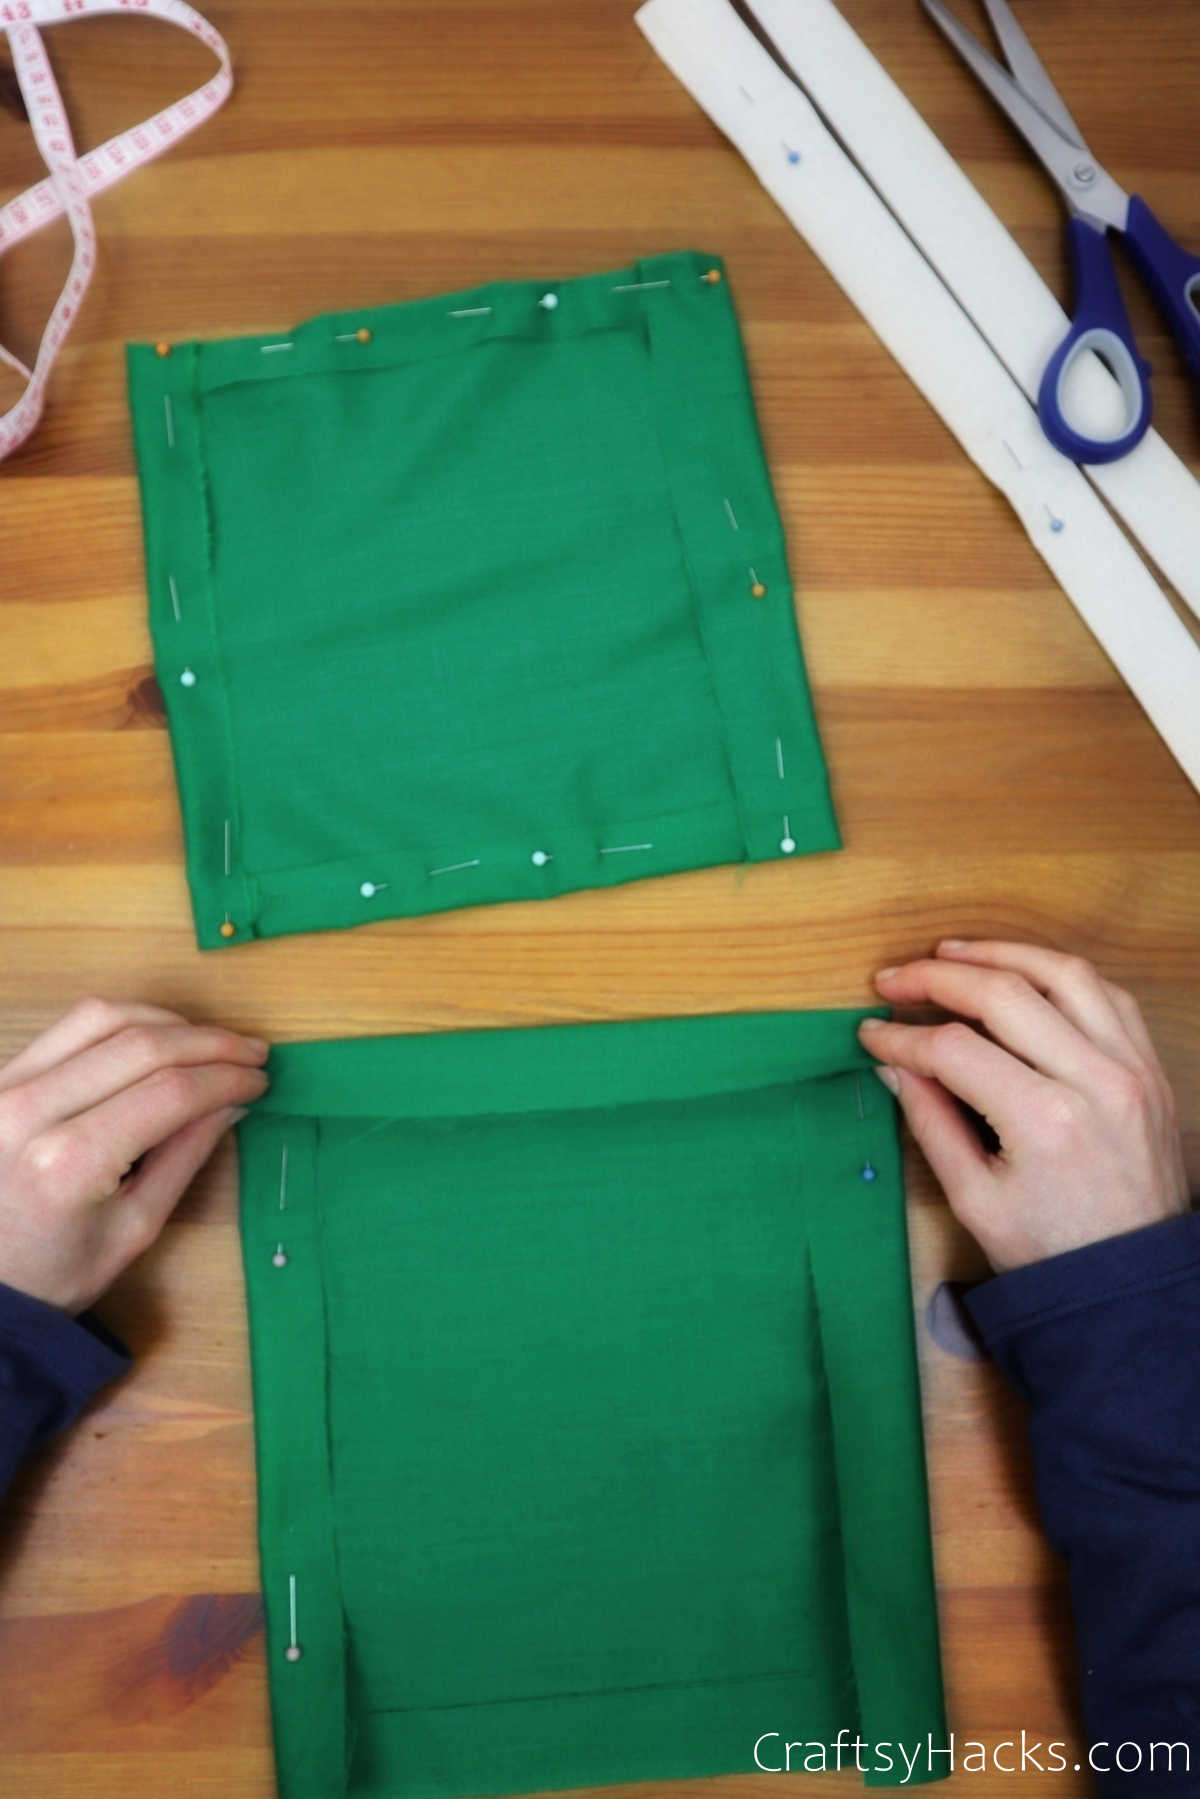
Step 3
Pin the ends down and set each pocket aside while you work your way through the project. You can use sewing pins, or plain old bobby pins should just as easily do the trick.
Step 4
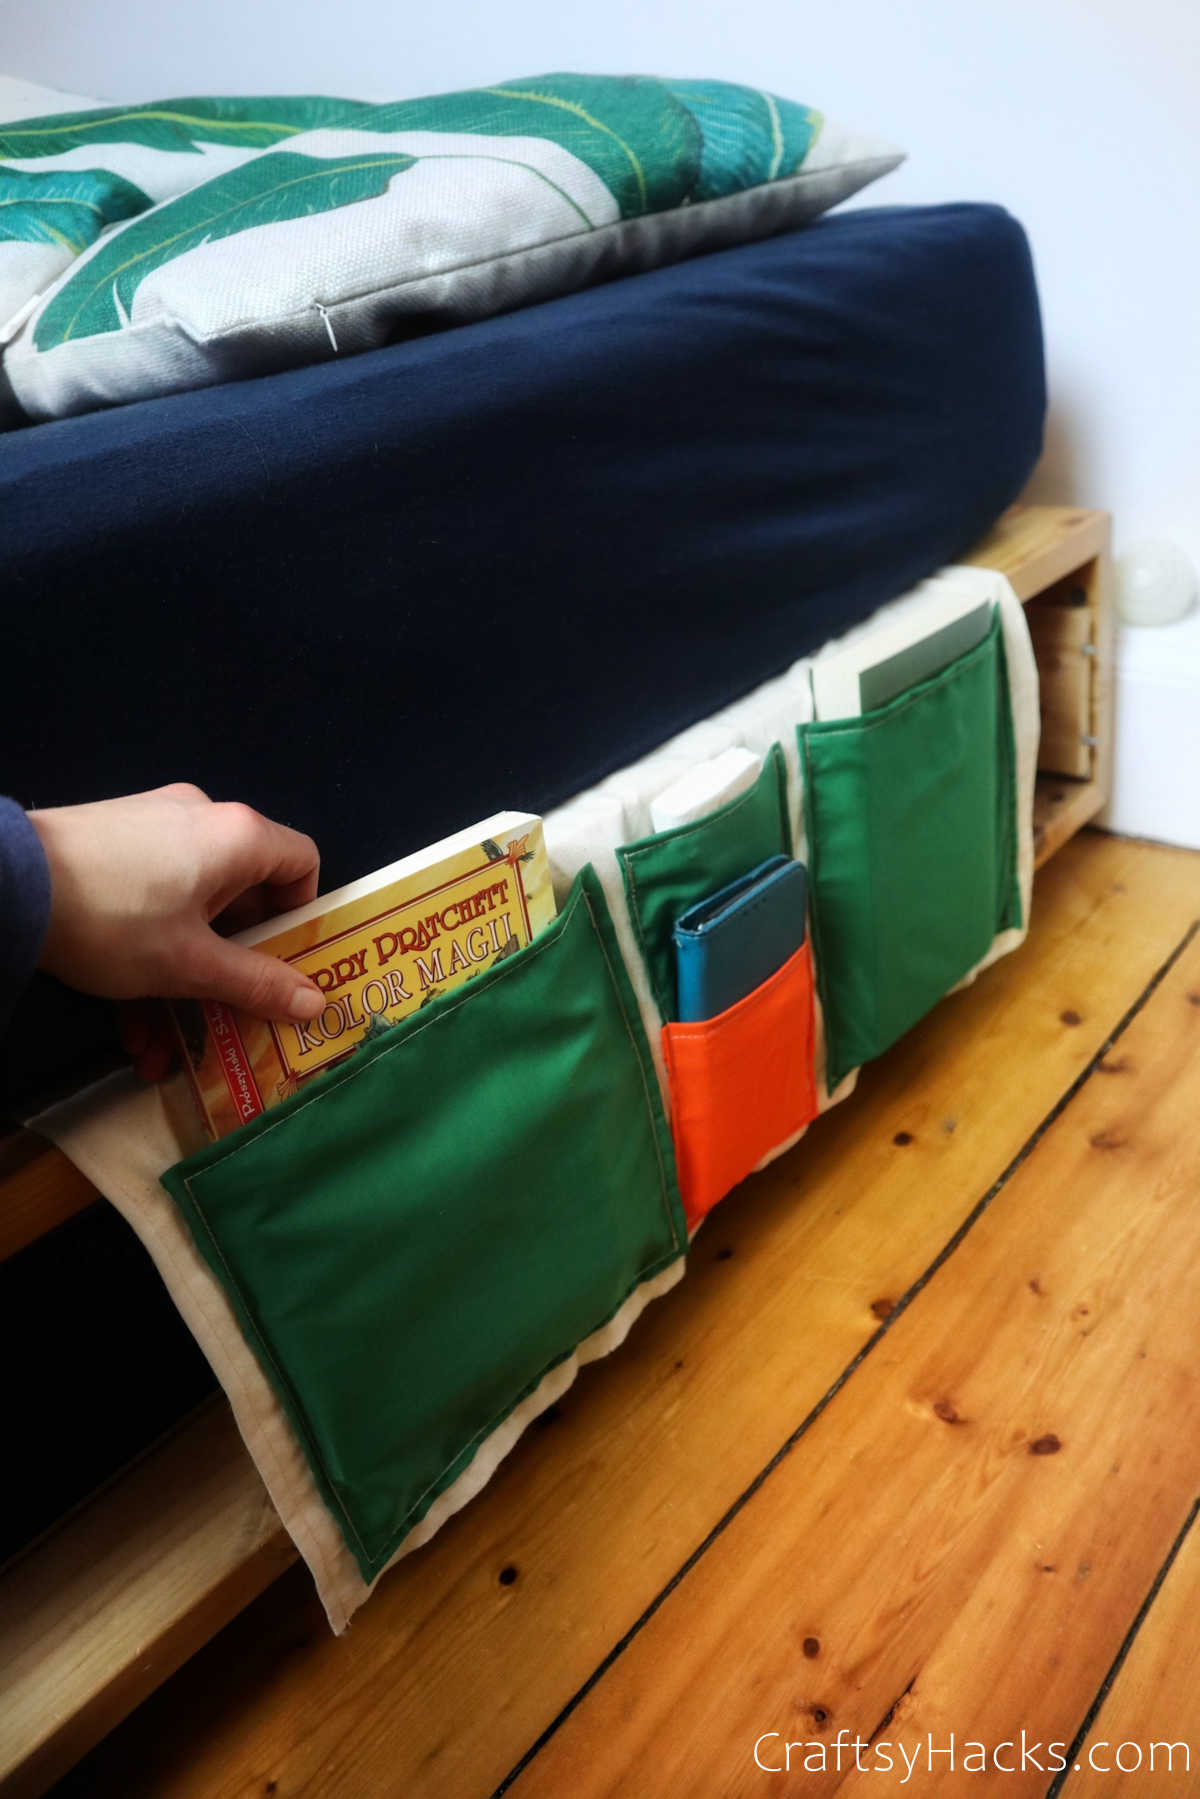
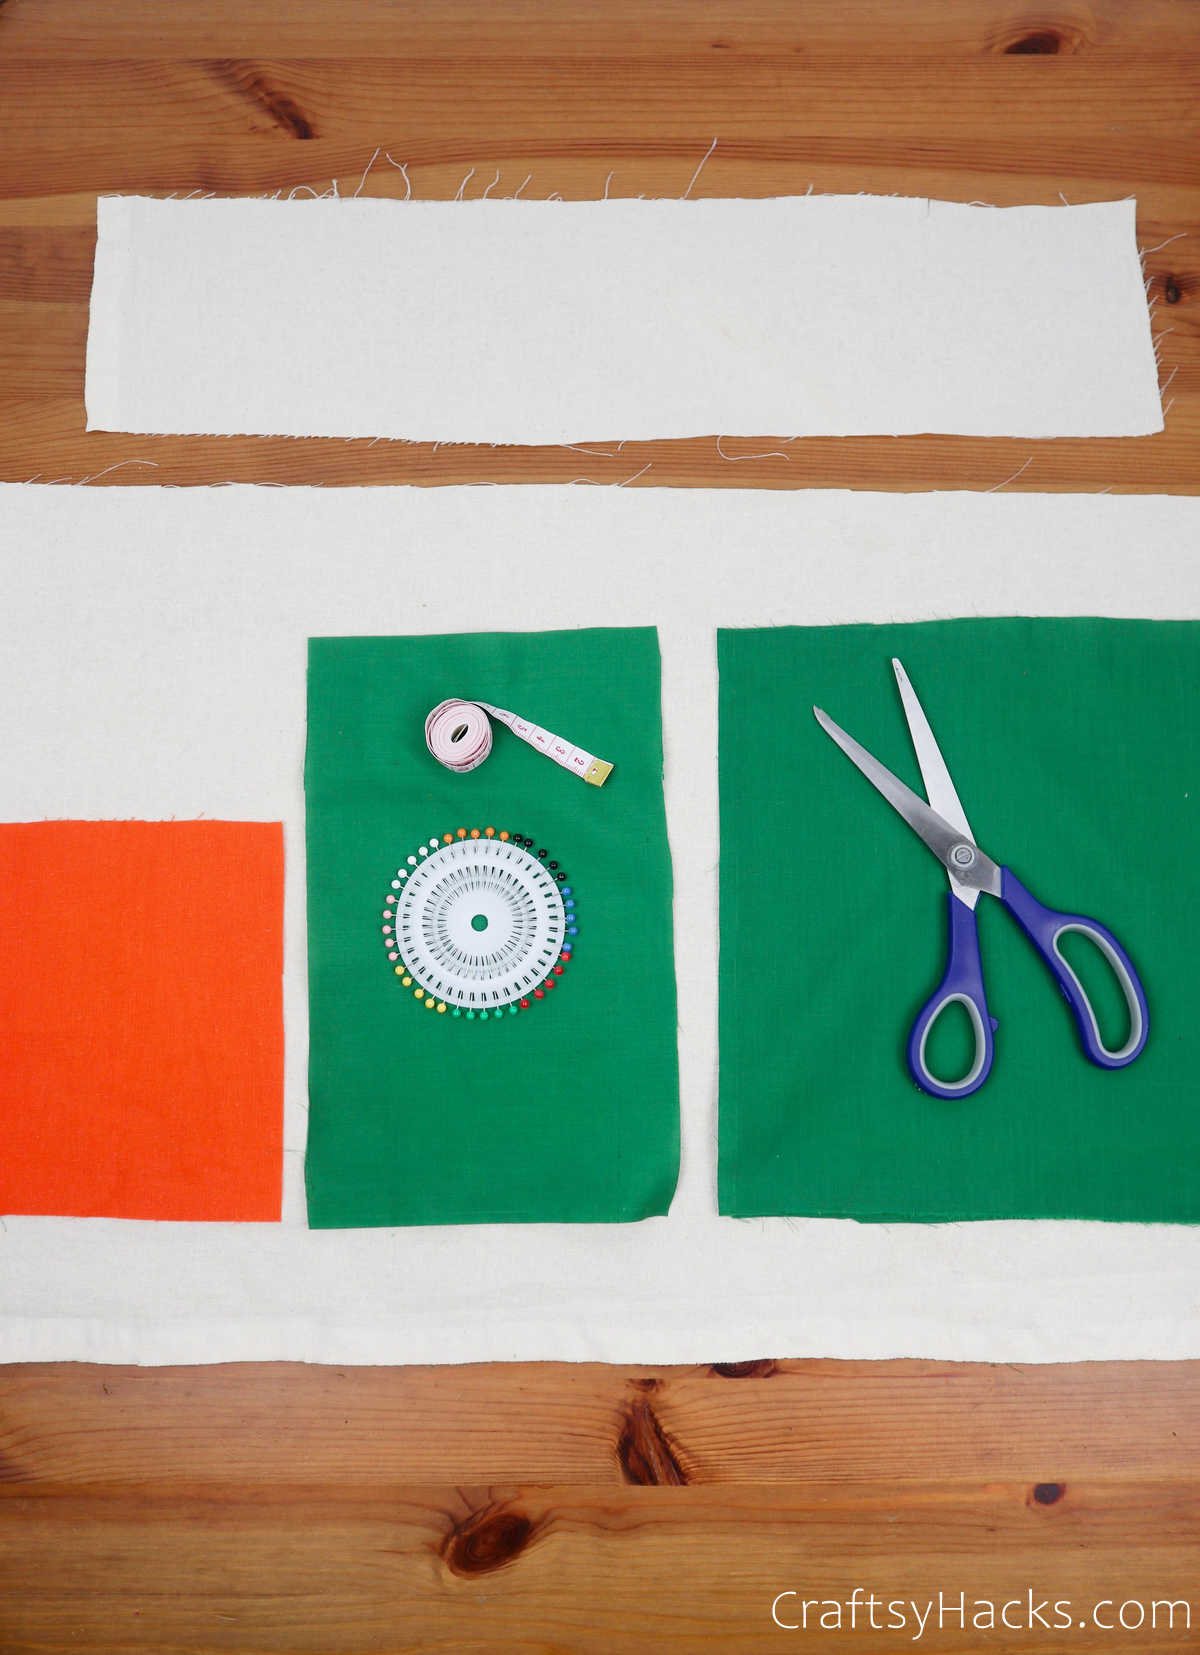
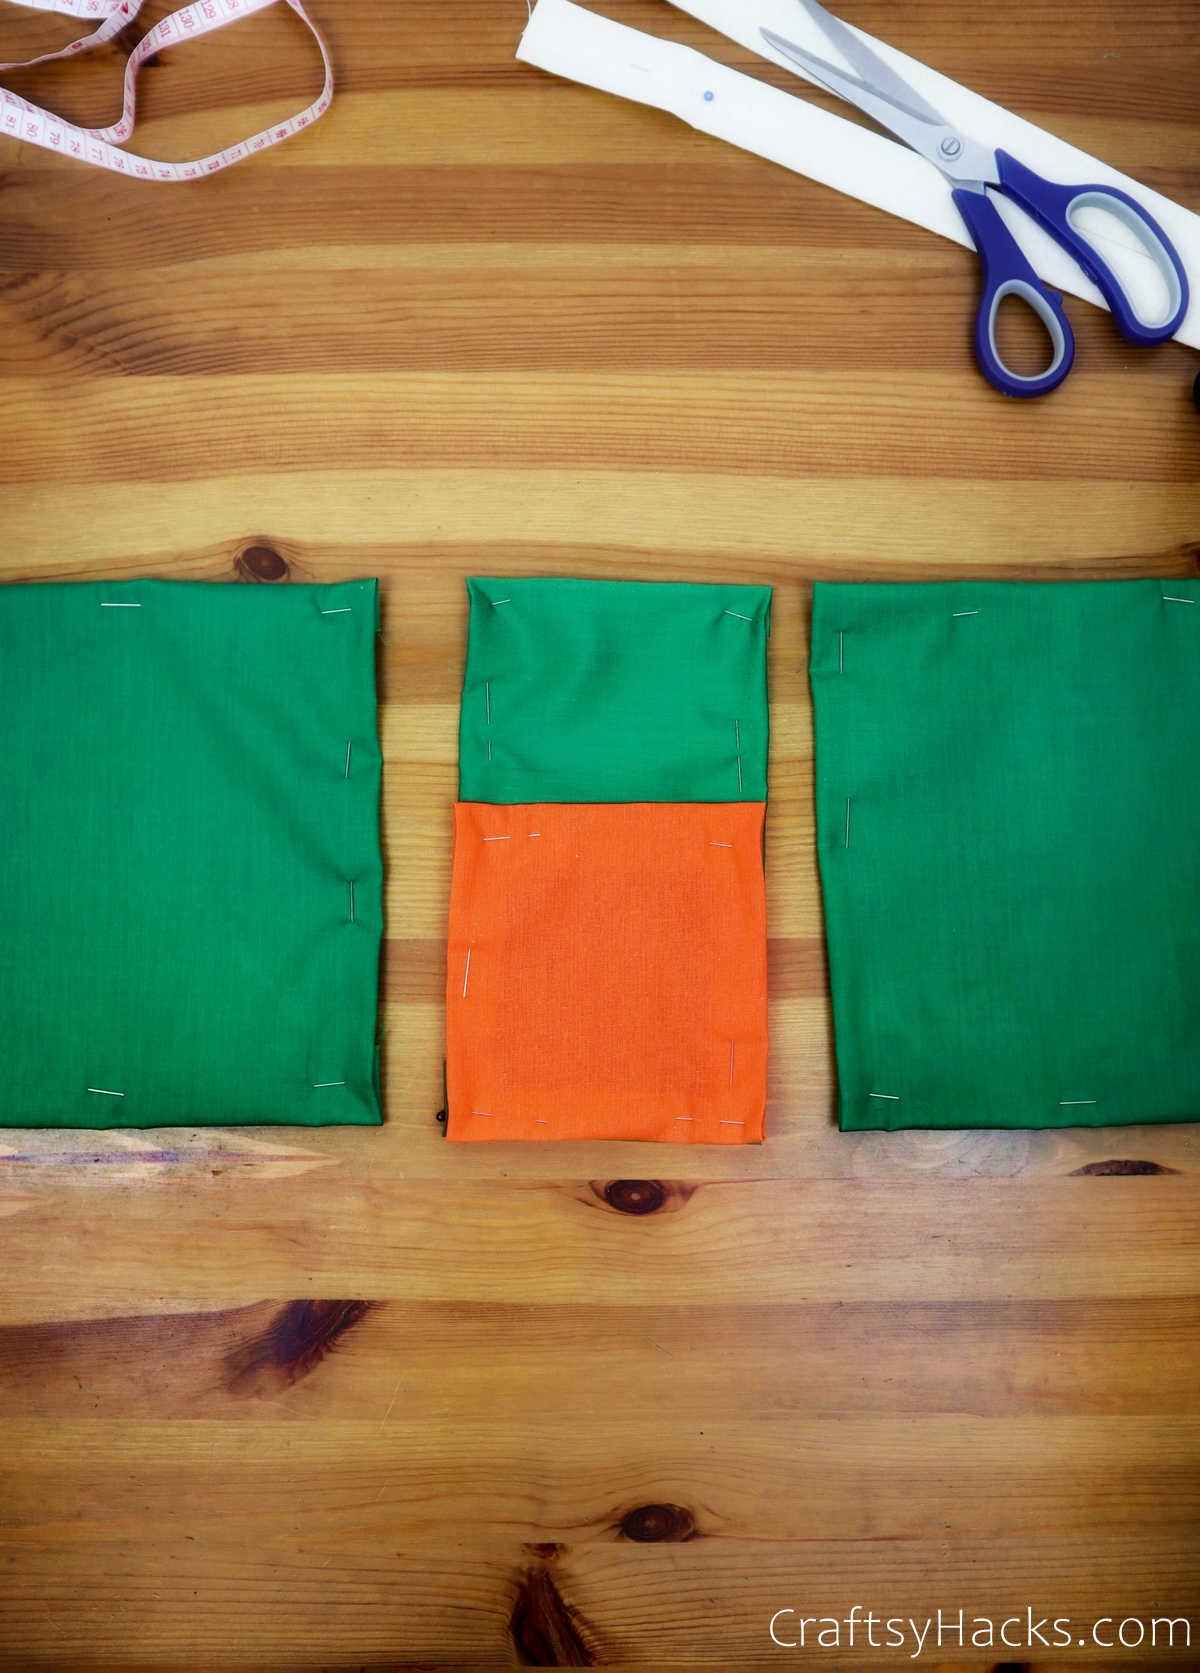
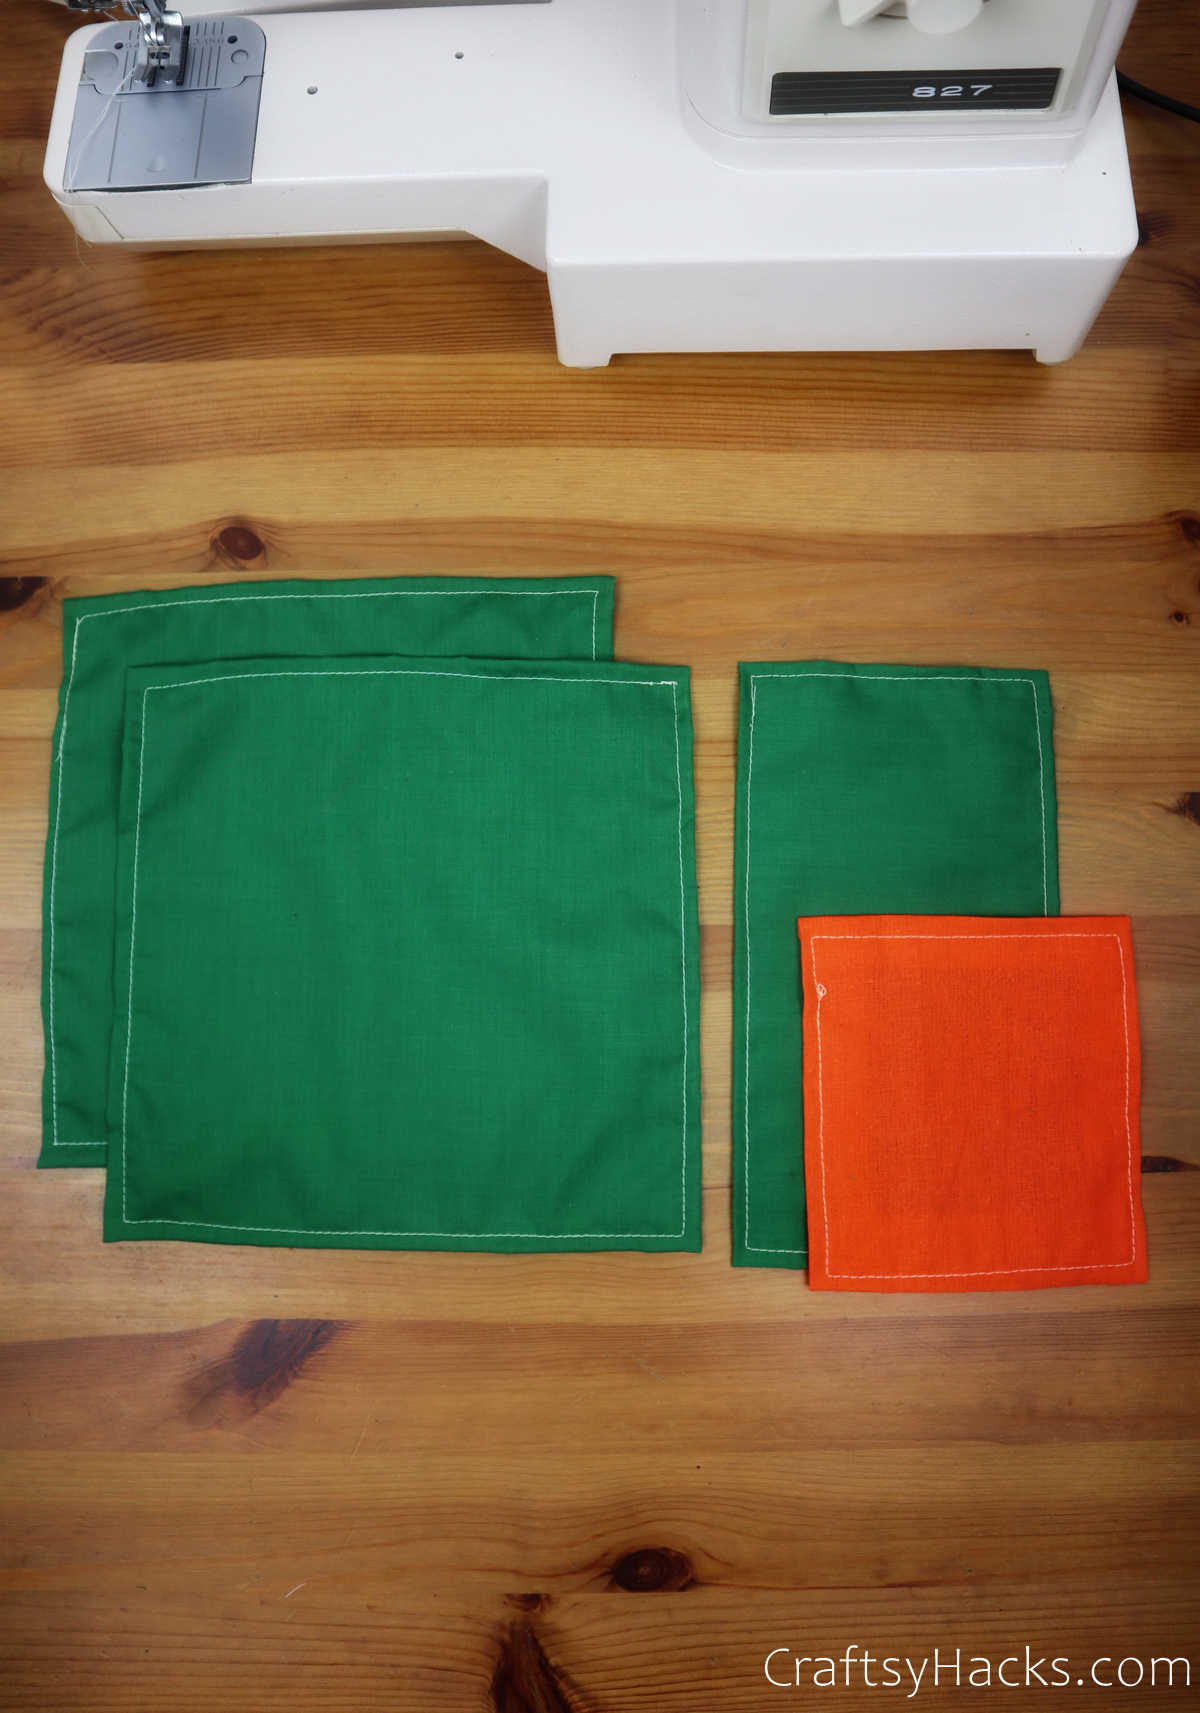
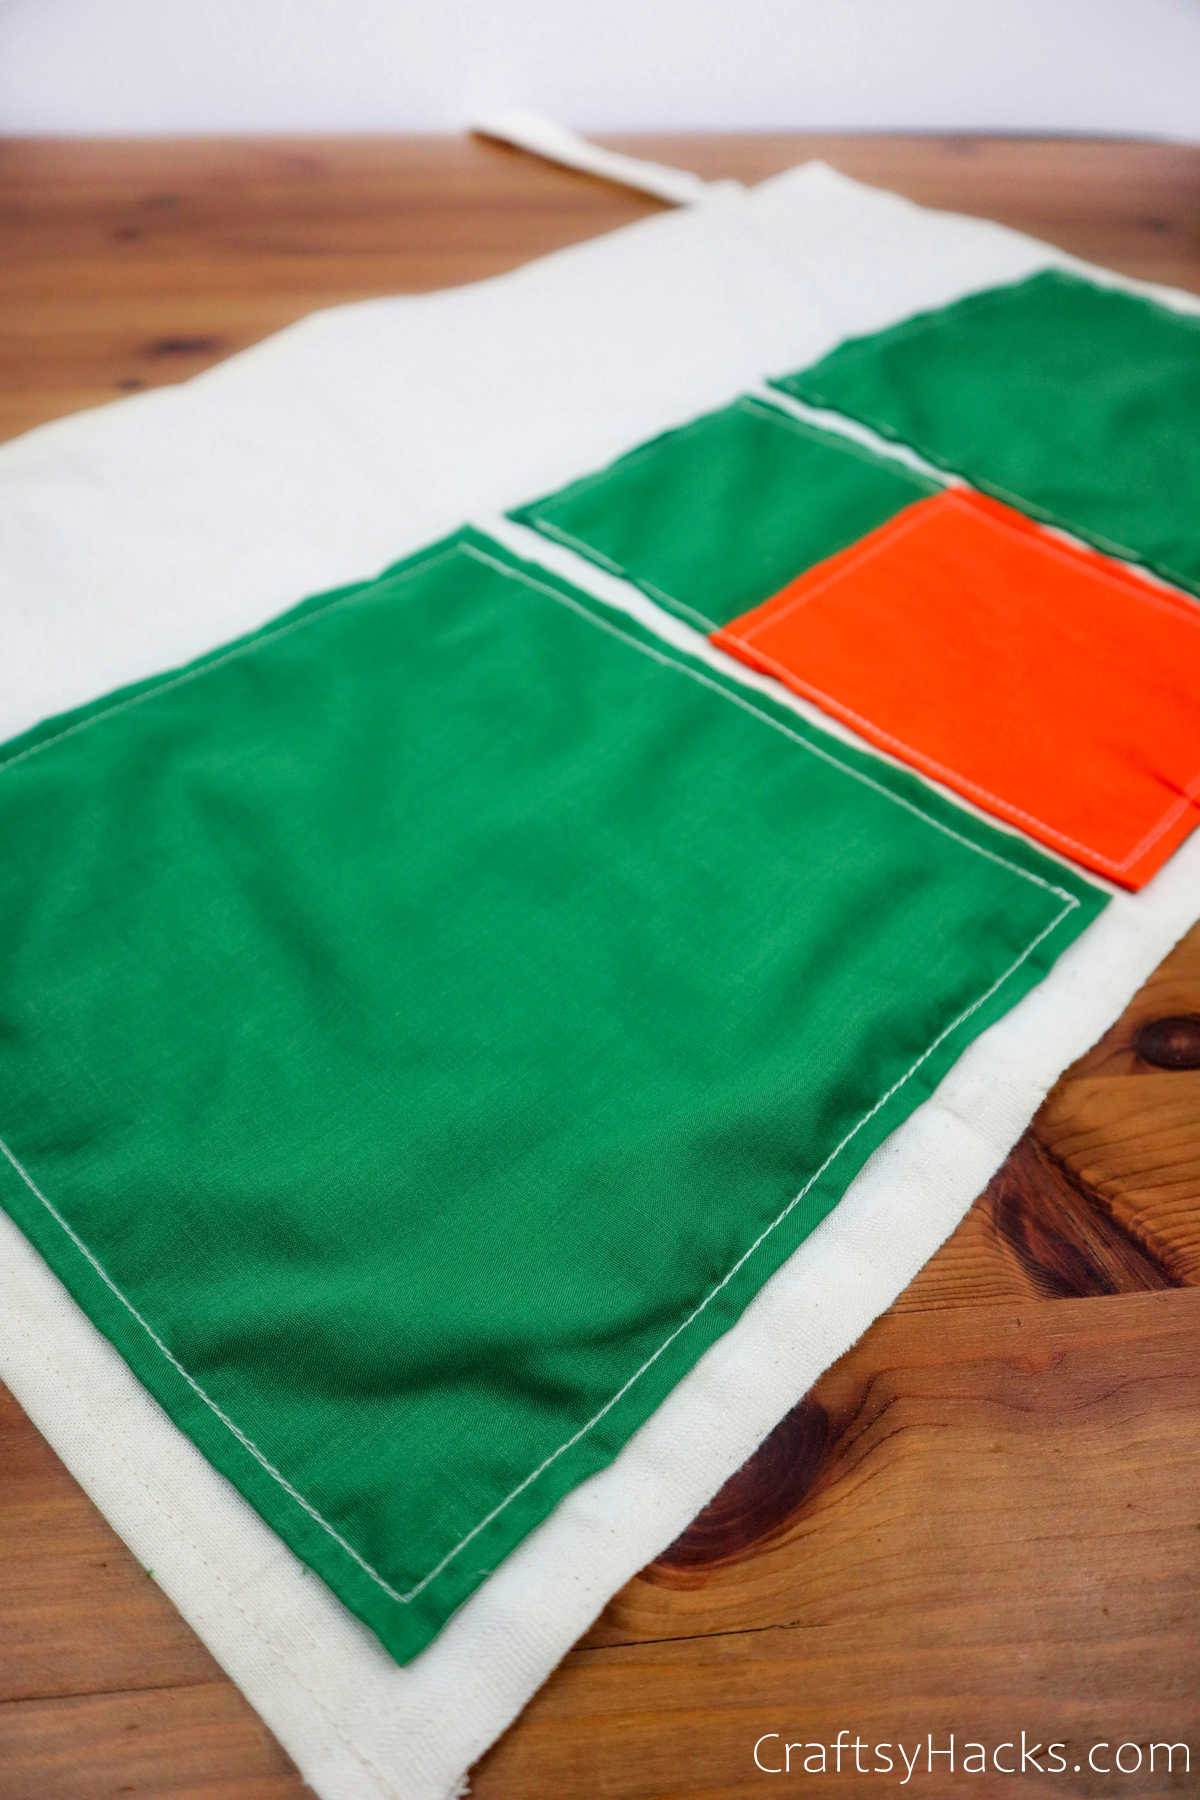
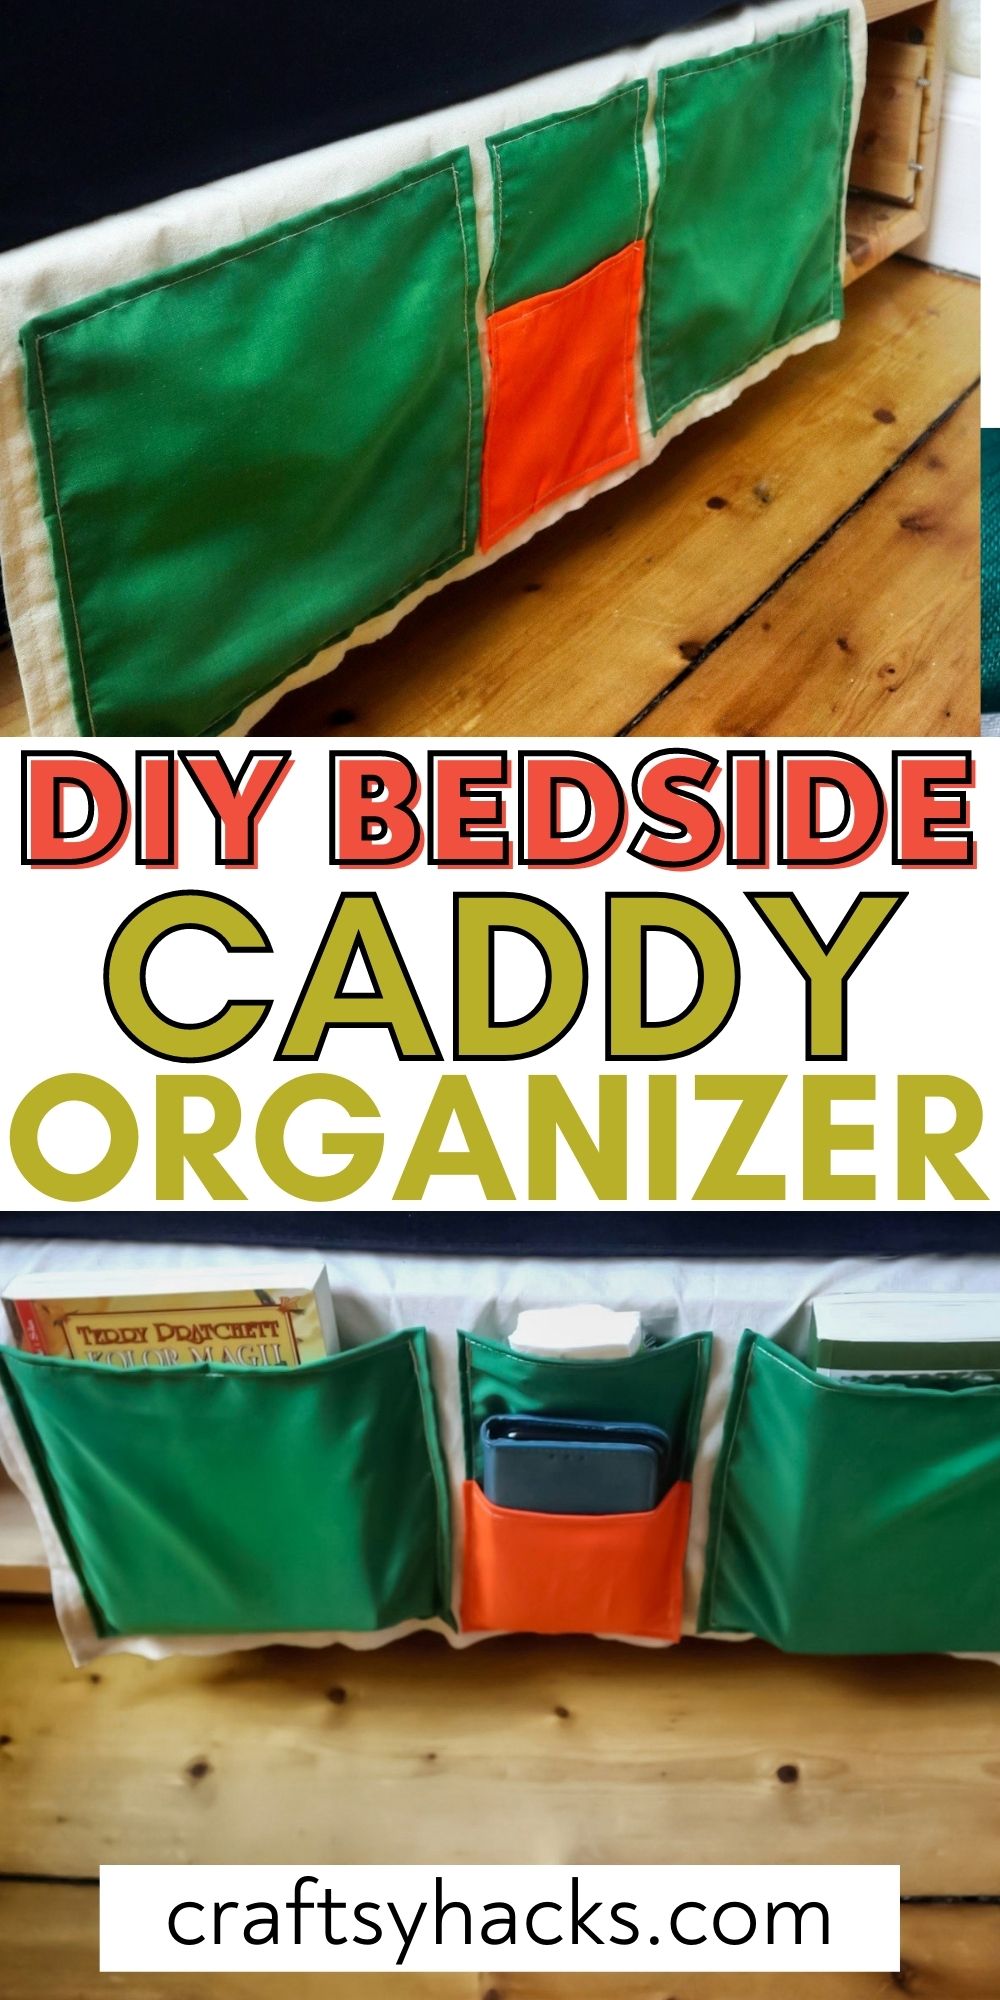
Switch out different colors for different pockets to really make your bedside caddy stand out. As you can see below, this project uses a lovely kelly green and saffron combo.

Turn the swatches around and ensure that the edges are all even.
Step 5
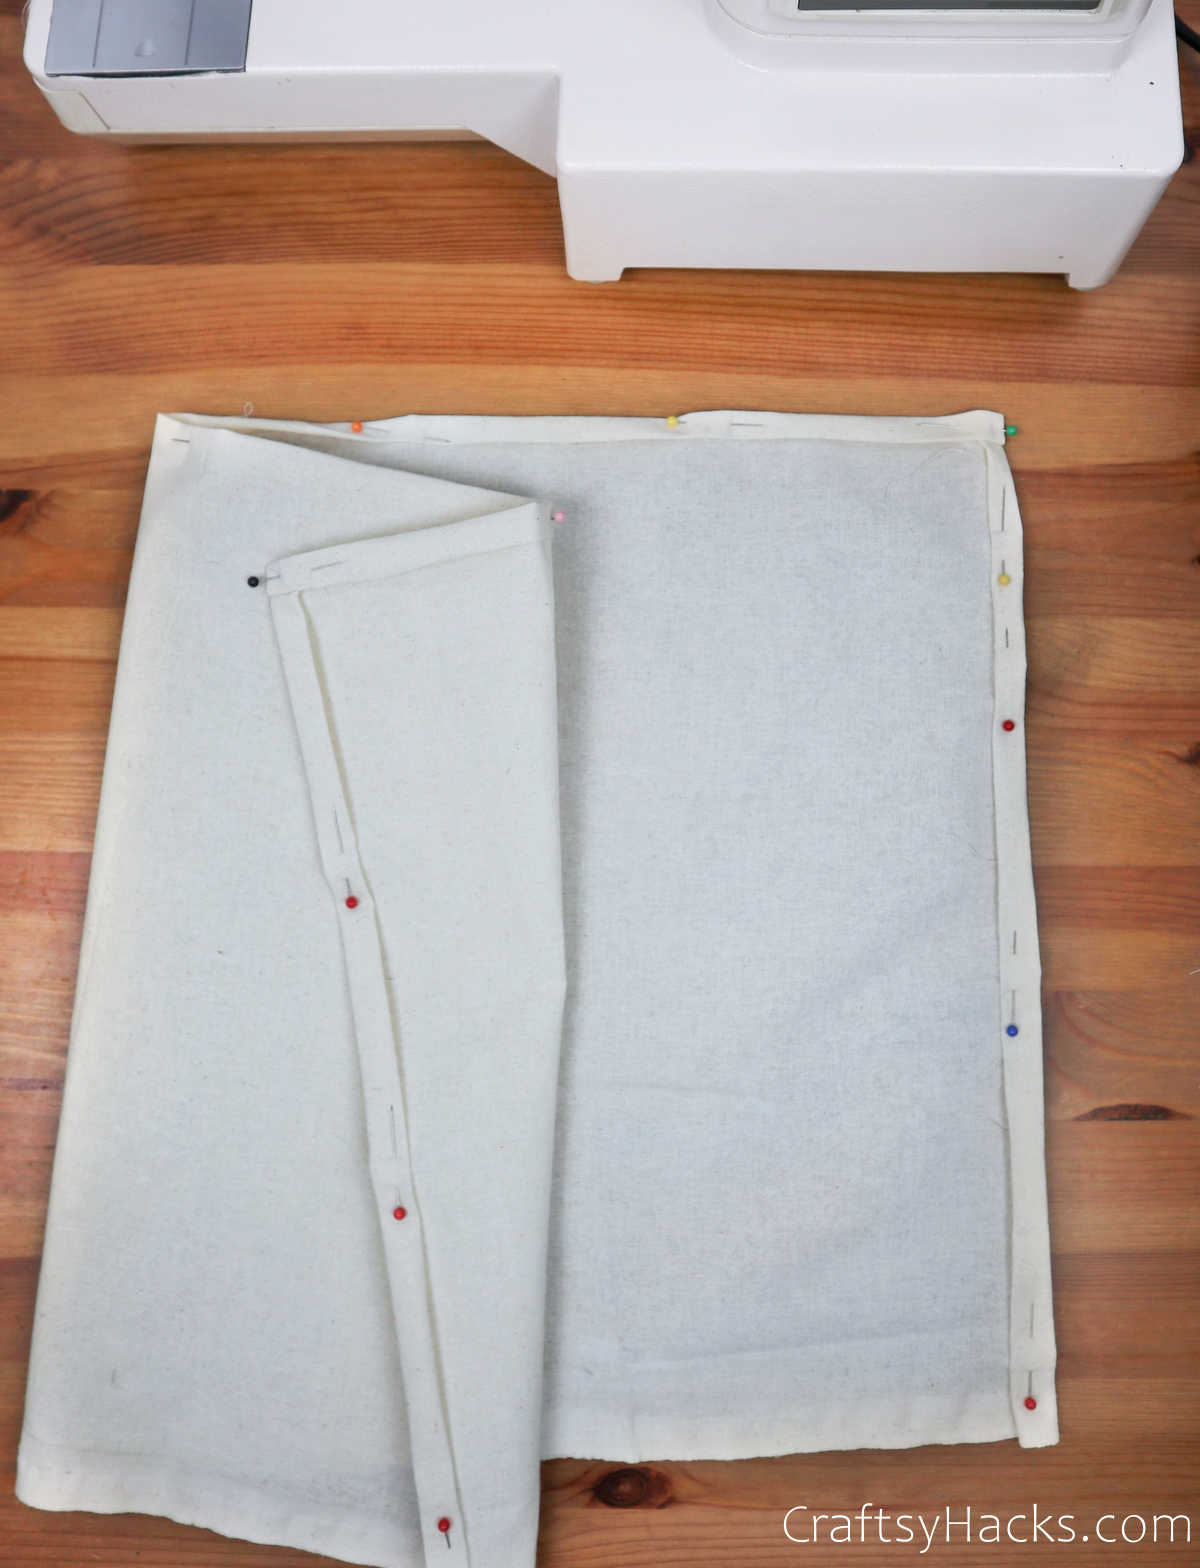
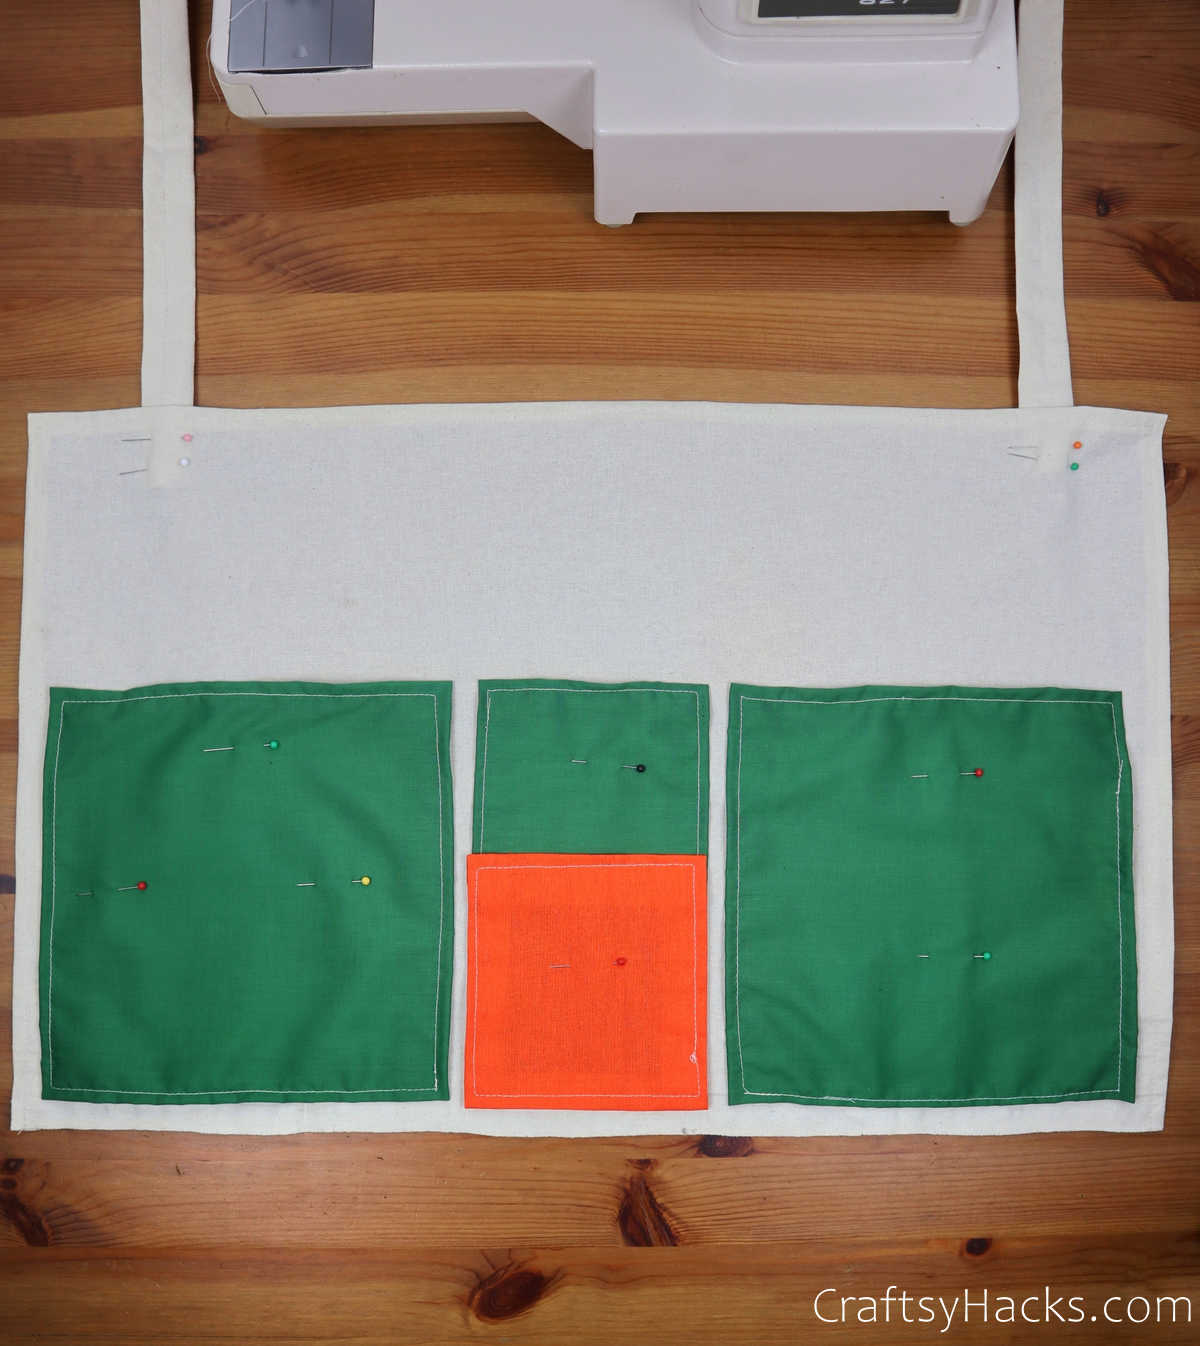
Remember that big length of fabric you set aside earlier? Pull that out and make sure all the ends are pinned together in place.
At this juncture, you can lay out the pockets over the big white backdrop to figure out where you want each one to go.
Step 6
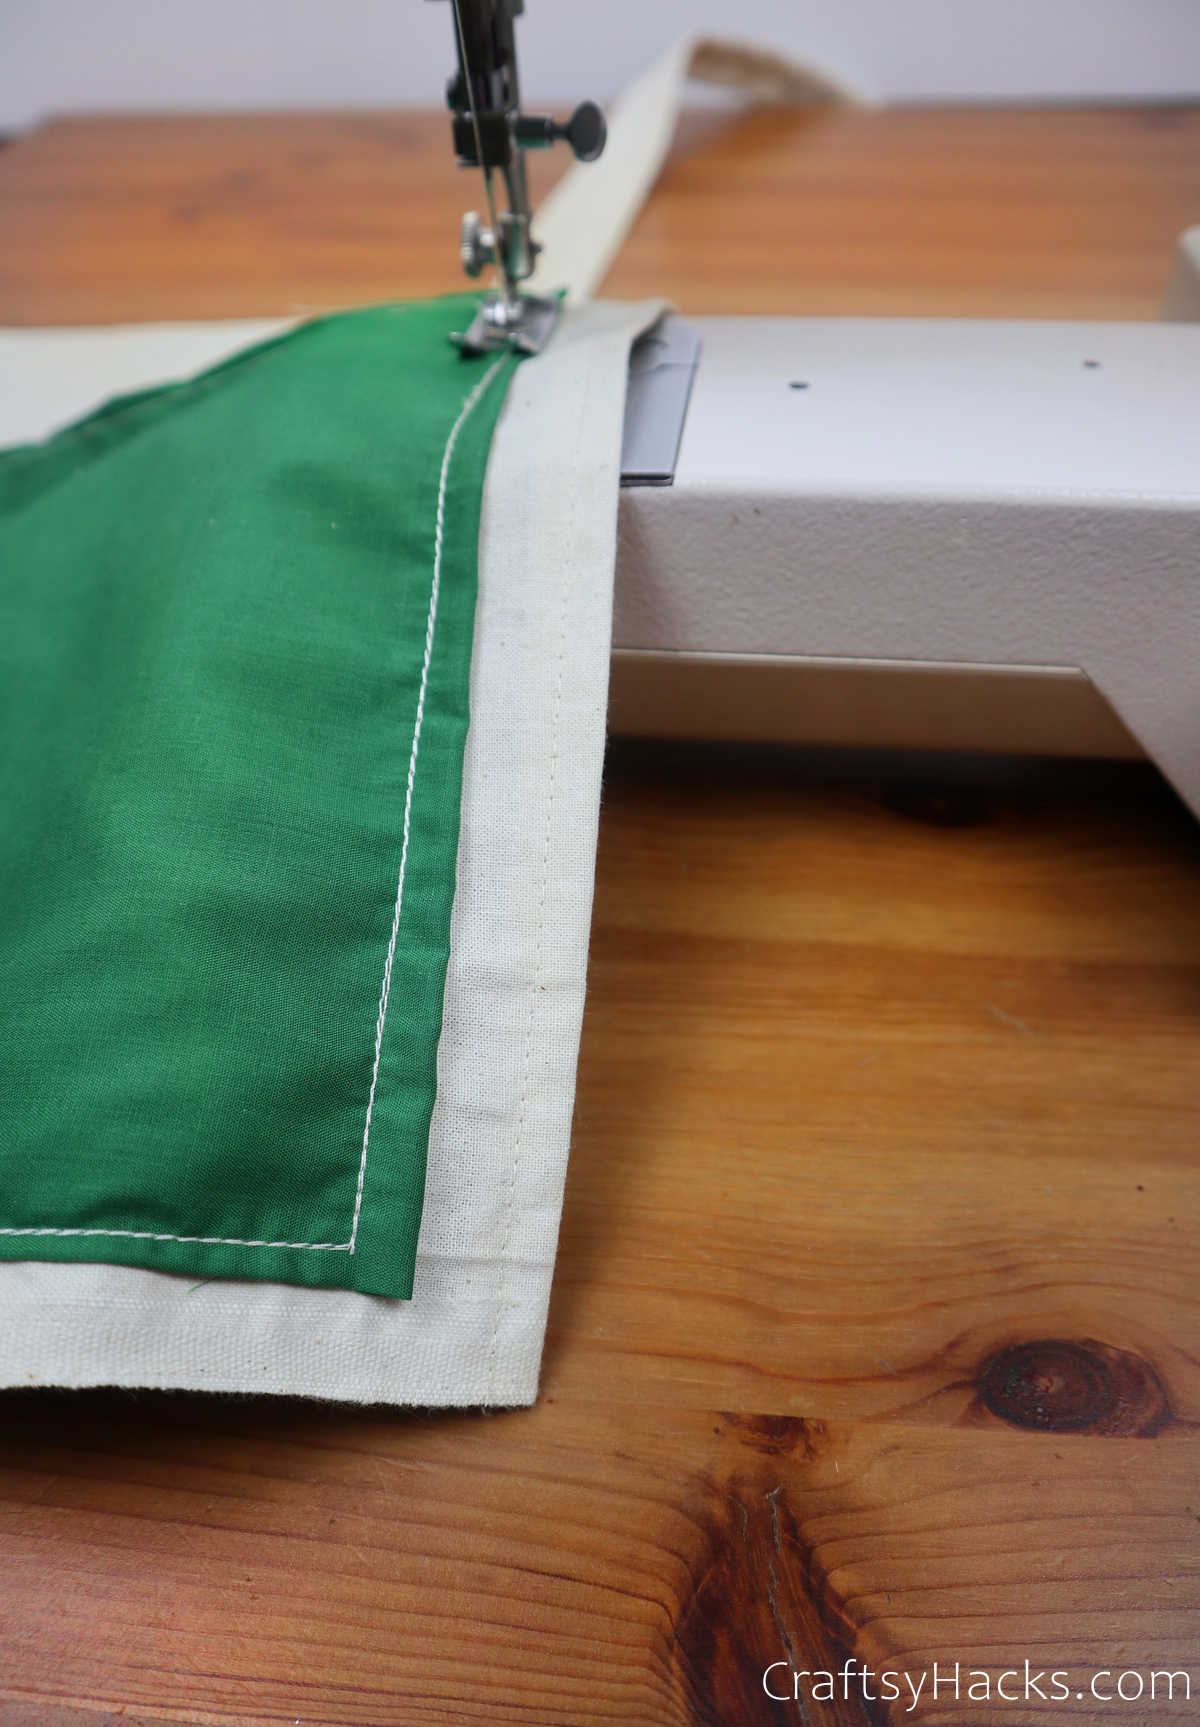
It’s time to sew all your pockets. You can hand stitch them, or just use your sewing machine.
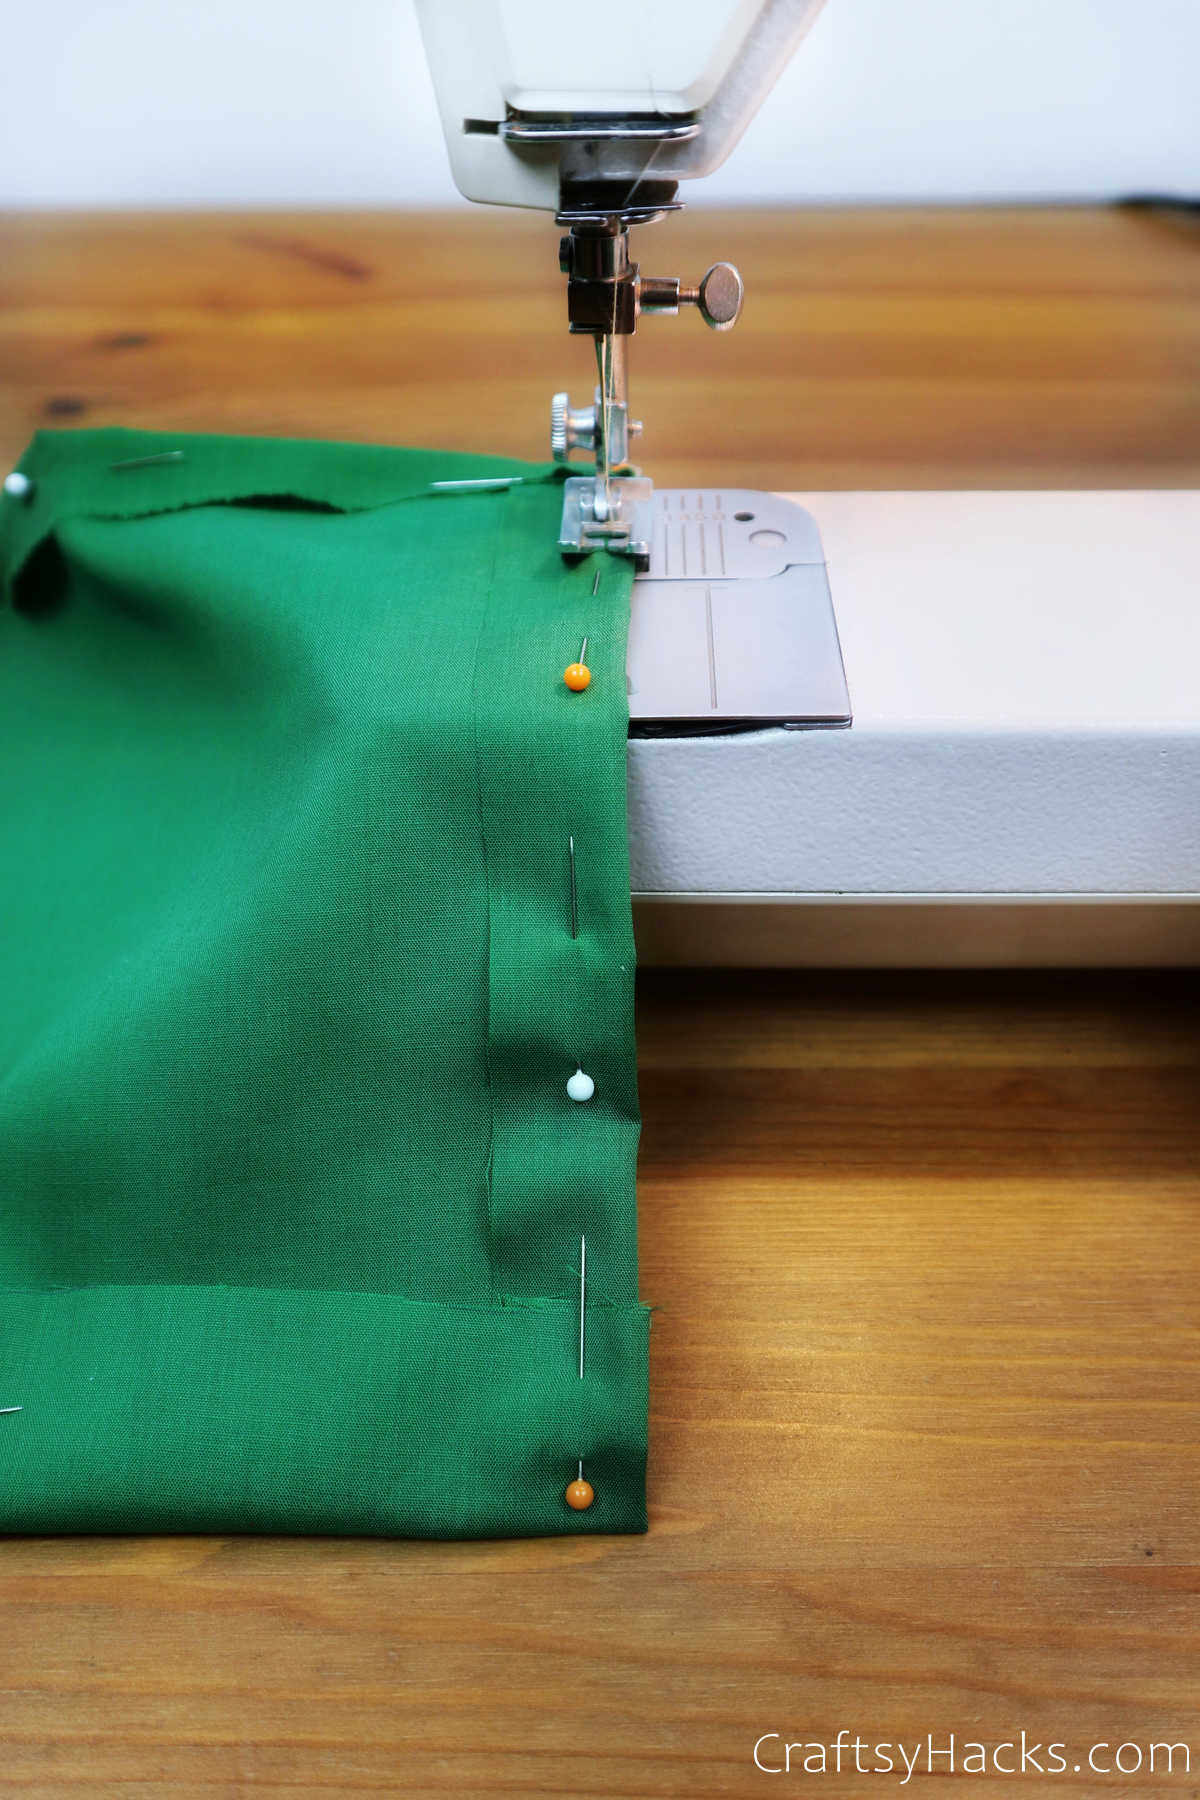
Consider using a contrasting color for the thread you’re using to sew the pockets. They’d go a long way to jazz up the entire project. They also make the pockets look well-rounded, giving them a finished edging.
Don’t forget, you also have to sew the long narrow strips of white fabric that you cut out and pinned. You can sew down the middle of the strip, using a similar color of thread for this swatch.
Step 7
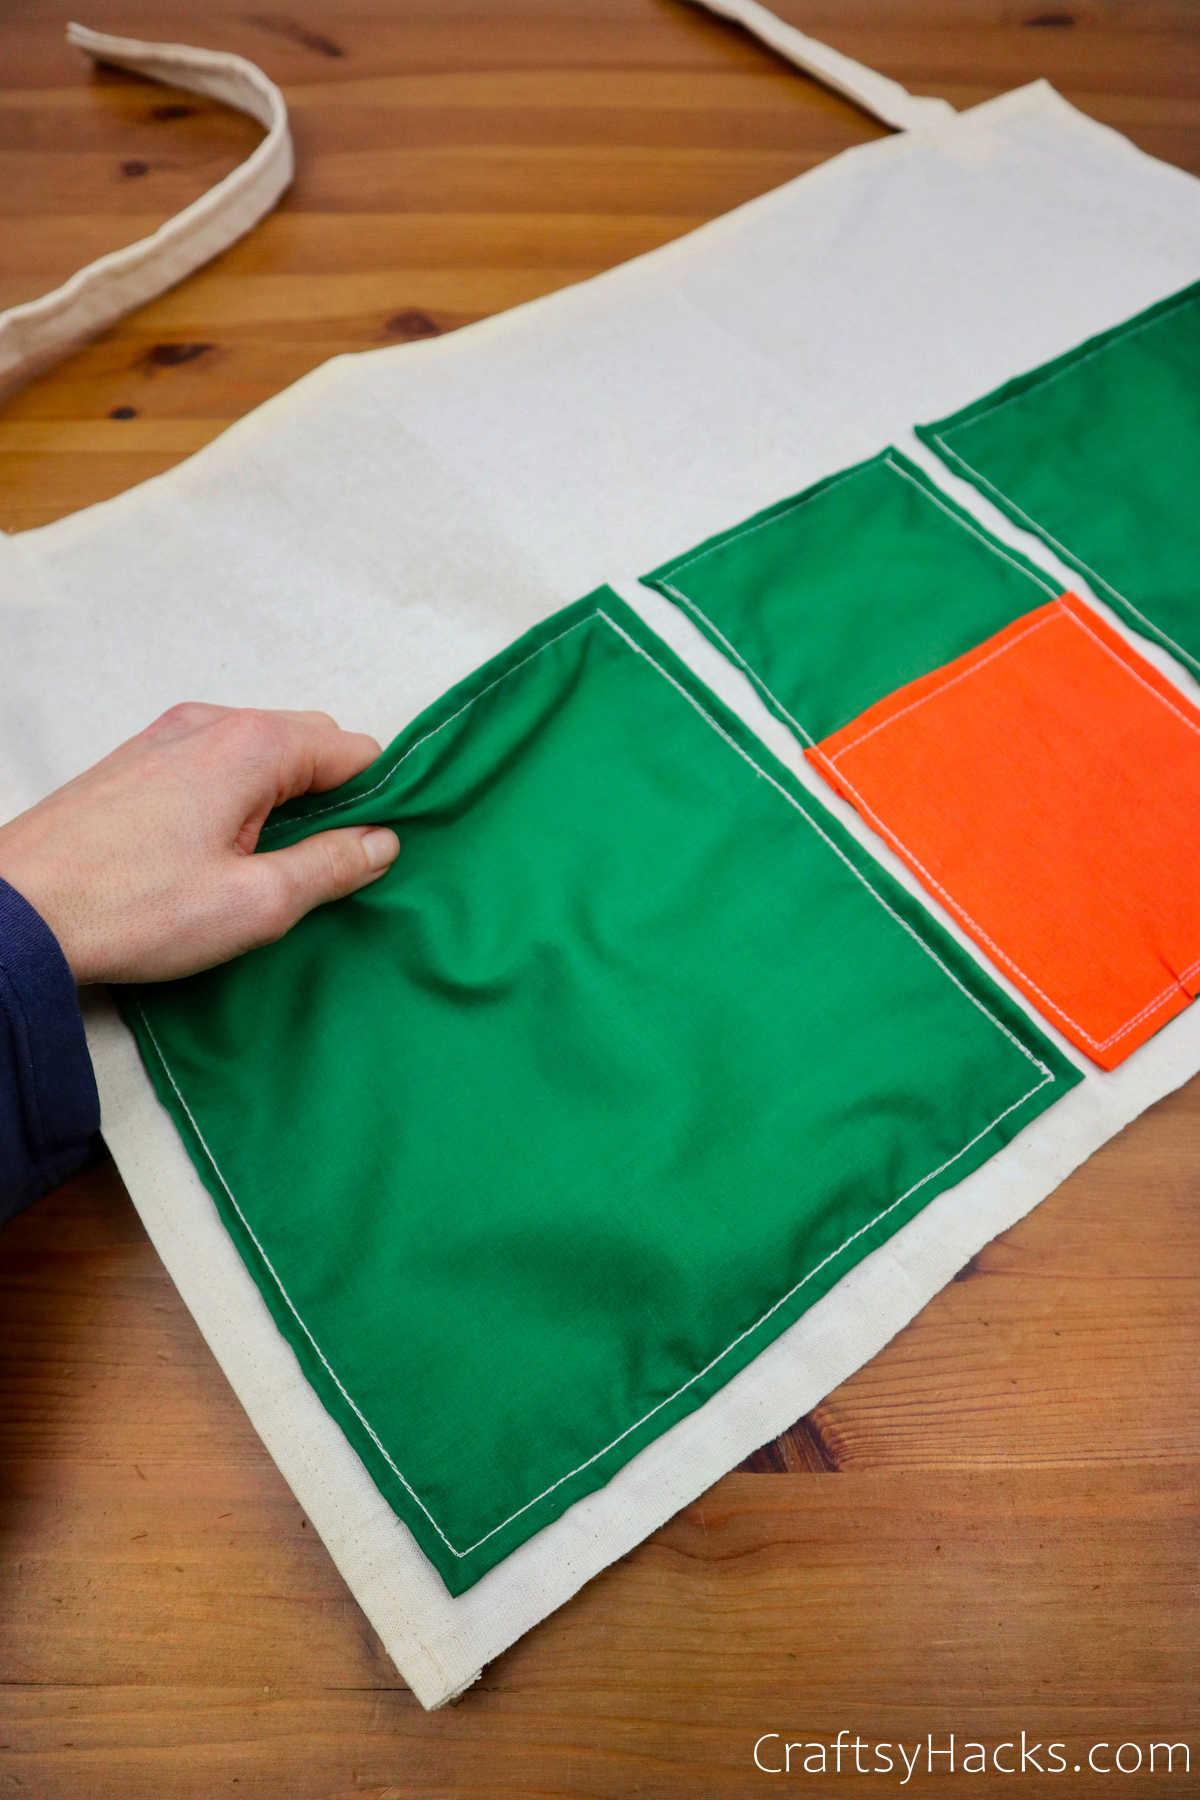
Once you’ve sewn all the pockets, the strips, and the large white backdrop fabric, it’s time to assemble them all together.
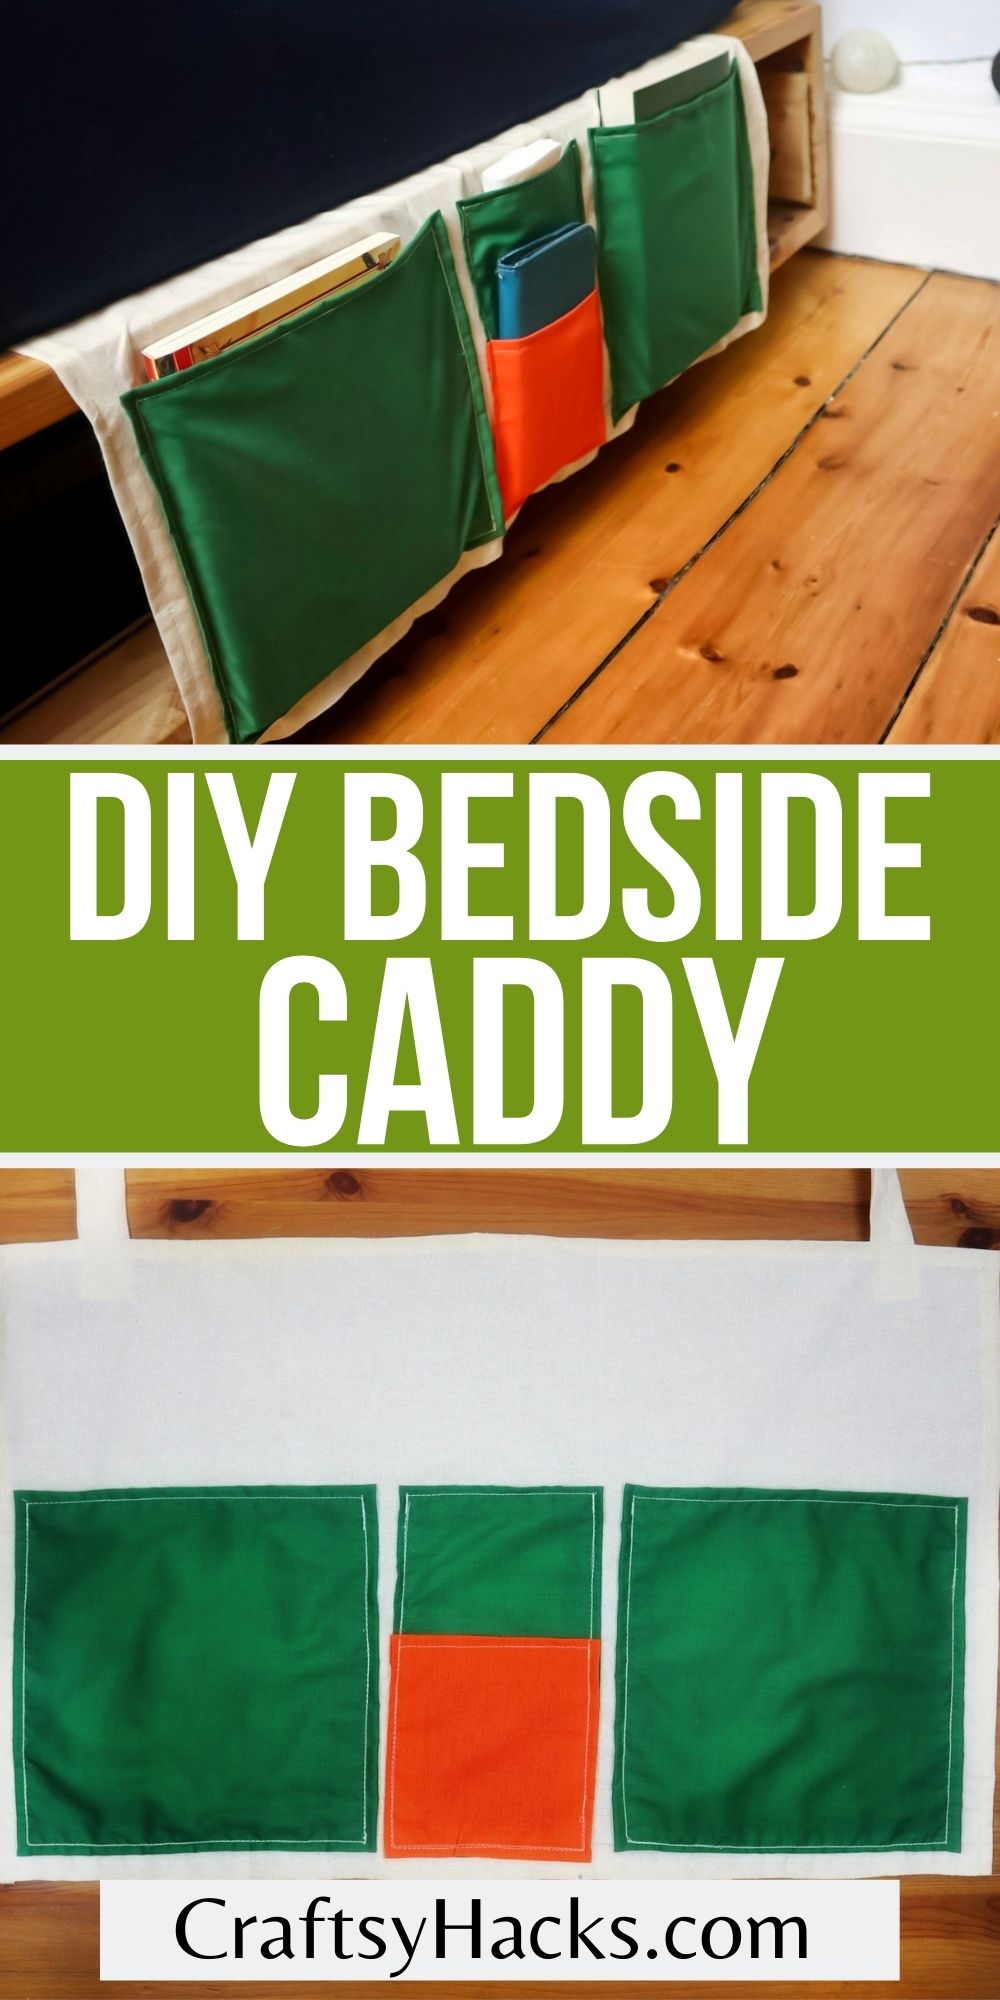
Are you wondering what the strips are for? Then, take a look at what amazing handles they make.
Step 8
Once you are happy with the layout and you’re certain that all the pockets are exactly where they belong, then it’s time to sew the entire project together!
Oh, and don’t go sewing the pockets shut while you’re attaching them onto the white backdrop.
Here’s a note on the exact measurements you see in the picture below, and for the entire project:
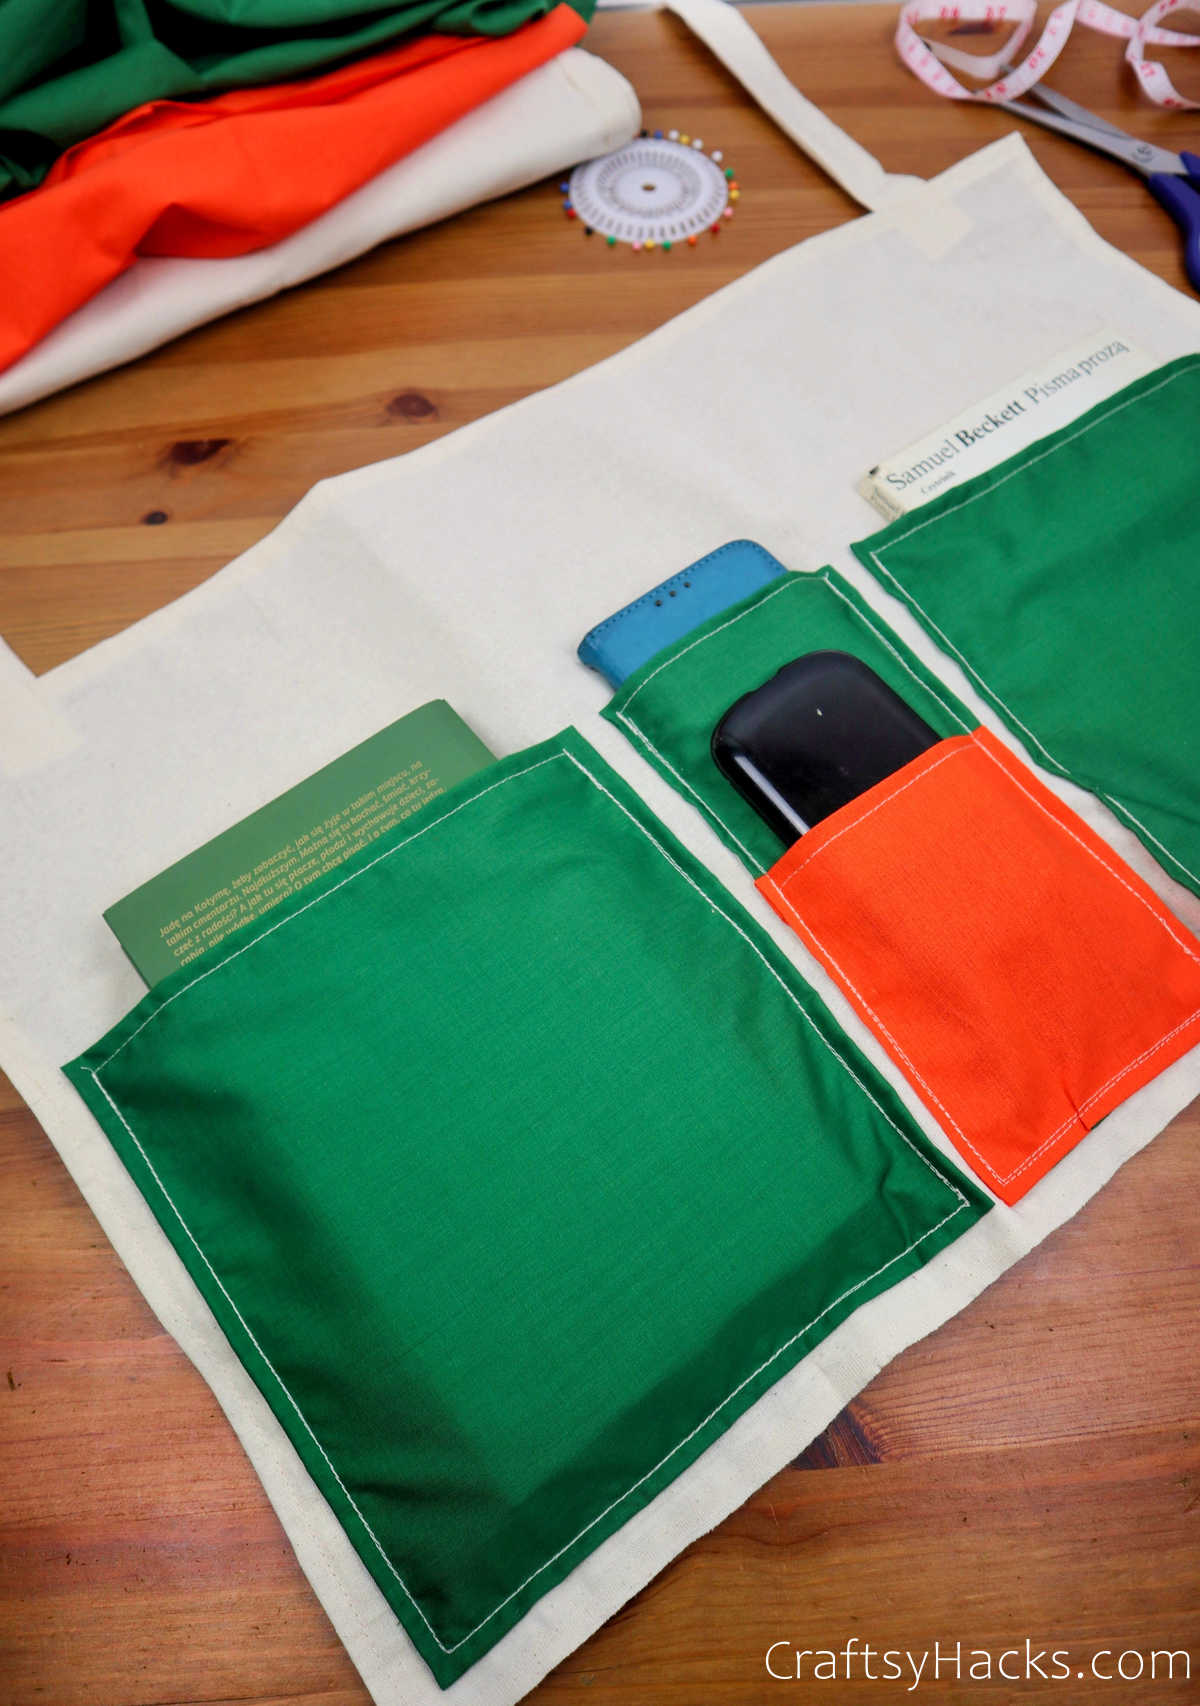
- The two big pockets are 8.6’’ x 8.6’’ (22 cm x 22 cm) each. But once you sew the edges, they fold into 7.9’’ x 7.9’’ (20 cm x 20 cm).
- The small green pocket is around 8.6’’ x 6.7’’ (22 cm x 17 cm). After you fold in the edges and sew them, the pocket measures 7.9’’ x 9’’ (20 cm x 15 cm).
- The smallest pocket— the one that is saffron colored— is 7.1’’ x 6.7’’ (18 cm x 17 cm). Once you’ve sewn the edges, the pocket finally measures 6.3’’ x 5.9’’ (16cm x 15 cm).
- The last piece of this project is the big white backdrop cloth. The dimensions for this piece is 19.7’’ x 13.8’’ (50 cm x 35 cm). Fold each side inward and sew them close and you’ll have 18.9’’ x 13’’ (48 cm x 33 cm).
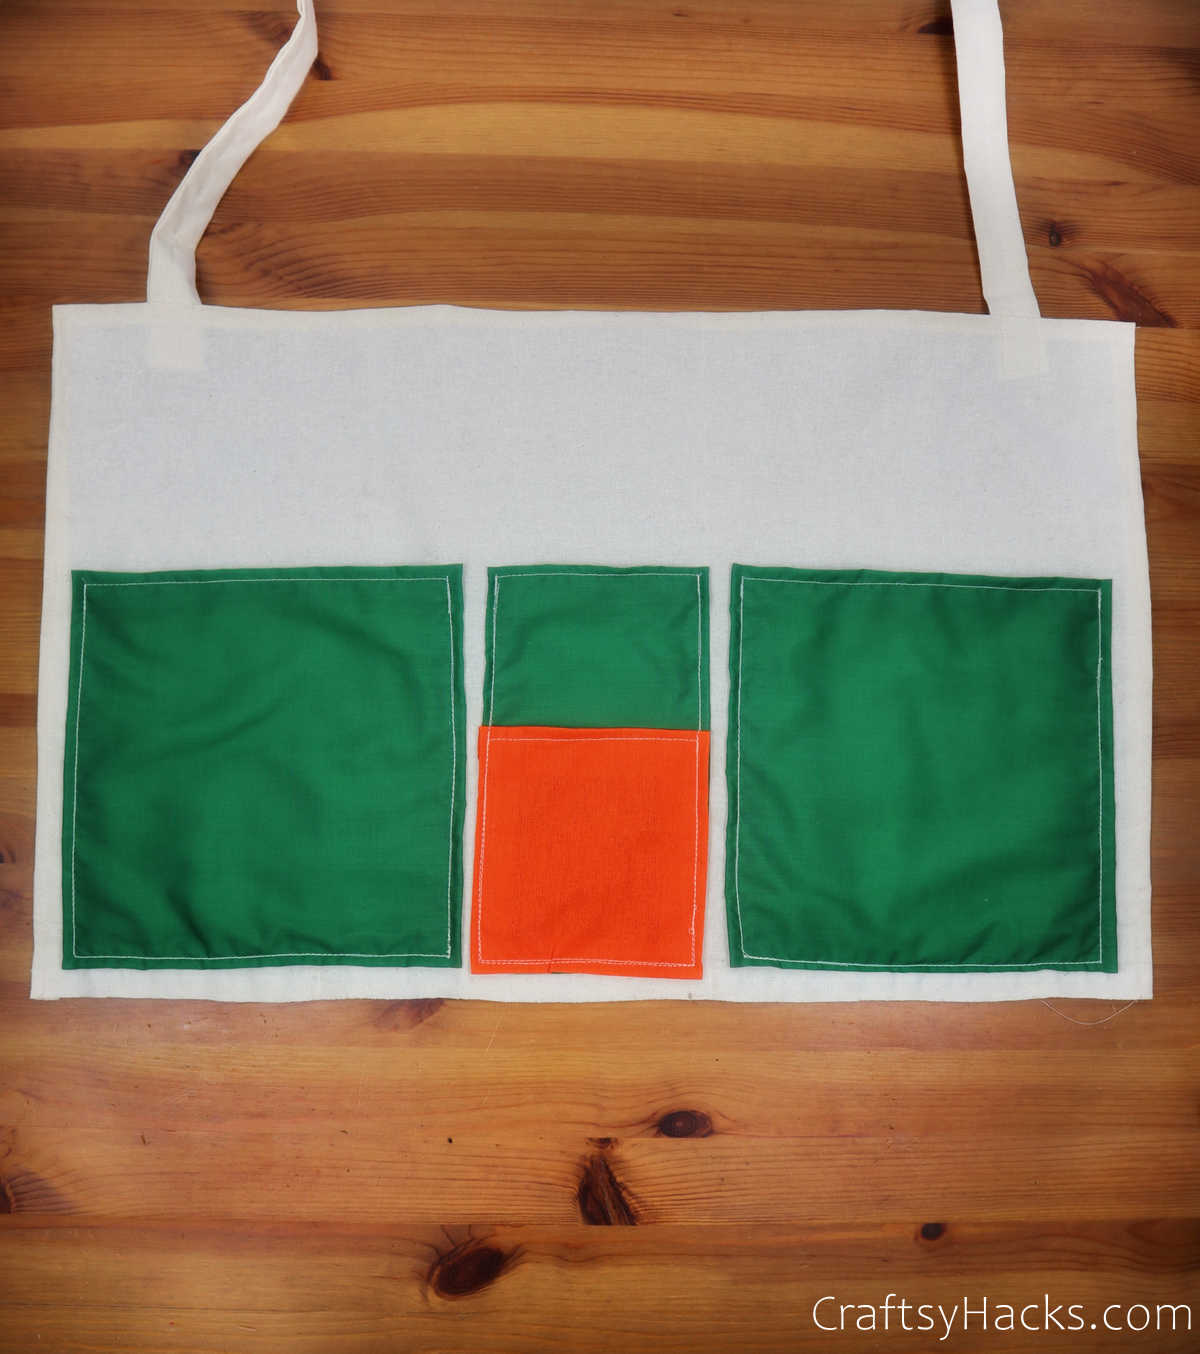
Note: One thing to always keep in mind is that all the pockets should be the same height, if not the width.
Step 9
The last step is to sew the long white strips—the handles—in place. Then all that’s left to do is remove all the pins you used to keep the edges and folds in place.
You can run an iron over the entire caddy to make it crisp and new!
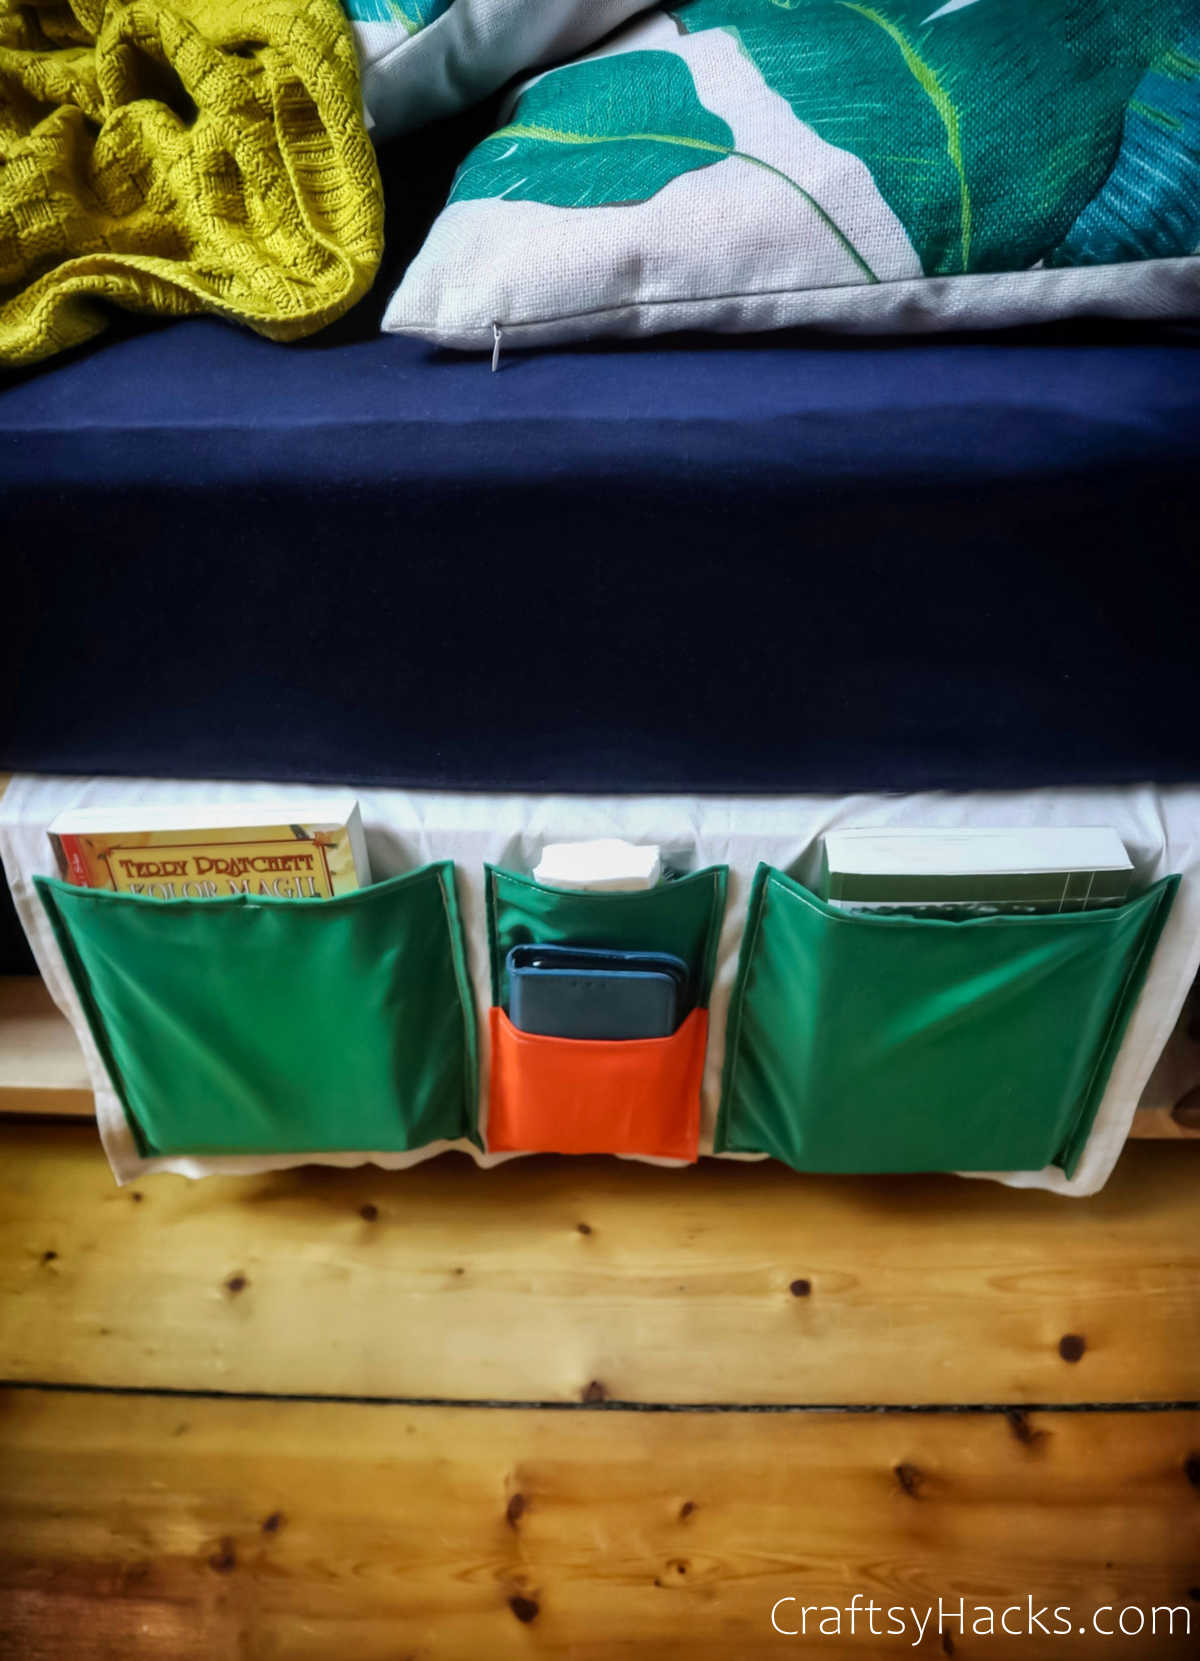
Now, all that’s left to do is fill up the pockets and hang the caddy over the side of your bed.
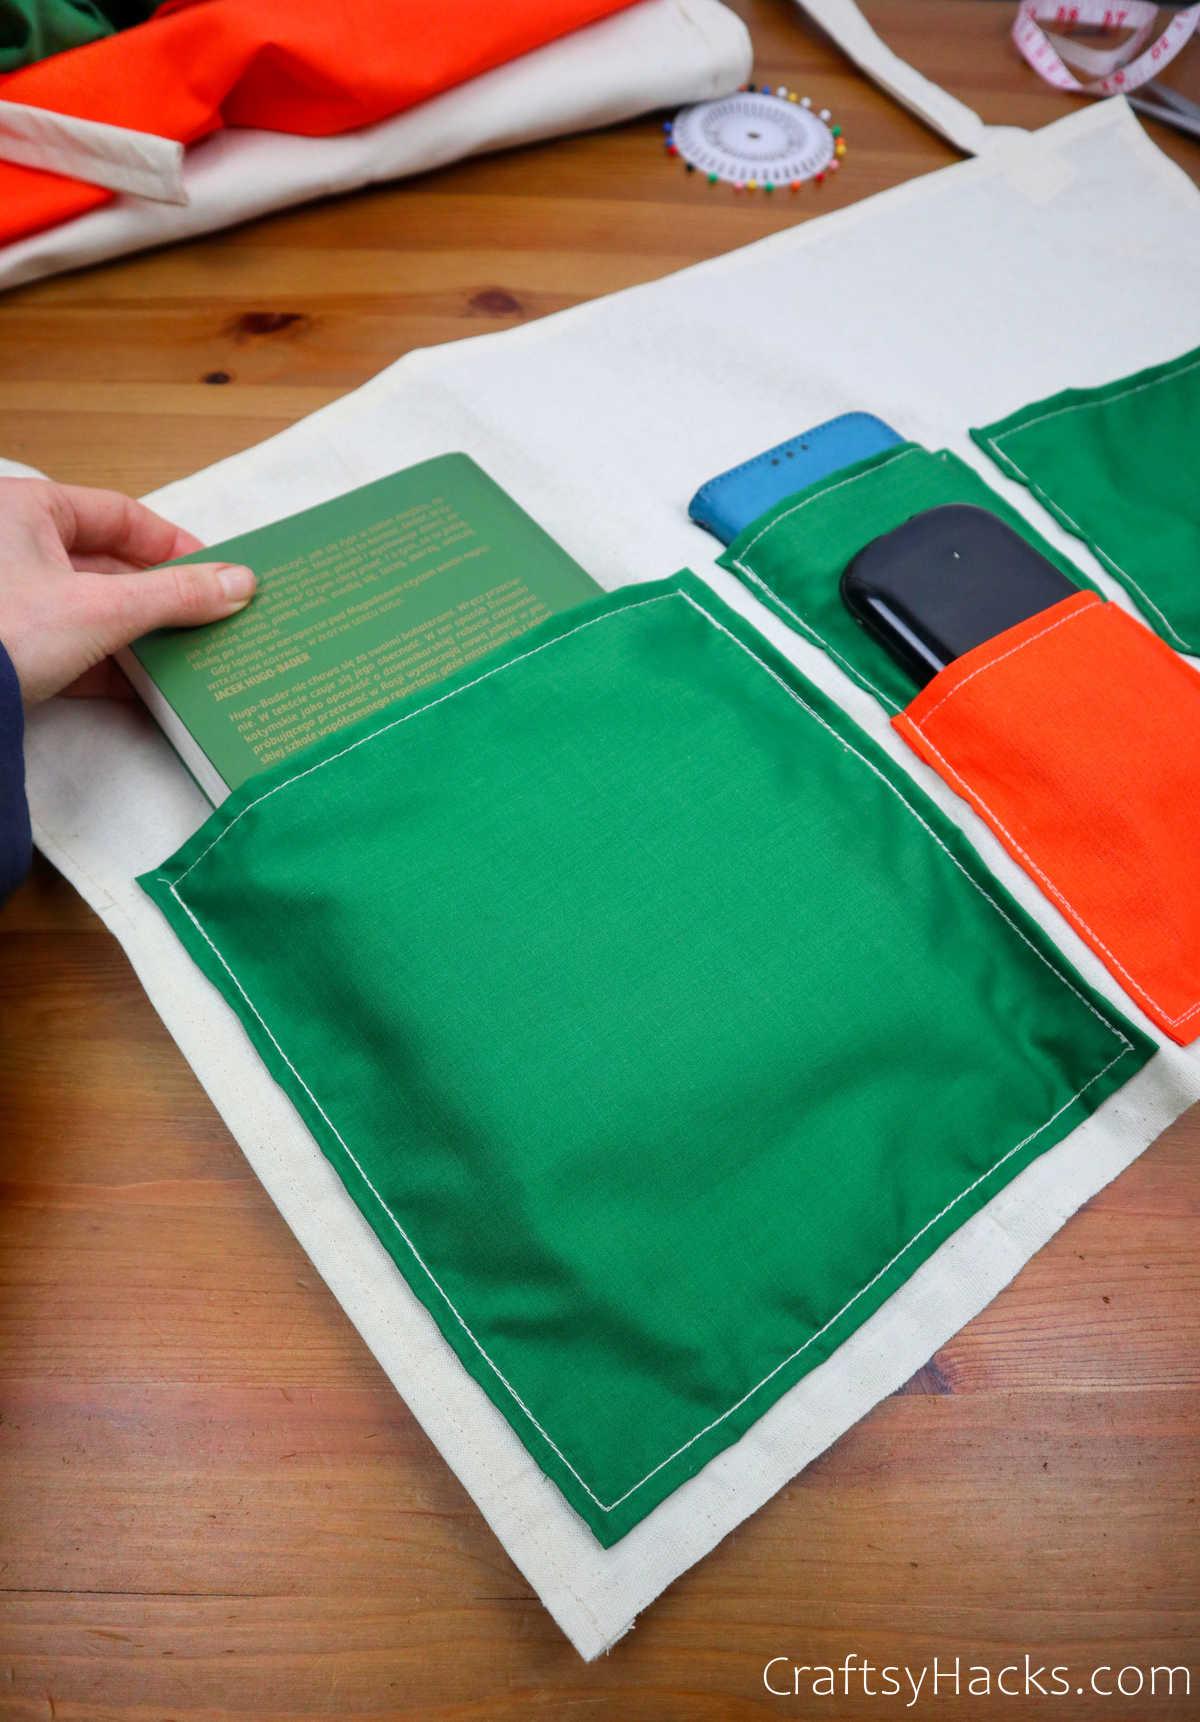

If you’ve been careful with the dimensions when you initially measured them out, then you’ll have a caddy that hands just off the floor from your bed!
Other Organization Ideas
- 47 Organization Ideas
- DIY Desk Organizer
- 21 Dollar Tree Storage Ideas
- 40 Office Organization Ideas
- 20 Small Bedroom Organizing Ideas
- 20 Storage Ideas for Small Spaces
- 25 Ways to Organize Children Toys
- 25 Laundry Room Storage Ideas
- Small Bedroom Organization Ideas
- 16 Organization Ideas for Closet

DIY Bedside Caddy
Video Tutorial
Equipment
- Pins
- Scissors
- Ruler
- Tape measure
Materials
- A large piece of fabric
- A few pieces of fabric for pockets
- 2 x piece of fabric for strips
Instructions
- Gather all your supplies and start measuring the dimensions you require for each pocket.
- Measure out two long strips—you will use these as the handle for your bedside caddy. These should be 5 cm to 6 cm in width.
- Cut all the pockets, making sure to leave enough room to fold the edges to sew them. Pin them in place with sewing pins or safety pins.
- Sew the edges for every individual pocket. You can play around with the fabric’s color and even use a contrasting thread to jazz it up the way you like.
- Once you’ve sewed the individual pockets, lay them out on the white cloth backdrop to ensure they are evenly spaced. Pin them in place.
- Sew the pockets into the white fabric. Keep in mind not to accidentally sew the
- Attach the white strips of cloth to the top of the caddy and sew them in place. You can also run an iron over the caddy to smoothen it out.
- Finally, hang it over your bedside and fill it up with whatever you need!