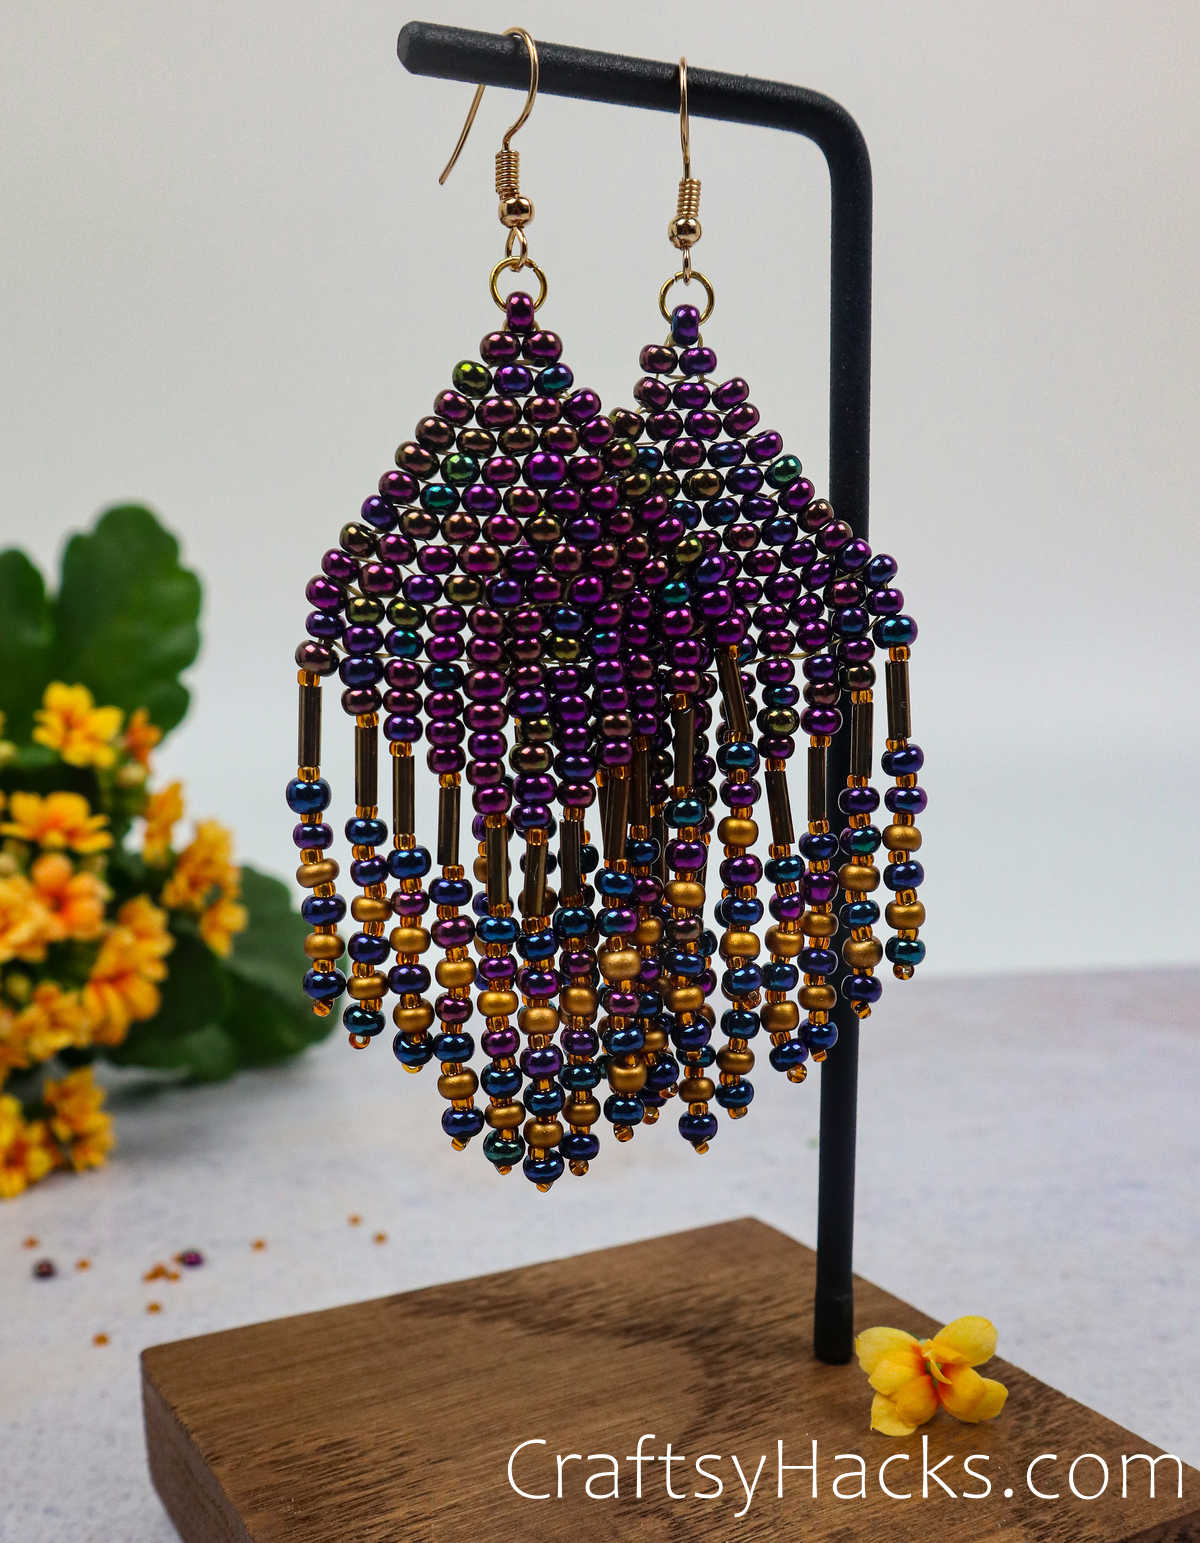
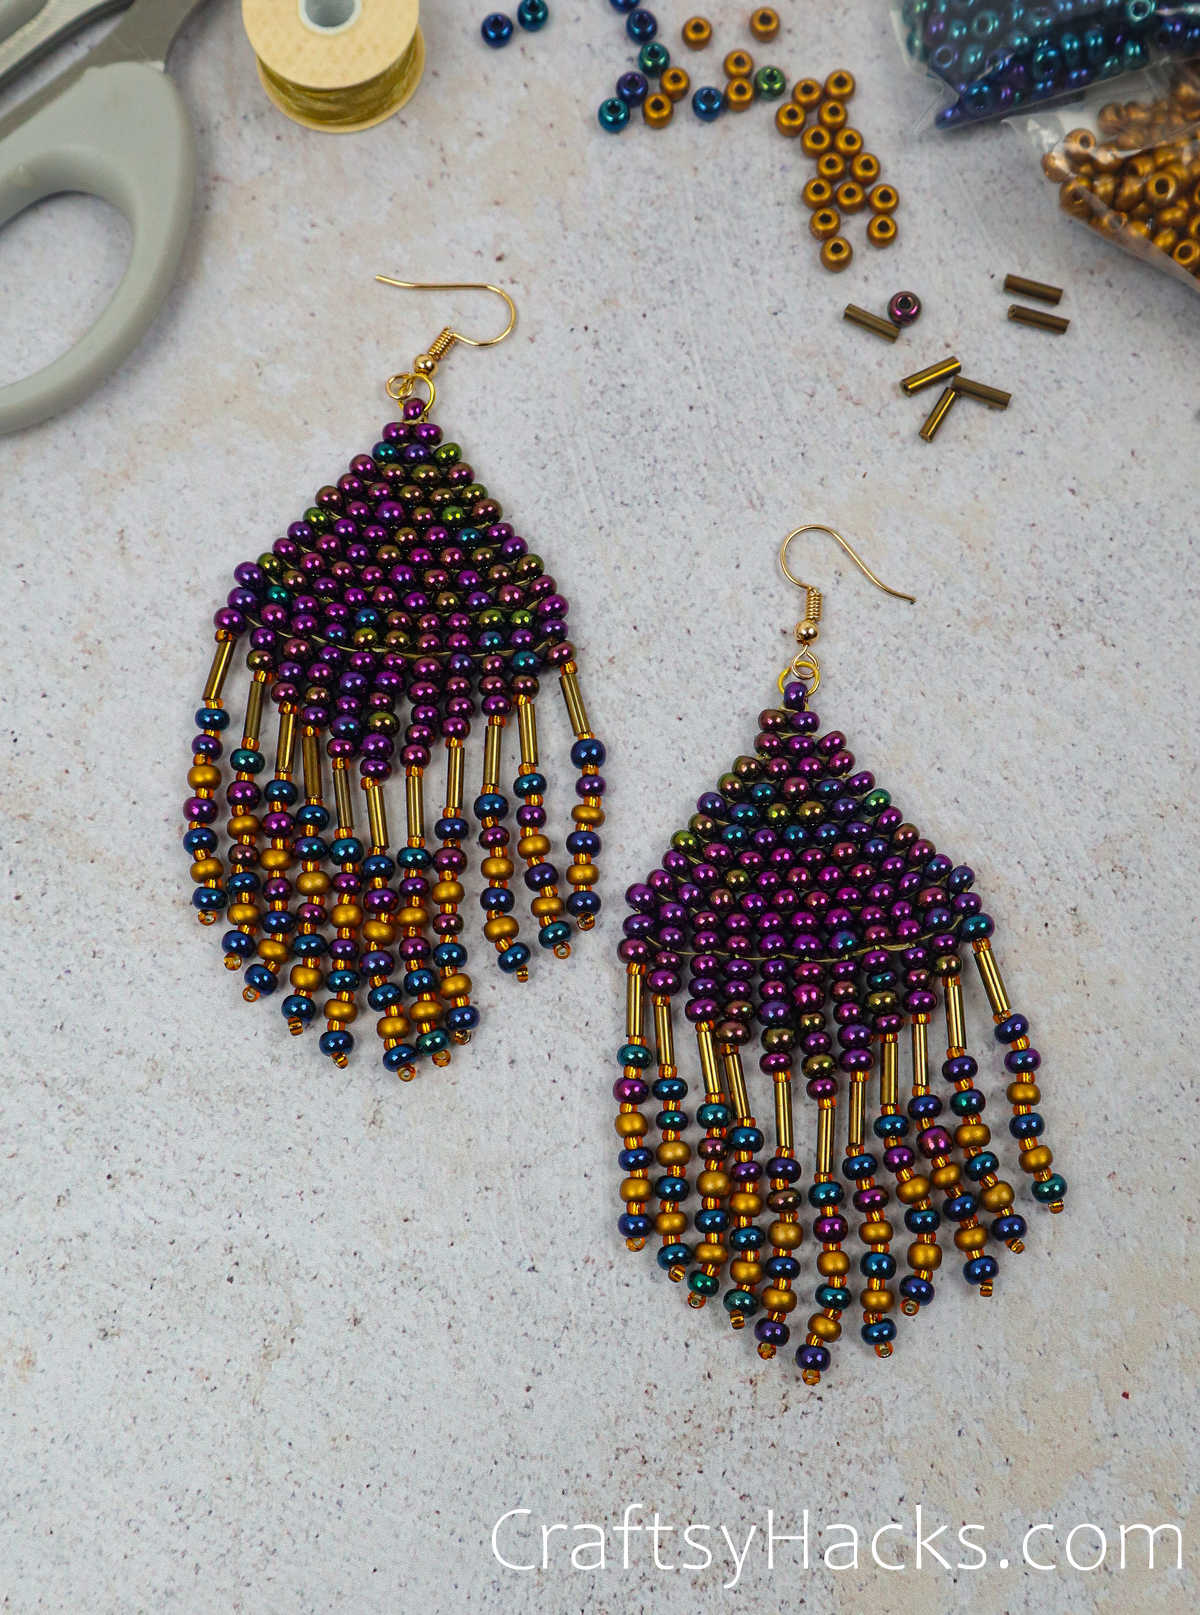
How to Make Beaded Earrings
This post may contain affiliate links: full affiliate disclosure.

Are you someone that’s crafty or looking to become craftier this year? Or someone that loves to give extra special gifts with a personal touch? These beaded earrings are for you!
Making your own beaded earrings is surprisingly easy and pretty fun if you’ve got everything set up well.
Nothing is too pricey, and a few different-sized beads works for this pattern, keep reading to learn more.
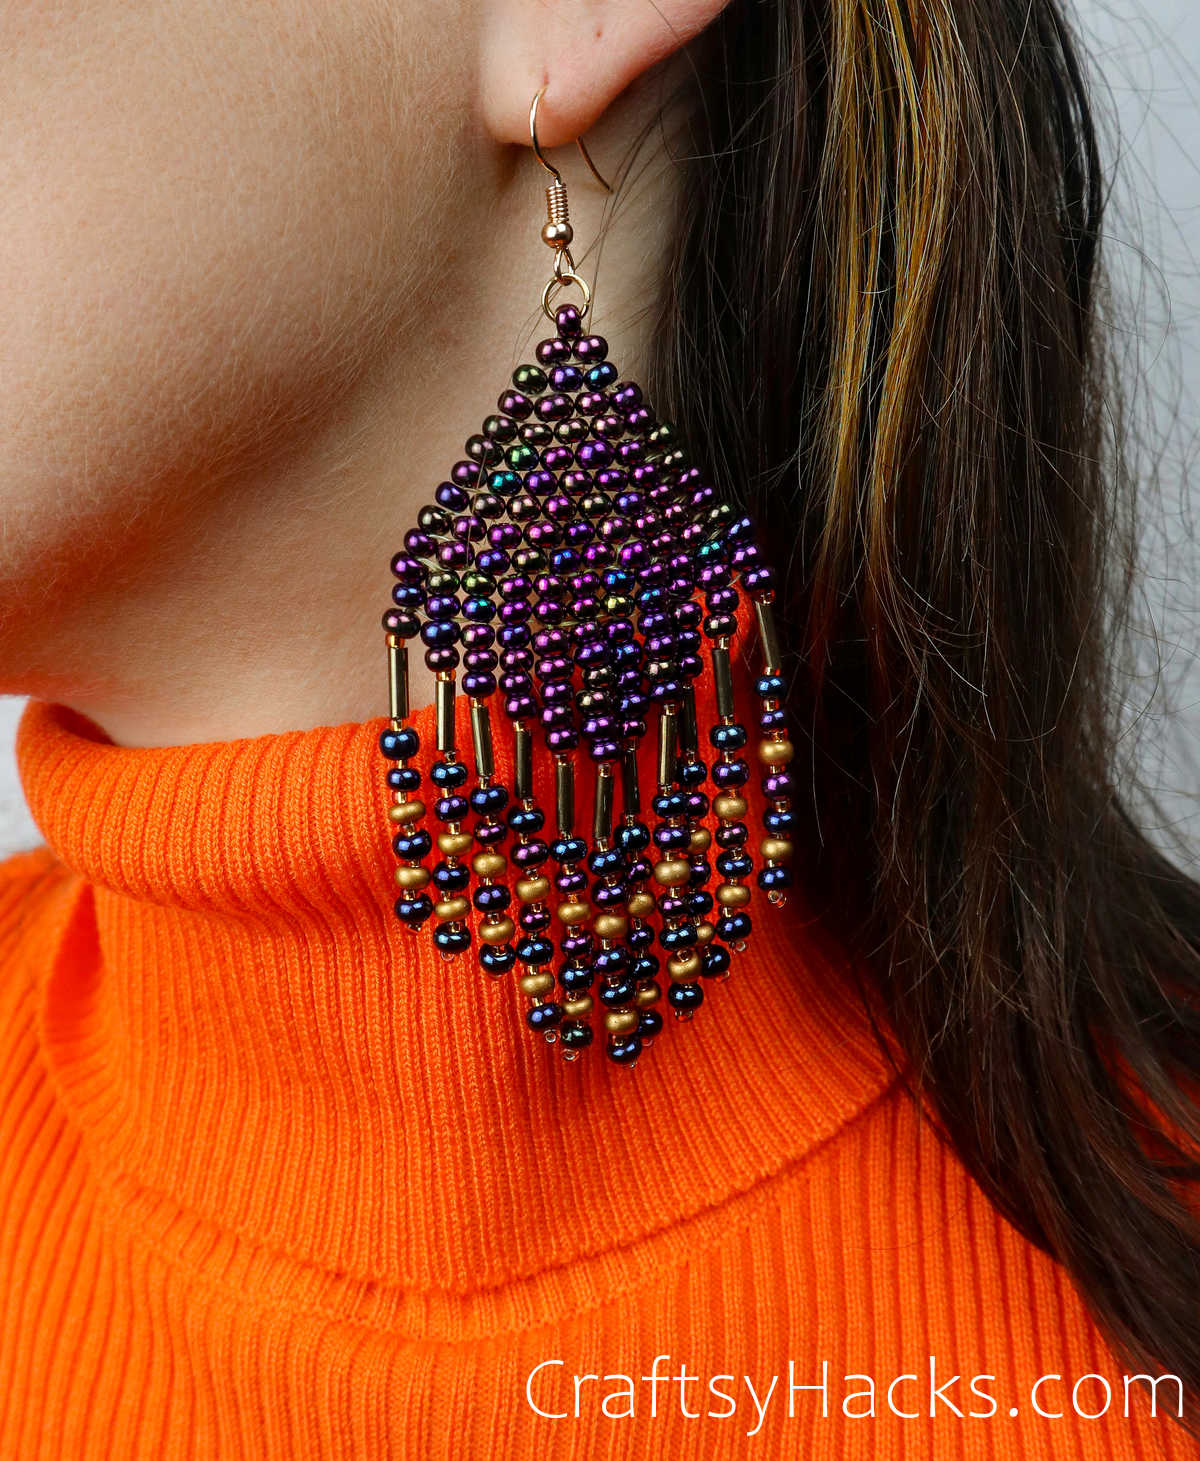
These earrings are a big hit amongst my loved ones as sweet little presents or make for a great girls’ afternoon date.
The key here is to be organized and take your time–it may be a little odd to get the hang of it, but once you’ve got the basics it’s just a matter of building off of the origin point.
If you happen to run into any issues, feel free to consult my YouTube page, where I have a tutorial for these earrings.
Again, just take your time–this is very suitable for bold beginners, those that are looking to practice some techniques, and anyone in between!

Supplies You’ll Need
- Seed beads size 6*
- Seed beads size 11
- Bugle beads
- Nylon beading thread
- Size 12 beading needle
- 2x earrings hooks
- 2x jump rings
- Scissors
- Lighter
*you can use smaller beads – popular sizes are 10, 11, 12

How to Make Beaded Earrings
As I mentioned, the best thing to do is to take your time, organize your materials, and have an appropriately sized space to partake in the craft.
Most importantly, enjoy your time–I certainly do when I have the time to sit down and make something like jewelry.
Now that I’ve shared my tips let’s get onto the tutorial!
Step 1
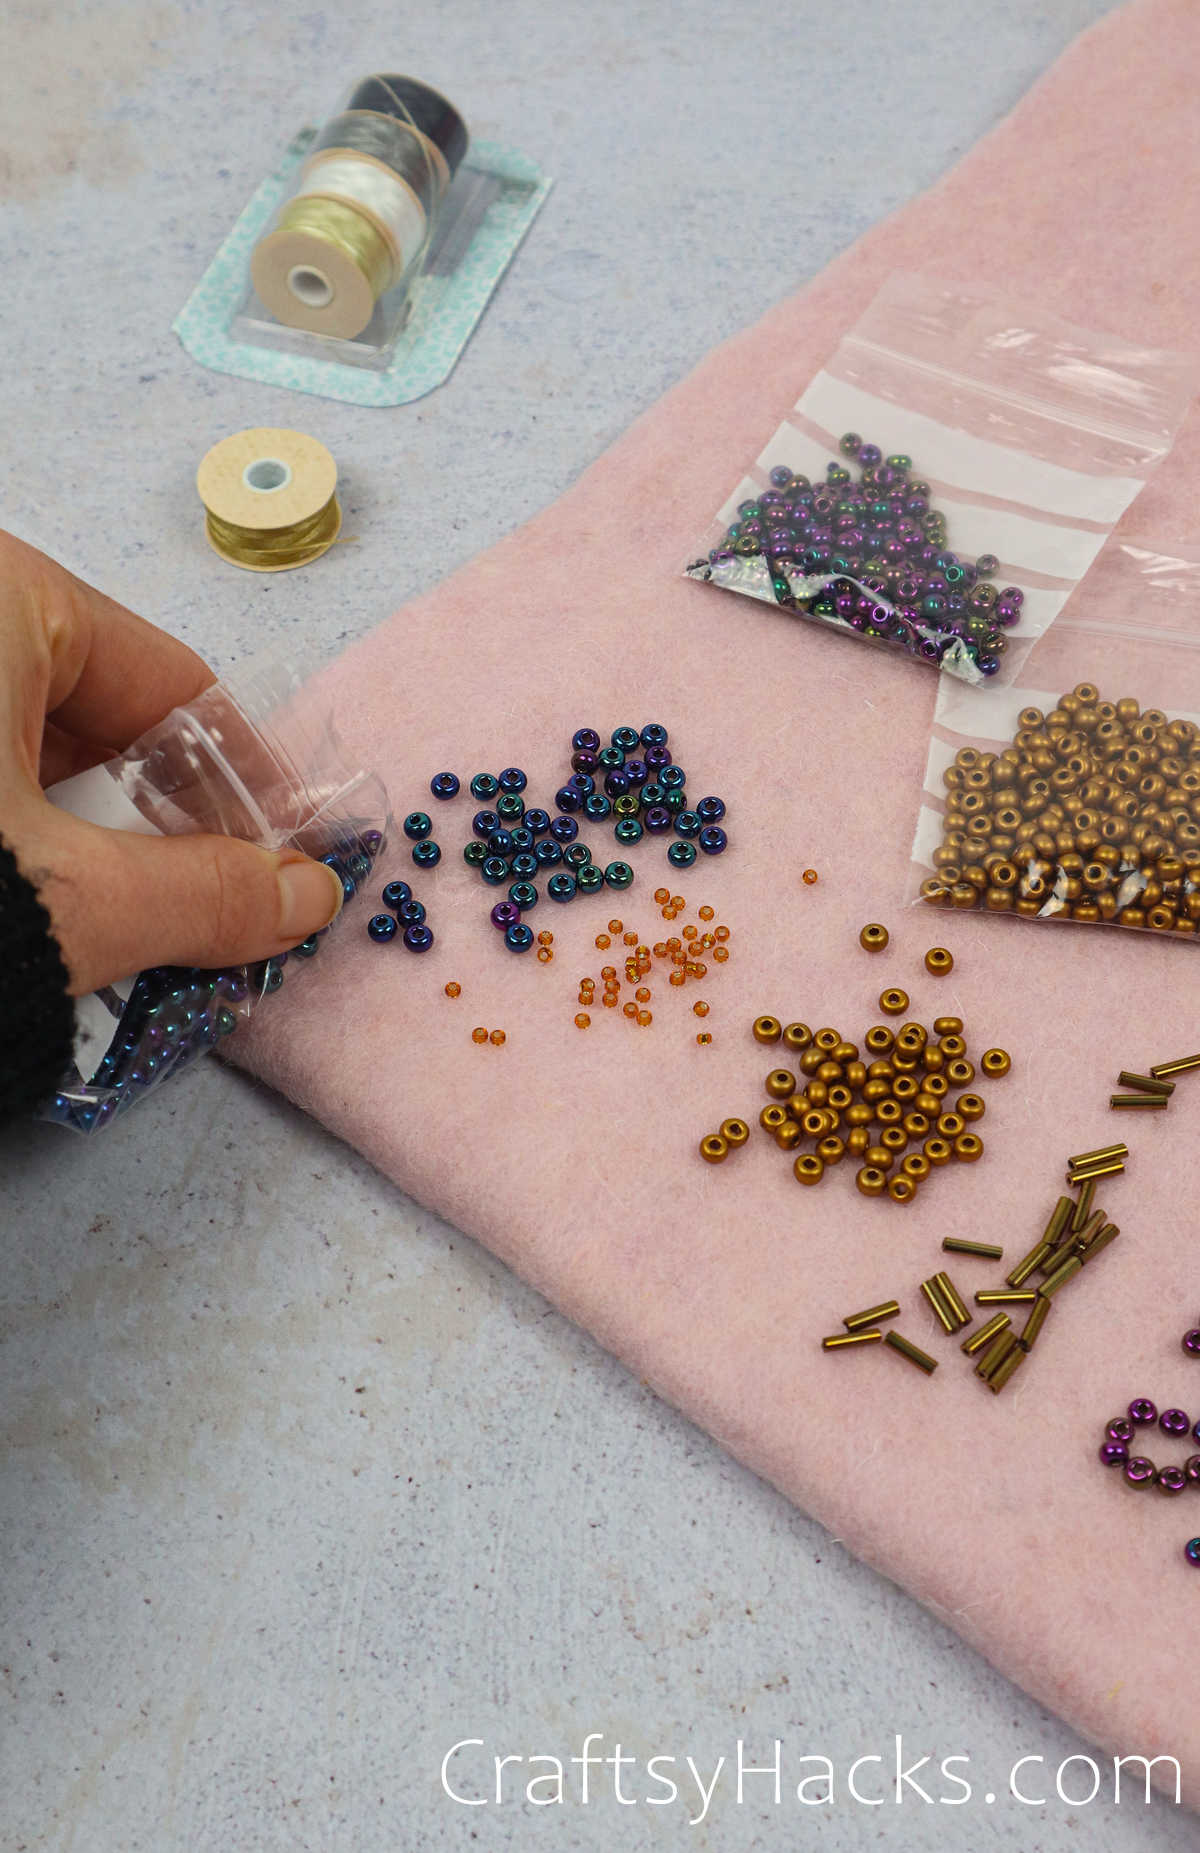
To start, I have found that laying out my materials on a designated piece of fabric, so there’s no chance of runaways!
As you can see in the pictures, I have a felted material, but anything that has some texture to it will get the job done.
Step 2
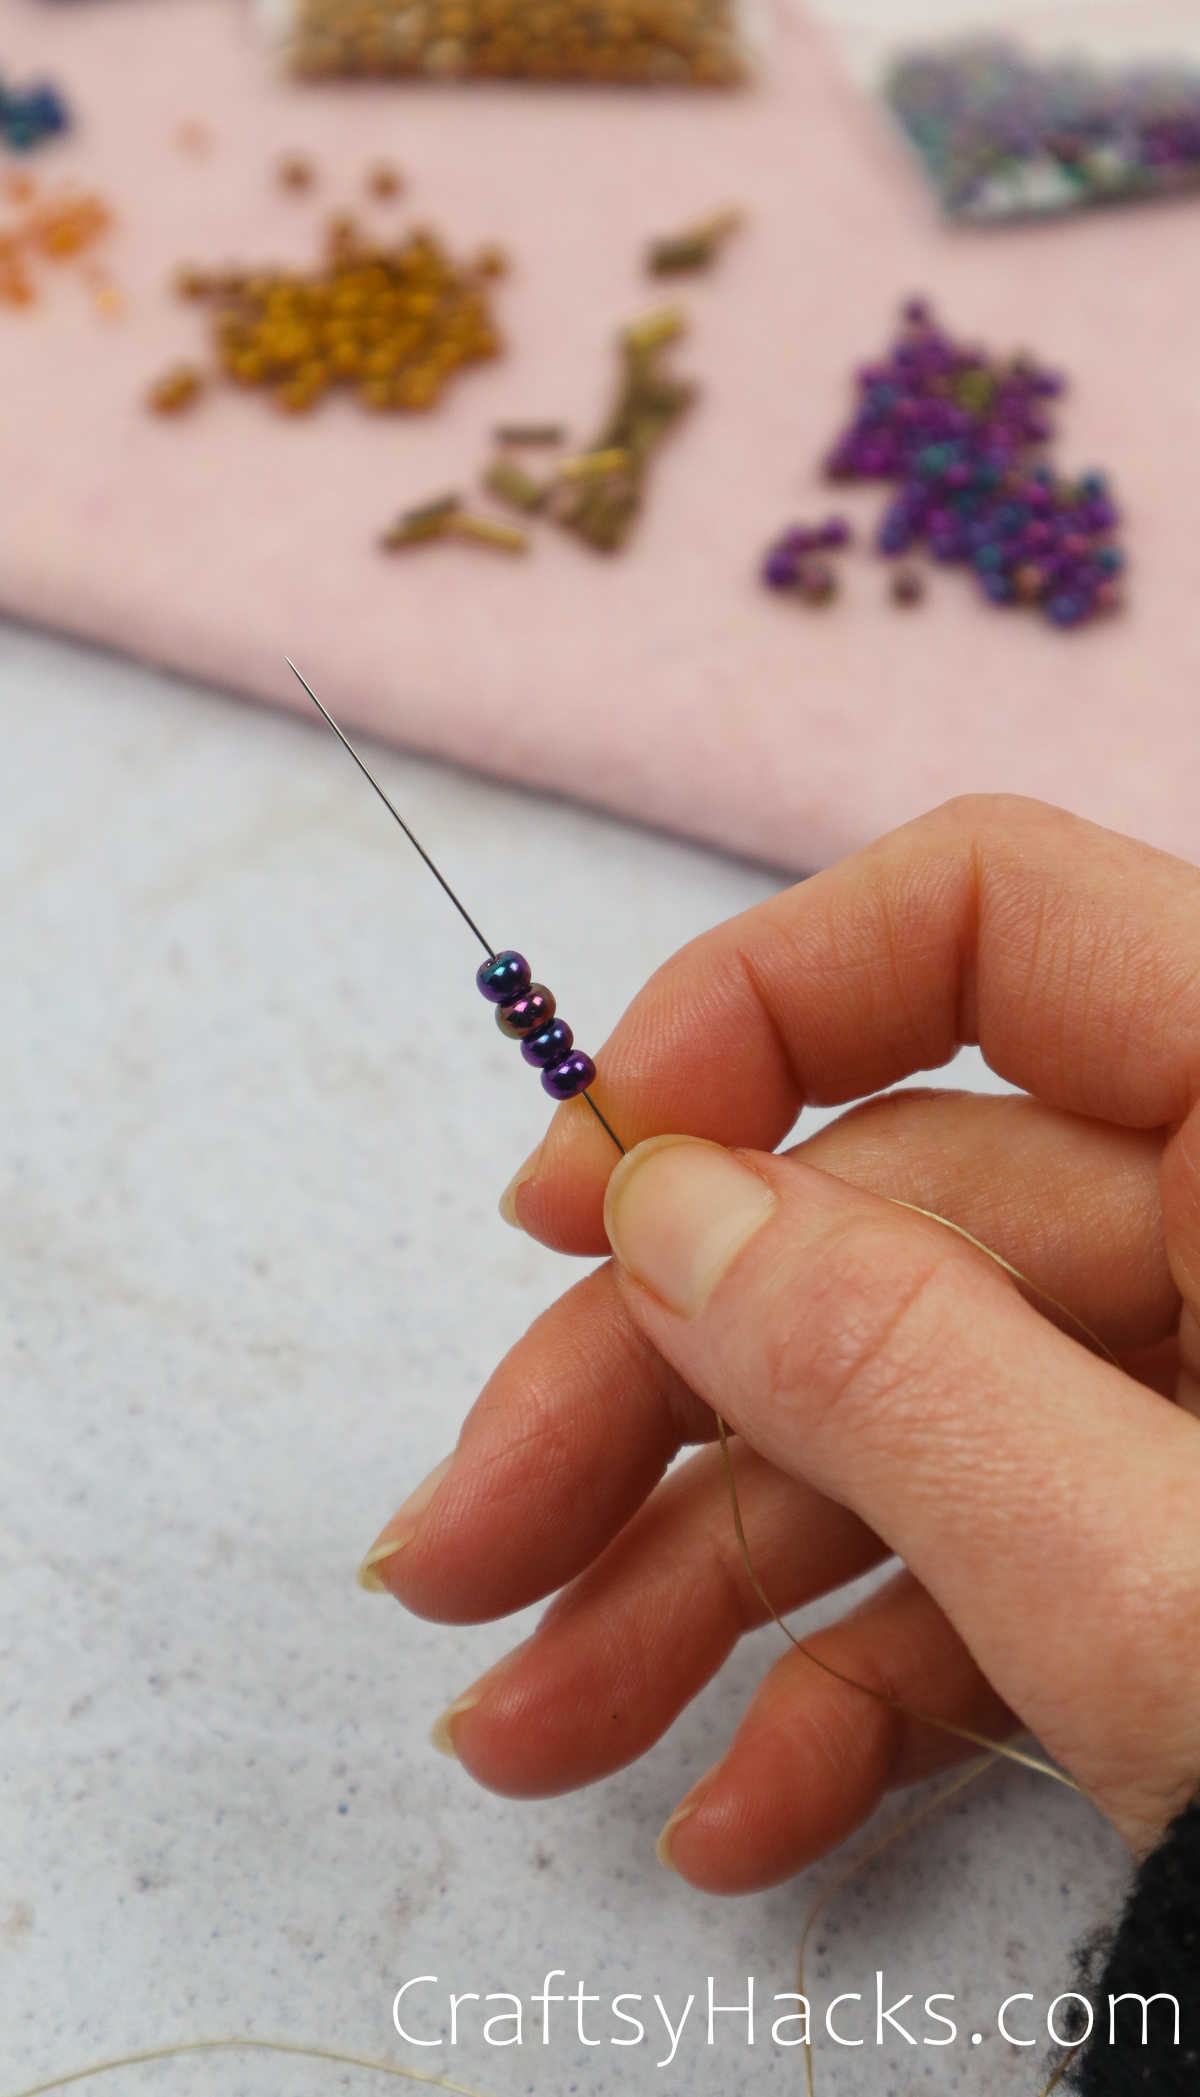
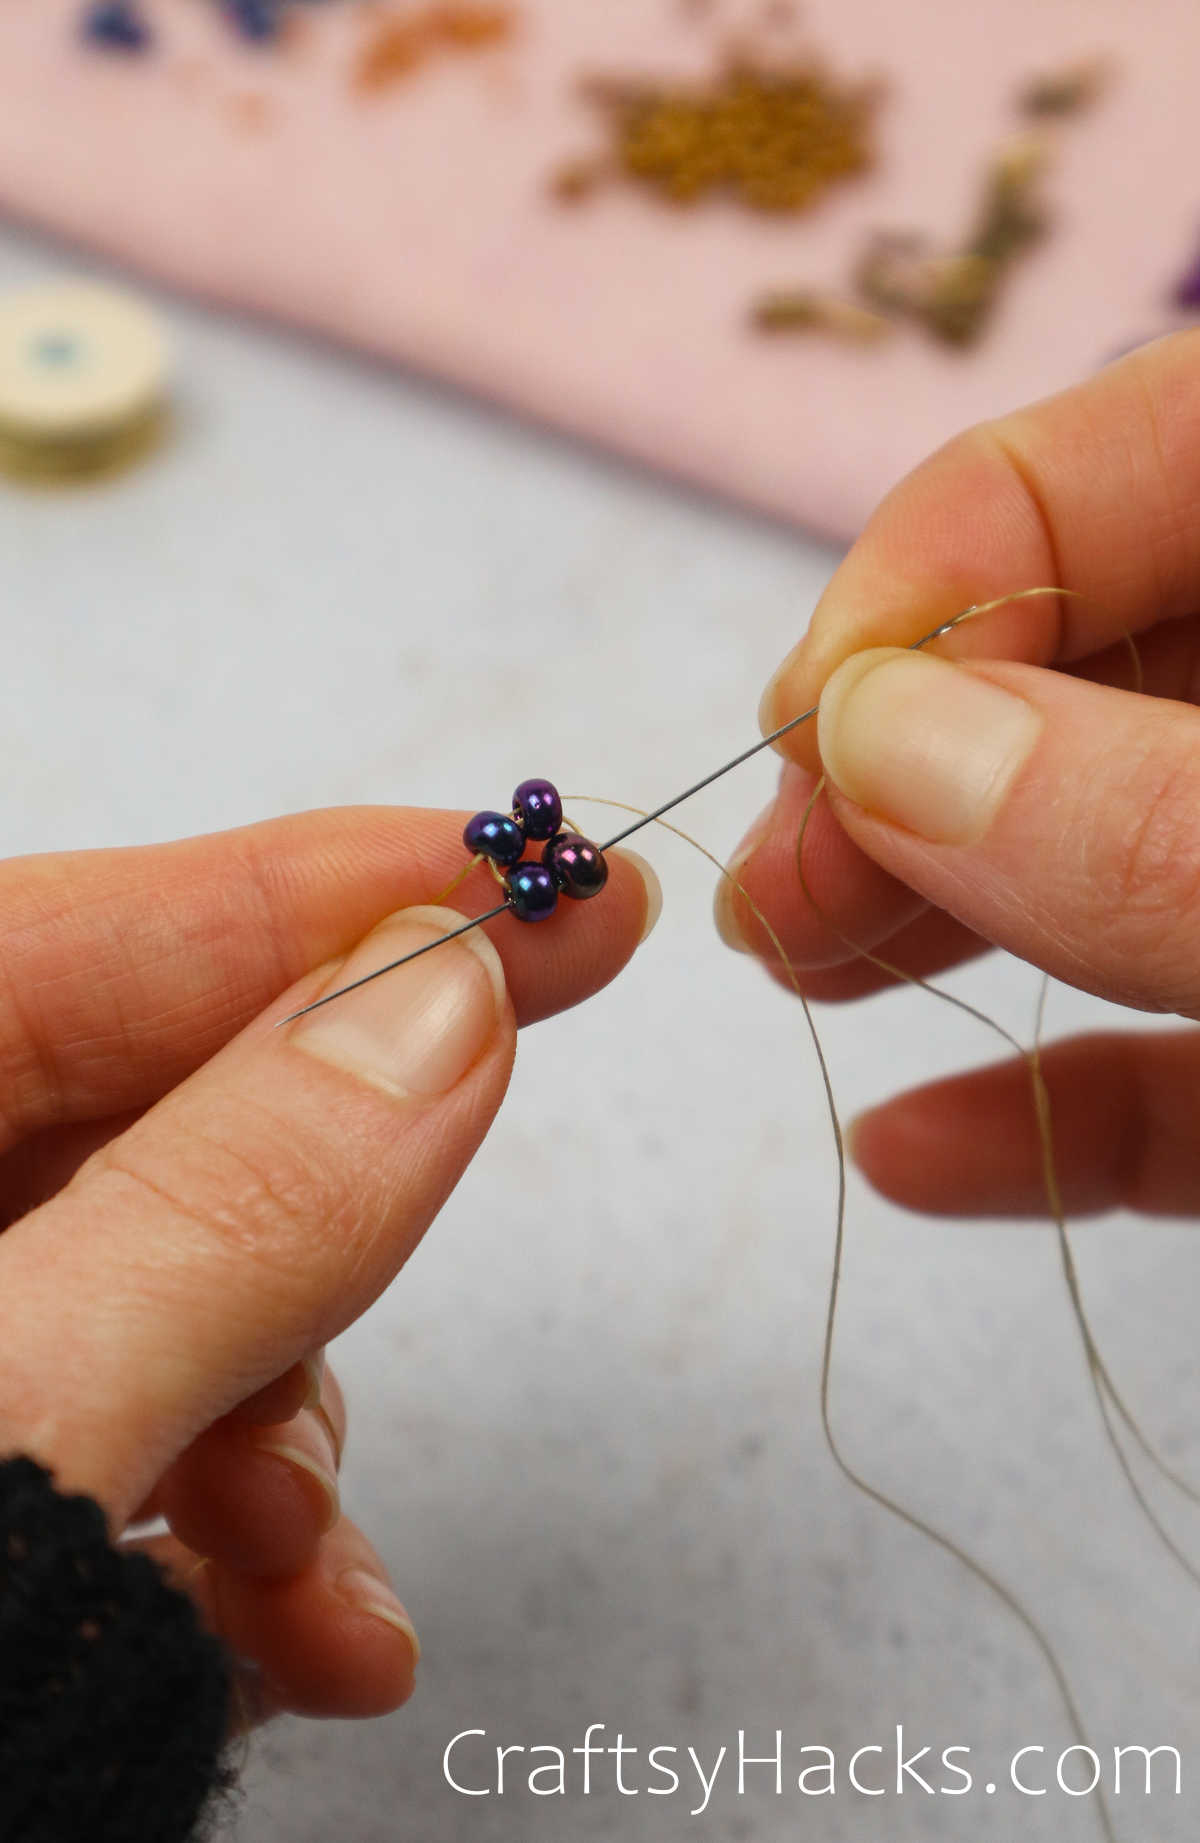
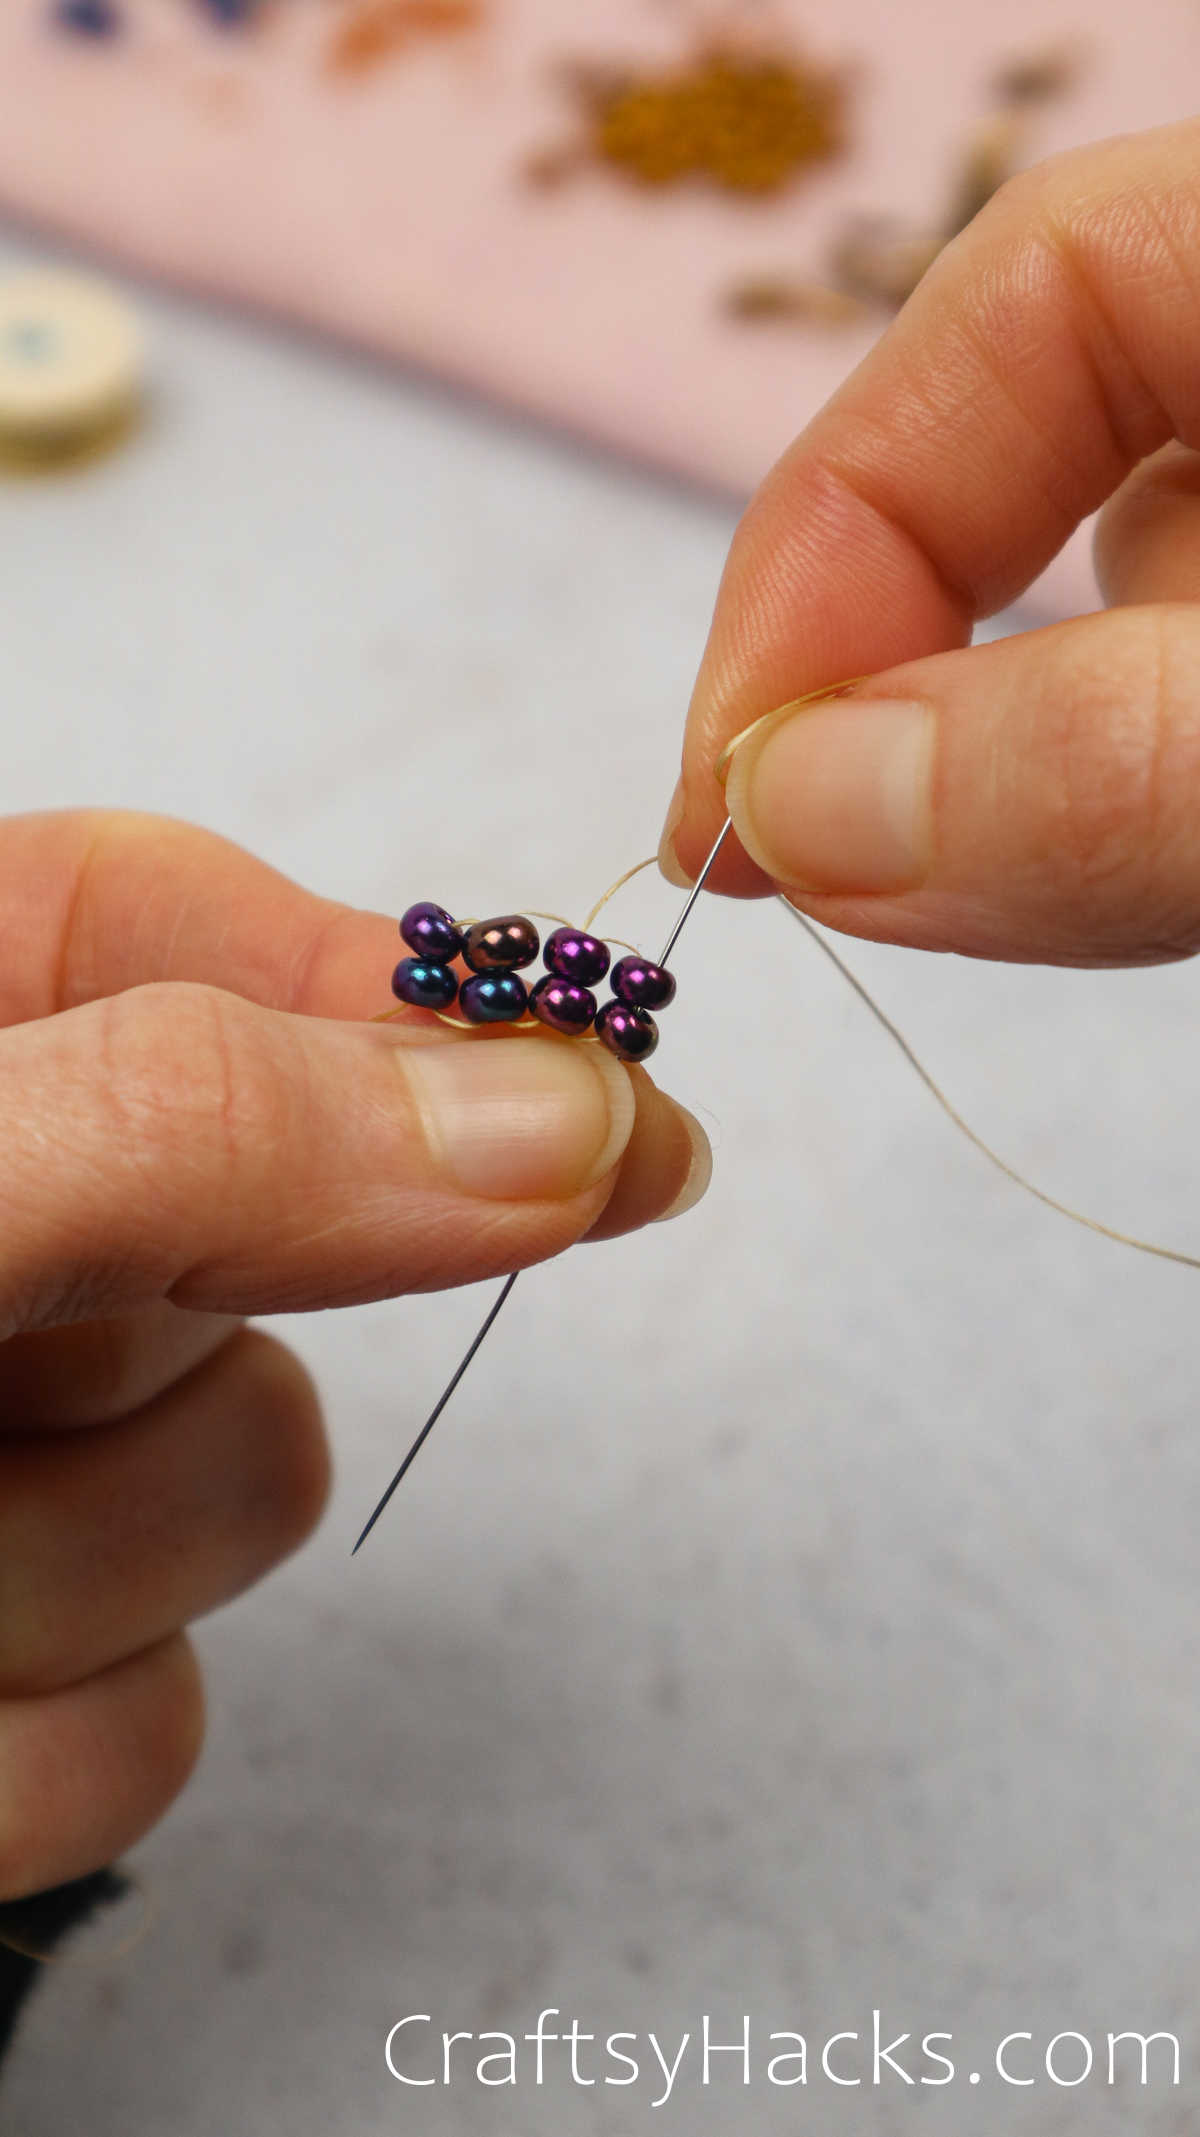
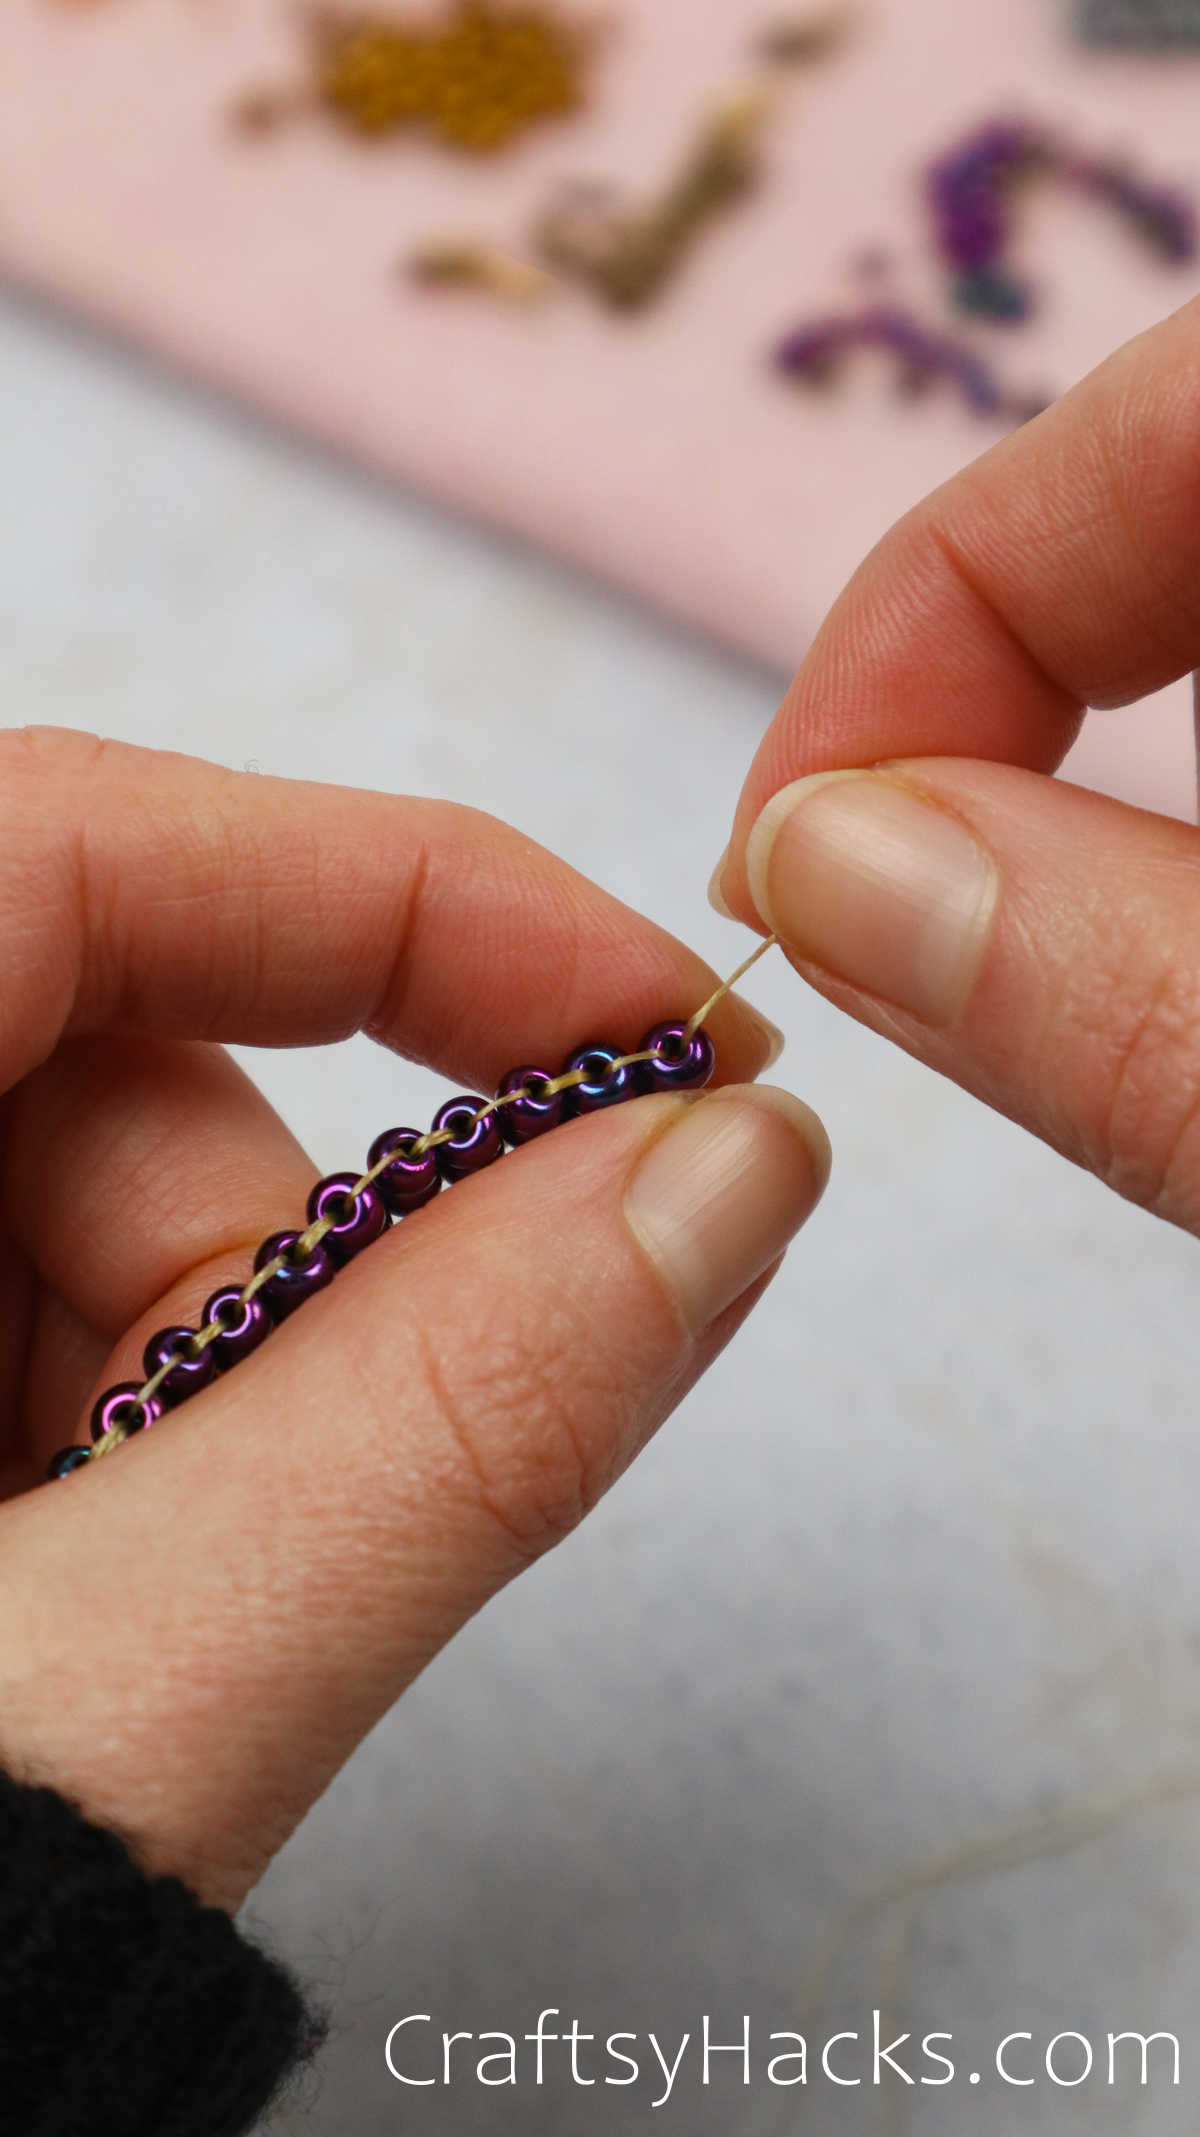
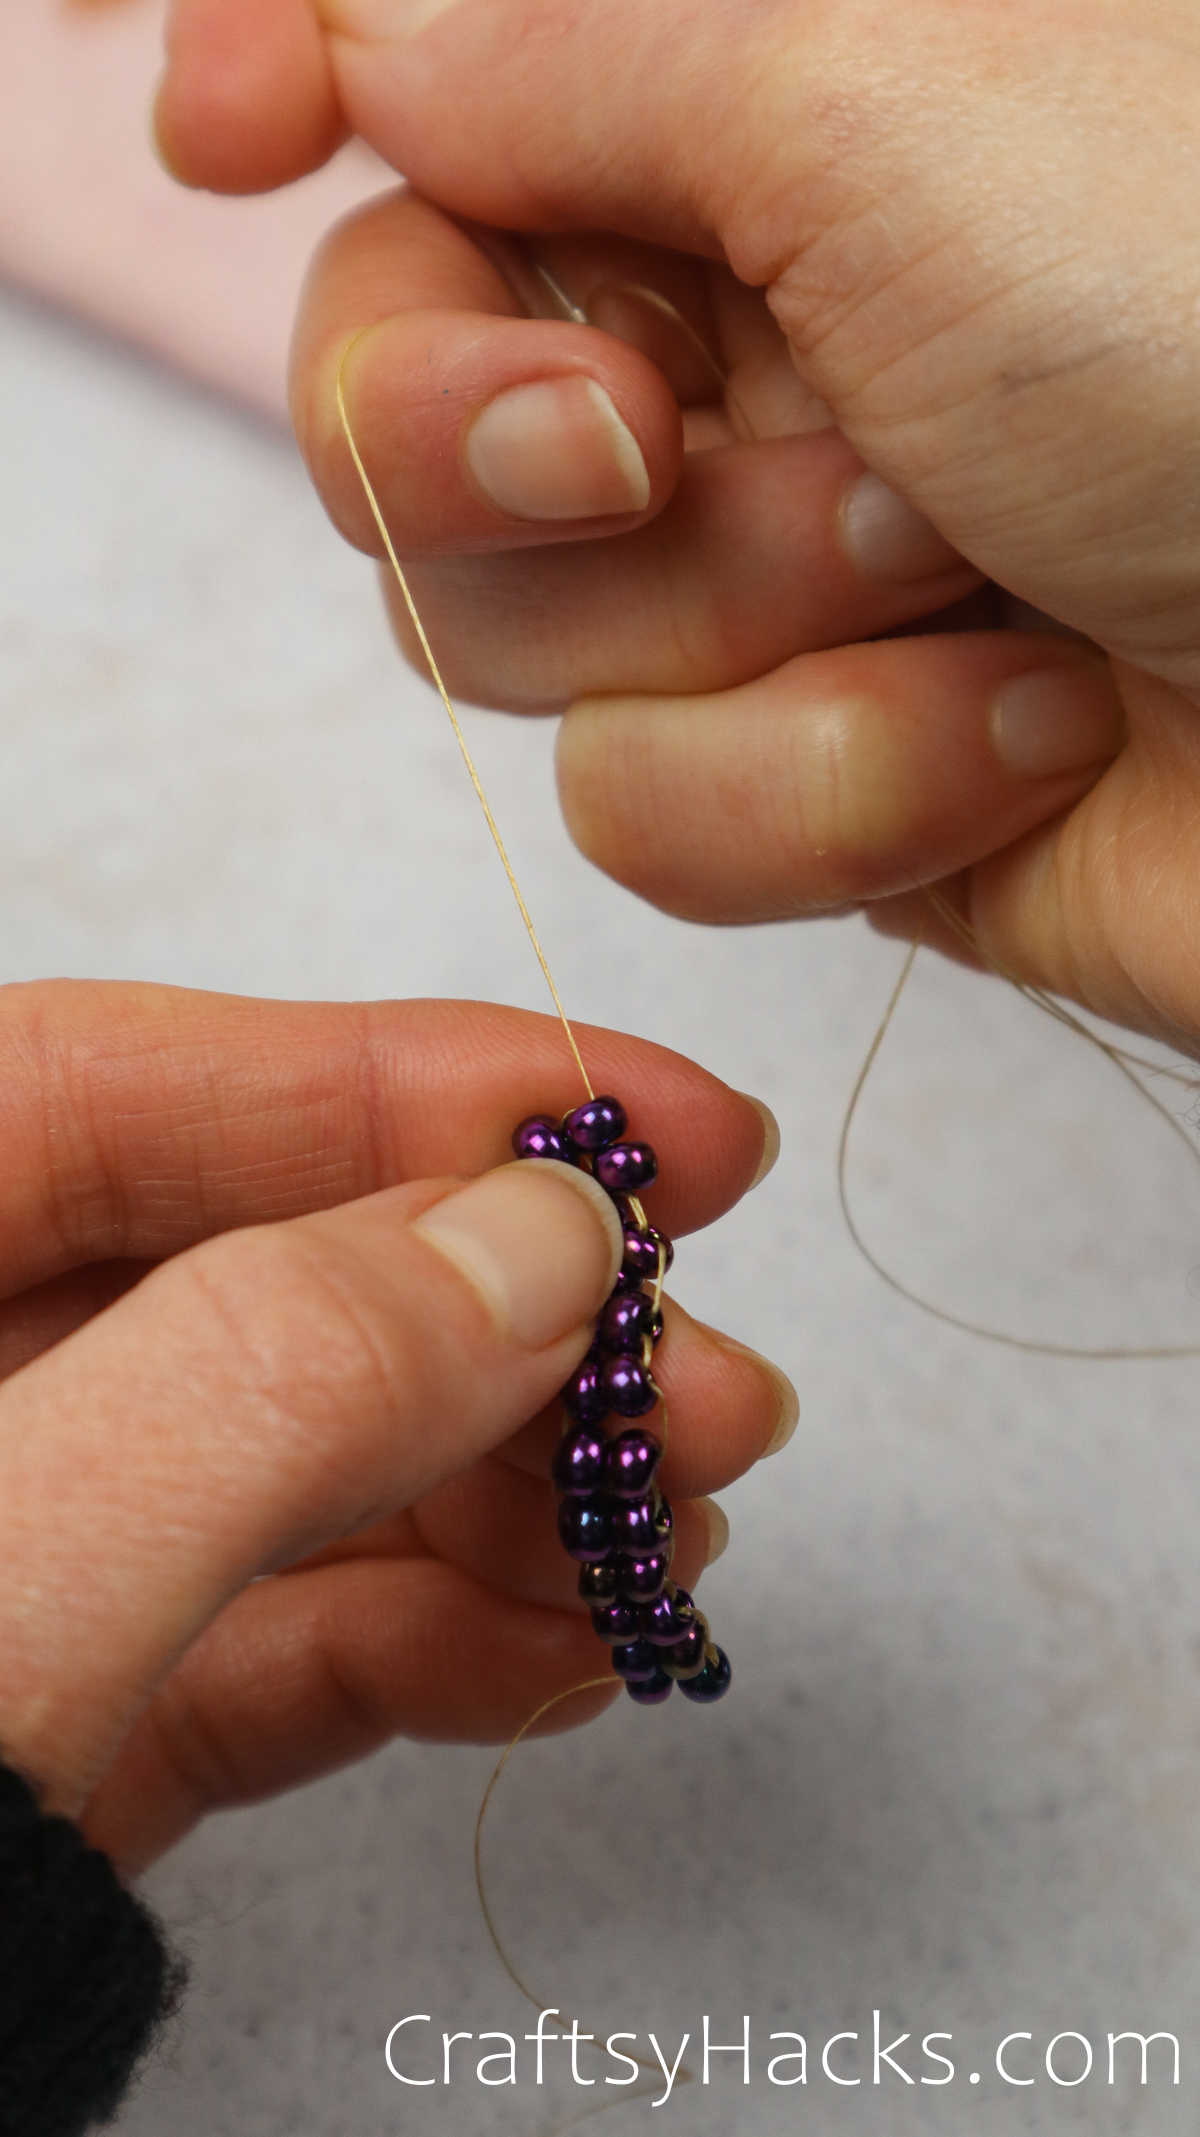
We’ll start by cutting a large line string, threading it onto our needle, and stringing four beads onto the line.

Situate your four beads onto your string and get them to the appropriate part on the line–where you feel comfortable handling them so there’s enough room to continue working.
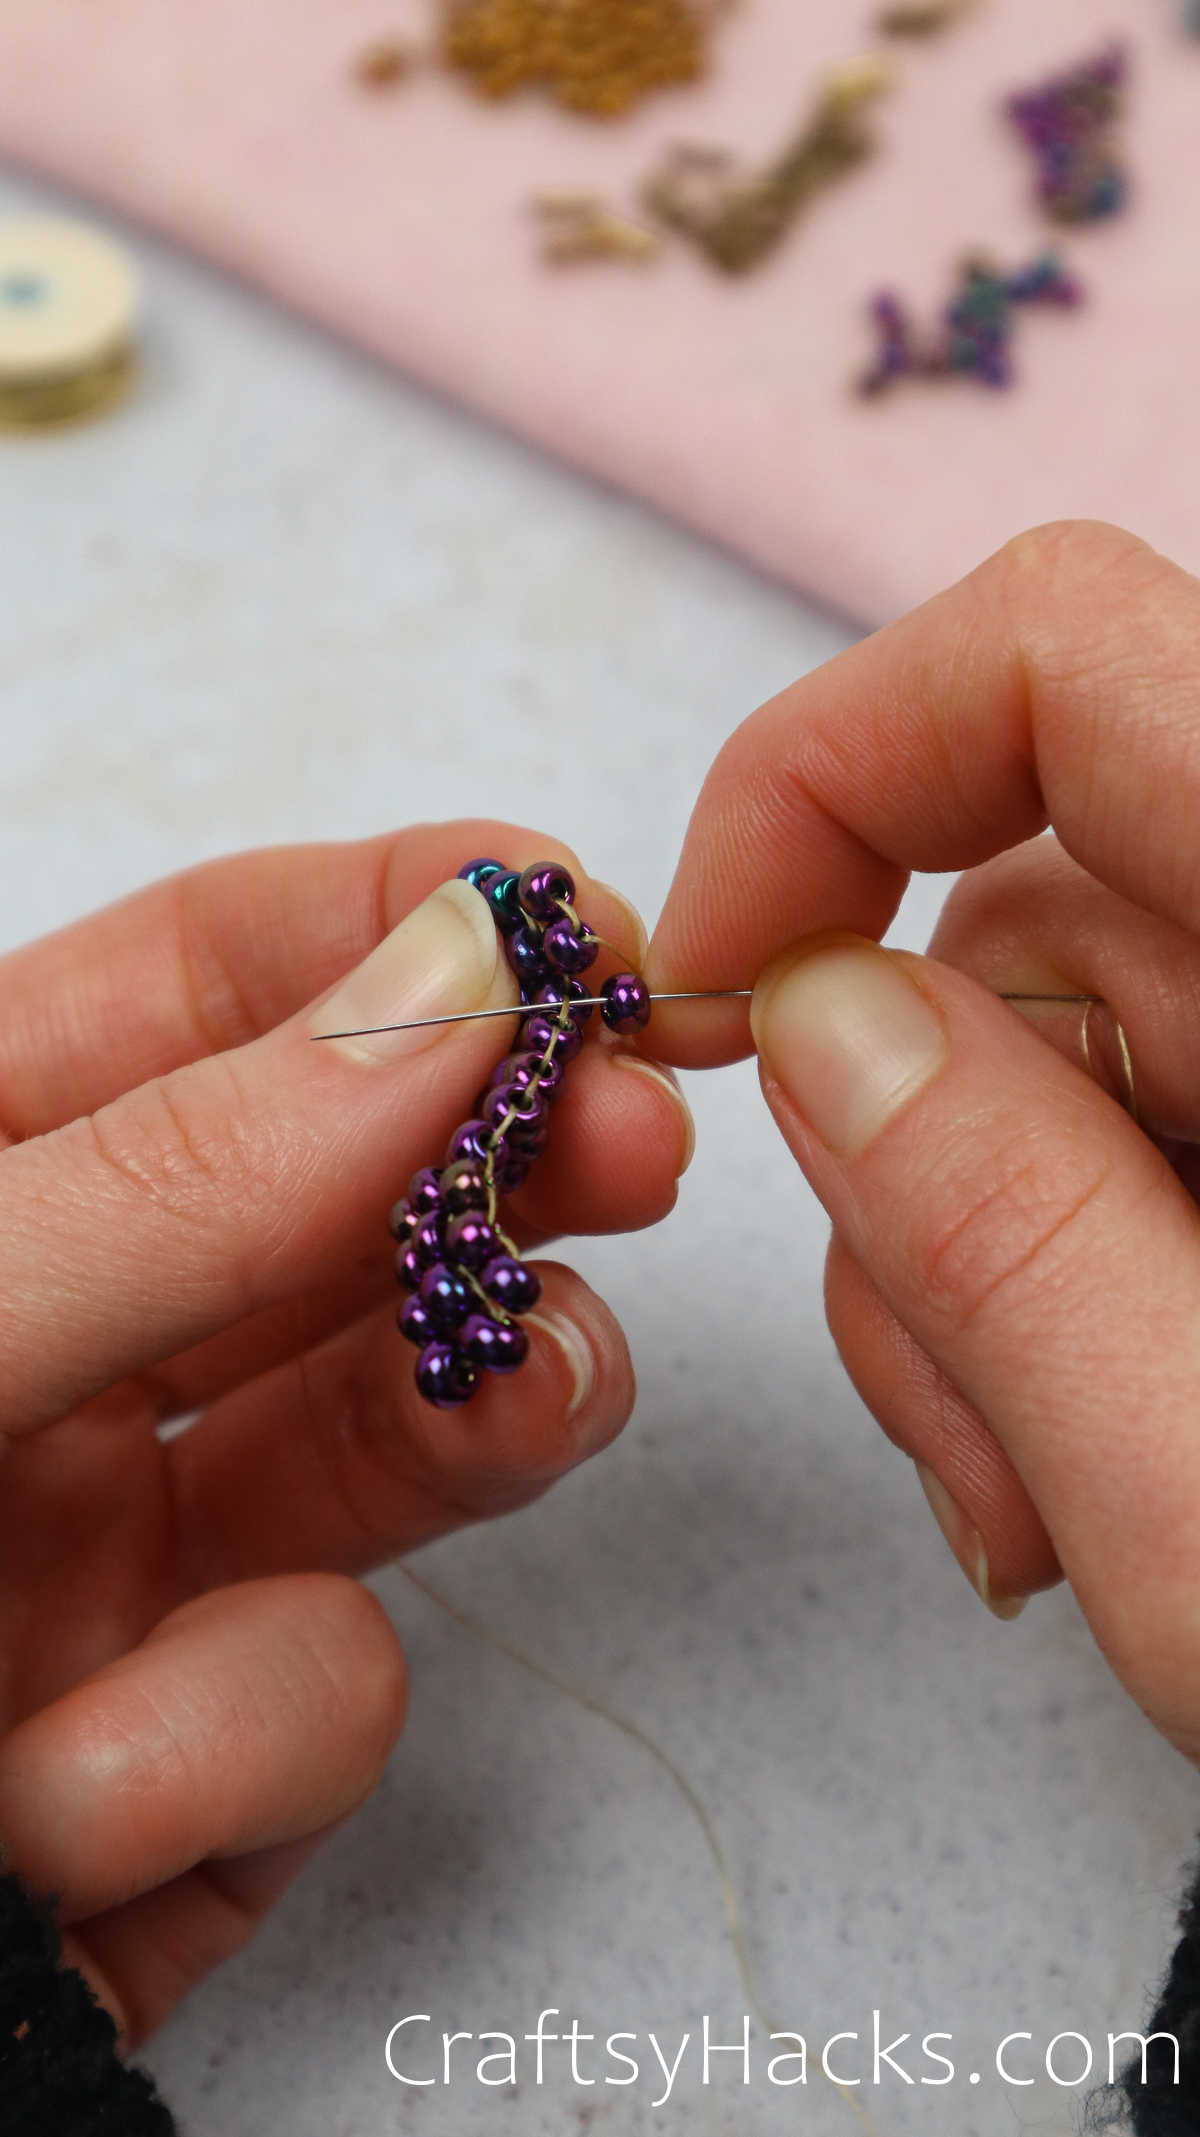
Step 3
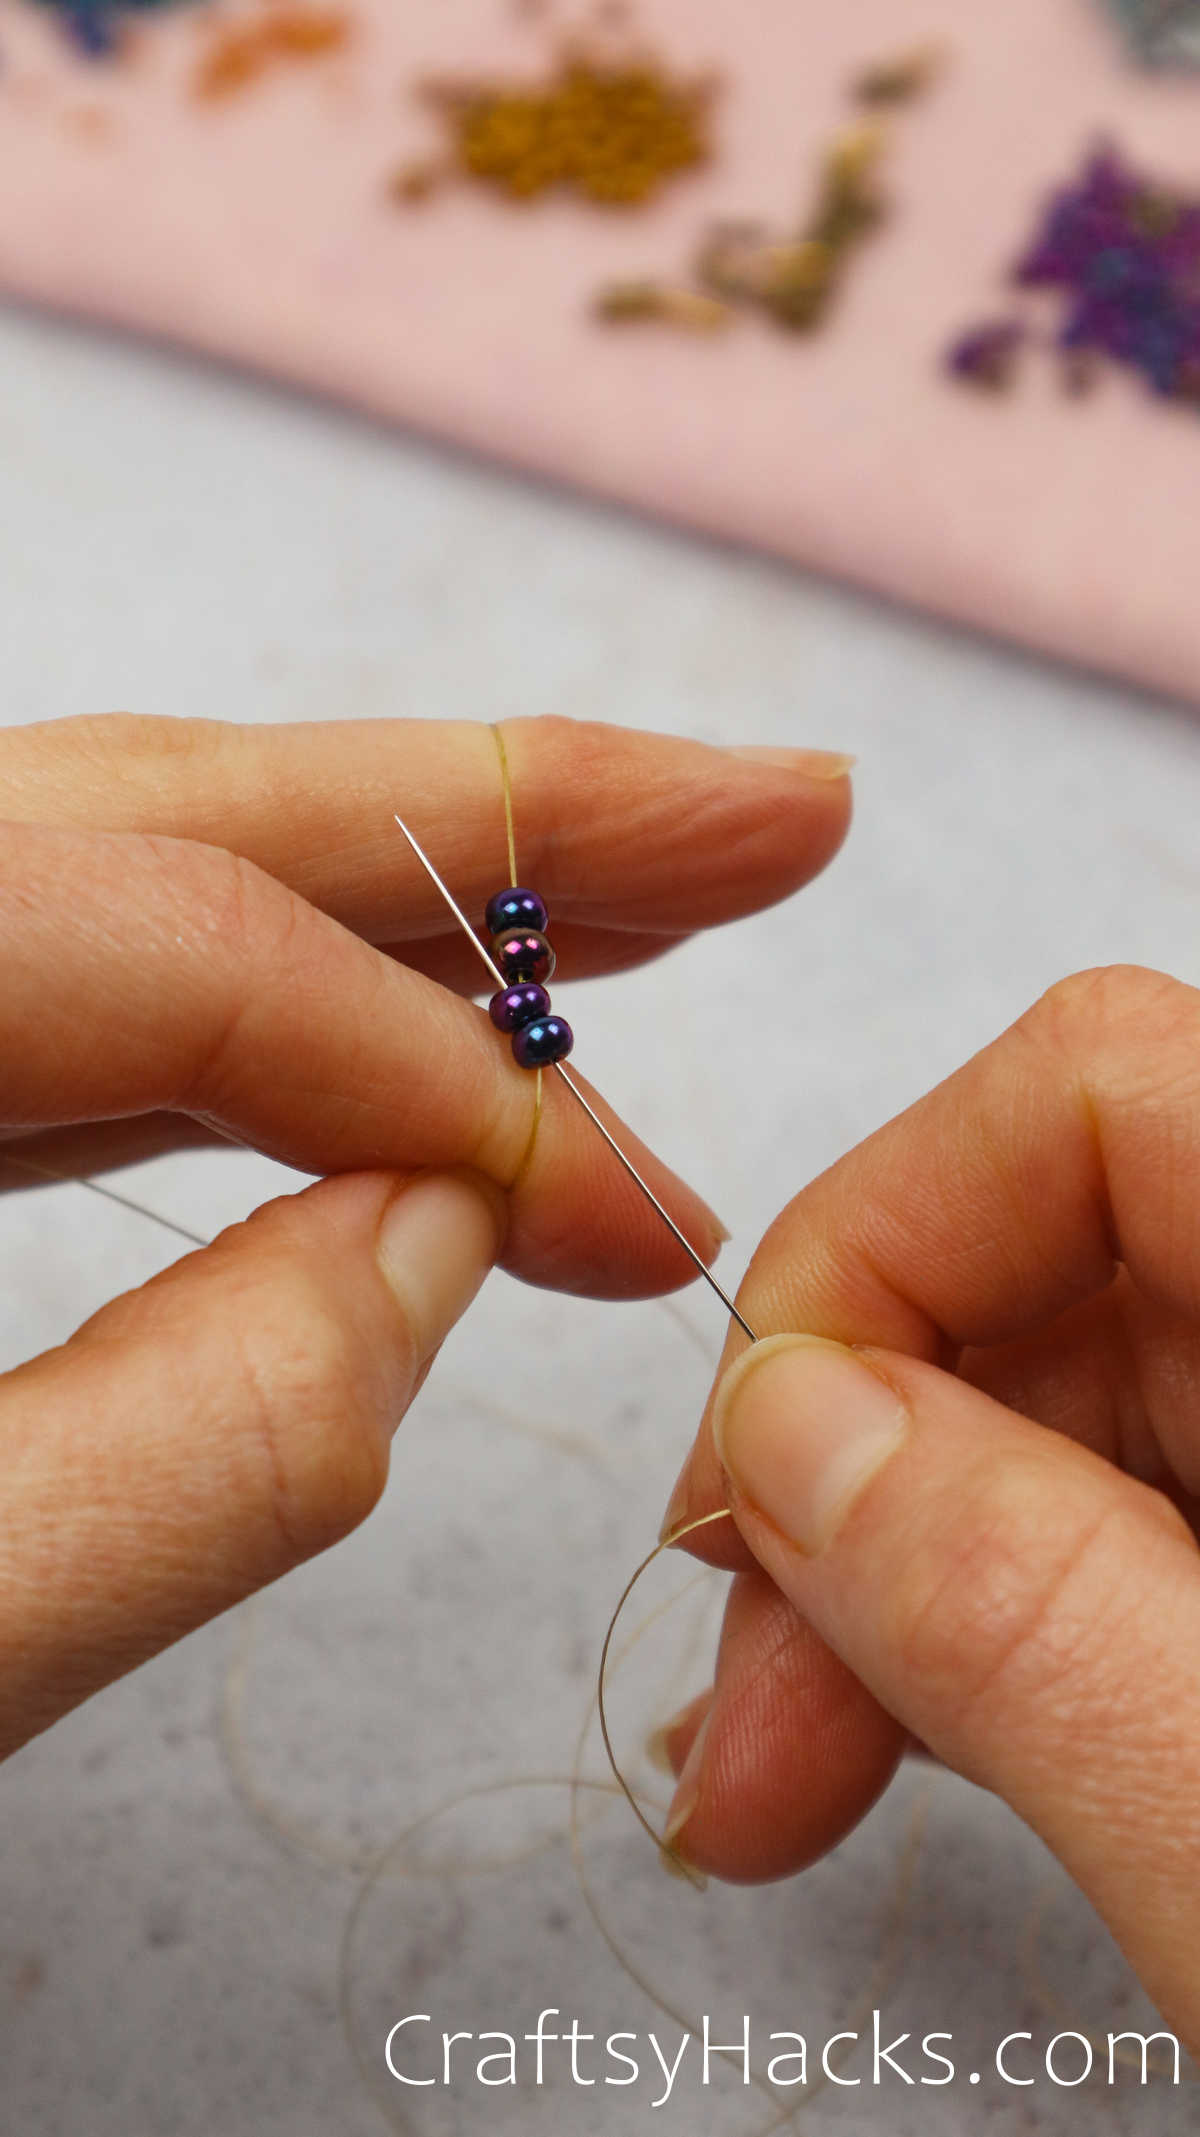
We want to leave at least five to six inches of a tail to work with later on to wrap up the project. We’ll prepare to stitch back through the bottom two beads as you get that right.
As you can see below, they form a square shape. This formation is also known as a ‘ladder. stitch.
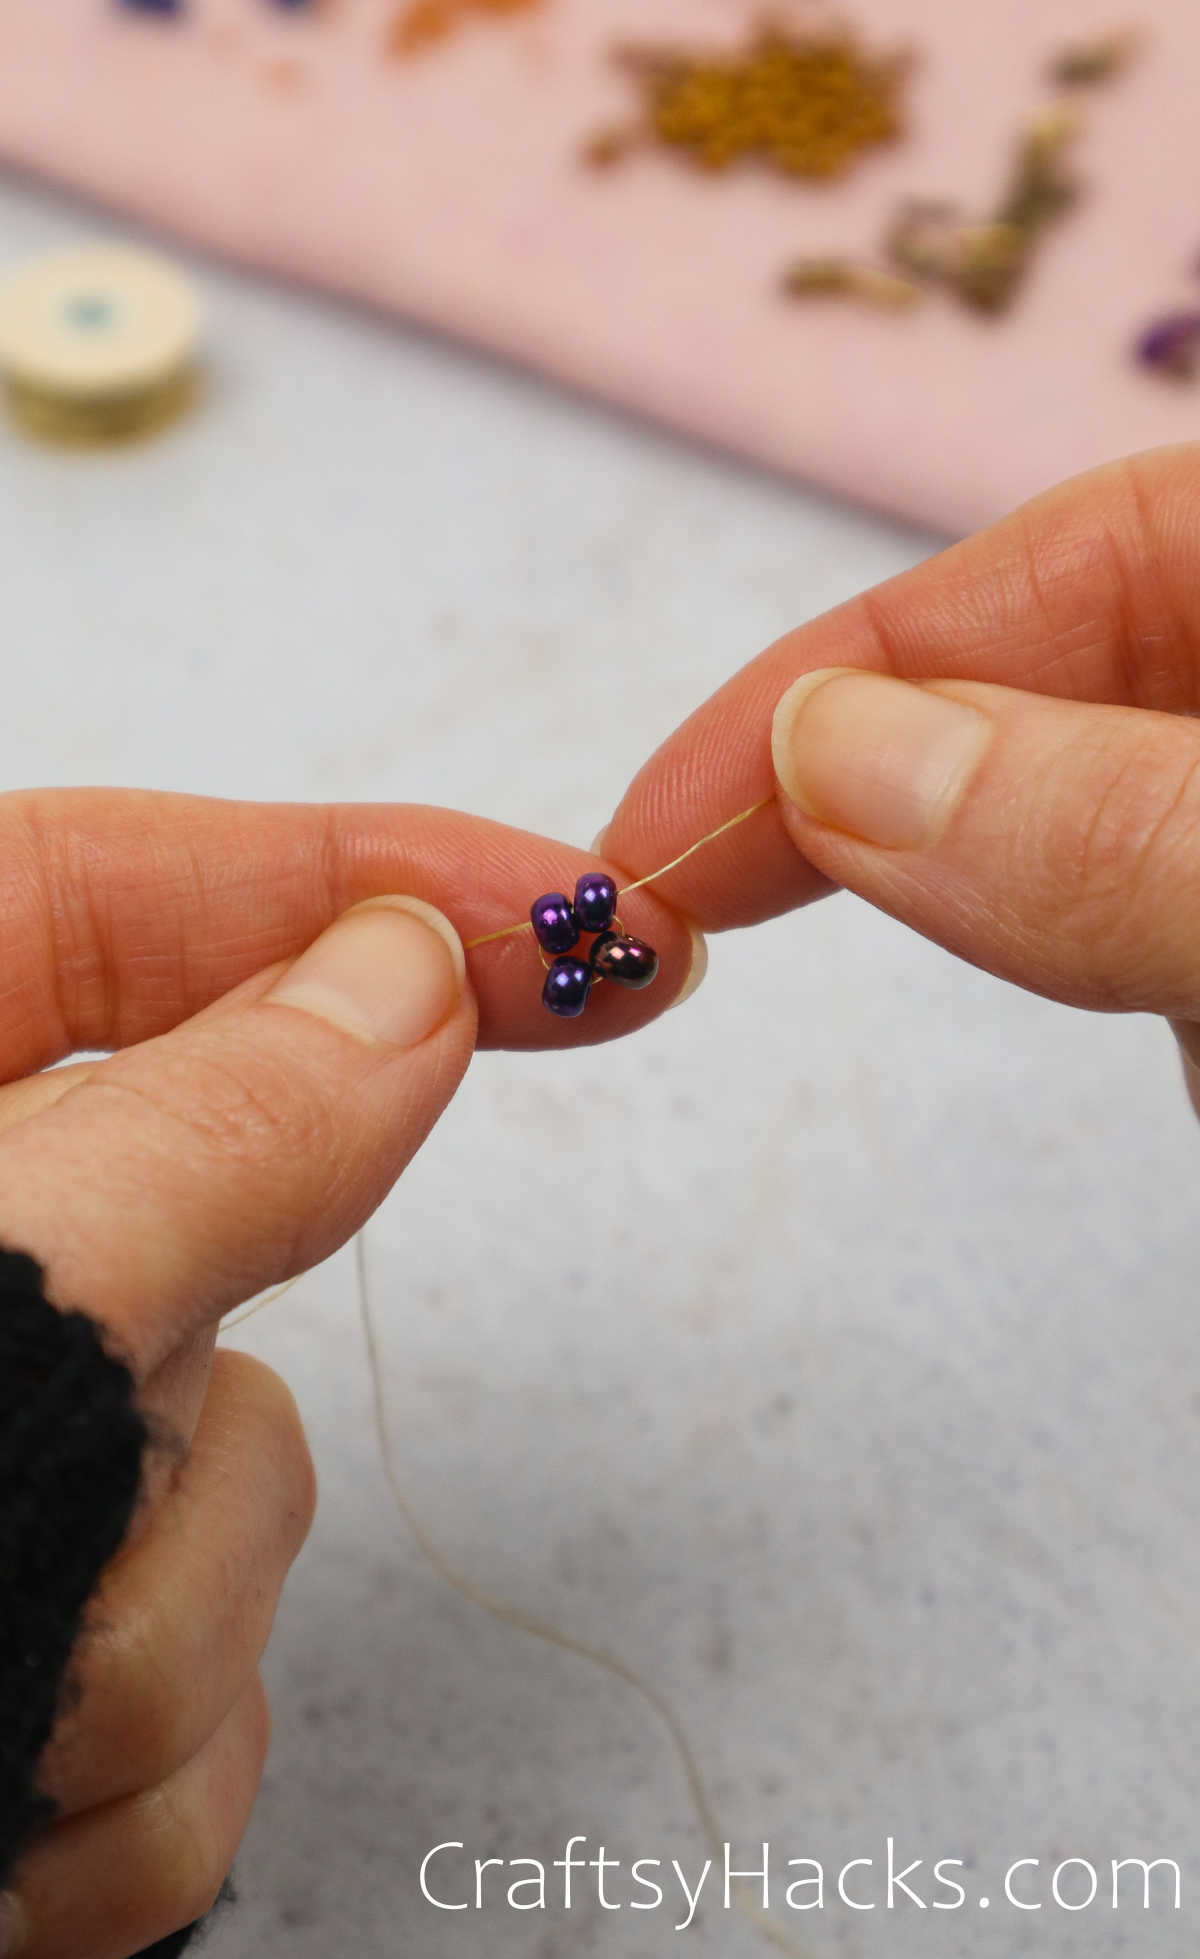
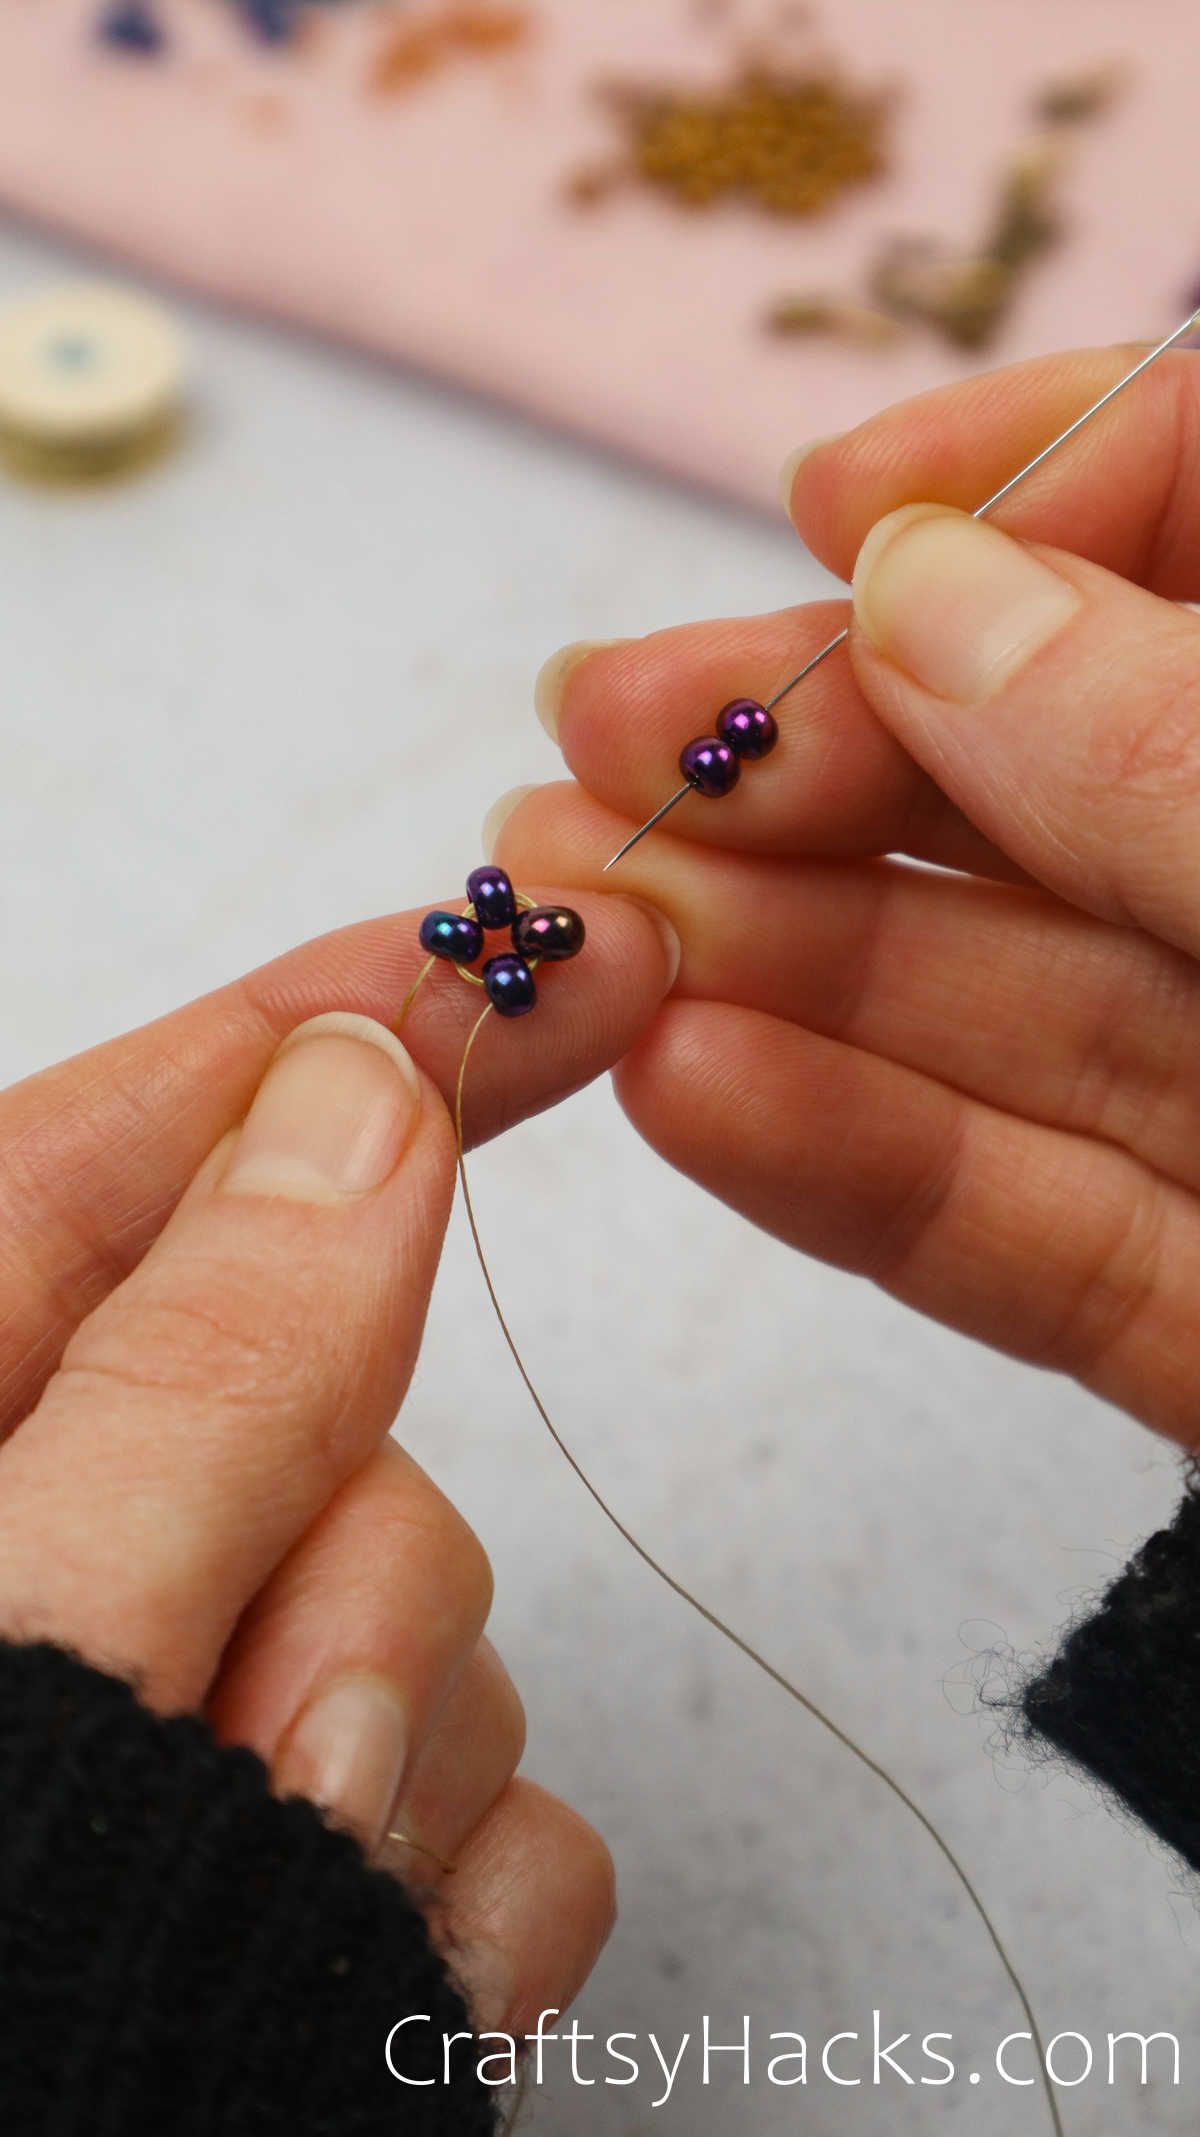
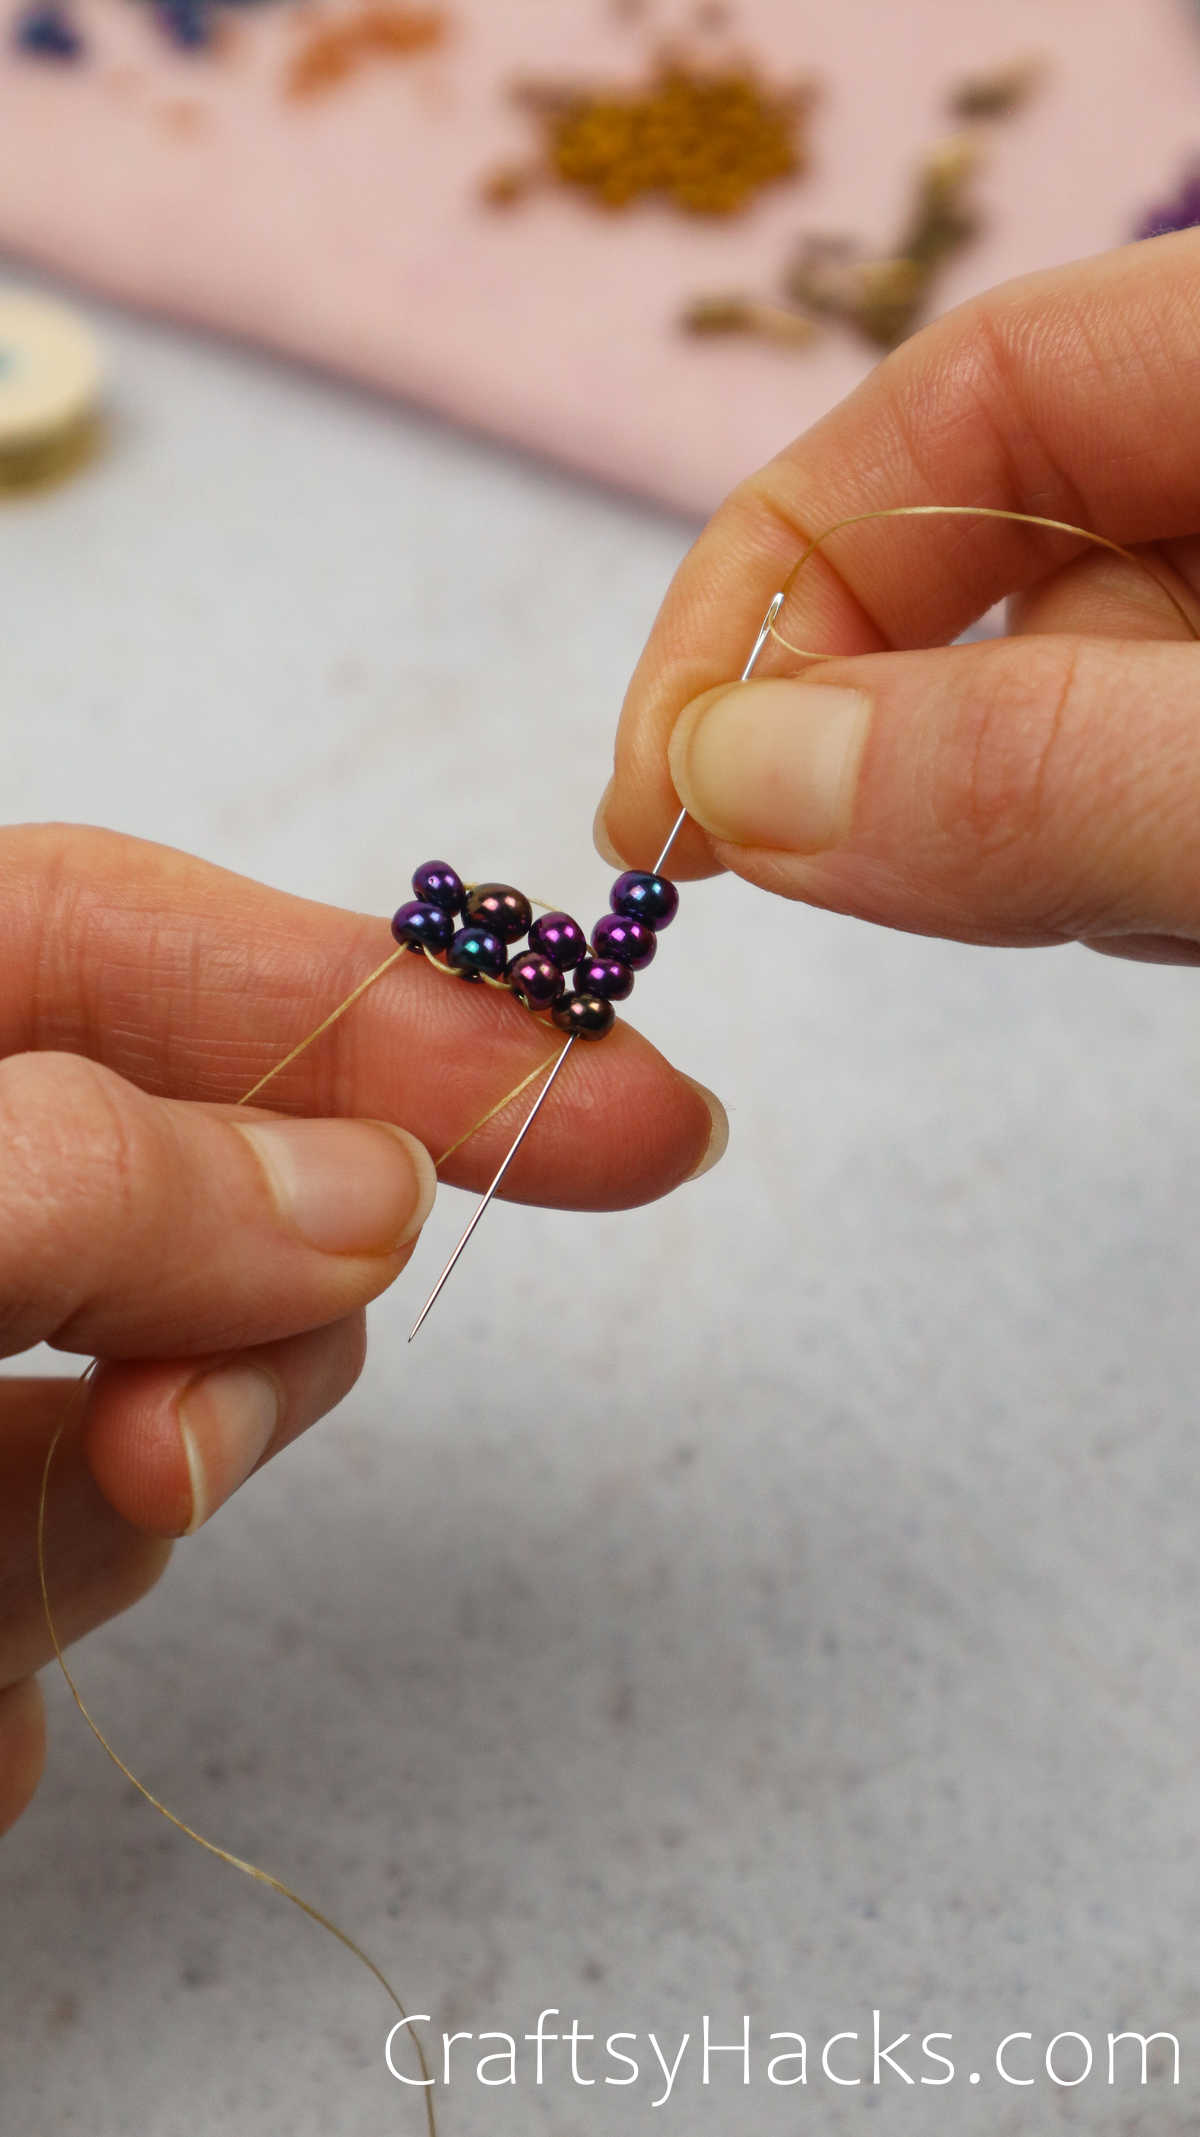
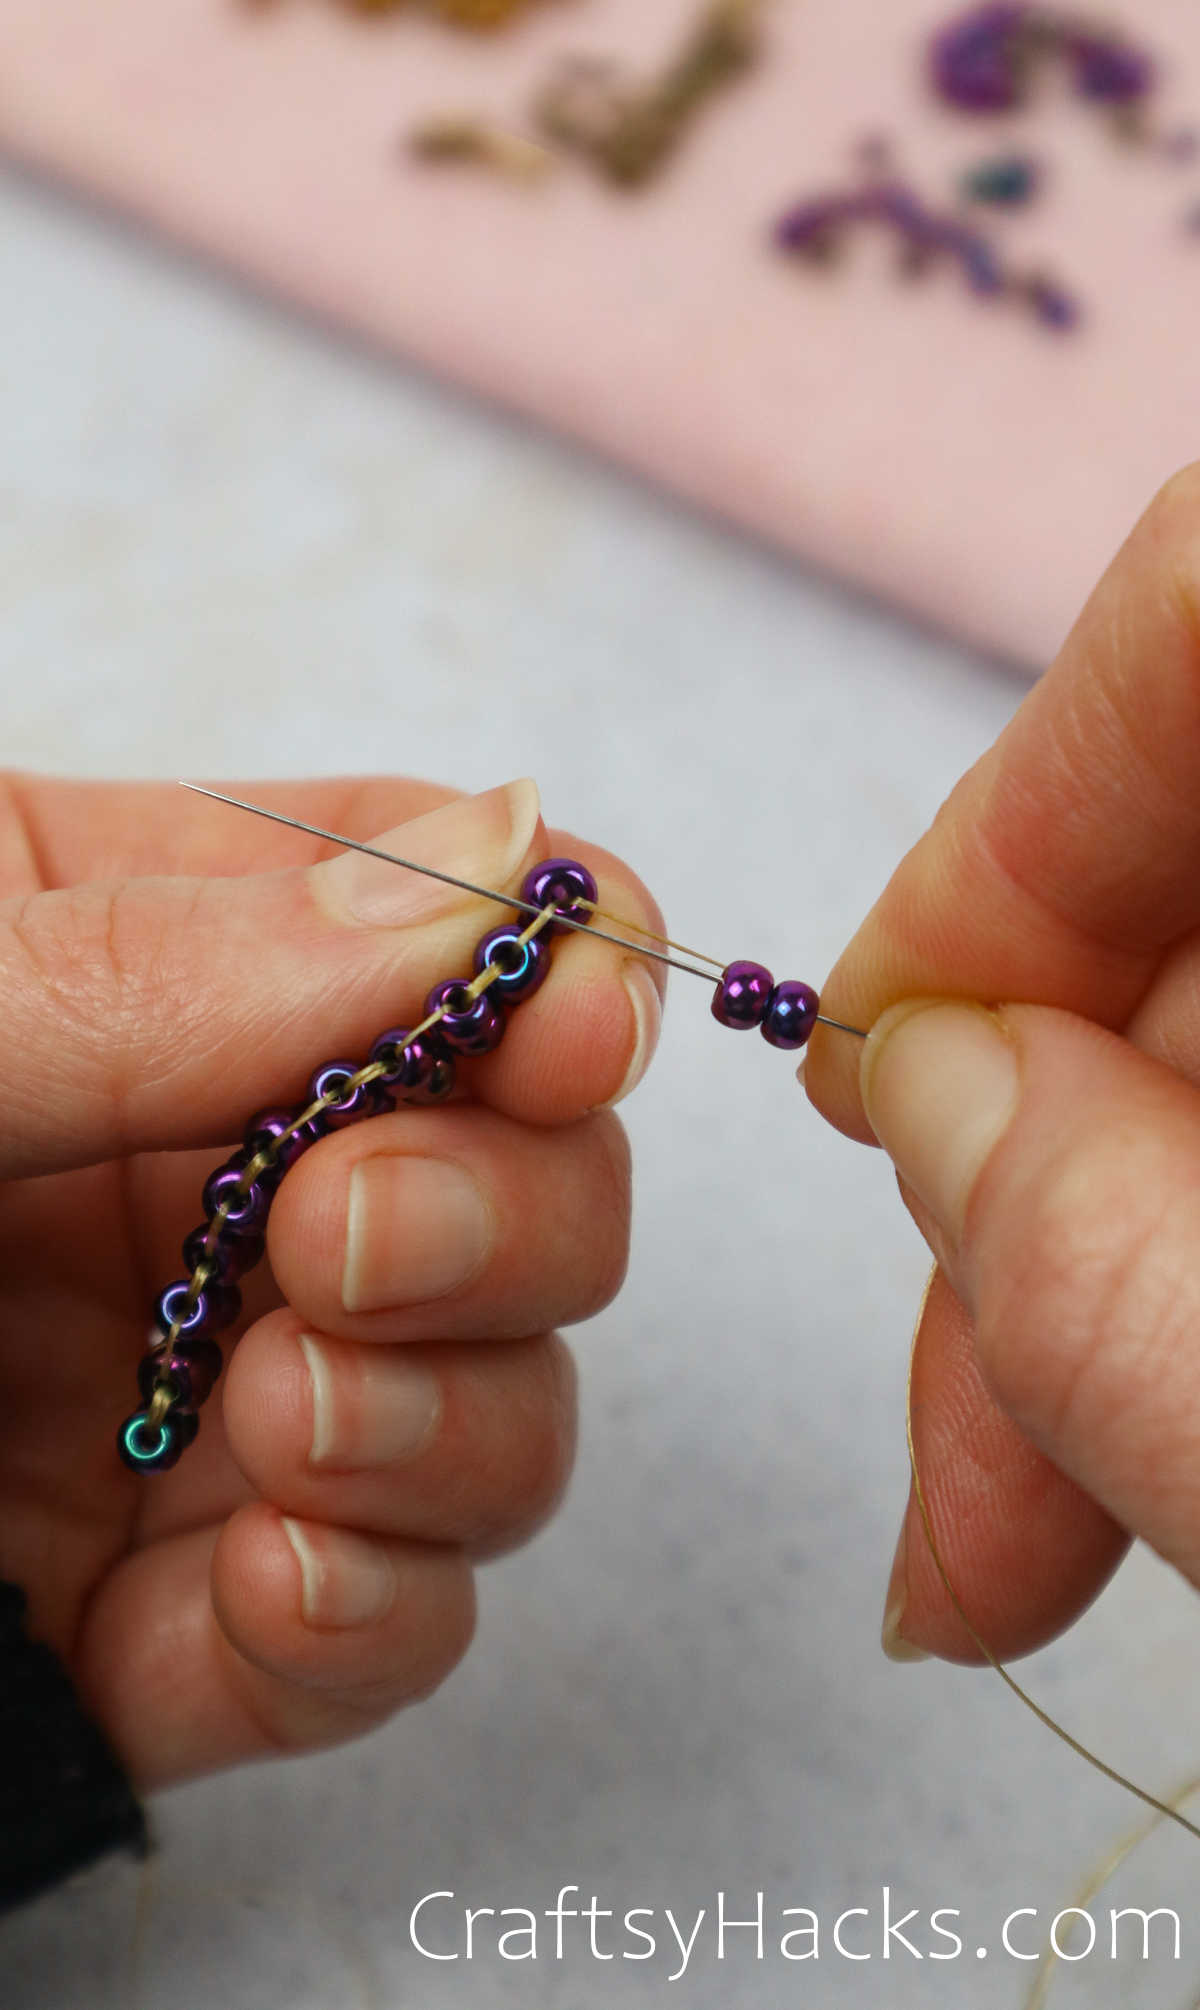
Step 4
Once the two squares are parallel, pull everything together to make them snug or meet at the center points. This step is where the initial ladder stitch forms correctly.
Step 5
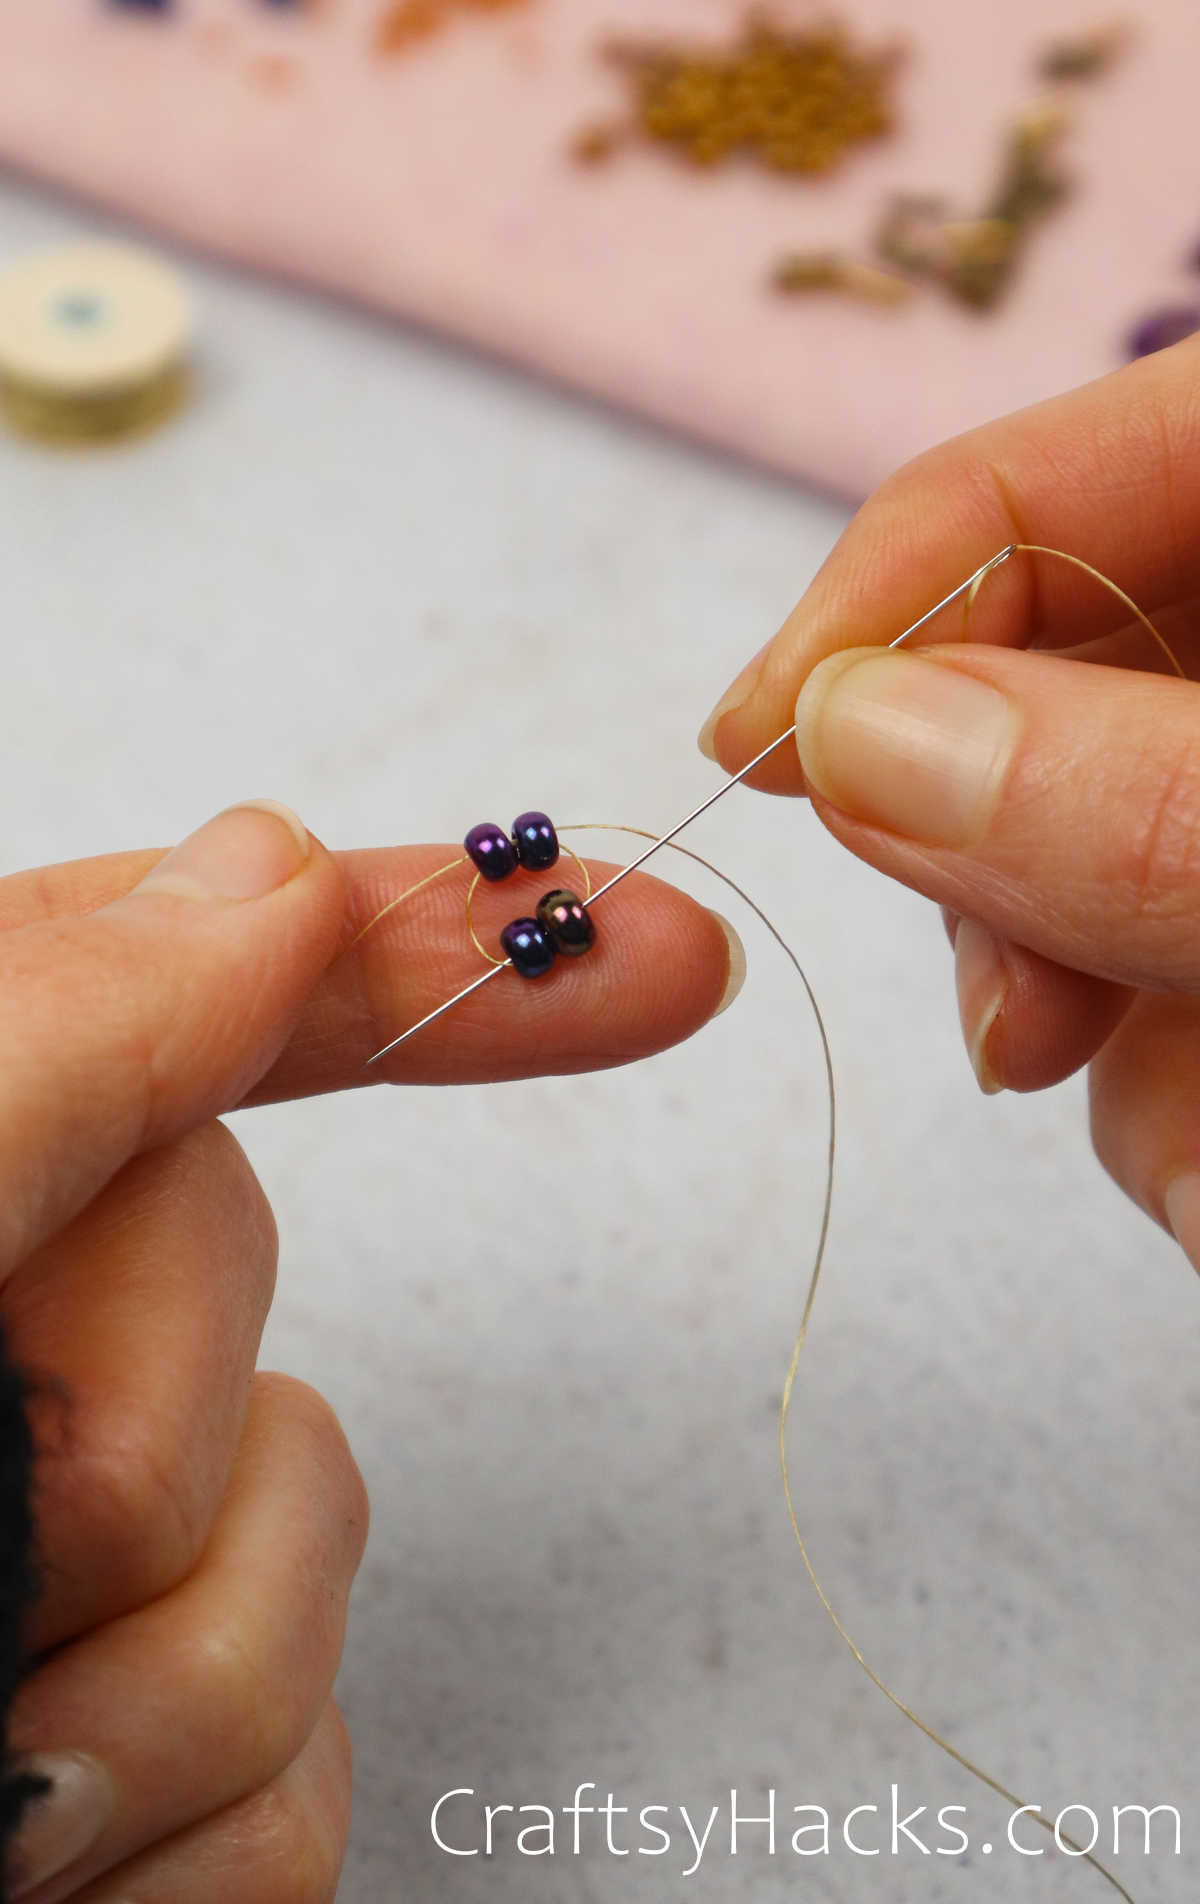
As the initial ladder is getting built, we need to secure the base of the whole earring. So, we’ll take the needle back through the other two beads to reinforce the strength.
As we reinforce one side, we’ll do the same to the other–by looping the needle through the original two beads.

As we reinforce the first part of the ladder to complete the job and move into the following step, we’ll go through the second set of beads one more time.
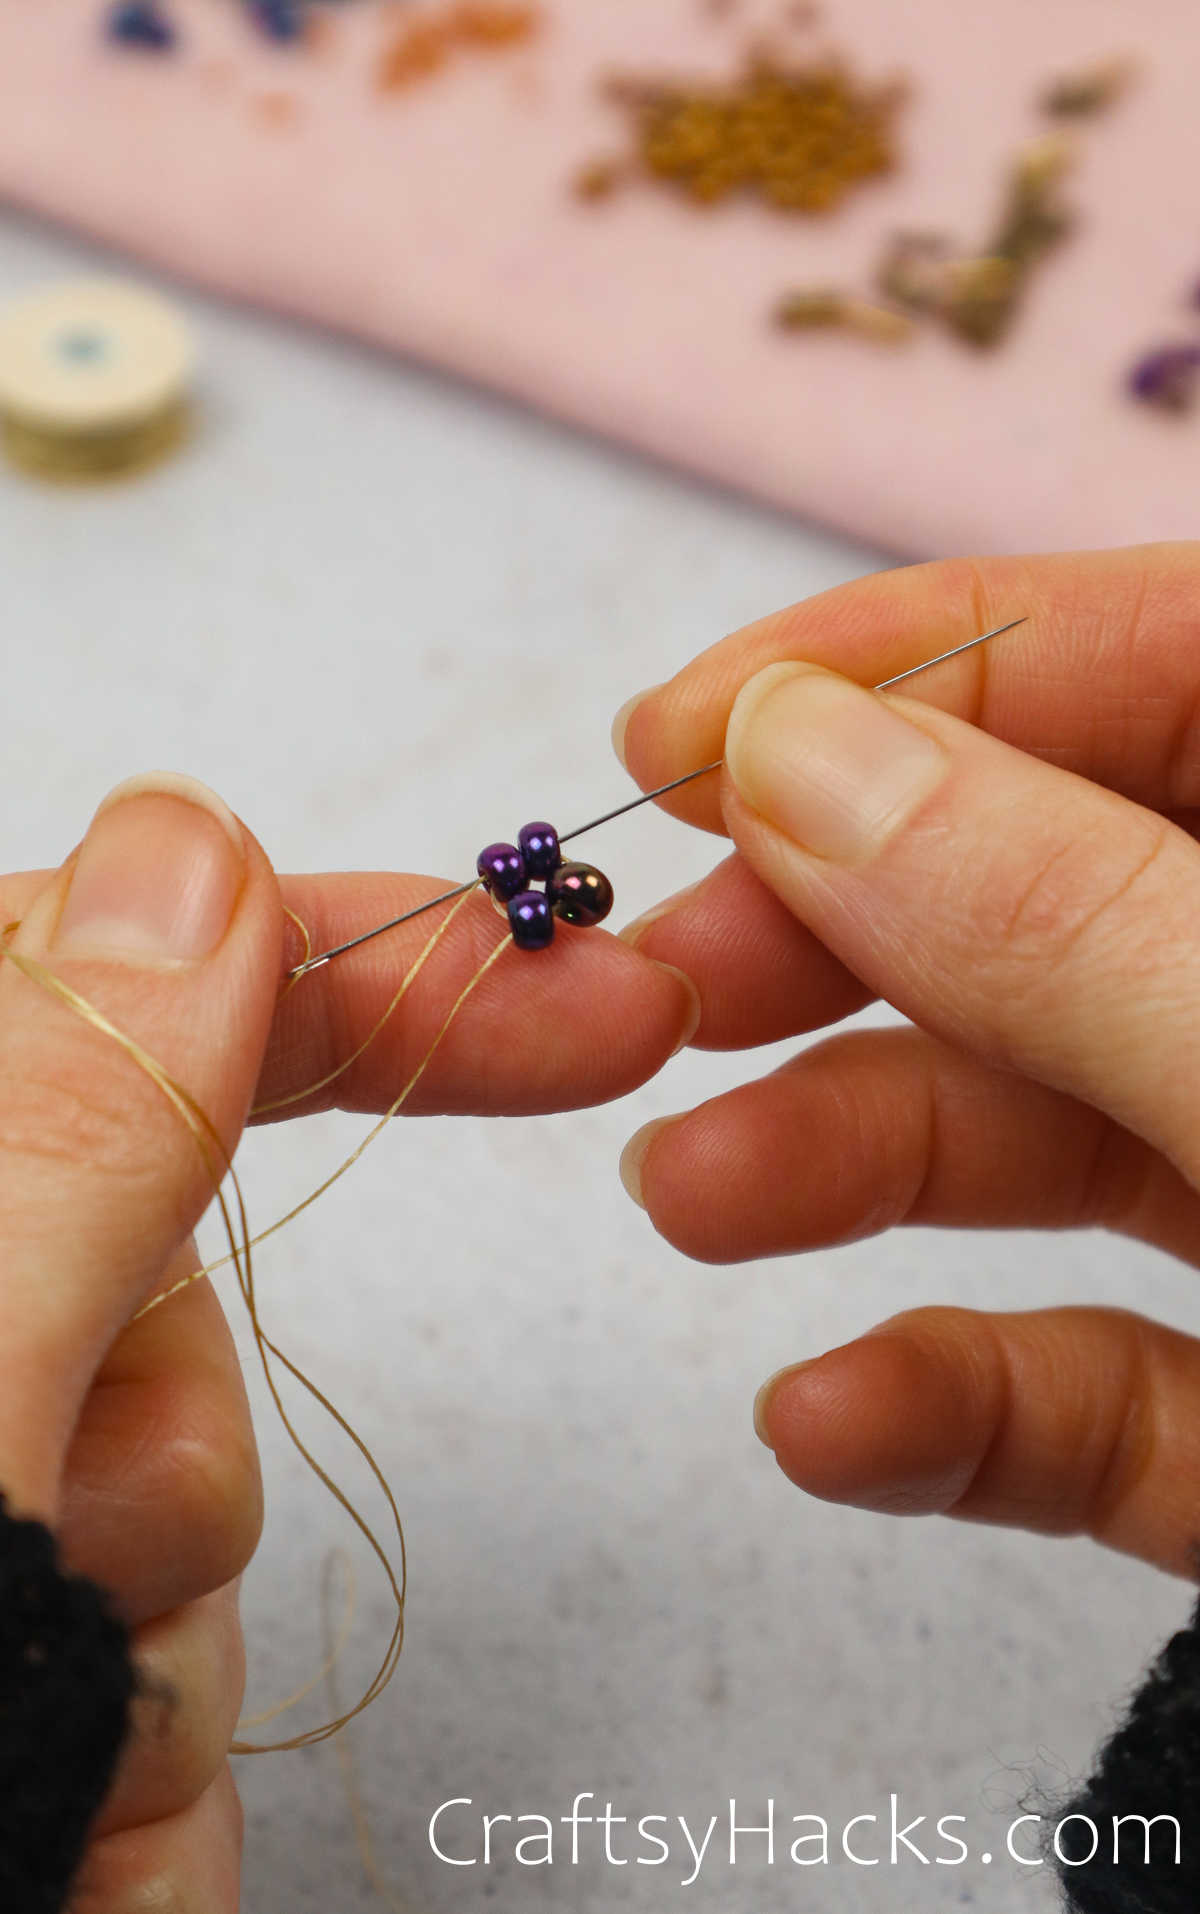
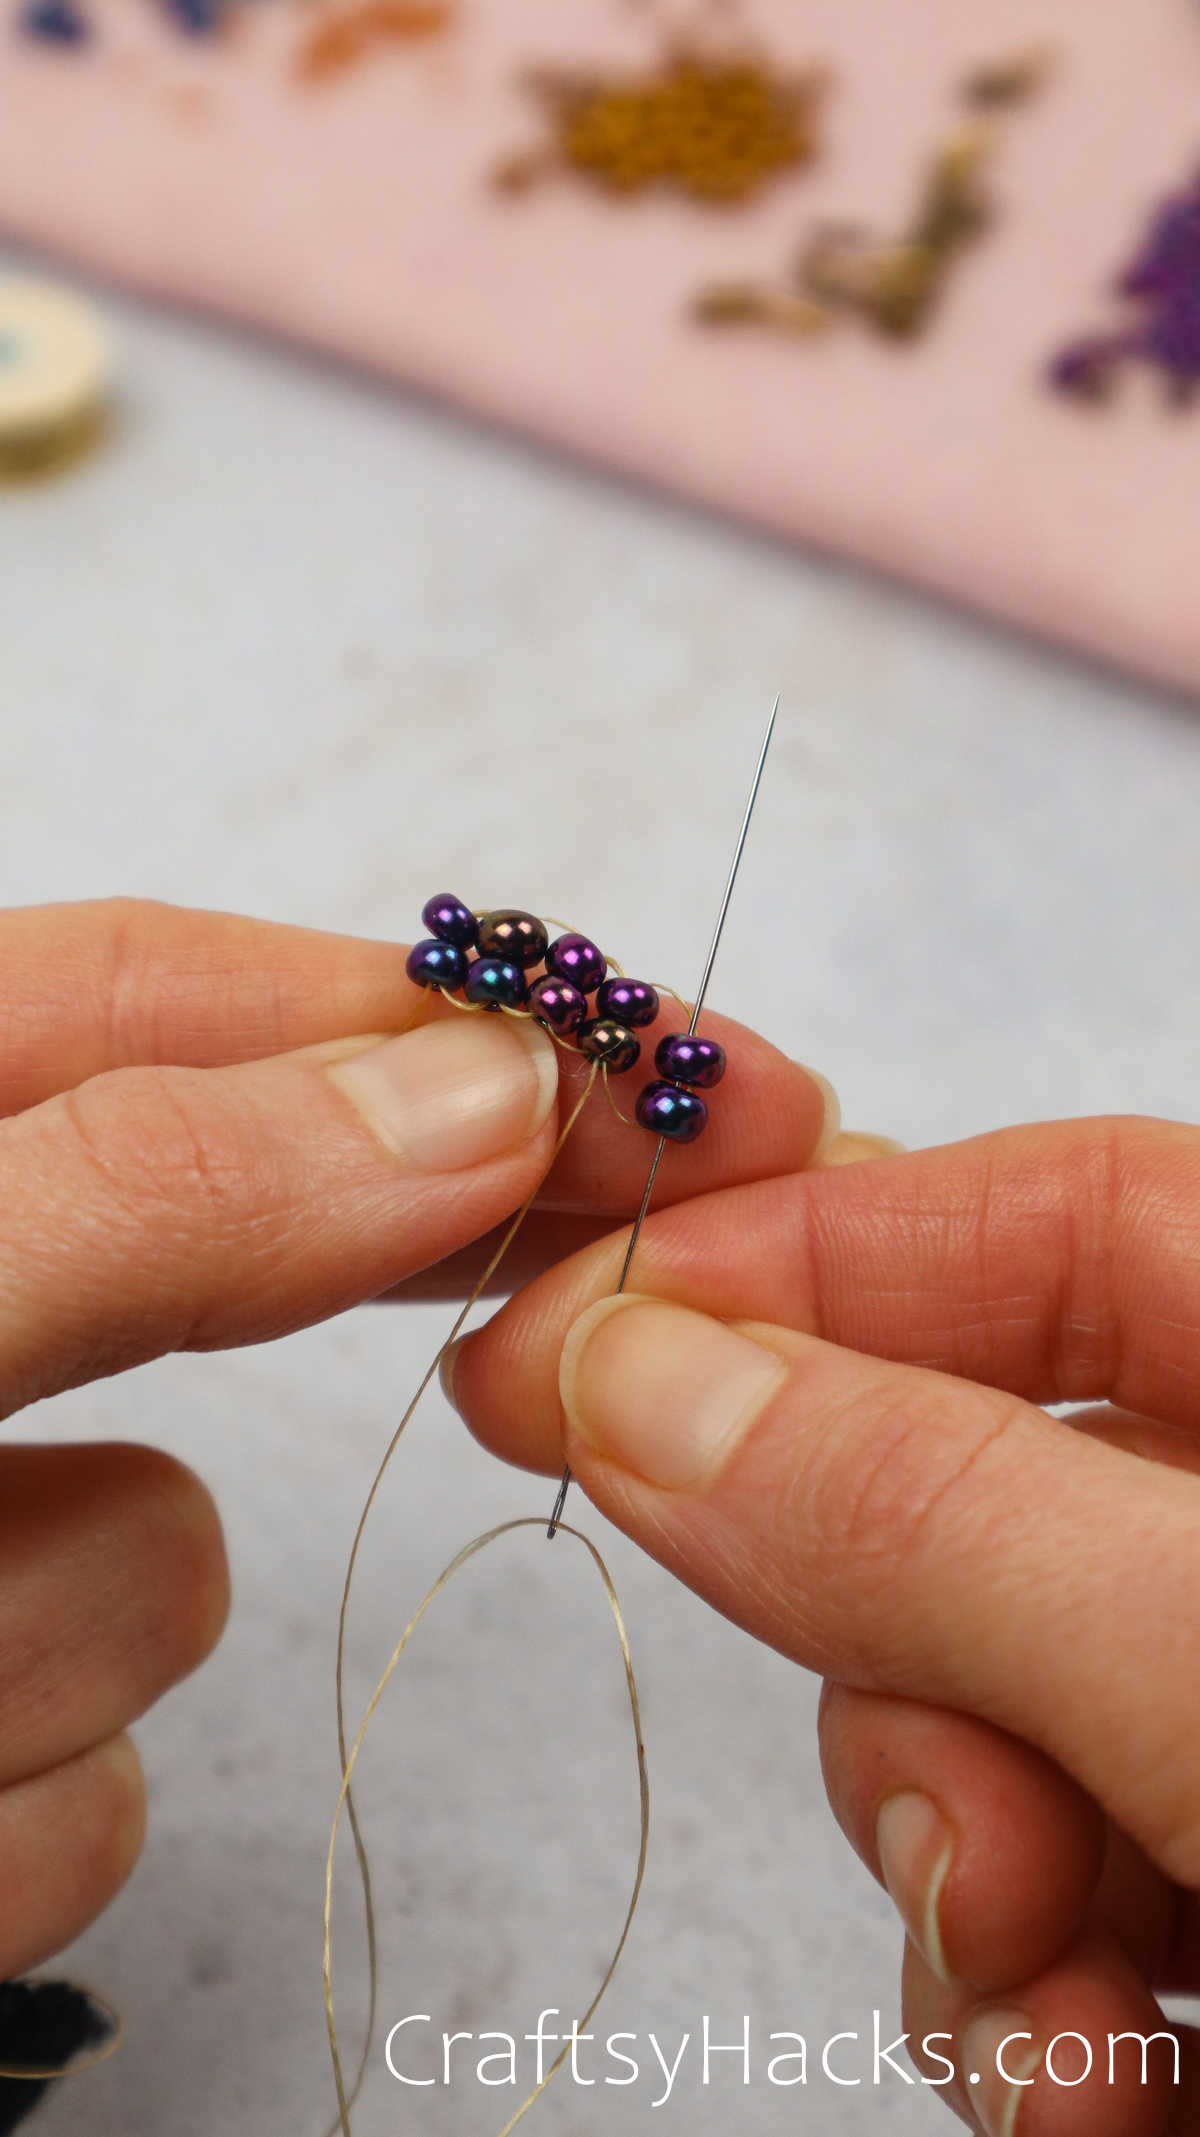
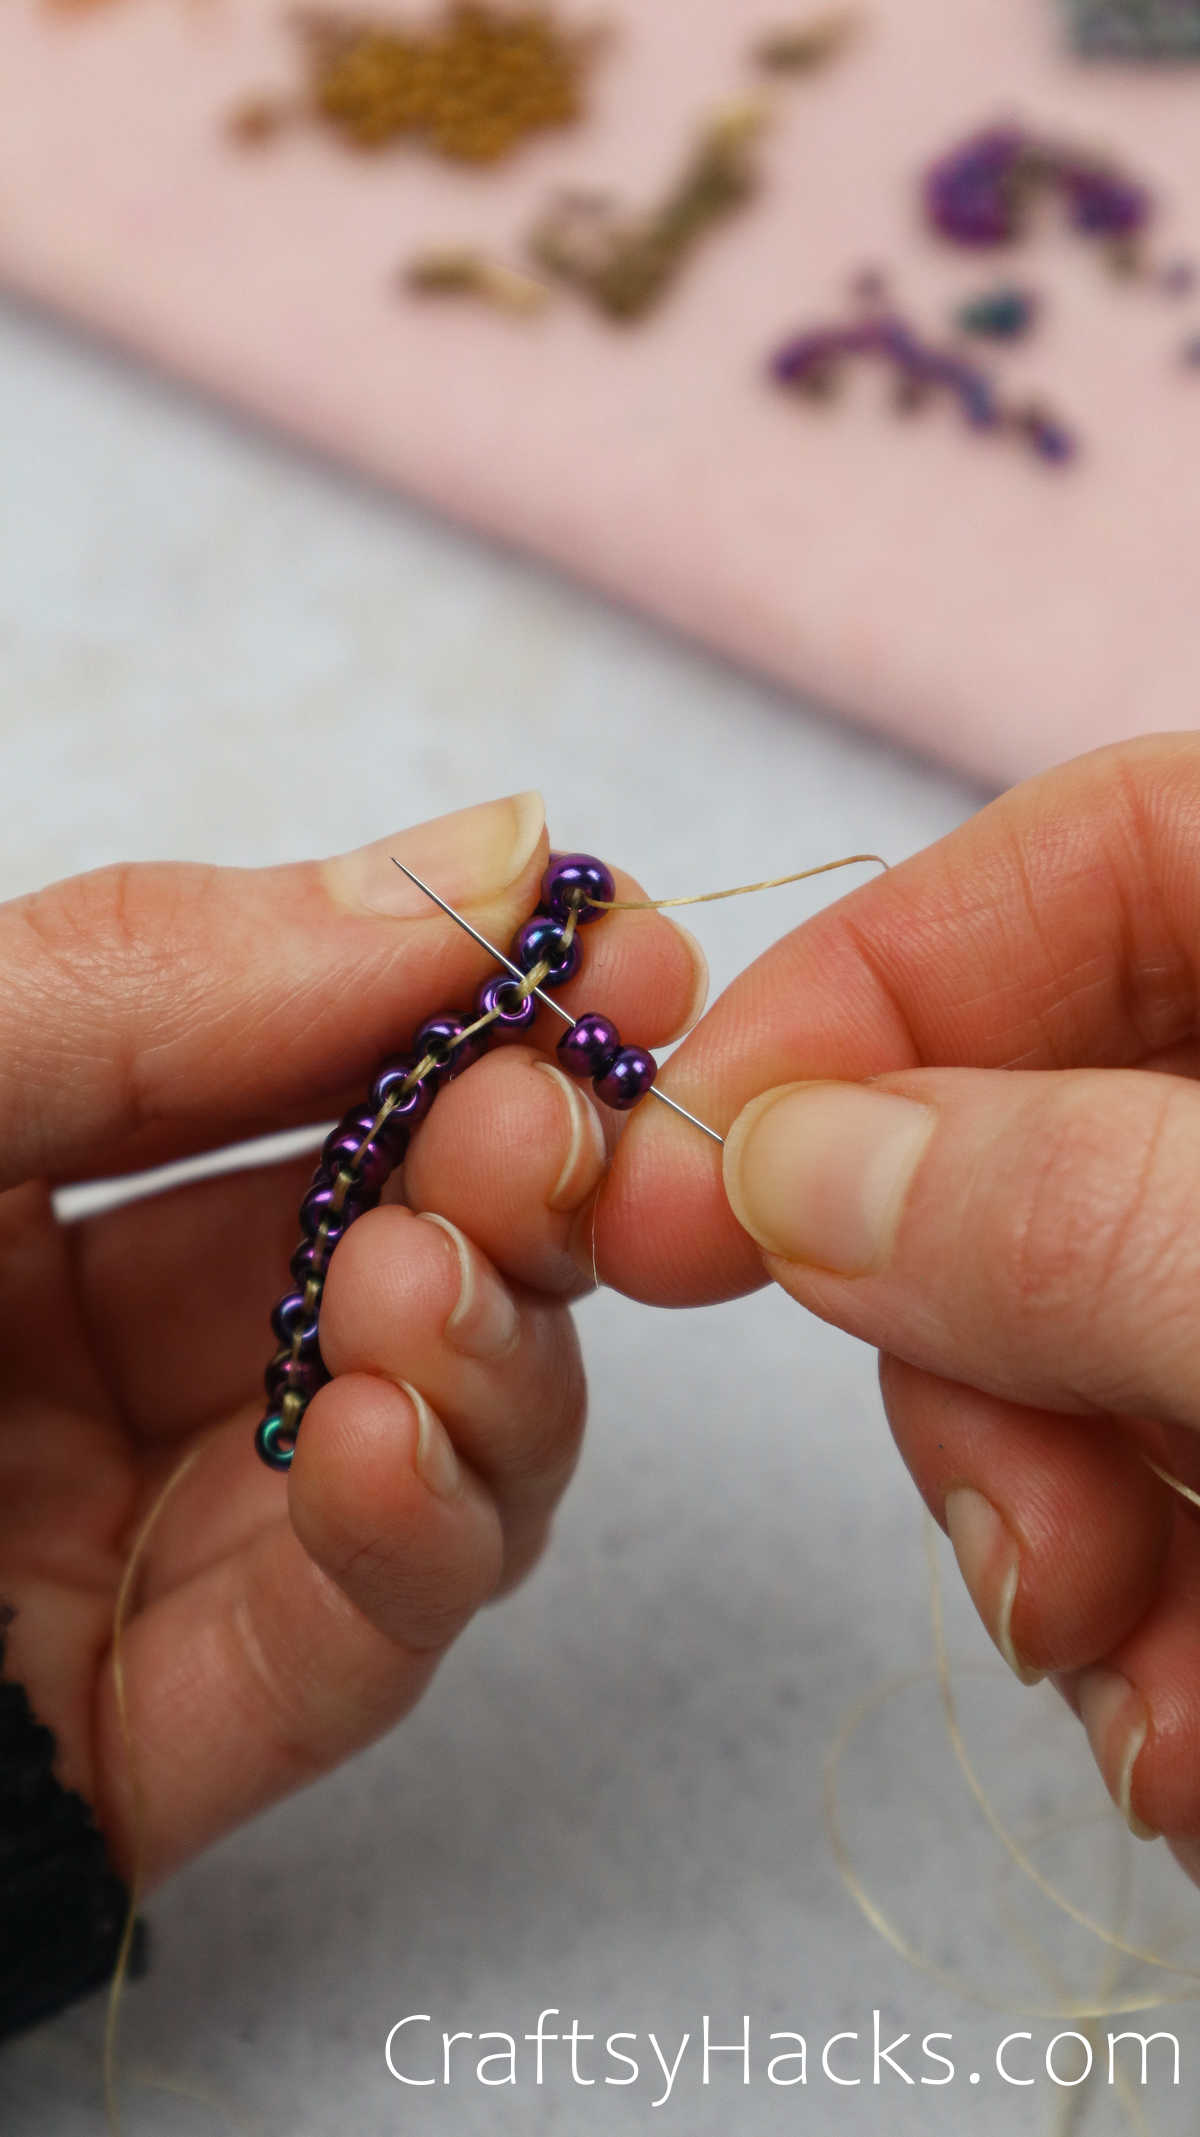
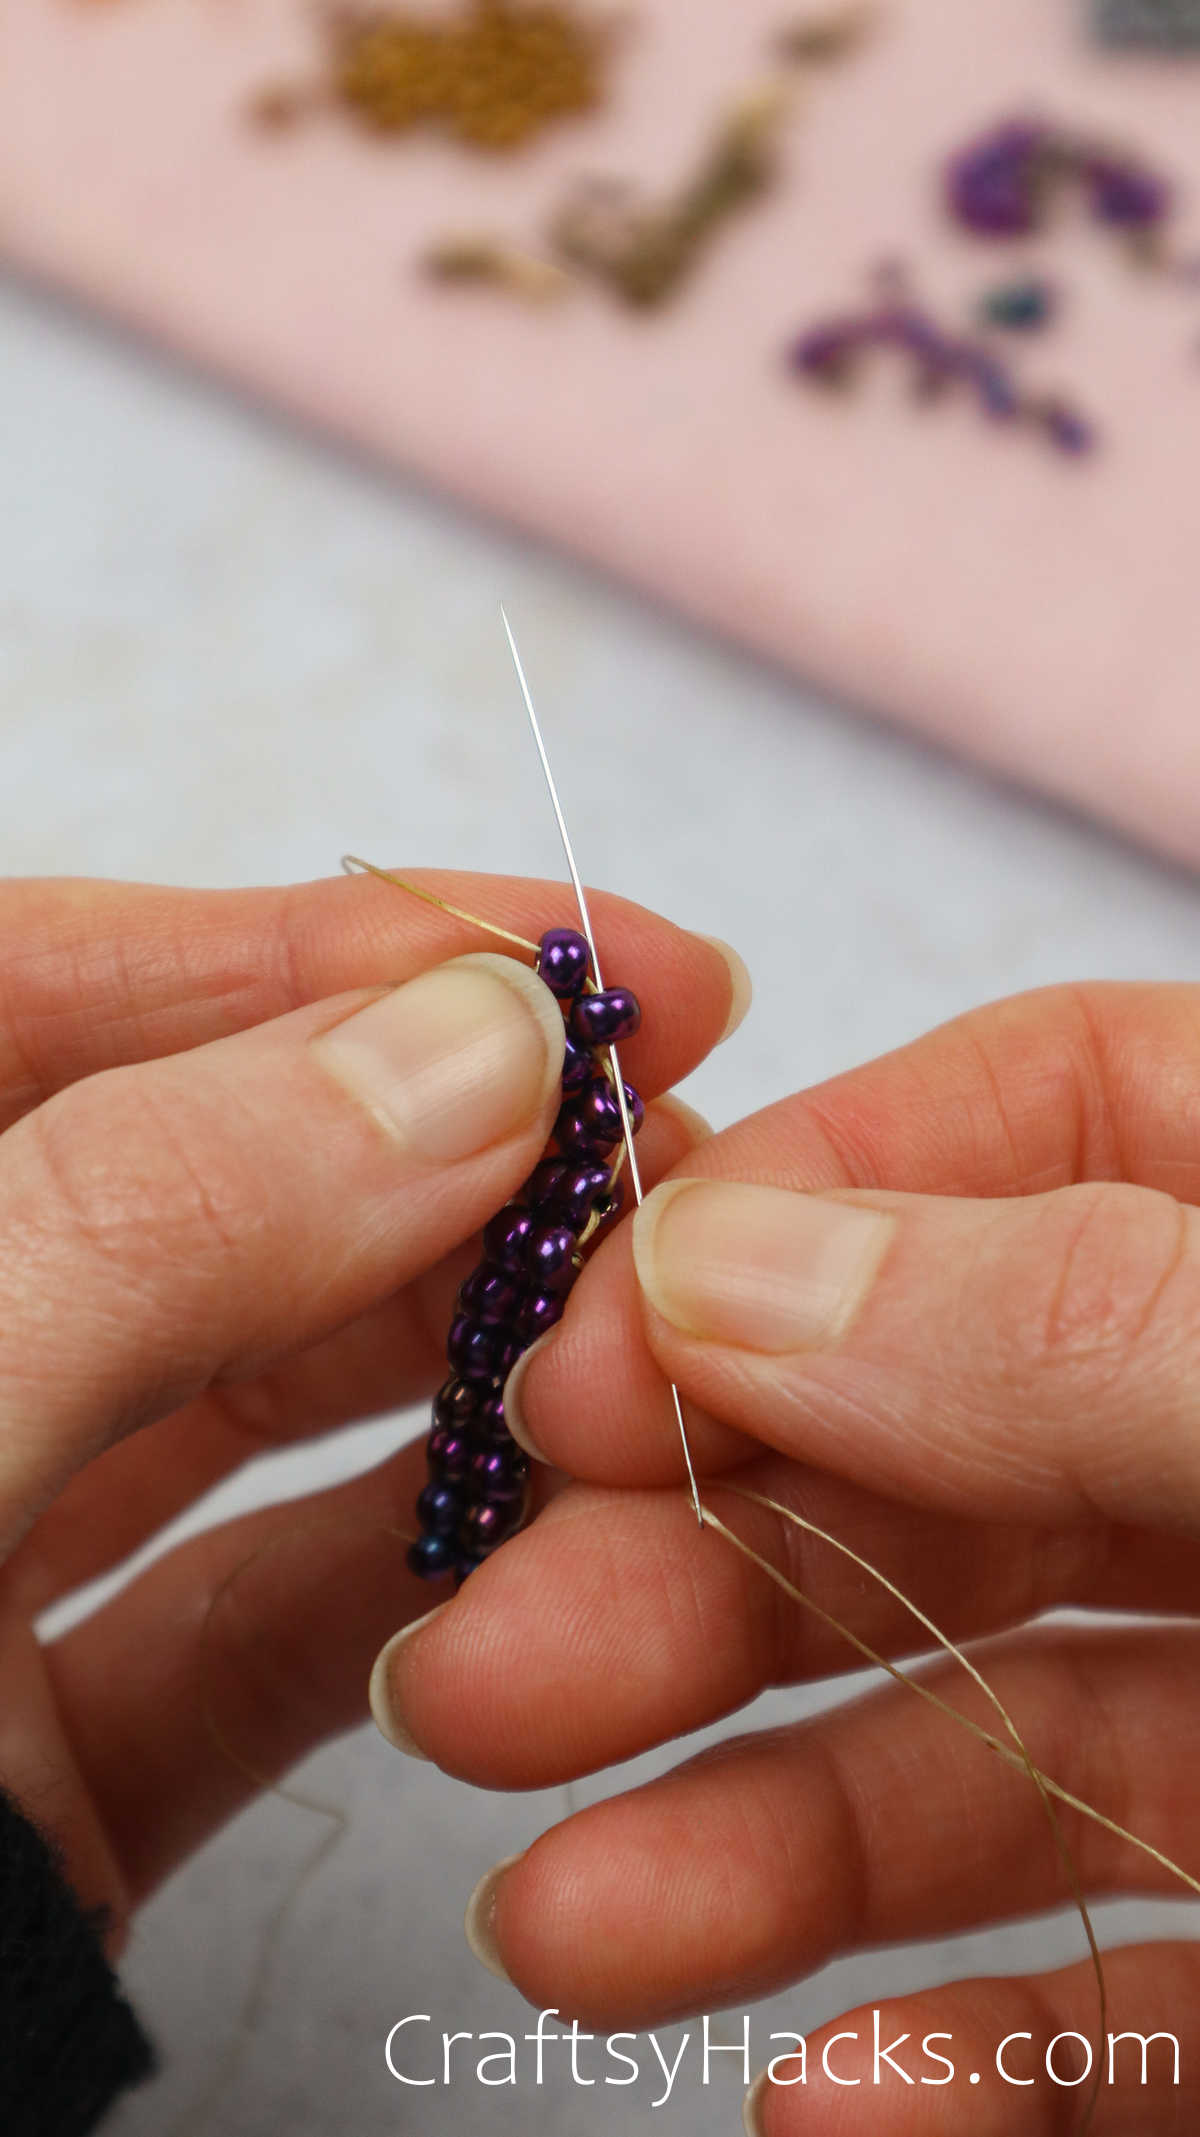
Step 6
This structure is the formula for the majority of the earring. We add two beads to each new round as we continue with the threading pattern.

An essential item to note is the two tails you have going! The right tail, or the dominant hand’s tail, is shrinking.
The other important thing of note is that when you reinforce your beads, you put your needle through an opening that the string didn’t just come out of.
This will create multiple complications.
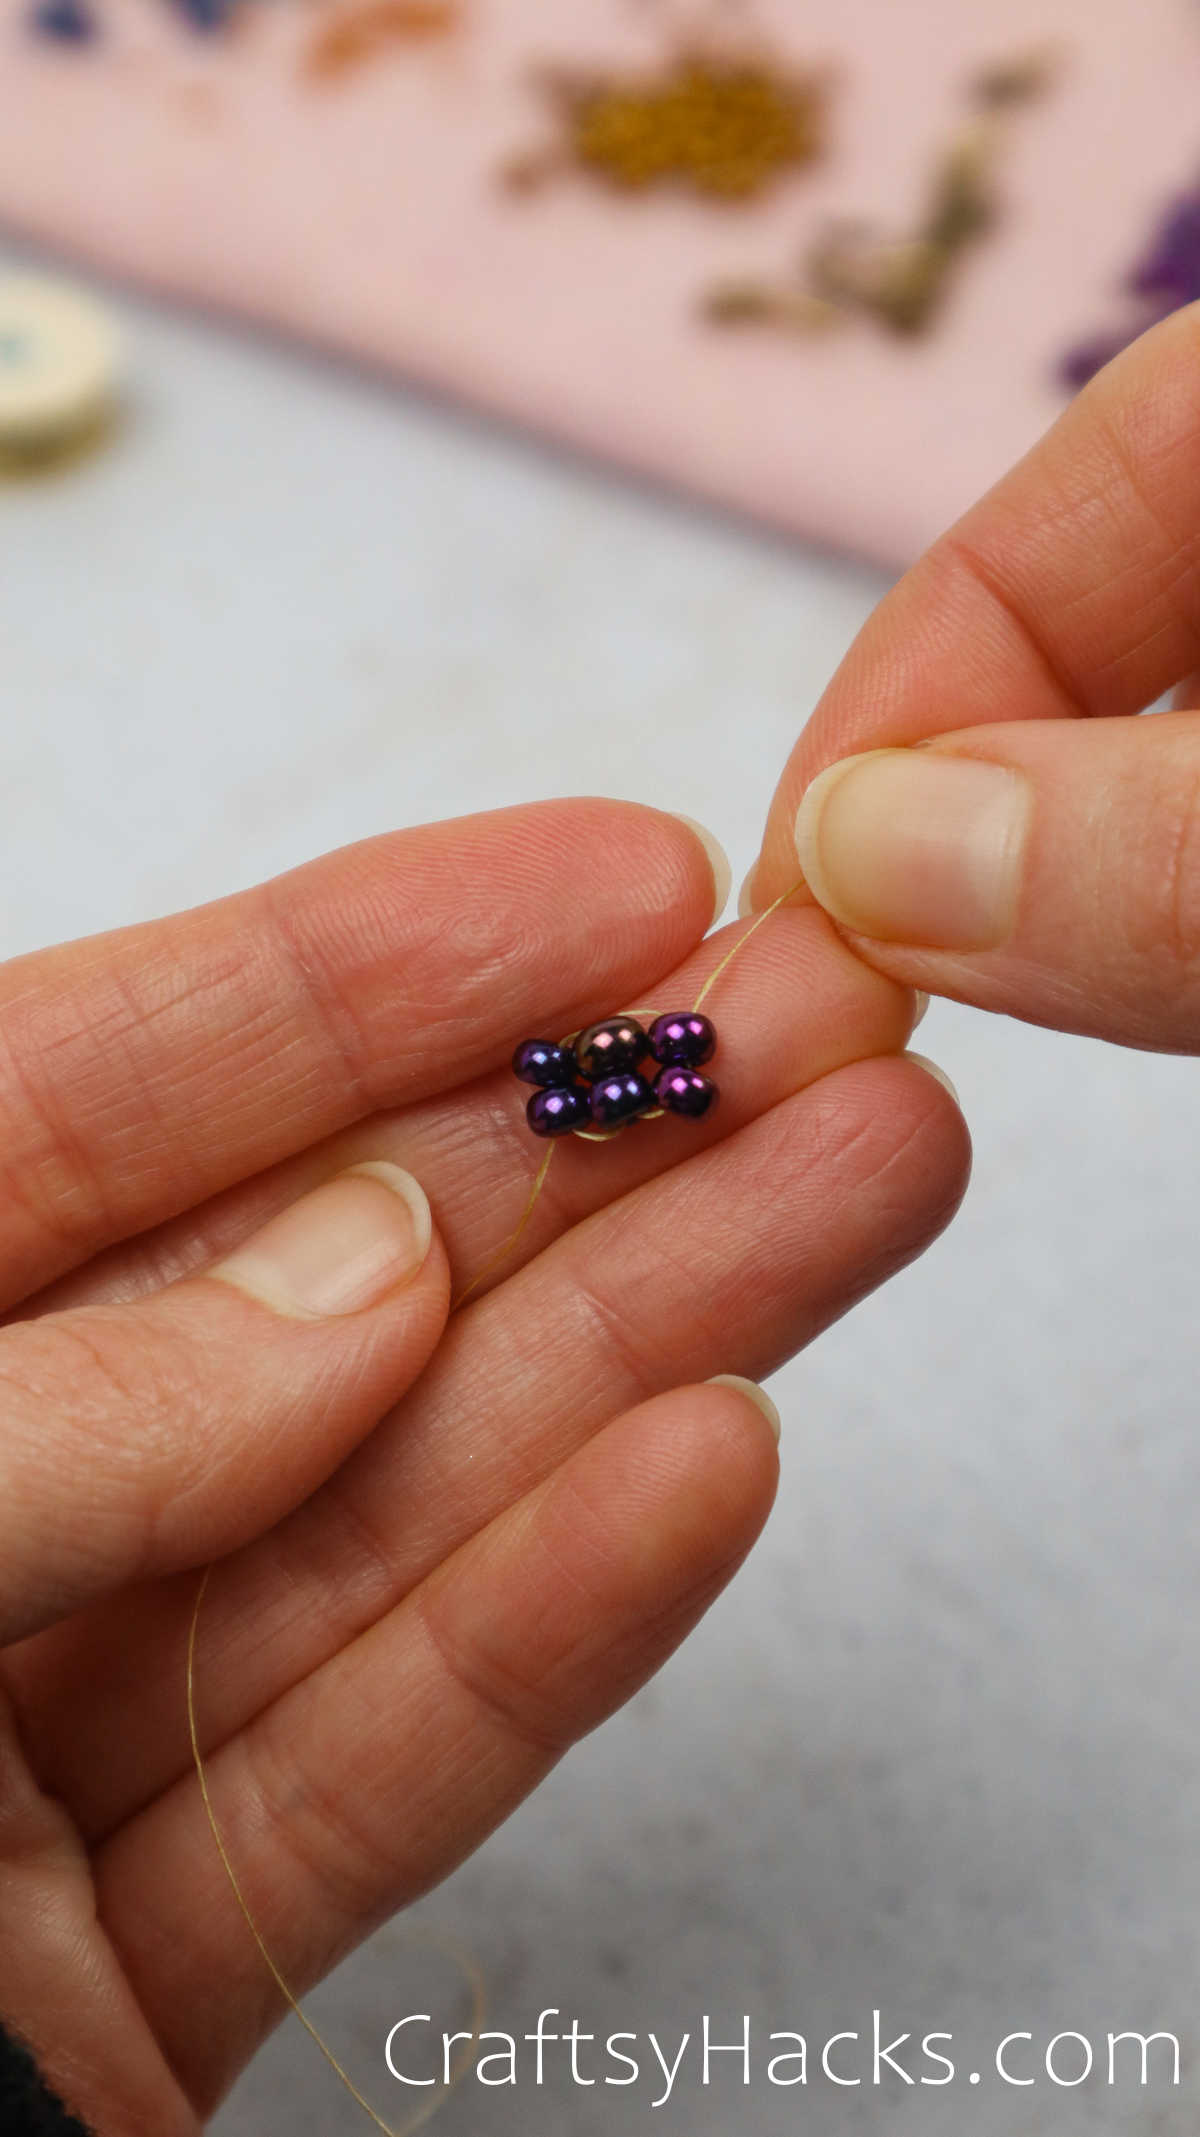
We’ve created our third row at this point, and to secure, just like before, thread through the new row of beads.
Our right tail should be coming out of the top opening of a bead at this point.
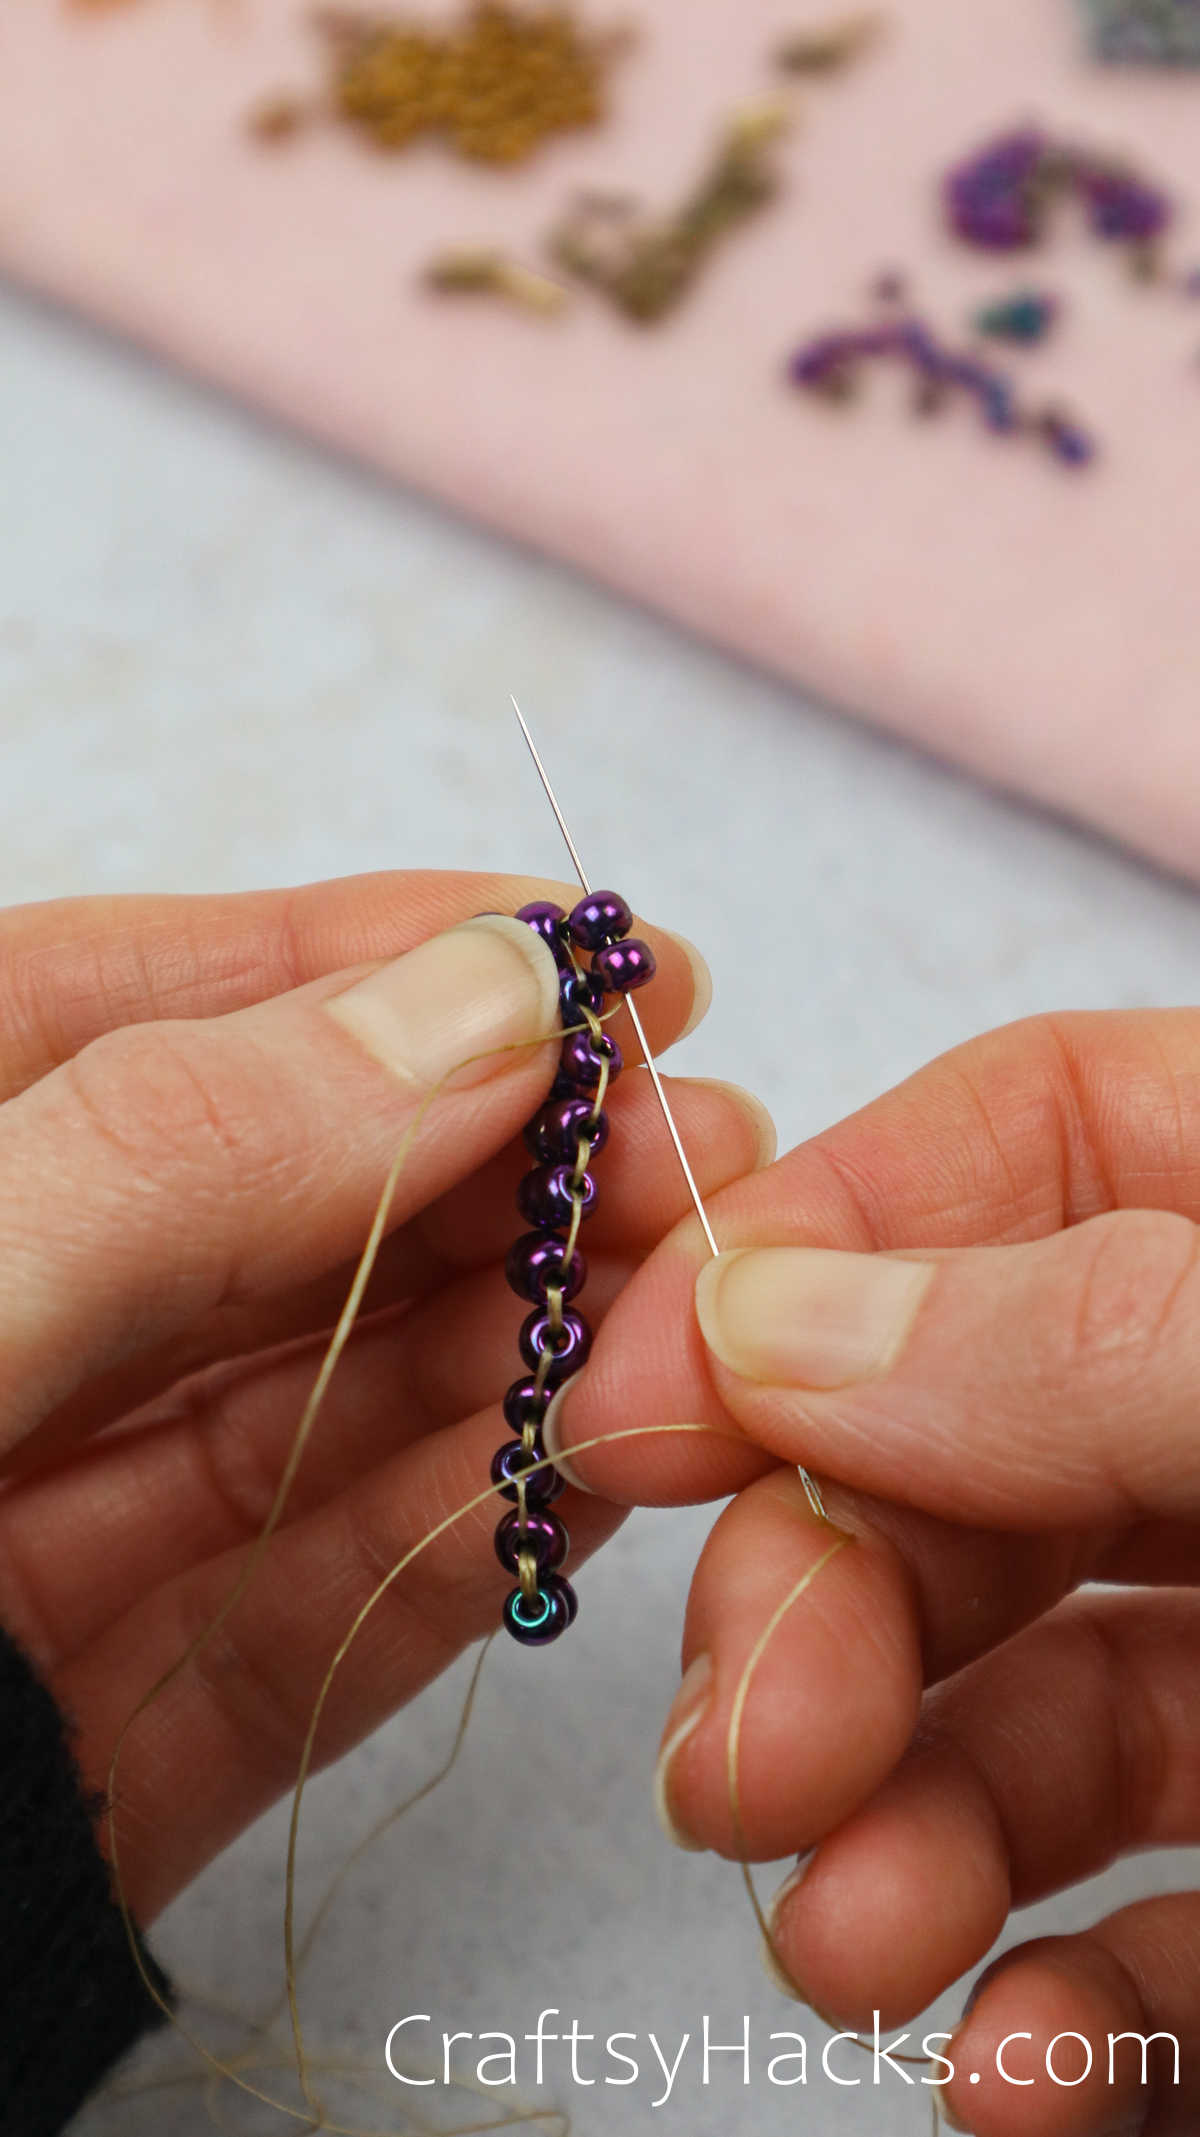
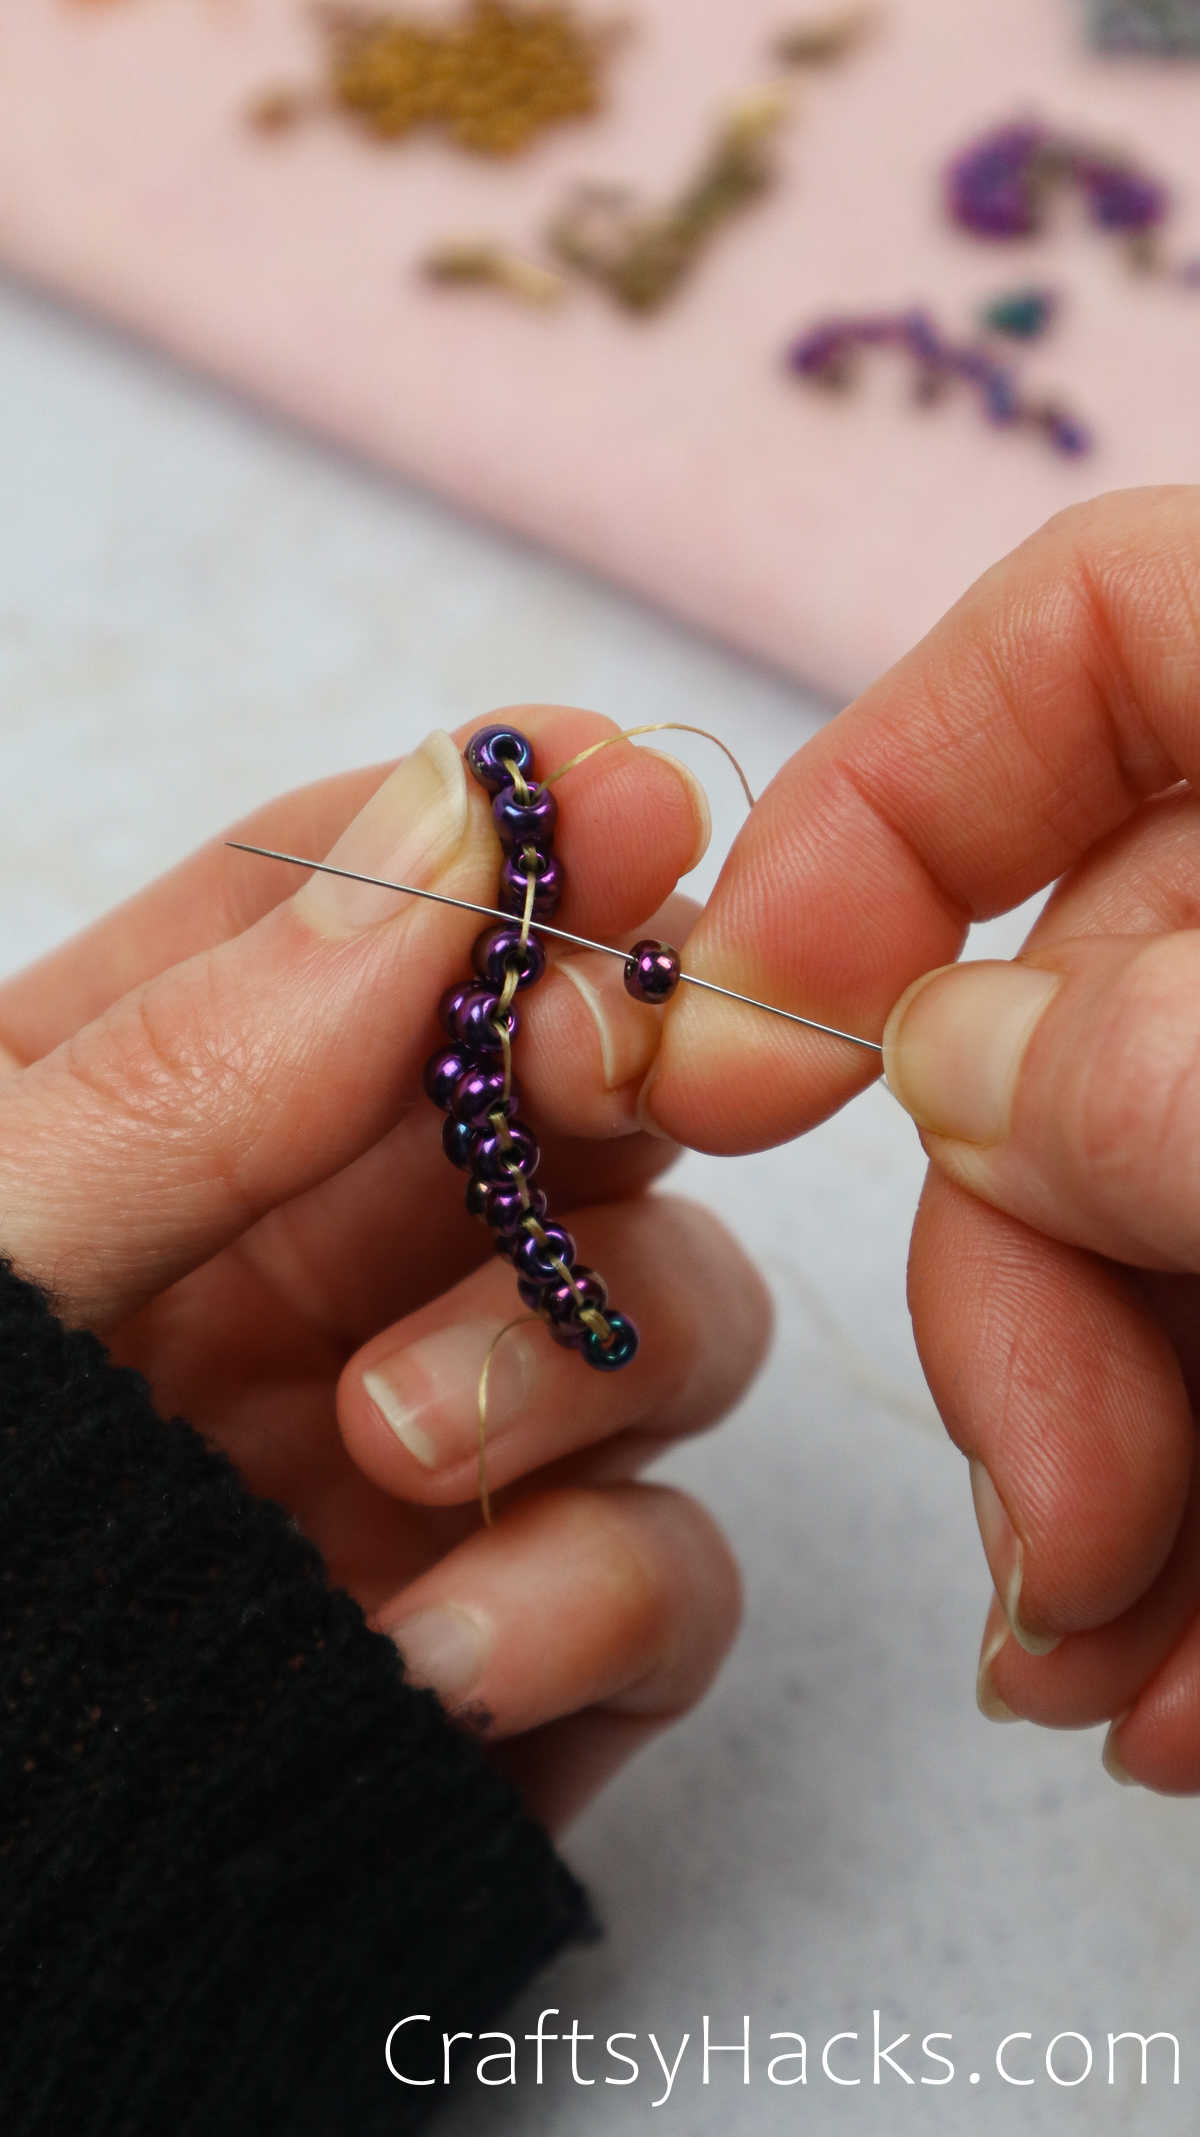
Step 7
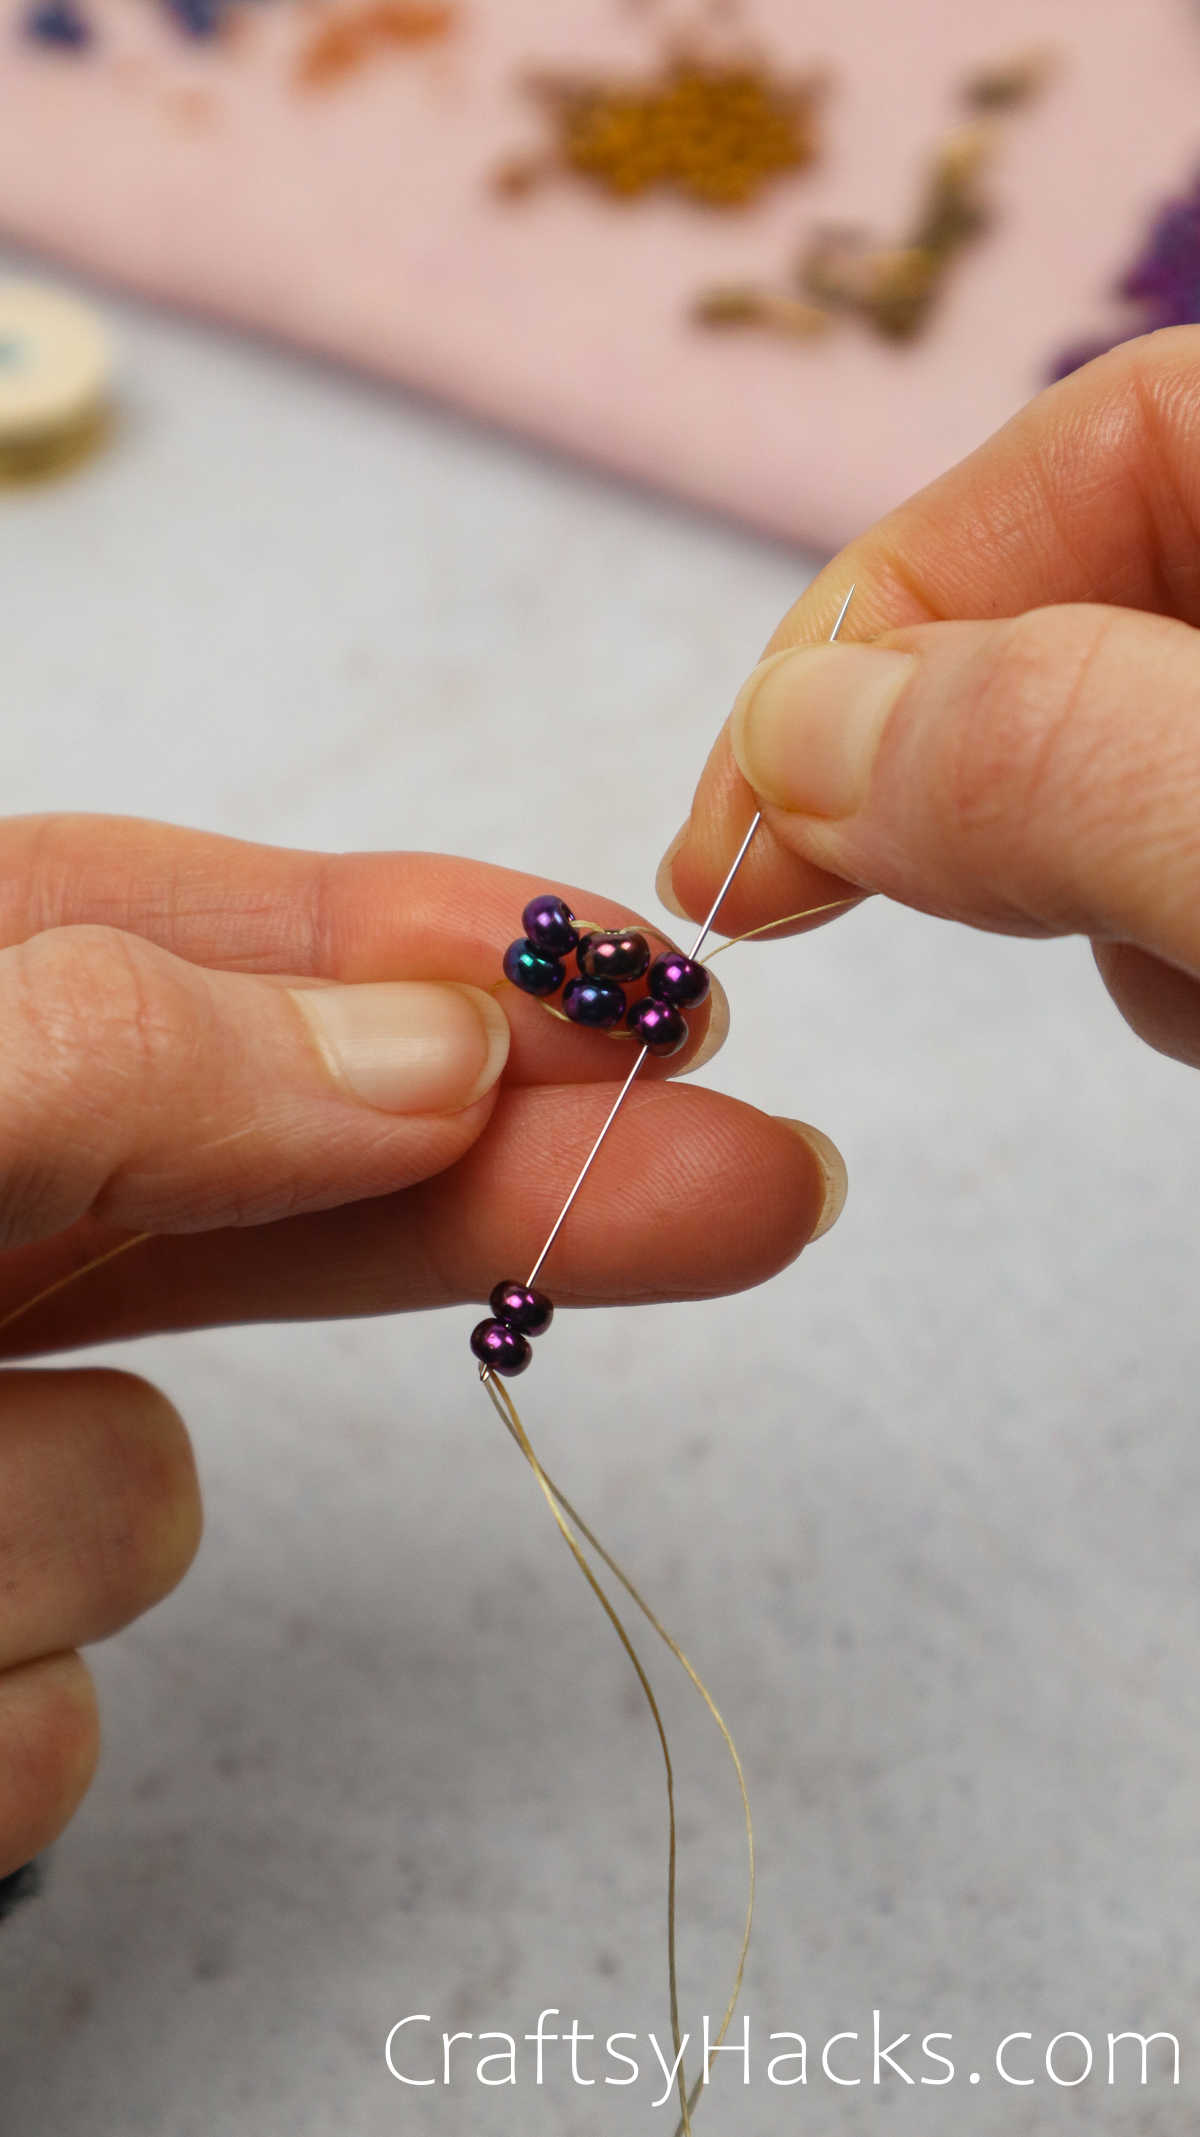
We’ll bring the needle up from the bottom to secure this set and then continue to make another row in the ladder.
Continuing to secure as we go, we’ll repeat this step until a full ladder has formed.
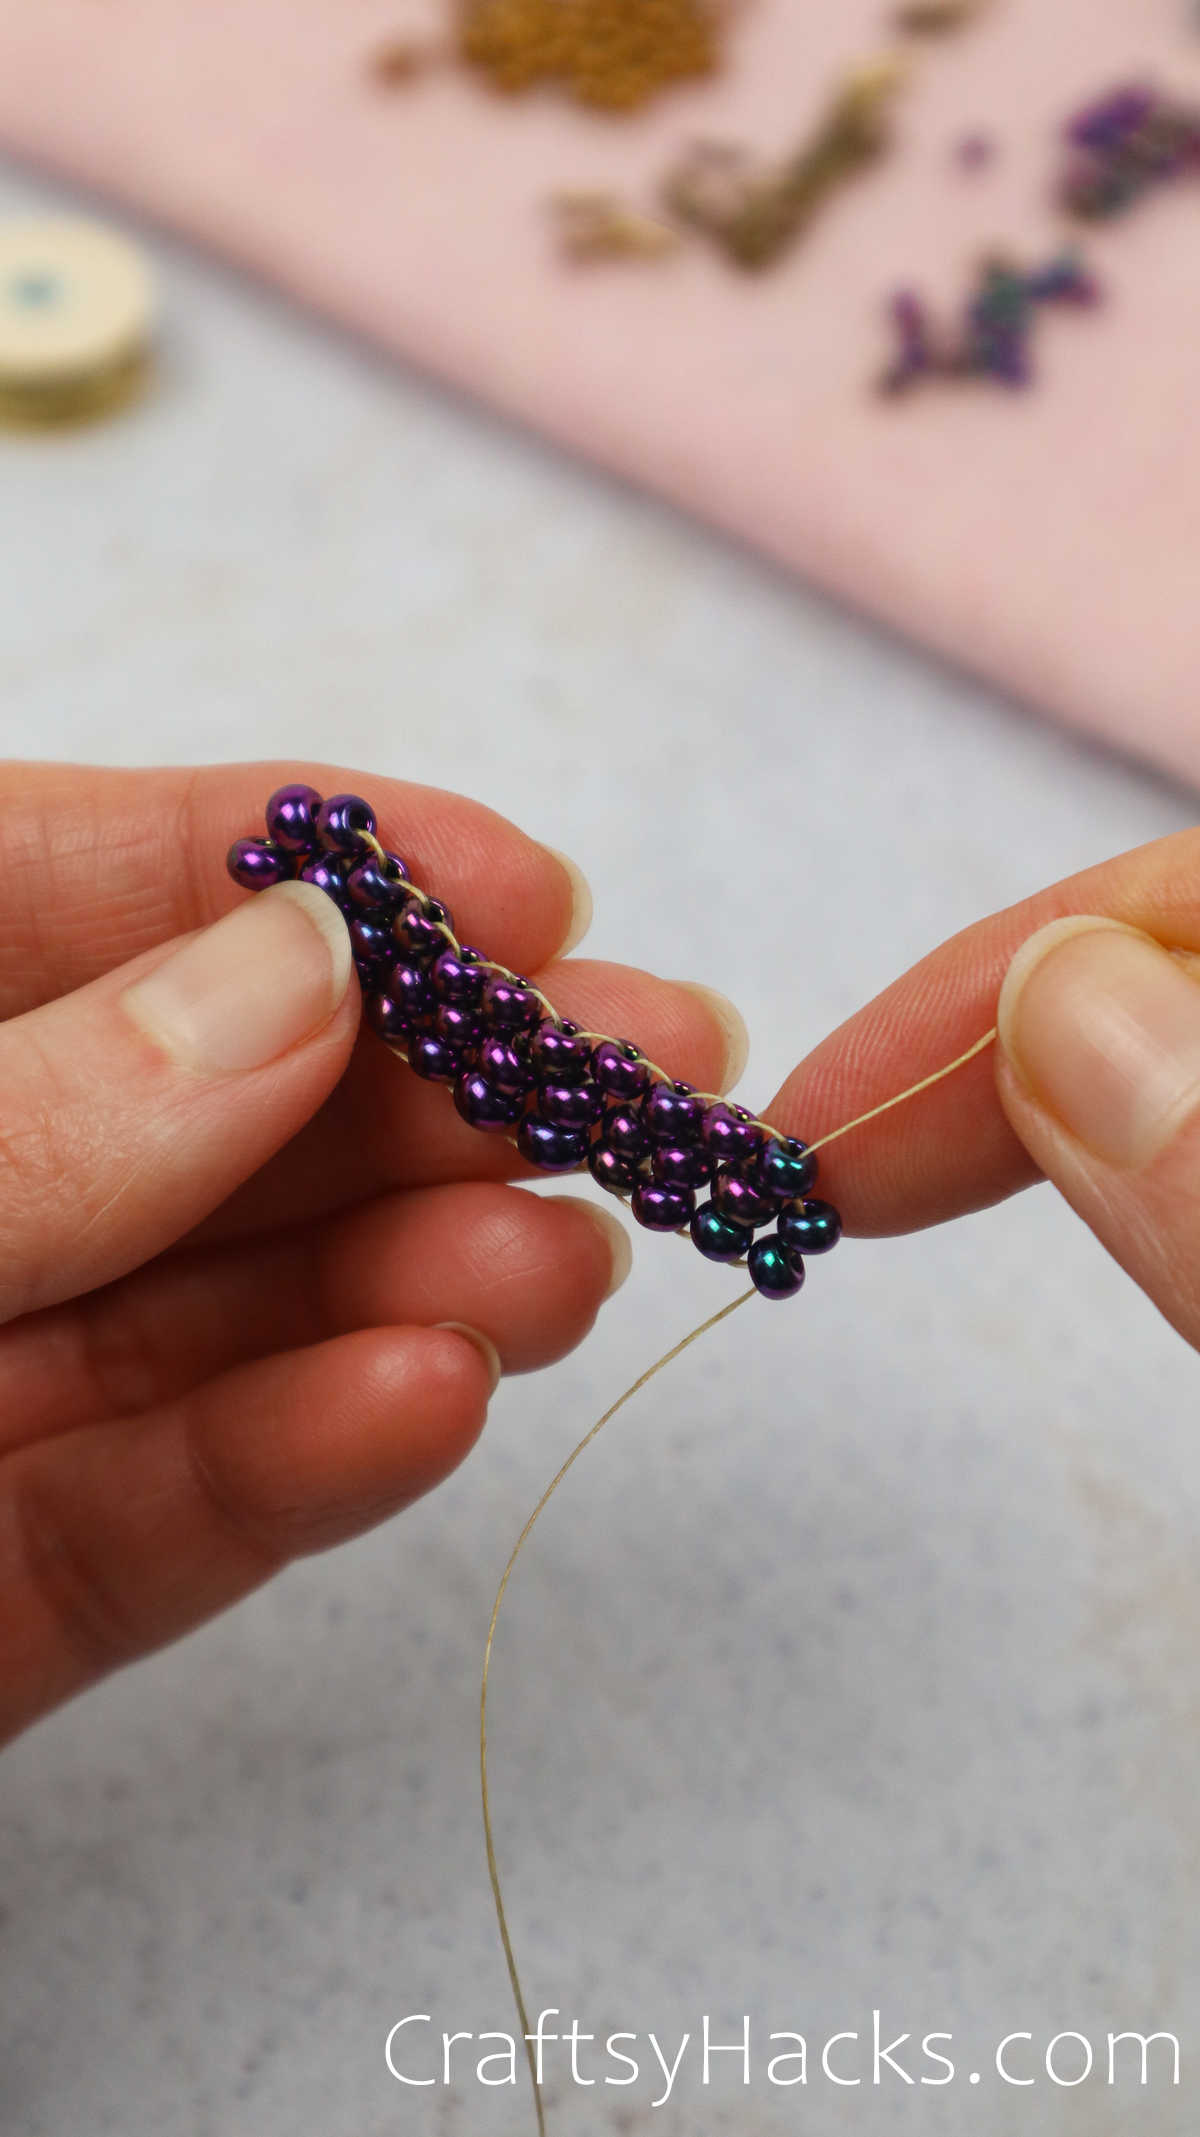
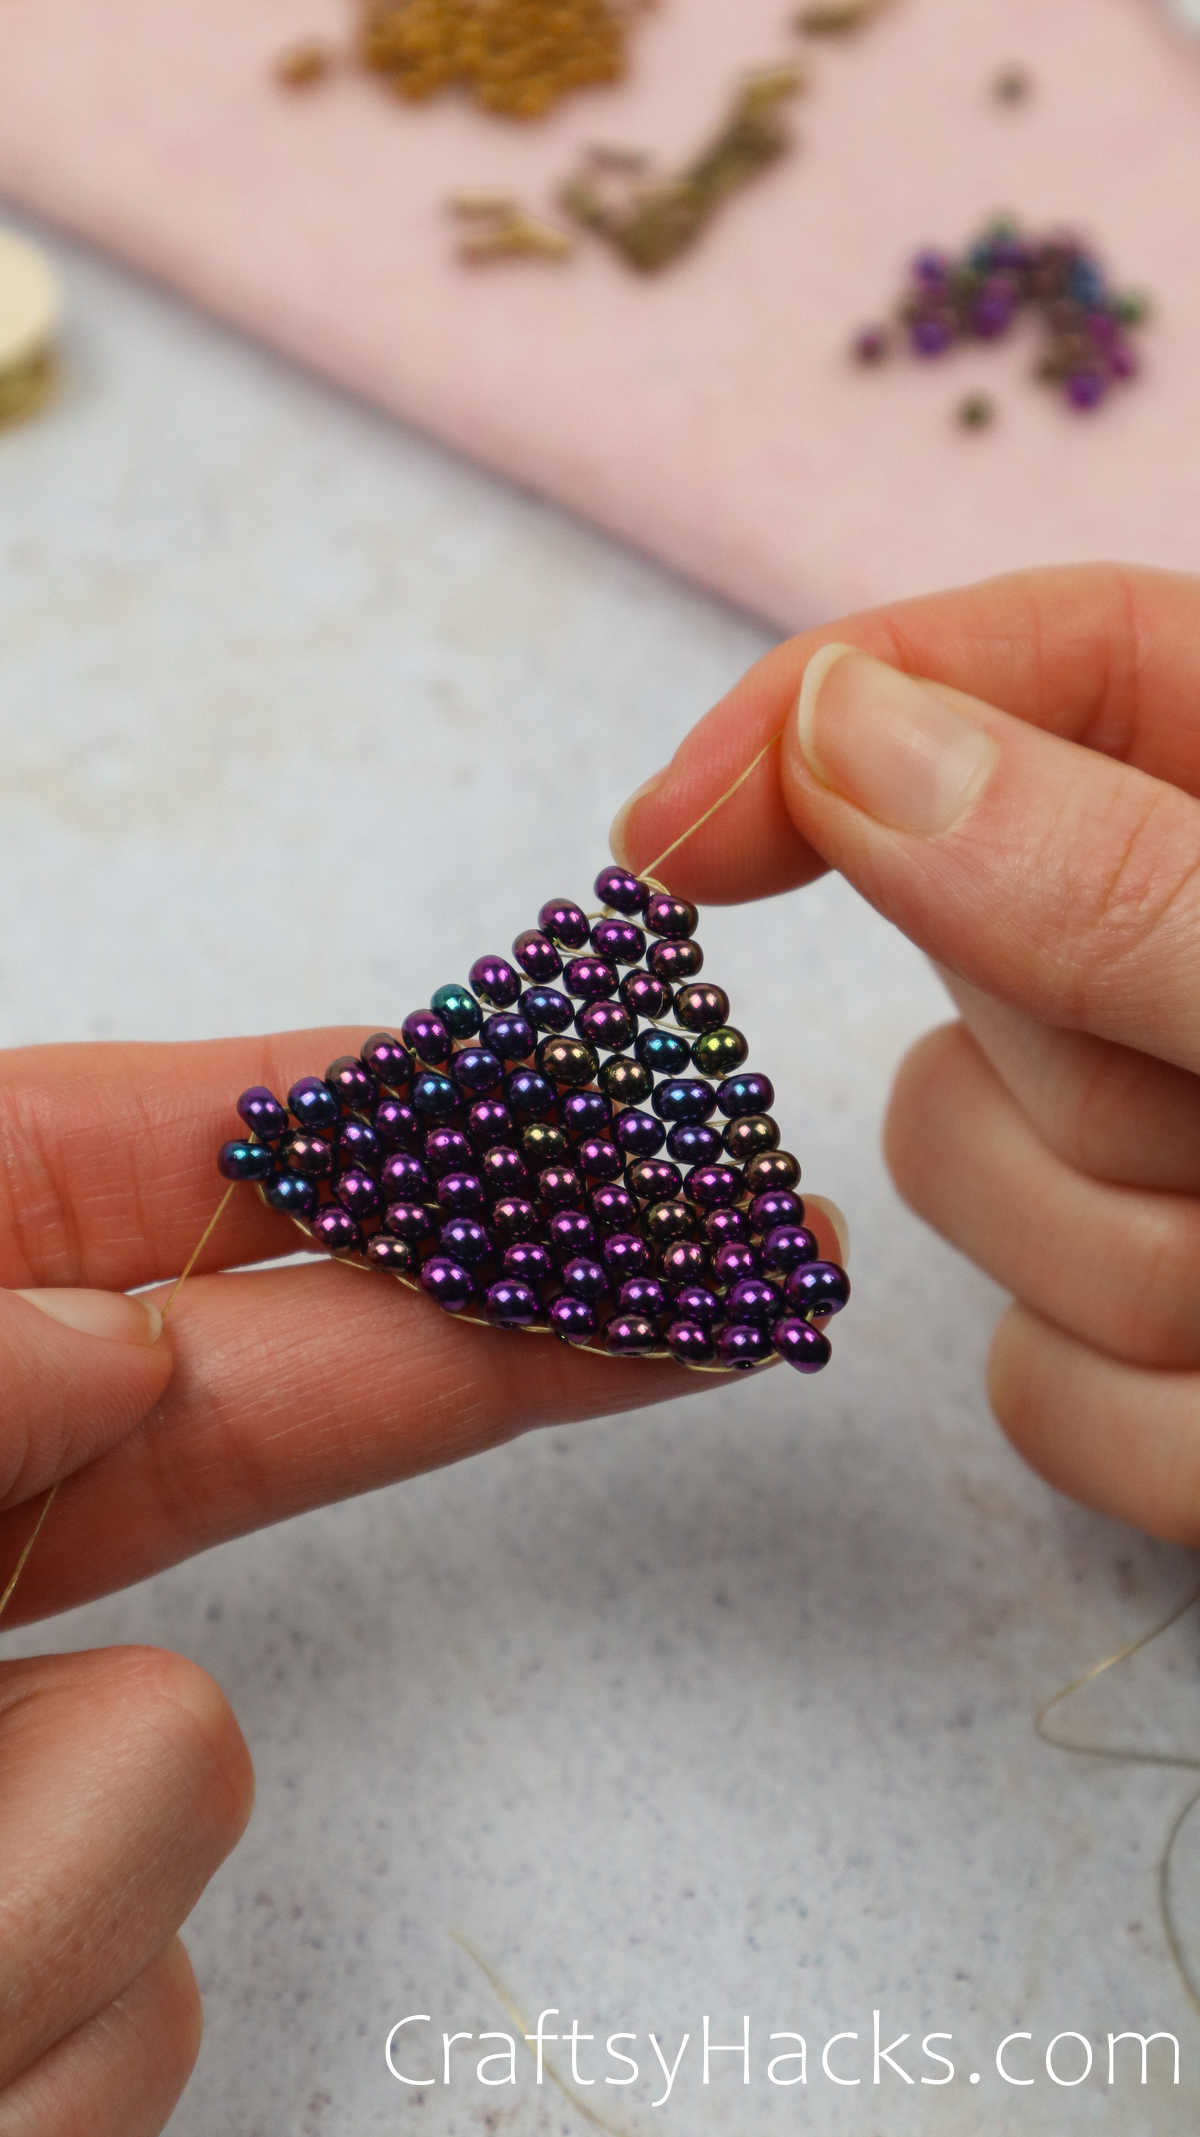
Repeat this step to build the ladder until an ODD number of rows has been created. I’ve decided to have eleven for this set of earrings.

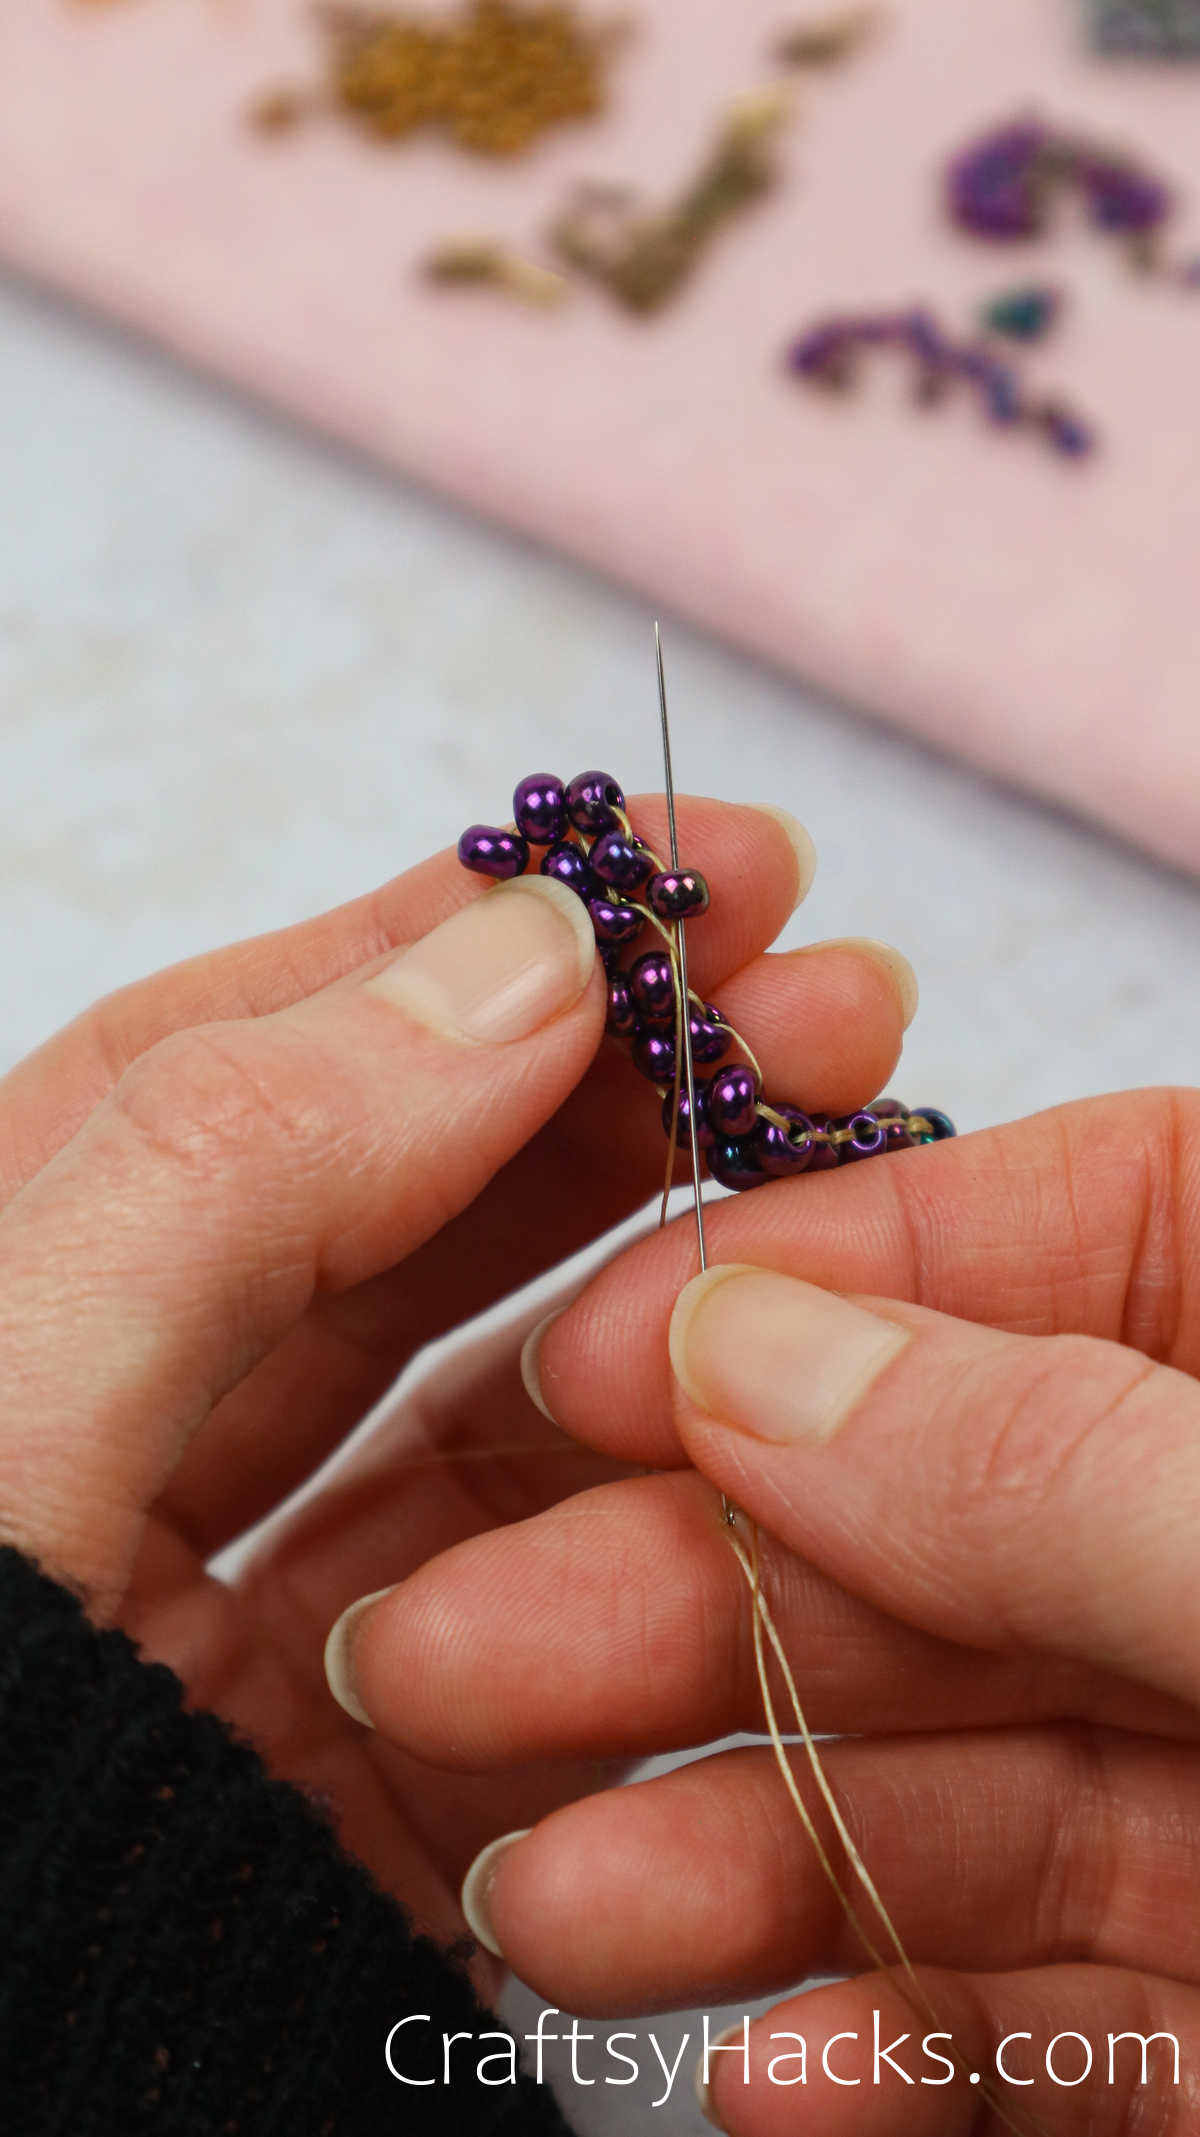
Continuation of building my ladder.
Continuation of the initial ladder.
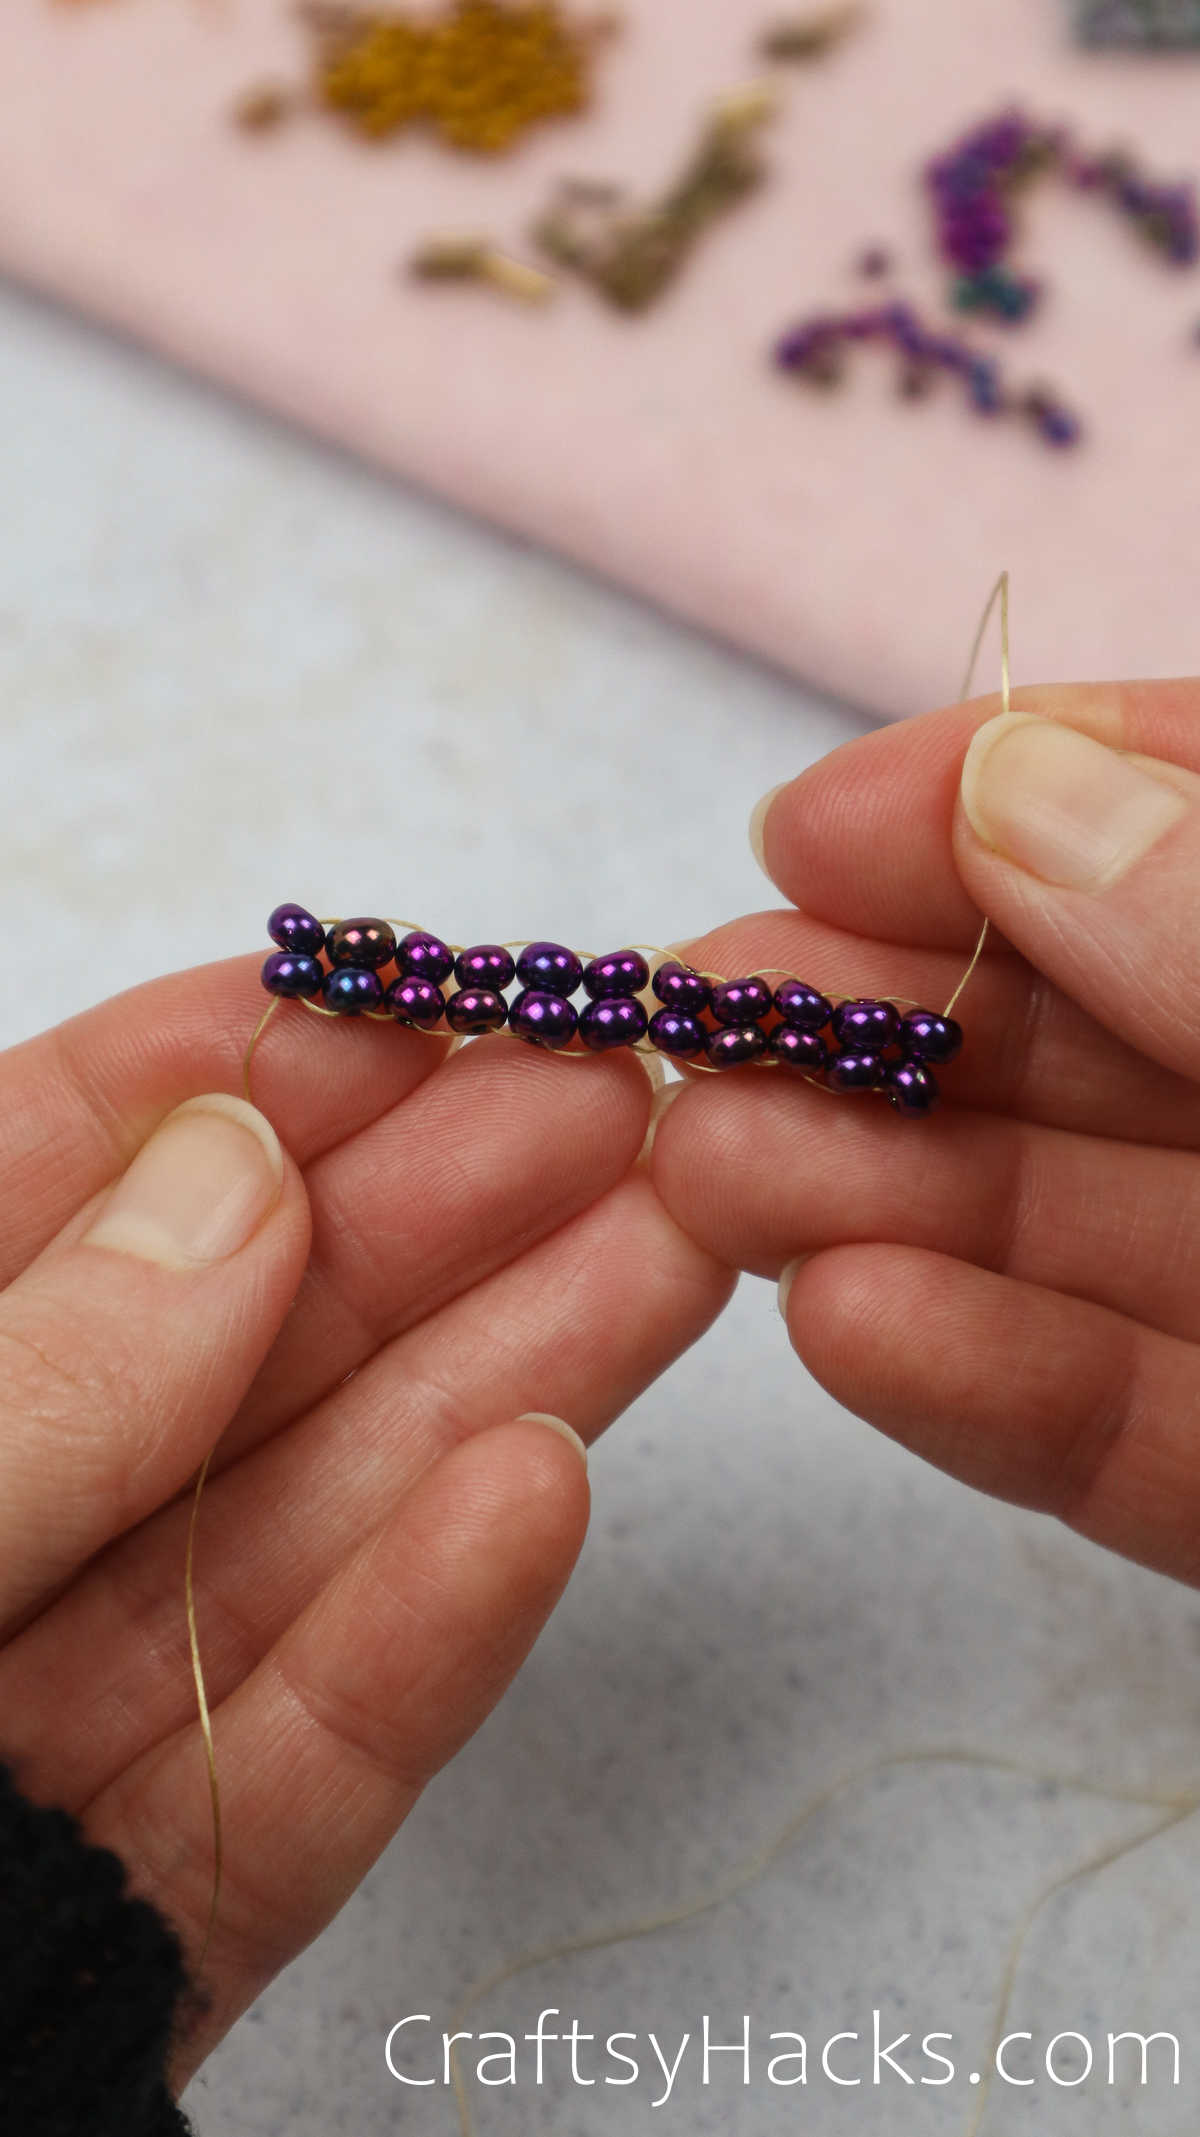
What my full ladder looks like when completed.
Now that the ladder has gotten done, it’s time to prepare for the next progression of forming the earring.
Before we start with two new beads, look to ensure everything looks good before moving forward.
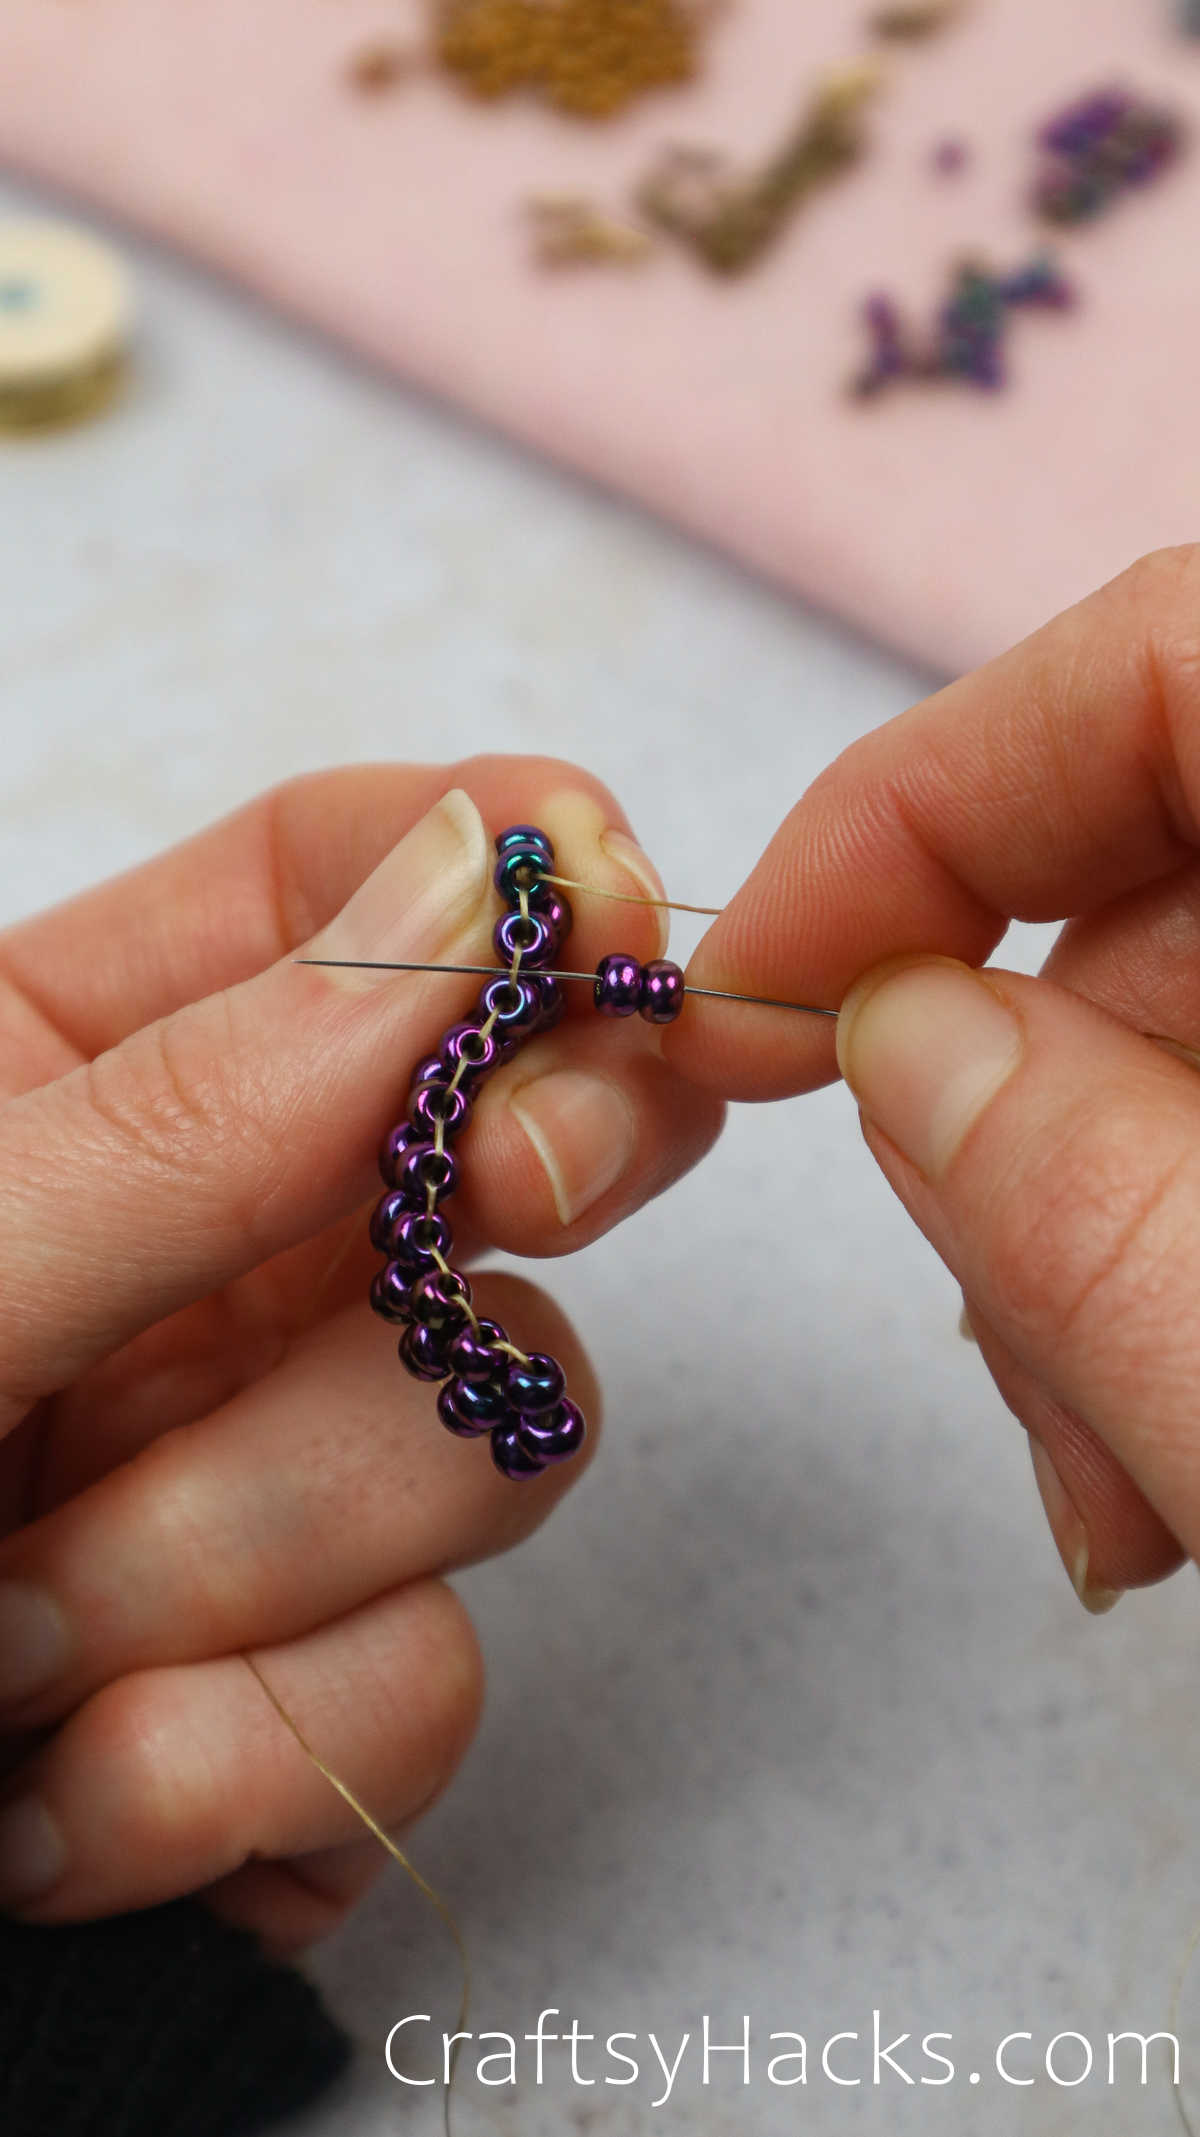
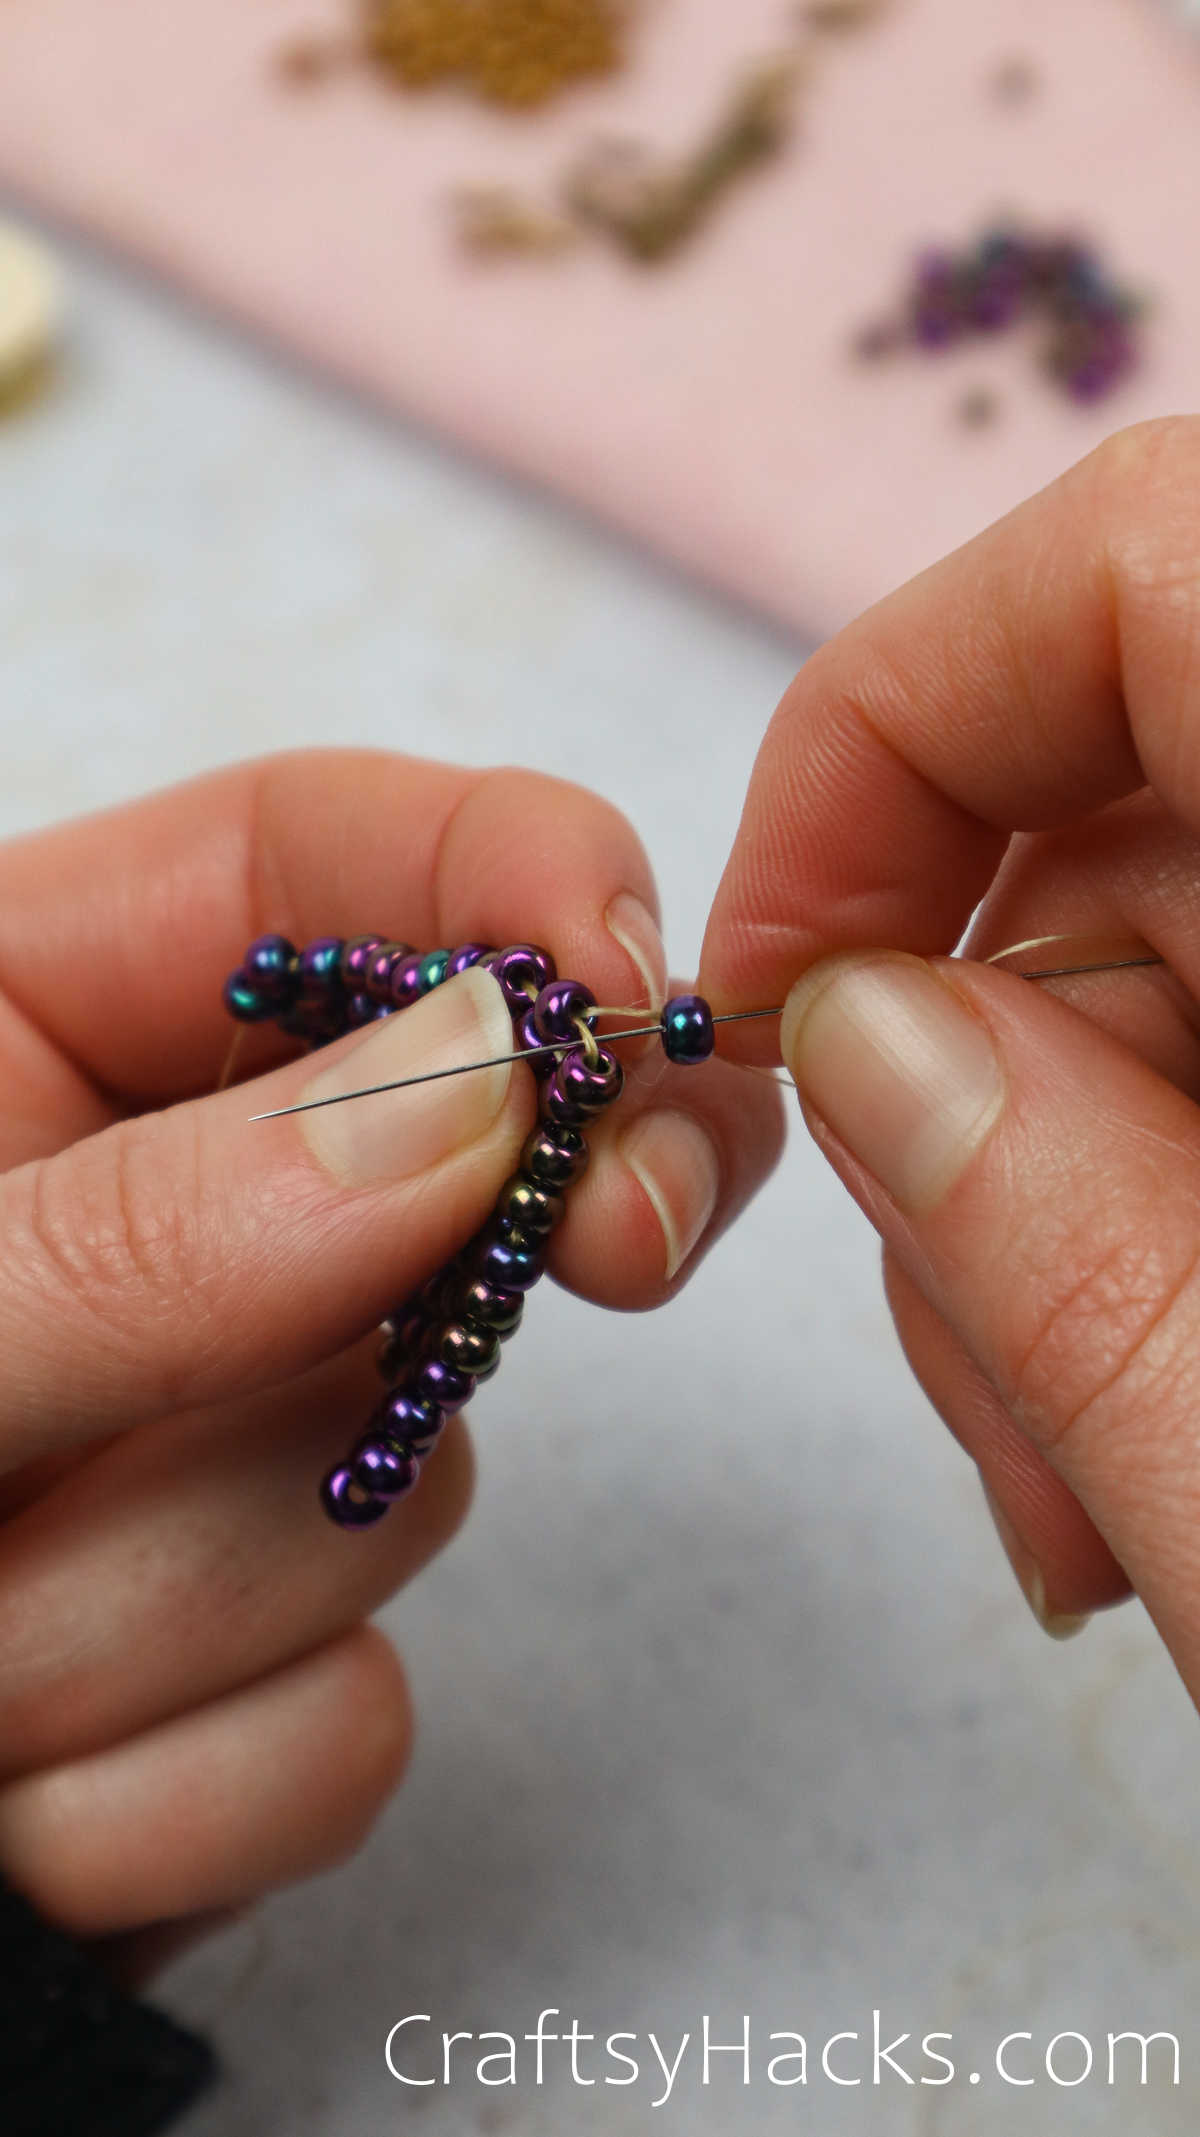
Step 8
It’s important to note in this picture that we are not looking to thread our needle through the first thread bridge between beads but the second.
As mentioned, this is the bridge we would like to thread two new beads into by coming up from underneath the ladder.
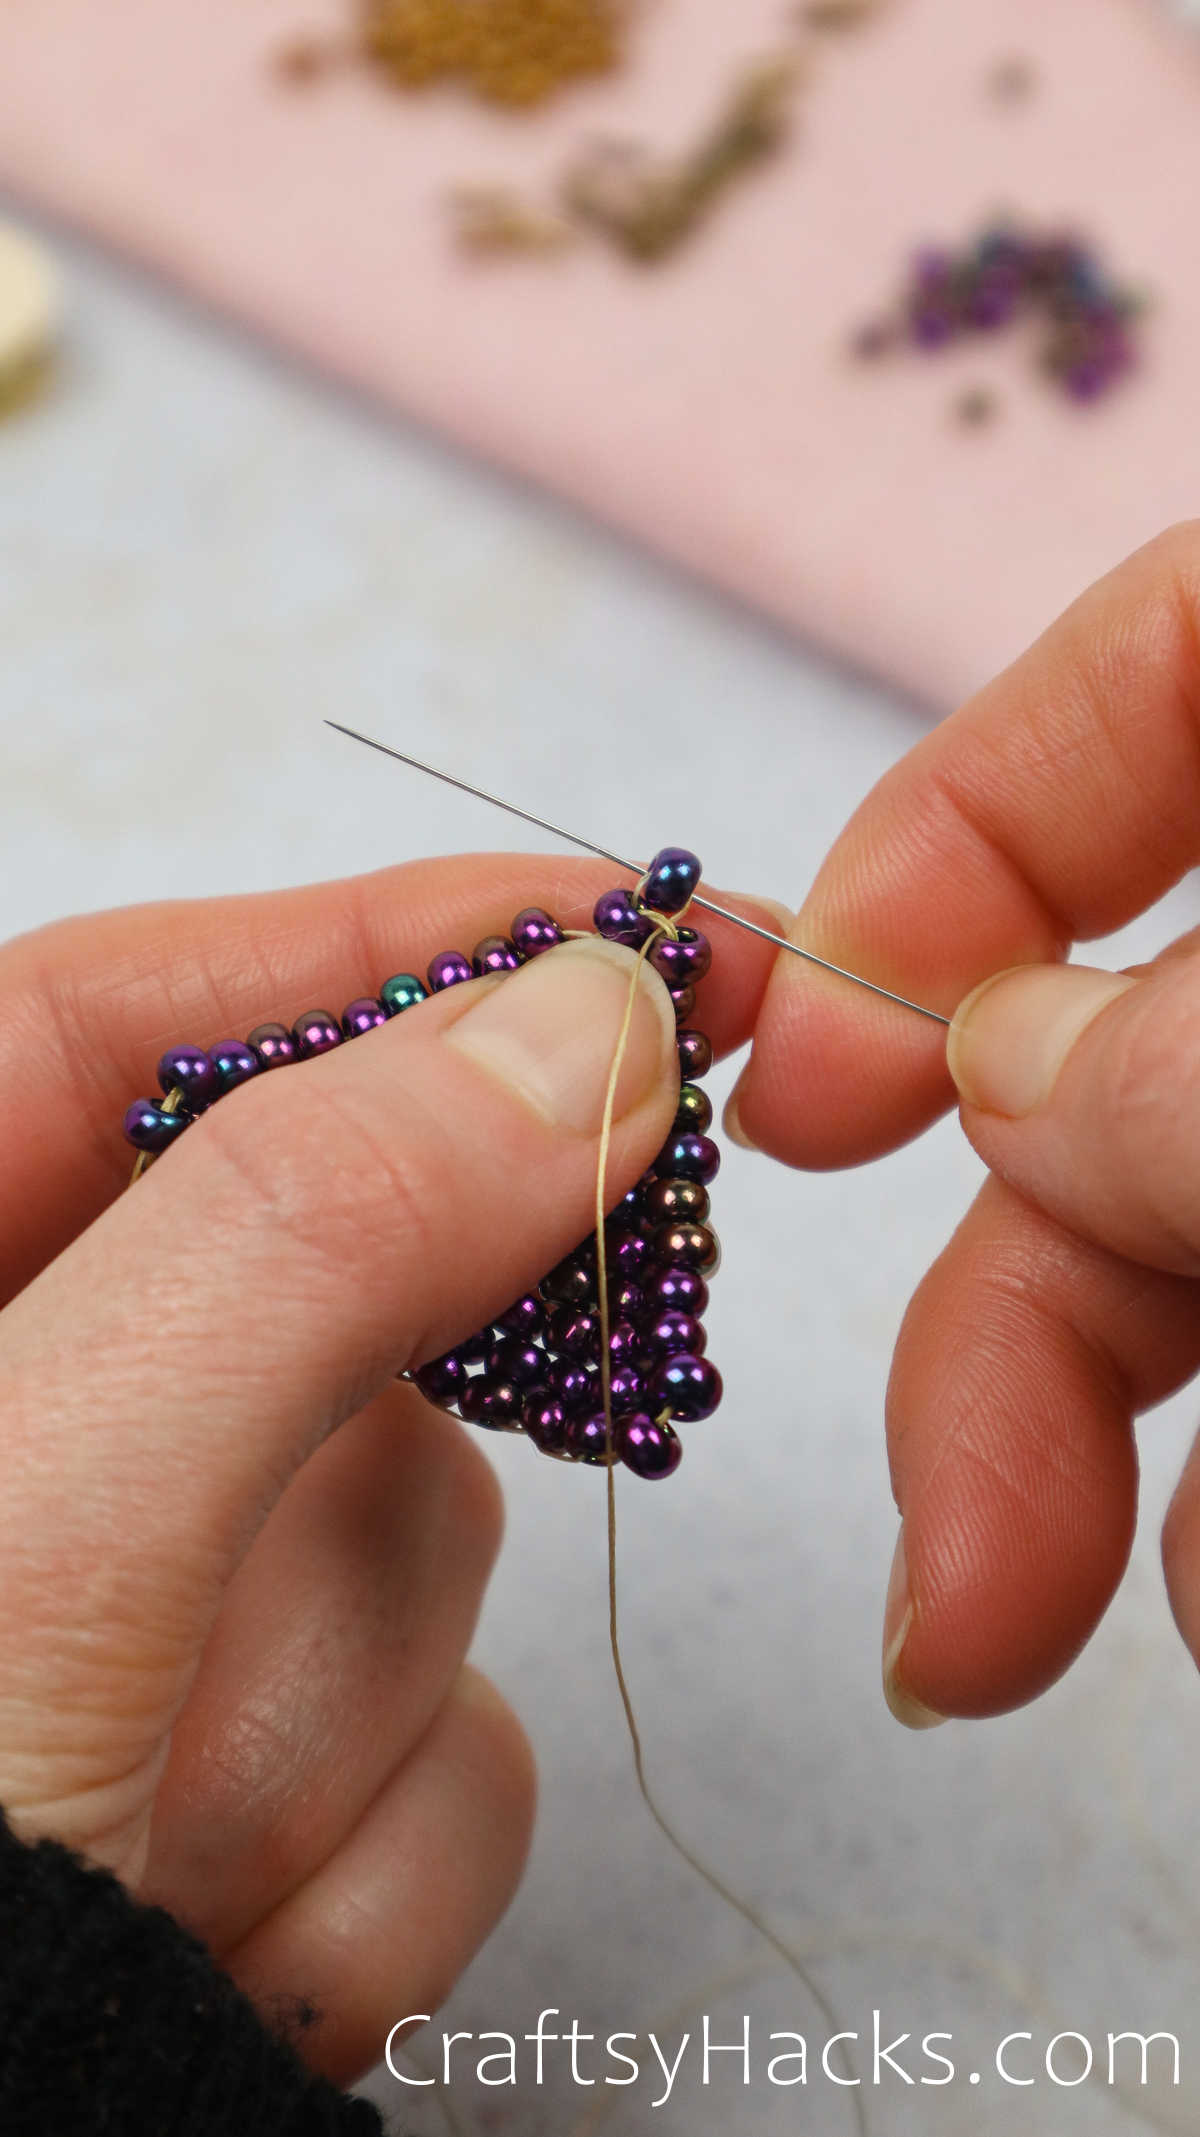
Step 9
Threading from the underside, we are now connecting multiple rows–the way to create the diamond shape of the earrings.
Then, we’ll thread right through the two beads to connect them to the rest of the network.
Pull the whole thing tight.
To have everything come together nicely and have the beads lay flat, continue by only going through the second bead and pulling it tight.
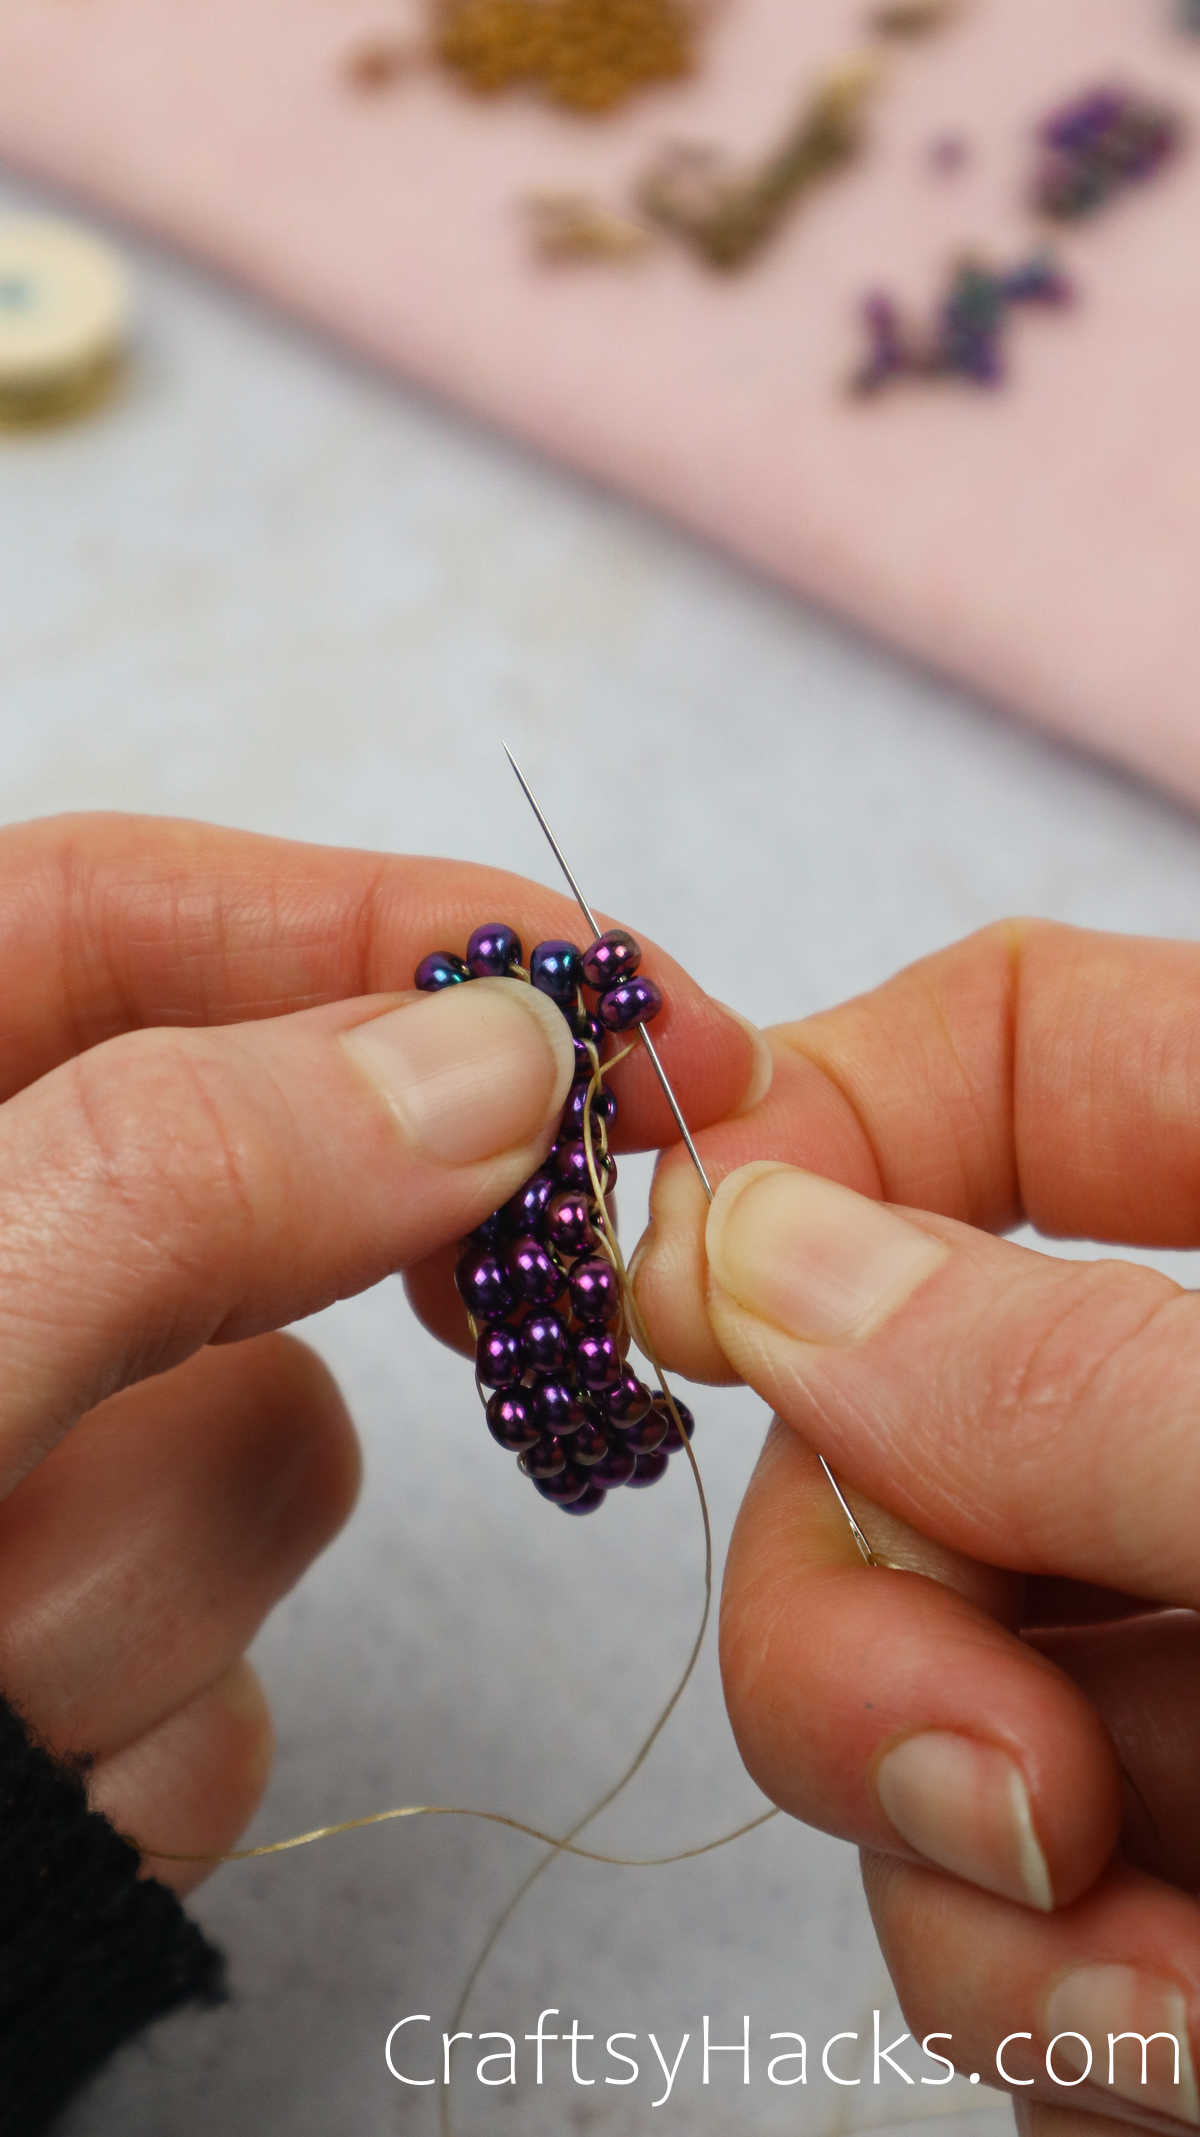
Step 10

Continue the weaving motion of the needle and practice until you’ve created a flower-esque-looking shape.
From here on out, we’ll be adding one bead at a time. This time is also perfect to ensure your earrings look right and work anything out.
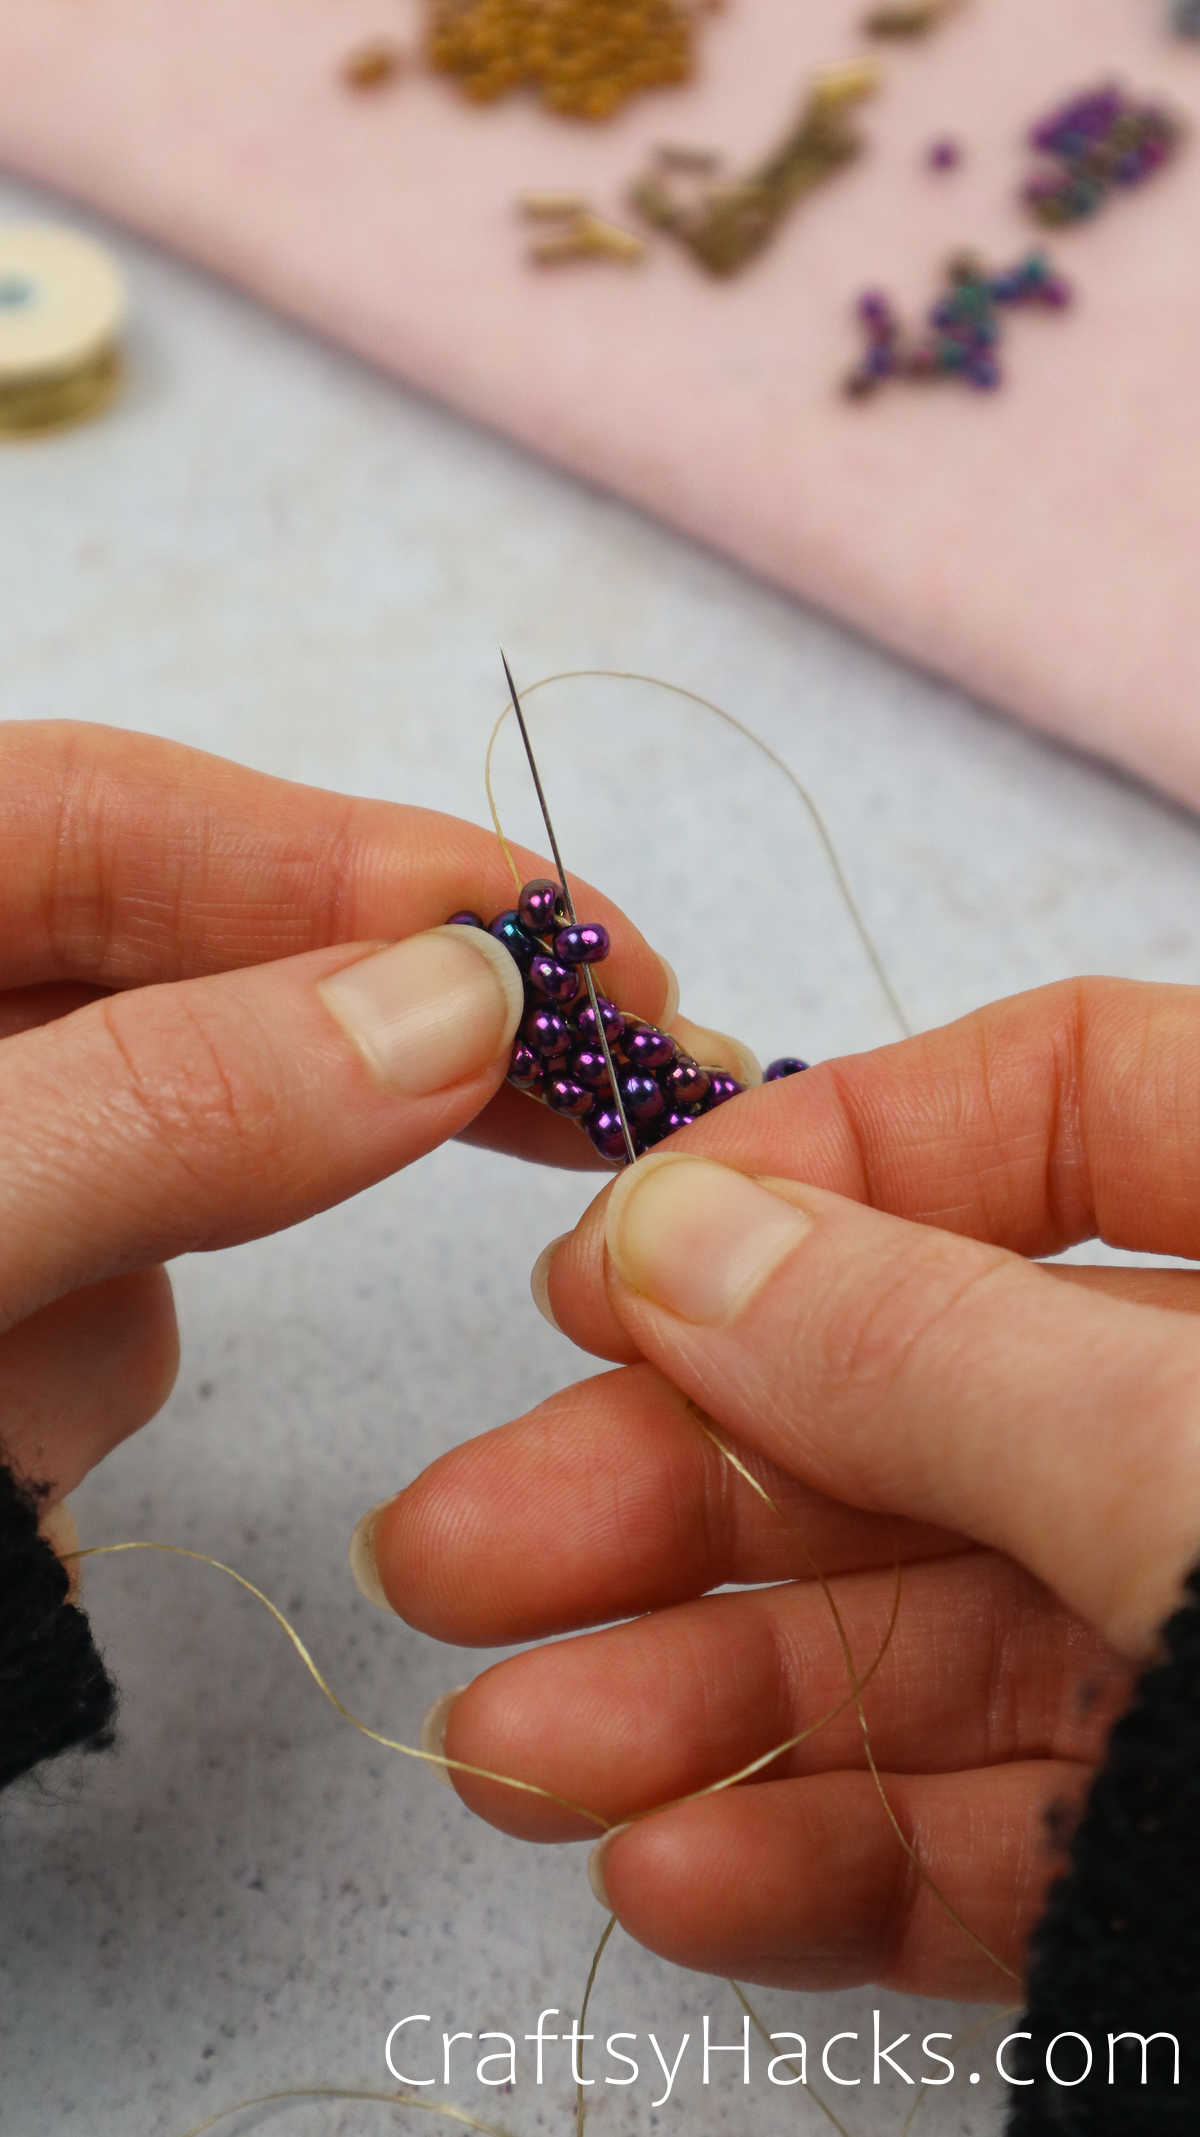
Step 11
Pull up through the bridge and go back up, so the bead is situated next to all the other beads.
Step 12
Repeat the threading process with one bead, skipping the first gap between beads.
Step 13
Continue building outward and down with a tapered edge to look like a triangle.
Step 14
Continue working with one bead as you get things situated until you’ve reached the peak.
Continuation of the triangles as they taper towards the top.
Remember, always weave into an empty bead hole with your needle, and we don’t want to unthread or tangle by heading back into a bead your needle just came out.
Continuation and example of the first triangle getting formed.
Step 15
Finish your first triangle with the bead on top.
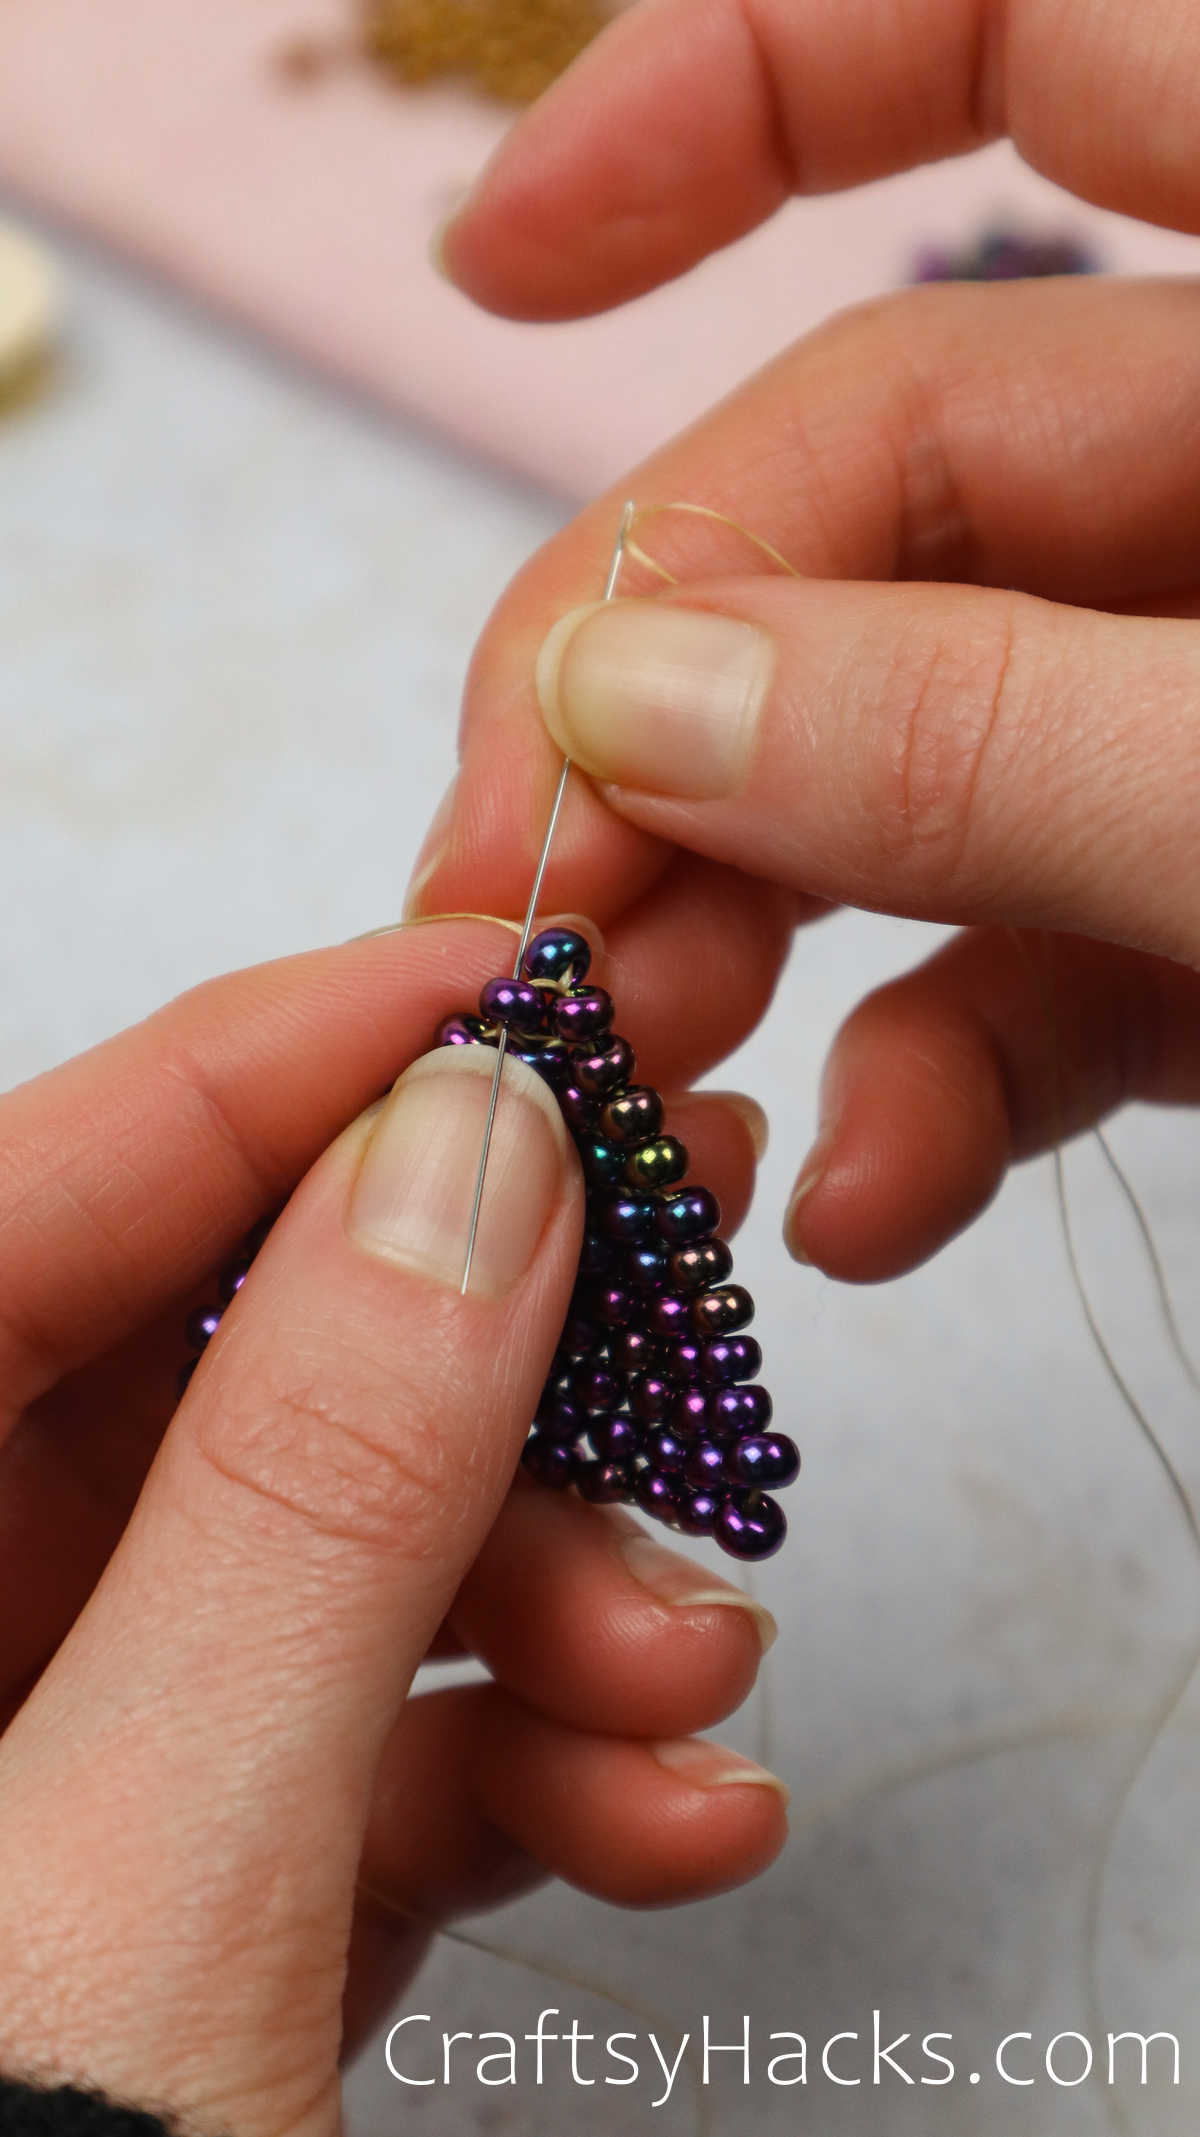
Don’t forget to secure your earrings! Loop the top into other bead parts of the picture.
Step 16
Secure in the top beads below the very top one.
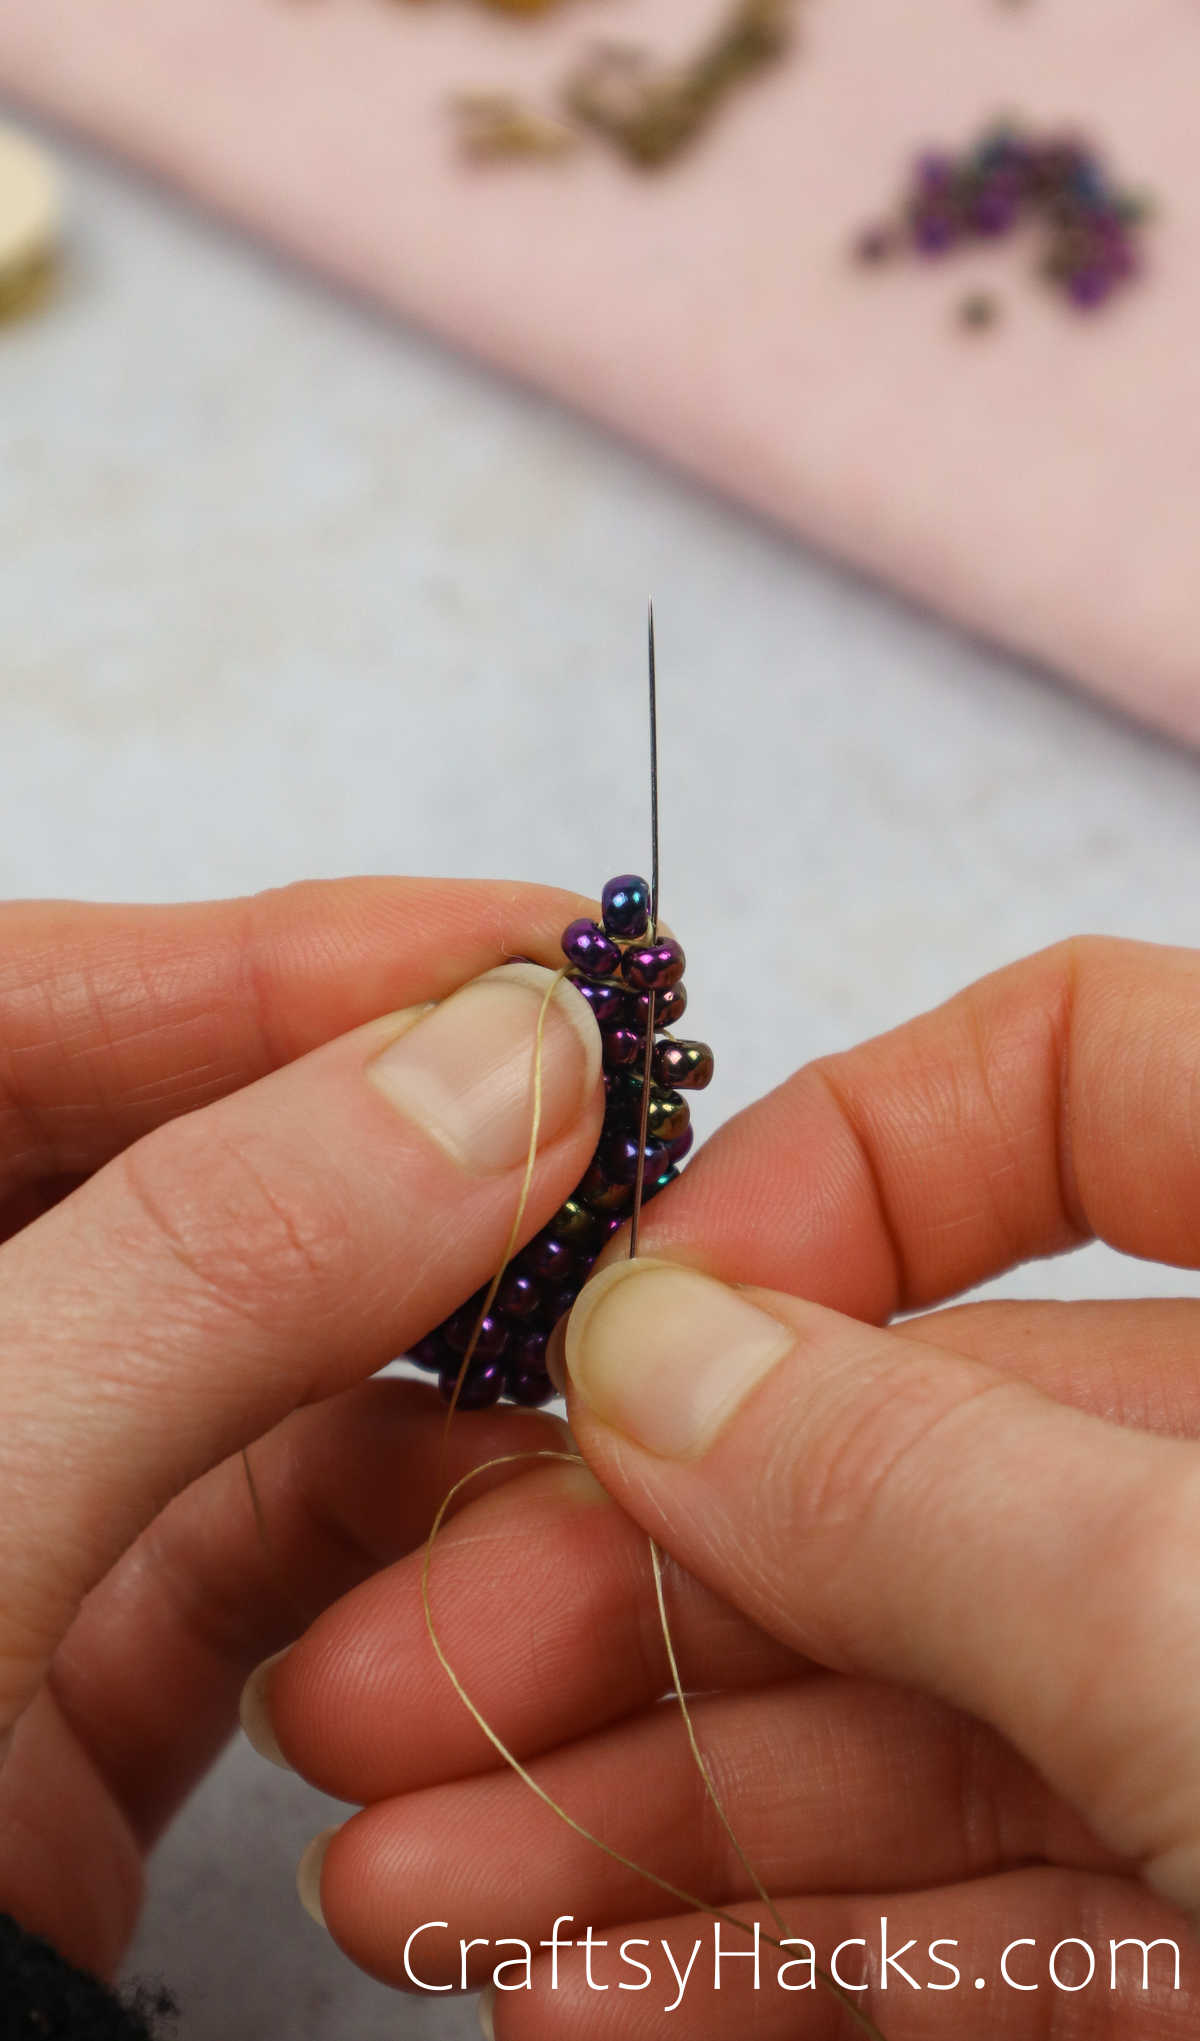
Secure the top and prepare for a jump hook to get fastened into the interior.

Securing the integrity of the triangle.
Continuation of securing.
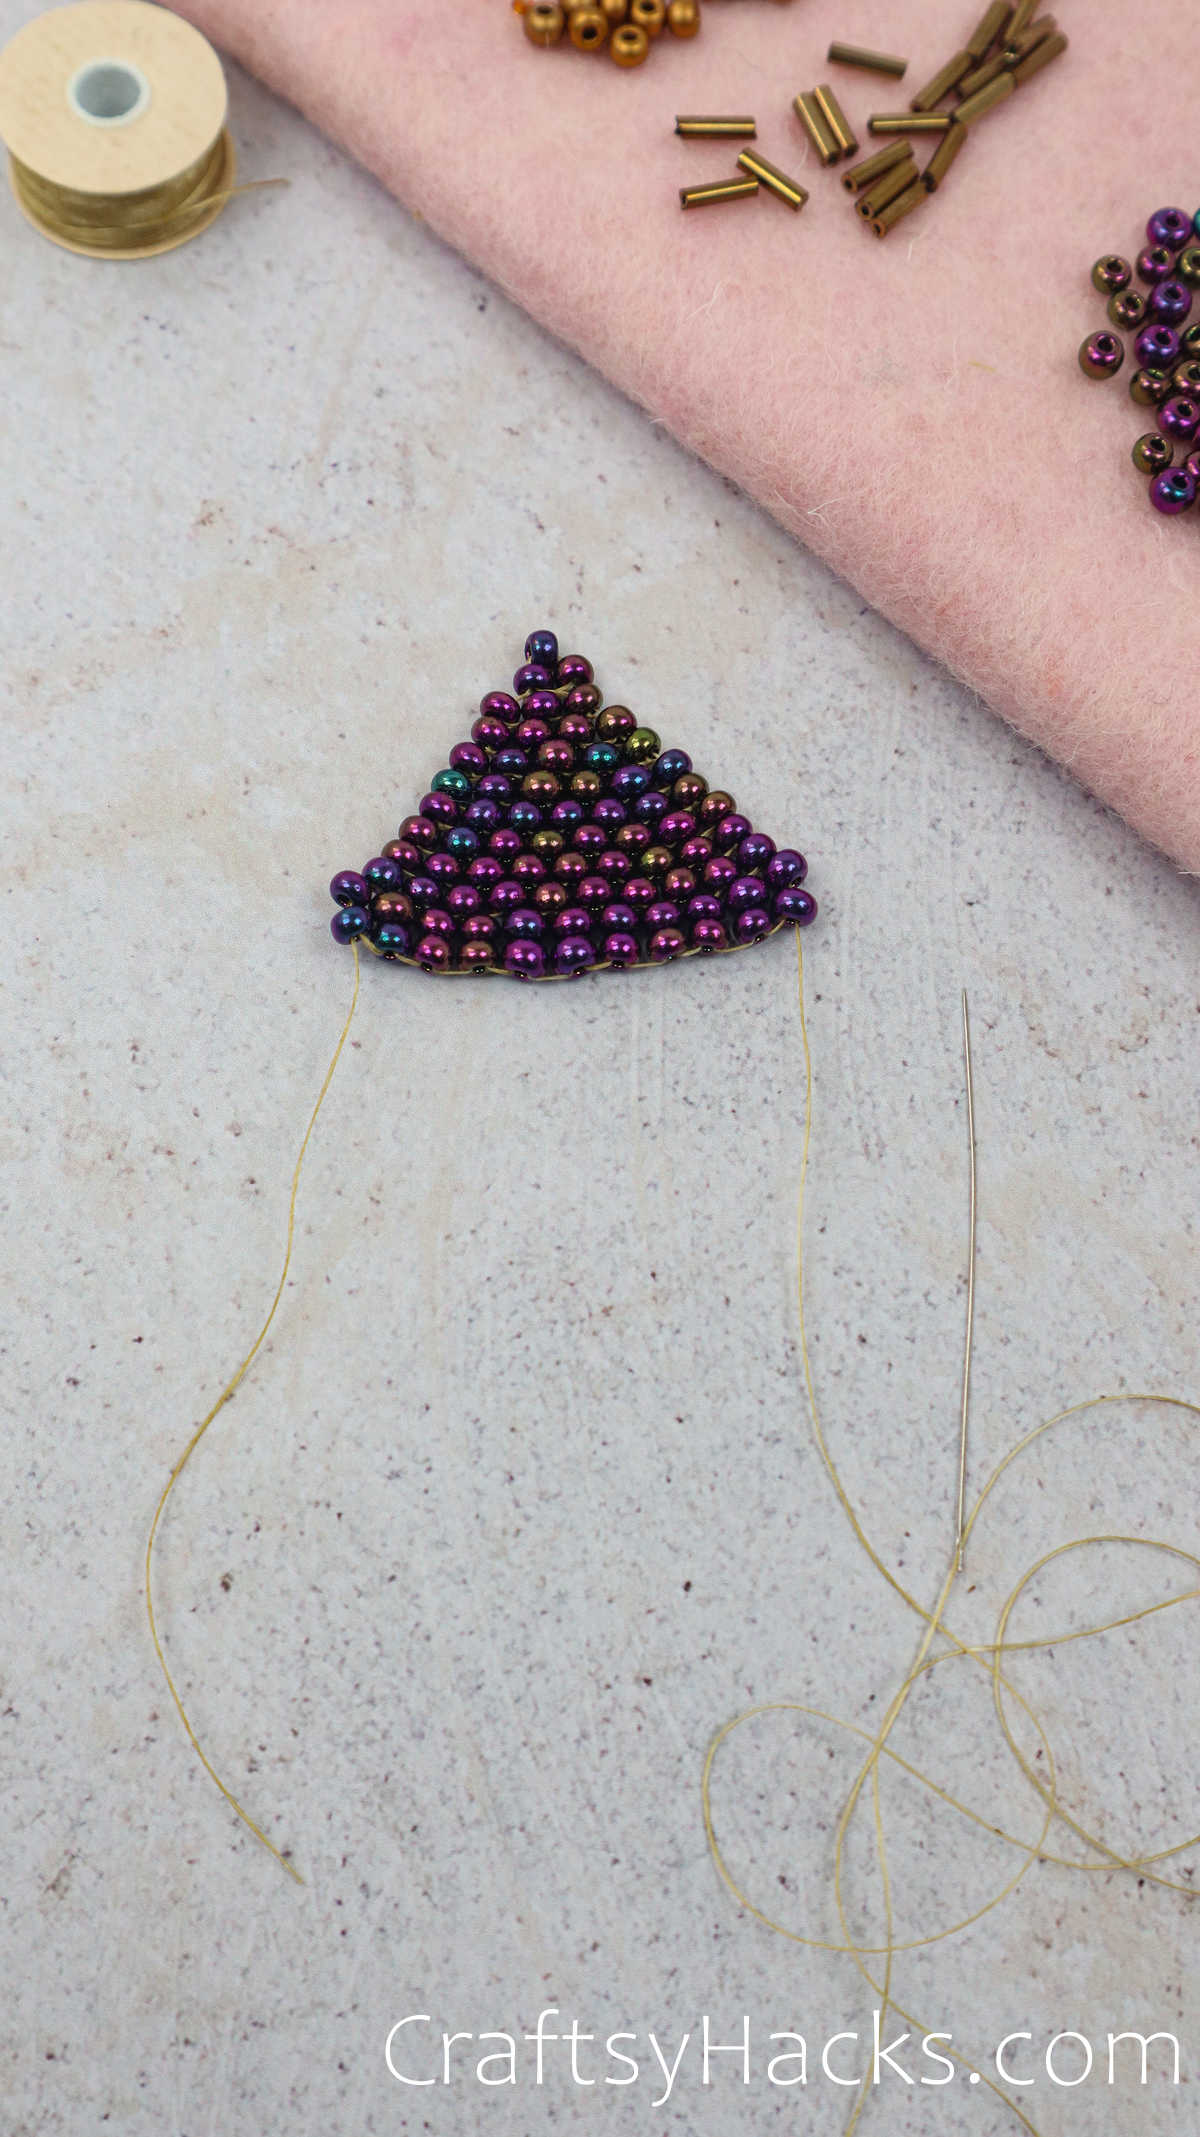
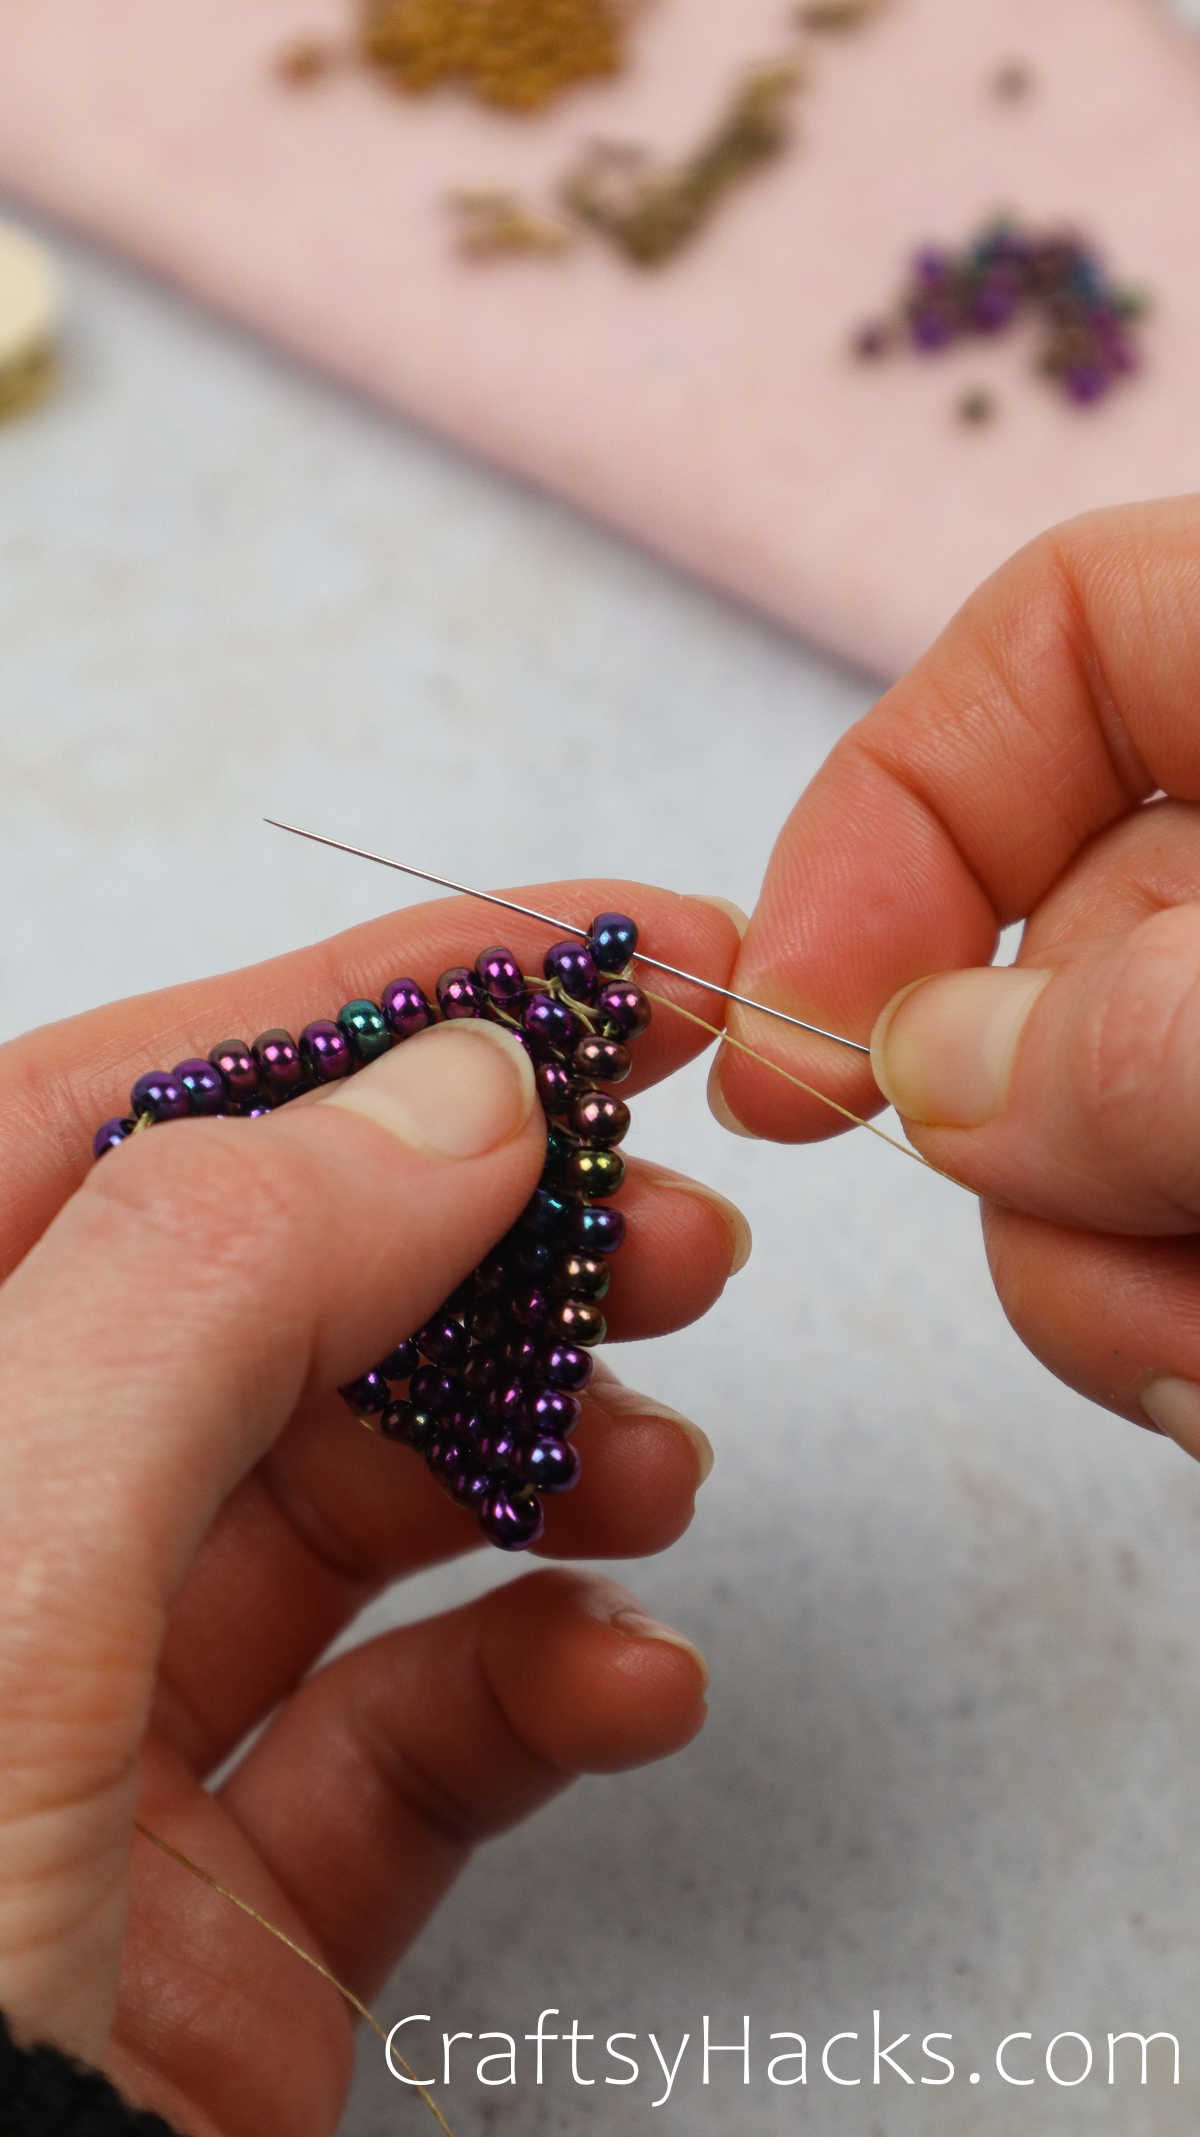
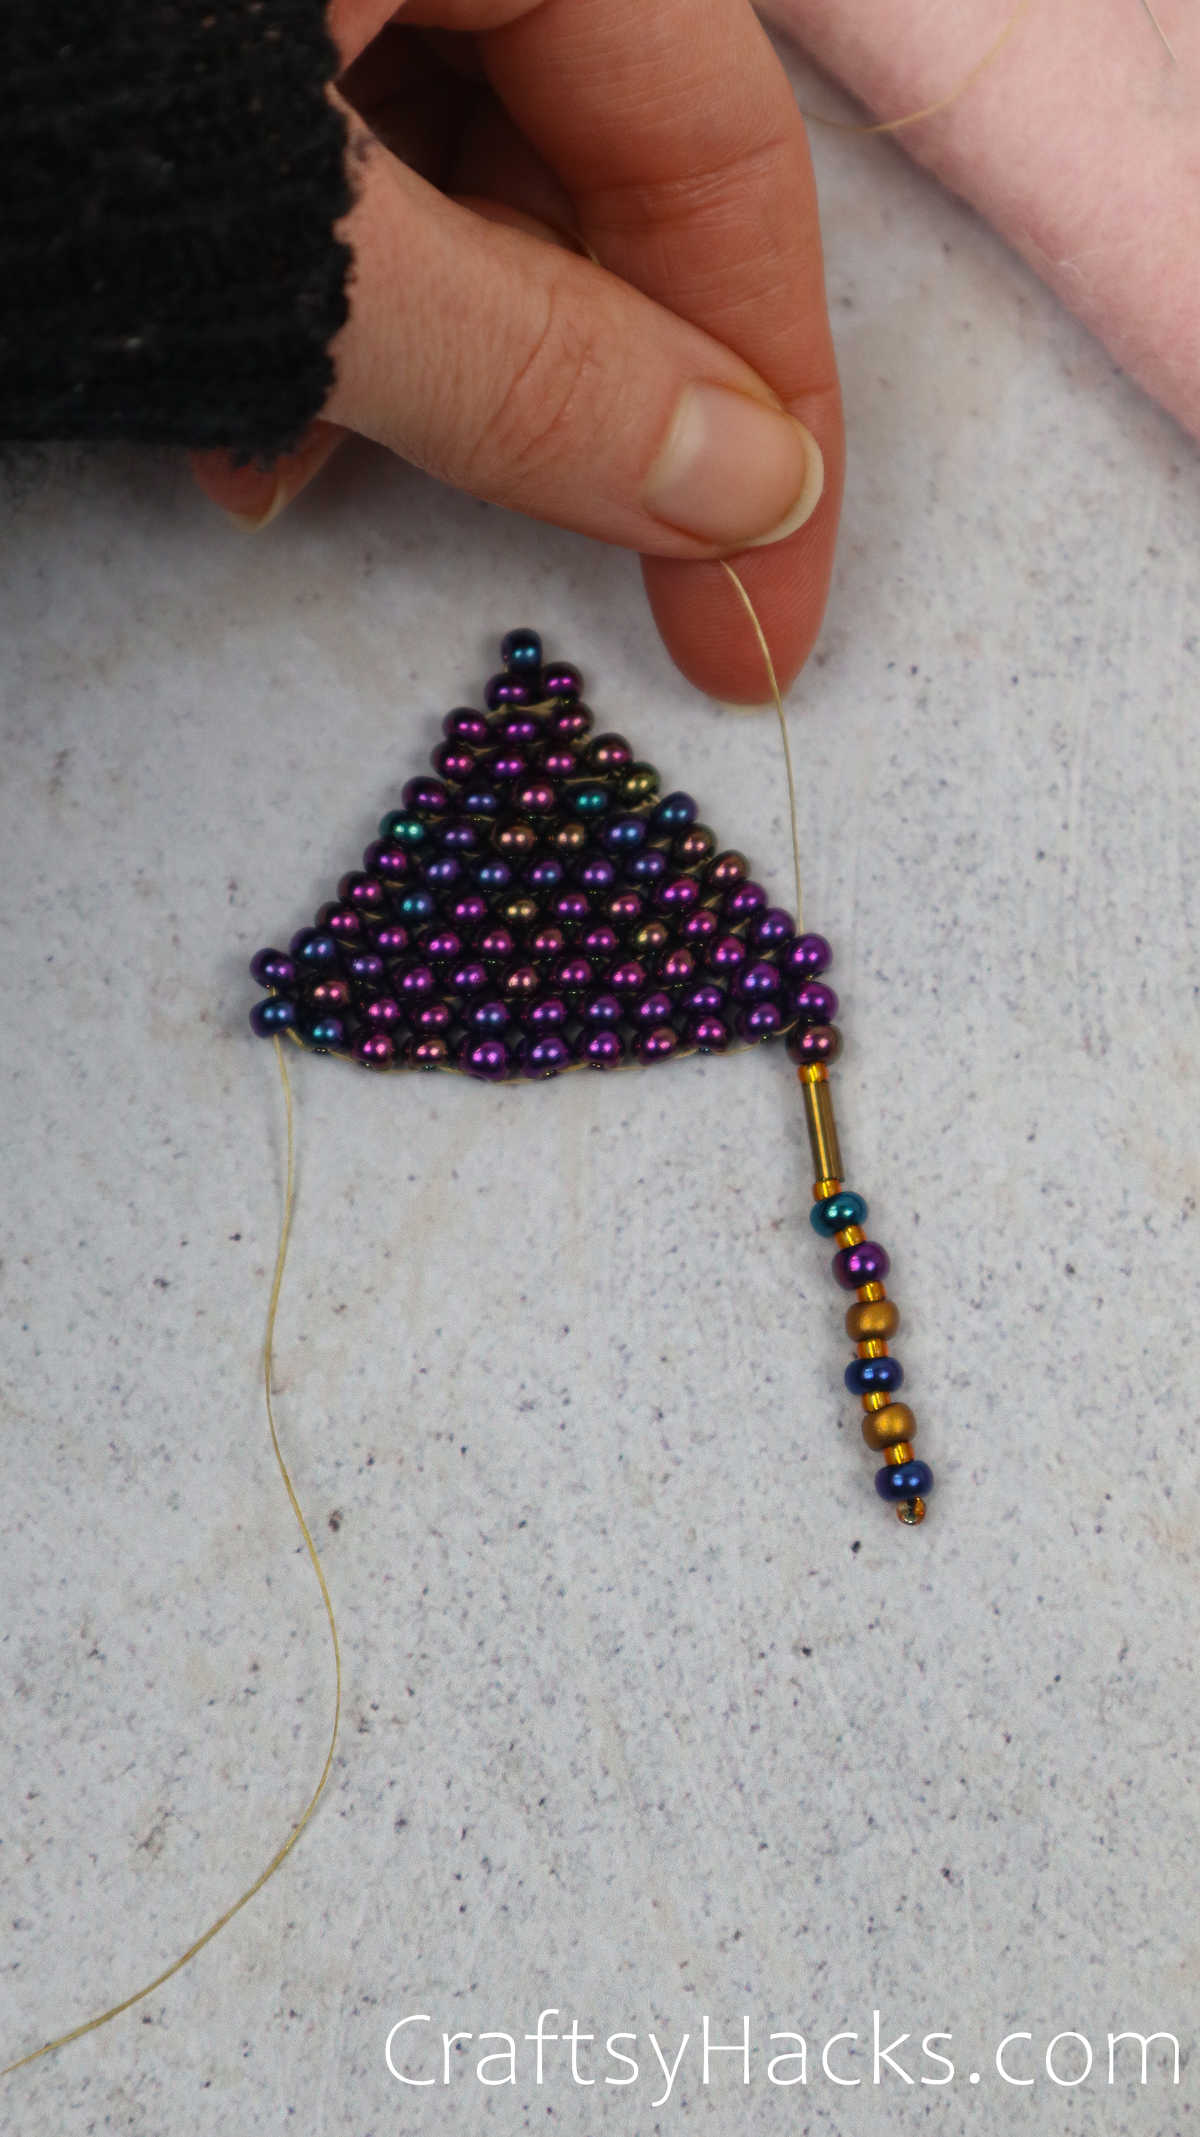
This reference point is for everyone to take a look at! Pay attention to the tails and which side is longer.
Step 17
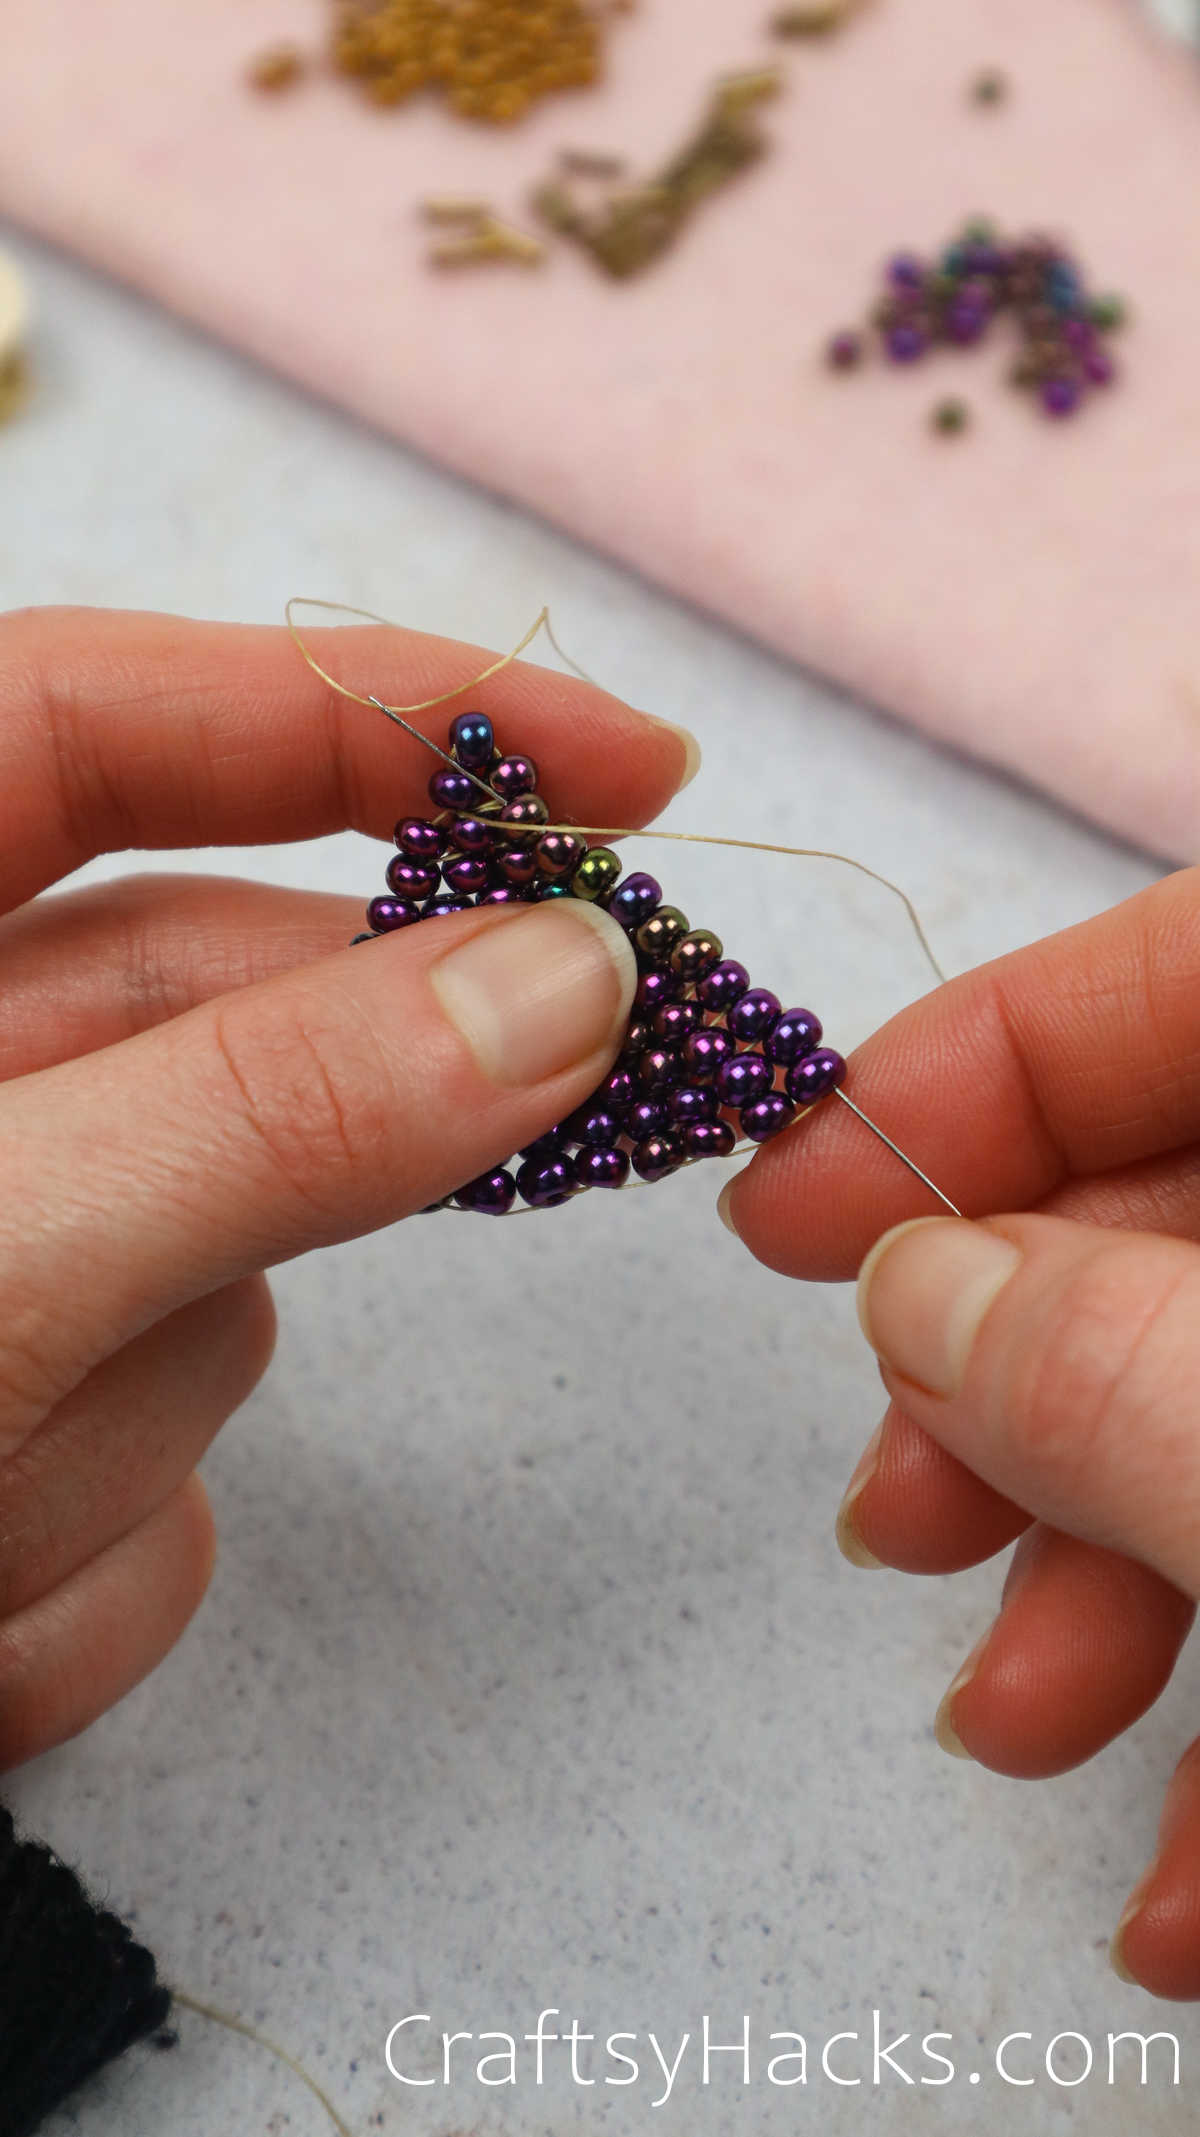
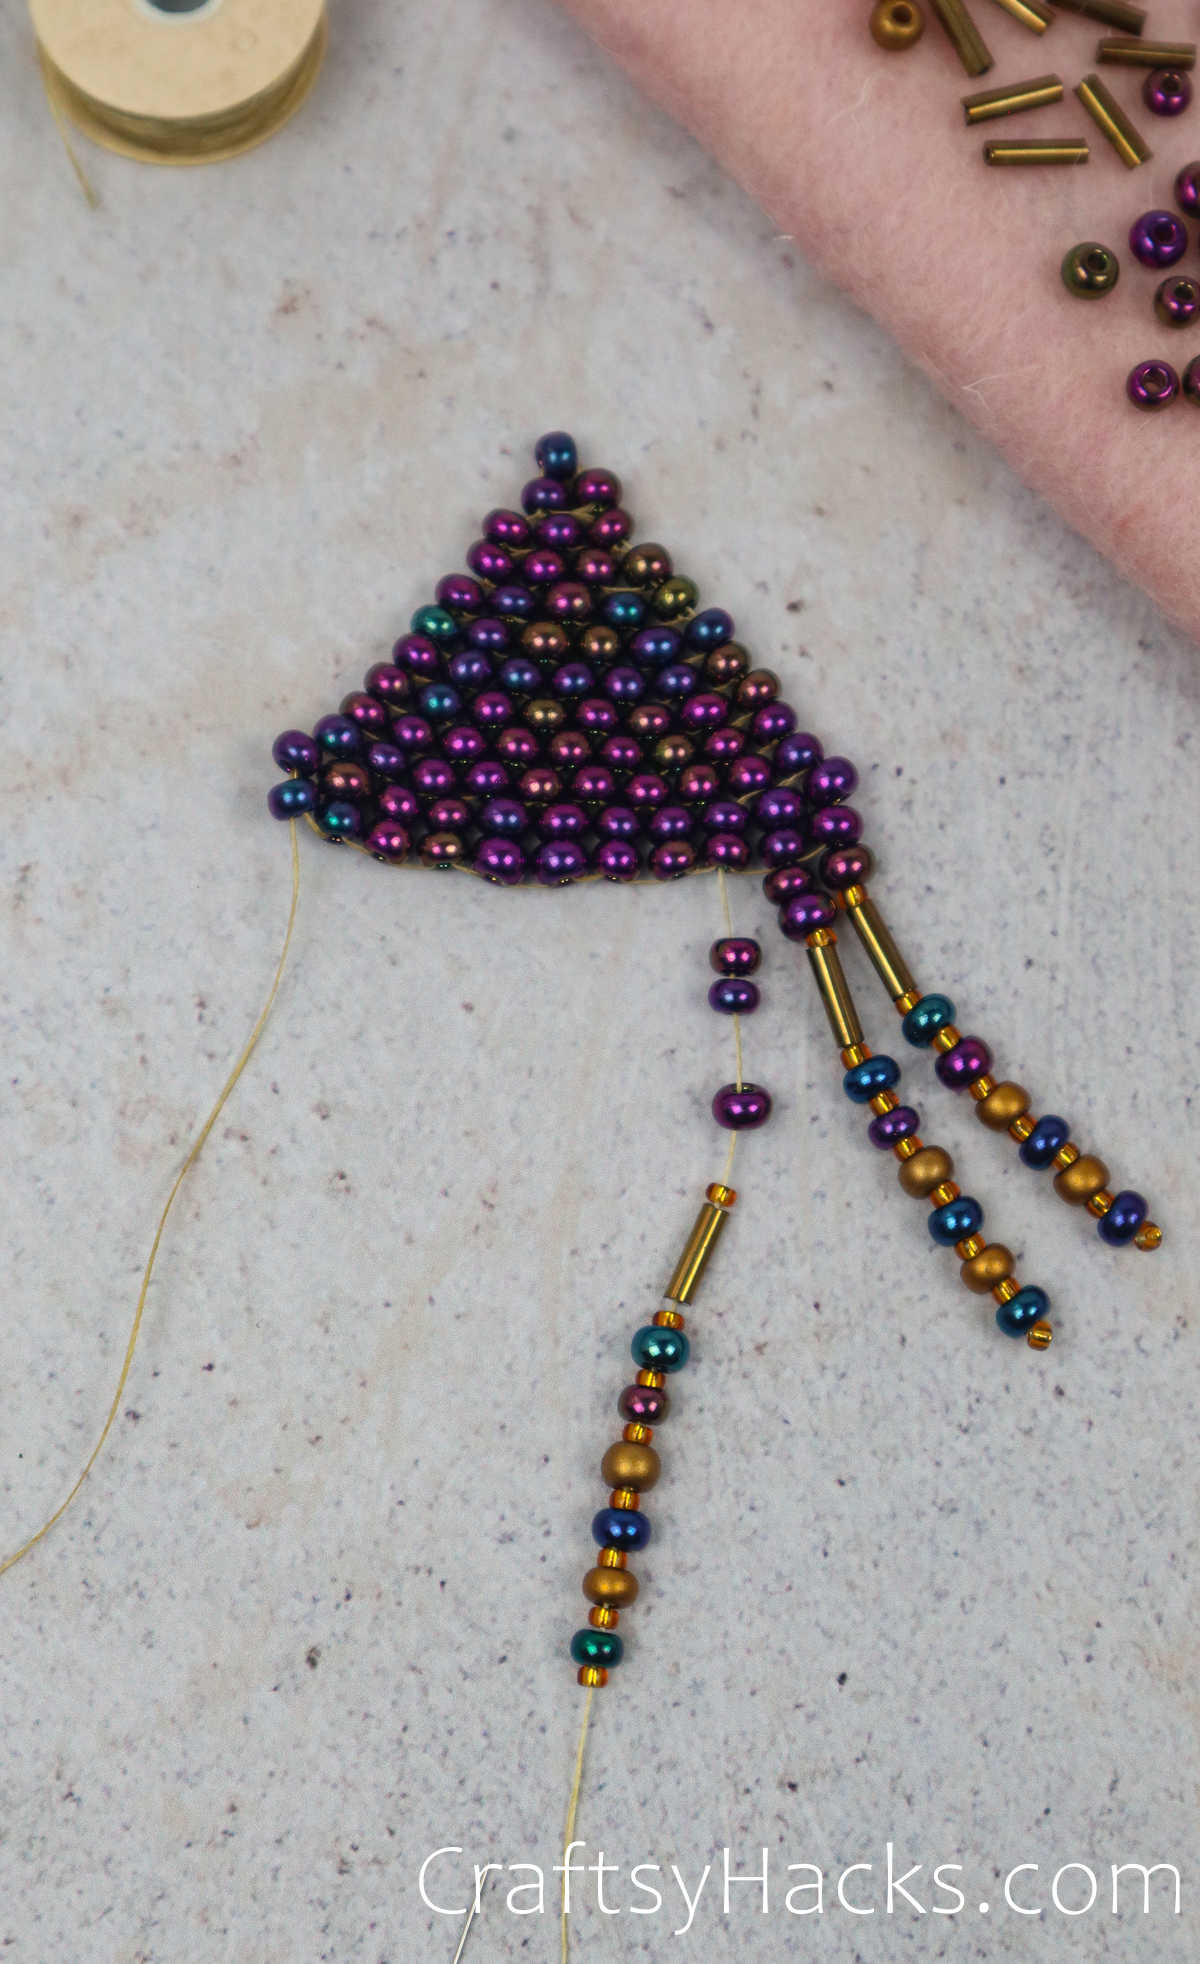
We’ve gotten done with the triangular shape and begun the fringe on the earrings.
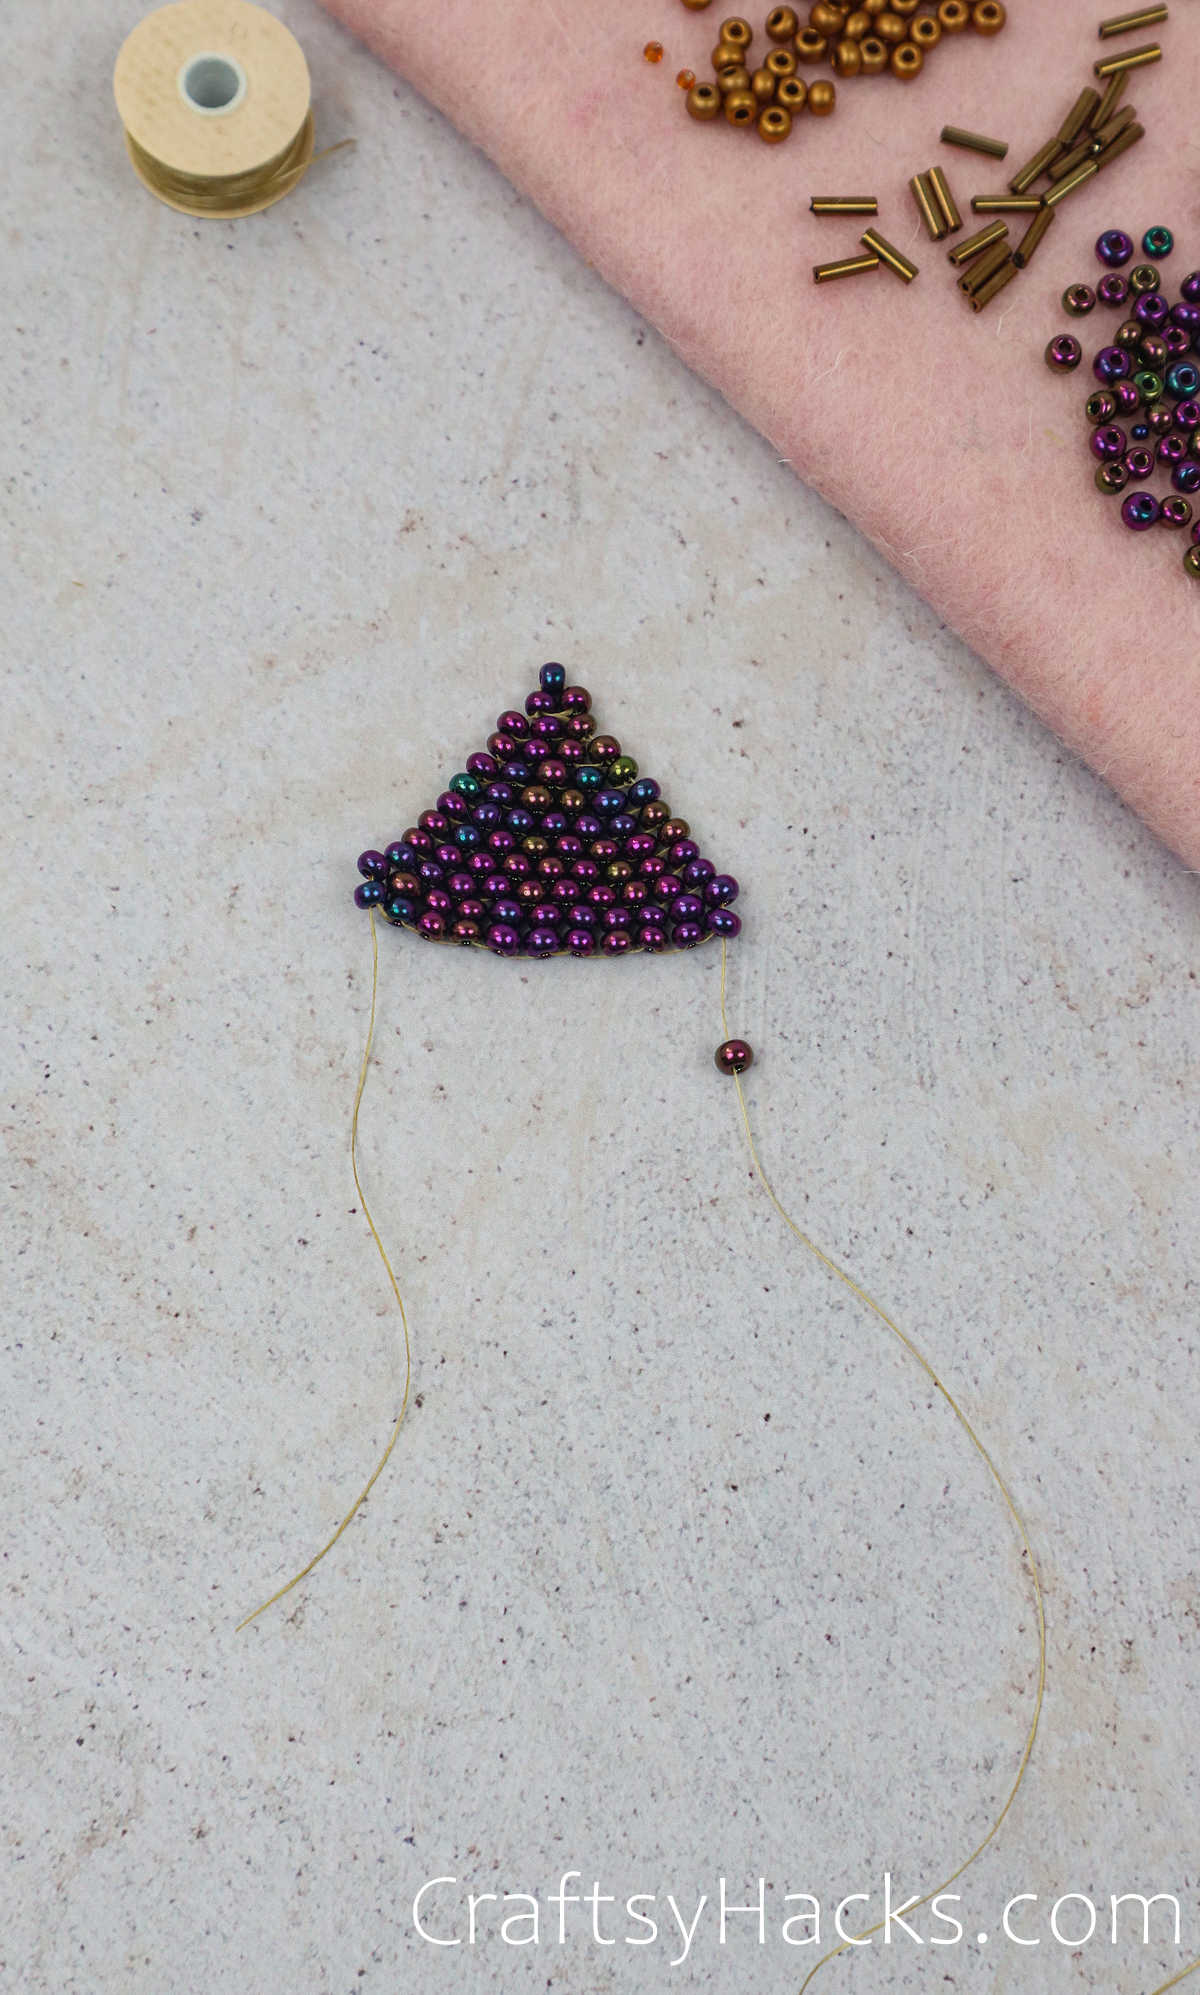
The fringe is up to you and how much or little you’d like on there! Pick the design, colour scheme, etc.–this portion is full of creative reign.
Step 18
Continuation of fringe getting threaded. As you complete a line, take your needle and thread it back up through every bead except the bottom.

Threading up through the fringe, you’ll find the two lowest beads and thread through those.
Pull up and out on the strung fringe string.
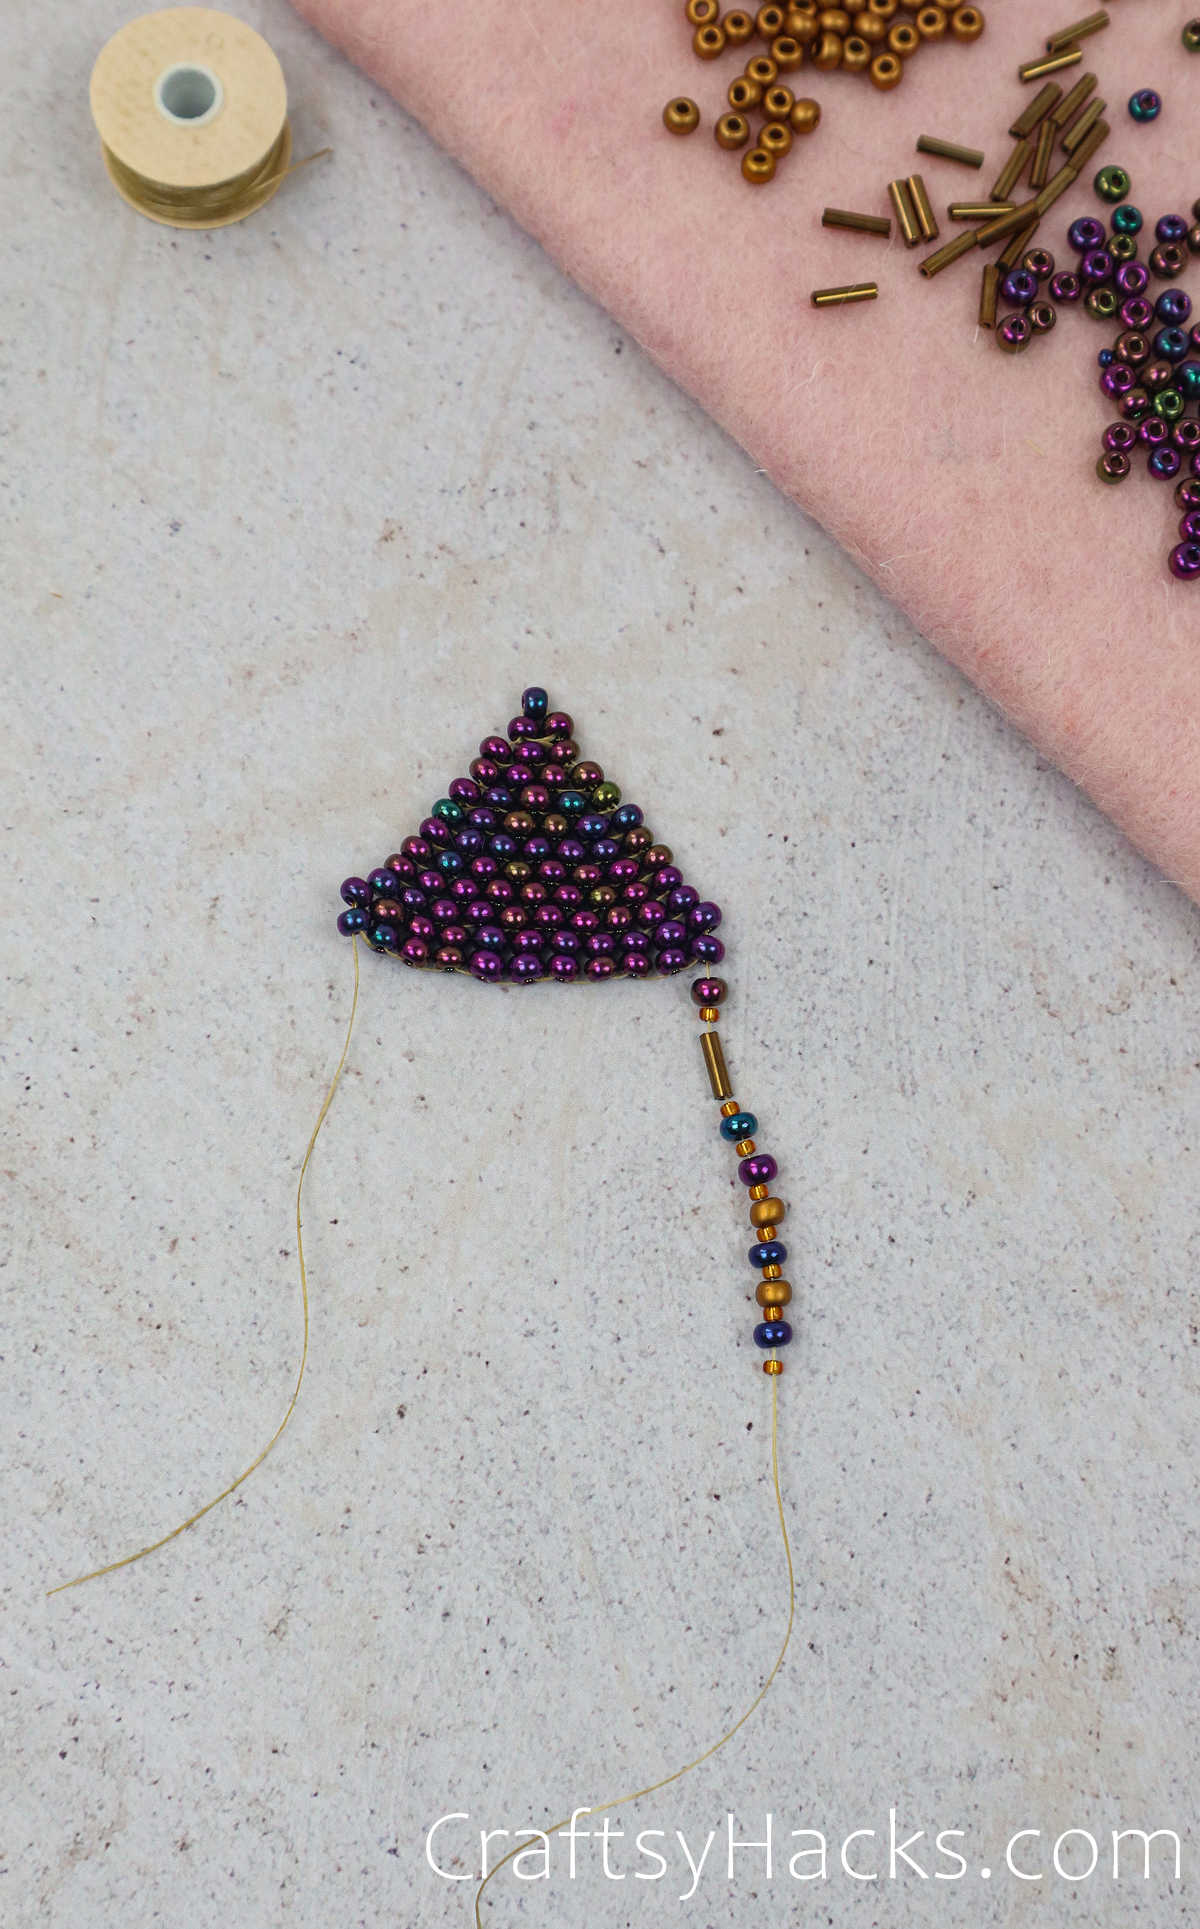
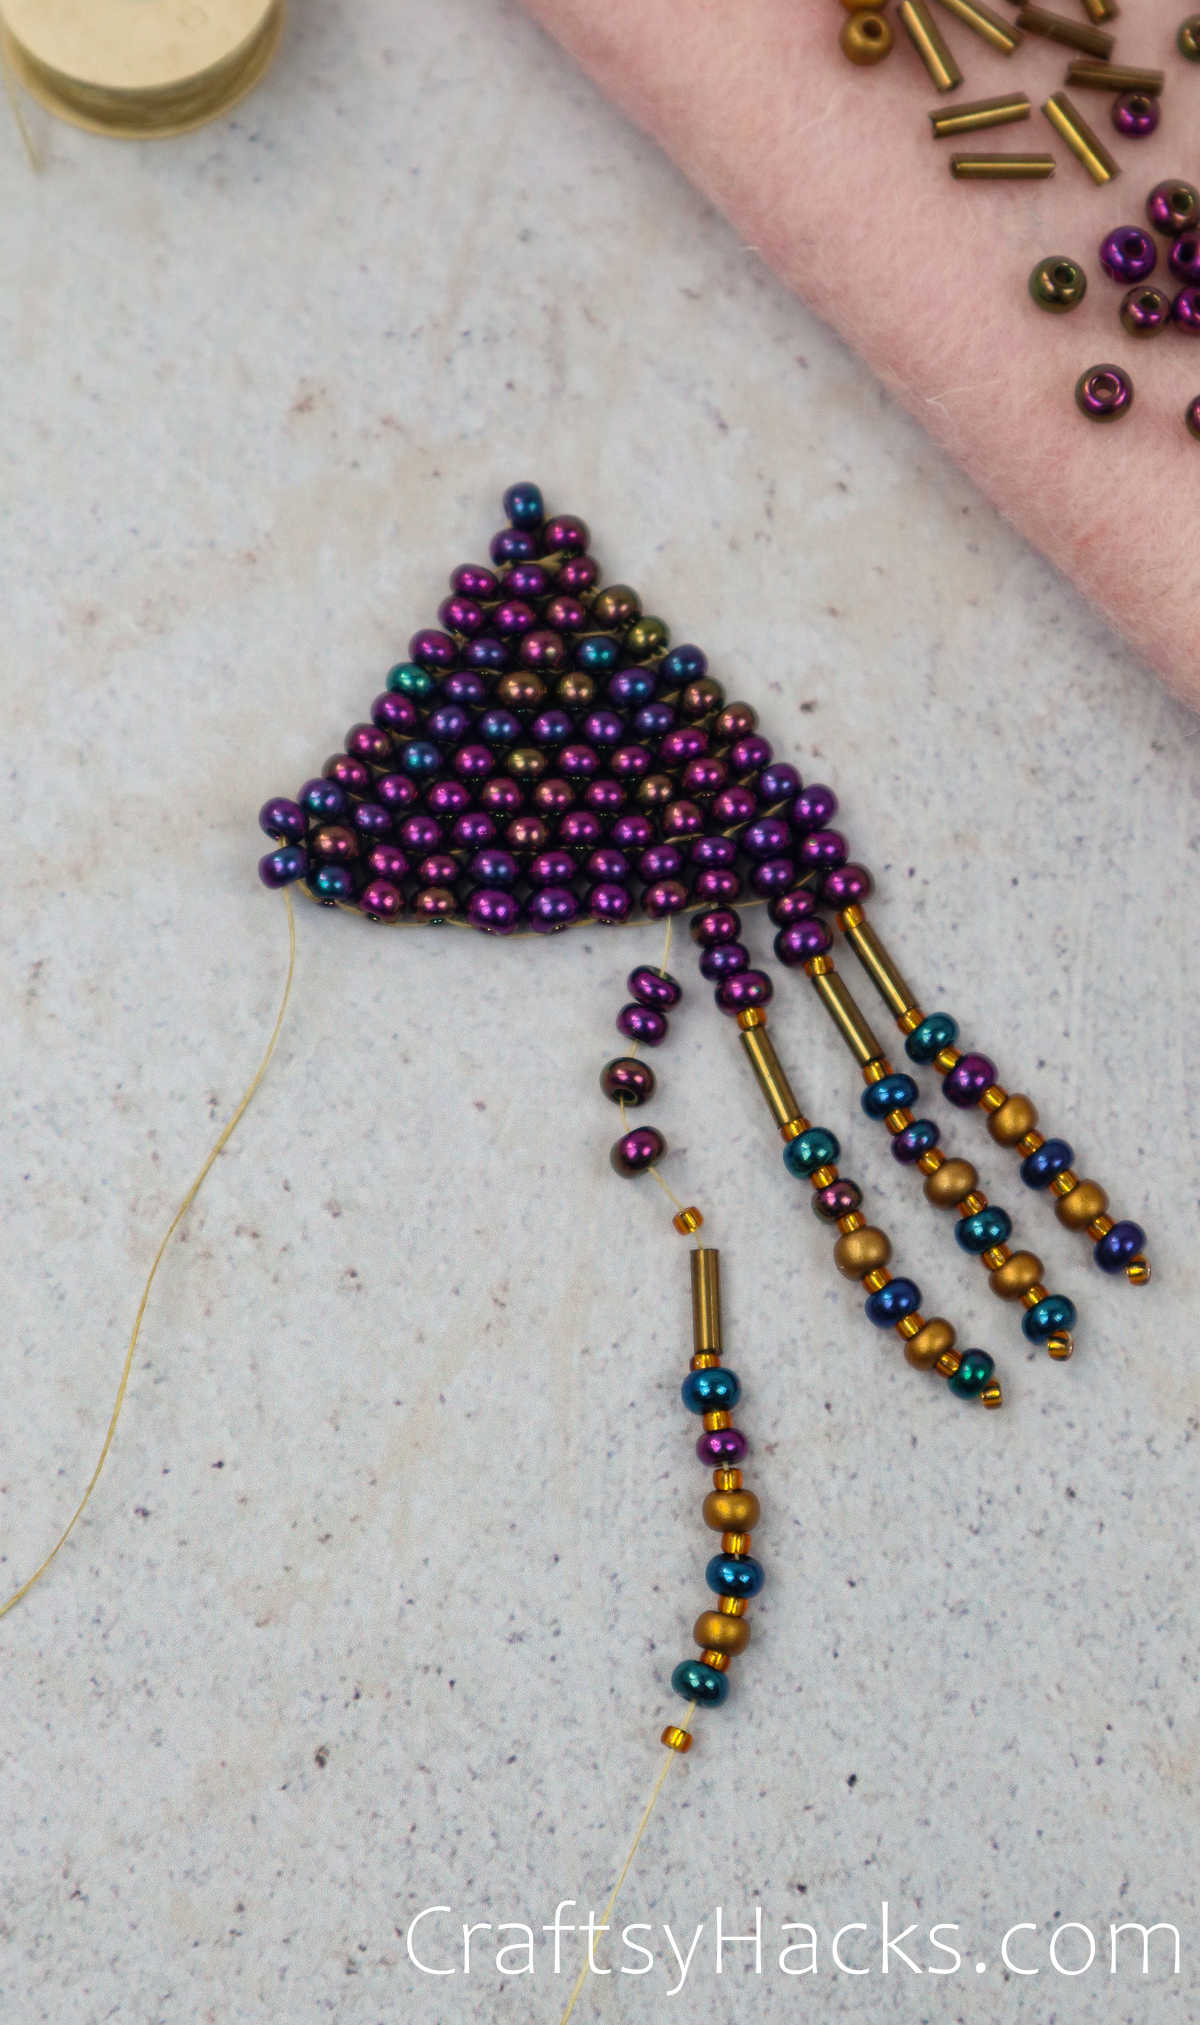
Step 19

Once up and out, we’ll take the needle and poke it through a hole close enough to the first line of fringe to make the second and repeat the process.

Pulling the thread down through the next bead in the ladder creates your following fringe line.
Step 20
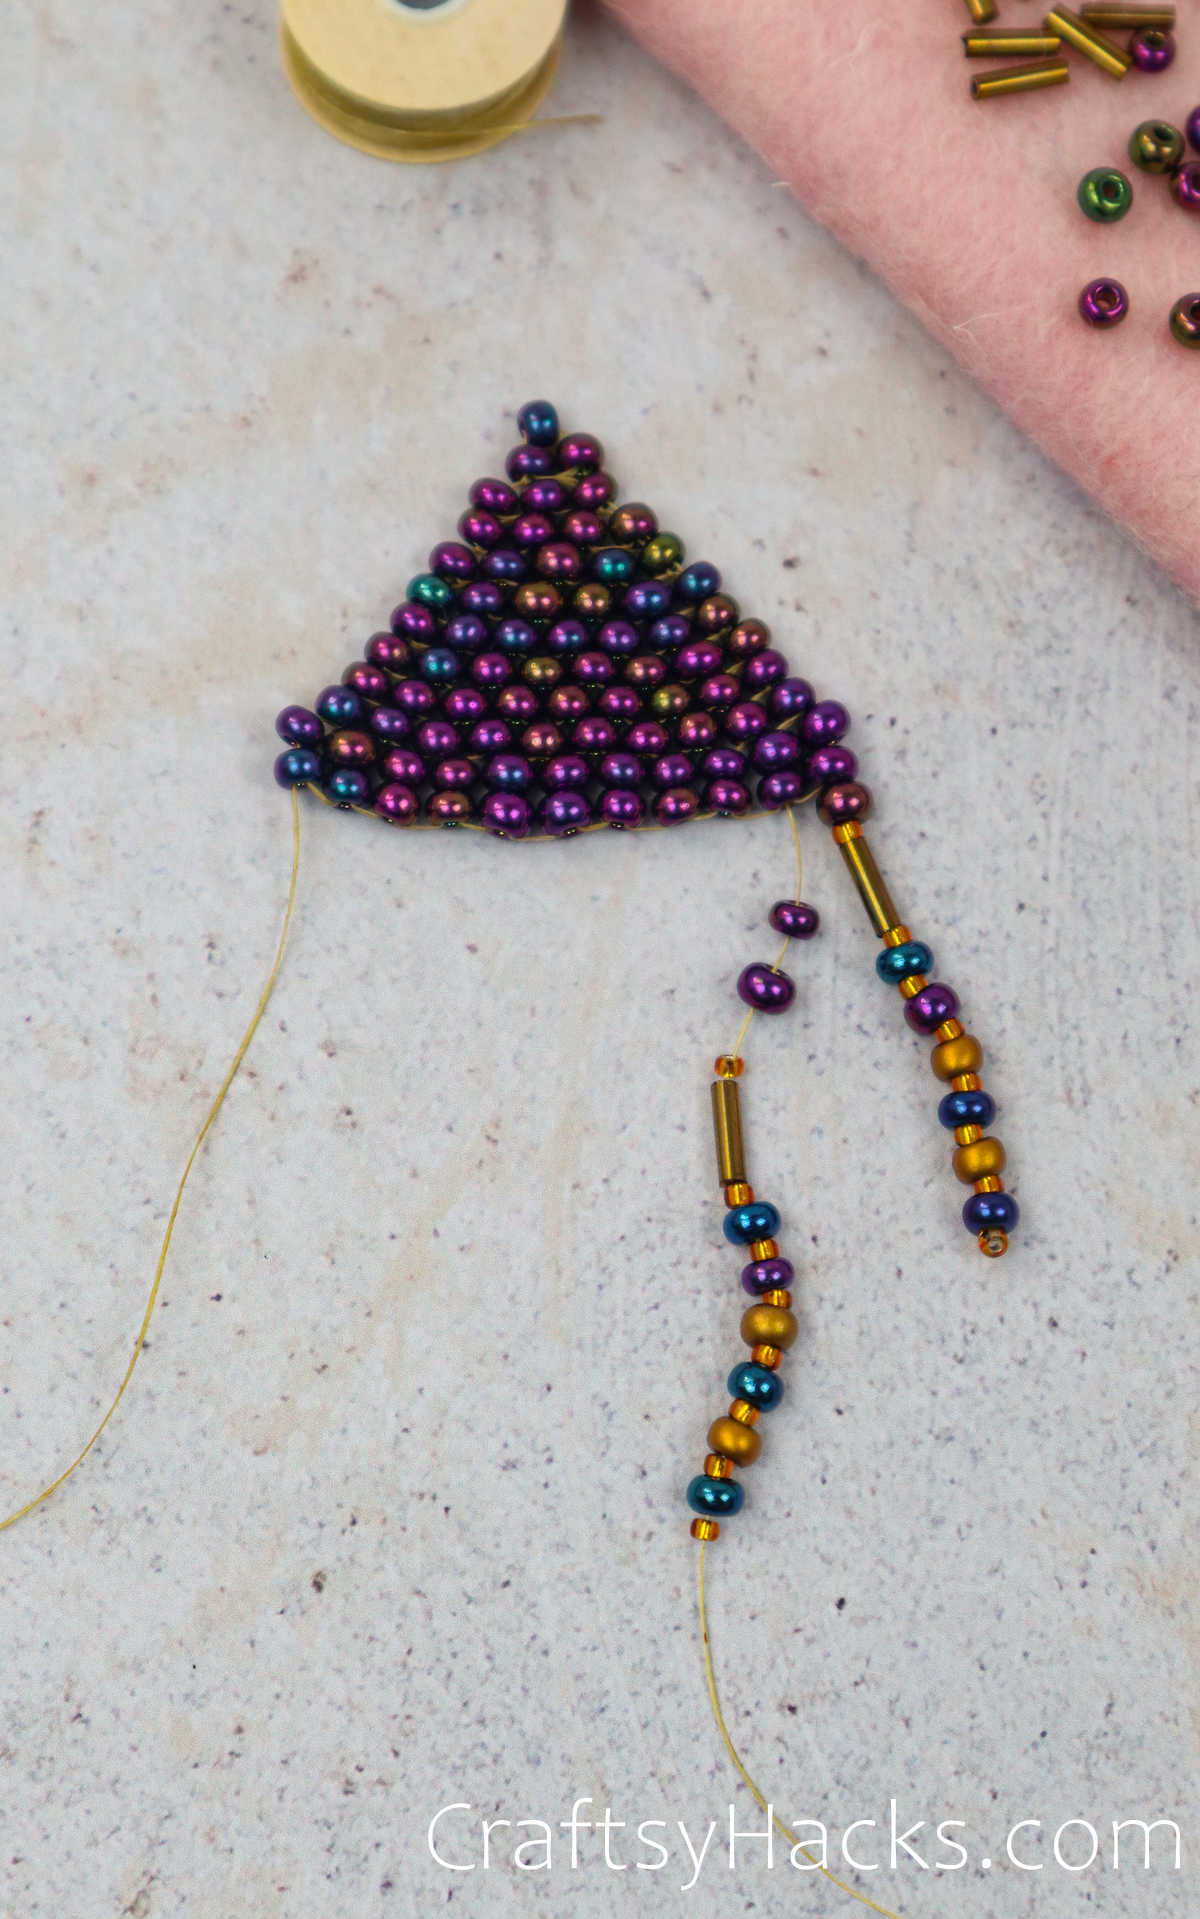
String your second line and repeat the process until you get across.
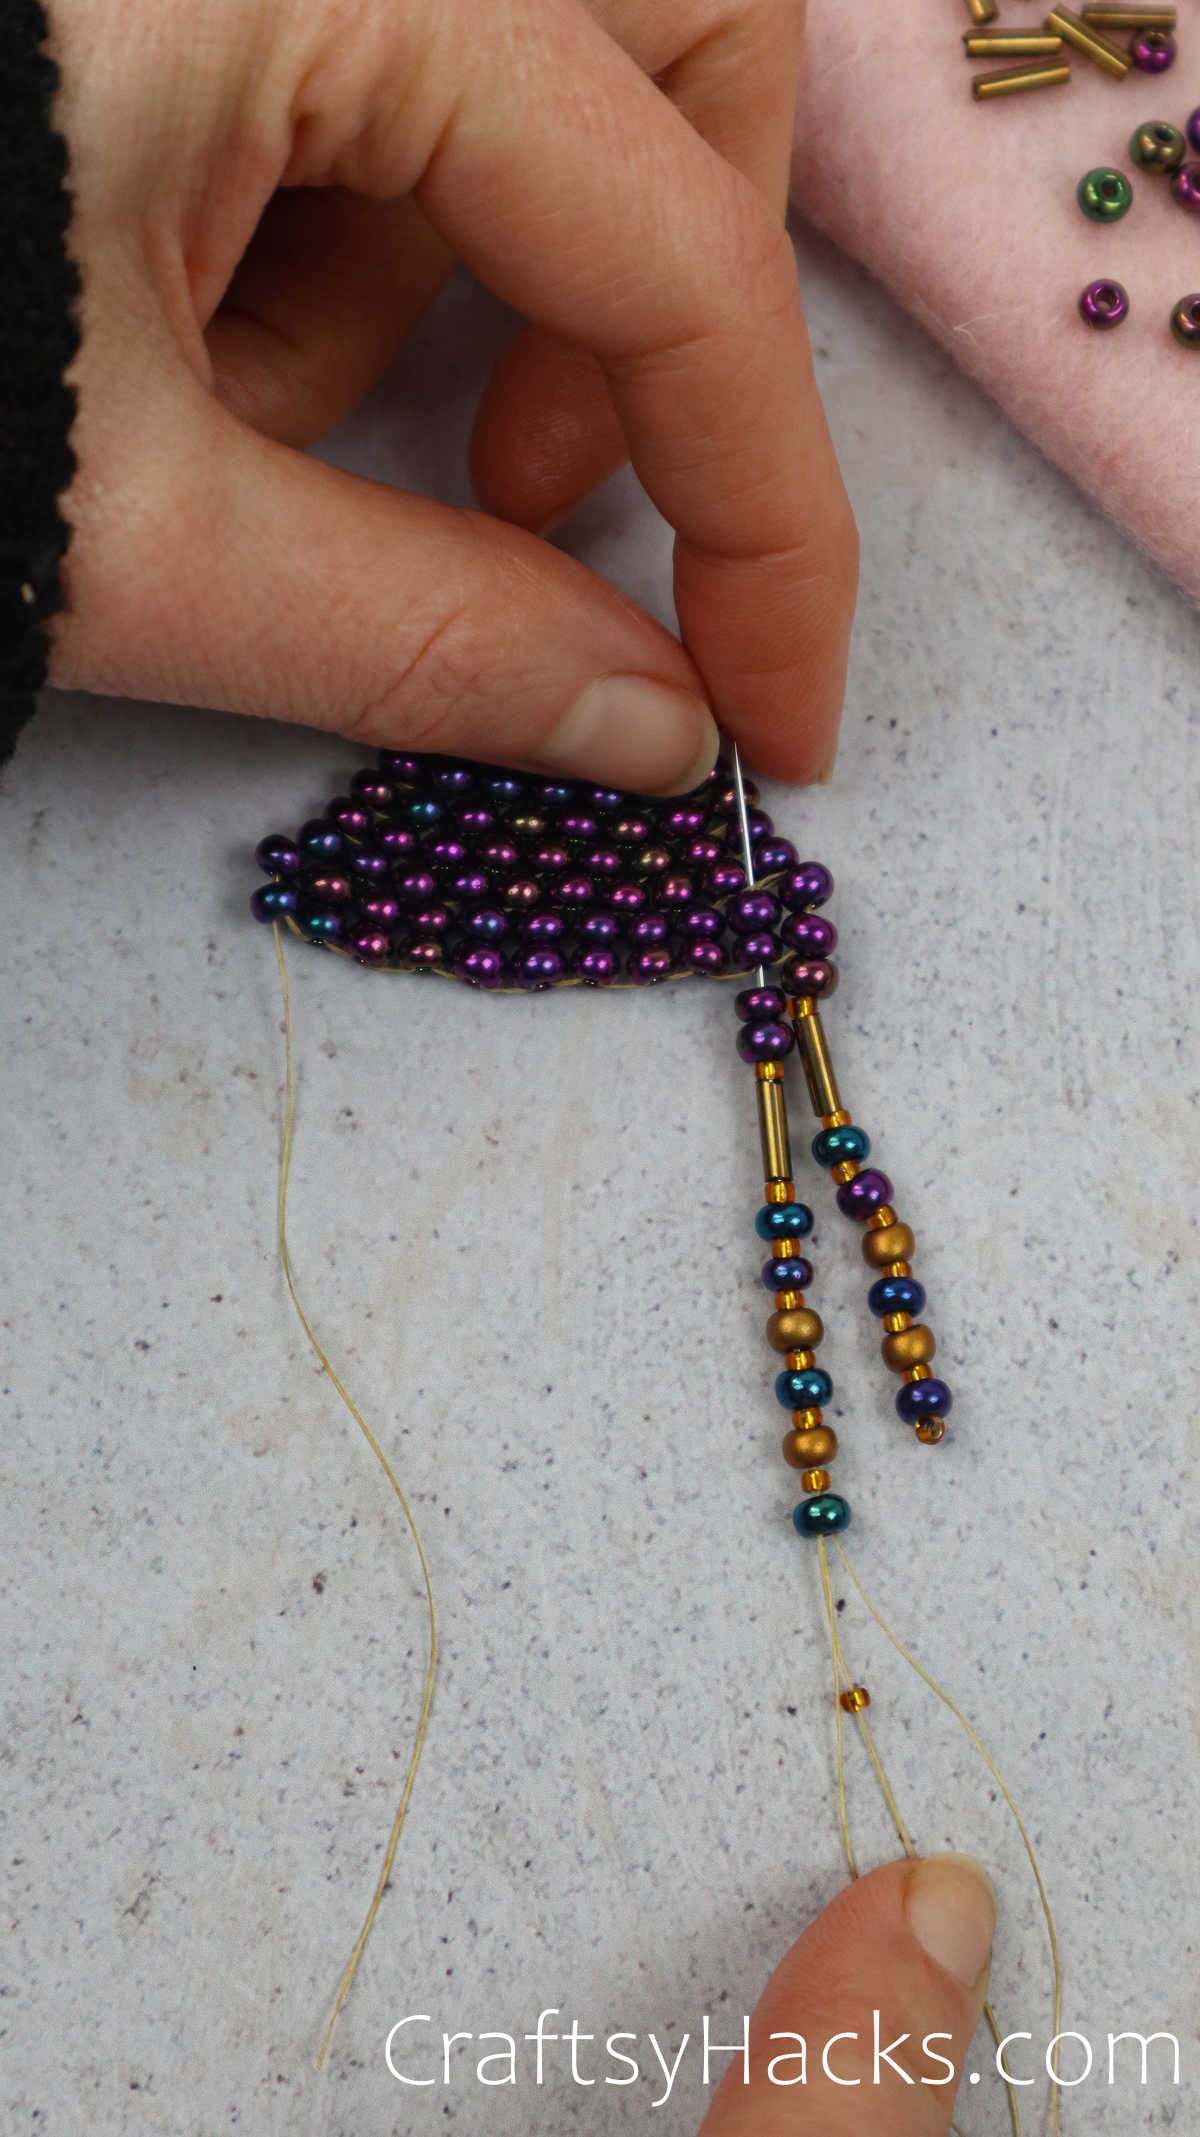
Avoid your bottom bead, and thread up through the two beads in the ladder.
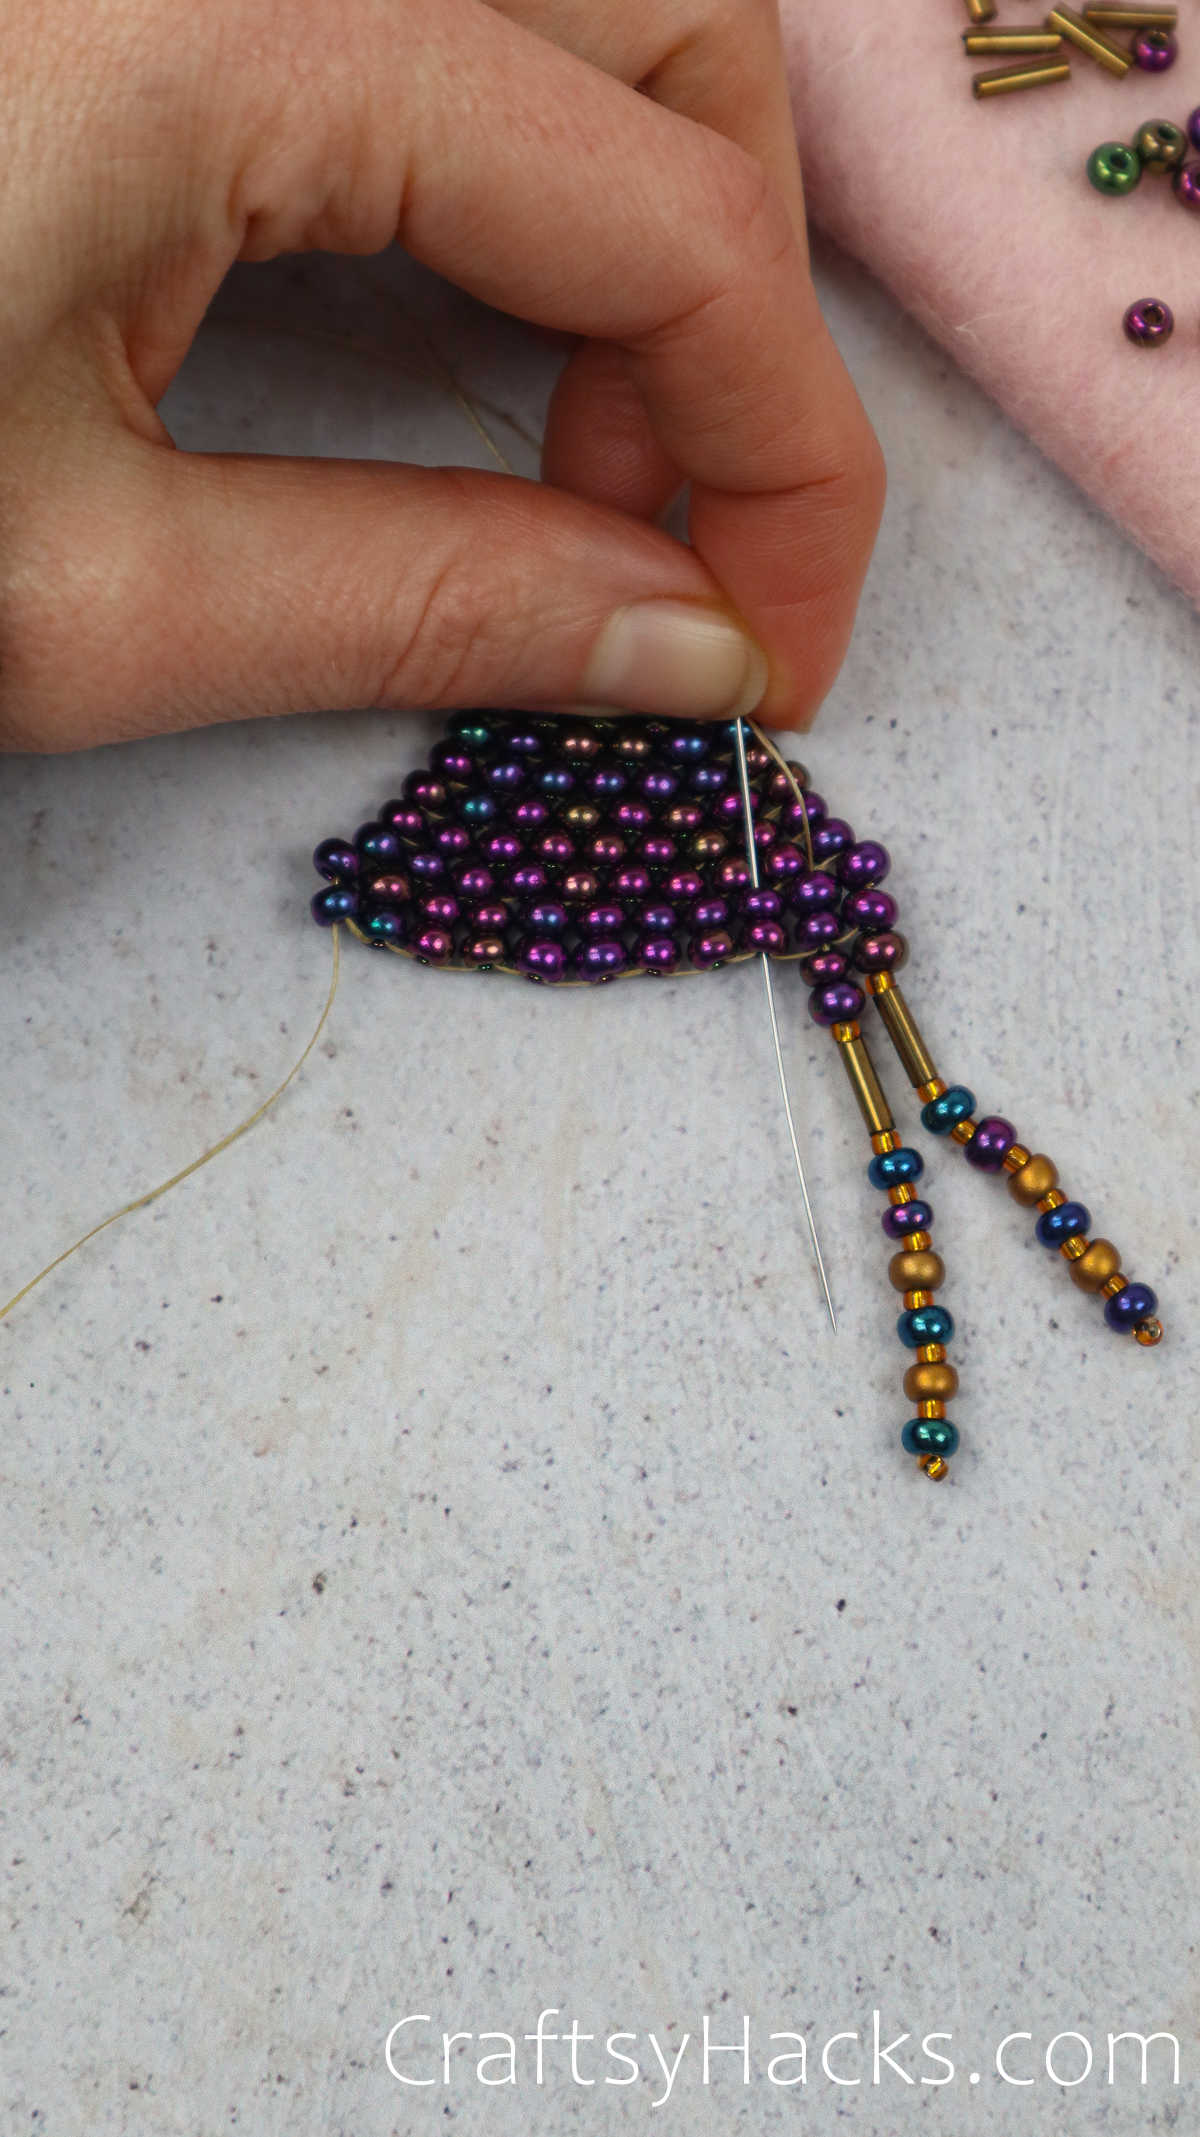
Just like before, thread back down through one bead to create the following line.
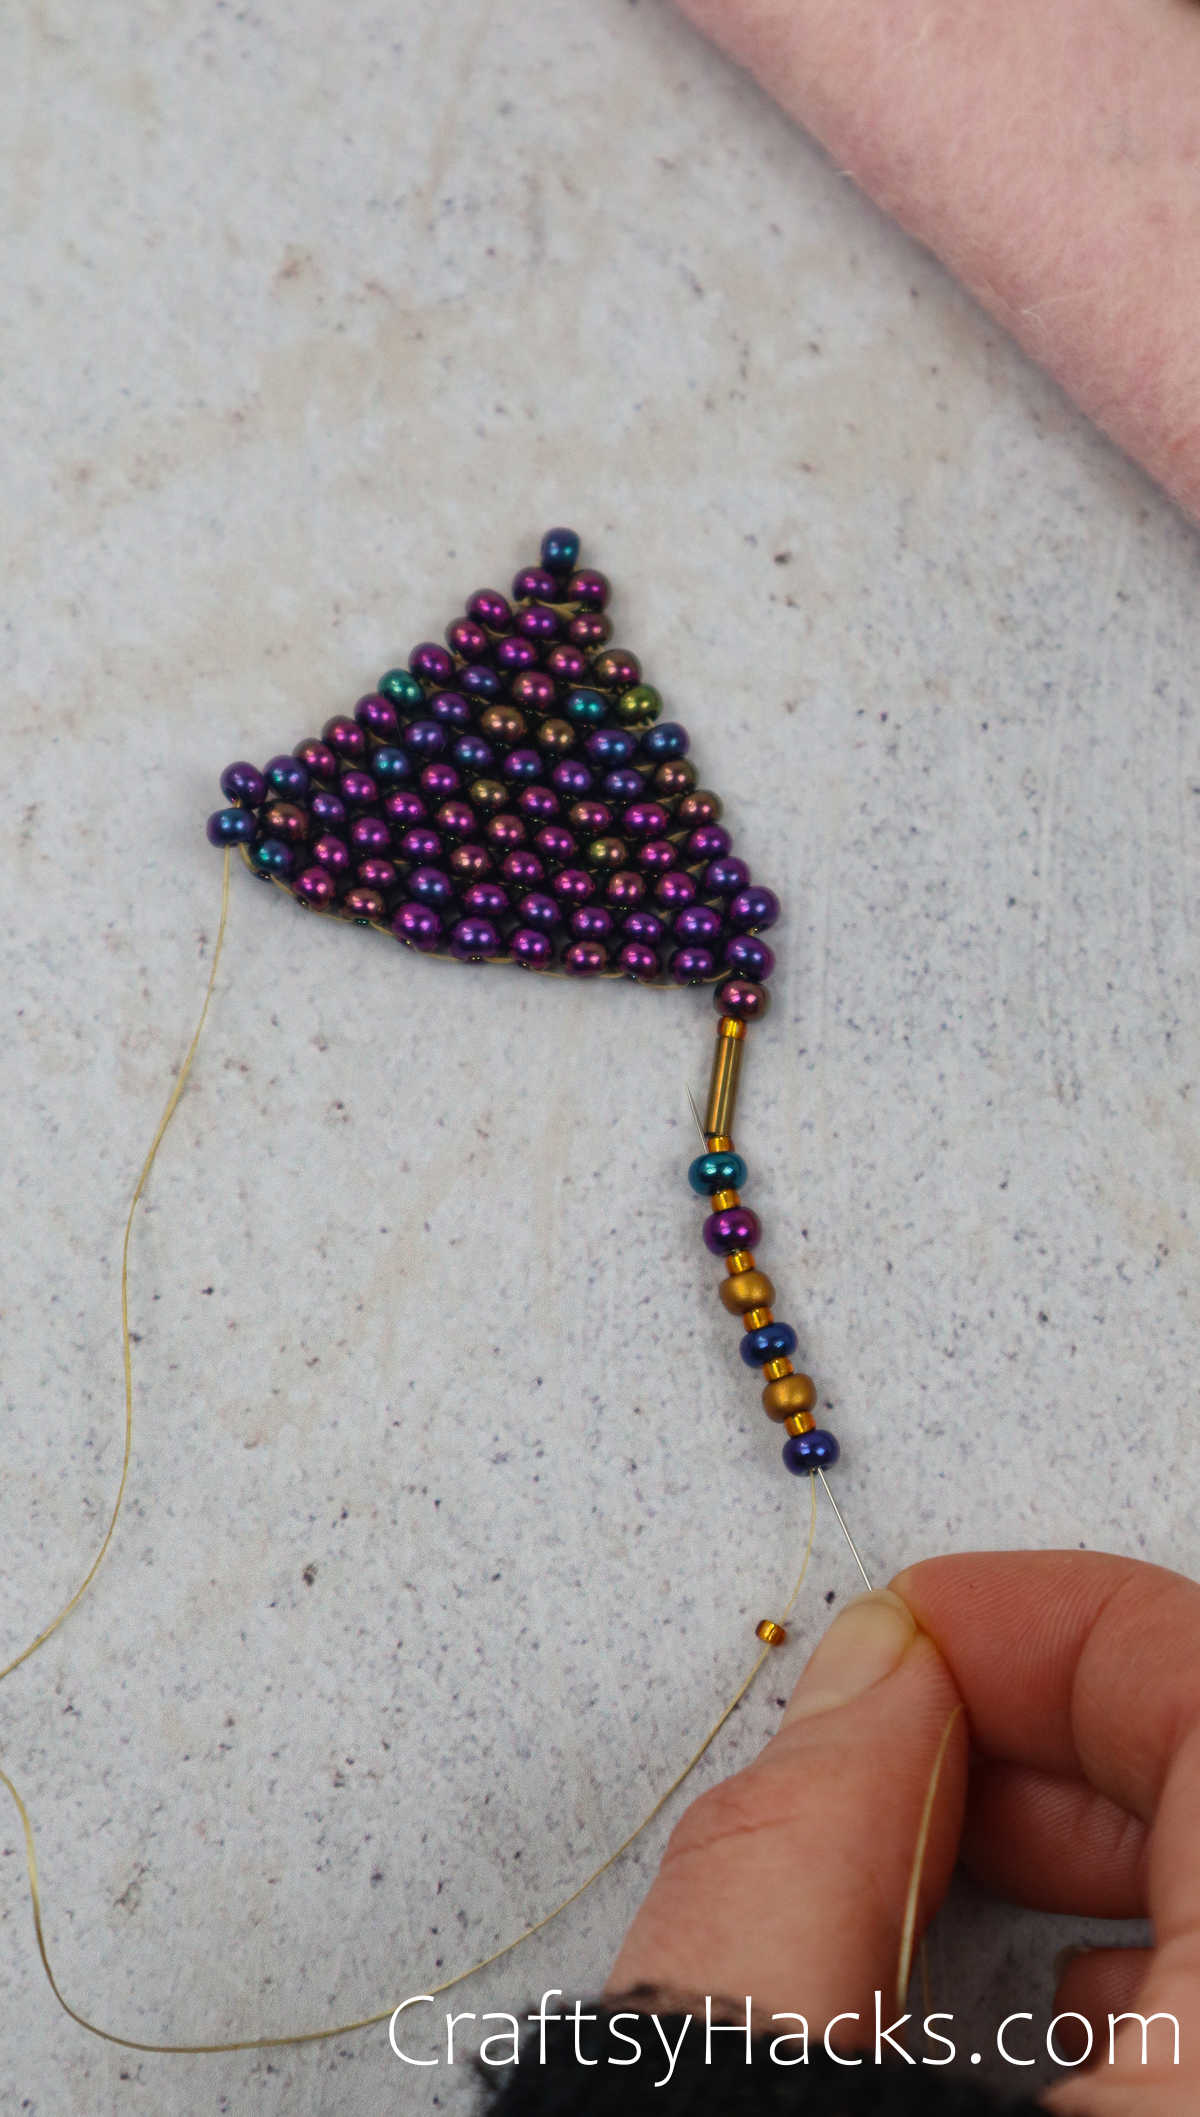
Step 21
The idea is that the fringe will mirror a triangle shape by adding one more bead than previously.
At this point, I’ll add 2x purple on the beginning, and the core will stay the same. I will also increase purple beads on the top of fringe each time until i will be halfway.
Each fringe will get a little longer as it heads towards the center, and will get a little longer–the longest being the middle strand.
Continue threading, but with longer pieces of thread.
Continuation.

Continue–the longest strand.
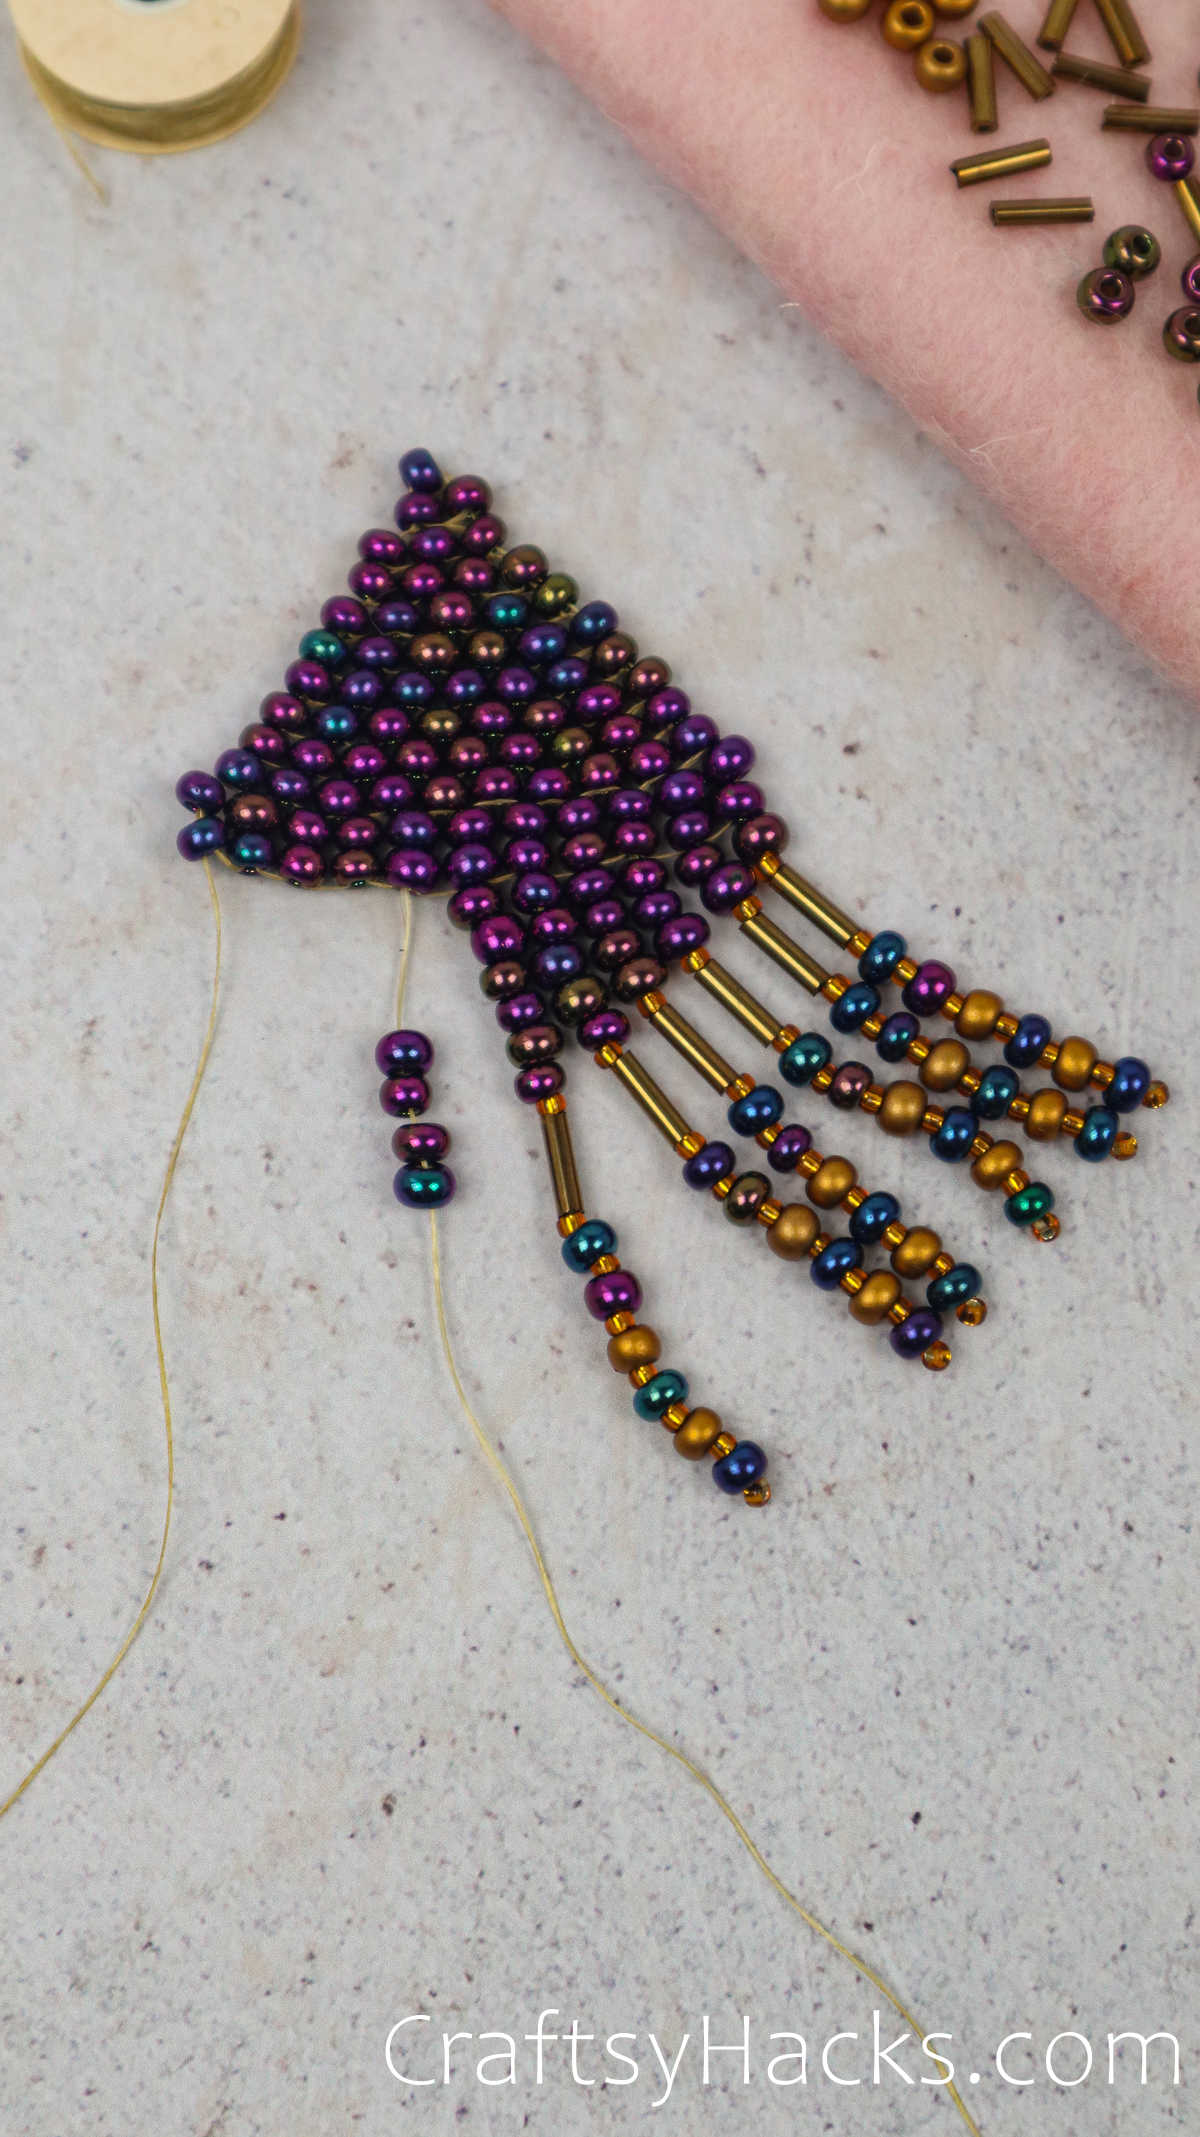
Begin to shorten your fringe again as you head left.
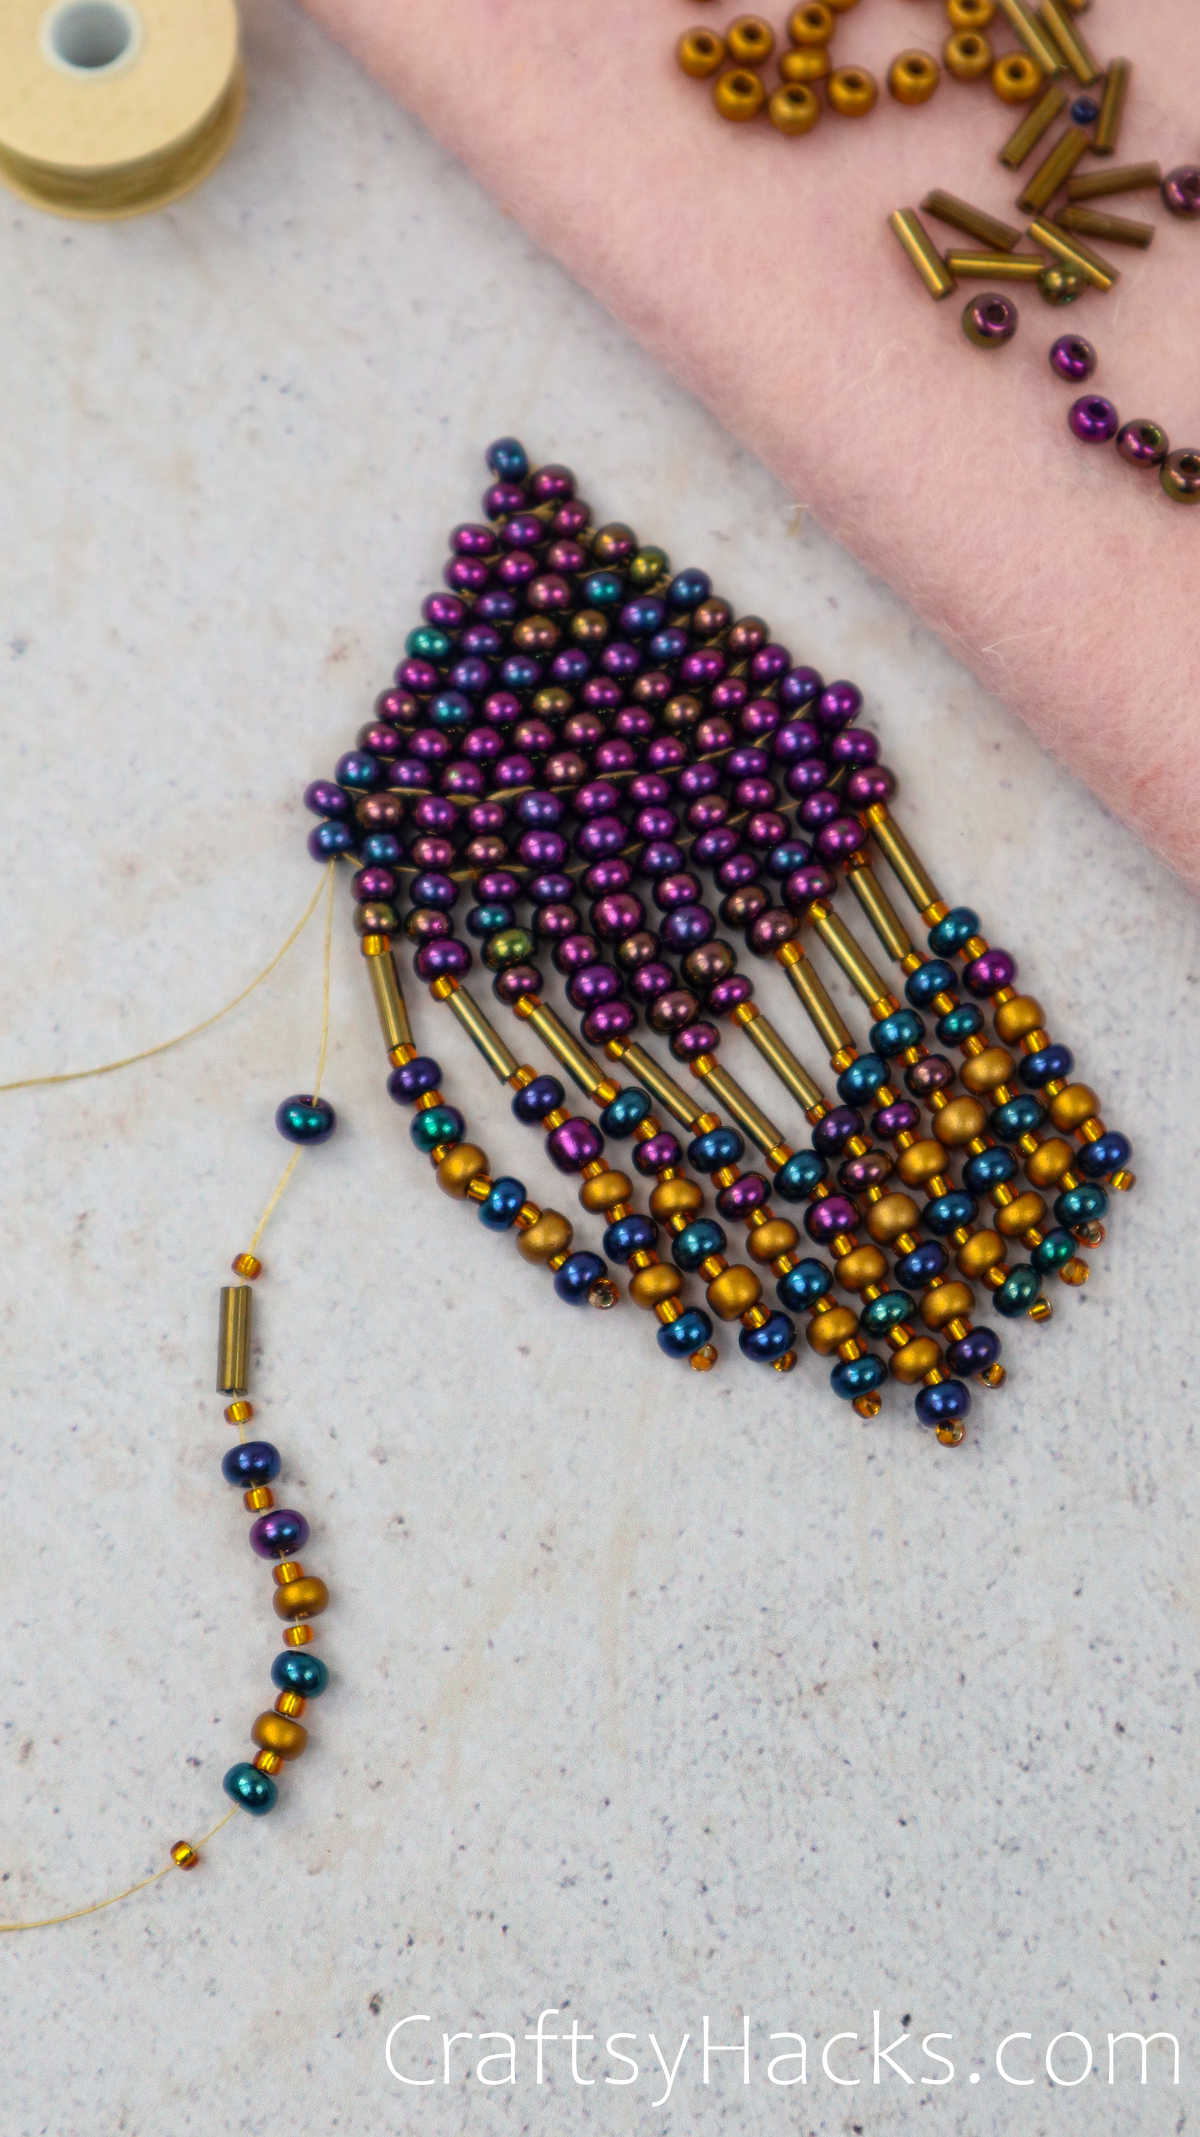
Step 22
For the last fringe line, do the same, thread back through the line except for the very bottom bead and go through your two beads along the ladder and come back down another.
Do the same once or twice more, knot the tail, and pull it into the earring.
Step 23
Finally, once everything is secure, take your lighter to burn the tail off the earrings, but be careful not to damage any other part of the earring.
At this point, follow the directions in the package to attach the hardware to your earrings.


