DIY Tassel Earrings (Step-by-Step Tutorial)
This post may contain affiliate links: full affiliate disclosure.
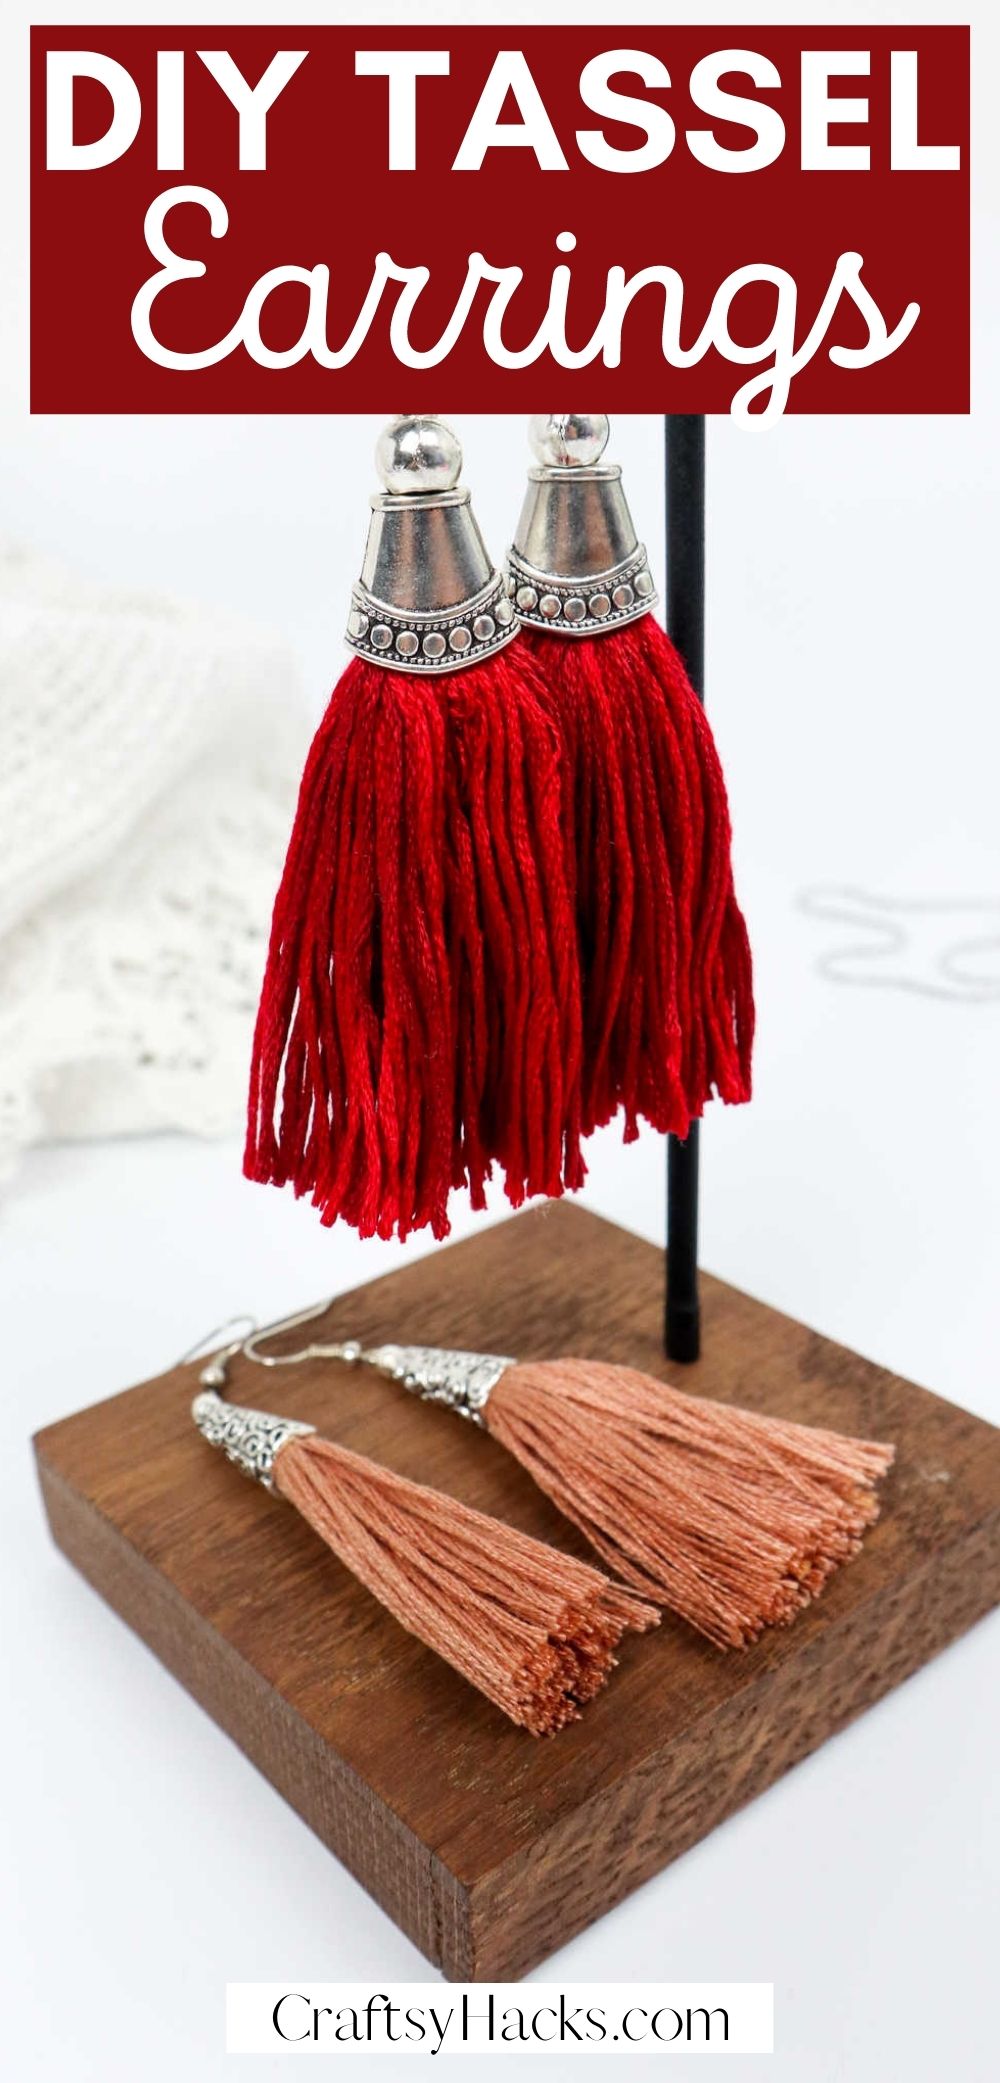
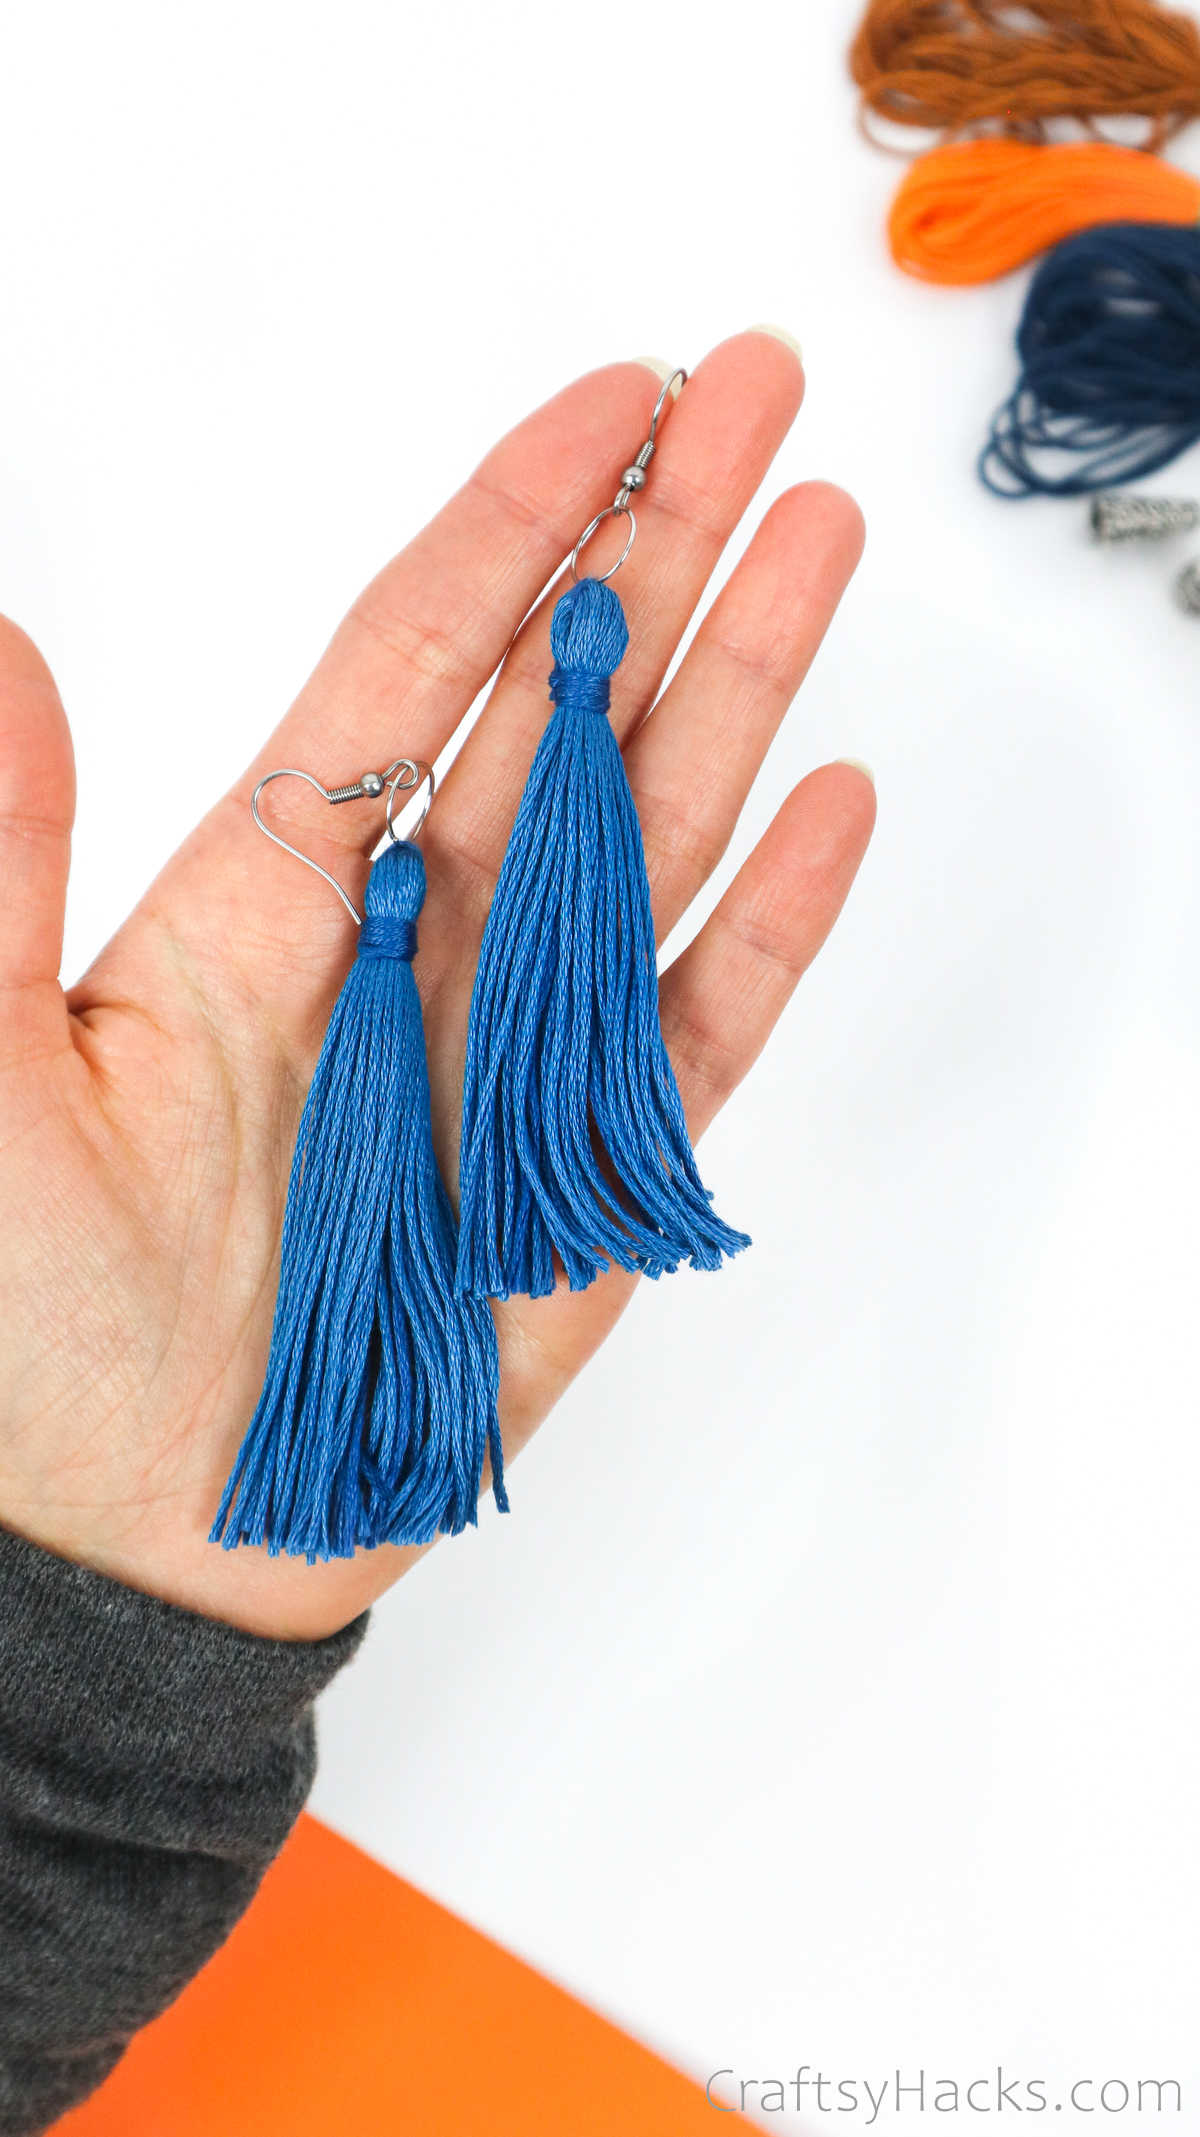
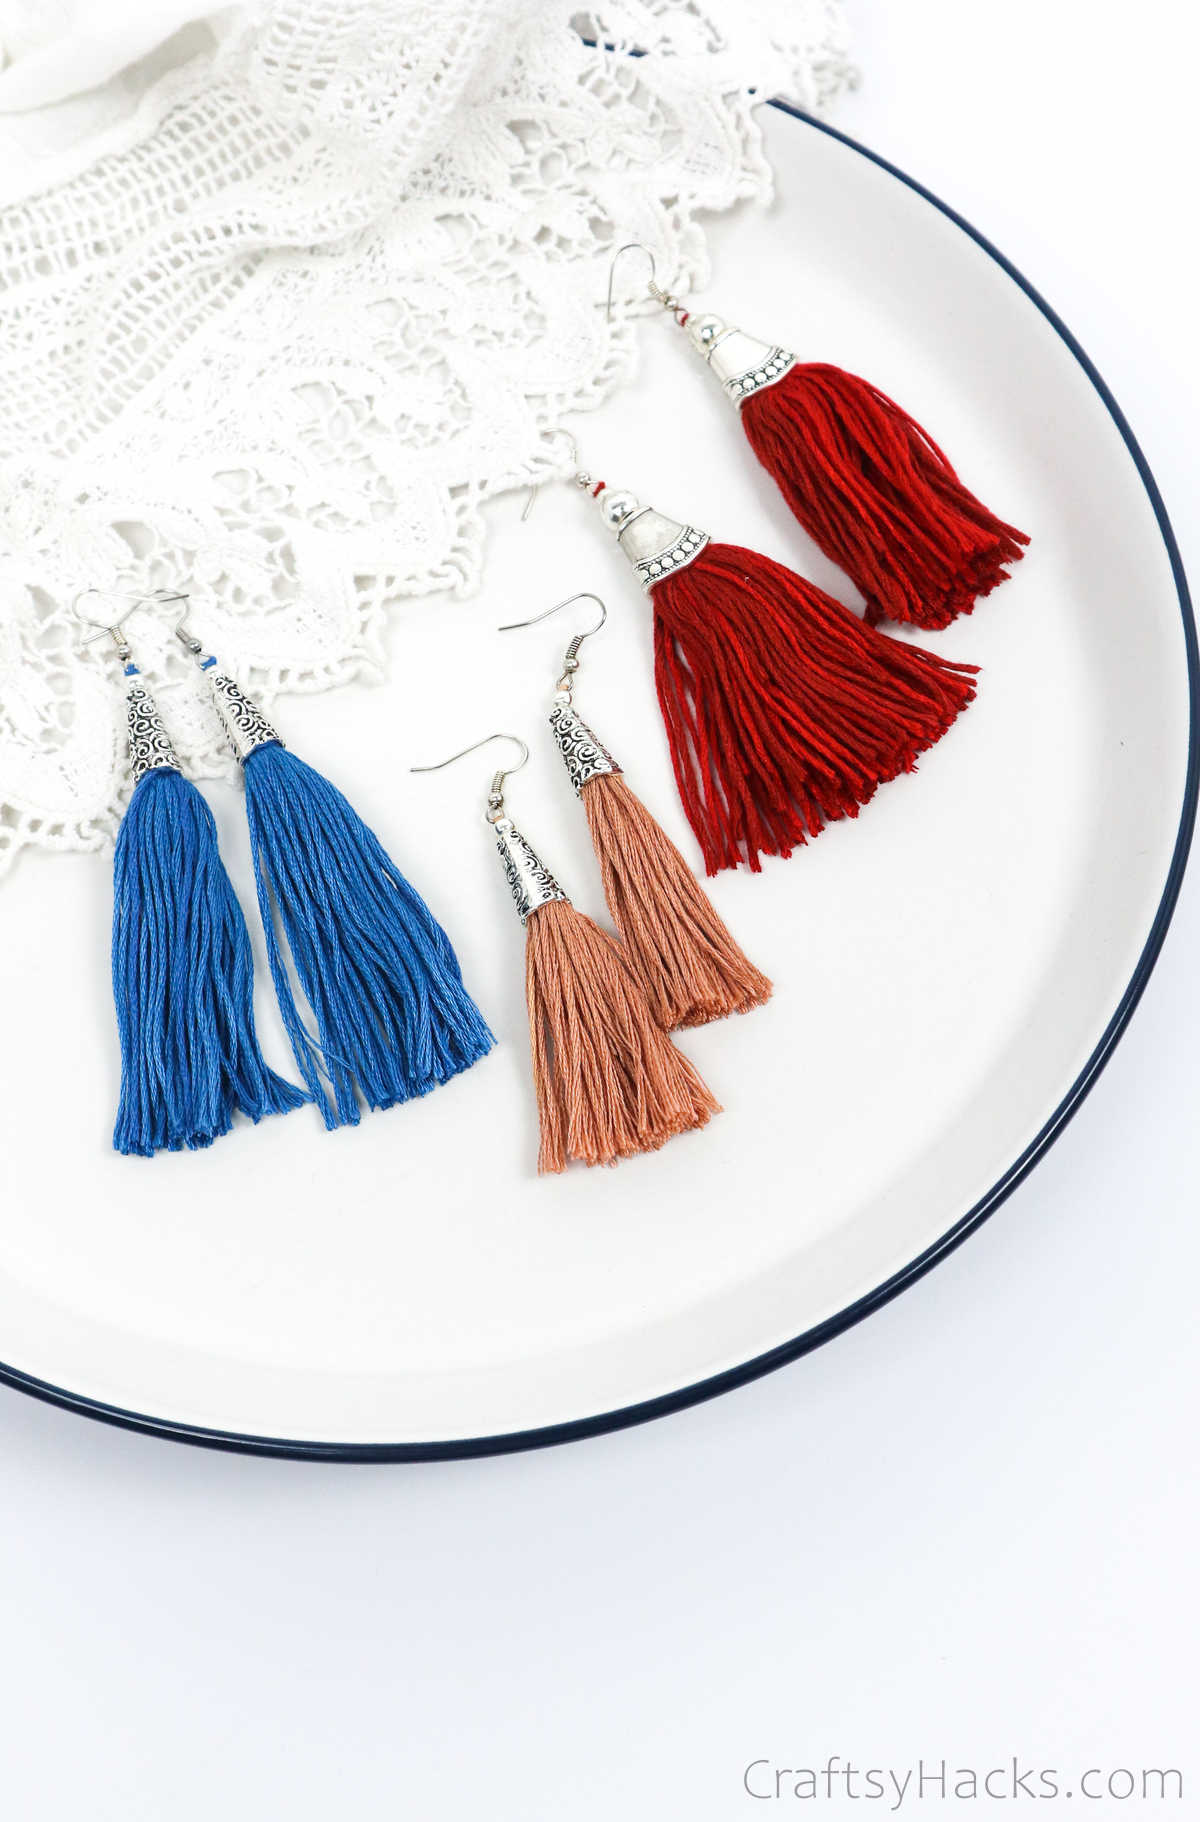
These tassel earrings make for beautiful gifts. Truly a fun and beautiful project anyone can make and wear for special occasions.
You’re probably used to seeing tassels as a part of your home decor. Tassels as decorative accents from curtain holders, as keychains, on throw pillows, and more are pretty amazing, right?
Well, how about you make tassel earrings for a change? They’re flirty and fun and add a ton of color and texture to help you accessorize.
You’ll be surprised at just how easy these tassel earrings are to make. You can make at least half a dozen pairs in an hour once you get the hang of it. They make wonderful gifts and party favors, so you can make these DIY projects ahead of time and store them till you need them!
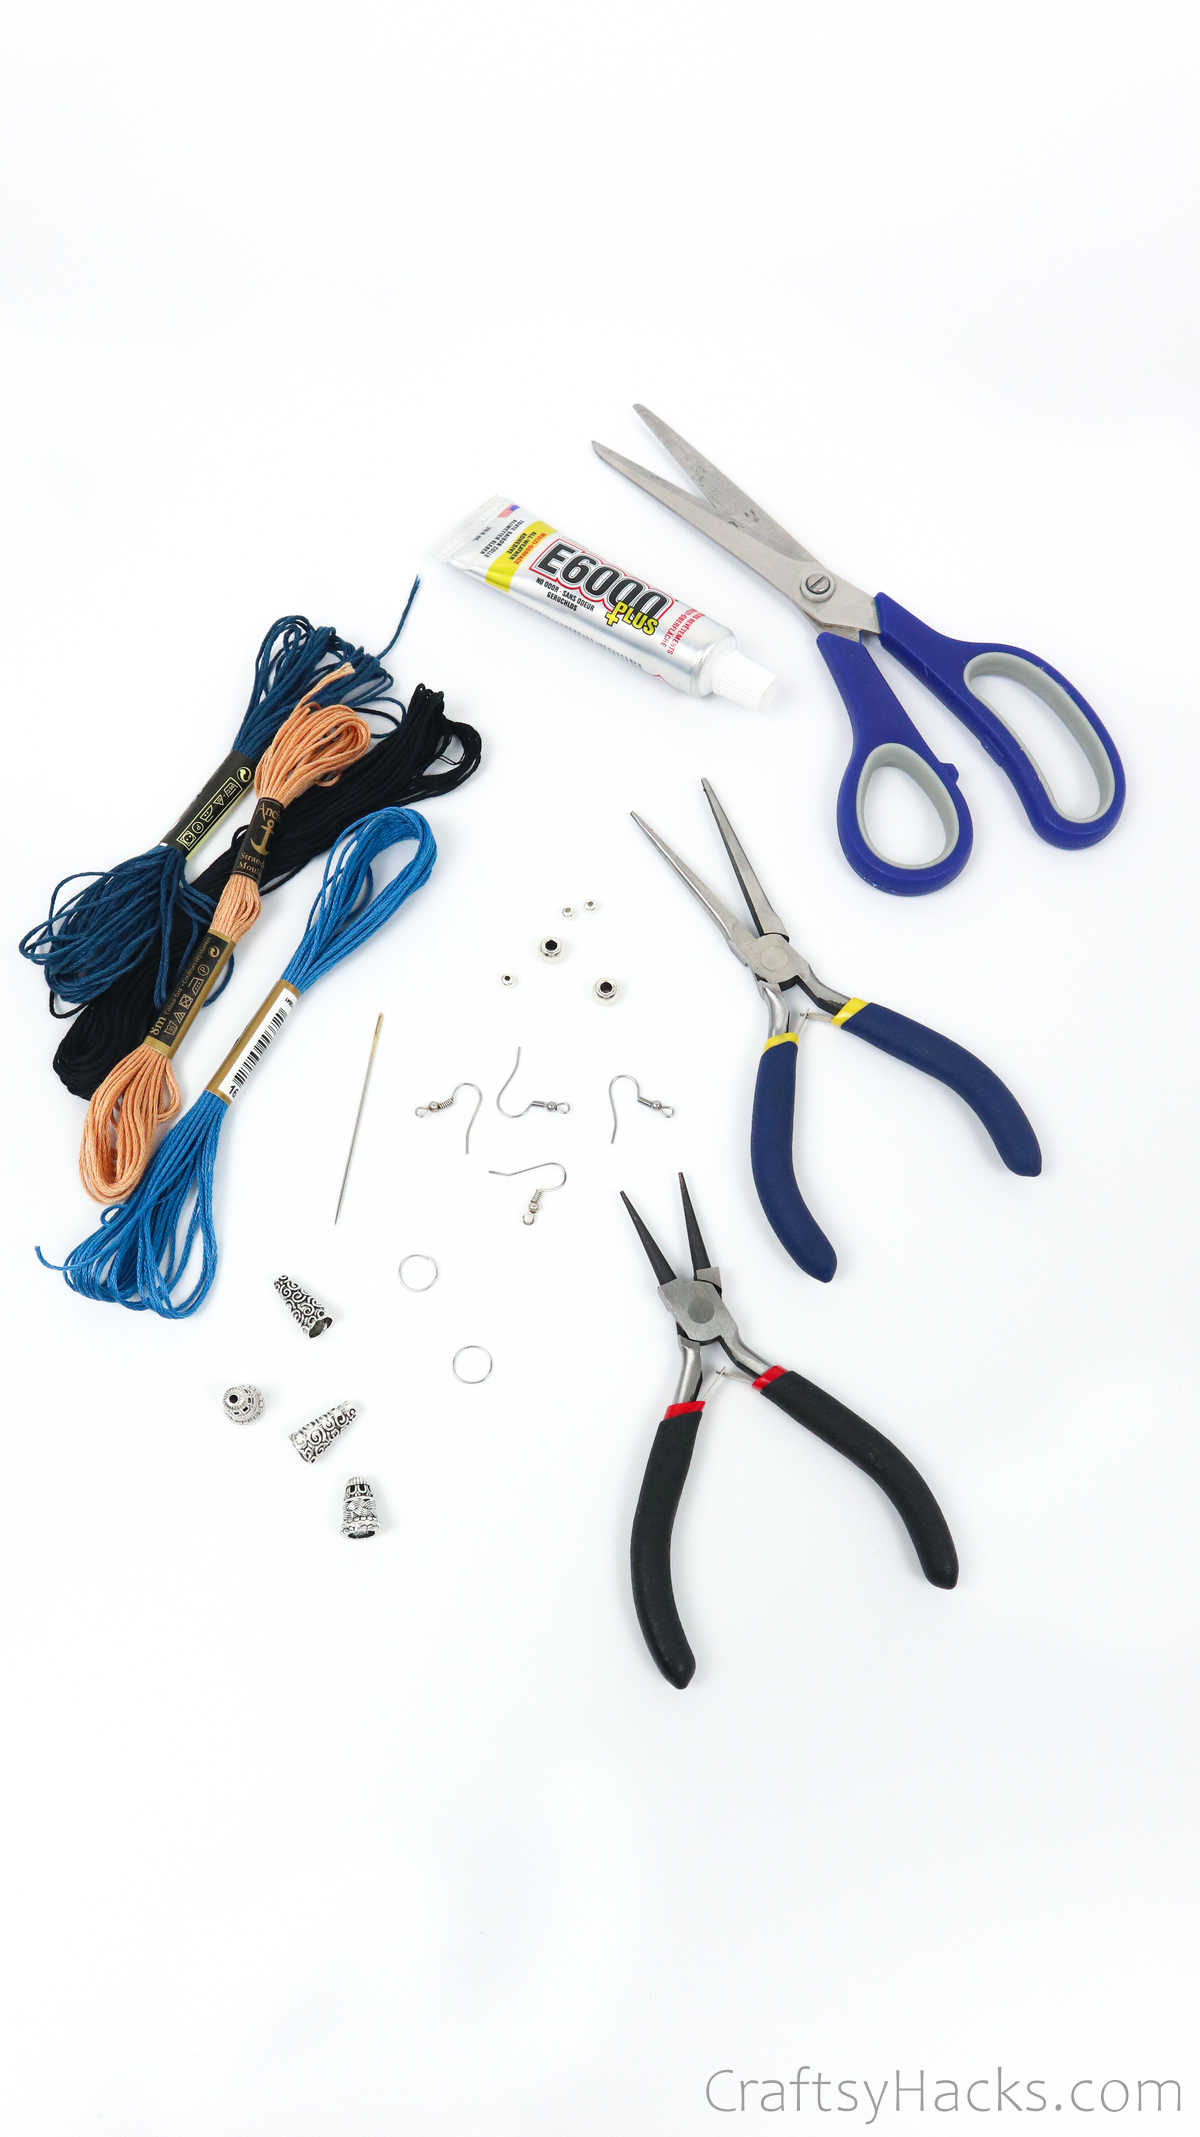
Supplies and Tools You’ll Need
Here’s a list of everything you’ll need to make your tassel earrings:
- Scissors
- Pliers
- Embroidery thread
- Pony eye needle
- Earrings hooks
- Jump rings
- E6000
- Beads
- Cone bead caps
How to Make Tassel Earrings
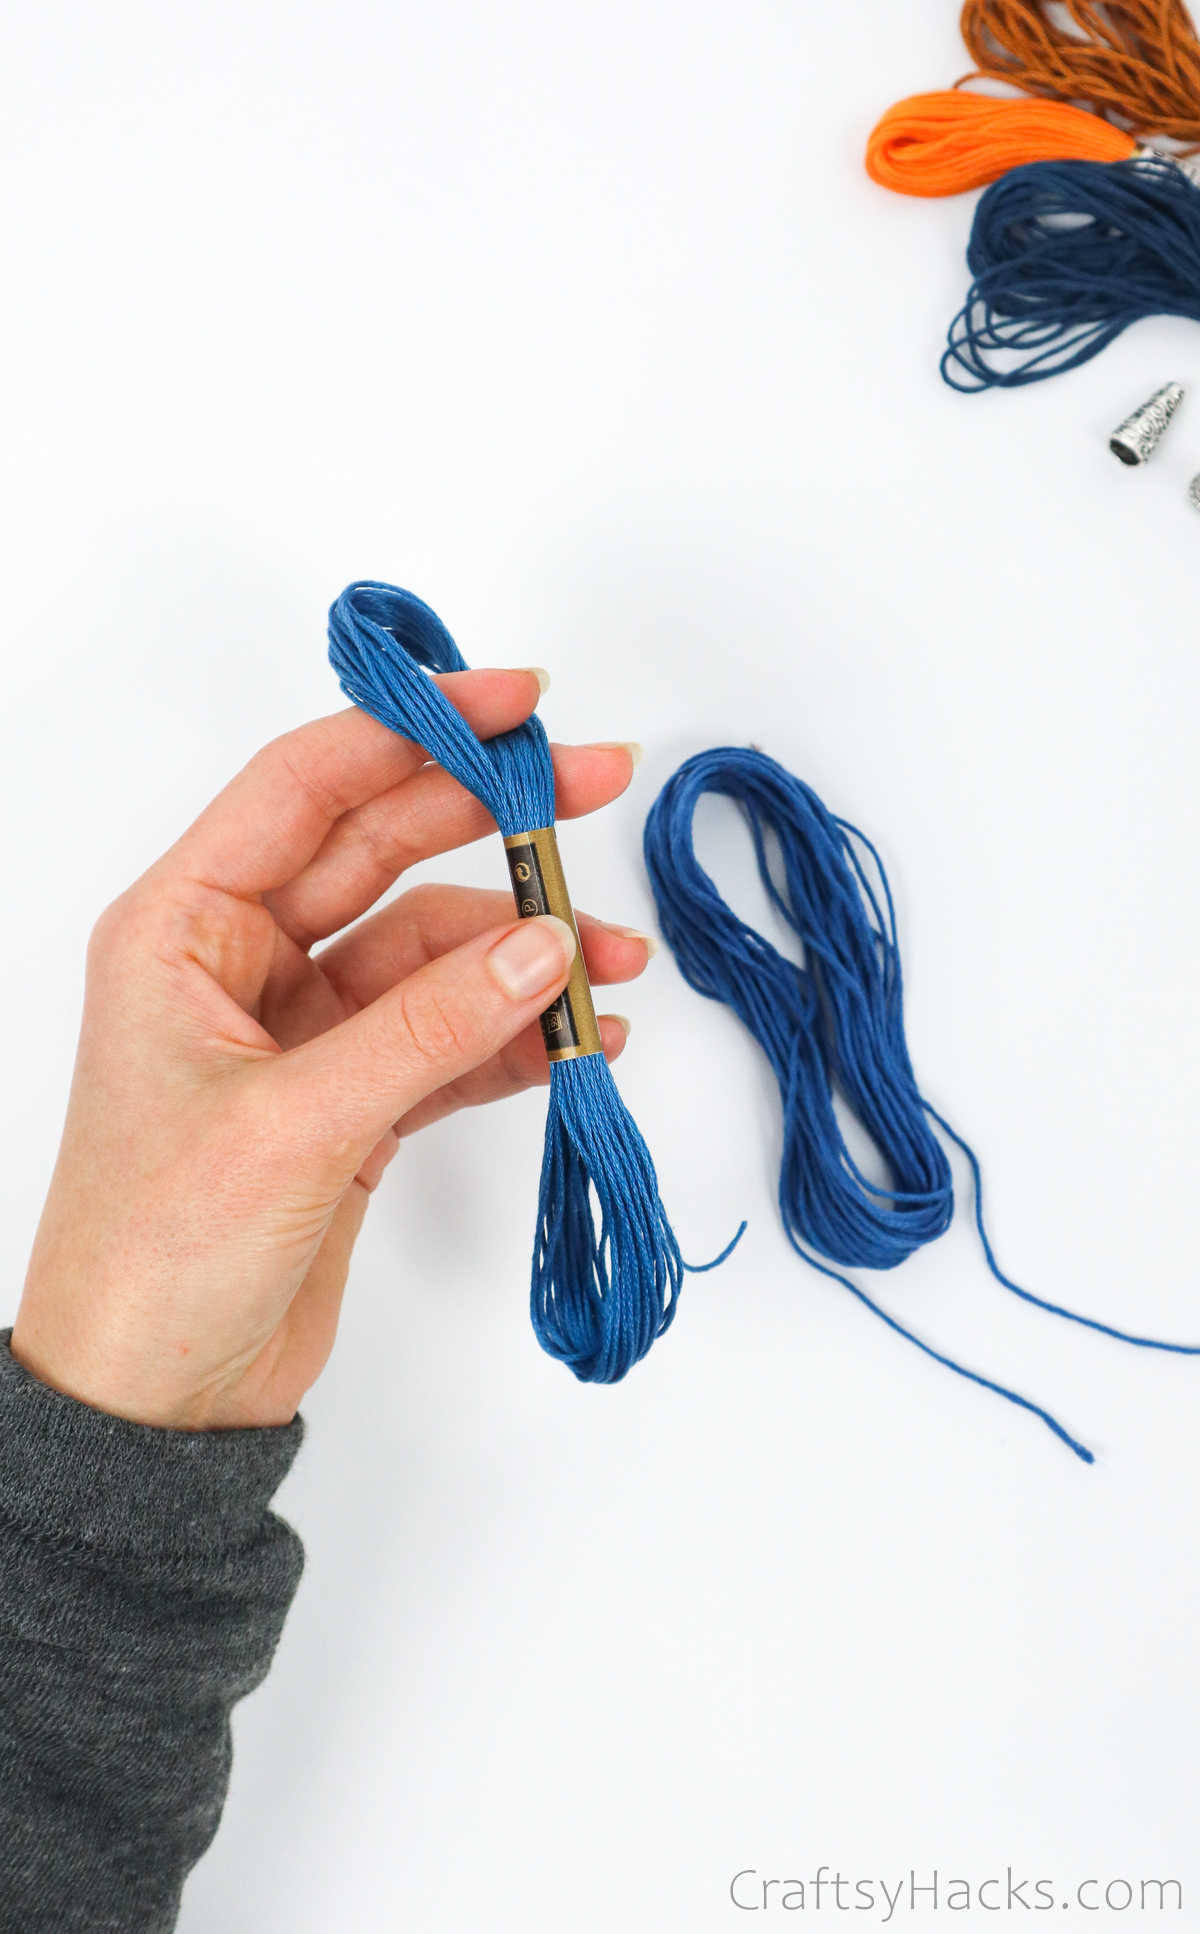
Pick out your favorite color of thread for your earrings. You can also switch things up a little and blend two colors, too!
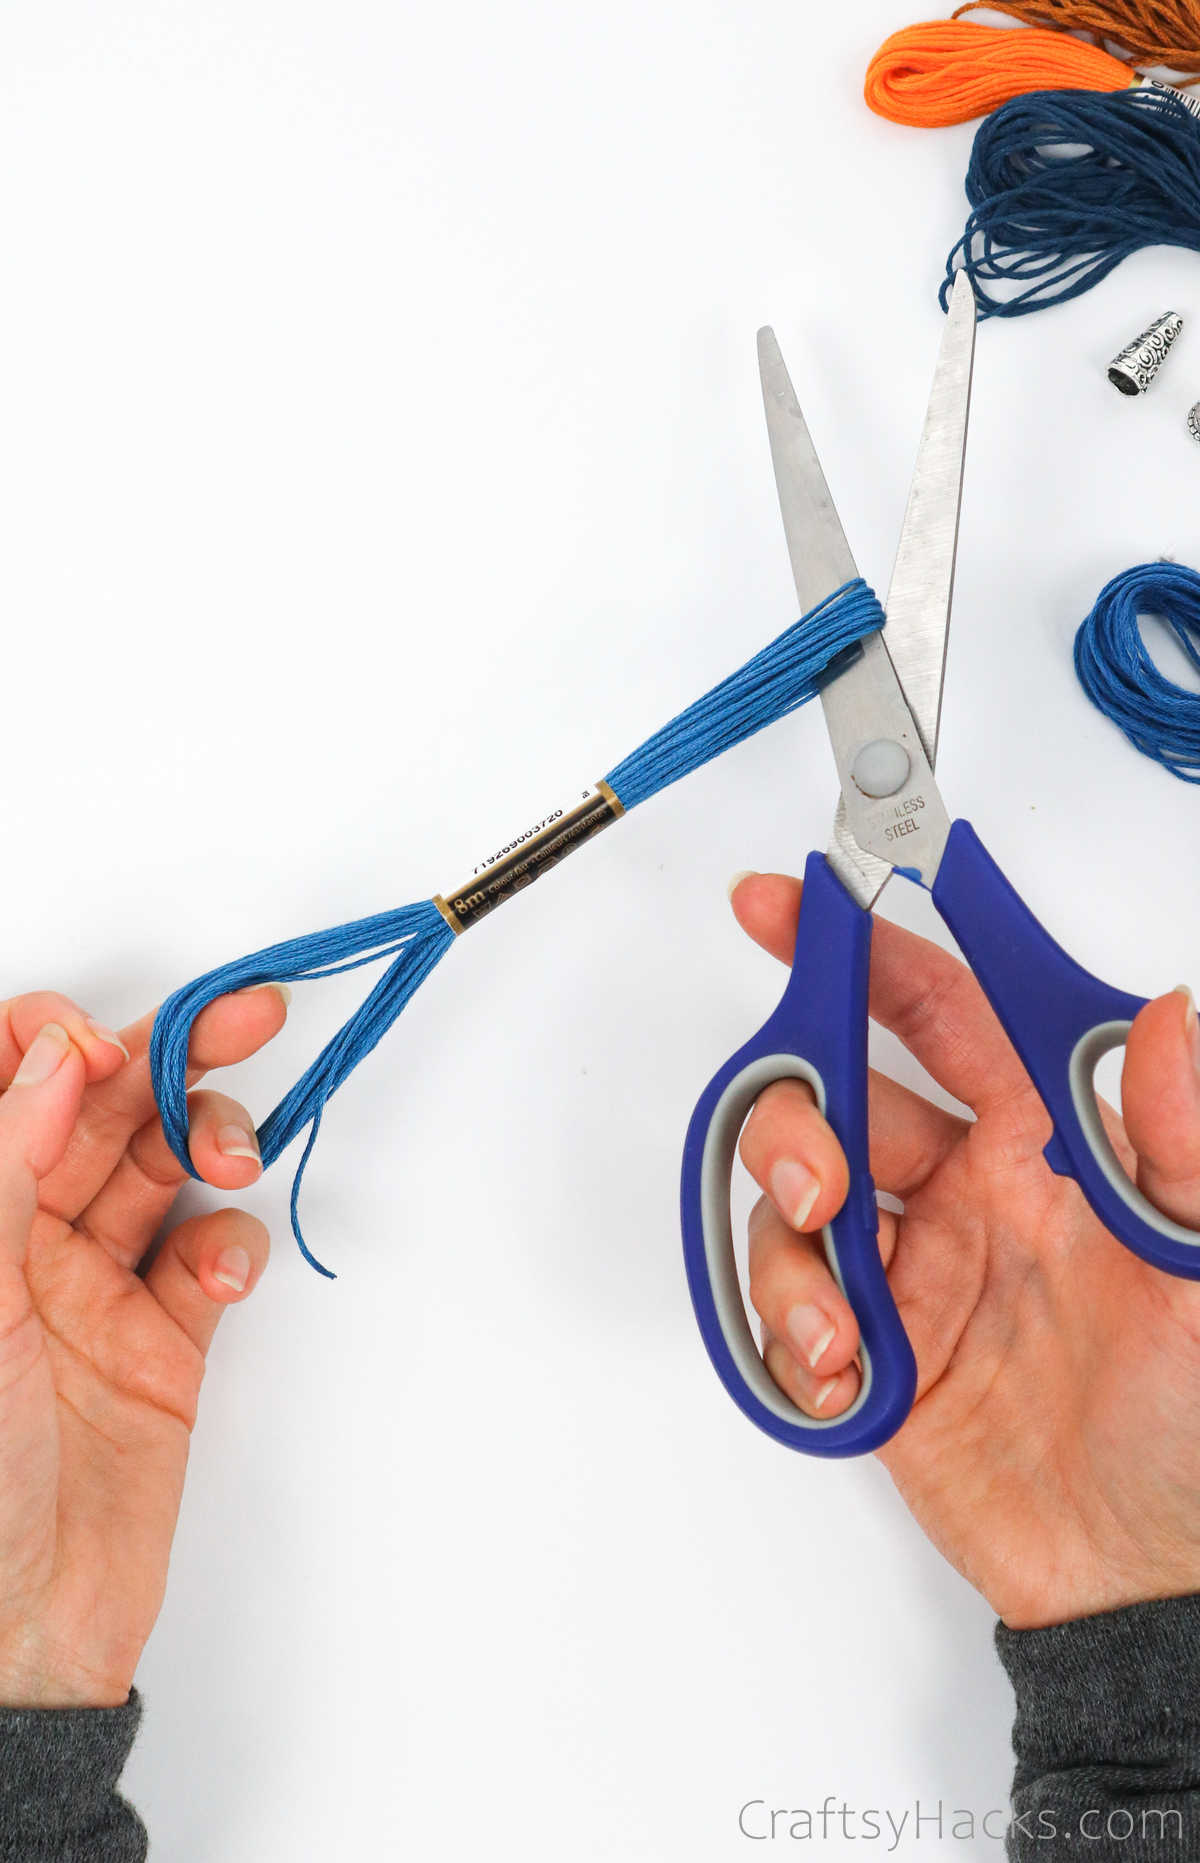
Step 1
The first step is to find the center loop on either end while keeping the little plastic wrapper around the middle intact.
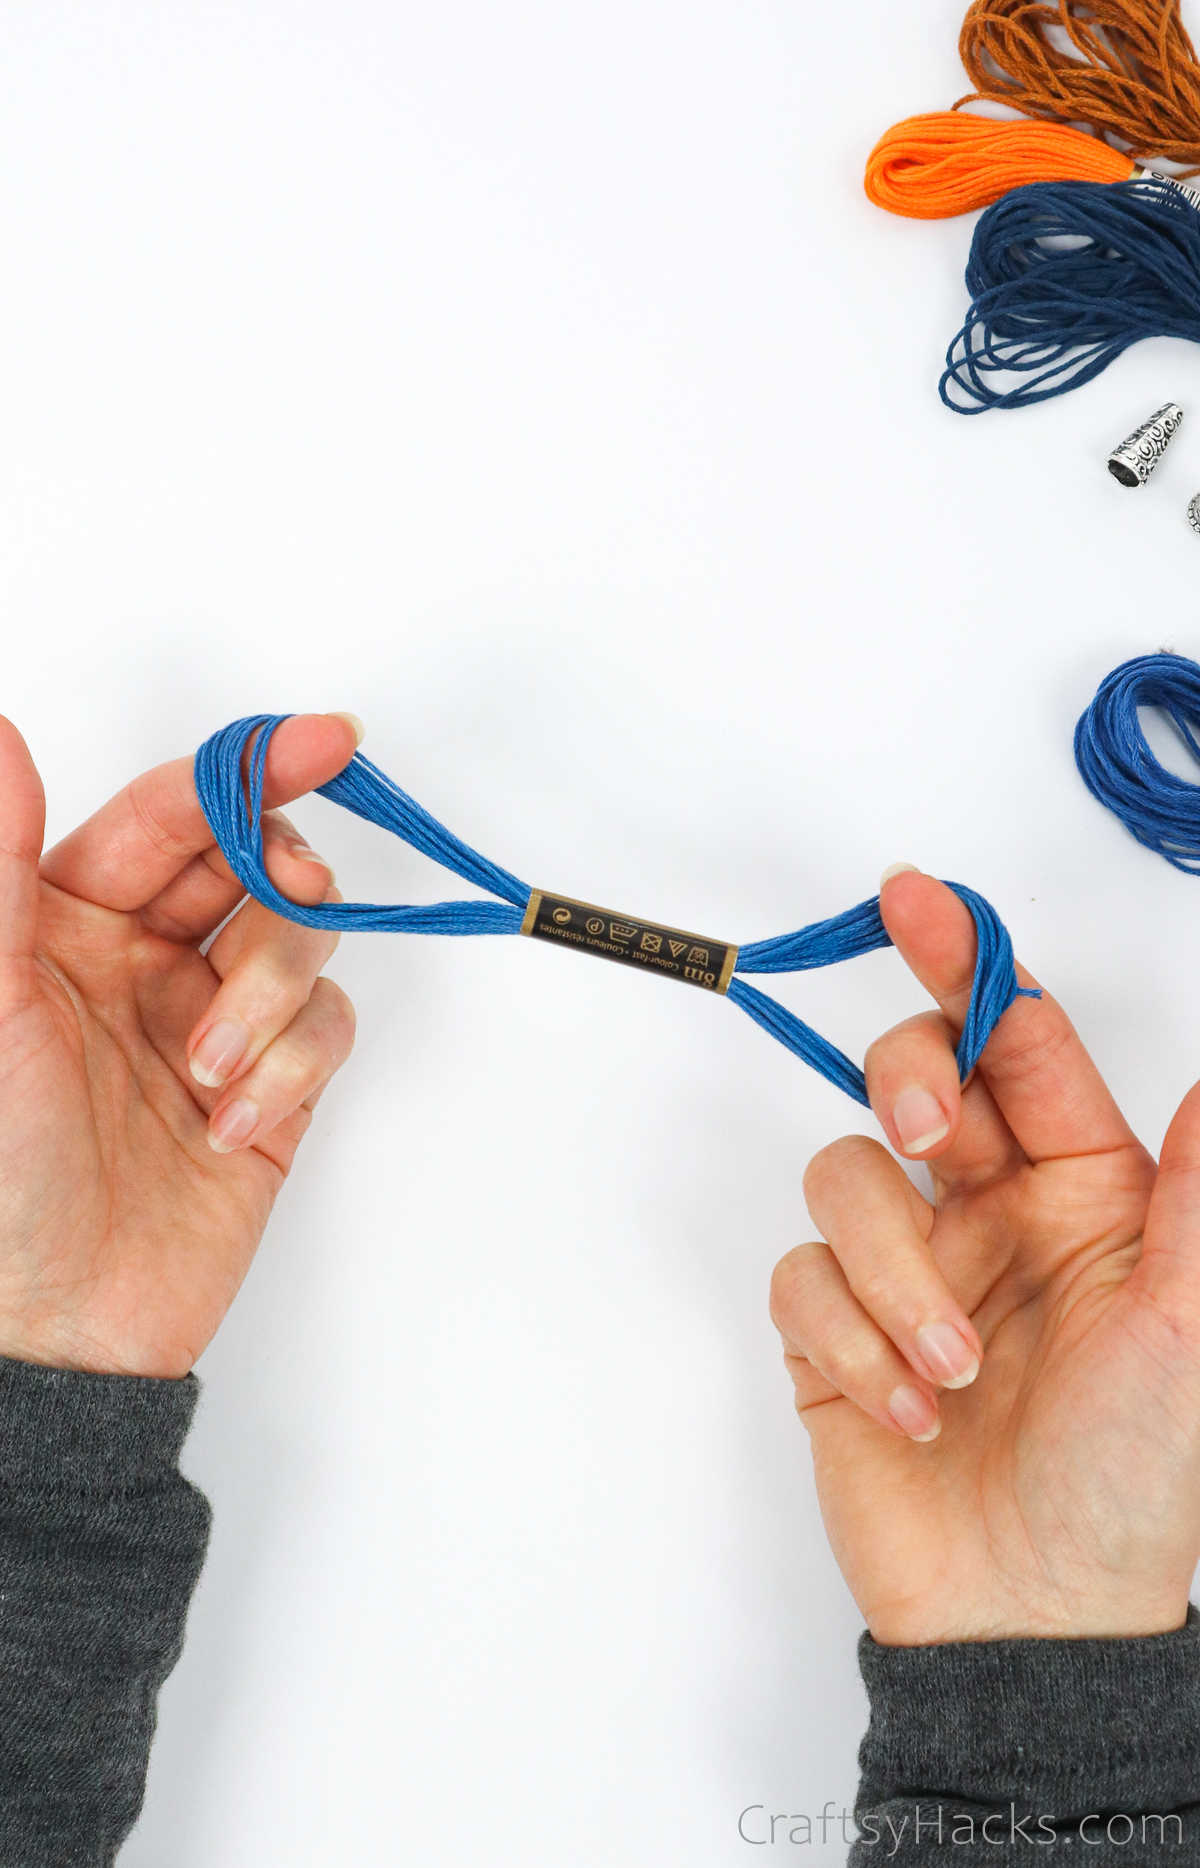
Grab a pair of scissors and snip off the two ends, cutting through all the threads around the center loop, just so.
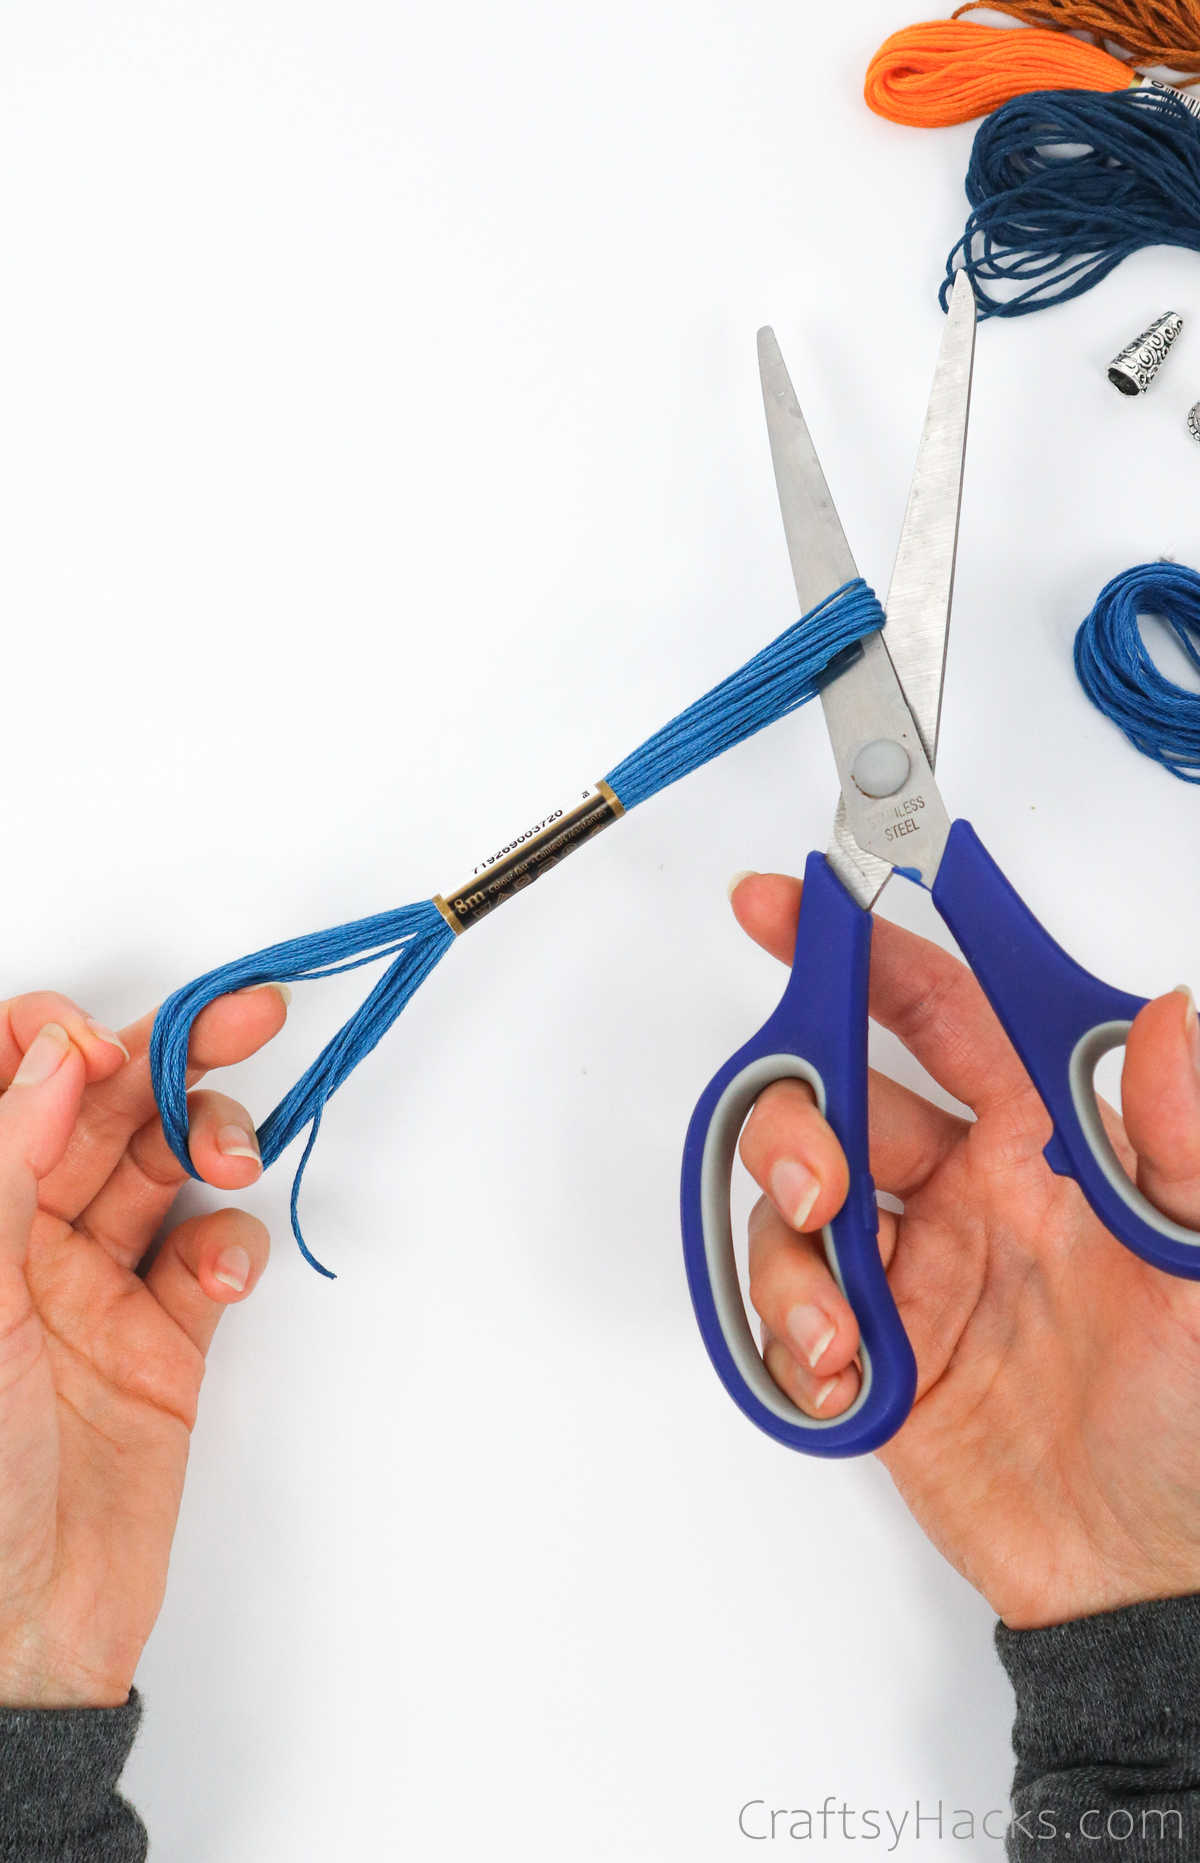
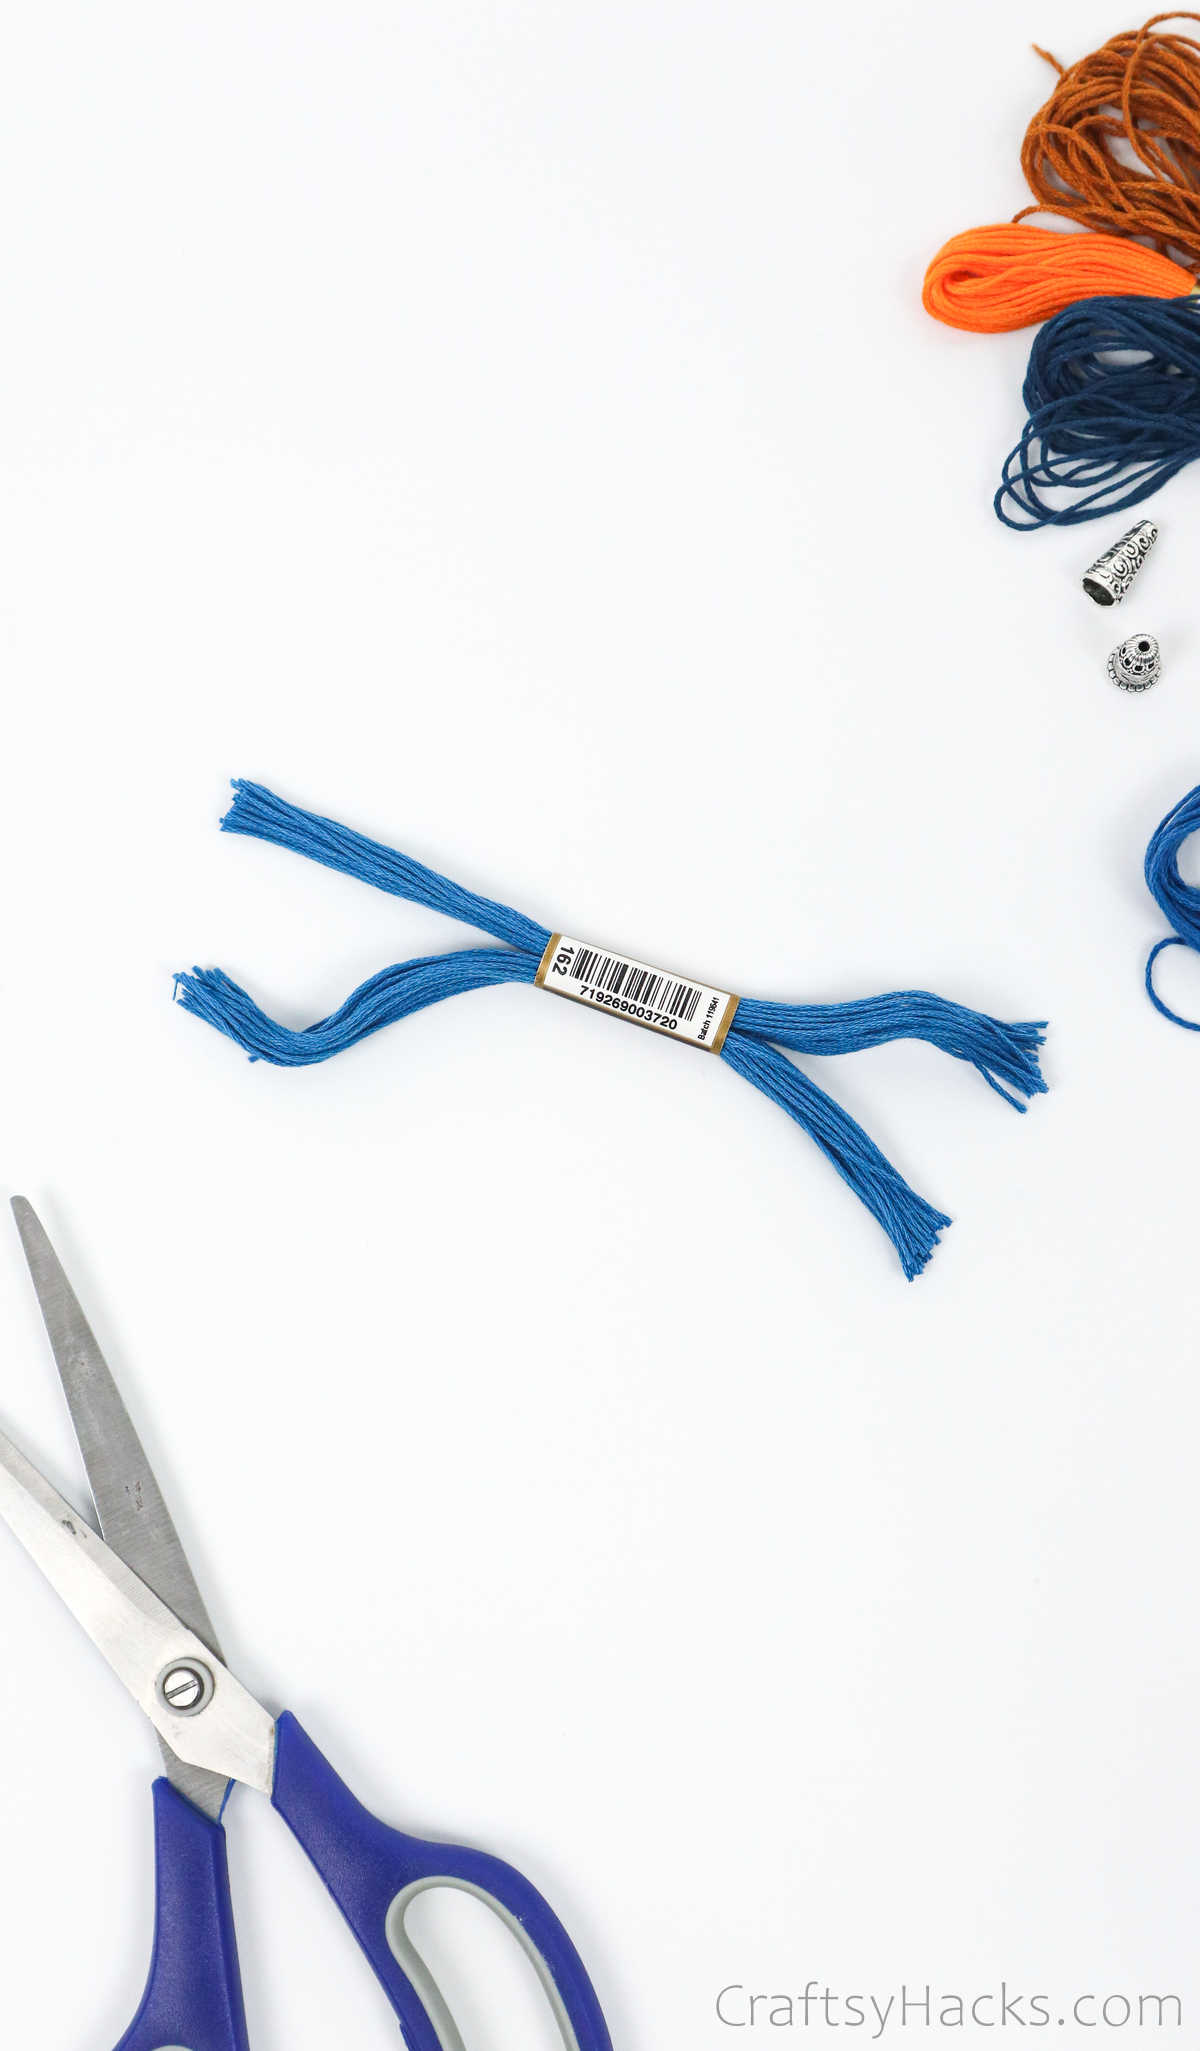
Step 2
Next, carefully pull the wrapper away and separate your embroidery threads into two equal halves.
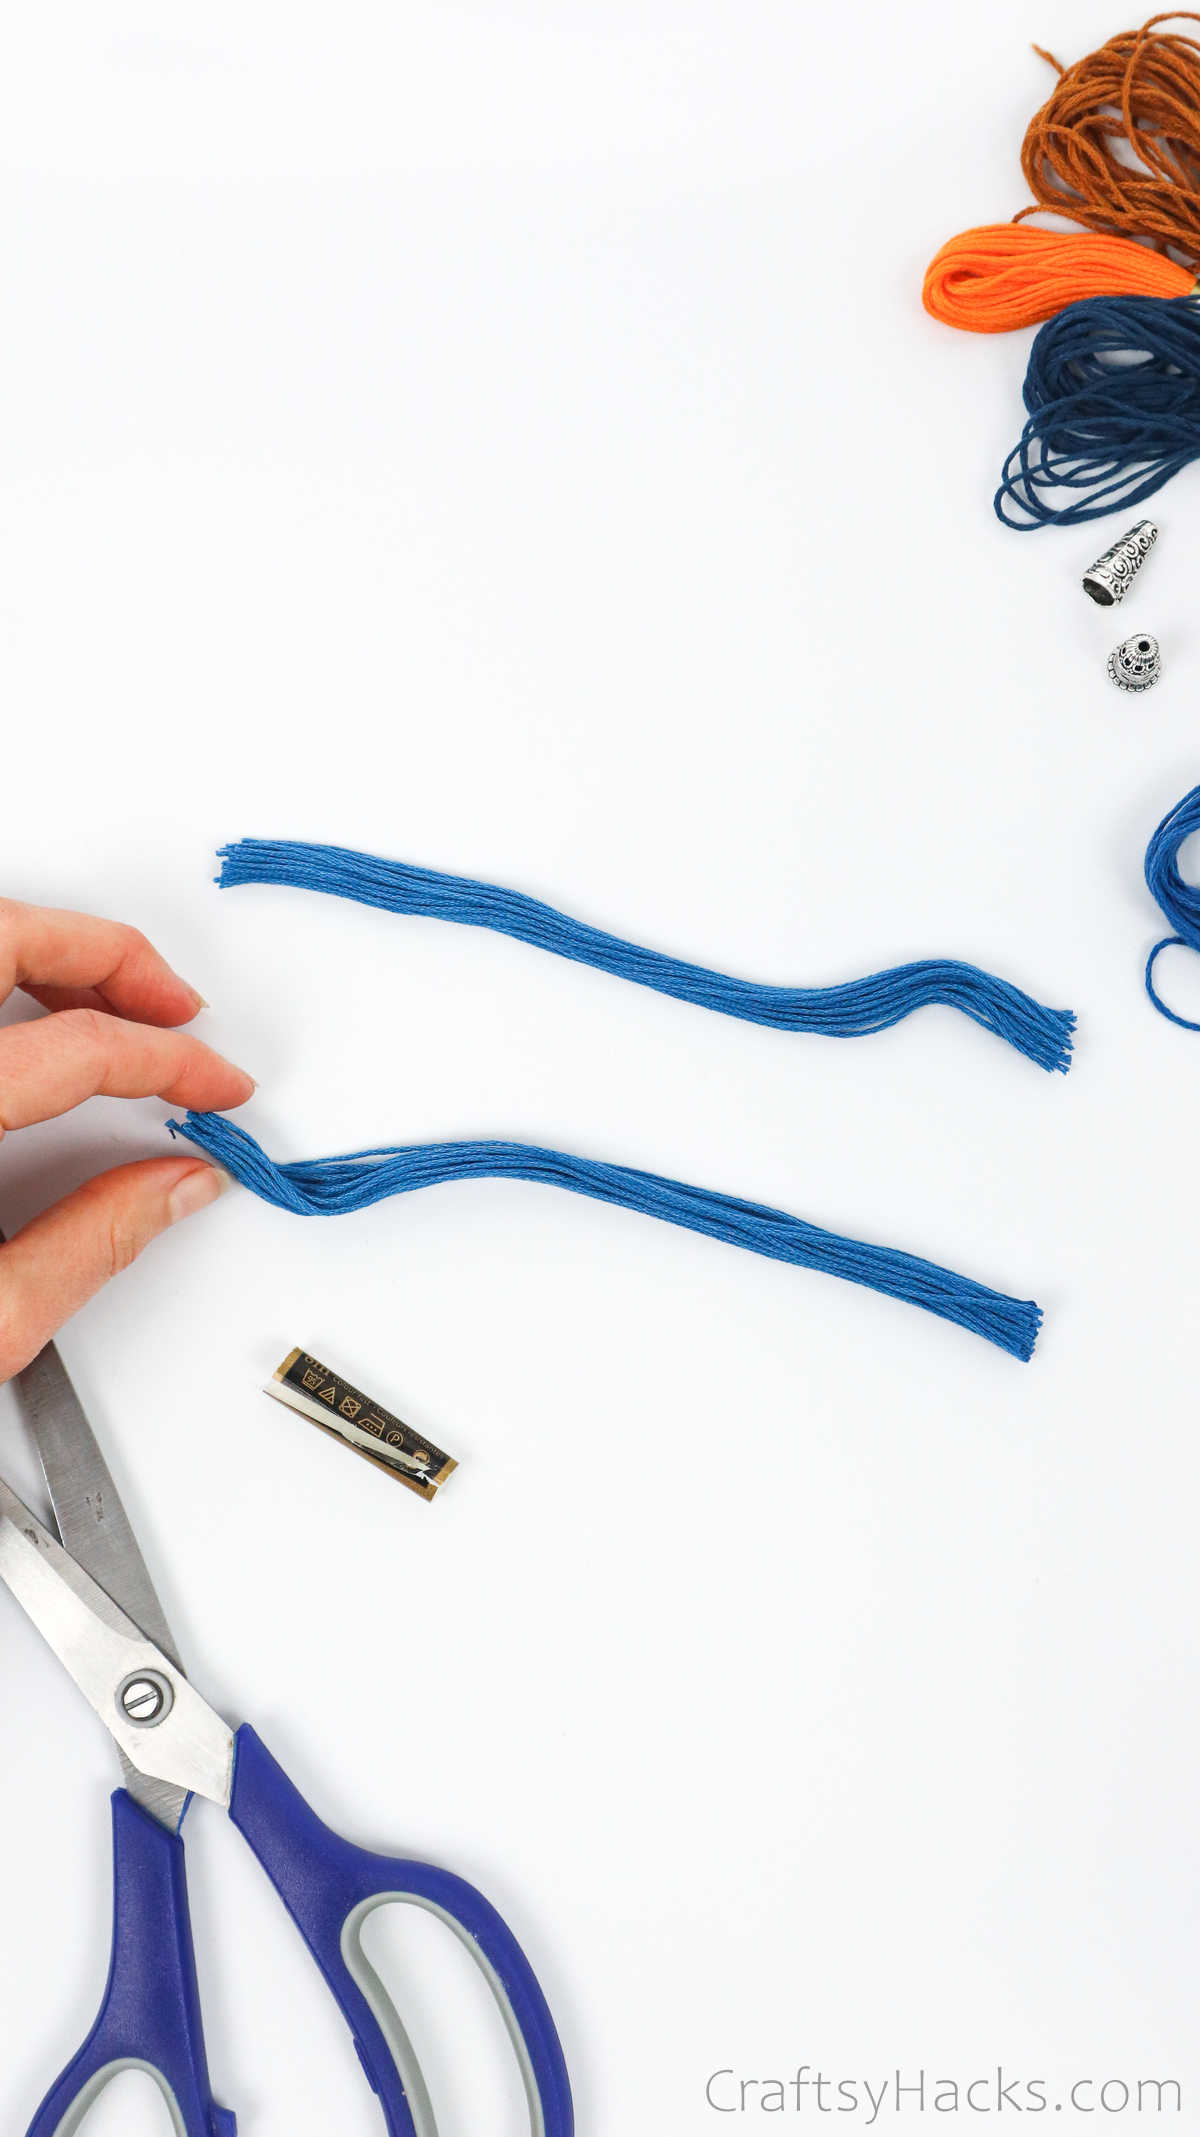
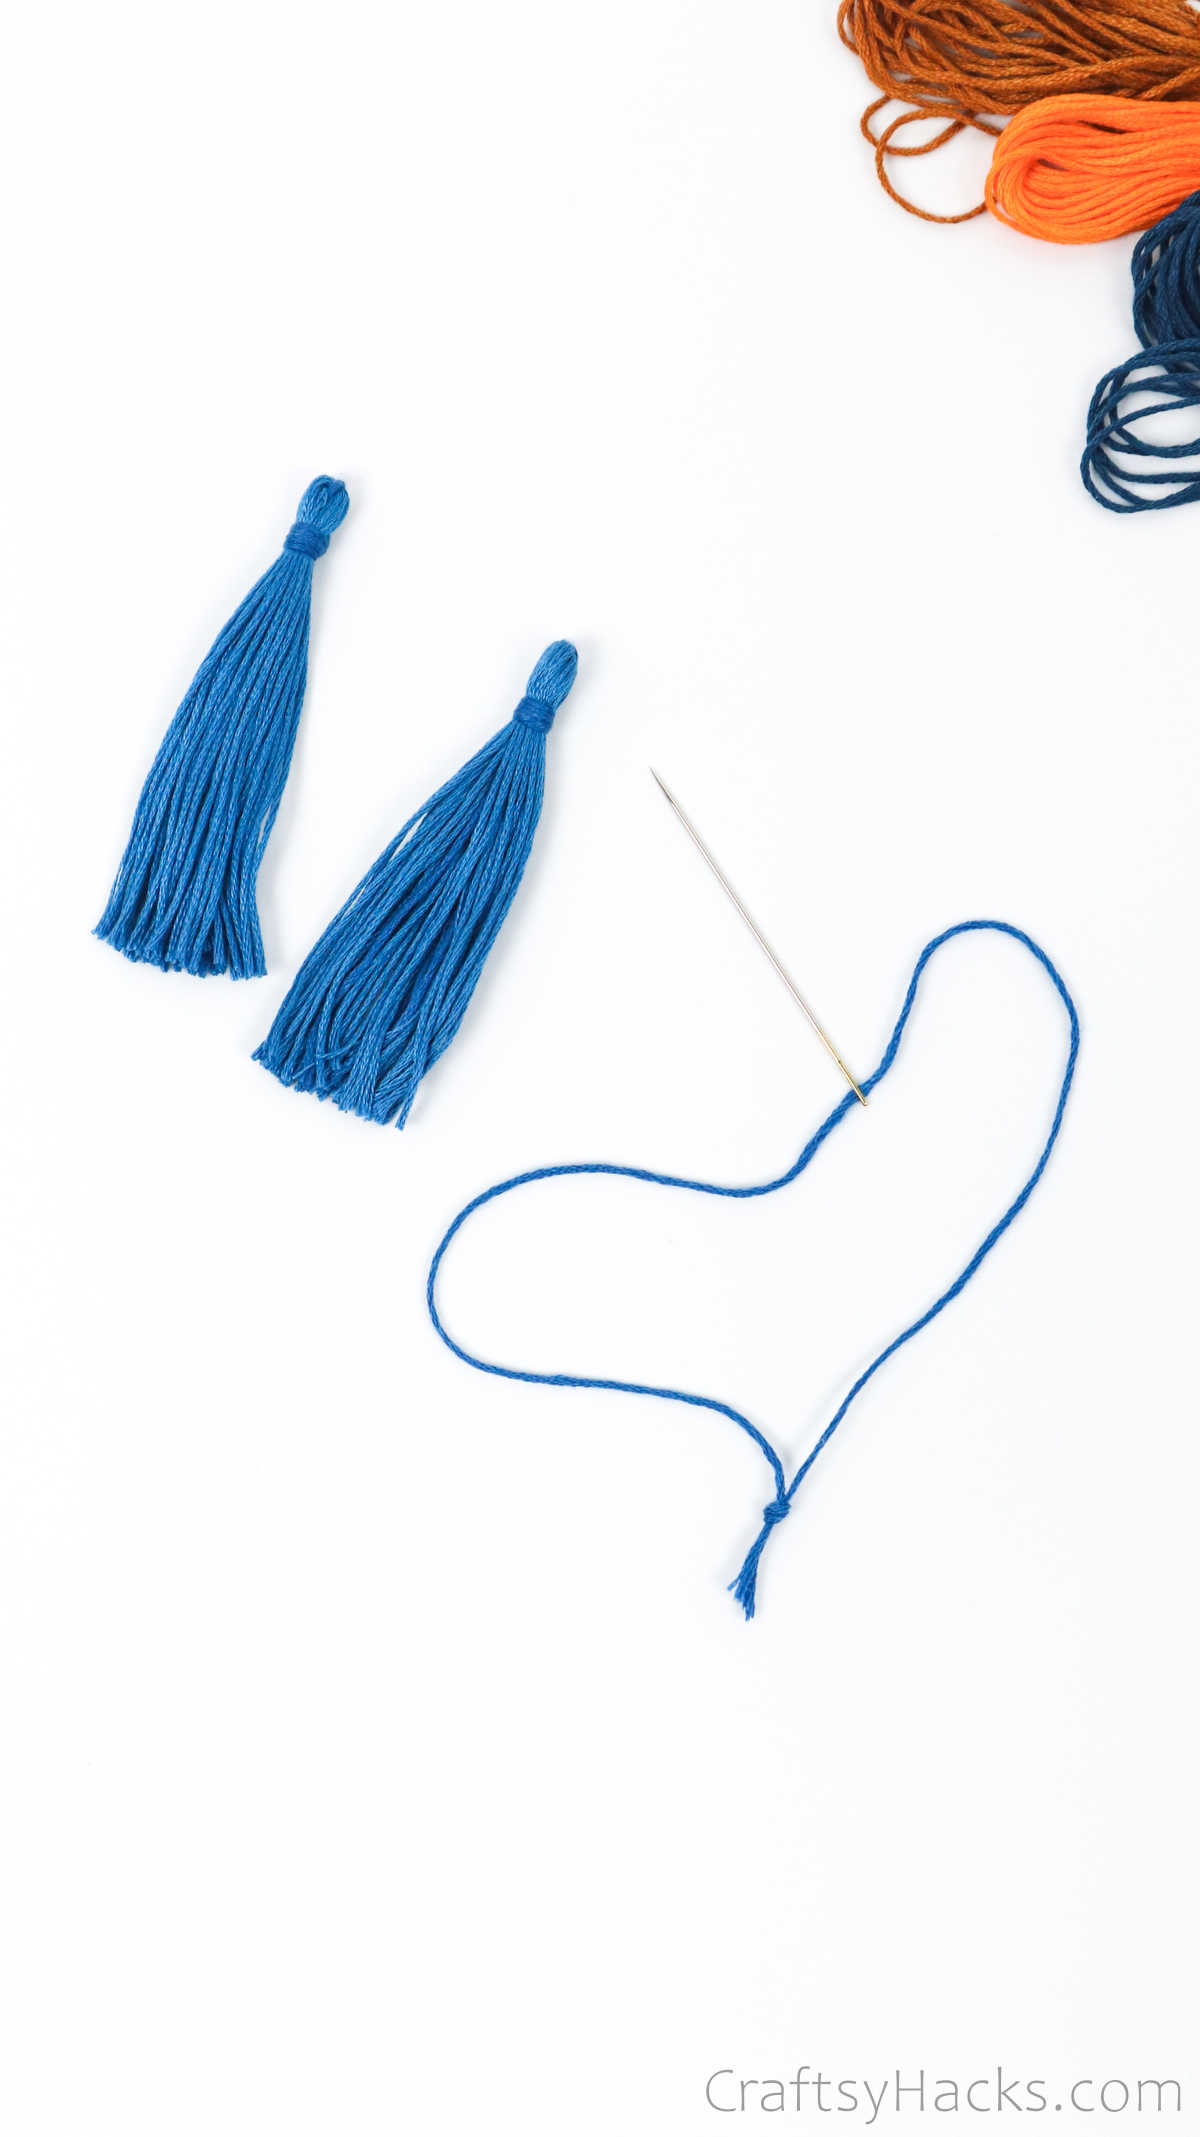
Step 3
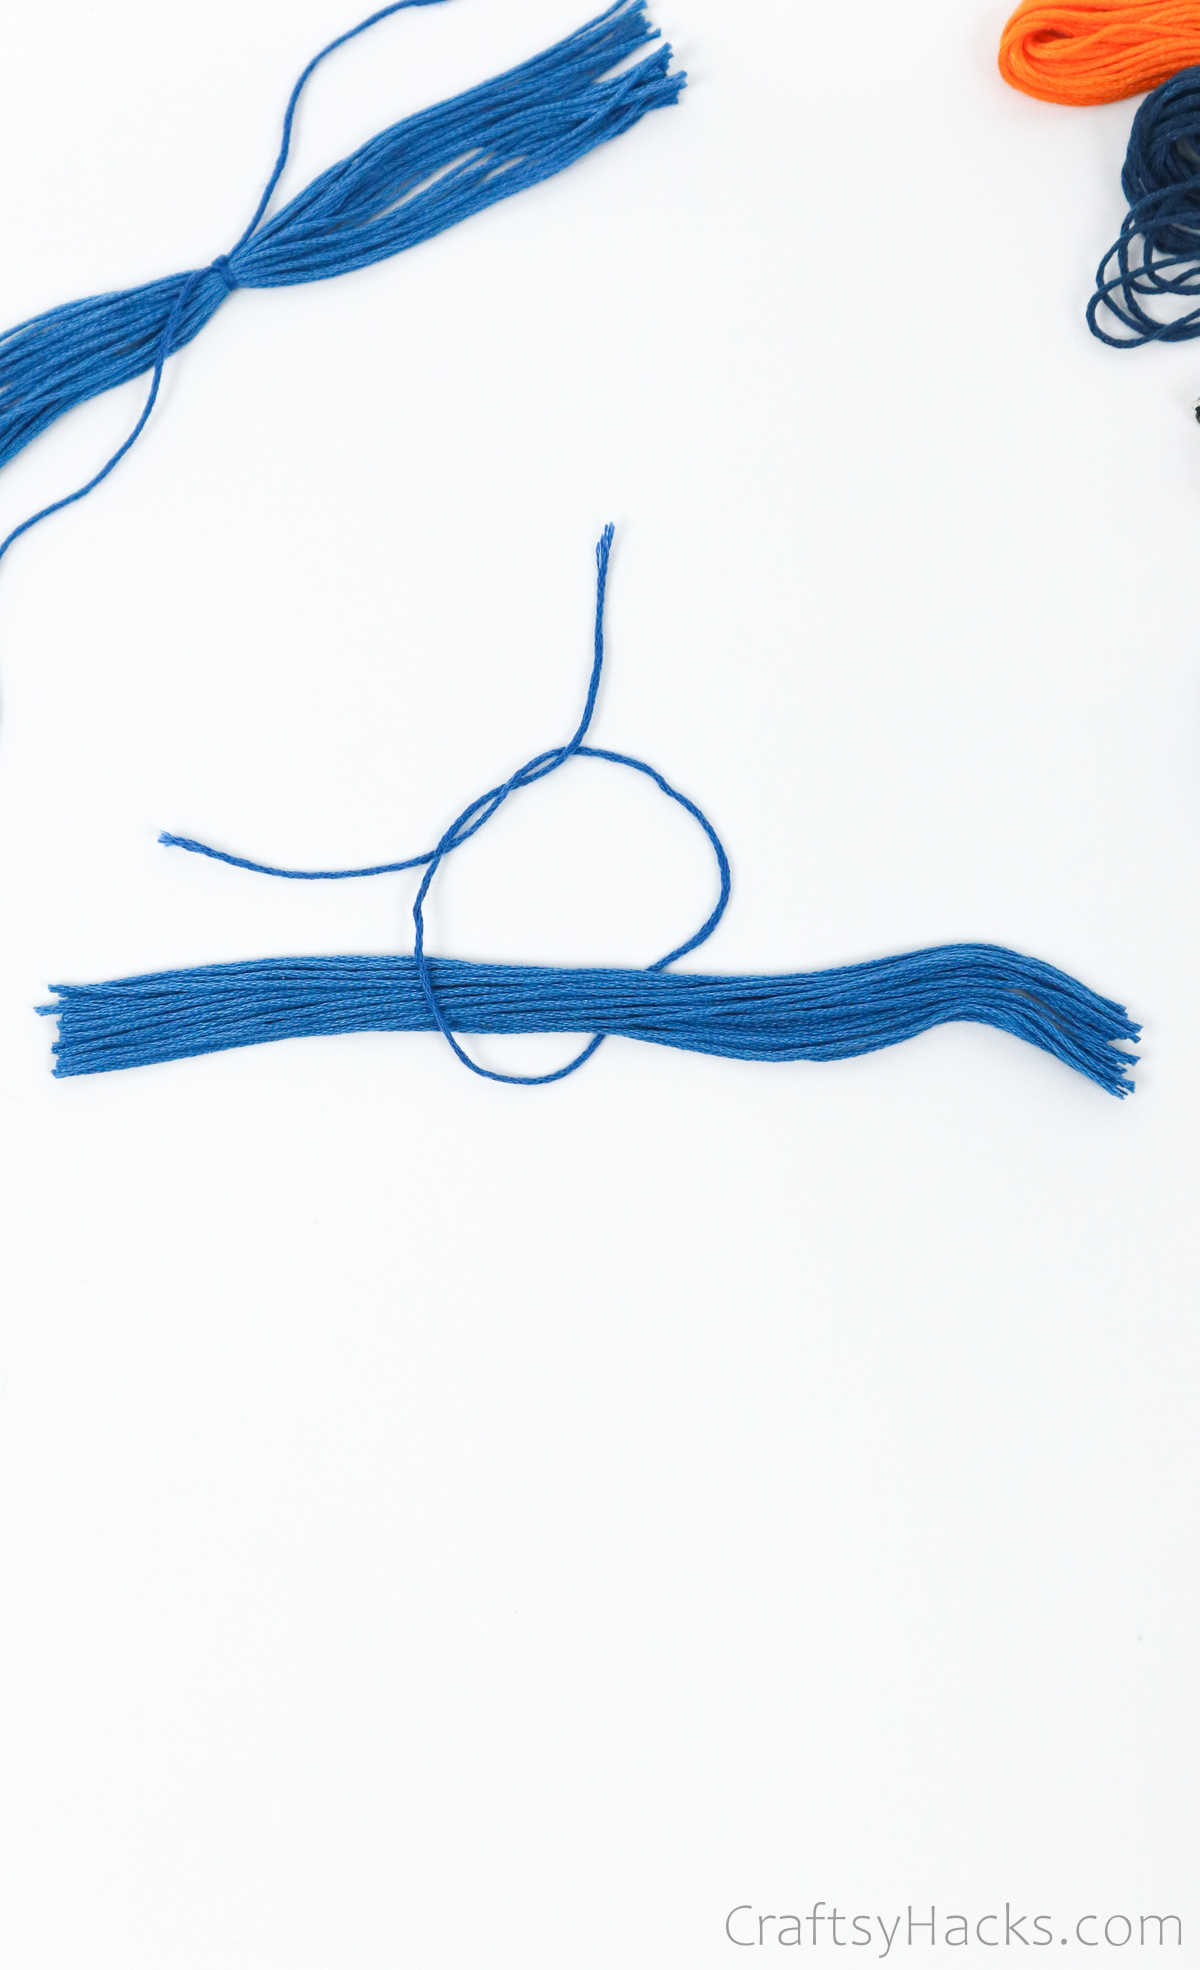
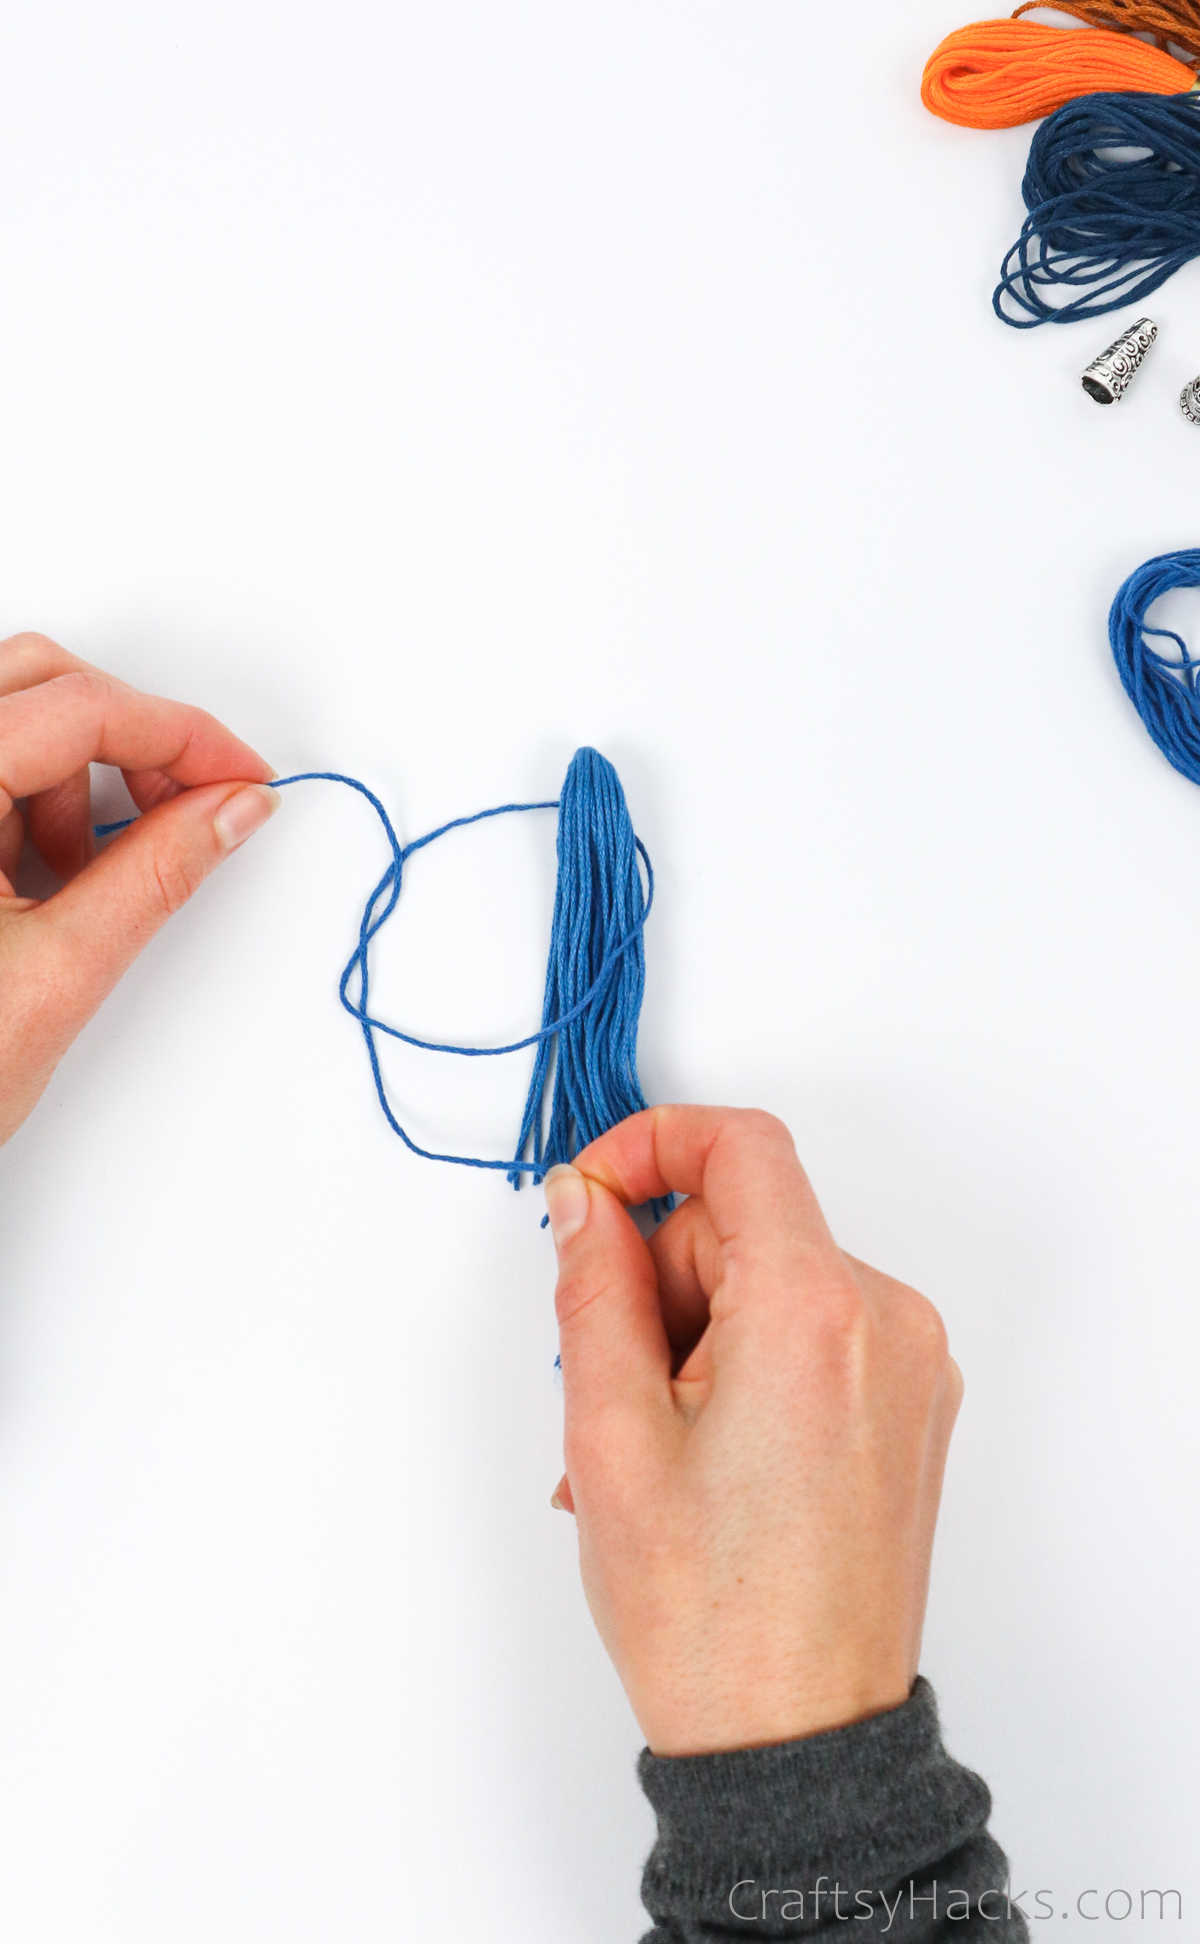
From another batch of embroidery thread(preferably a matching color), snip off a length of thread approximately 8 inches long.
Pull that thread under one half, right around the middle, and tie a knot.
Repeat this step with the other half, as well.
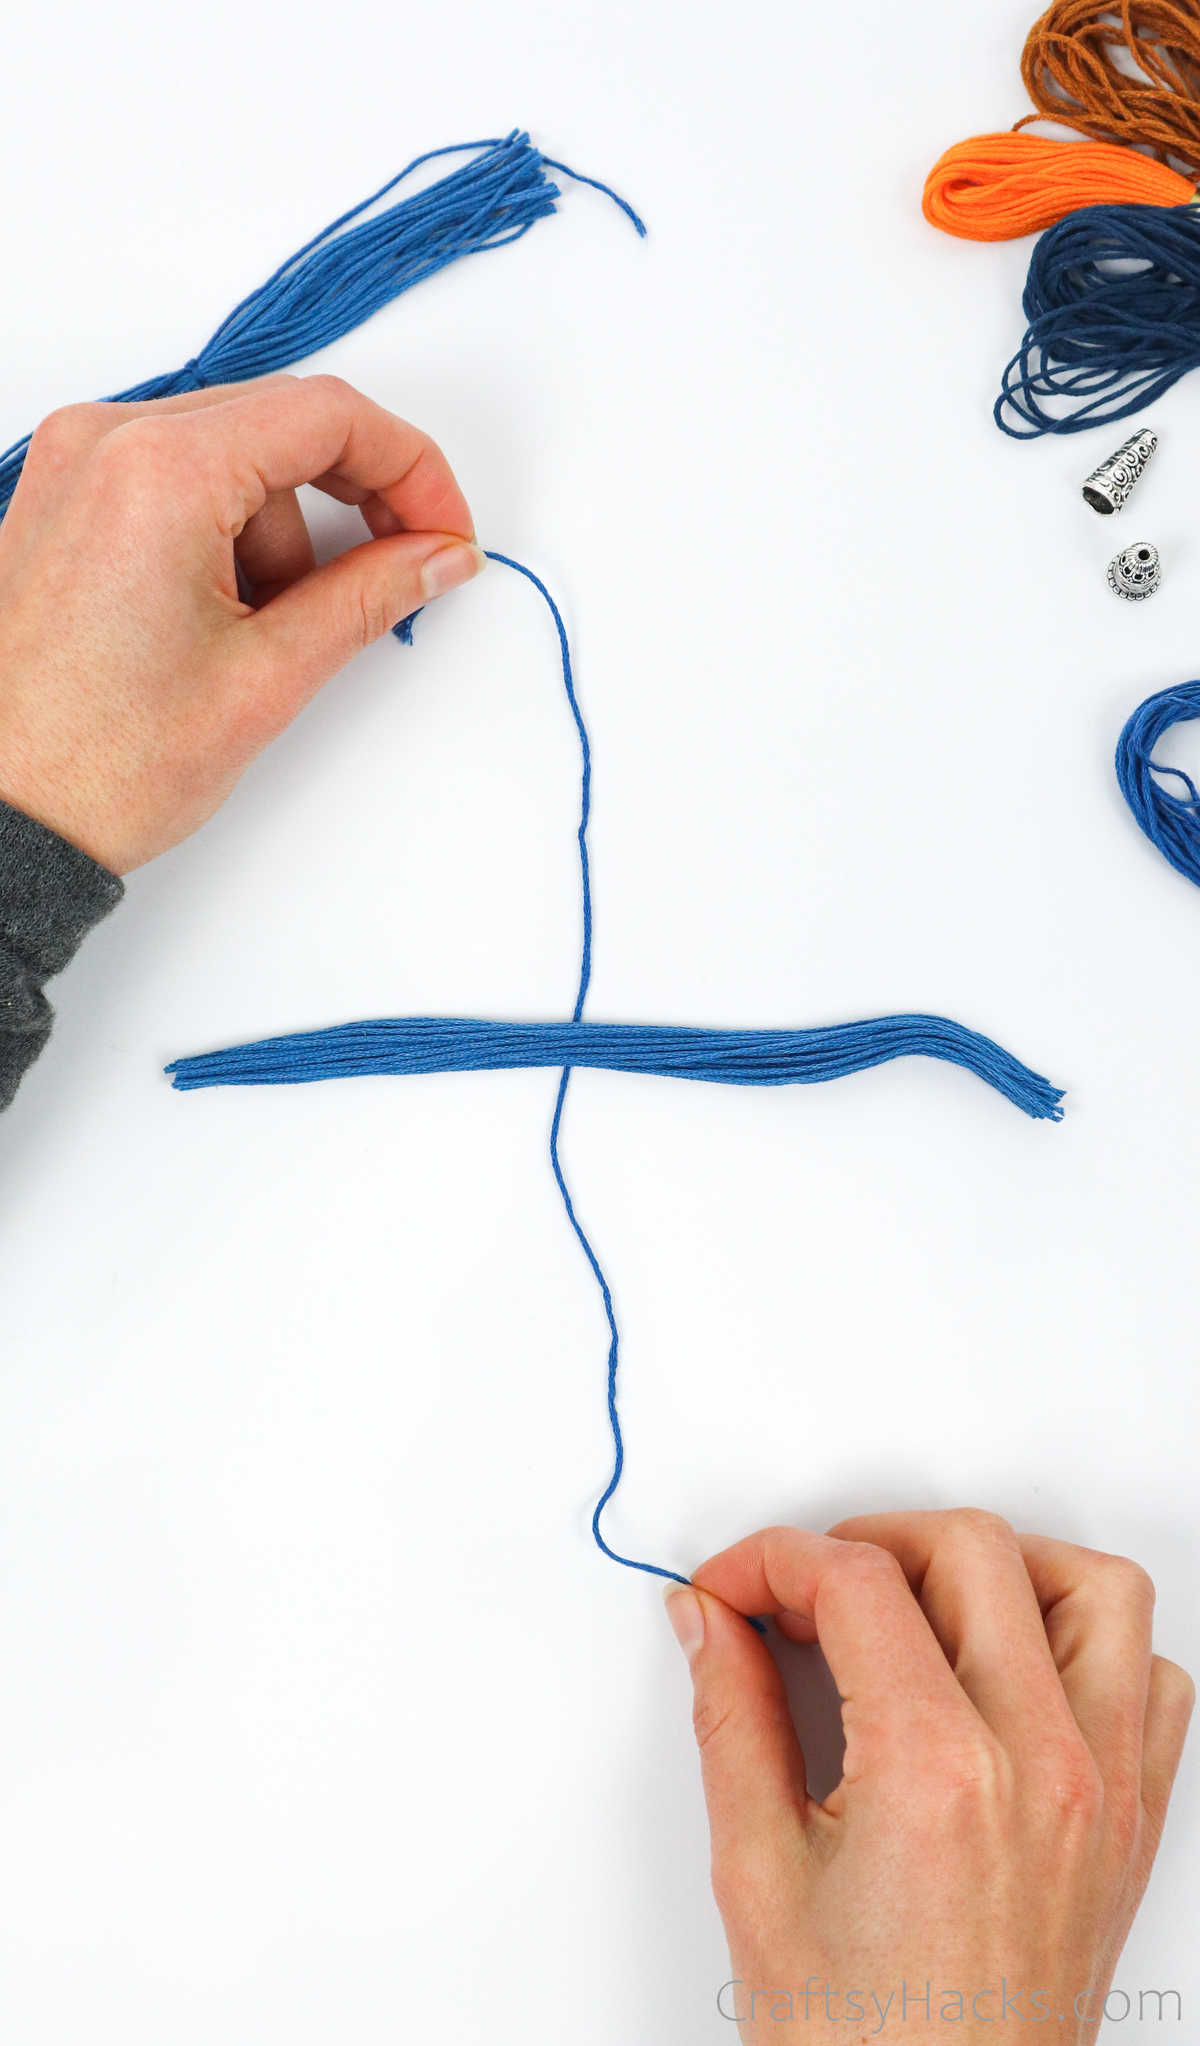
Step 4
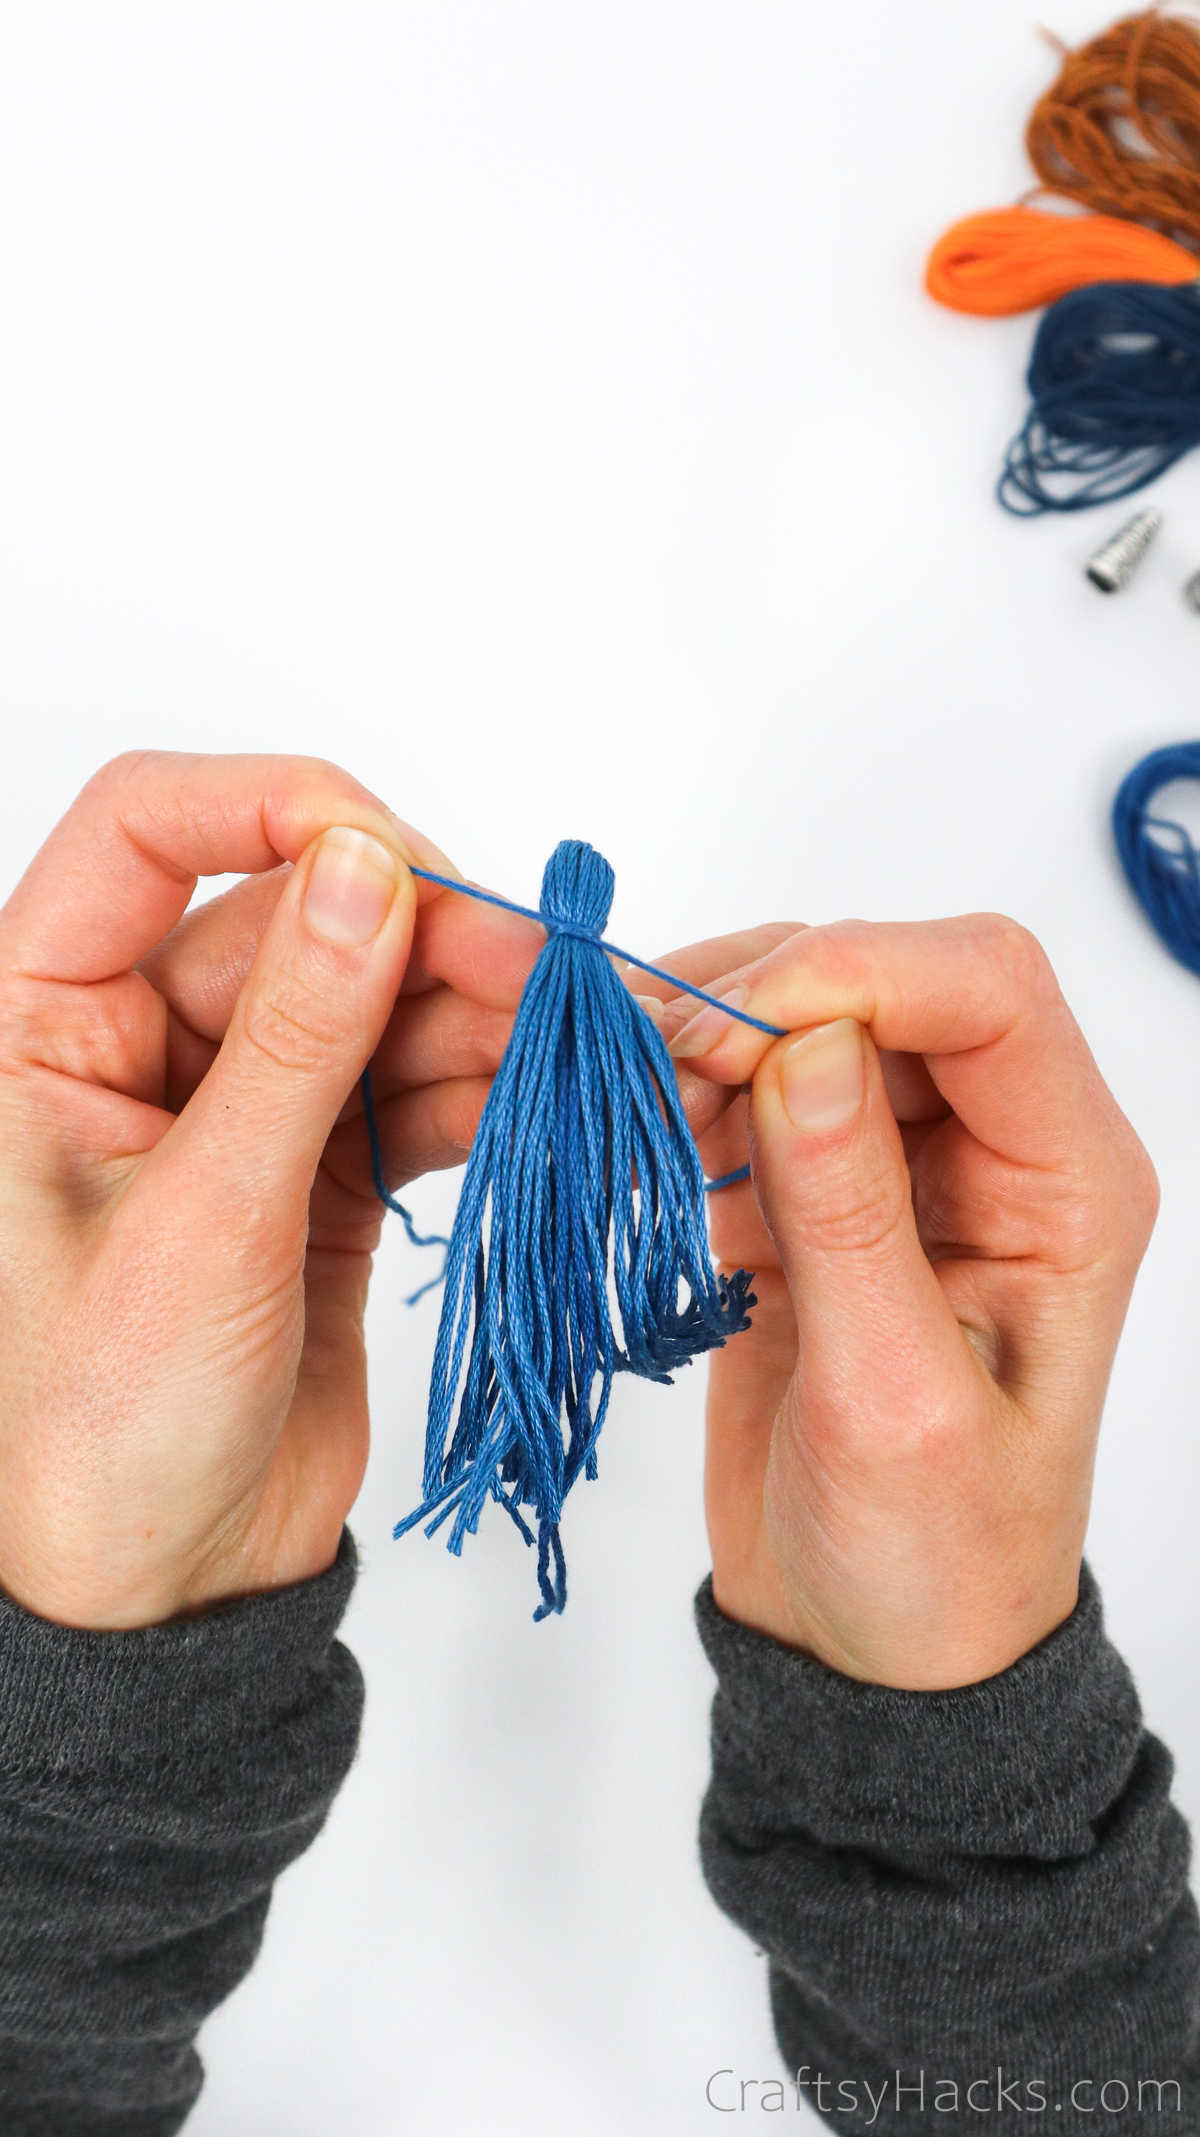
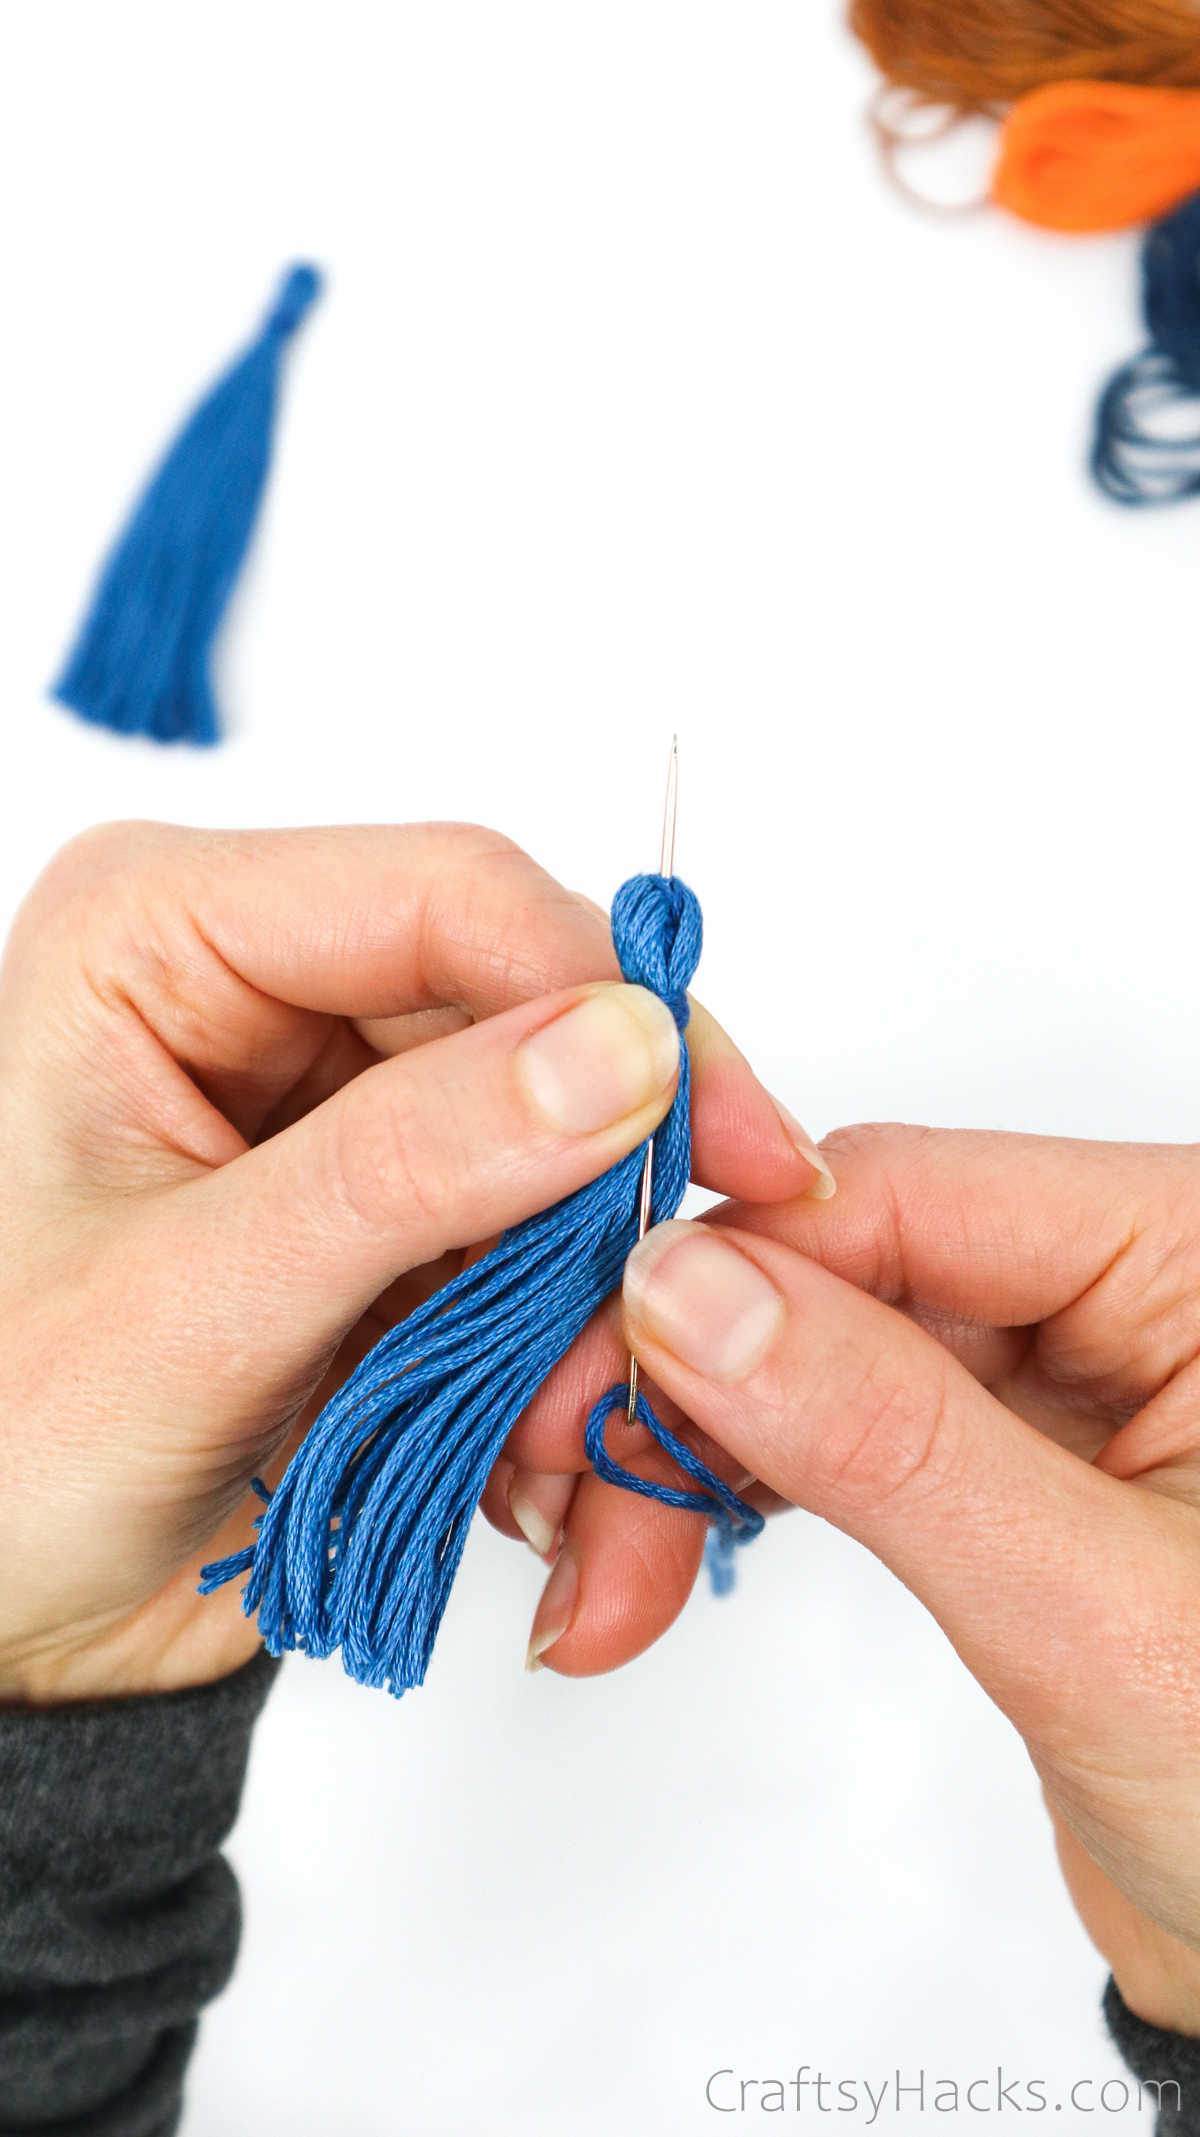
Fold the bunch of thread in half where you tied the knot, as you see in this picture below.
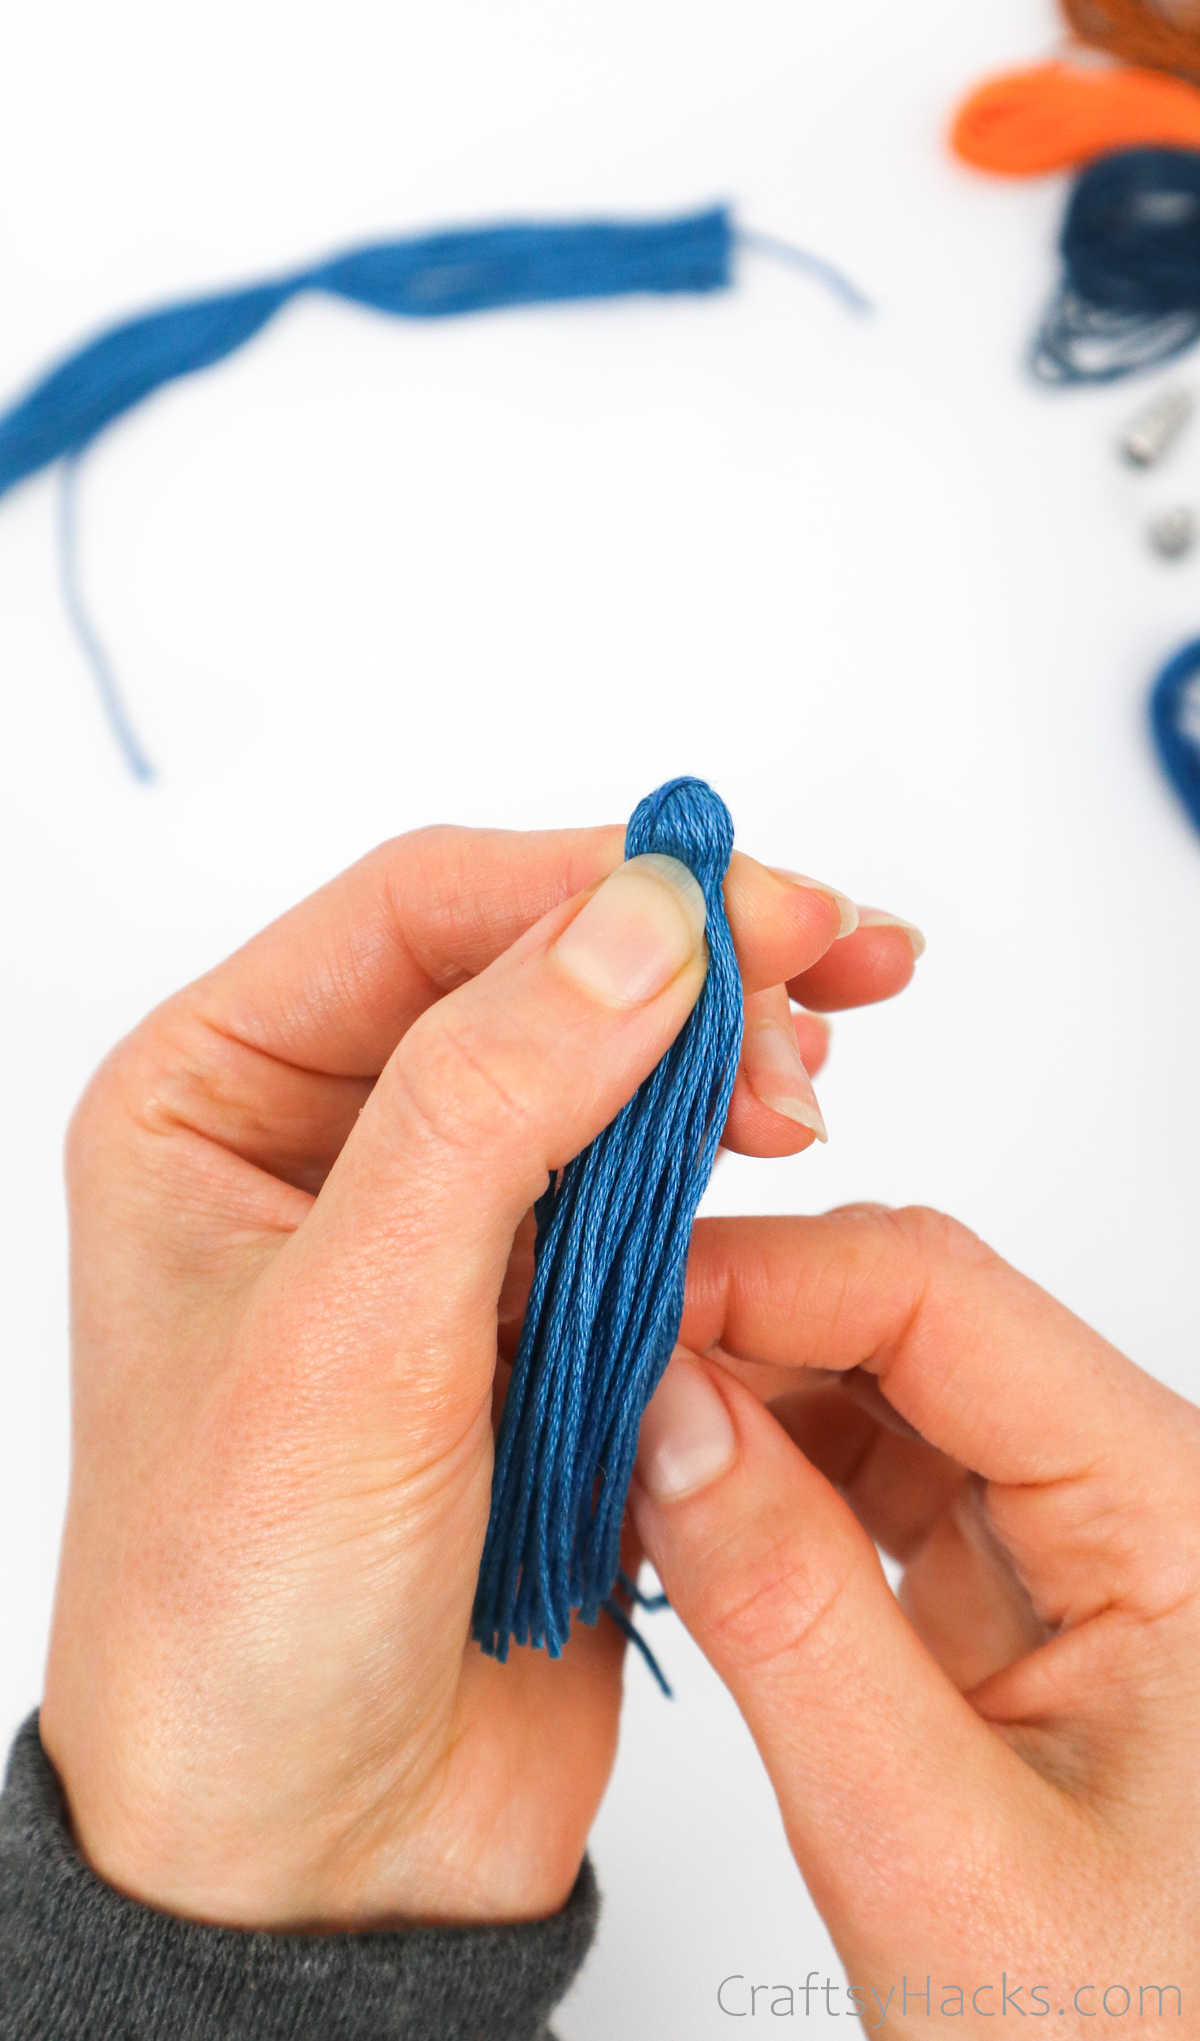
Then, cut another strand of thread, this one 10 inches long, and tie it around the head of the folded threads, about a centimeter down from the top.
Tug at the ends to tighten the knot.
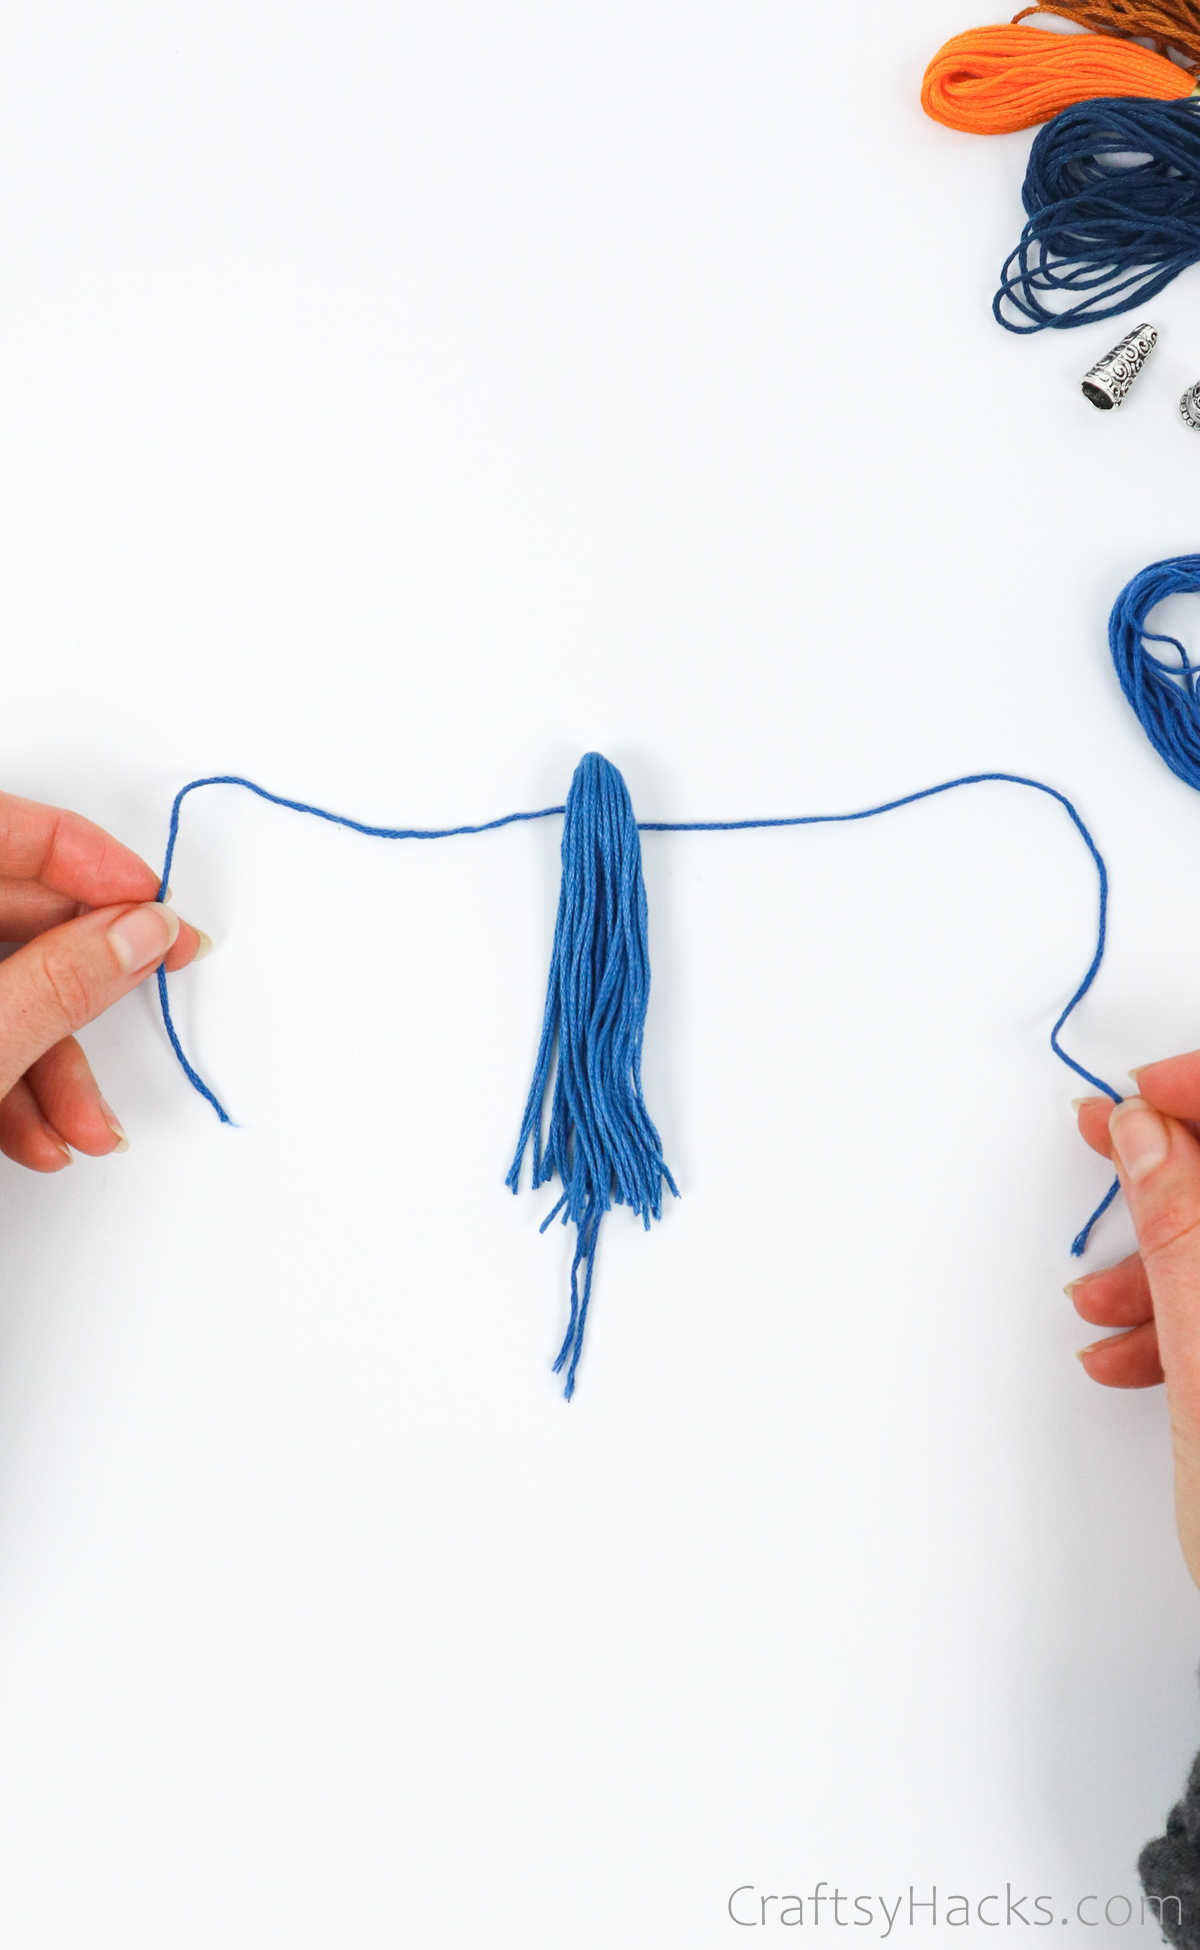
Now, grab the longer end and wrap it around the head a few times.
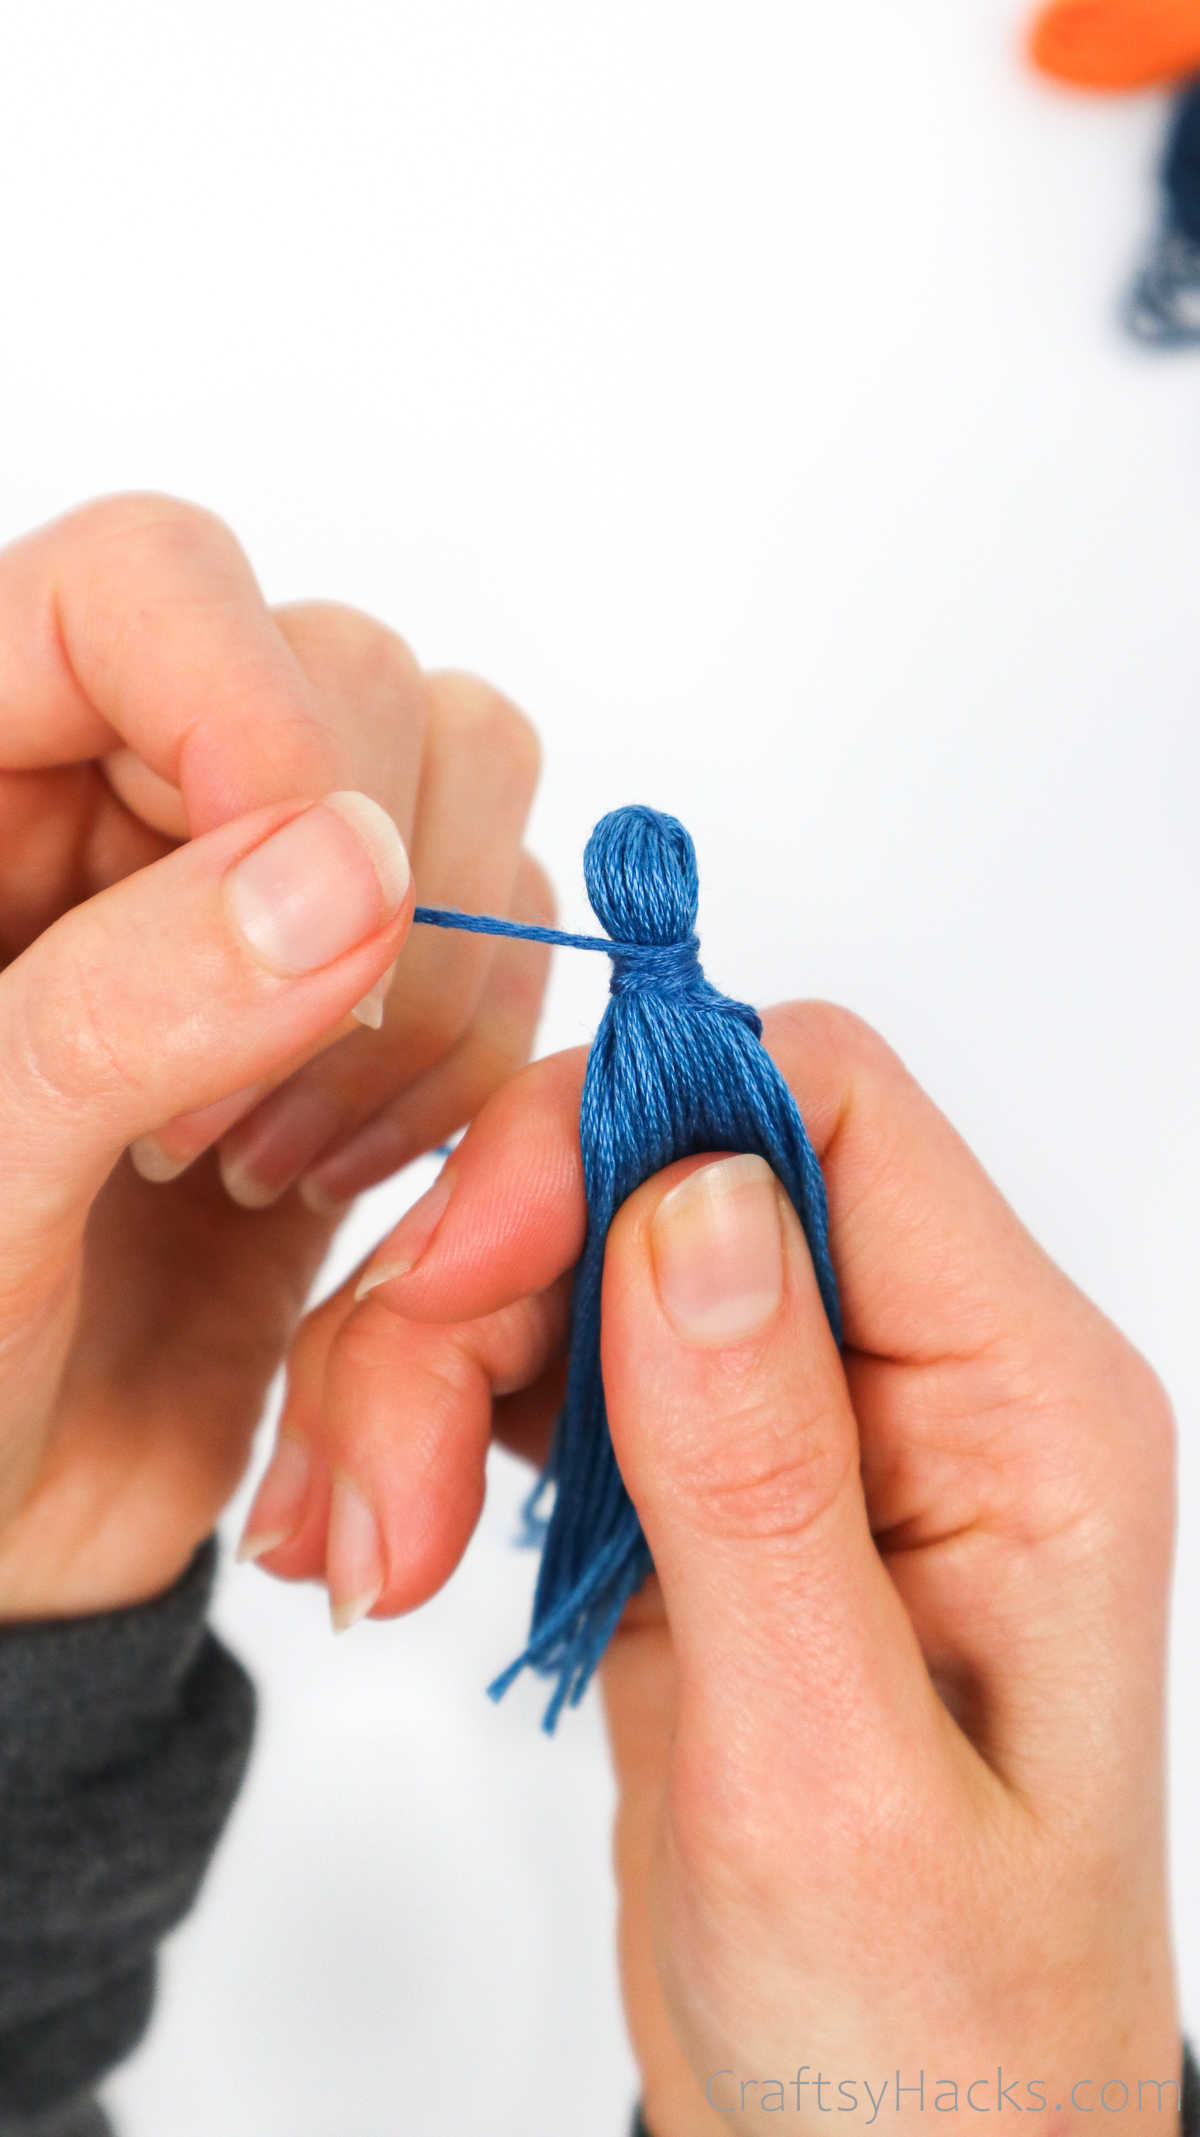
Then, tie a double knot to secure the strand in place and just snip off the ends.

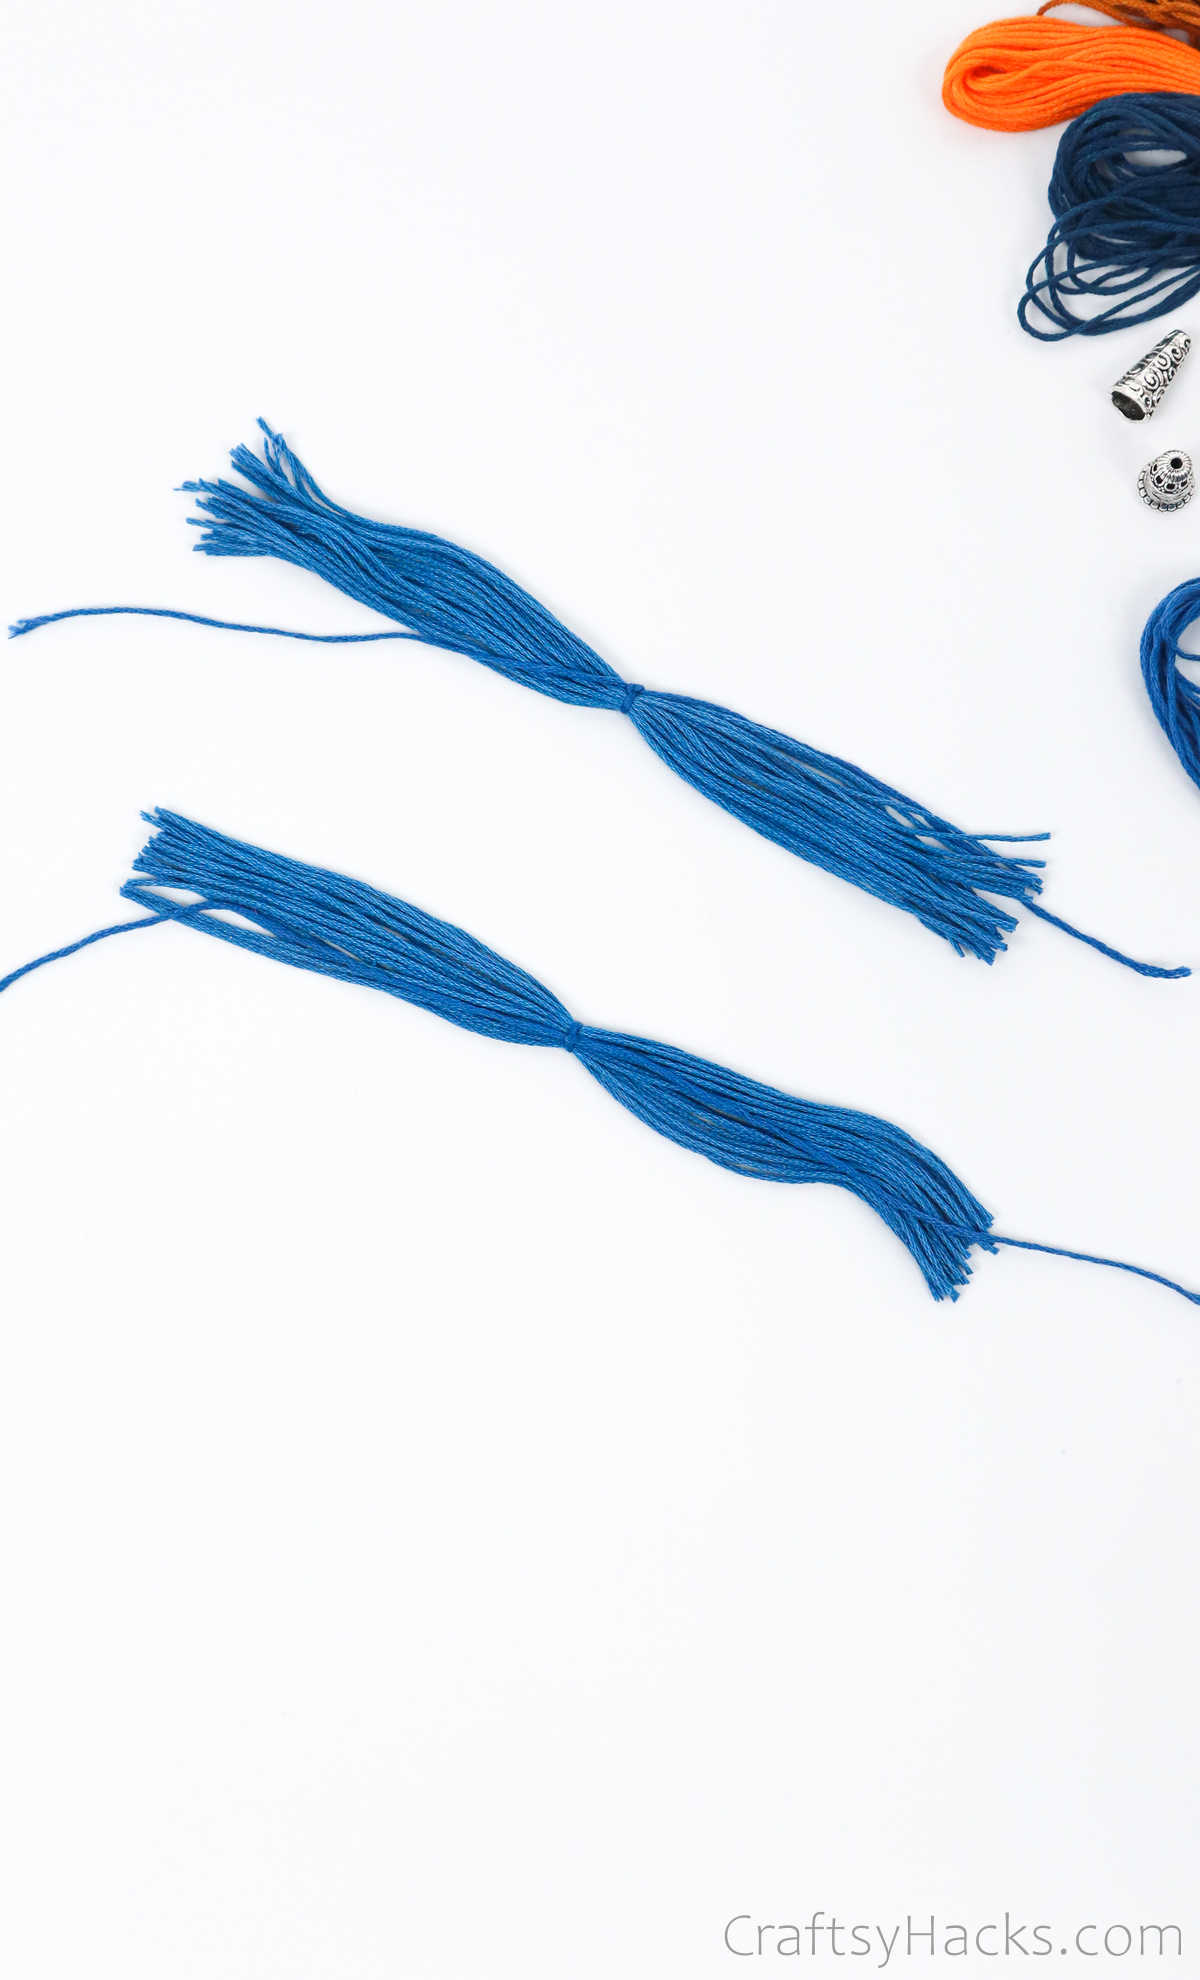
Step 5
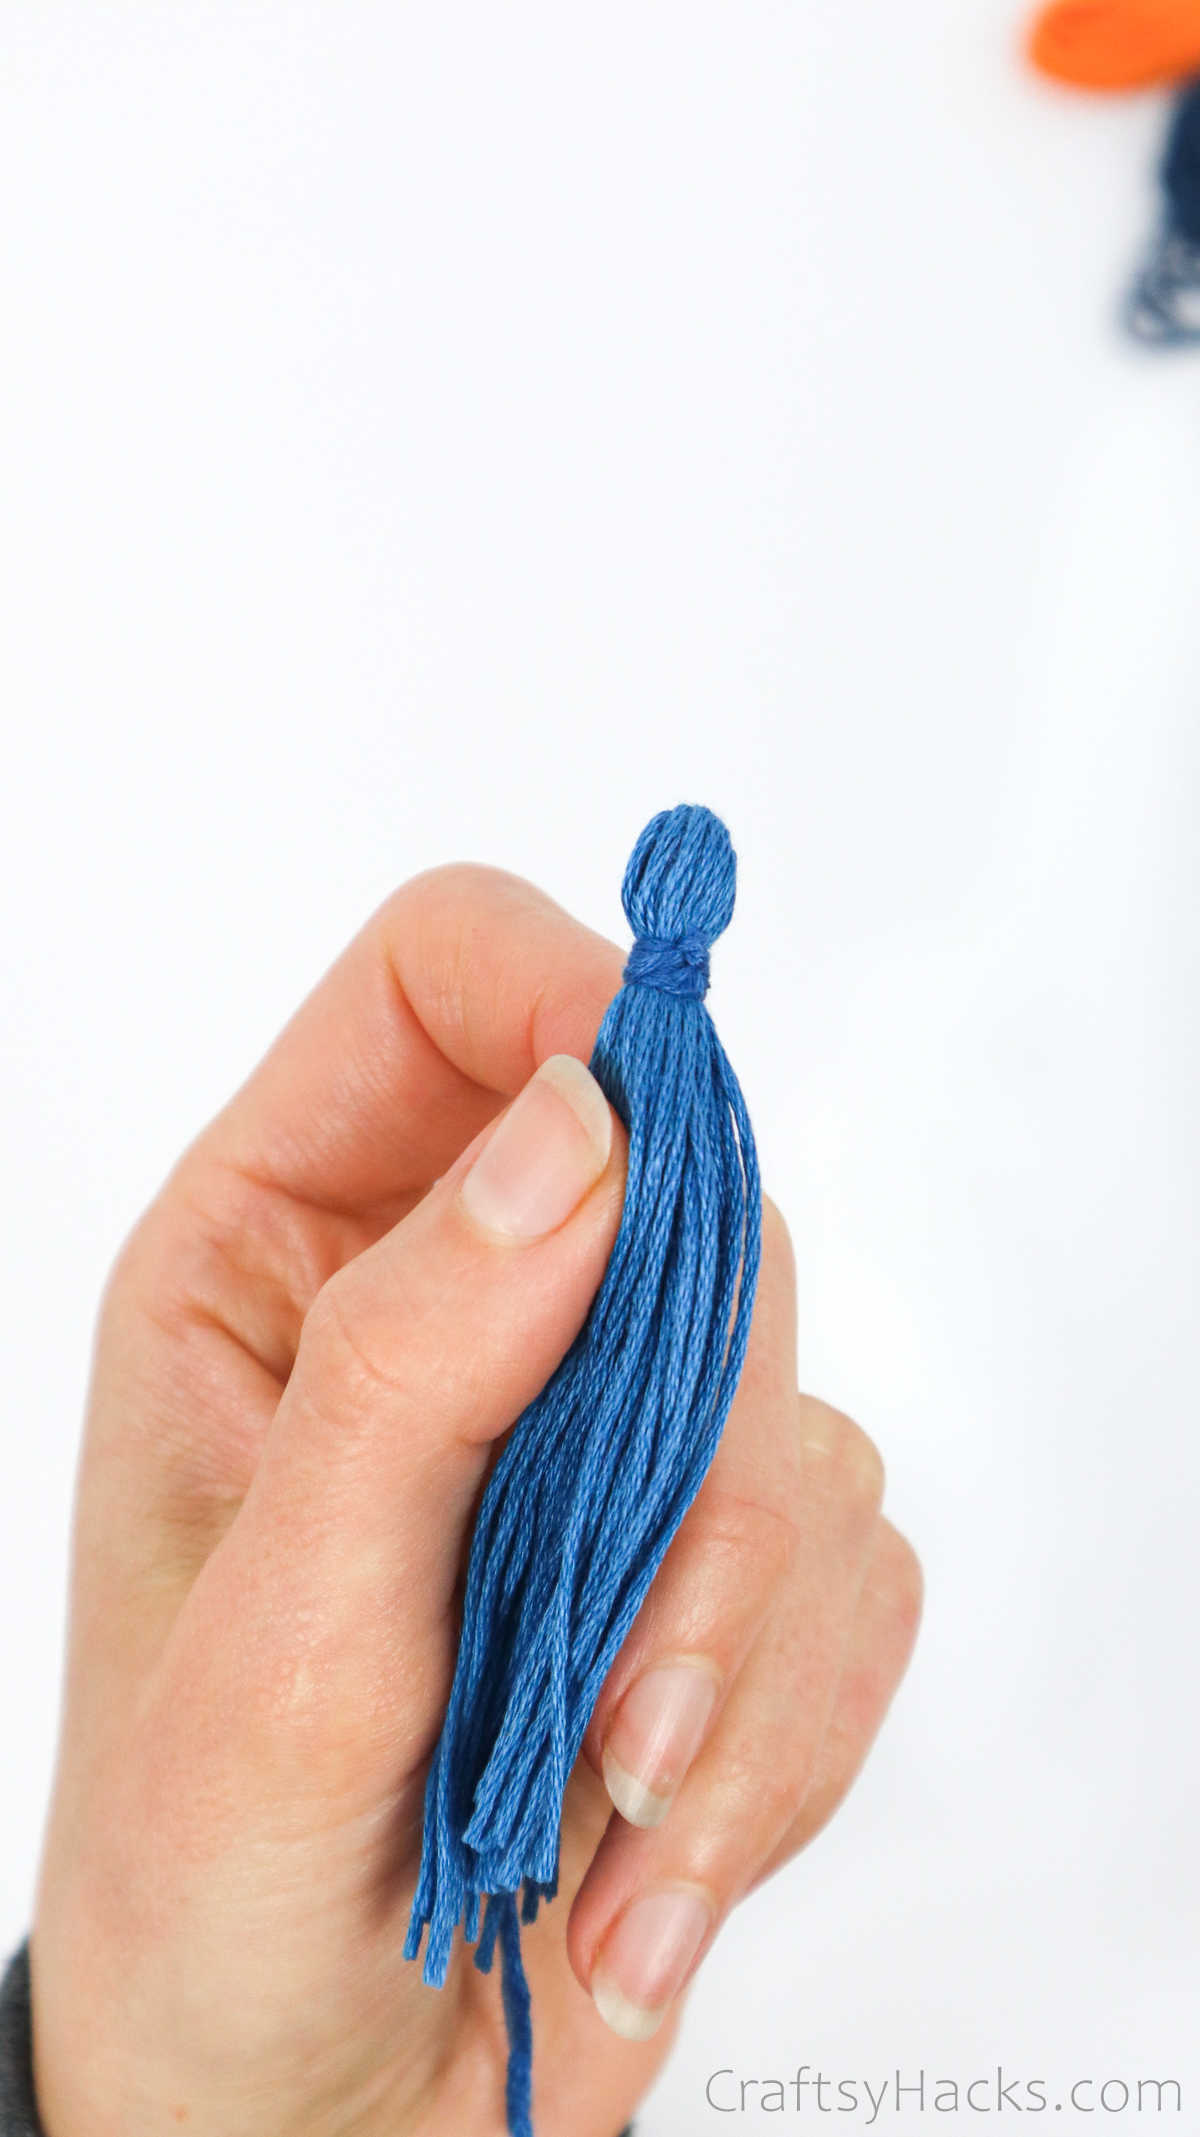
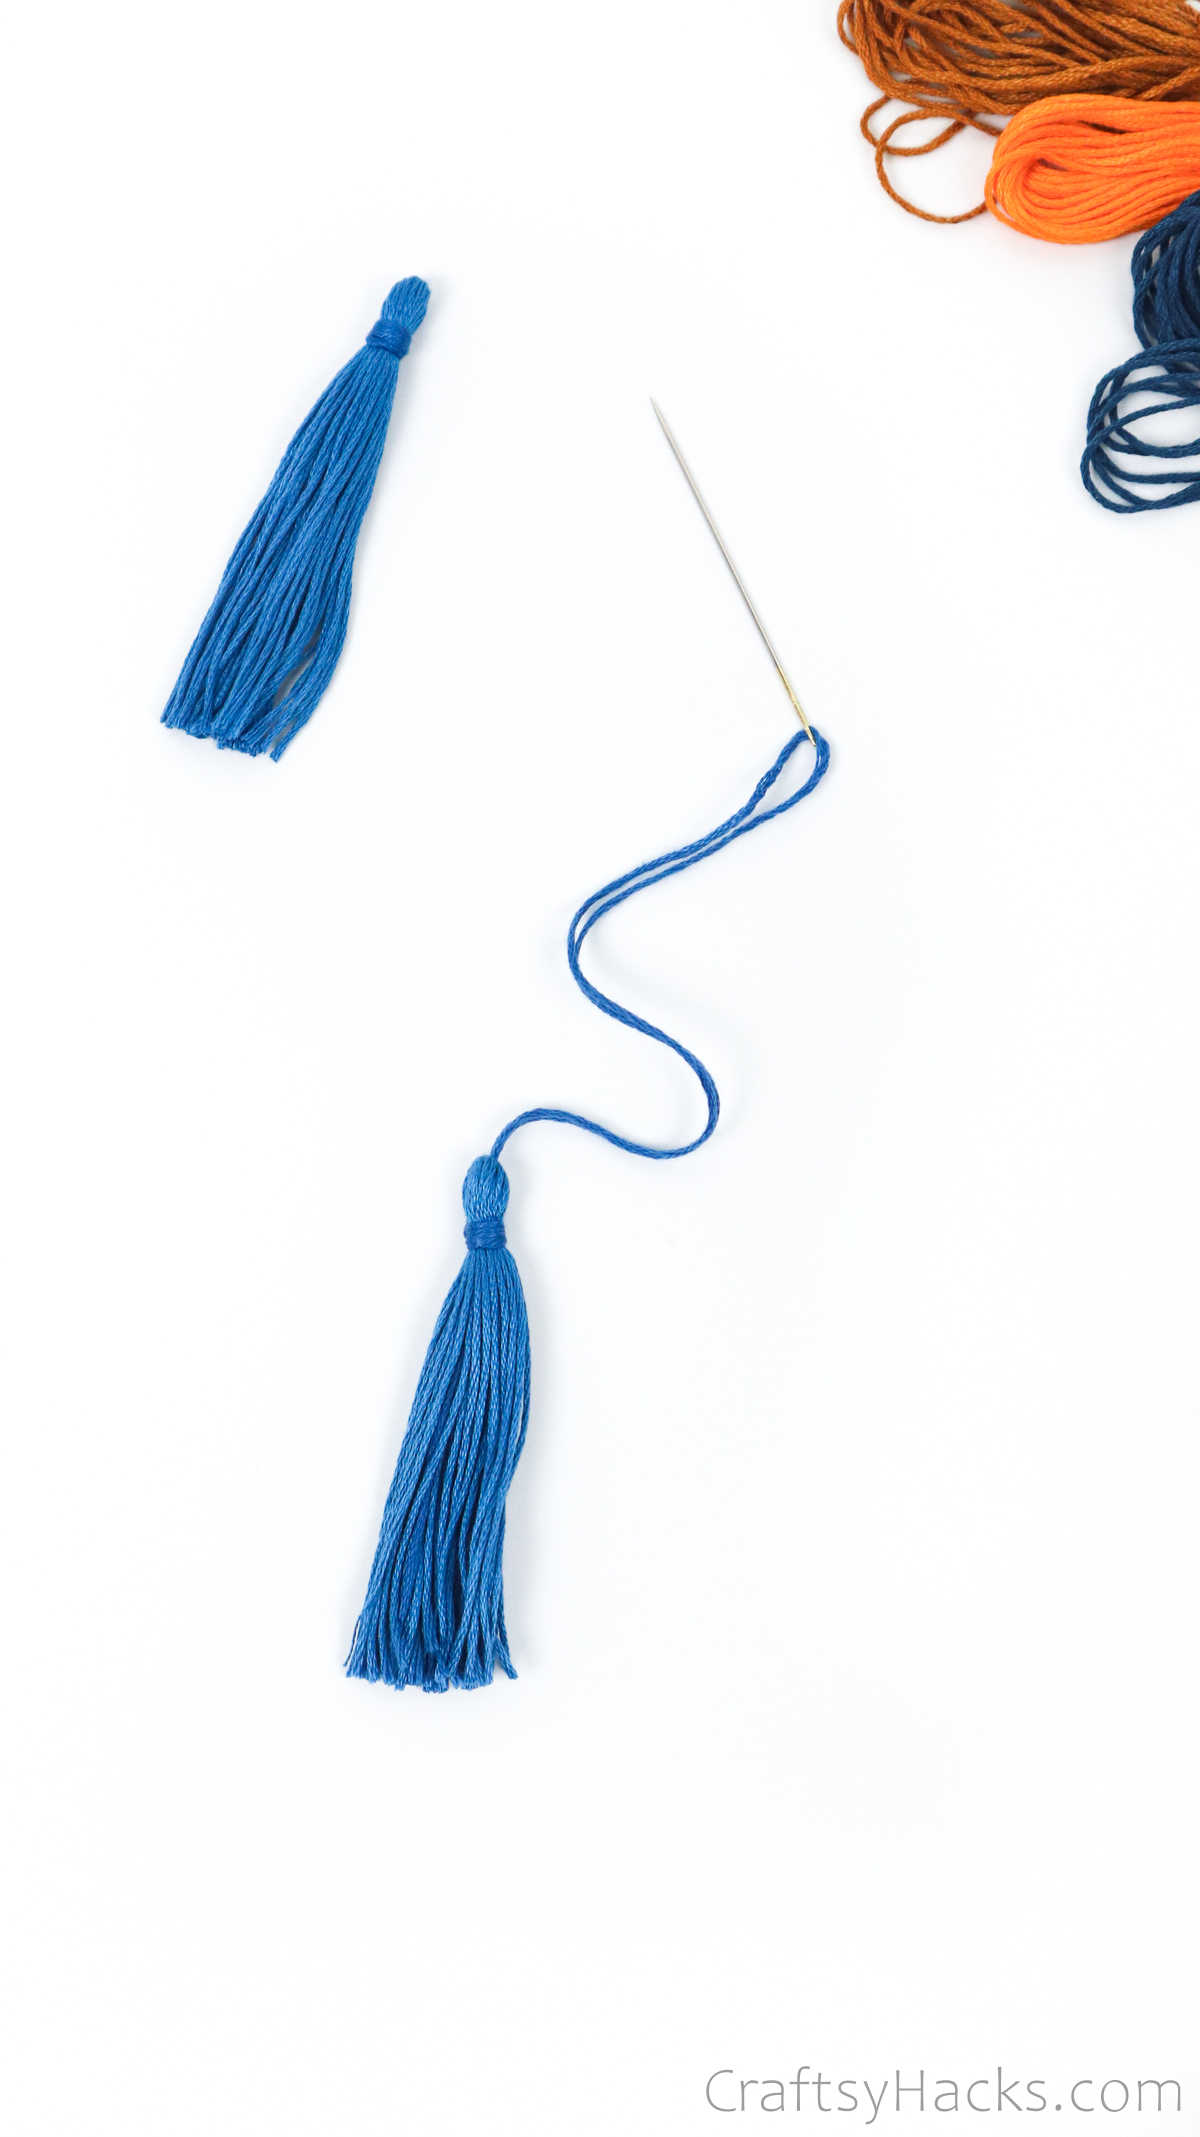
Don’t put away those scissors just yet. Turn your tassel around and trim the threads at the other end evenly.
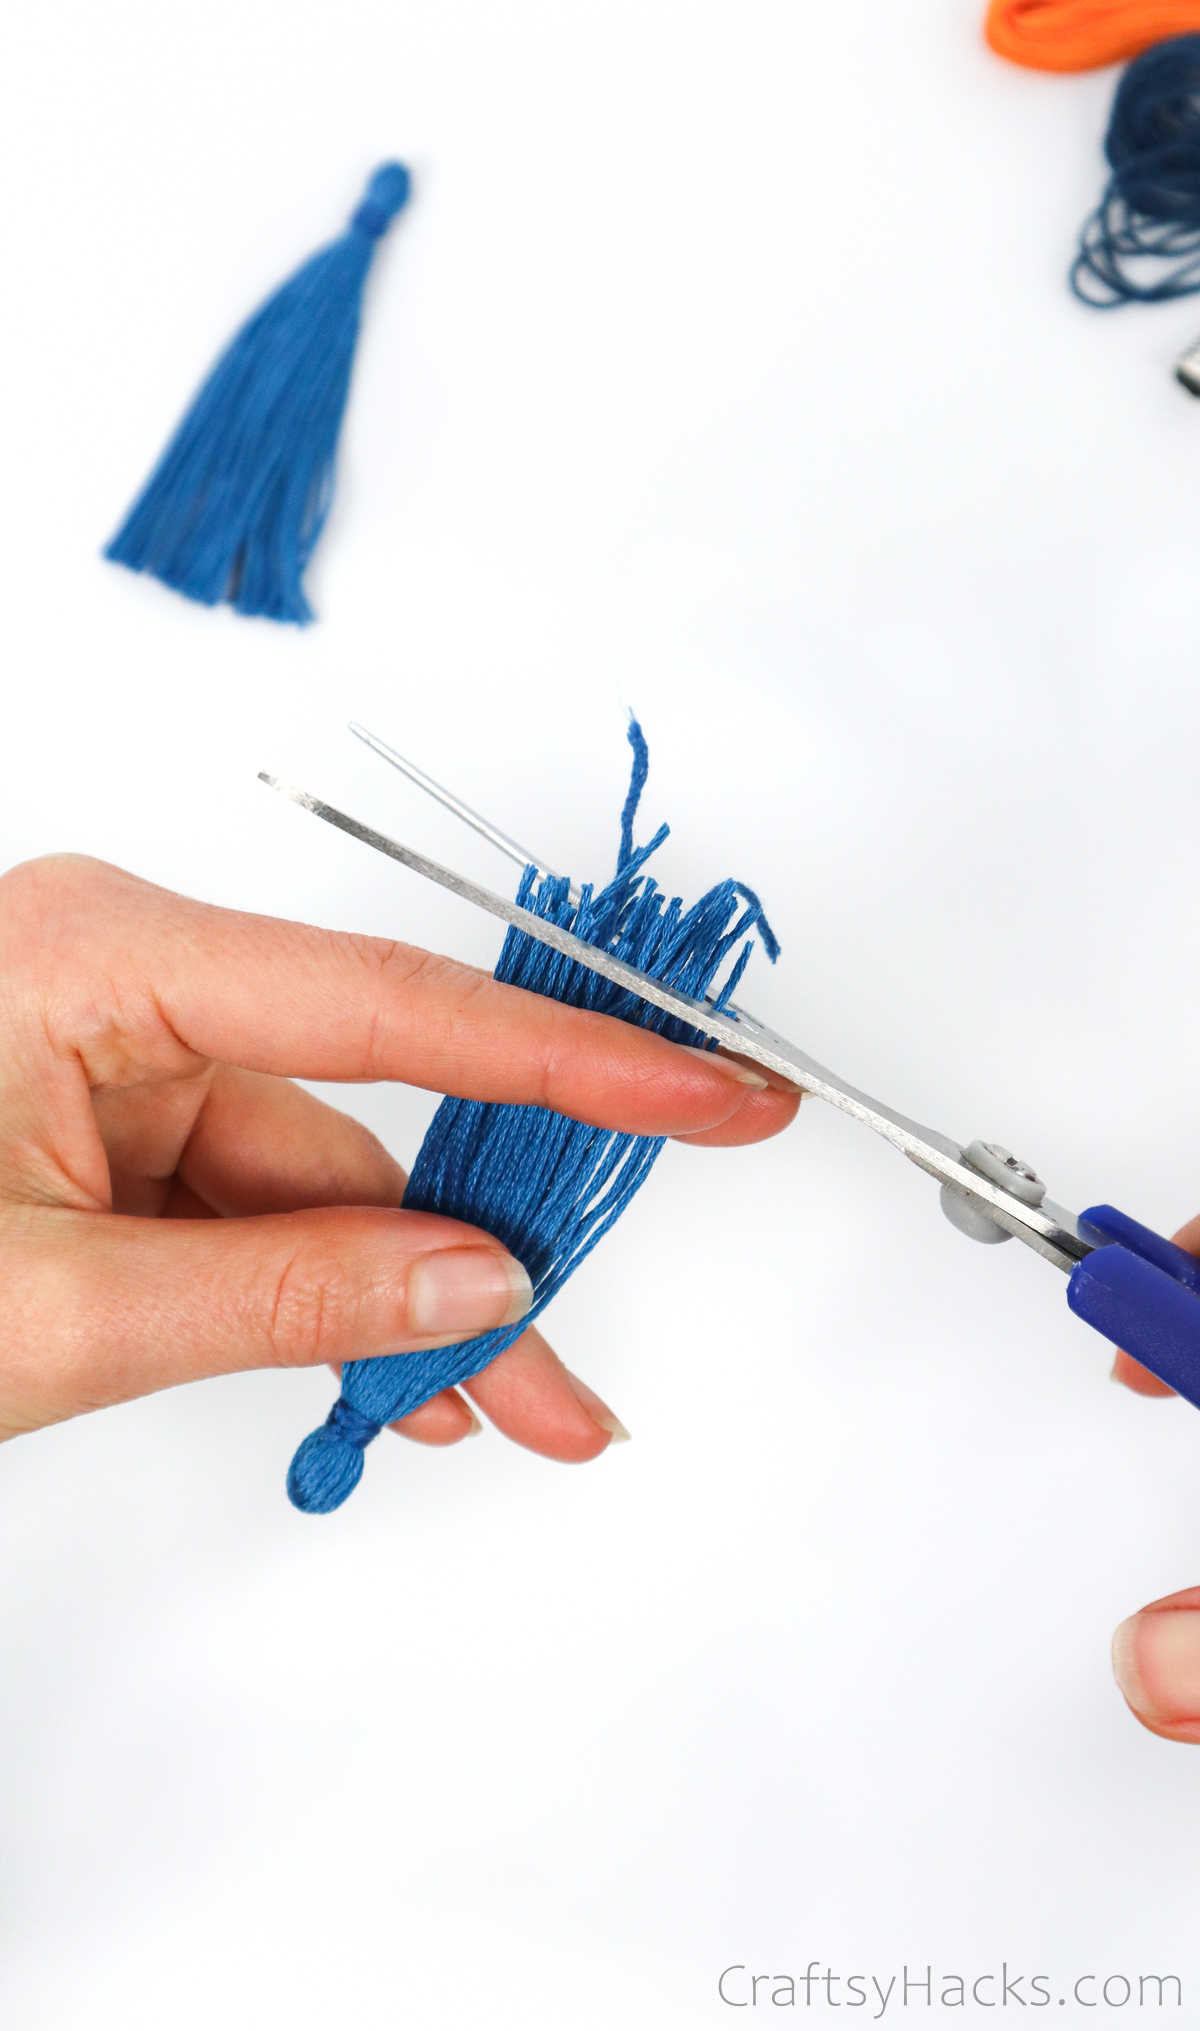
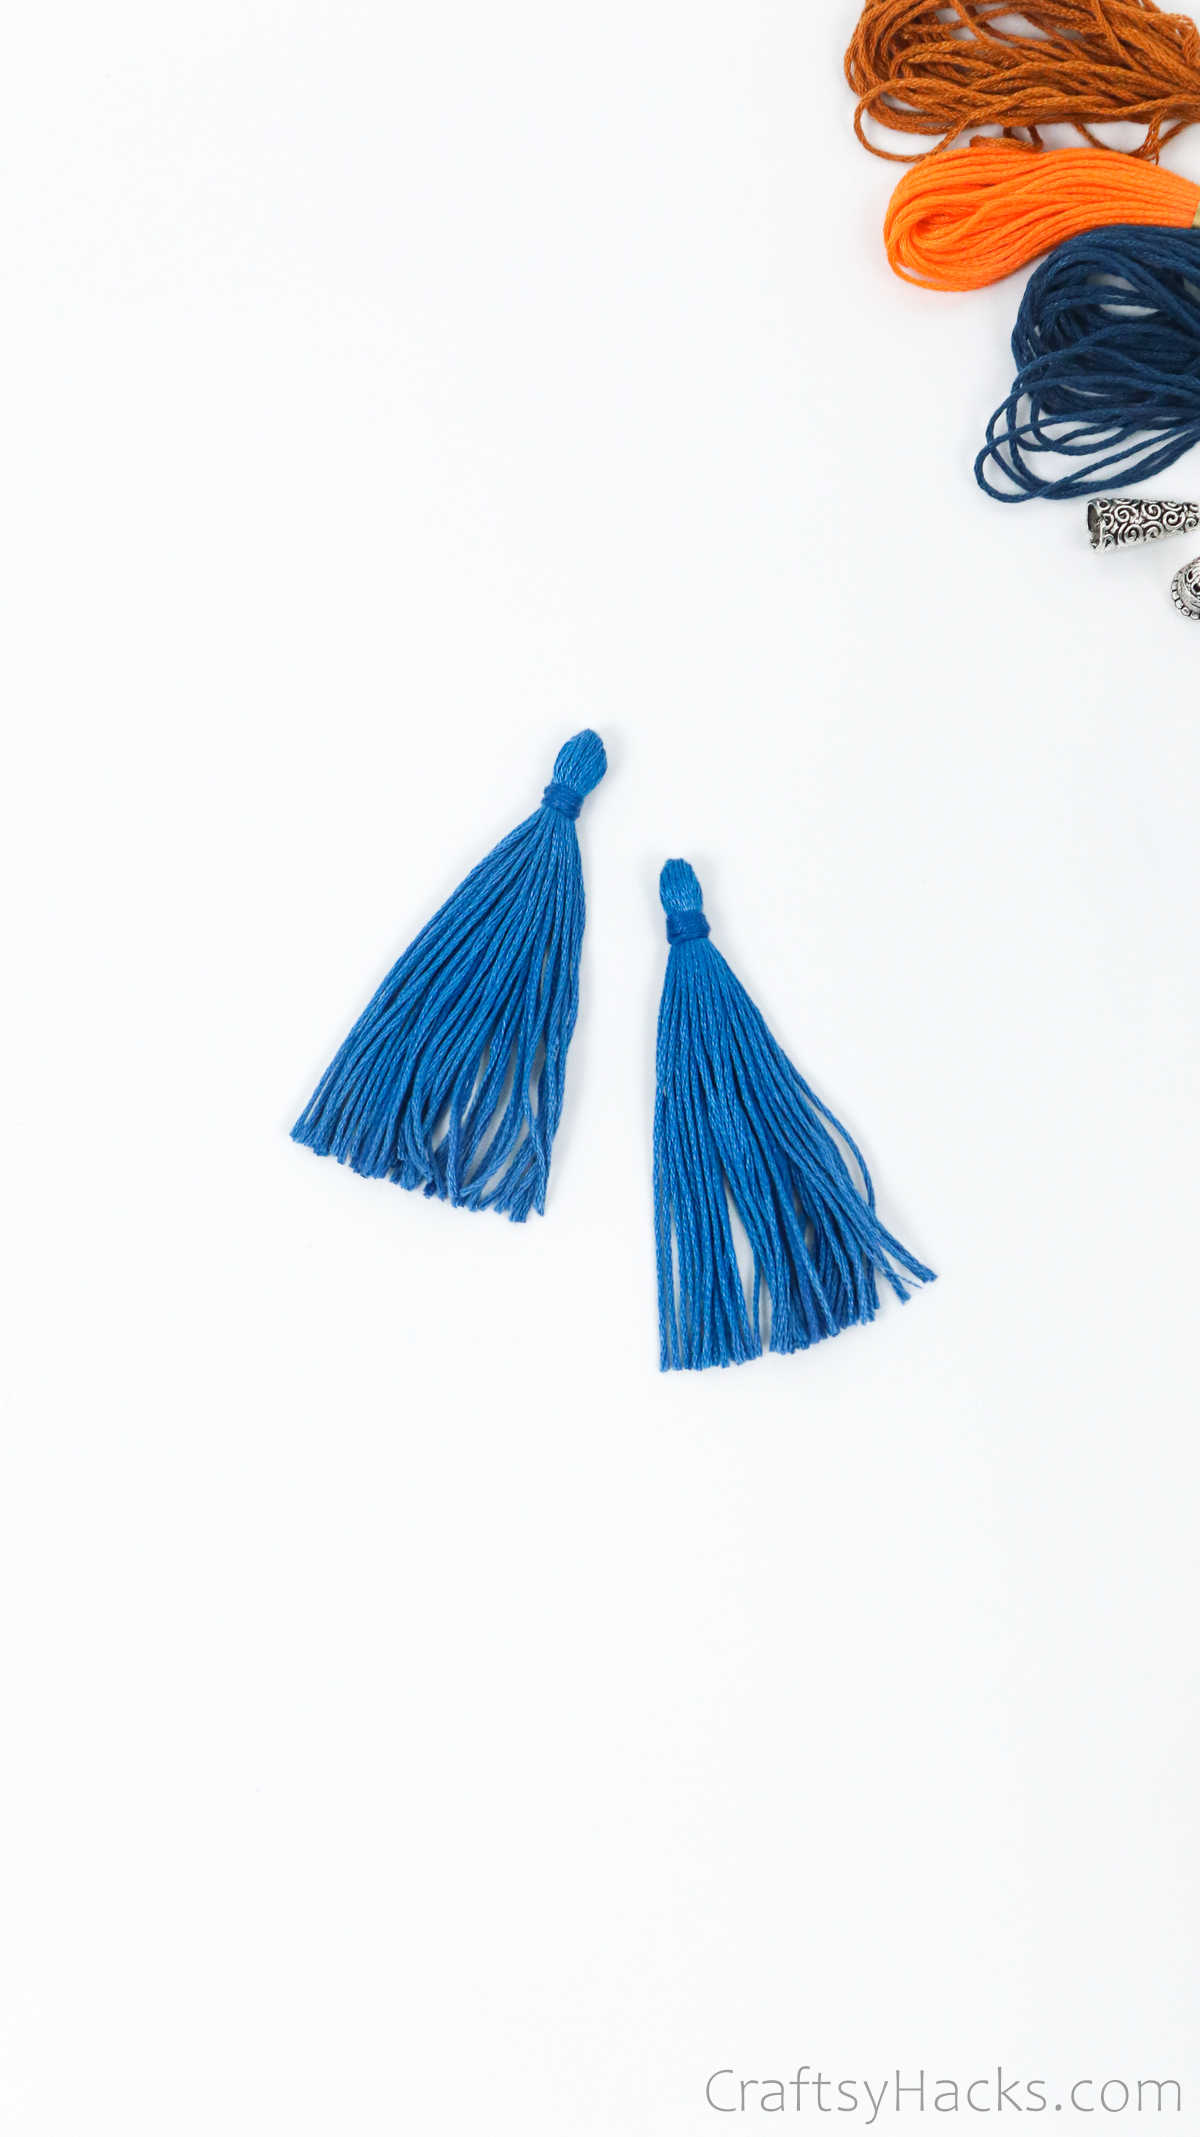
Congratulations! You just learned how to make a tassel. Now, make the matching pair using the other half of the threads you set aside earlier.
Let’s take a look at how to turn these into earrings! There are a few ways you can do this, so go ahead and experiment a little to figure out what works best for you!
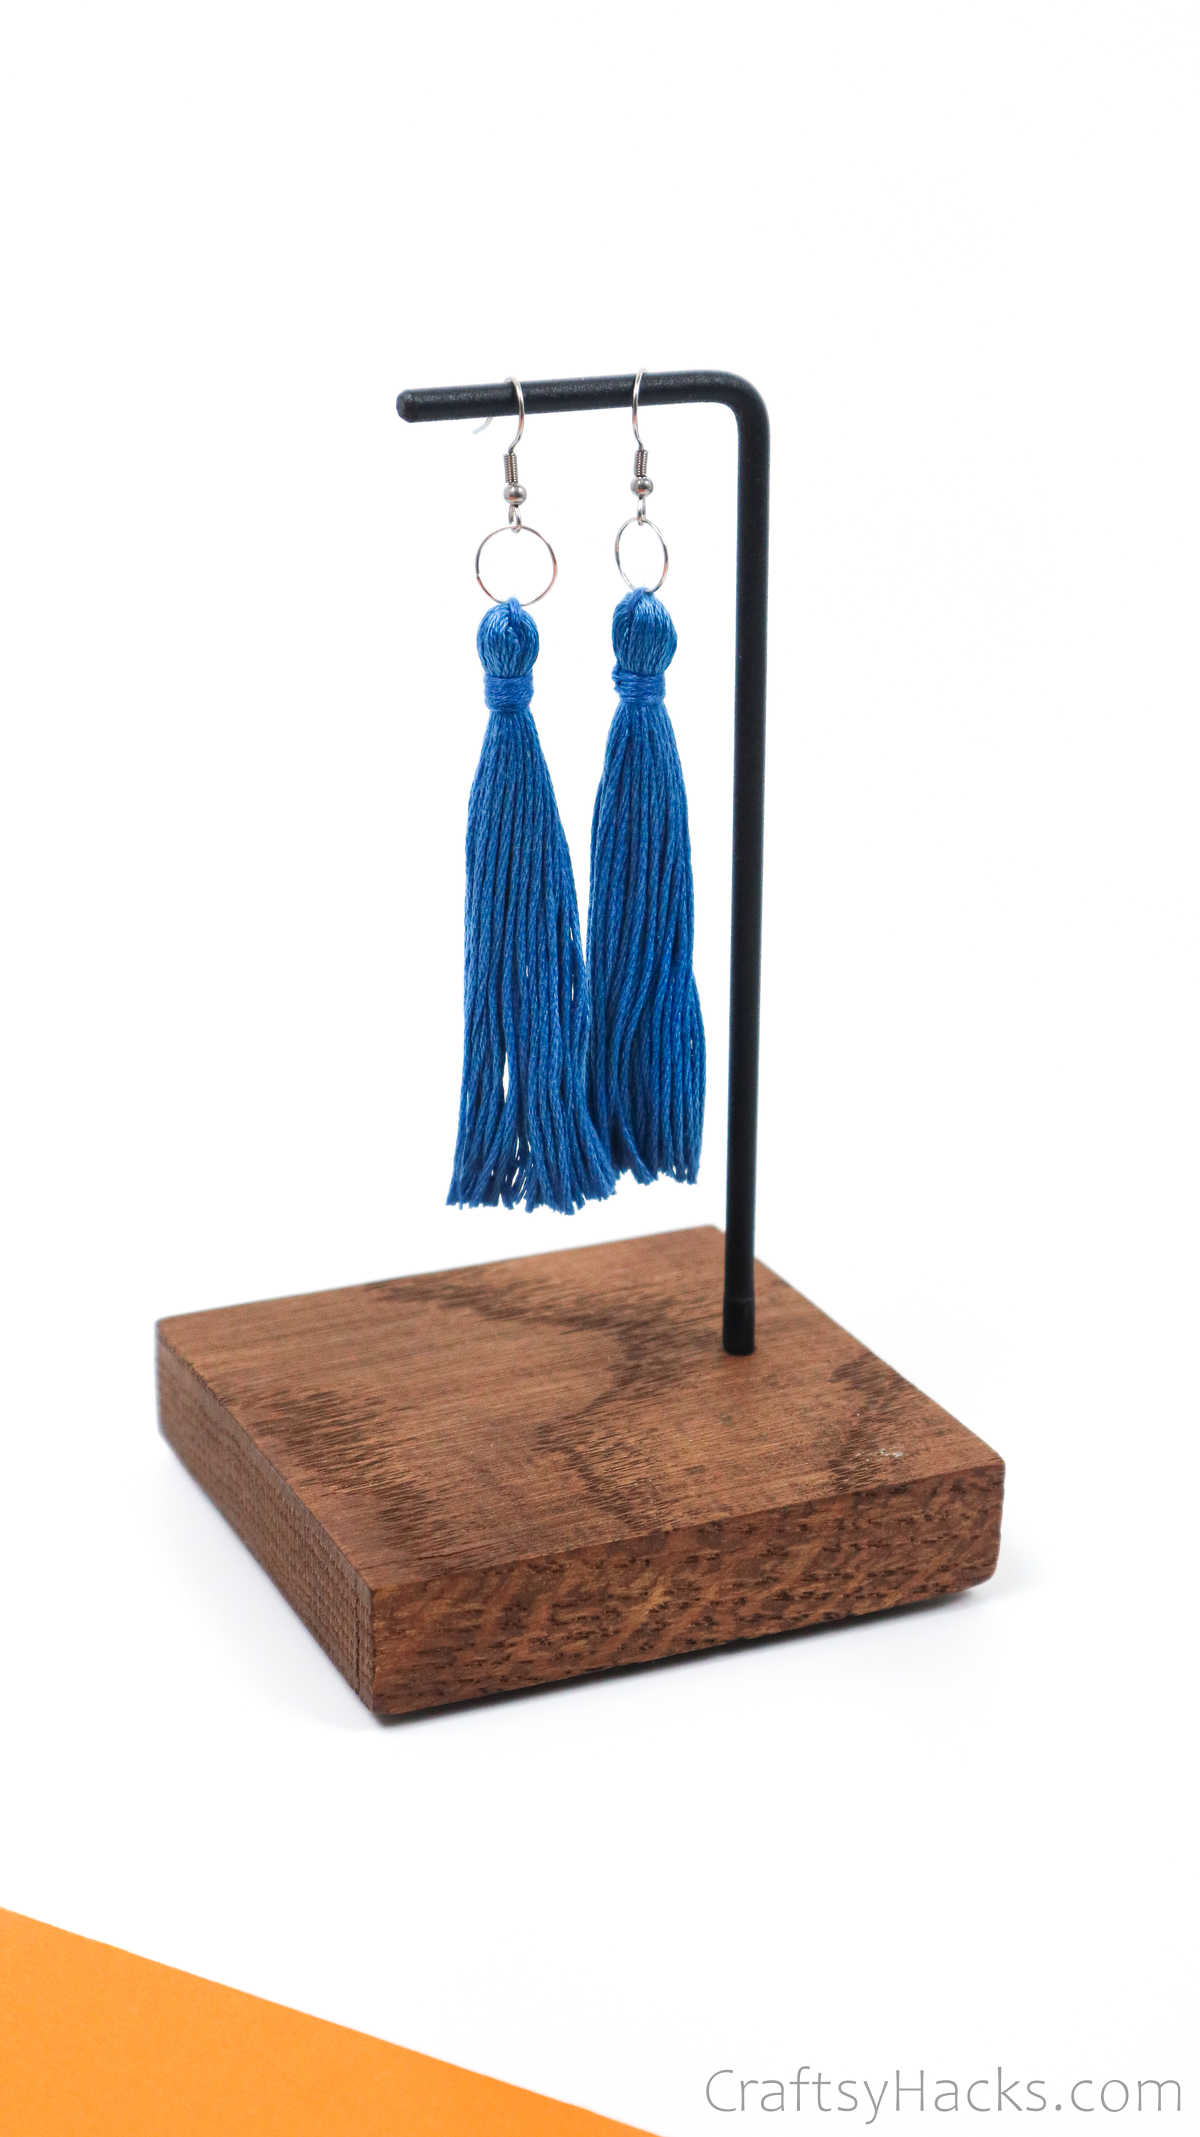
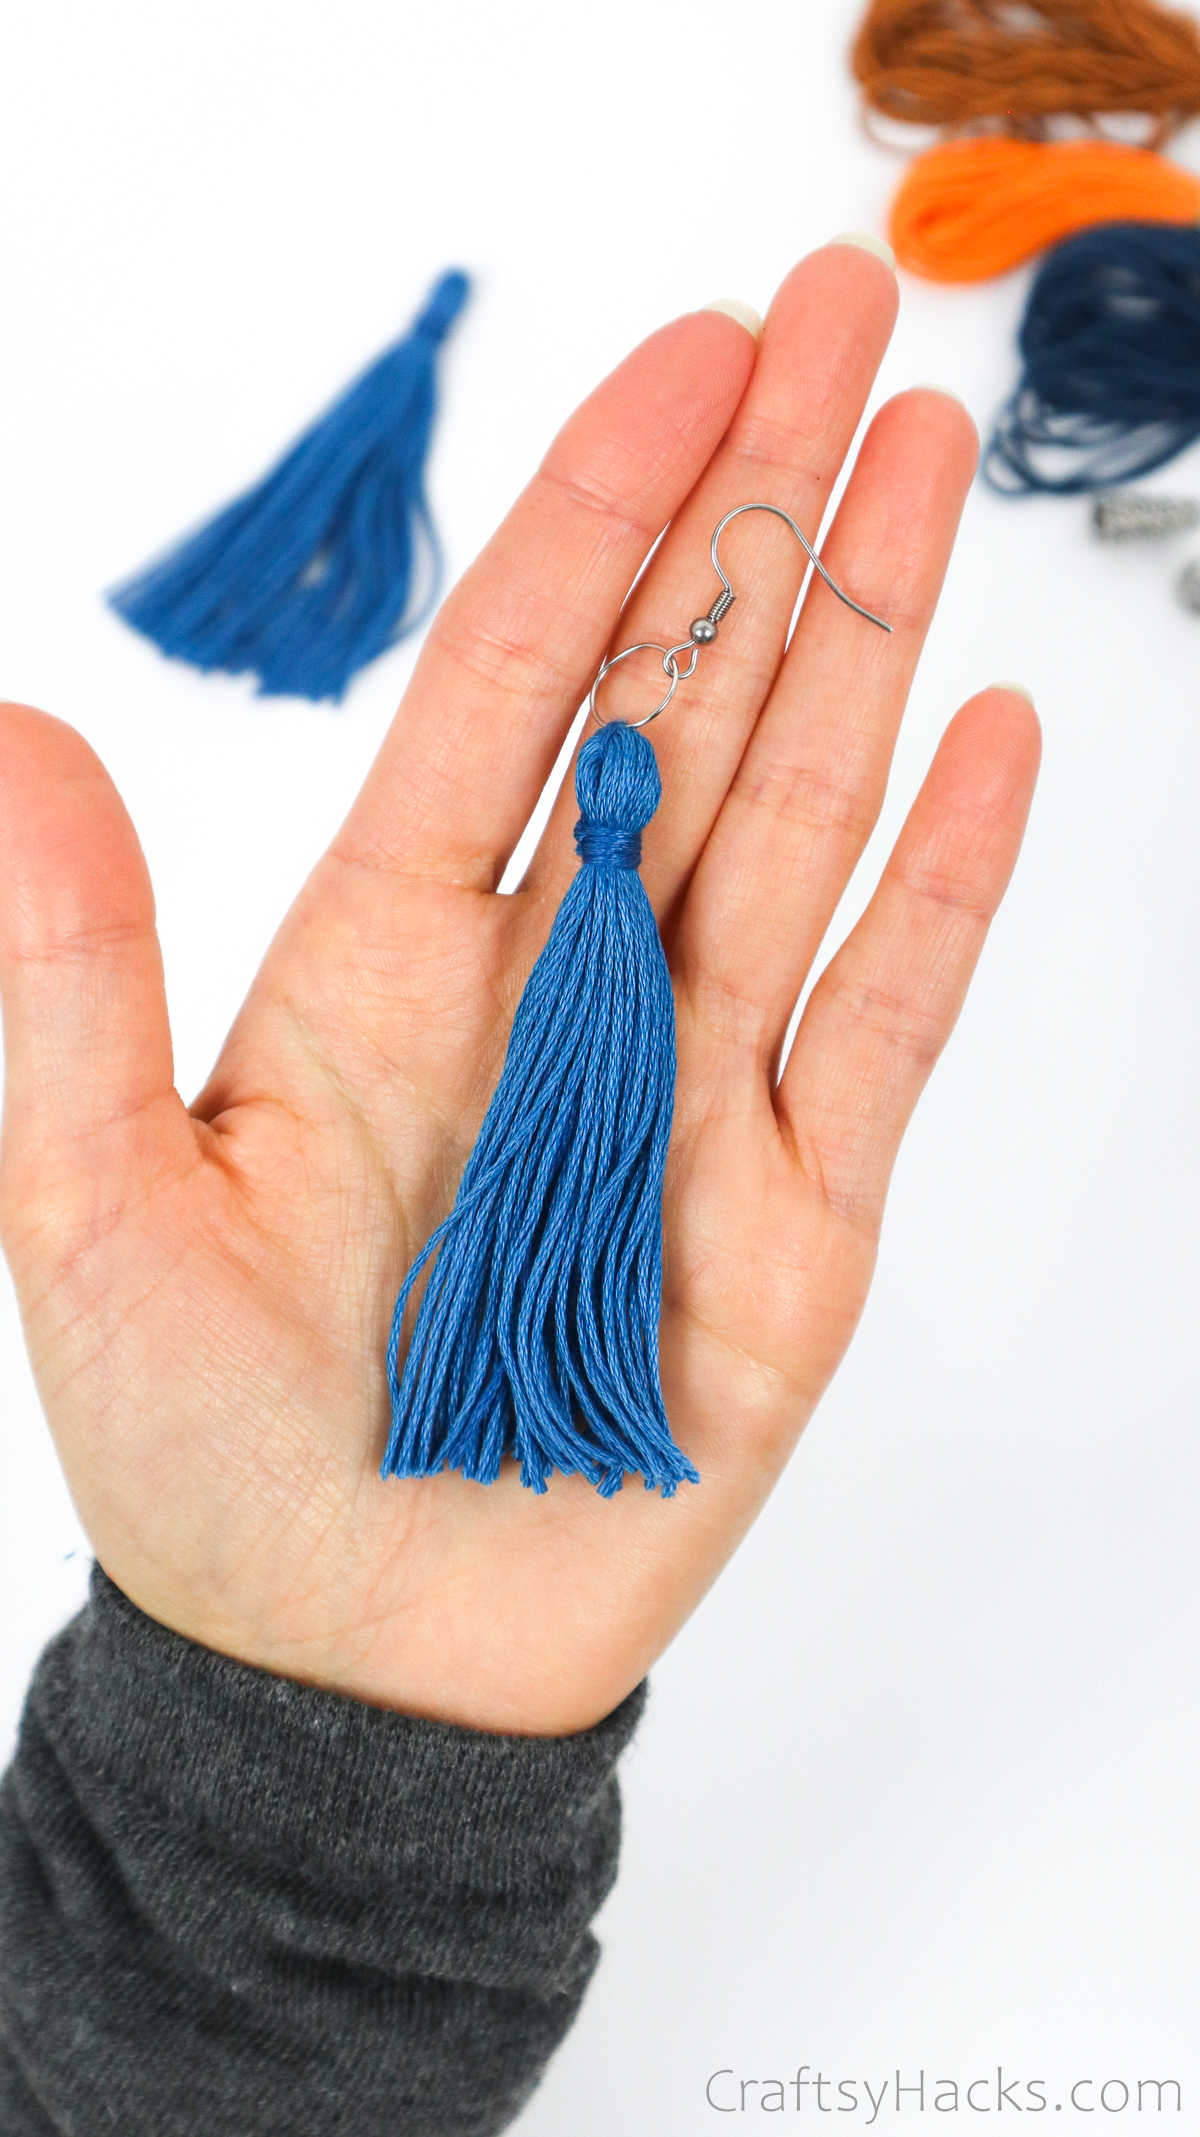
Turn Tassels Into Earrings – Method 1
Take a little jump ring or metal hoop and loop it into one of the threads at the top. If you want to be extra careful, use pliers to help you with this step.
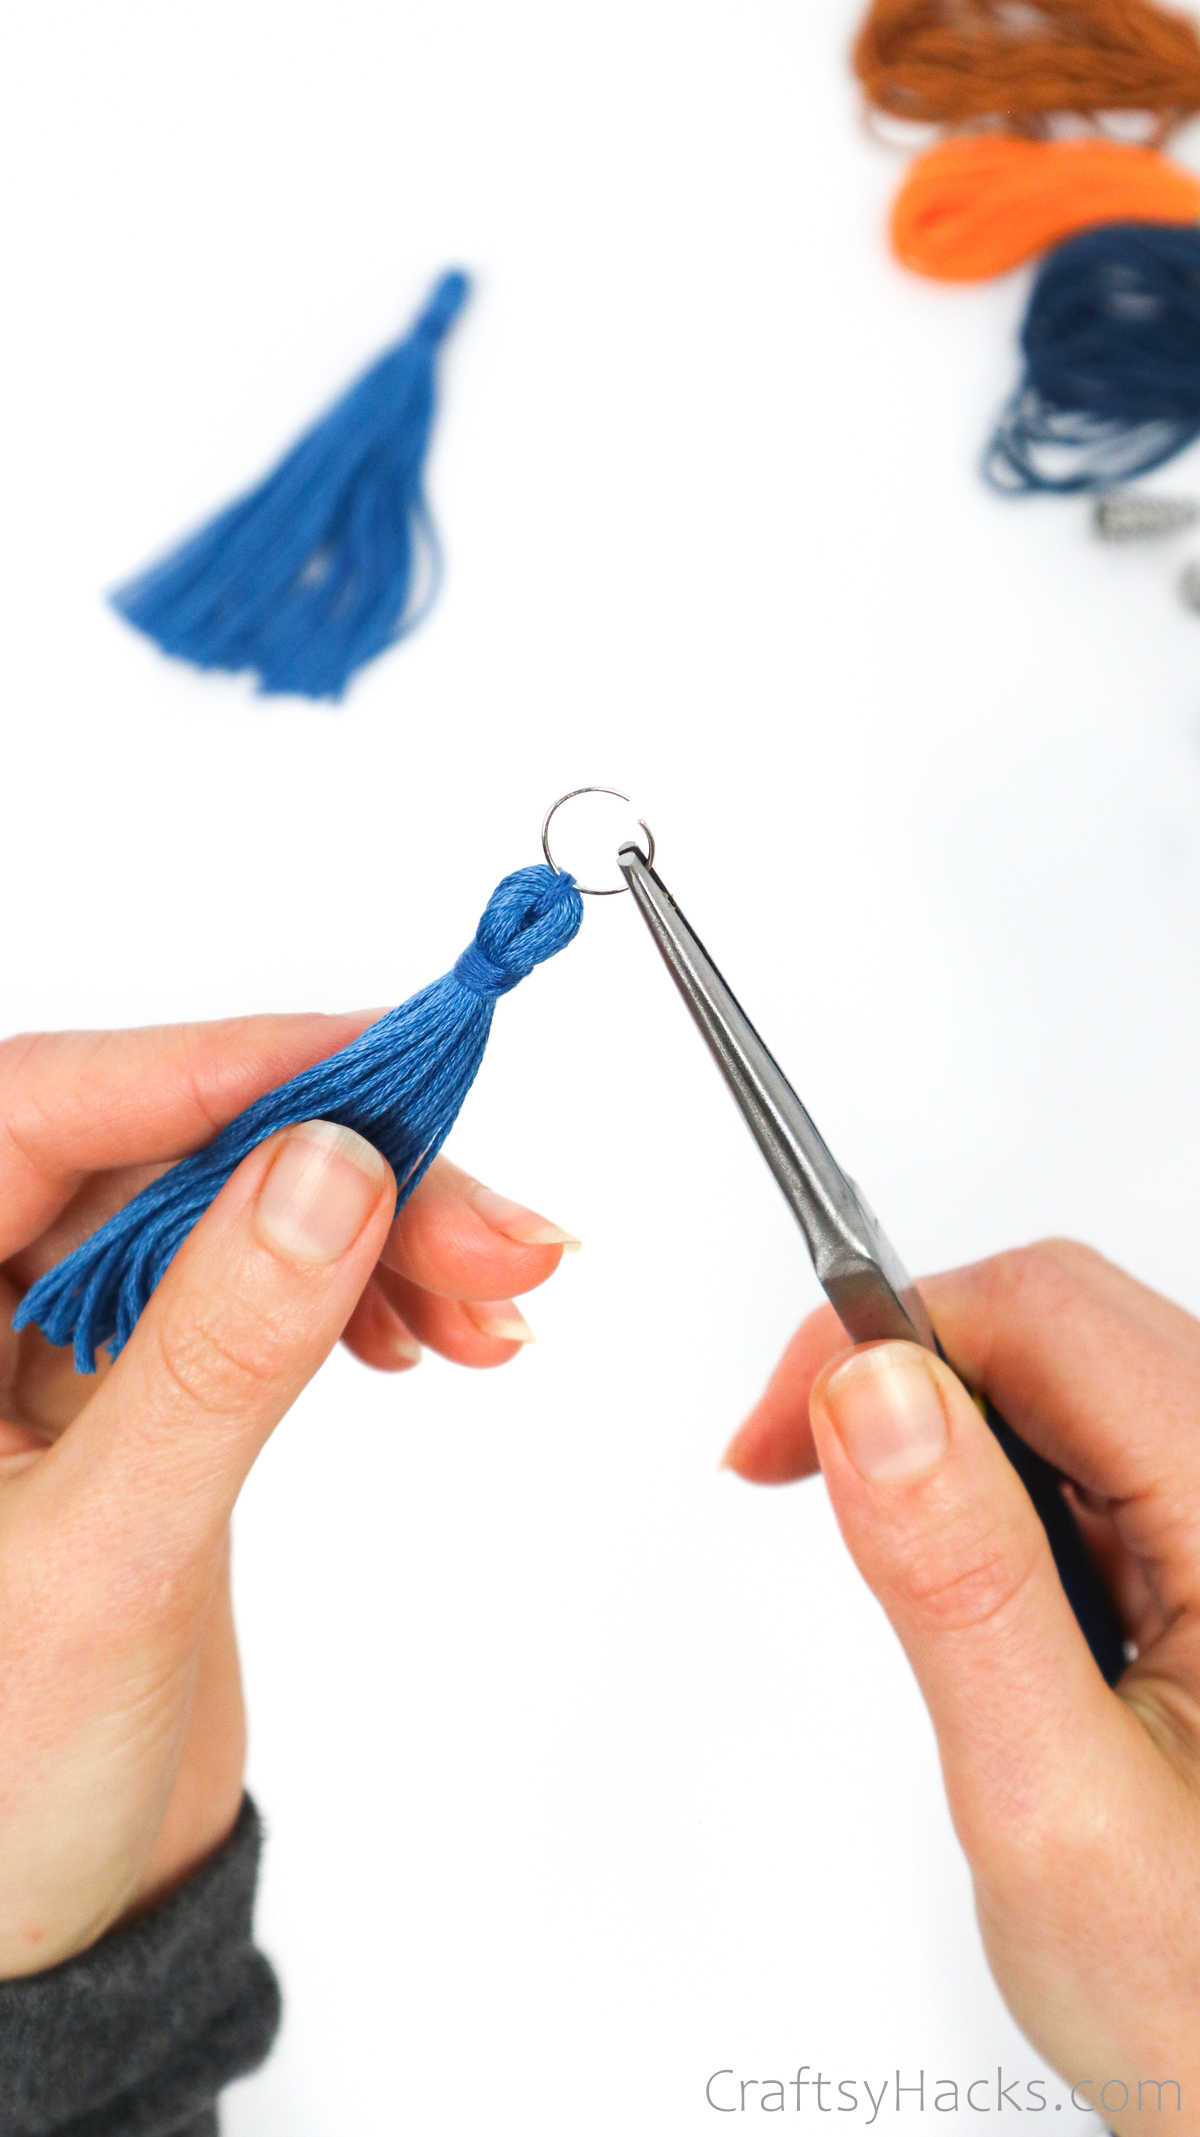
Once you’ve attached the hoop, grab the earring hook and attach that to the jump hoop. That’s it! Your DIY earring is all done.
Method 2
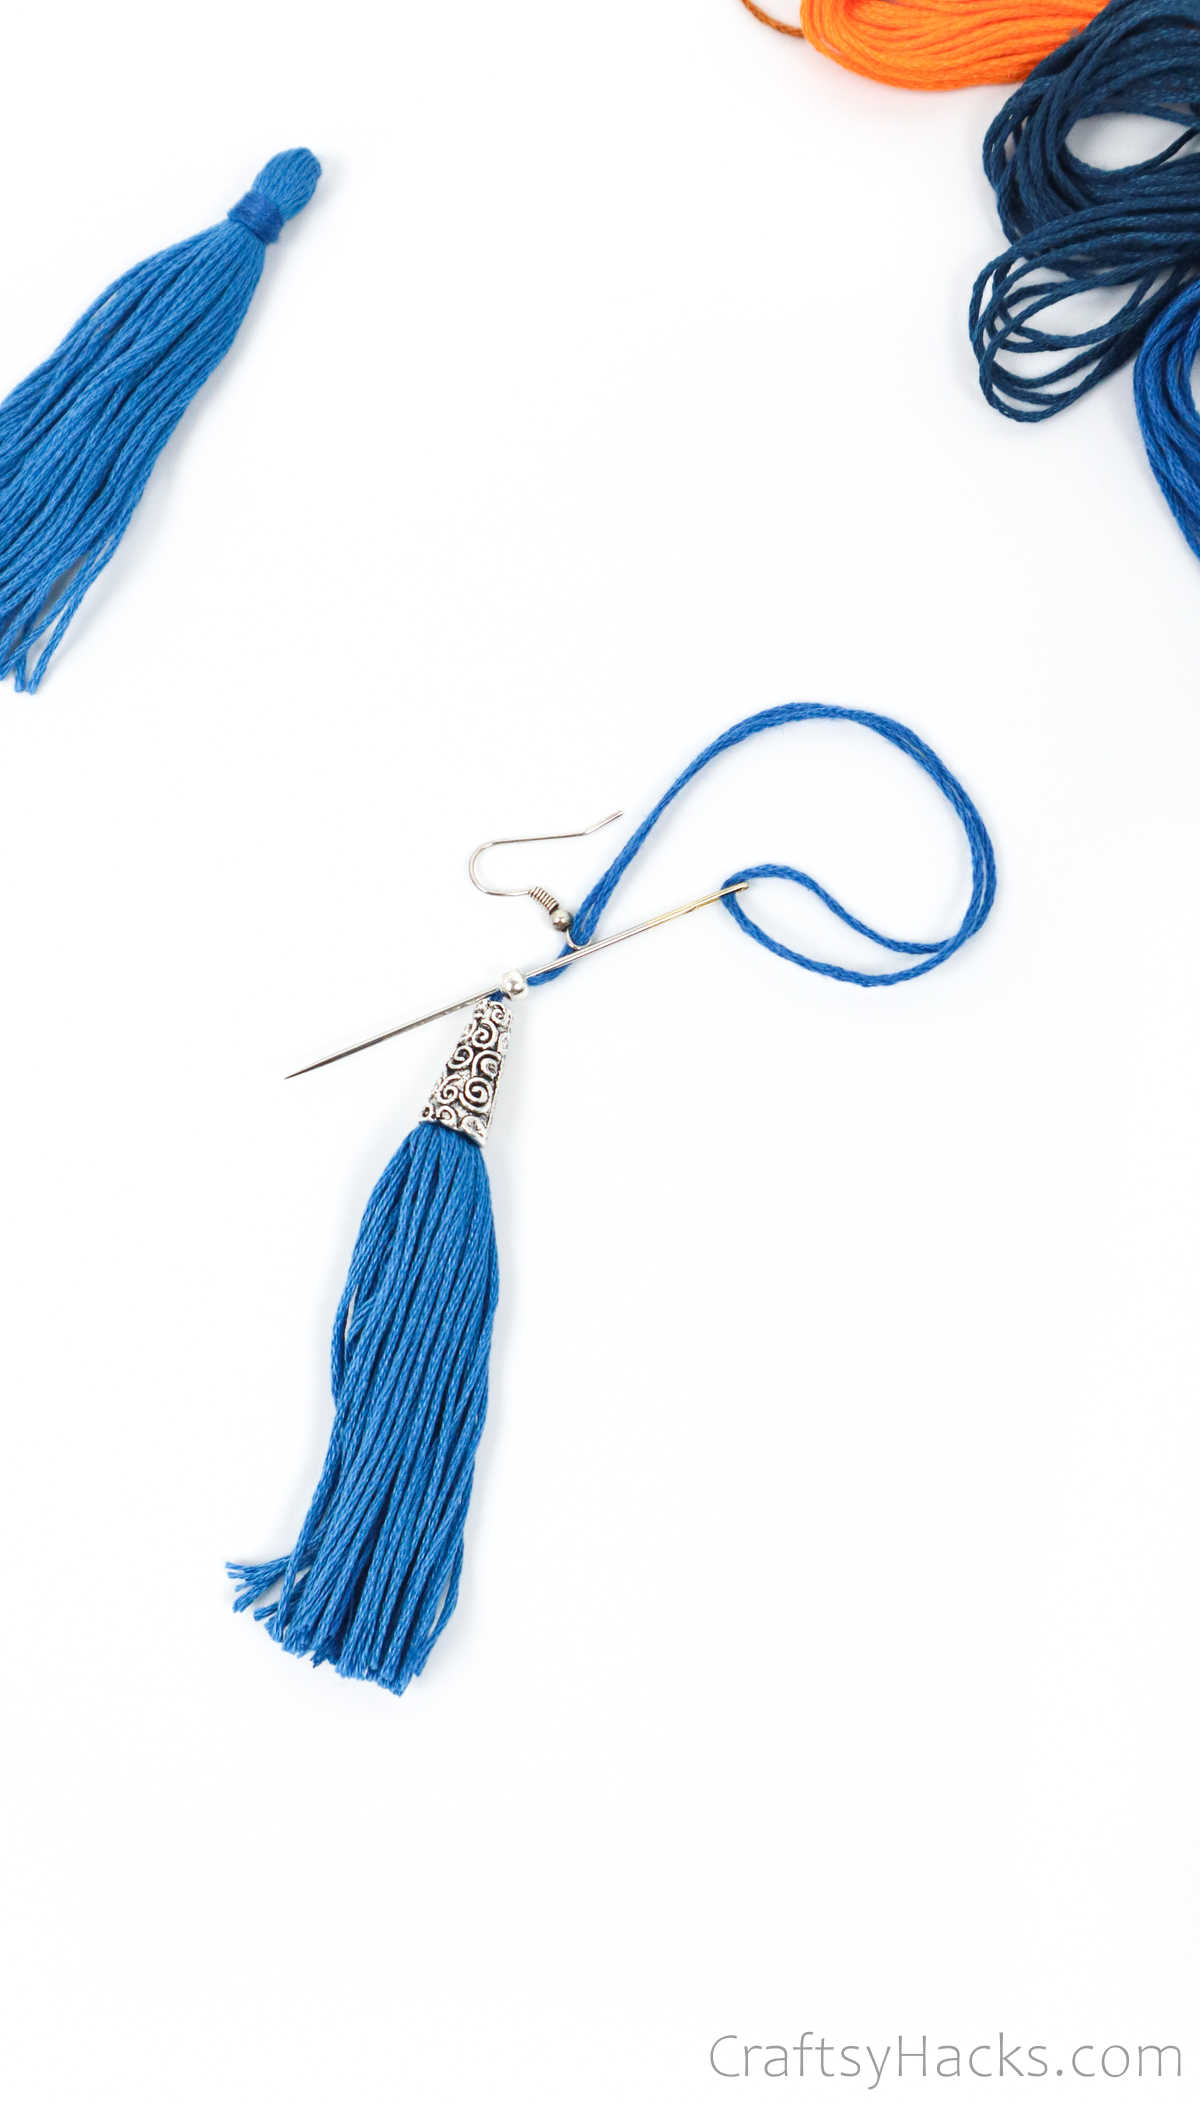
The second method would be to thread a large embroidery needle and make a double knot at the end.
Now, insert the needle right through the center and out through the top of the head. Pull the needle through and set it down for just a second.
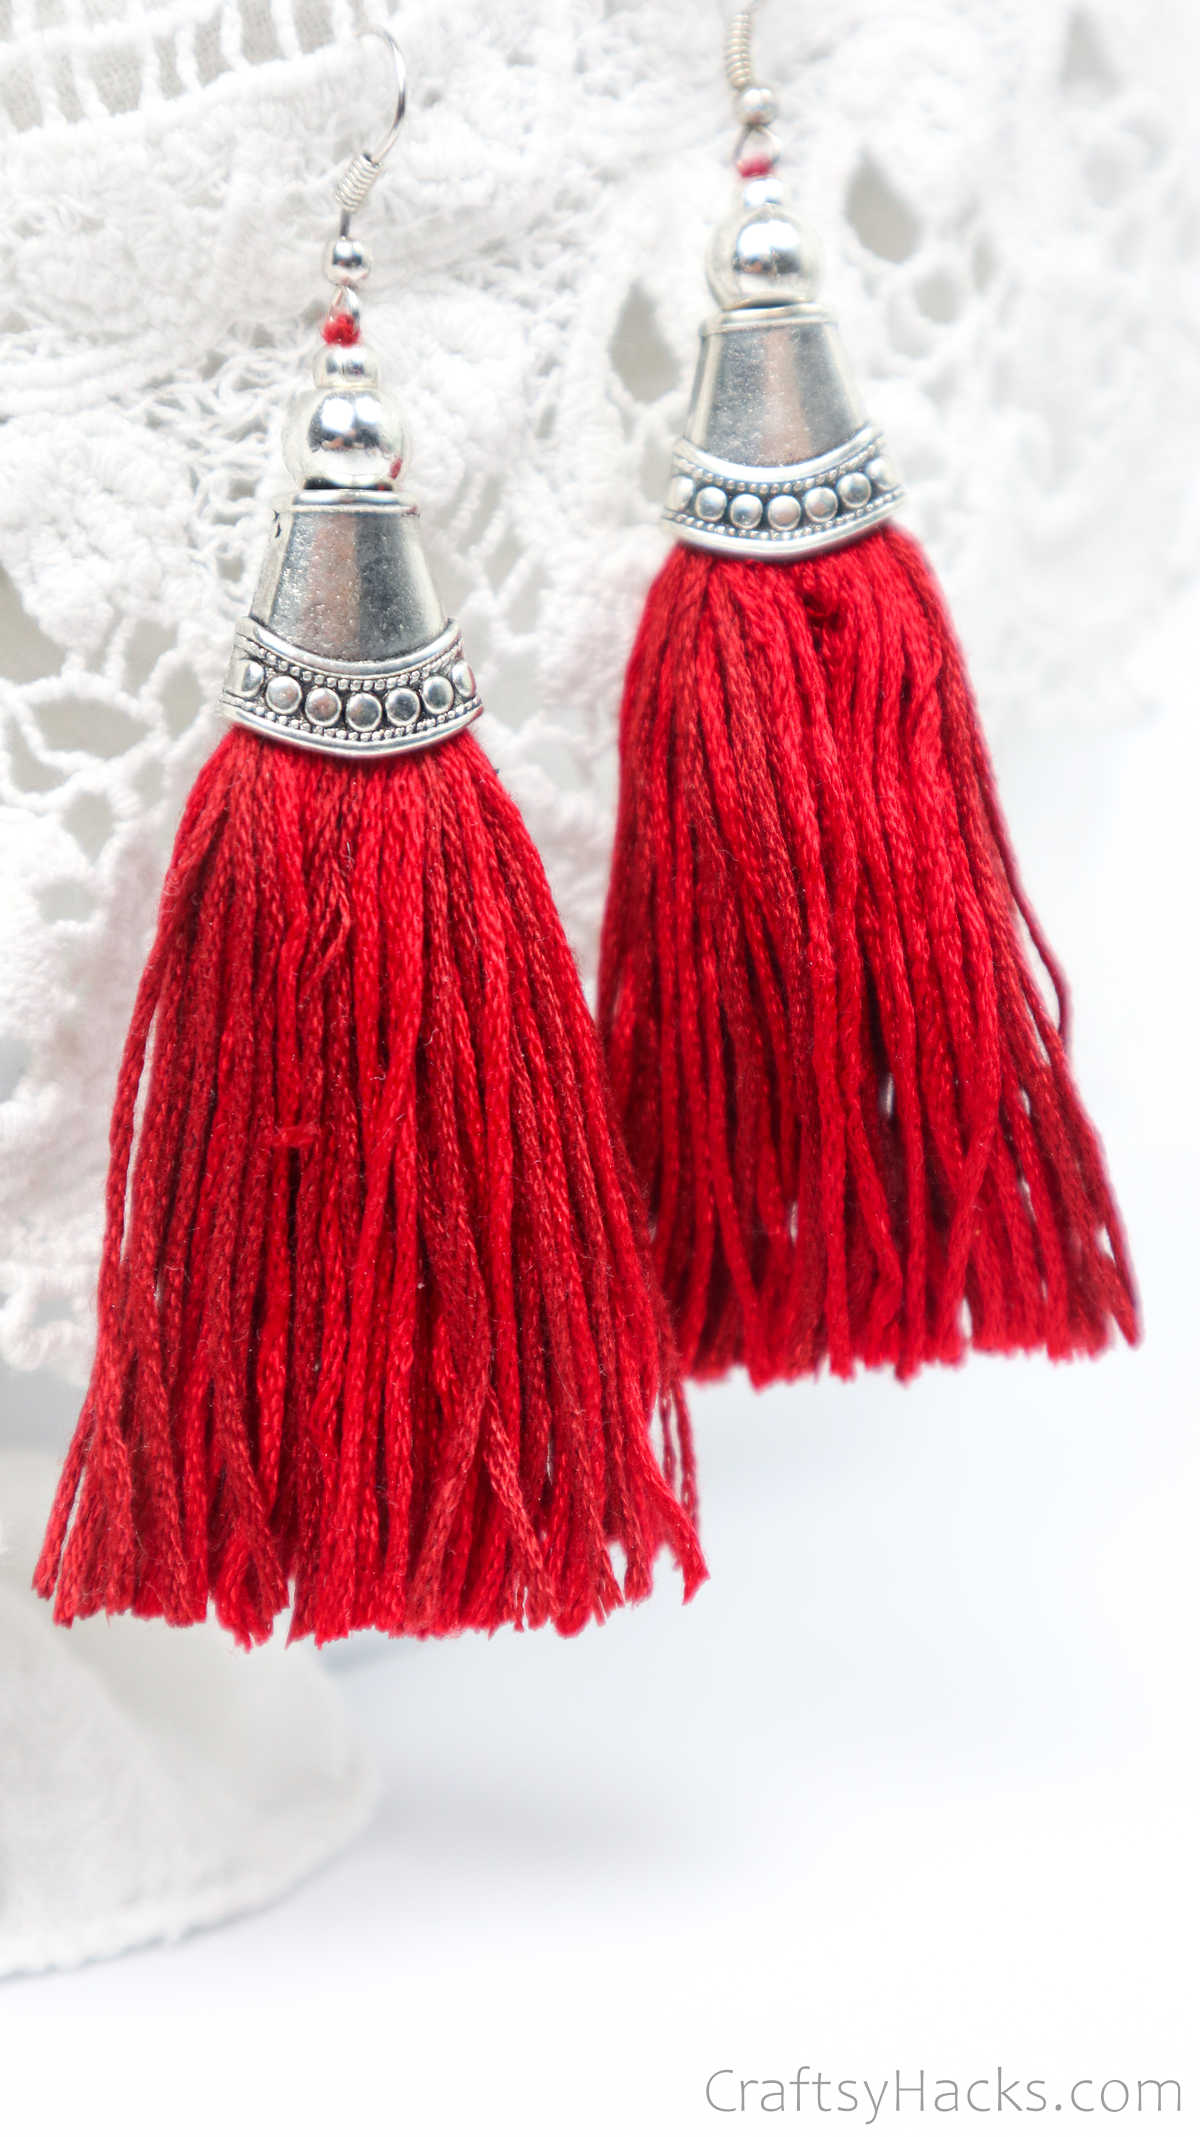
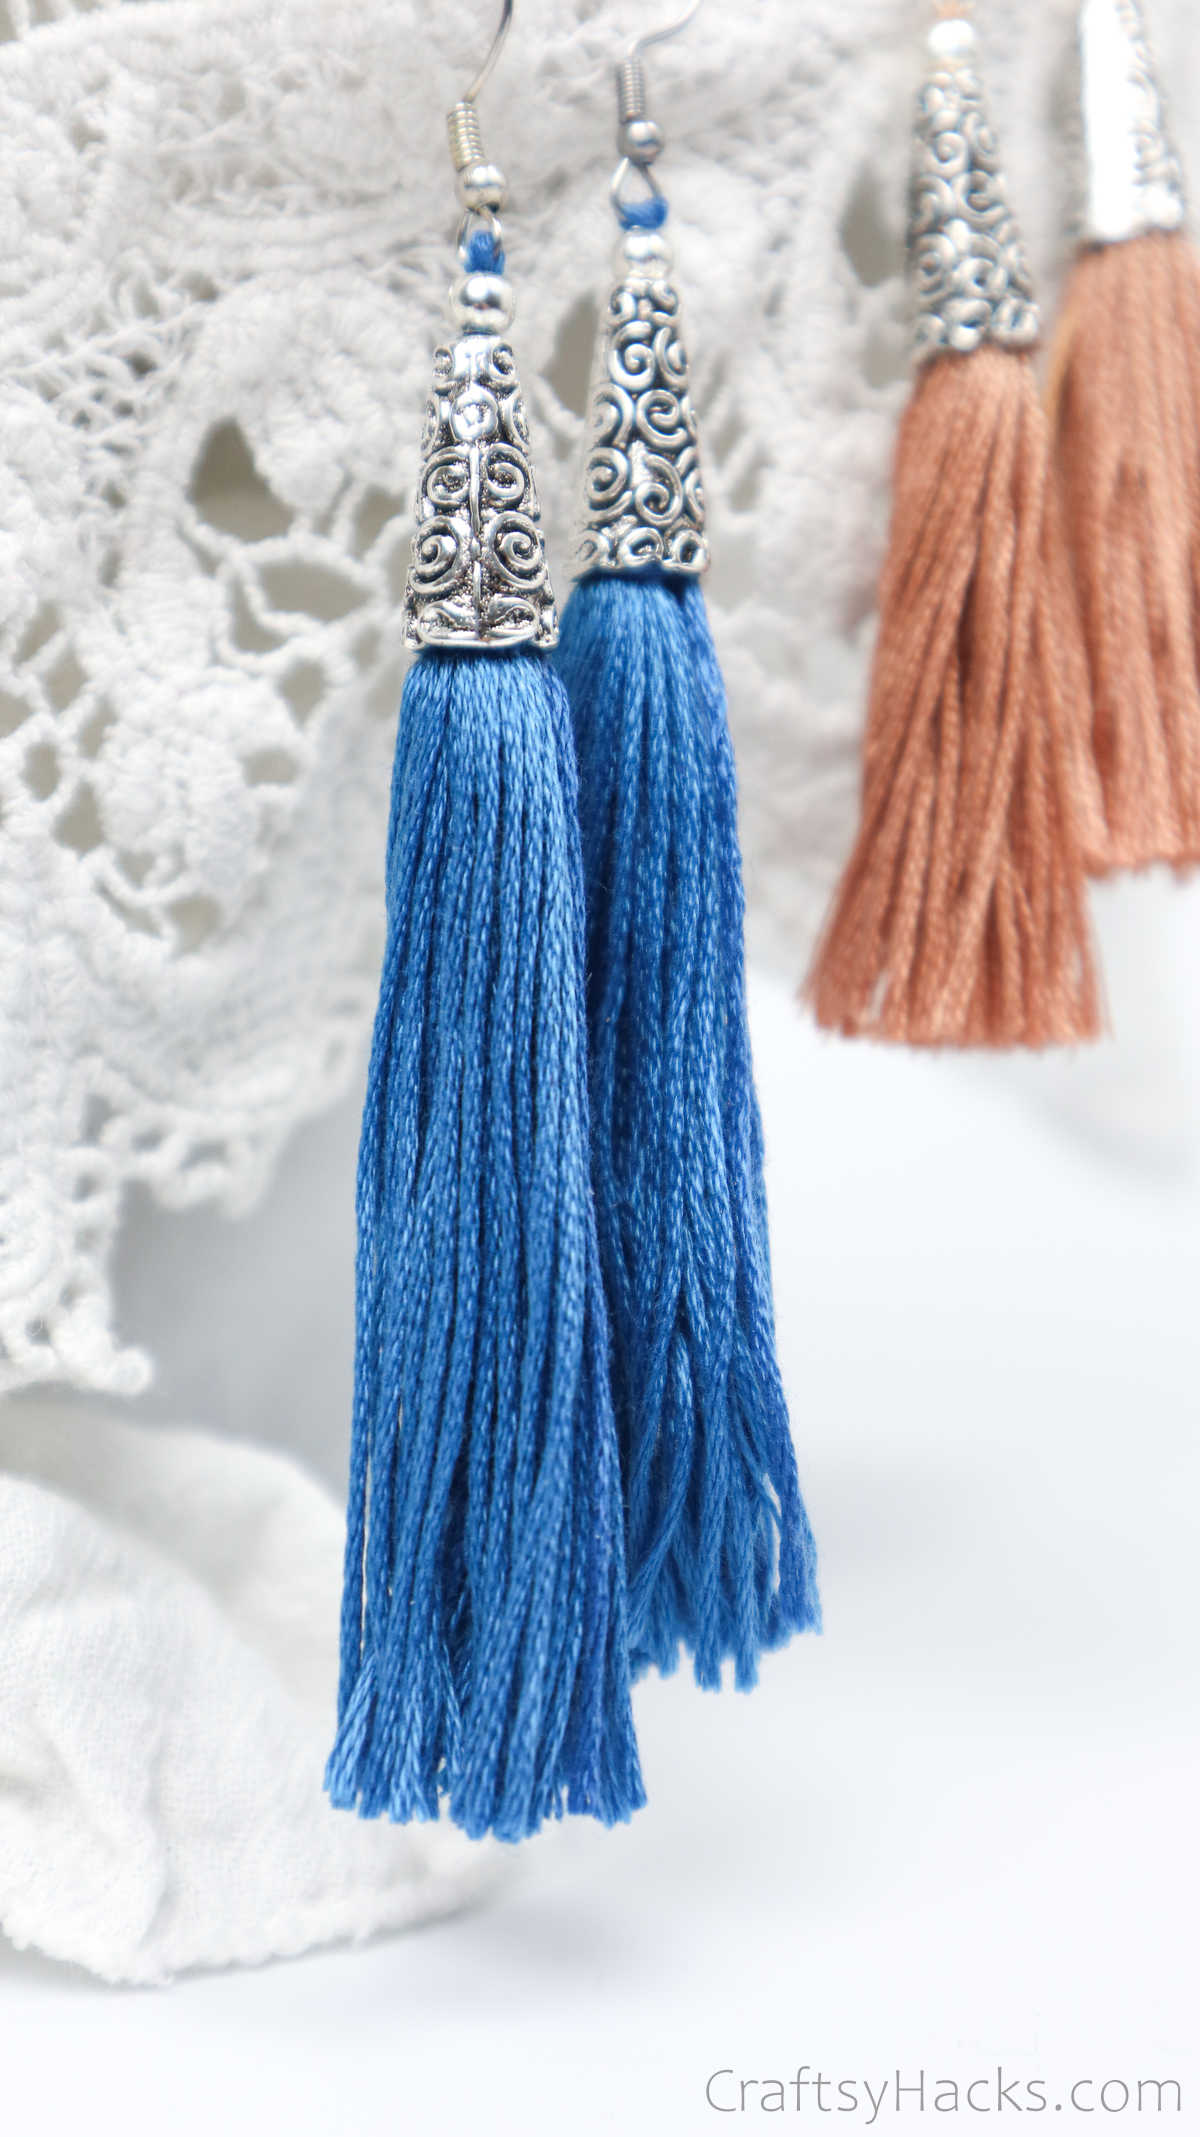
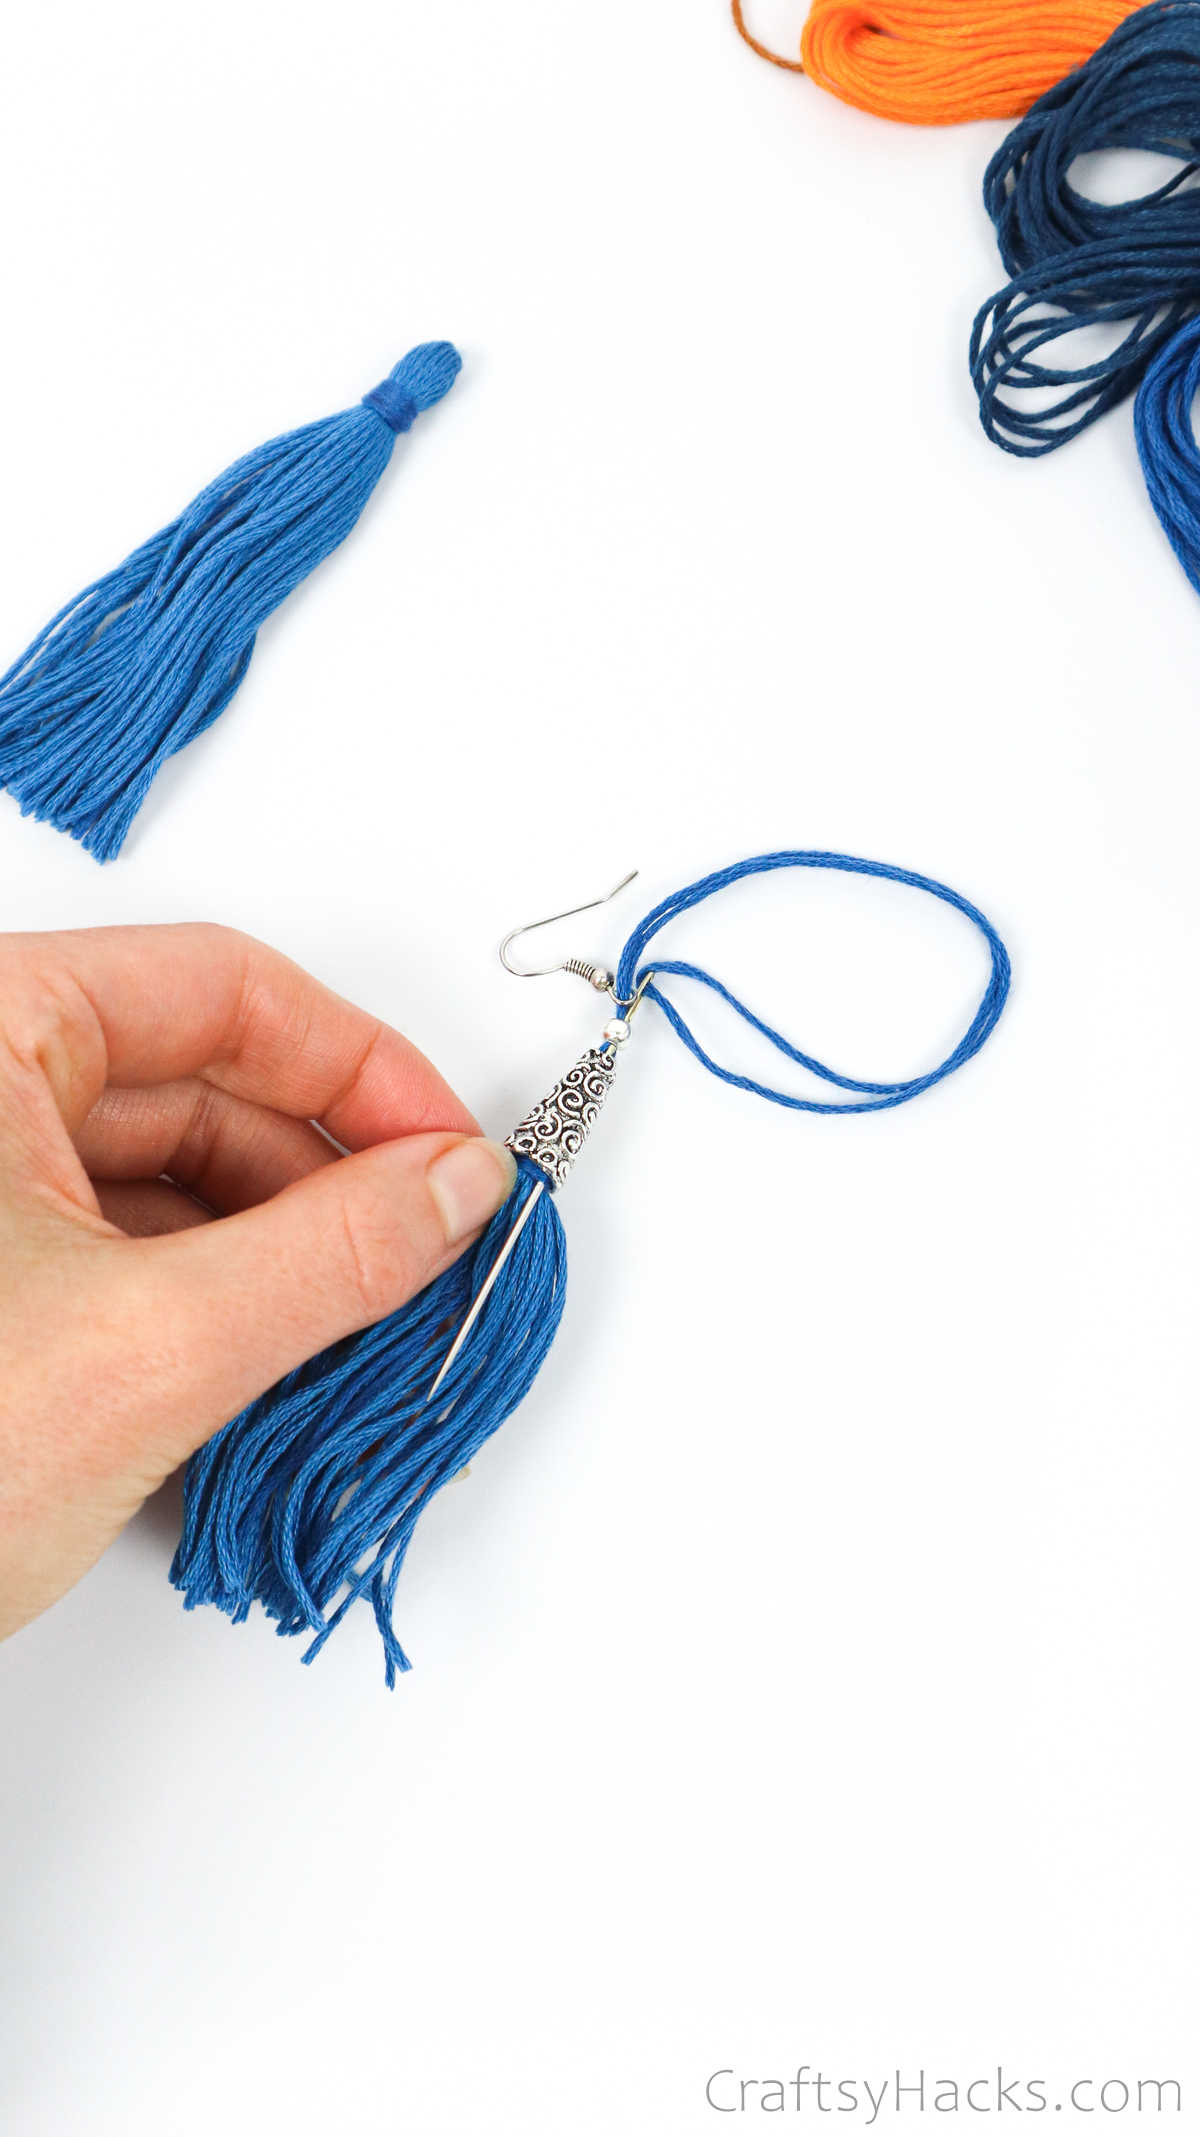
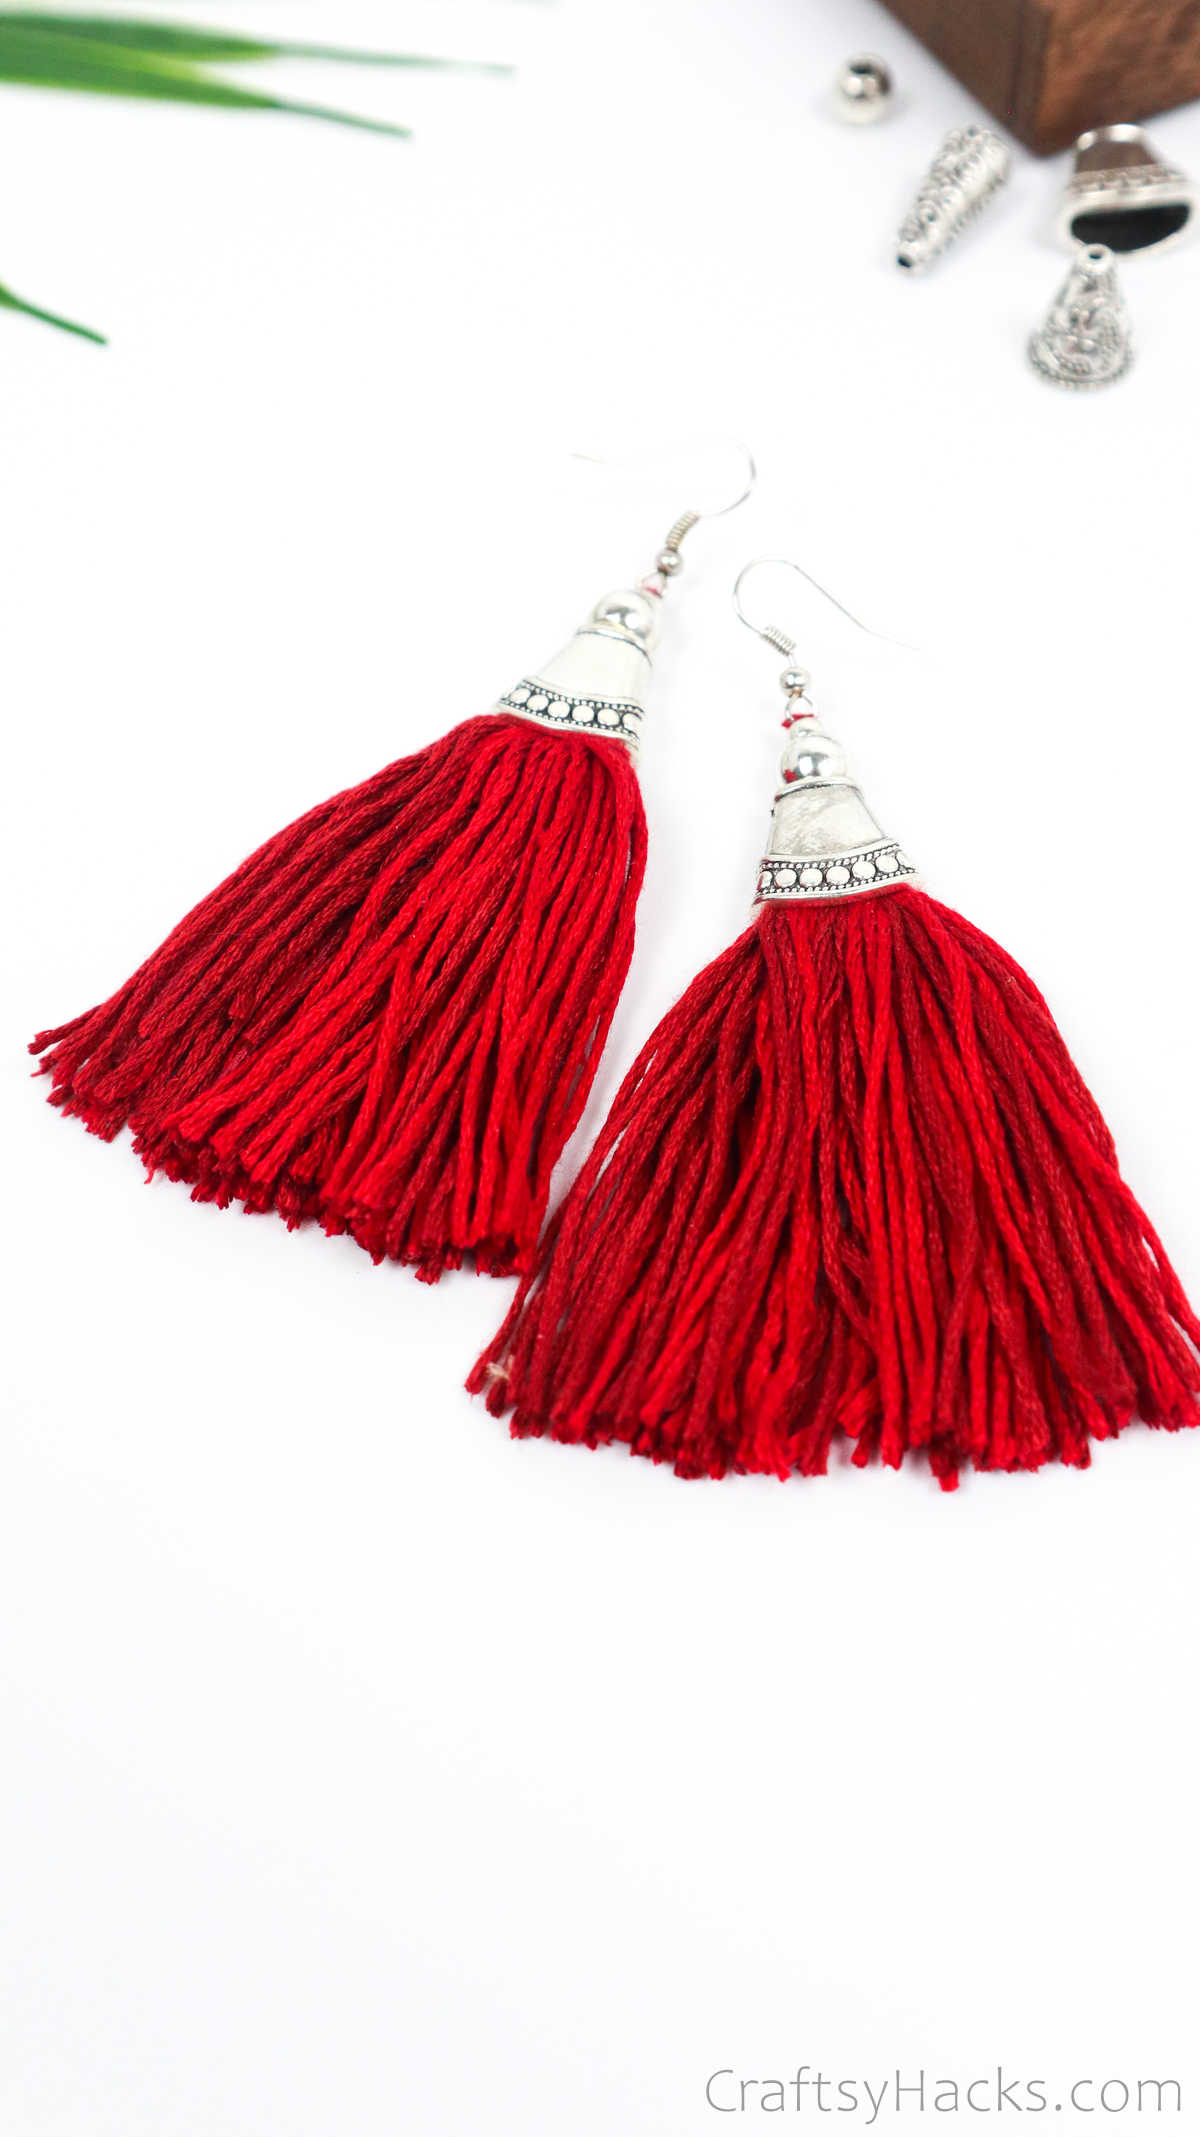
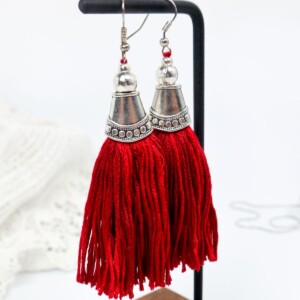
There are plenty of ways you can accessorize your earrings. Take these silver charms, for example. They’re unique and pretty and can jazz up your tassels instantly. You can also add beads if you like.
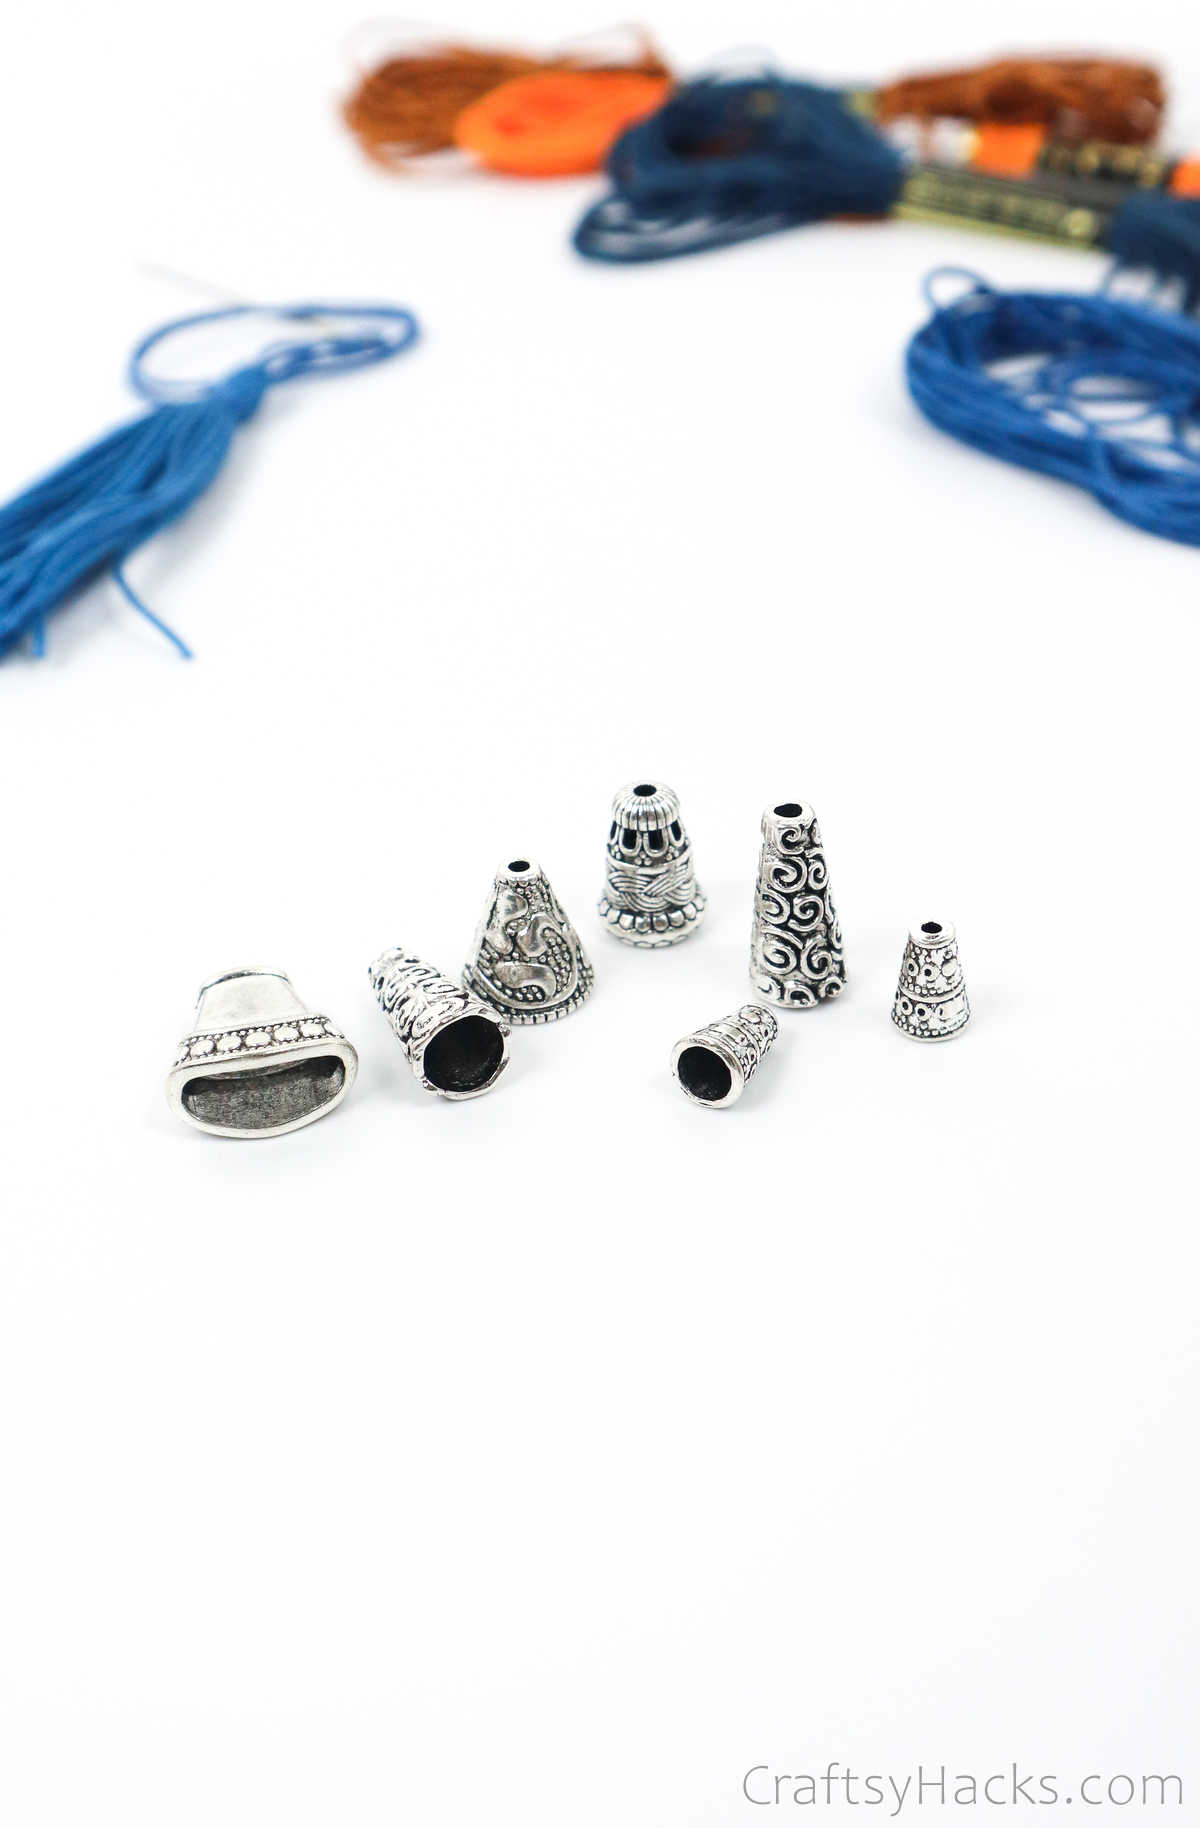
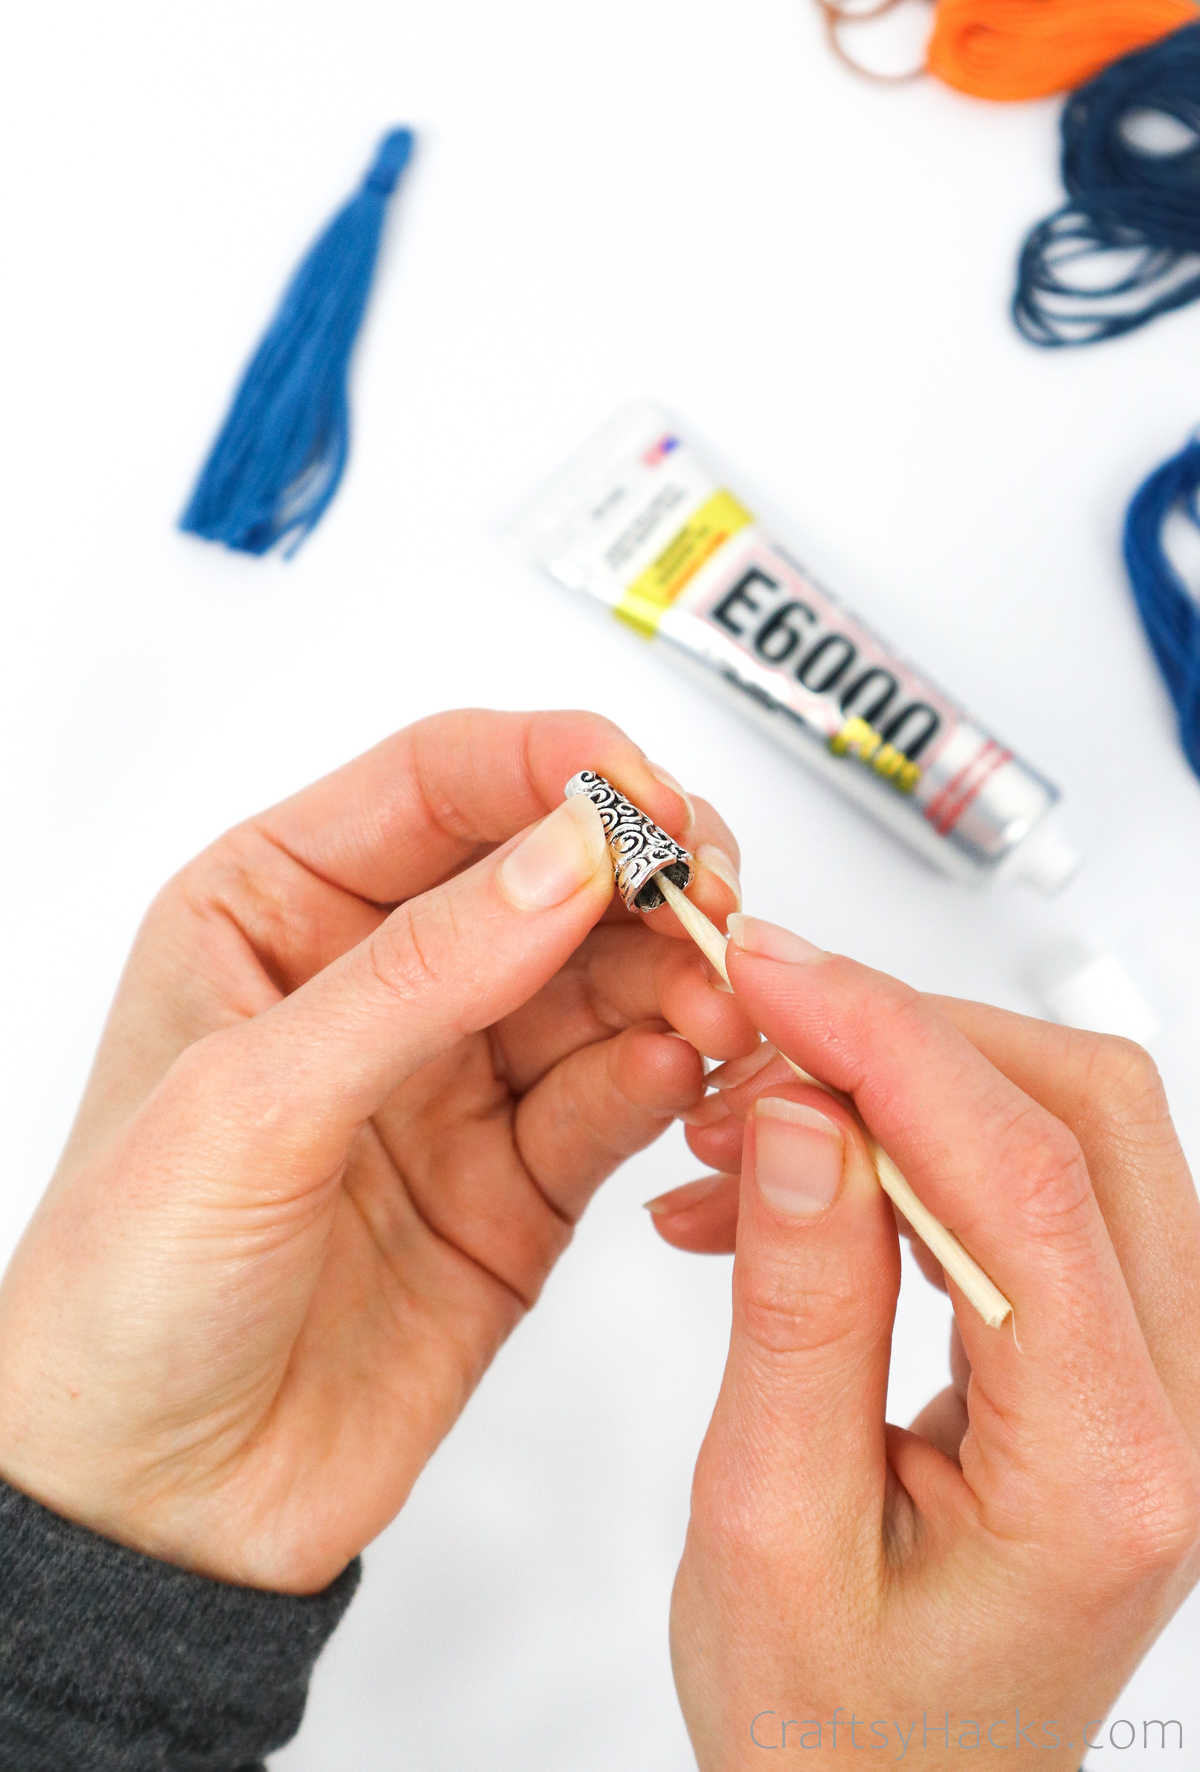
Before you pull the needle through, just dab a small amount of glue to the inside of the charm. This will help adhere it to the tassel more firmly.

Next, just pull the needle through the bottom and out the top of the charm and push the charm down over the head . Hold it in place for a second for the glue to work its magic. You can also add a small bead(or more) and send the needle through it, pushing down so it sits atop the charm.
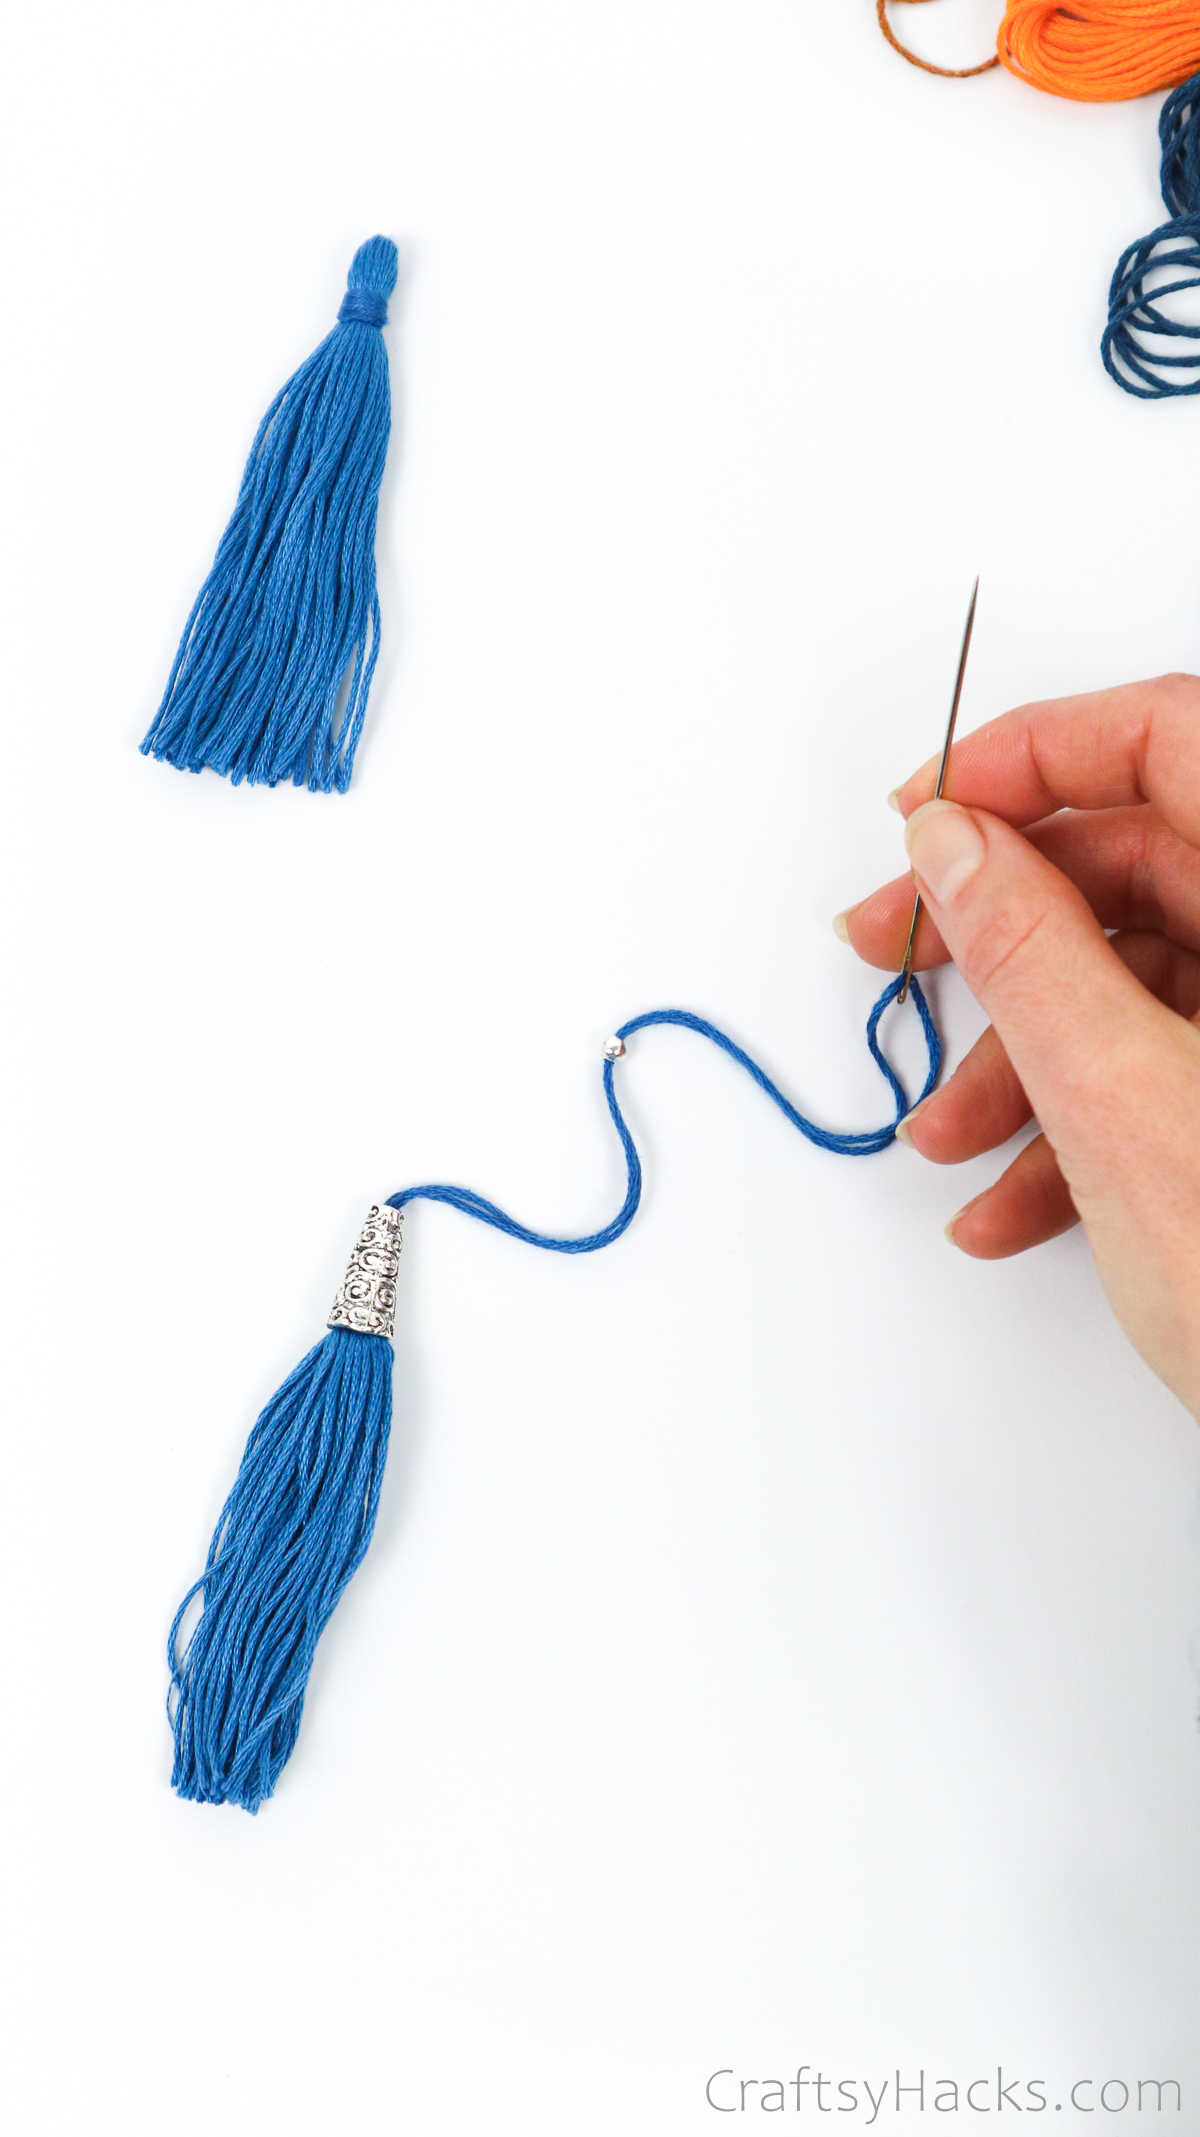
To attach the hook, just pull your needle through the little hoop under it and pull through
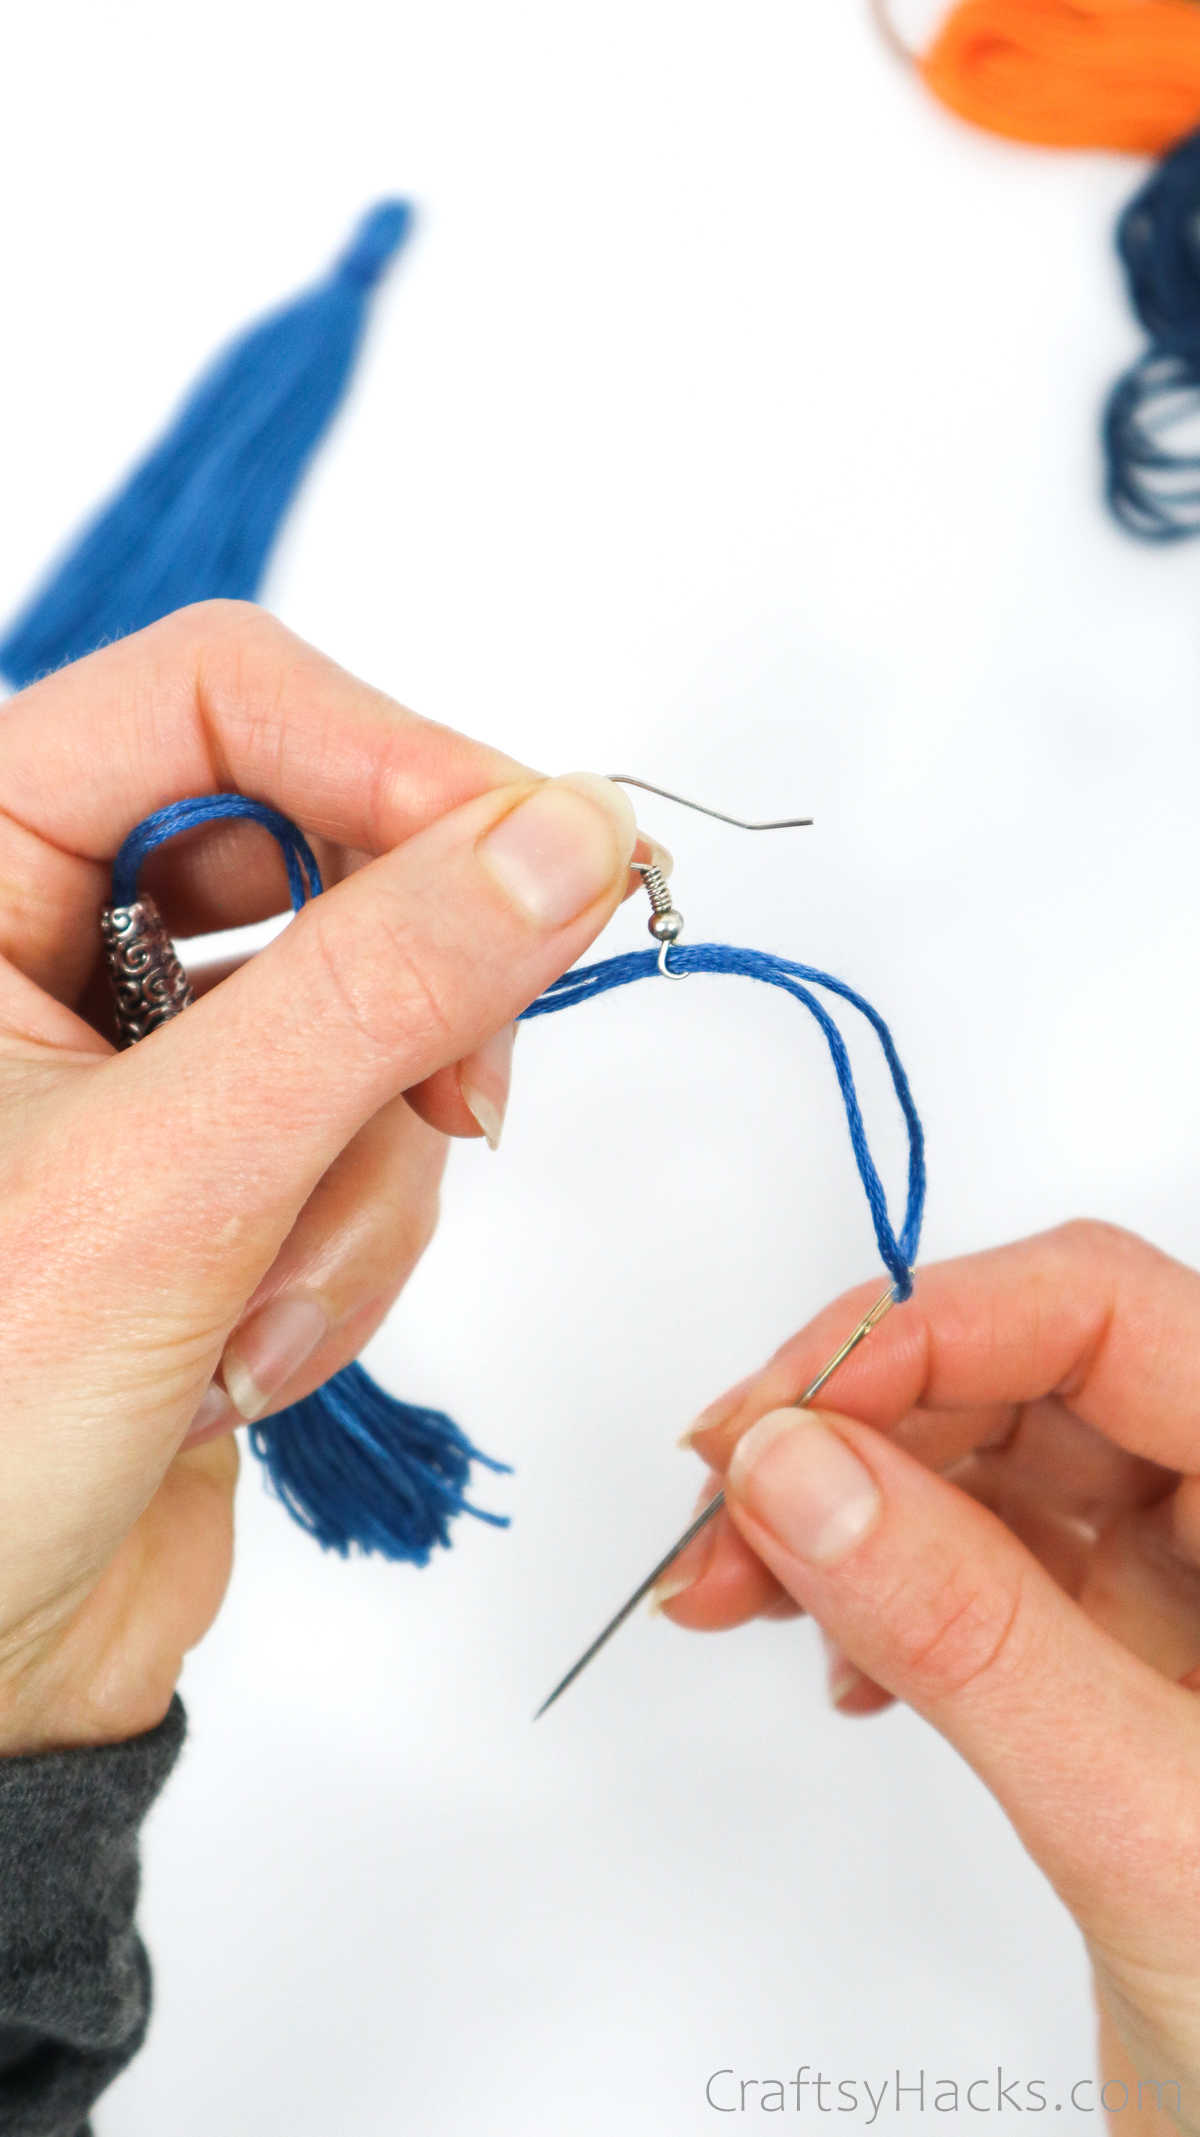
To fasten off, pull the needle back through the little bead you inserted earlier.
Next, pull the needle back through the big charm and out through the tassel.
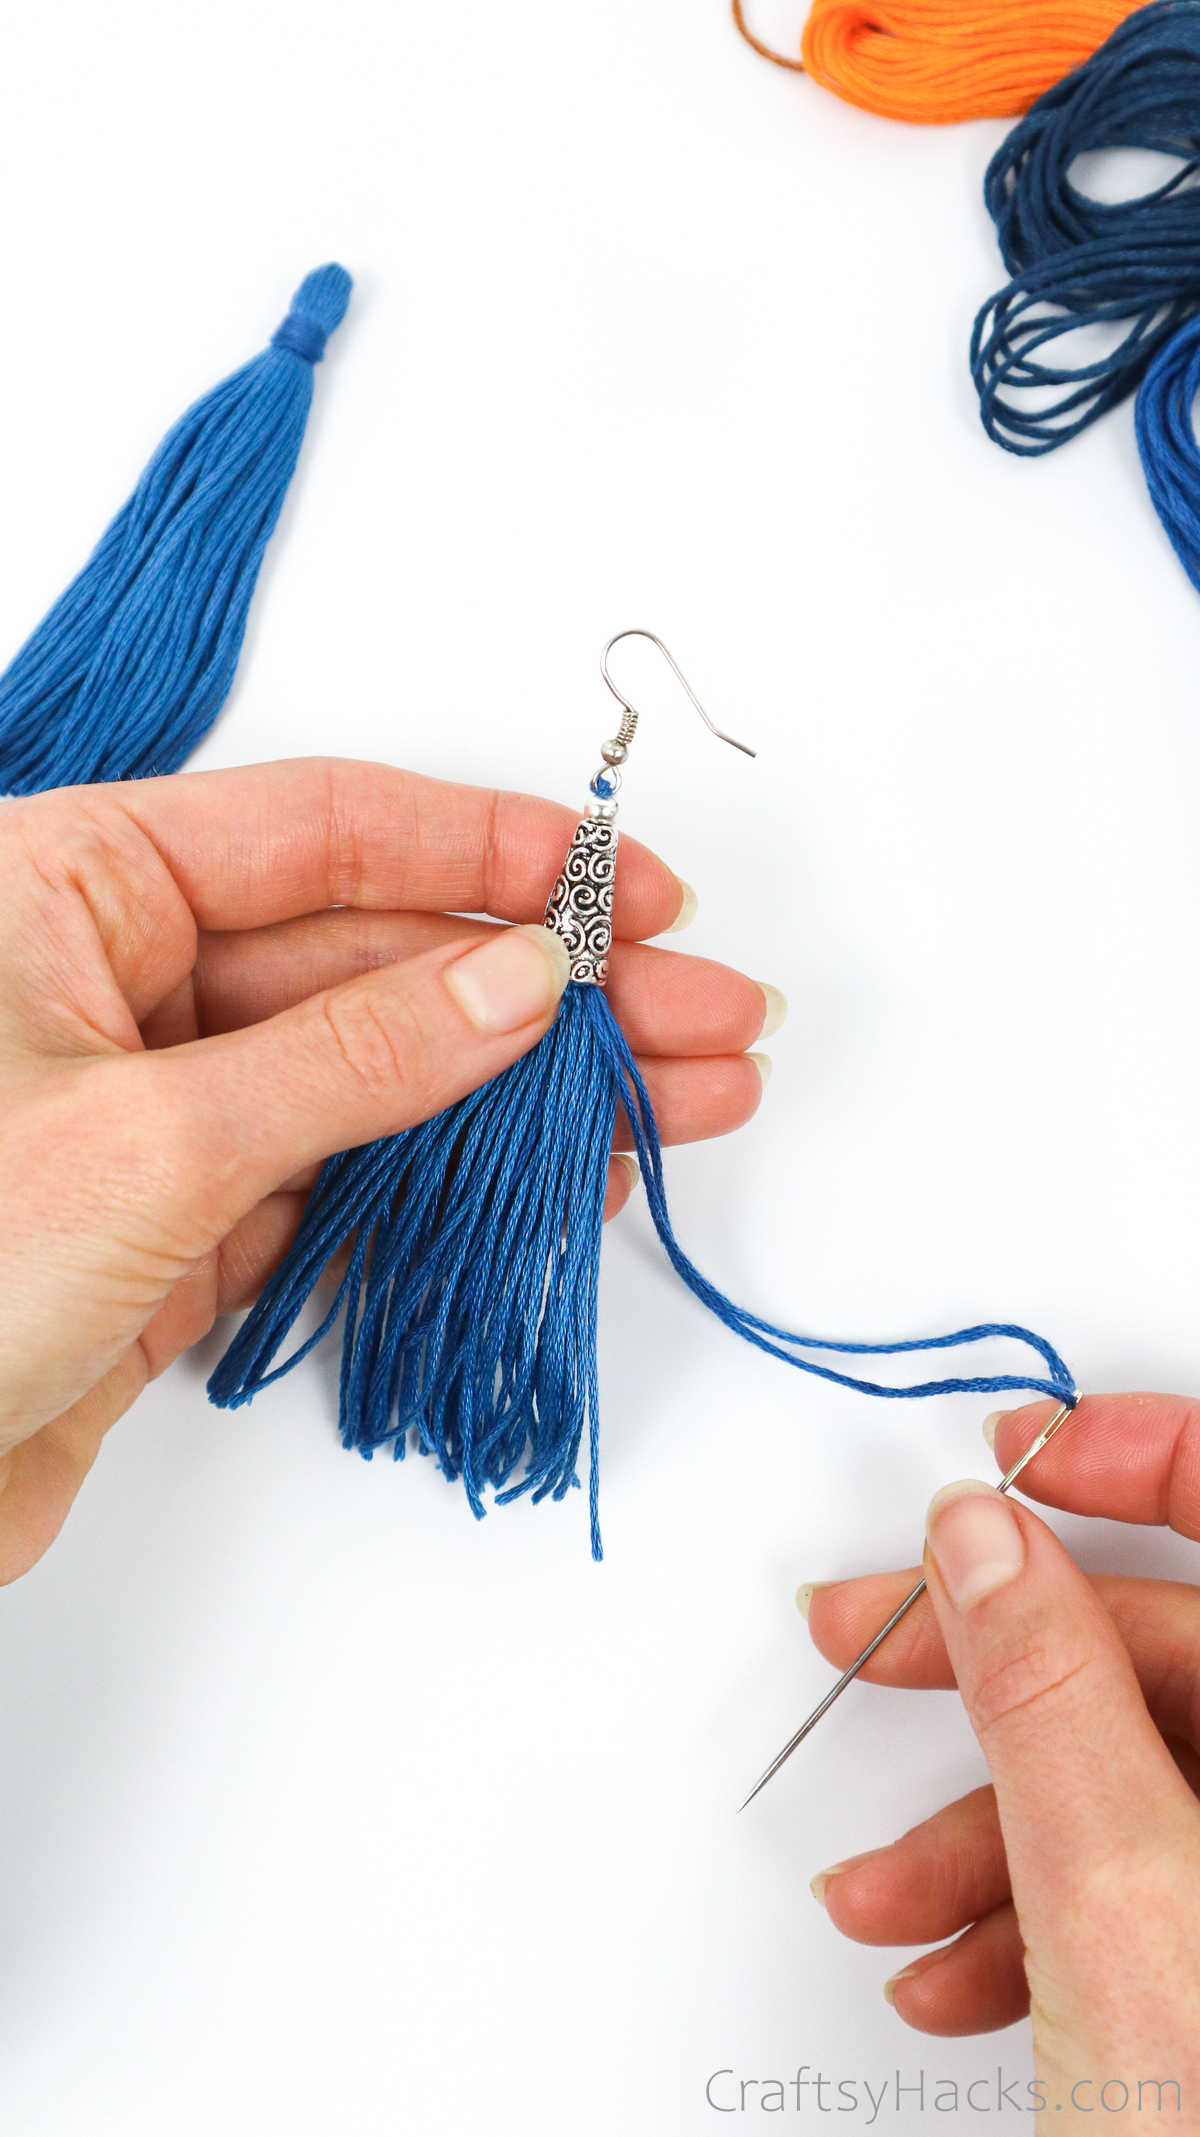
You can secure the ends with a knot. You can push the knot up into the base of the charm to hide it between the threads!

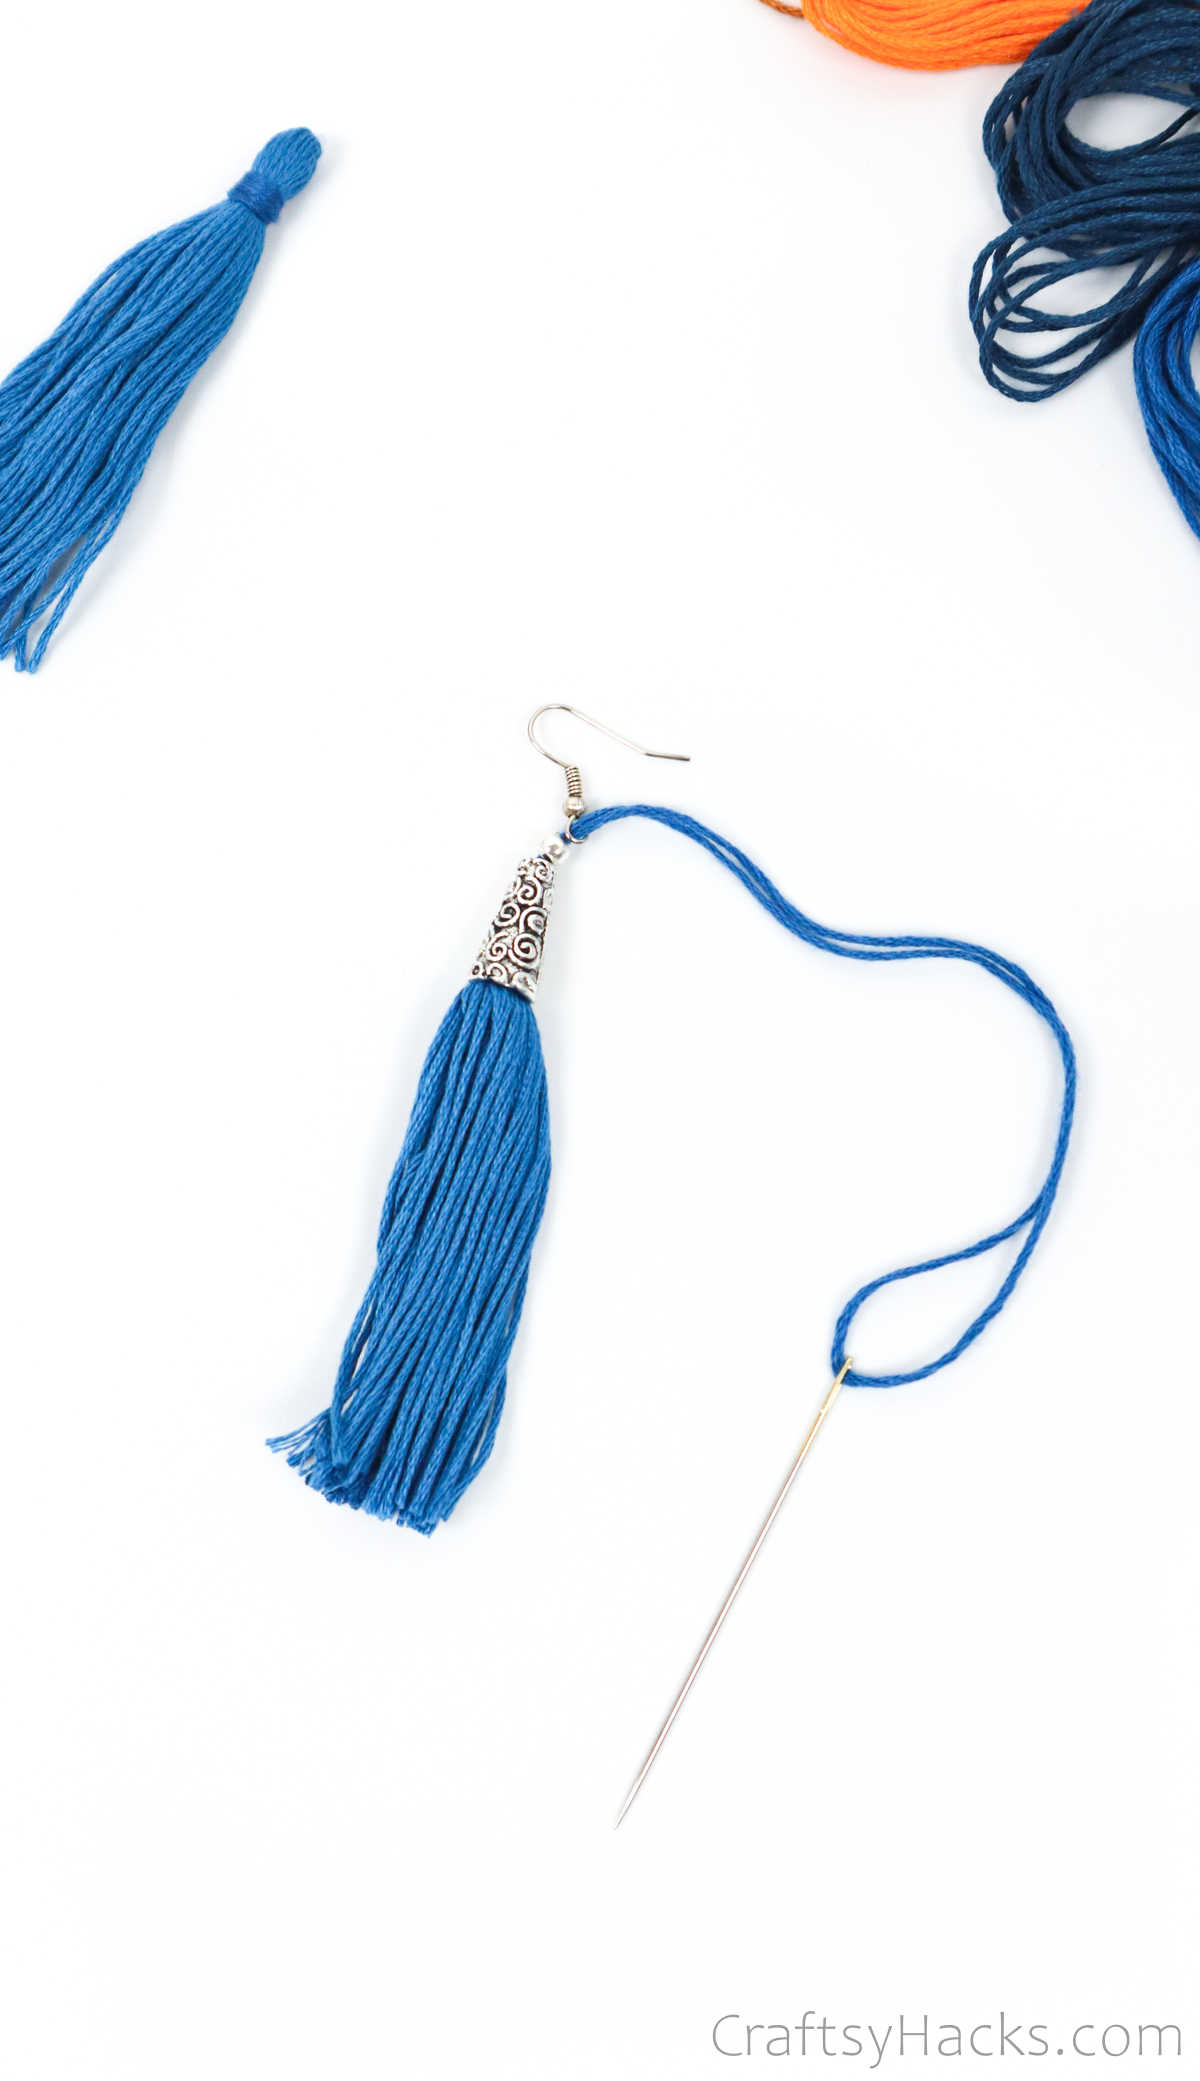
Finally, just add a dot of glue to make the knothead extra-secure!

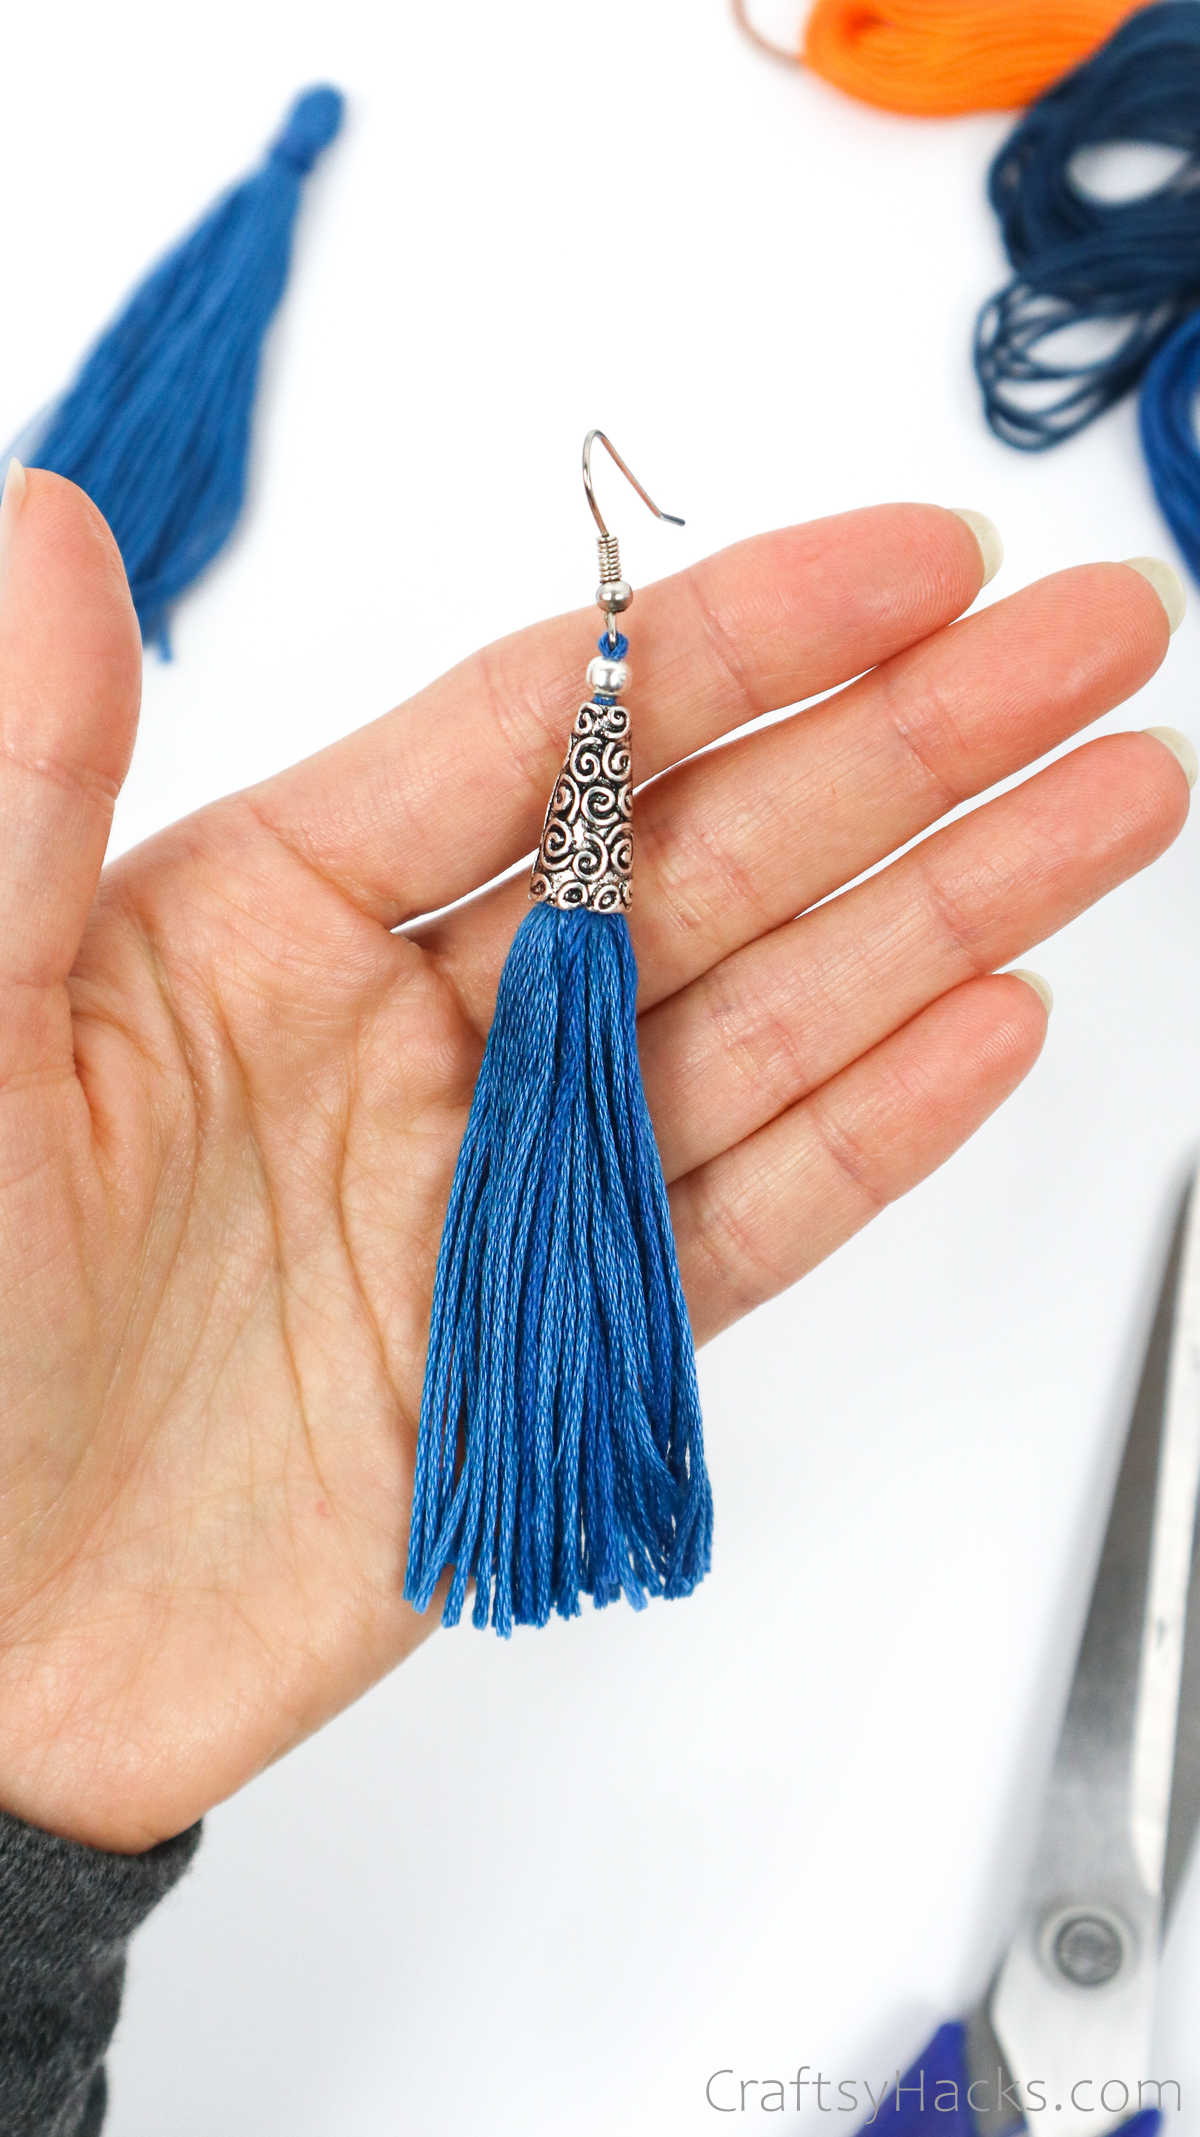
That’s pretty much it, your macrame earrings are all done!
What Thread Do You Use for Tassel Earrings?
The most popular choice would be rayon thread. Most embroidery floss are made of rayon, so you can just use them directly. They’re the perfect size—not too thin, or too chunky—and they won’t fuzz too much.
Cotton threads, too, are pretty popular. There are thinner threads, as well, like silk floss, for a more refined and sleek finish to your tassels.
What Can You Wear These Earrings With?
These earrings are perfect for pairing with casual outfits like a summer dress, or even a pair of jeans and a tee. If you use heavy or chunky silver charms, you can definitely class up your evening wear outfits with the tassels earrings you make with them!
Other Projects You Might Want to Make
- 37 Brilliant Crafts to Make and Sell
- 27 DIY Rings
- 37 Crafts for Girls
- 37 Yarn Projects You’ll Love
- How to Make Polymer Clay Earrings
- DIY Macrame Keychain
- Macrame Leaf Earrings
- 47 Fun Projects for Adults
DIY Tassel Earrings (Step-by-Step Tutorial)
Equipment
- Scissors
- Pliers
- Pony eye needle
Materials
- Embroidery thread
- Earrings hooks
- Jump rings
- E6000
- Beads
- Cone bead caps
Instructions
- Gather all your supplies to get started.
- Take one bundle of embroidery floss-still with the wrapper attached in the middle-and find the center of the loop on either end.
- Grab a pair of scissors and cut the threads at both ends, right through the loop.
- Now, peel off the wrapper and divide the bundle into two equal sets of threads. Set one half aside for now.
- Cut another strand of thread from another batch of floss—it should measure 8 inches. Pull the 8” thread under the threads down to the middle and tie a knot
- Fold the threads in half where you tied the knot.
- Next, cut another strand, this one 10” long. Secure another knot about a centimeter away from the looped top to form a head, of sorts, for your tassel.
- Then, grab the end of that 10” thread and loop it around the knot a few times. Tie a double knot and snip off the ends. You now have a tassel. Remember that bundle of threads you set aside earlier? Go ahead and make another tassel with that.
- You can attach the earring hooks in two ways. The first is the easiest. Just use pliers to loop a jump hoop into one of the threads at the top of the tassel head and then secure the earring hook through the jump hoop.
- The second method is a little more elaborate. First, thread a large embroidery needle with floss and make a double knot at one end.
- Insert the needle right down the center of the tassel head and pull it through from below.
- Pick out a pair of matching silver charms and beads and loop one through the needle and push it snugly over the head of the tassel. You can add a drop of glue to adhere the two together.
- Then, insert a bead(or more) through the needle and sit them atop the charm. When you’re ready to insert the earring hook, just pull the needle through the little hoop under the hook and pull it through.
- Then, pull the needle through one of the beads you inserted and pull it through. After that, pull the needle through the silver charm as well, and pull it through from under the charm.
- Now, cut the thread off the needle and secure a knot, pushing it all the way up into the base of the charm to hide it. You can also add a bit of glue over the knot to secure it.


