DIY Phone Case (Step-by-Step Tutorial)
This post may contain affiliate links: full affiliate disclosure.
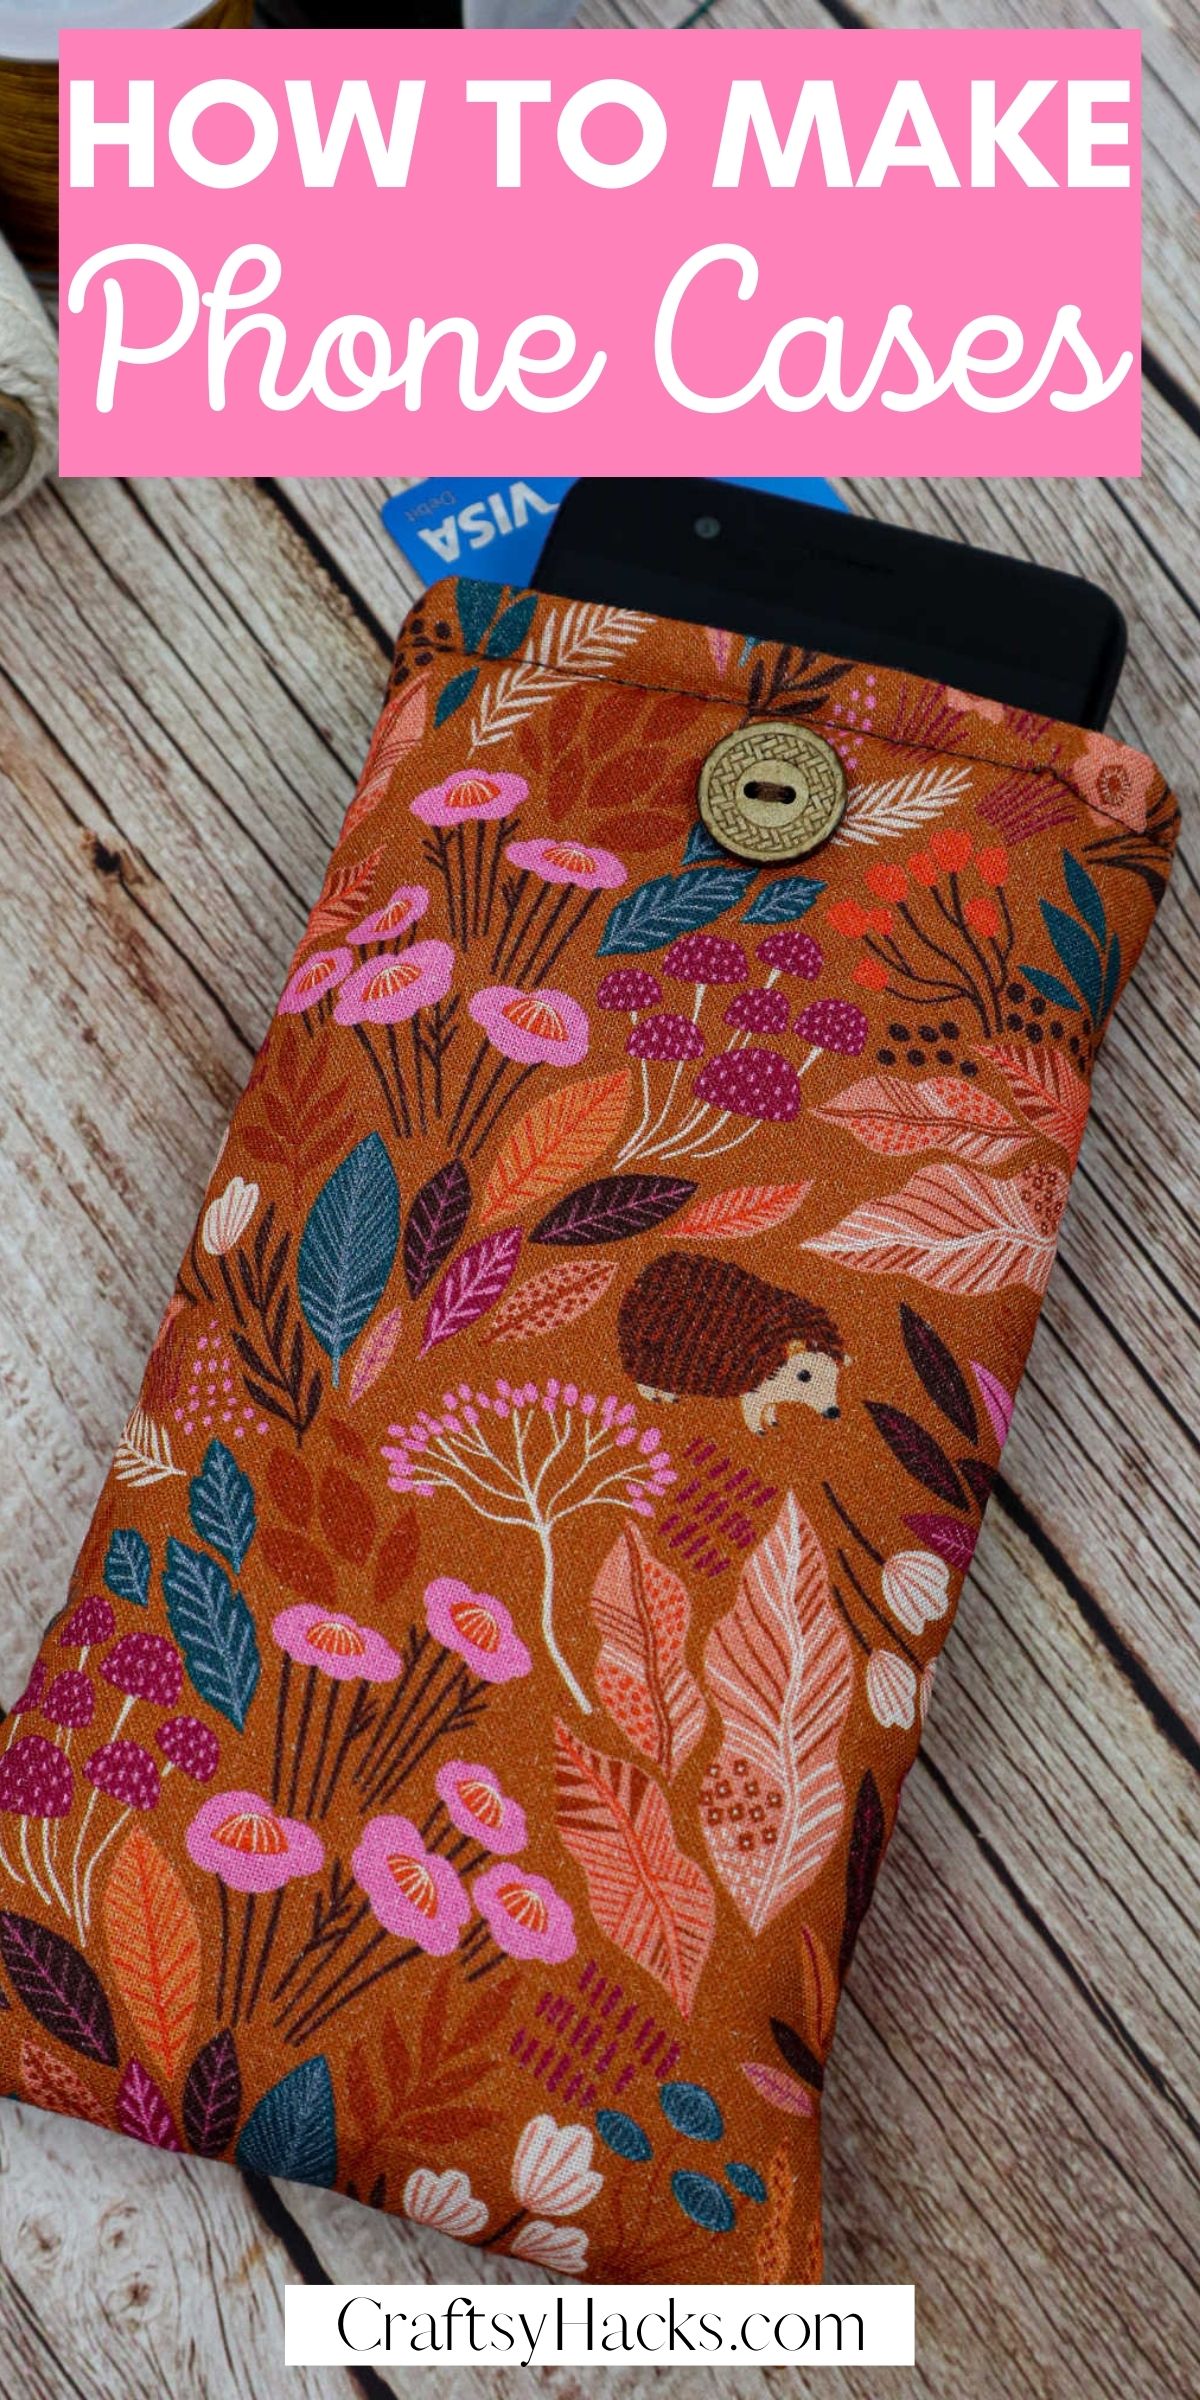
Got some fabric and want to get creative? Make this DIY phone case out of fabric.
This project offers a great way to start your sewing journey as a beginner.
Are you just tired of having to paw through the contents of your handbag to find your mobile phone? With how thin these phones are today, they really do slip down and all the way back inside your purse, and it’s just not ideal having to dig around for it, especially if you’re in a hurry to answer a call, or in an emergency.
Even if it’s not out of necessity or convenience, don’t you think your mobile phone should have a case of its own? This is your chance to personalize your phone even more with a bright and beautiful fabric case to suit your mood.
If you’re ready to get started then here’s a list of everything you will need to get started.
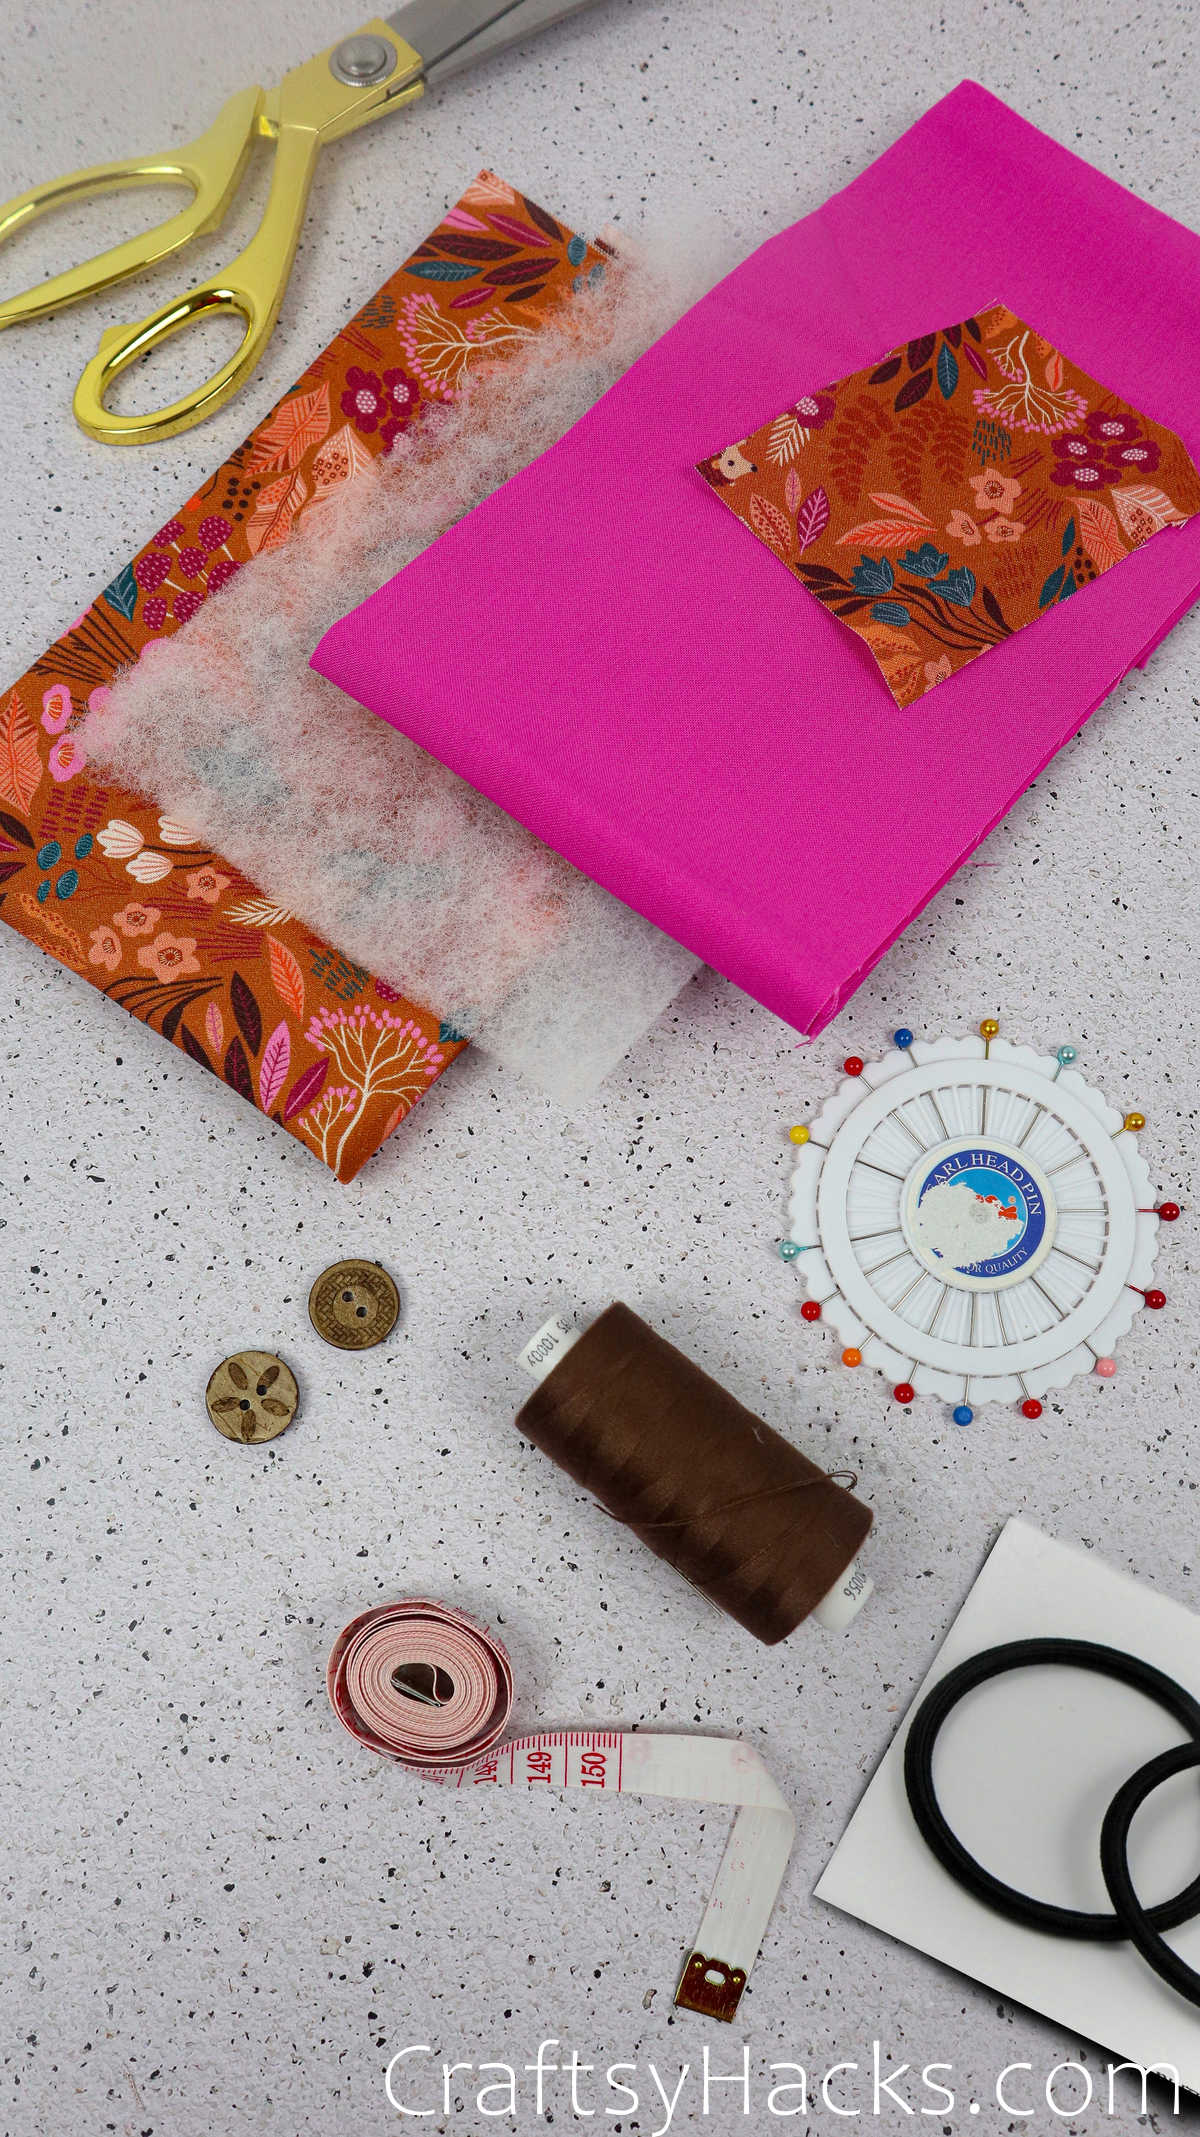
Supplies You’ll Need
- Scissors
- Cotton Fabric 16″x 5.5″ (front)
- 1oz Wadding Piece 15″x 5.5″
- Cotton Fabric 16″x 5.5″ (lining)
- Cotton Fabric for a Pocket 3.5″ x 5″
- 2x Buttons
- Thread and Needle
- Measure Tape
- Sewing Pins
- Elastic Hair Band
How to Make Fabric Phone Case
Gather everything you’ll need? What about your fabric? Did you pick out something fun, colorful, textured, and just pretty to boot? Then you’re all set to begin.
Video Tutorial
Step 1
The first step is to measure your phone’s dimensions and make note of those measurements. You will need to cut your fabric swatches according to these measurements, as well as the wadding and lining.
Step 2
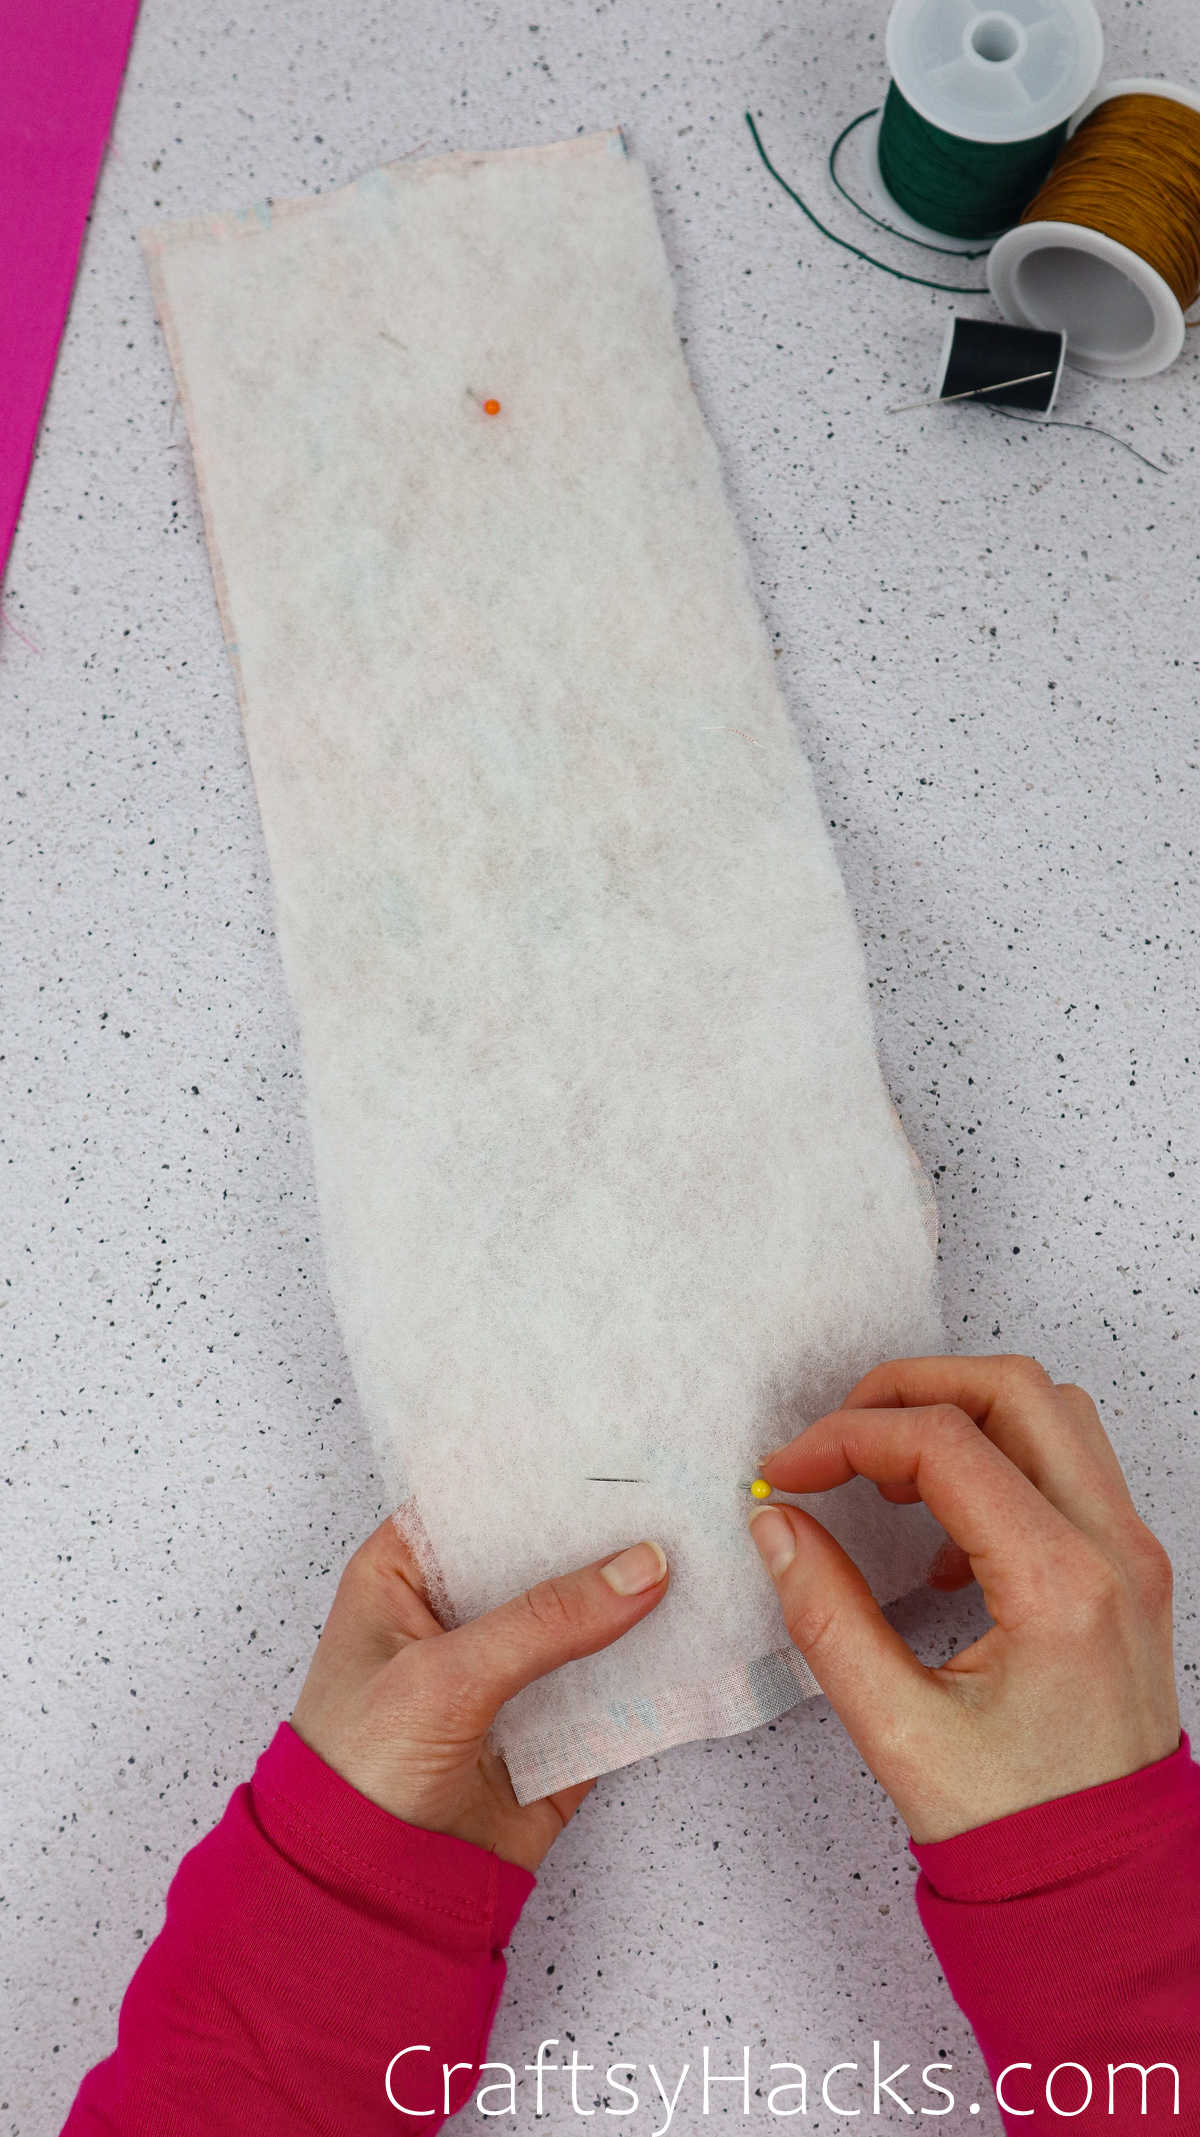
Once you’ve cut out a strip of fabric in the appropriate size, go ahead and lay it down on your work surface with the printed side facing down. Next, place the wadding on top. You will notice that the measurements for the wadding are smaller than the outer fabric.
Just make sure that there is a half-inch gap on the top and bottom when you place it on top of the fabric.
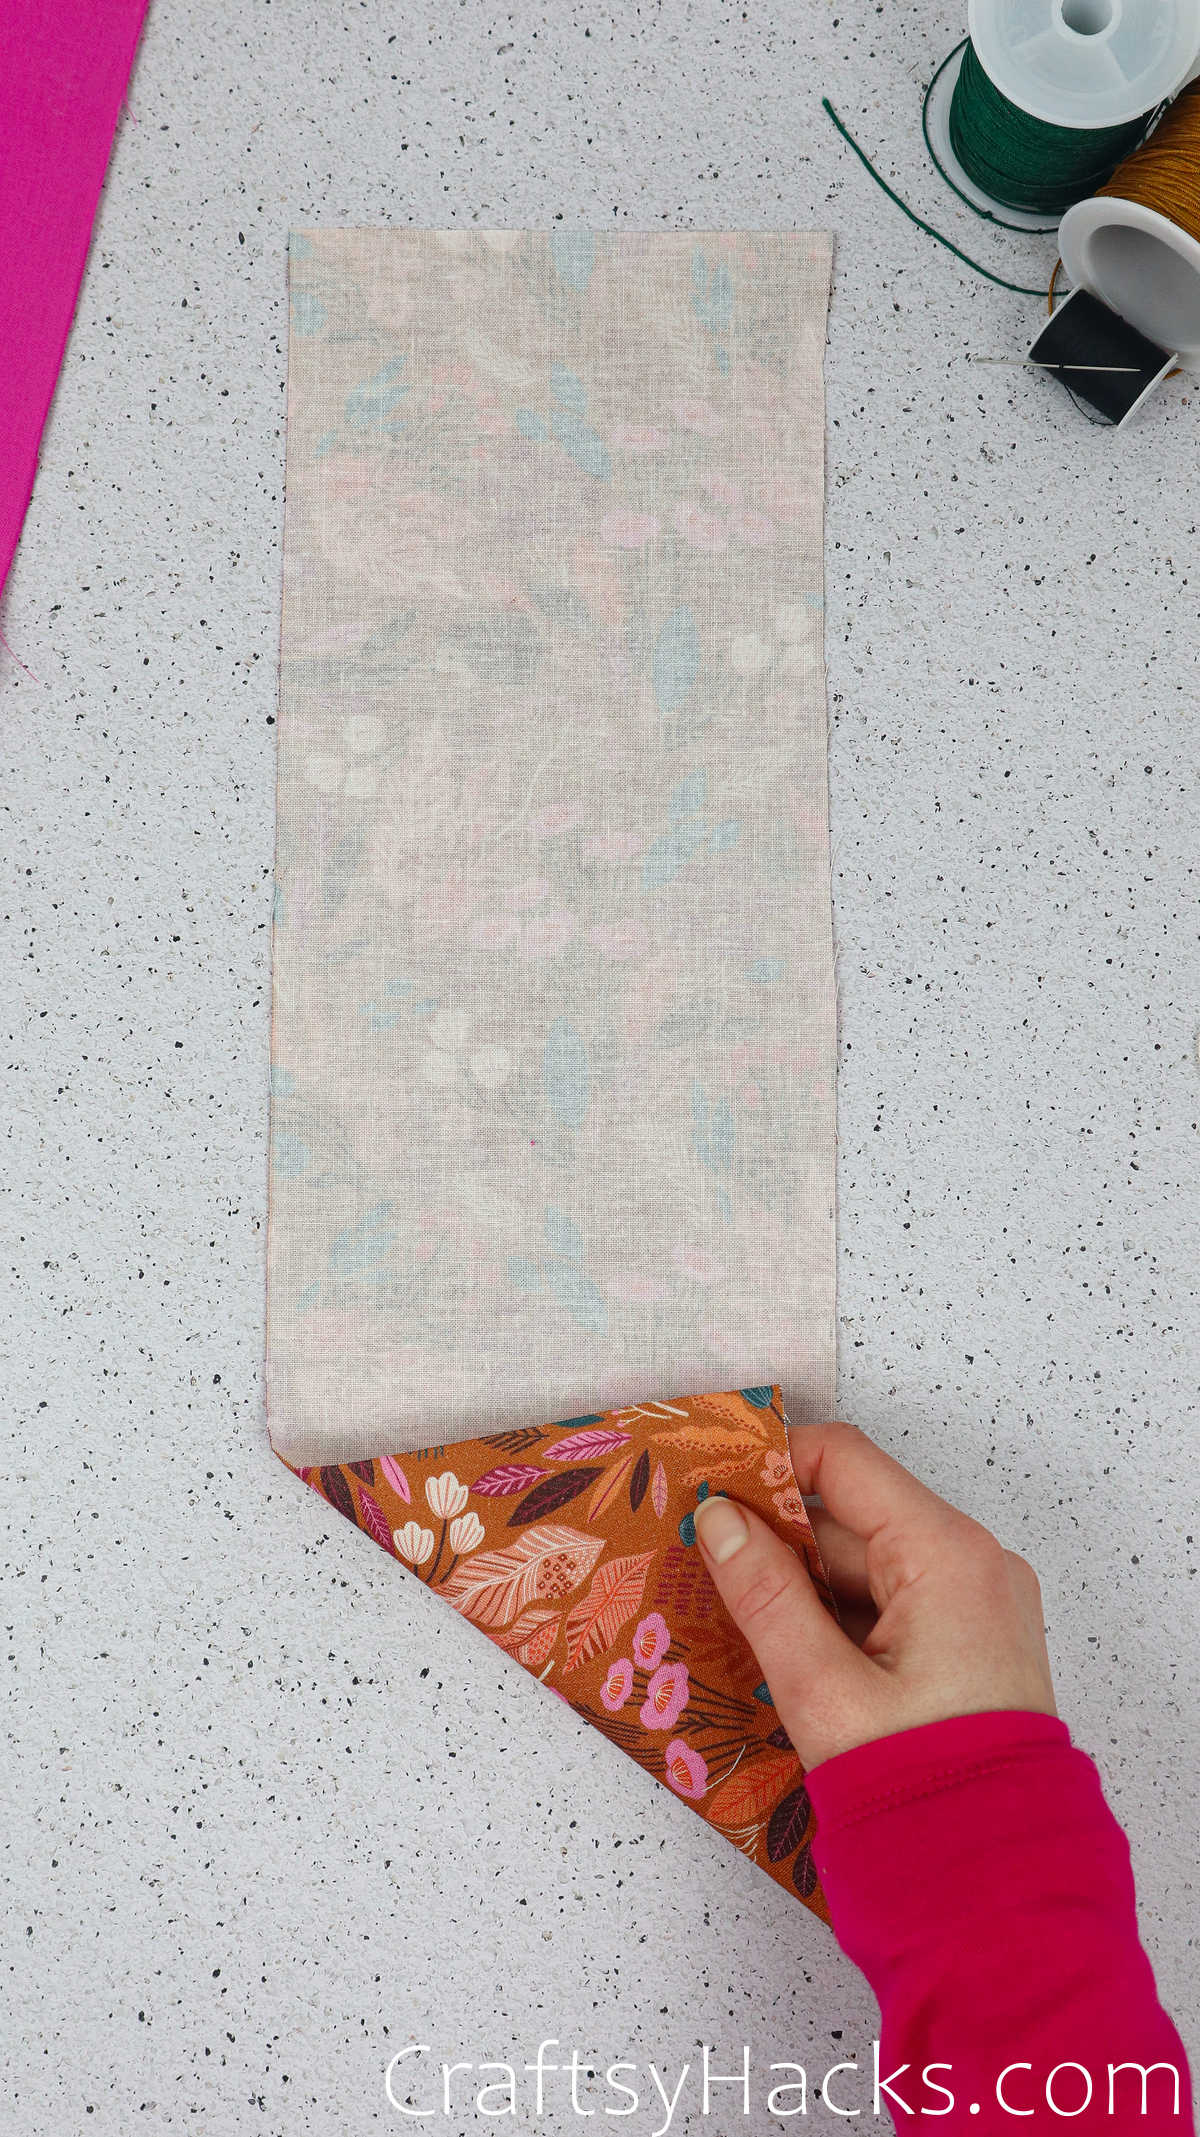
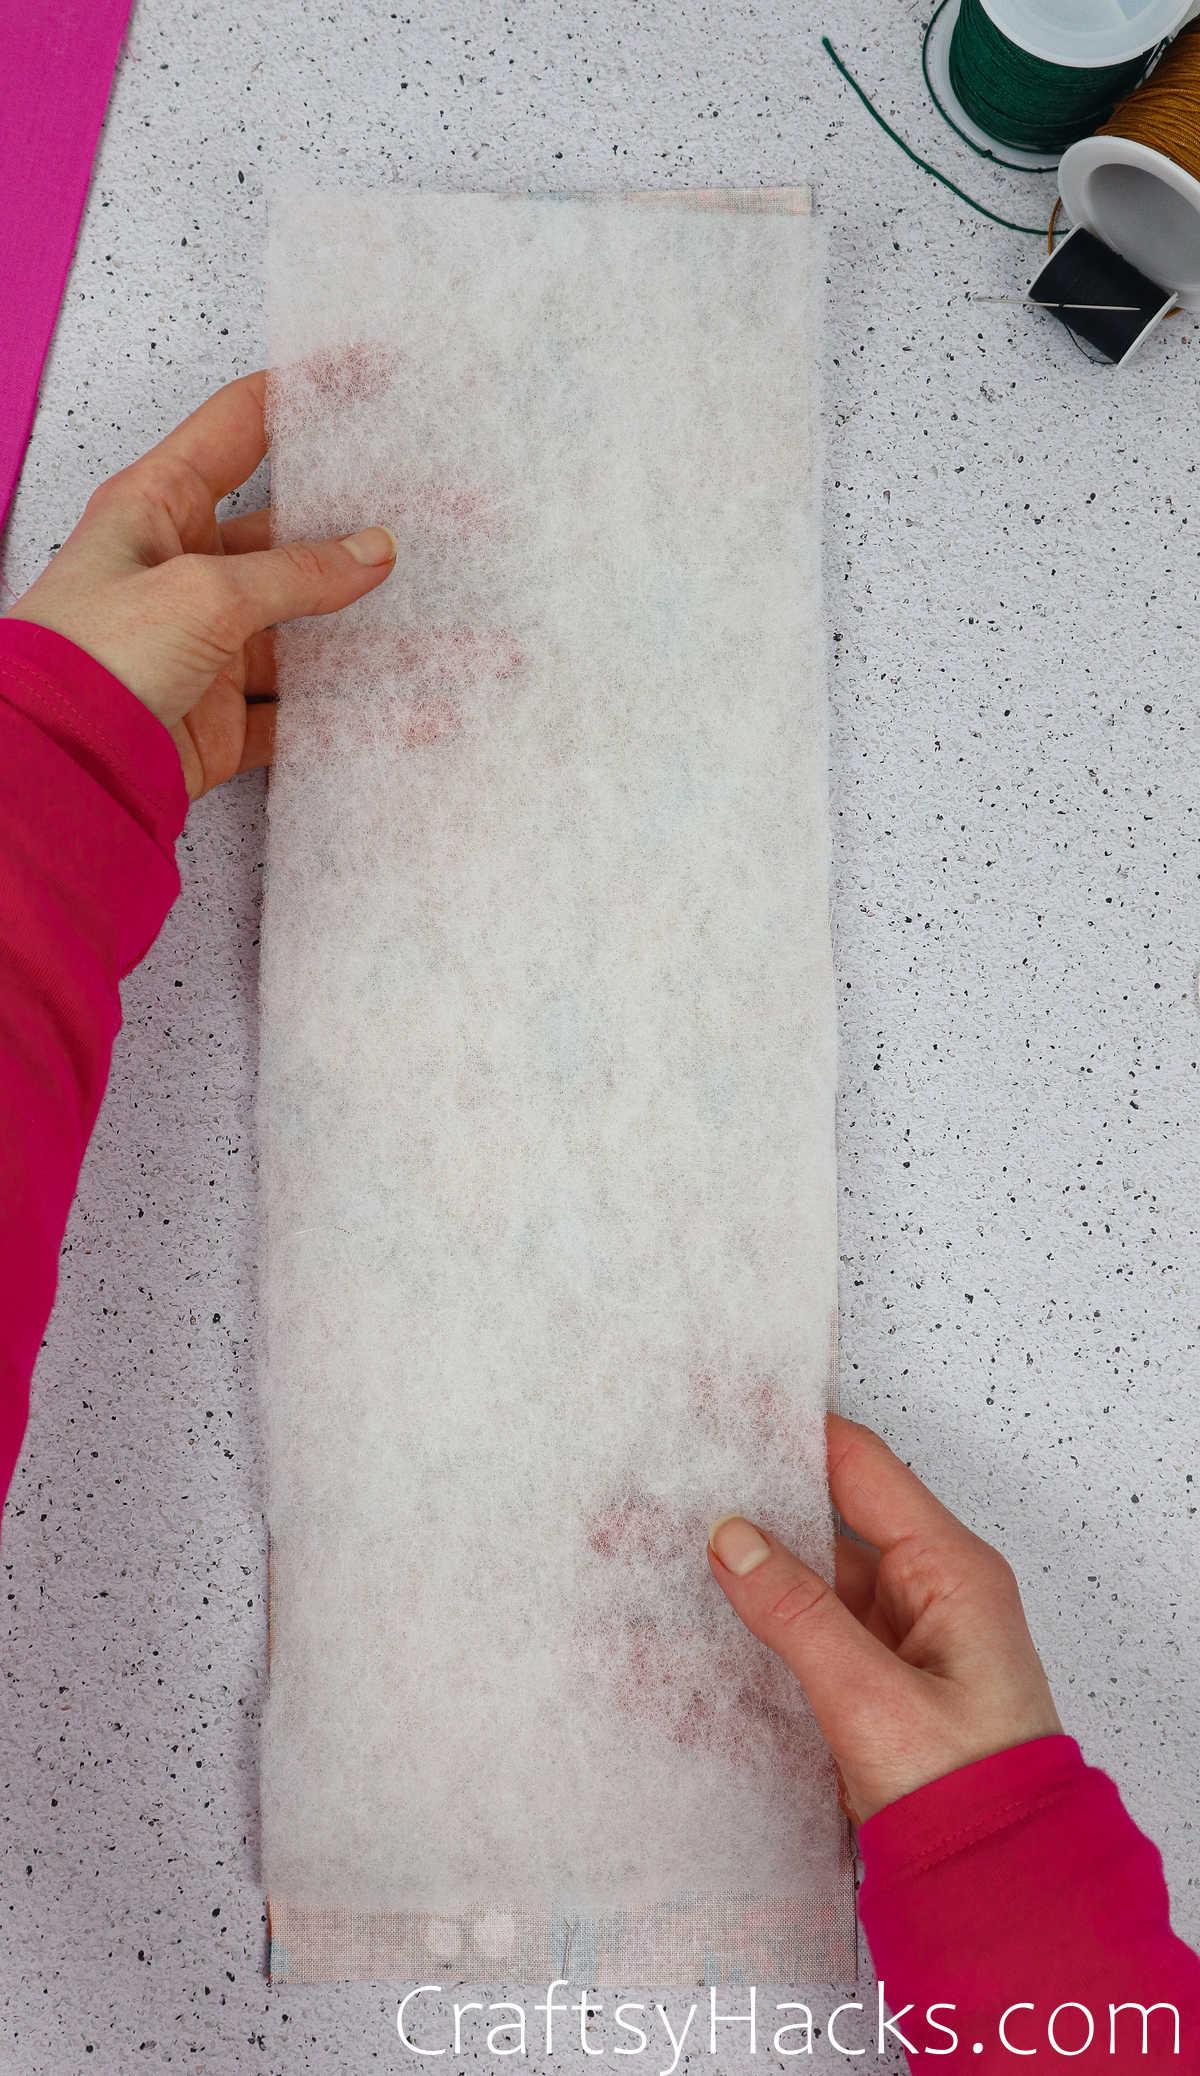
You will need a couple of sewing pins to secure the wadding to the fabric.
Step 3
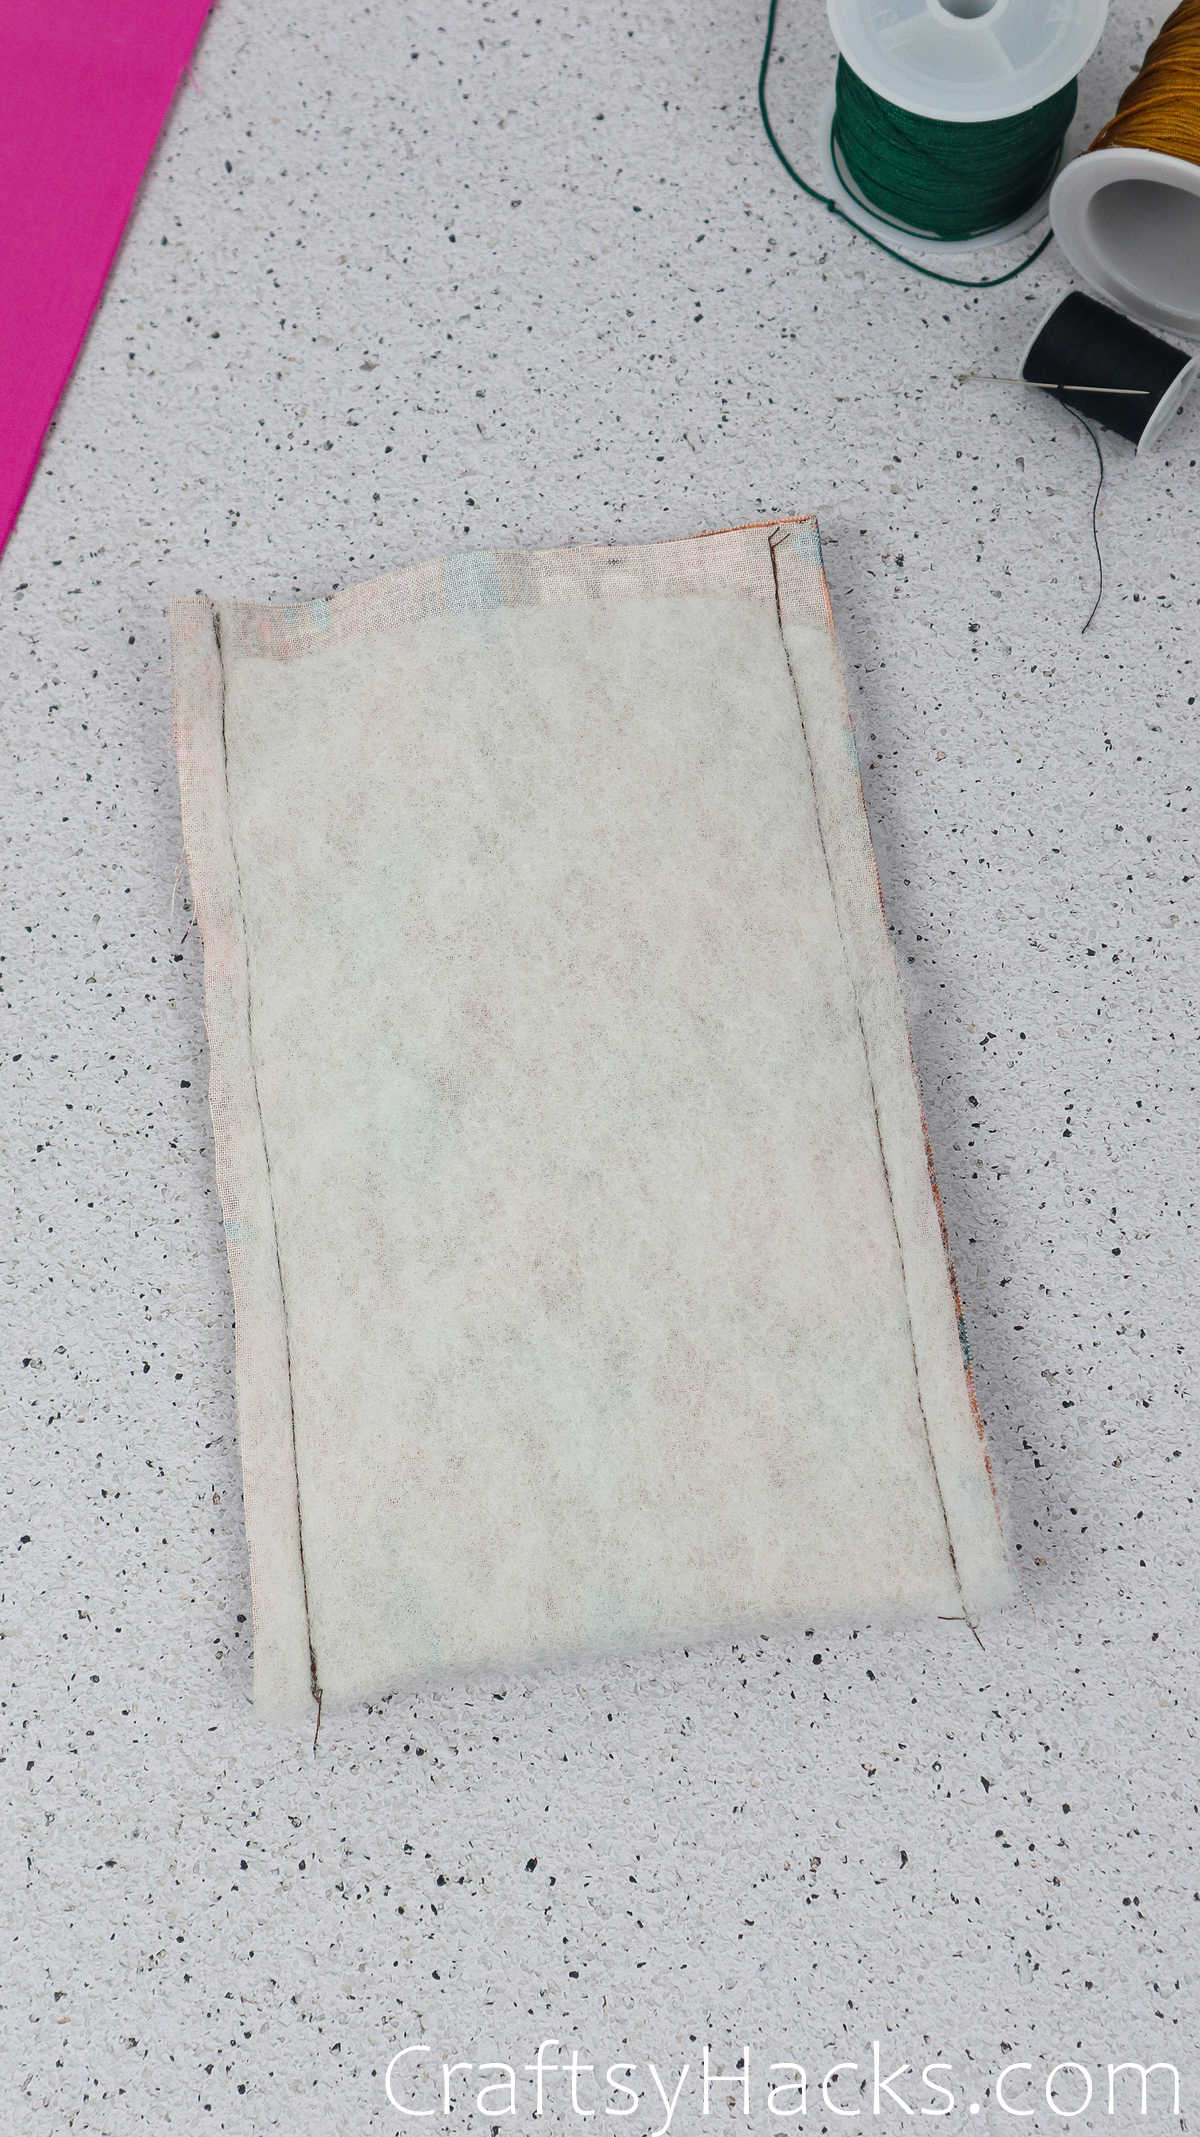
Now fold the fabric and wadding in half, as seen here.
Secure all the edges using sewing pins and head on over to the sewing machine.
Step 4
Stitch both sides of the fabric.
Now it’s time to flip the swatch inside out so that the printed side is facing out. Just set it aside for a bit while you work on the pocket.
Step 5
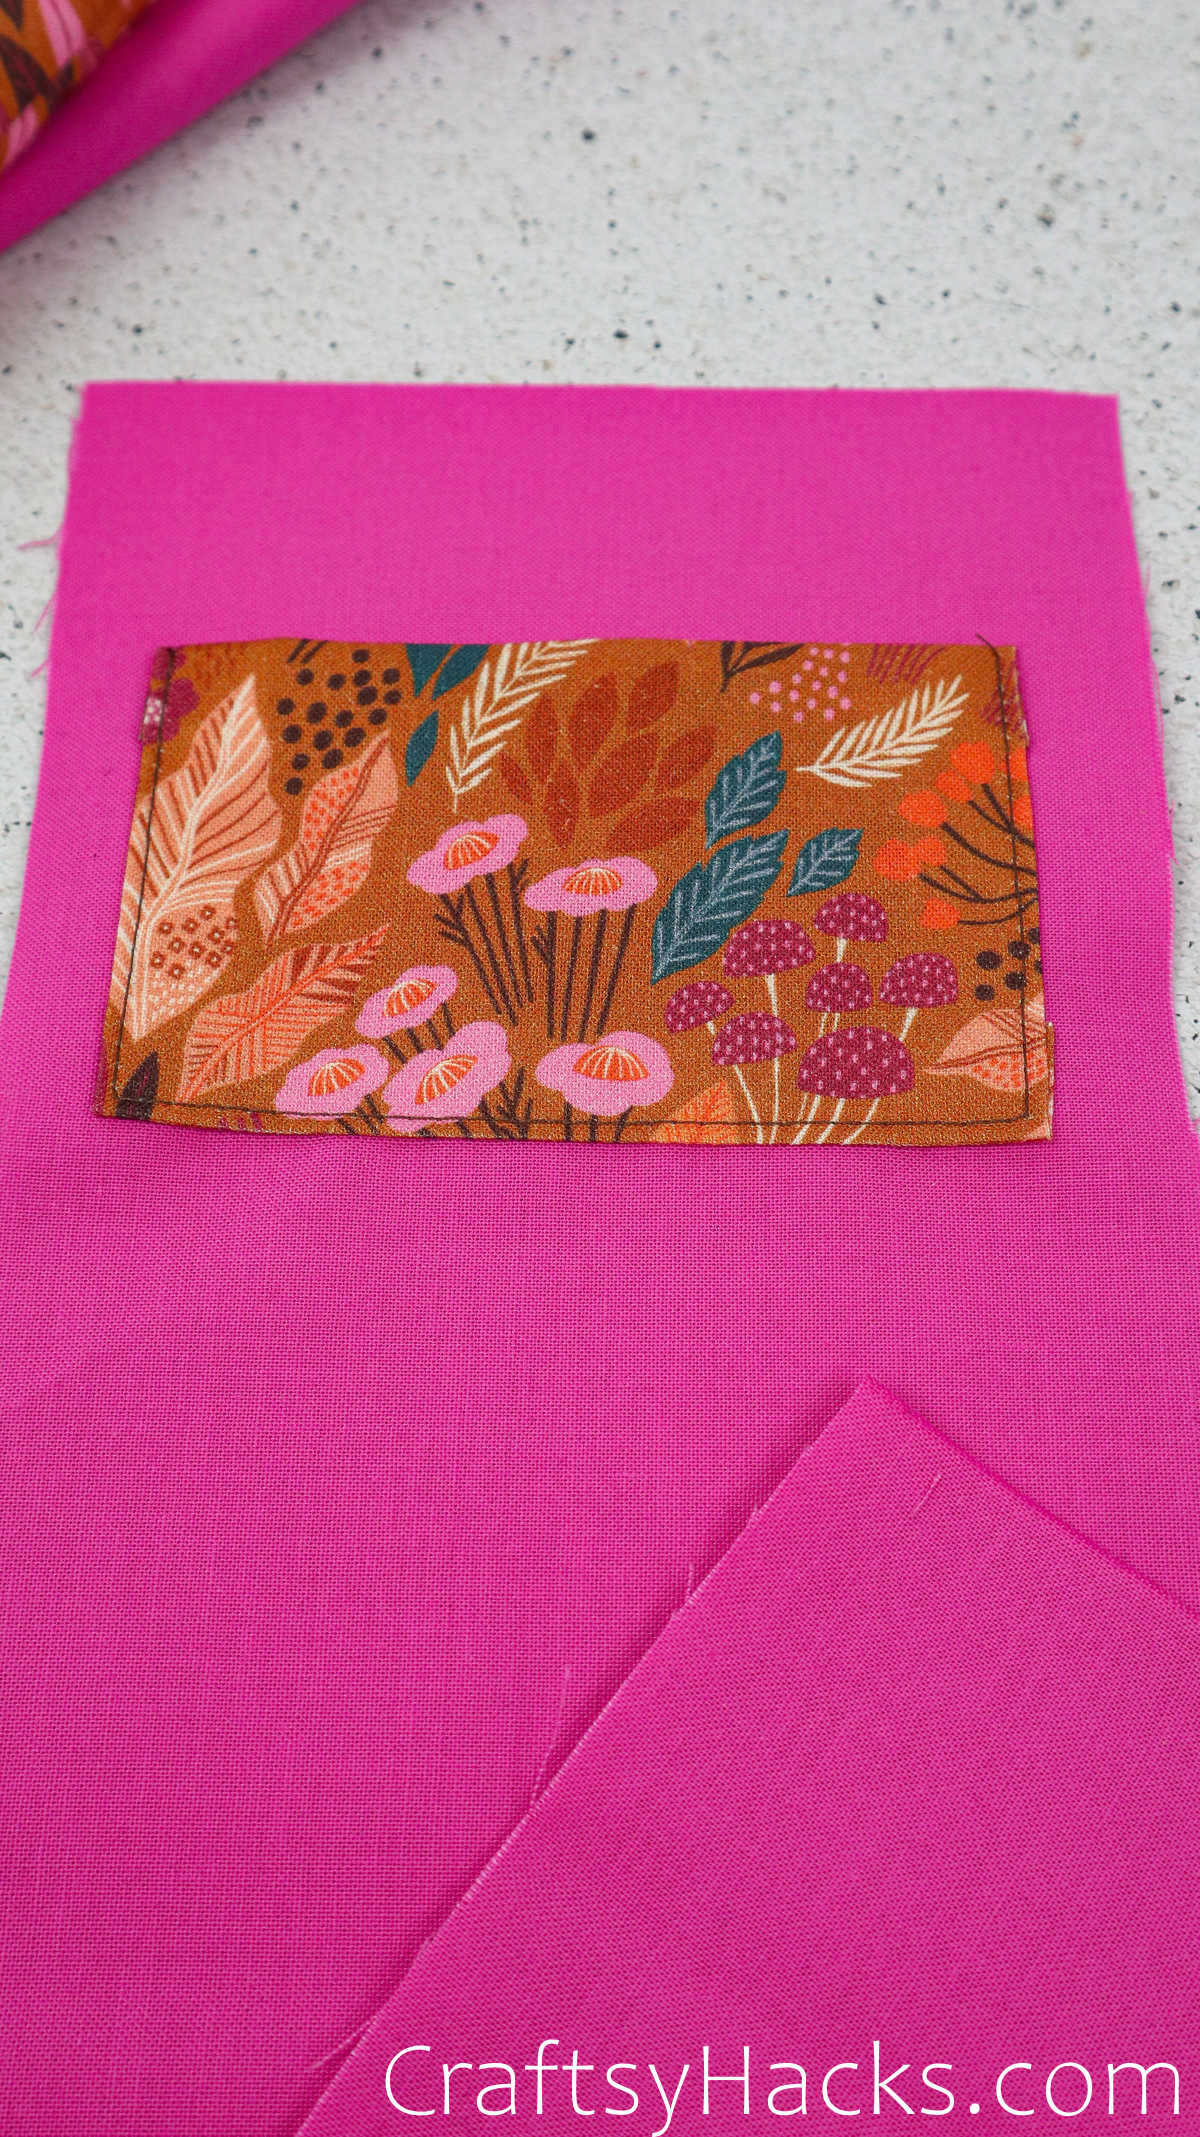
Take the fabric you’ve measured and cut for the pocket and lay it down on your work surface.
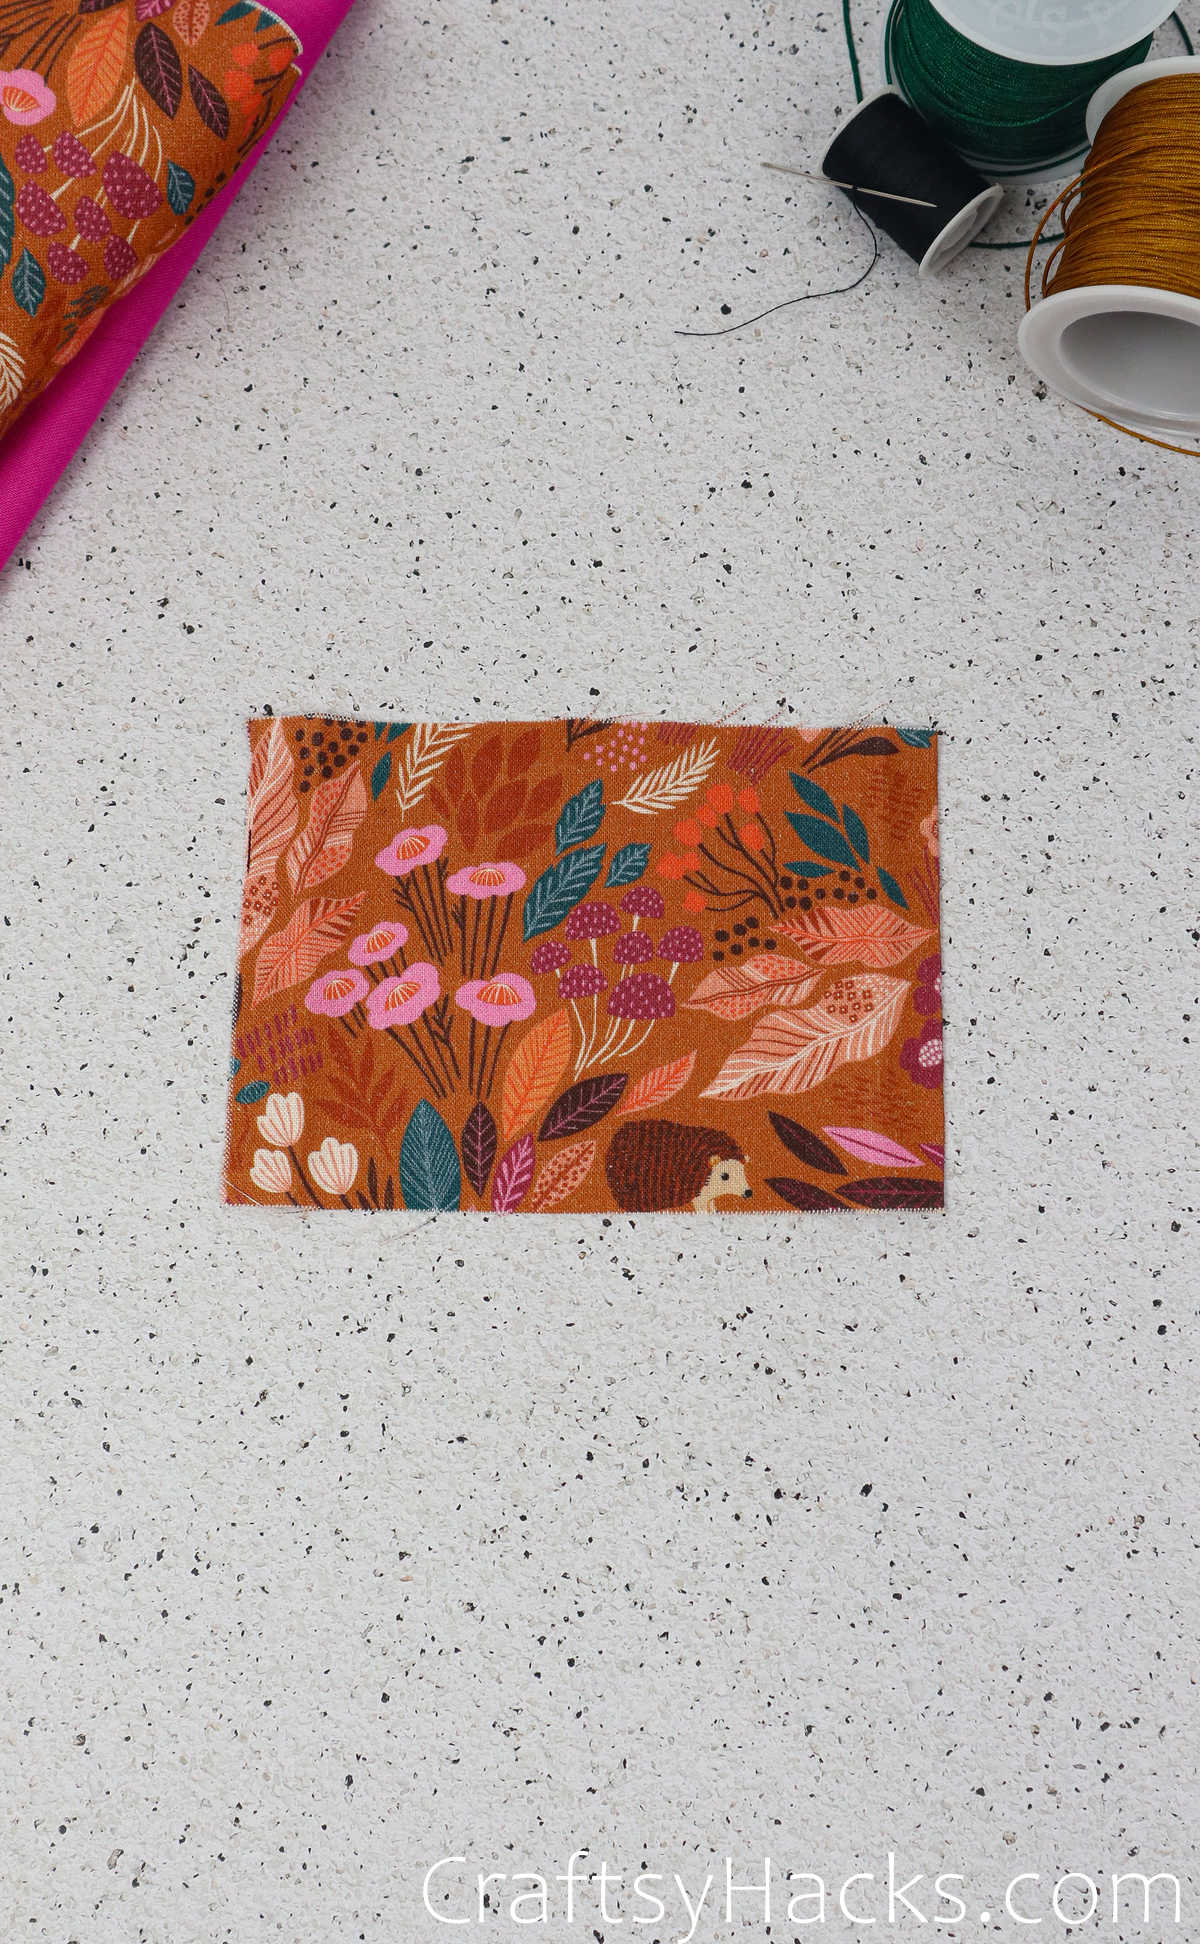
Now fold the left and right side of this swatch inside, at about half an inch. If you like, you can run an iron over the folds to help keep it in place.
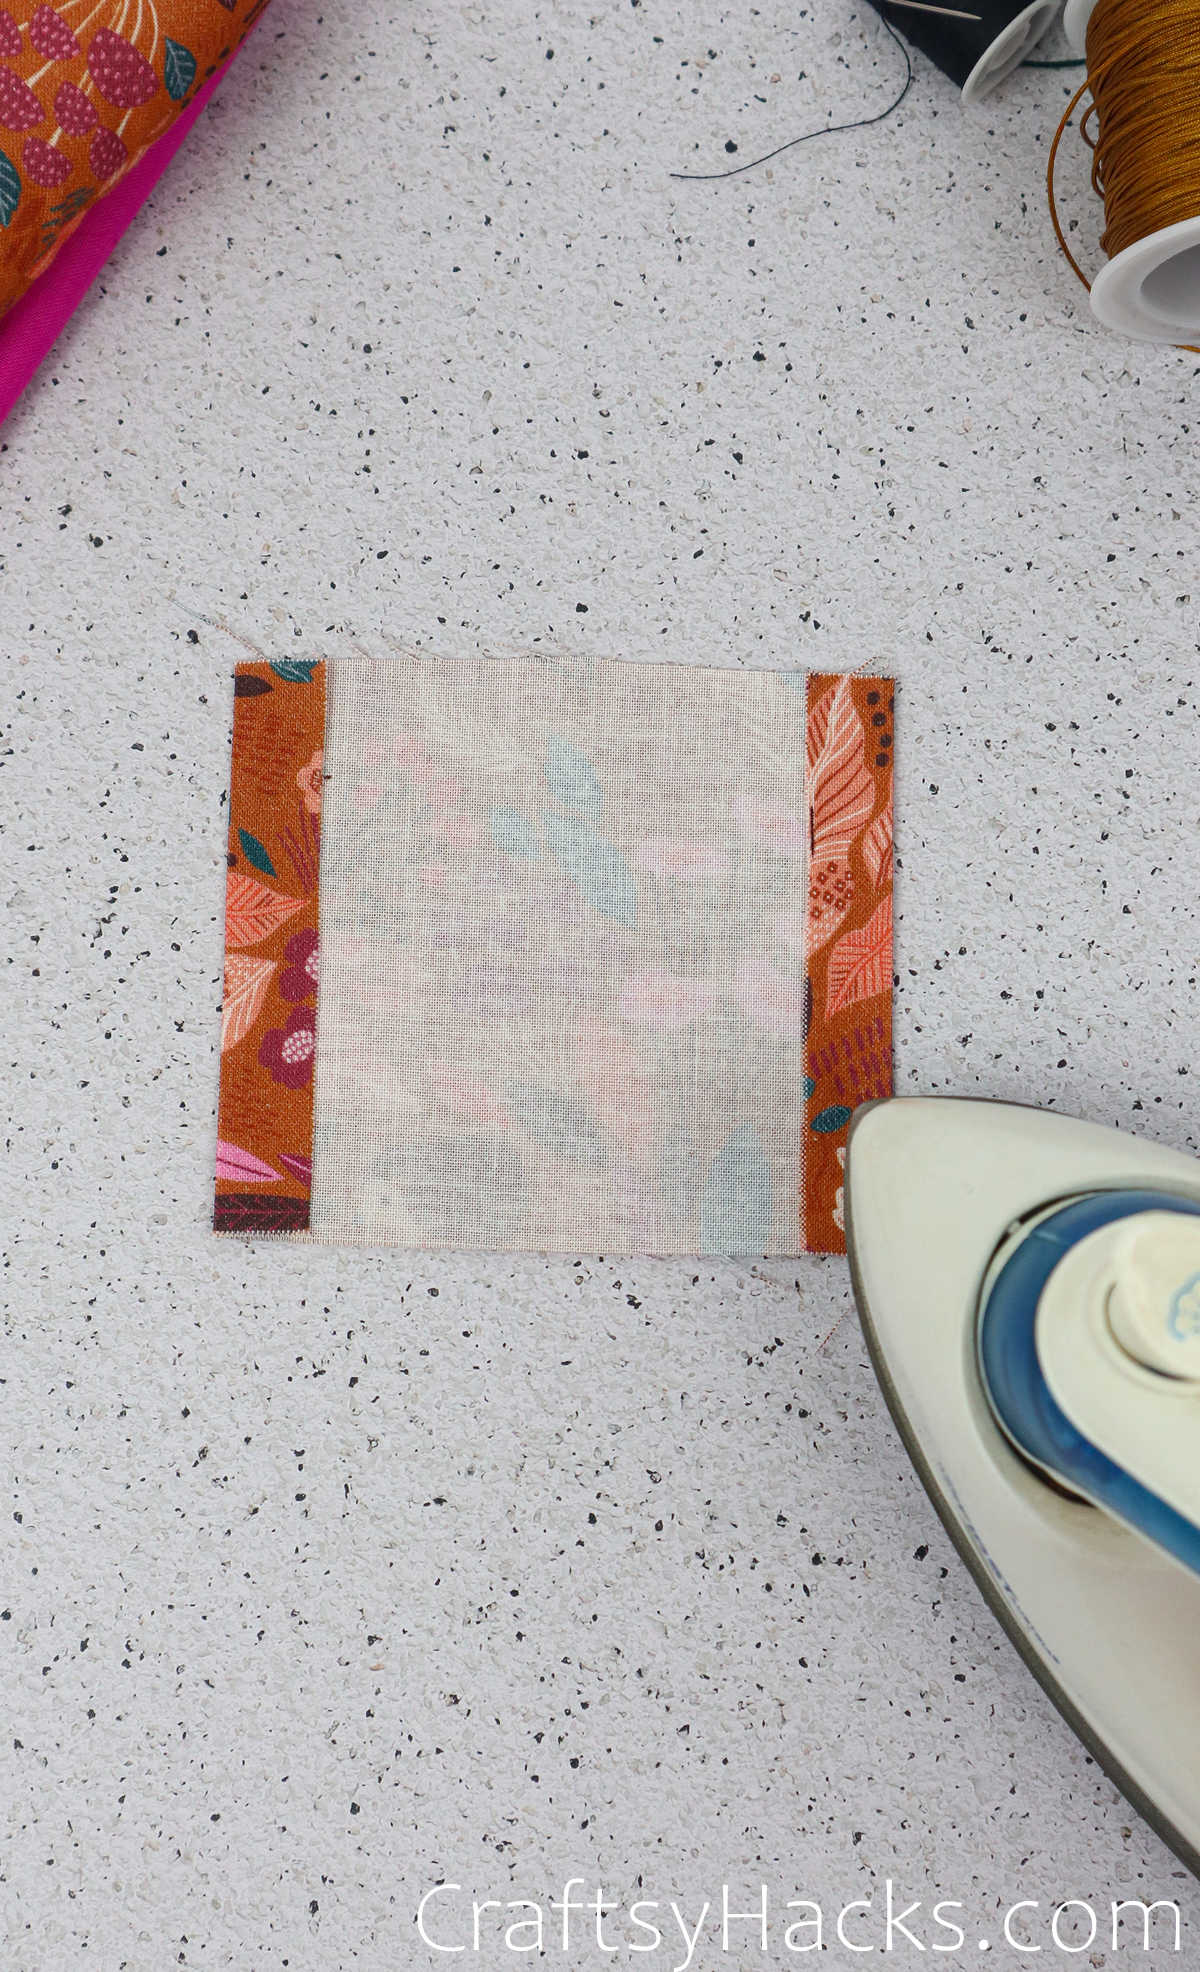
You will also need to fold the bottom, so go ahead and fold it and iron it.
The top will also need to be folded, and you can insert a sewing pin there to denote that it’s the top side.
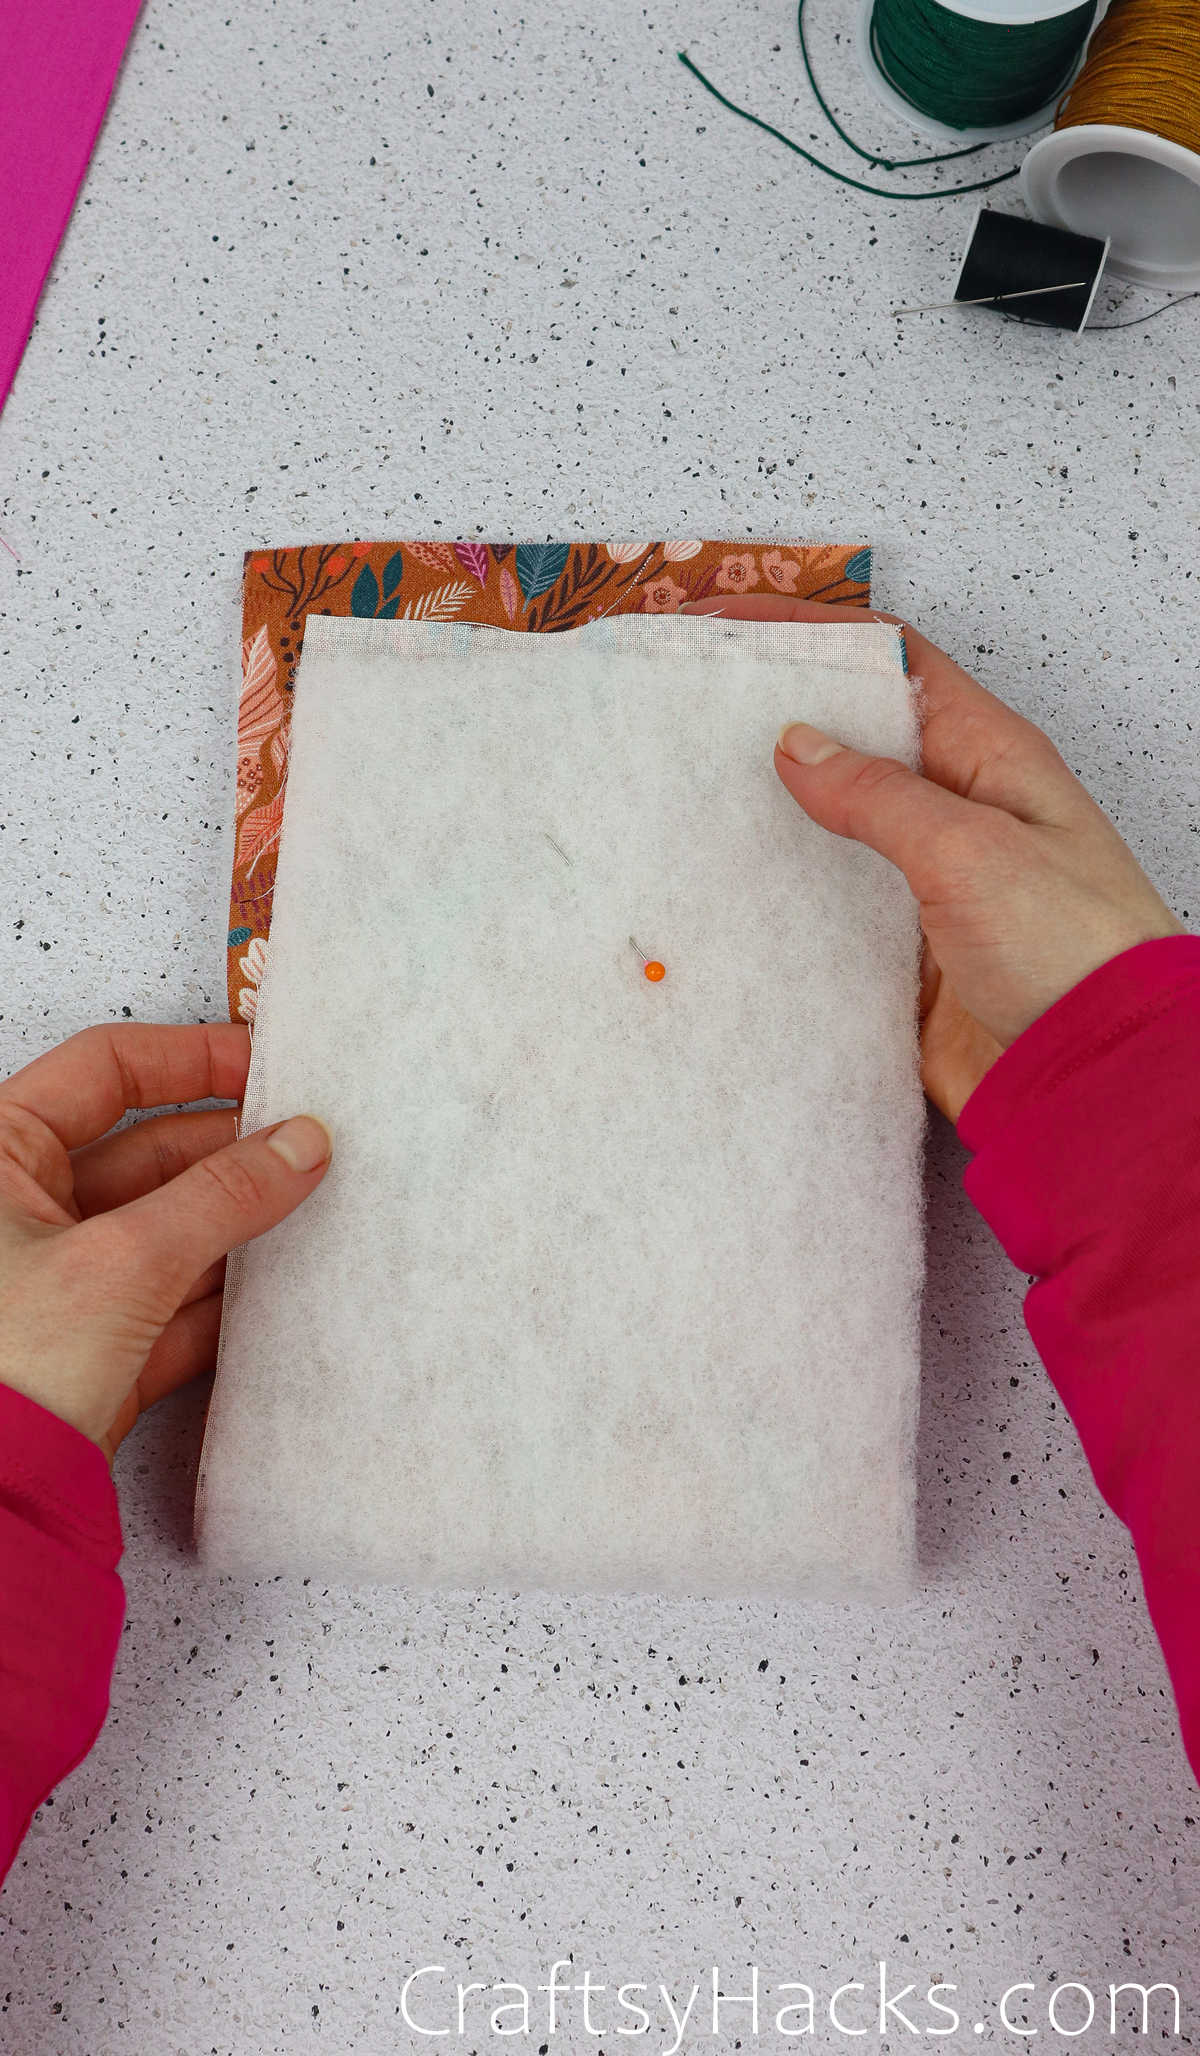
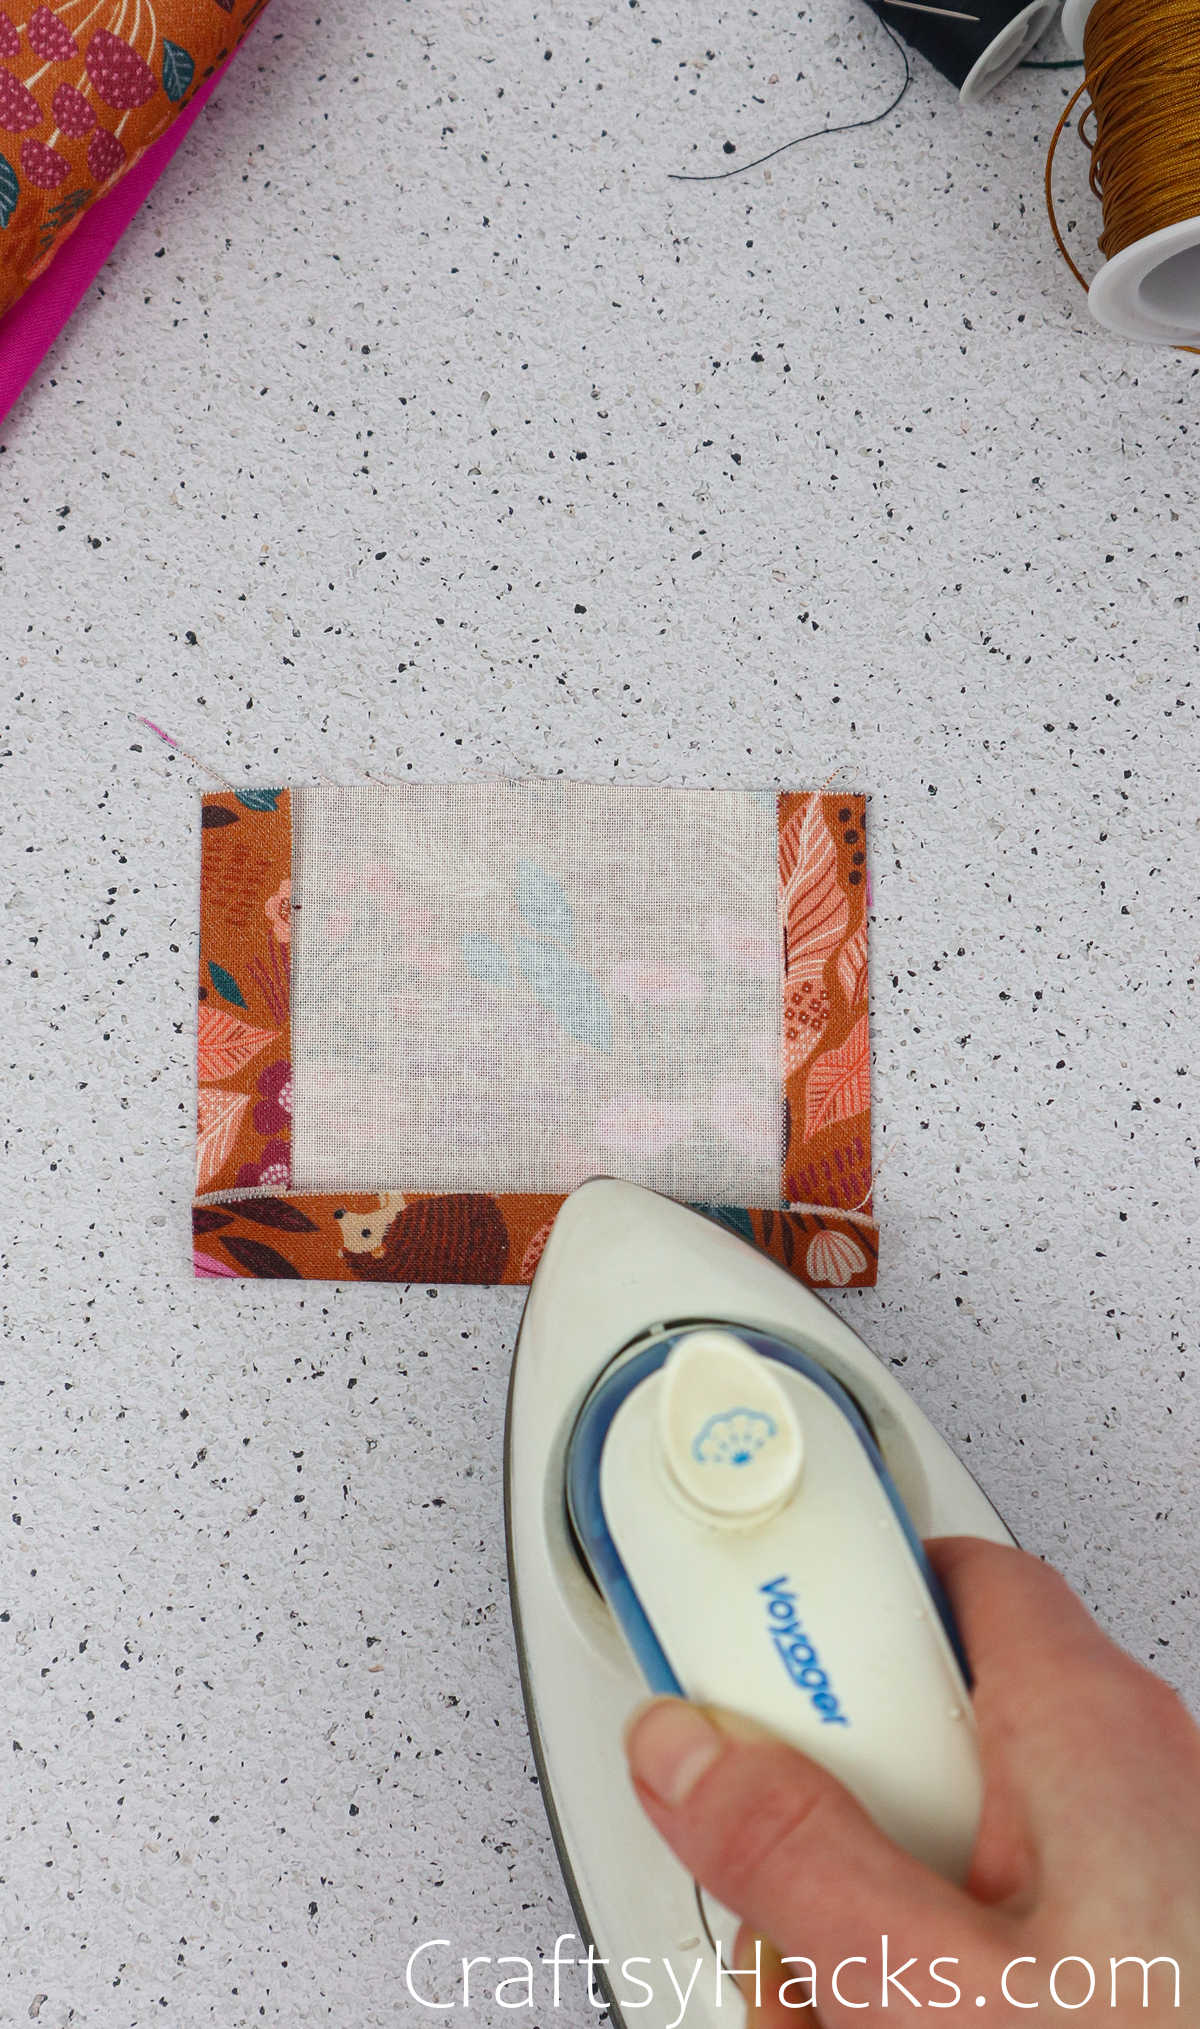
Step 6
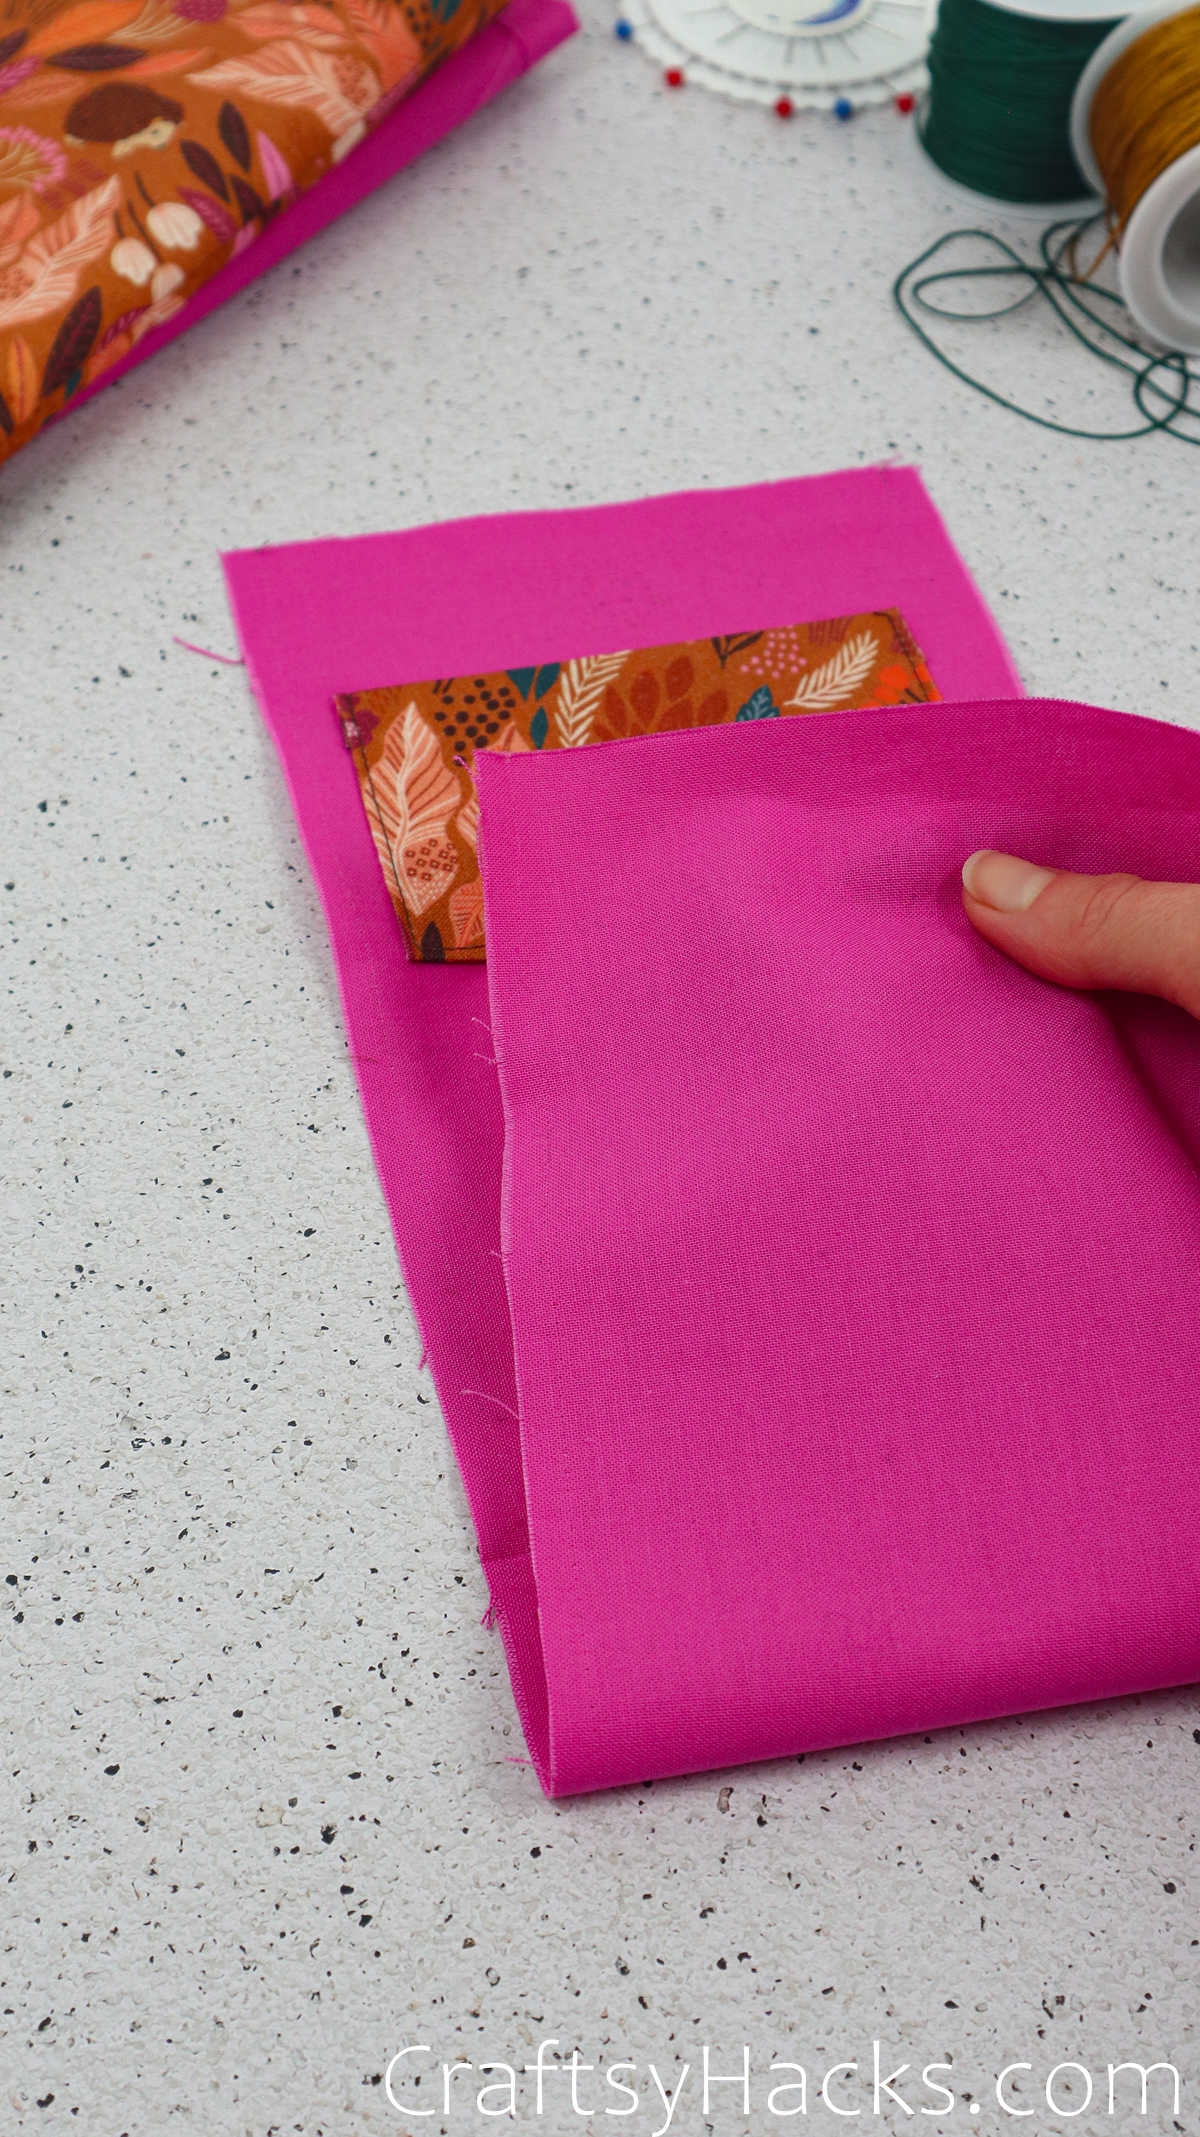
Now place your lining fabric on your work surface and place the pocket swatch over it, with the printed side facing down. The top of the pocket should be placed about an inch and a half way down, and the distance on either side of the pocket should be equal. Go ahead and pin the swatch in place if you like.

Step 7
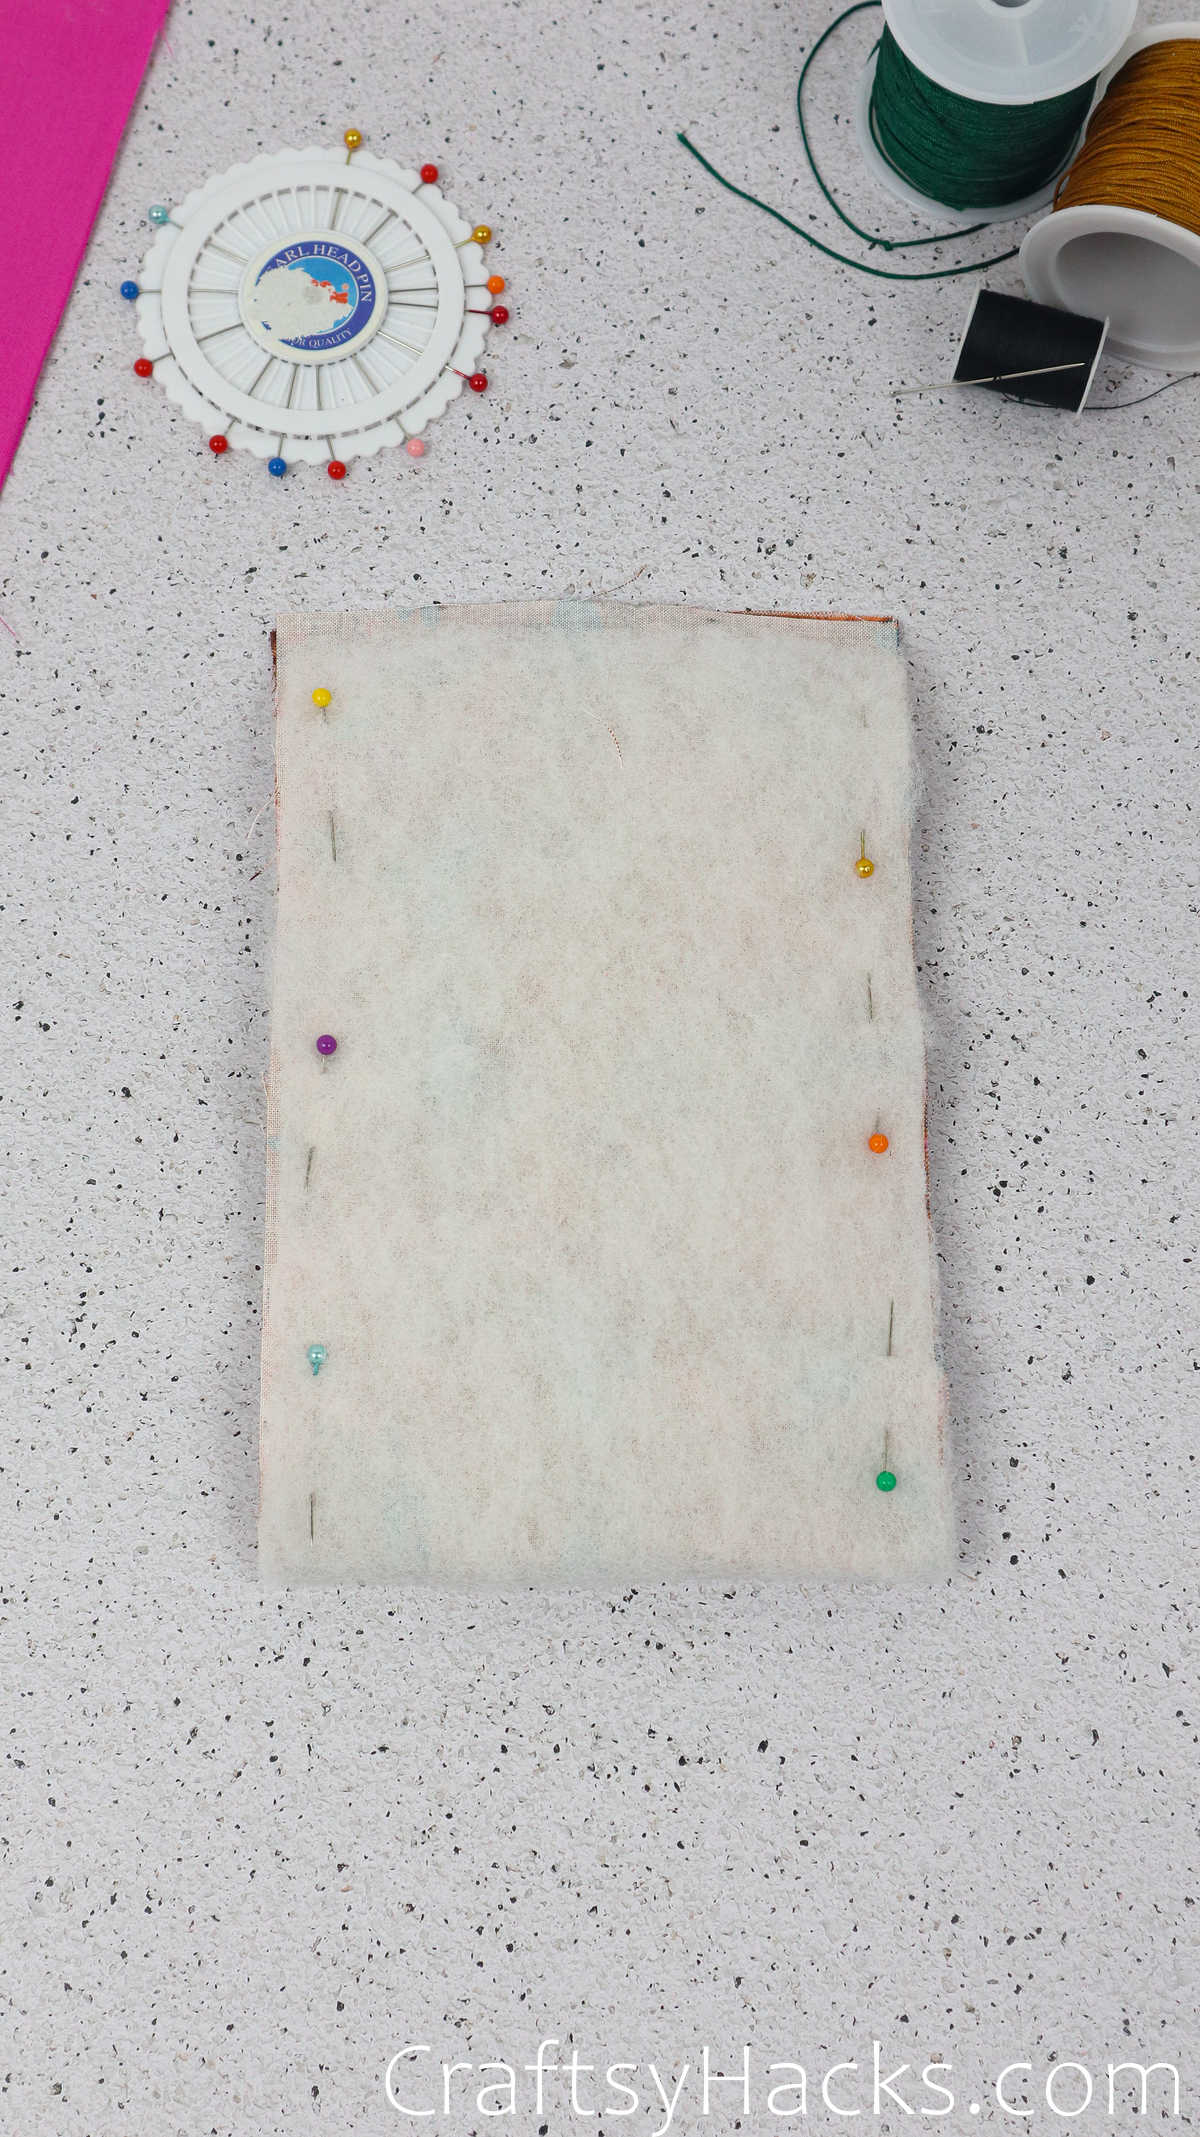
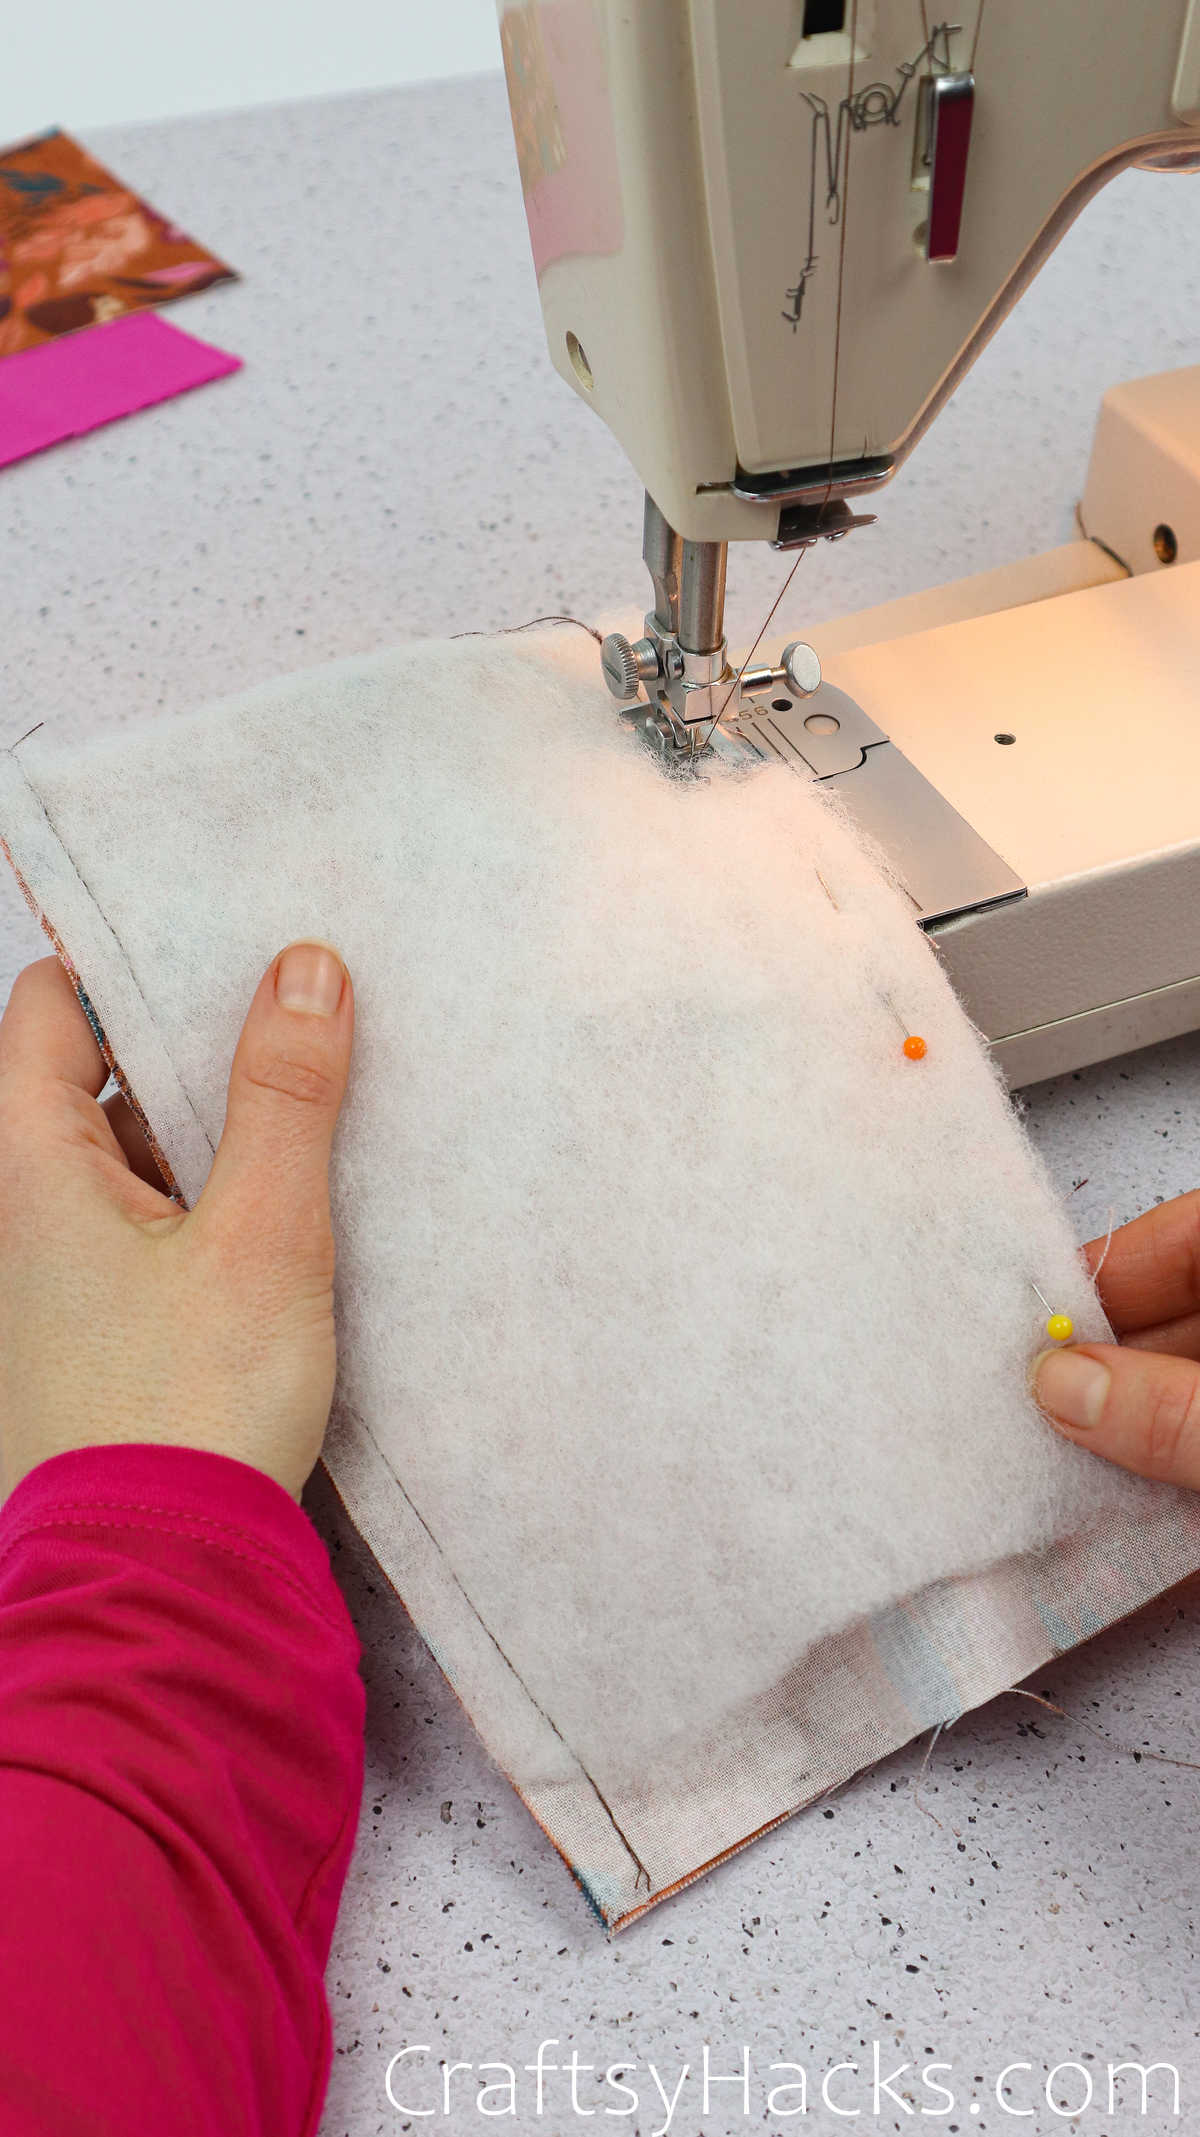
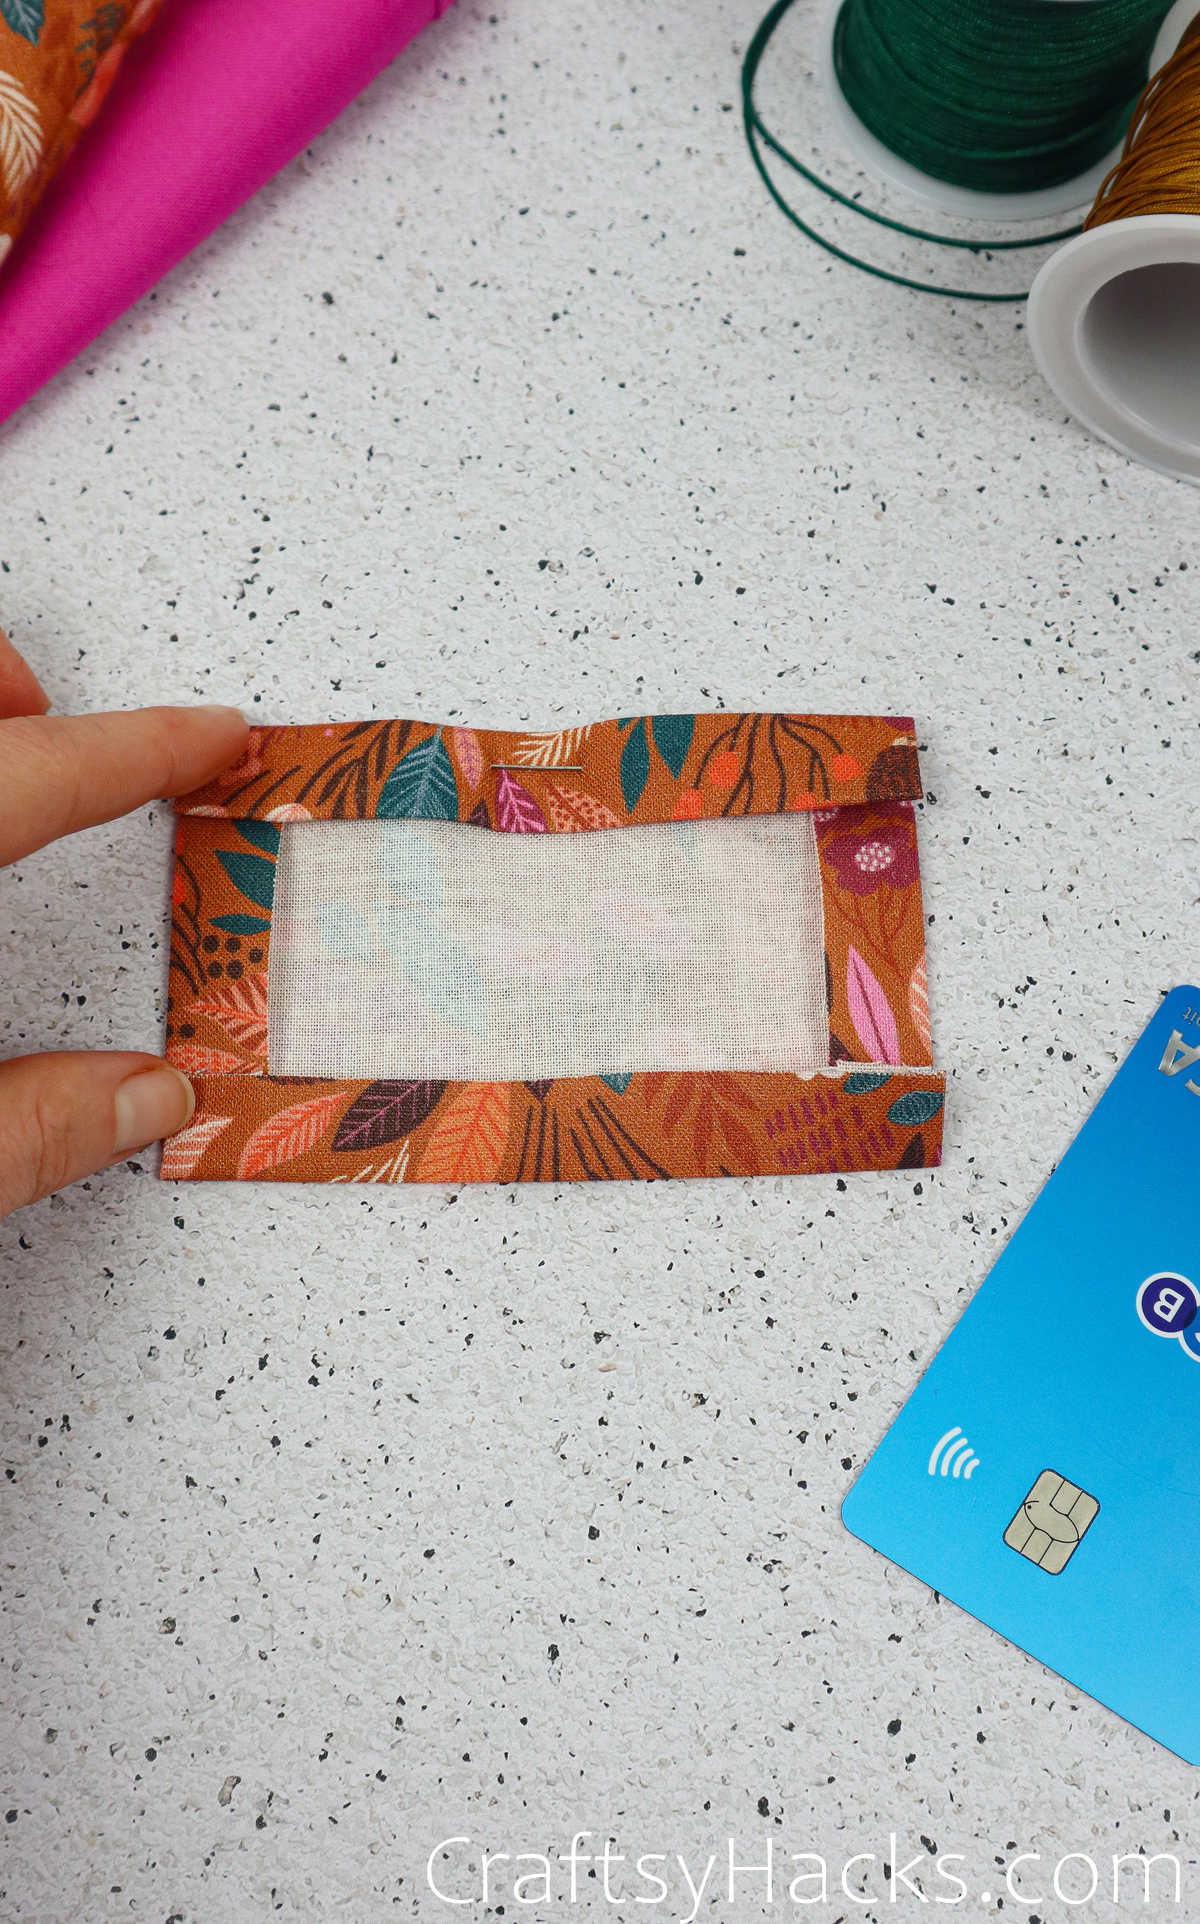
Sew the pocket onto the lining on three sides, leaving the top side open.
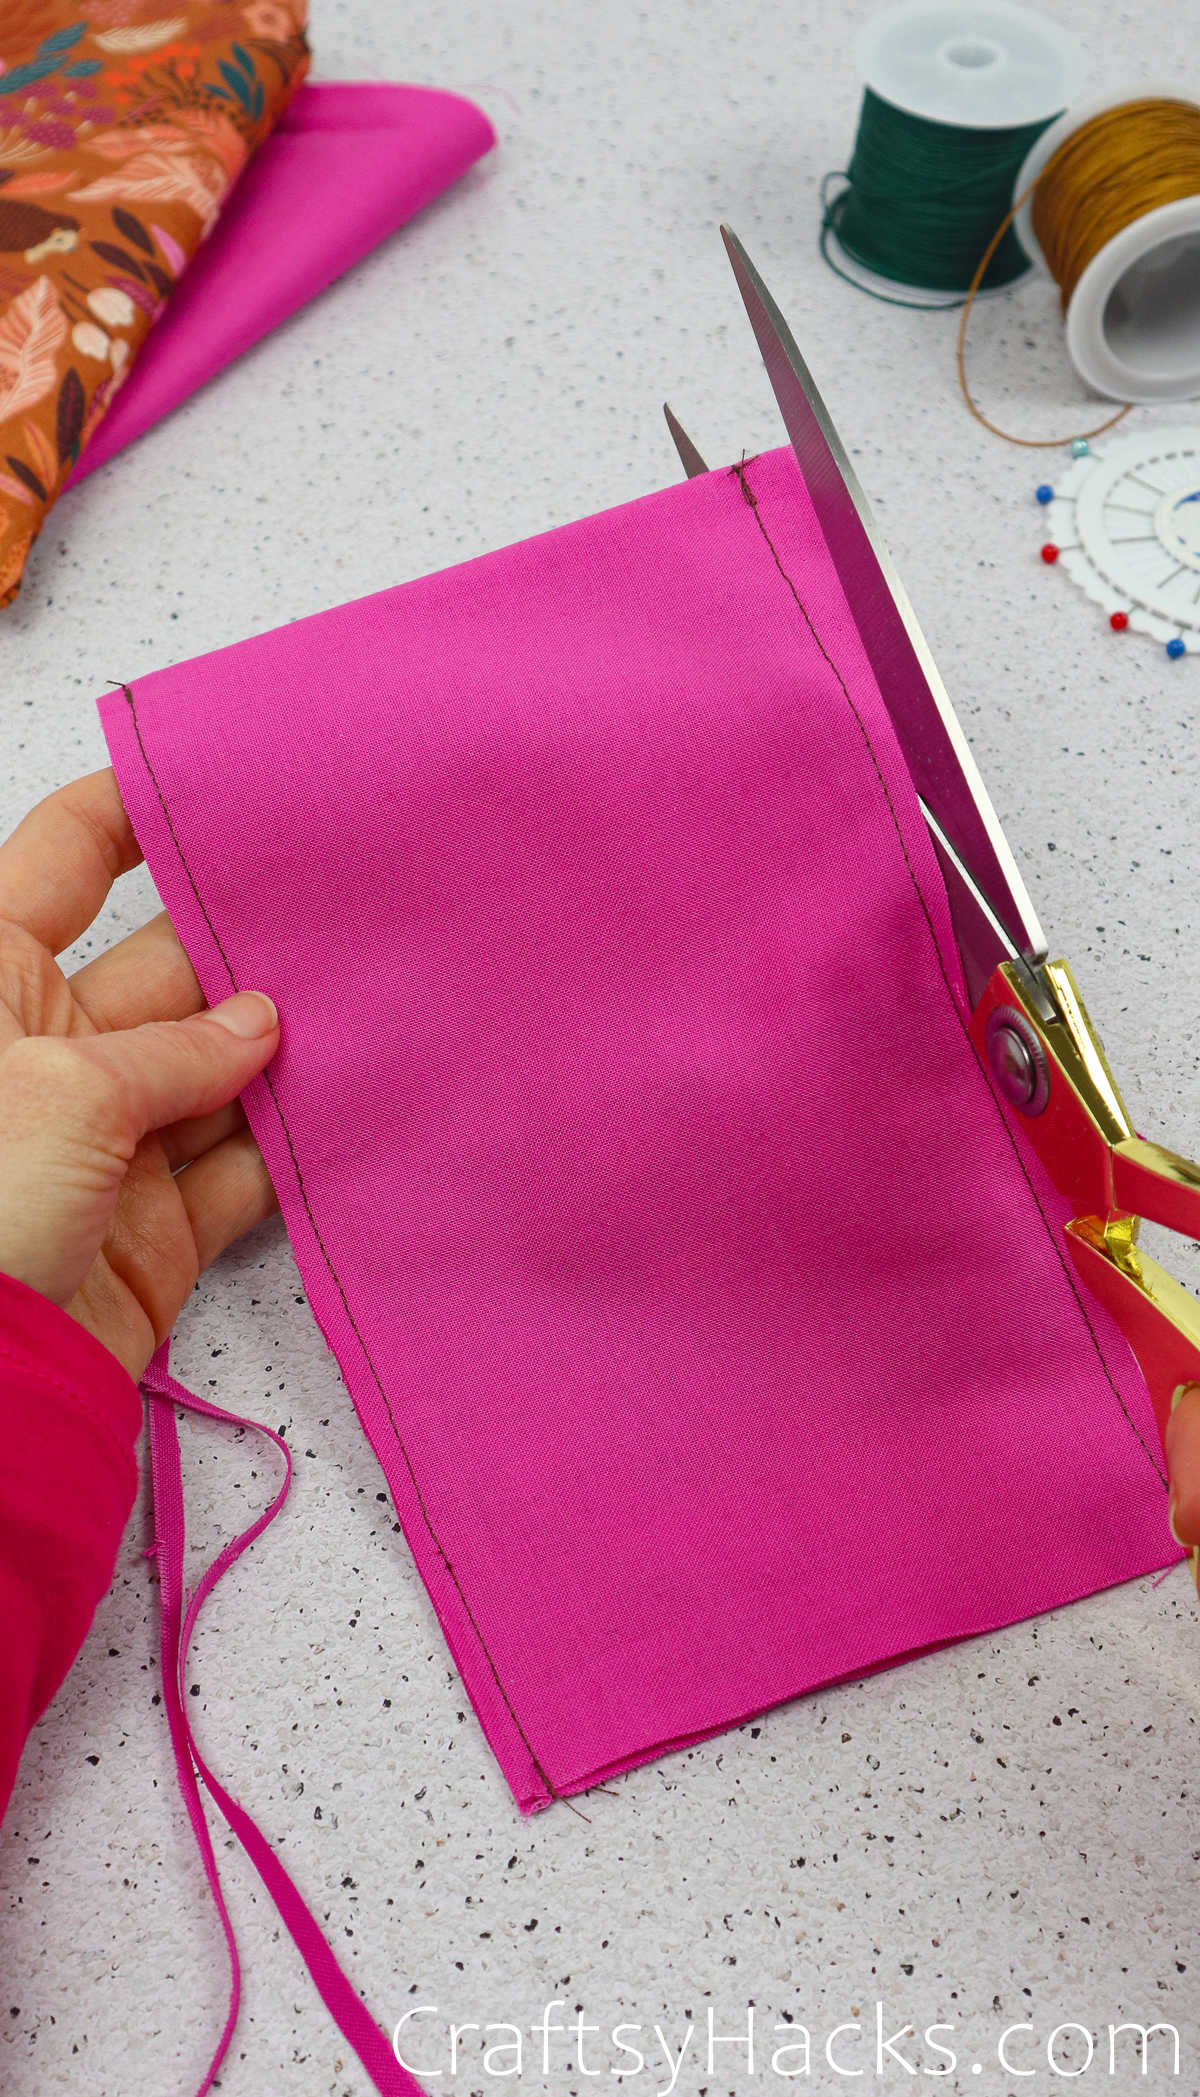
Next, fold the entire lining fabric in half and secure the edges with pins. Make sure that the pins are a quarter of an inch away from the edges.
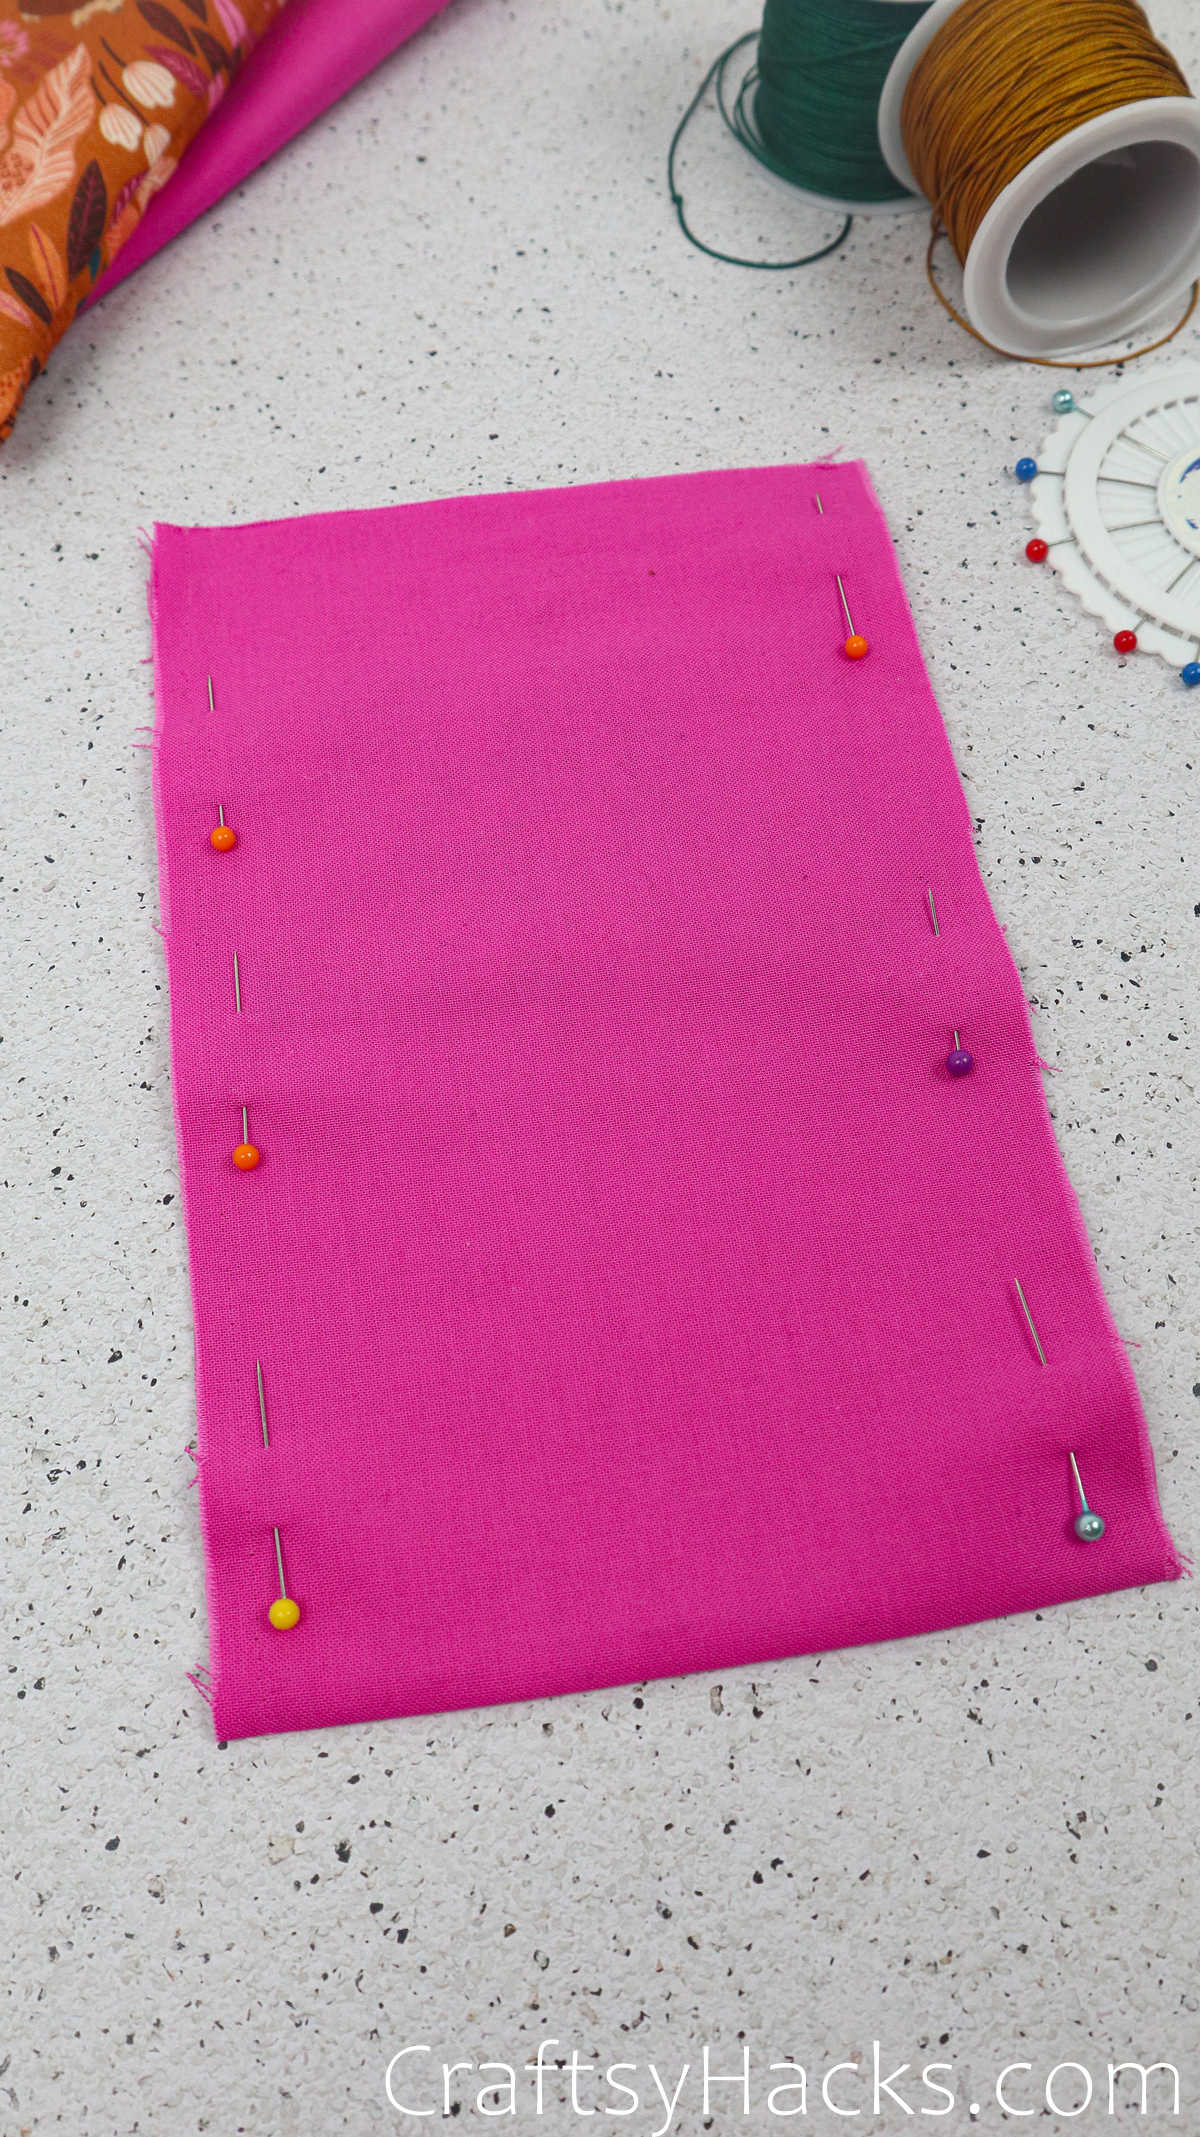
Stitch up the two sides, as seen below, leaving a quarter inch allowance on either side.
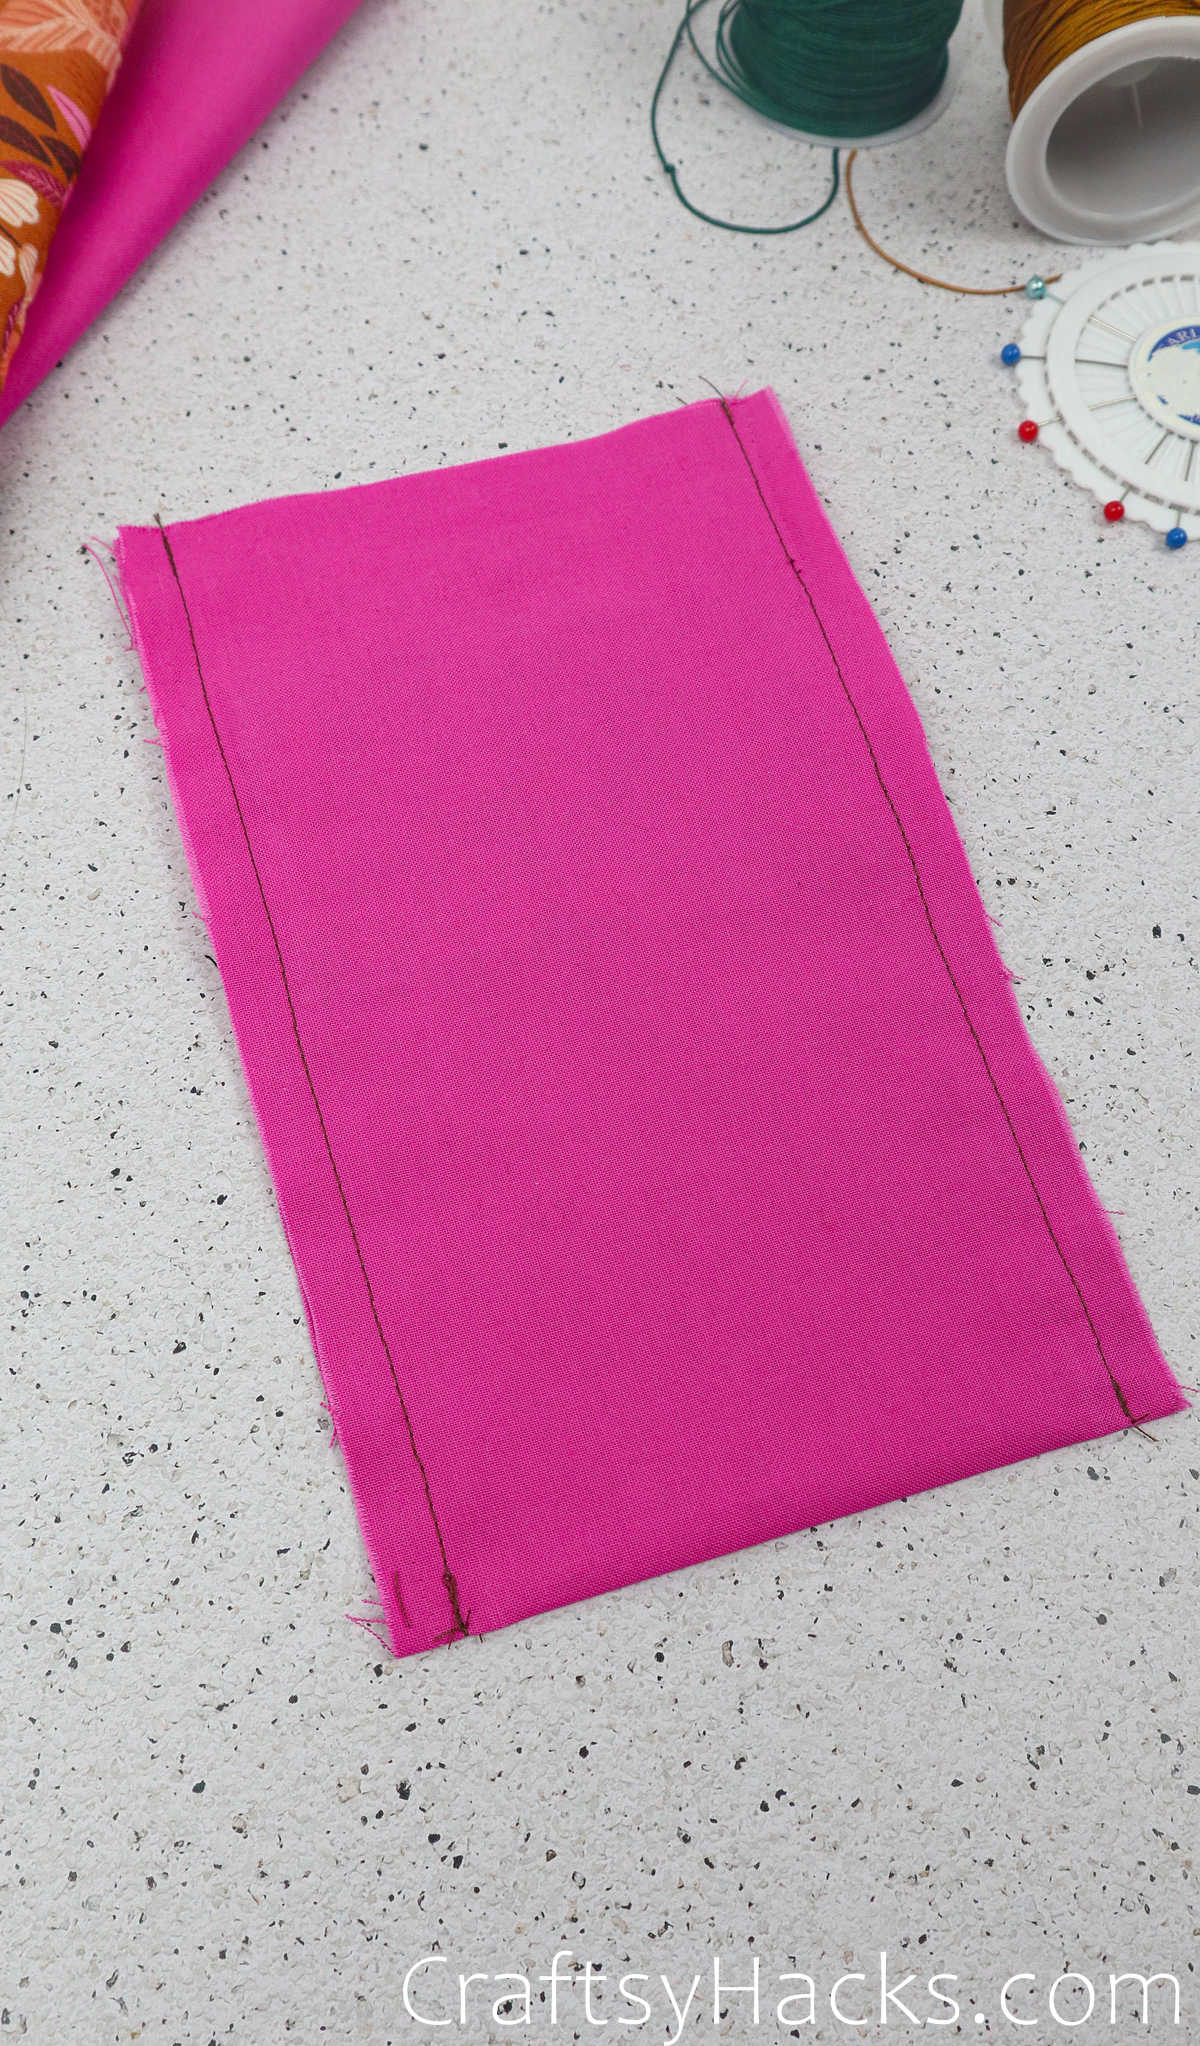
Feel free to cut away the excess if you need to. This might be necessary to help you fit the lining into the main fabric.
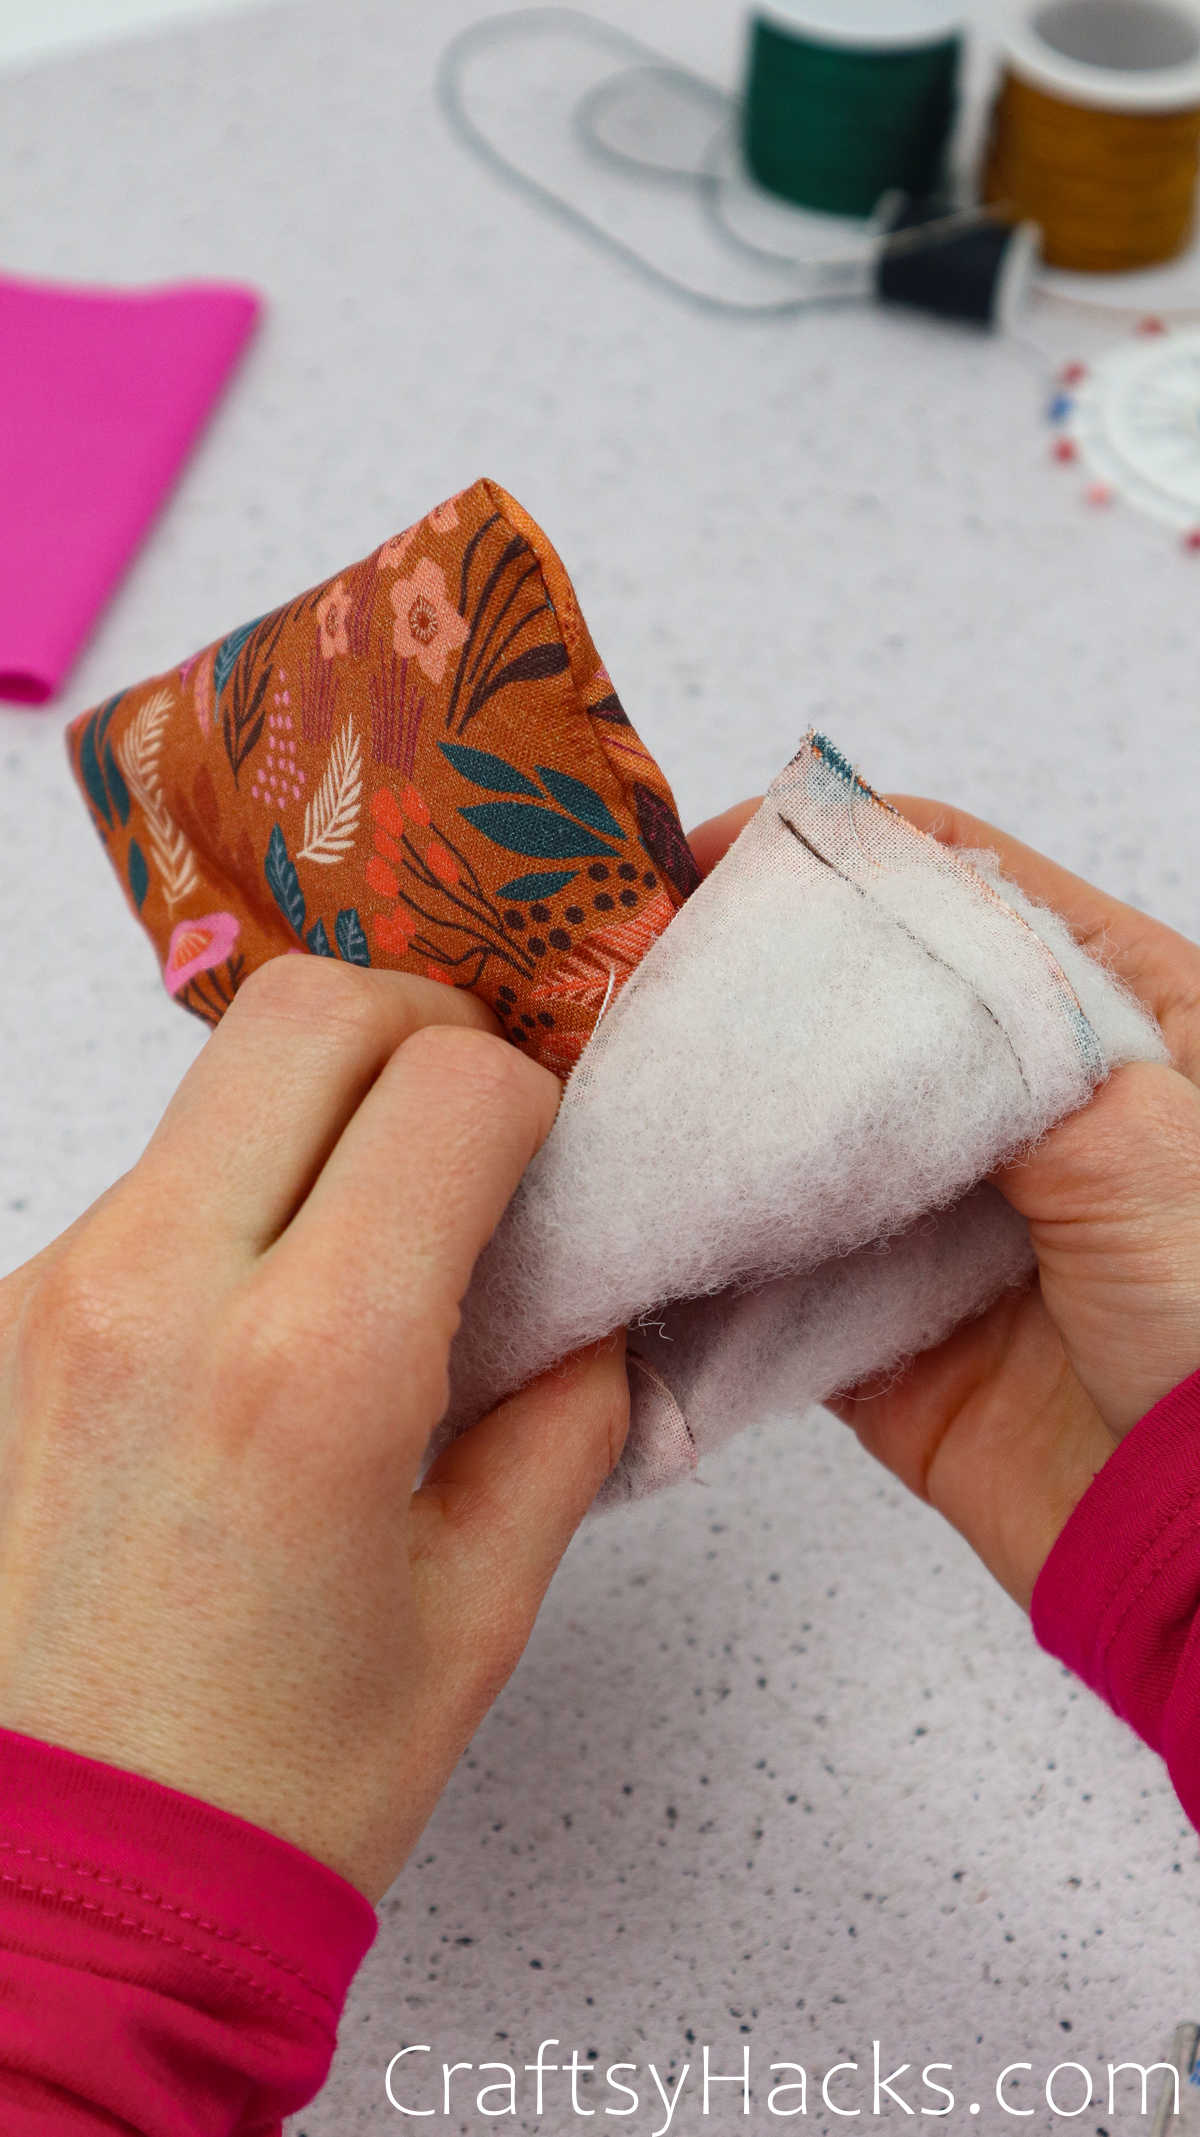
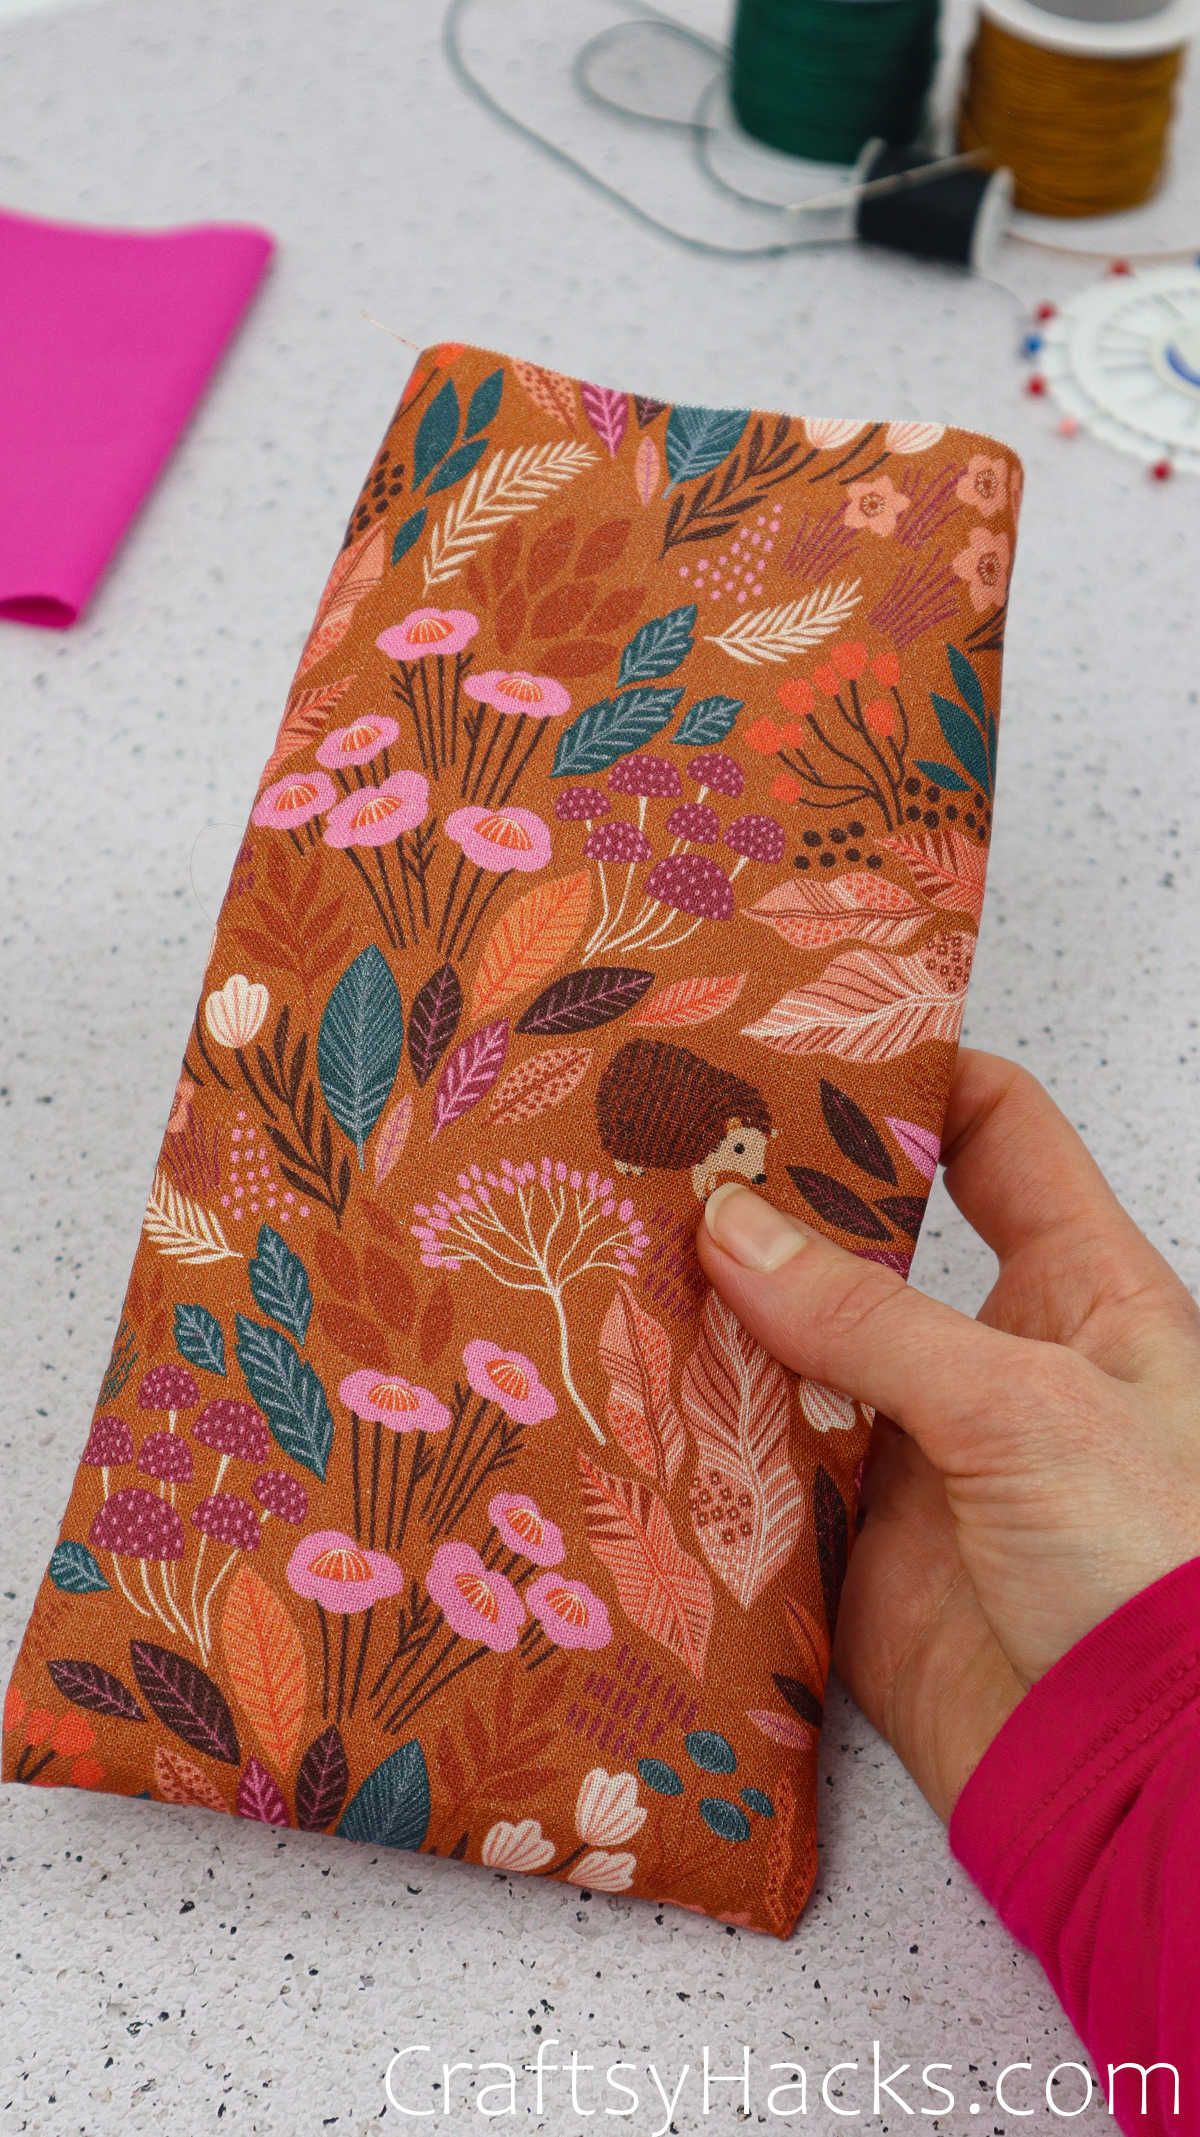
Step 8
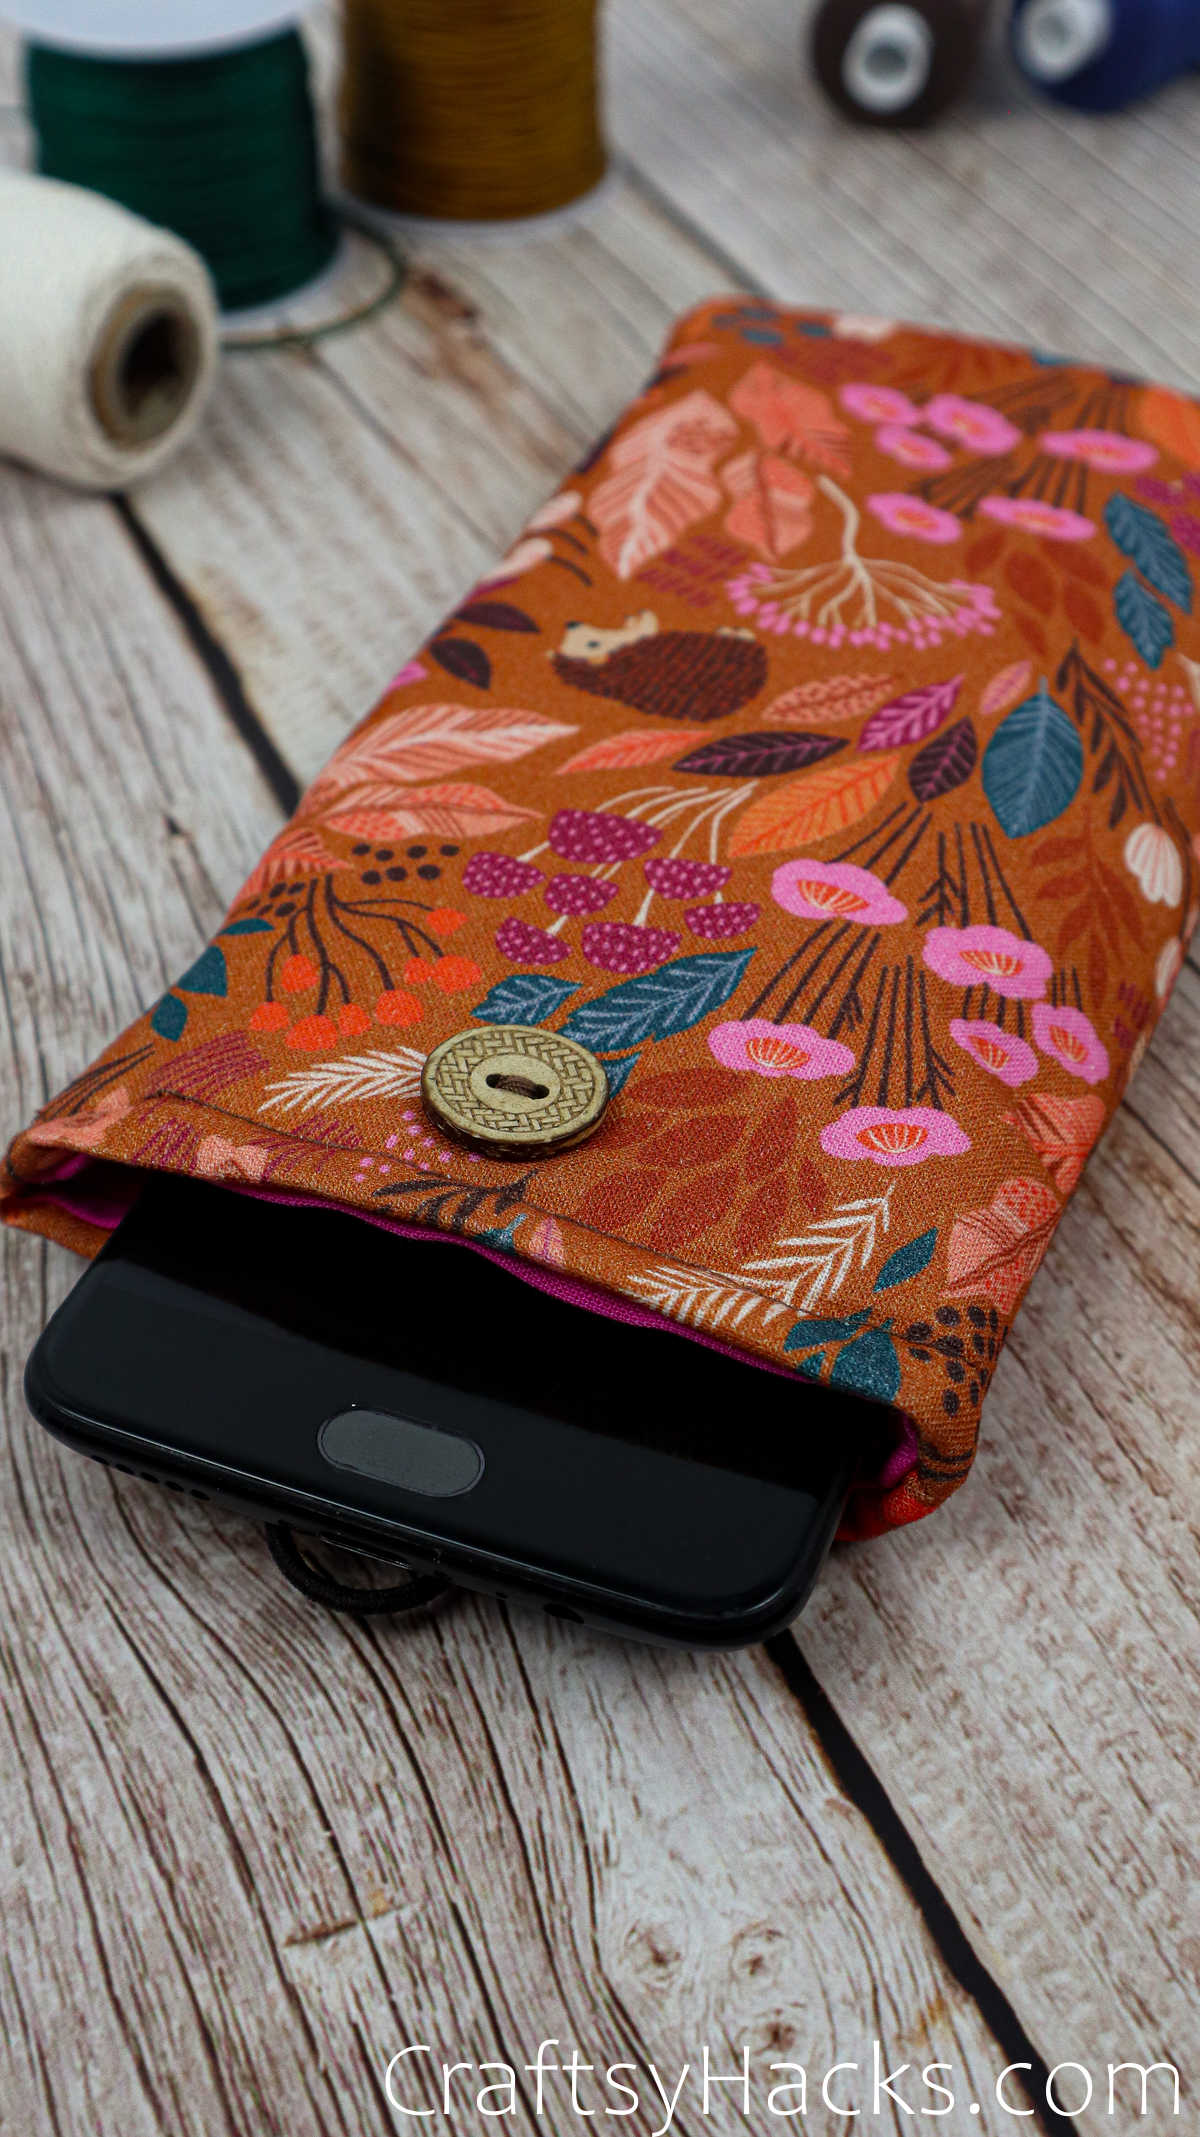
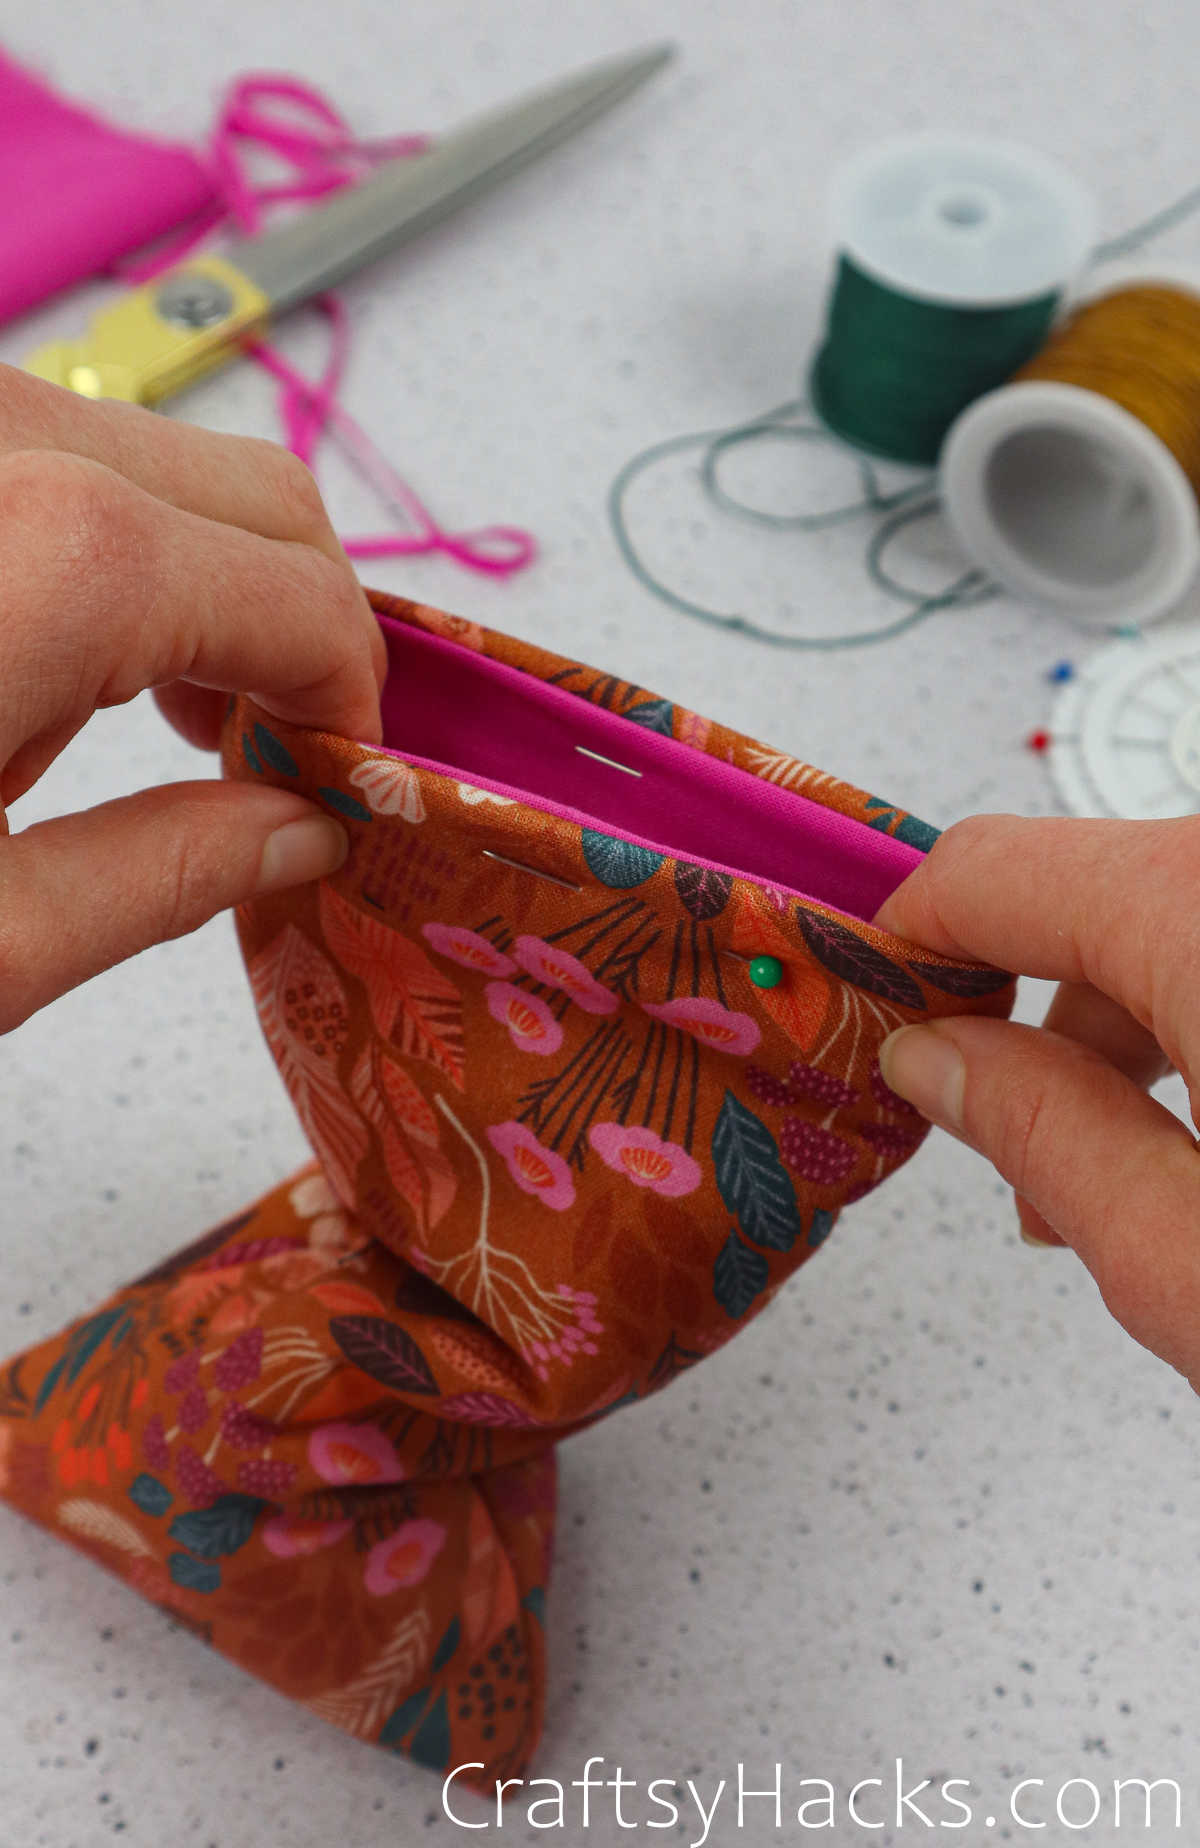
The next step is to insert the lining into the main fabric. Simply use your hands and fingers to push the fabric in and smoothen out the edges. Also poke out the corners of the fabric so that they point out.
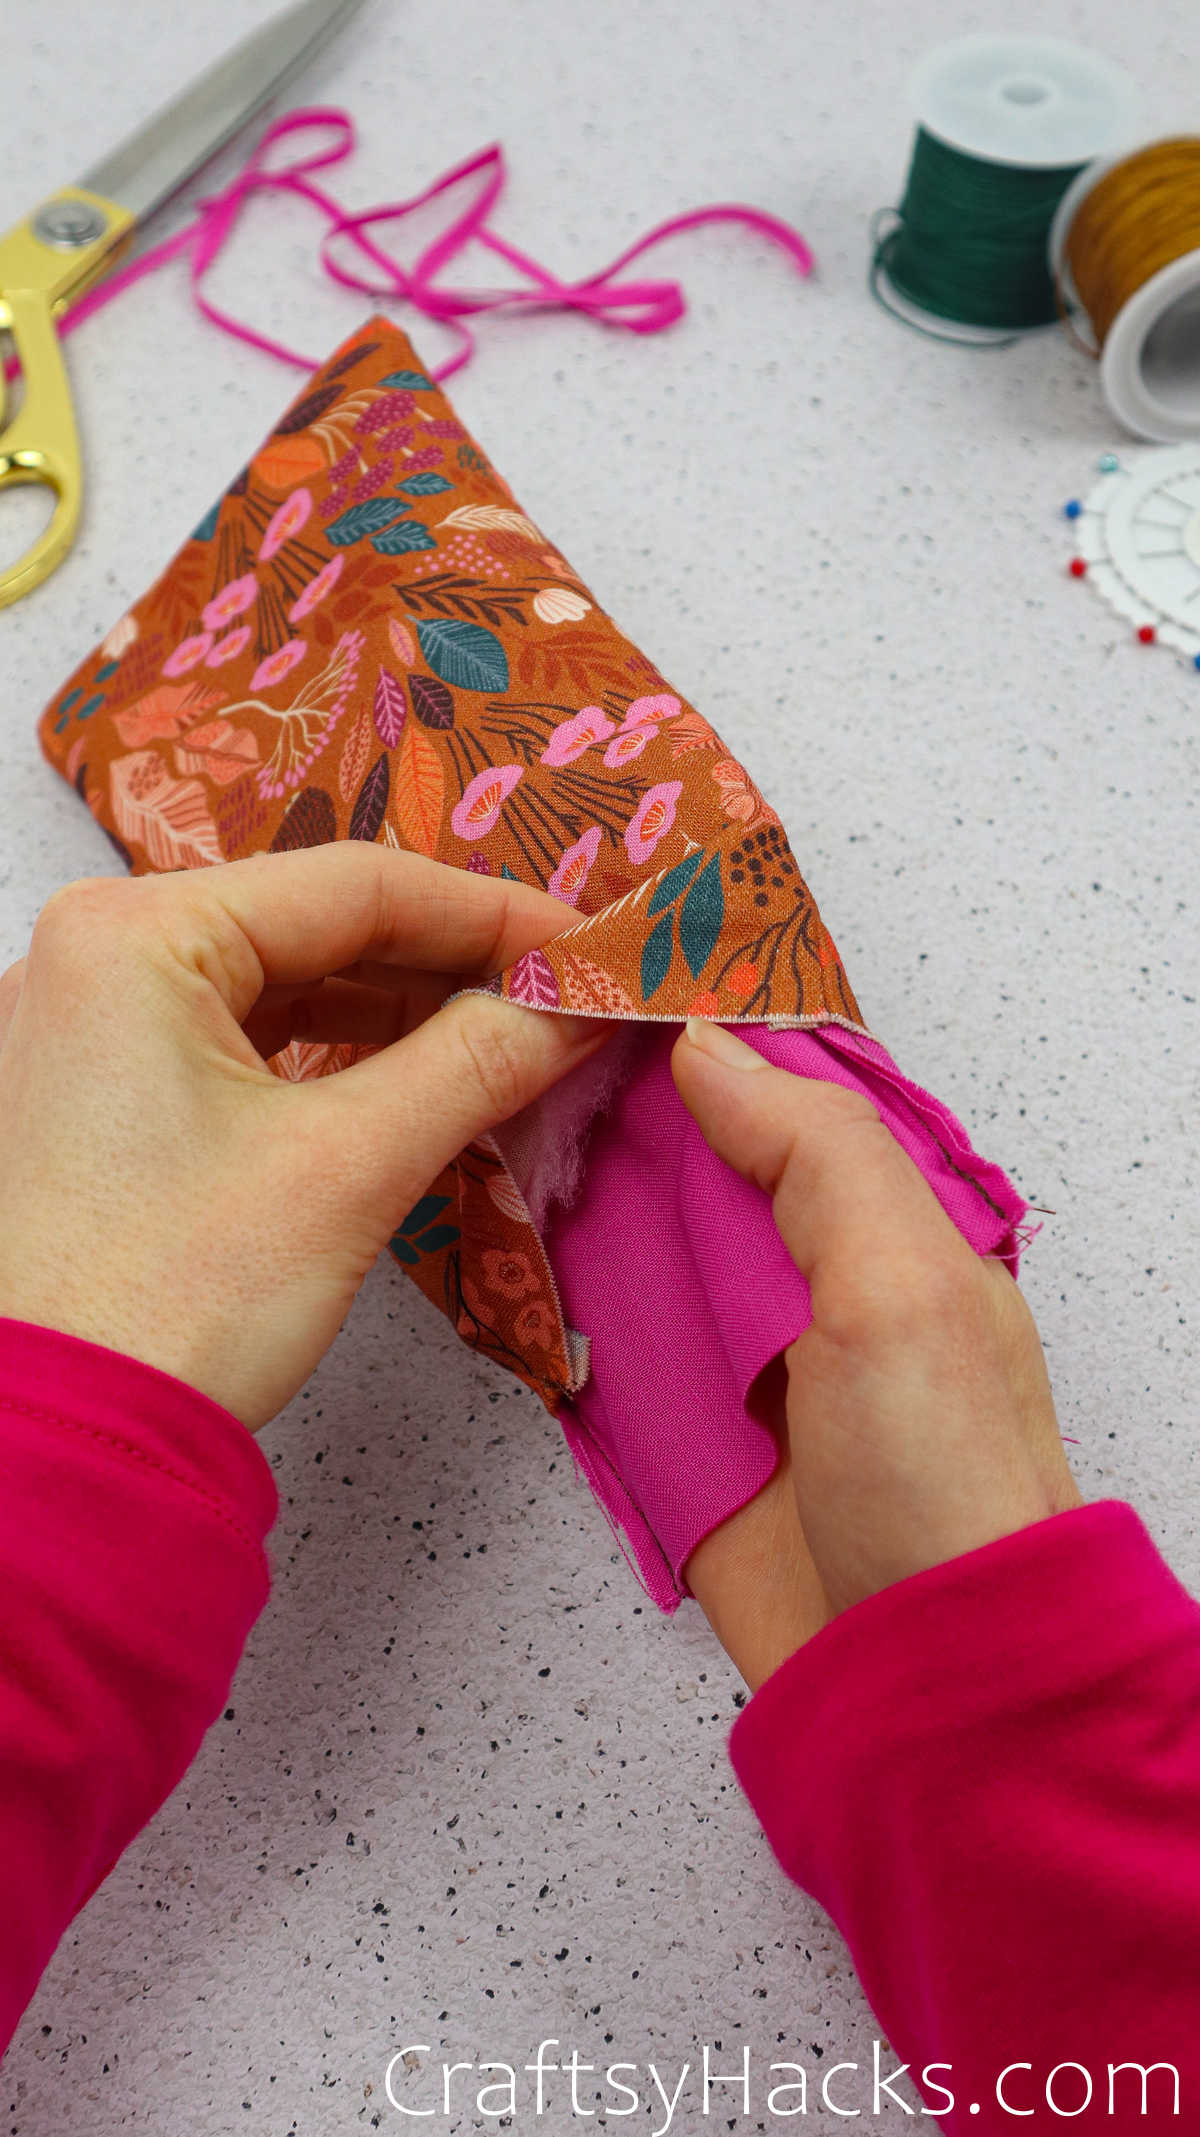
This means that the wadding will be snug between the lining cloth which is inside and the outer printed fabric. Just remember to tuck the fabric in so that the wadding is well hidden.
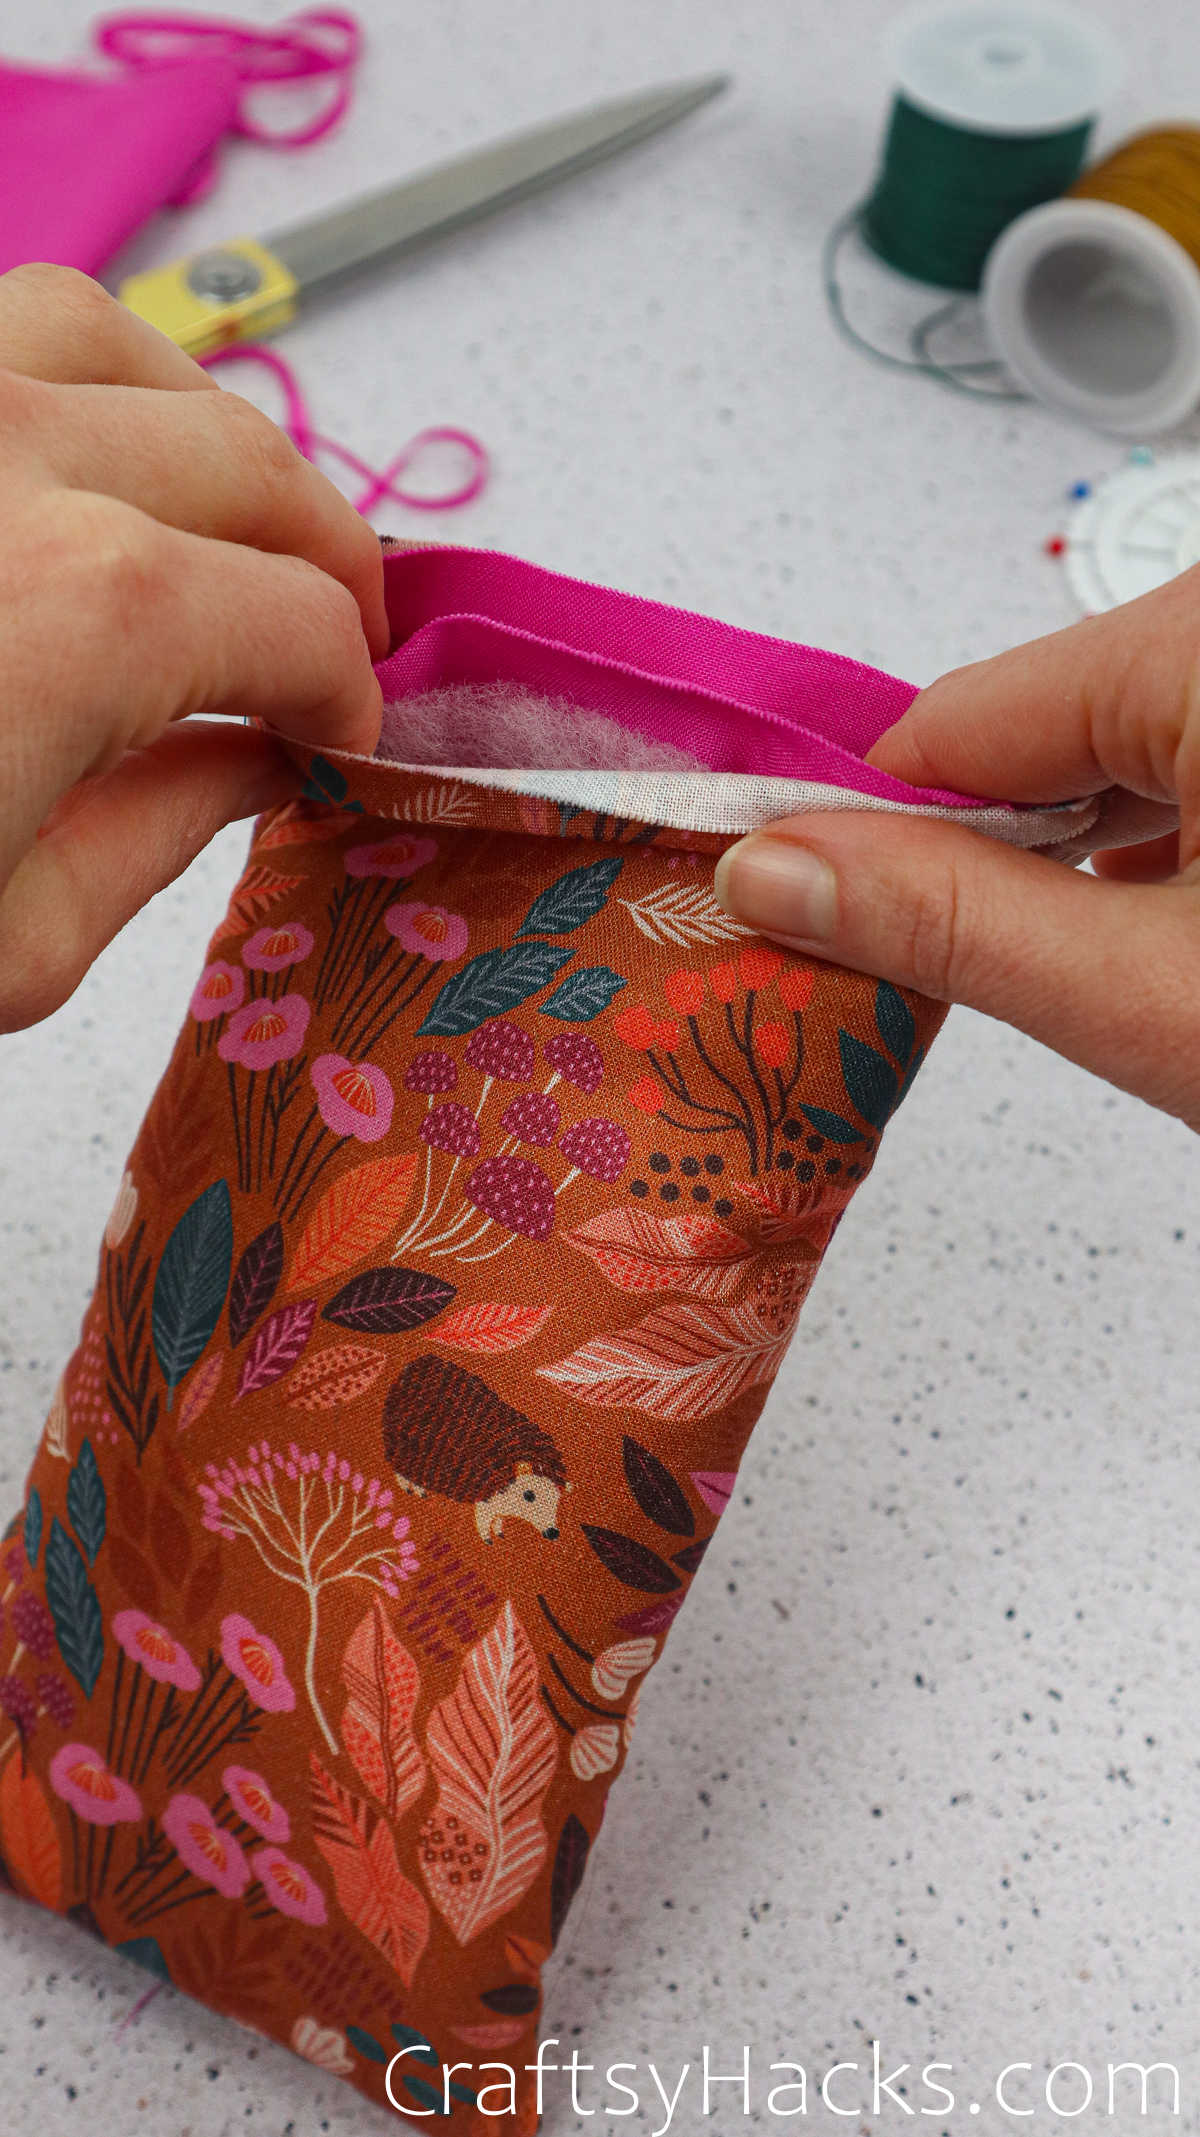
Once you fold the printed fabric inside to cover the fabric, secure it with a pin. You must also fold and align the lining fabric so it is on par with the printed fabric, as indicated.
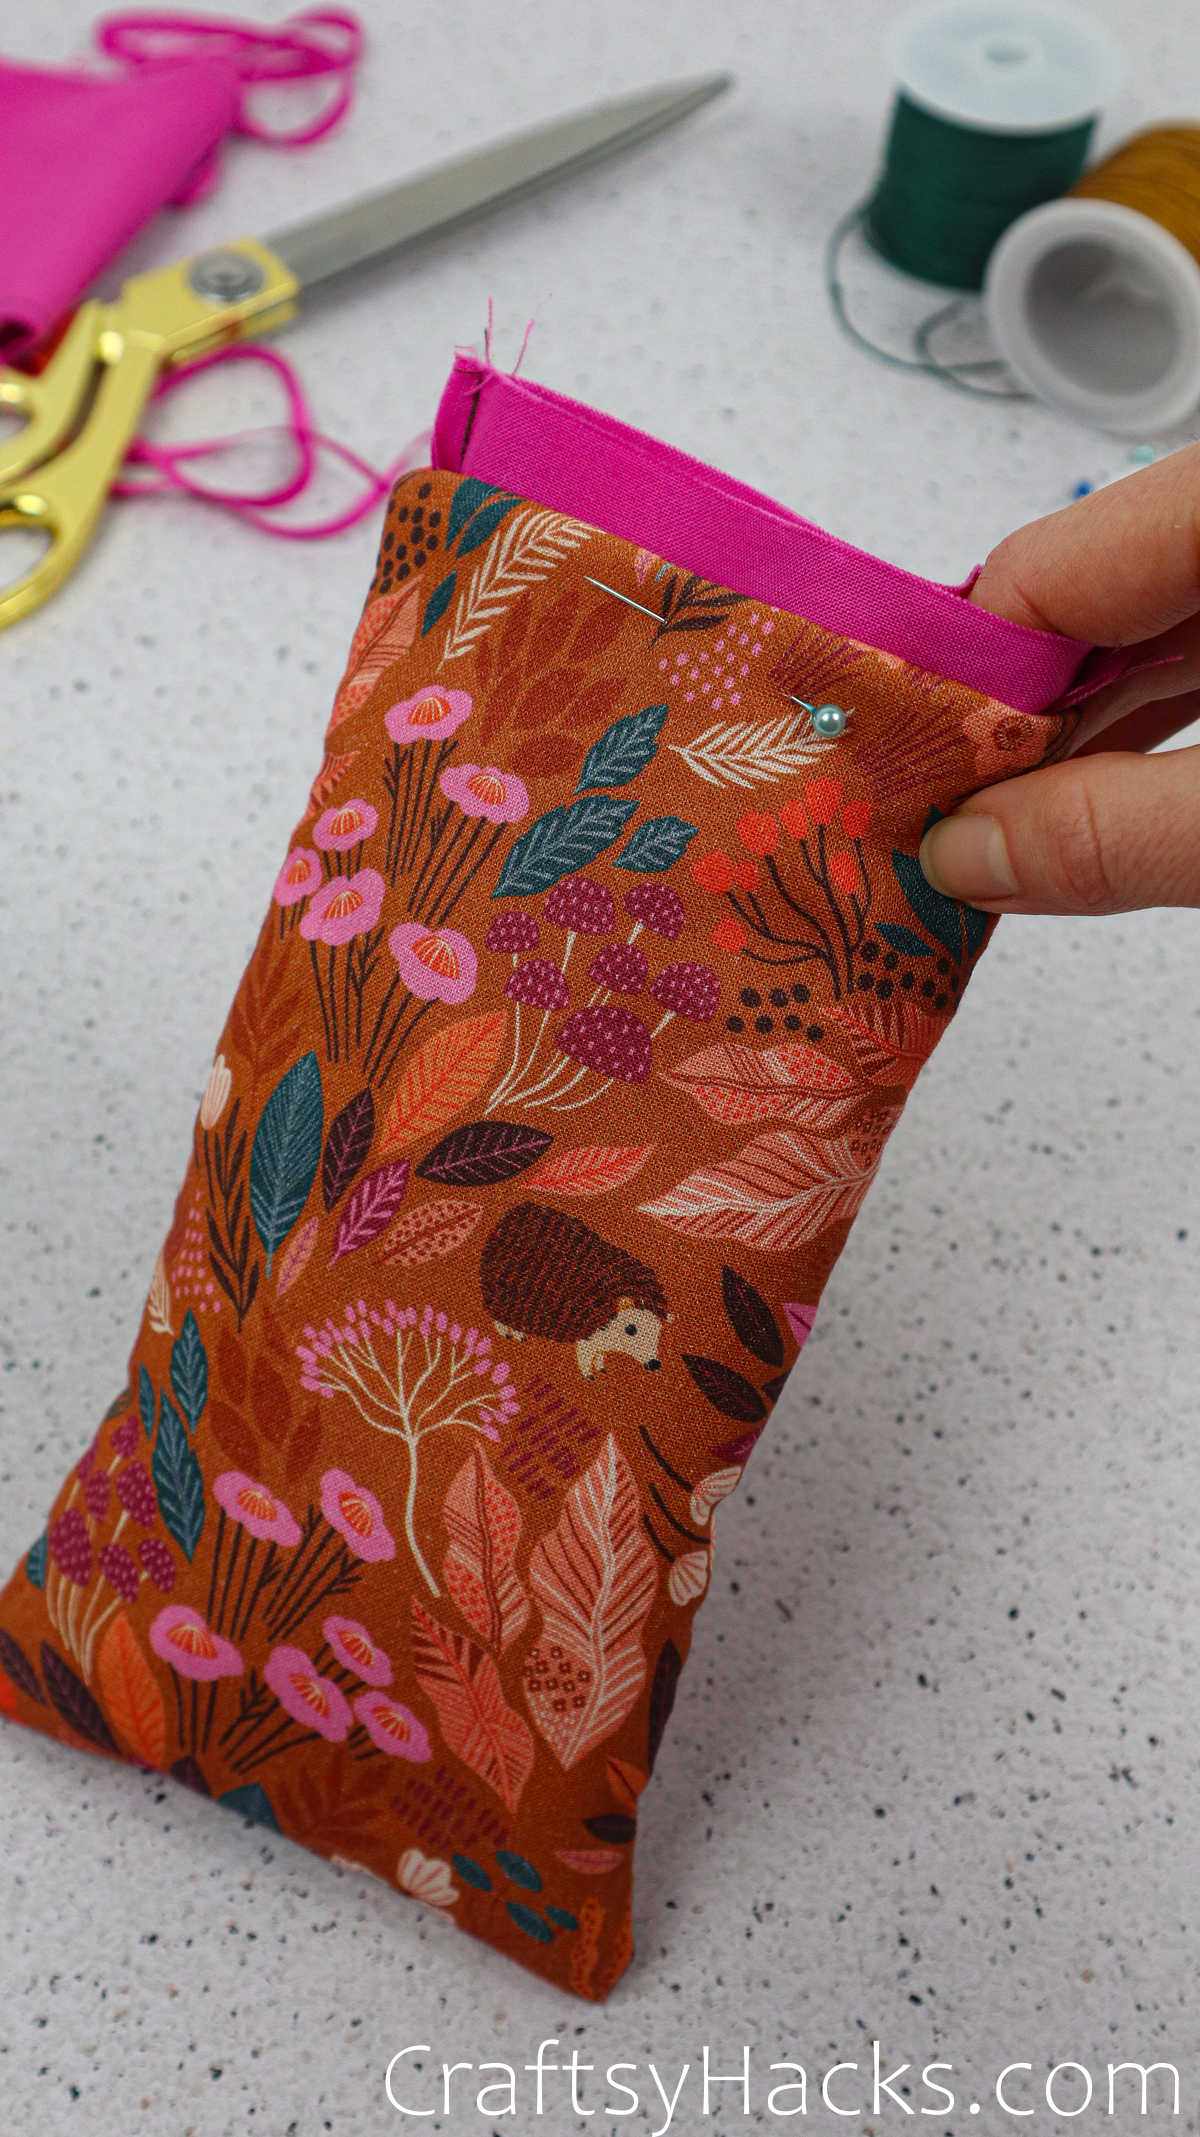
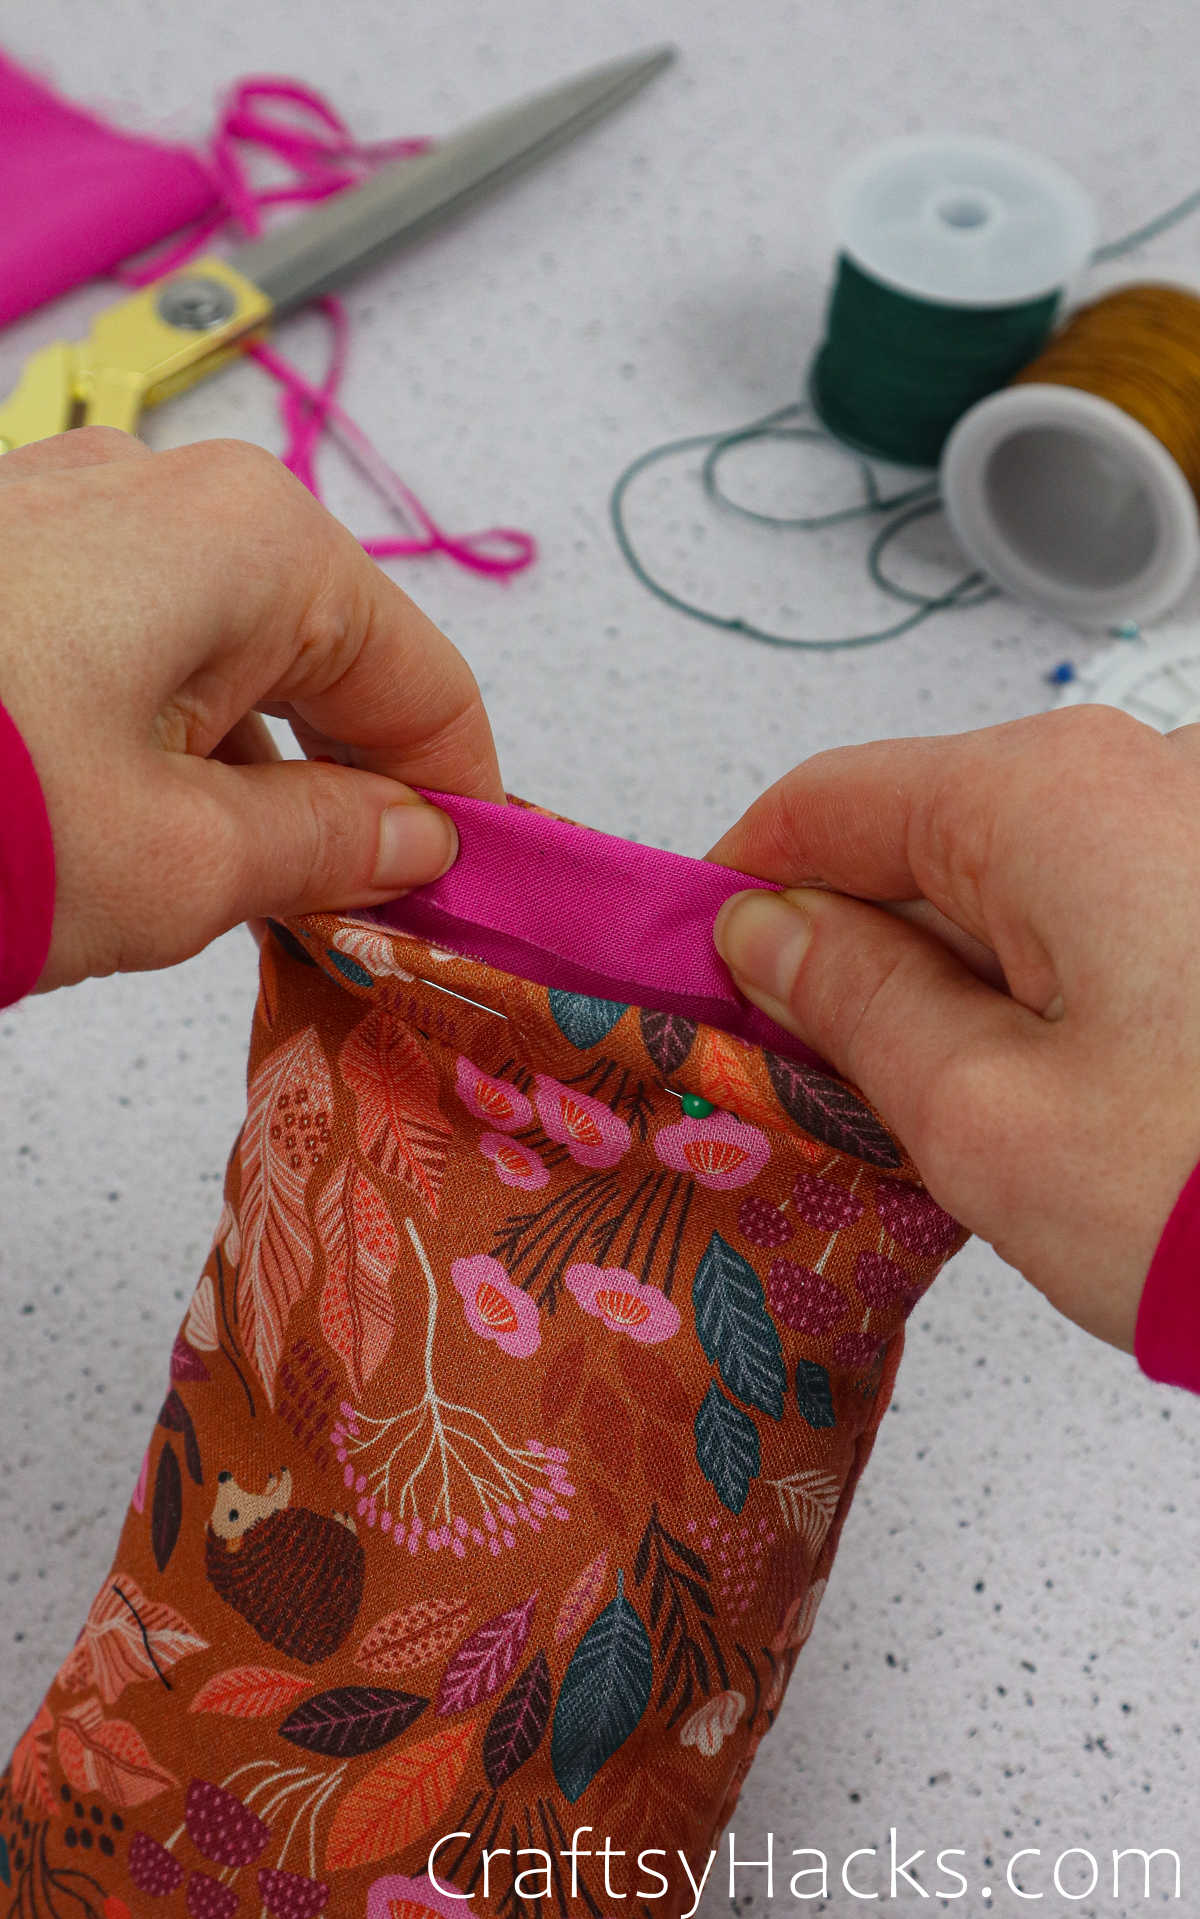
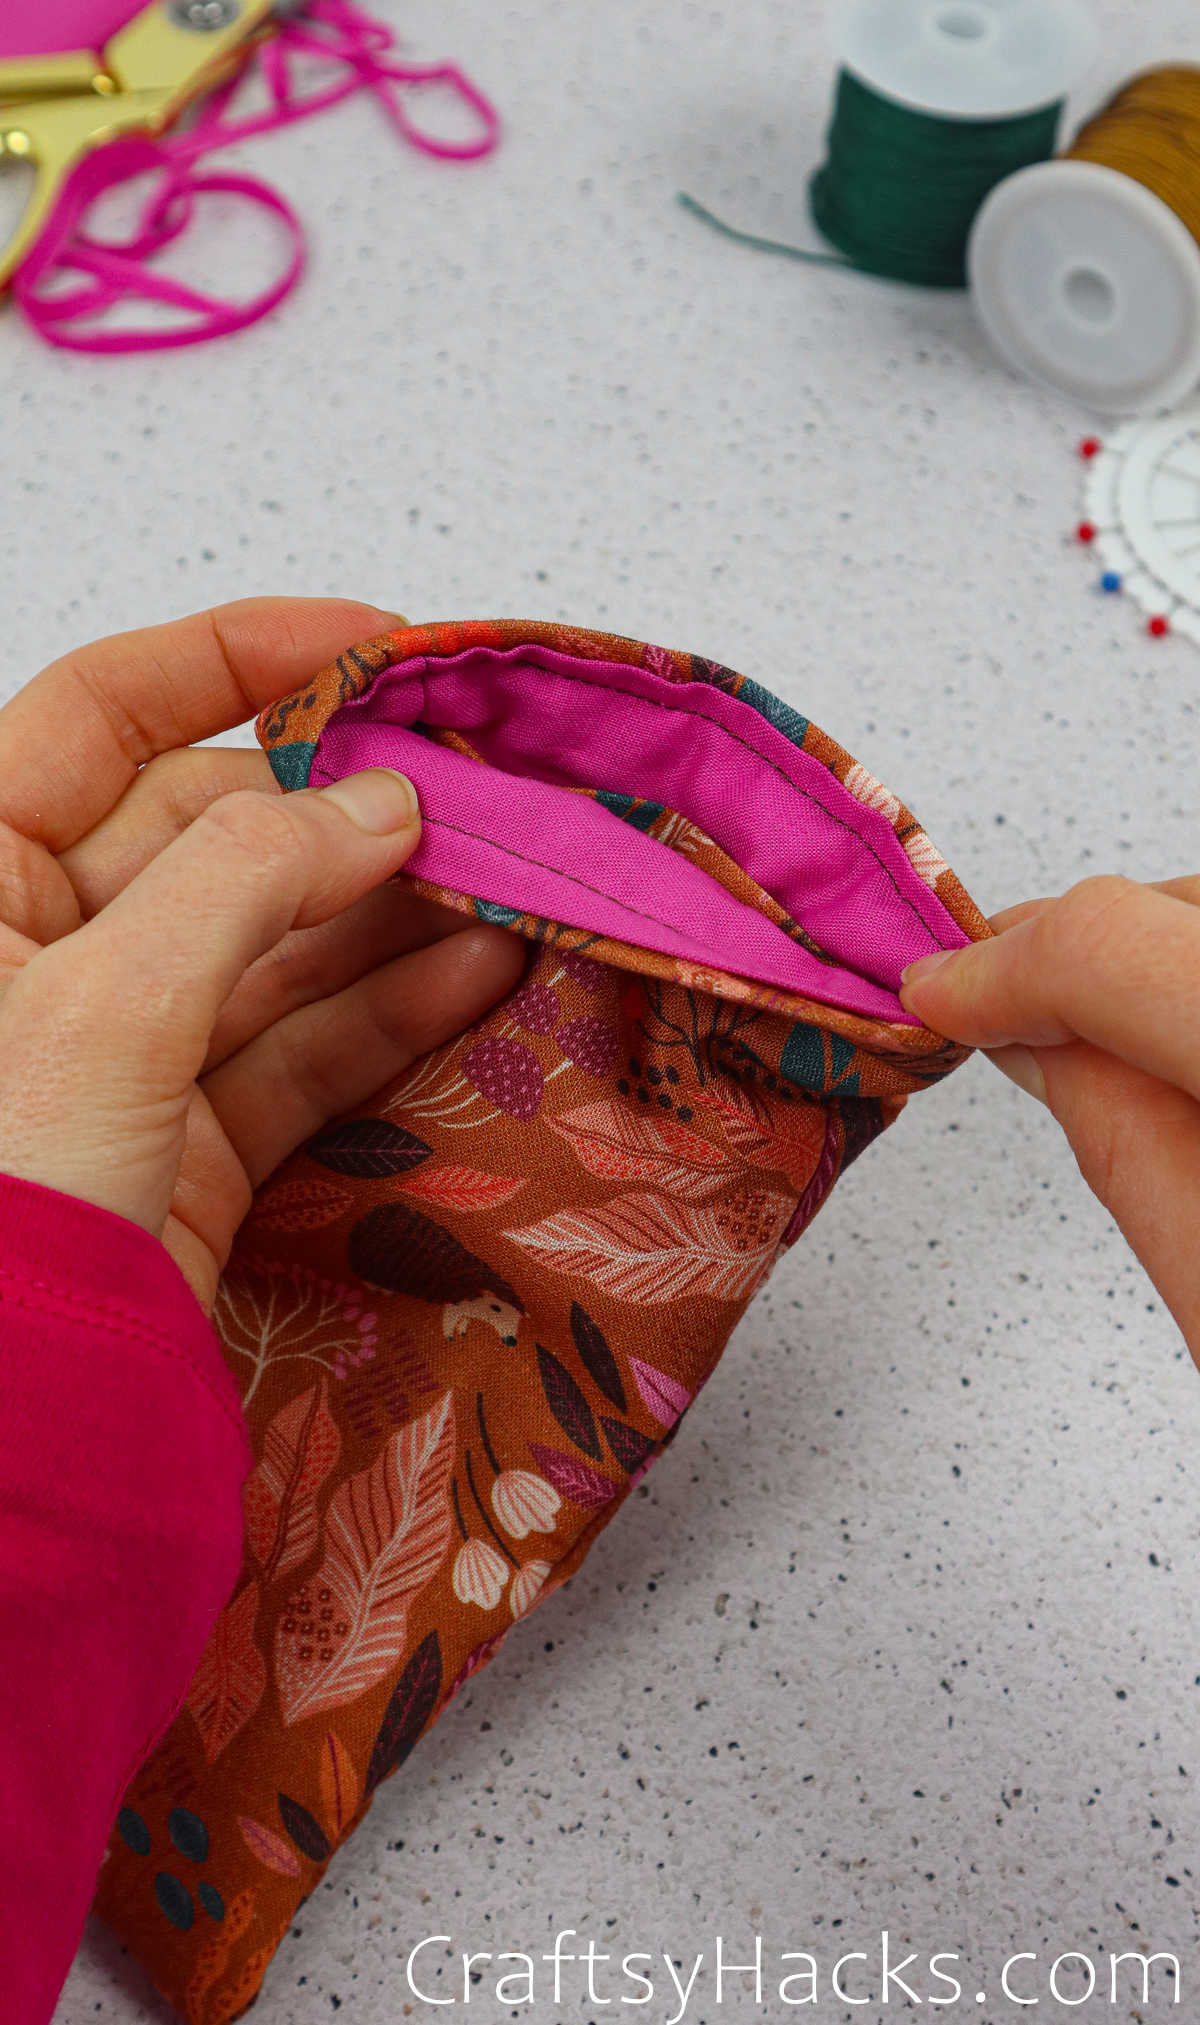
Pin the lining, the wadding, and the printed fabric in place on both sides. Now head on over to your sewing machine and sew the two sides around the mouth of the pouch.
Step 9
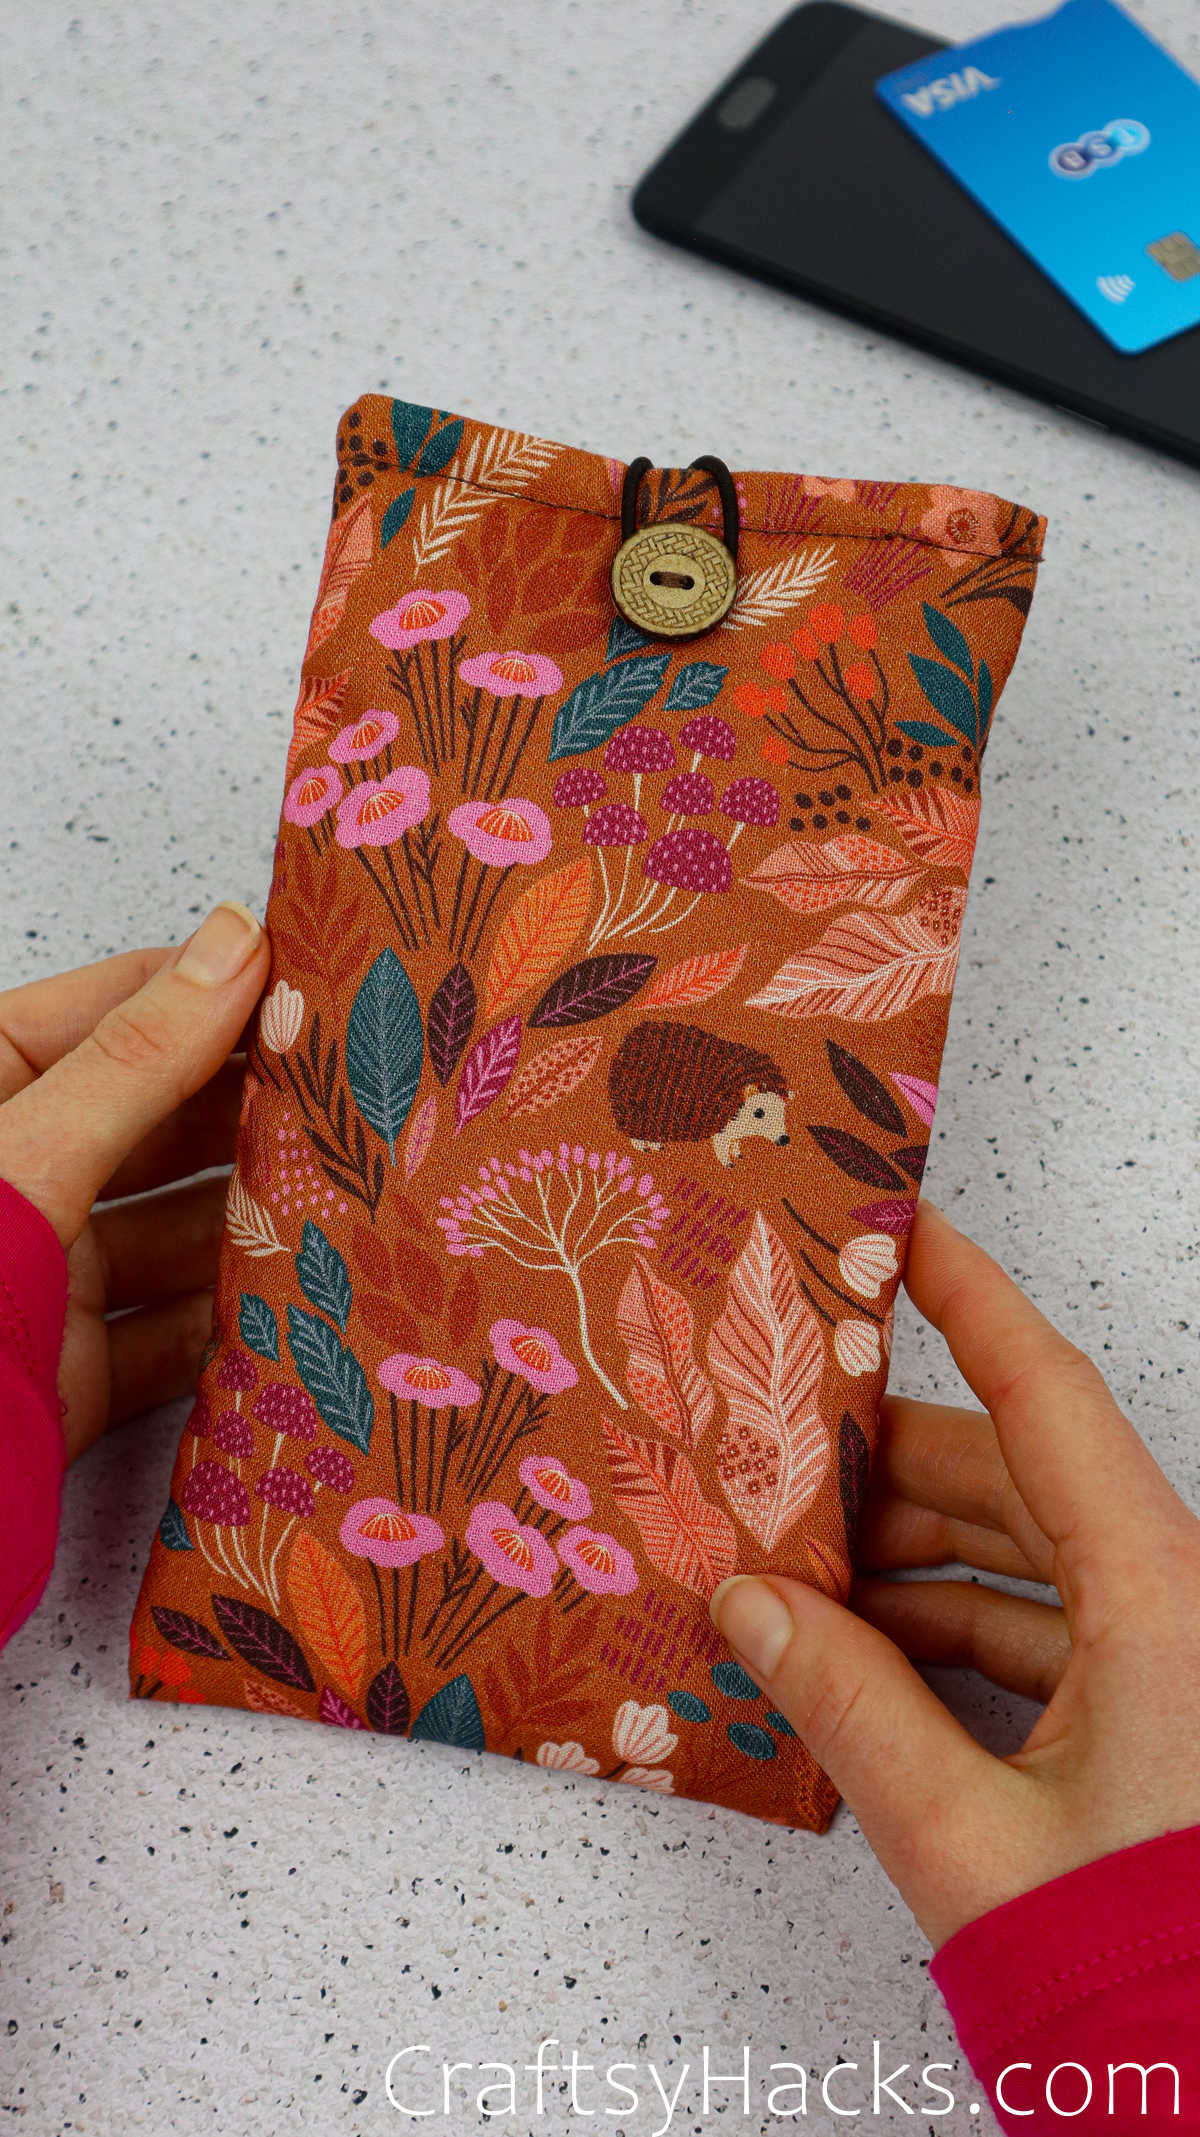
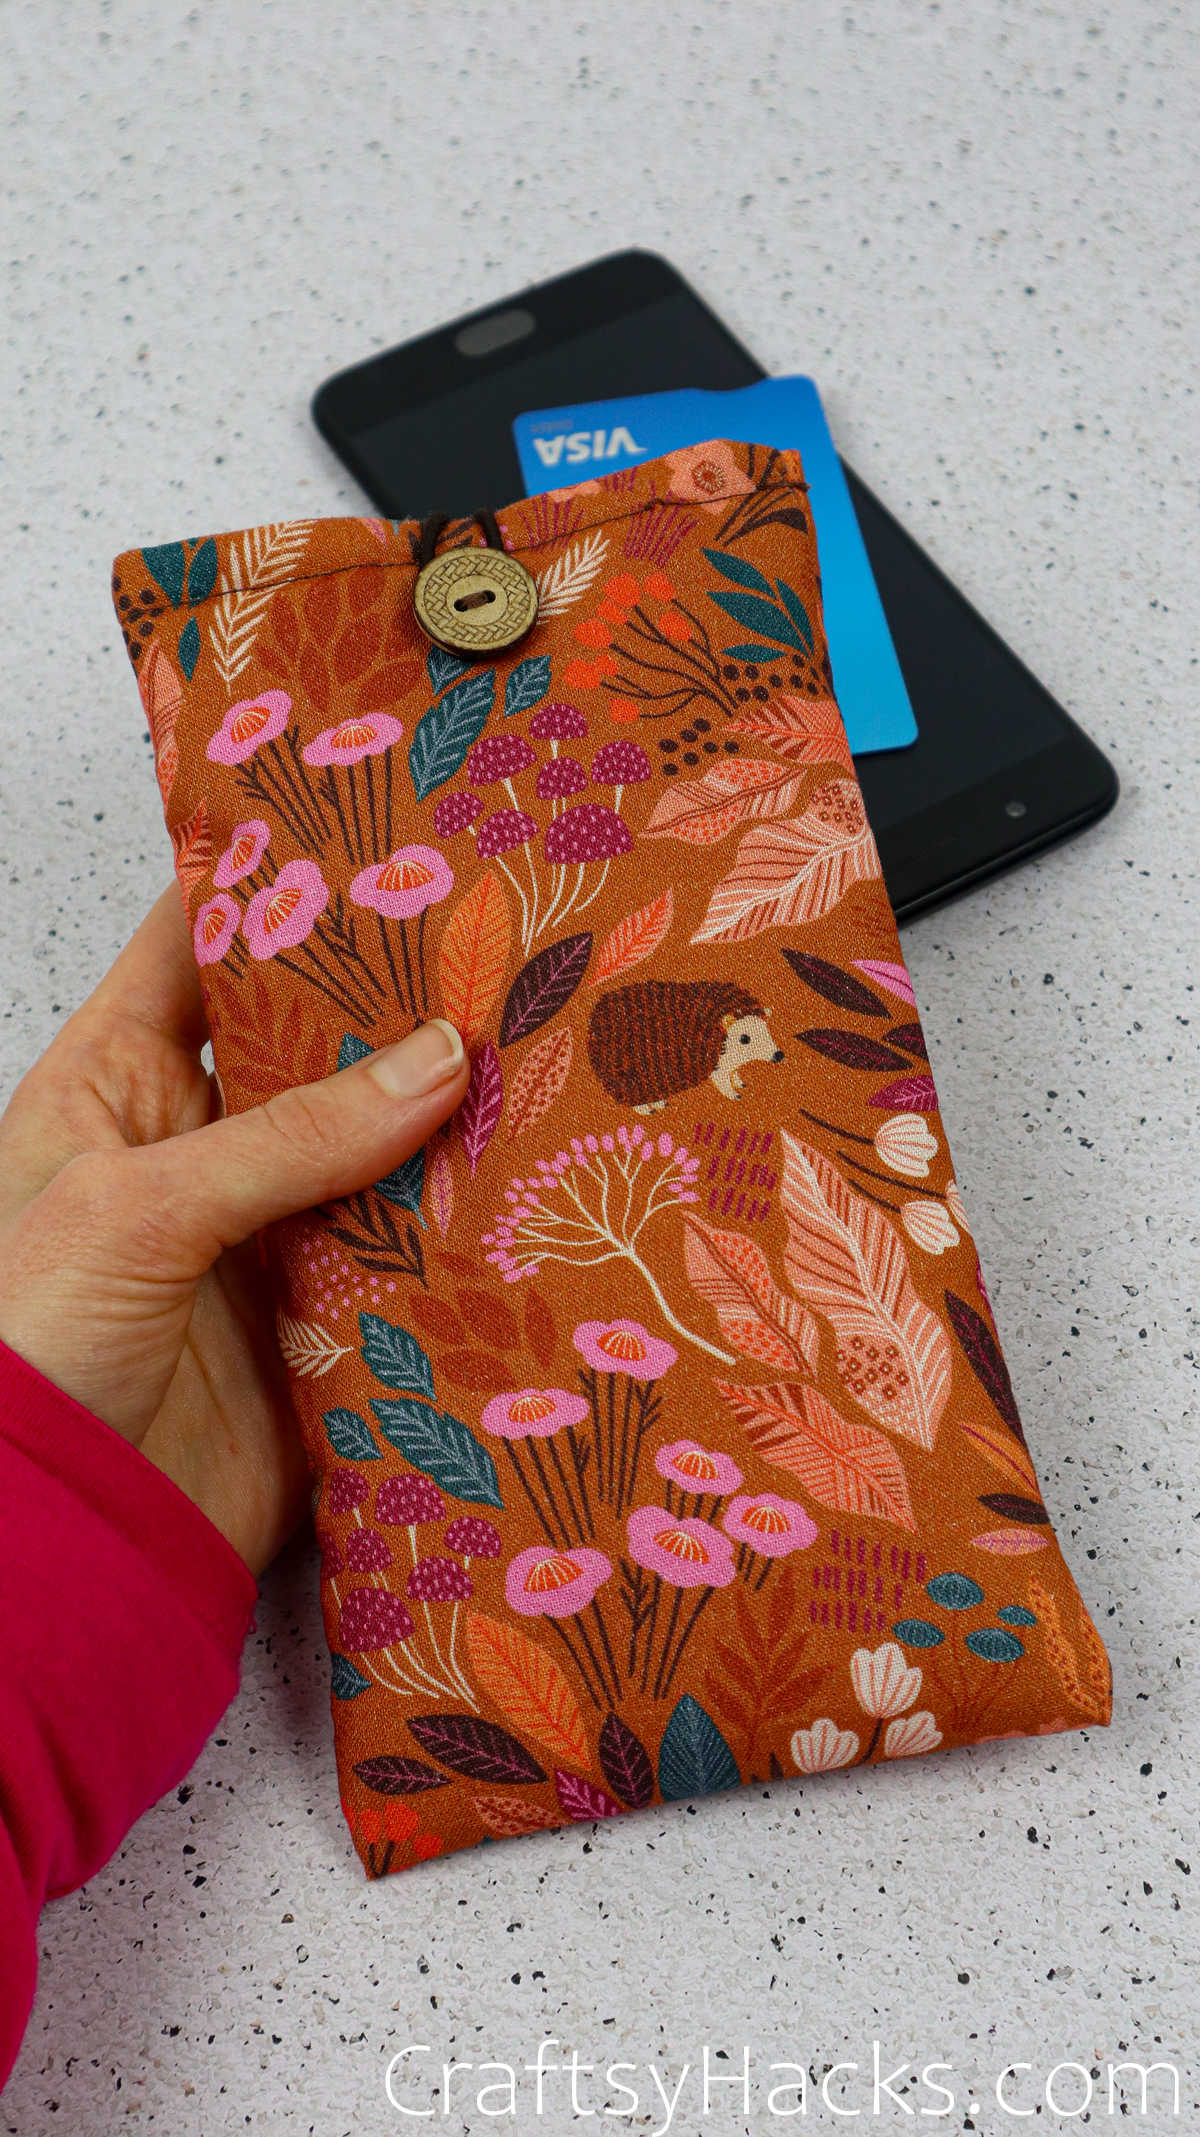
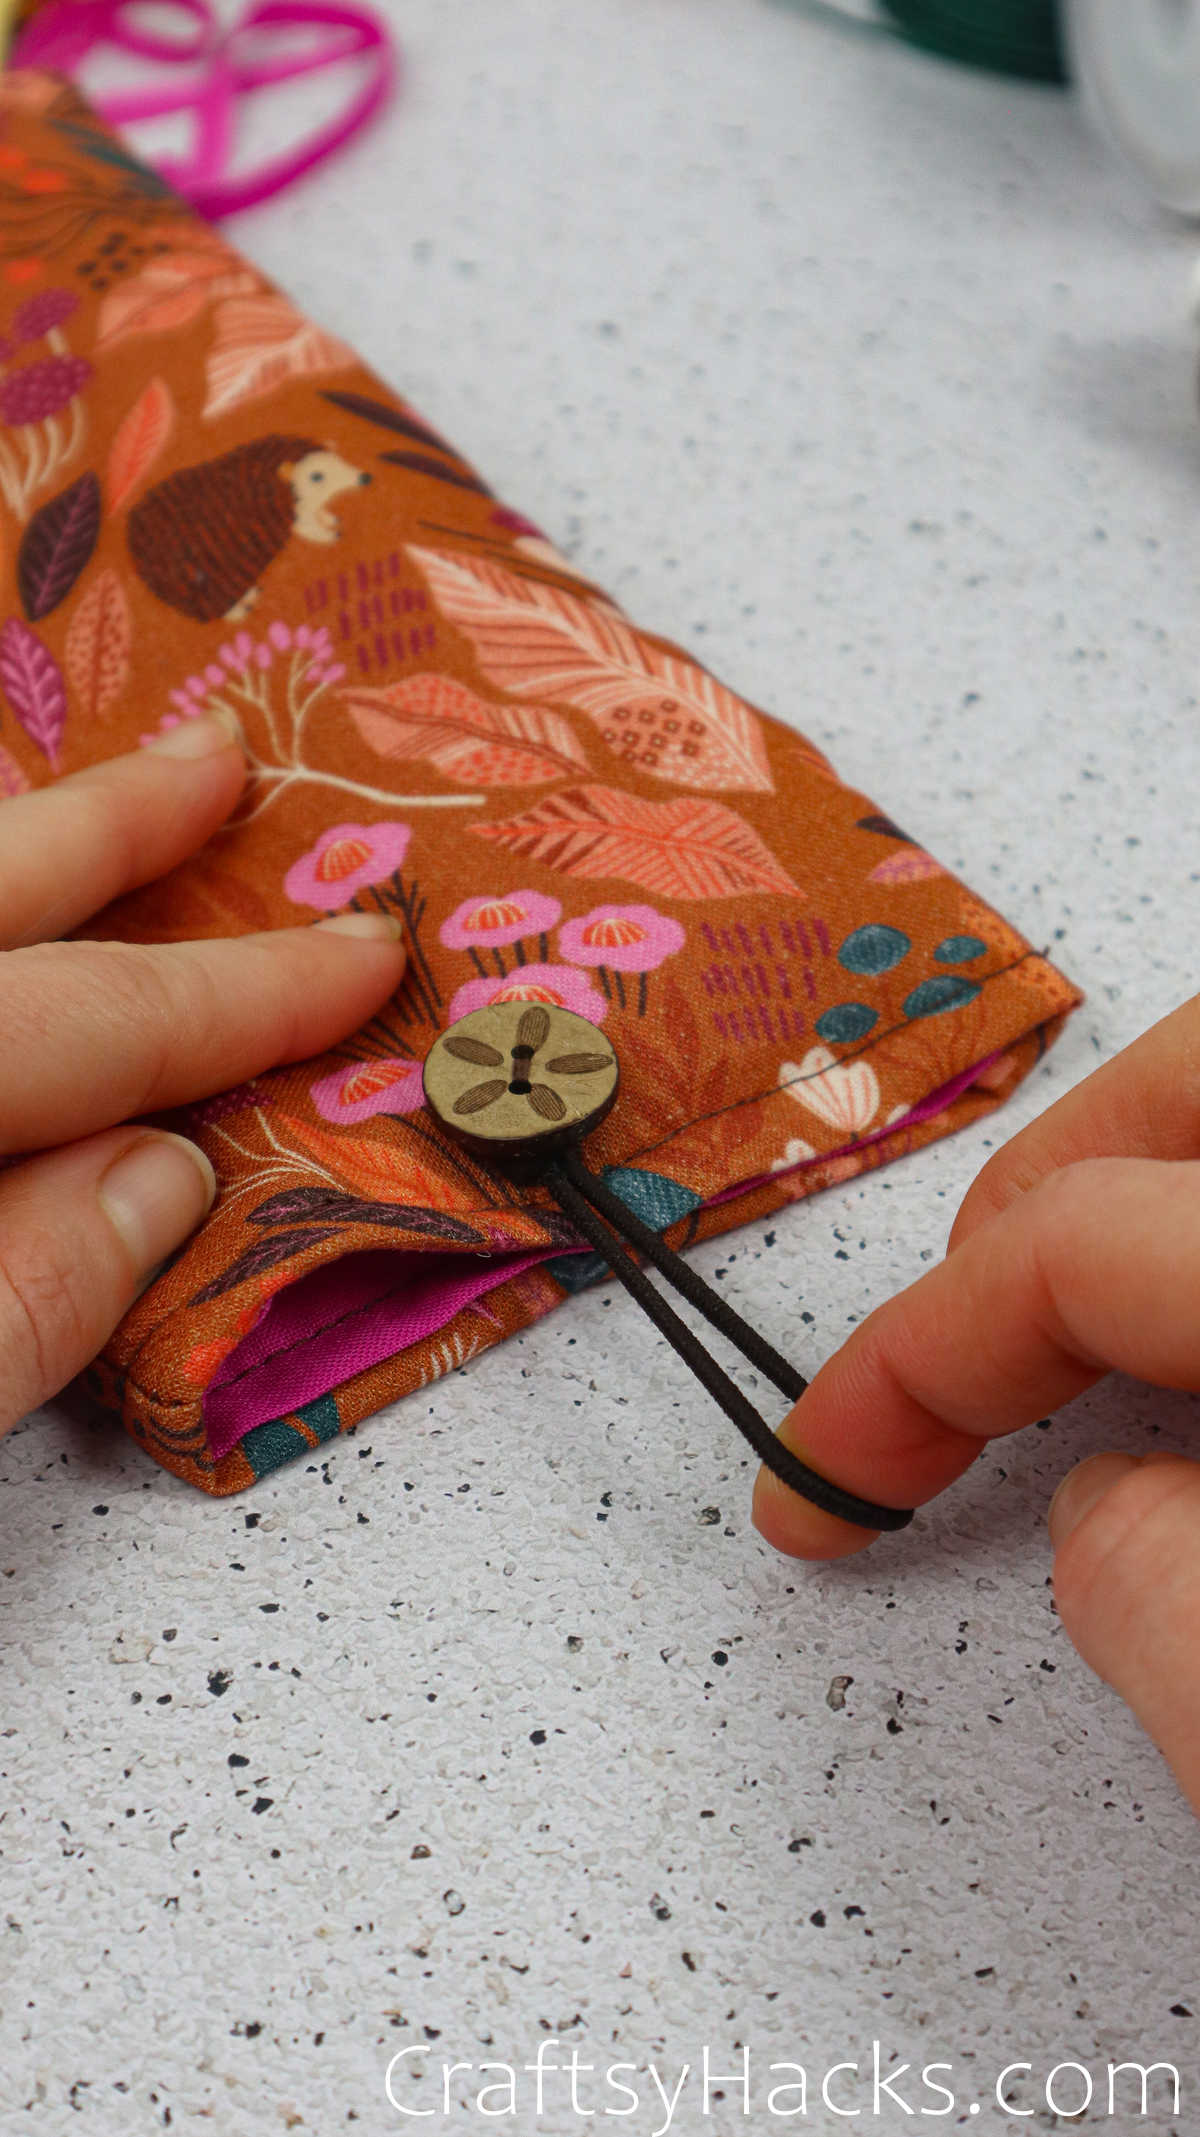
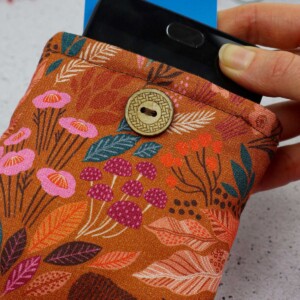
Do you want to decorate your pouch and jazz it up? Feel free to sew a button enclosure. You can use a big and sassy button and hand sew it in place about an inch down from the top.
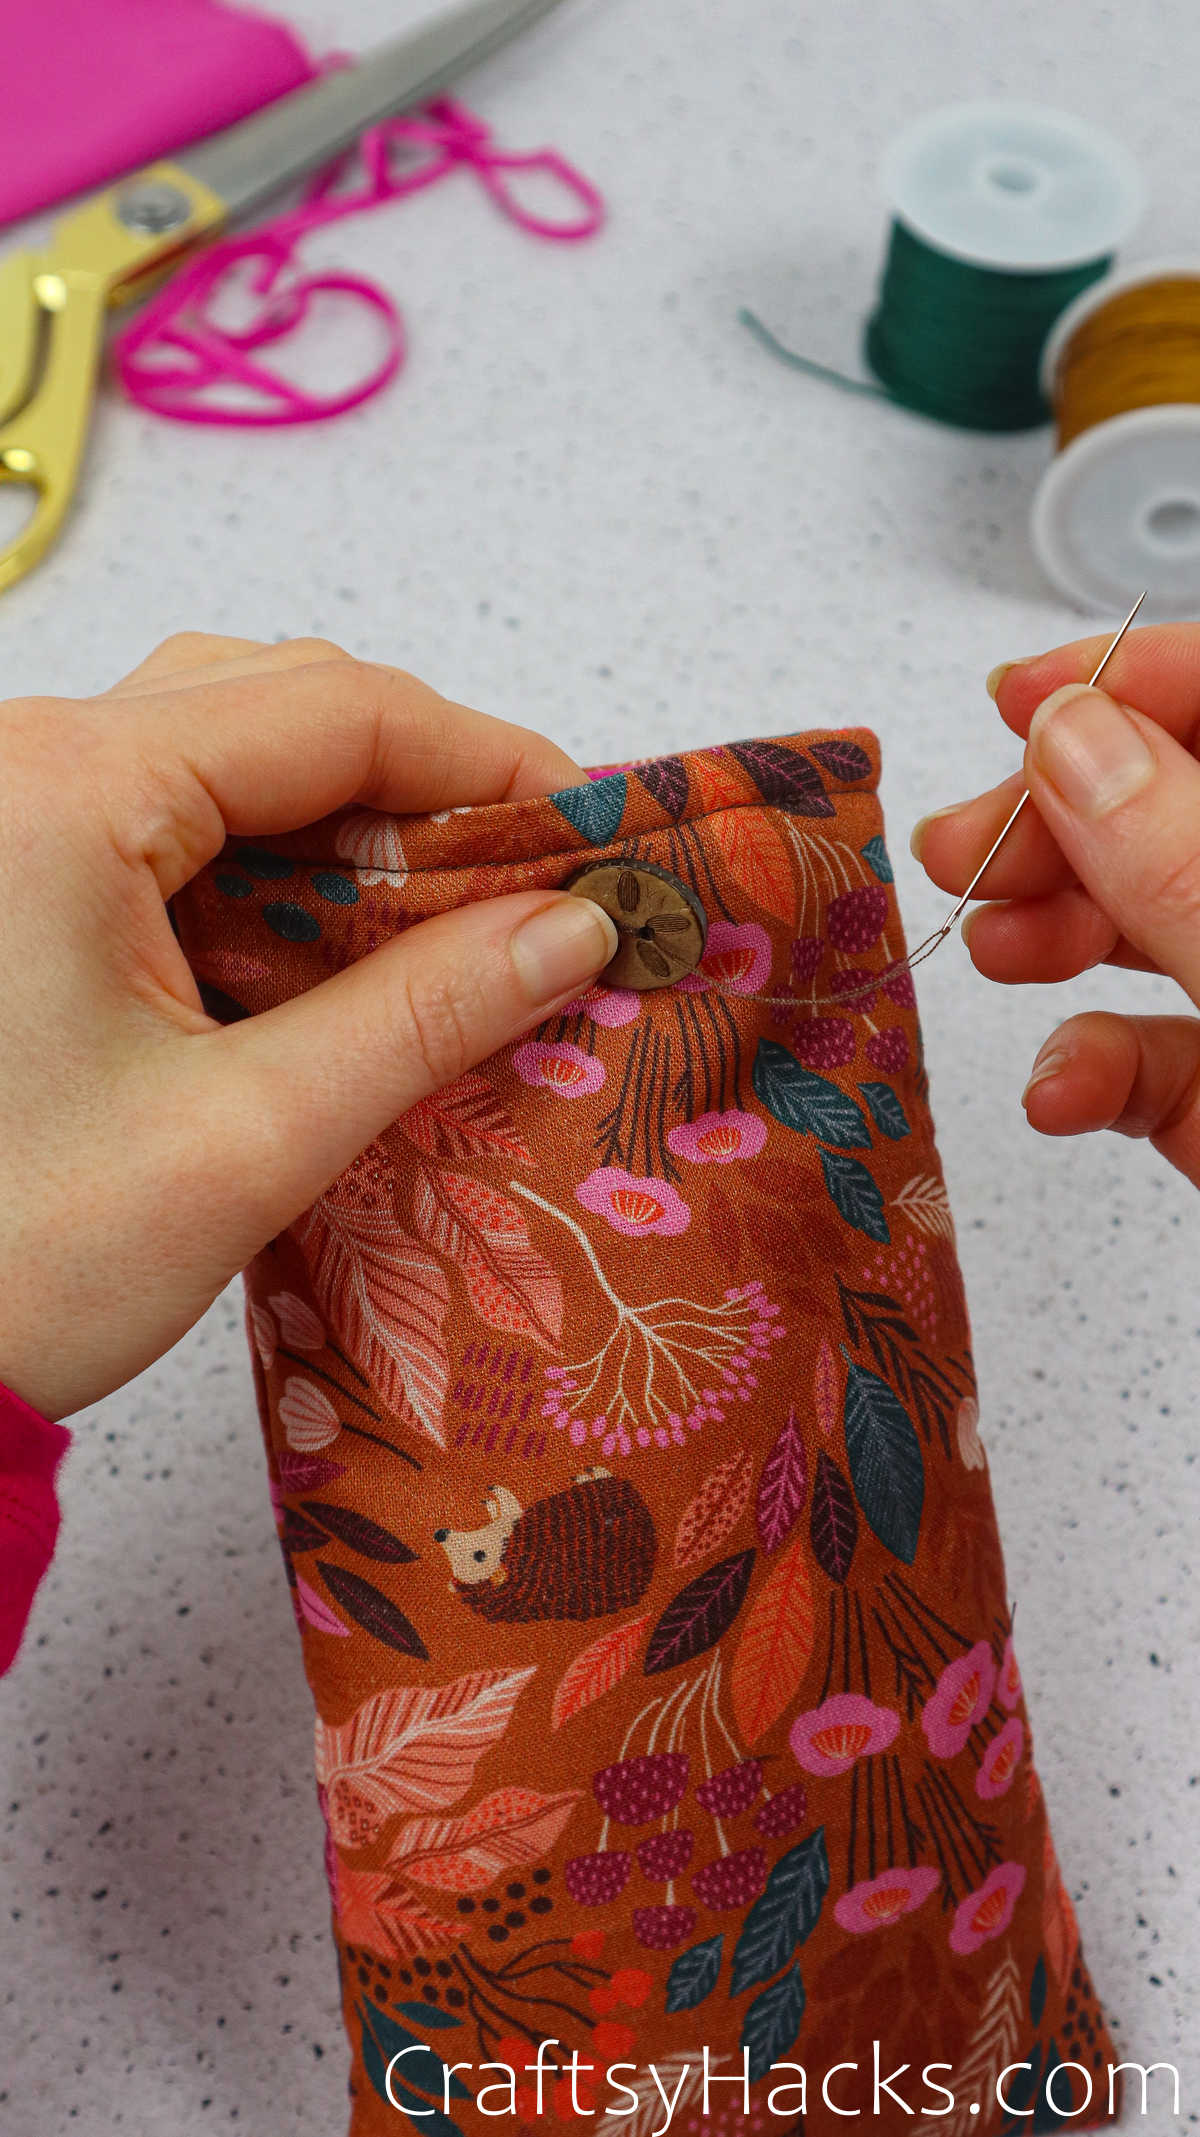
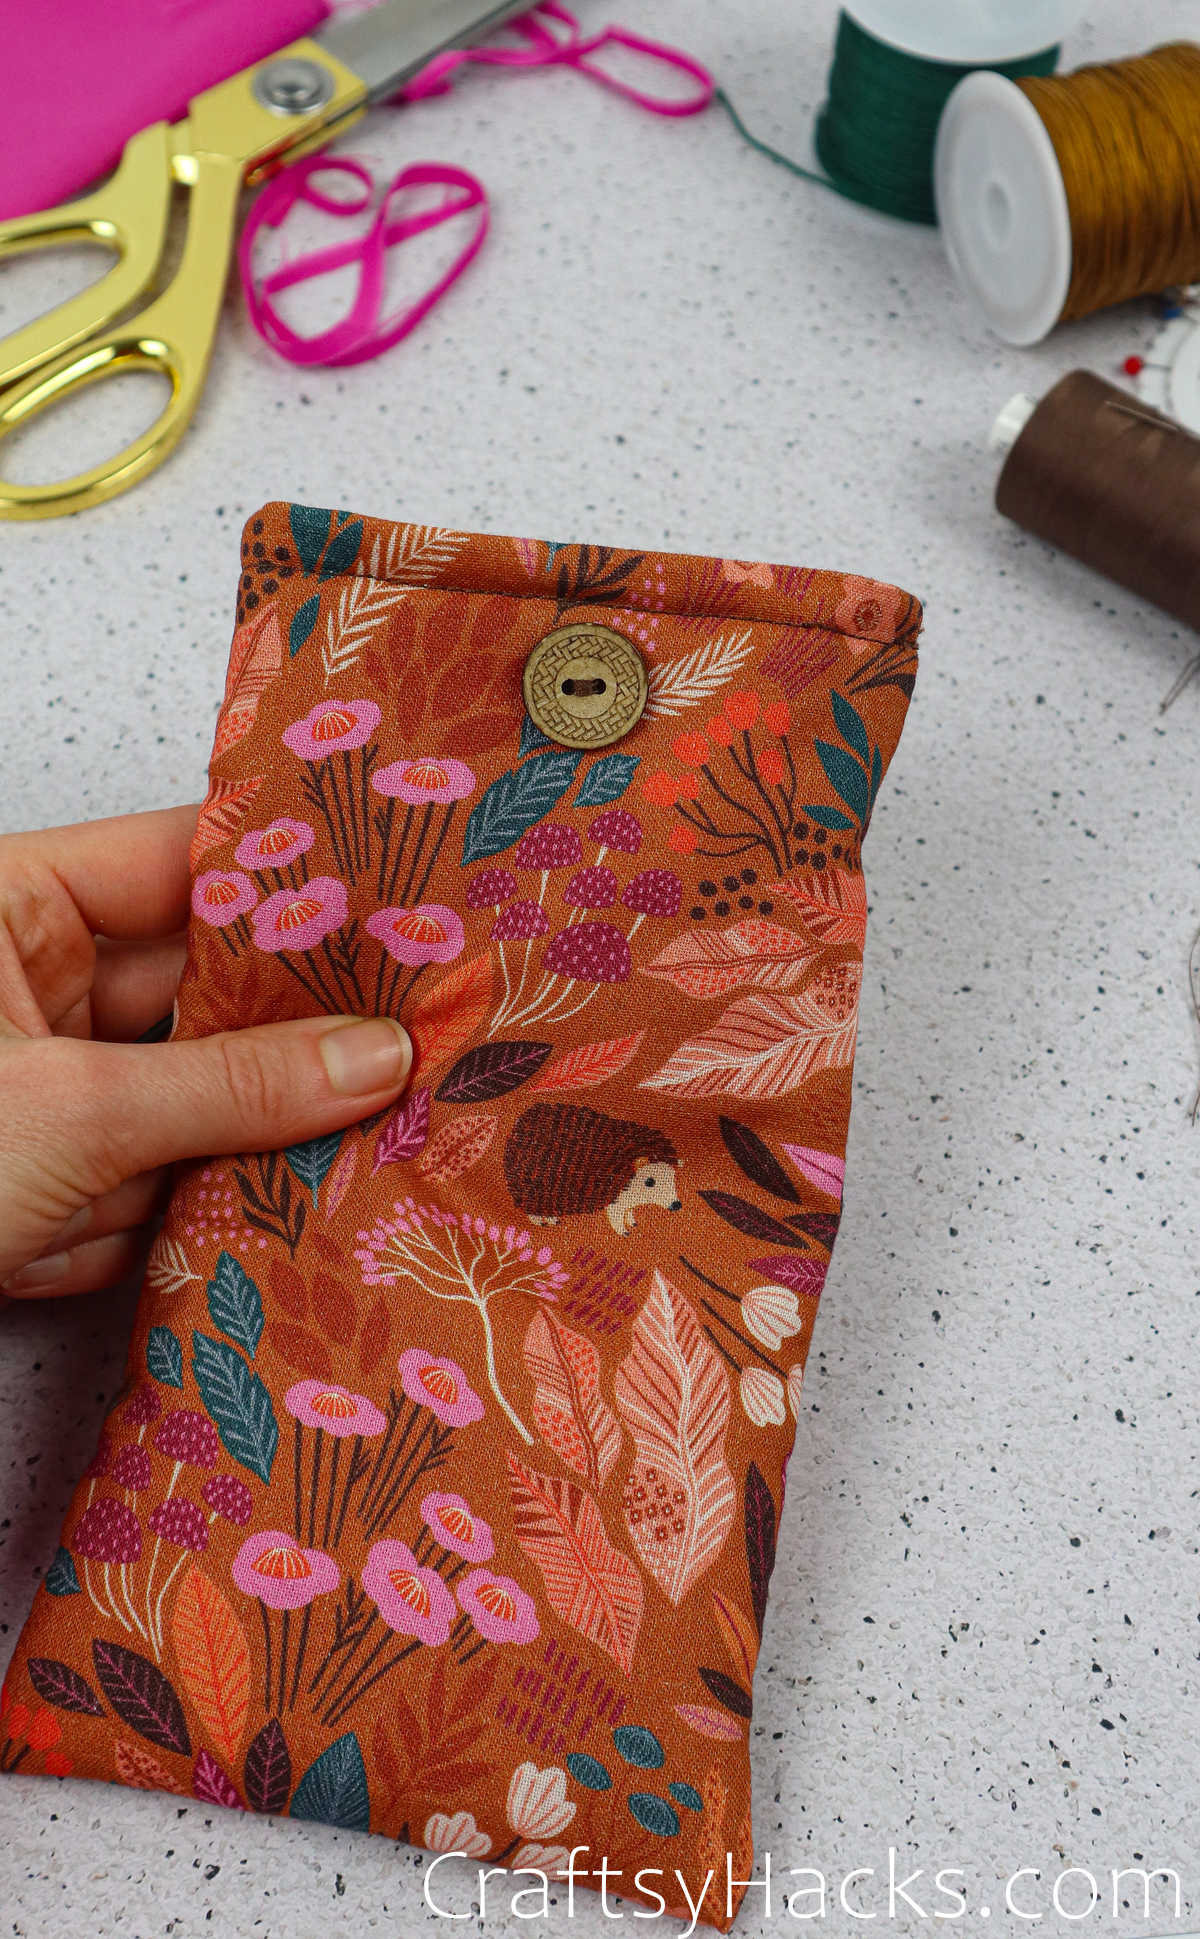
Sew on another button on the other side, too.

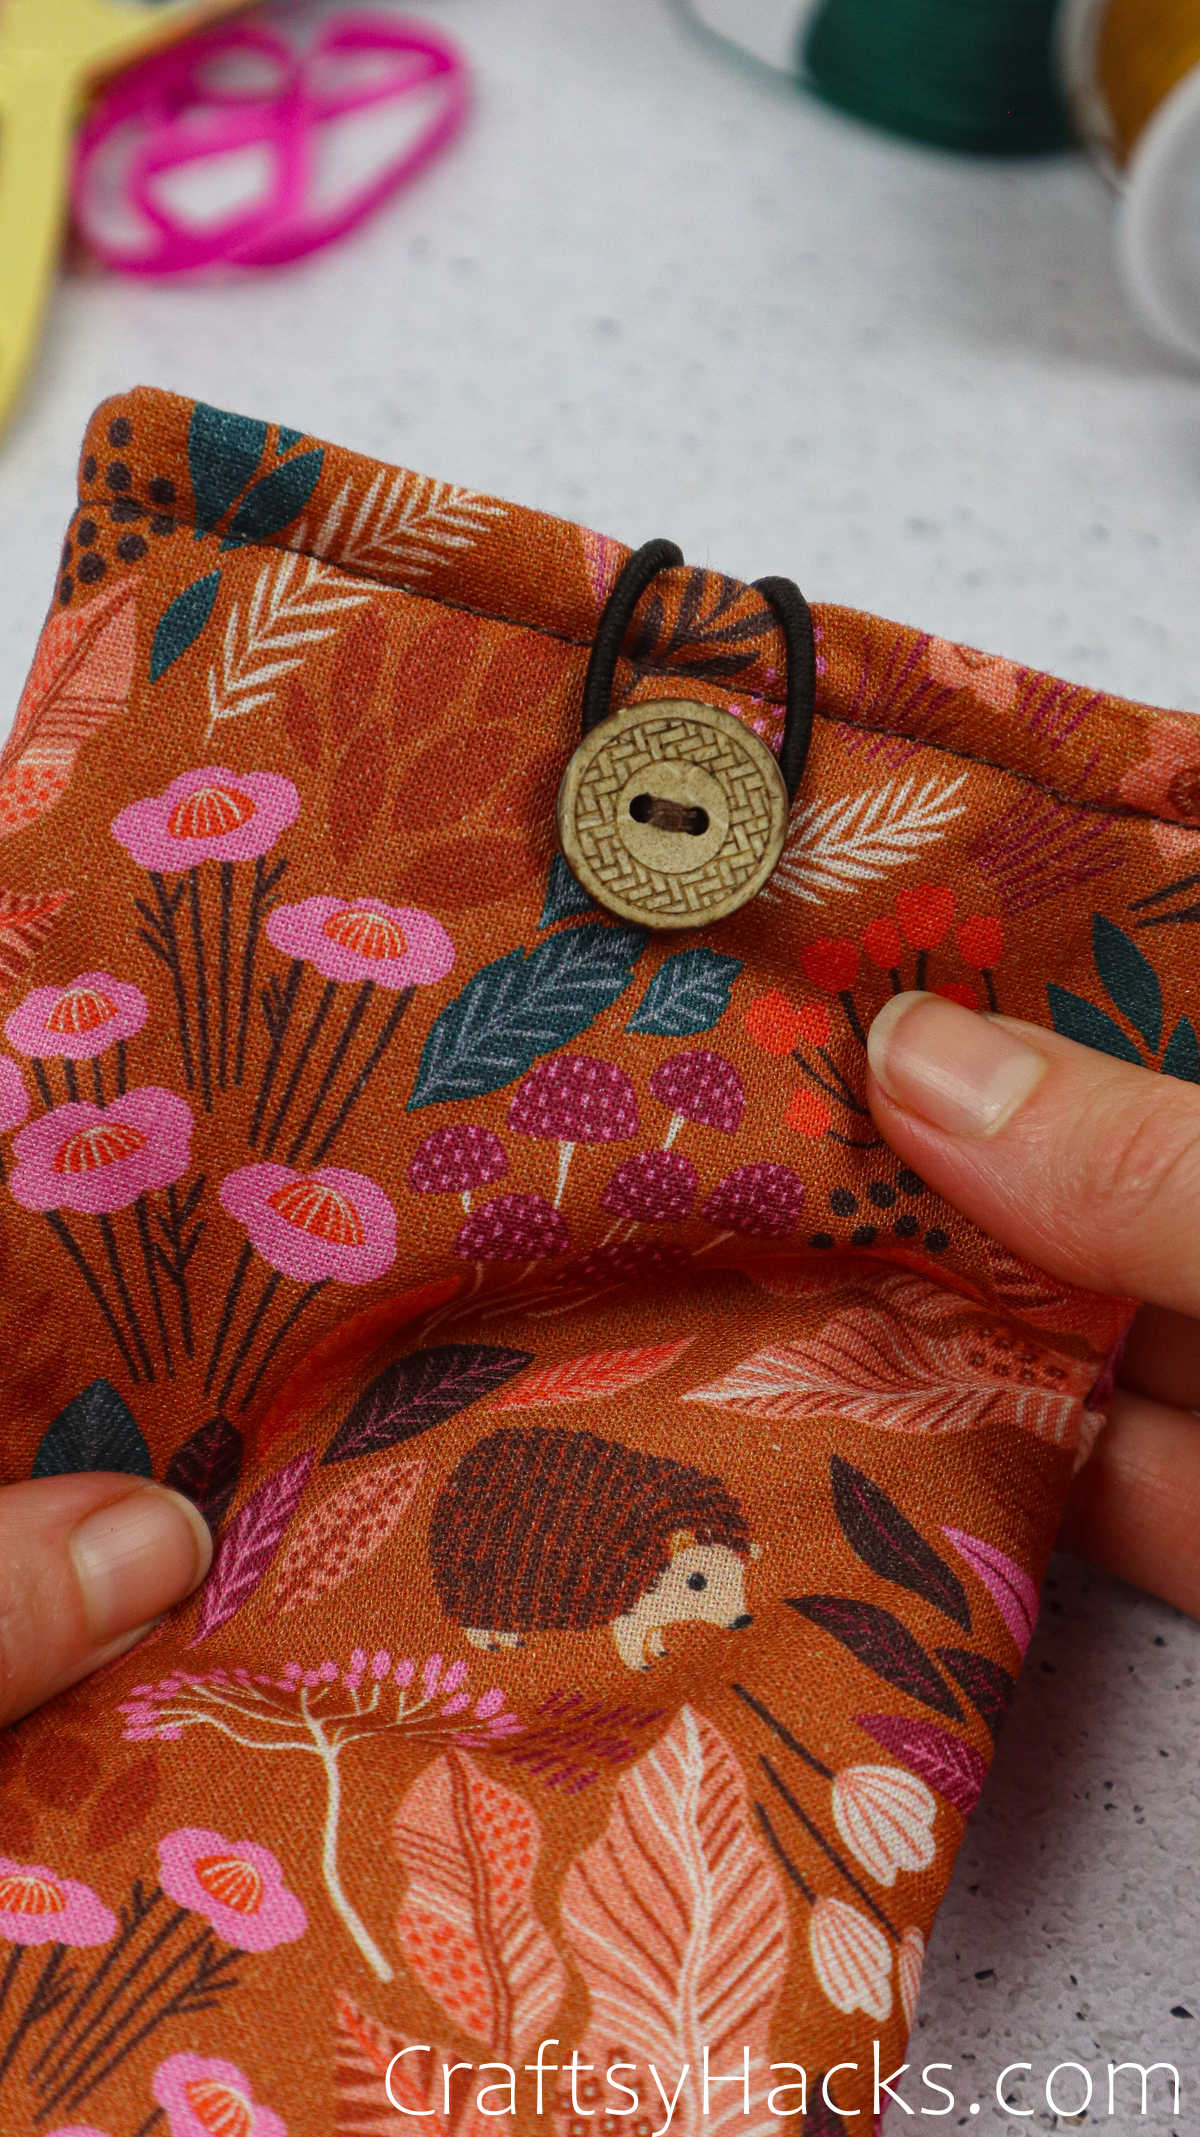
Now, just grab an elastic band and secure it onto one of the buttons on one side by pulling it tight around the button.
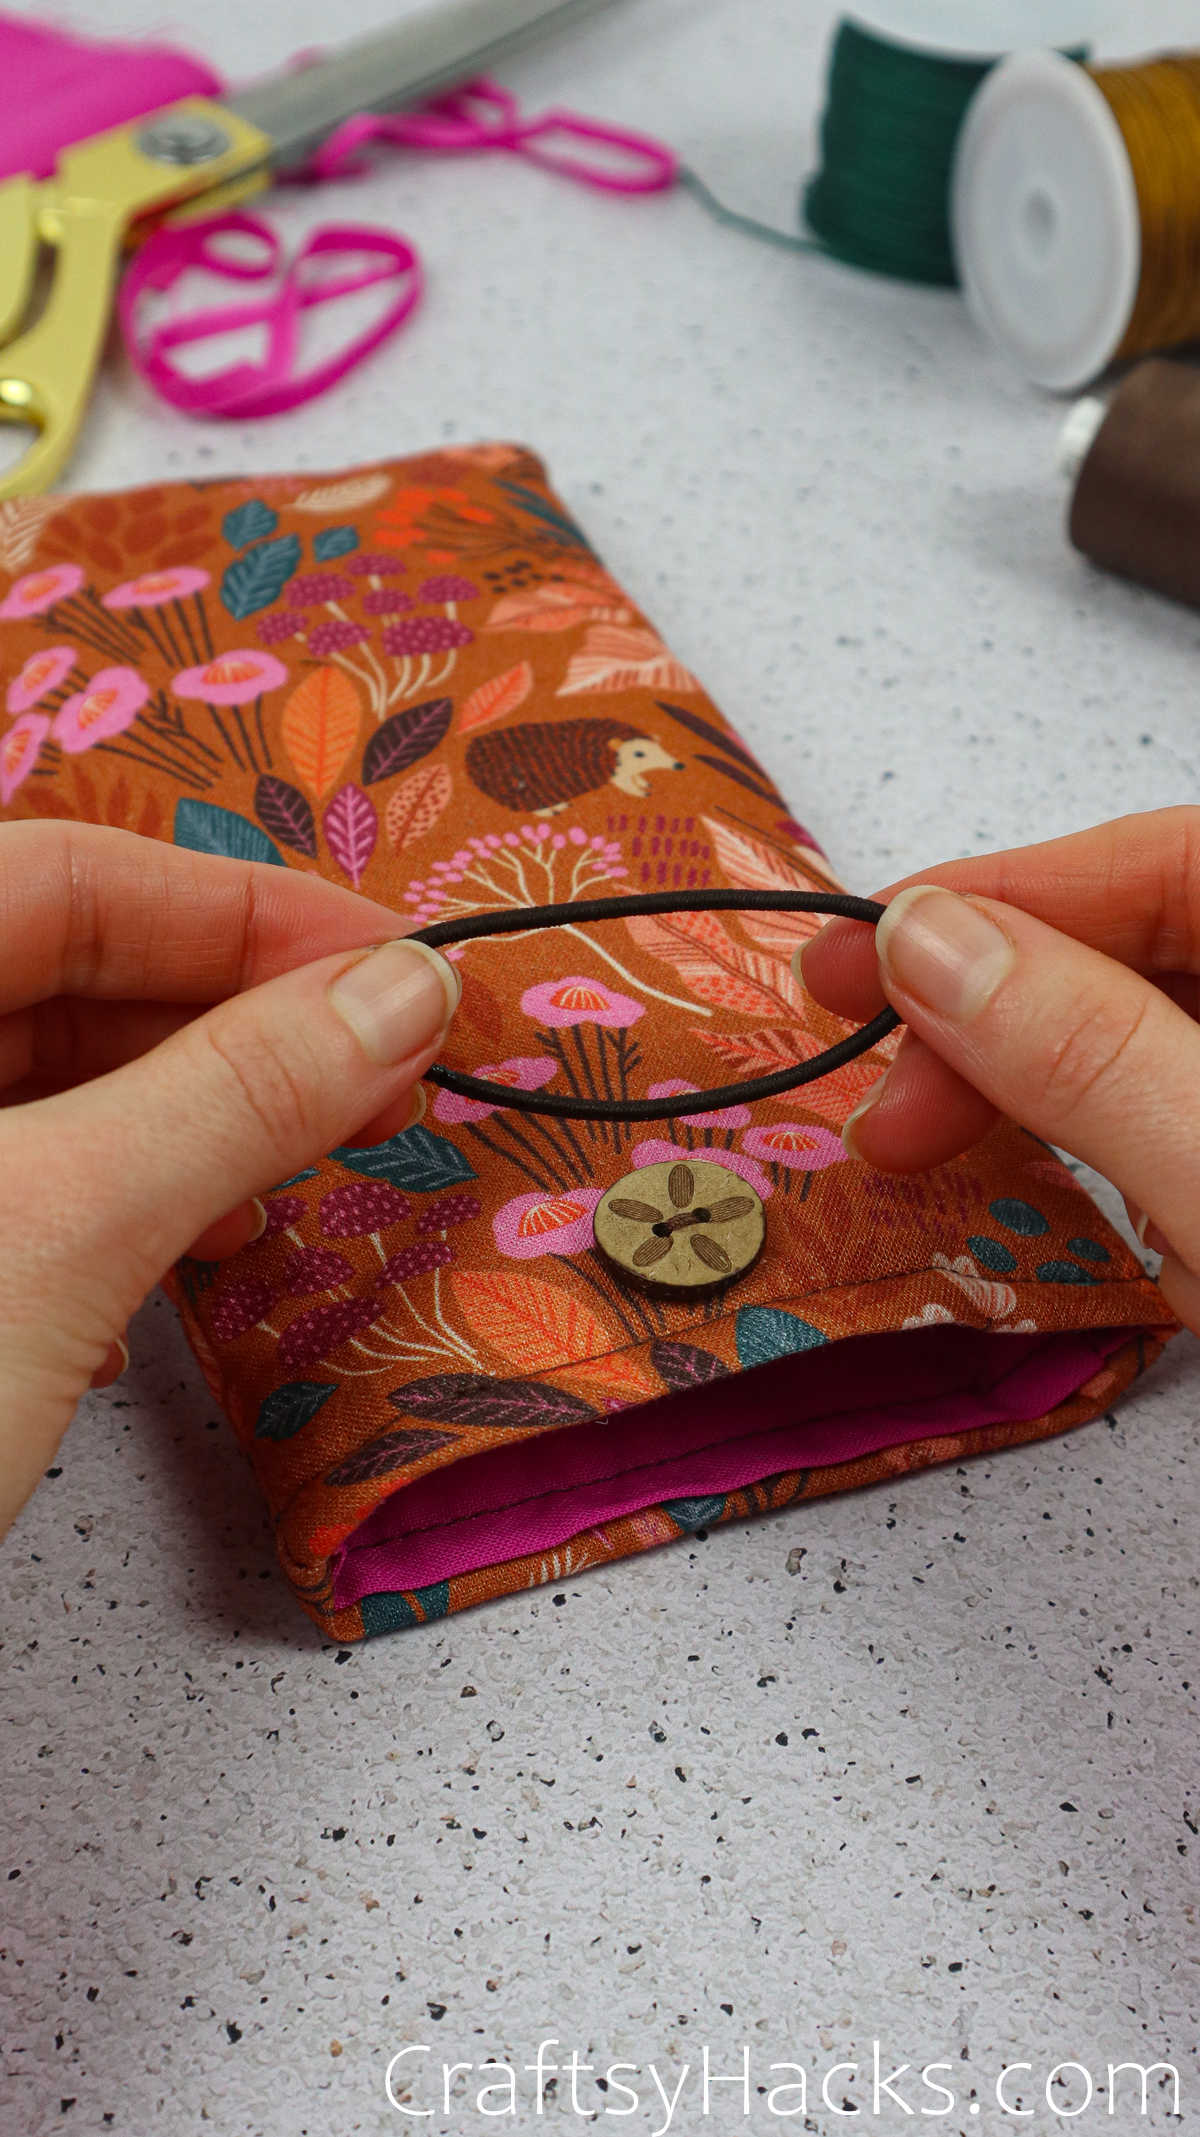
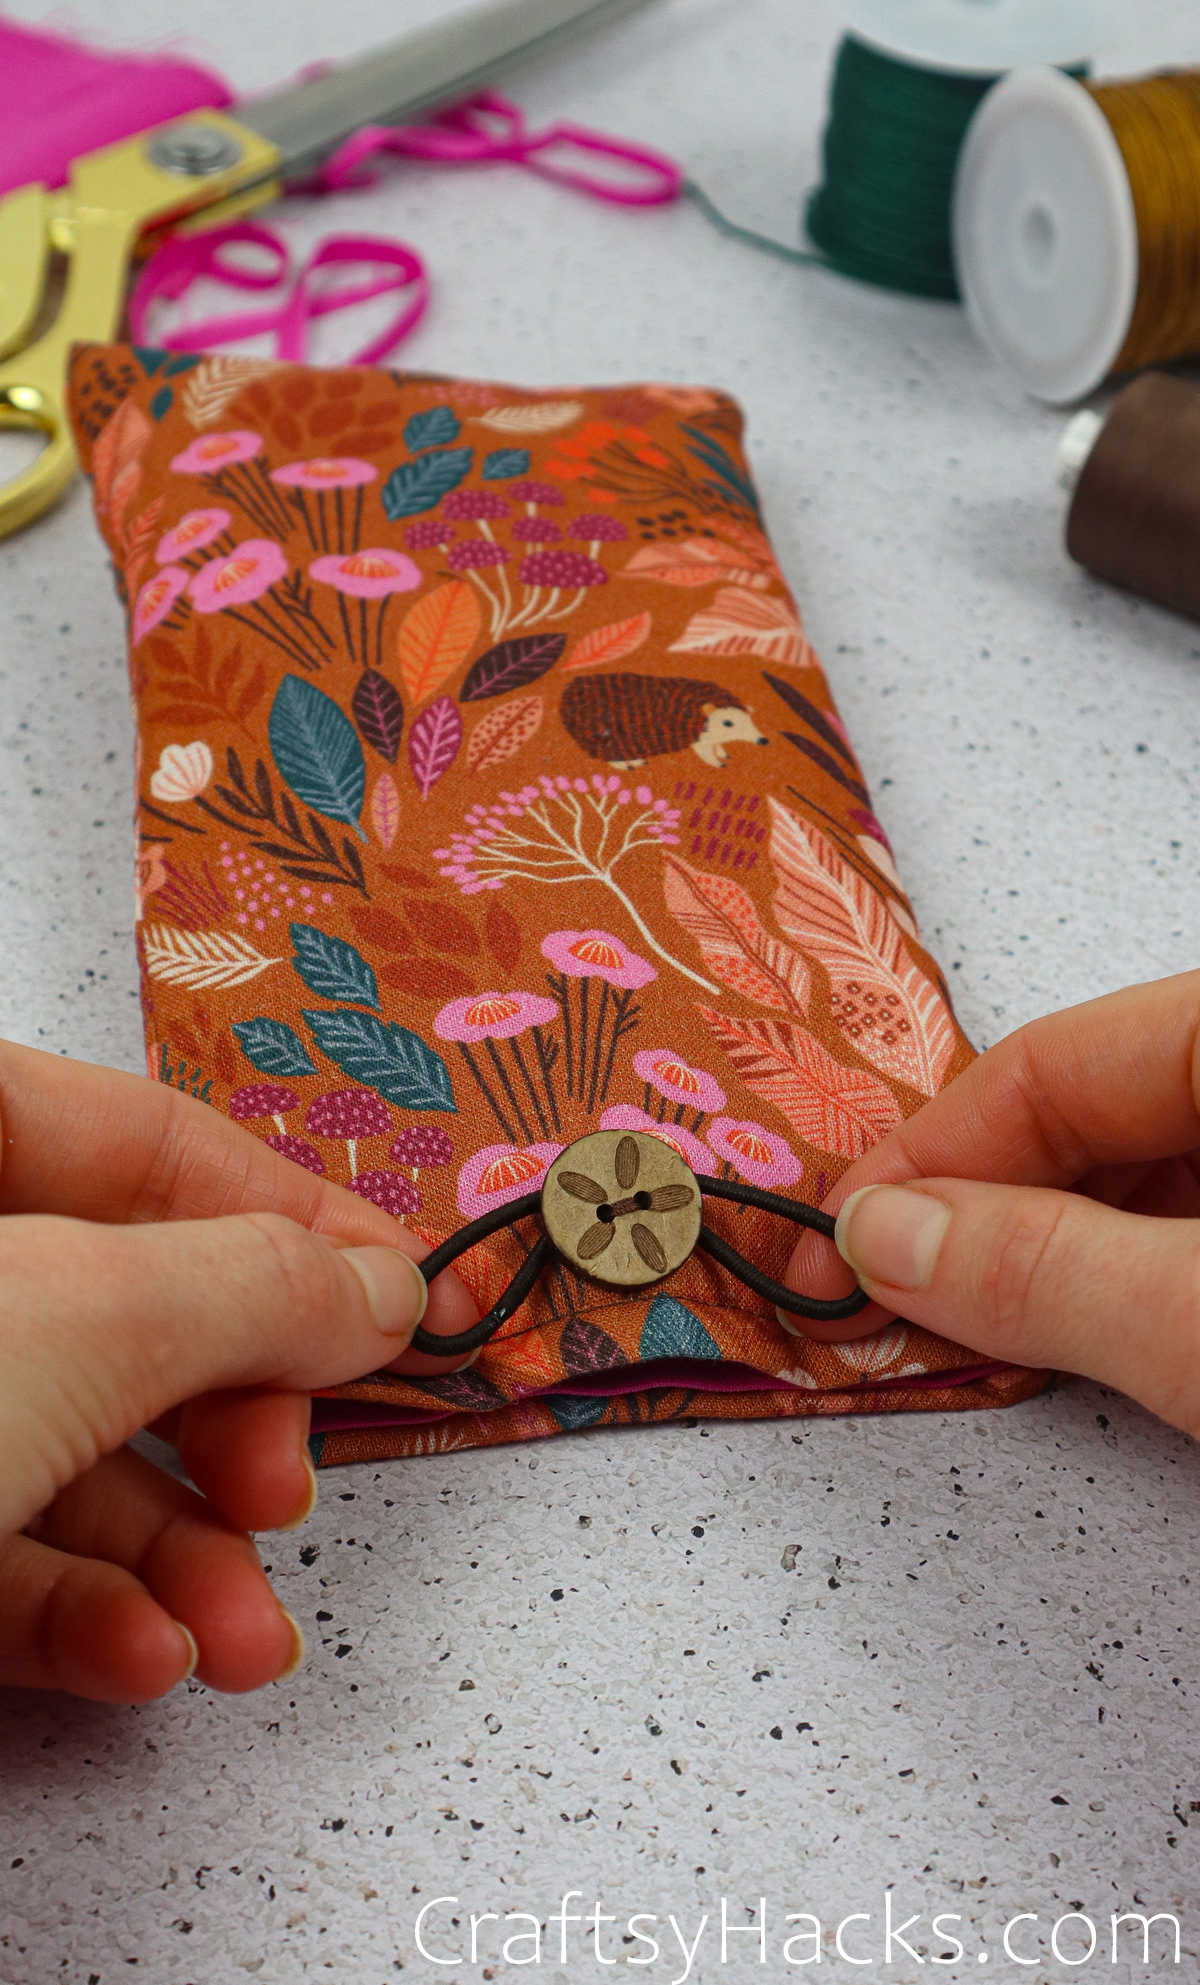
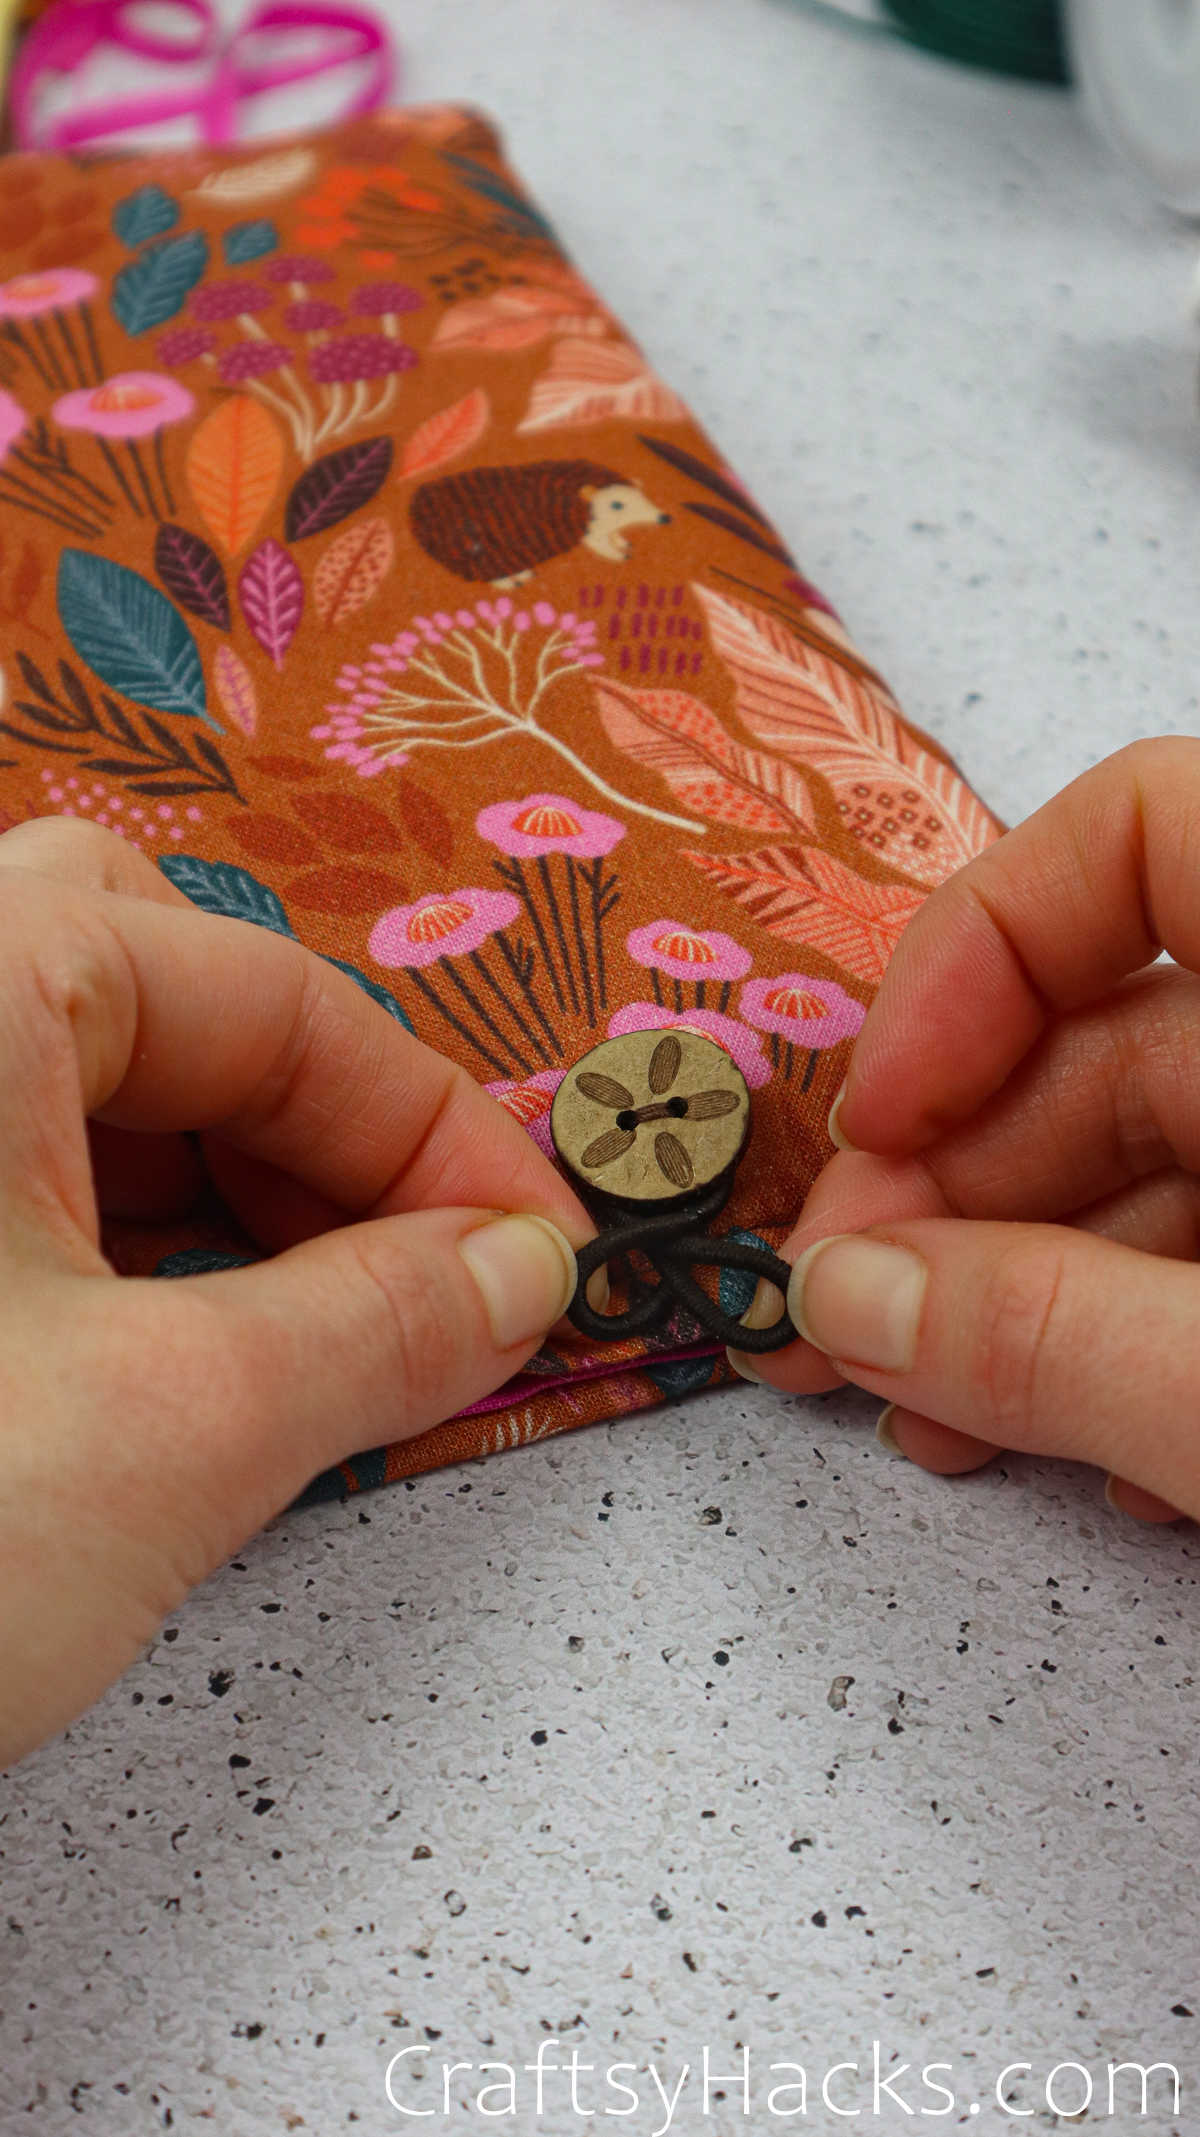
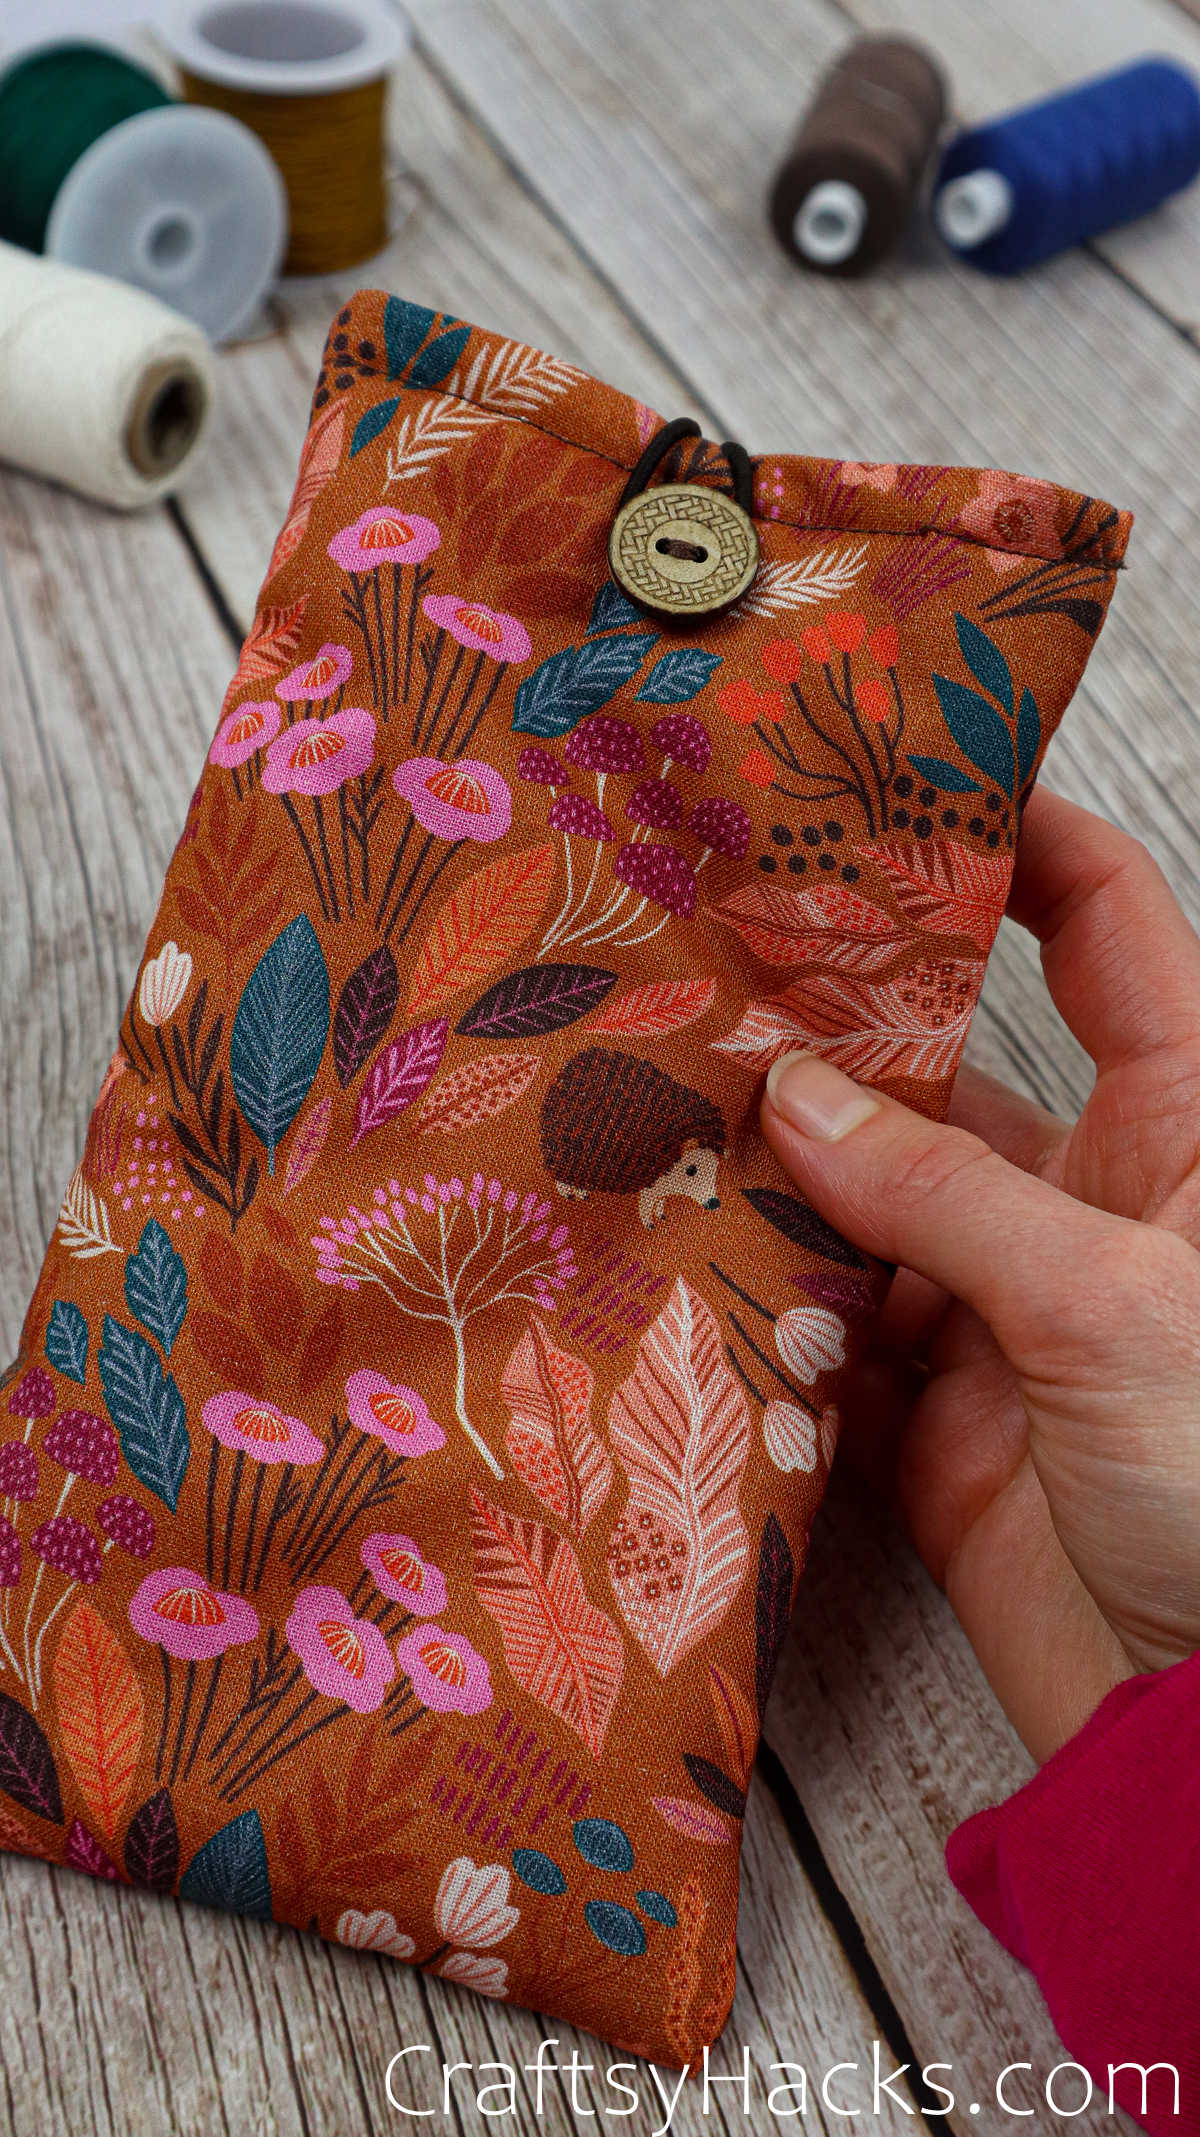
Then just pull it over to the other button on the other side to close the pouch, and you’re all done!
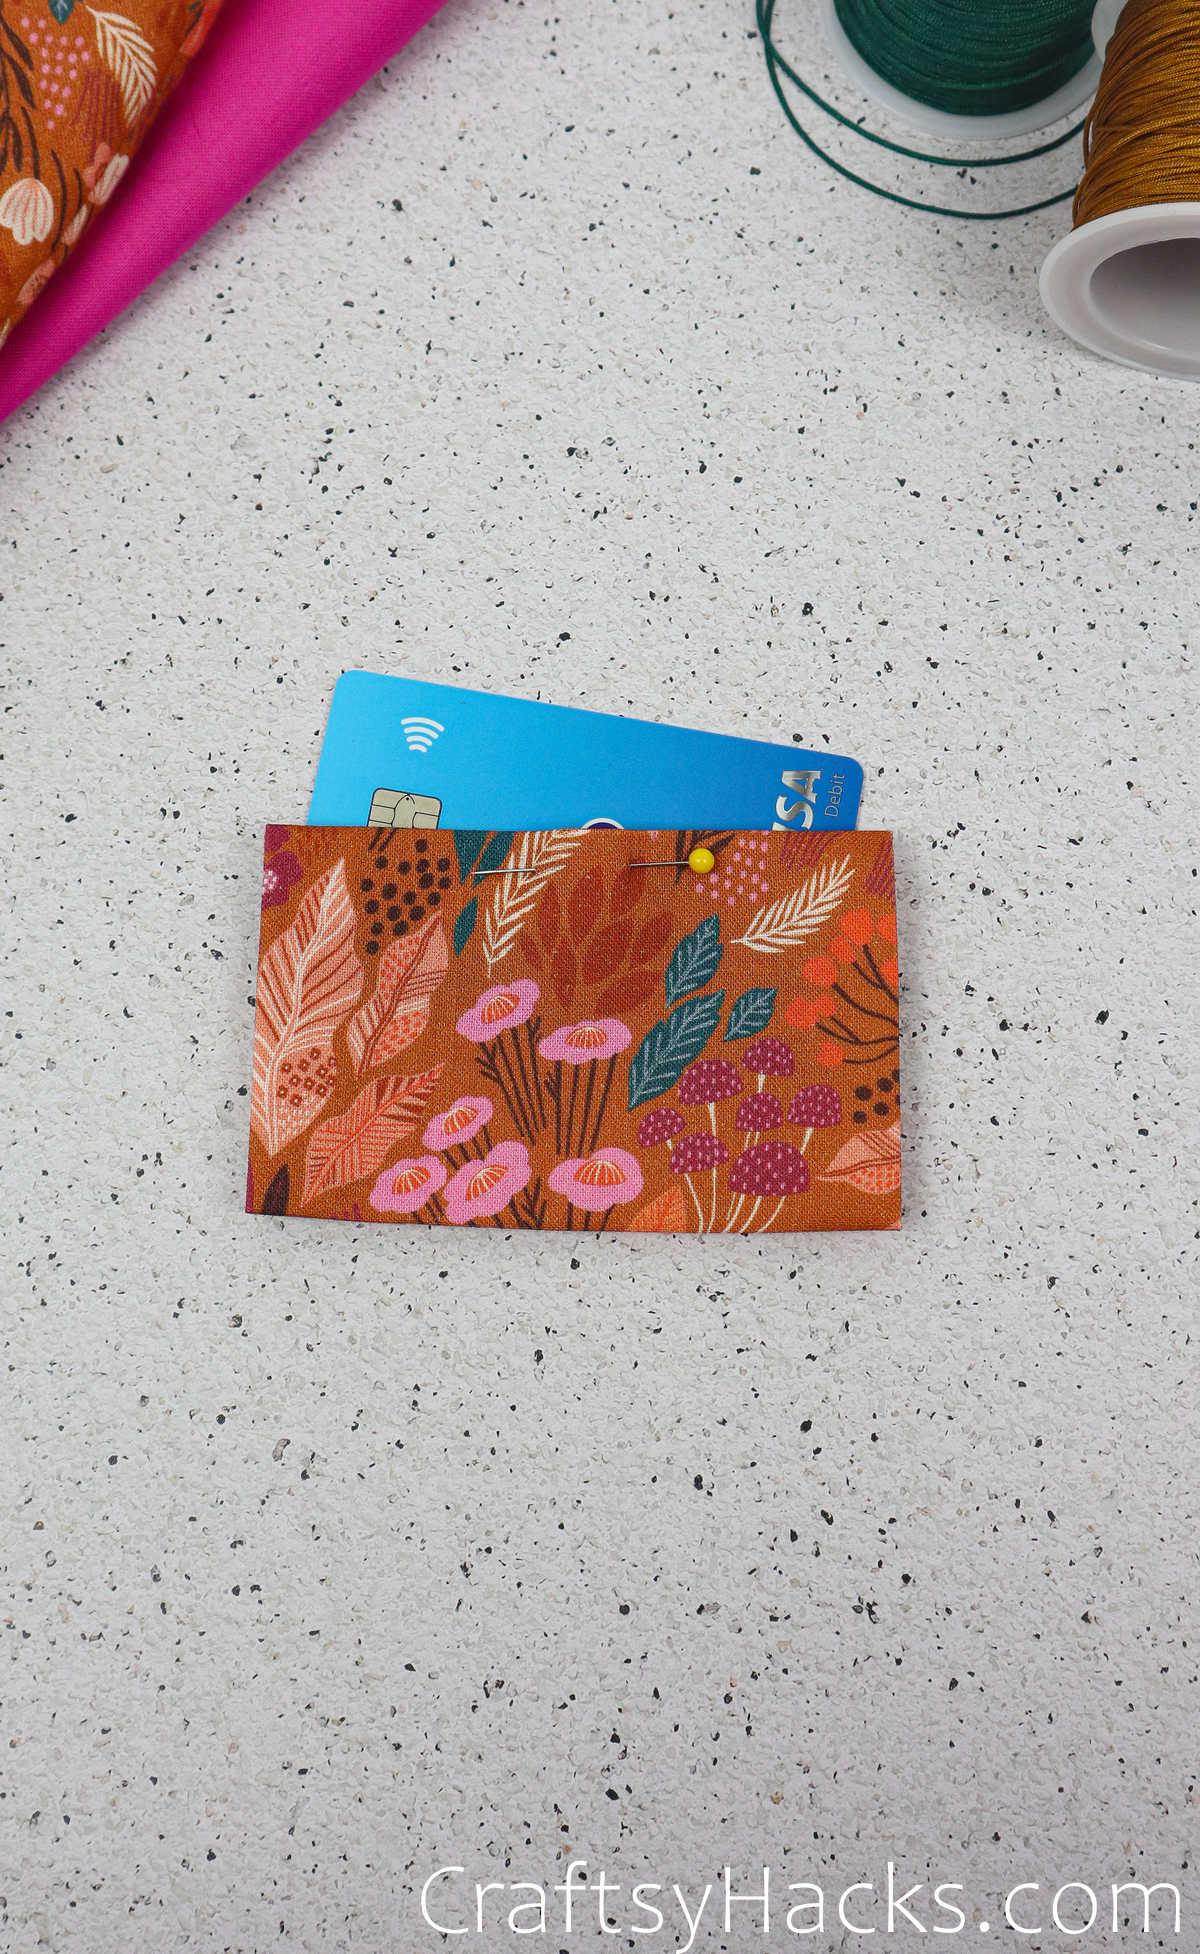
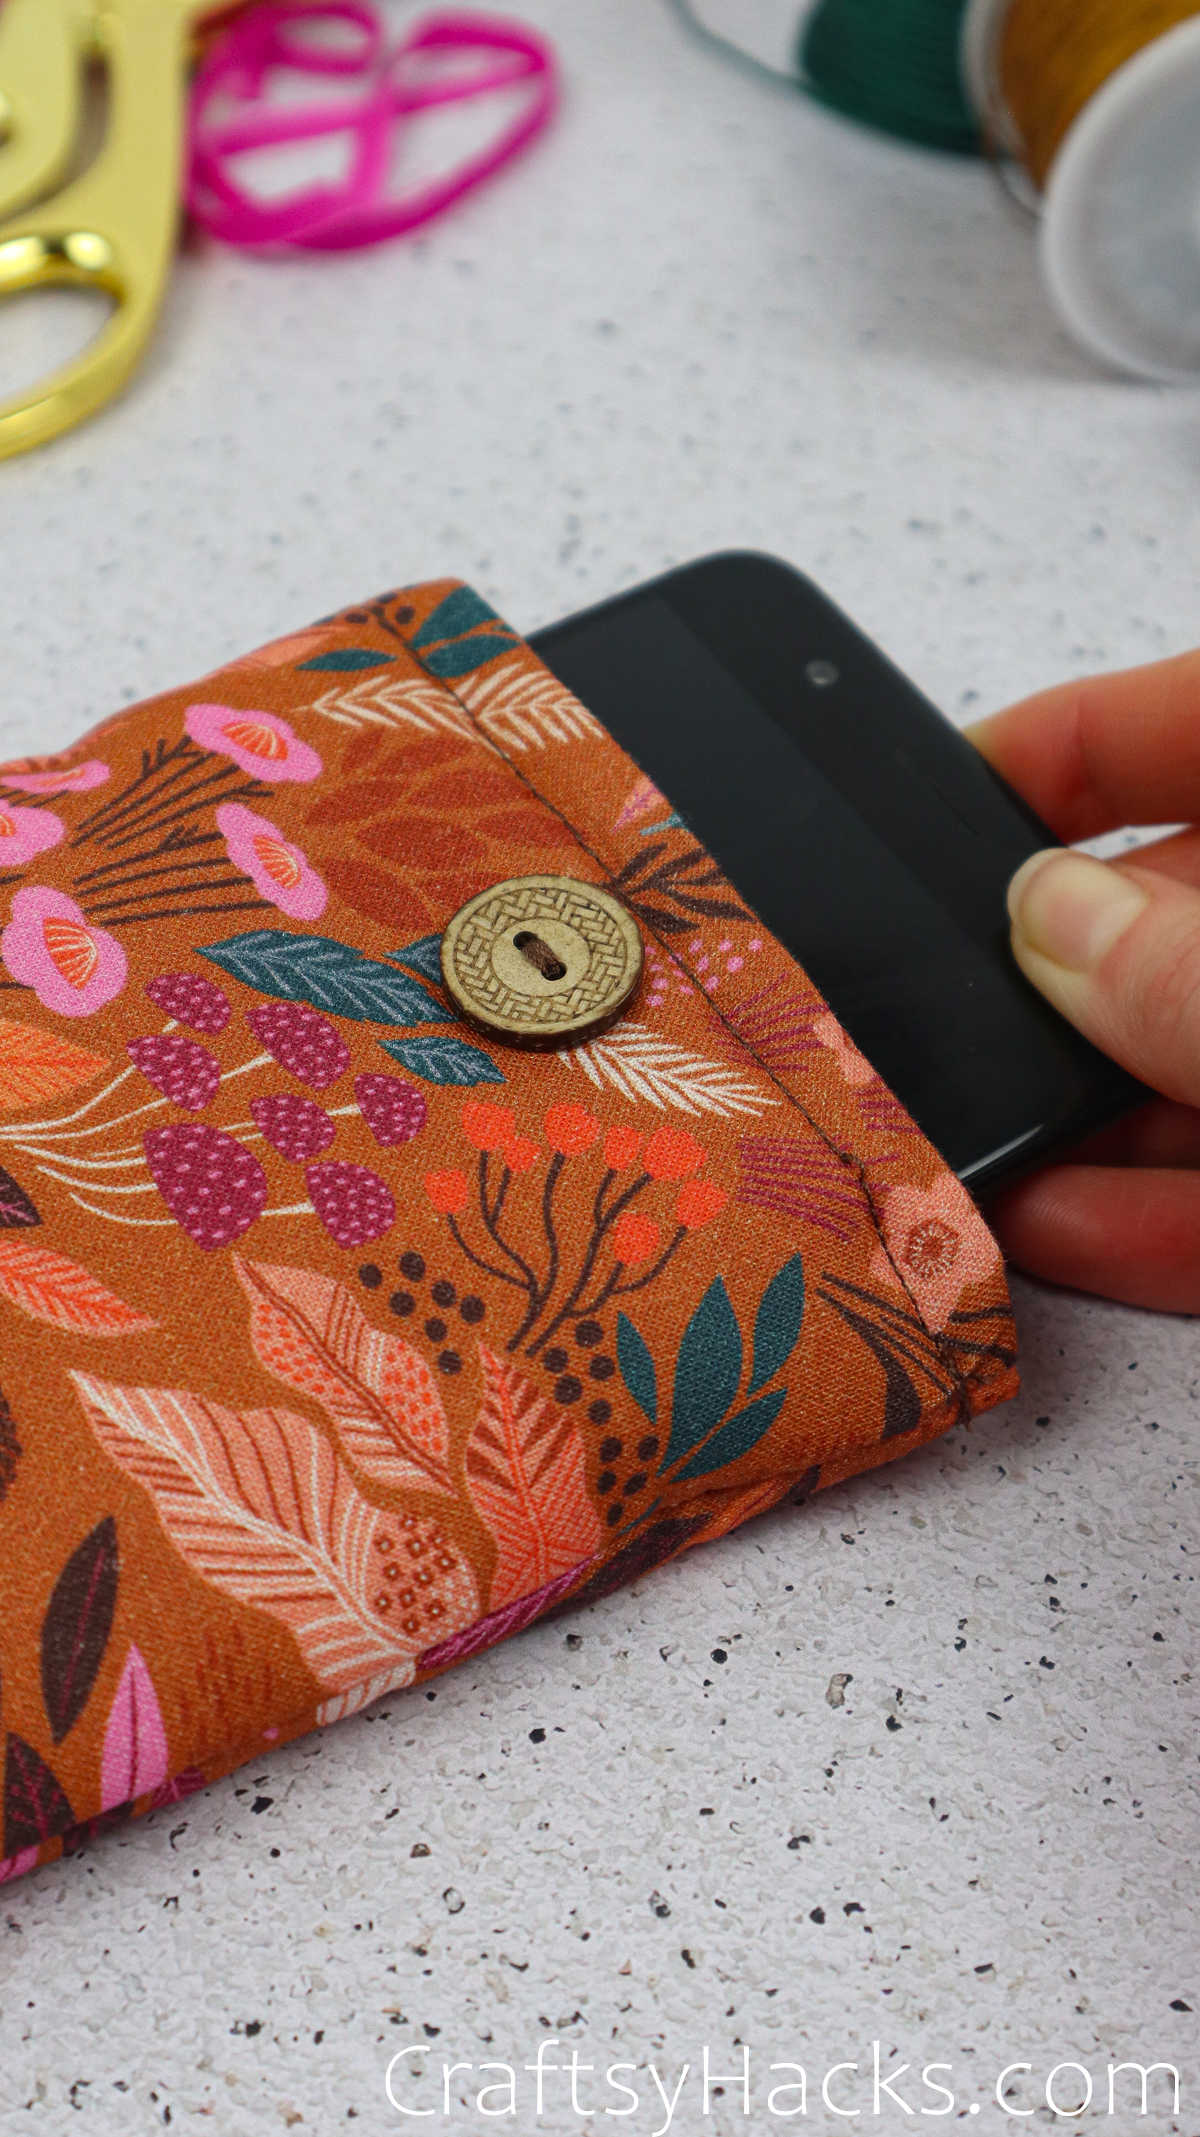
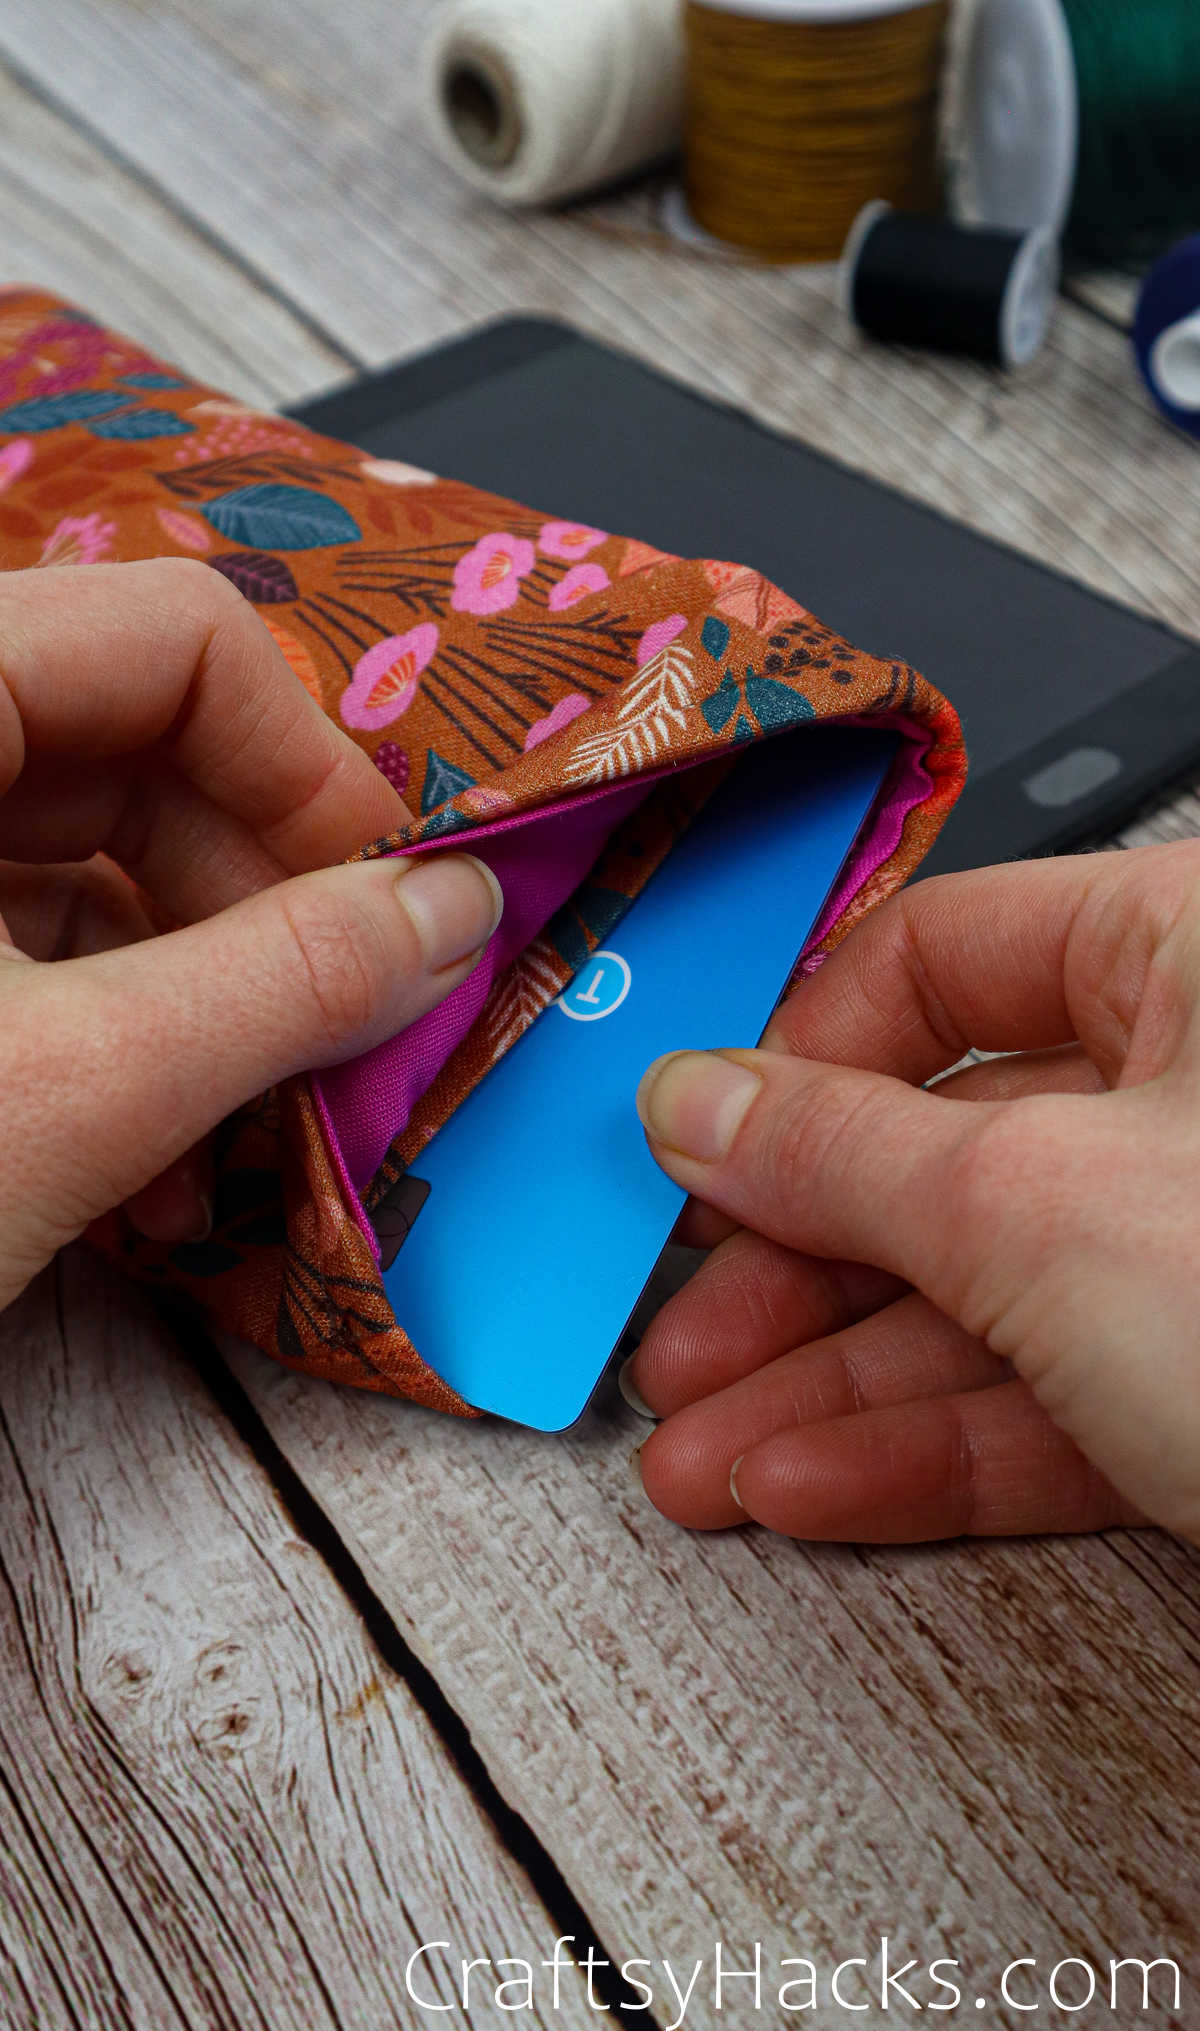
Go on and slip your phone inside to check if it fits snug. You can use the pocket inside to store your cards and a little money, too.

Other Crafts You Might Like
- 47 Fun Crafts for Adults
- 47 DIY Fabric Crafts
- DIY Hair Bows
- 47 DIY Projects
- 47 Easy Sewing Projects
- How to Make a Scrunchie
- 47 Easy Sewing Gifts
DIY Phone Case Out of Fabric
Video Tutorial
Equipment
- Scissors
- Thread and Needle
- Measure tape
- Sewing pins
Materials
- Cotton Fabric 16″x 5.5″ front
- 1 oz Wadding Piece 15″x 5.5″
- Cotton Fabric 16″x 5.5″ lining
- Cotton Fabric for a Pocket 3.5″ x 5″
- 2 x Buttons
- Elastic Hair Band
Instructions
- Gather all your supplies to get started on this project.
- The first step is to line your wadding over your printed fabric. Make sure that there is a half inch gap on both the bottom and top. Fold it in half and secure it with sewing pins.
- Stitch both sides, leaving a quarter inch gap as seam allowance. Turn the fabric right side out and set aside for now.
- To make the pocket, place it over your lining fabric. There should be a 1.5” gap from the top and equal gaps on either side. Stick a sewing pin on the top to denote that it is the top side. Sew the other three sides onto the lining.
- Next, fold the lining fabric in half and secure both the left and right sides with sewing pins, about a quarter inch from the edge. Sew along both these sides and then cut out the excess fabric with a pair of cloth scissors.
- Now take your lining with the pocket inside and slip it into the printed fabric. When you’re done smoothing out the lining into the fabric, you should find the wadding between the two fabrics.
- Fold the printed fabric inward over the wadding to cover it, and fold the lining, too, and align the ends of both. Secure with a pin before sewing around the mouth of the pouch.
- Next, sew two buttons, on either side of the pouch. Take an elastic and secure it to one of the buttons. Now simply tig the elastic over the pouch to the button on the other side and slip it in place to fasten it.


