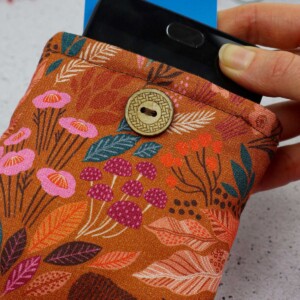
DIY Phone Case Out of Fabric
Beginning your sewing journey? Start with this simple DIY phone case out of fabric. A lovely project for your phone!
Video Tutorial
Equipment
- Scissors
- Thread and Needle
- Measure tape
- Sewing pins
Materials
- Cotton Fabric 16"x 5.5" front
- 1 oz Wadding Piece 15"x 5.5"
- Cotton Fabric 16"x 5.5" lining
- Cotton Fabric for a Pocket 3.5" x 5"
- 2 x Buttons
- Elastic Hair Band
Instructions
- Gather all your supplies to get started on this project.
- The first step is to line your wadding over your printed fabric. Make sure that there is a half inch gap on both the bottom and top. Fold it in half and secure it with sewing pins.
- Stitch both sides, leaving a quarter inch gap as seam allowance. Turn the fabric right side out and set aside for now.
- To make the pocket, place it over your lining fabric. There should be a 1.5” gap from the top and equal gaps on either side. Stick a sewing pin on the top to denote that it is the top side. Sew the other three sides onto the lining.
- Next, fold the lining fabric in half and secure both the left and right sides with sewing pins, about a quarter inch from the edge. Sew along both these sides and then cut out the excess fabric with a pair of cloth scissors.
- Now take your lining with the pocket inside and slip it into the printed fabric. When you’re done smoothing out the lining into the fabric, you should find the wadding between the two fabrics.
- Fold the printed fabric inward over the wadding to cover it, and fold the lining, too, and align the ends of both. Secure with a pin before sewing around the mouth of the pouch.
- Next, sew two buttons, on either side of the pouch. Take an elastic and secure it to one of the buttons. Now simply tig the elastic over the pouch to the button on the other side and slip it in place to fasten it.
Tried this craft?Leave a comment below with your rating! I love the feedback and respond to every comment!