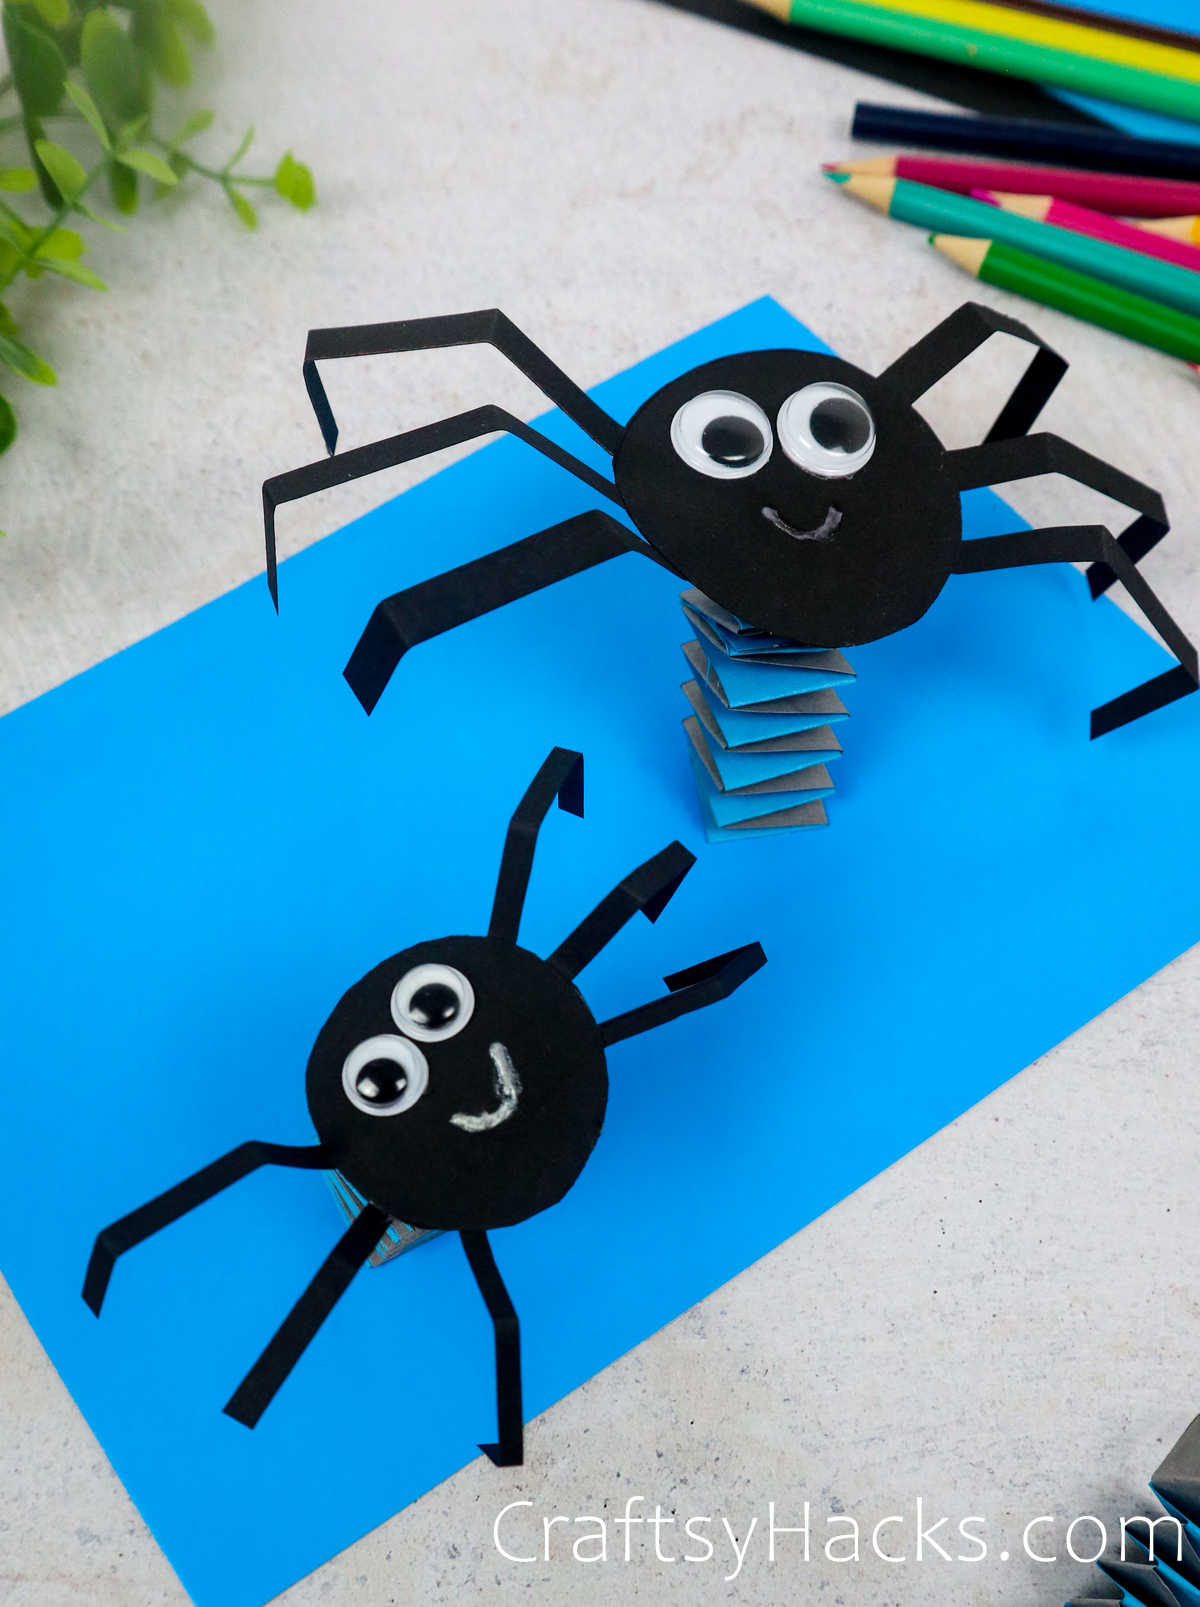
DIY Paper Spider (Step-by-Step)
This post may contain affiliate links: full affiliate disclosure.
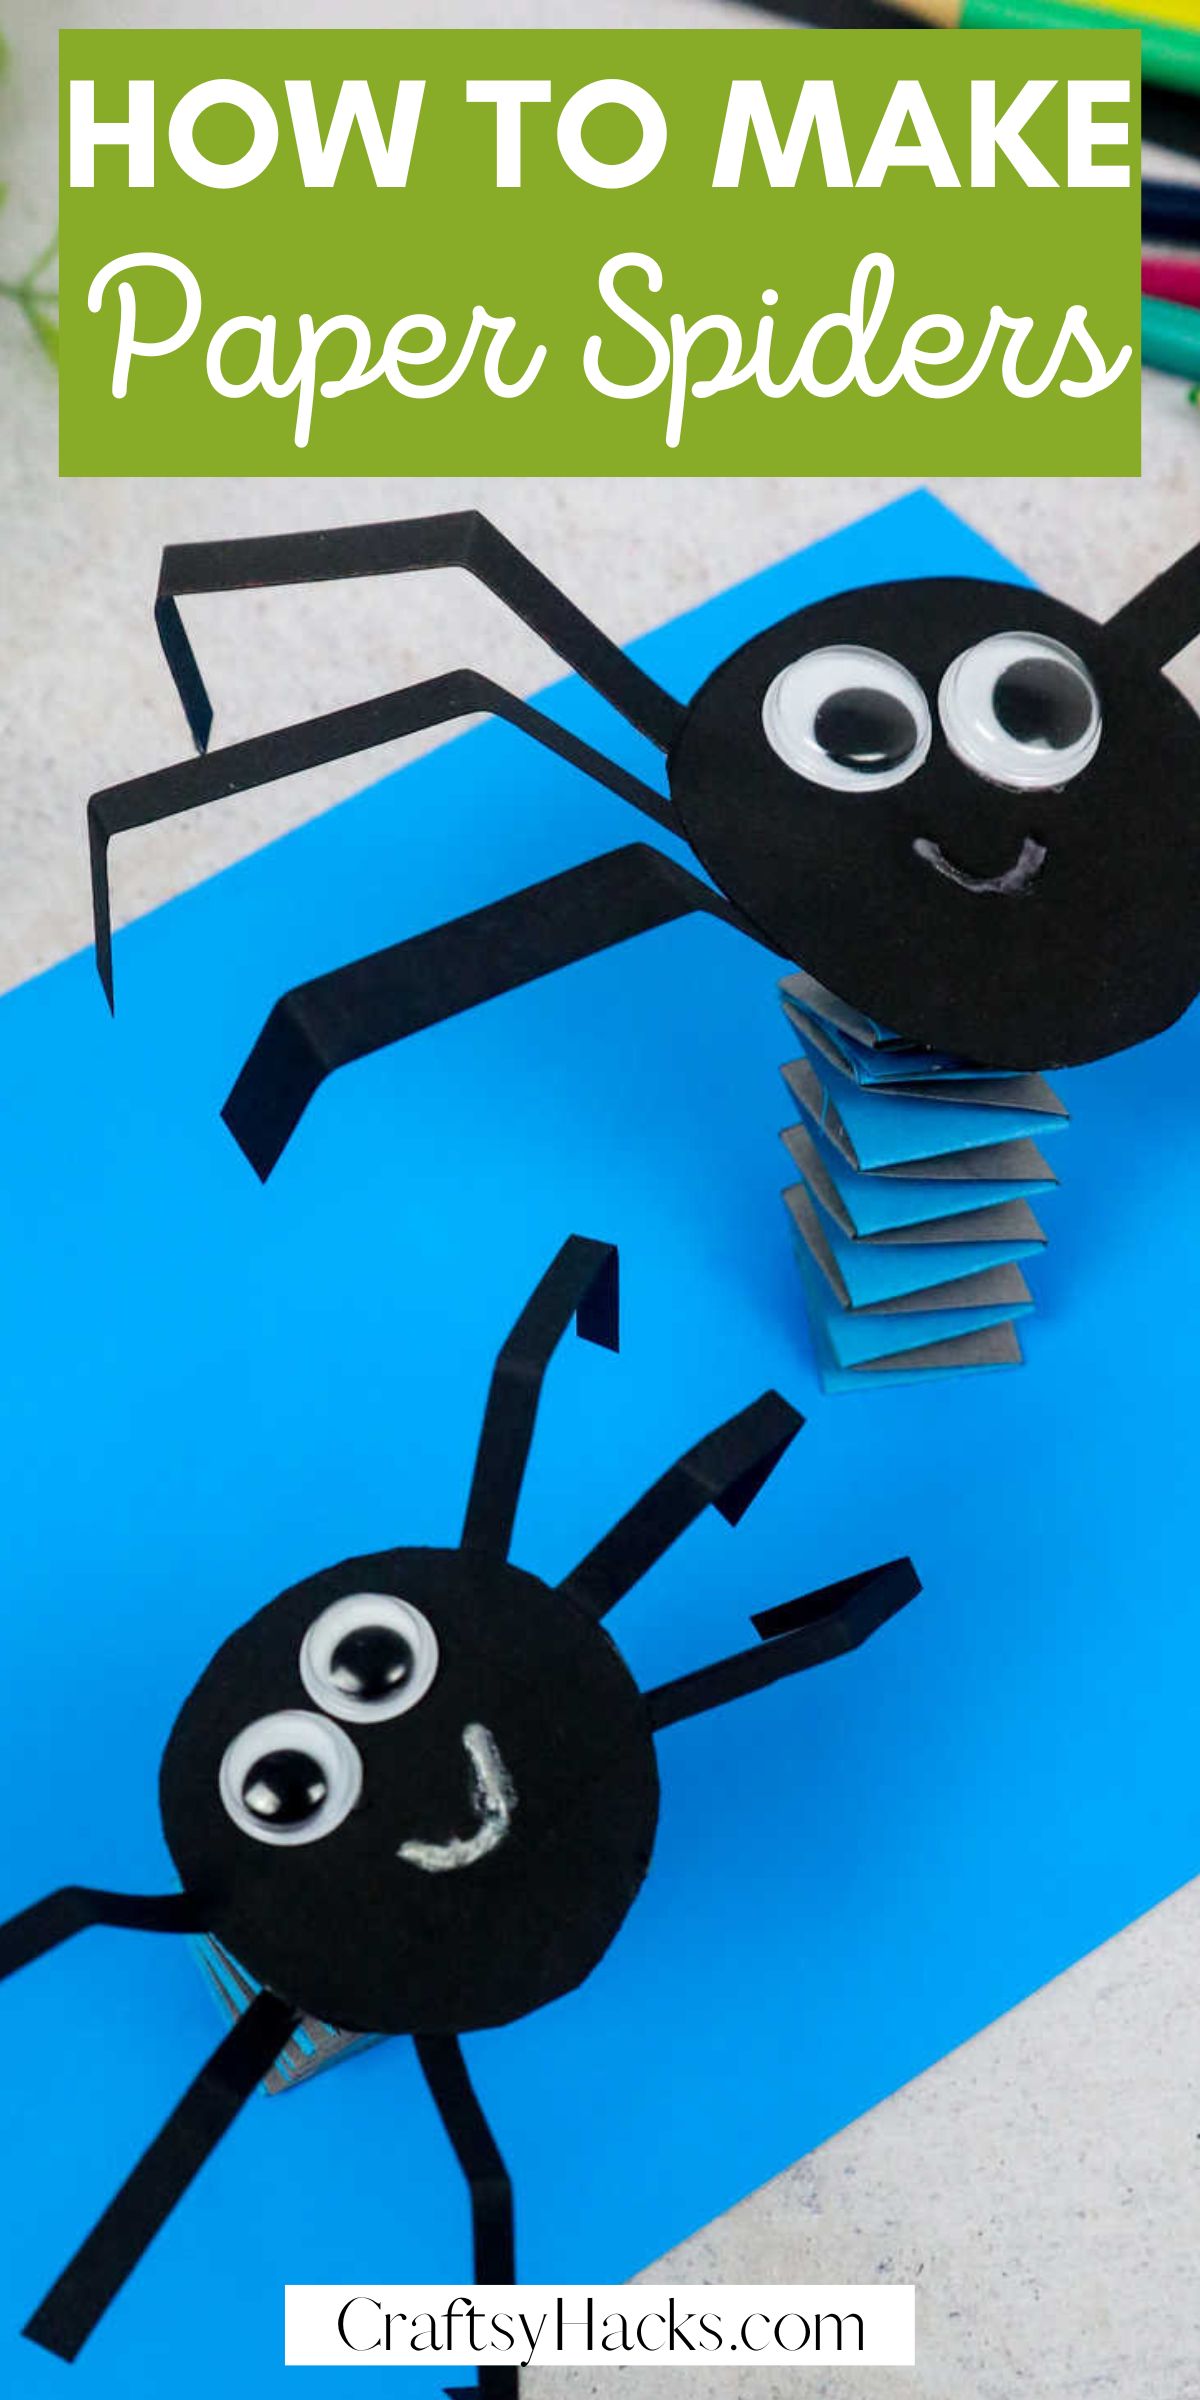
Are you looking for a fun craft with your kids on a rainy or quiet afternoon? Look no further–one of my favorites, my DIY paper spider, should do the trick for you and your family!
This craft is relatively easy to do with kids of any age–if they are a bit younger, you may have to guide them a bit more, but all children love the bouncing spider in the end!
What you’ll need is pretty simple–you may even have a lot at home already! The folding technique takes the most time, but the payoff is a lot of fun for your little ones.
If you have any issues, check out my YouTube page and, specifically, my video version–DIY Bouncy Spiders Out of Paper, to get the full scoop on the accordion fold and more.
When I first tried this, it also took me a minute to get the hang of the pattern, but it was so easy once I did!
Gather just what you need or duplicates of what’s called for below to make a whole family of bouncing spiders.
I hope you enjoy the craft with your family or bookmark it for a fun Halloween craft this year!
You could swap in another simple insect if you’re not into spiders. Let me know if you do, and I could see a ladybug, bumble bee, or even a butterfly relatively easily!
Supplies You’ll Need
- A4 construction paper sheets–these have a great array of colours
- wiggle eyes–a variety pack we can’t get enough of
- kid safe scissors
- ruler
- marker–my tried and true favorite one that is kid friendly too
- paper glue–a staple for any crafty crafter
- small paper cup or sippy cup (for tracing)

How to Make a DIY Spider
A tip before we start, the A4 paper will help the stability of the spiders and their bounce without as much wear and tear as time goes by.
Also, although it may be tempting to your kids to immediately test out the wiggly walkers after completing the project, have them wait!
The spiders do their best once entirely dried and appropriately attached to the page! Now that we’ve collected the goods and tips for this project, it is time to make our wiggly creepy crawlers!
Step 1
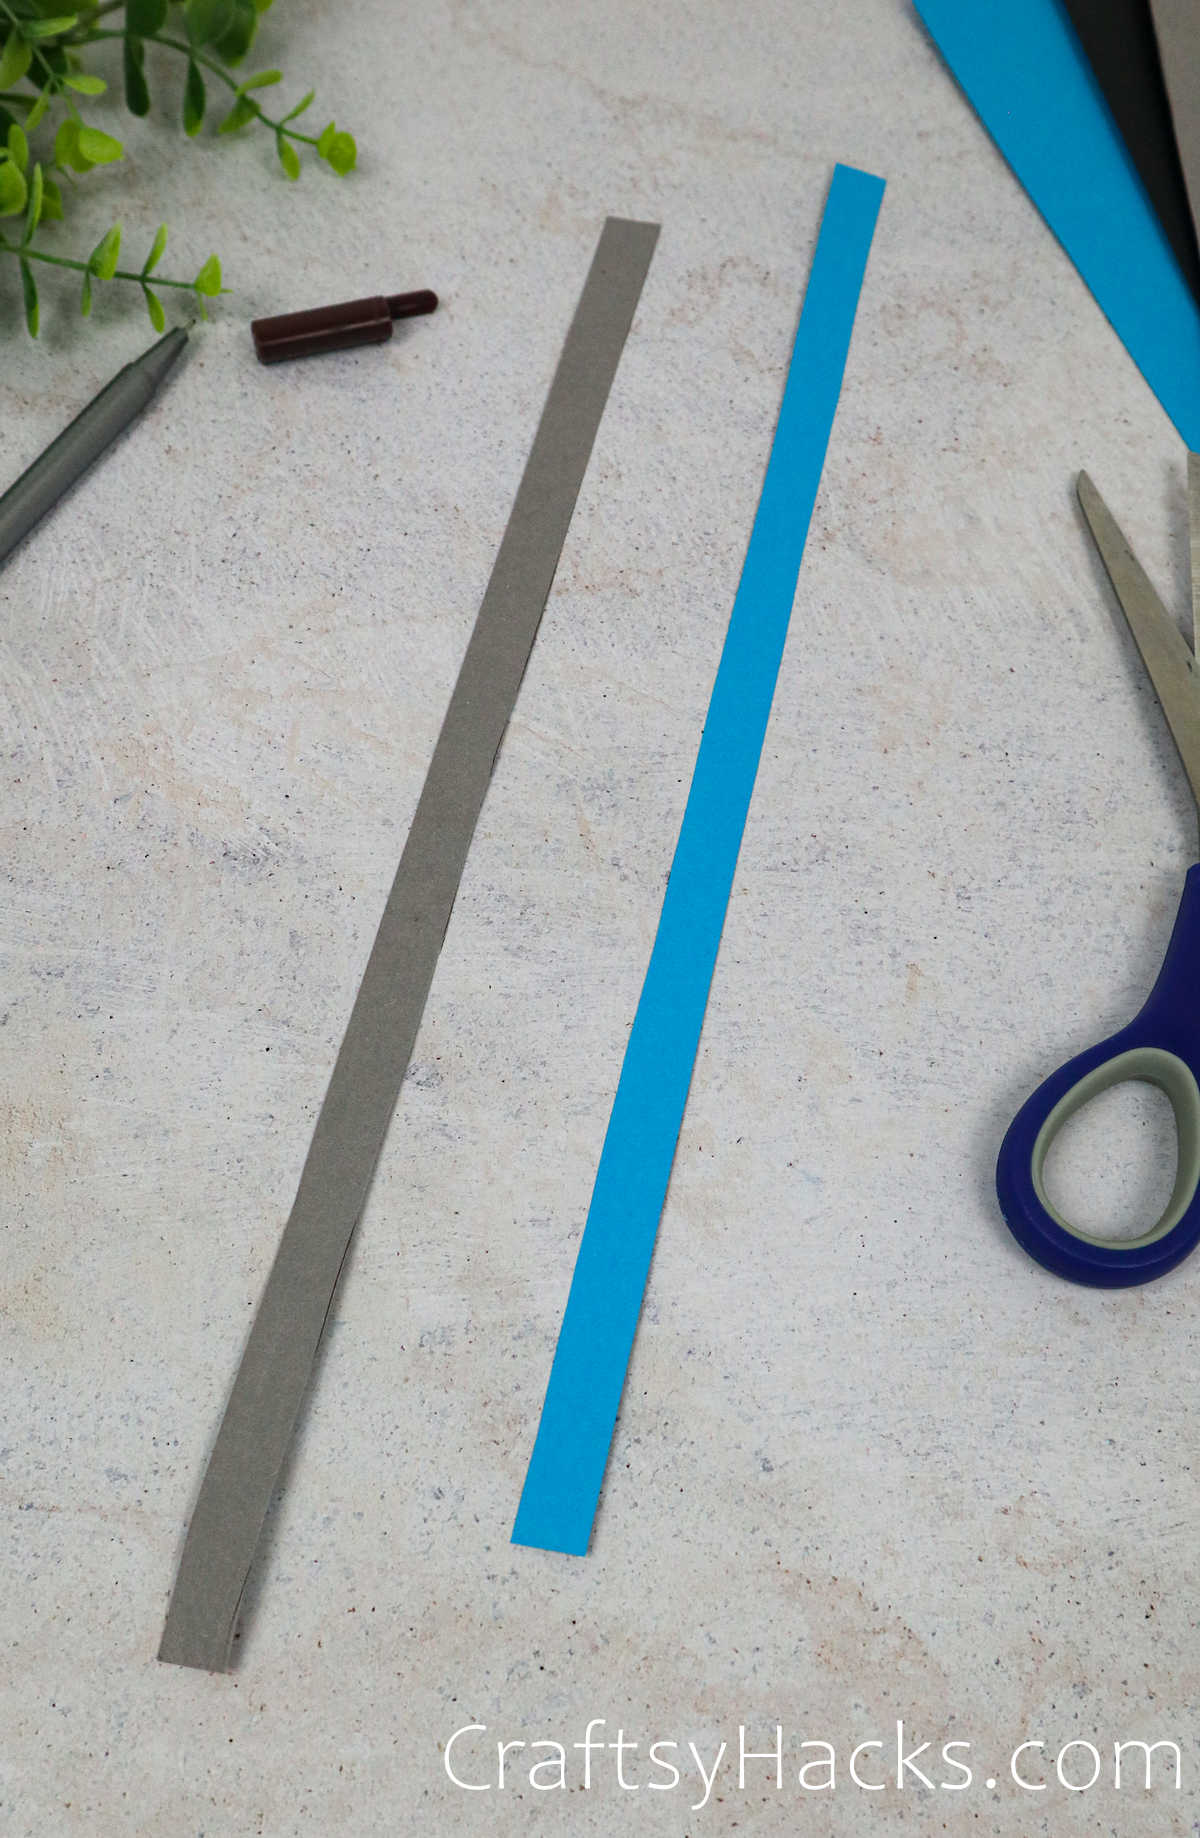
The first thing to do is to cut out two strips of 10” by ¾ – the strips can be different colours and any of your choosing.
I decided to go with some pretty neutral shades so it blends in with the body and makes the spider’s bounce more pronounced.
Depending on the age of the child participating, they may need assistance with the measurements and cutting portion.
These strips will become the springy part of the project, so the closer this is to the recommended size, the better.
Step 2
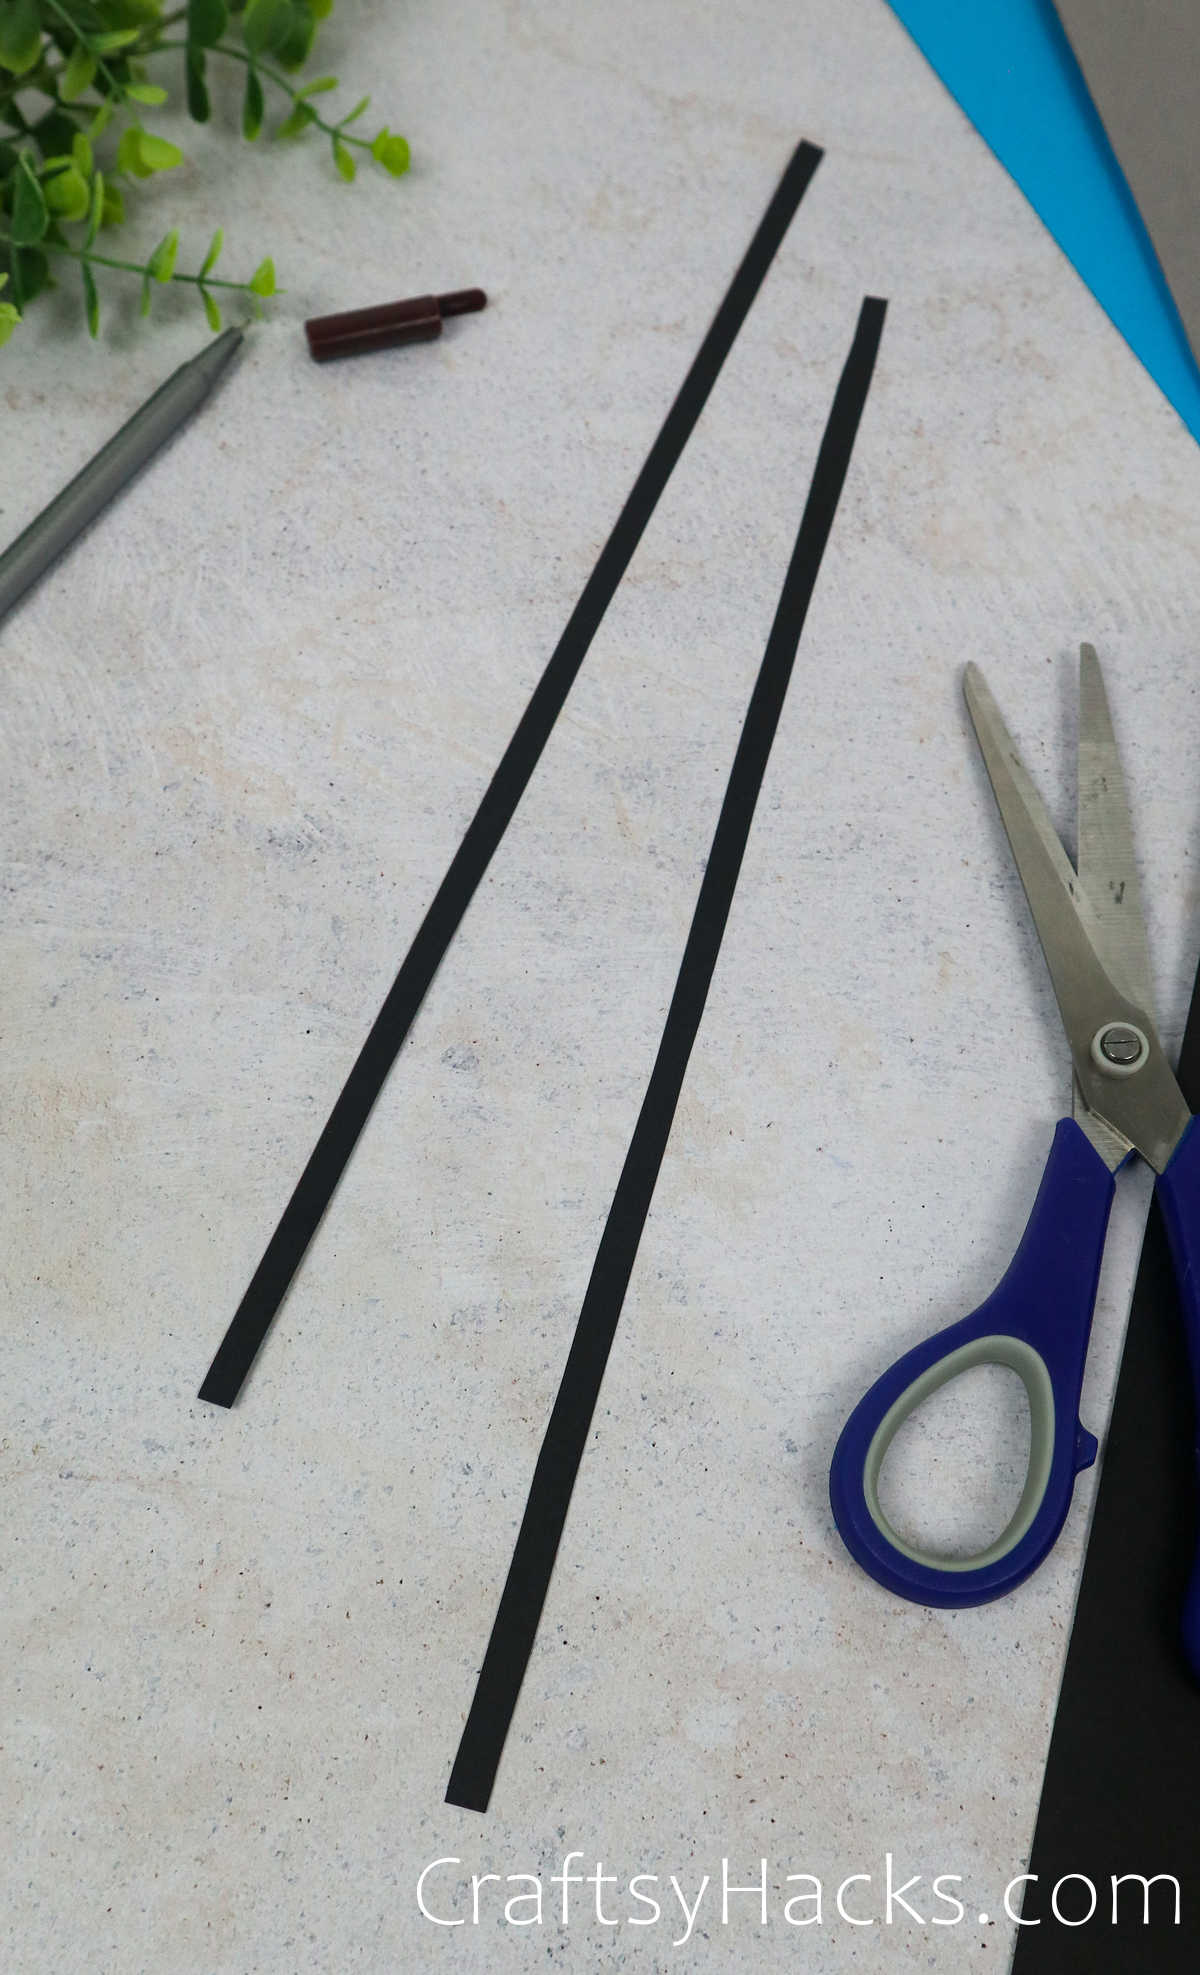
Grab a black sheet of paper and cut two long strips out of it–they should be about 13” by ¼” for the legs.
It’s a good size for this bouncy project, but if they’re a little off, it’s okay, don’t worry about it too much.
Step 3
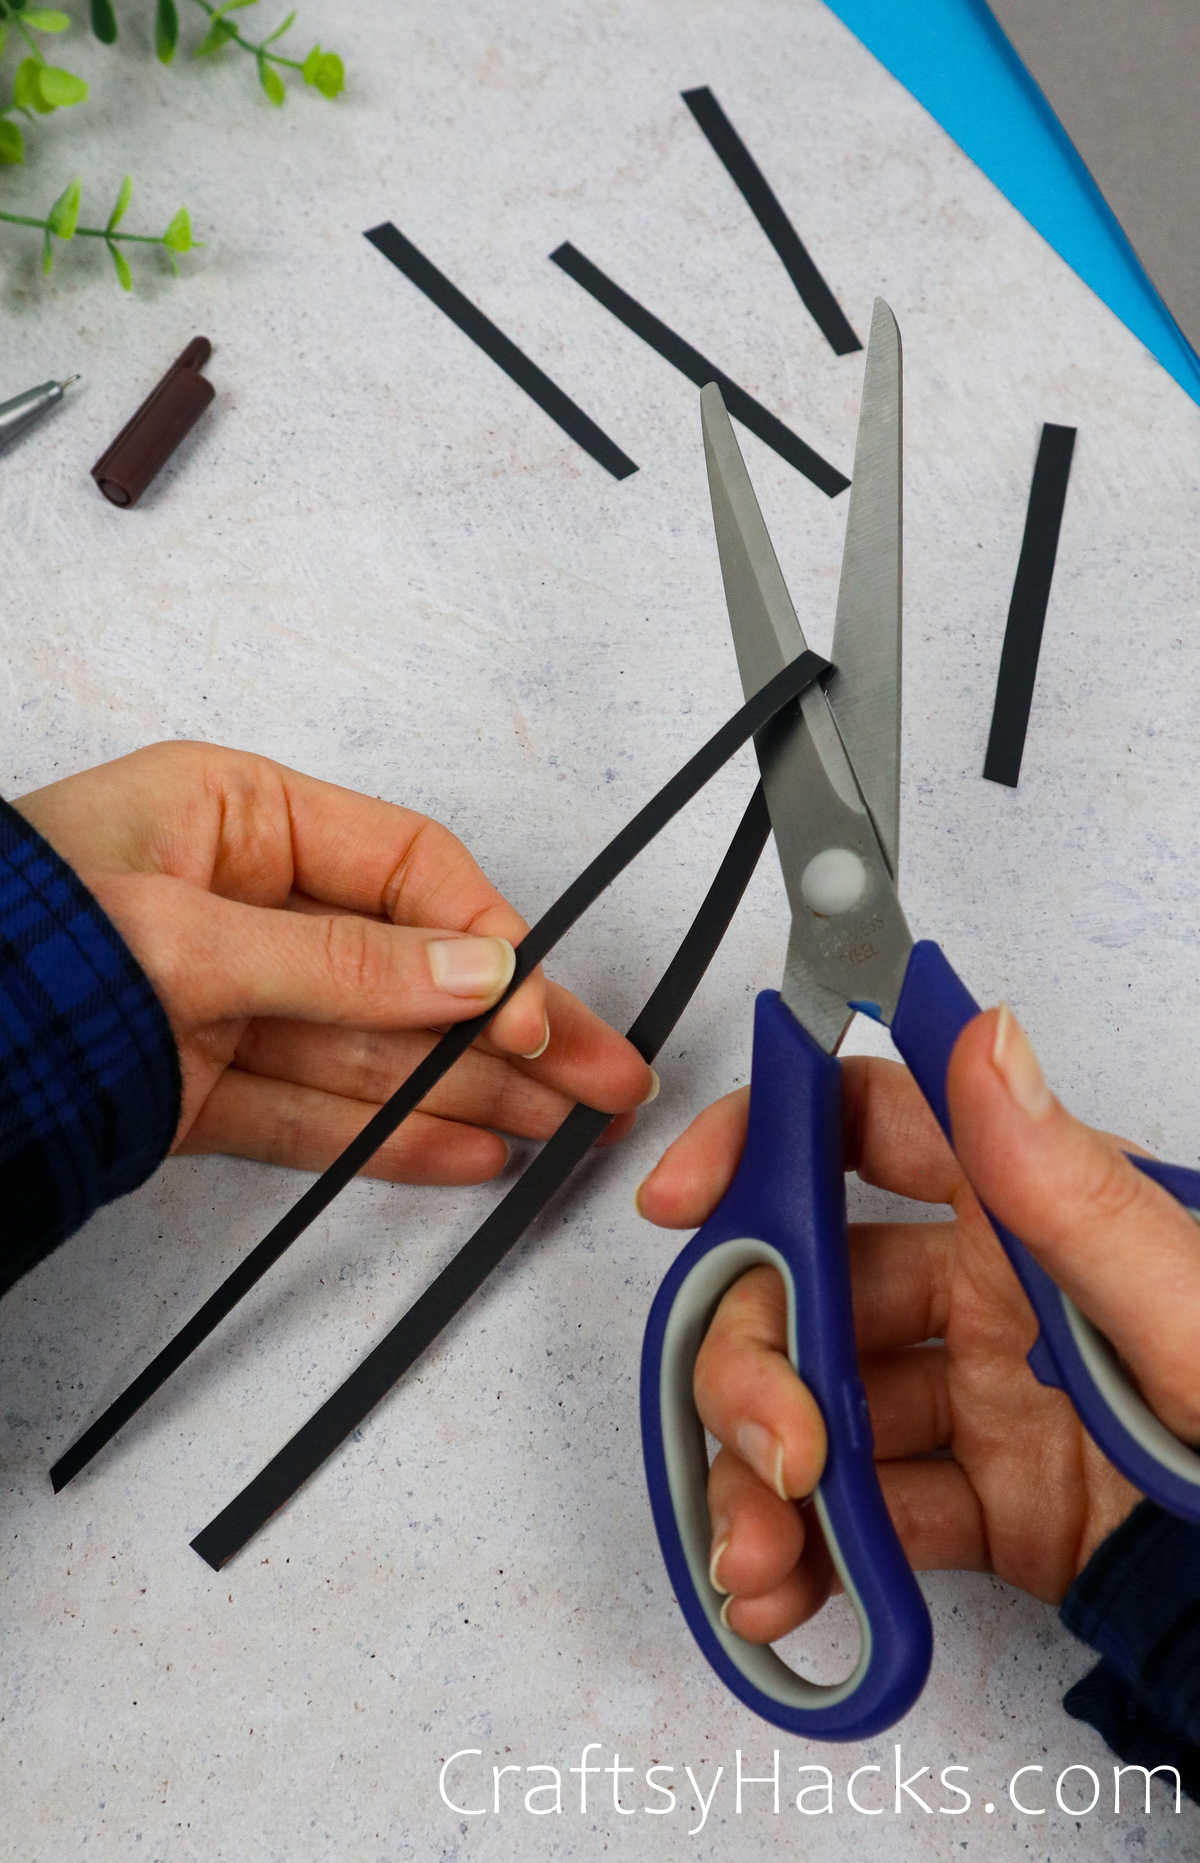
Take your black stripes and cut them in half to yield four identical pieces, making your job or the crafter’s job easier!
Repeat this process with your second set of legs, so you’ll end up with eight limbs total for your spider.
Set aside and return to your spring.
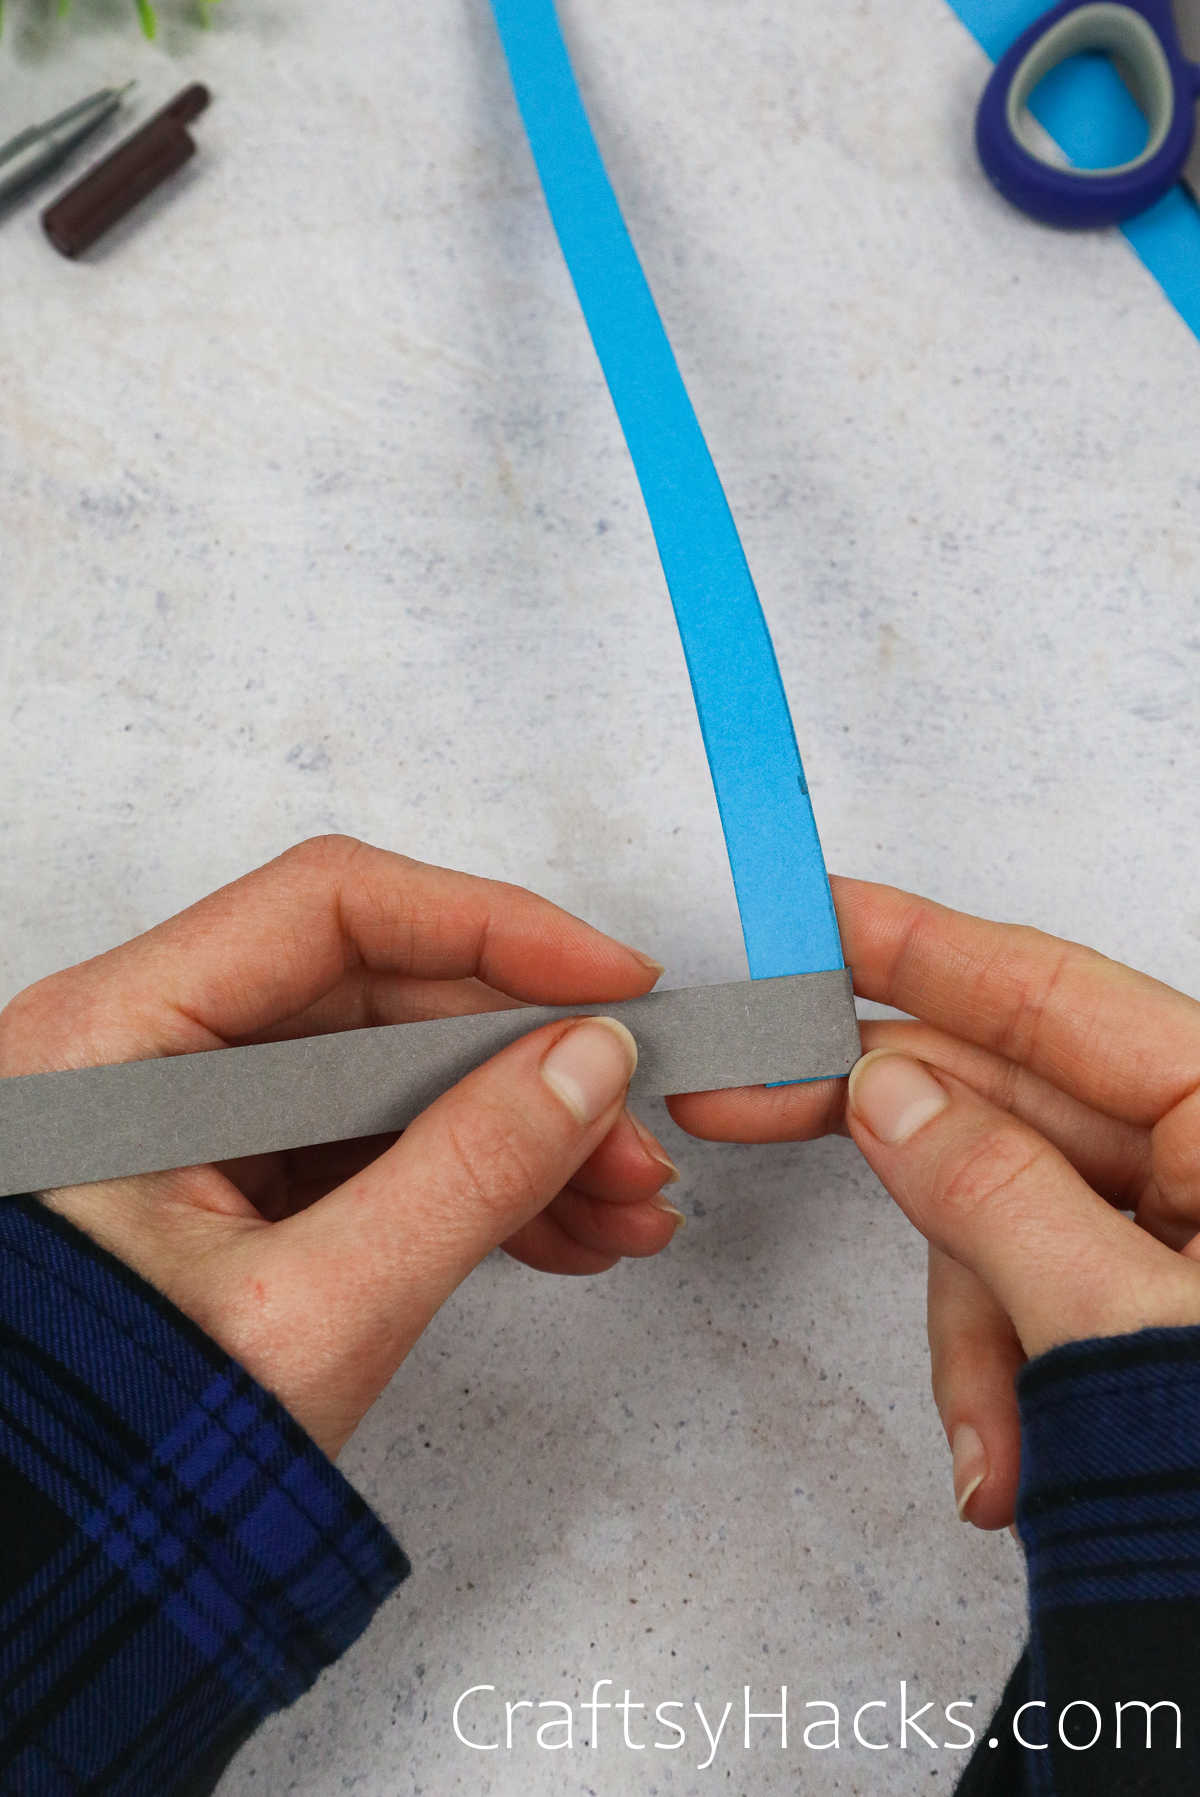
Step 4
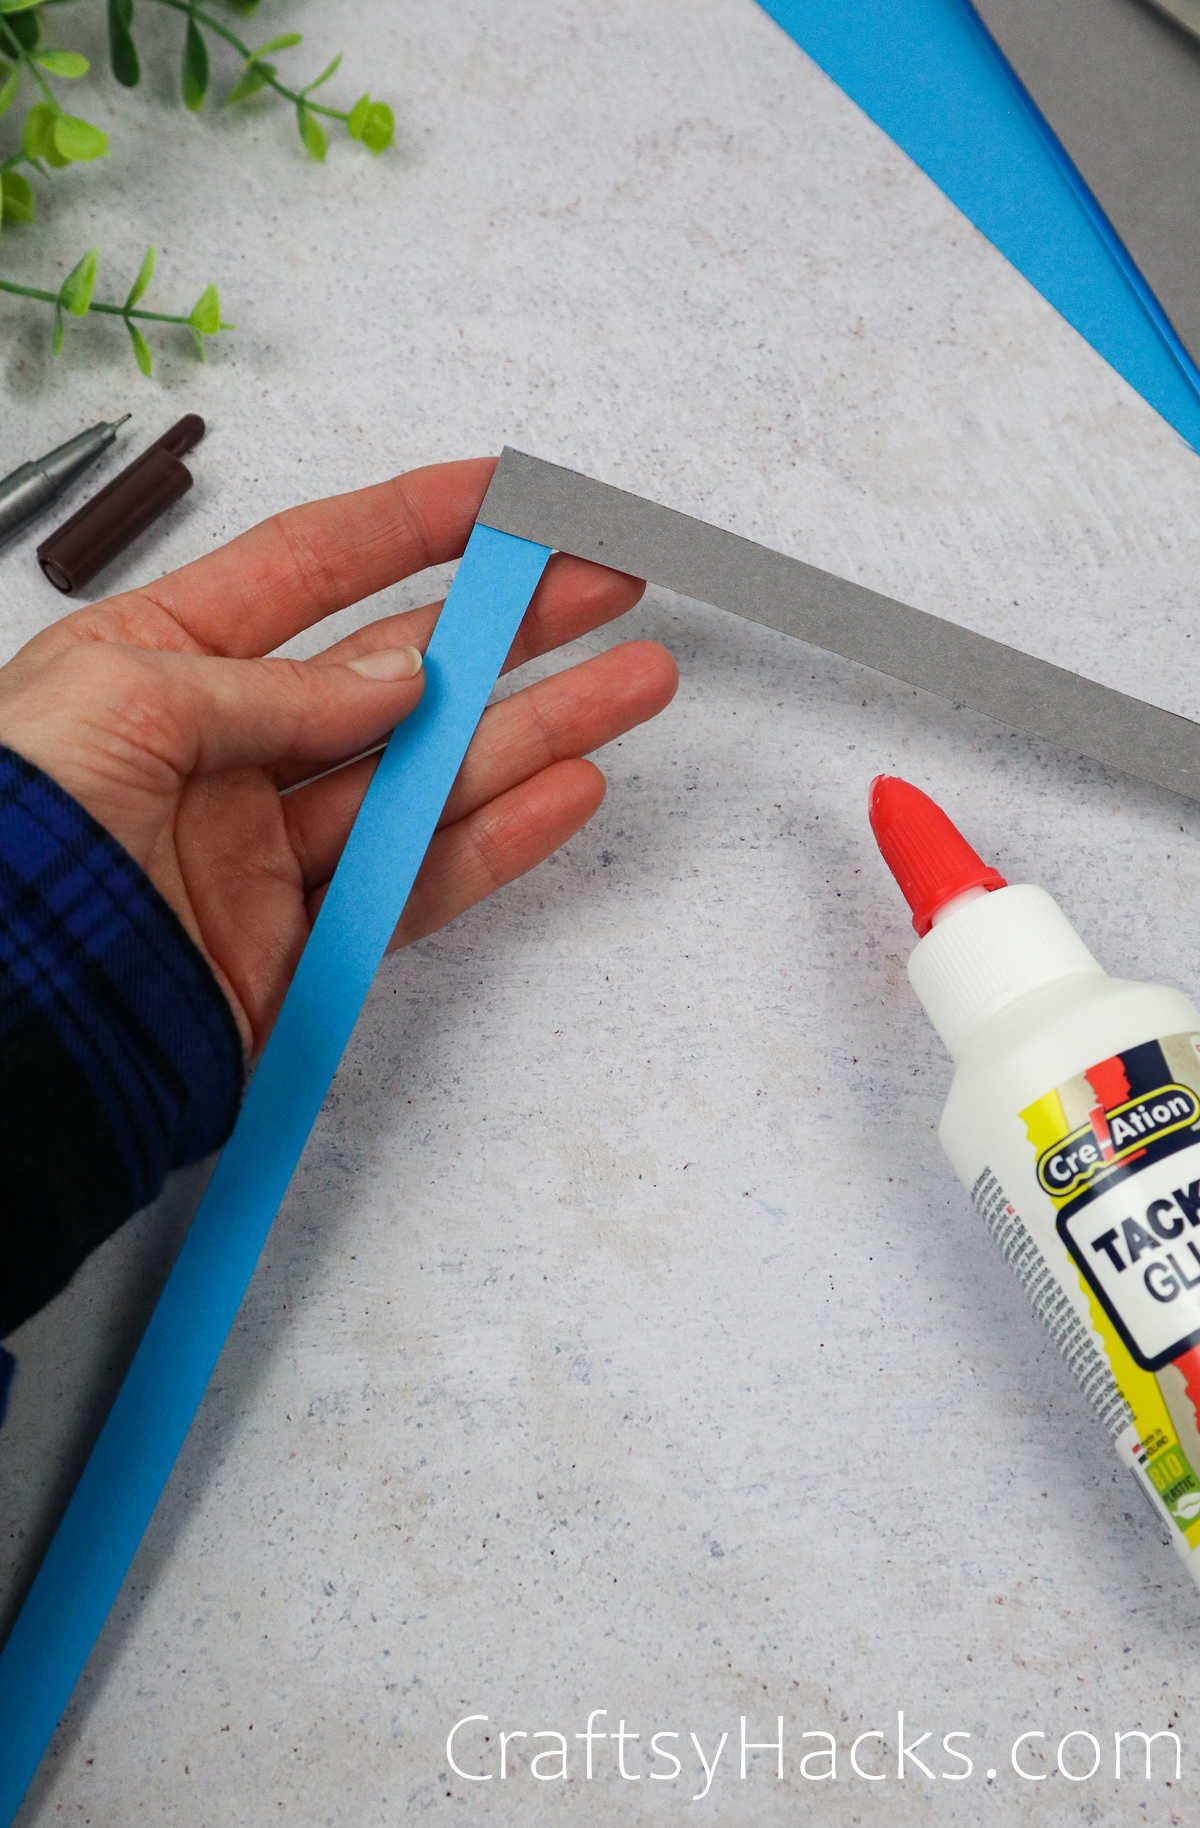
Glue your two different strips of paper in an “L” shape with some adhesive. Pinch together, and sometimes, I even secure a paper clip to the end so that it has some added security.
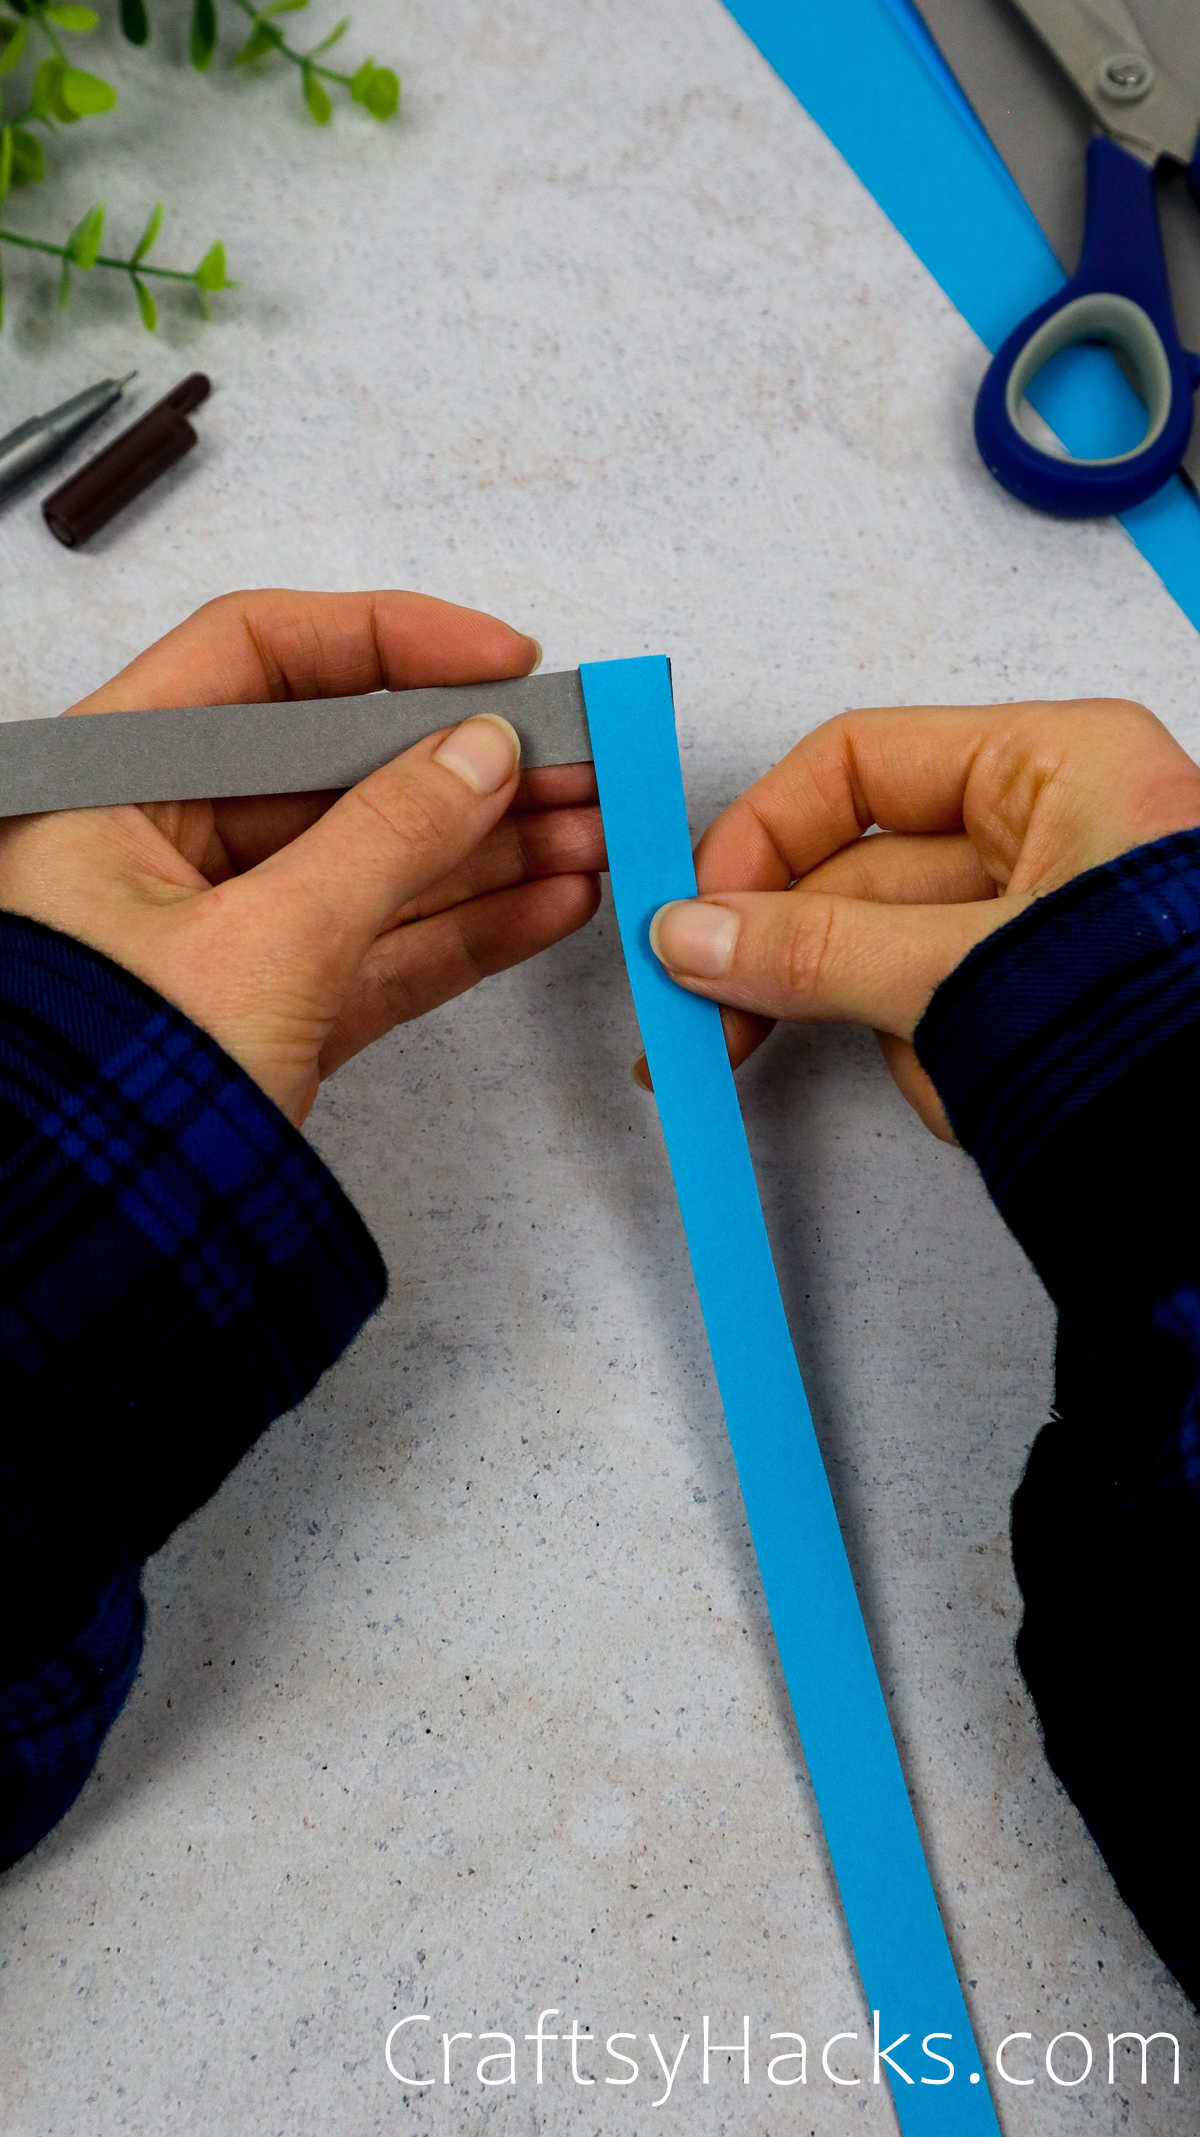
Step 5

Start with the bottom colour and fold over the top colour. My base was blue here, so as you can see, I’m starting to pull it over the gray.
Continue onward, again alternating the two back and forth. Again, here is an example of taking the base colour, this time gray, and folding it over the top one, blue.
A pattern should emerge as you continue to alternate strips of paper–repeat until almost to the top.
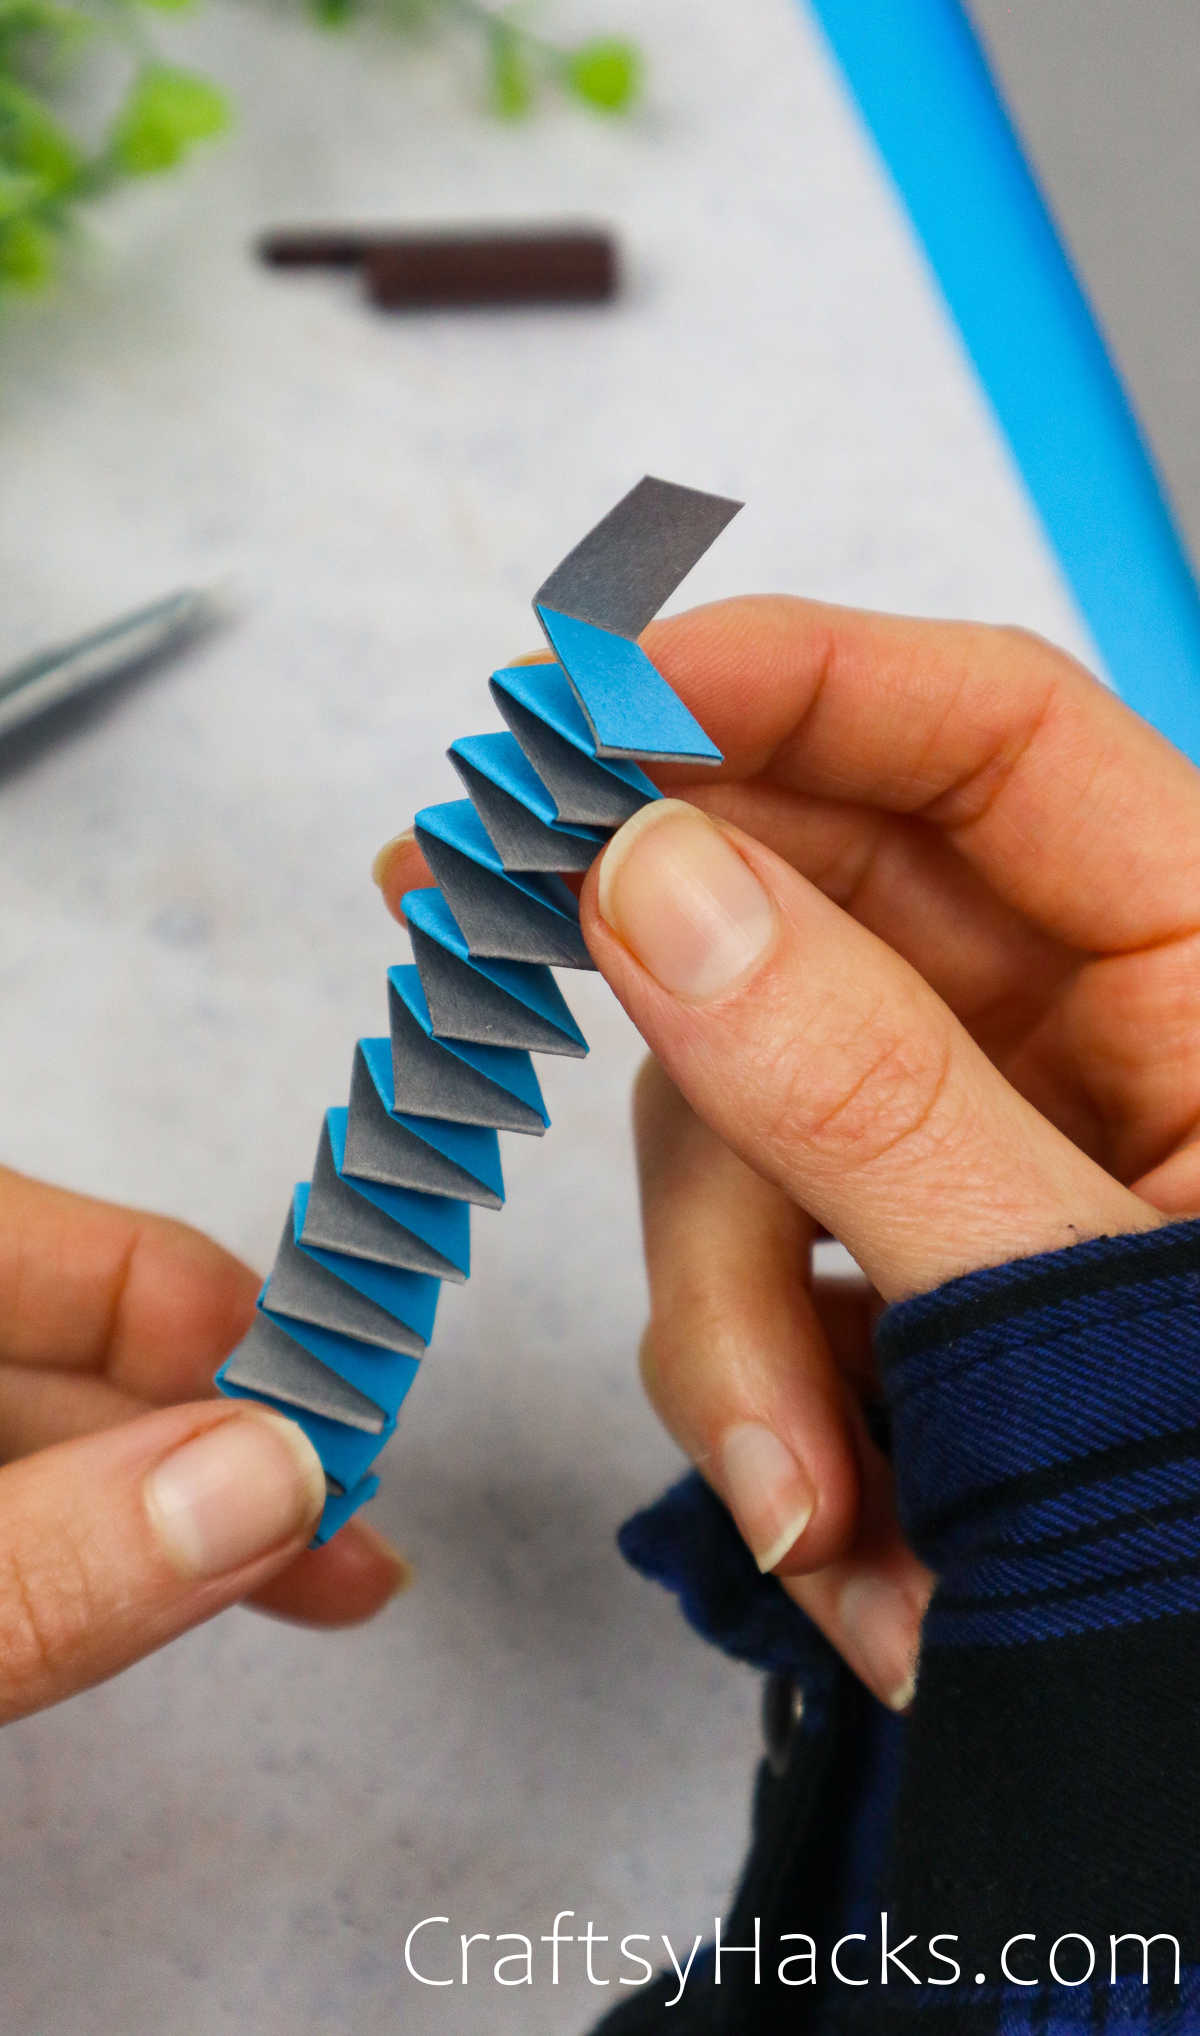
Continue until you get to the end of your paper and leave the second one up. Set aside; we’ll come back to the spring once the spider is complete.
Step 6
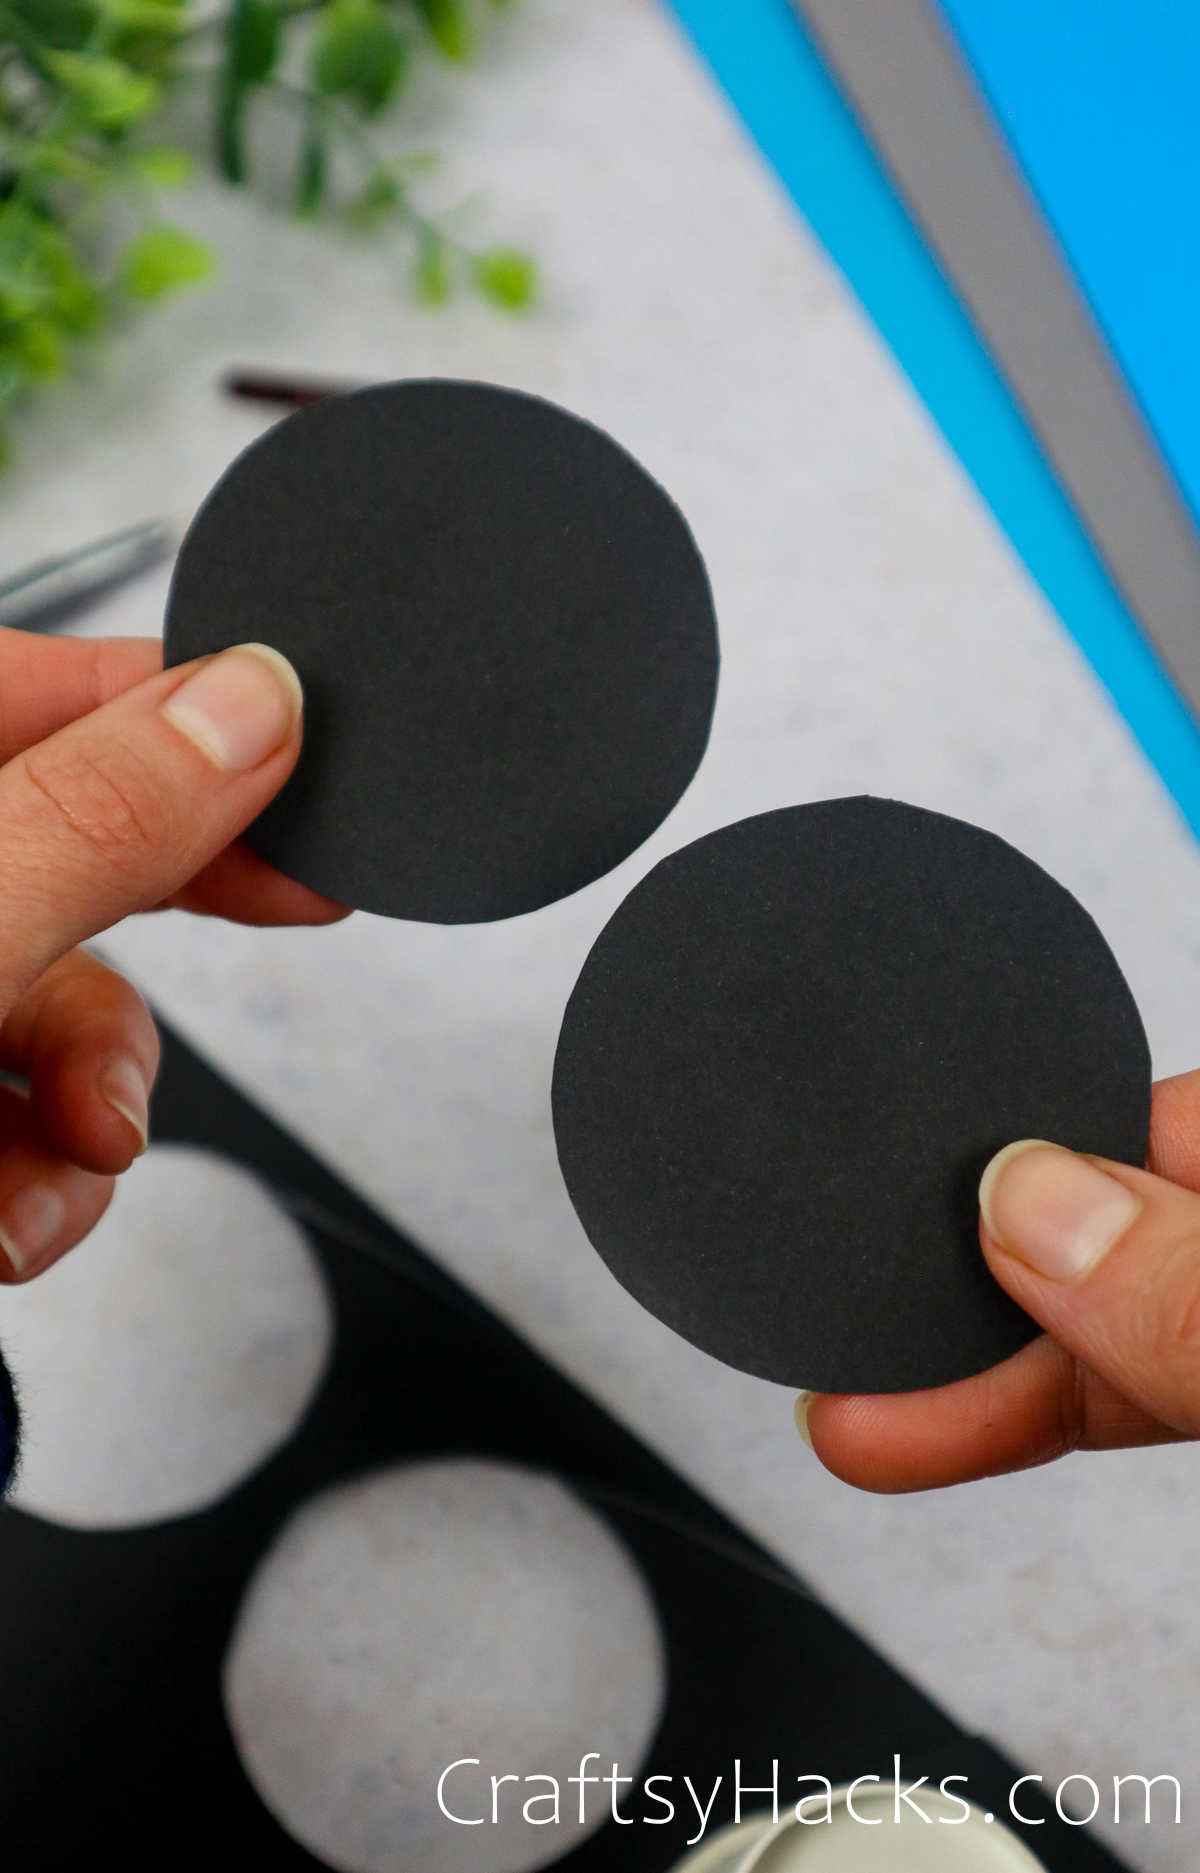
The body is easy, and you’ll need your paper cup to trace two circles.
If you don’t have paper cups, try to look for a similarly sized circumference for your spiders unless, of course, you’d like to size this project up.
Step 7
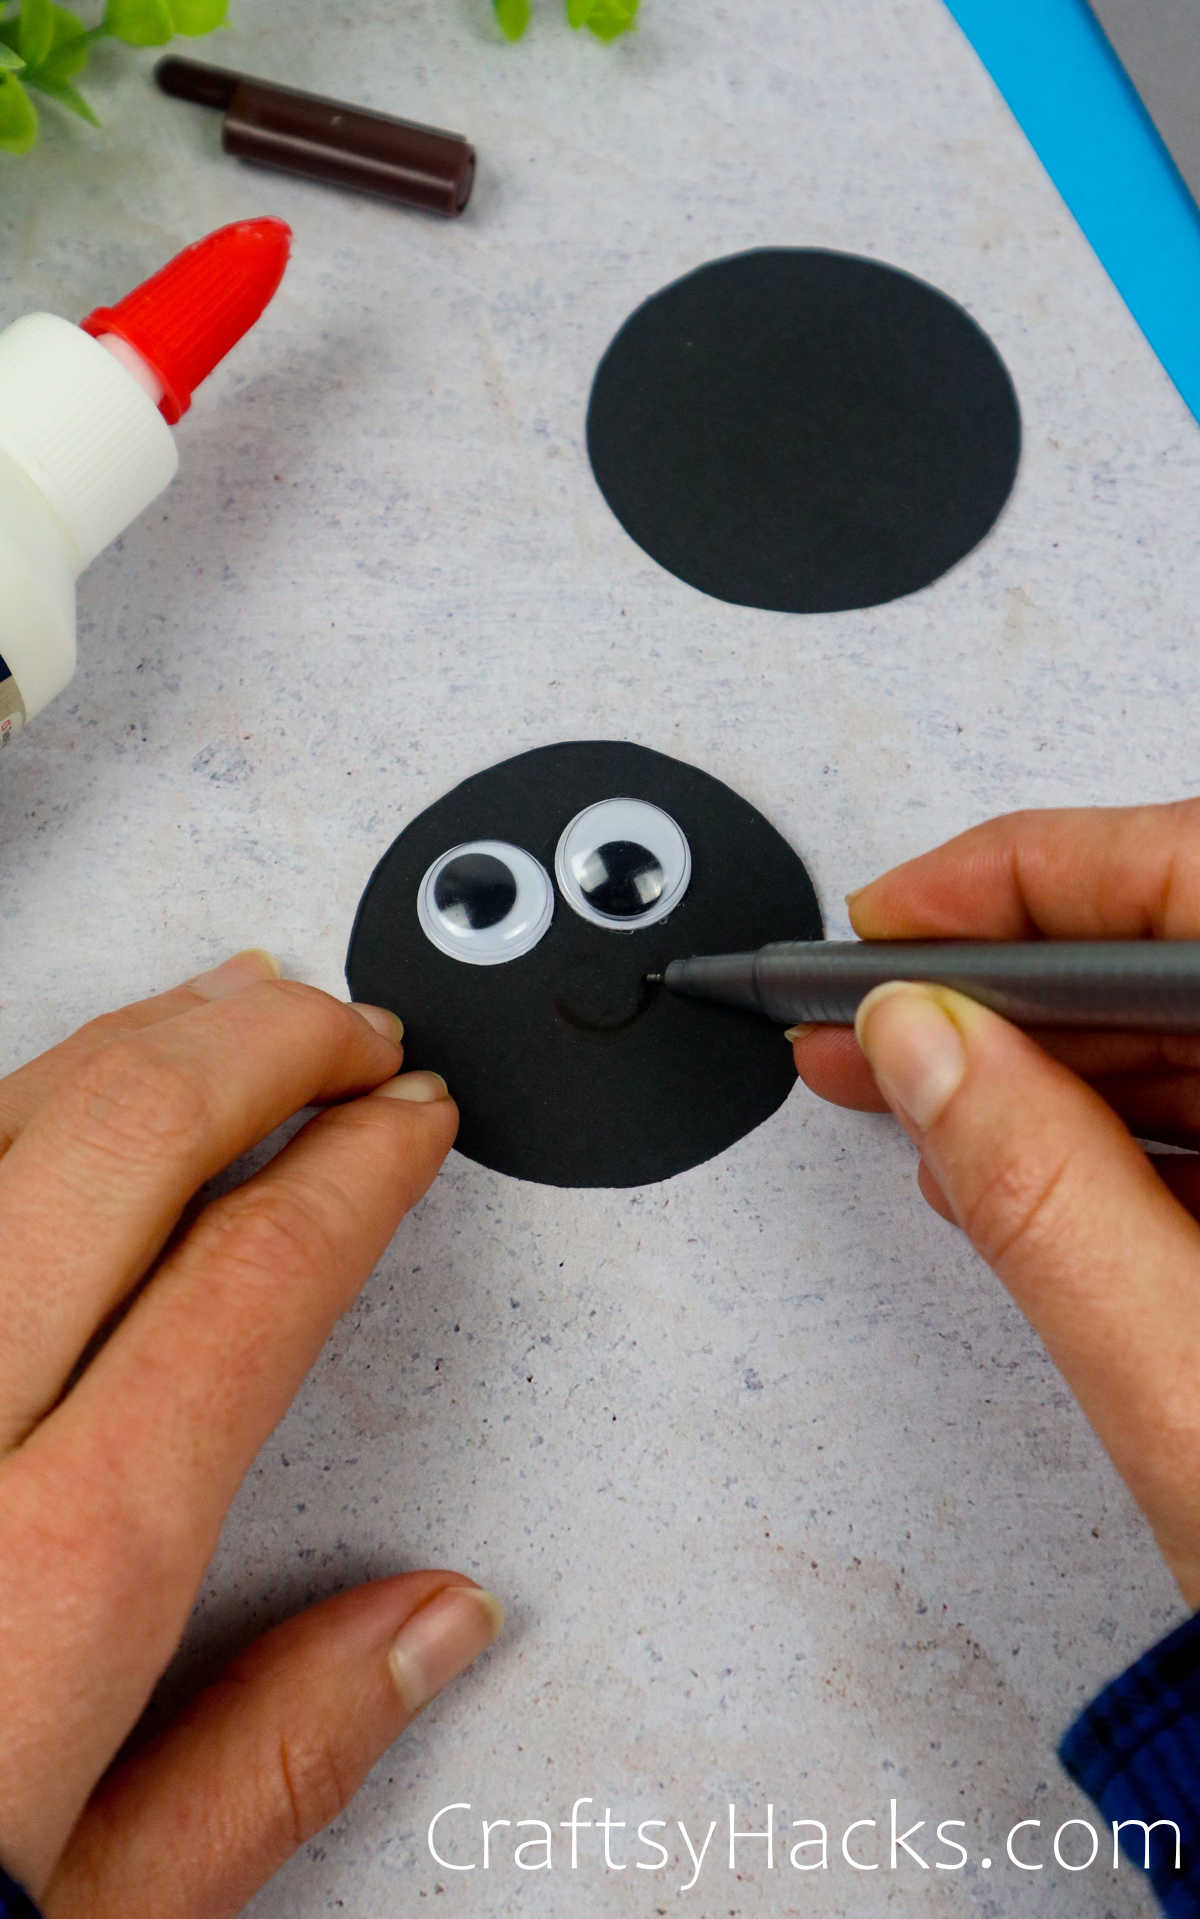
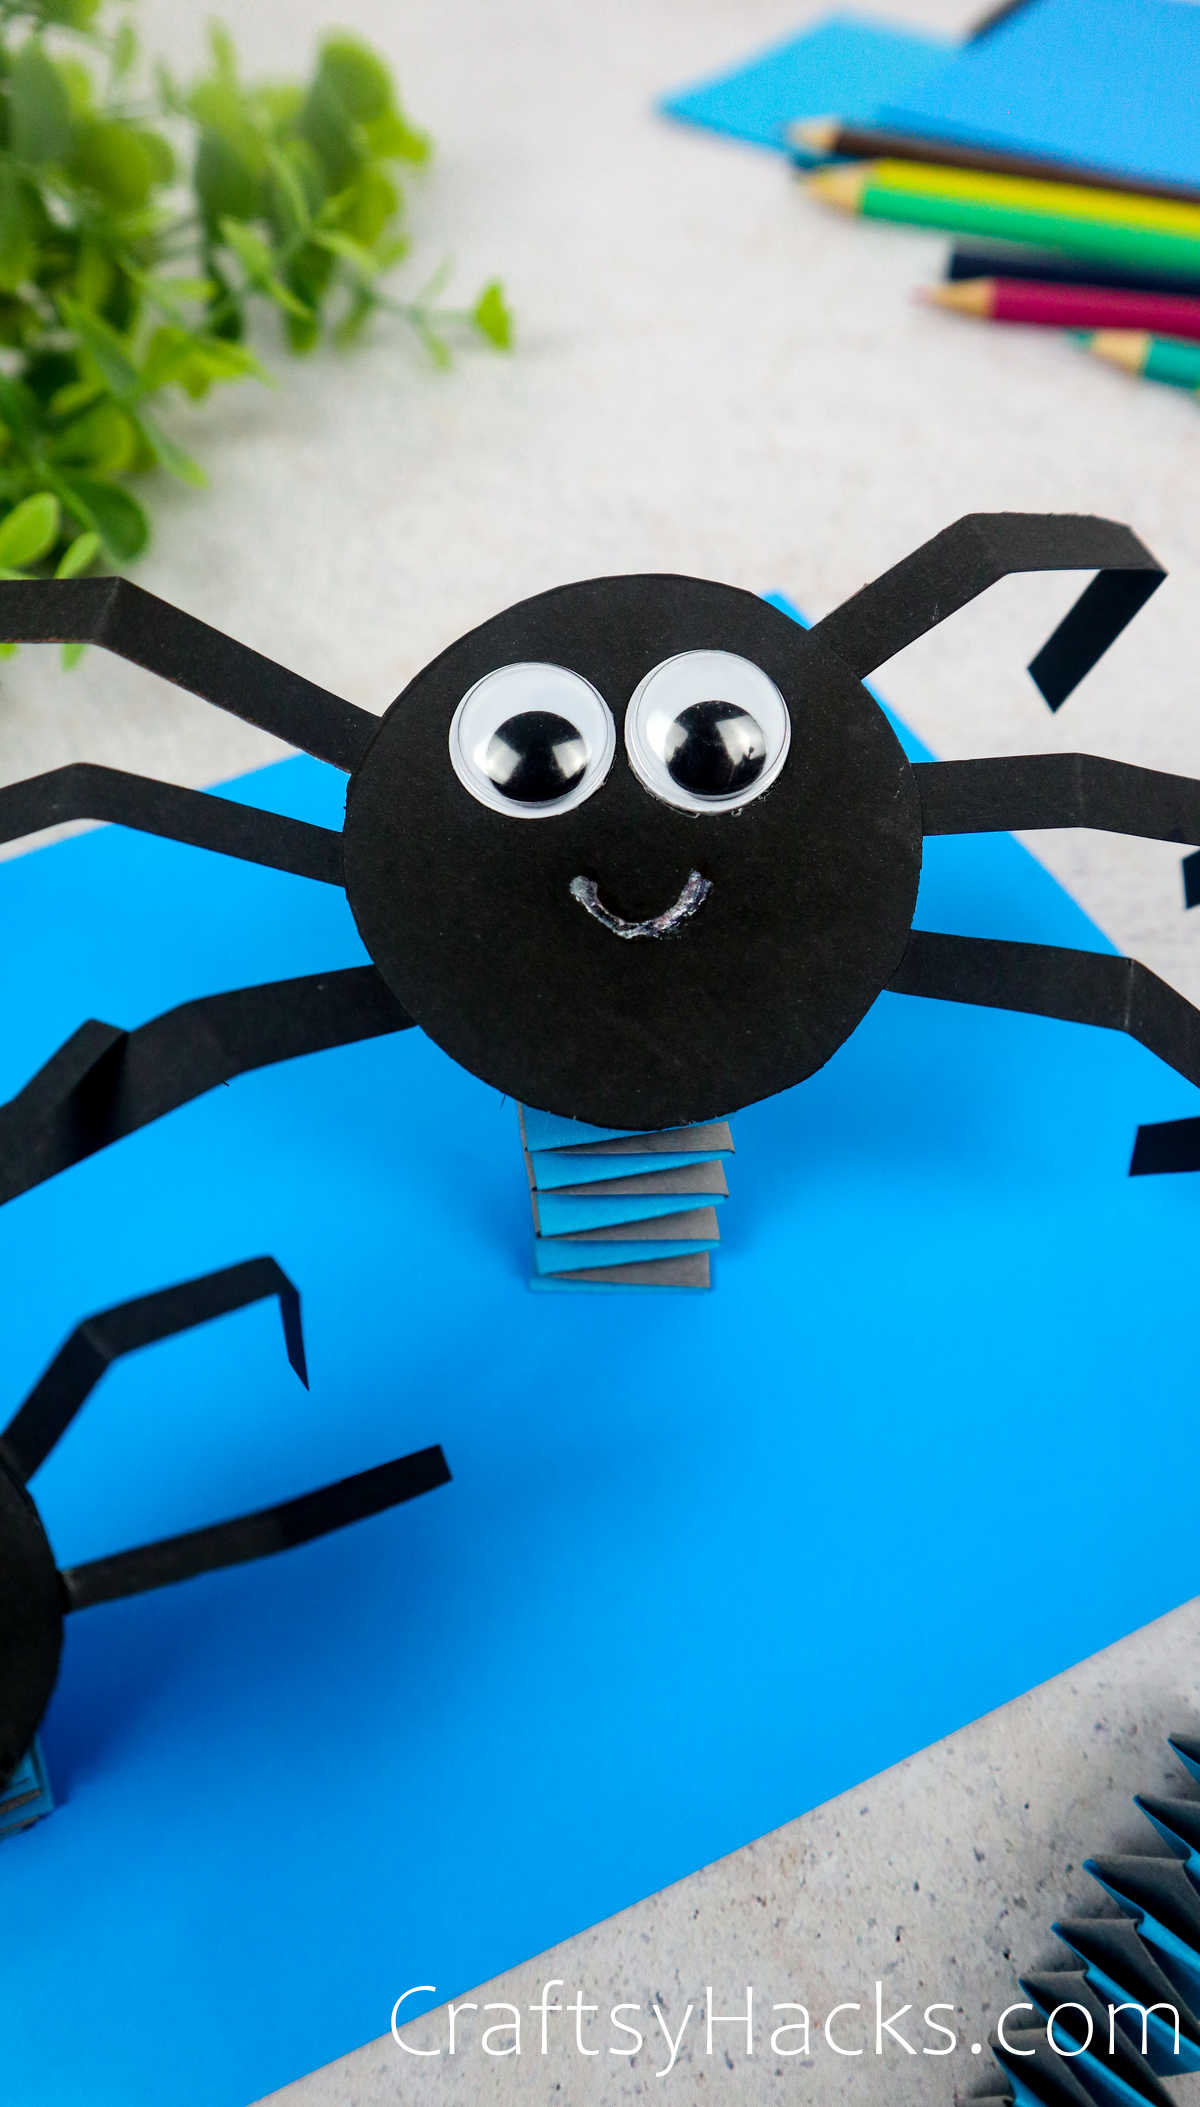
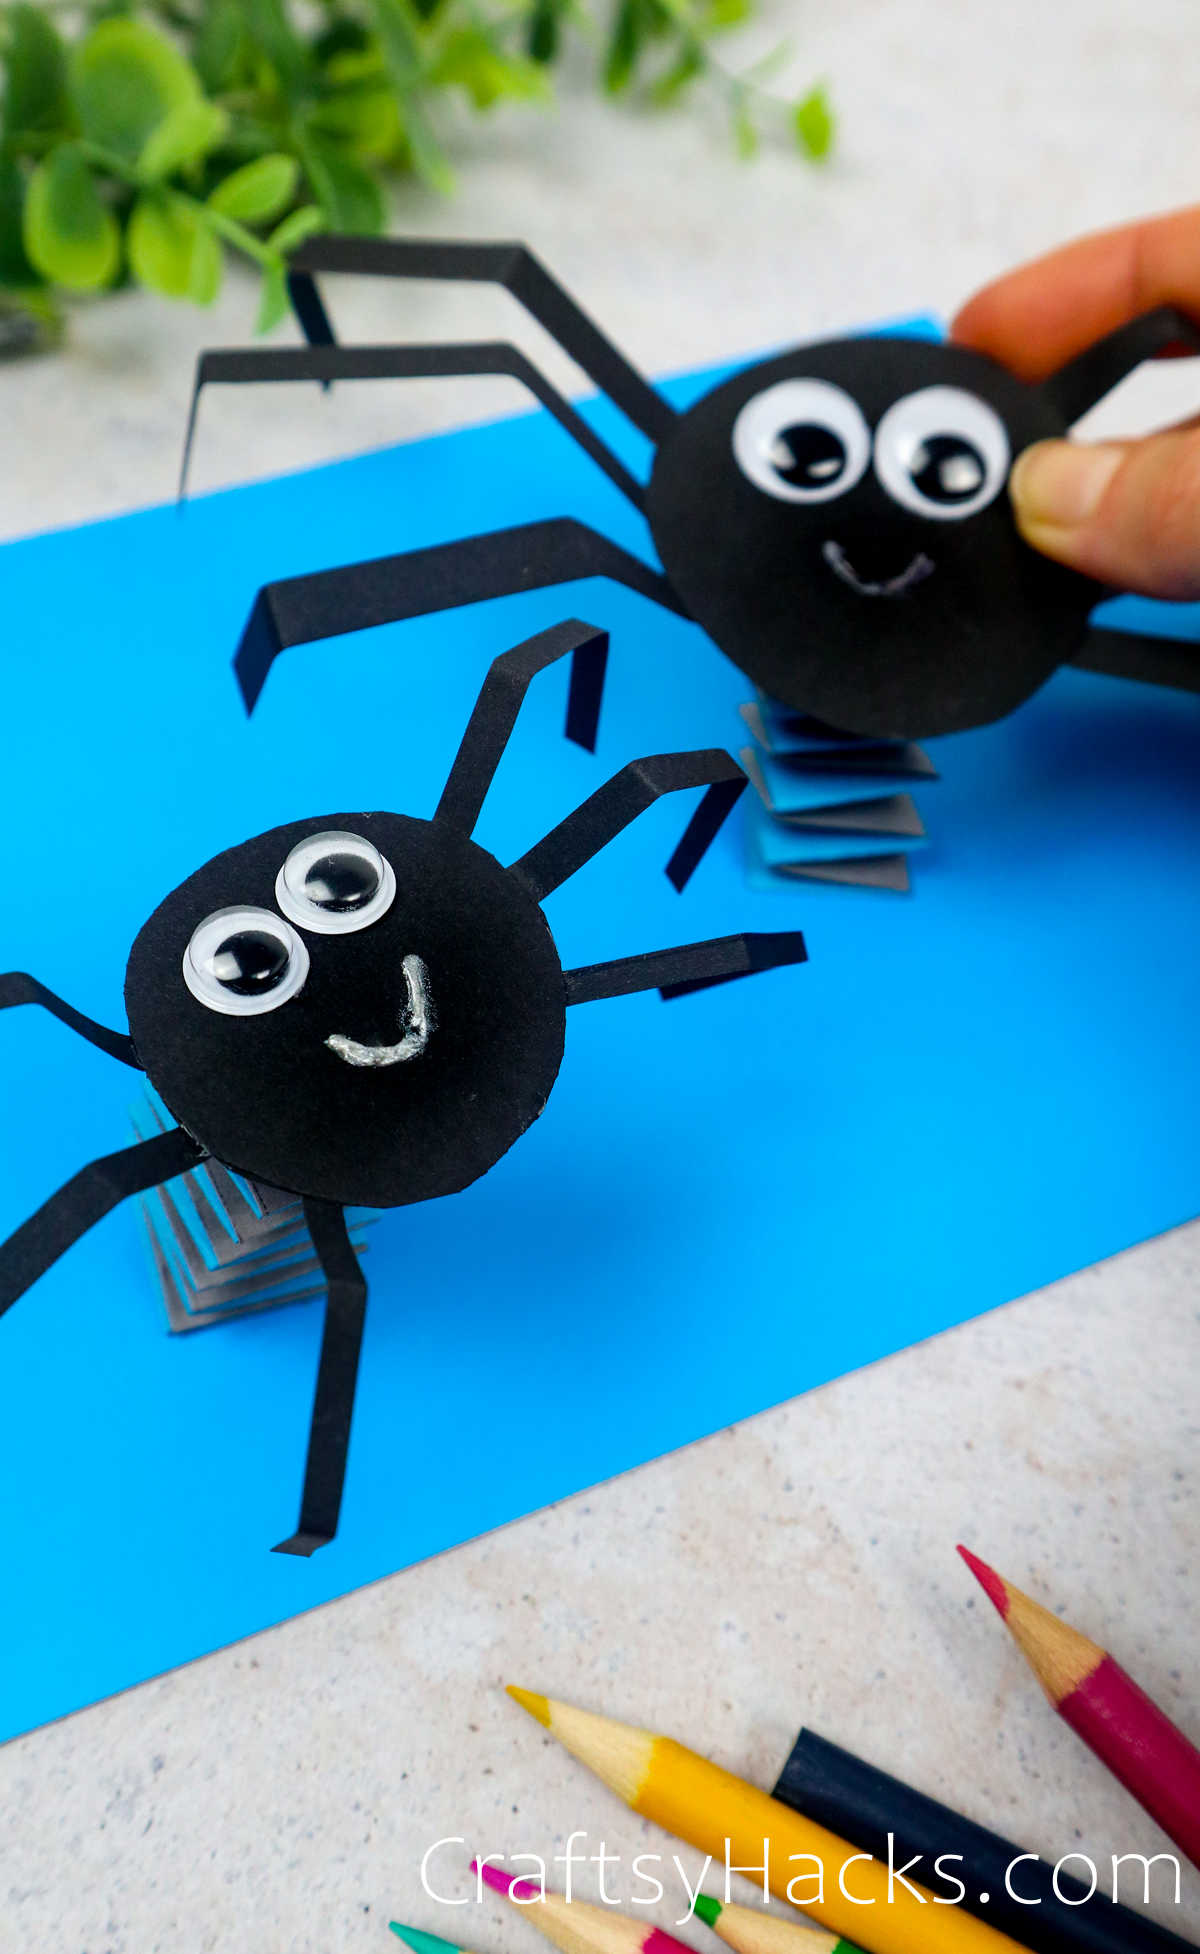
I love a project with a wiggly eye, so we’ll start with the head. Attach both eyes and draw a friendly little smile or silly face if you feel a little extra!
Step 8
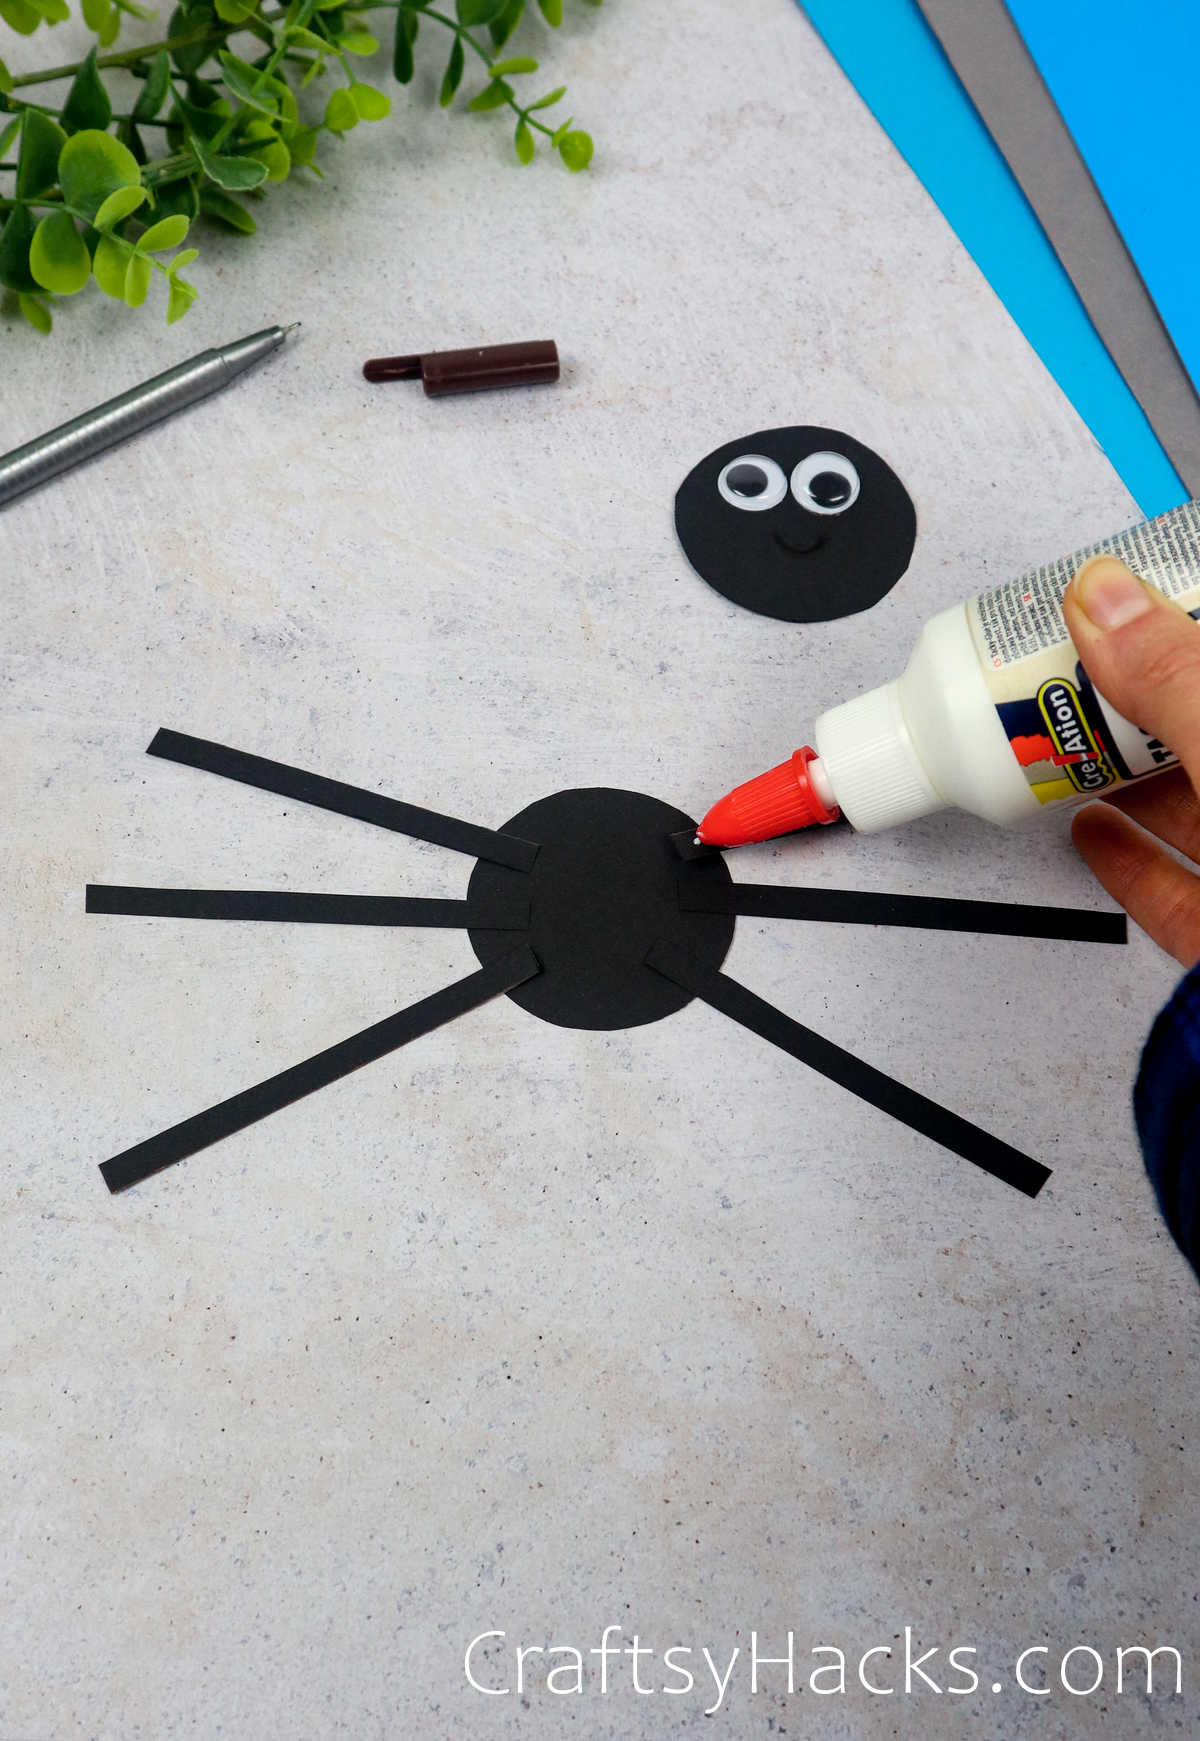
Moving on from the head of the insect, we’ll glue all of the legs onto the body. We want to space the eight pieces evenly on either side.
Step 9
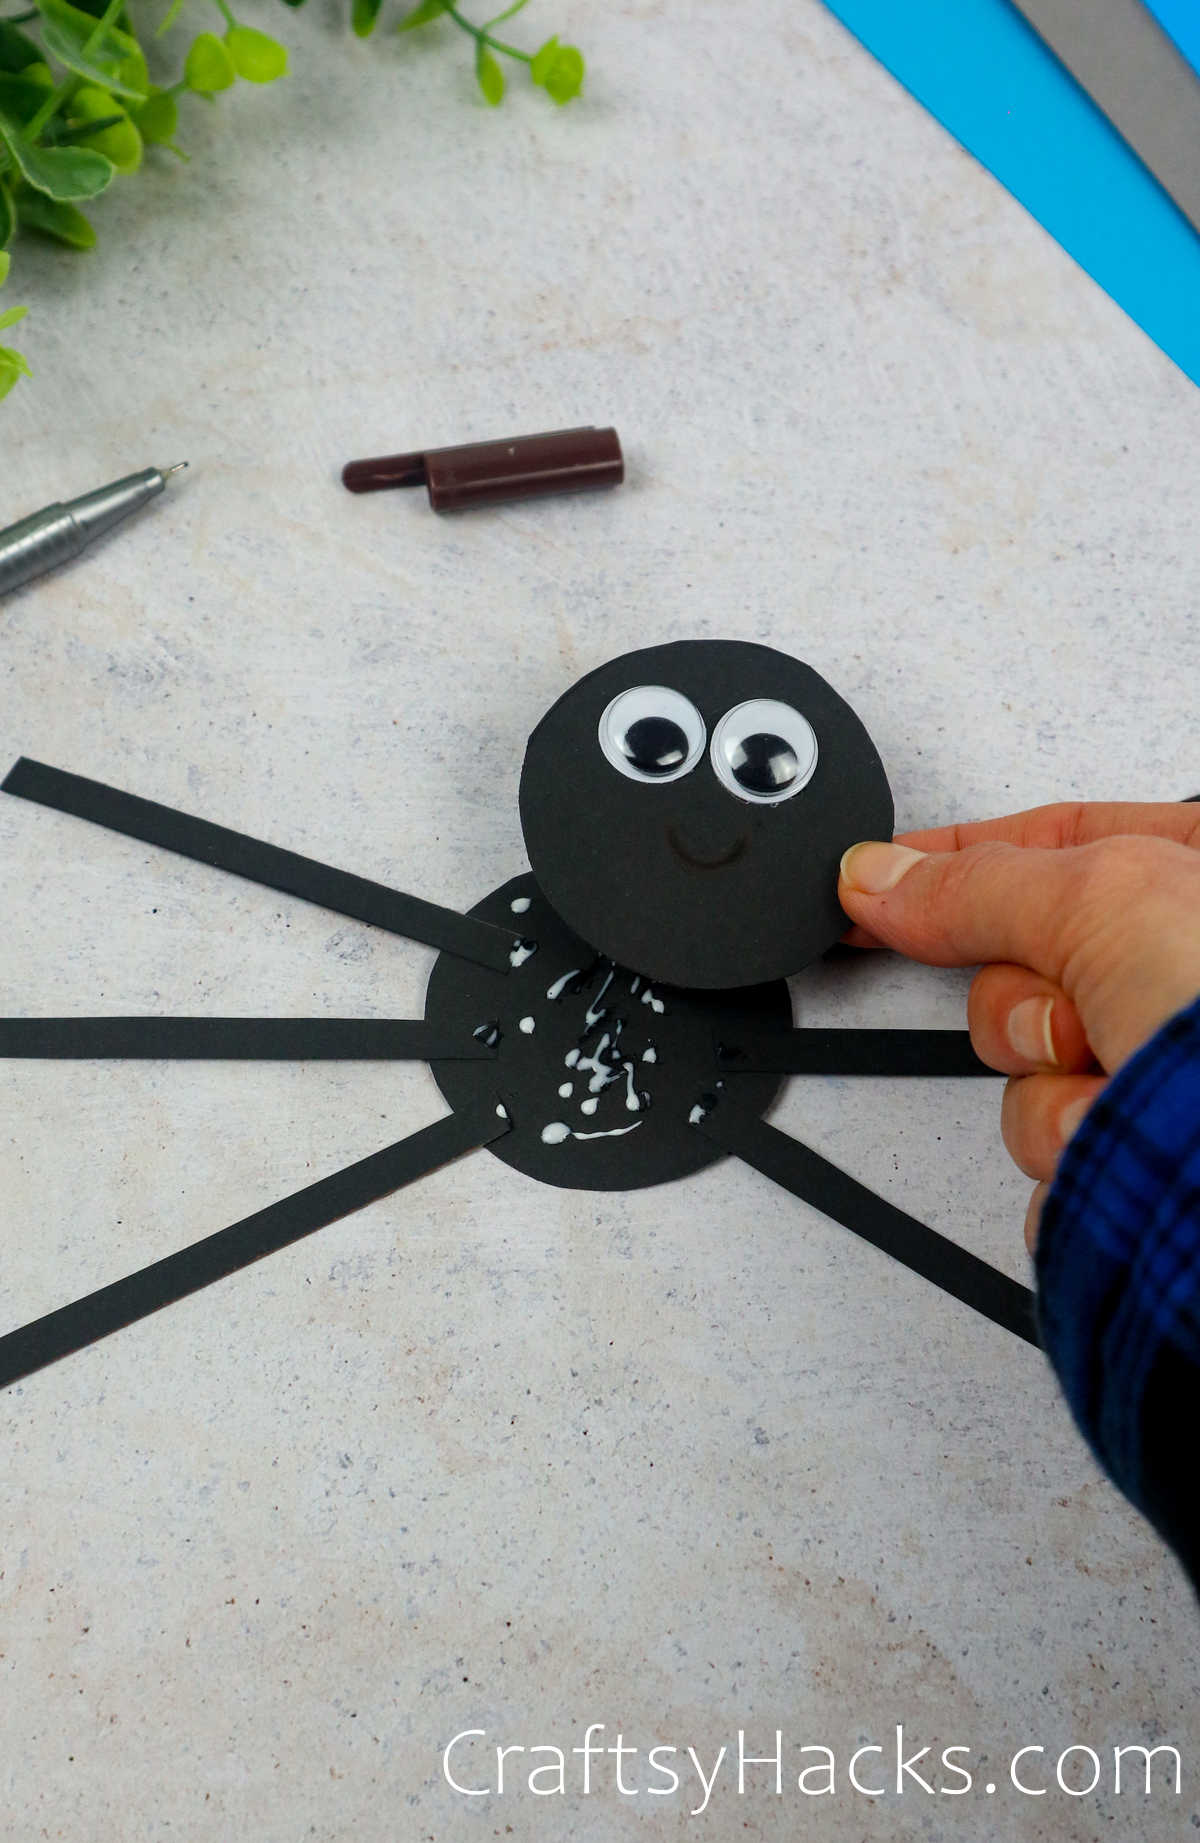
Now that our friend is coming together, continue by glueing the second circle on top of the first. The idea here is to hide the legs in between the two pieces of paper.
Step 10
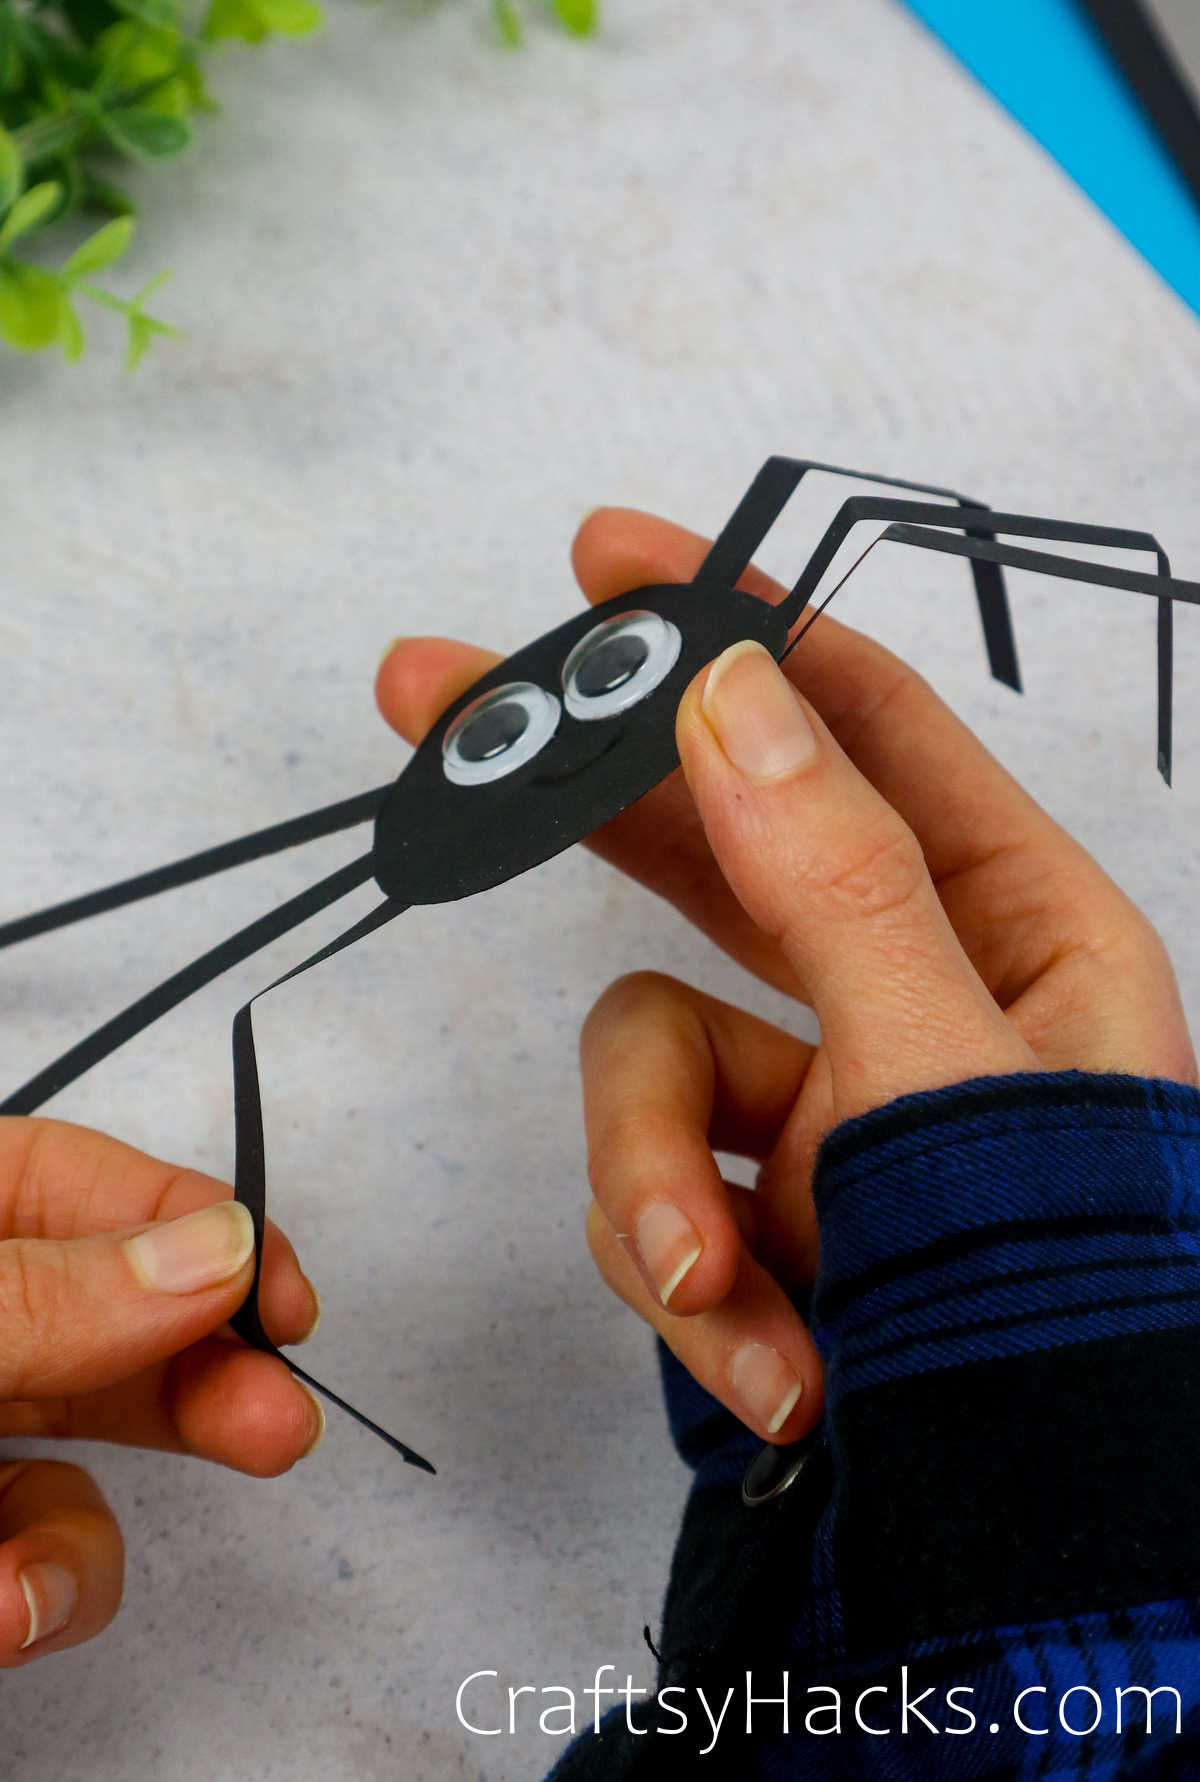
As you finish up the spider’s body, we’ll crimp the legs in two places. Place the marks roughly in thirds with soft bends; no real creasing is needed here.
Play around with the bends and make them work for you. If you’re working with a child on this project, remind them to be gentle and take their time with completing this step.
Step 11
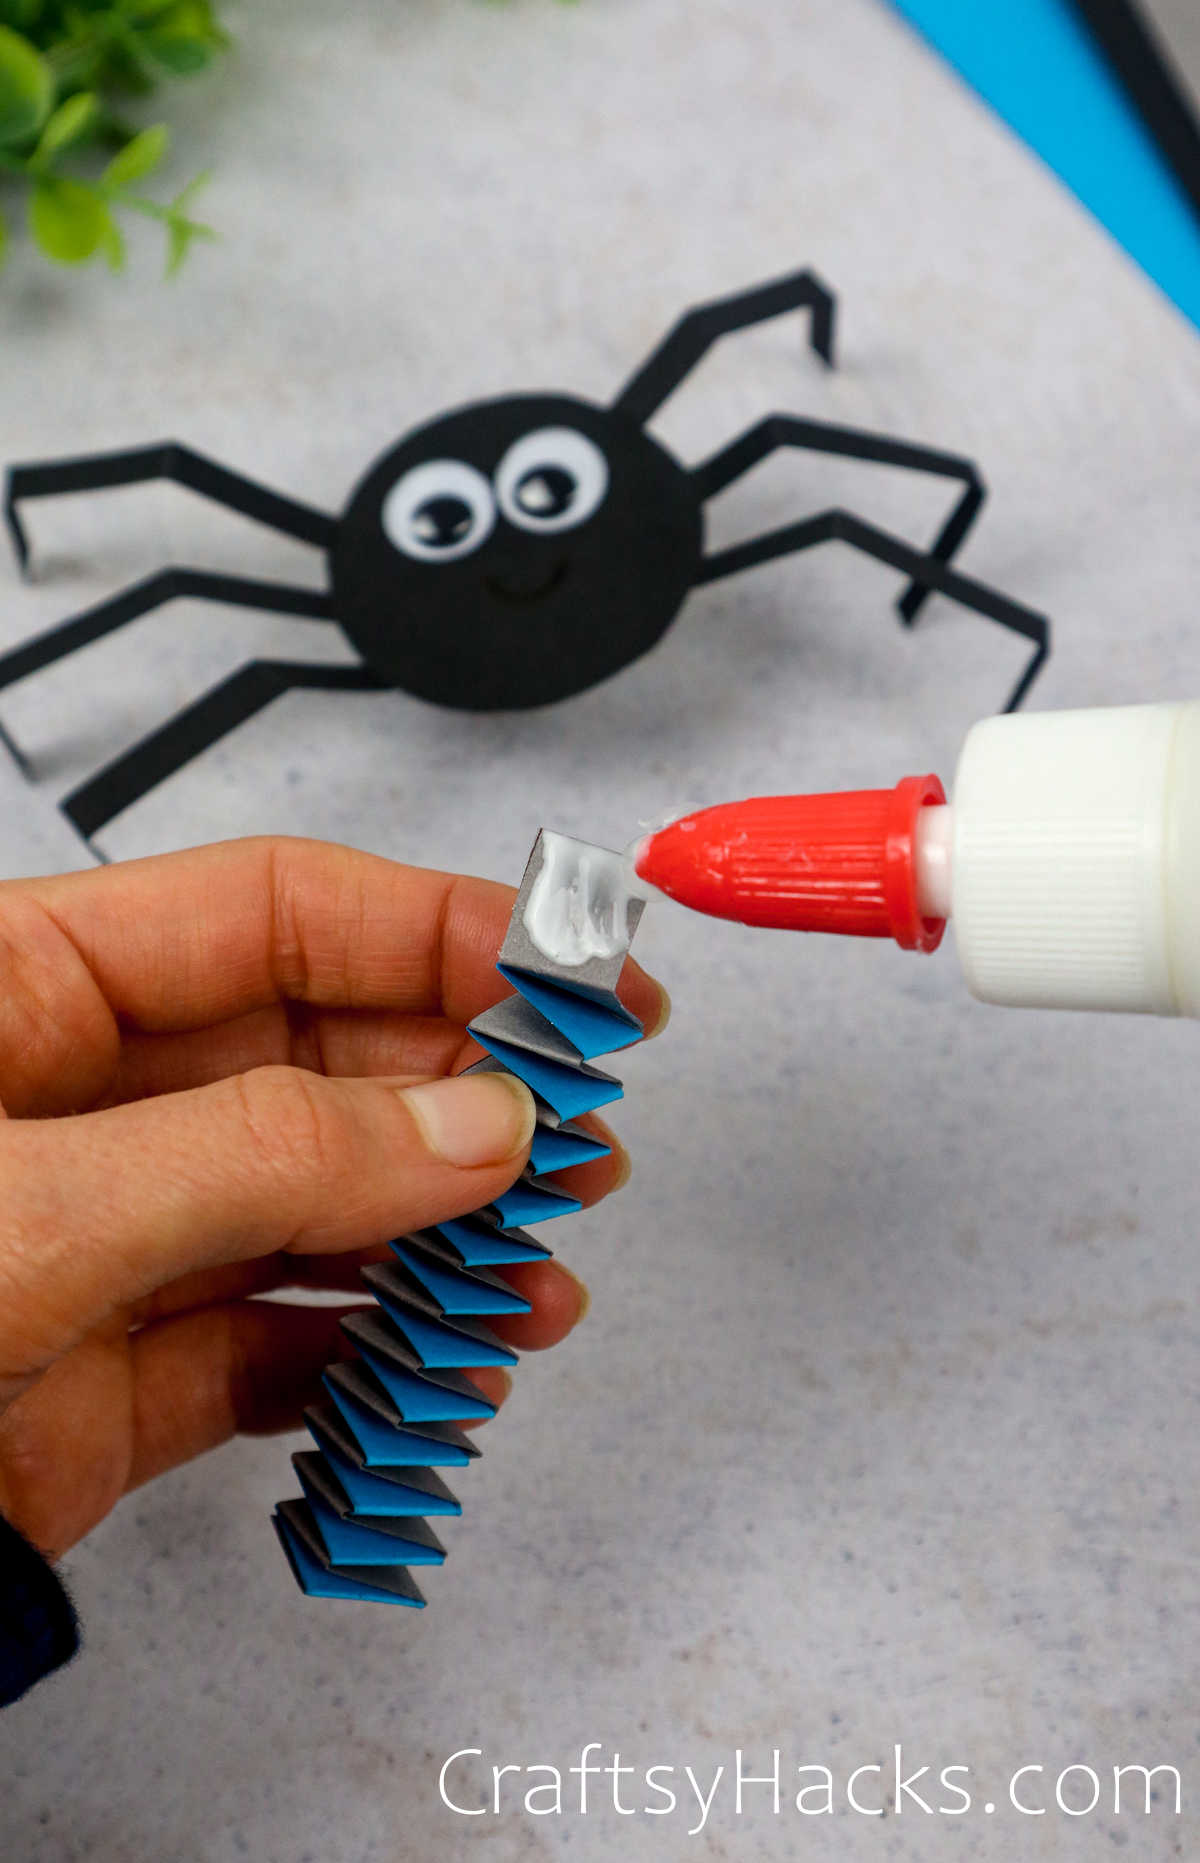
After your eight-legged friend gets created, it’s time to glue the spring to the backing of the spider.
Simply add glue to the very top square of the spring and press it together with the back side of the spider–let dry.
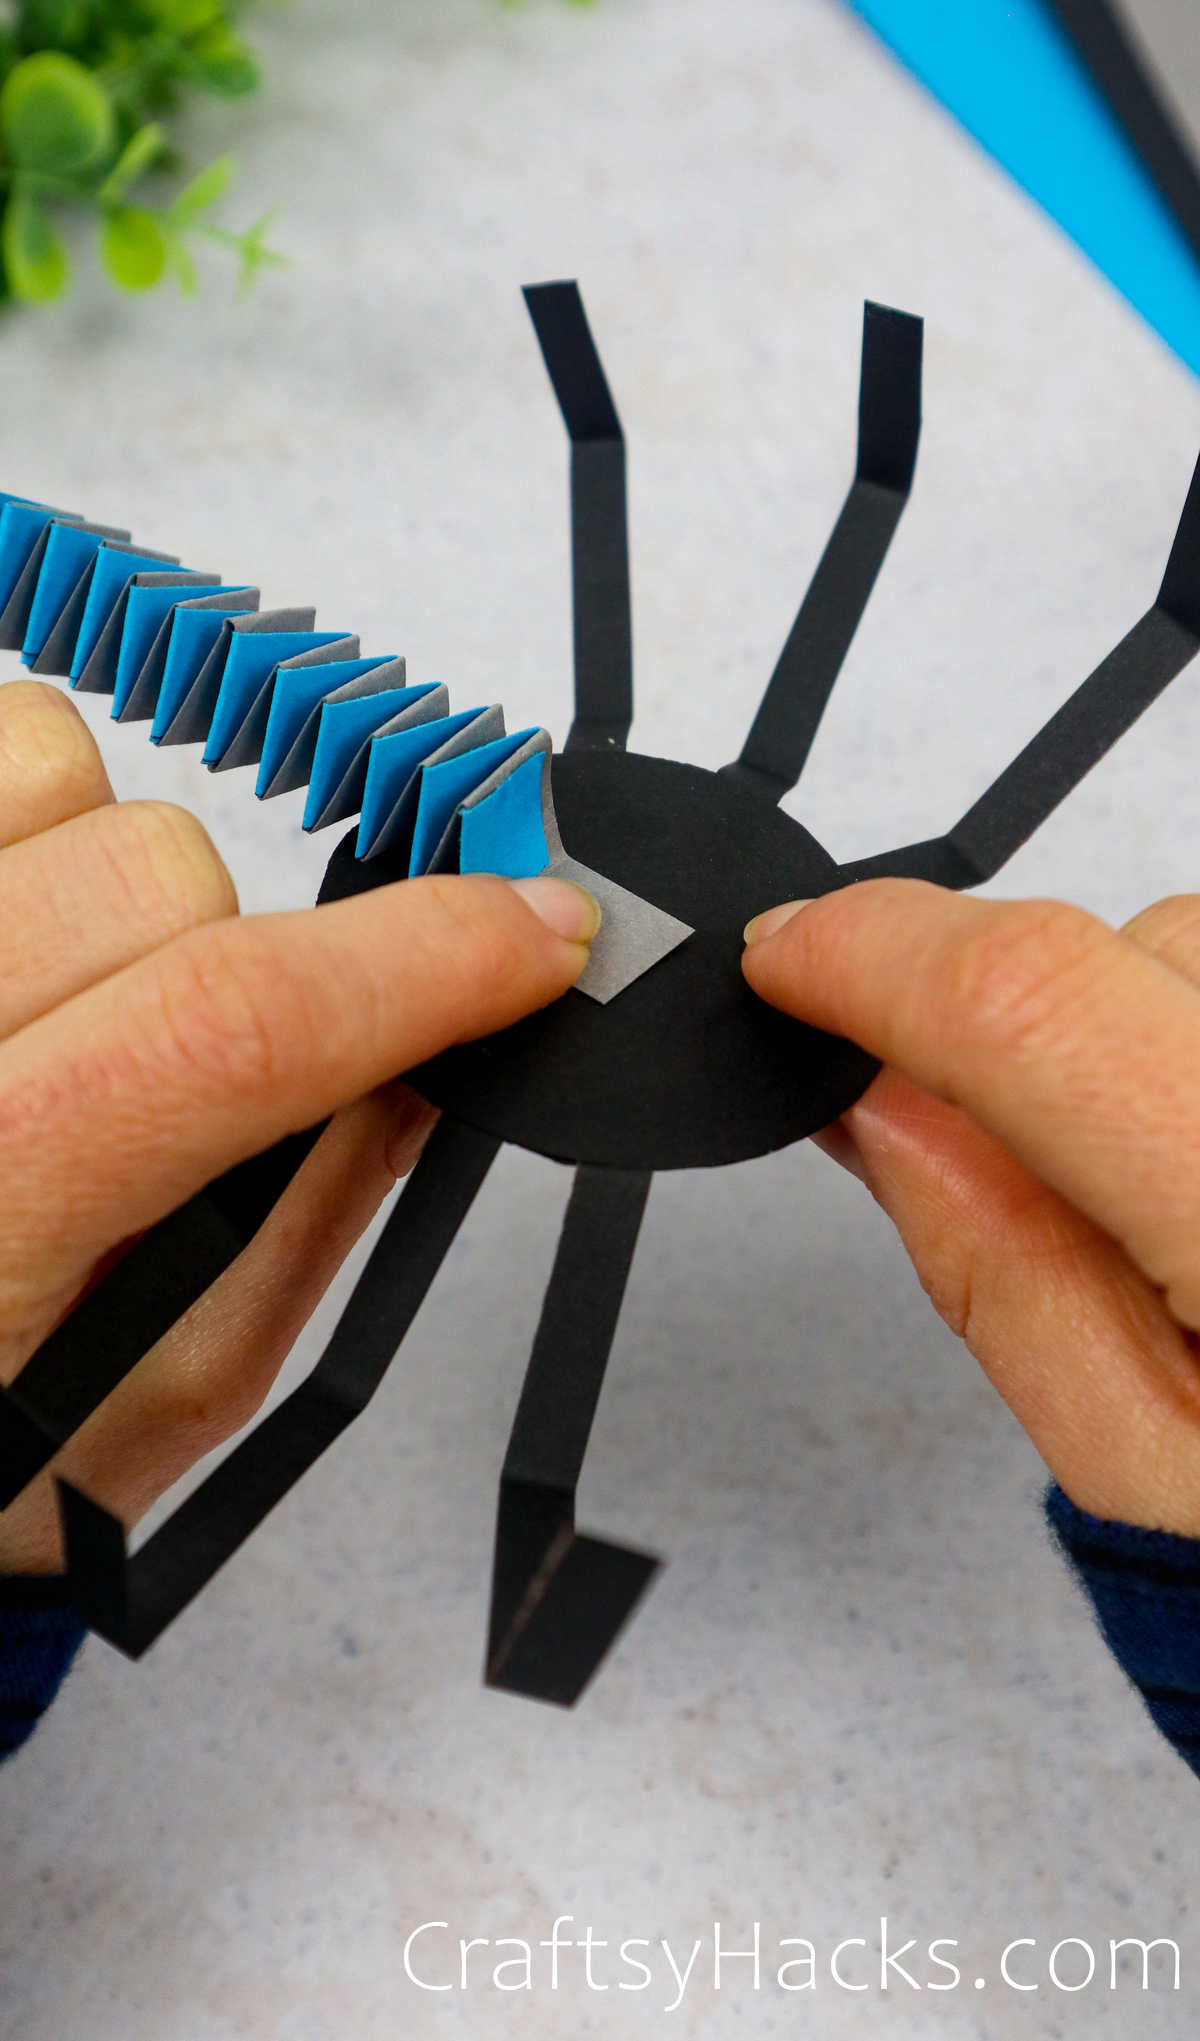
Finally, we will glue the spider onto the last unfolded spring tab we left upward. Then, attach the other end to a thicker sheet of construction paper and let it sit until dry.
And there we have it–a friendly jumpy spider! Don’t forget to give it all the time to dry properly before trying the spiders out.


