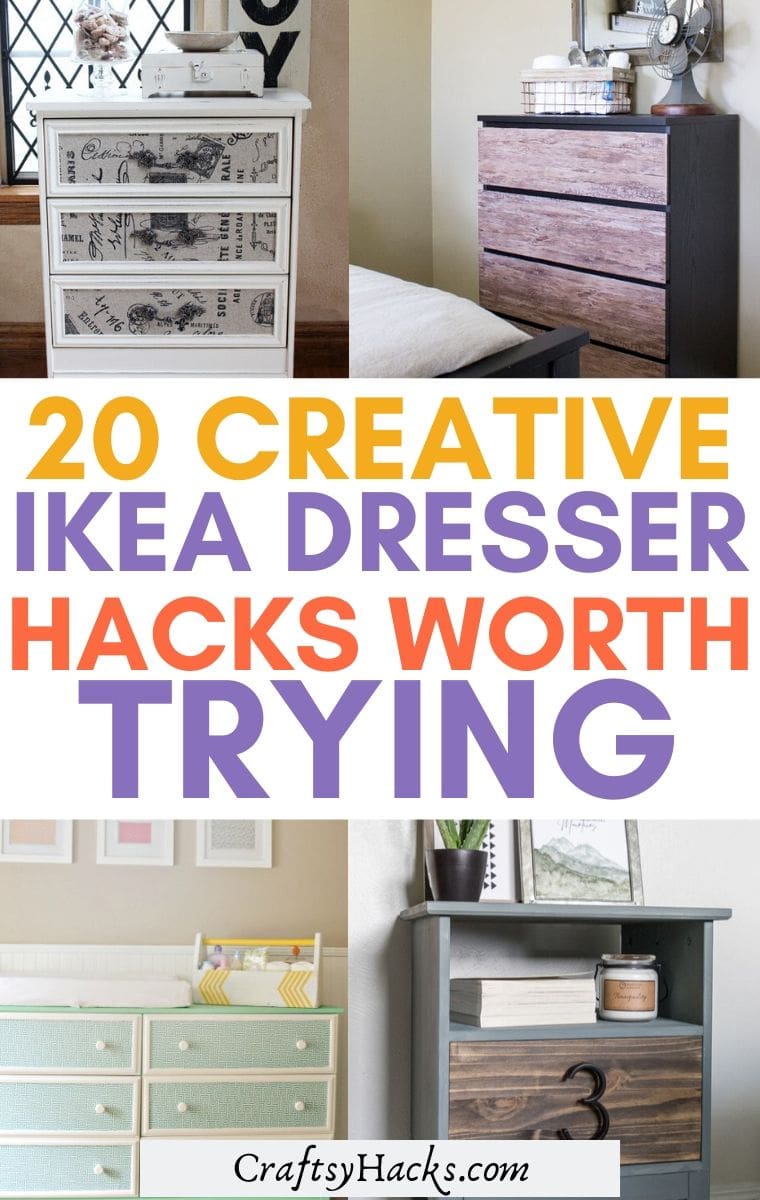
20 IKEA Dresser Hacks For Your Bedroom
This post may contain affiliate links: full affiliate disclosure.
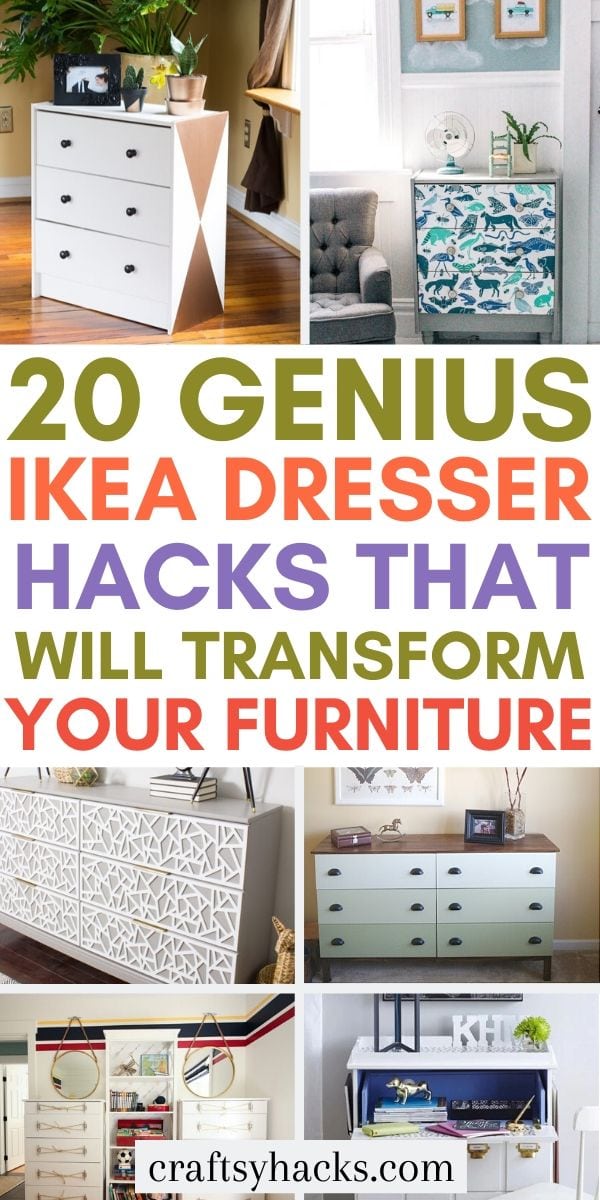
Use your IKEA dresser to add style to your bedroom. These IKEA hacks will do just that!
IKEA furniture is popular for a reason. The efficient furniture is not only great on its own, but there are also a multitude of ways to ‘hack’ the pieces to create an entirely new piece.
These hacks can allow you to save space, add storage, or simply create your own one-of-a-kind pieces of furniture to meet your specific function.
For kids’ rooms or adult spaces, these helpful hacks can come to the rescue when you’re looking for the perfect piece you can’t find. Make sure to read through the tutorials before you grab your hammer; some projects may need more time and tools alloted than others, so be prepared.
It also helps to have a helper!
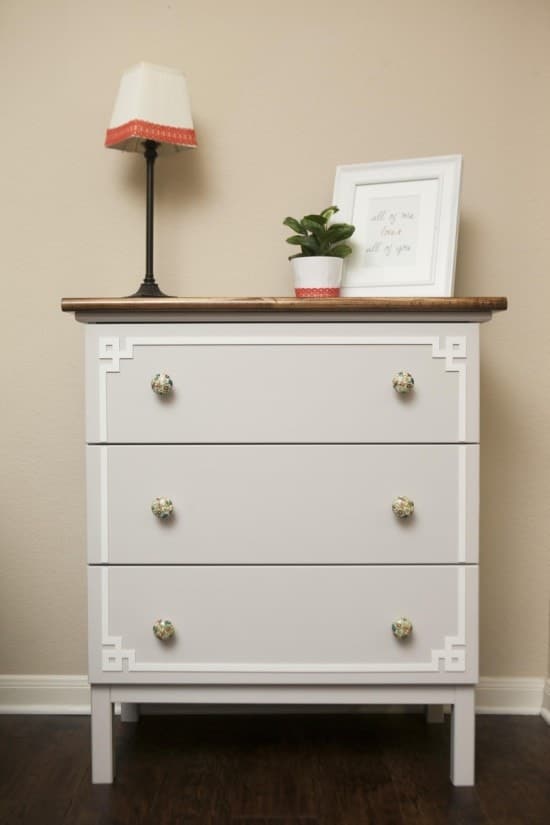
1. From Basic to Beautiful
Credit: hunker.com
This IKEA dresser hack turns your average, everyday IKEA dresser into a work of art. This dresser looks like you spent thousands.
Give your Tarva a makeover with simple pieces like wooden dowels, chalk paint like this, and golden pulls like some of these.
For a fraction of the cost of purchasing a dresser like this, you can hack your own, and you may be surprised at the results.
2. Rast Hack
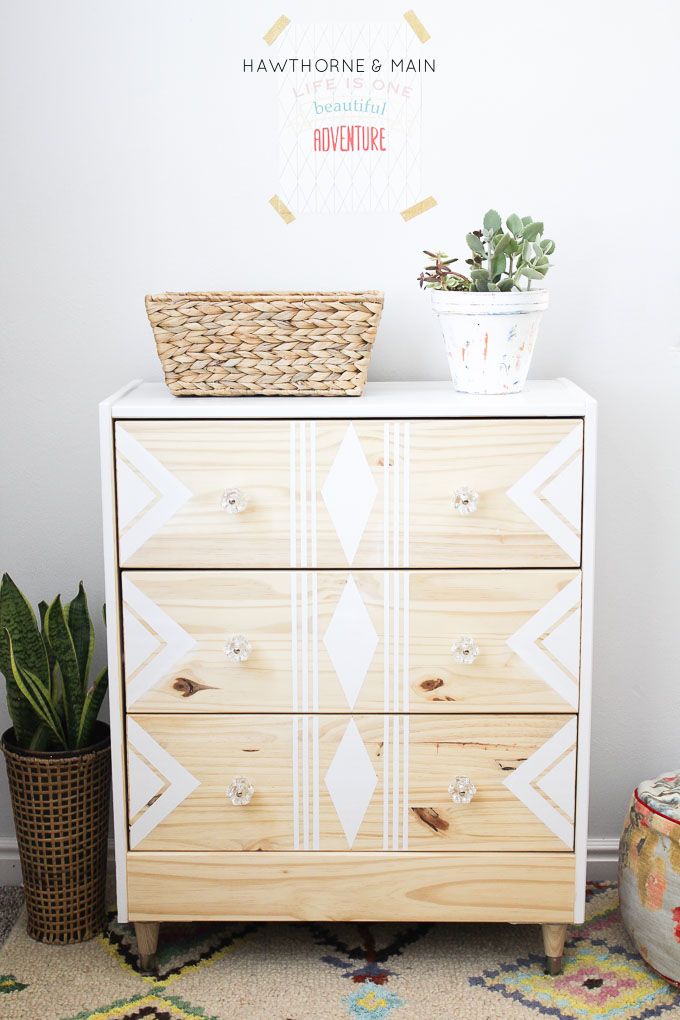
Credit: hawthorneandmain.com
With just a few simple tweaks and a custom paint job, this Rast dresser went from nice but plain to sleek and stunning.
This DIY gives the Rast a serious upgrade, and it’s not time-consuming or expensive. Adding legs to the dresser gives it a more custom feel, and the cool designs make it unique.
Legs are also functional, as they’ll make it easier to move your dresser when you want to relocate it.
3. Tarva Transformation
Credit: ikeahackers.net
Sure, there’s nothing wrong with your Tarva dresser, it’s great! But why not take a few extra steps and turn it into something absolutely fabulous!
By adding a new custom paint job, some overlays, and brand-new drawer pulls, you can put your own personal stamp on this dresser and make it look like a completely different dresser.
That’s the great thing about IKEA pieces; the bare bones are there, you just have to enhance them!
4. Ombre Tarva Dresser
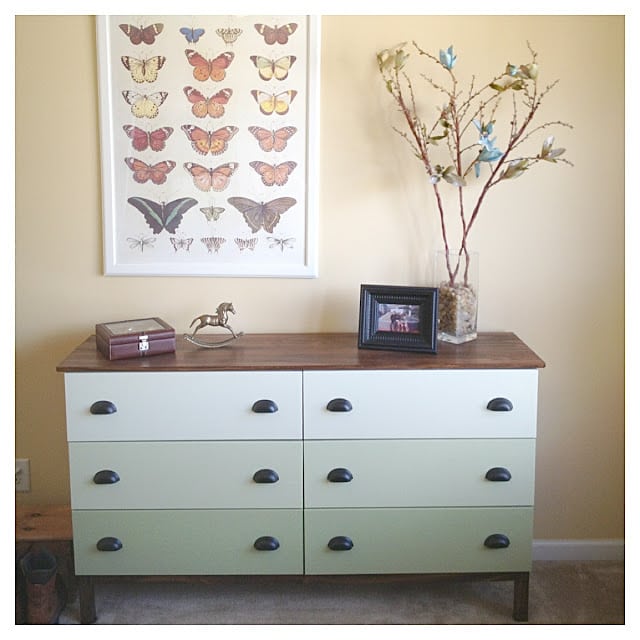
Credit: ashflynn.blogspot.com
Ombre never seems to go out of style, and the Tarva is one of IKEA’s most popular pieces for a reason. These basic, perfectly-sized dressers are just right for customizing!
This easy DIY takes the Tarva and turns it into an ombre dream. This DIY uses green, but you can apply any color to this tutorial and create a beautiful, colorful dresser to complement your existing decor.
Imagine how dreamy pink would be, or even lemony yellow. Add new drawer pulls and you’ve got a brand-new dresser.
Ombre is a trend that’s not going anywhere, so your dresser should stay stylish for years, but if you’re ready for a change, you can easily repaint it.
5. Ahoy Matey, It’s a New Tarva!
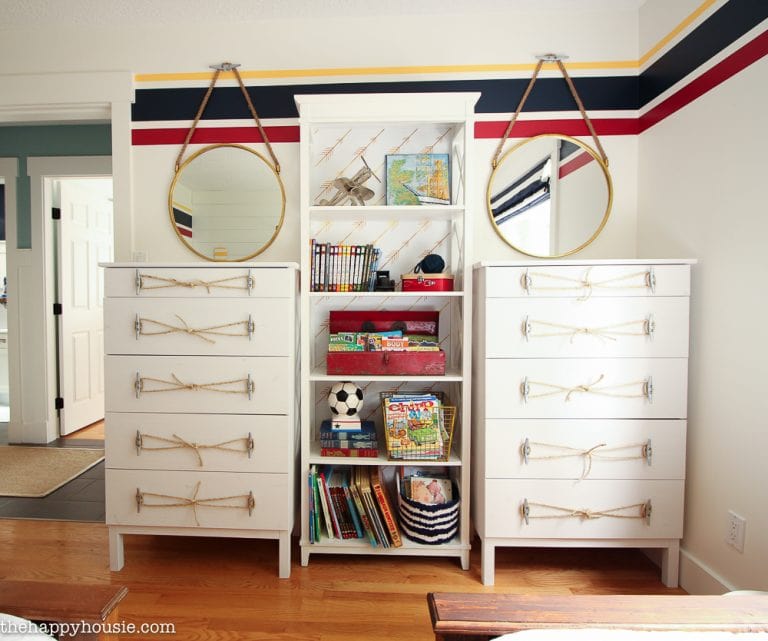
Credit: thehappyhousie.porch.com
There is no shortage of ideas online when it comes to customizing the Tarva dresser. If you love nautical-themed pieces or your child’s room is done with this theme, this is the DIY for you!
With some paint, rope, and dock cleats like these, this Tarva is ready to sail the high seas! (or, store clothes!) Your Tarva never has to be basic, and you could get even more creative with this DIY by using red or navy paint or nautical accents.
This can become the centerpiece of an adorable boat-themed bedroom alongside nautical wall hangings like anchors. Too cute!
Check out more IKEA bedroom hacks like these here.
6. One-of-a-Kind Fabric Dresser
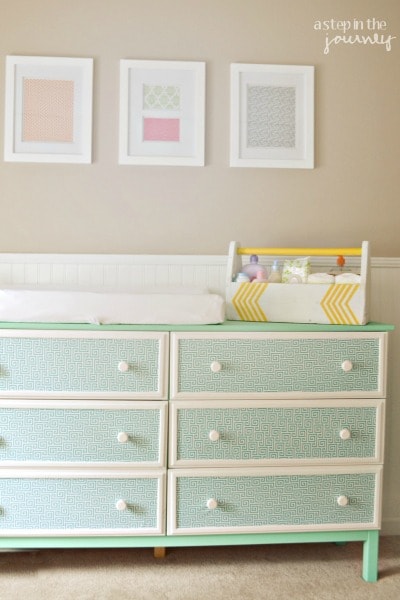
Credit: astepinthejourney.com
Yes, you guessed it, it’s another Tarva makeover! This time, you can use fabric to make a custom dresser for your room or your child’s space.
This is a fairly easy DIY that doesn’t require too many materials or steps. Paint the dresser in a color that complements the fabric you pick, and you will definitely fall in love with the results!
Using fabric to customize a dresser is definitely a unique idea that you don’t see often, and imagine how many options there are when it comes to picking fabric.
For the dresser, you’ll definitely need a Krylon Adhesive Spray!
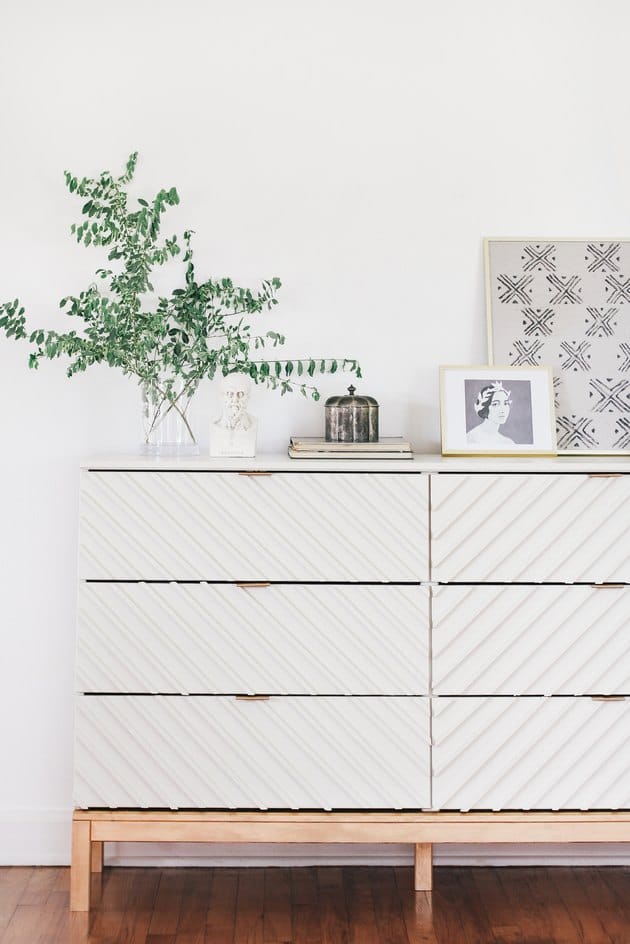
7. Geometric Dream Dresser

Credit: erinspain.com
Overlays are the secret to this amazingly cool and modern-looking dresser DIY. This dresser will instantly become the focal point in any room you add it to.
Other small touches like new legs, pretty pulls like these, and paint combine to create a beautiful dresser you’ll never believe was a basic chest before.
Give your Tarva new life or upcycle an old dresser into something very “now” with this IKEA hack.
8. Colorblock Nightstand

Credit: cherishedbliss.com
A super simple nightstand hack takes your plain Tarva nightstand and gives it a cool, almost rustic colorblock appearance.
Though this isn’t a terribly difficult DIY, the result will make your nightstand look like a completely different, shabby piece of furniture, and the open drawer space is a neat effect that you can use to put your favorite knick-knacks or a stack of books.
It’s the perfect nightstand! And it blends in well with any type of decor. Use FolkArt Chalk Finish Paint to bring the nightstand to light.
9. Whimsical Dresser DIY
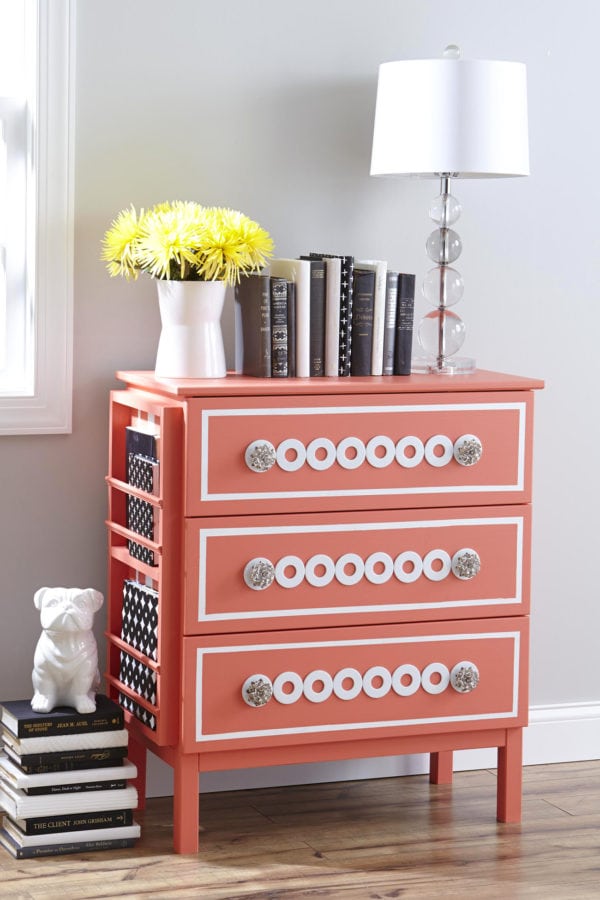
Credit: thistlewoodfarms.com
You’ll never recognize your humble IKEA dresser once you transform it into this whimsical wonder. This is an adorable idea for a kids’ room or even for a cute kitchen space.
You may want to show this piece off in one of the common areas of your home.
And no, you don’t have to be a genius at construction; this dresser was done over with glue! Things like washers and other common objects were used creatively to make this dresser an object of art.
10. Two Small = One Big
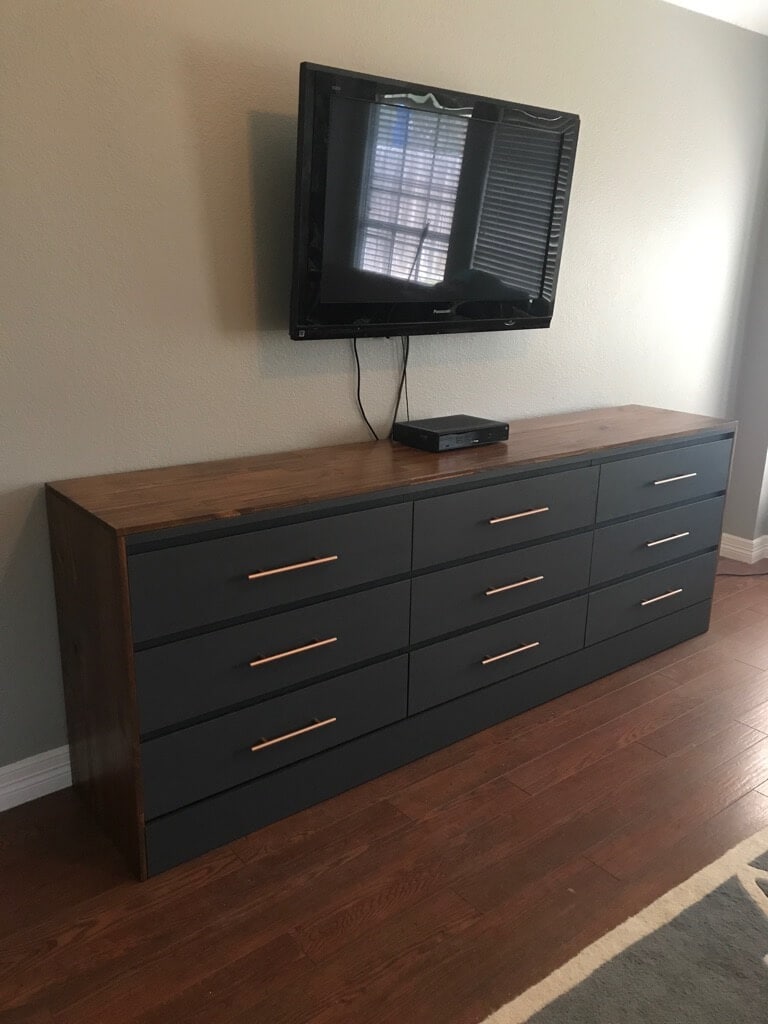
Credit: ikeahackers.net
This DIY takes two dressers and turns them into one supersized dresser. It’s a pretty clever way to make one sleek piece from two pieces that are differently-sized.
This DIY turns the dresser into a cohesive piece that offers a neater look than separate pieces. Pretty drawer pulls and a new coat of paint make this look like a completely different dresser.
You could even use these chest drawers for your office or use it as an IKEA desk hack!
11. The Wonder of Wallpaper
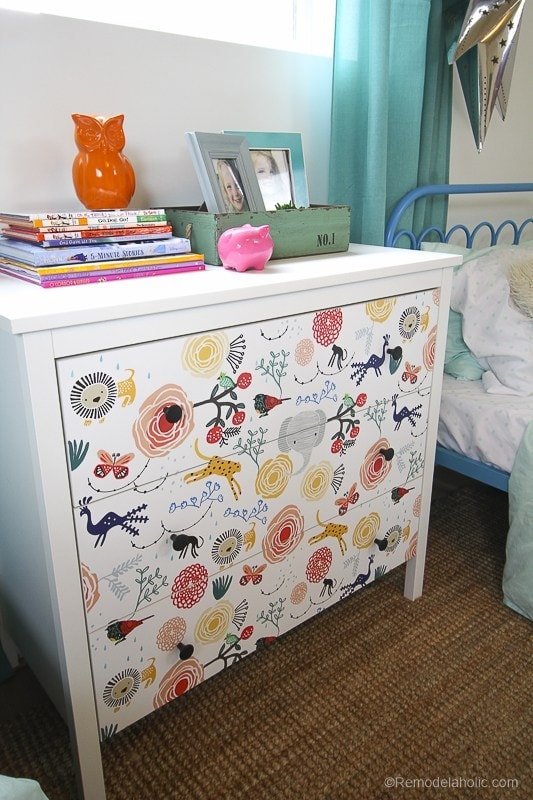
Credit: remodelaholic.com
Want to completely upgrade an IKEA dresser or nightstand but you don’t have the budget for a total restoration?
One word: wallpaper! Pick a cute wallpaper and use it to accent the front of the dresser.
Check out multiple options for wallpapers here!
If it’s in your budget, switching out the drawer pulls is also an easy and inexpensive way to change up how a dresser looks, but you’ll be surprised how easy and cheap this facelift is.
12. Personalize Your Dresser DIY

Credit: athomewithashley.com
The Rast dresser is great. It’s a perfect size, it’s affordable, but best of all, it’s totally basic, which means you can customize it to match your space as you desire.
This DIY isn’t super costly or time-consuming, and essentially you can create a whole new dresser just by adding legs, using chalk paint, and accenting the front of the dresser with wallpaper.
You will not believe this is even the same dresser! It’s amazing how just a few changes can create the look of a totally different piece of furniture, and you don’t even have to be proficient in DIY to do this hack.
Also, it tremendously increases your storage space which is always great for organization purposes.
13. Rustic Malm
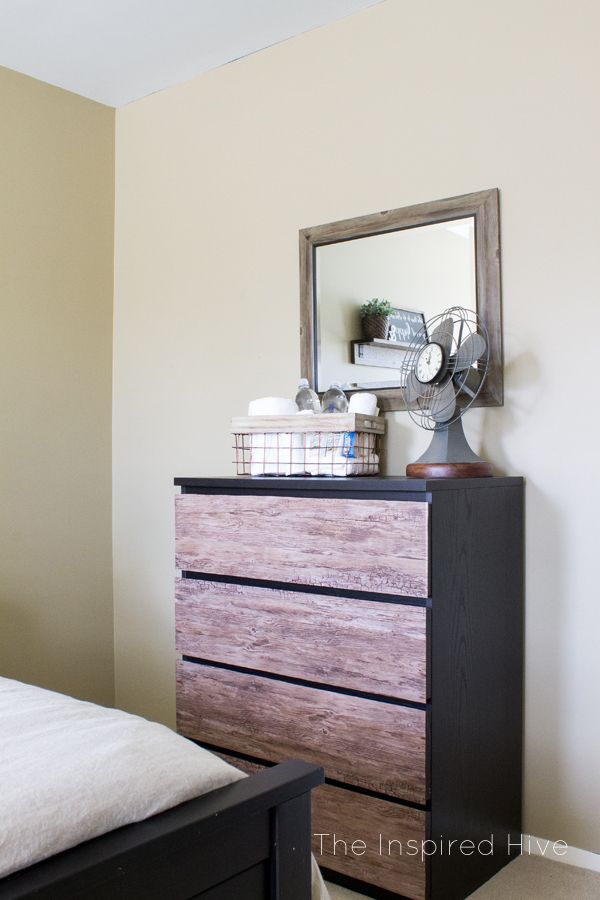
Credit: theinspiredhive.com
Though IKEA furniture is fairly simplistic and basic, it does have a more modern look to it.
If your aesthetic is more homey, shabby chic, or rustic, there are a few simple tweaks you can make to your Malm to make it look like it blends in with your existing decor nicely.
Mainly using vinyl that has the appearance of the woodgrain is what gives your Malm a whole new flavor. This is what accents the drawers. Then, you can paint the rest of your dresser.
This will give your dresser a completely fresh look and that shabby style you’re after but without the high price tag of shabby chic furniture.
Experiment with different paint colors and different wood grains before you settle on one. There are many combinations you can use.
14. Retro Tarva with Changing Pad
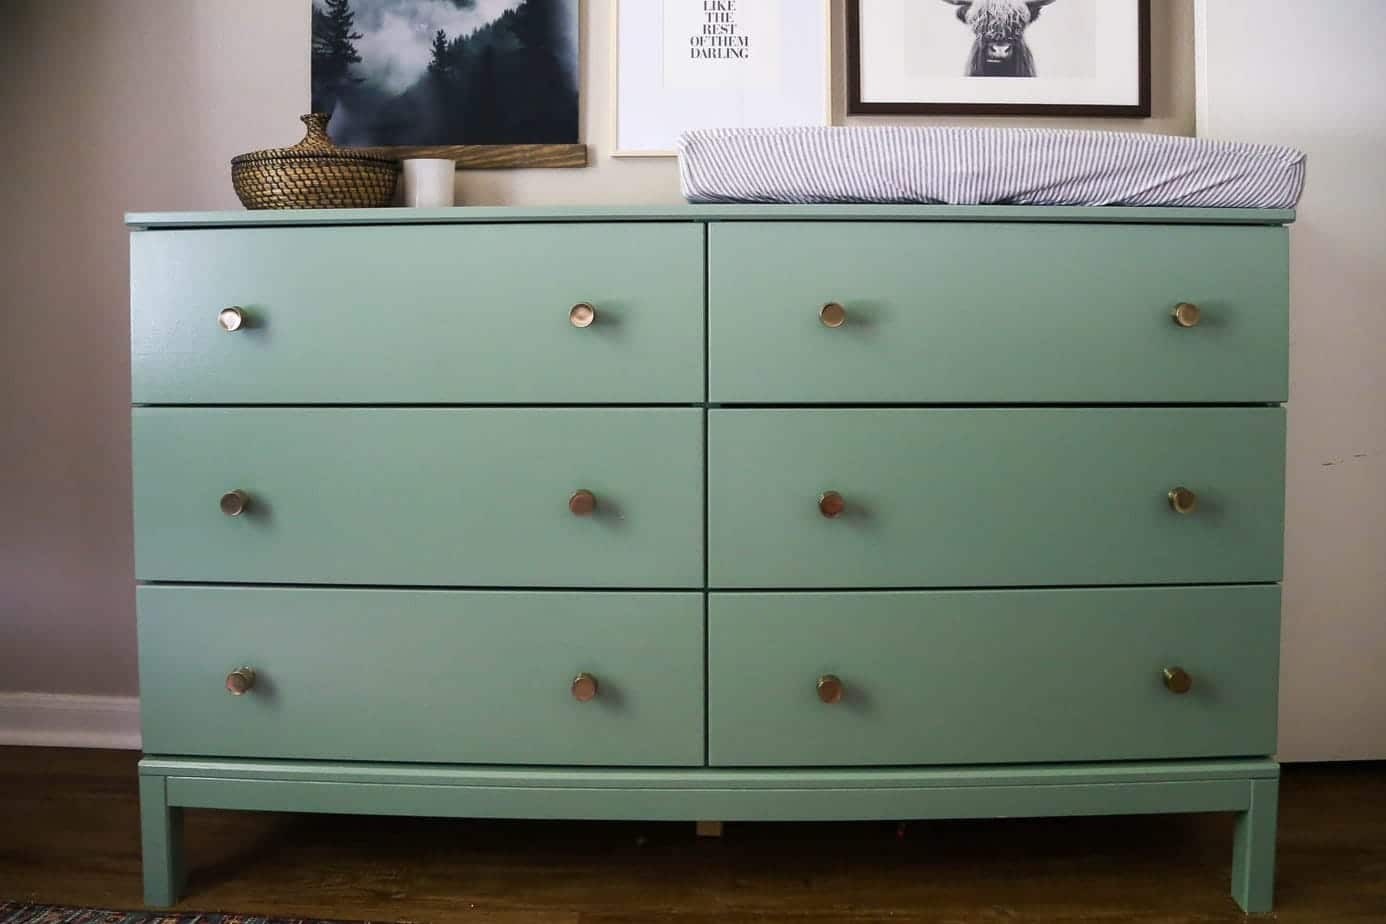
Credit: loveandrenovations.com
Perfect for a nursery, all this Tarva needed was a paint job, new drawer pulls, and a changing pad to turn it into a just-right addition to a nursery.
Using a vintage-style sage green paint color and sleek, small drawer knobs, this dresser got a retro renovation.
Adding a changing pad on top turns this dresser into a piece that does double duty. This is such a stylish piece that your child can also continue to use it as he or she grows up.
You could even repaint it later to match new bedroom decor as your child gets older.
15. Think Pink
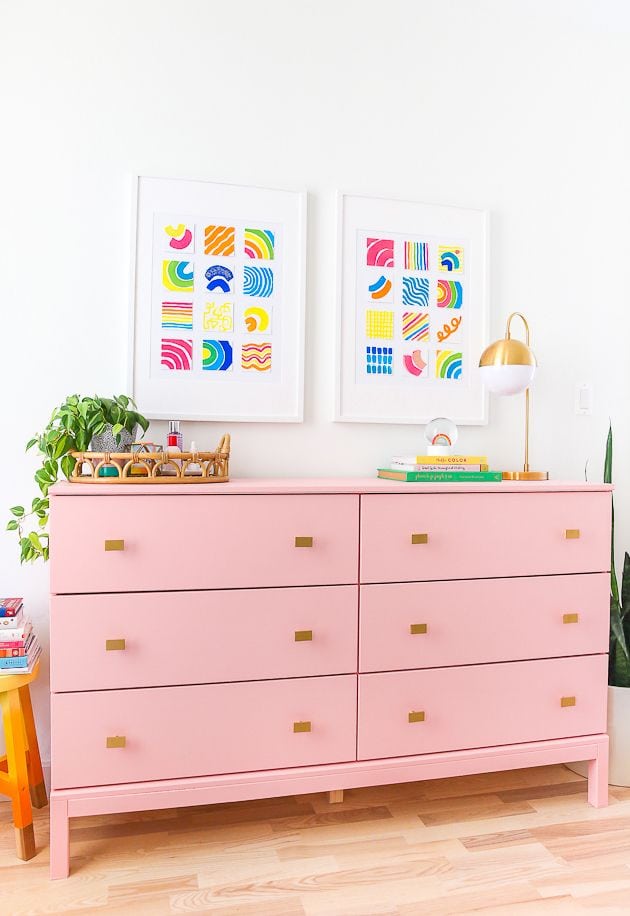
Credit: thecraftedlife.com
Turn a Tarva dresser into the shade you’ve been coveting with a coat or two of paint specifically designed for furniture.
In this case, the tutorial calls for furniture paint by Valspar. It’s meant to last and provides a beautiful sheen for furniture.
This DIY uses light pink paint, but you could also select the color you desire and transform your wooden Tarva into a beautiful piece that complements your bedroom decor.
Add gorgeous drawer pulls and you have a brand-new, upscale dresser that looks much more costly than it truly was!
16. From Cheap to Chic
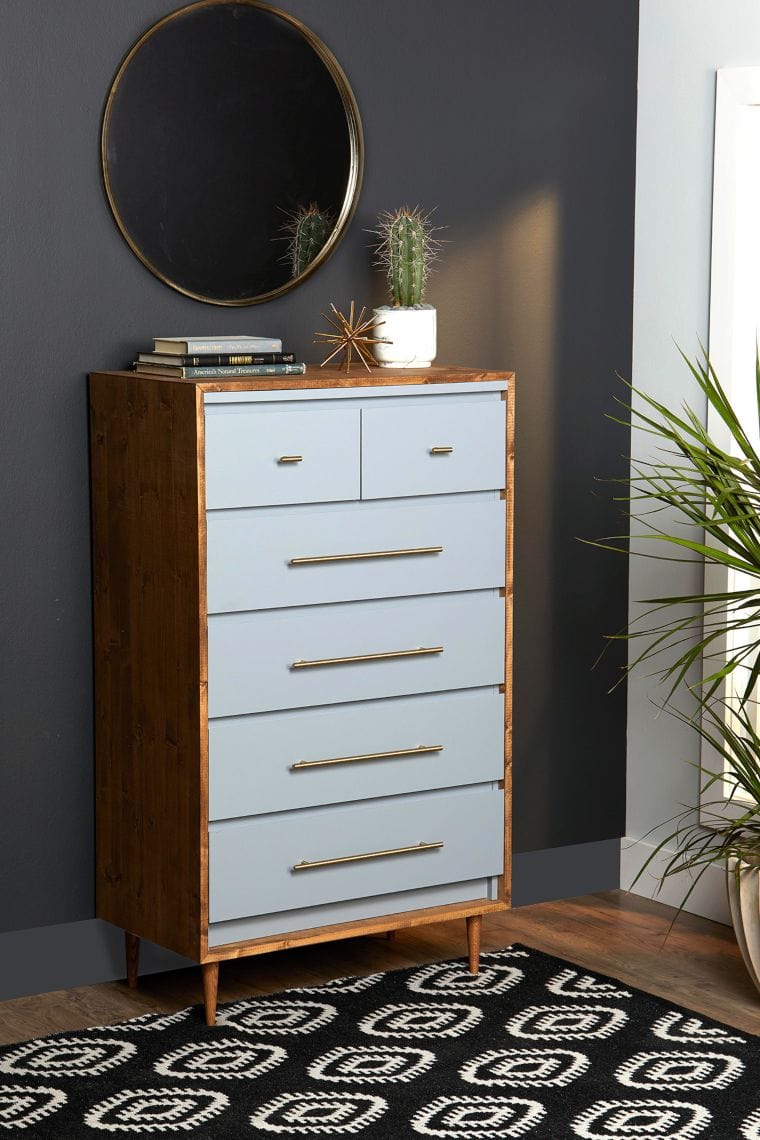
Credit: bhg.com
By adding extra wood panels, paint, and pretty pulls, you can instantly not only add flair to your existing IKEA dresser, but give it an upgrade that looks expensive and stylish.
This is a fairly simple DIY that does require some basic supplies, but once you’re done, your dresser will look like it came from a high-end furniture boutique instead of your local IKEA.
17. Dresser to Desk Transformation
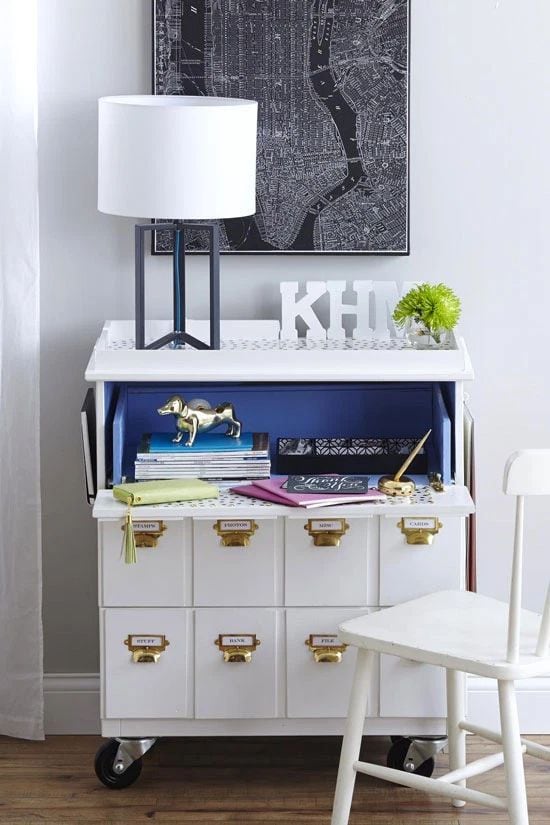
Credit: inmyownstyle.com
Perfect for a kids’ dorm room or bedroom, this IKEA makeover uses some wood and accessories to create the coolest rolling desk. In fact, you may never know that it started out life as a dresser.
With plenty of storage drawers, a pull-open desktop, and a sizable cubby, this dresser makes for a perfect desk! There’s also room on top for a lamp or other decorations.
This DIY will take an investment of time and supplies, so it makes for a good weekend project you may want to recruit another adult for.
18. Stained Rast Dresser
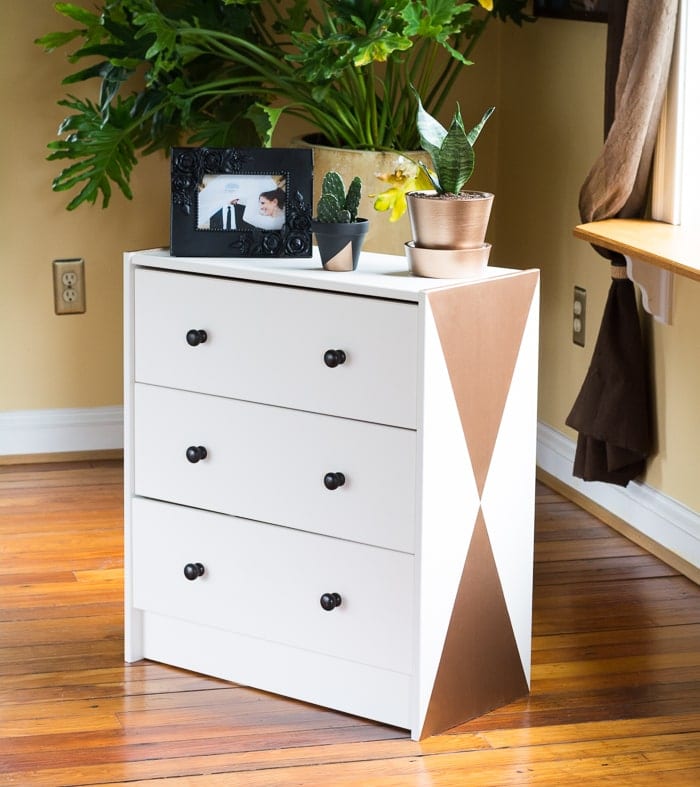
Credit: bybrittanygoldwyn.com
So your Rast is looking a bit boring these days. Why not give it a makeover?
All you need is some stain and a few other supplies, and you can turn this boring piece into something really unique and cool.
Staining is easy, and you don’t need to be a professional DIY-er to tackle this task.
Gold designs on each side give a gilded look to the piece that upscales it even more, creating an eye-catching, modern appeal that adds even more to this piece, and it’s a simple process.
Don’t forget to change out the drawer pulls, which can make a huge difference in the way a dresser looks.
19. From Meh to Marvelous!

Credit: confessionsofaserialdiyer.com
You may look at the finished product of this DIY and think wow, I could never do that! But when you break it down, you’ll see it’s not that difficult after all.
Pretty fabric enhances the front of the drawers, while molding makes them stand out. A fresh coat of paint, some legs, new pulls, and voila!
You’ve got a brand-new dresser that will literally become the showpiece in any room you place it in.
Conclusion
Are you going to try any of these IKEA dresser hacks? Let me know in the comment section!


I stayed up late in the morning just so I could continue the looking at your information and I will enjoy creating these things especially the desks from a dresser but I would use a piano hinge and add a chain or ropes either side so I could close it