DIY Macrame Keychain (Step-by-Step Tutorial)
This post may contain affiliate links: full affiliate disclosure.

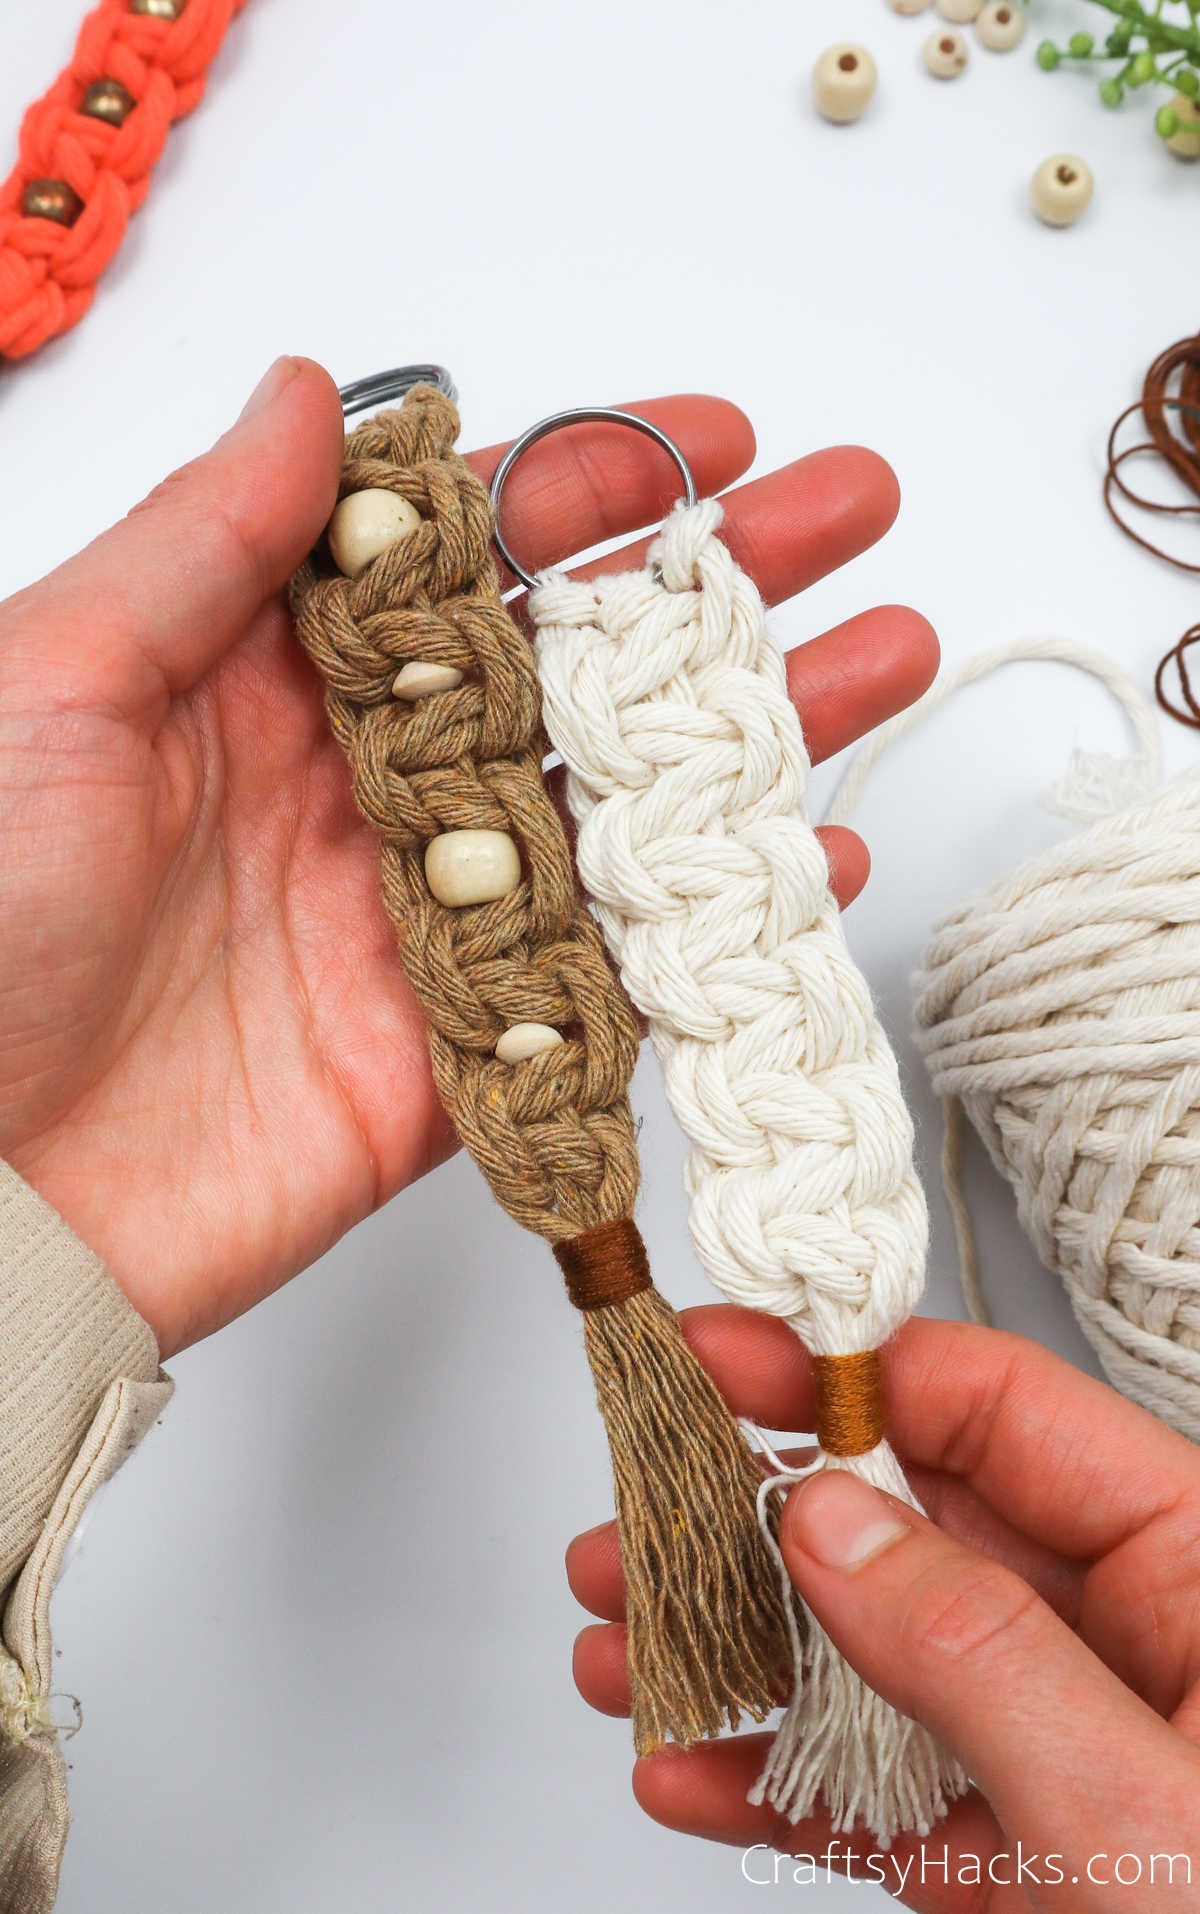
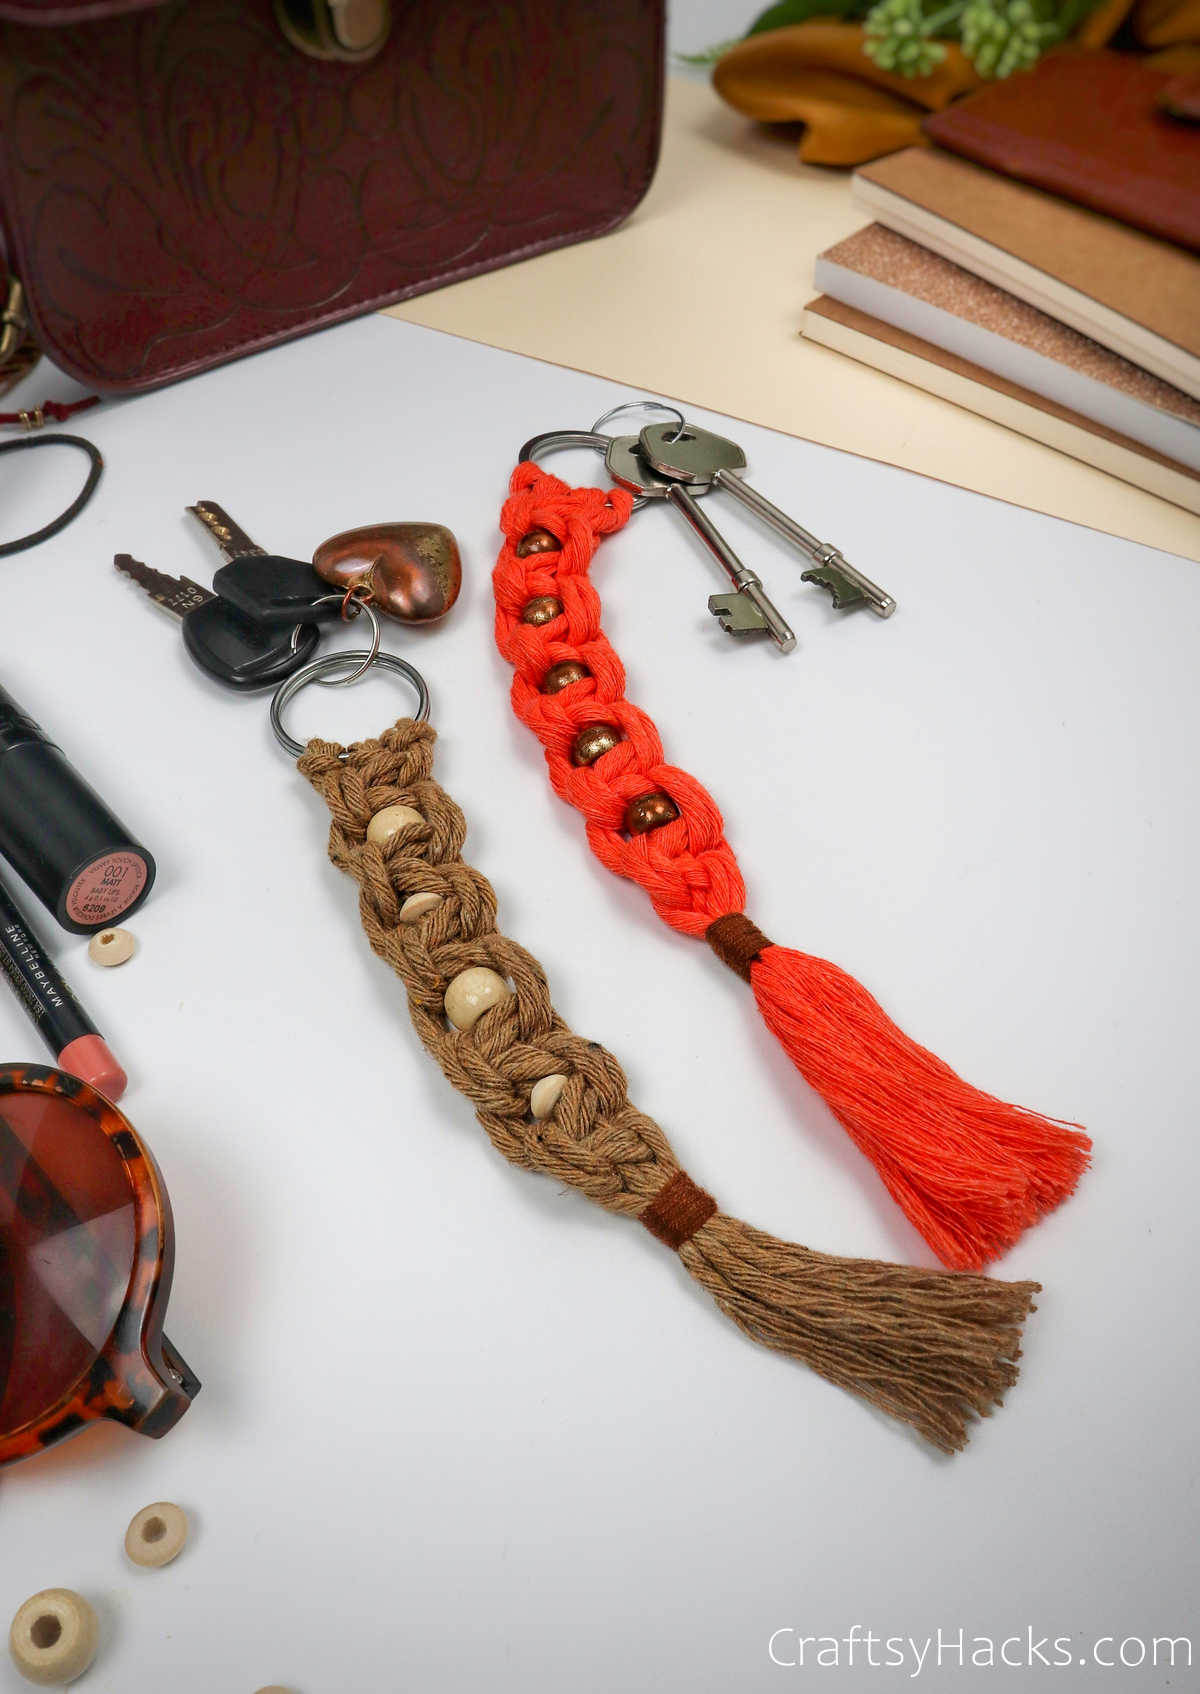
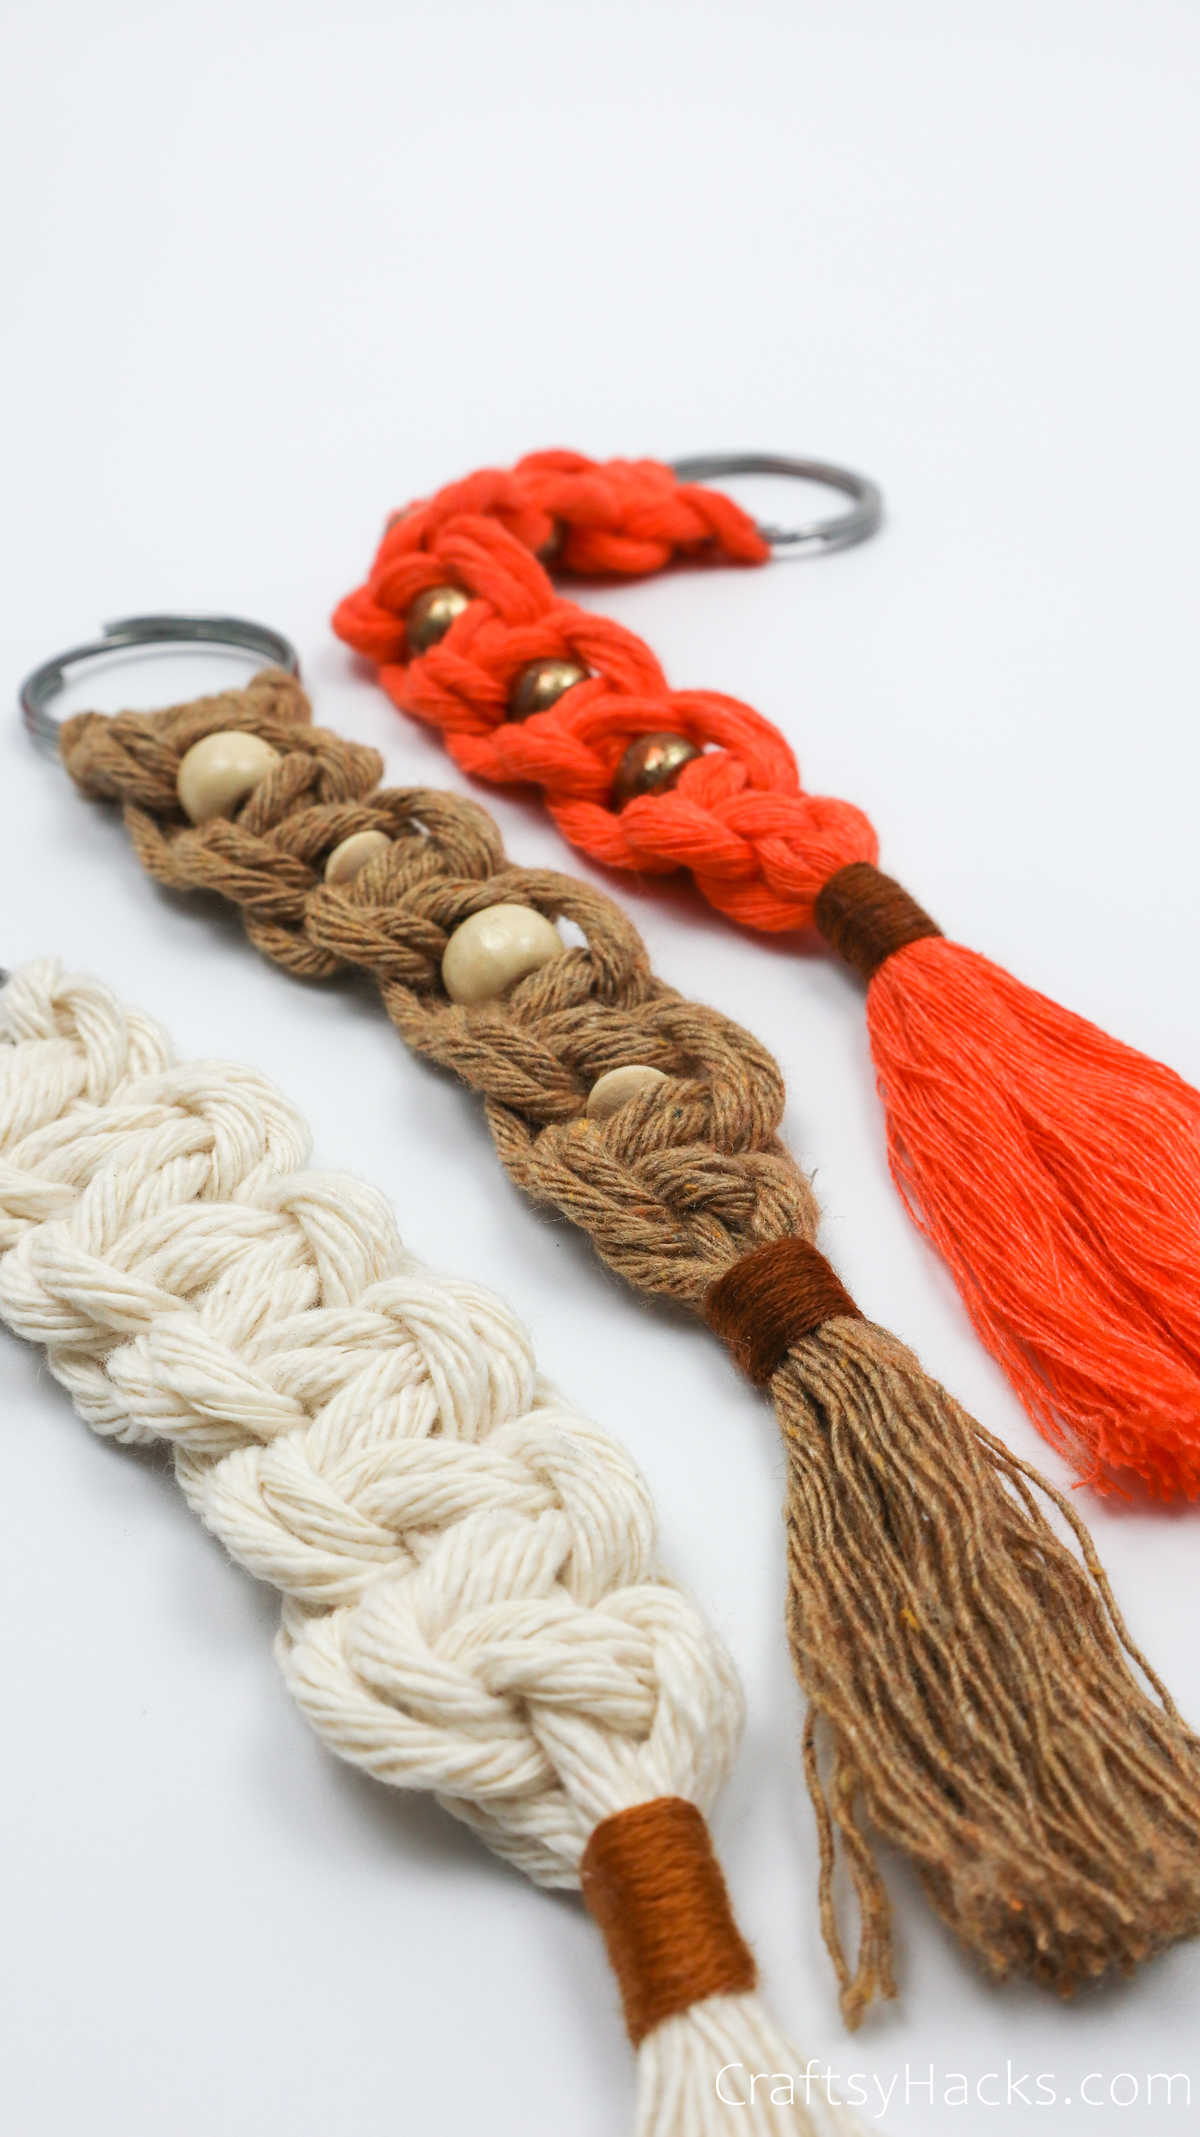
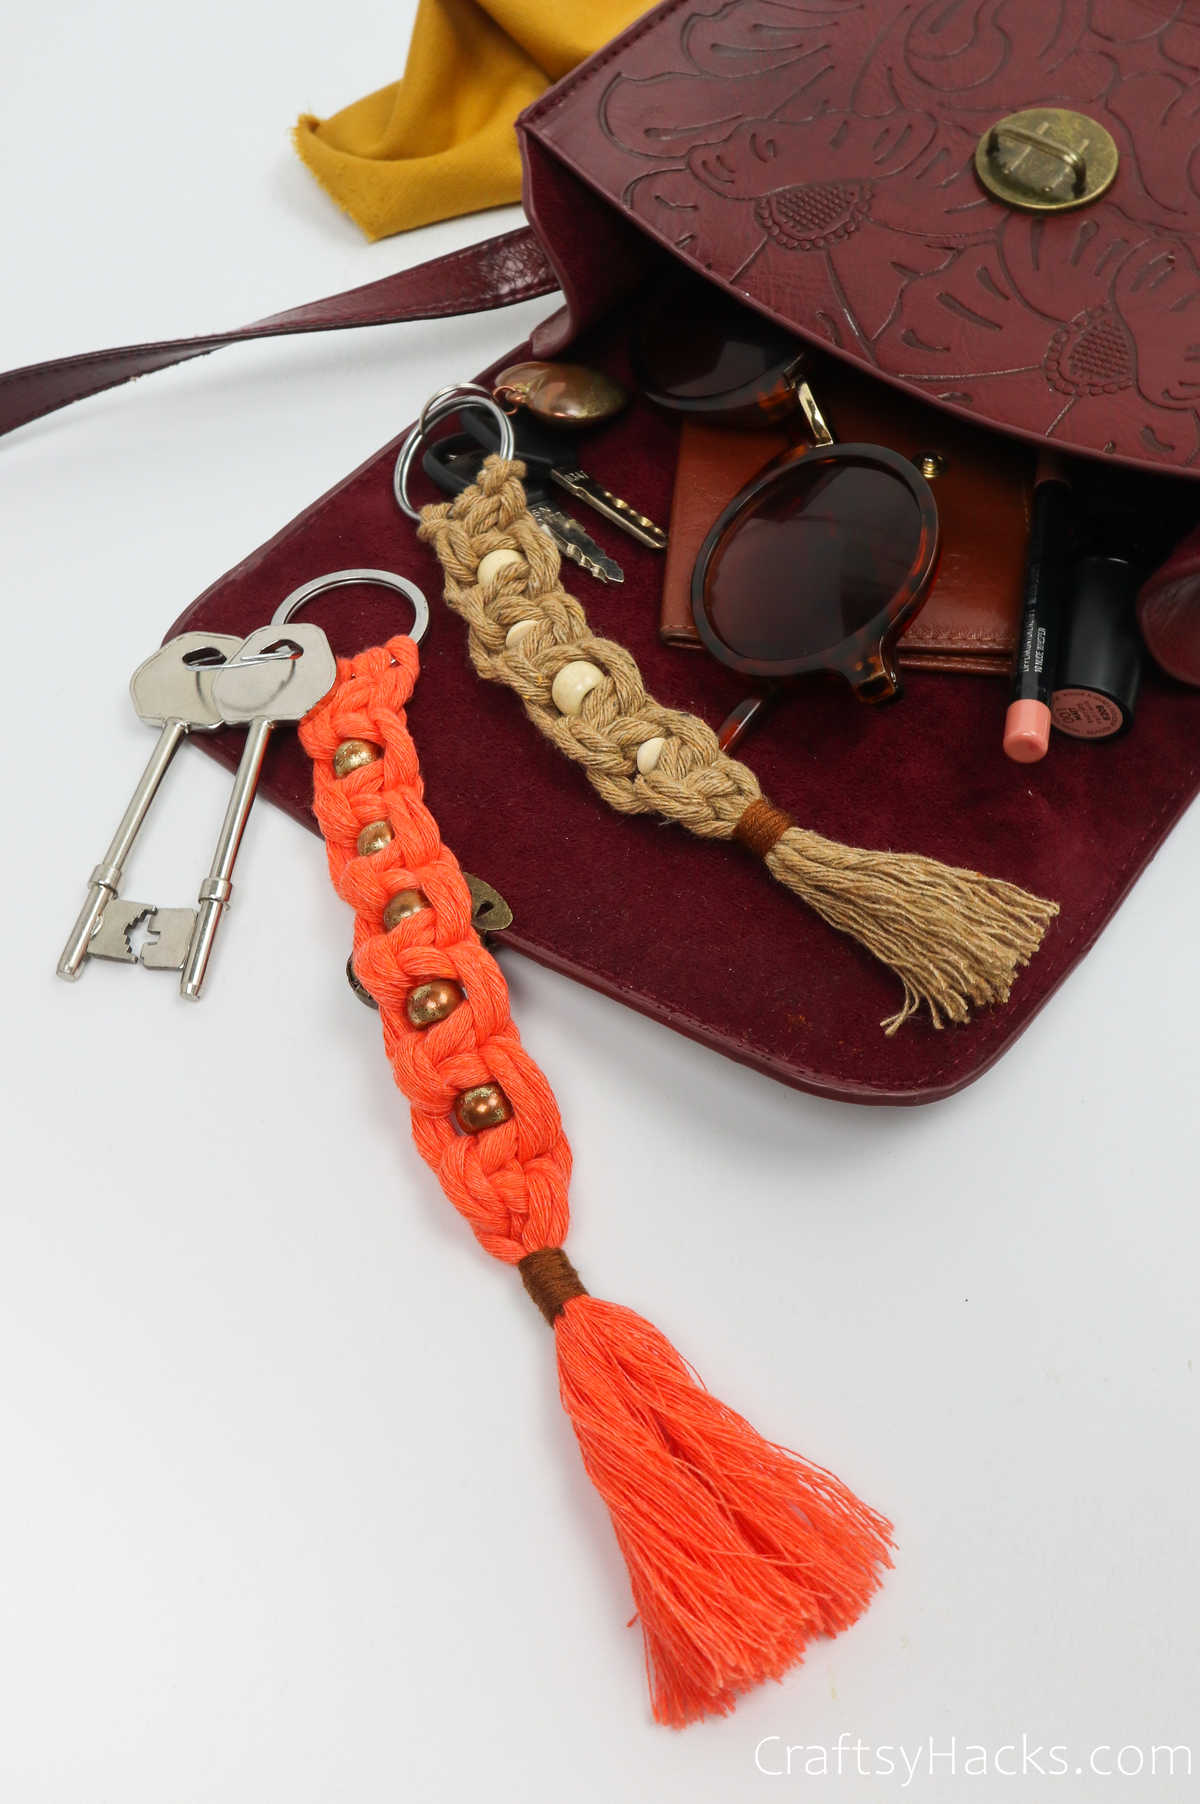
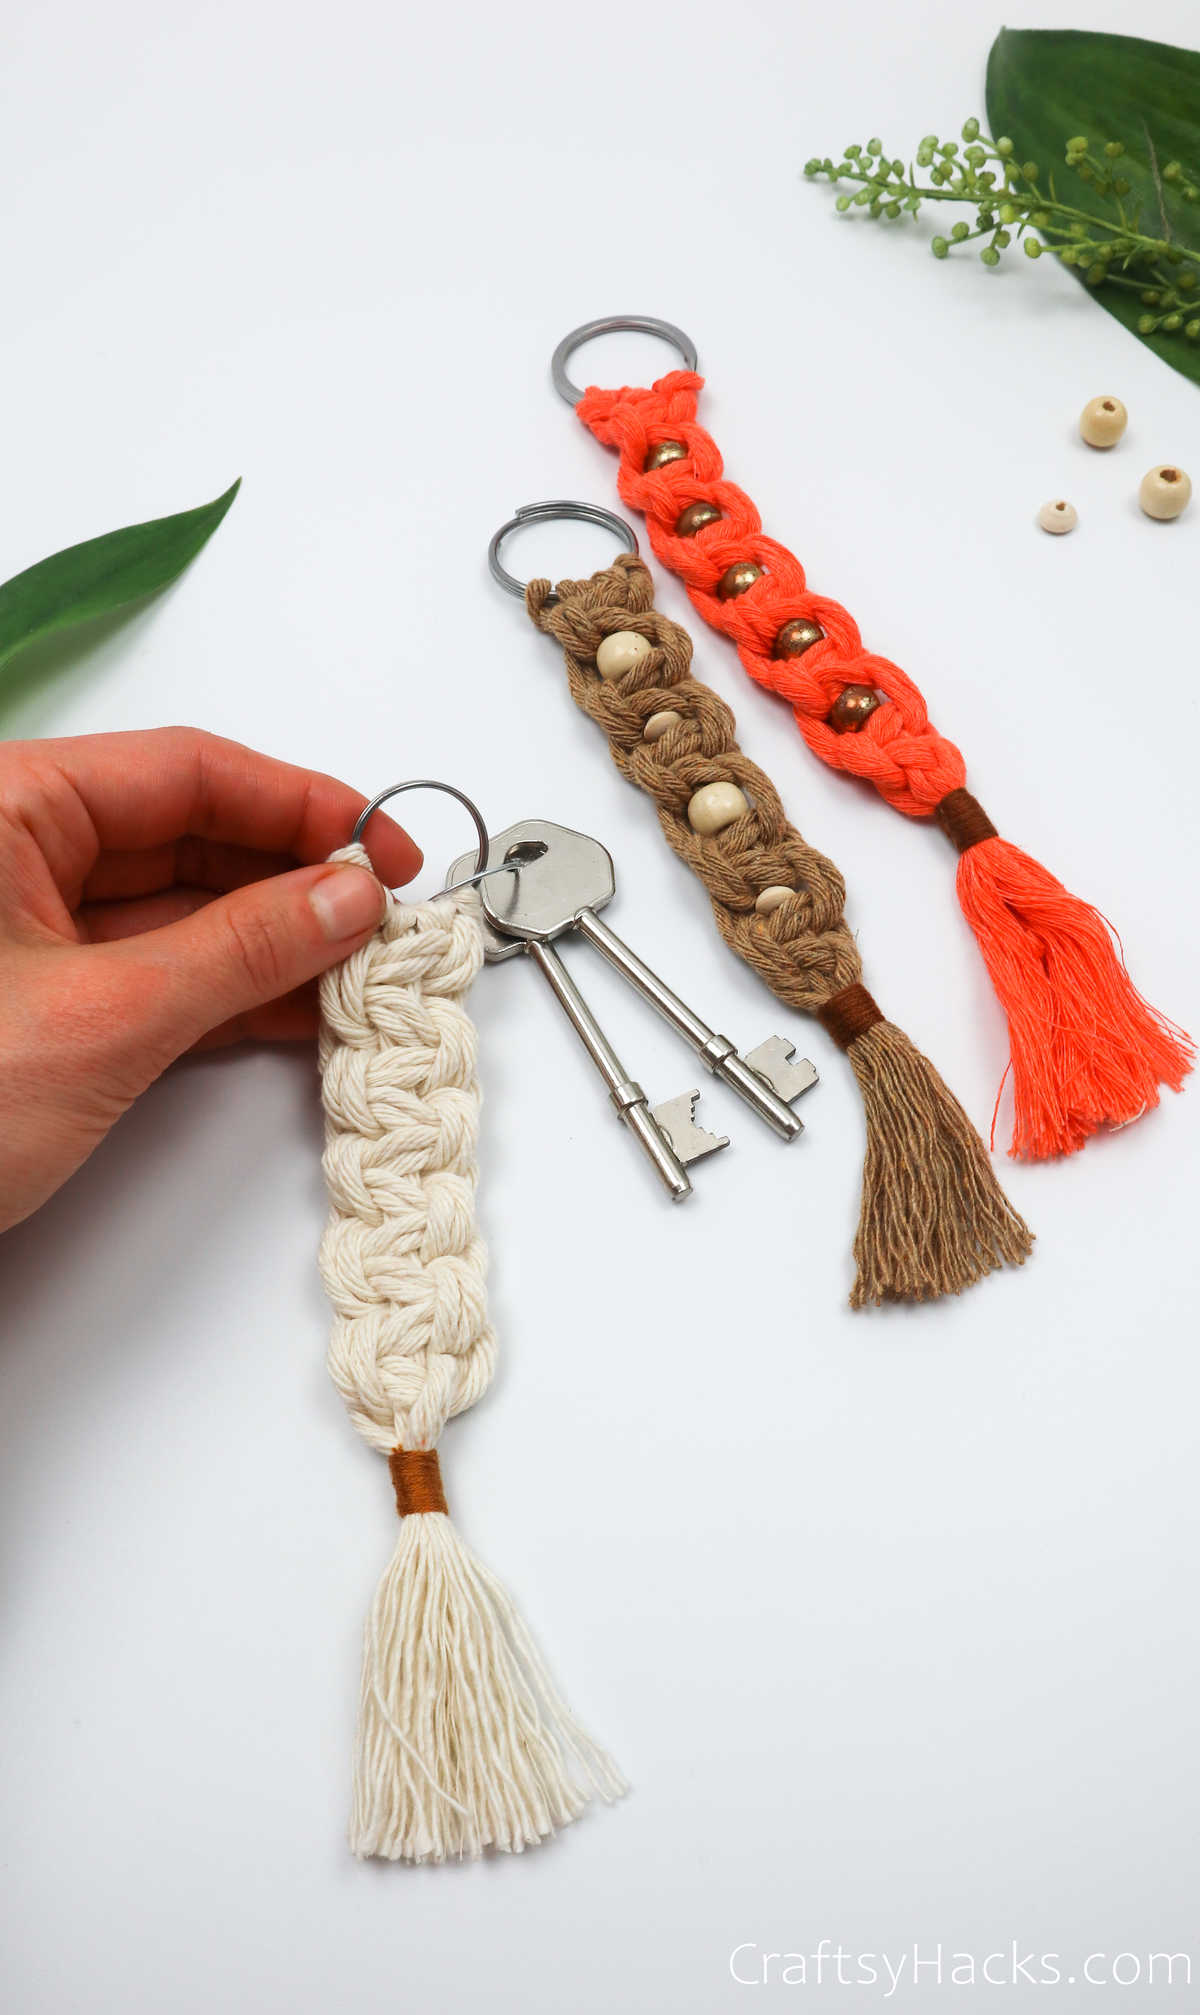
This macrame keychain is a perfect craft for those beginning their macrame journey. A beautiful item you can gift to whomever you want.
At one point or another, we have all gone a little overboard with accessorizing our bags and keys with keychains. I remember a few years ago when Scooby ties were all in rage, and before that, embroidery floss hangings and keychains.
You’ll be surprised by what you can pull off with just a key ring and a few scraps of thread.
Now, though, it’s the era of macrame, and we’re all gaga over how boho-chic and cute macrame products are. Why don’t you check out this super simple DIY macrame keychain project?
If it’s your first foray into the world of macrame, then this project is perfect to set you off. But this keychain is also pretty amazing for even the most expert macrame artists to make and hang their keys from
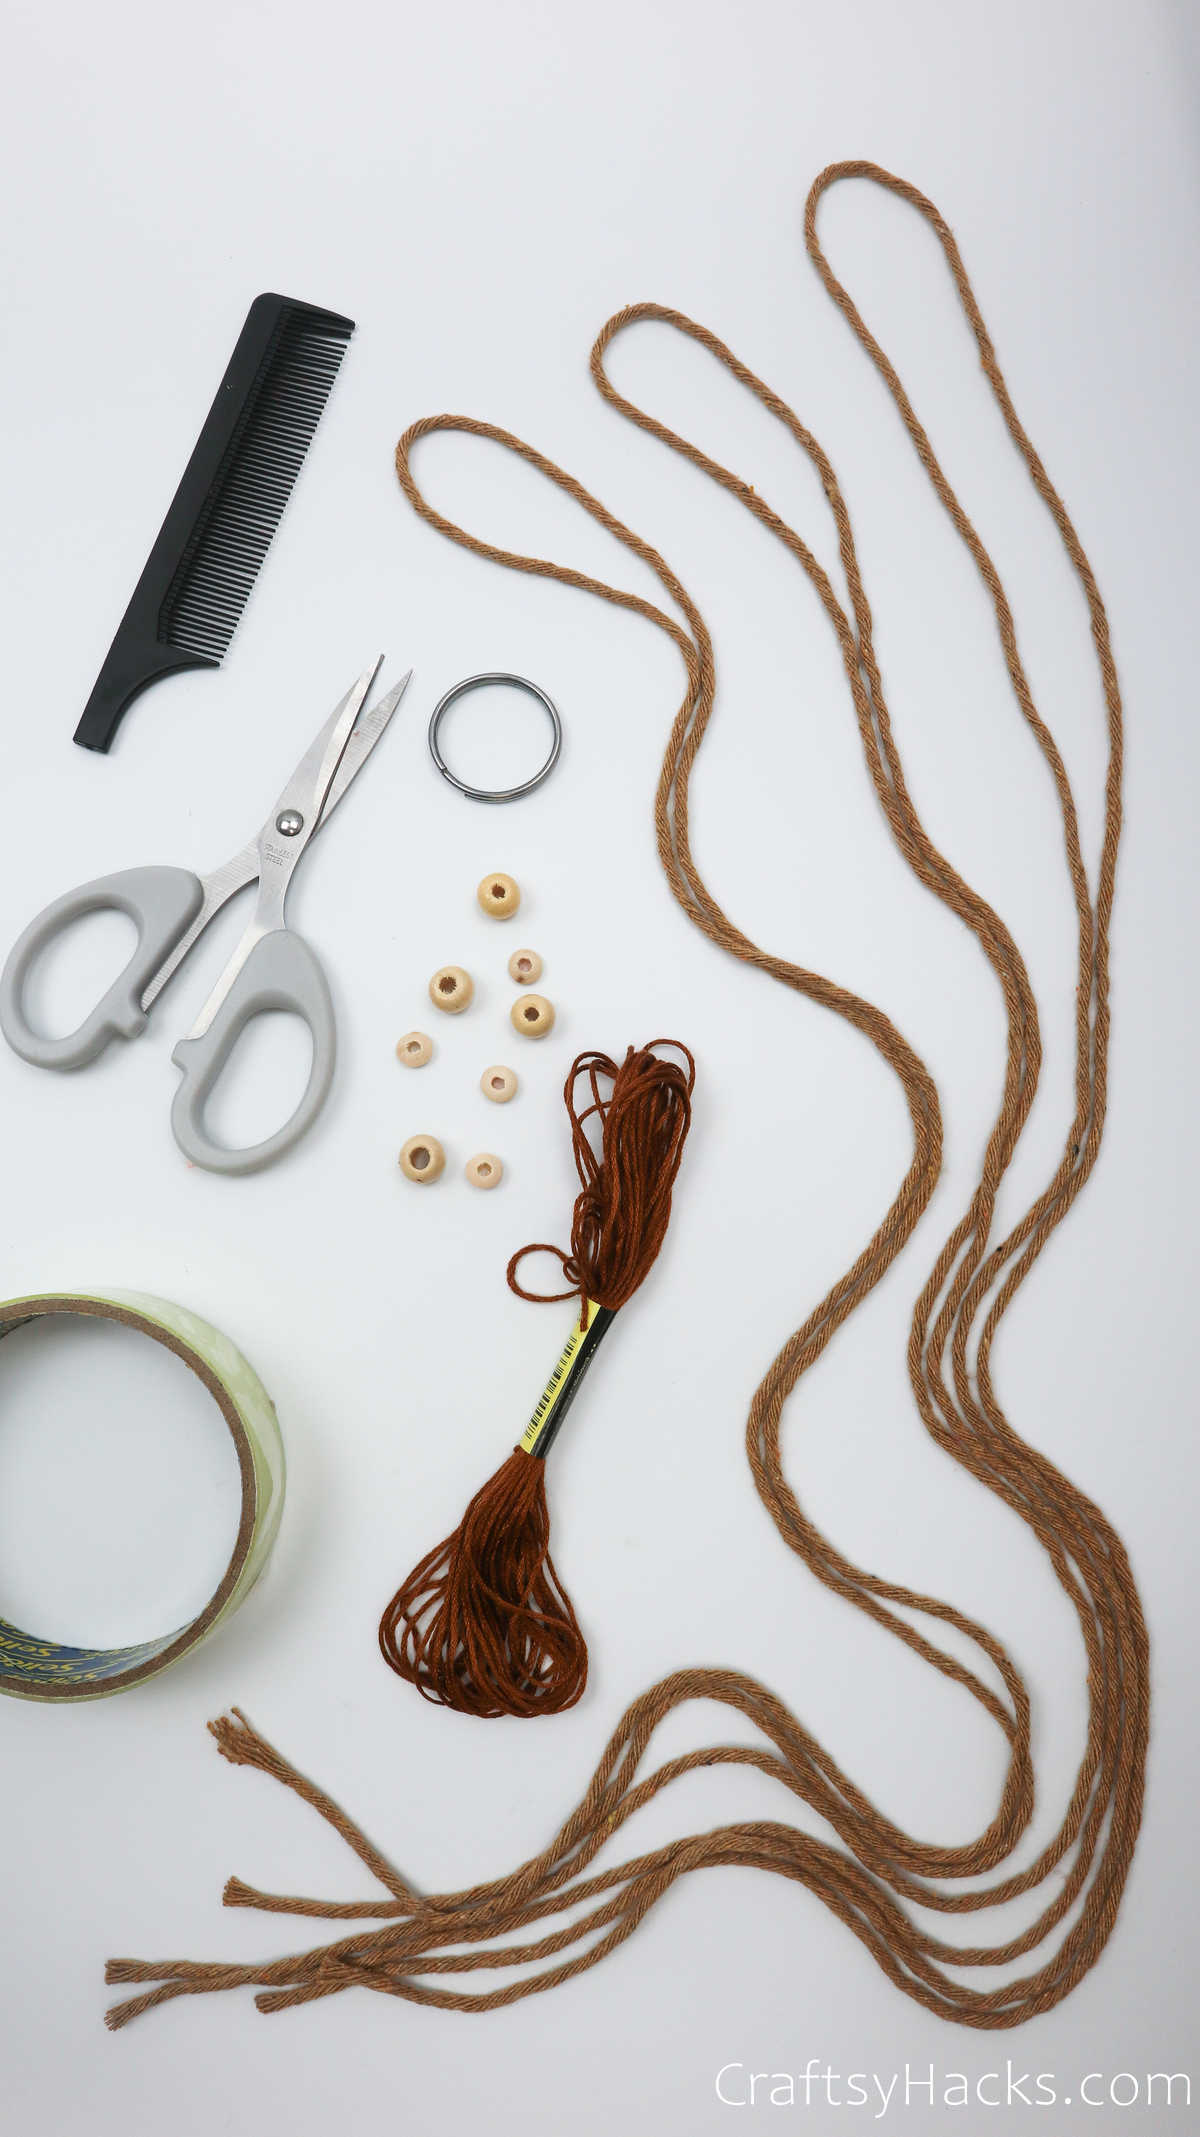
Tools and Supplies You’ll Need
But before you can get started, you’ll need to gather your supplies. Here’s what you will need:
- Key ring
- 3x 4mm single twist cotton cords (32″ long)
- Sellotape
- Scissors
- Beads
- Embroidery thread
- Hair comb
How to Make a Macrame Keychain
Here is a step-by-step tutorial on how to make a keychain.
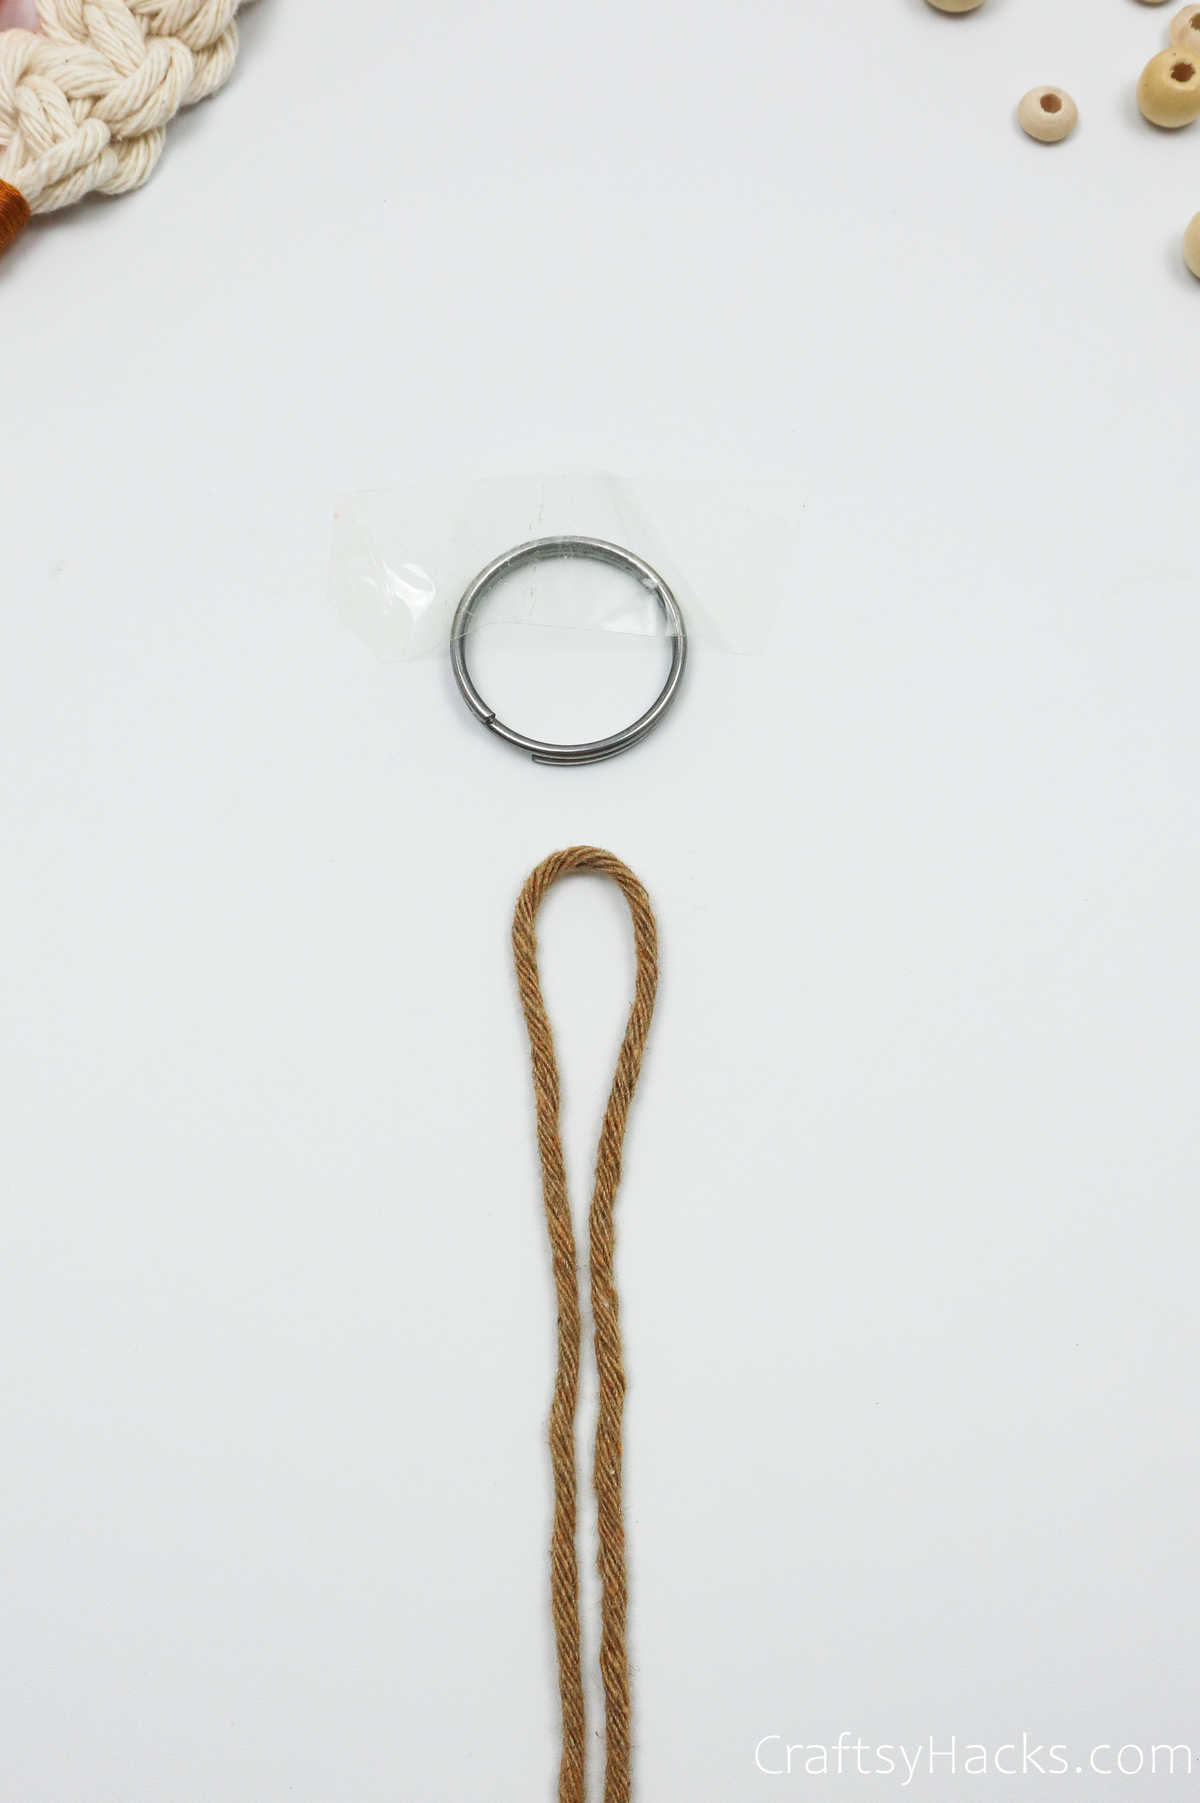
Step 1
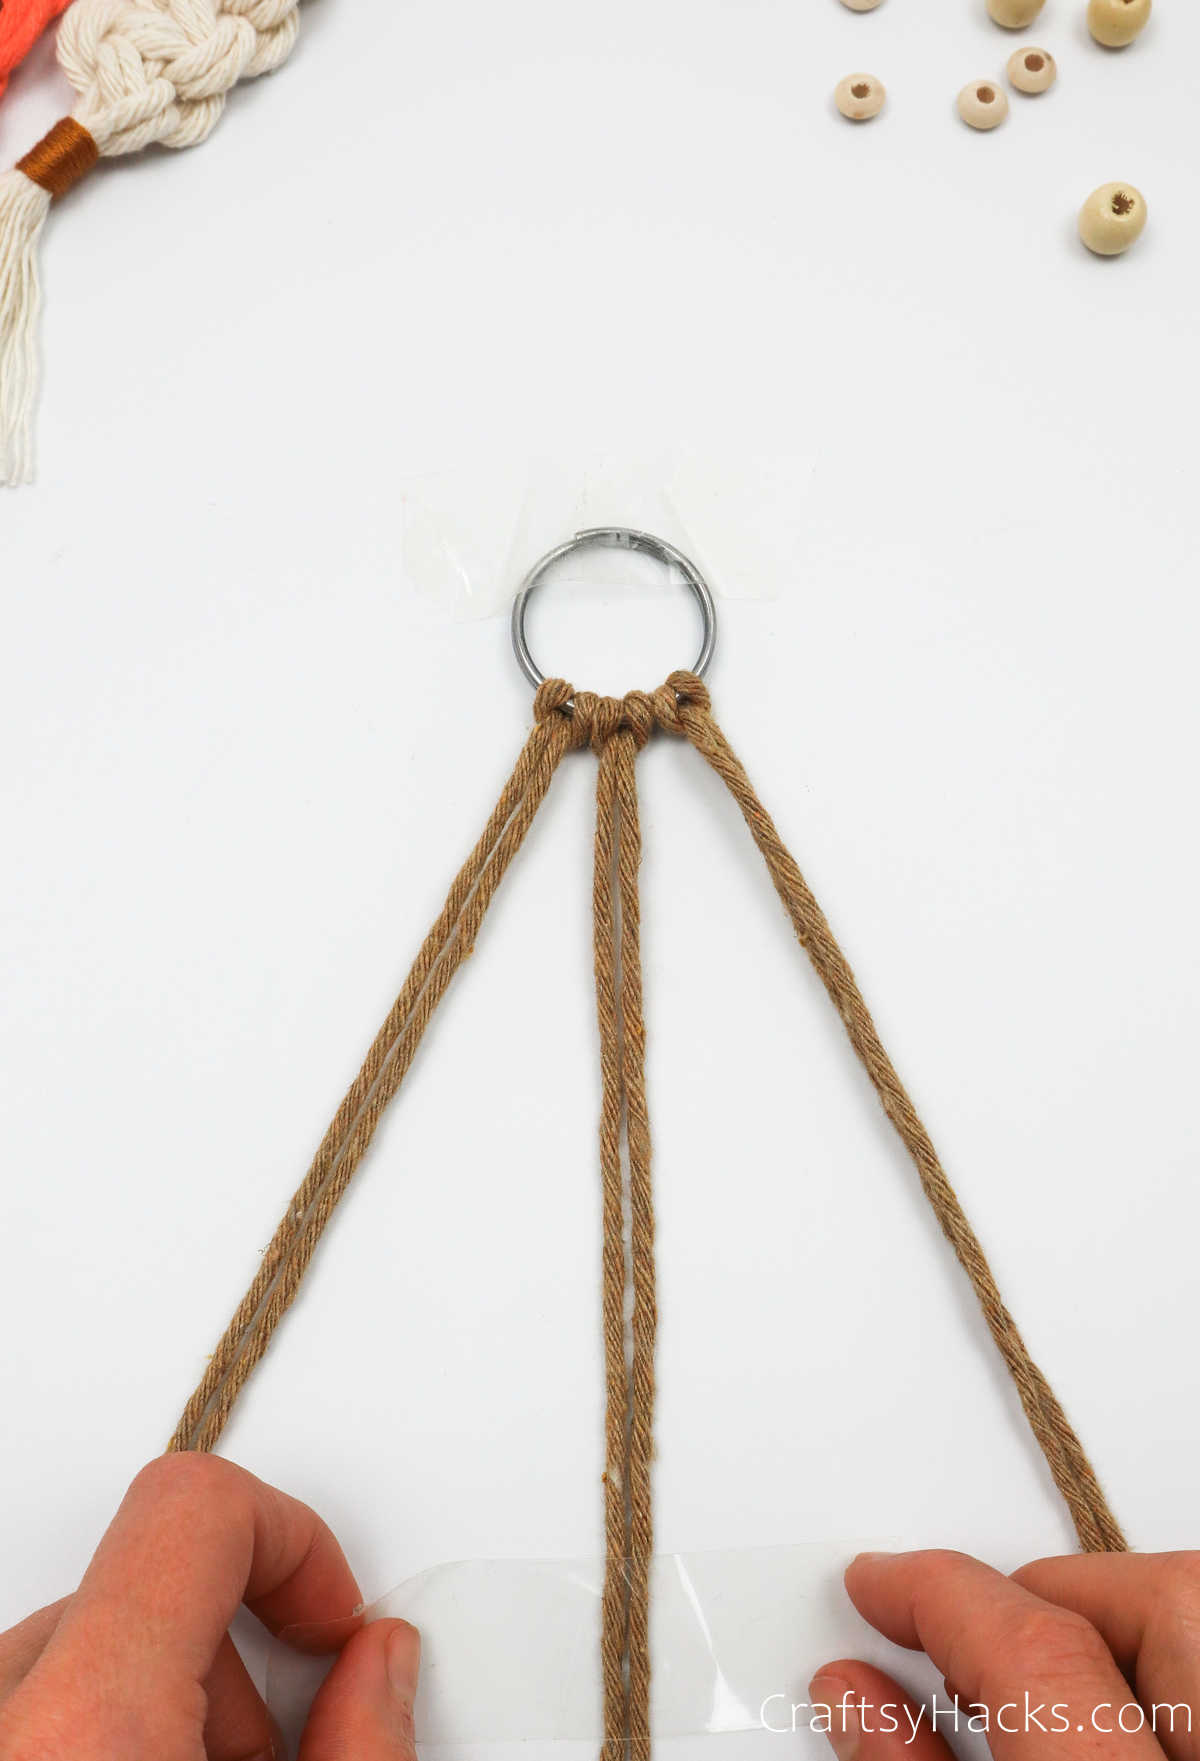
To make it easier on you, I’d recommend that you tape the top of the keyring to your work surface. This will secure the ring, and you can work on the DIY project without worrying about how the ring keeps getting dislodged.
Now, take one of your cords and bend it in half, bringing the ends together. The other end will be a loop like this.
Step 2
Pull the loop under then through the key ring.
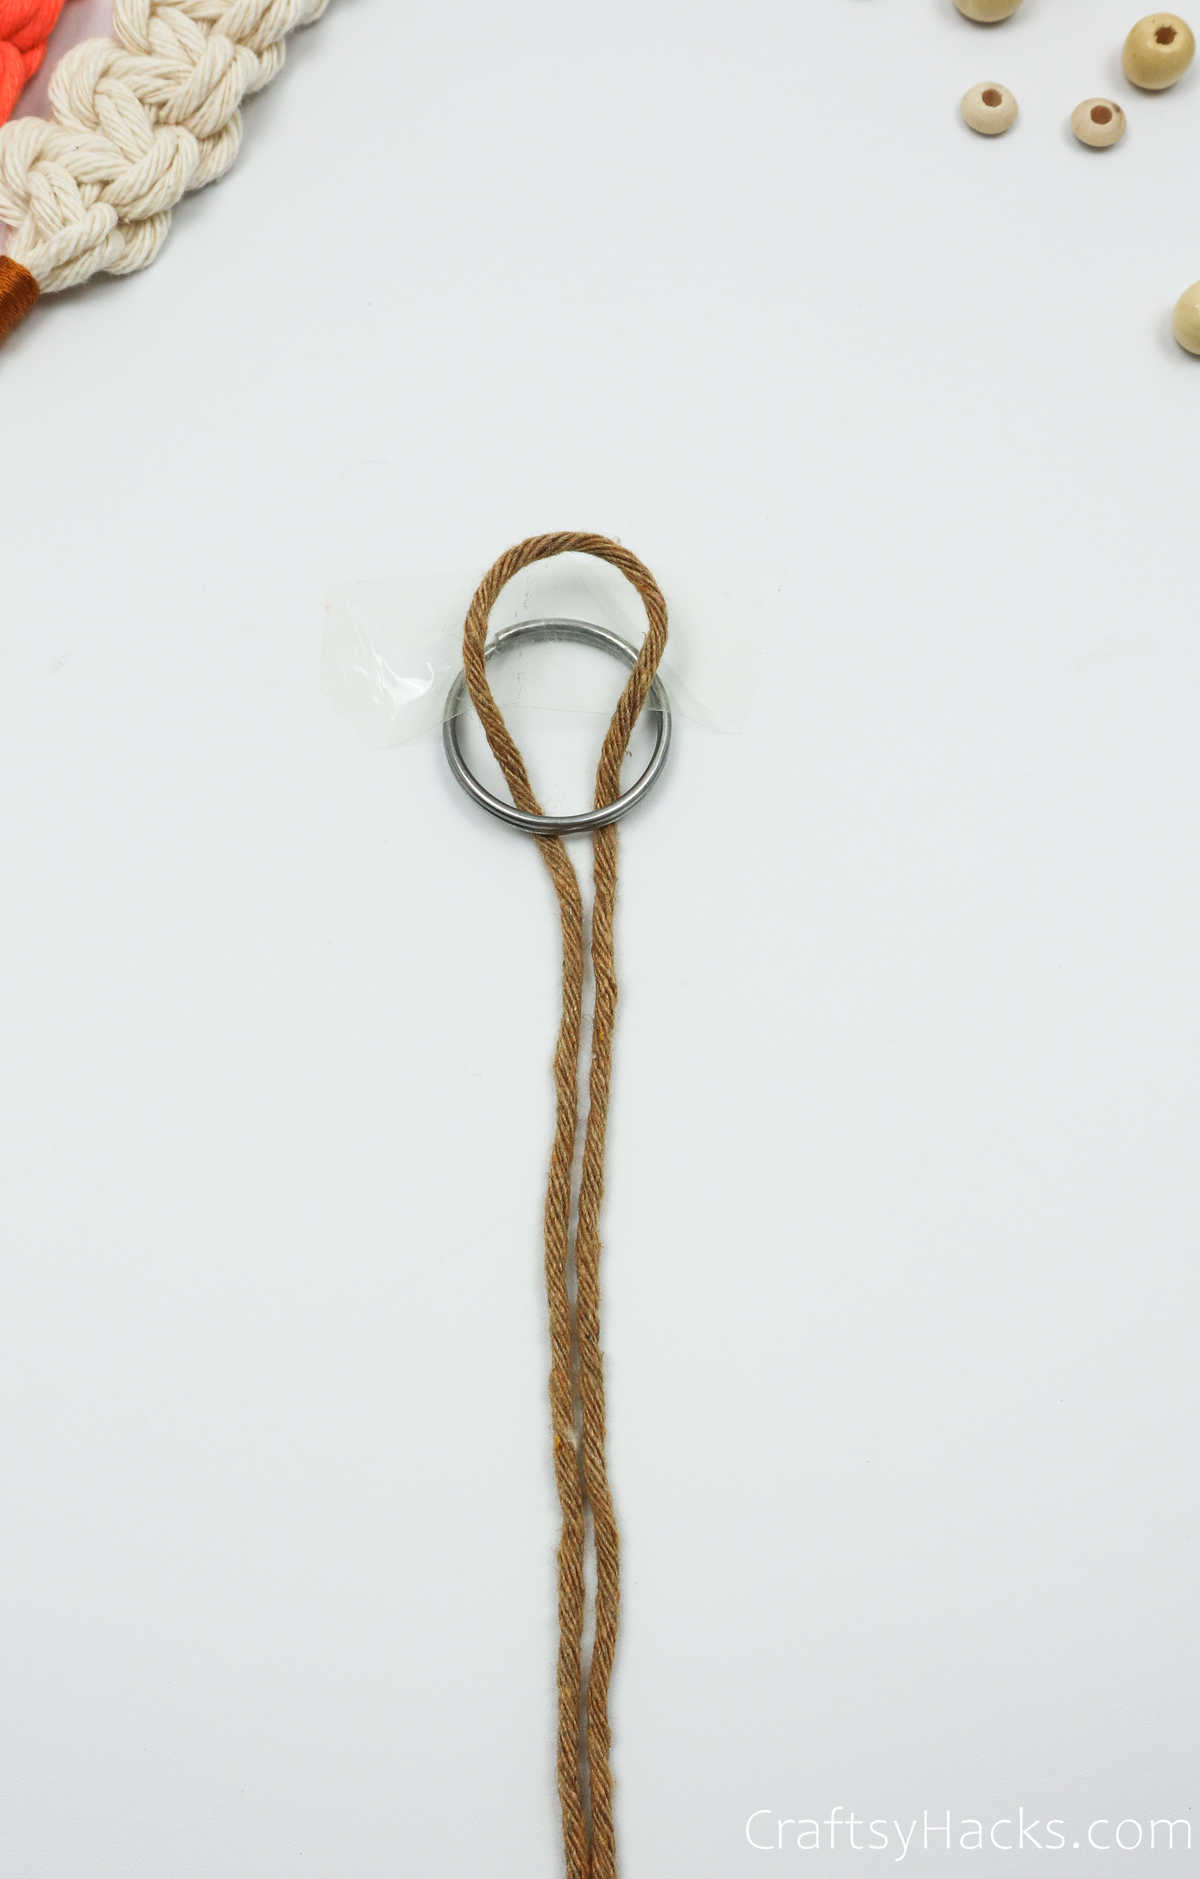
If you’re familiar with different macrame knots, then go ahead and pull the two cords through the ring to create a lark’s head knot.
If, however, you’re not familiar with macrame terms for different knots, fret not!
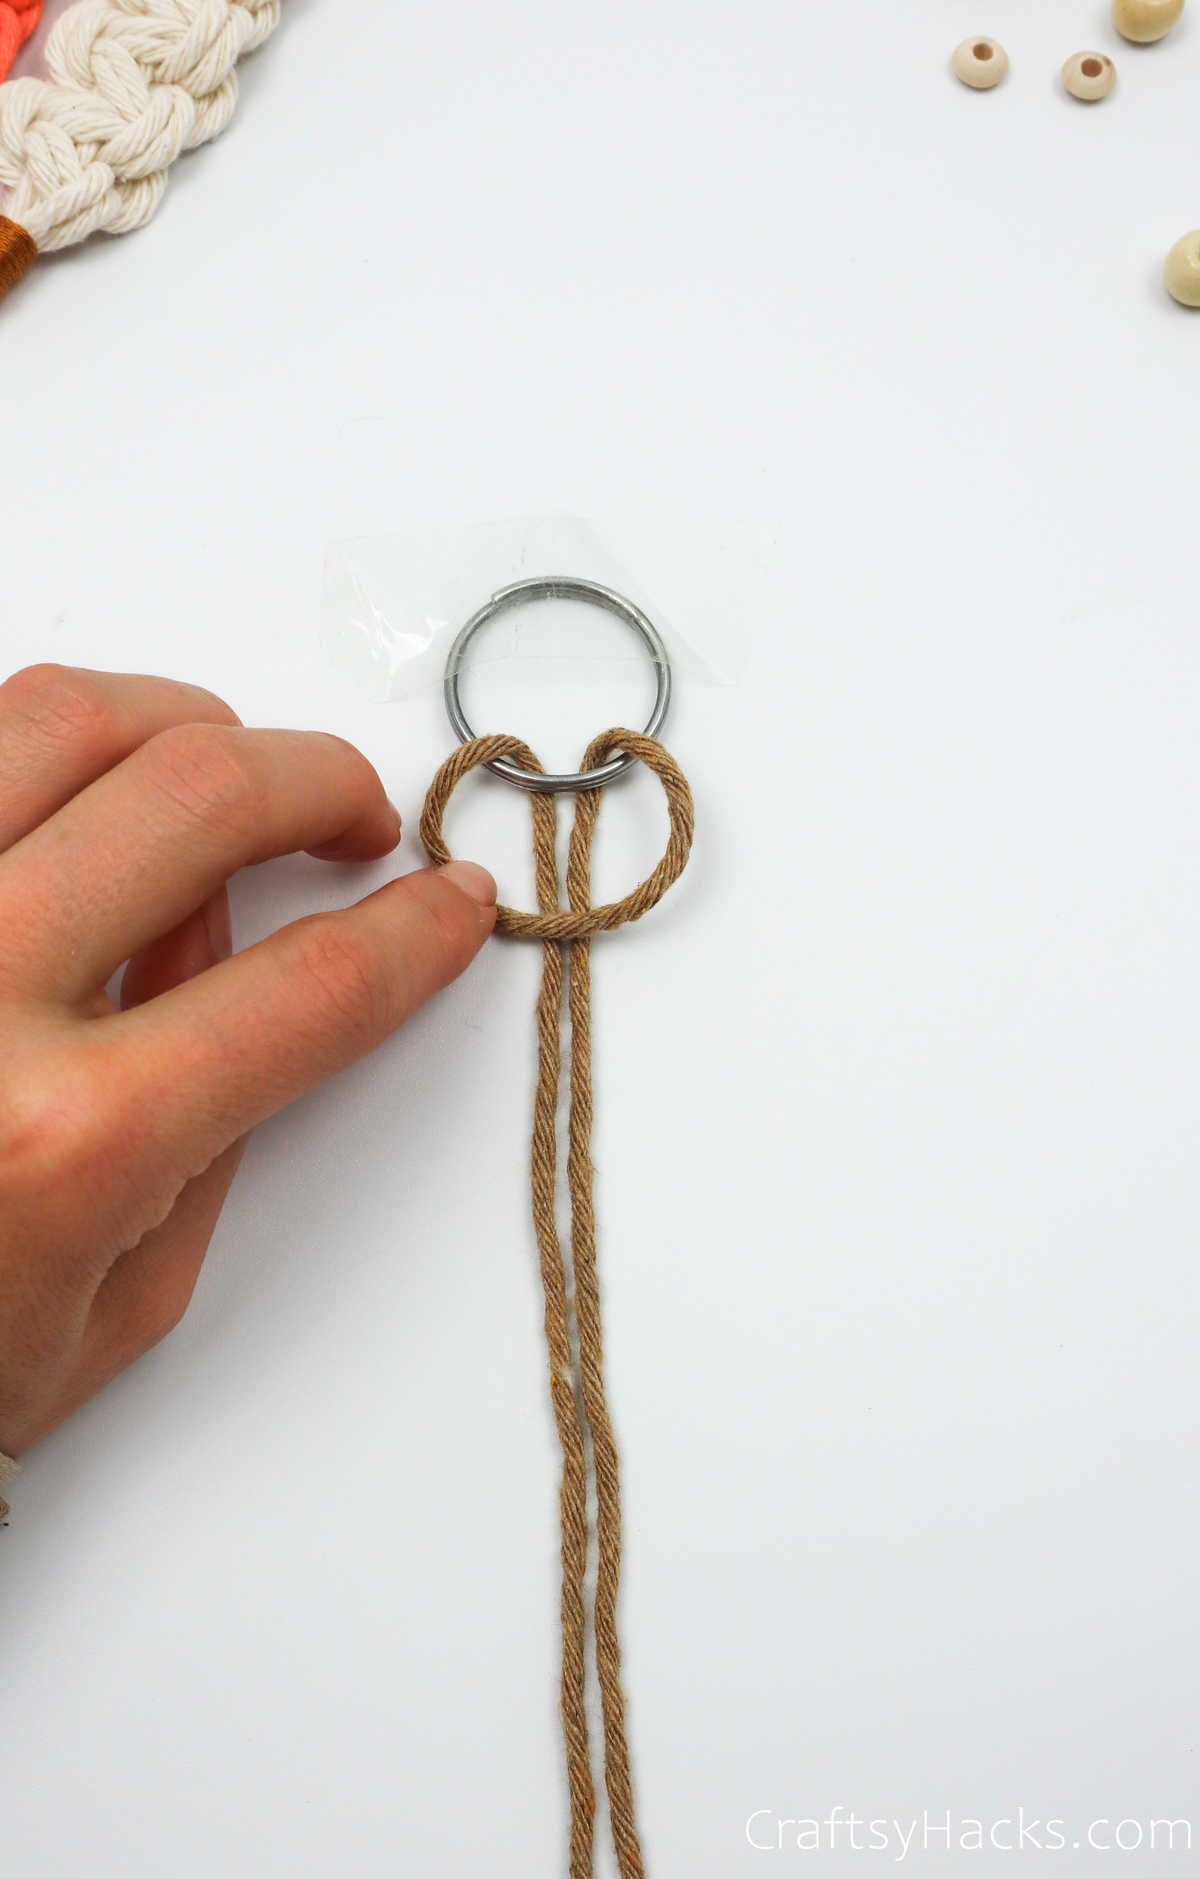
Once you’ve pulled the loop under and through the ring, pull it down again to rest it over the metal, just so. Then, insert a finger through the loop to gather the two end cords and pull them through the loop.
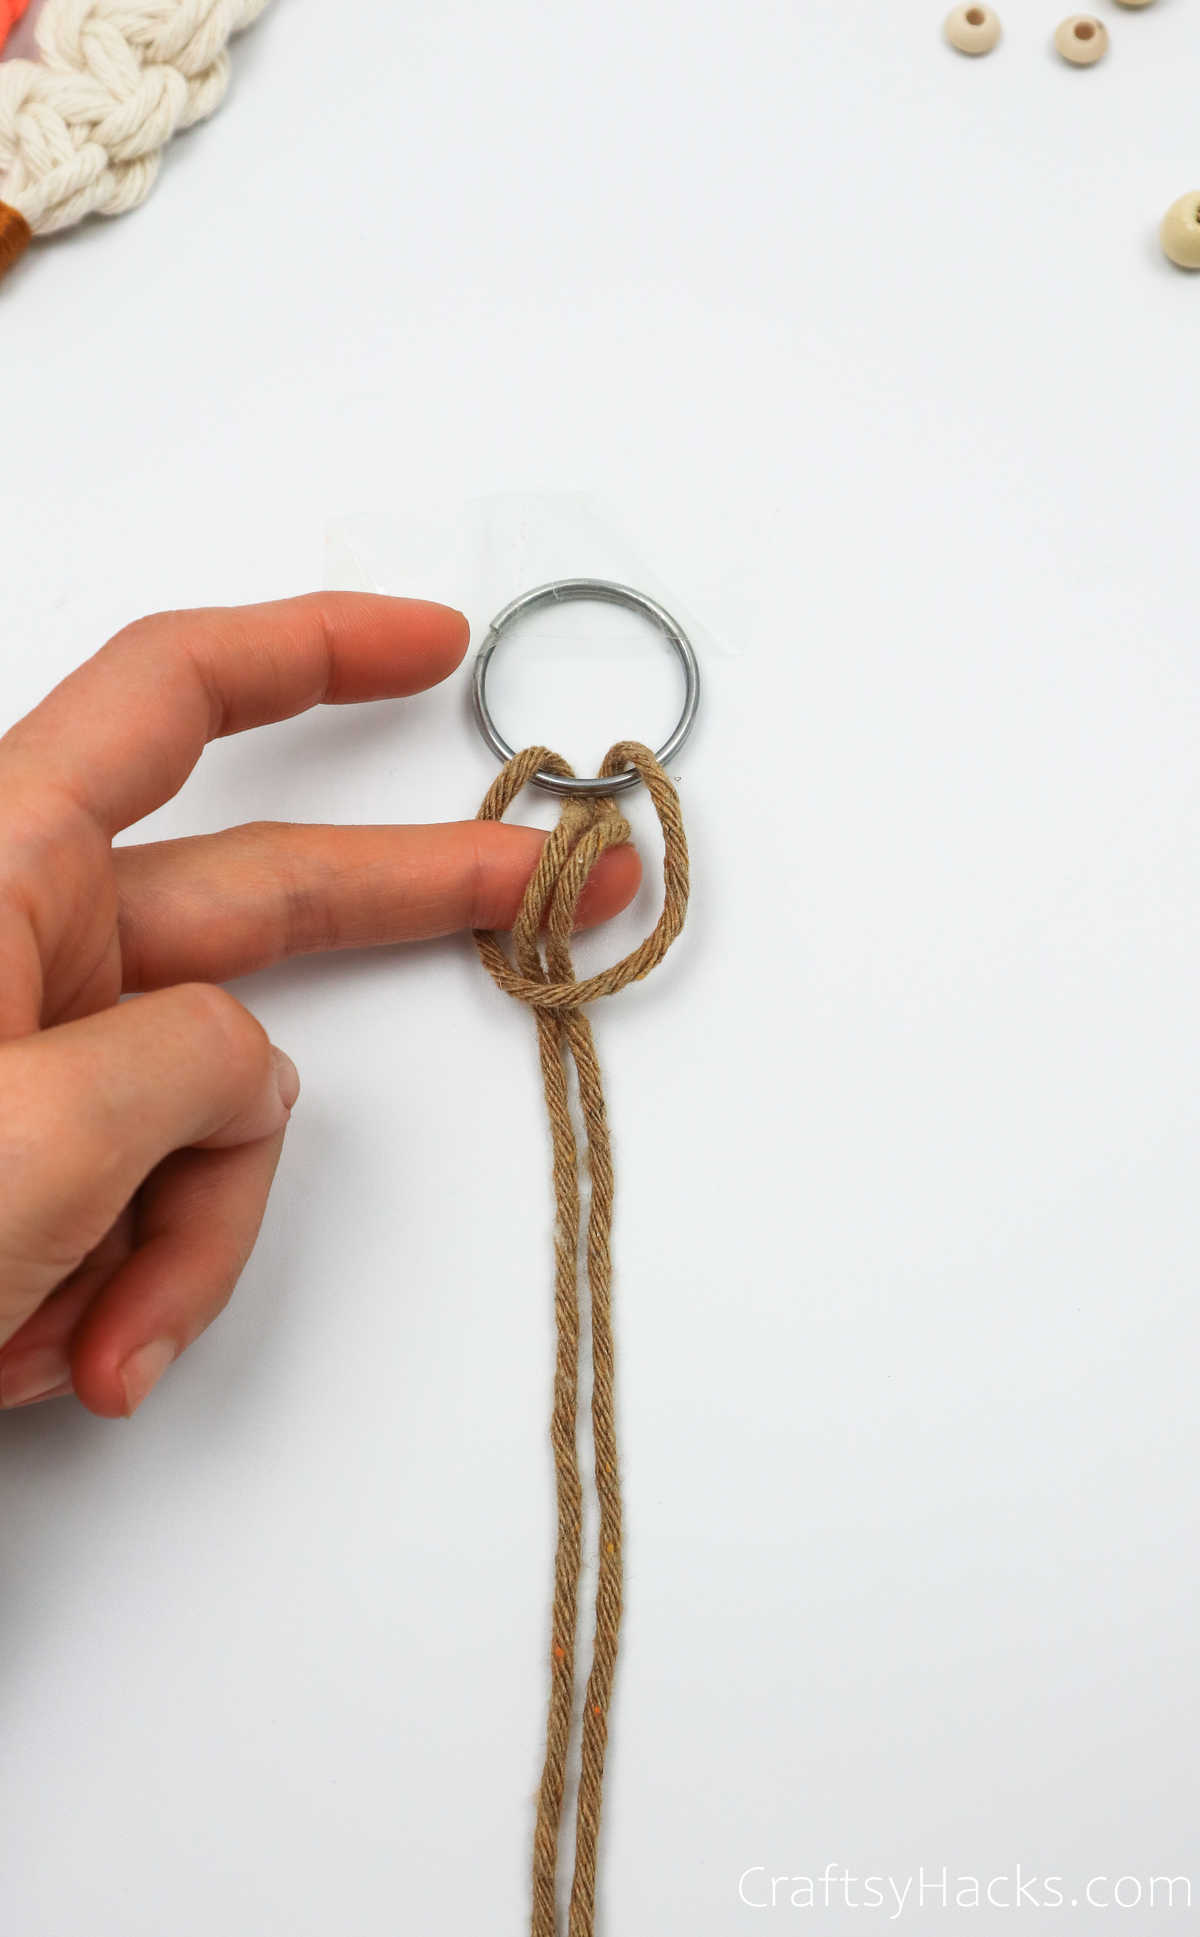
Pull the cords through and tug at them to tighten the knot around the ring. Ta-da! You’ve made your first lark’s head knot.
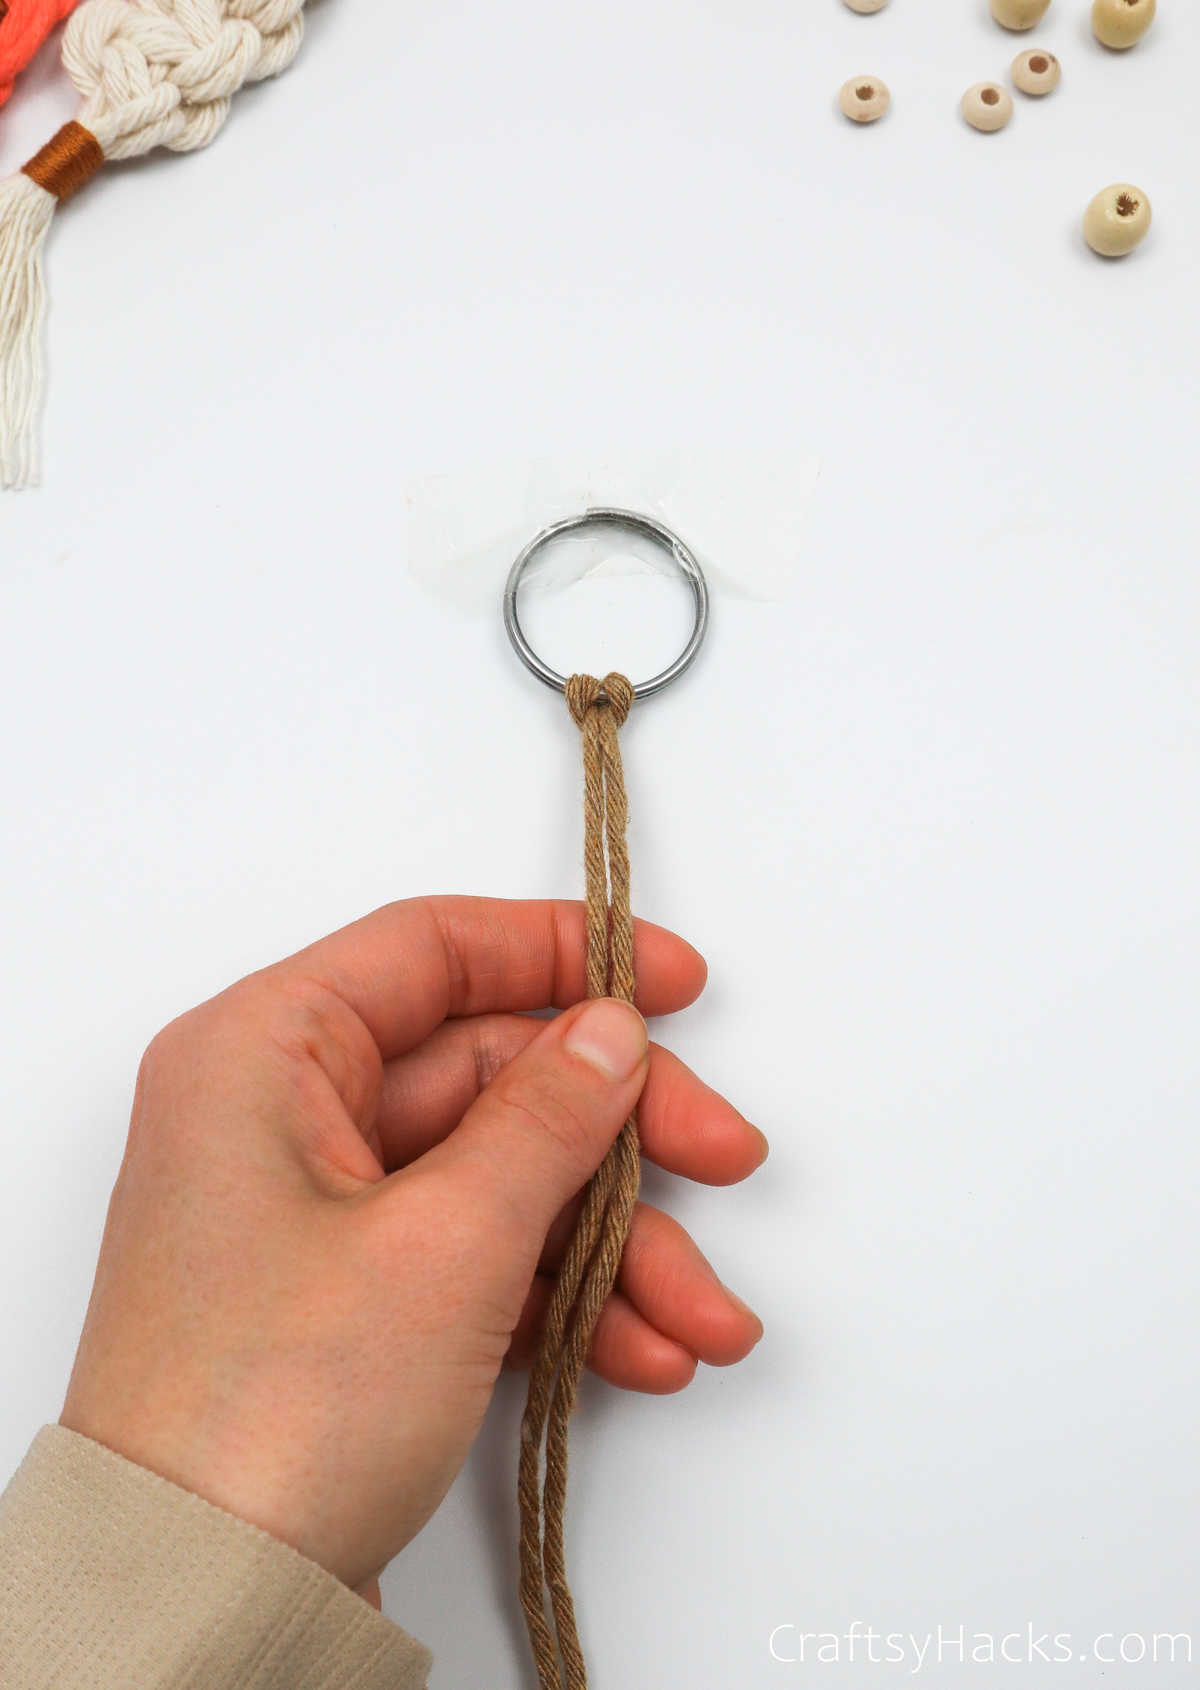
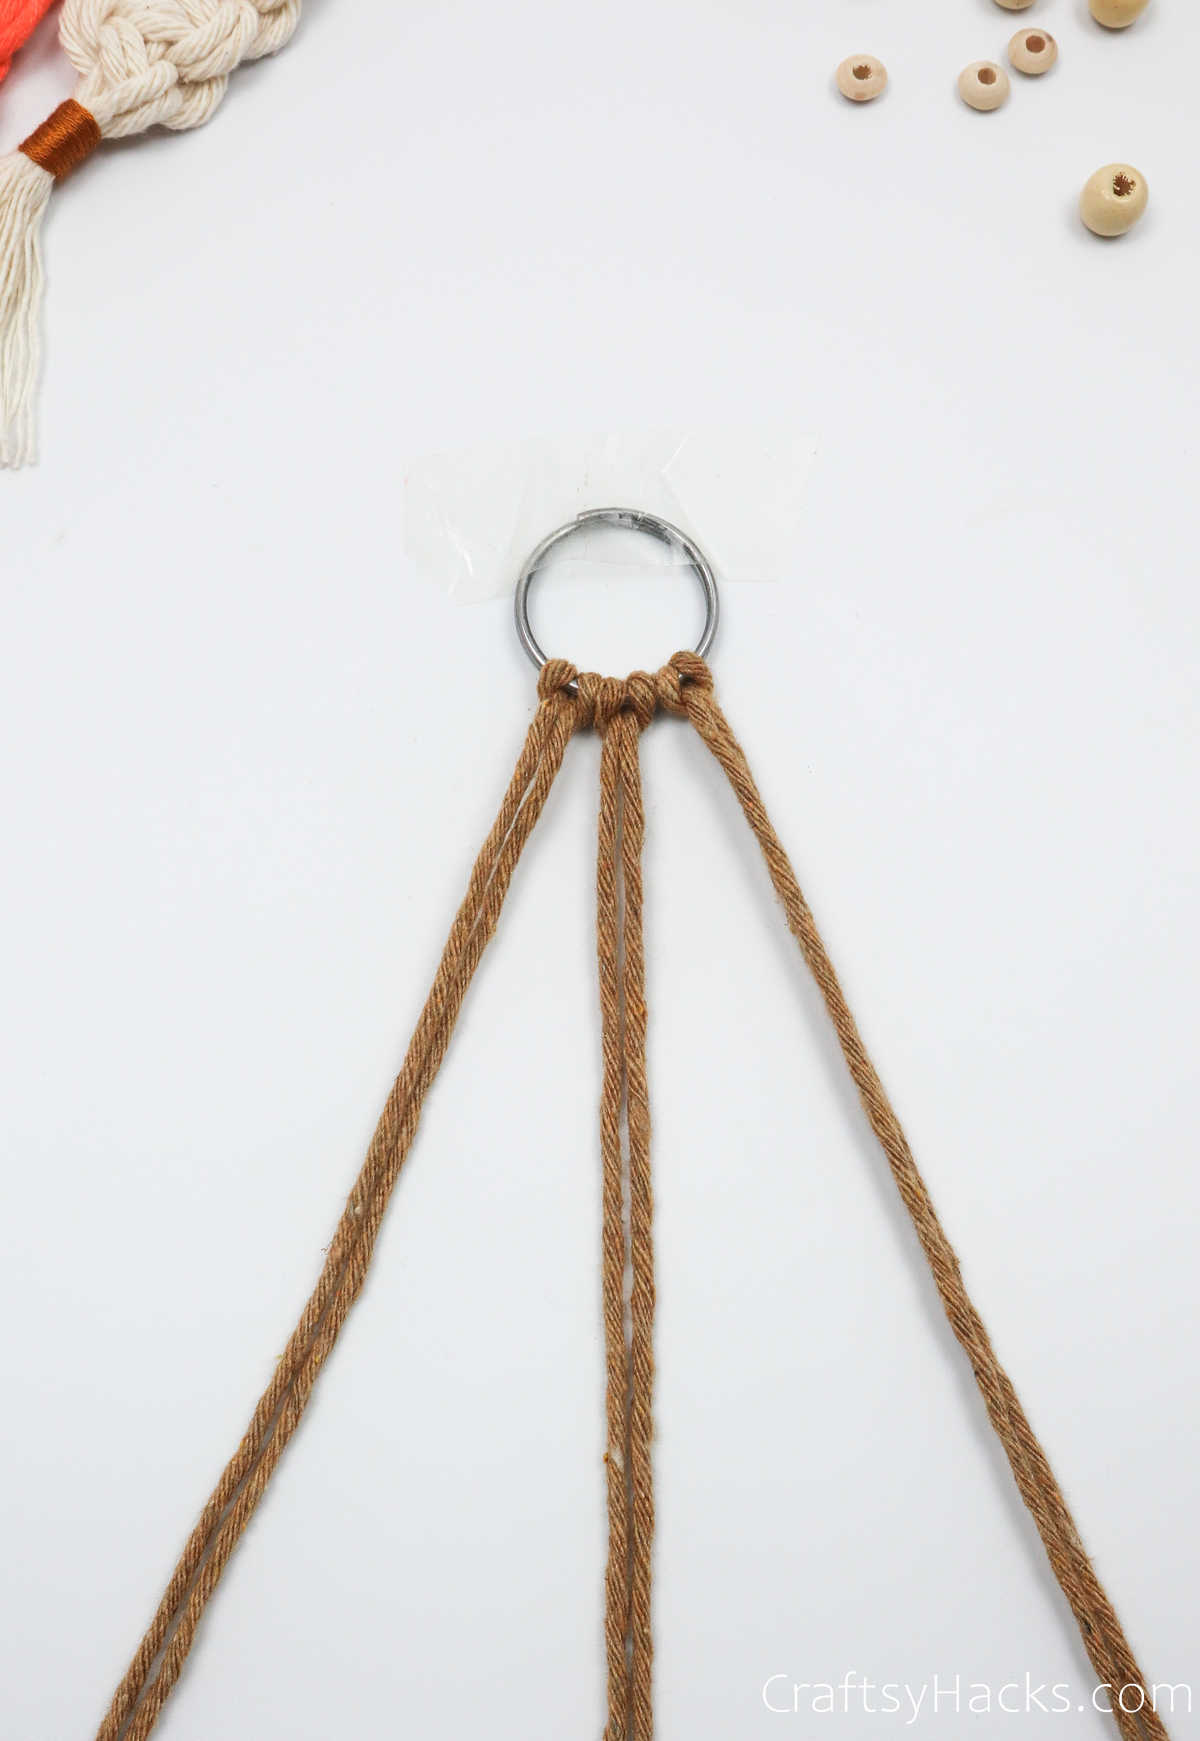
Just repeat this step with the other two cords, and you’re all set to start working on your design.
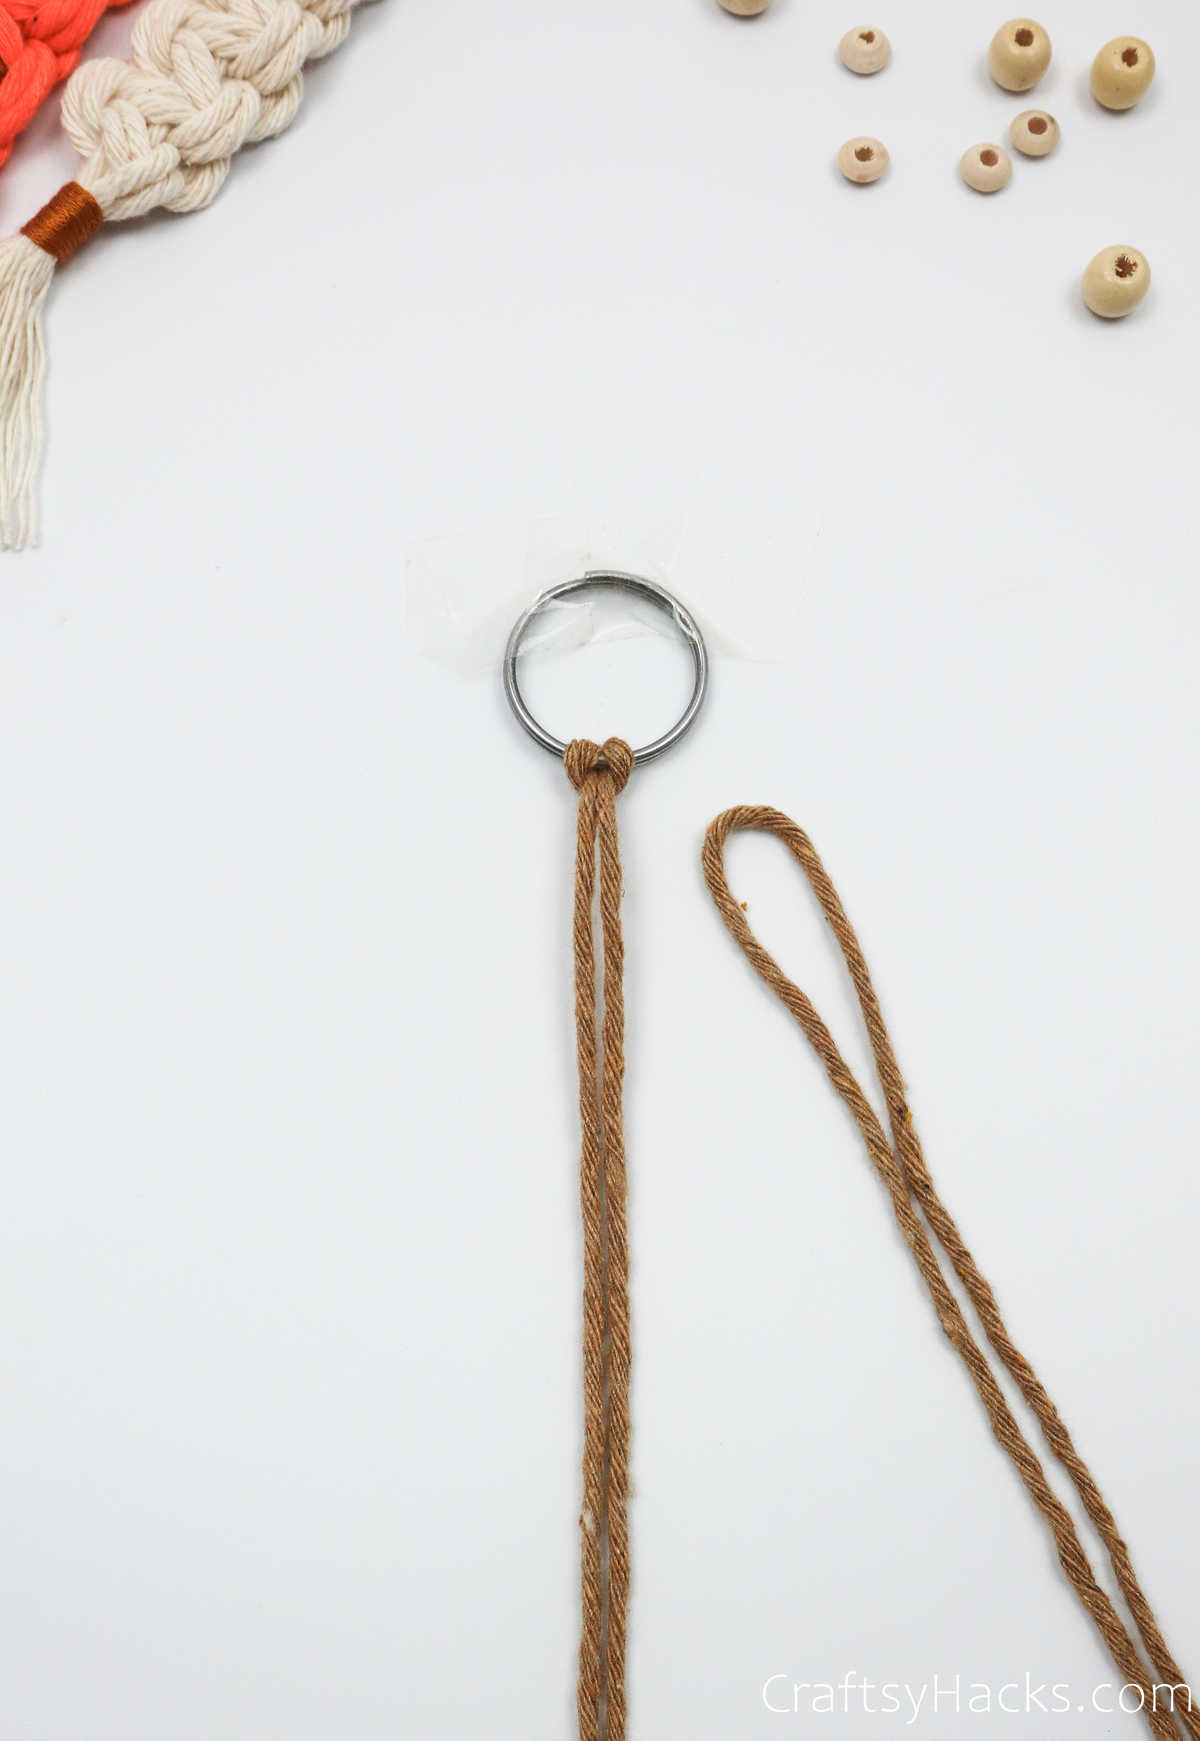
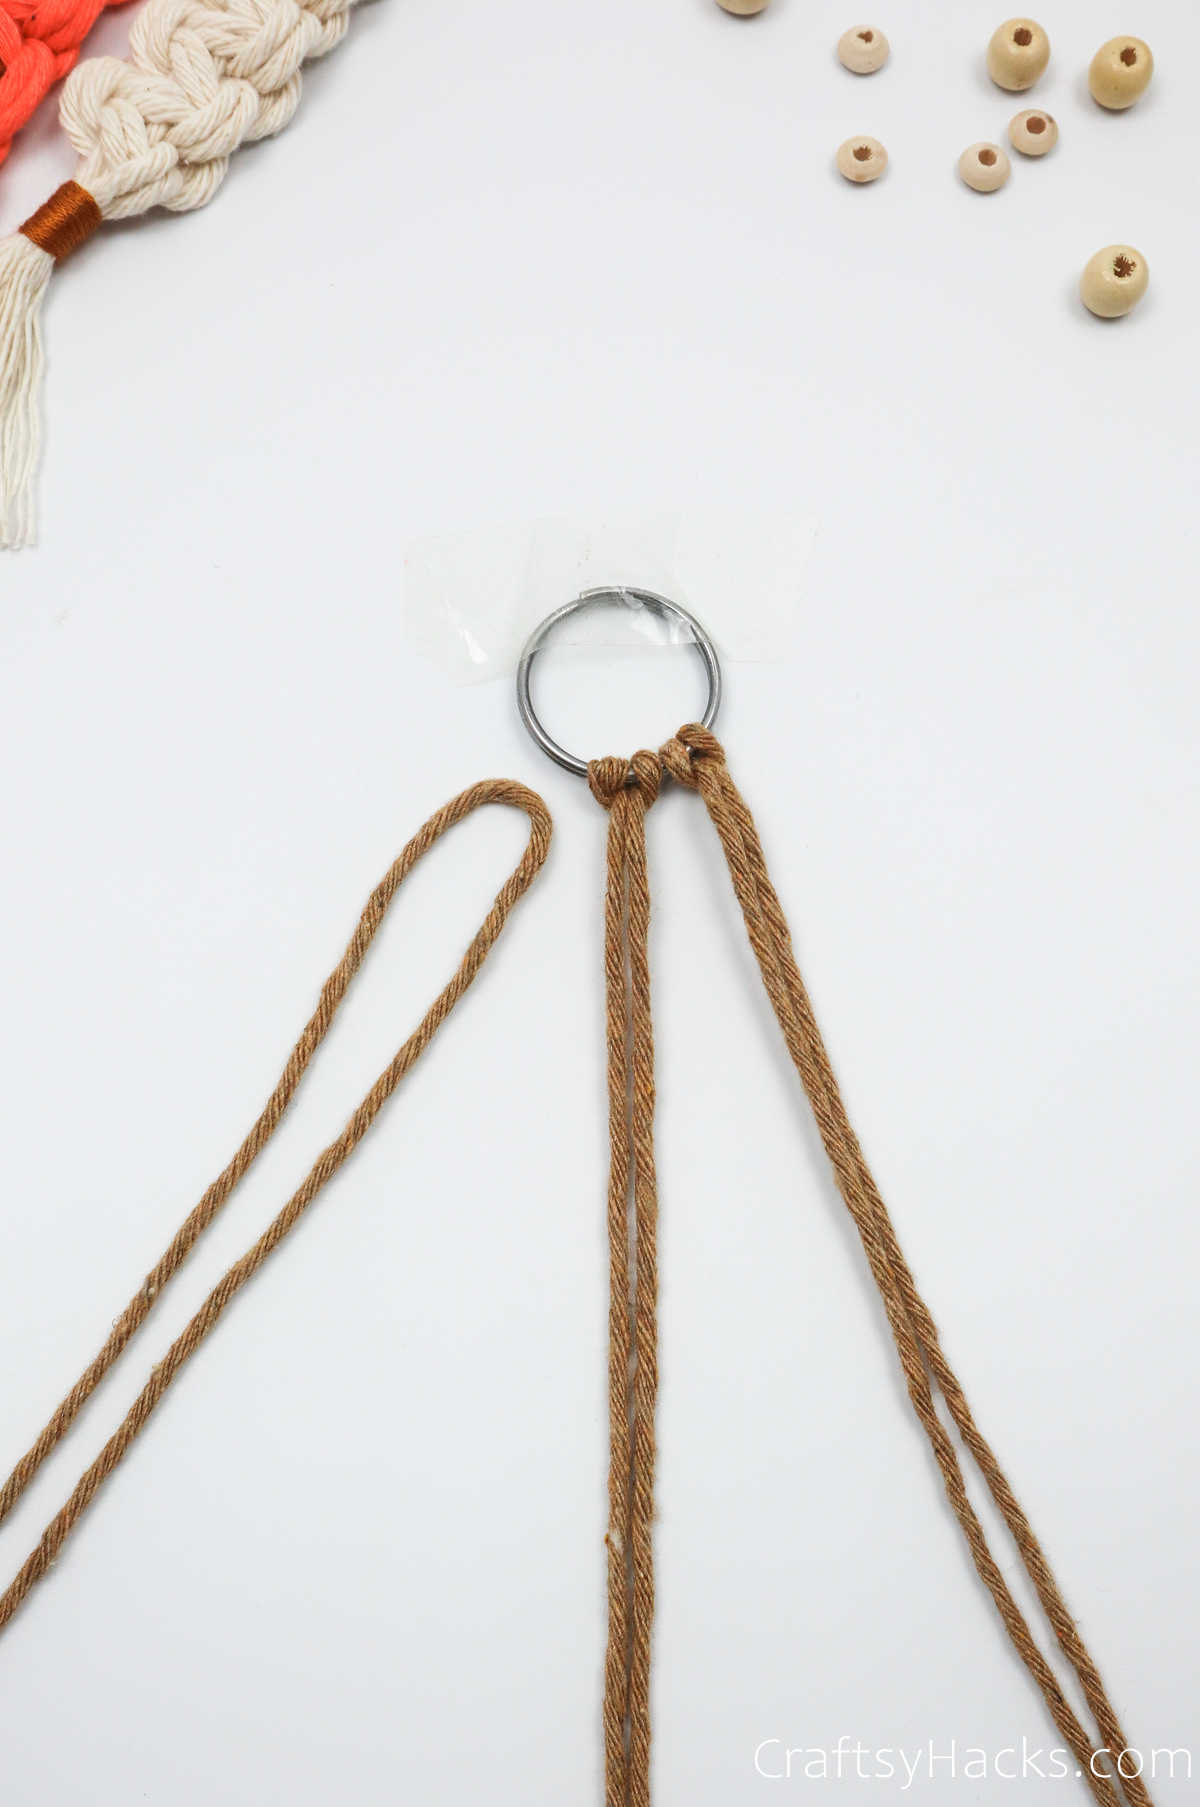
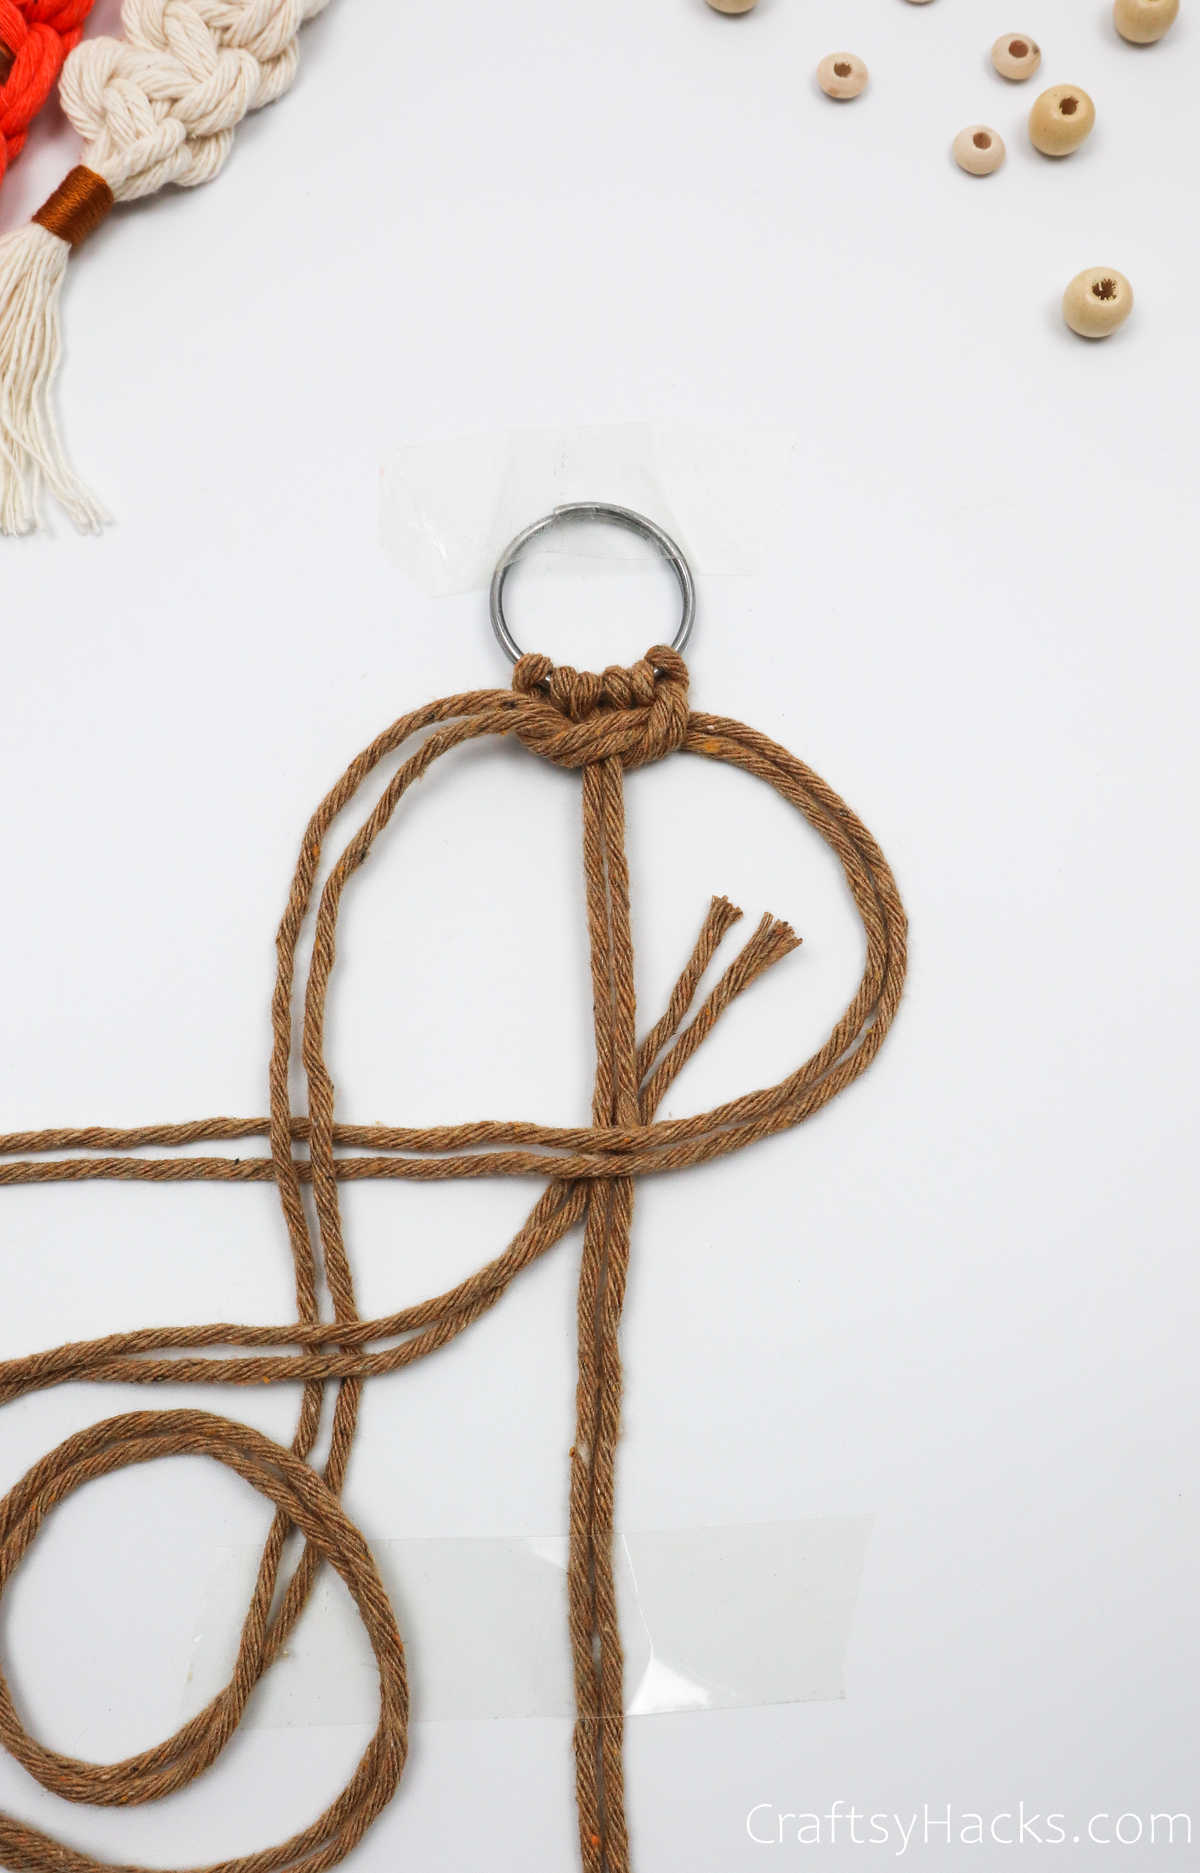
Step 3
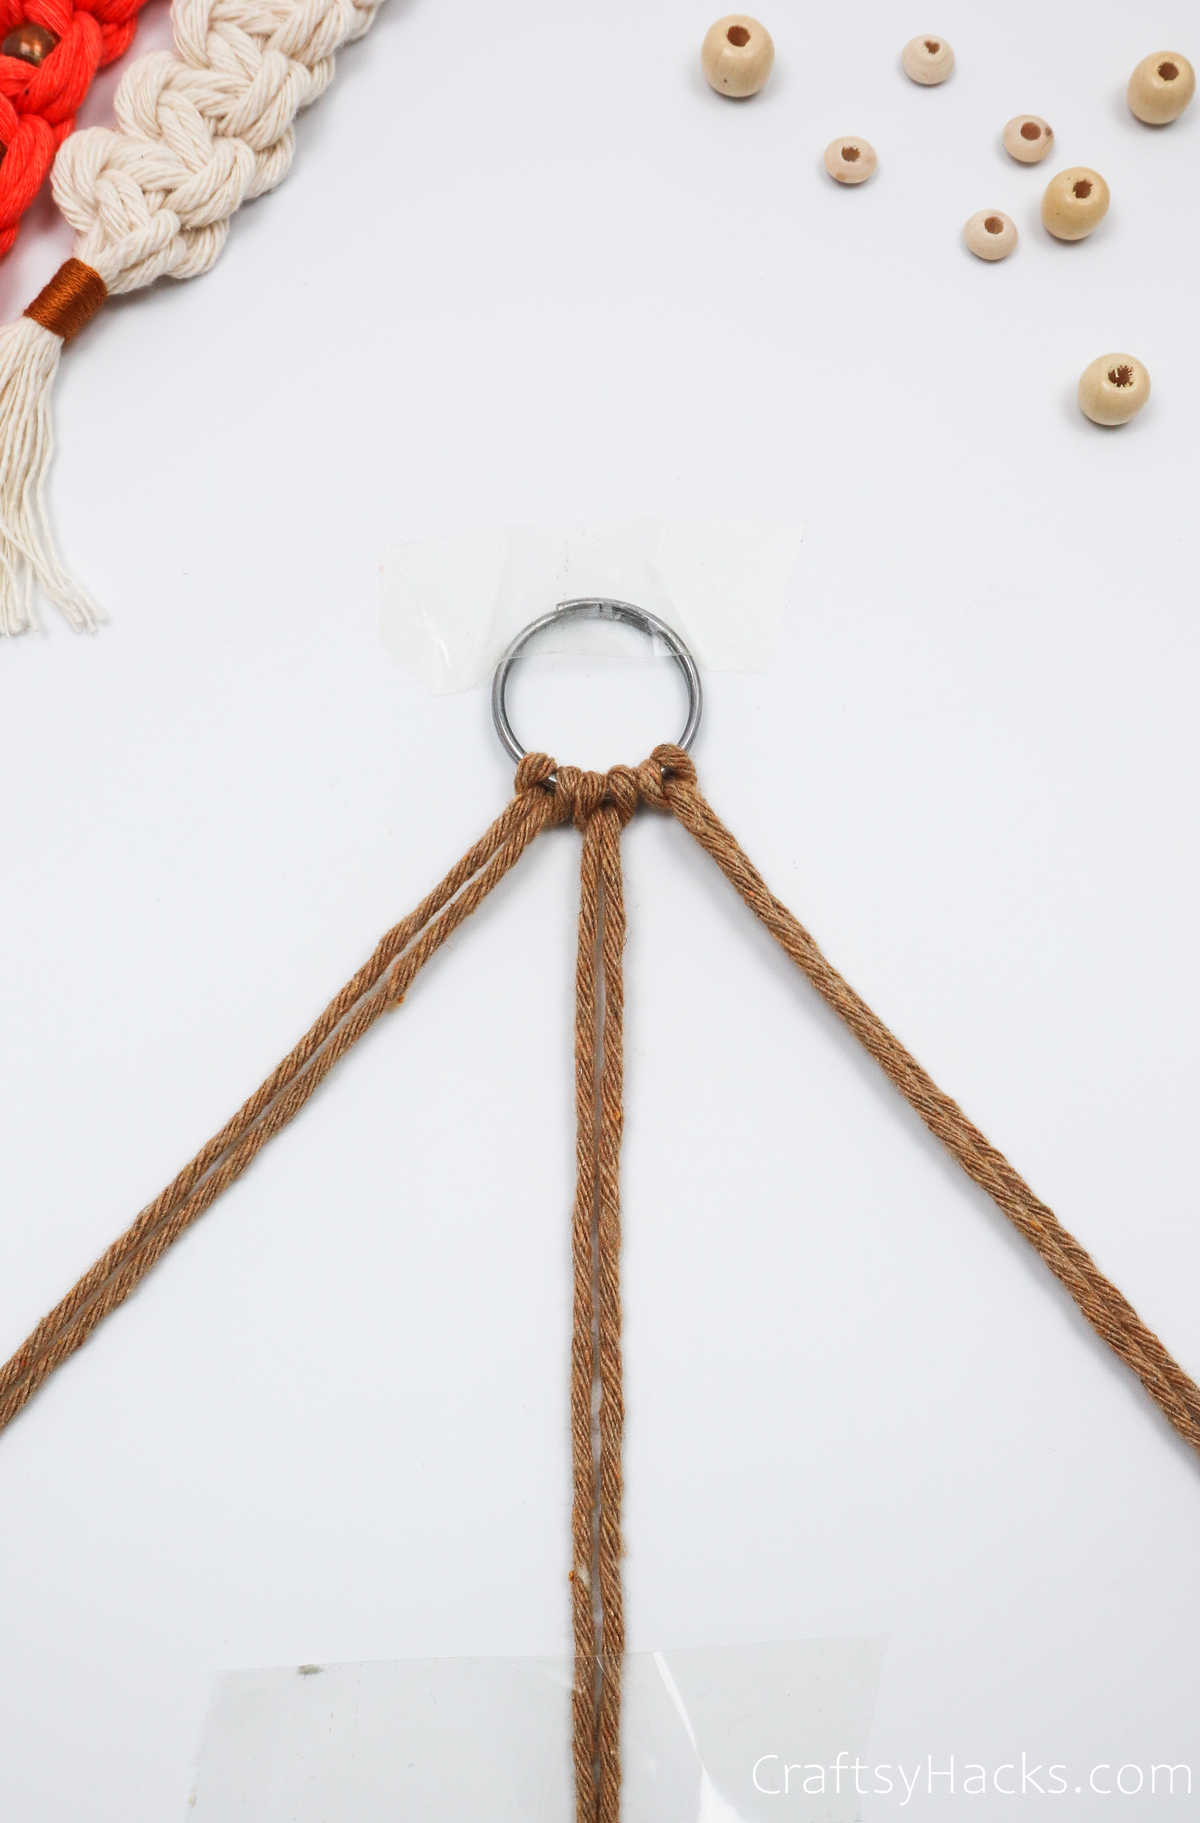
Next, divide the six cords into three. Use a bit of tape to secure the middle two cords onto your work surface.
This is optional, but trust me, it will definitely make it easier for you to make knots as you move along this project.
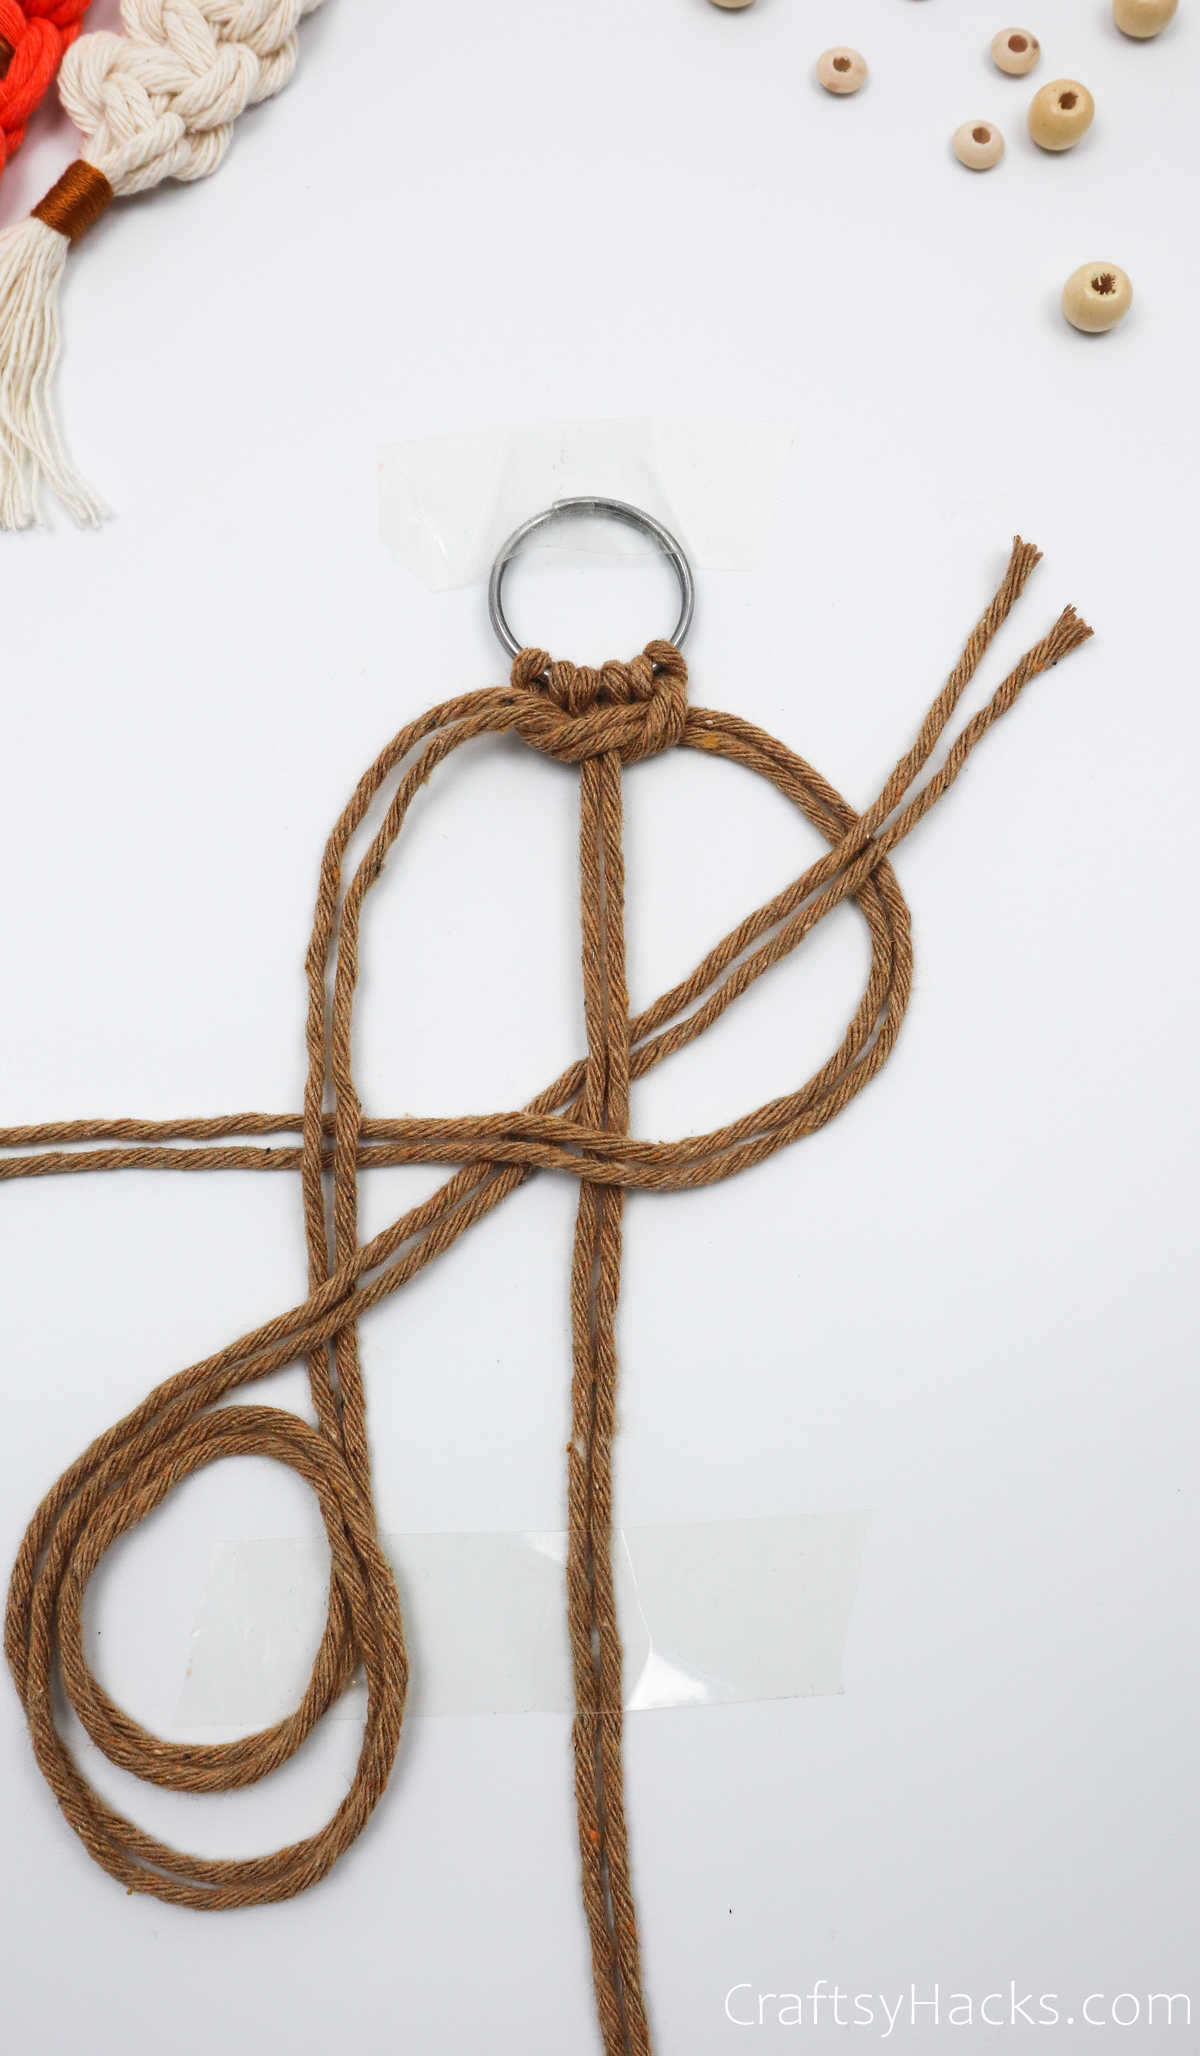
Step 4
For this particular design, you’ll be making a series of ‘square knots.’ Let me explain. First, grab the two cords on the left and place them over the middle cords to form a loop that looks like a ‘4.’
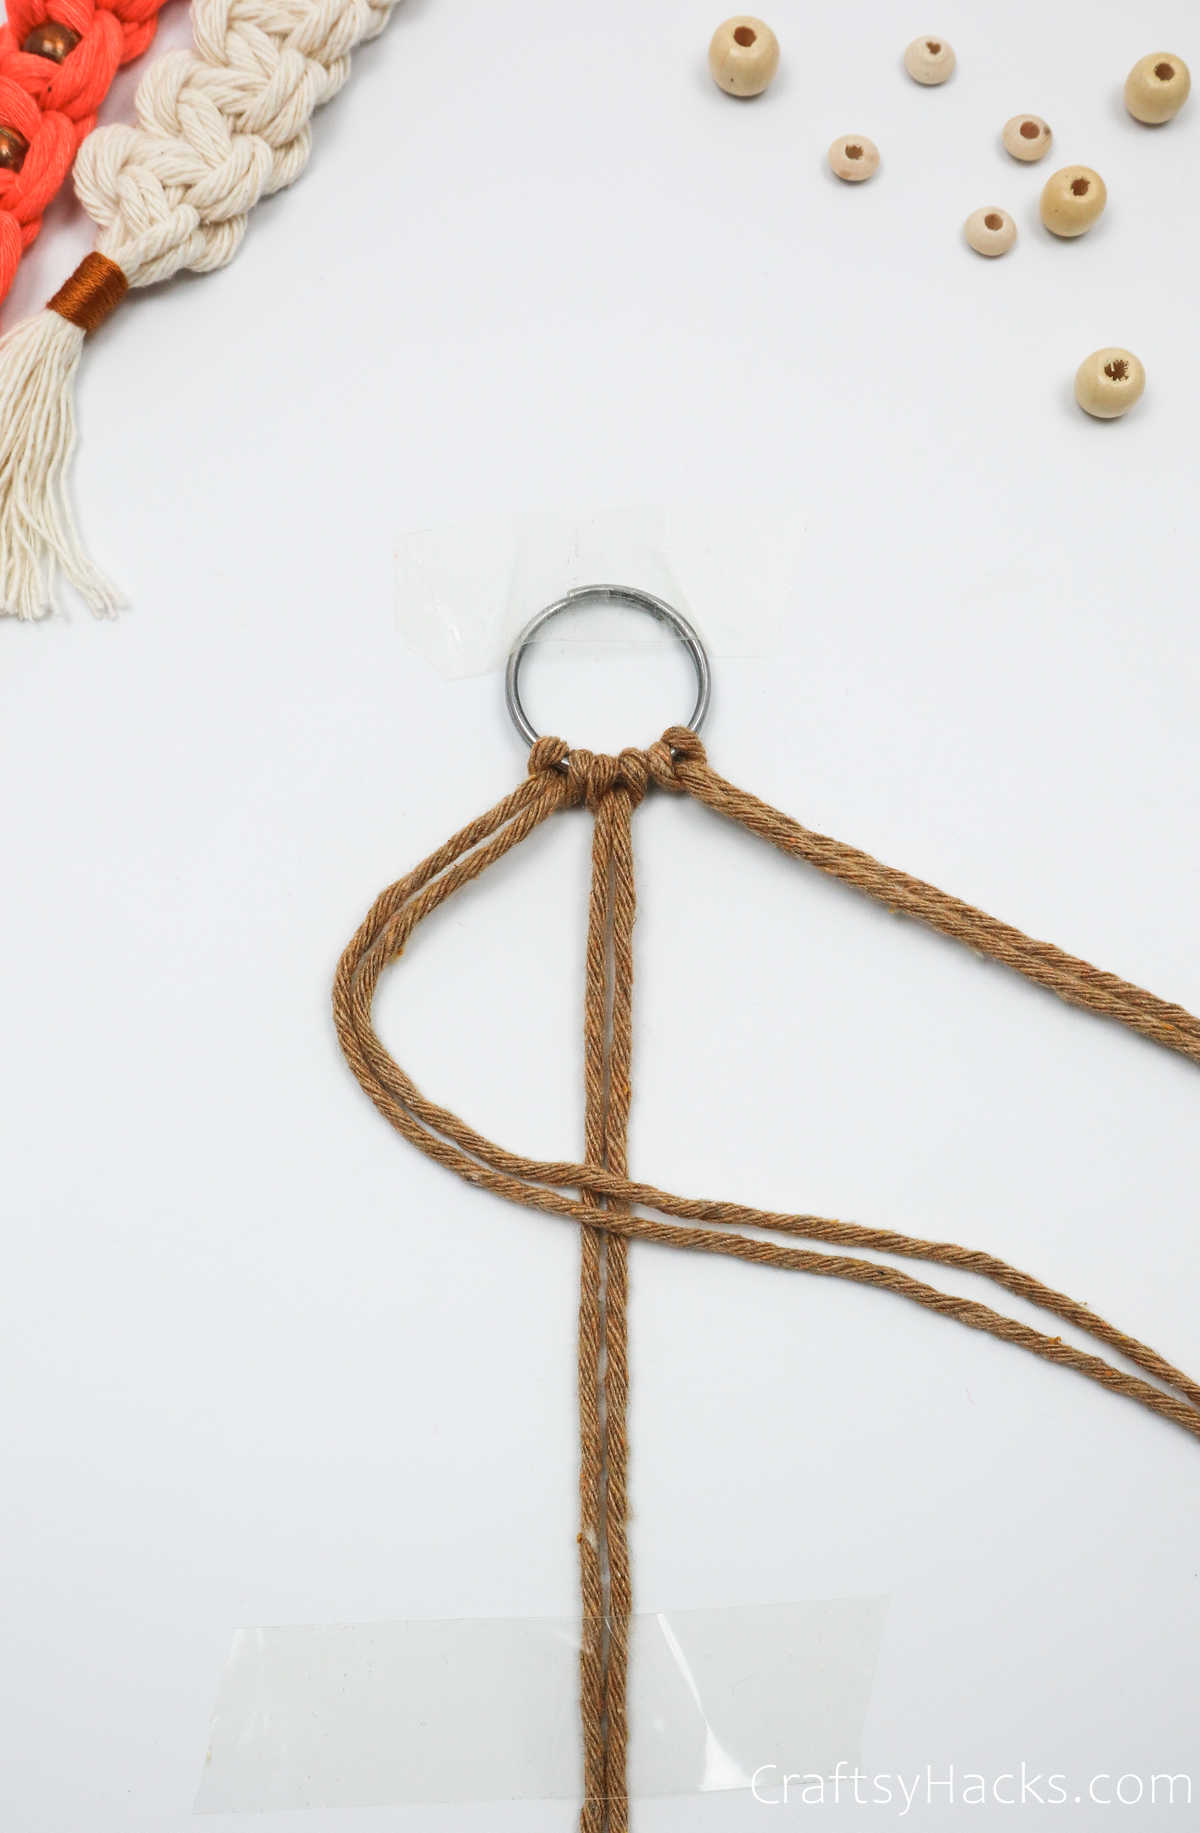
Then, take the cords on the right and place them over the cords from the left.
Do you notice the point where the left cords are crossed over the middle ones? Now, pull the right cords under that crossover and through the loop you made with the left cords.
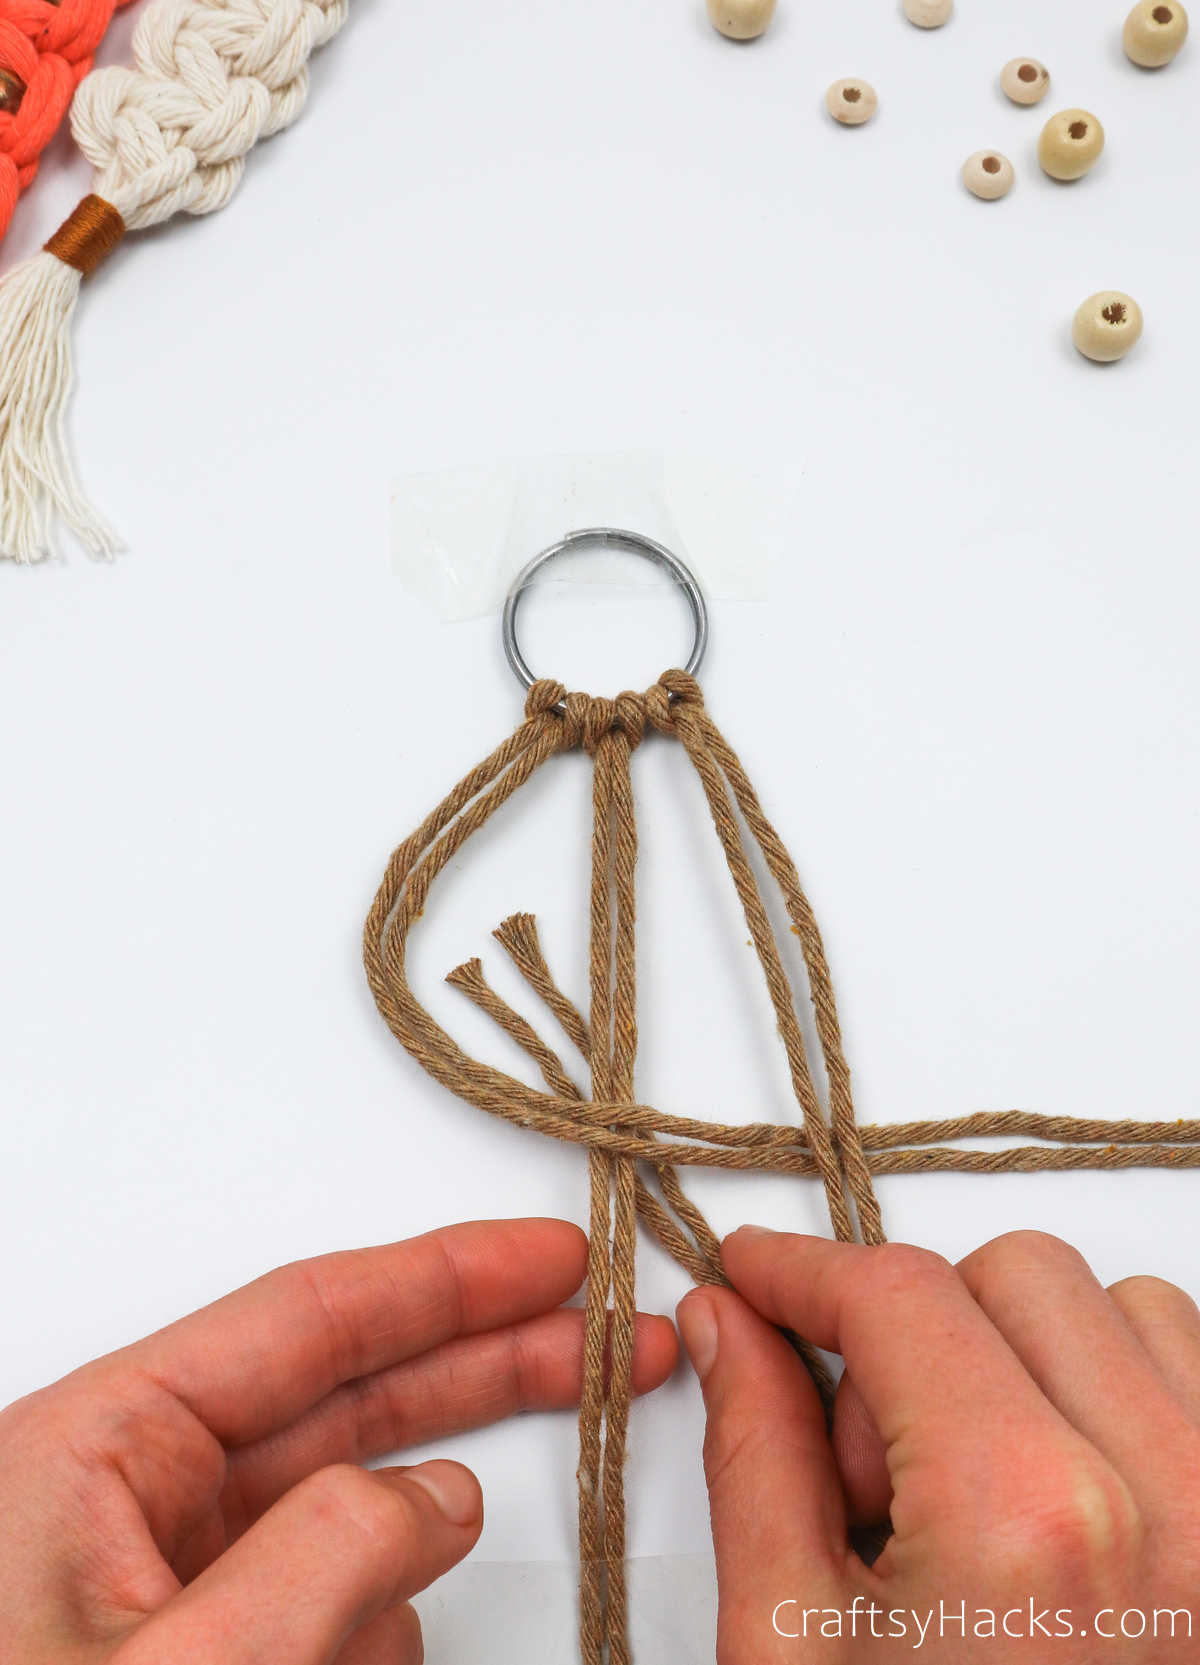
Now pull the ends of the two cords in opposite directions and move towards the ring as you do so to form the first half of your square knot.

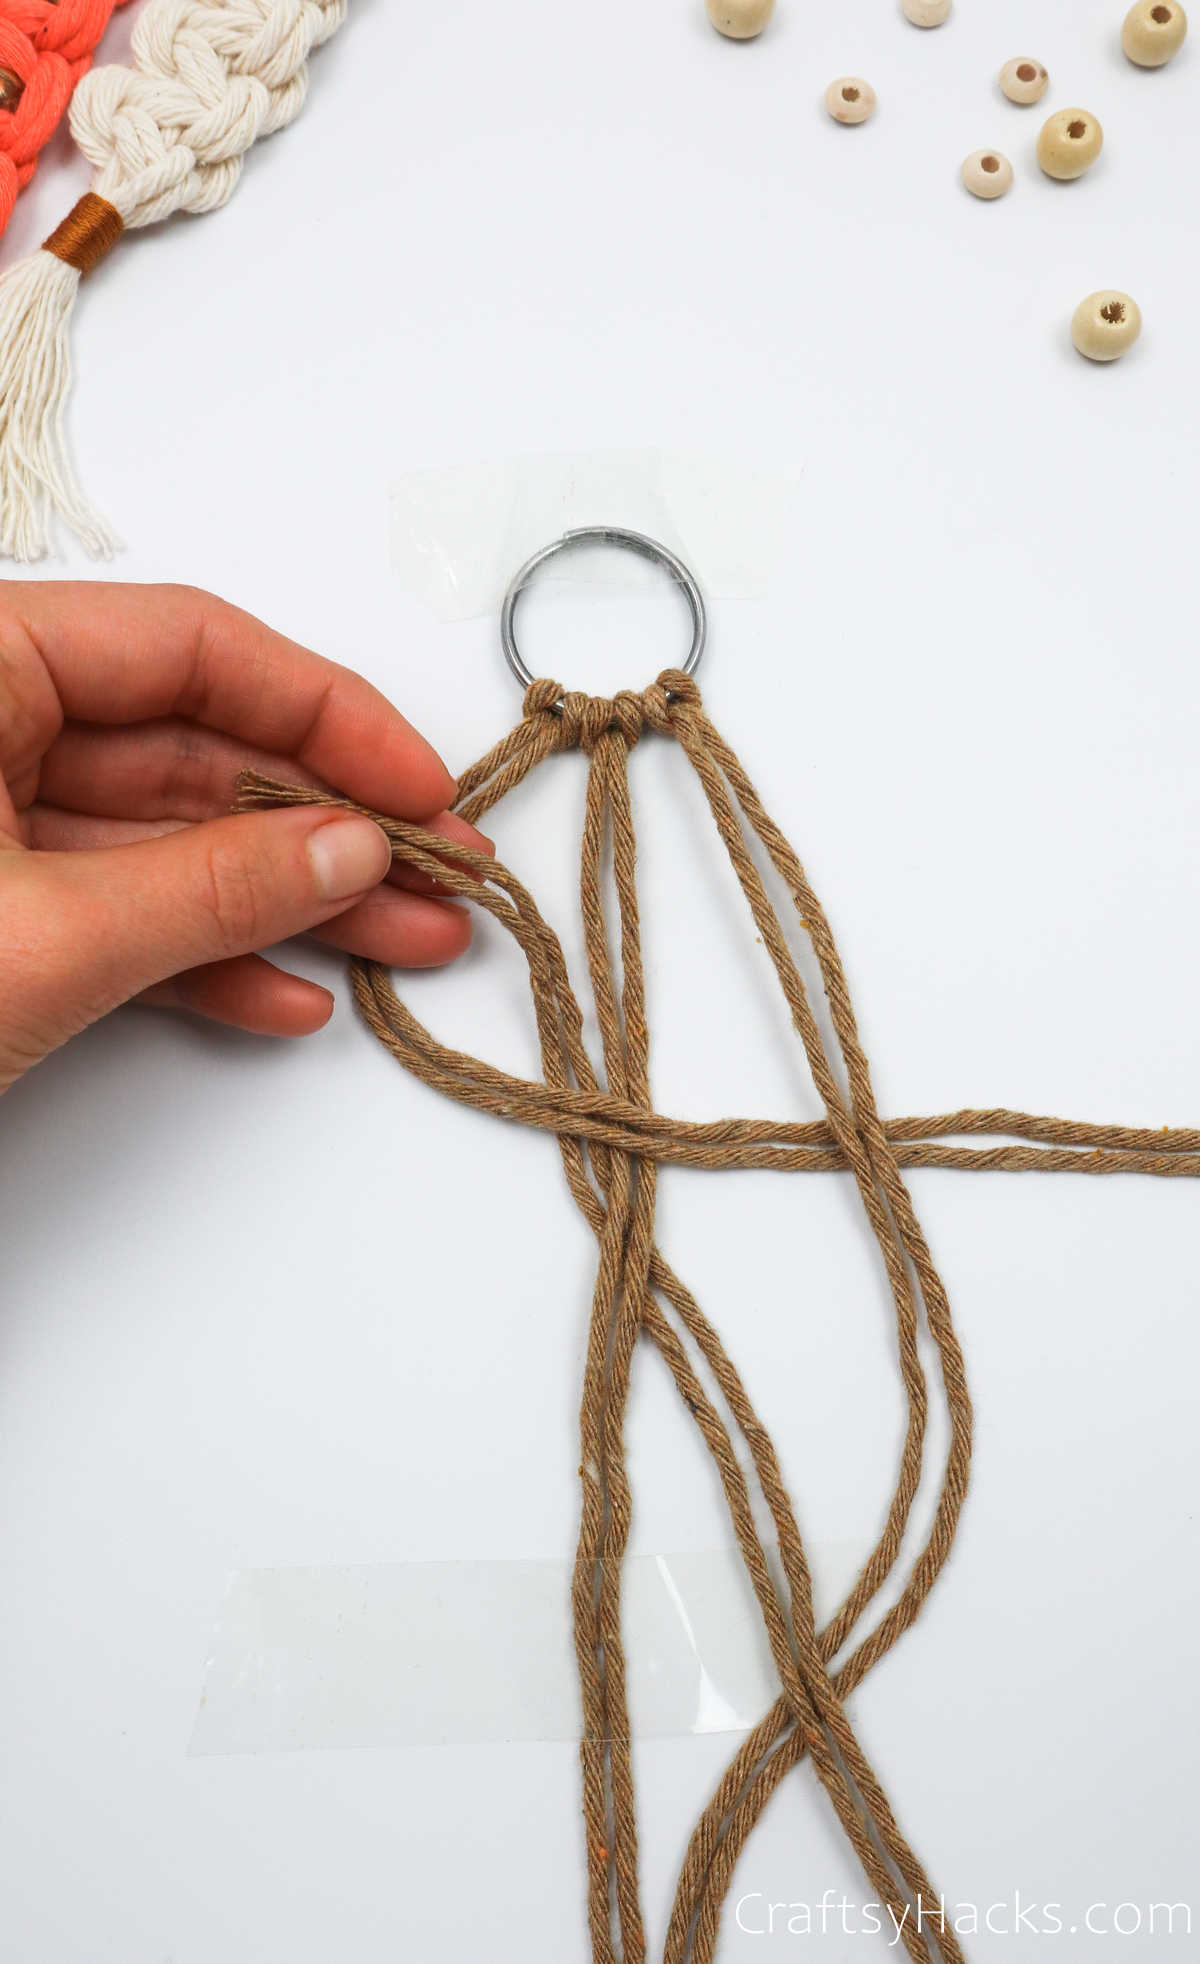
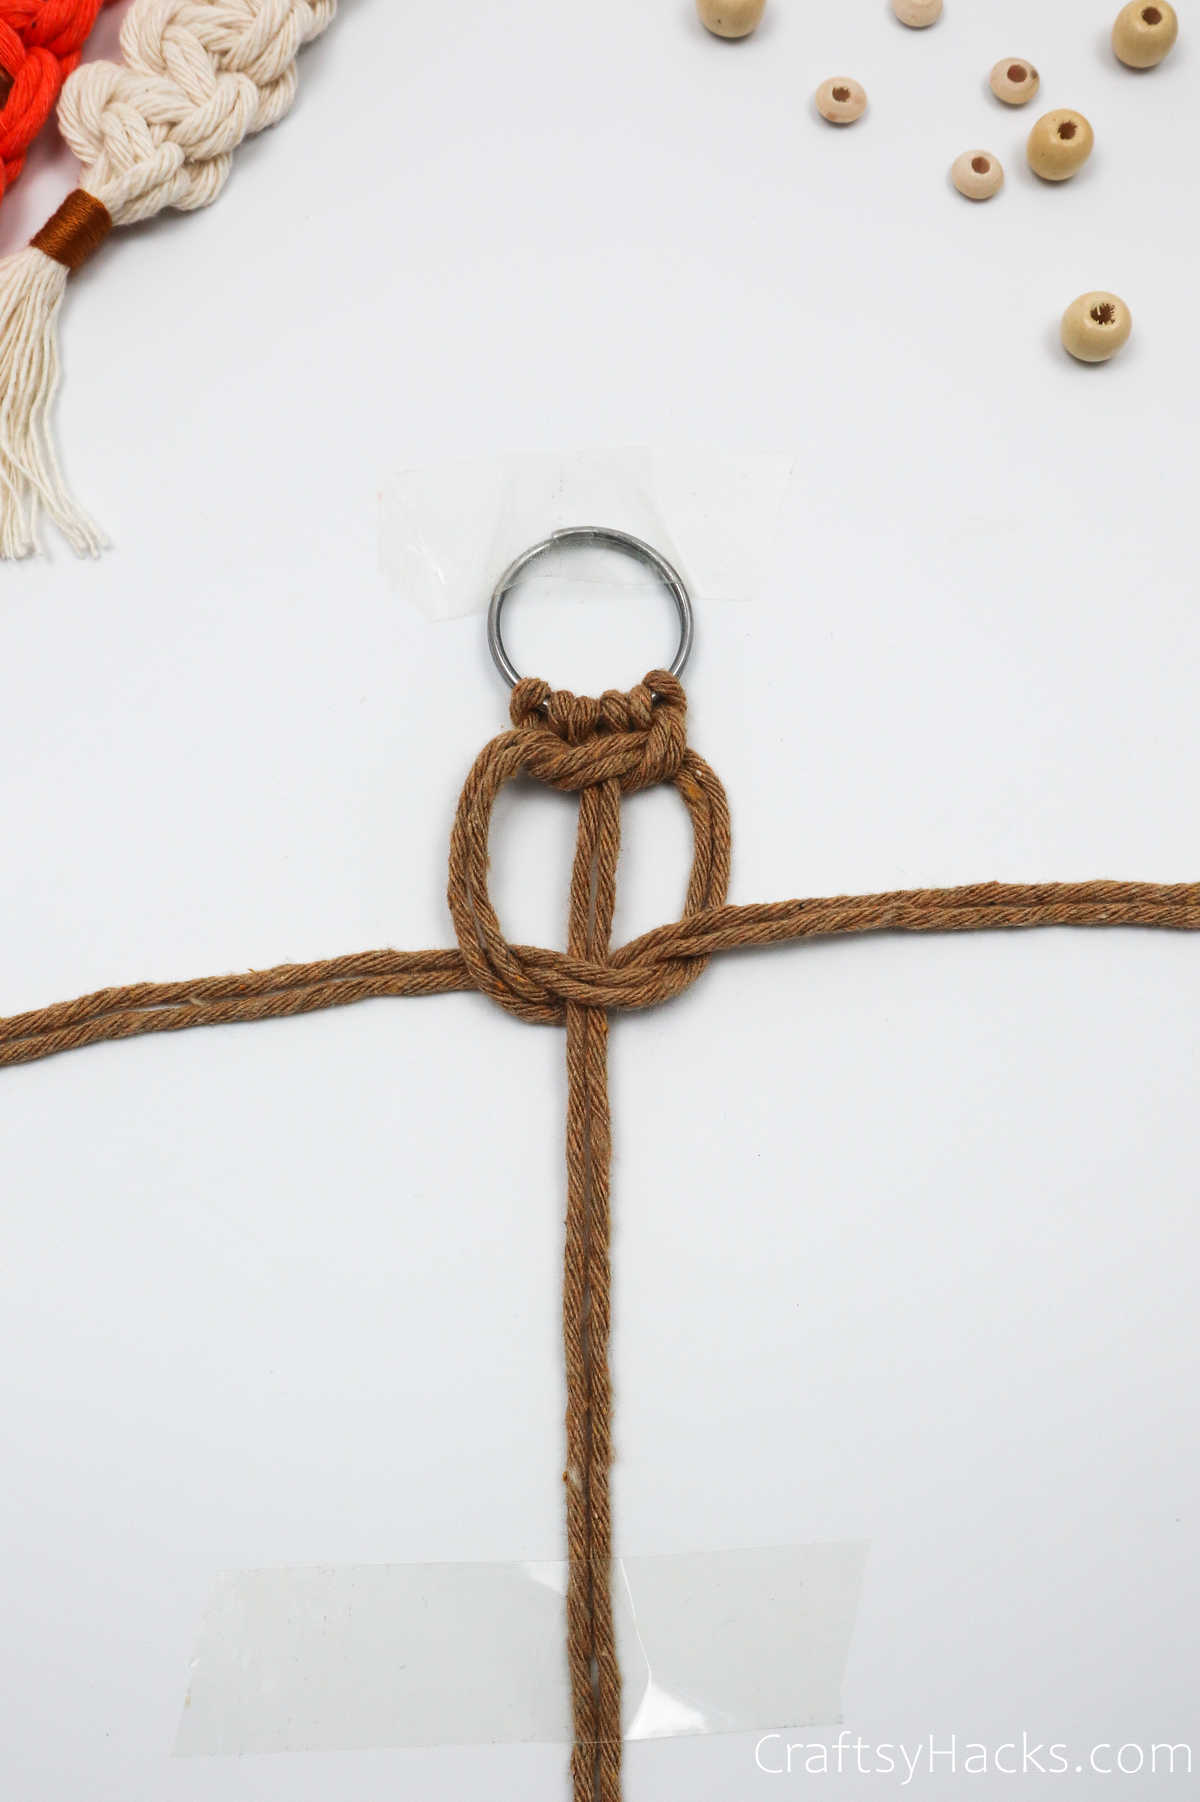
Step 5
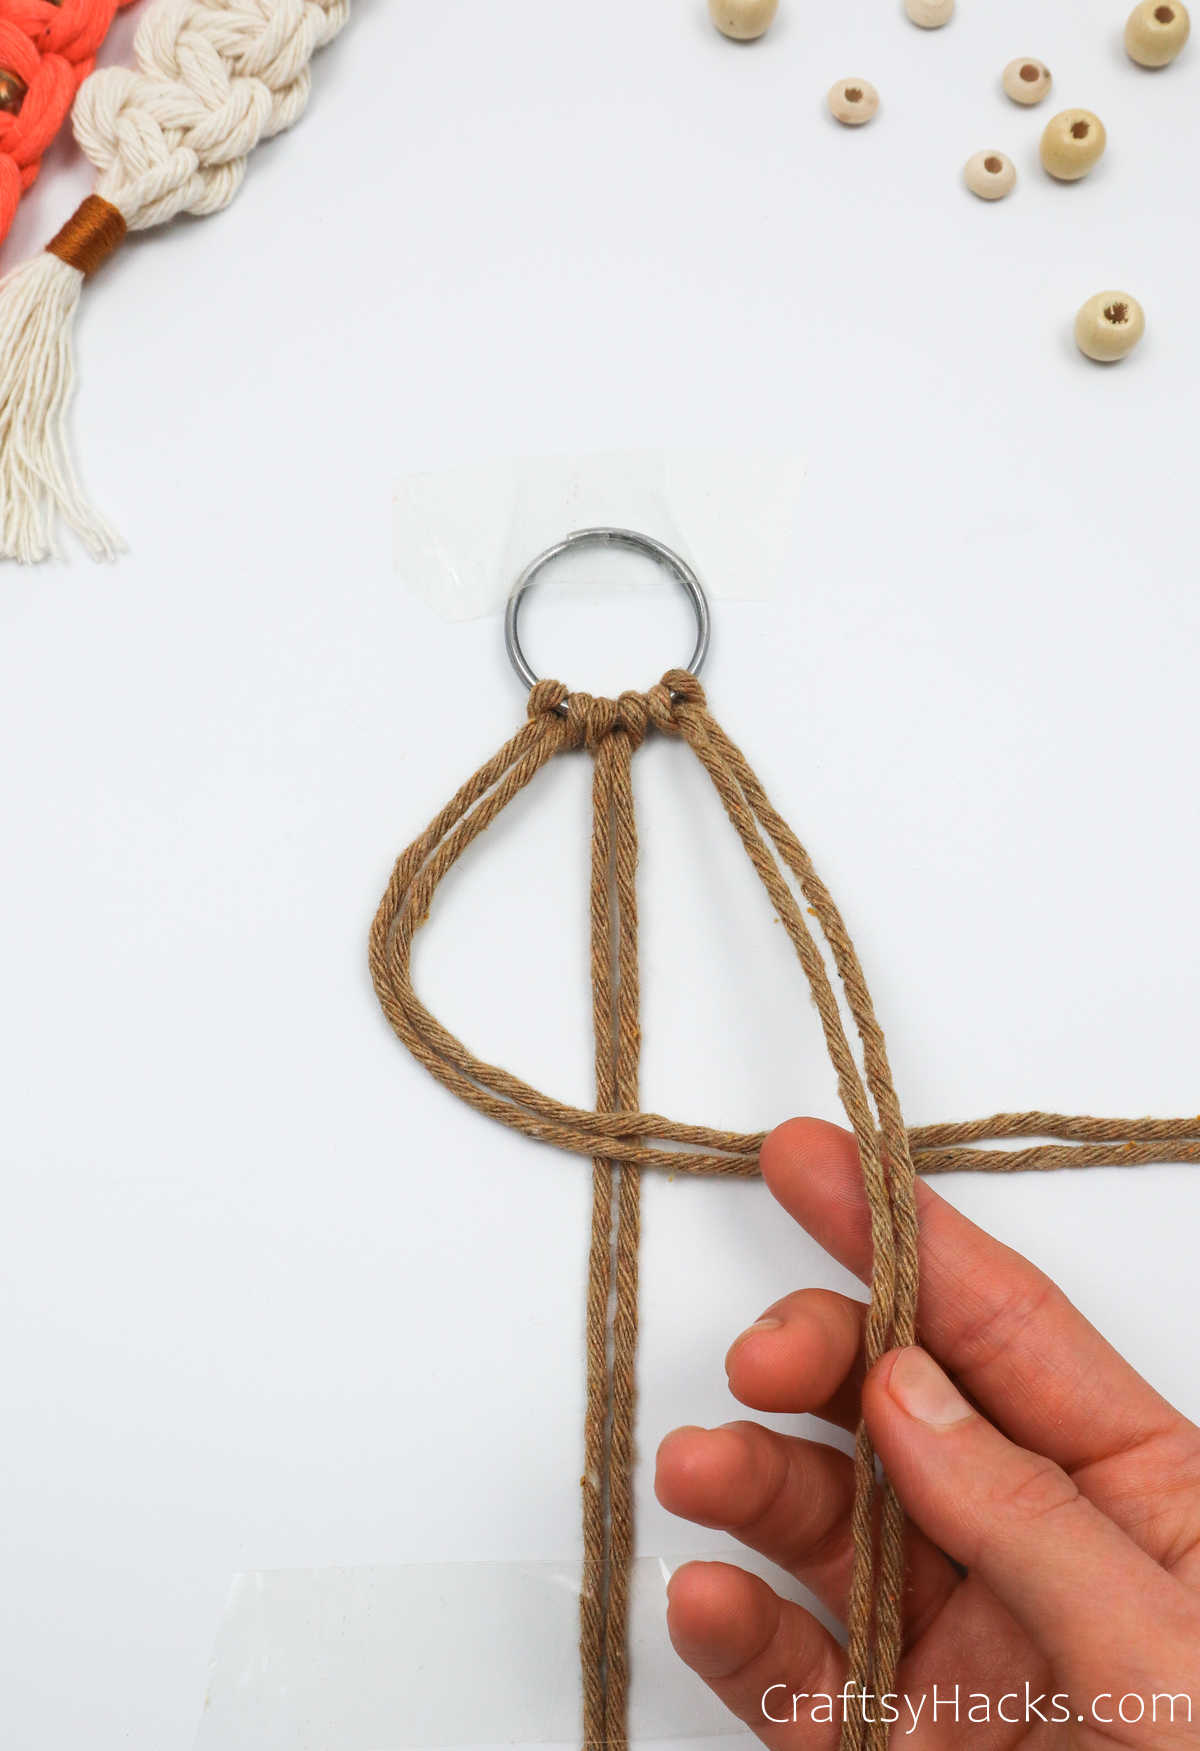
Now, you’re going to make the exact same knot, only this time, you’ll pull the cords on the right to form the loop over the middle cords.
Next, place the cords on the left over the right cords, then pull the ends under and through the loop you made.
Tug the ends of the cord to tighten the knot. Secure this second knot right under the first one you made. These two knots together make one square knot!
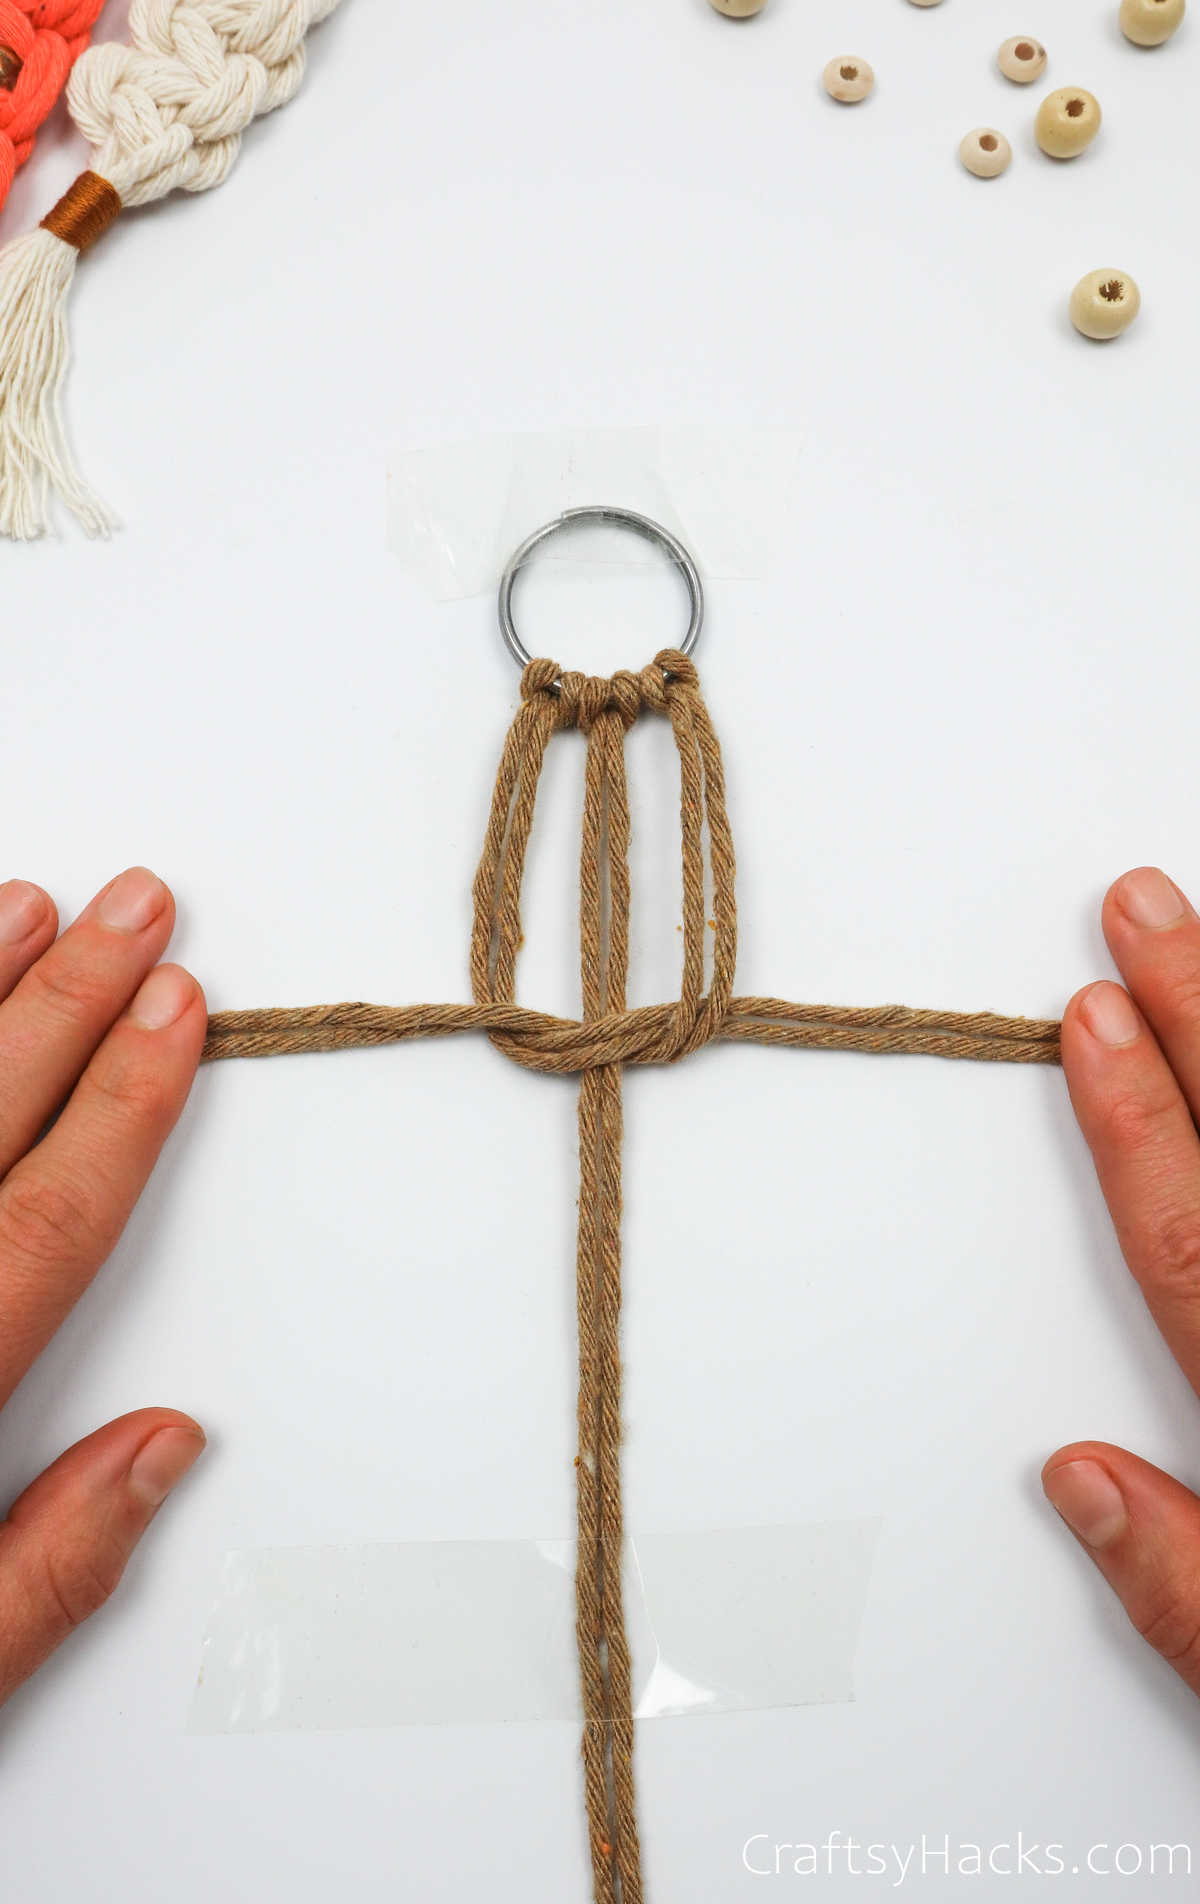
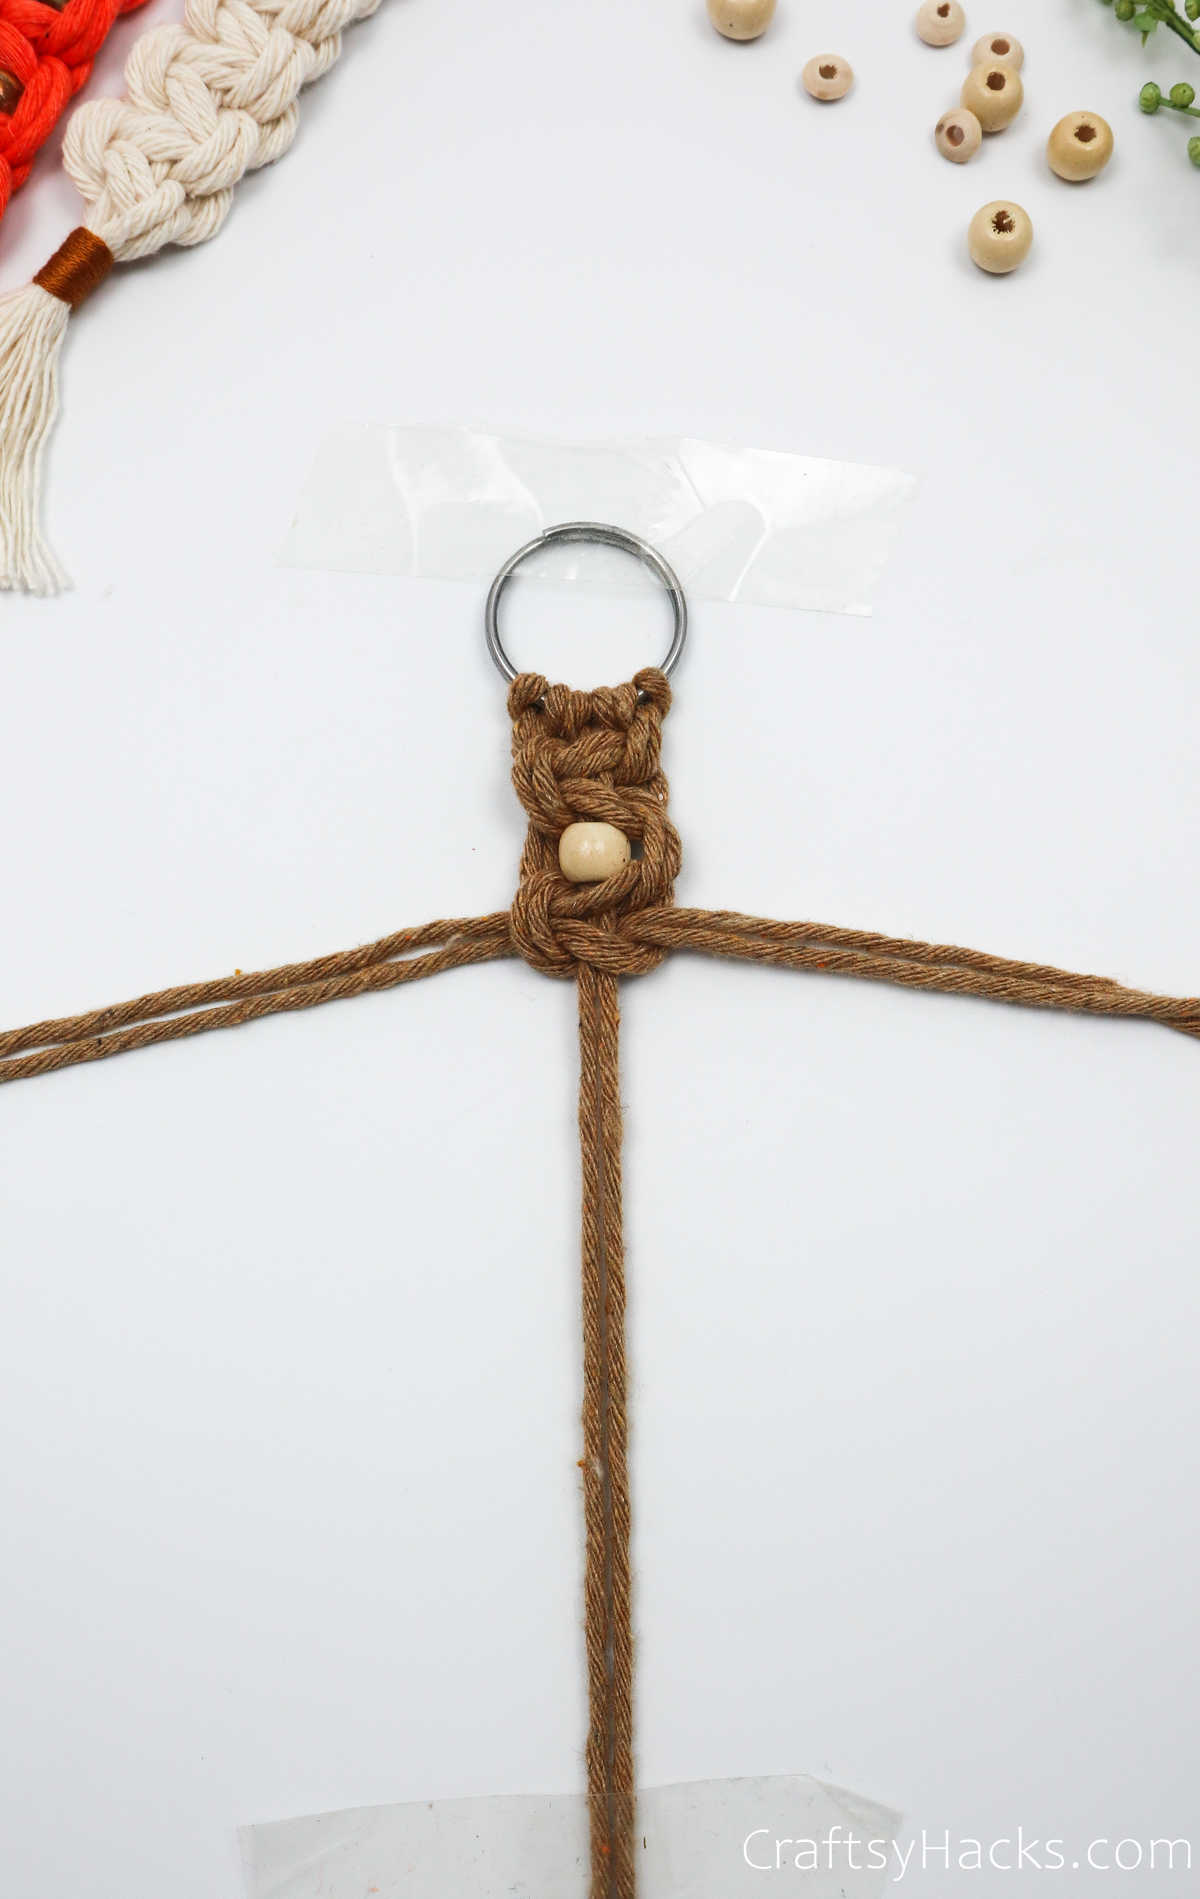
Step 6
Before you proceed, we’re going to add a little bead to jazz up your keychain. For this, you’ll need to tape the ends of the two middle cords. It will make it easier to insert them through the bead.
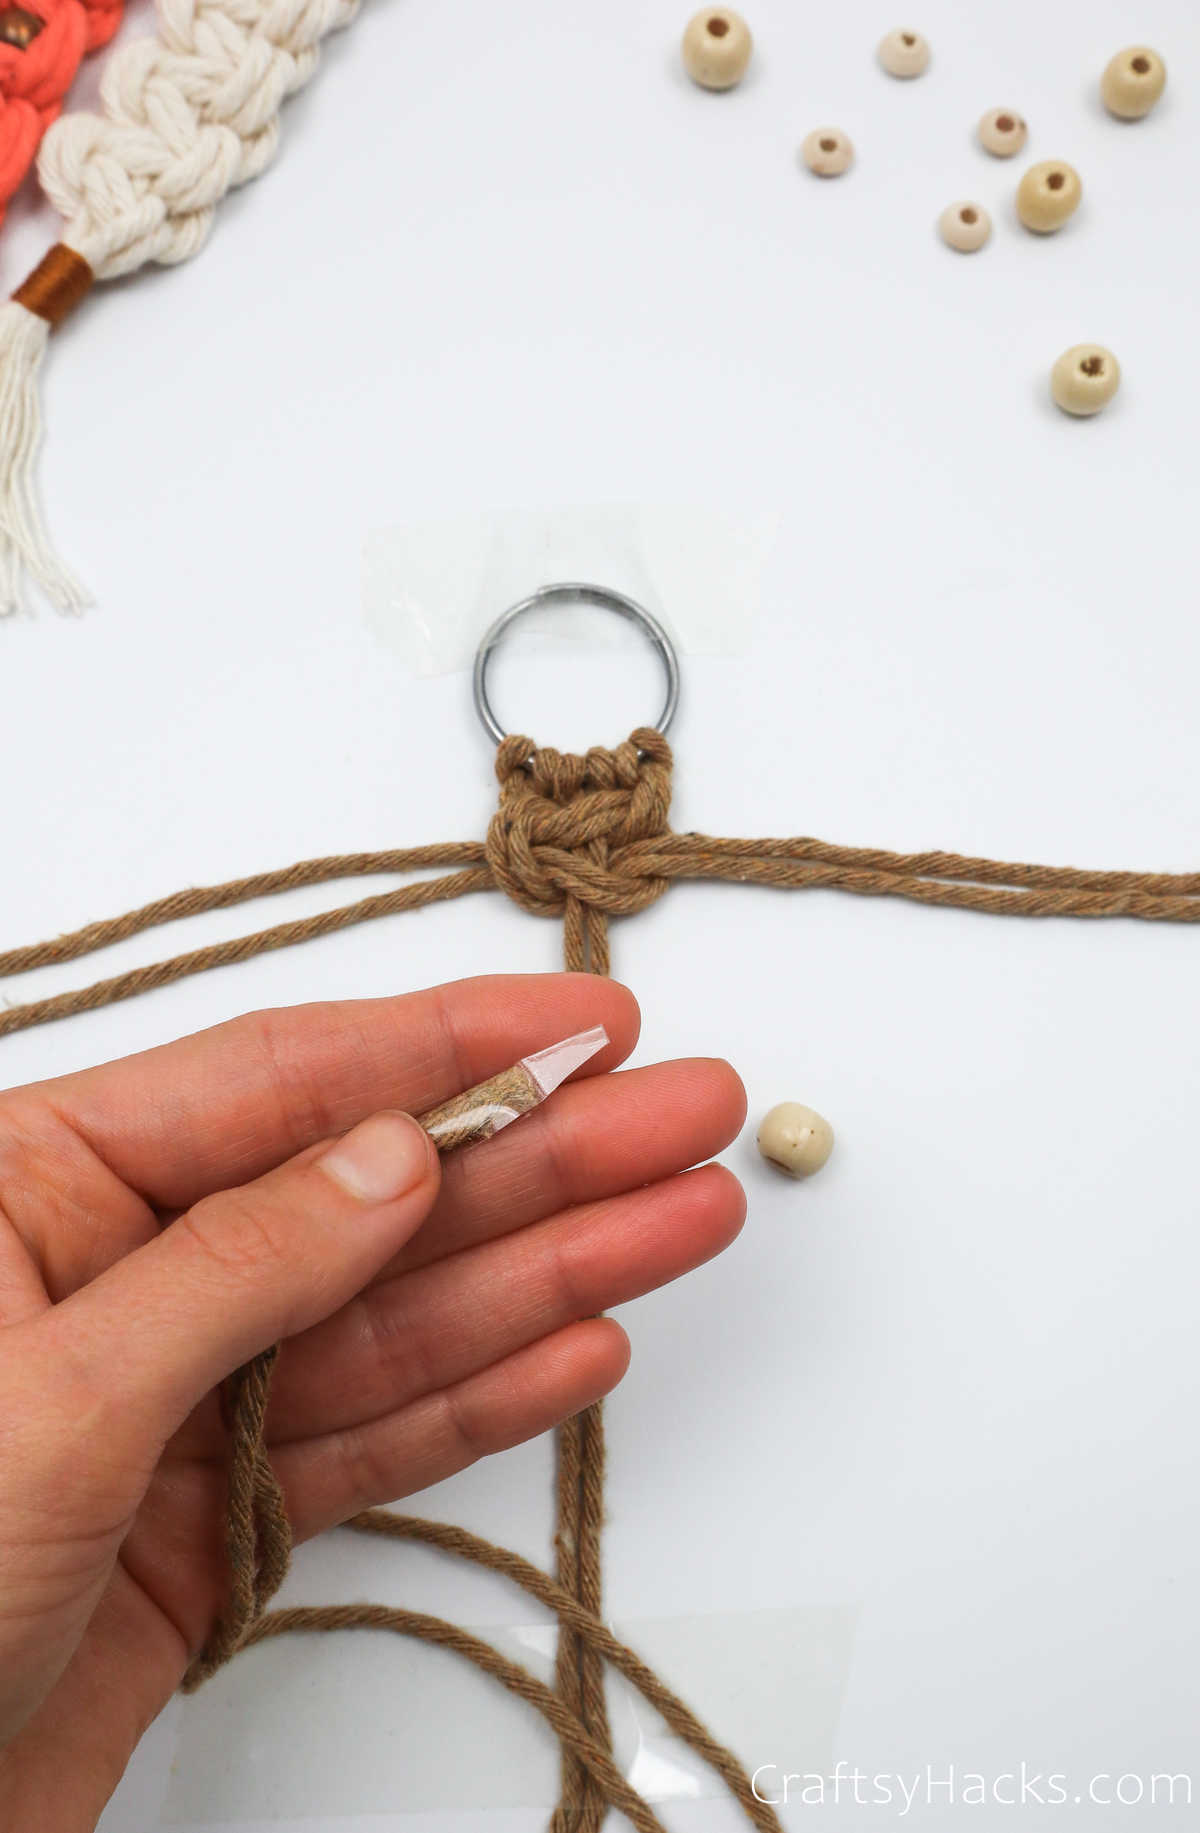
Pull the bead through and place it right at the top under your first square knot.
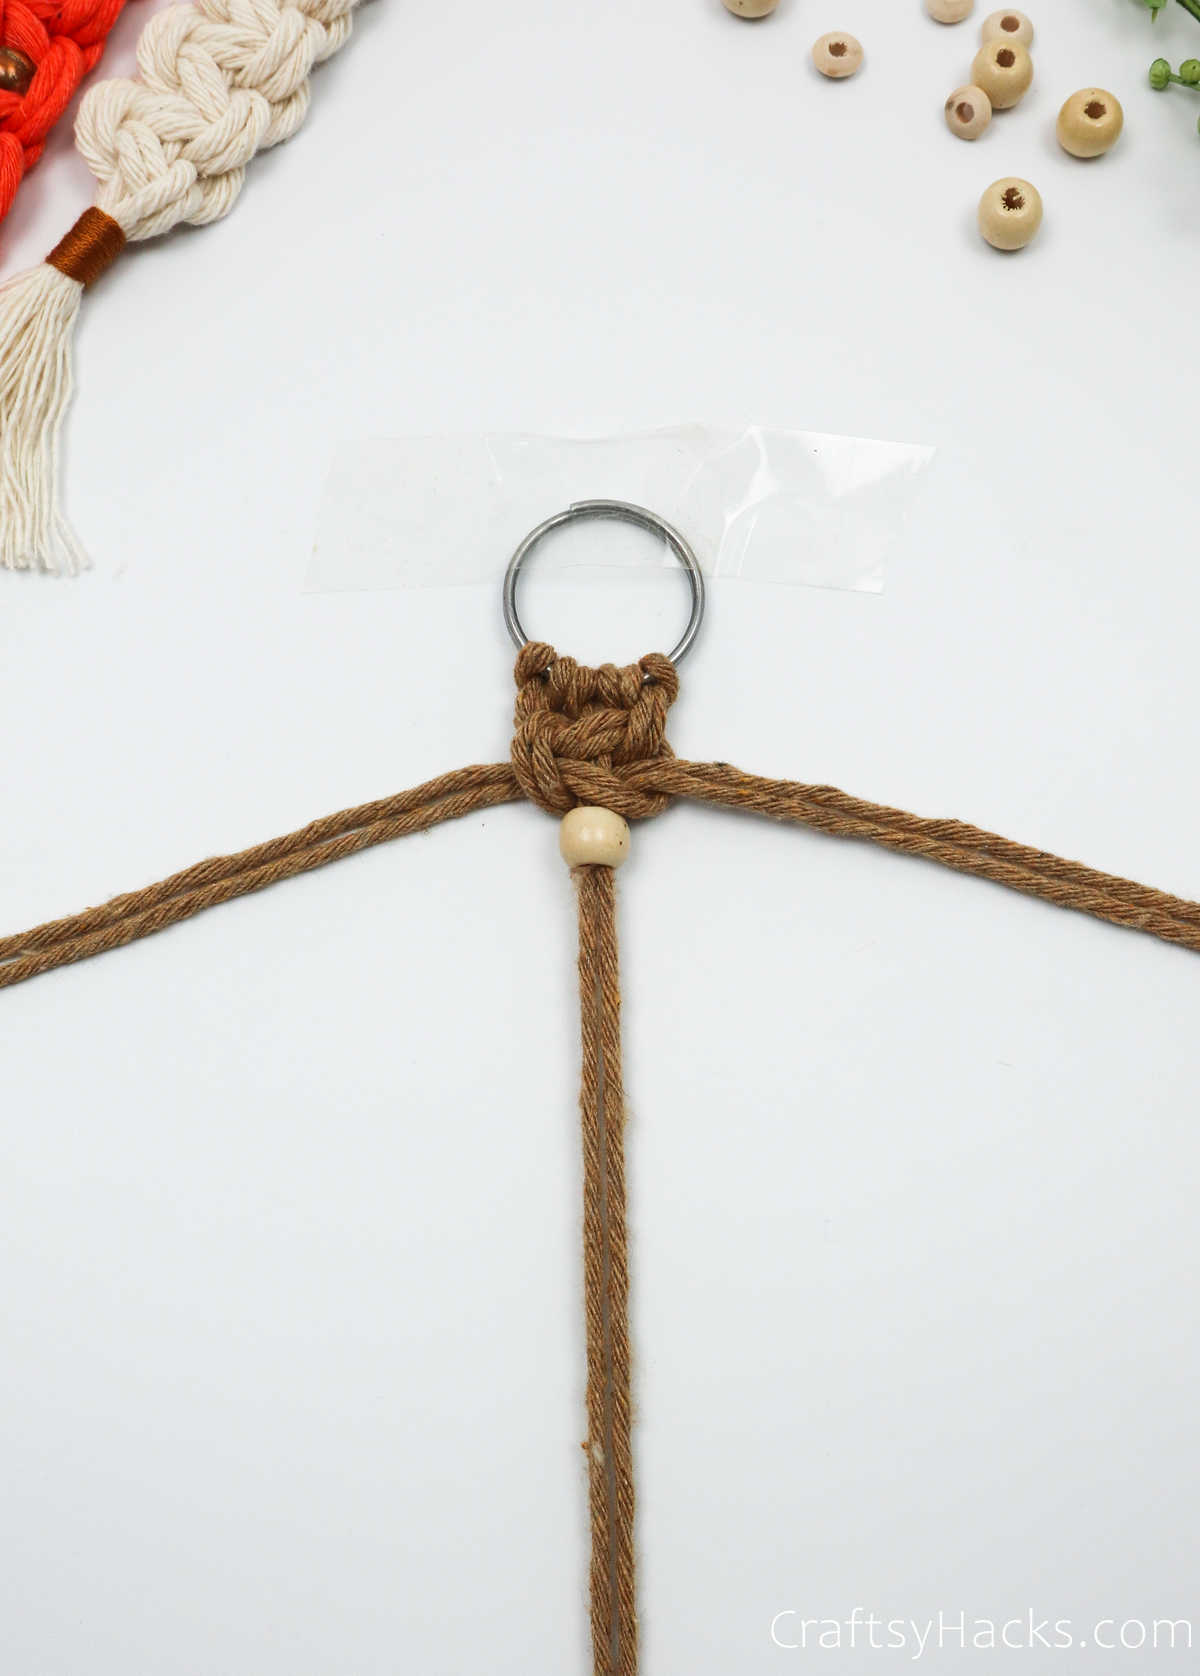
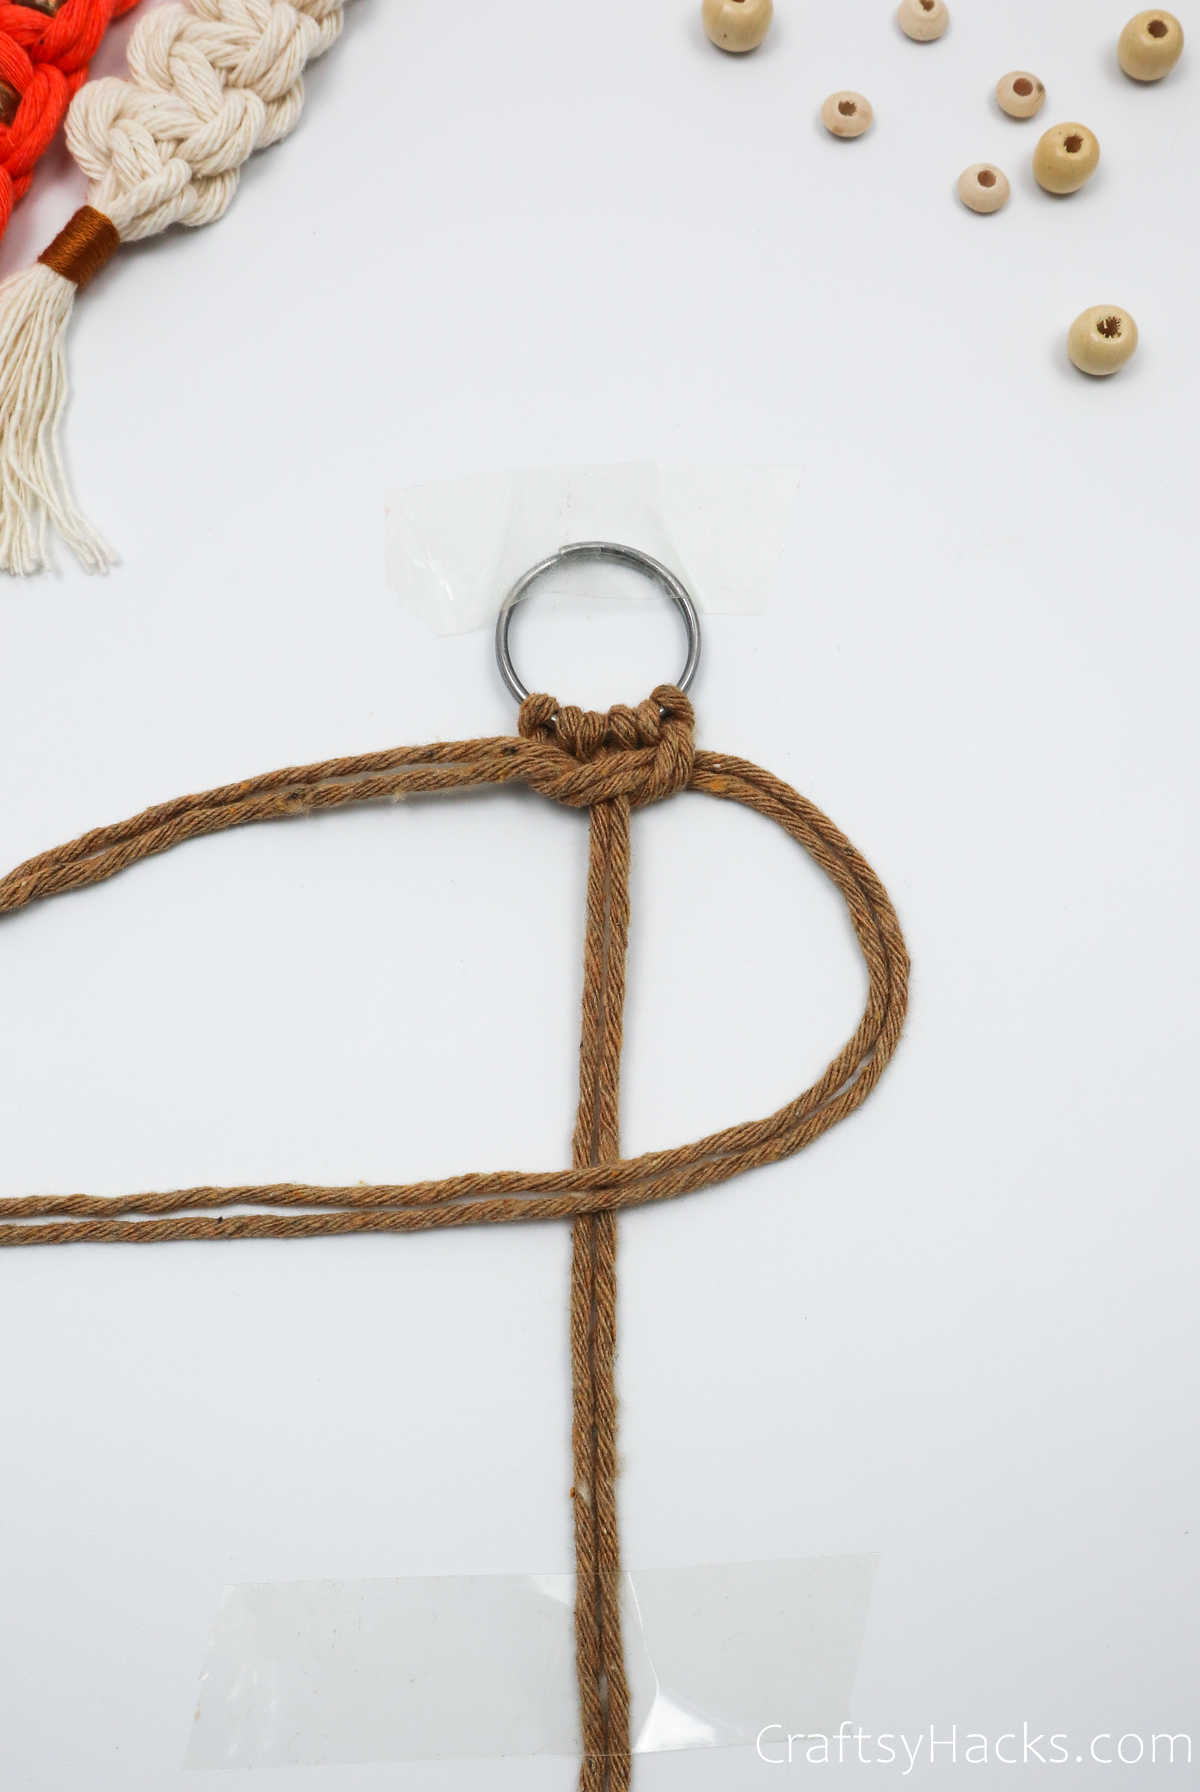
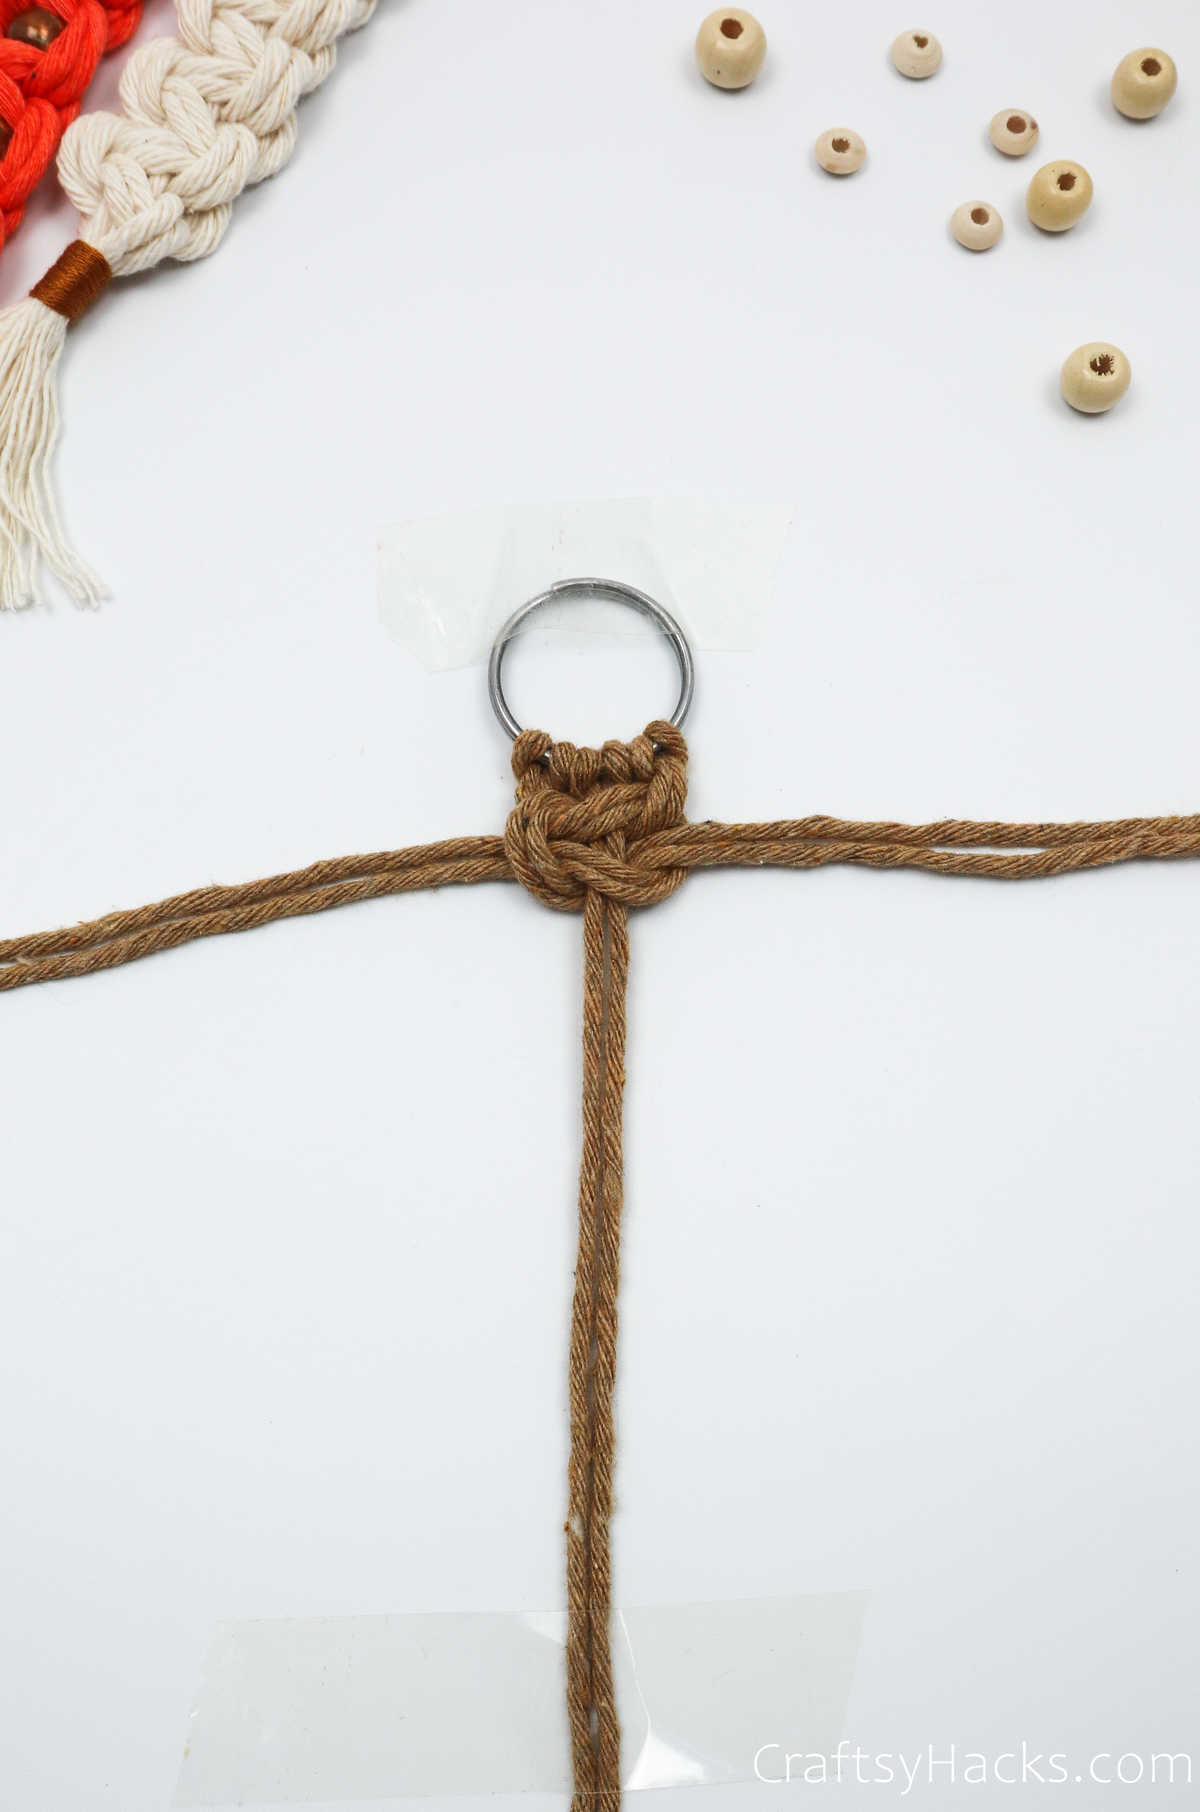
Step 7
Then, you’re just going to make another square knot to secure the bead in place. You know the drill; just start with the cords on the left!
This is how your keychain should look. Cute, isn’t it?
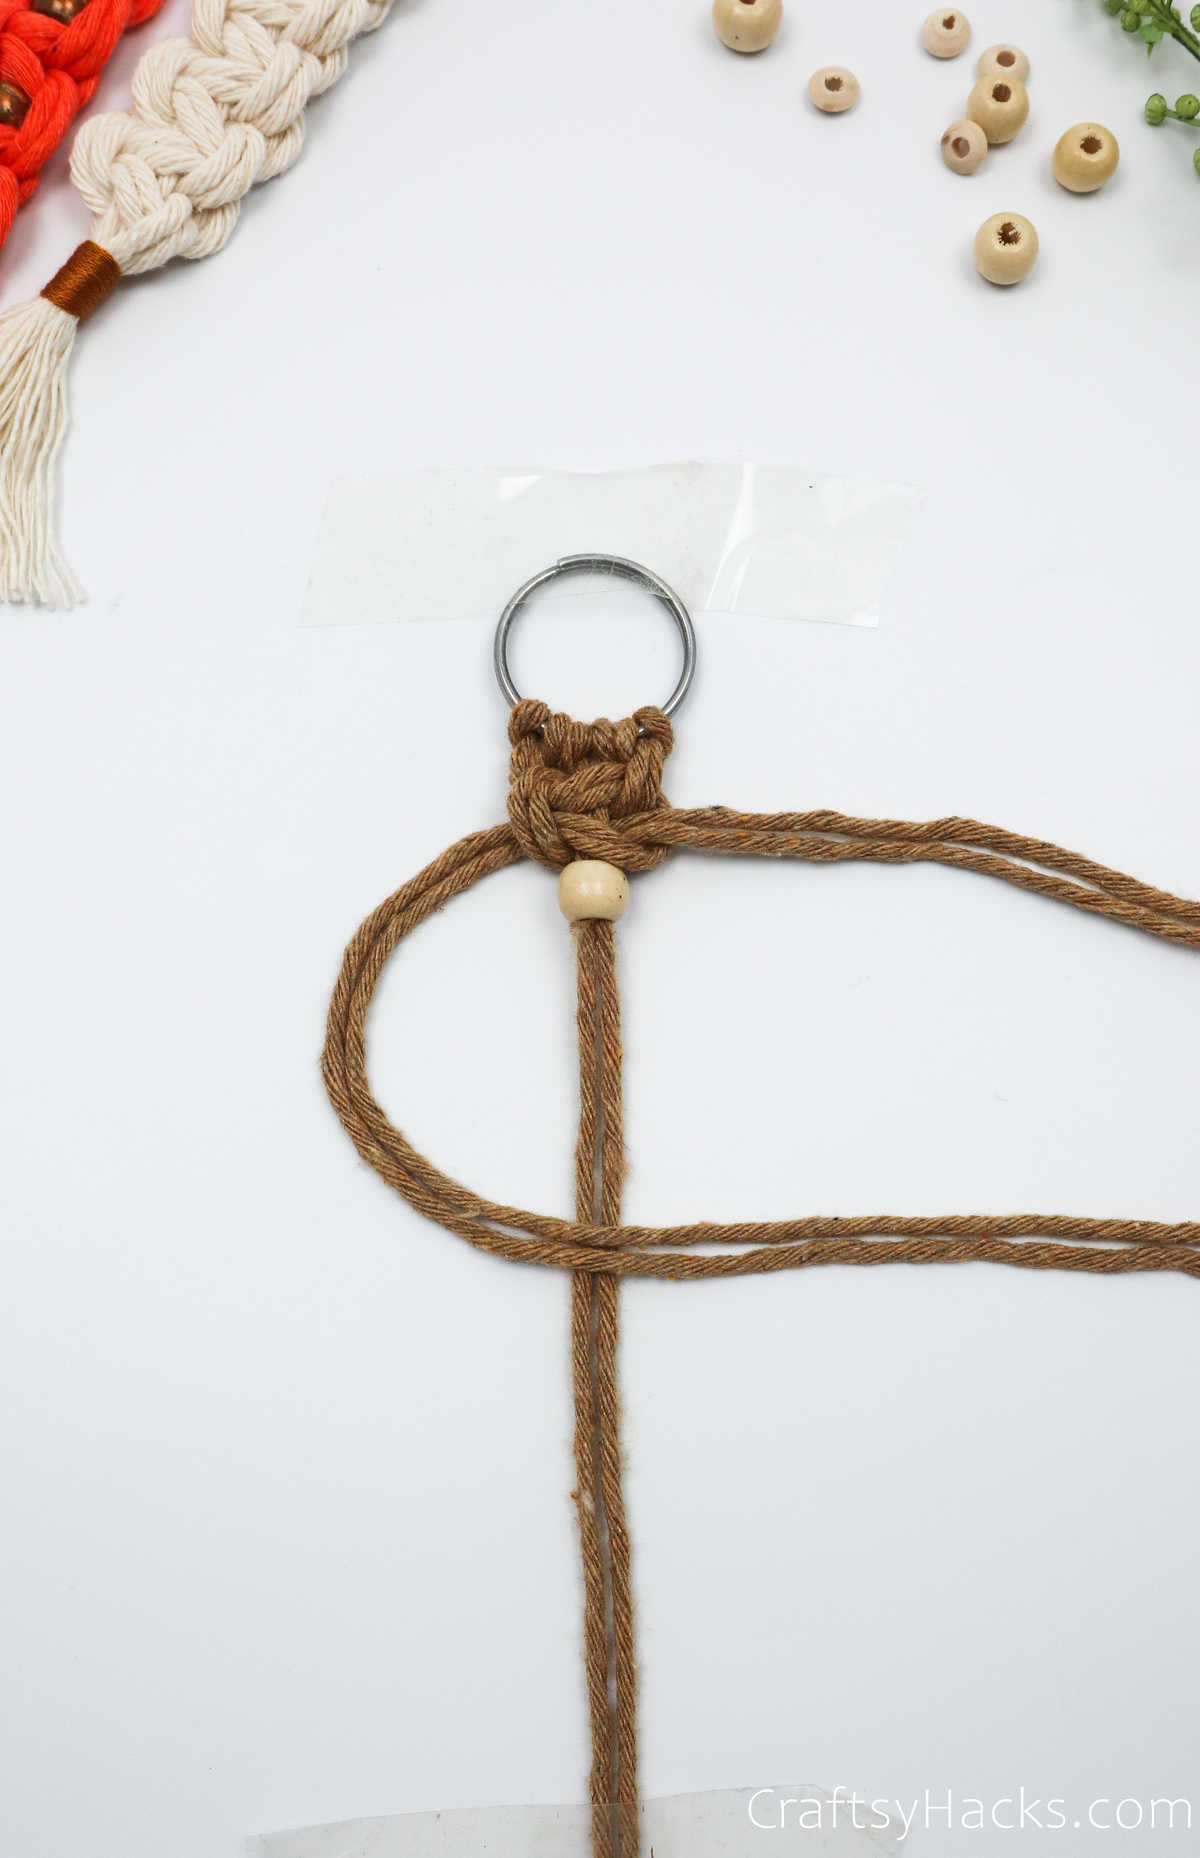
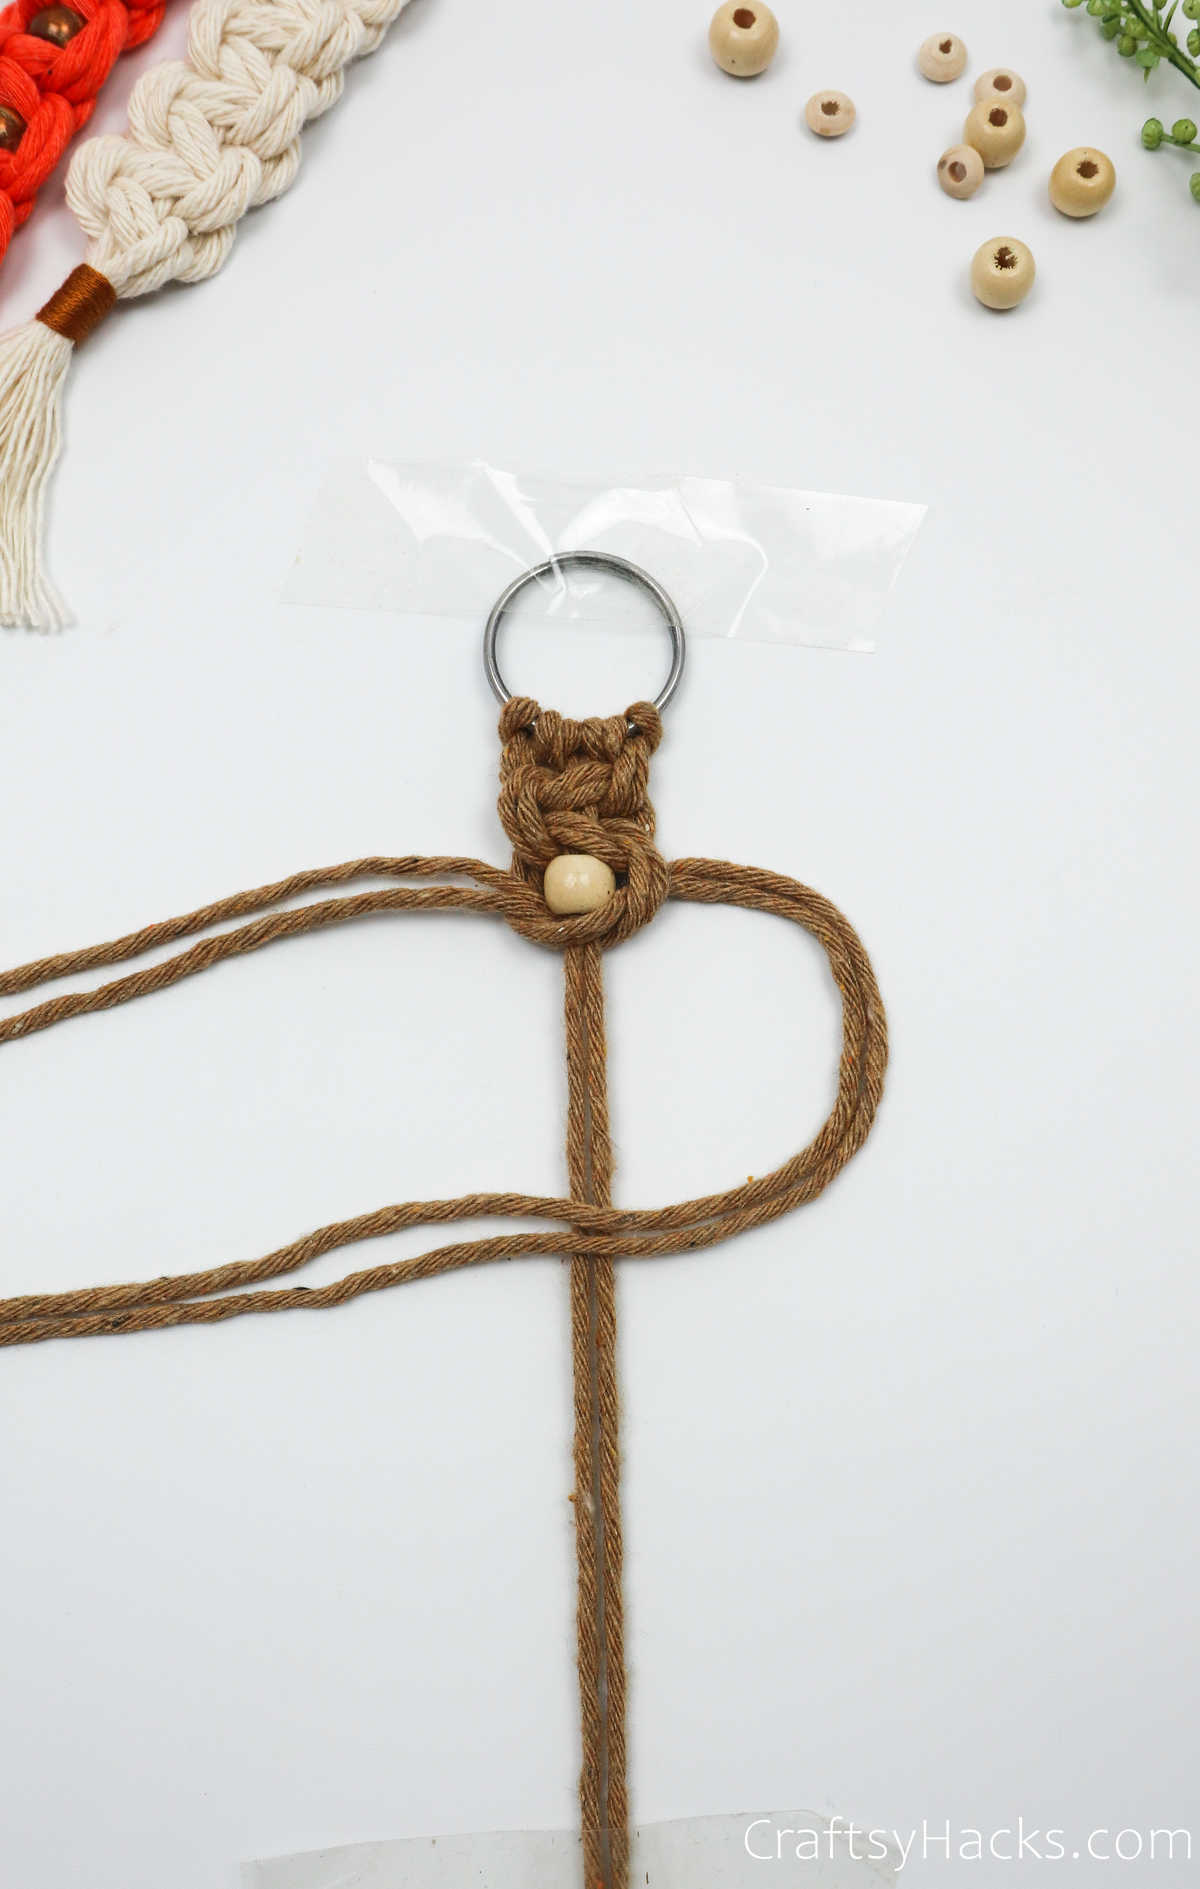
Just continue to work your way down. After every square knot, insert a bead and round it off with another square knot. It’s a piece of cake, once you get the hang of it.
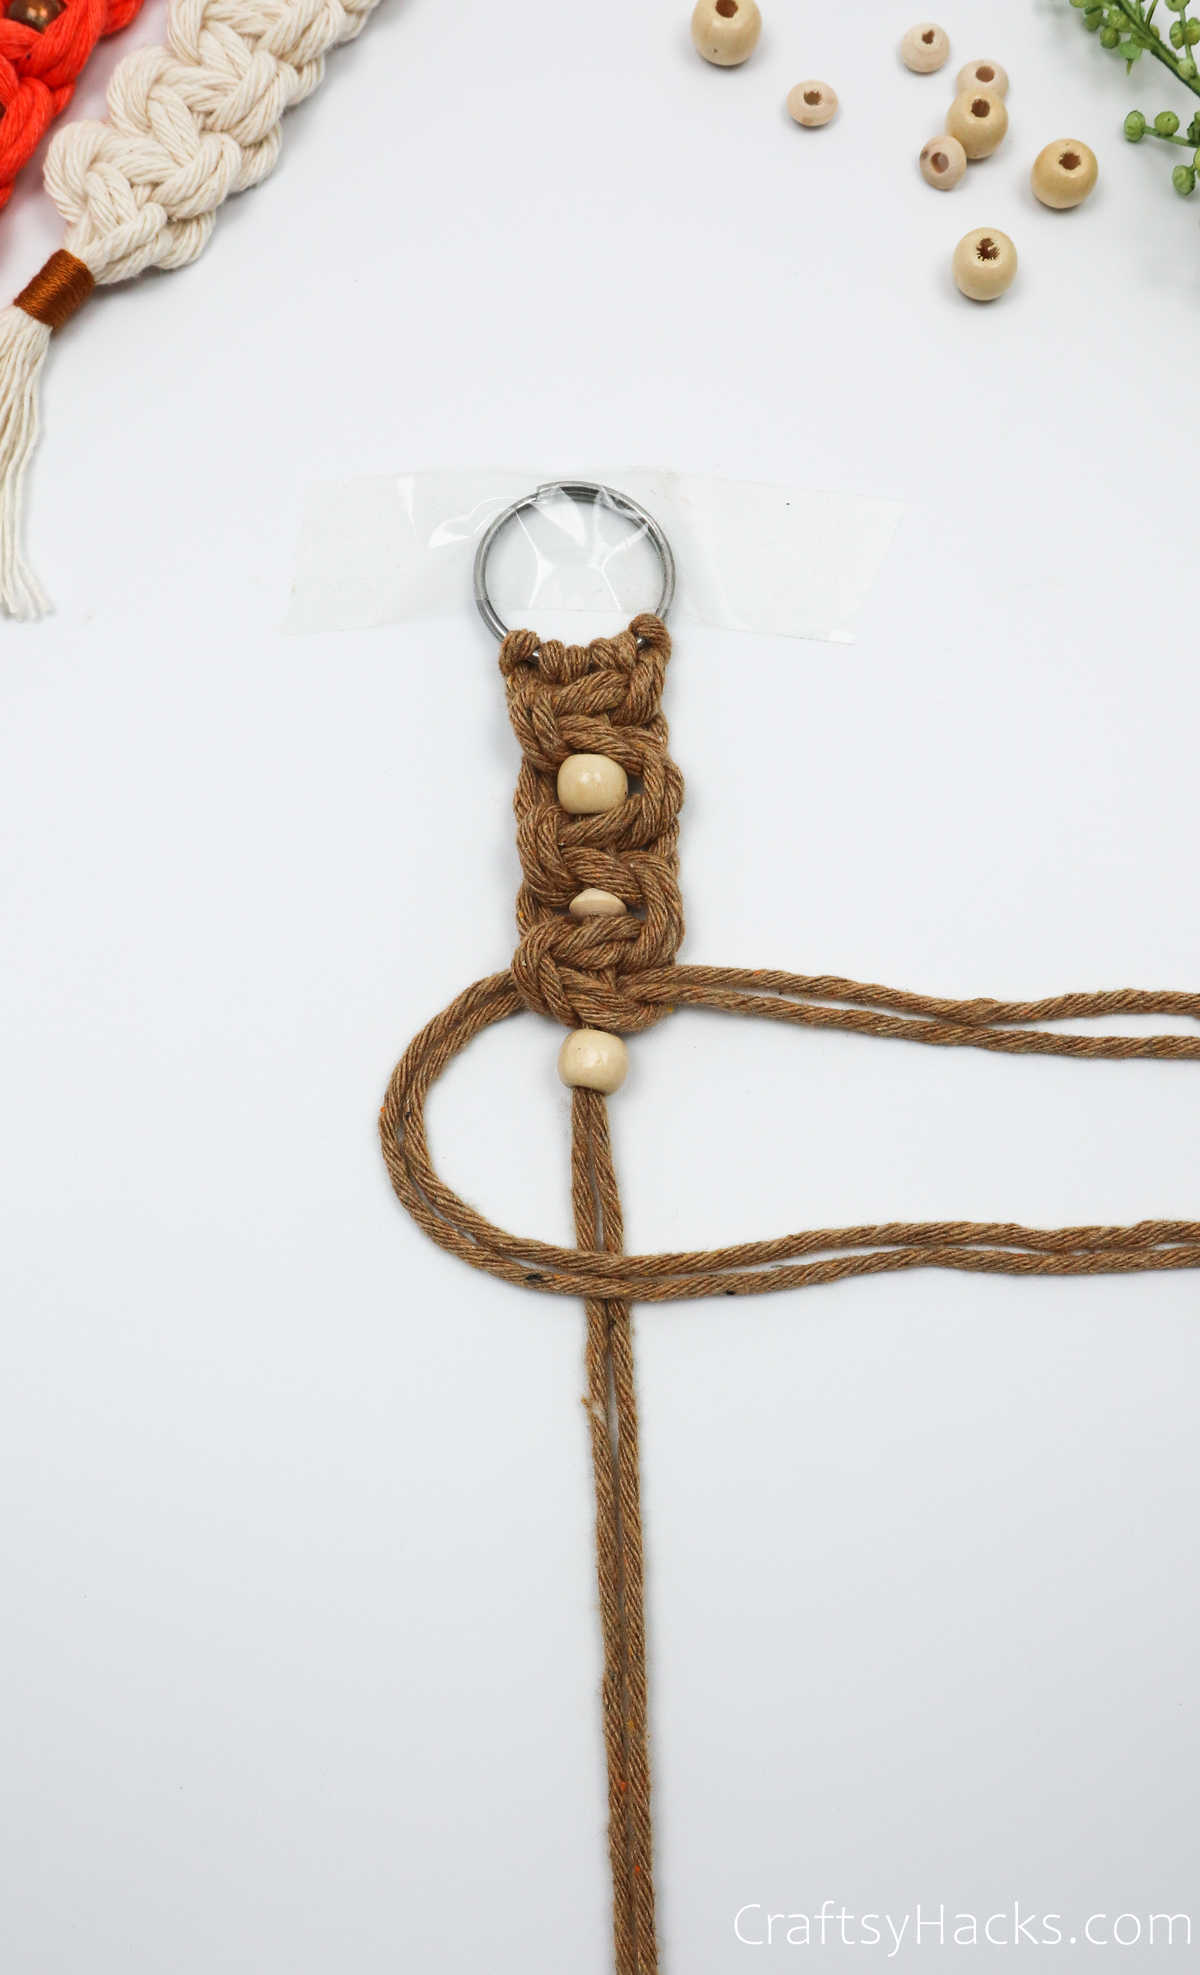
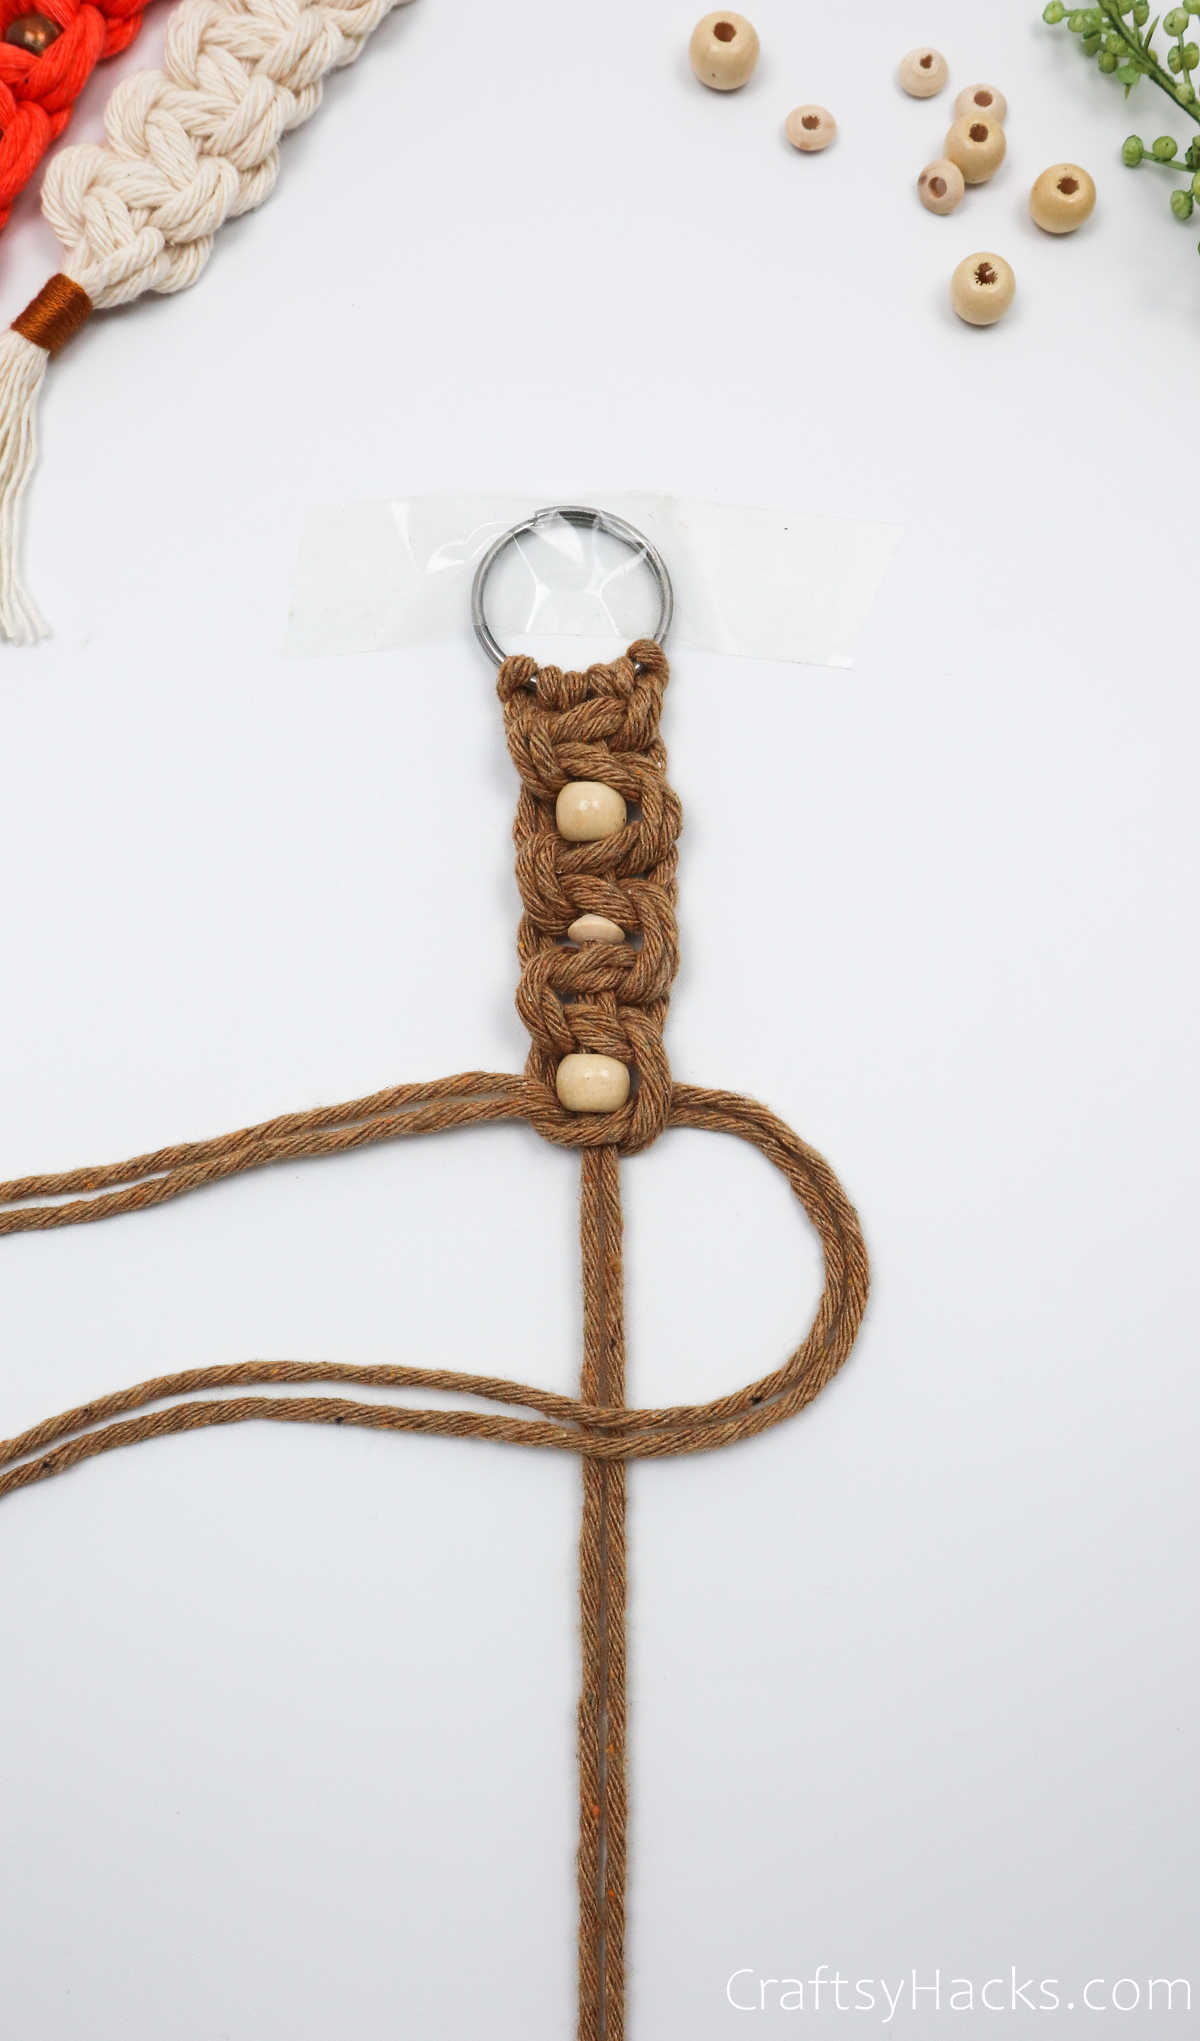
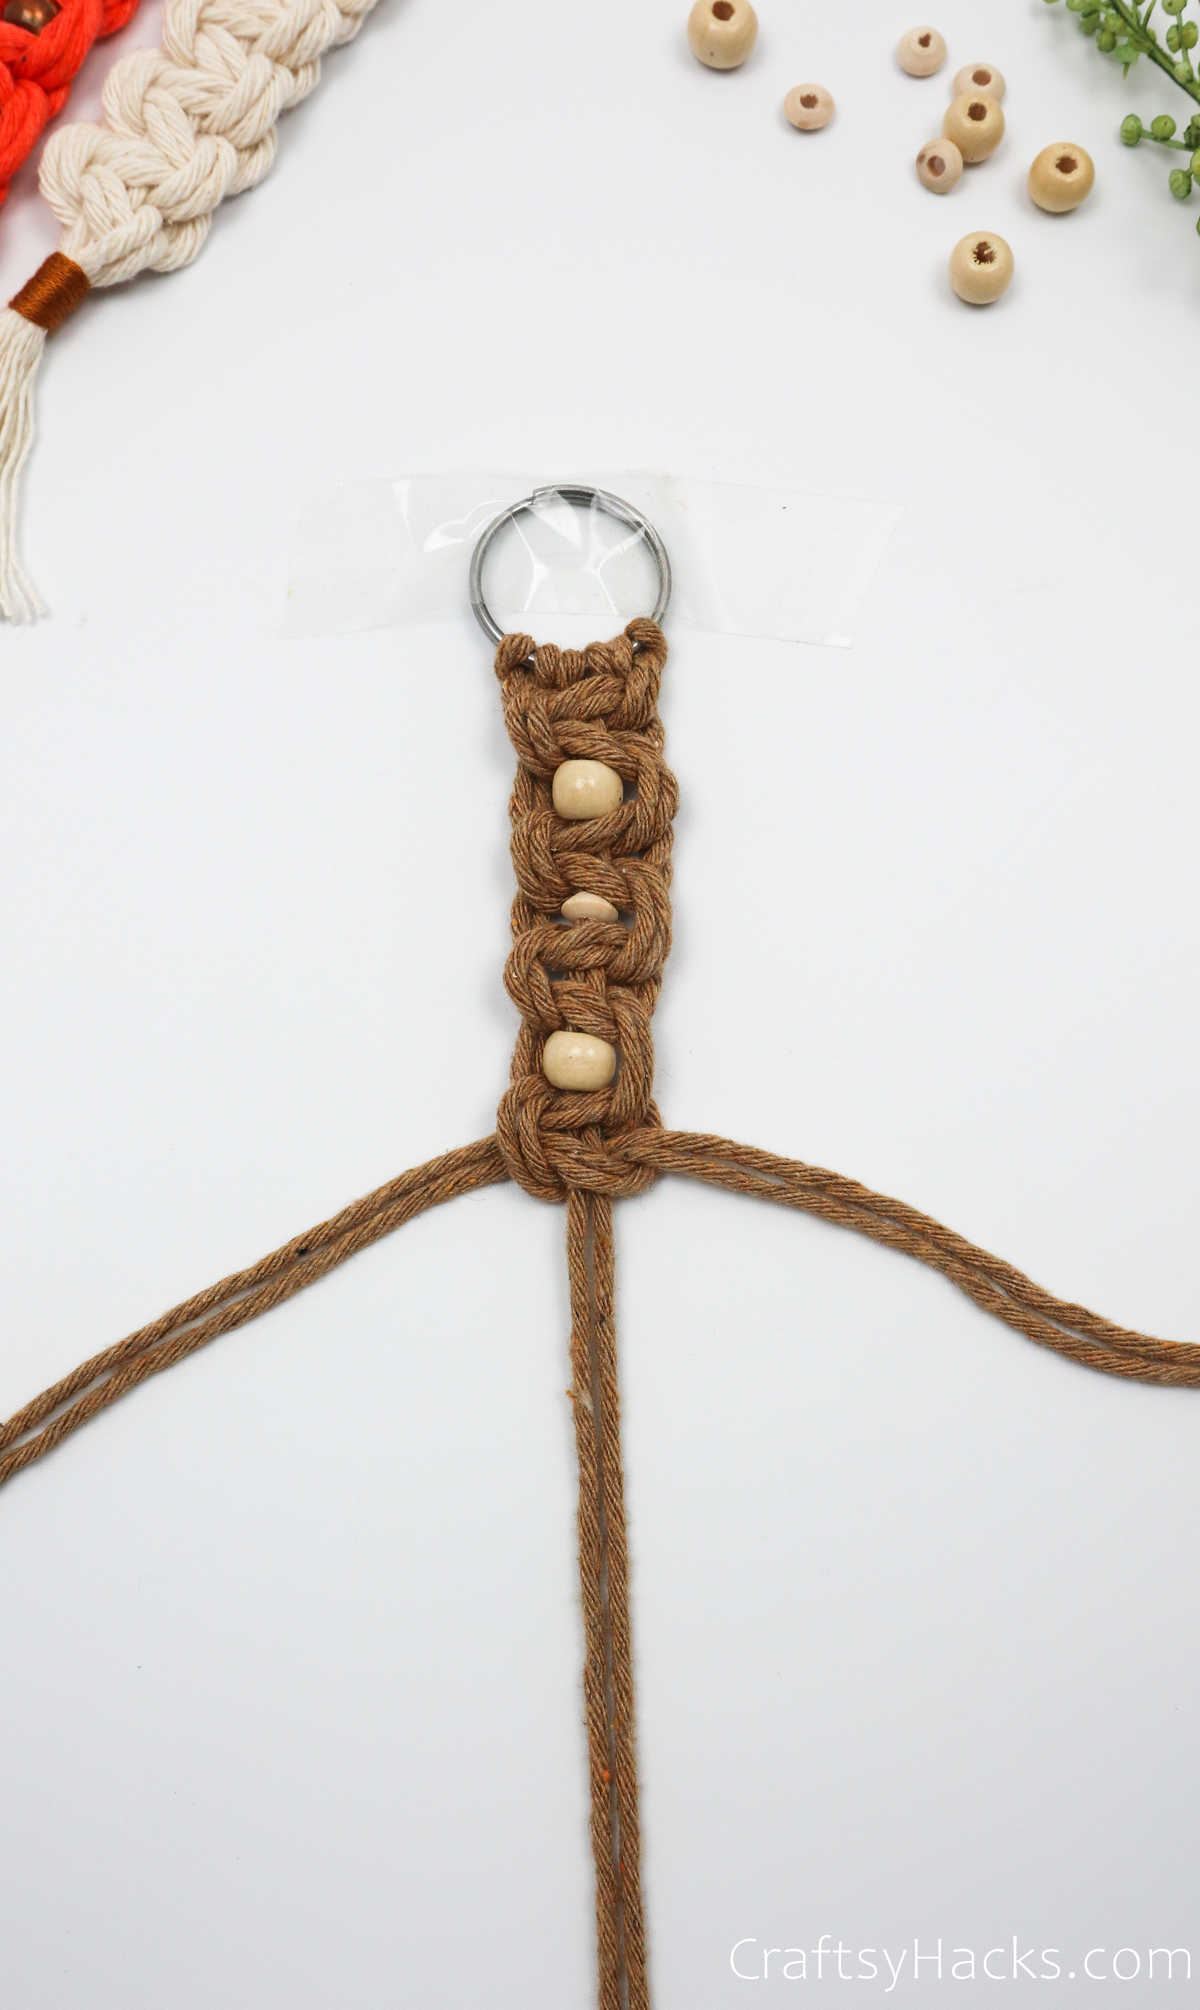
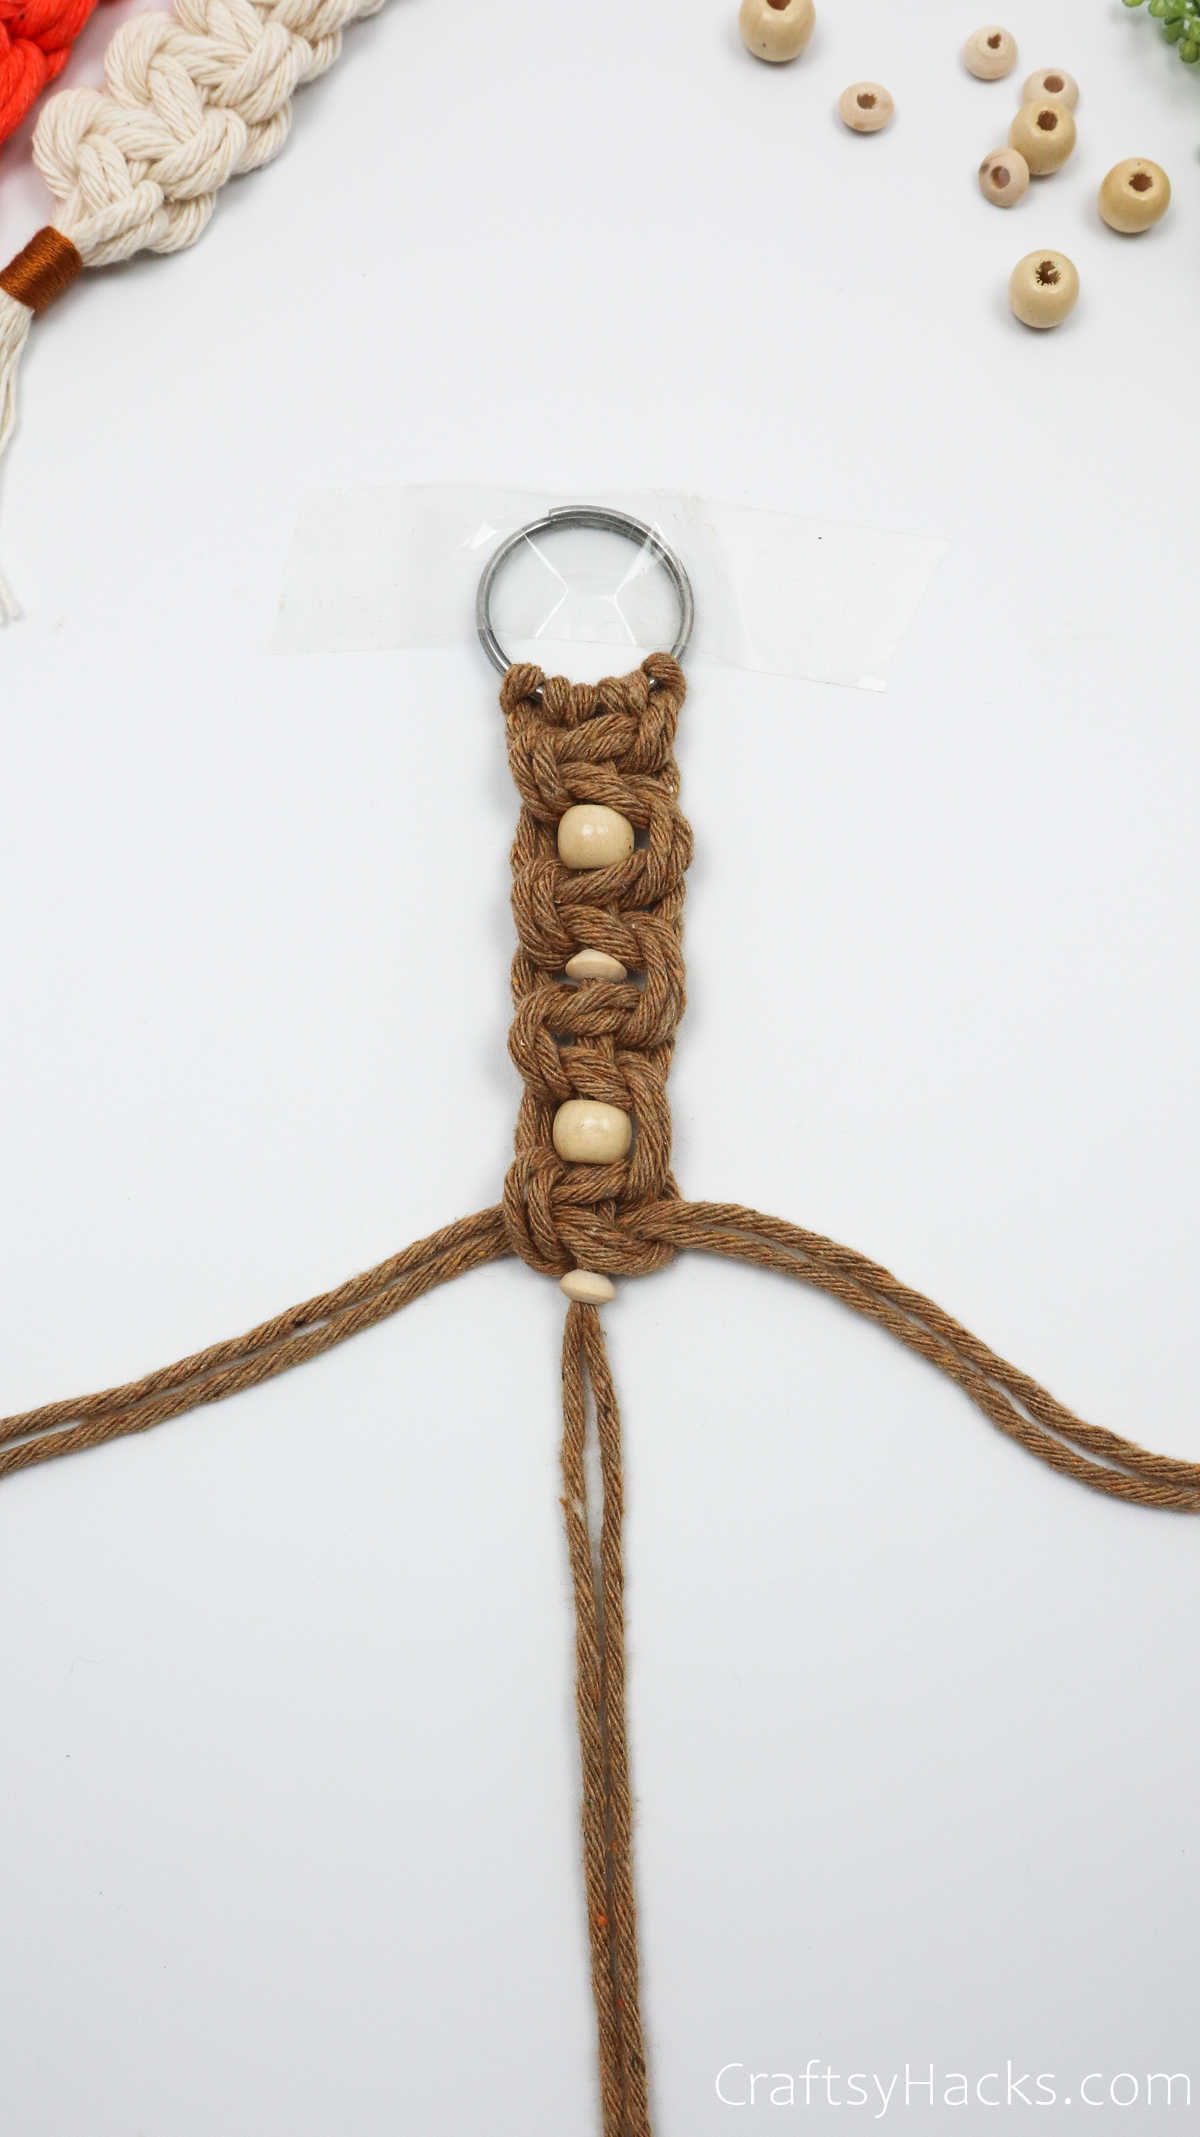
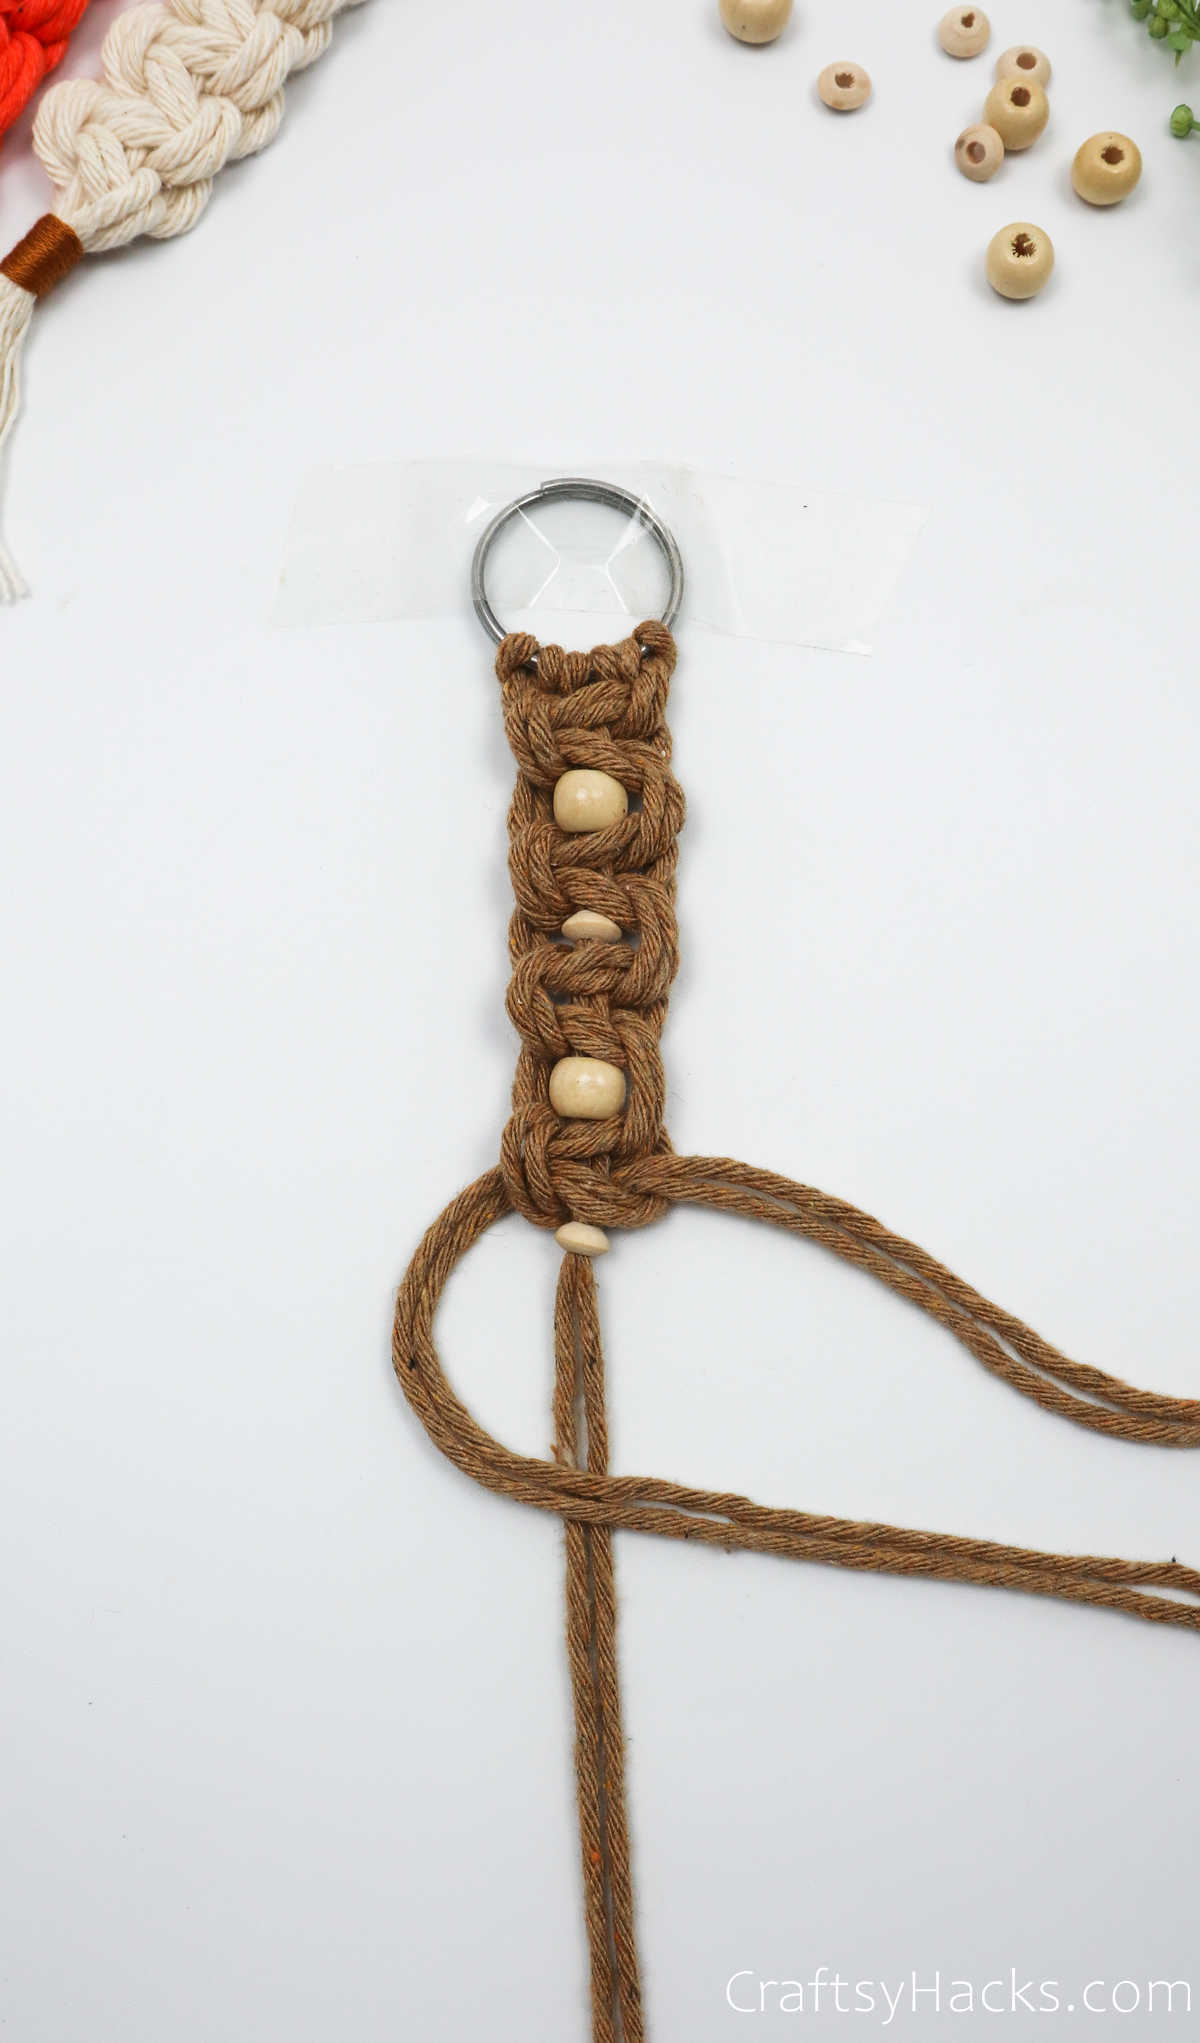
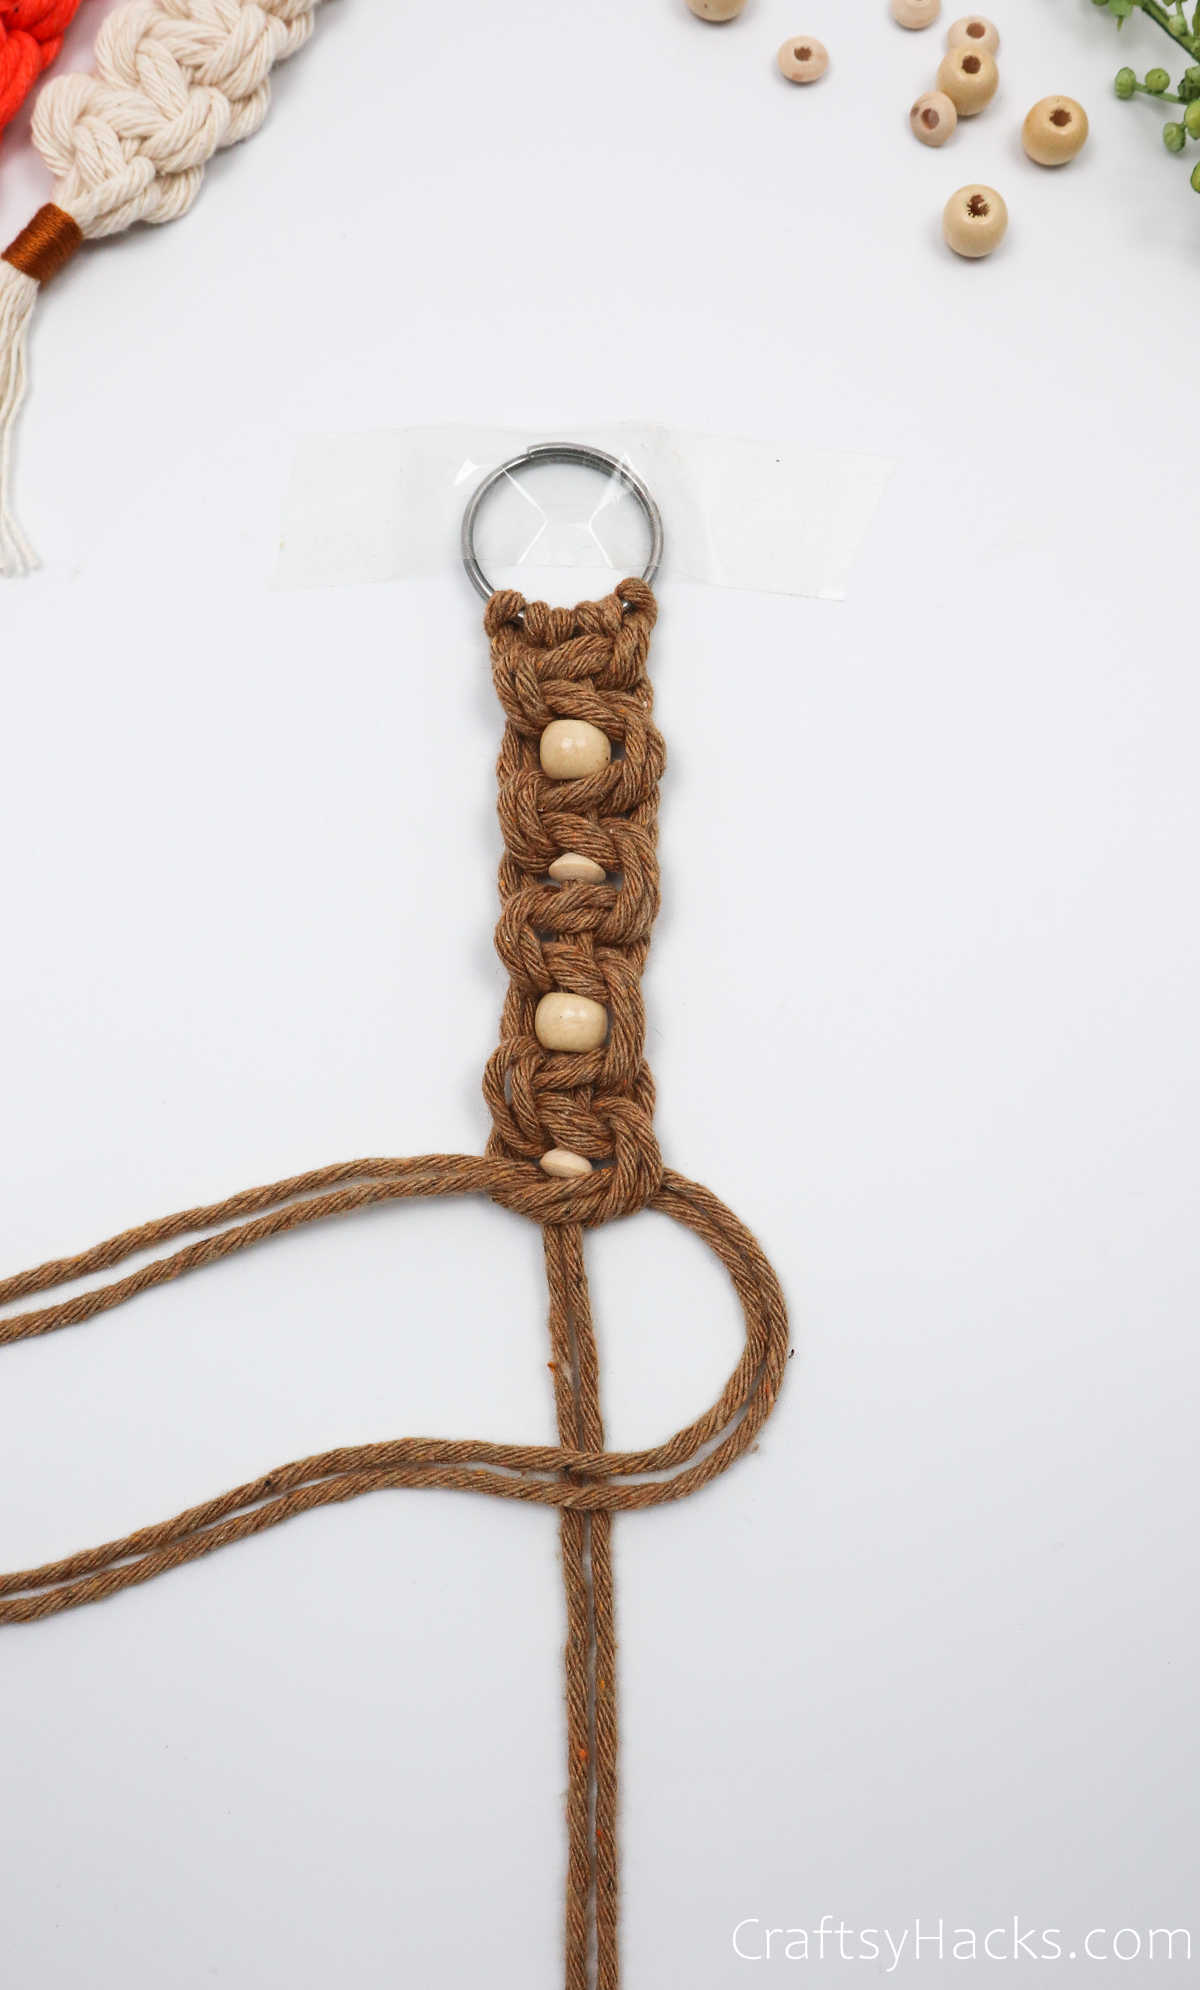
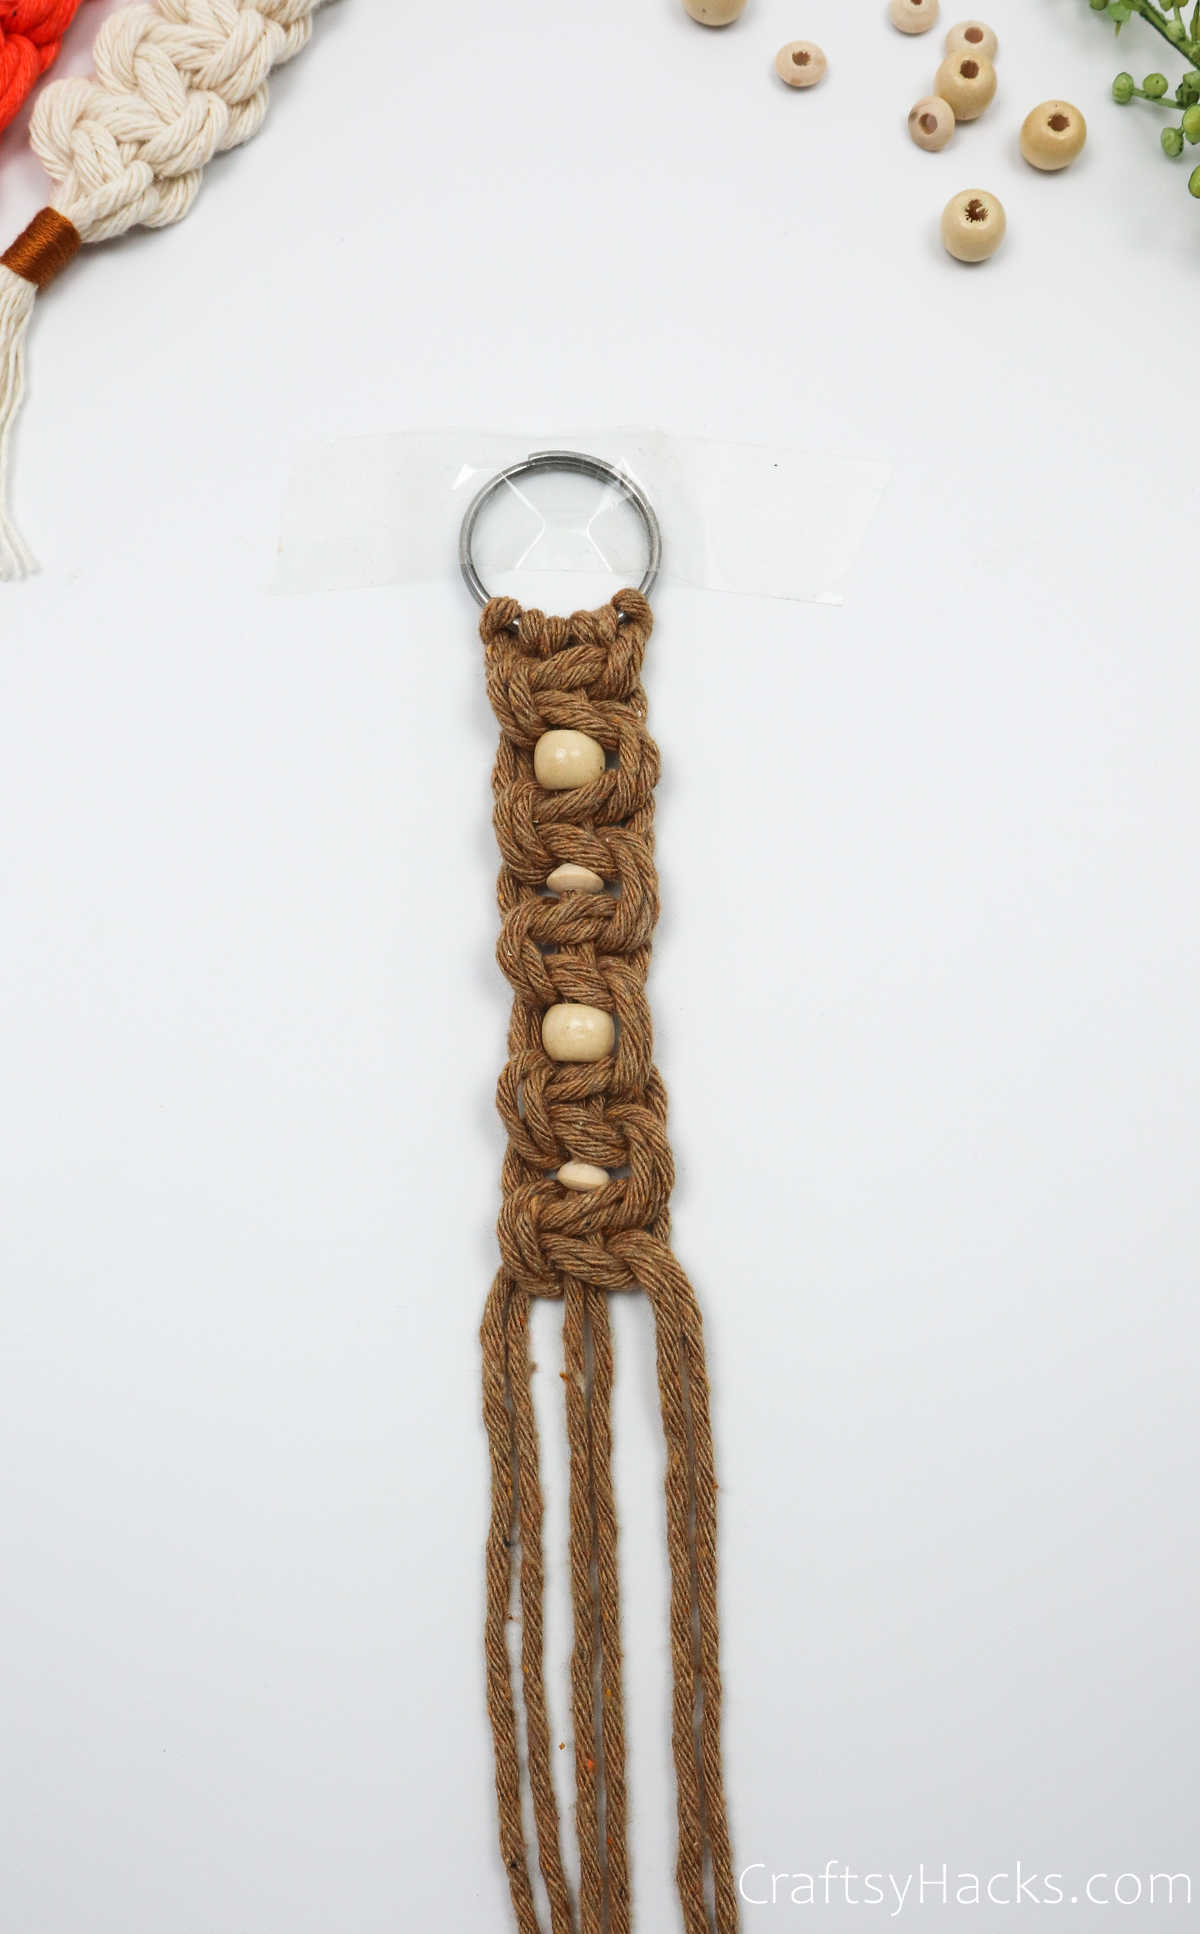
Just to give you an idea, you should have a set of five square knots, with four beads in between them. If you’re done and are happy with the length, it’s time to finish it off.
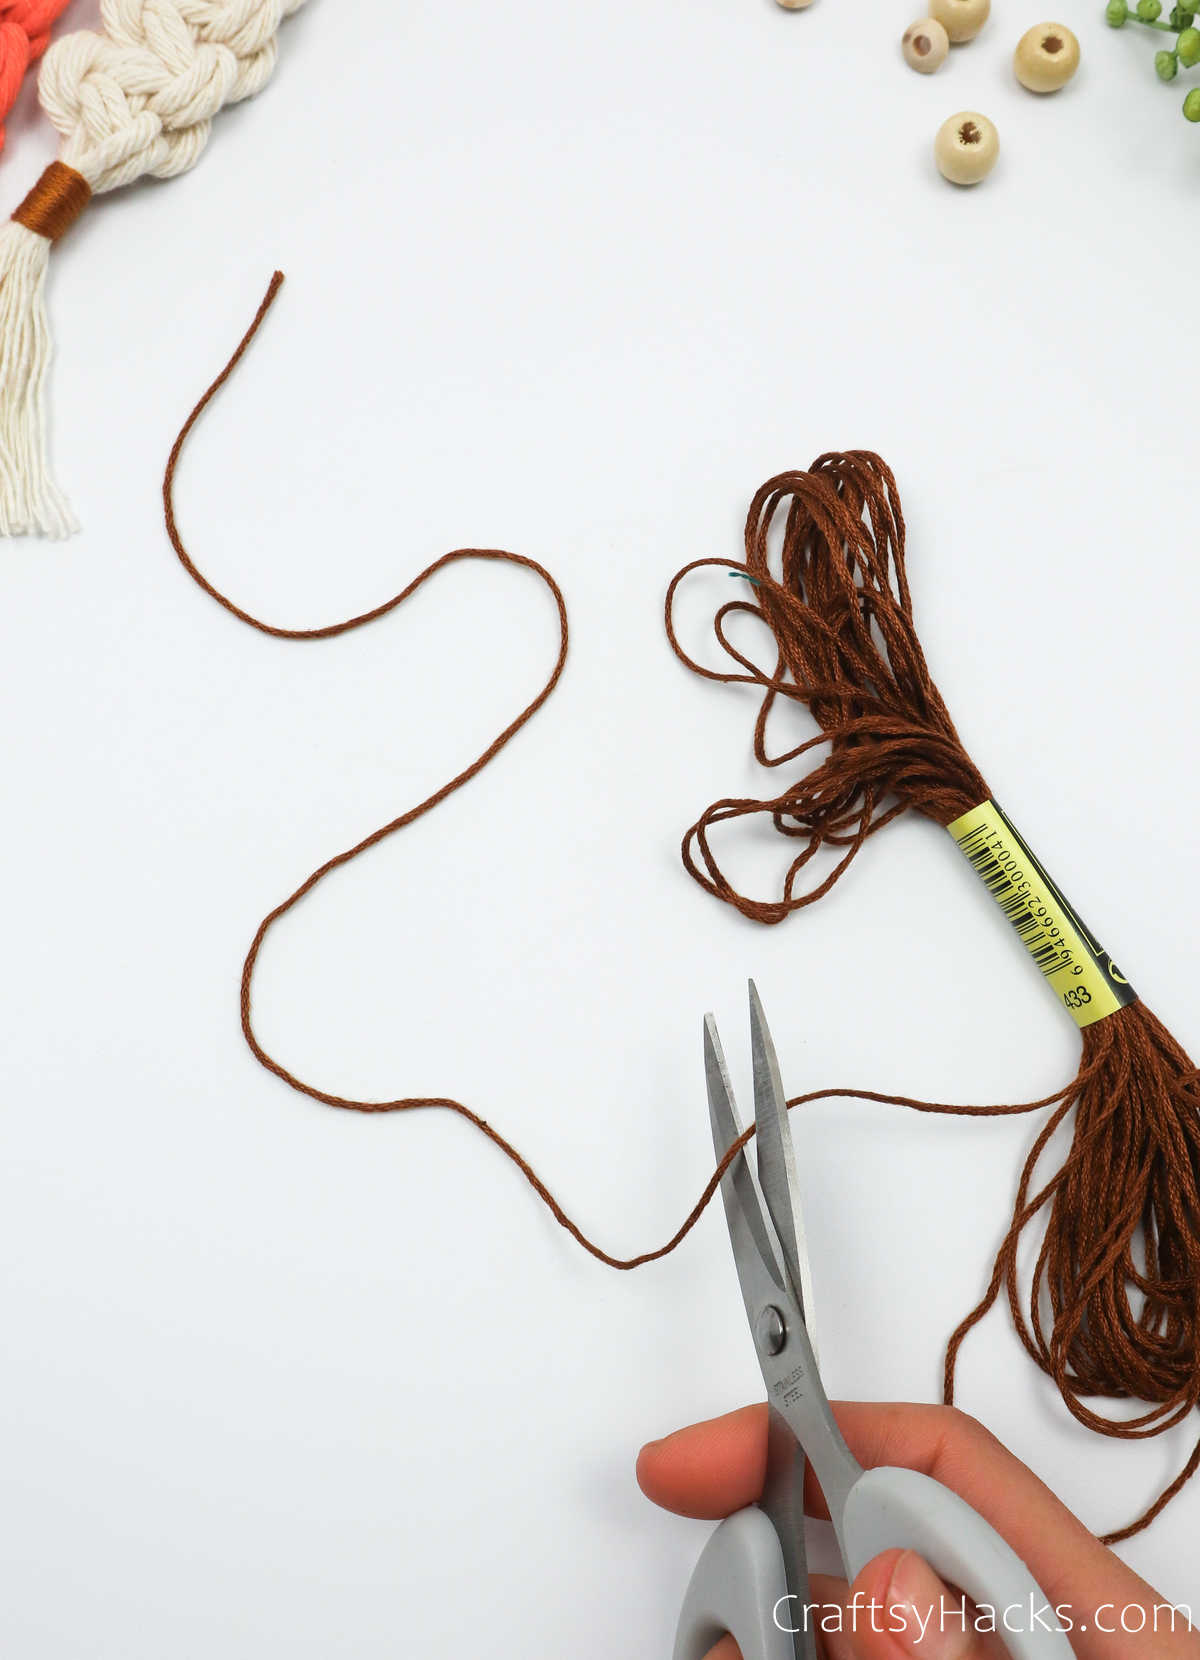
Step 8
Use a pair of scissors to snip off a length of embroidery floss. Feel free to use the same colored thread as your cotton cord, or use a contrasting color.
Step 9
With one end of the thread facing up, pull the other end to for a U-like shape over the cords.
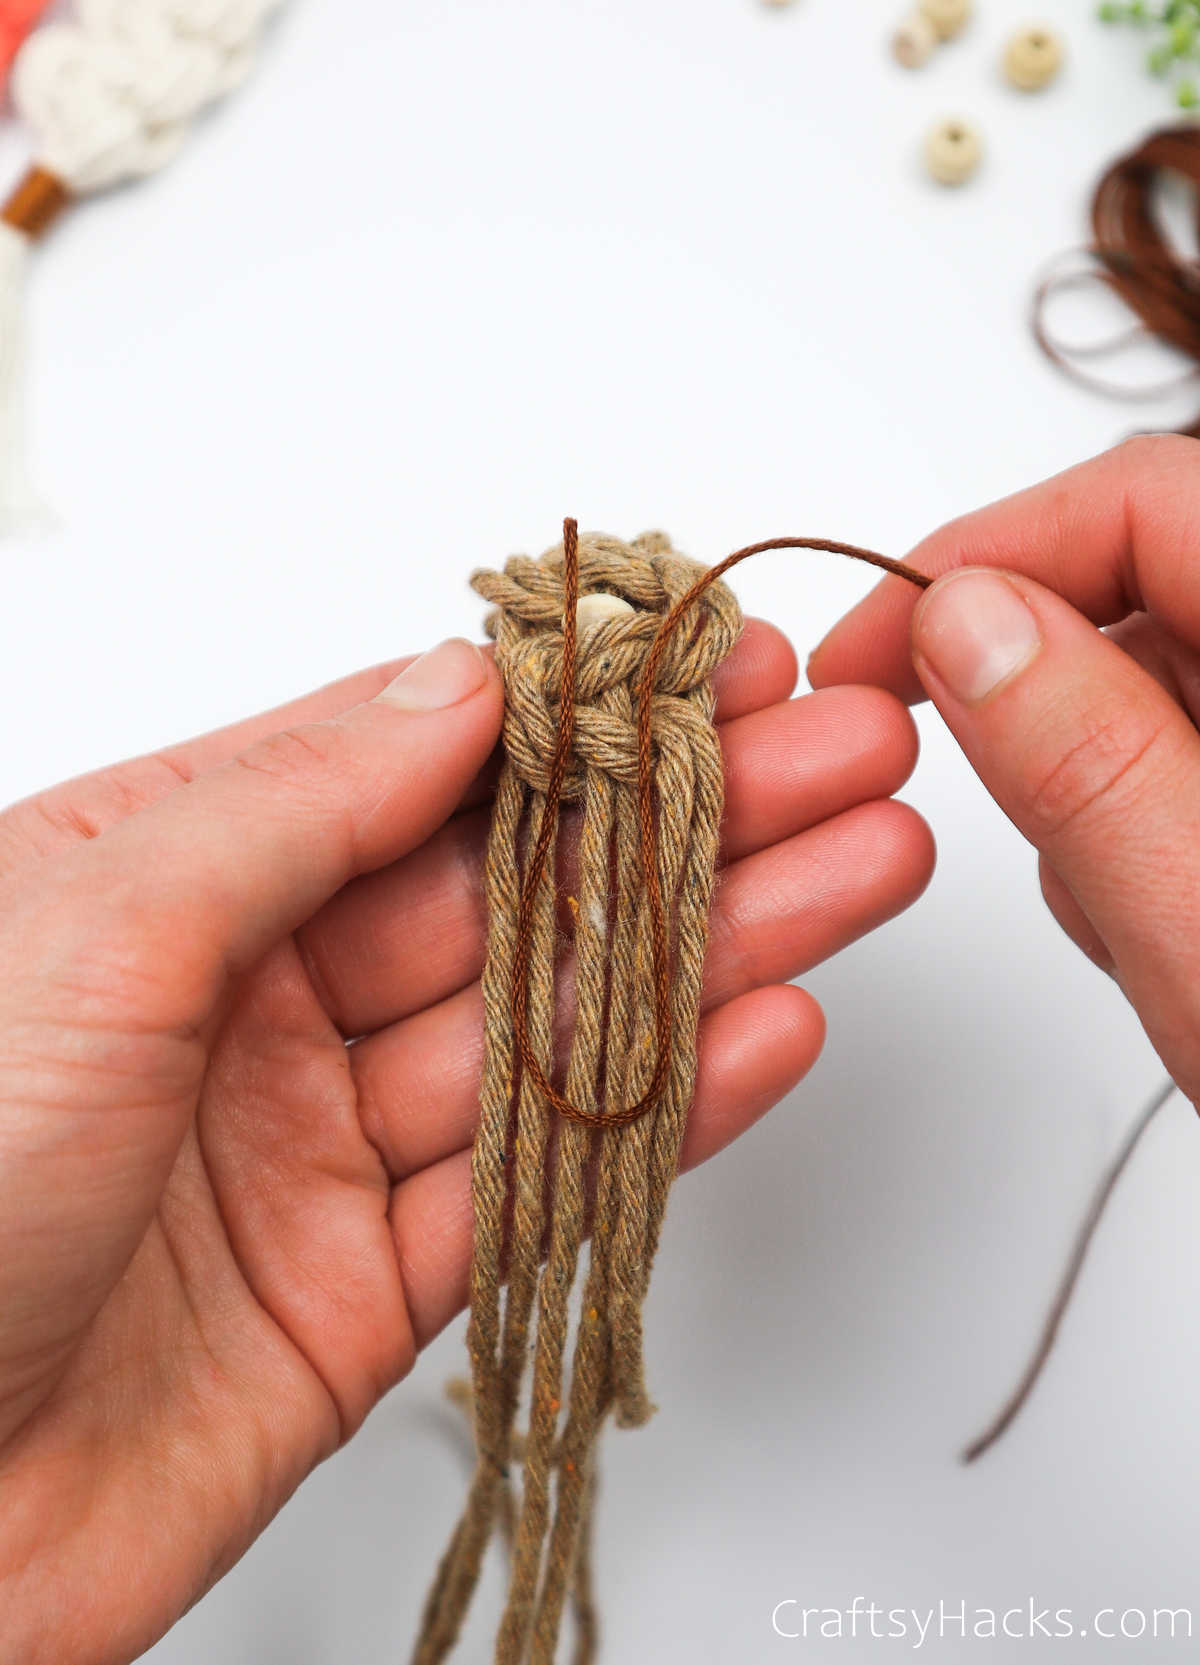
Holding that U shape in place, bright the other end of the thread around and wrap it around the end of the last square knot, bunching all the cords together.
Continue to wrap the thread around till you’re happy with the thickness.
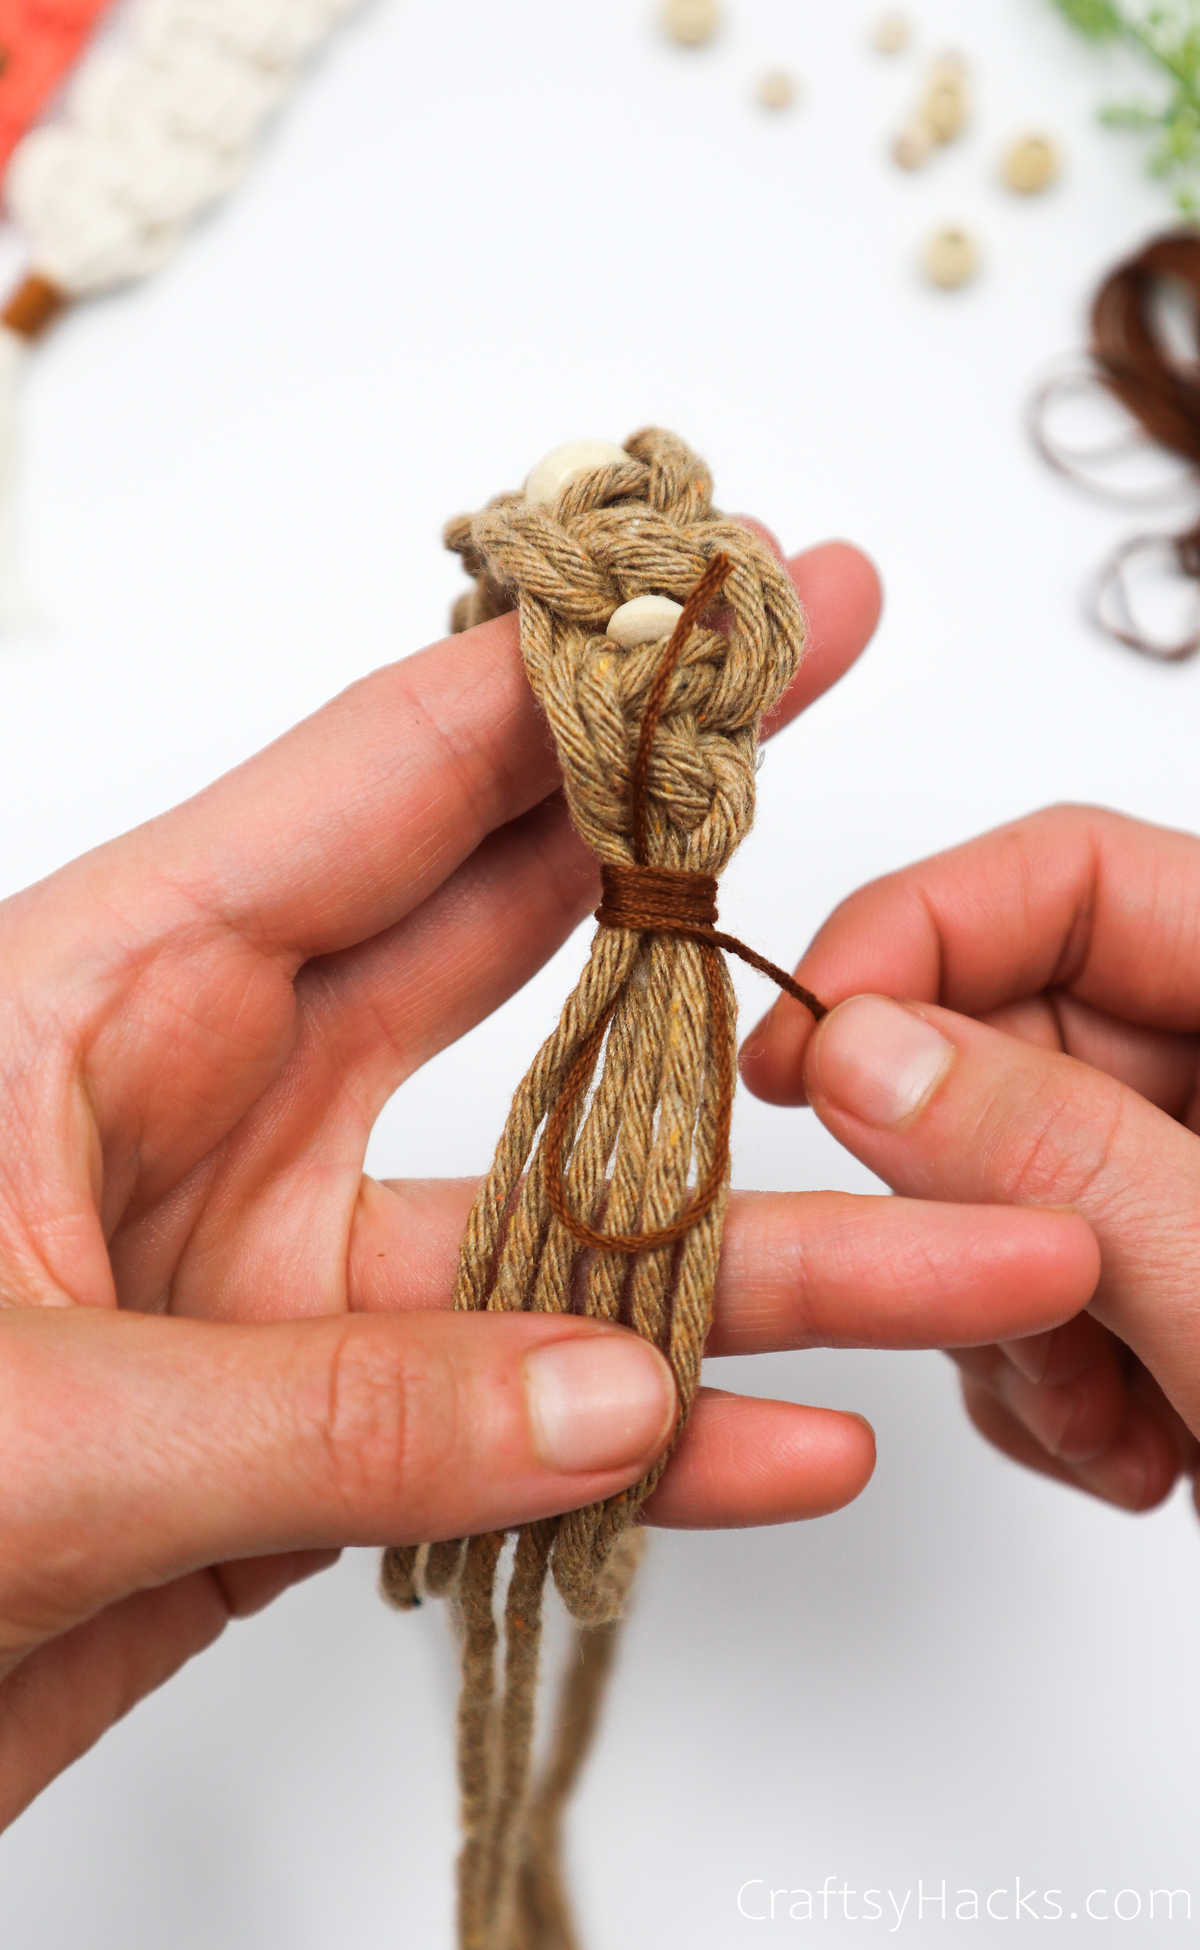
Grab the end of the cord you just wrapped and pull it through the U-loop.
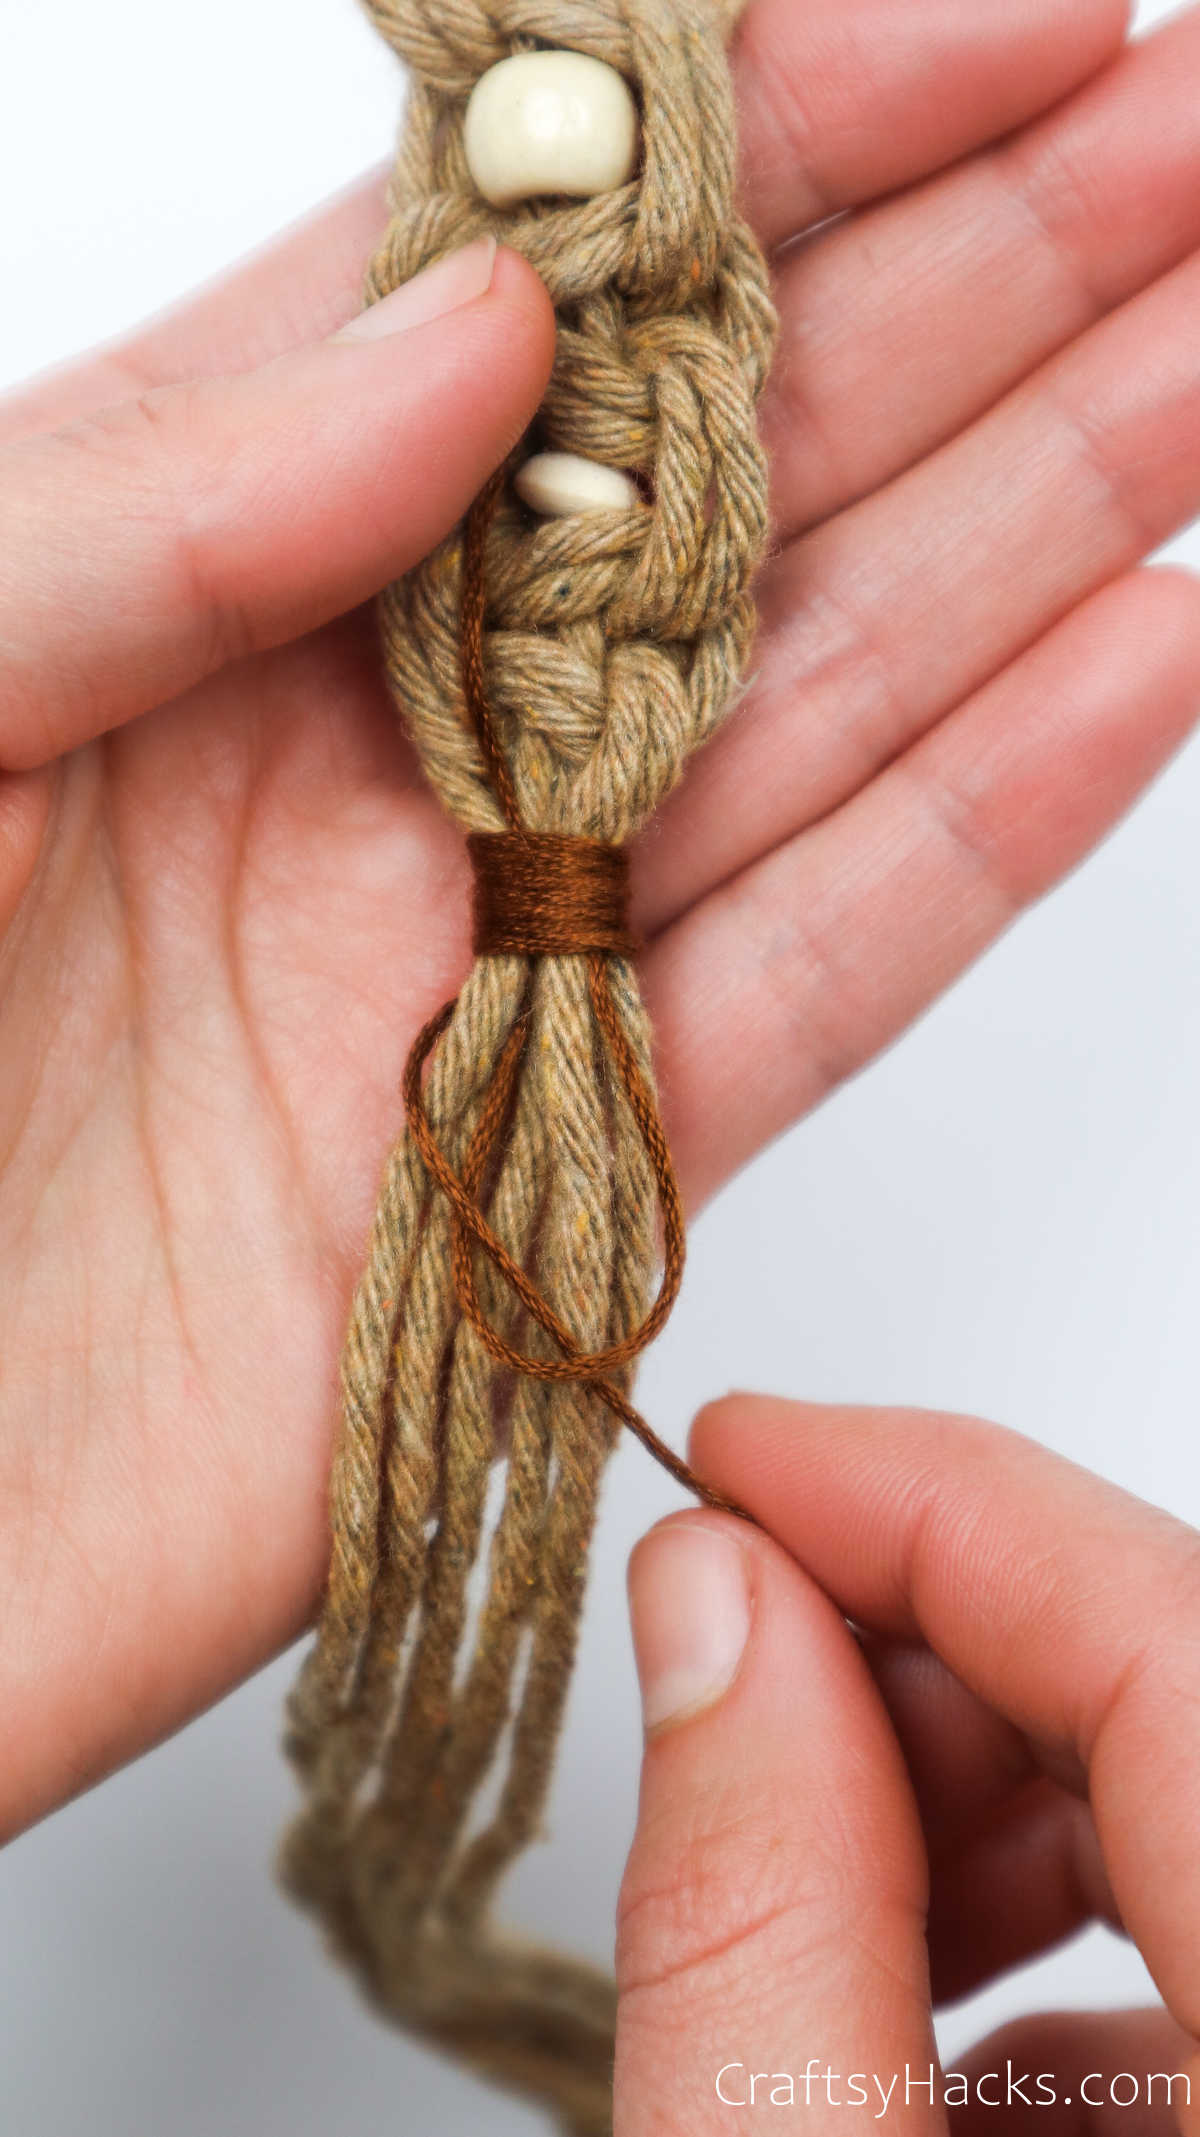
Now, grab both ends and tug them in opposite directions to secure the wrapping in place.
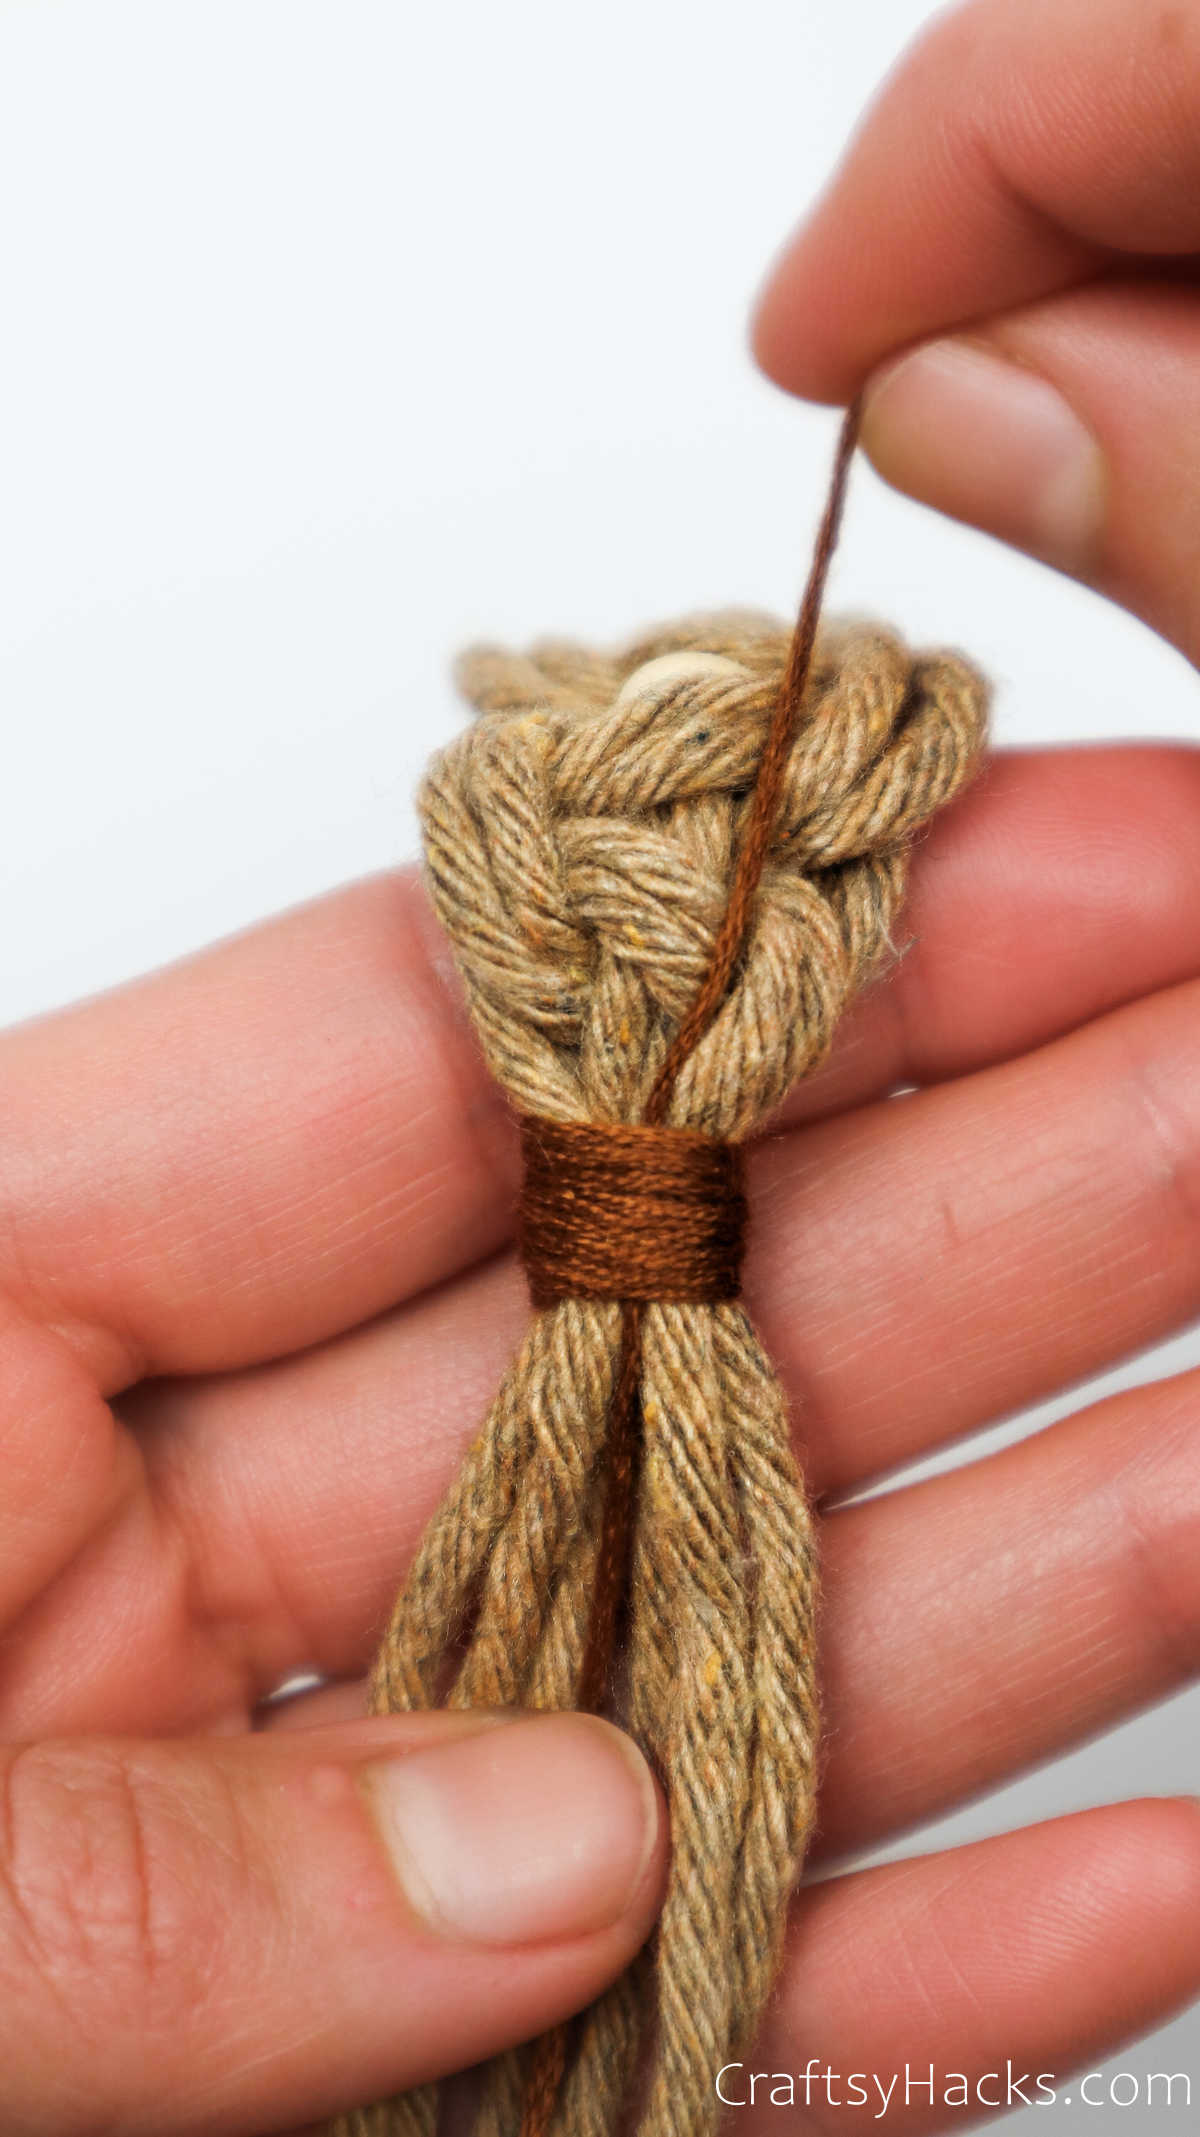
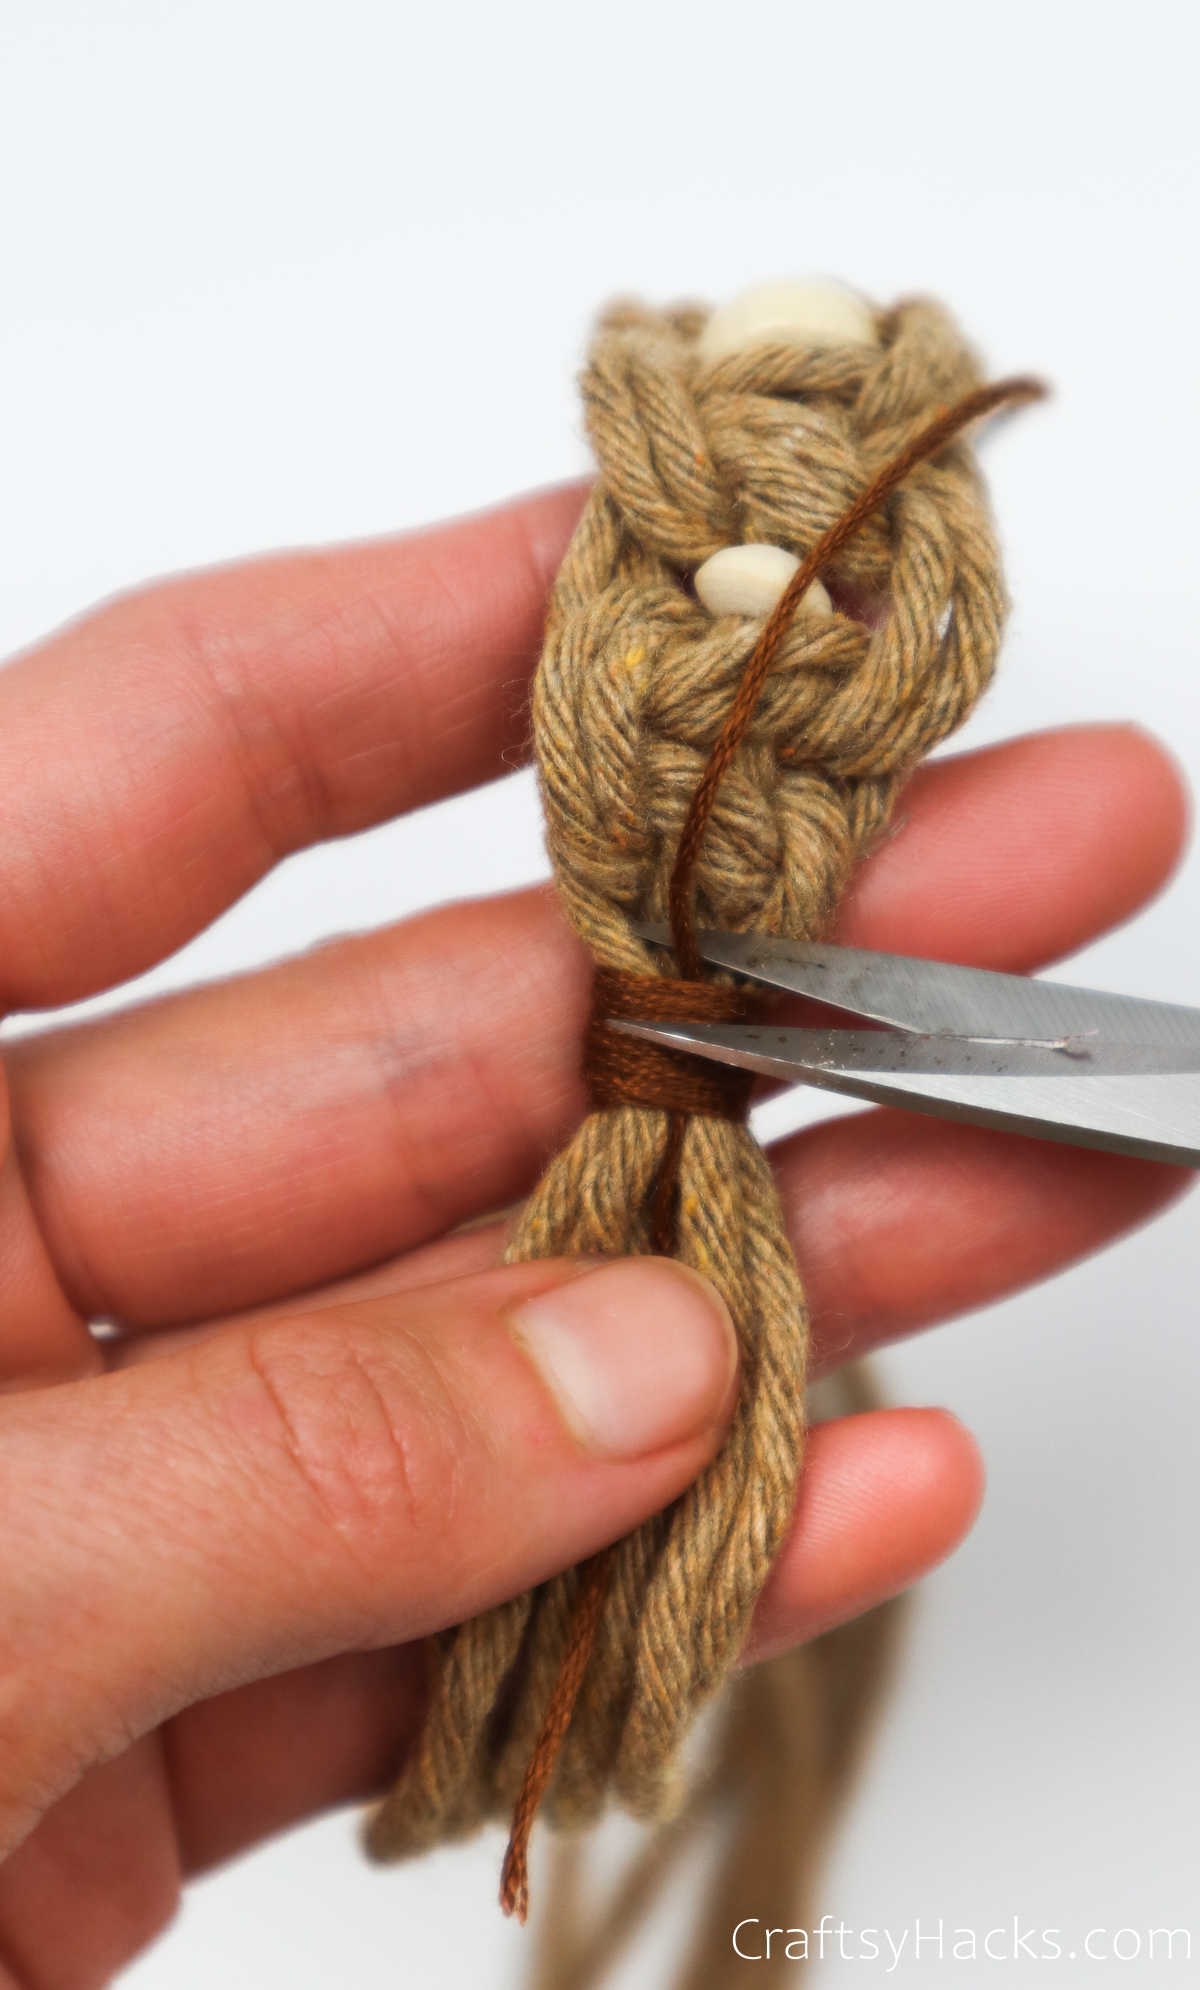
Finally, snip off the two ends.
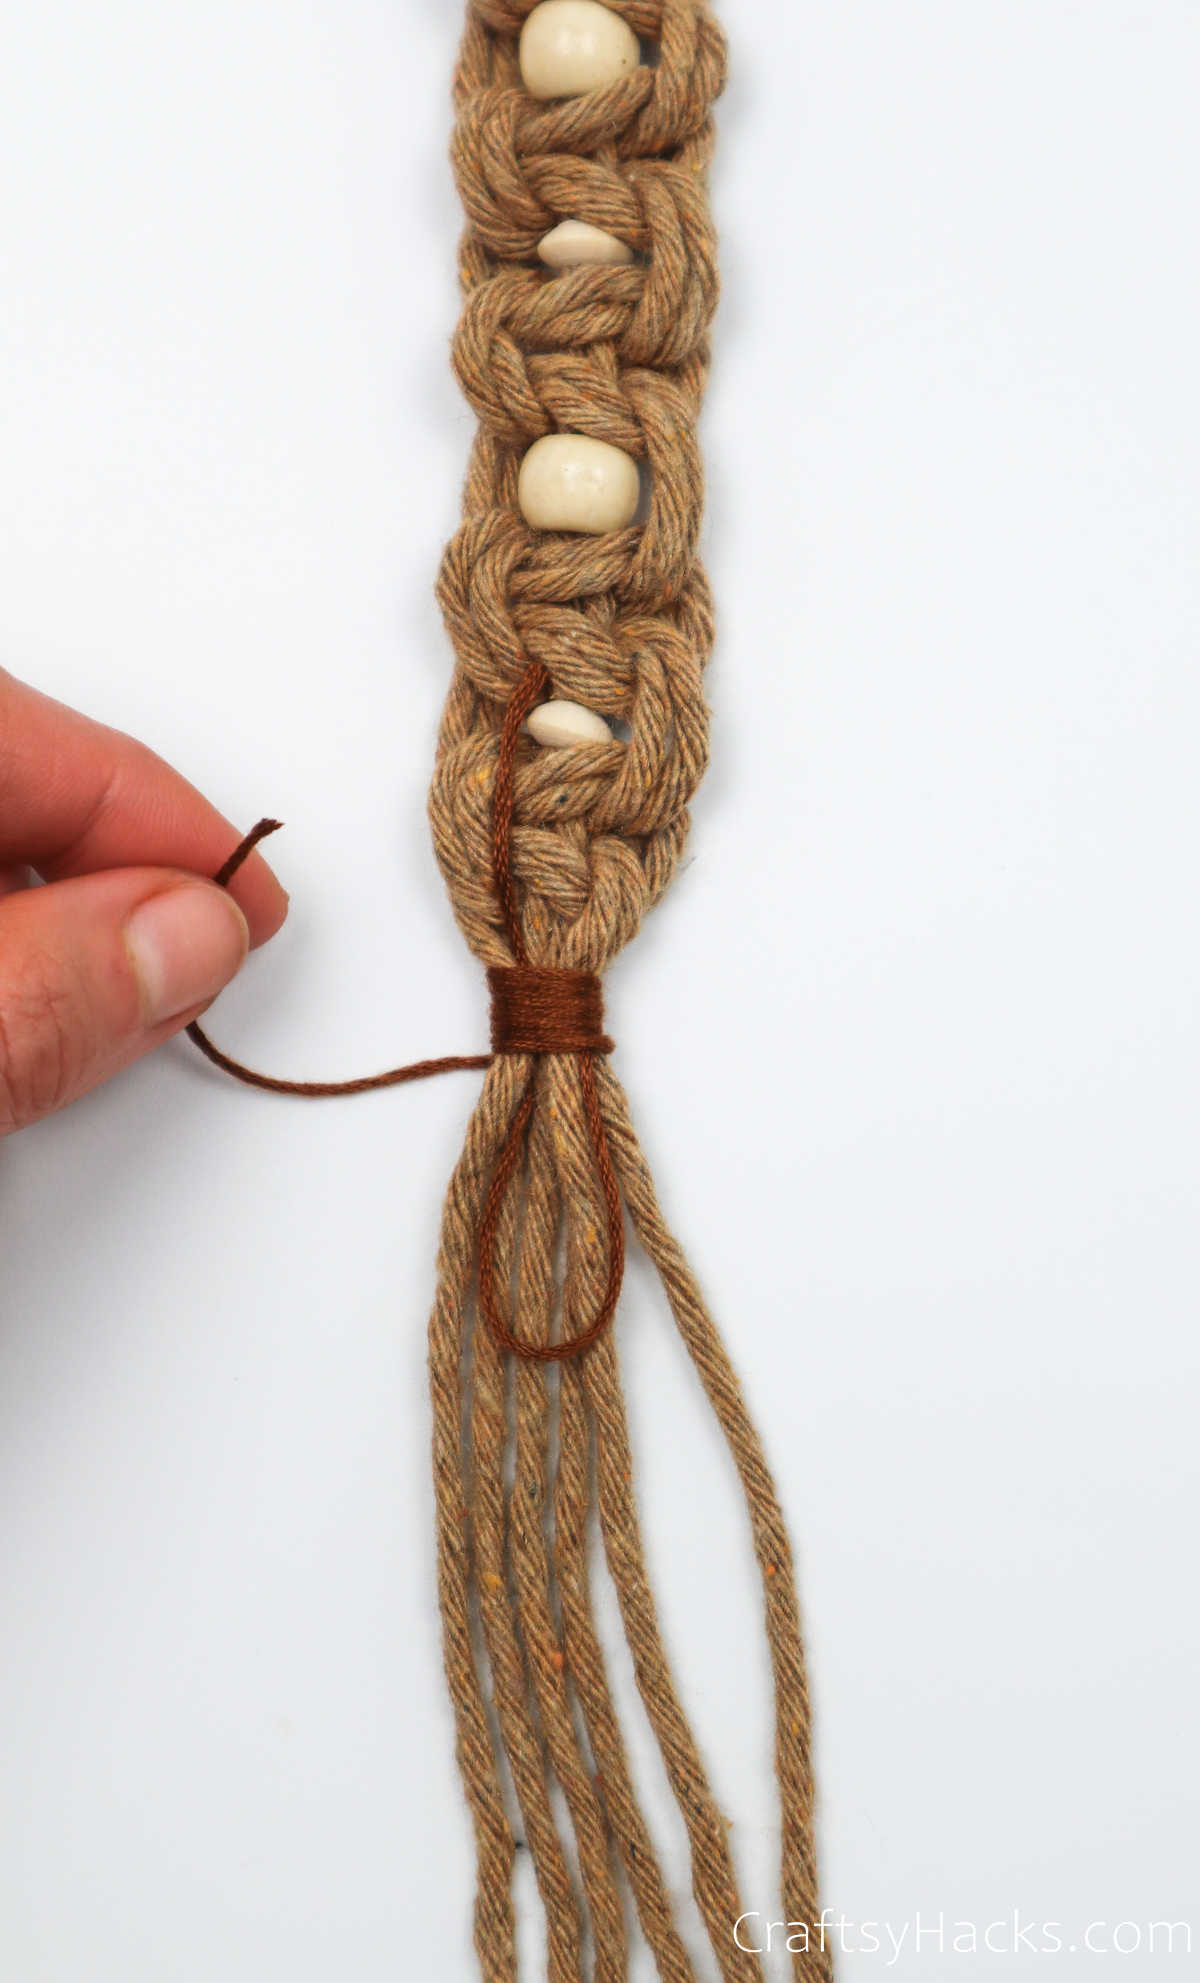
Step 10
You’re almost done! Just trim the ends of the cords evenly, and pull a comb through them to brush them out.
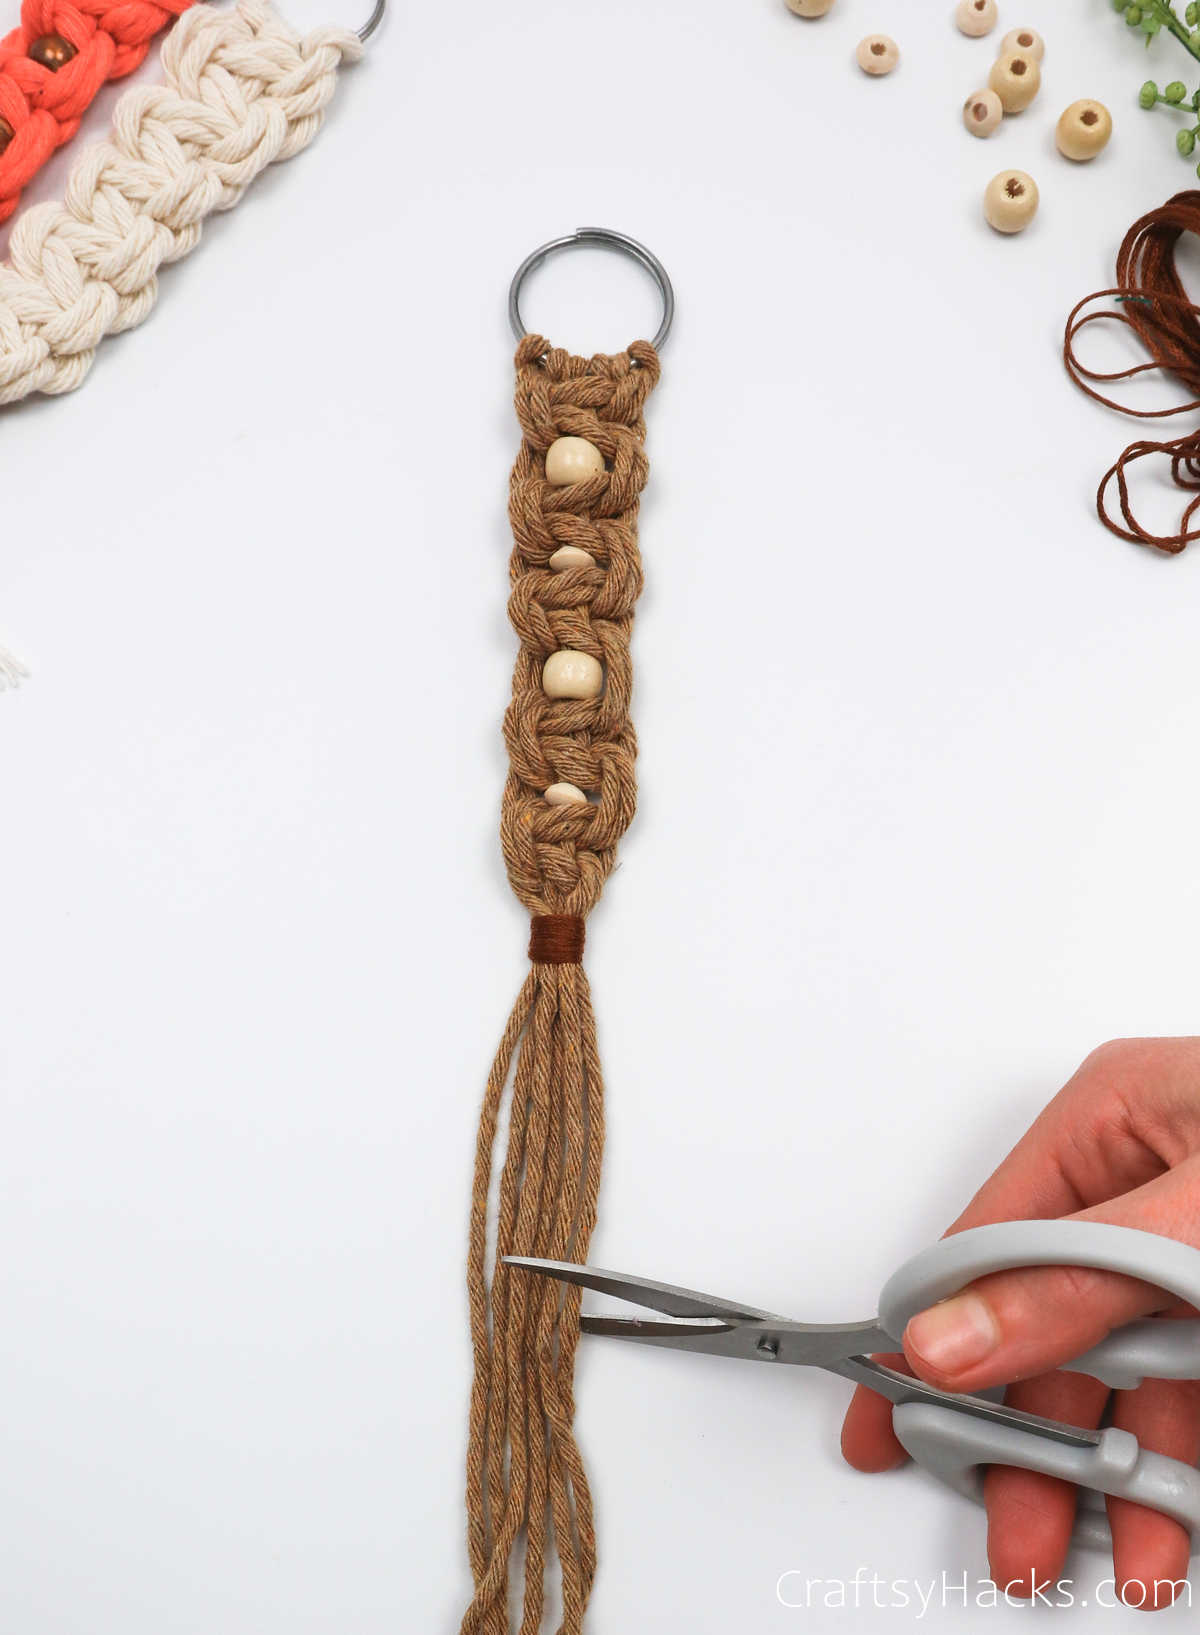
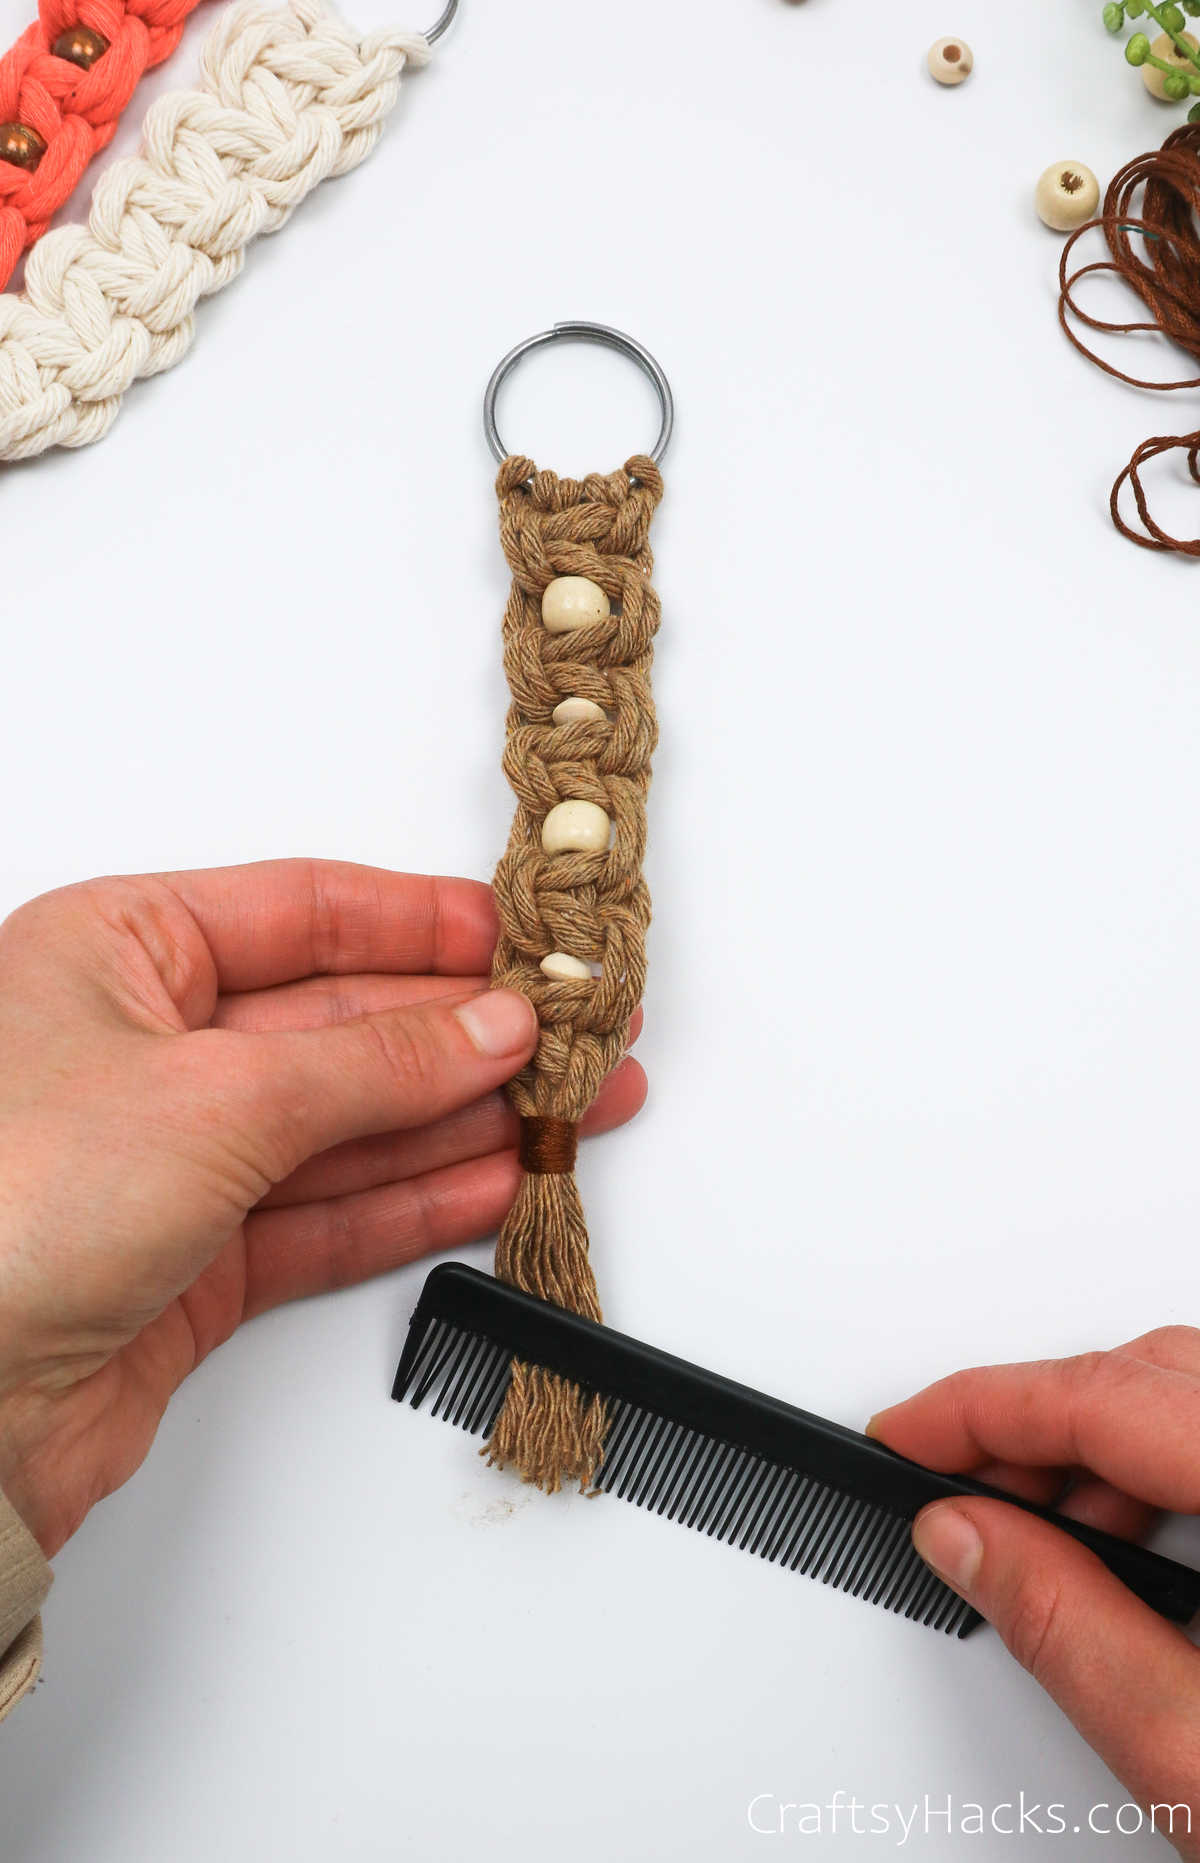
Trim the ends again after you’ve brushed the cords.
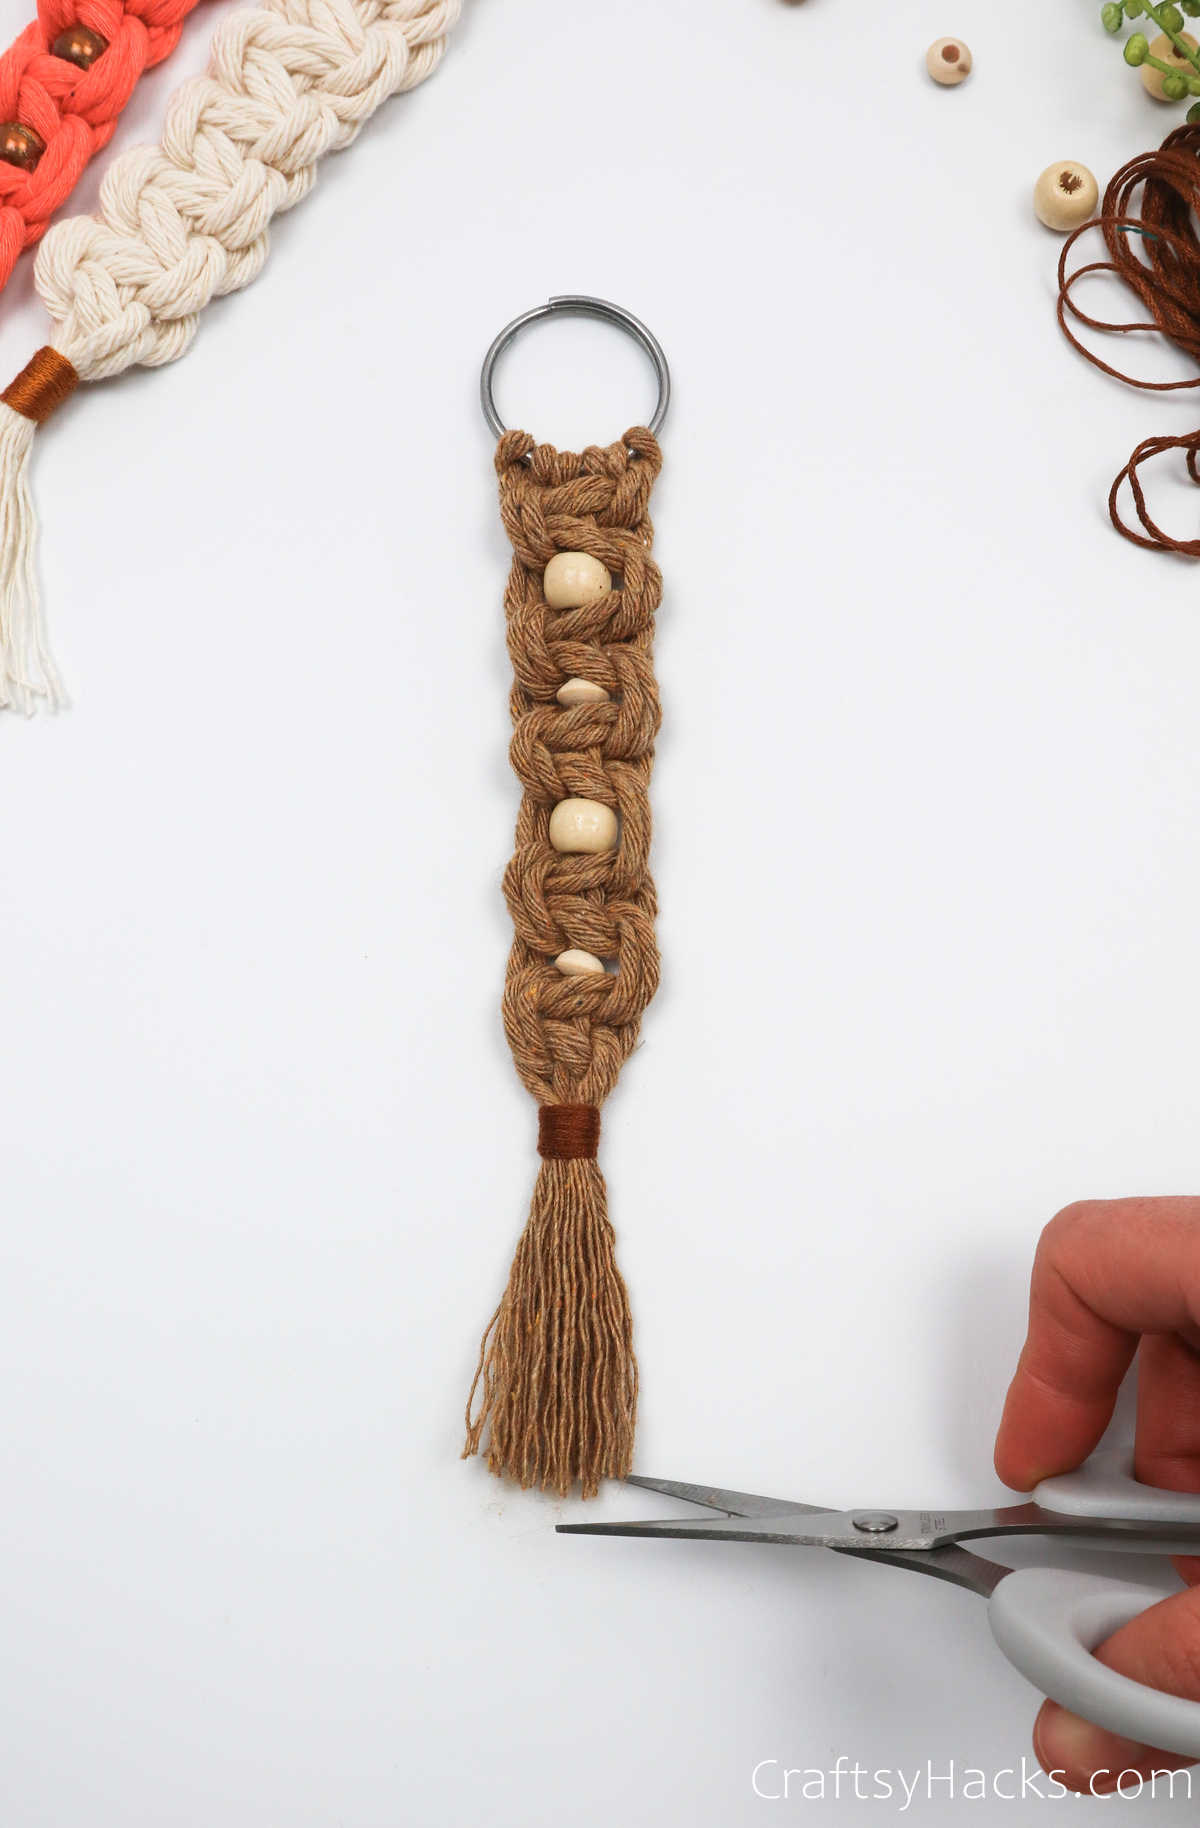
And voila, your macrame keychain is all done!

Watch: How to Make Macrame Keychains
For all visual learners, it’s much easier to check this full video tutorial!
What Kind of Cord is Used for Macrame Keychain?
Cotton cord is the most popular choice of macrame cords as it offers the most elasticity and is more cost effective, but nylon and jute are also used. You can also choose between twisted cords, braided cords, single strand cords, and more.
There’s also a number of sizes to choose from. The most popular choice is between 3mm-5mm cords. They offer the most control and the best finish.
How Long Does It Take to Make a Macrame Keychain?
This macrame keychain will take an absolute beginner just under 30 minutes to make. But once you get the hang of it, each keychain won’t take you more that fifteen minutes apiece, and you’ll be speeding through them!
Other Craft Ideas
- 37 Yarn Projects
- 27 Back to School Crafts
- DIY Bracelet Out of Shoelaces
- 47 Fabric Projects
- 37 Crafts to Make and Sell
- Macrame Earrings
- 47 Projects for Adults

DIY Macrame Keychain
Video Tutorial
Equipment
- Sellotape
- Scissors
- Hair comb
Materials
- Key ring
- 3 x 4mm single twist cotton cords 32″ long
- Beads
- Embroidery thread
Instructions
- Gather all the materials and cut the cords as instructed into the desired length.
- Secure the keyring to your work surface with tape to prevent it from moving around when you work.
- Next, bend one of your cords in half and pull the looped end under, through, and then over the ring.
- Pull the two end cords through the loop you just made. This is called a lark’s head knot. Repeat the same with the other two cords.
- Section the cords into three and secure the two middle cords to your work surface with some tape.
- To make your first square knot, place the two cords on the left over the middle chords to form a 4-shaped loop. Pull the right cords over the left ones, then bring them under both the left and middle cords. Finally, pull the ends through the 4-shaped loop.
- Tug the ends to secure the first half of your square knot.
- Now repeat the same, only this time, place the right cords over the middle. Then, bring the left cords over the right cords, and then under the middle and right cords to pull them through the loop.
- Tug the ends to secure your first square knot.
- This step is optional, but you can insert a bead at this stage. Tape the ends of each of the two middle cords to help you pull the bead through both of them.
- Then place another square knot under the bead to secure it in place between two square knots.
- Continue to alternate every square knot you make with a bead and work your way through the project till you reach the desired length.
- To fasten off, cut a strip of embroidery thread. Hold one end up over the cords and pull the other into a U-shaped loop. Wrap the other end at the base of the last square knot and bunch all the cords together.
- When you’re done wrapping, pull the end through the loop and tug the two ends in opposite directions to secure the knot. Snip off the two ends.
- Finally, brush out the cords if you like and trim the ends evenly.
- Your macrame keychain is ready!


