Hot Cocoa Craft
This post may contain affiliate links: full affiliate disclosure.
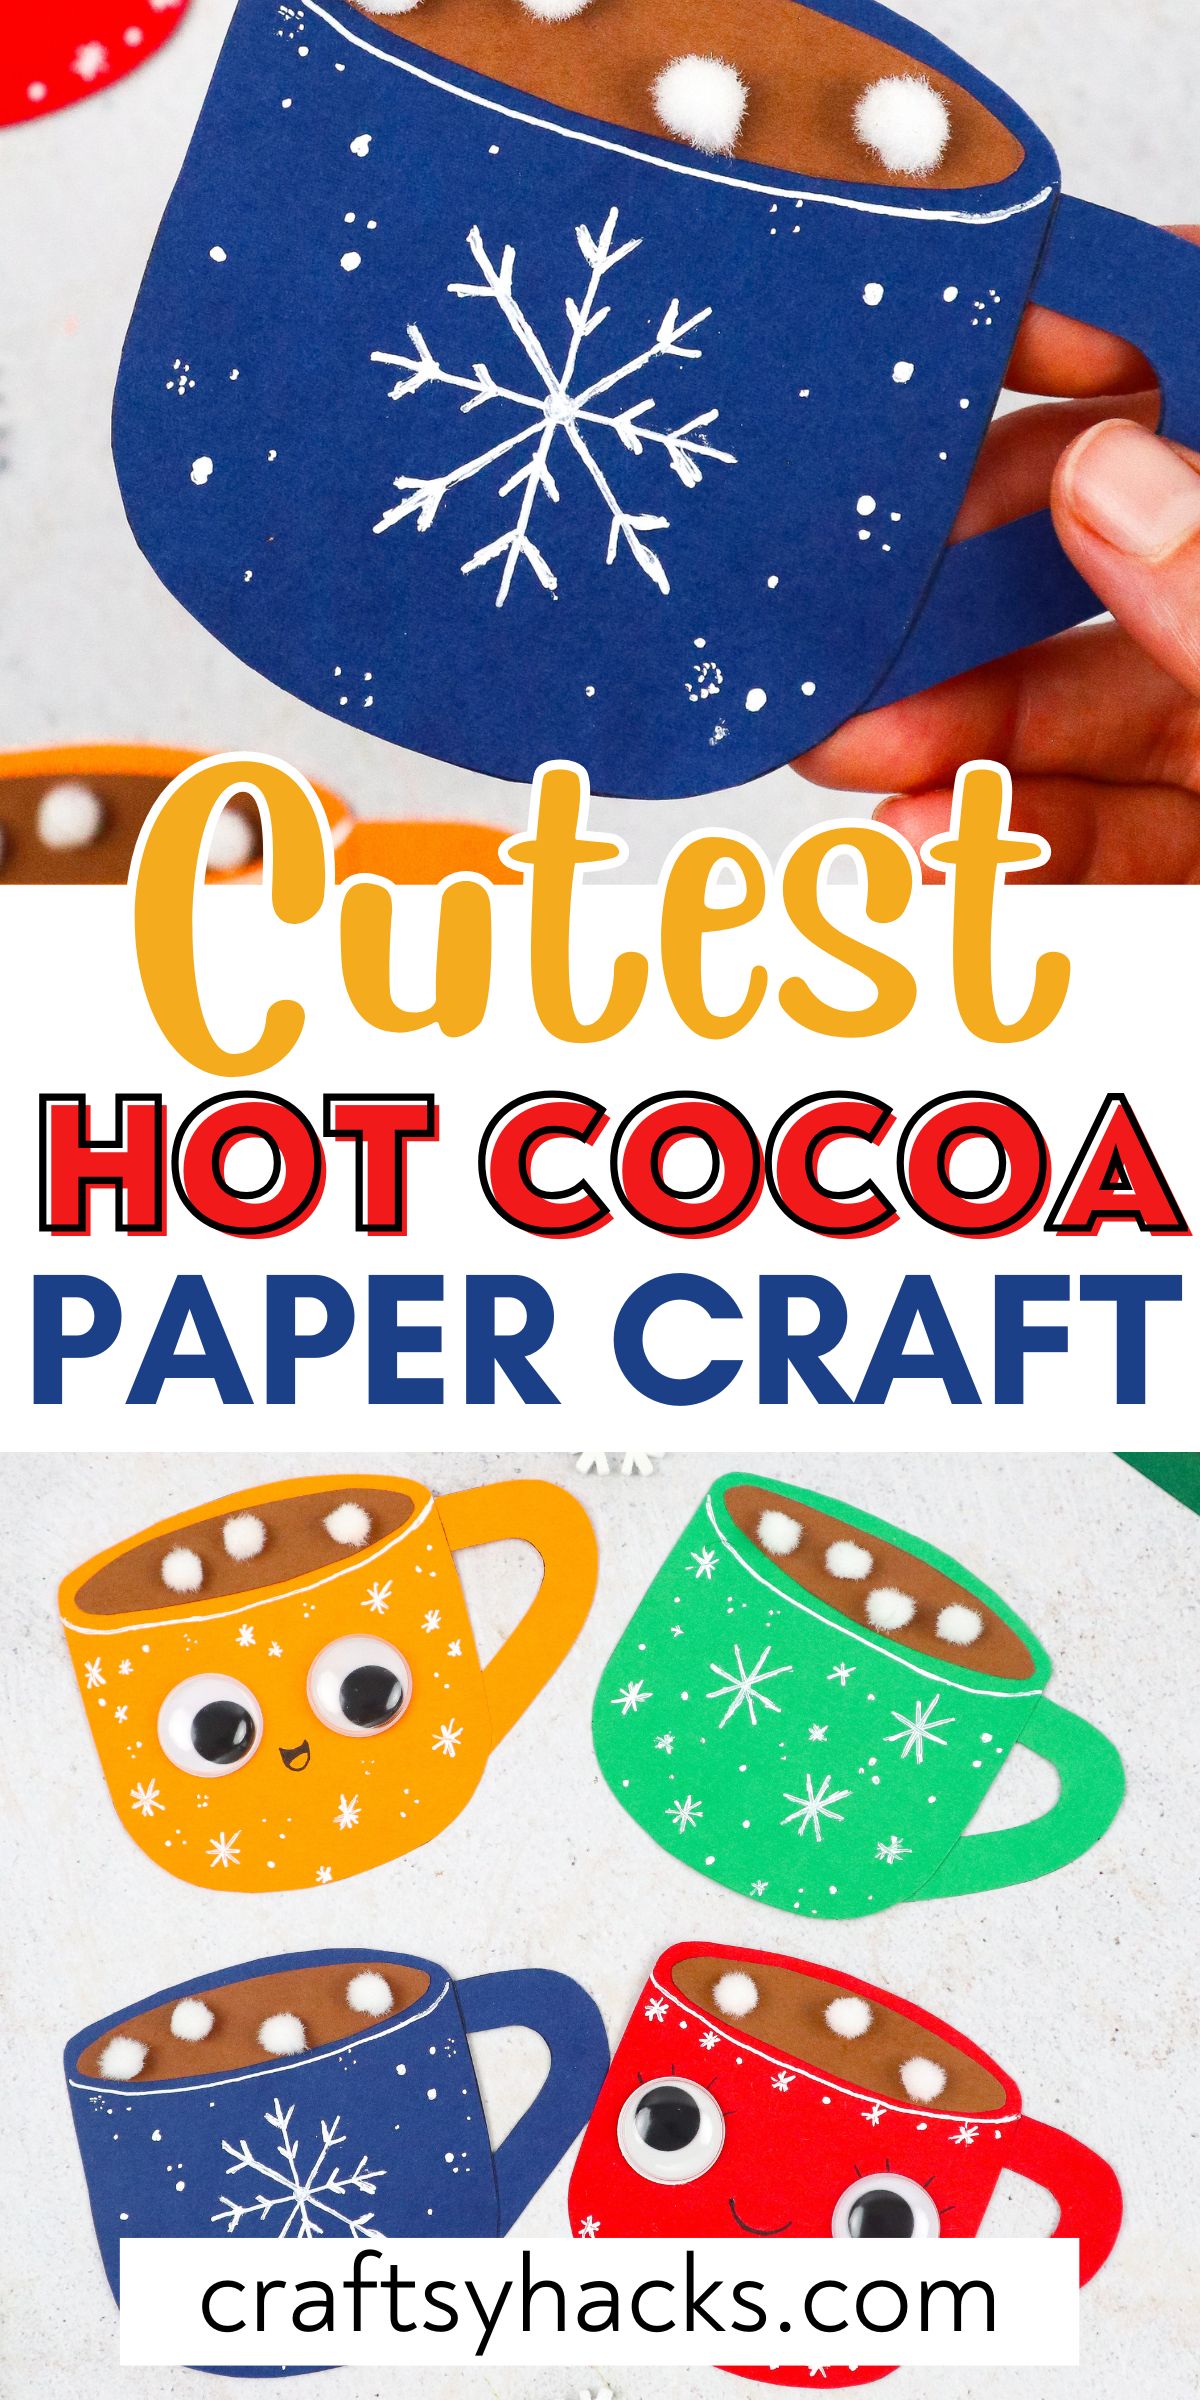
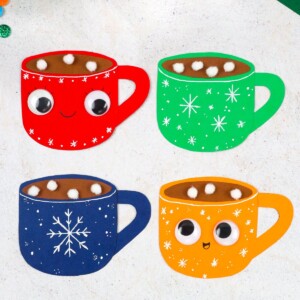
If you are looking for a cozy craft to do as winter approaches, you will love this adorable hot cocoa craft. This activity is super cute and fun.
My favorite winter treat is a steaming hot mug of hot cocoa. Add some marshmallows to that hot cocoa and I will be over the moon!
It is guaranteed to give you all those cold weather vibes!
You can add these to your walls as part of your winter décor, string them onto ribbon or rope for a garland, or add them to holiday cards and gifts. Whatever you choose to do with them, they are sure to bring joy, festive cheer, and a big smile to anyone who sees them!
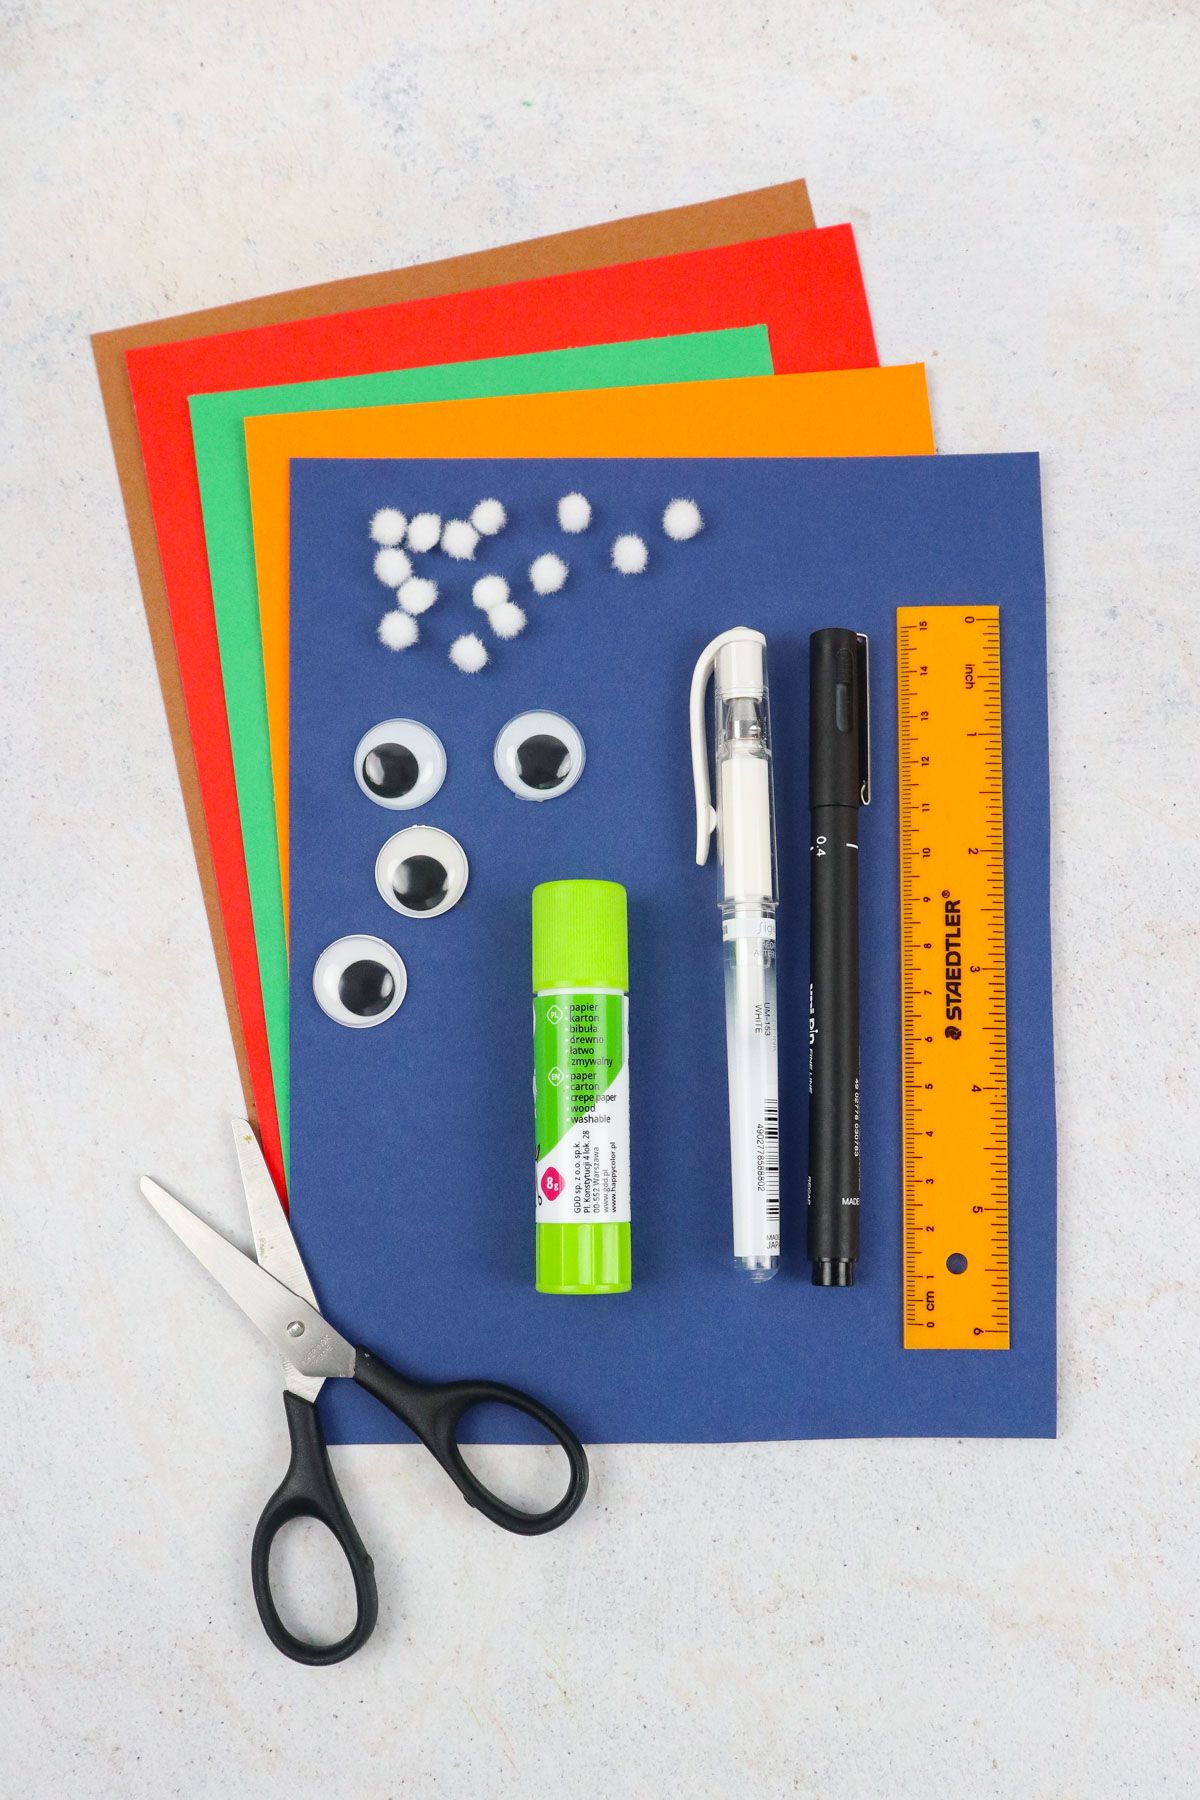
You only need a few items to make your own hot cocoa craft. Grab some cardstock, mini white pom poms, googly eyes, a glue stick, a white gel pen, a black marker, and a ruler, and let’s get started!
Supplies You’ll Need
- 1 x Brown cardstock
- 4 x Colorful cardstock
- Mini white pom poms
- Googly eyes
- Glue stick
- White gel pen
- Black marker
- Ruler
How to Make Your Hot Cocoa Craft
Step 1. First, we need to create a template for our hot cocoa mugs. To do this, get your ruler and your marker and draw a 3” x 3” square onto a colorful piece of cardstock.
Then, draw a curved line across the top of the square and another curved line across the bottom of your square.
Step 2. Now, draw your mug handle. You can use a half heart shape or a “C” shape to do this.
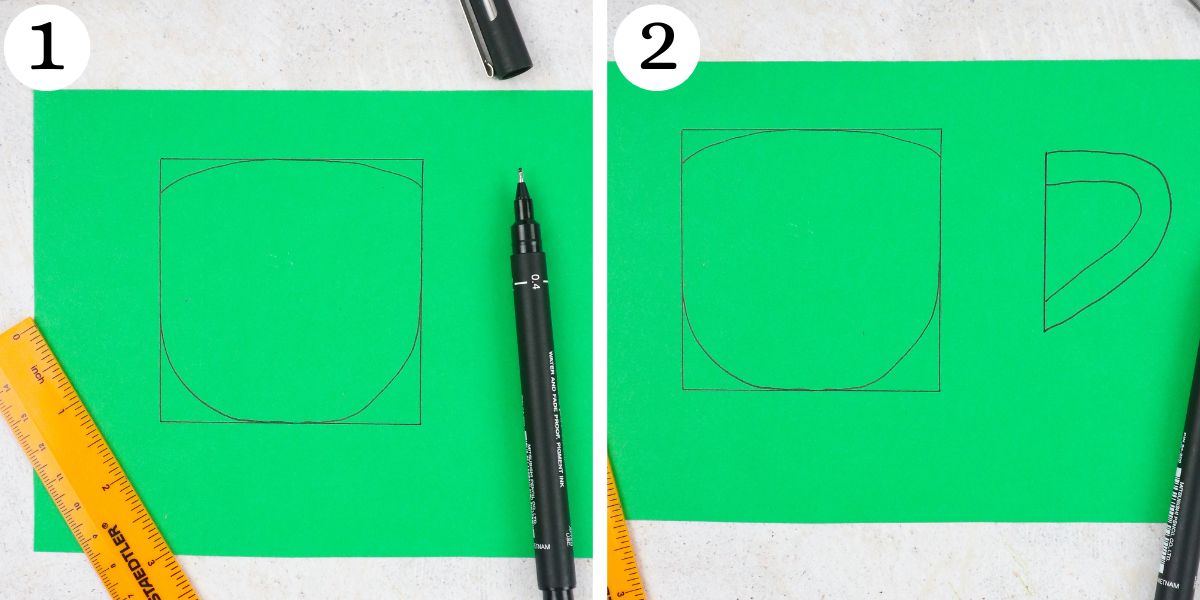
Step 3. Using your scissors, cut out your hot cocoa mug and handle.
Step 4. Now, it is time to use your mug template and make more mugs. Trace your template three times onto three different pieces of cardstock.
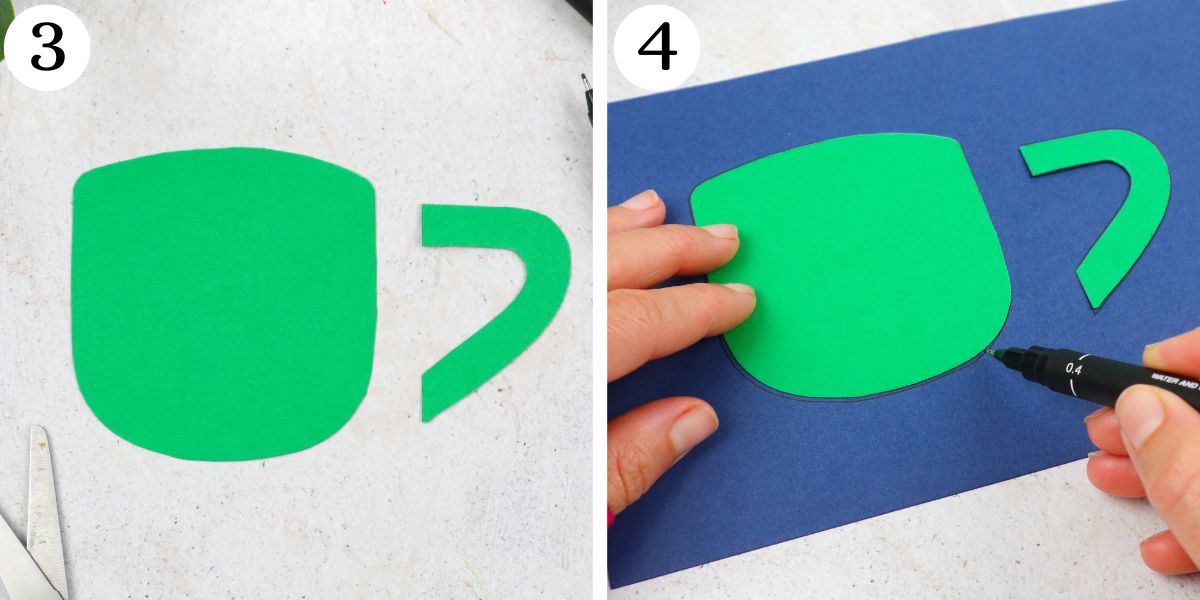
Step 5. Take your mug handle template and trace it onto three different pieces of cardstock as well.
Step 6. Cut out your traced hot cocoa mugs and handles.
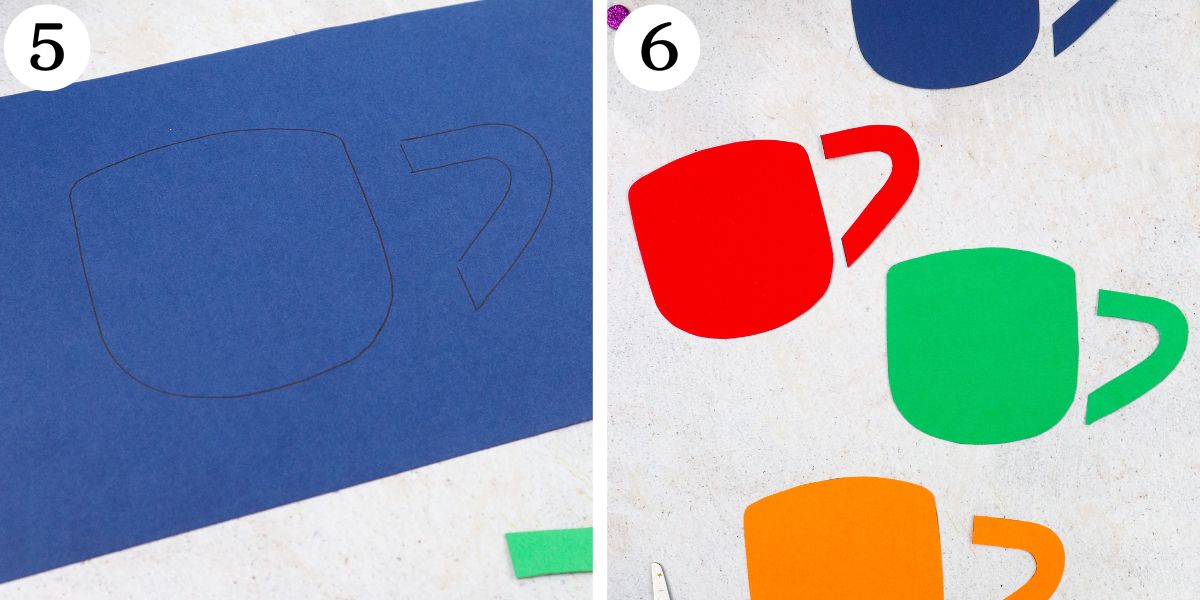
Step 7. Now, get your glue stick and attach each handle to its mug.
Step 8. Draw a narrow oval or disc shape about 2.5” long onto your brown paper.
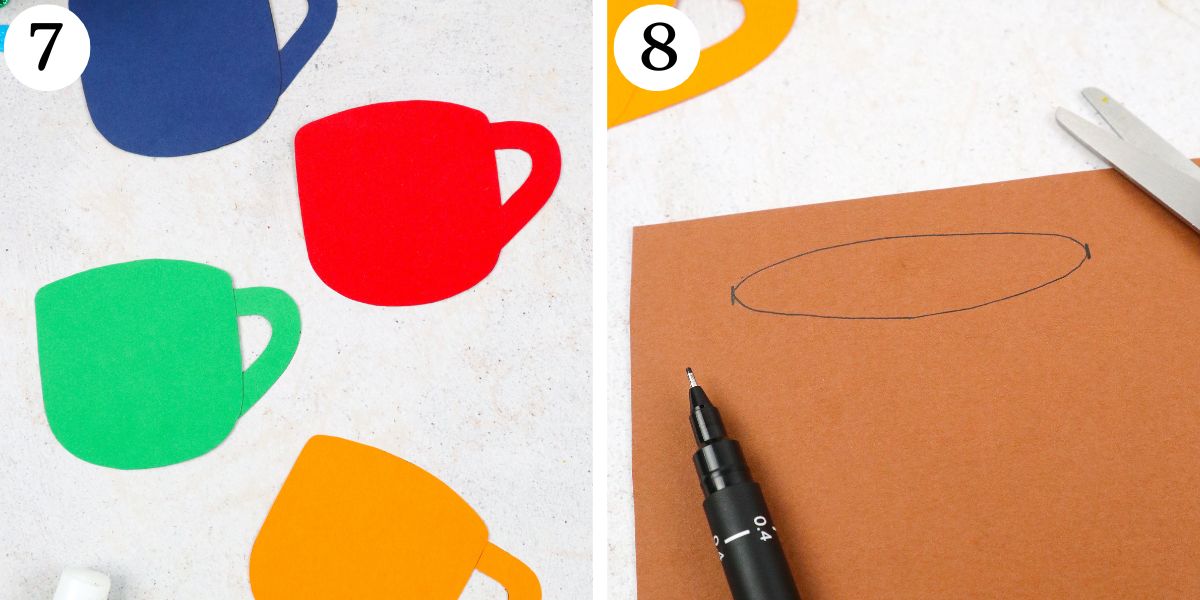
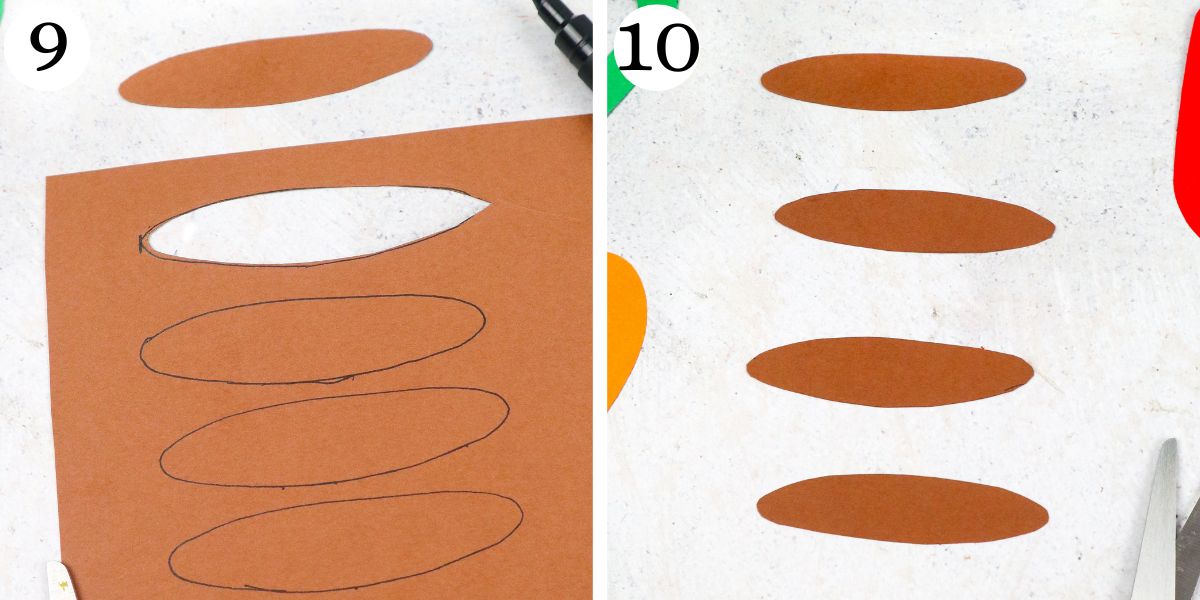
Step 9. Cut out your brown disc.
Step 10. Trace it three more times onto the brown paper and cut all the brown discs out so that you have four discs in total.
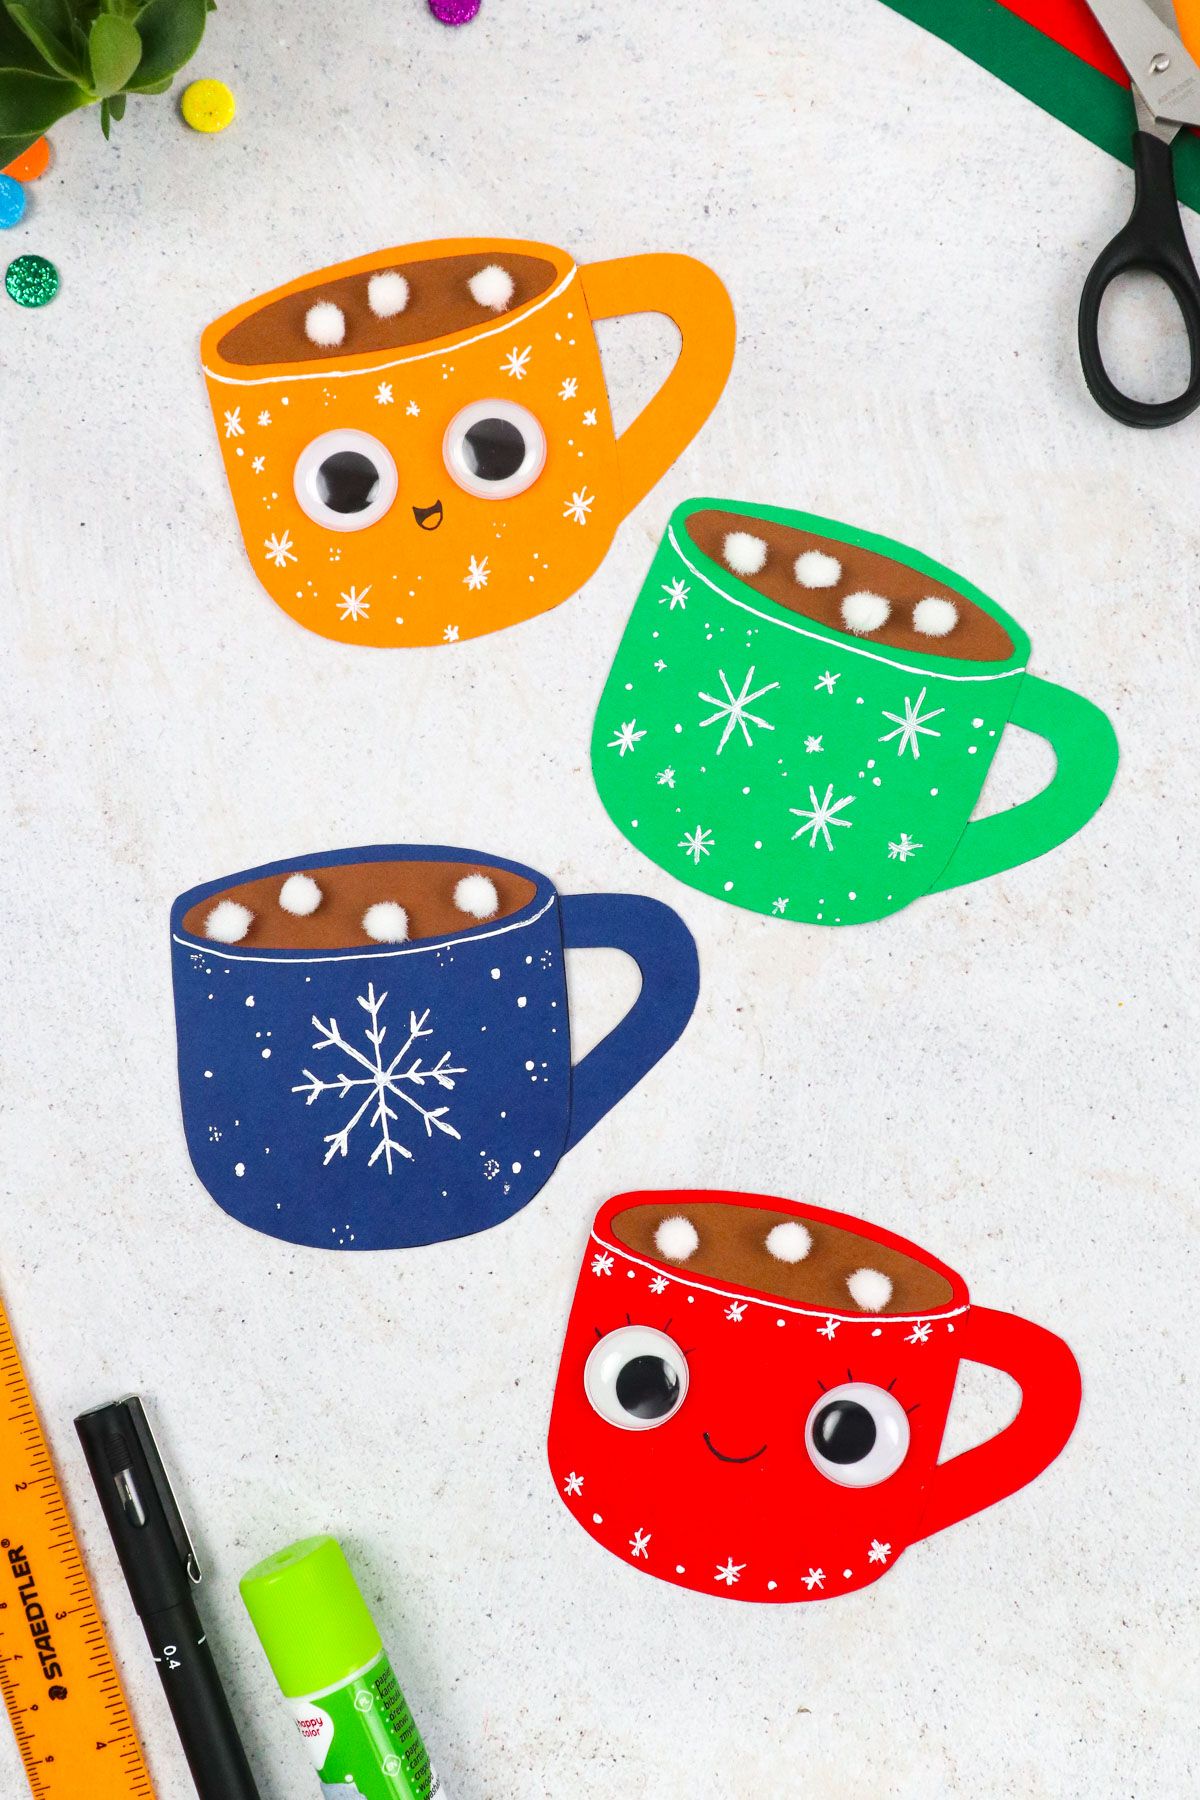
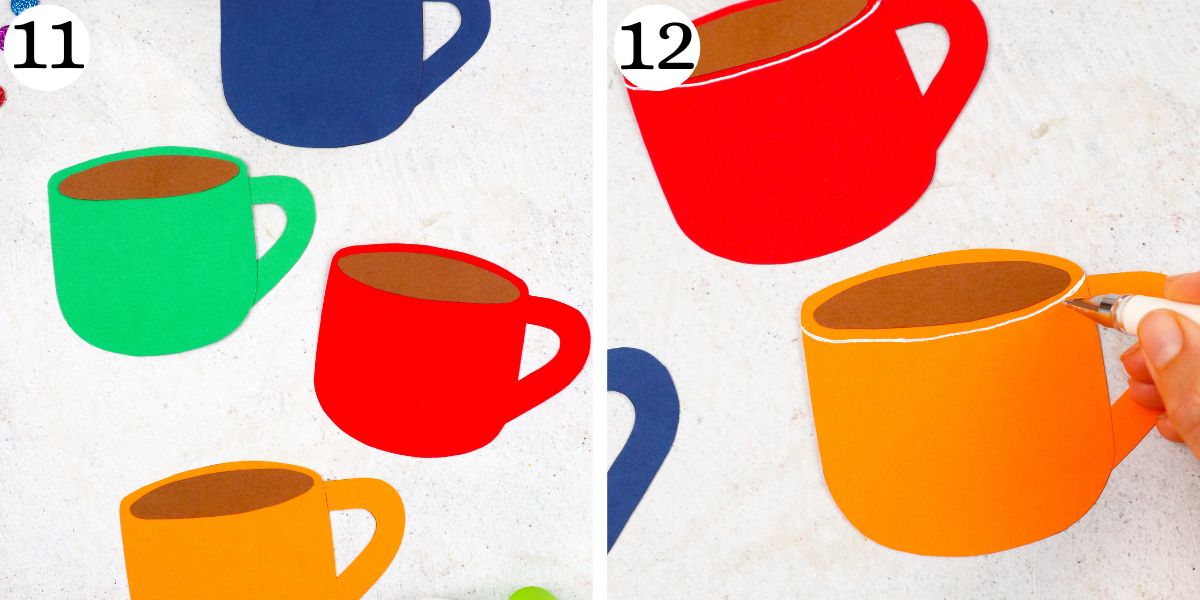
Step 11. Glue the brown pieces onto the tops of each mug. This is the hot cocoa!
Step 12. Draw a white line on each of your mugs just below the brown hot cocoa. This marks the top rim of the mug.
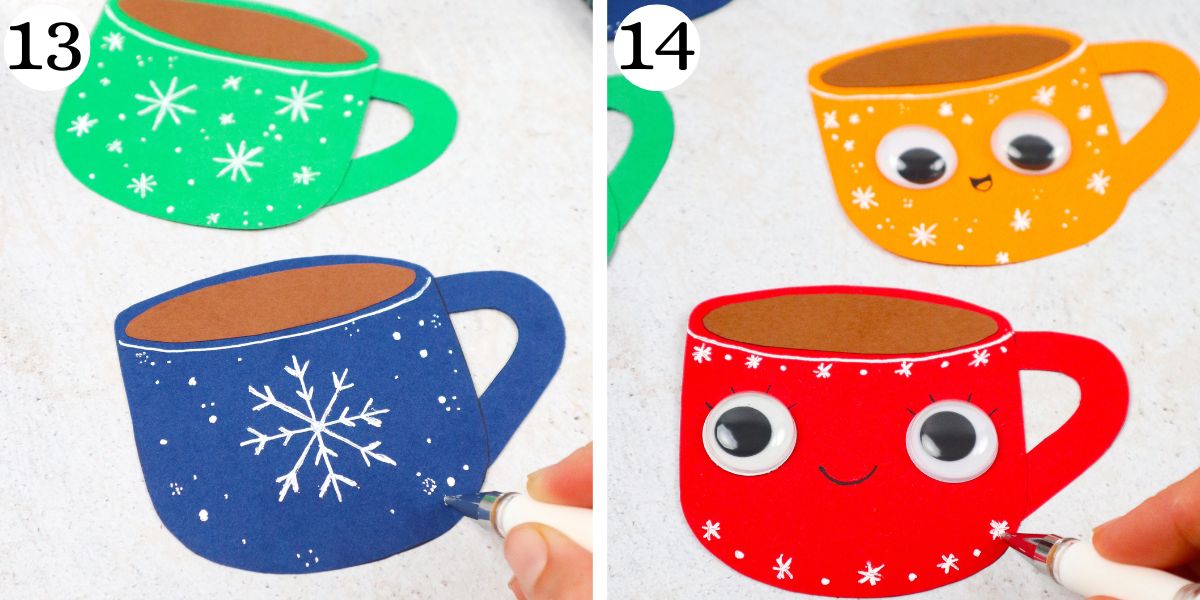
Step 13. Decorate your mugs however you would like. This is when you get to have fun and get super creative!
I drew snowflakes, but you can do whatever you would like.
You could also draw snowmen, snowcapped mountains, Christmas trees, reindeer, Santa faces, and more! The possibilities are truly endless!
Step 14. Here is another example of how you can decorate your hot cocoa mugs. Adding eyes and a smile make for super cute faces!
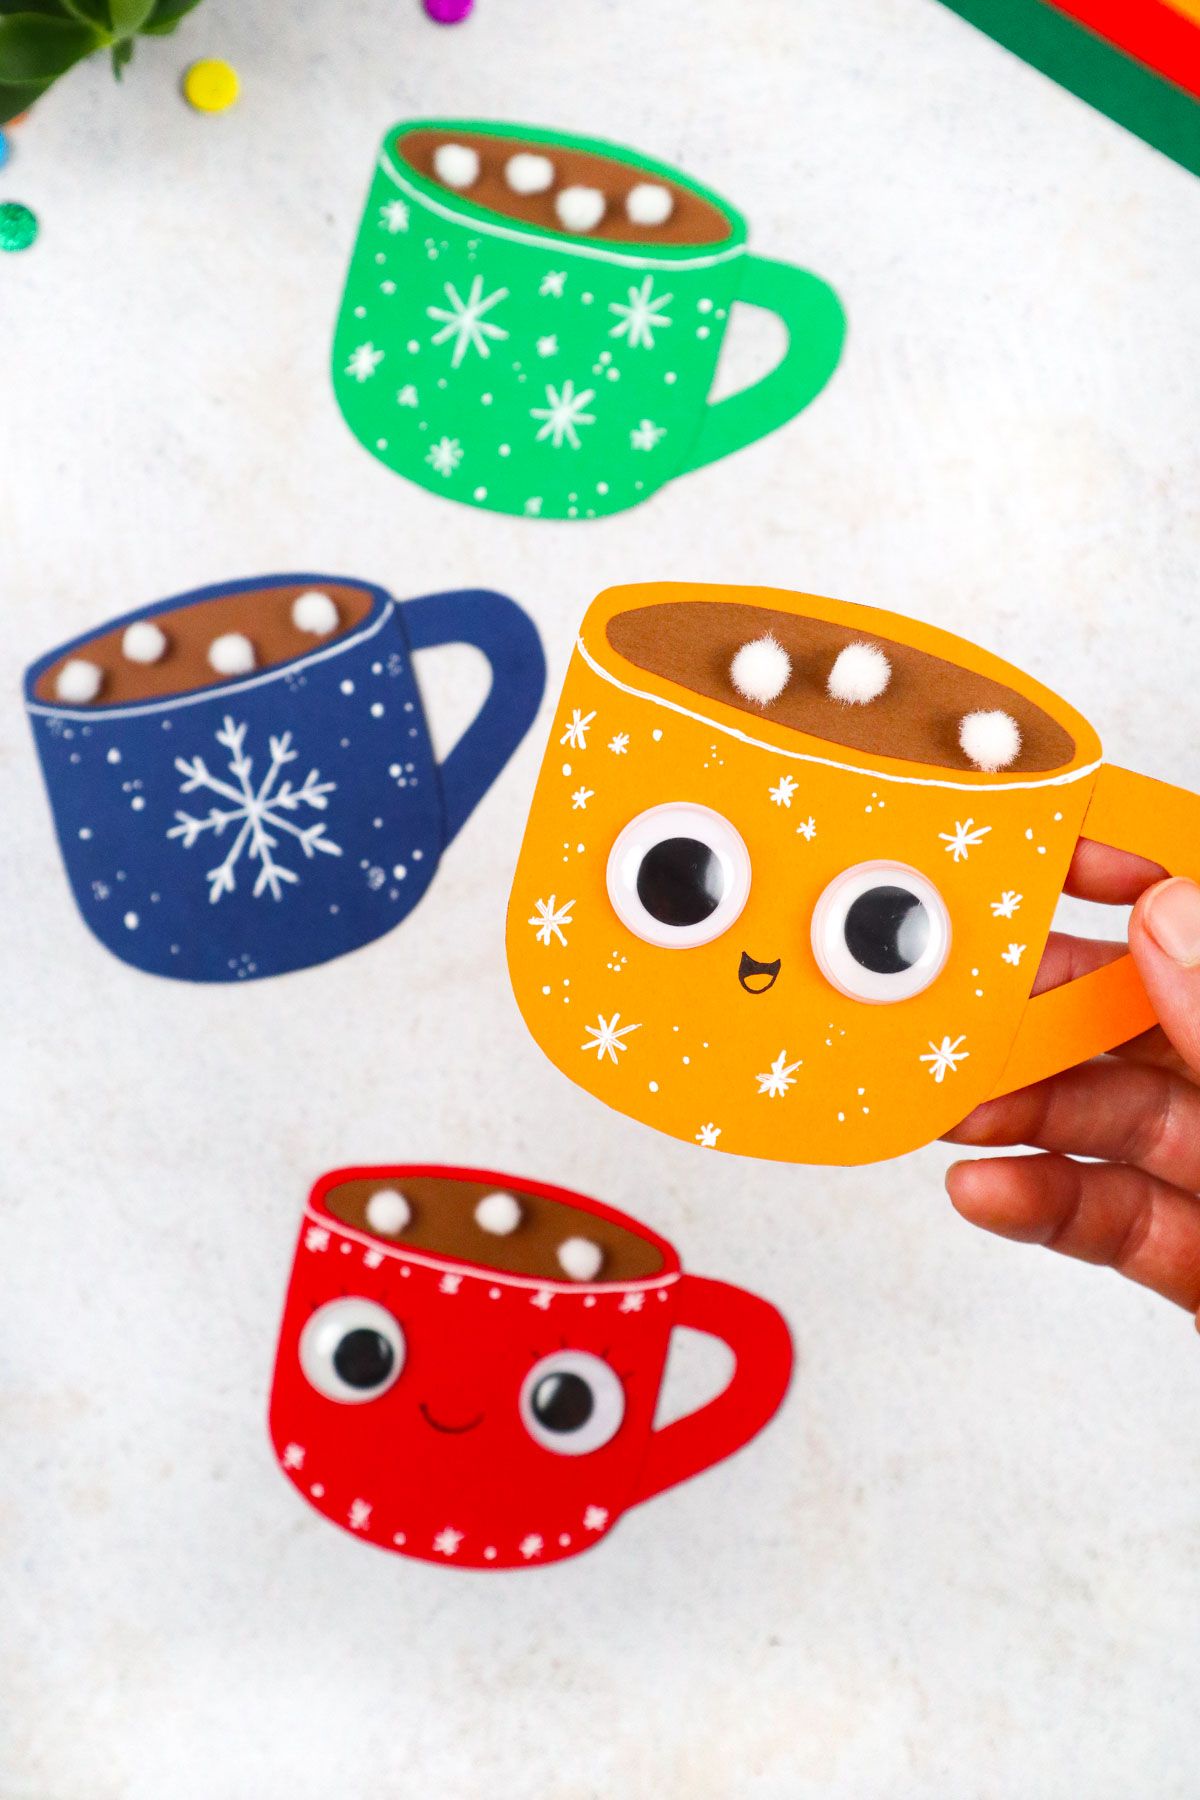
Step 15. Glue your white pom poms onto the brown hot cocoa for marshmallows! I think 3 or 4 pom poms are perfect.
Step 16. Your hot cocoa craft is complete!

Watch How to Make
How Long Do These Hot Cocoa Crafts Take to Make?
These hot cocoa crafts are not time-consuming at all. It took me about 15-20 minutes to make four of them.
Keep in mind that if you are making these with little ones, it may take a bit longer. Kiddos might need assistance with some parts of this project, especially the cutting.
Still, this is a super fun and super fast winter project.
More Crafts Like This
Hot Cocoa Craft
Video Tutorial
Materials
Instructions
- Create your hot cocoa mug template by drawing a 3” x 3” square onto colorful cardstock using your ruler and marker.Then, draw a curved line across the top of the square and another curved line across the bottom of your square.
- Draw your mug handle. You can use a half heart shape or a “C” shape to do this.
- Cut out your hot cocoa mug and handle.
- Trace your template three times onto three different pieces of cardstock to make your other mugs.
- Take your mug handle template and trace it onto three different pieces of cardstock as well.
- Cut out your traced hot cocoa mugs and handles.
- Now, get your glue stick and attach each handle to its mug.
- Draw a narrow oval about 2.5” long onto your brown paper.
- Cut out your oval.
- Trace it three more times onto the brown paper and cut these out so you have four ovals in total.
- Glue the brown pieces onto the tops of each mug. This is the hot cocoa!
- Draw a white line on each mug just below the brown hot cocoa. This marks the top rim of the mug.
- Decorate your mugs however you would like.I drew snowflakes, but you can do whatever your heart desires.
- Here is another example of how you can decorate your hot cocoa mugs.
- Glue your white pom poms onto the brown hot cocoa for marshmallows! I think 3 or 4 pom poms are perfect.
- Your hot cocoa craft is complete!


