DIY Paper Spinner
This post may contain affiliate links: full affiliate disclosure.
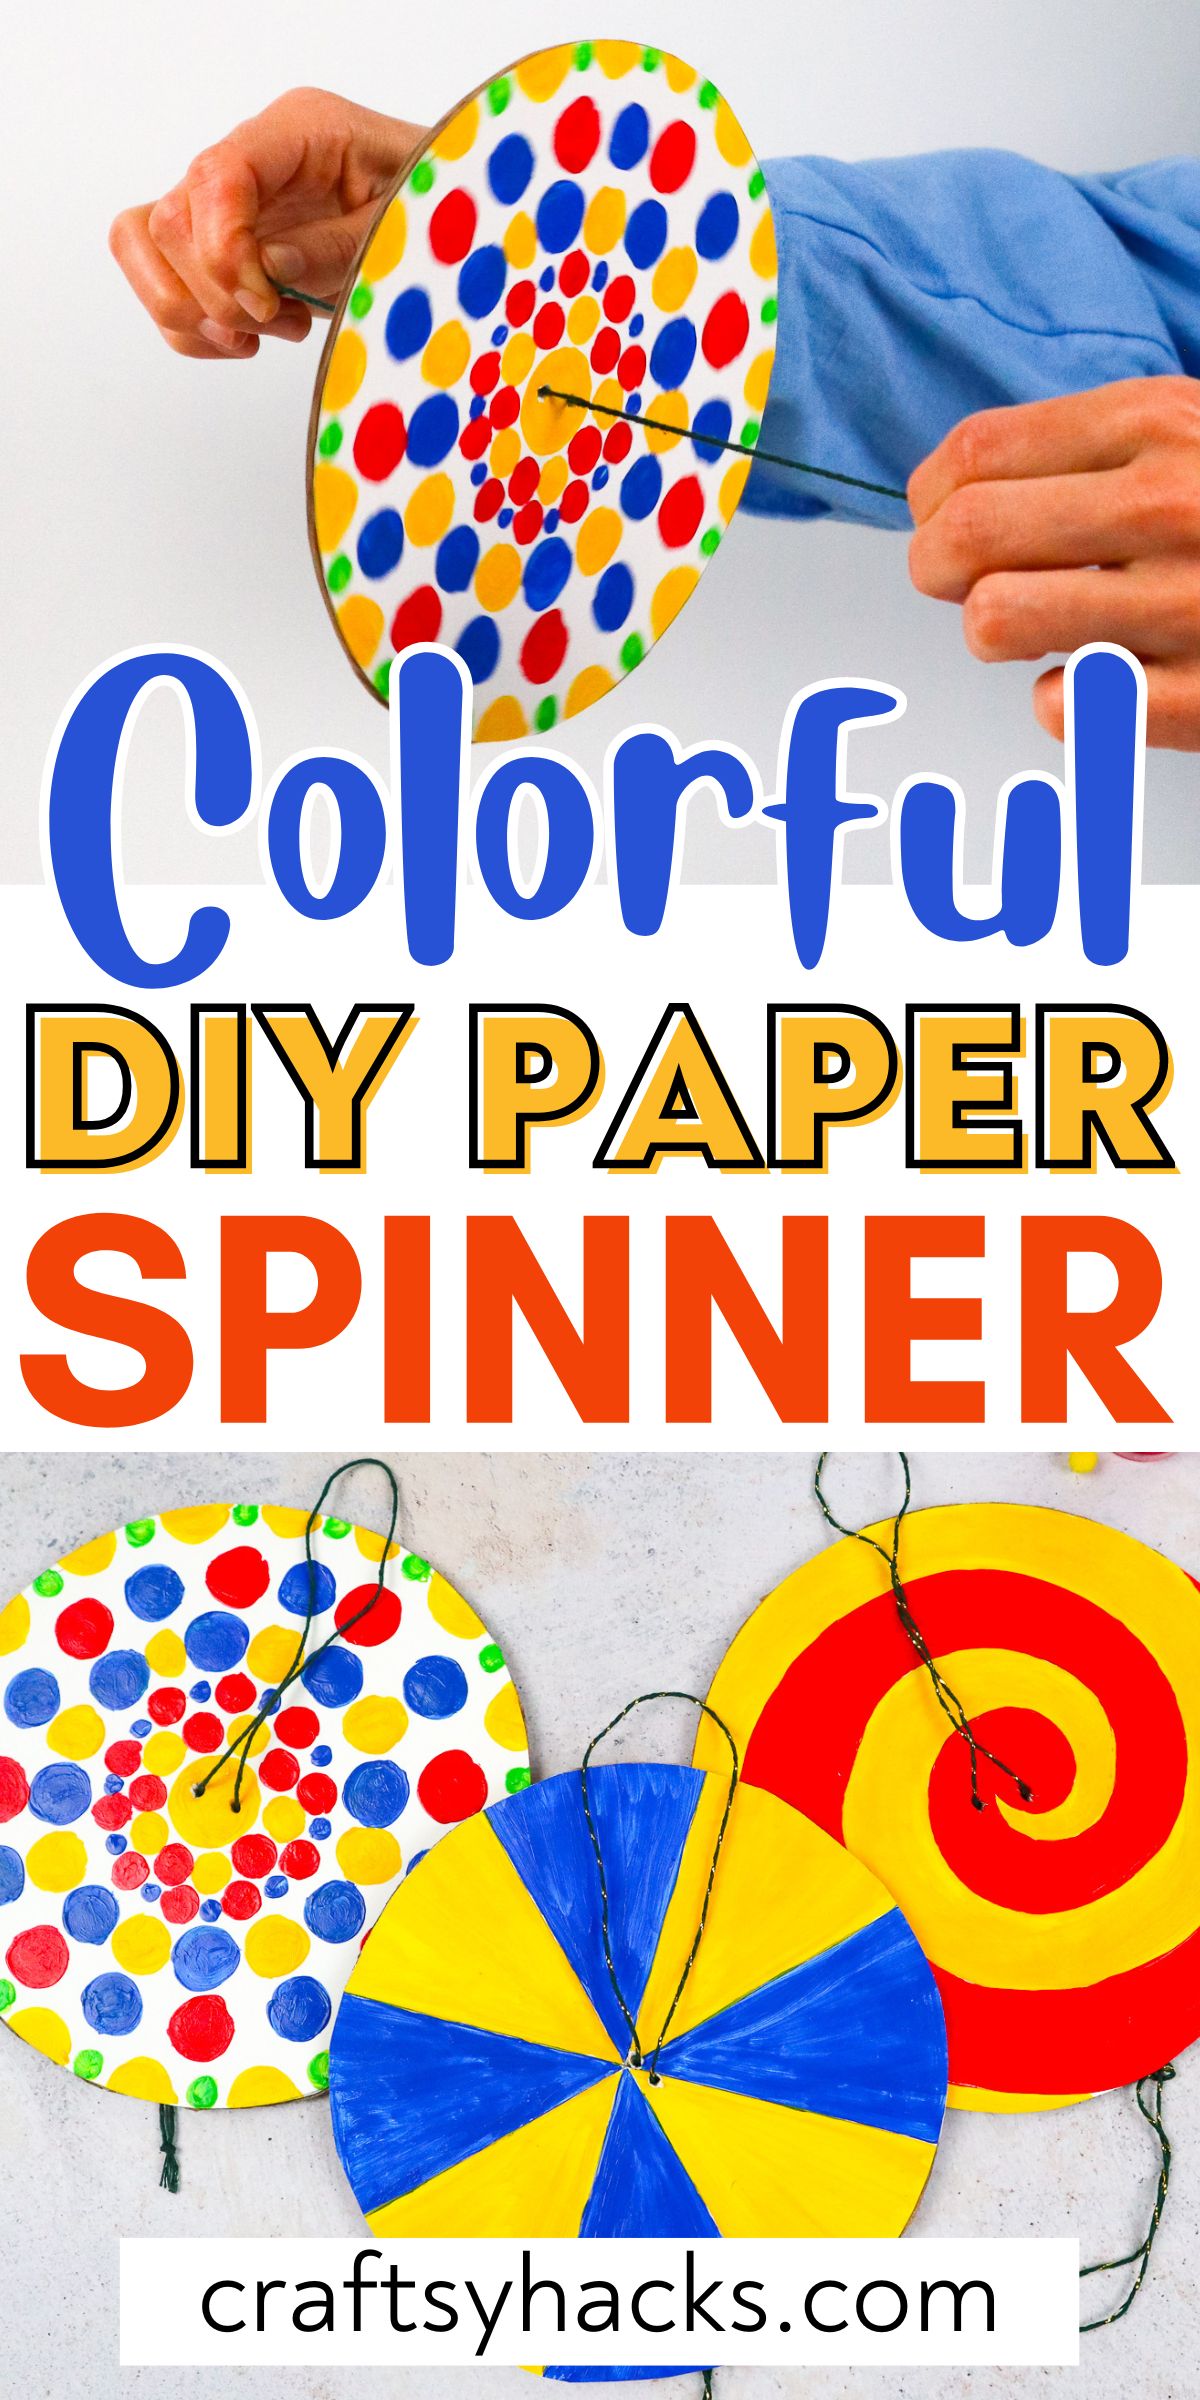
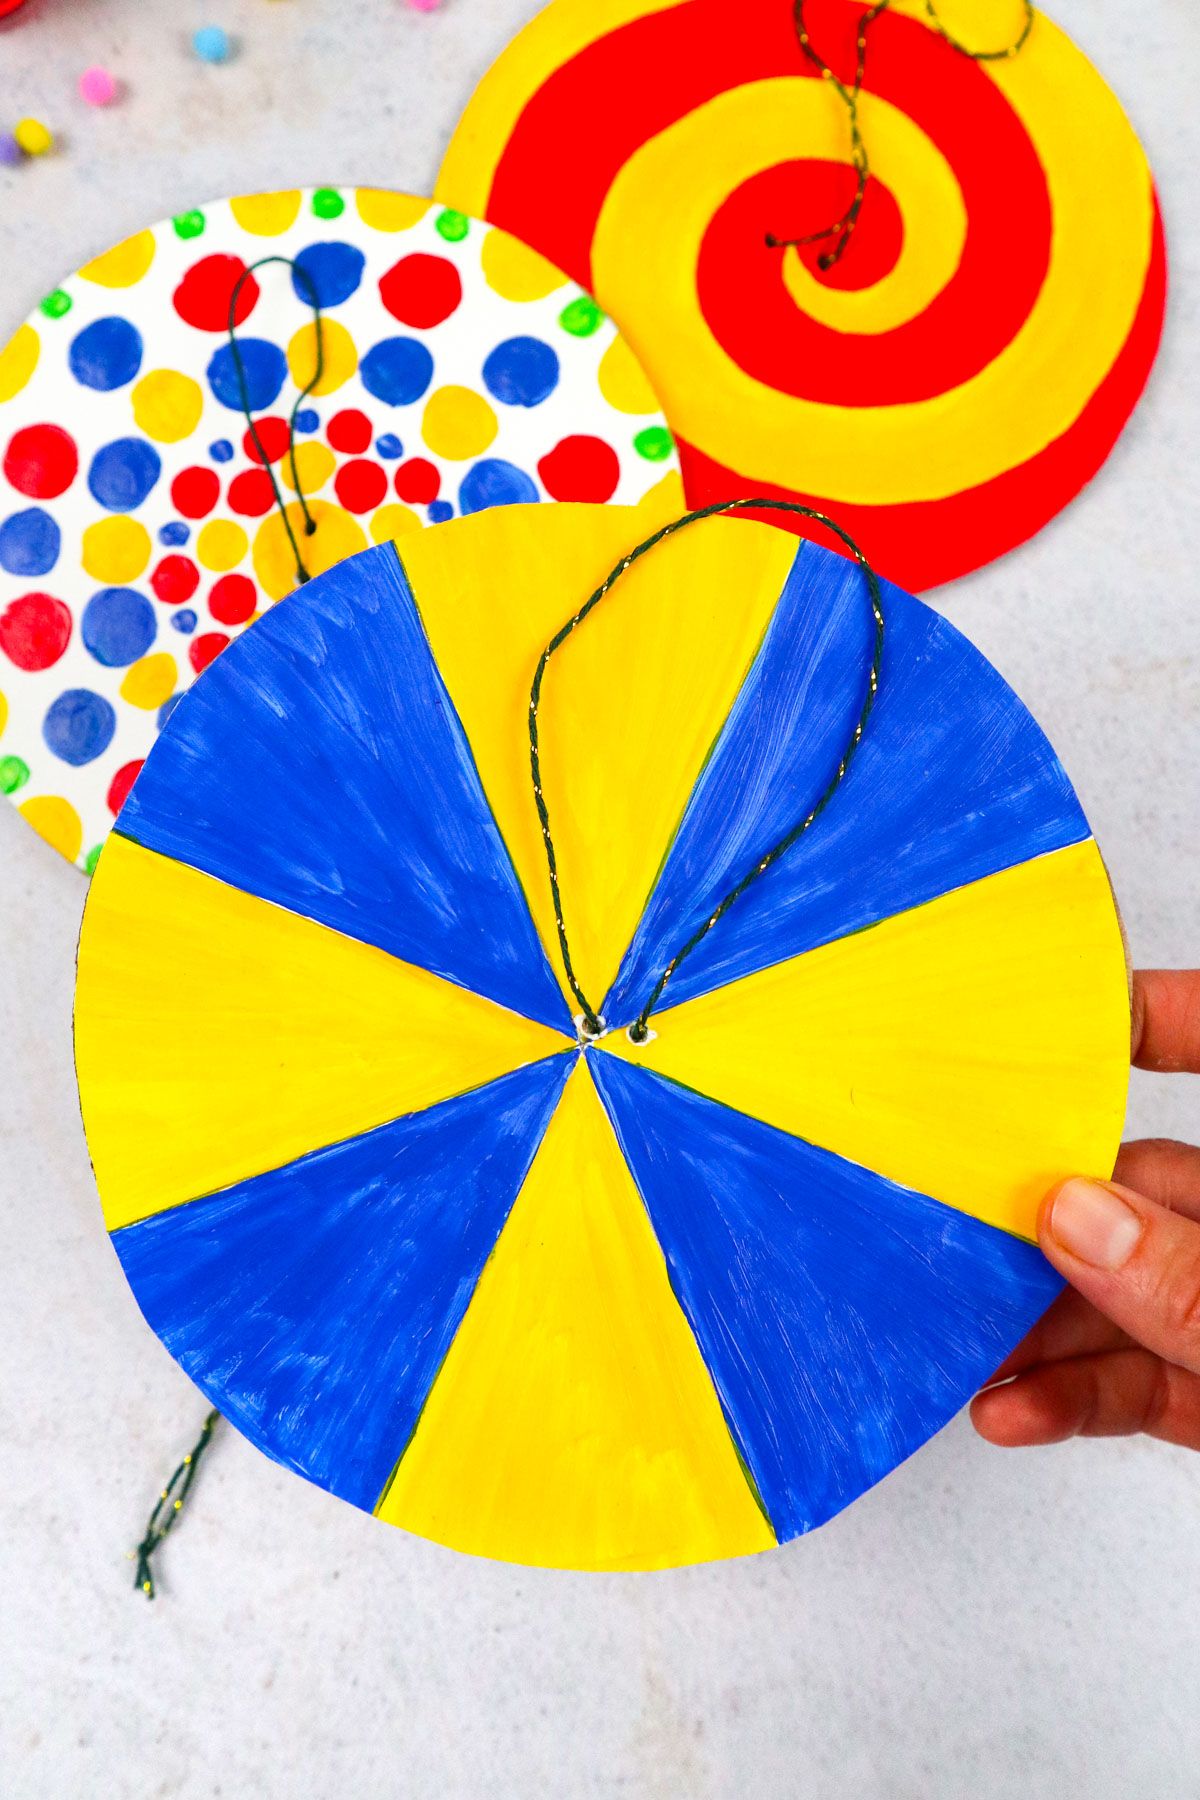
These pretty DIY paper spinners are fun to make and fun to play with! They are made using cardboard and paper.
This is an easy and simple craft that both kids and adults will enjoy. I love any project that lets me get creative with colors and patterns.
I have used acrylic paint to design my spinners, but you can use other materials to decorate your own.
If you are making this with a little one and want to avoid a mess, crayons, markers, and colored pencils will work just fine.
You and your kids will love making these spinners (and playing with them!) Let’s get started on these fun, cute, and easy-to-make spinners!

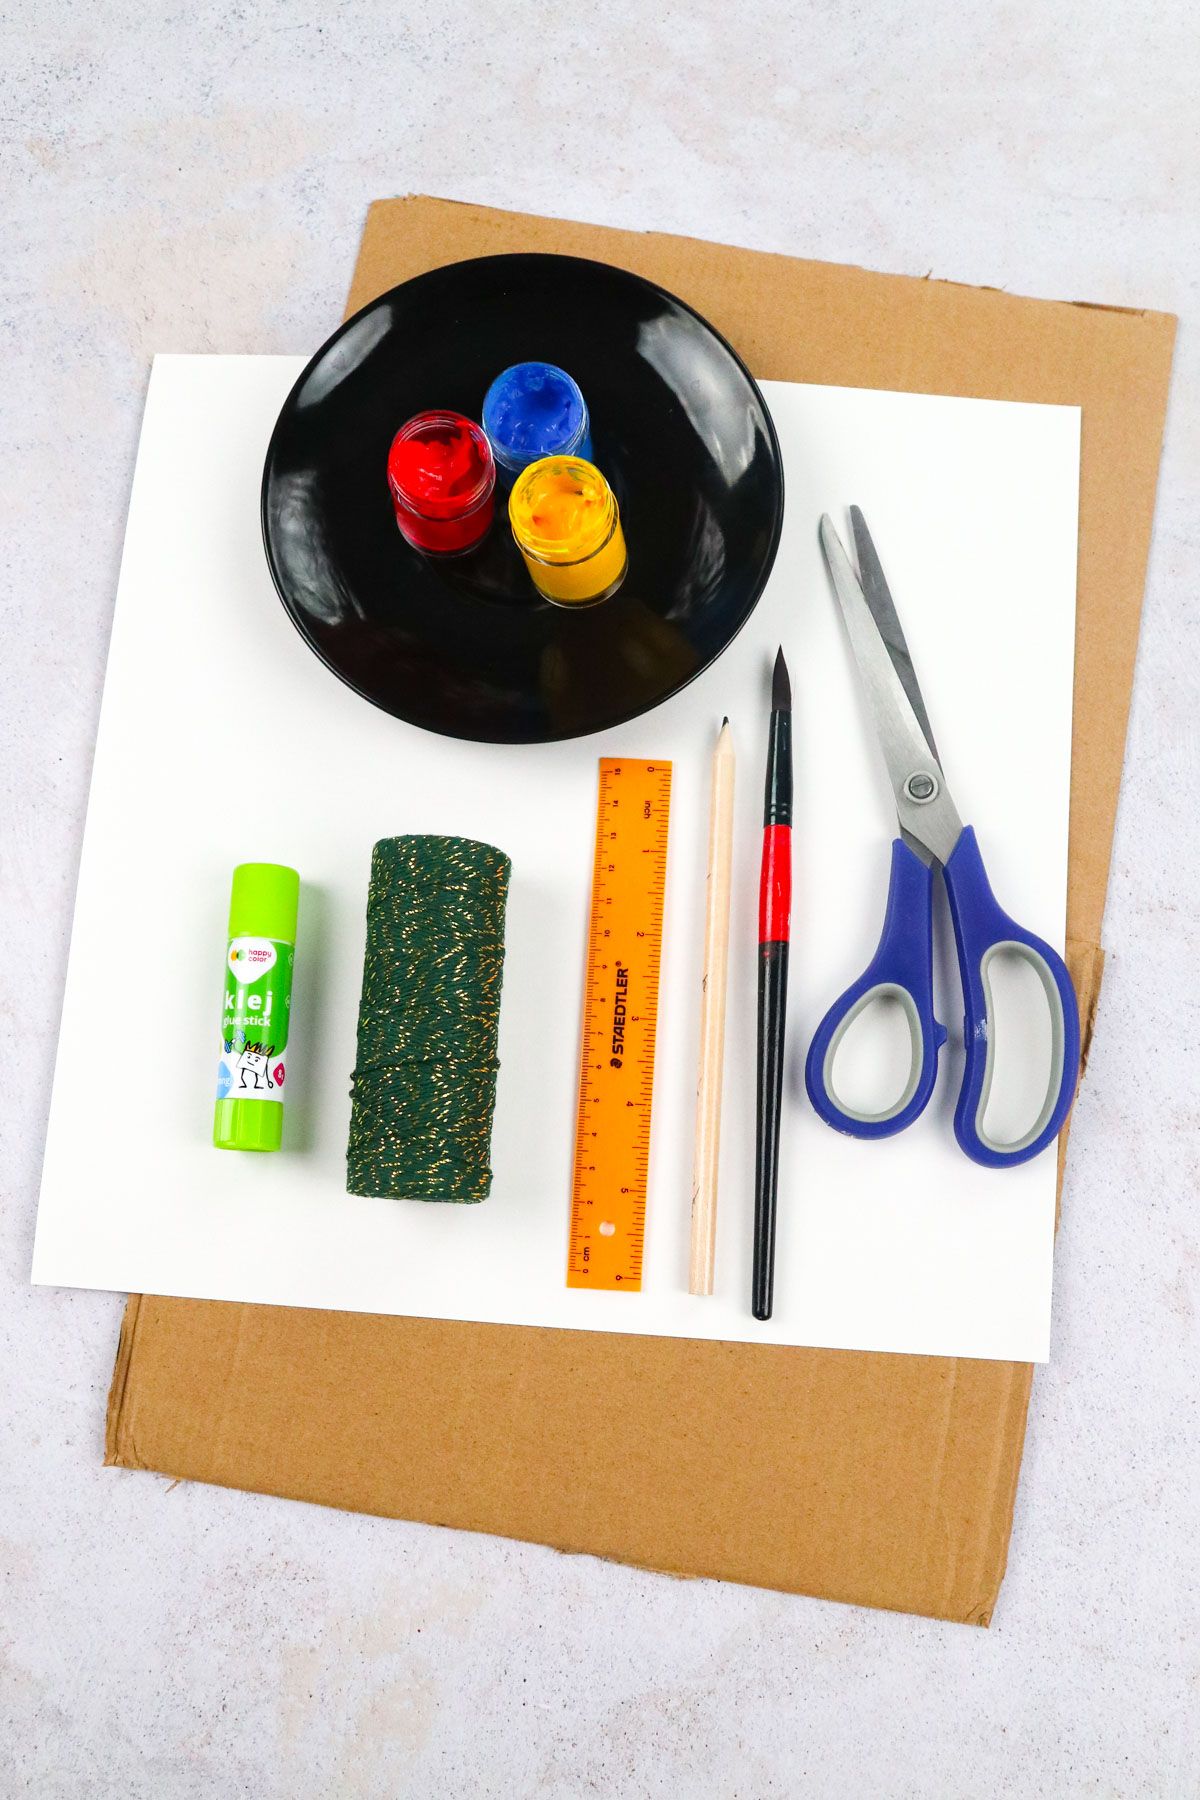
Supplies You’ll Need
- Cardboard piece
- White paper sheet
- Round item for tracing
- Pencil
- Ruler
- Acrylic paint*
- Paint brush
- Scissors
- Glue stick
- Twine**
*You could use markers, crayons, or colored pencils instead.
** Rope or string works instead of twine.
How to Make a DIY Paper Spinner
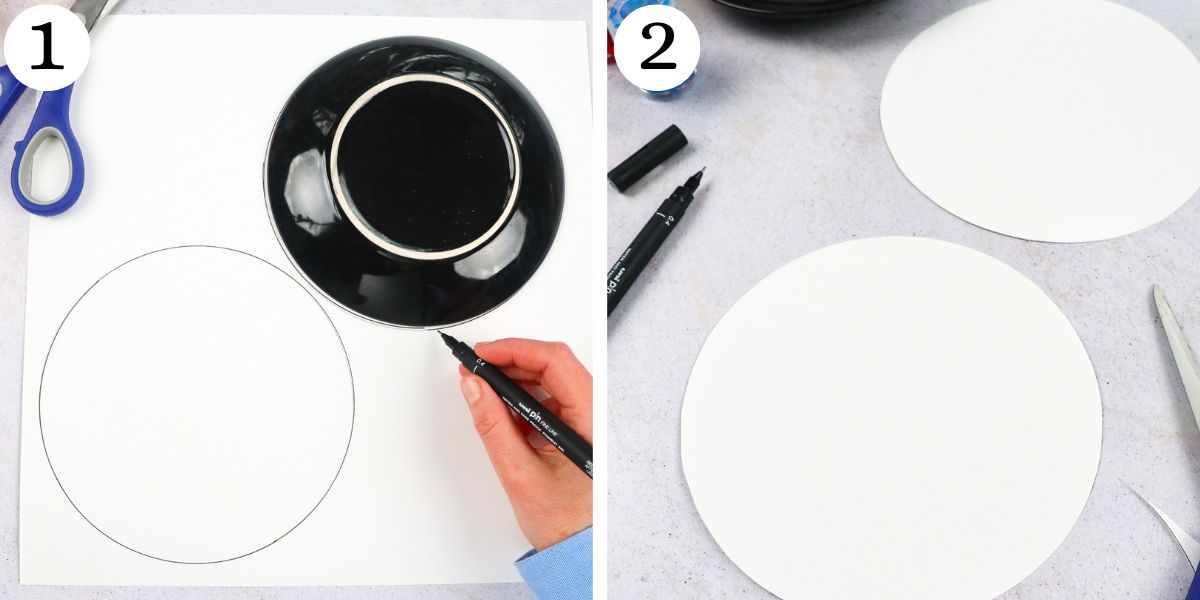
Step 1. We will begin by making two paper circles. To do that, trace any round object that you have on hand.
I used a small plate, but you could also use a jar lid or bowl.
Step 2. Get your scissors and cut out your circles.
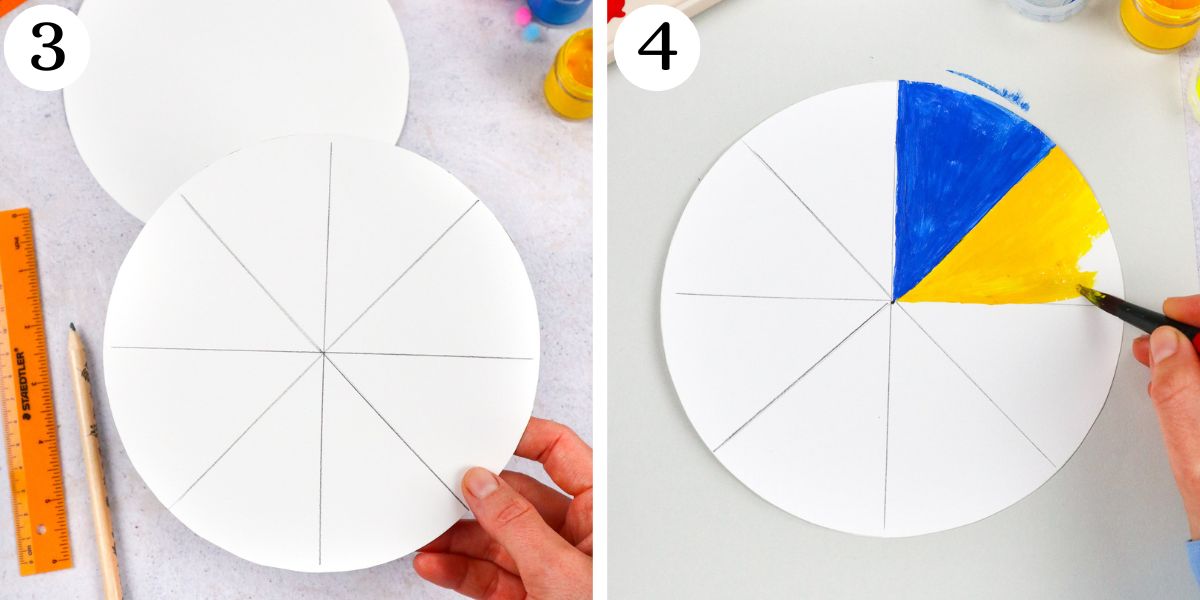
Step 3. Now, it is time to decorate your spinner. You can decorate it however you would like.
For this one, I used a ruler to find the center of the circle and drew lines to make the spinner look like a pie.
Step 4. Now, use paint to add color to your spinner. If you prefer, you can use crayons or markers instead.
Remember that you can decorate your spinner with any patterns and colors that you would like. Have fun getting creative!
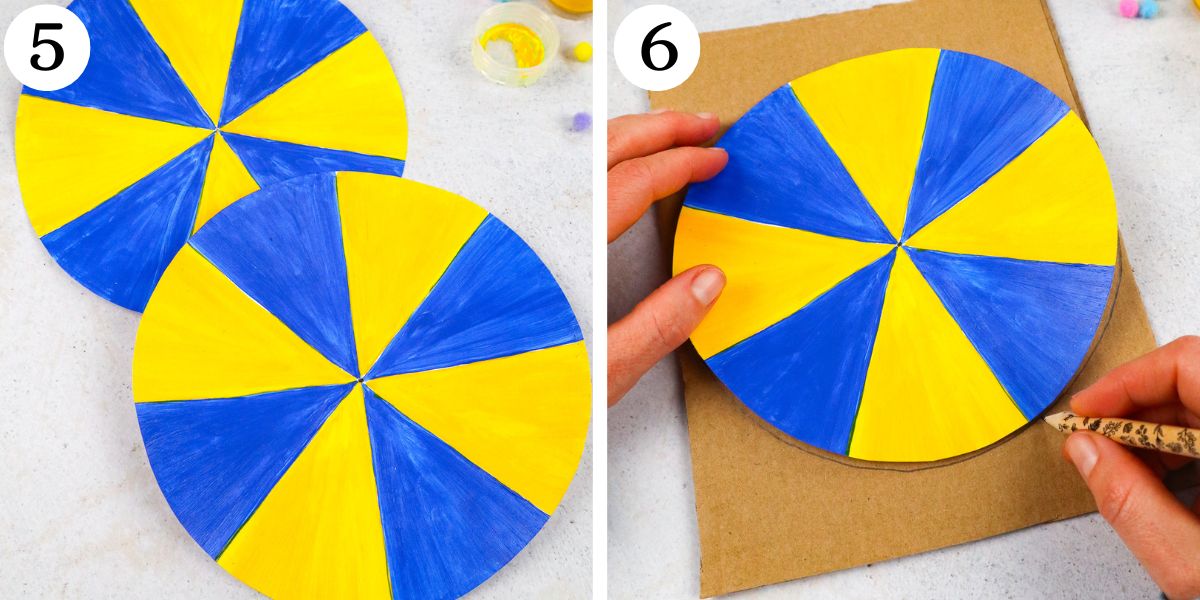
Step 5. Decorate the front of the circles only (the other side won’t be visible). Wait until the paint dries.
Step 6. Draw a circle on your cardboard by tracing one of your decorated circles onto the cardboard. Cut out the cardboard circle.
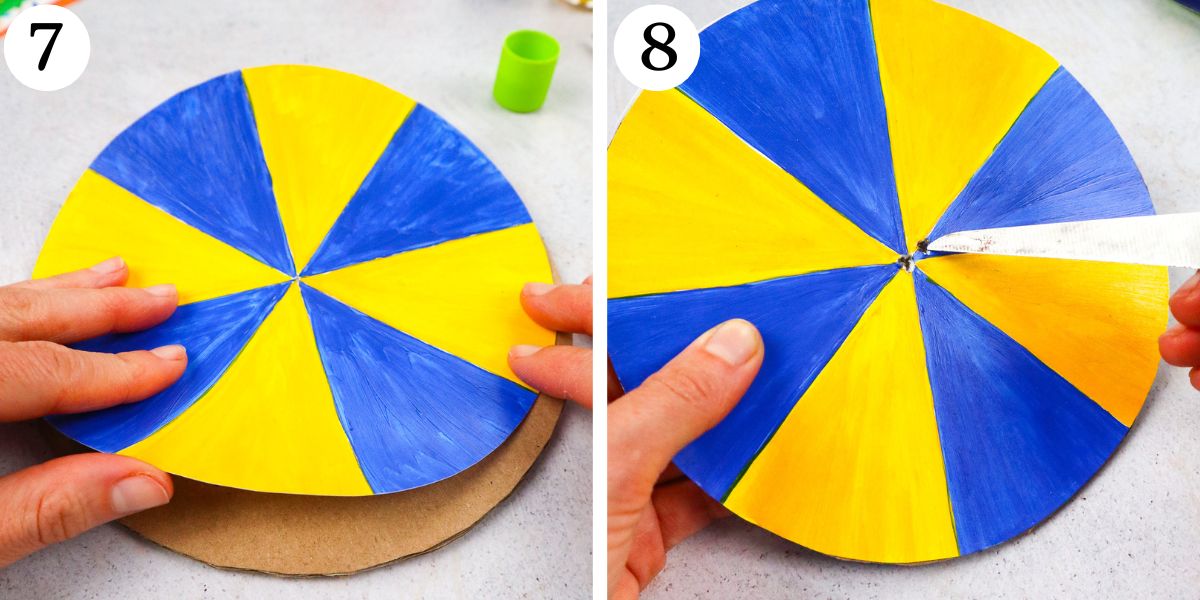
Step 7. Glue the paper circles to the cardboard circle. Put one on each side, painted side facing out.
Step 8. Using your scissors, poke two little holes in the center of your spinner.
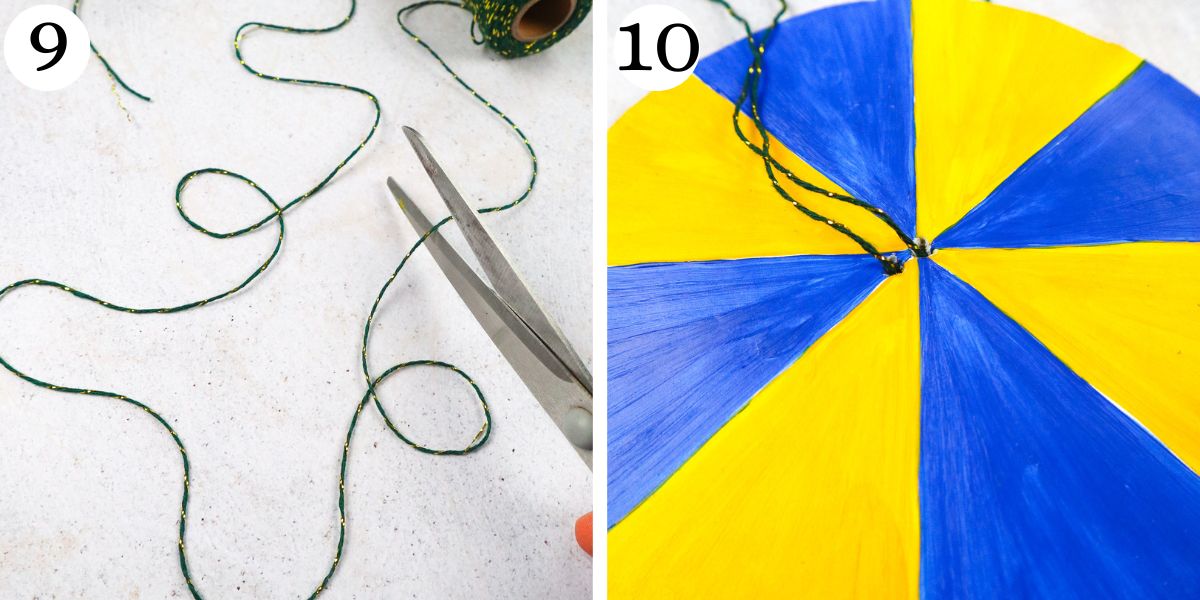
Step 9. Cut an 18” piece of twine (or string or rope). Thread it through one hole and then back through the other.
Step 10. Tie the loose ends into a knot. You should have two twine loops, one on either side of the spinner.
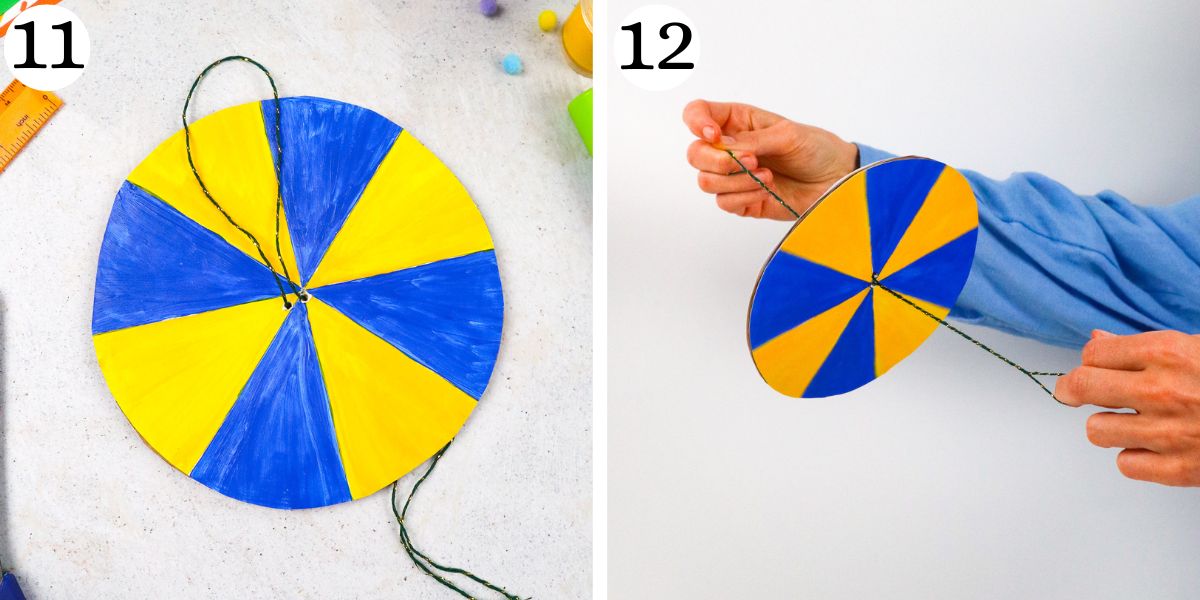
Step 11. Your spinner is done! To make it spin, take both ends of twine (one in each hand) and propel the spinner forward a few times.
It will start spinning and provide you and your little ones with tons of fun!
Watch How to Make
How Long Do These Spinners Take to Make?
One of the best things about this project is that it only takes a few minutes to make. It also will entertain your kiddos for a long time!
You can make your own spinner in about 20 minutes.
If you are using paint, you will need to wait for it to fully dry before assembling the spinner. This will take about 30 to 60 minutes.
You can speed up the crafting process up by using crayons or colored pencils to decorate your spinner instead of paint. Whatever method you choose, this is a quick and fun craft!
More Crafts Like This
DIY Paper Spinner
Video Tutorial
Equipment
- Round item for tracing
- Ruler
- Paint brush
- Scissors
Materials
- Cardboard piece
- White paper sheet
- Pencil
- Acrylic paint *
- Glue stick
- Twine **
Instructions
- Make two paper circles by tracing any round object that you have. I used a small plate to make my circles.
- Cut out your circles.
- Decorate your spinner.
- You can use paint to add color to your spinner or use crayons or markers instead.
- Decorate the front of the circles and wait until the paint dries.
- Draw a circle on your cardboard by tracing one of your decorated circles onto the cardboard. Cut it out.
- Glue the paper circles to the cardboard circle, one on each side. The decorated side should face out.
- Poke two little holes in the center of your spinner.
- Cut an 18” piece of twine and thread it through one hole and then back through the other.
- Tie the loose ends into a knot. You should have two twine loops, one on either side of the spinner.
- Your spinner is done! To make it spin, take both ends of twine (one in each hand) and propel the spinner forward a few times.
- Have fun!


