DIY Paper Spinner
Keep your kids engaged with these simple DIY paper spinners. With basic materials you can make a fun DIY paper toy for the little ones!
Video Tutorial
Equipment
- Round item for tracing
- Ruler
- Paint brush
- Scissors
Materials
- Cardboard piece
- White paper sheet
- Pencil
- Acrylic paint *
- Glue stick
- Twine **
Instructions
- Make two paper circles by tracing any round object that you have. I used a small plate to make my circles.
- Cut out your circles.
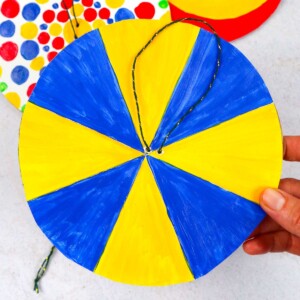
- Decorate your spinner.
- You can use paint to add color to your spinner or use crayons or markers instead.
- Decorate the front of the circles and wait until the paint dries.
- Draw a circle on your cardboard by tracing one of your decorated circles onto the cardboard. Cut it out.
- Glue the paper circles to the cardboard circle, one on each side. The decorated side should face out.
- Poke two little holes in the center of your spinner.
- Cut an 18” piece of twine and thread it through one hole and then back through the other.
- Tie the loose ends into a knot. You should have two twine loops, one on either side of the spinner.
- Your spinner is done! To make it spin, take both ends of twine (one in each hand) and propel the spinner forward a few times.
- Have fun!
Notes
*Or markers/crayons
** or rope, string
Tried this craft?Leave a comment below with your rating! I love the feedback and respond to every comment!