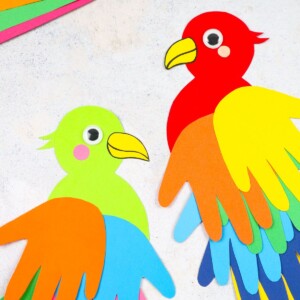
Handprint Parrots
This post may contain affiliate links: full affiliate disclosure.
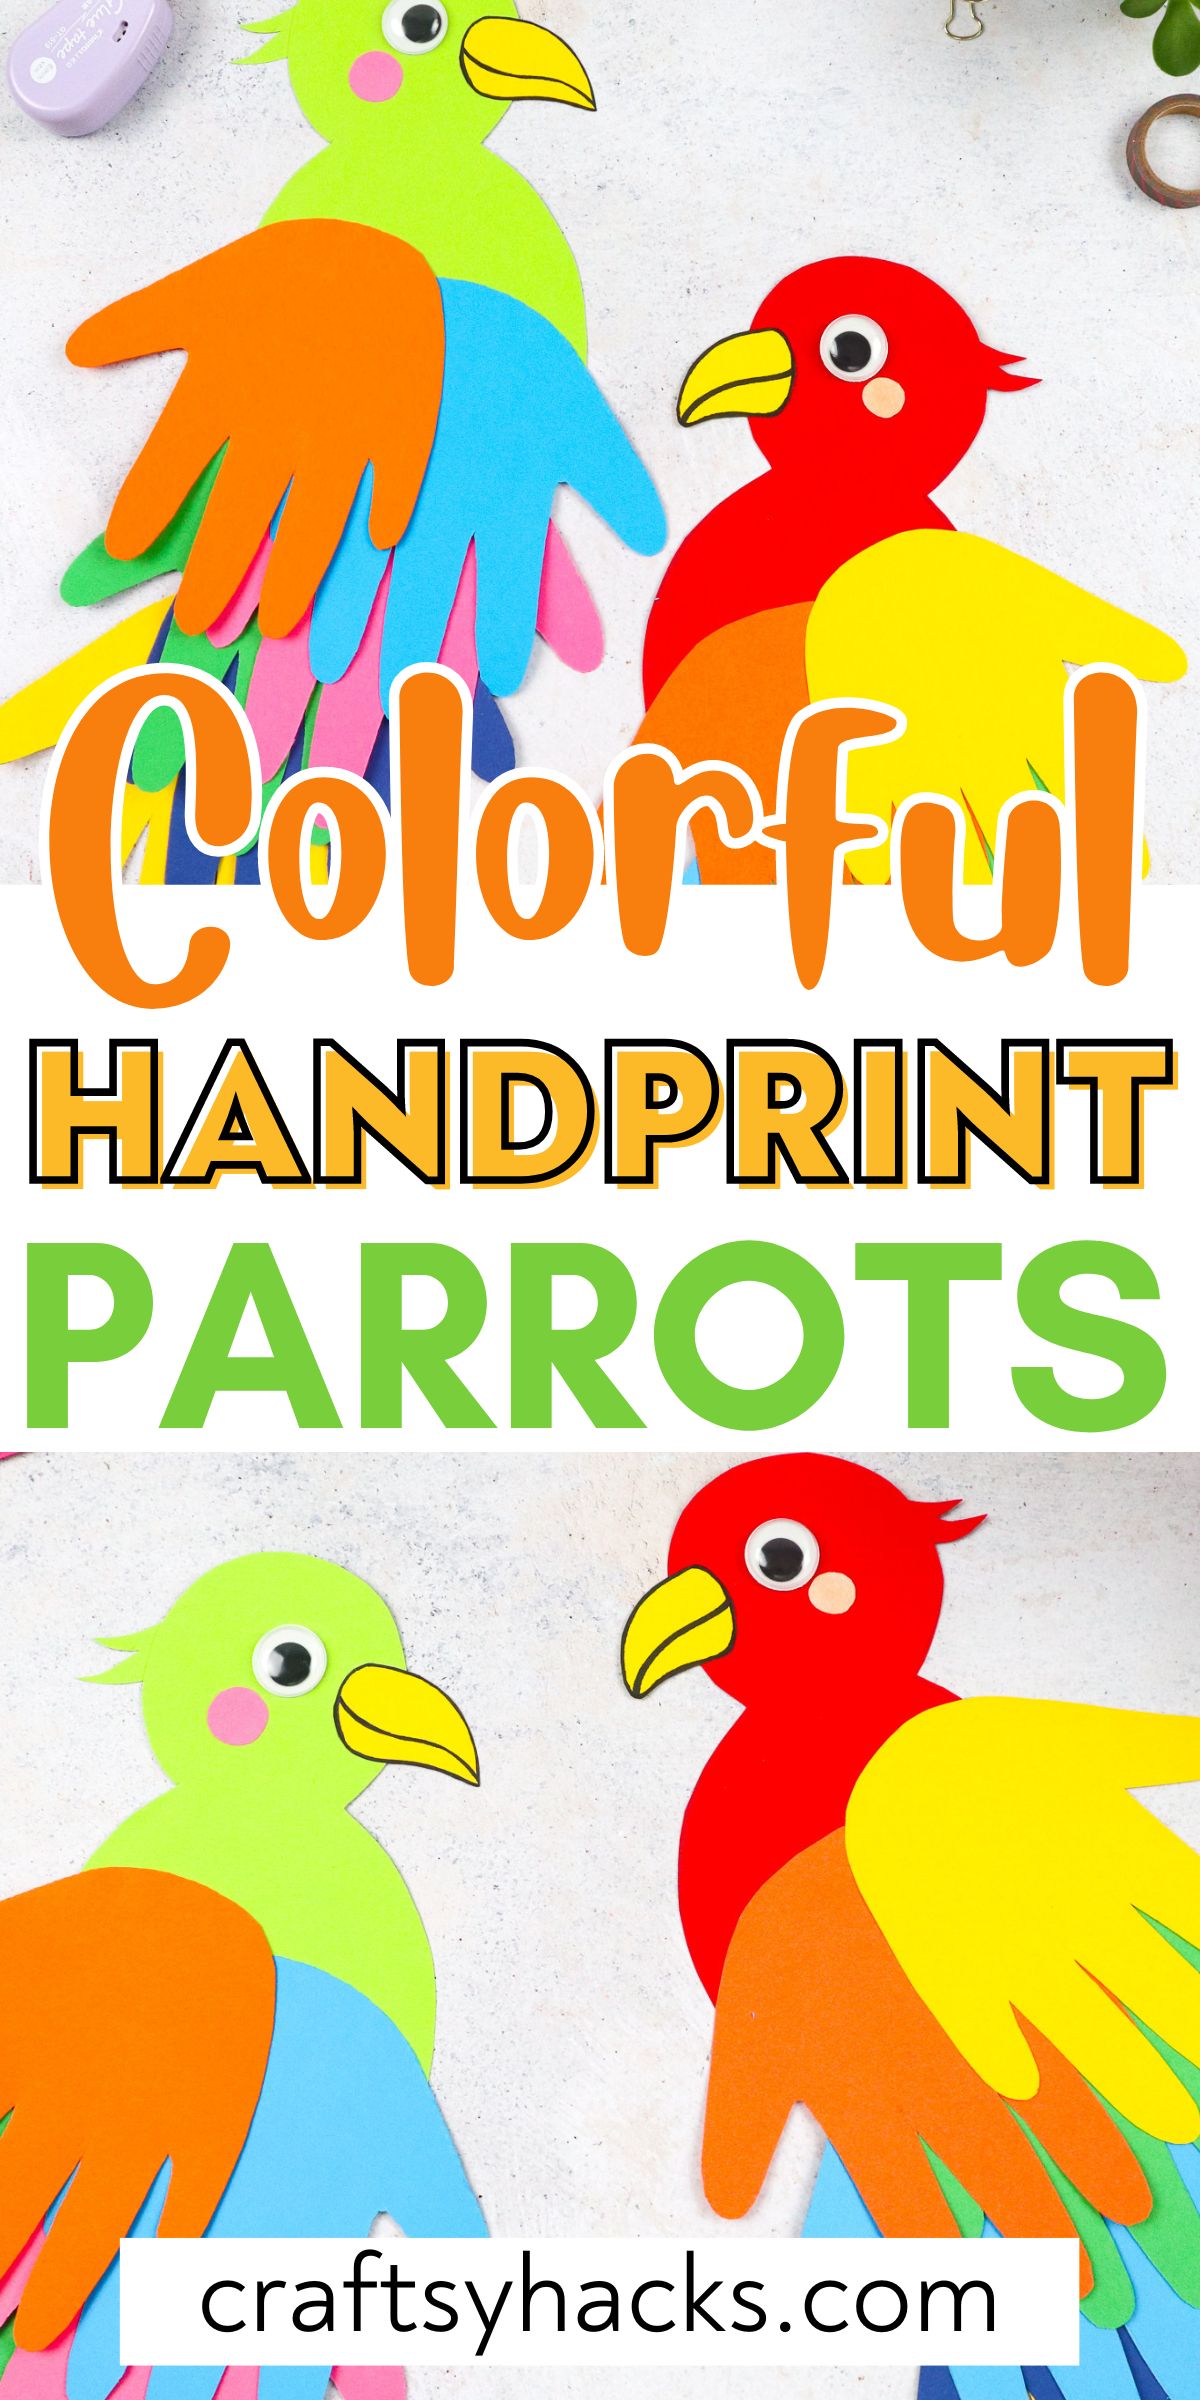
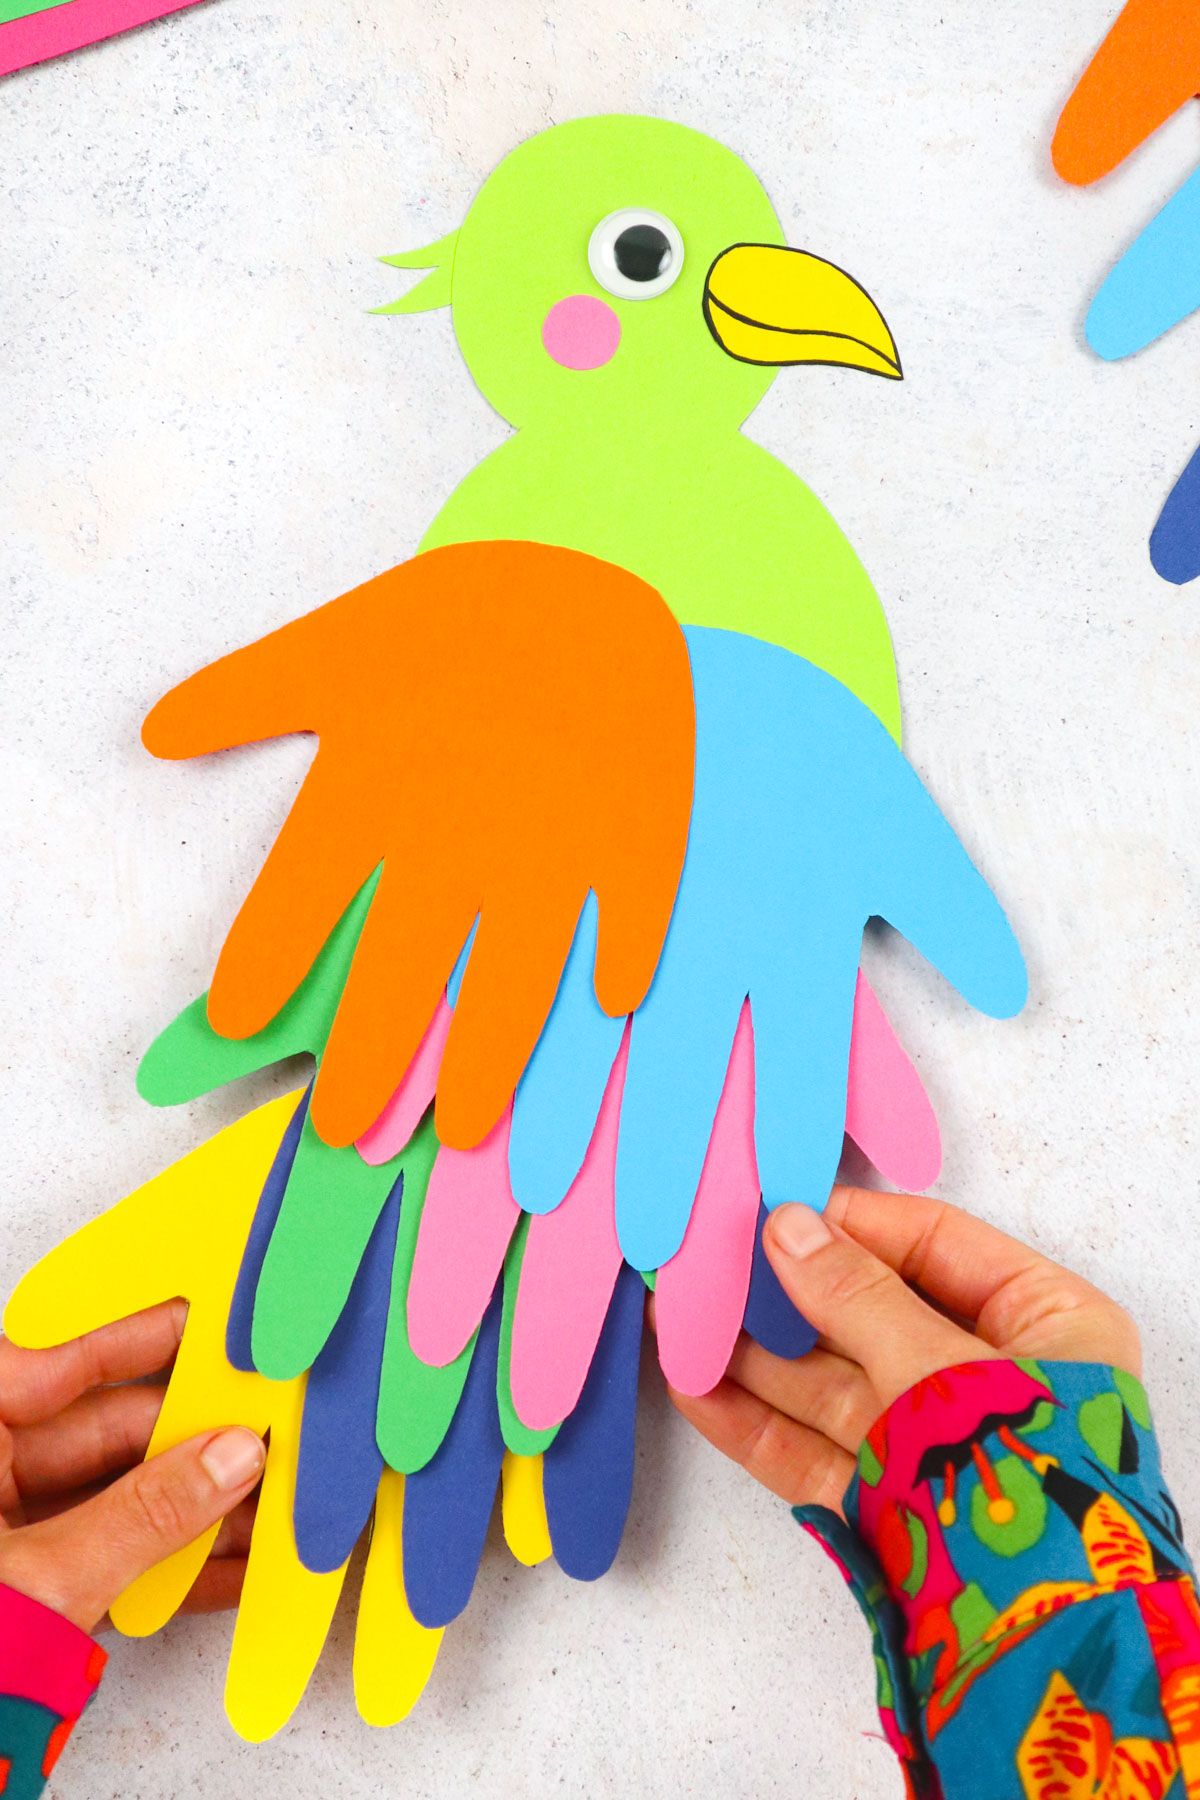
Need a fun craft to do with little ones? These handprint parrots are exactly what you have been looking for!
Bright, fun, and cheerful, this craft will bring a smile to your face. Best of all, you only need a few basic craft supplies to make these.
Kids will love choosing colors for the handprint feathers. They will also get a lot of practice with tracing and cutting (essential preschool and kindergarten skills!)
This is a great project for kids who love birds or are interested in the rainforest. I also love that it uses so many handprints.
When you look back at this parrot years from now, it will remind you how tiny your kiddos once were. Let’s get started on this fun and creative project!

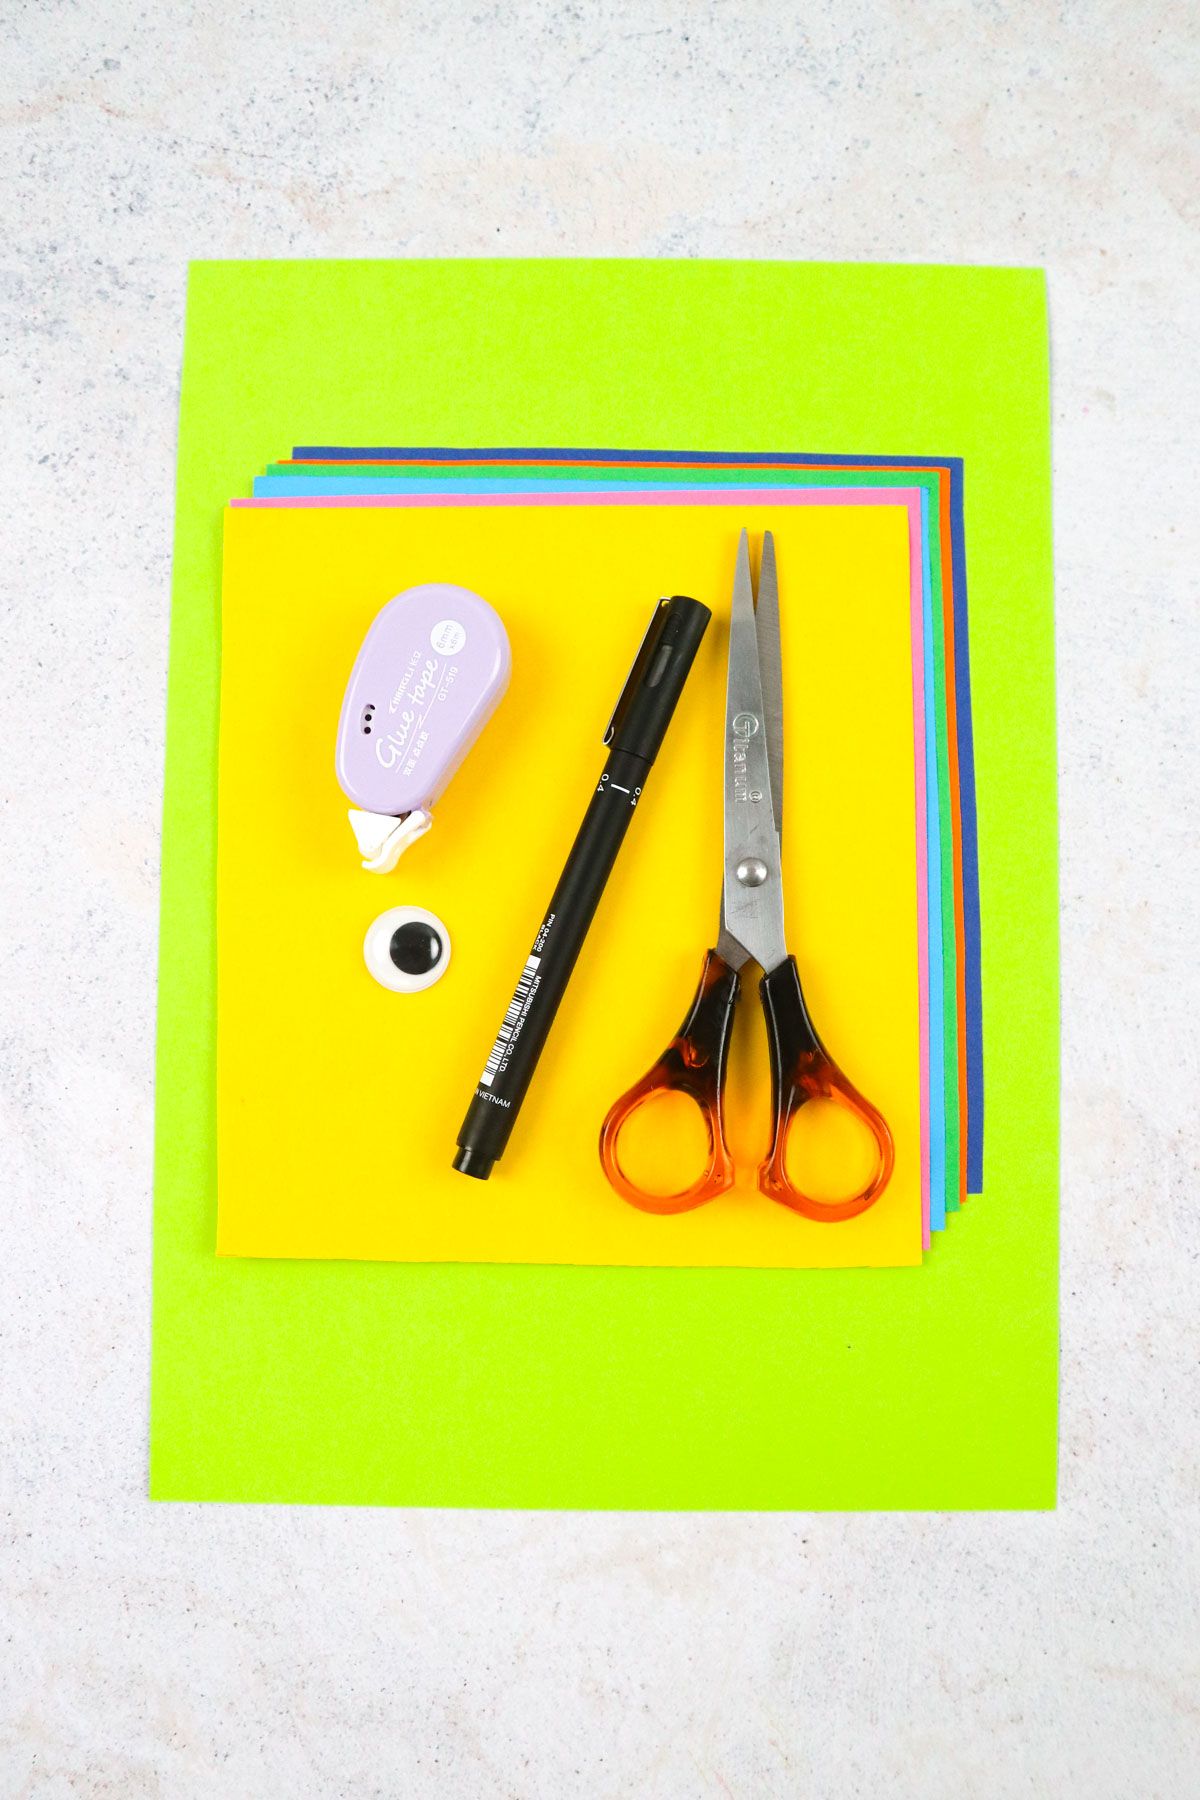
Supplies You’ll Need
- A4 craft paper sheet
- 5x Colored craft paper (7″x 7″ or A5)
- Black marker
- Glue tape*
- 1x Googly eye
- Scissors
- Optionally: pencil
*Or any craft glue
How to Make Handprint Parrots
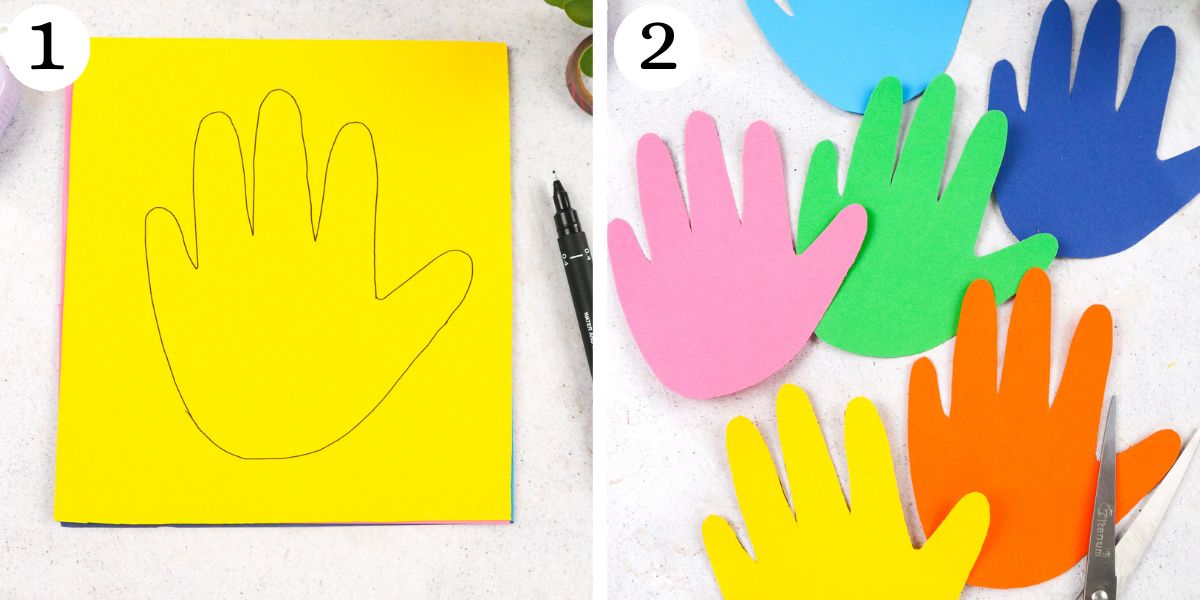
Step 1. Begin by tracing your hand (or your child’s hand) on the paper. Then, place all the colored craft paper in a stack, with the traced hand on top.
Step 2. Start cutting the traced hand out. When you are done, you should have six colored hands.
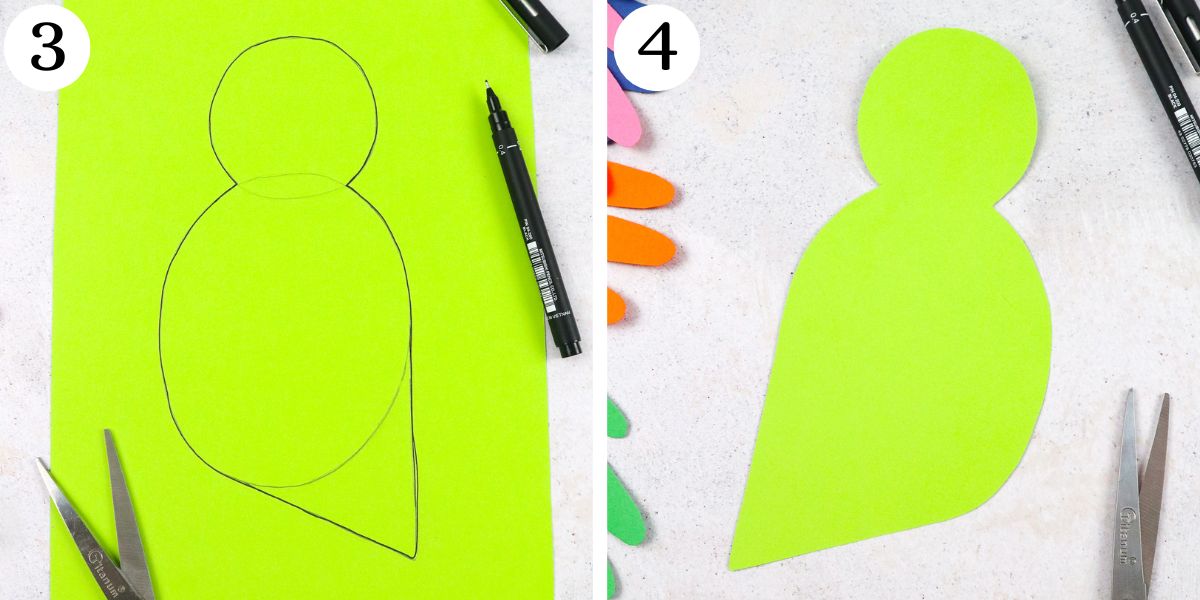
Step 3. It’s time to draw your parrot’s body. Begin by drawing a smaller circle to create a head.
Next, draw a bigger oval underneath to form the body. Finally, make a triangle-shaped tail on the bottom of the oval-shaped body.
I like to start the parrot’s body with a pencil sketch and then go over it with black marker once I am happy with how it looks.
Step 4. Using your scissors, cut your parrot out. Decide which way he will be looking (this will determine where you place your parrot’s facial features).
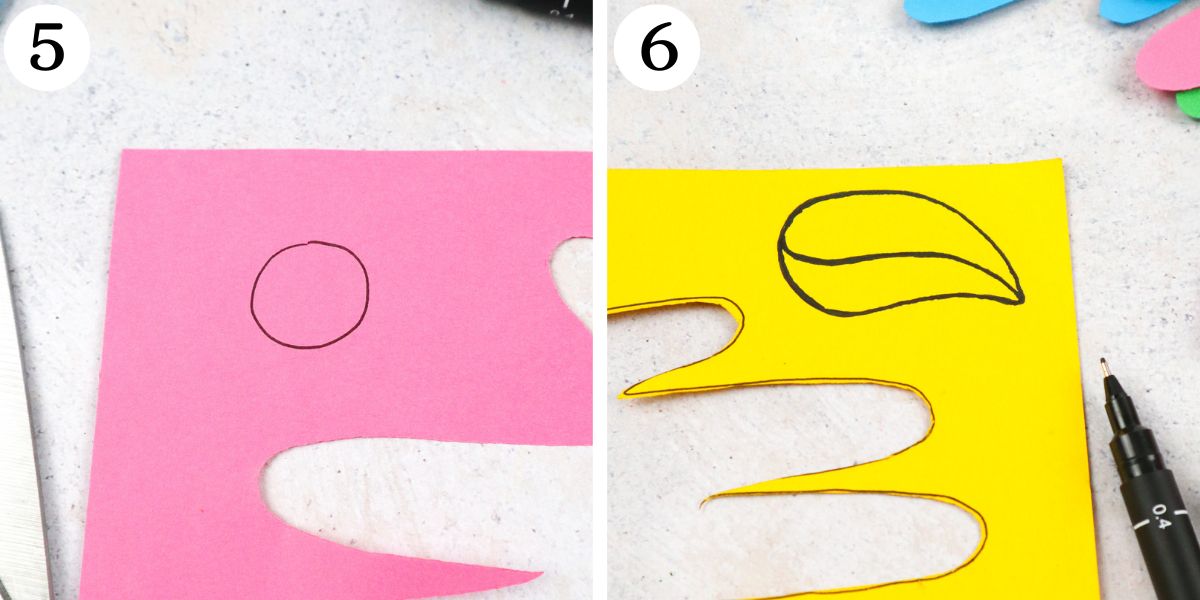
Step 5. Draw a round cheek for your parrot and cut it out.
Step 6. Draw your parrot’s beak and cut it out.
Step 7. We have all the elements of our parrot. Now it’s time to put everything together!
Step 8. Let’s start with the handprint feathers. Take one colorful handprint and glue it to the very bottom of the parrot’s triangular tail.
The fingers should be facing downward. Now, take another colorful handprint and glue it a little bit above the first one.
Keep gluing your feathers on in this way until 5 of them have been attached to your parrot.

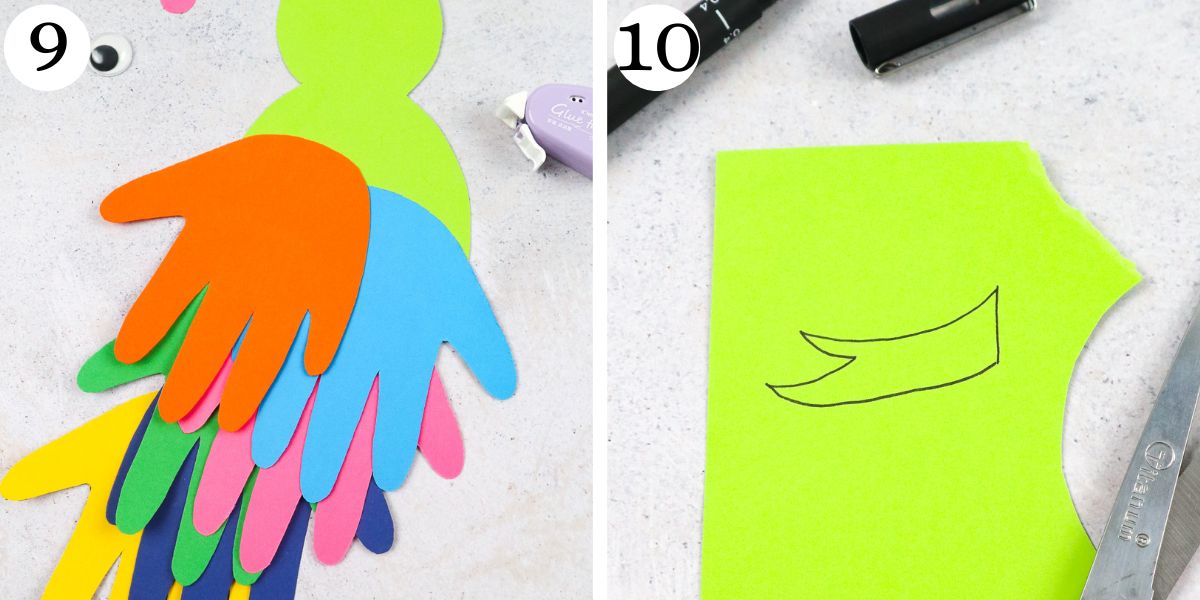
Step 9. Add the last handprint feather as your parrot’s wing. It should be placed above the rest of the handprint cut-outs.
Step 10. Draw a funny-shaped feather and cut it out. Glue this to the back of your parrot’s head.
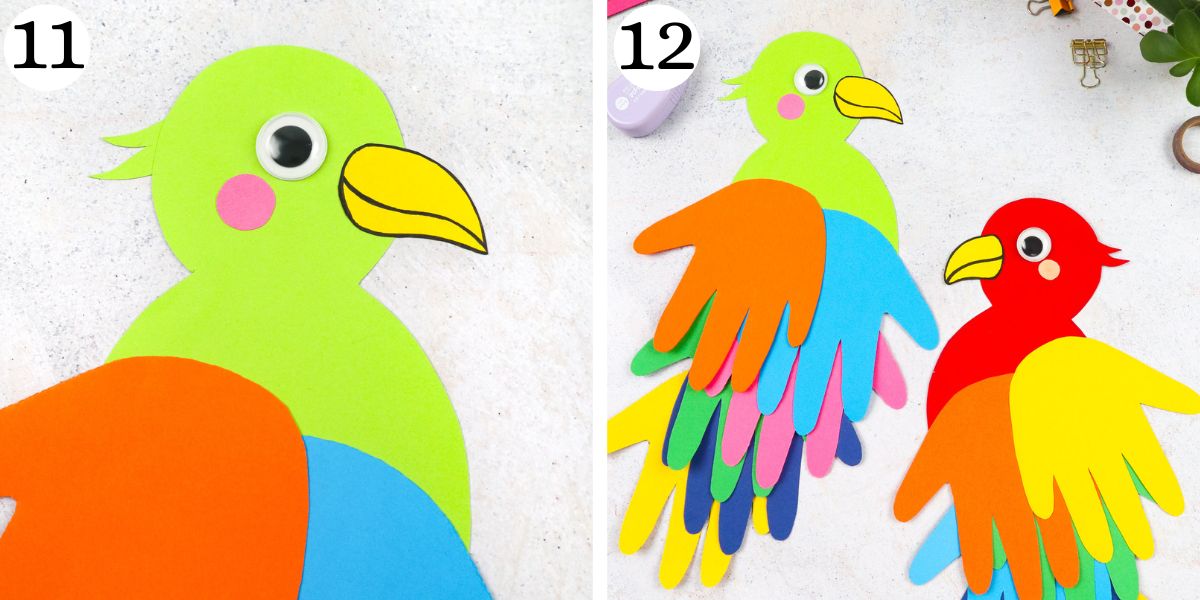
Step 11. Attach your beak, eye, and cheek to the head. You can use a googly eye like I did, or just draw one on with black marker.
Step 12. You have completed your colorful handprint parrot. Enjoy!
Watch How to Make
How Long Do These Parrots Take to Make?
These parrots do not take a long time to make at all. In fact, you can probably put one together in about 15 minutes.
Keep in mind that if you are helping kids trace and cut, it might take a little bit longer. Still, you should be able to make an entire parrot in 30 minutes or less!
More Crafts Like This
Colorful Handprint Parrots
Video Tutorial
Equipment
- Scissors
Materials
- Craft paper sheet A4
- 5 sheets Colored craft paper 7"x 7" or A5
- Black marker
- Glue tape *
- 1 Googly eye
- Pencil Optional
Instructions
- Trace your hand (or your child’s hand) on the paper. Arrange all your colored paper beneath this hand.
- Start cutting the traced hand. When you are done, you should have six colored hands.
- Draw your parrot’s body, using a circle for the head, a larger oval underneath for the body, and a triangular tale on the bottom.
- Cut your parrot out.
- Draw a round cheek for your parrot and cut it out.
- Draw your parrot’s beak and cut it out.
- Gather all your parrot’s features. It’s time to put everything together.
- Take one colorful handprint and glue it to the bottom of the parrot’s tail, with fingers facing downward. Grab another handprint and glue it a little bit above the first one.
- Keep gluing until only one handprint remains.
- Add the last handprint feather as your parrot’s wing. It should be placed above the rest of the handprint cut-outs.
- Draw a funny-shaped feather, cut it out, and glue it to the back of your parrot’s head.
- Attach your beak, eye, and cheek to the head. Add a googly eye or draw one on.


