DIY Paper Watermelon
This post may contain affiliate links: full affiliate disclosure.
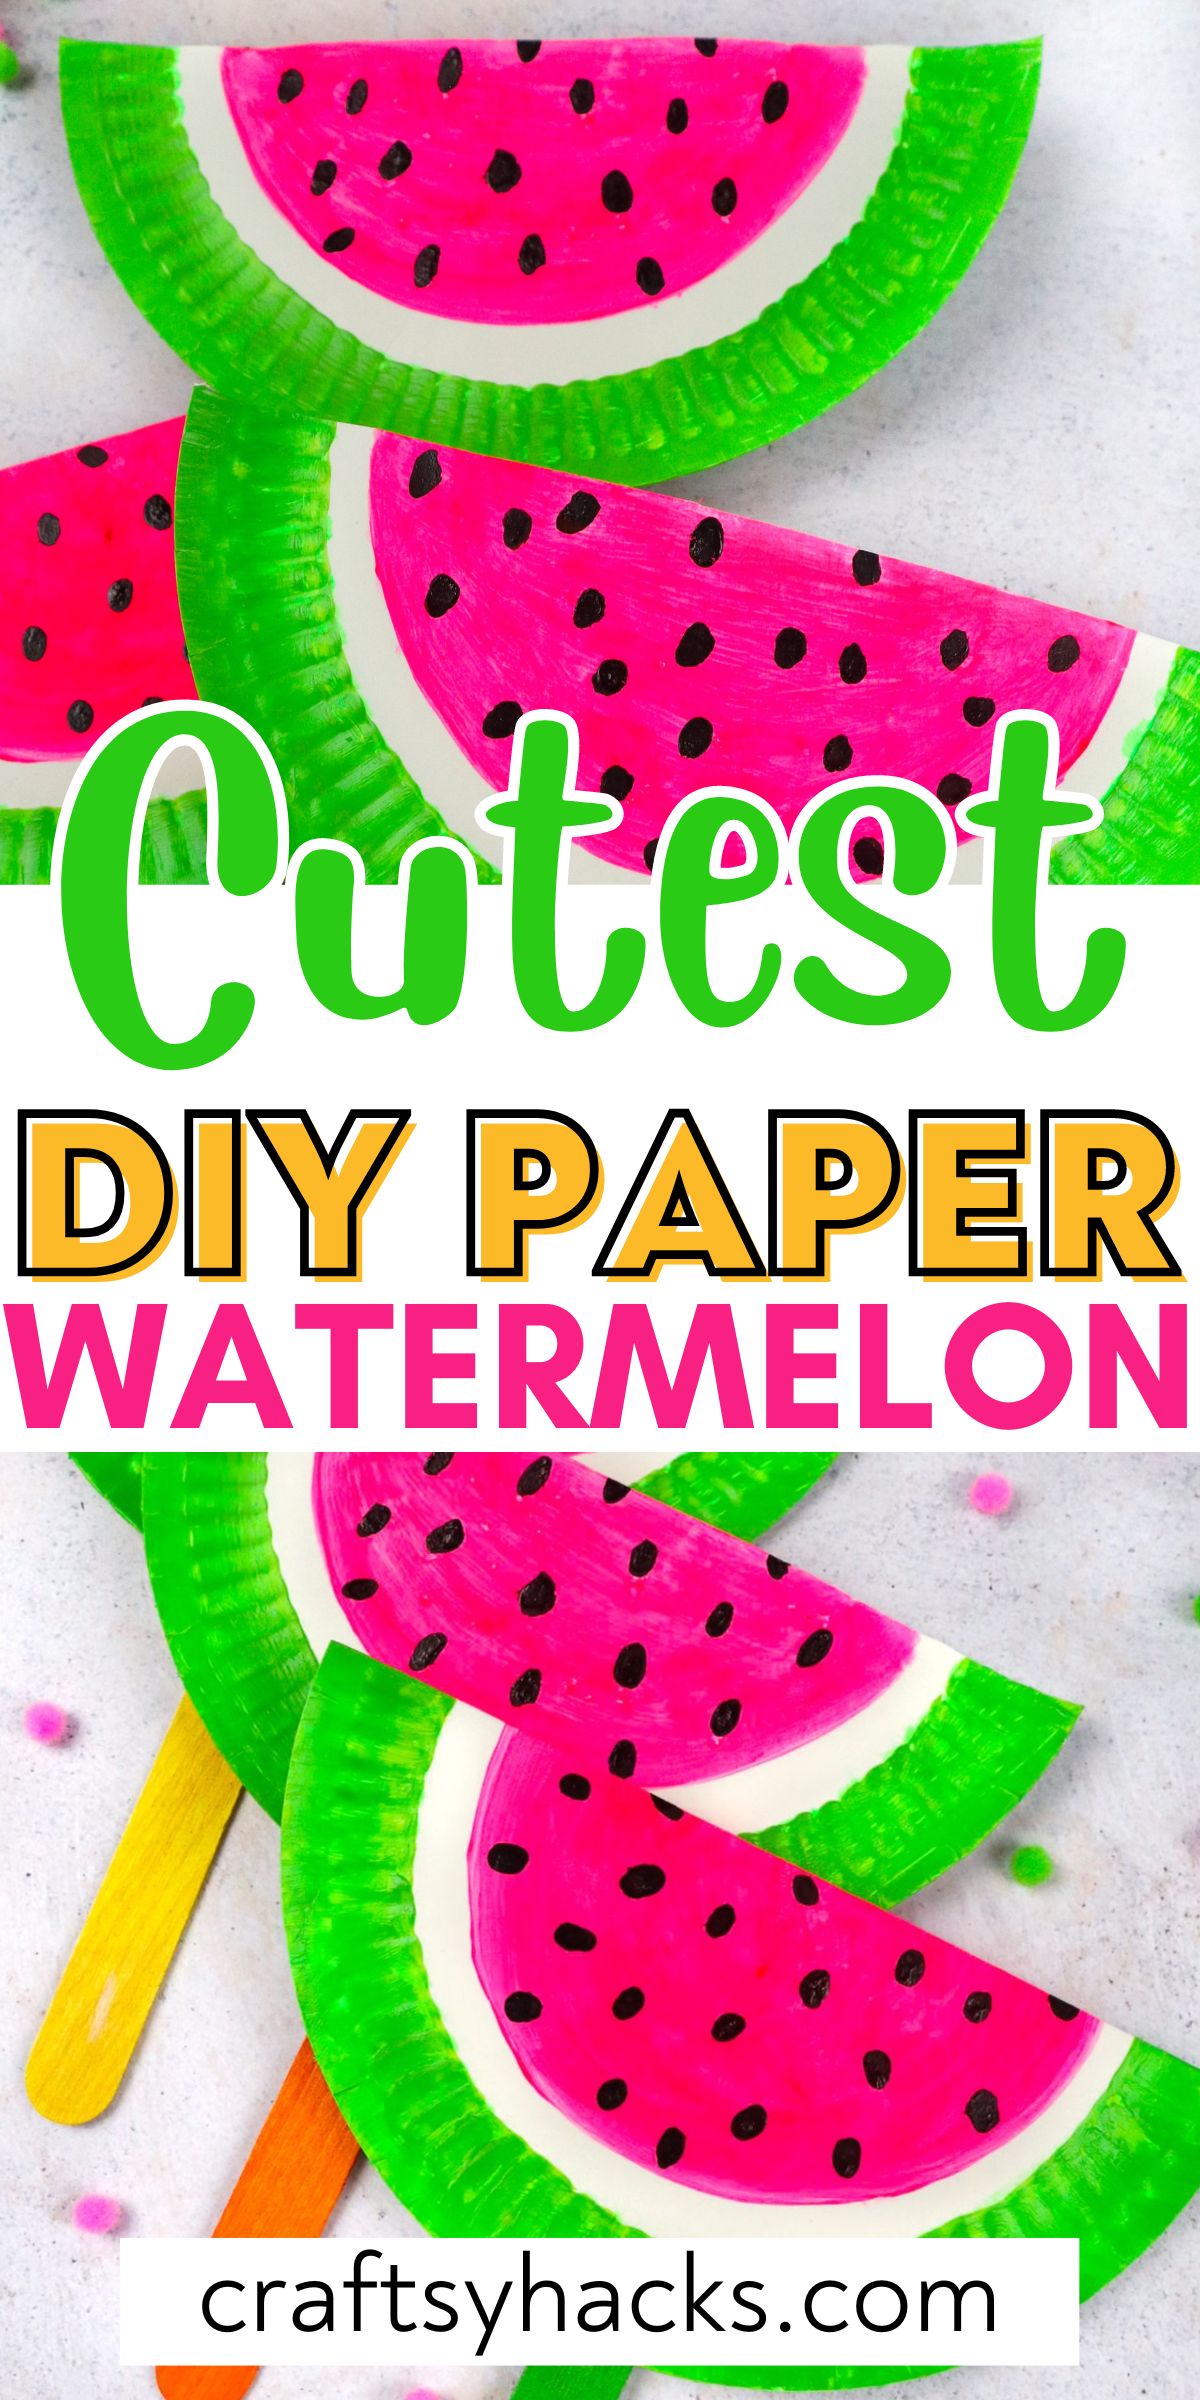
Watermelons are the perfect summer fruit, don’t you think? This adorable DIY paper watermelon is a great summer craft for little ones.
They are juicy and refreshing and make an excellent dessert or side dish for a backyard barbecue.
Watermelons are a must-have snack in my house during the hot summer months. Just looking at a watermelon makes me feel happy!
Whether you want to make them with your own kids or incorporate them into a lesson plan for summer camp, the kiddos in your life will enjoy creating this with you.
These are easy to make with just a few materials including paper plates, which are one of my favorite budget-friendly and versatile craft supplies.
You can hang the finished products up in the classroom or your house to get that lovely summer vibe!
They also make a perfect fan for those hot summer days. Let’s get started on making these cute watermelons with a few simple instructions!
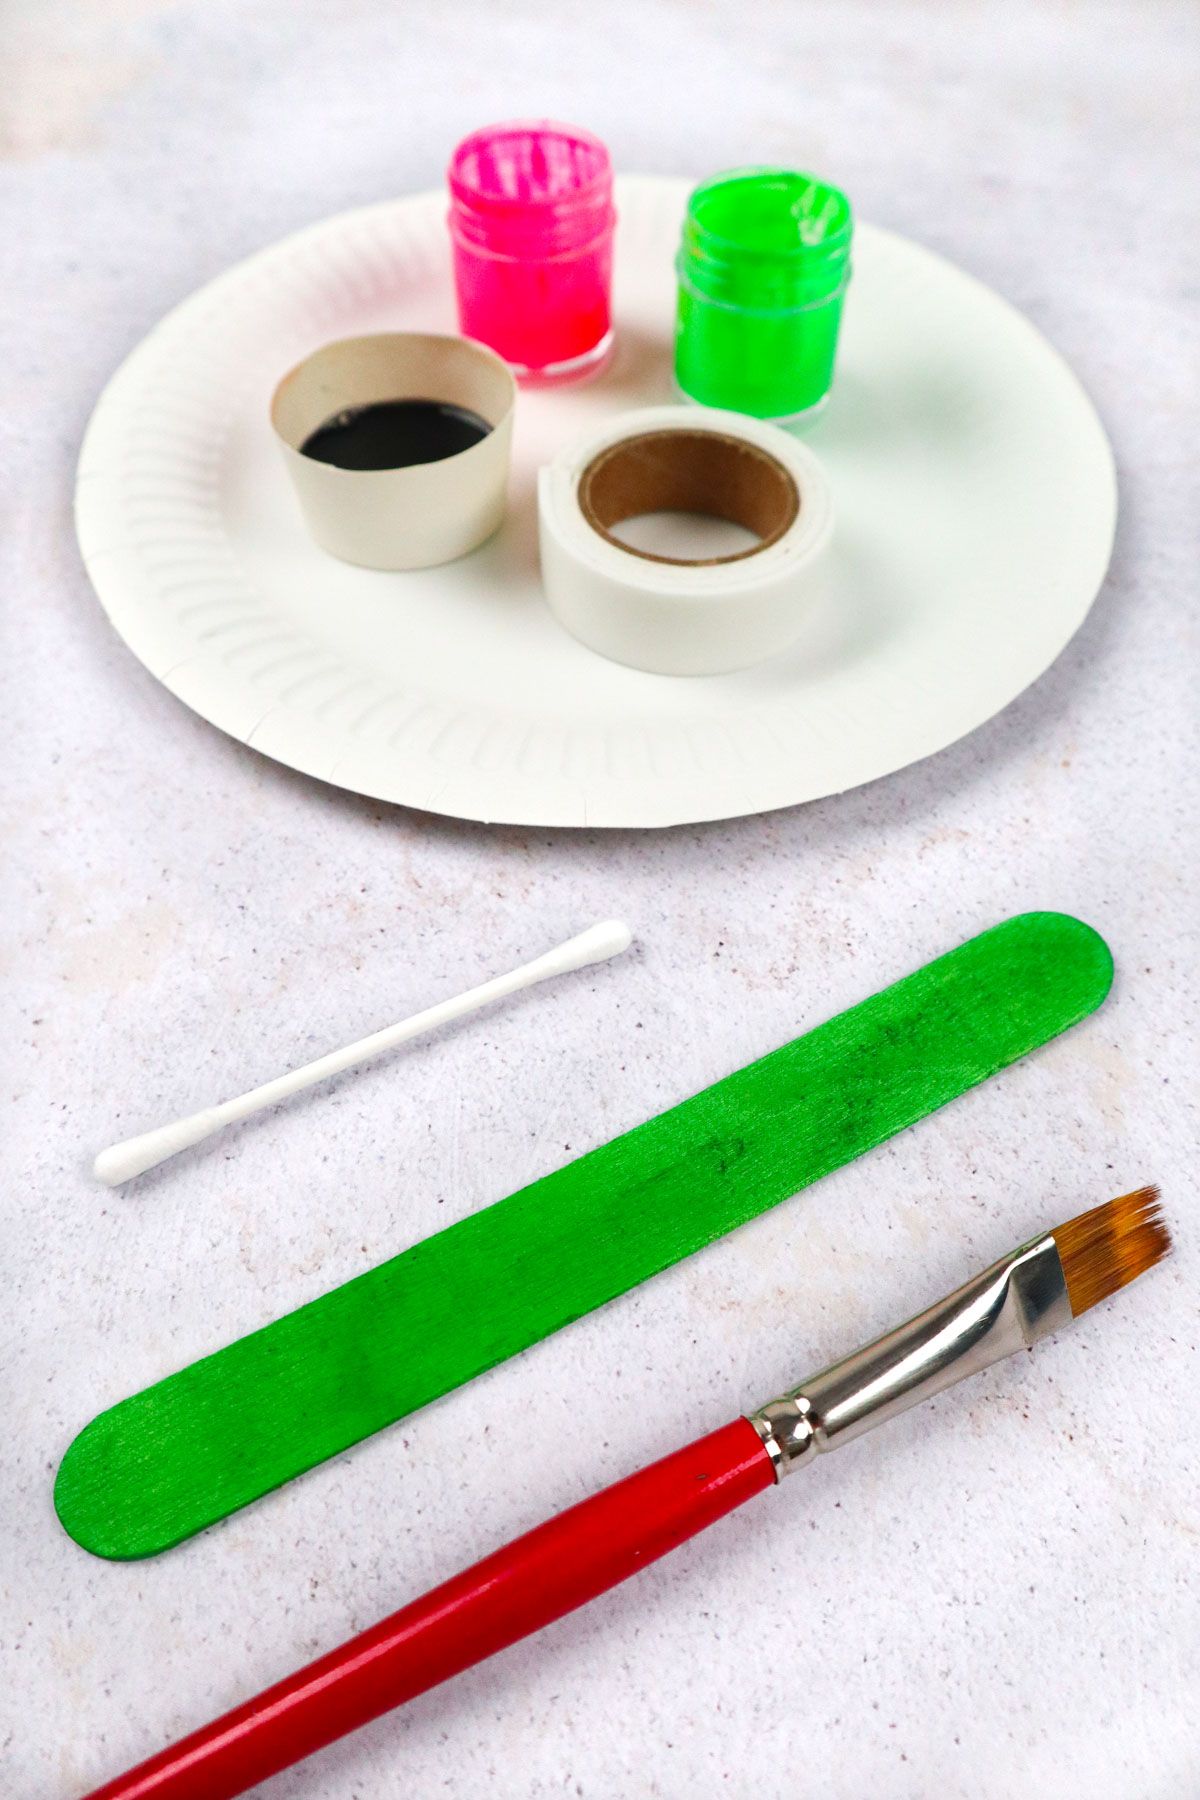
Supplies You’ll Need
Acrylic paints – pink, green, black
* Or a hot glue gun instead
** I have used pre-painted sticks. You may buy unpainted sticks and color them on your own or leave them pure.
How to Make a DIY Paper Watermelon
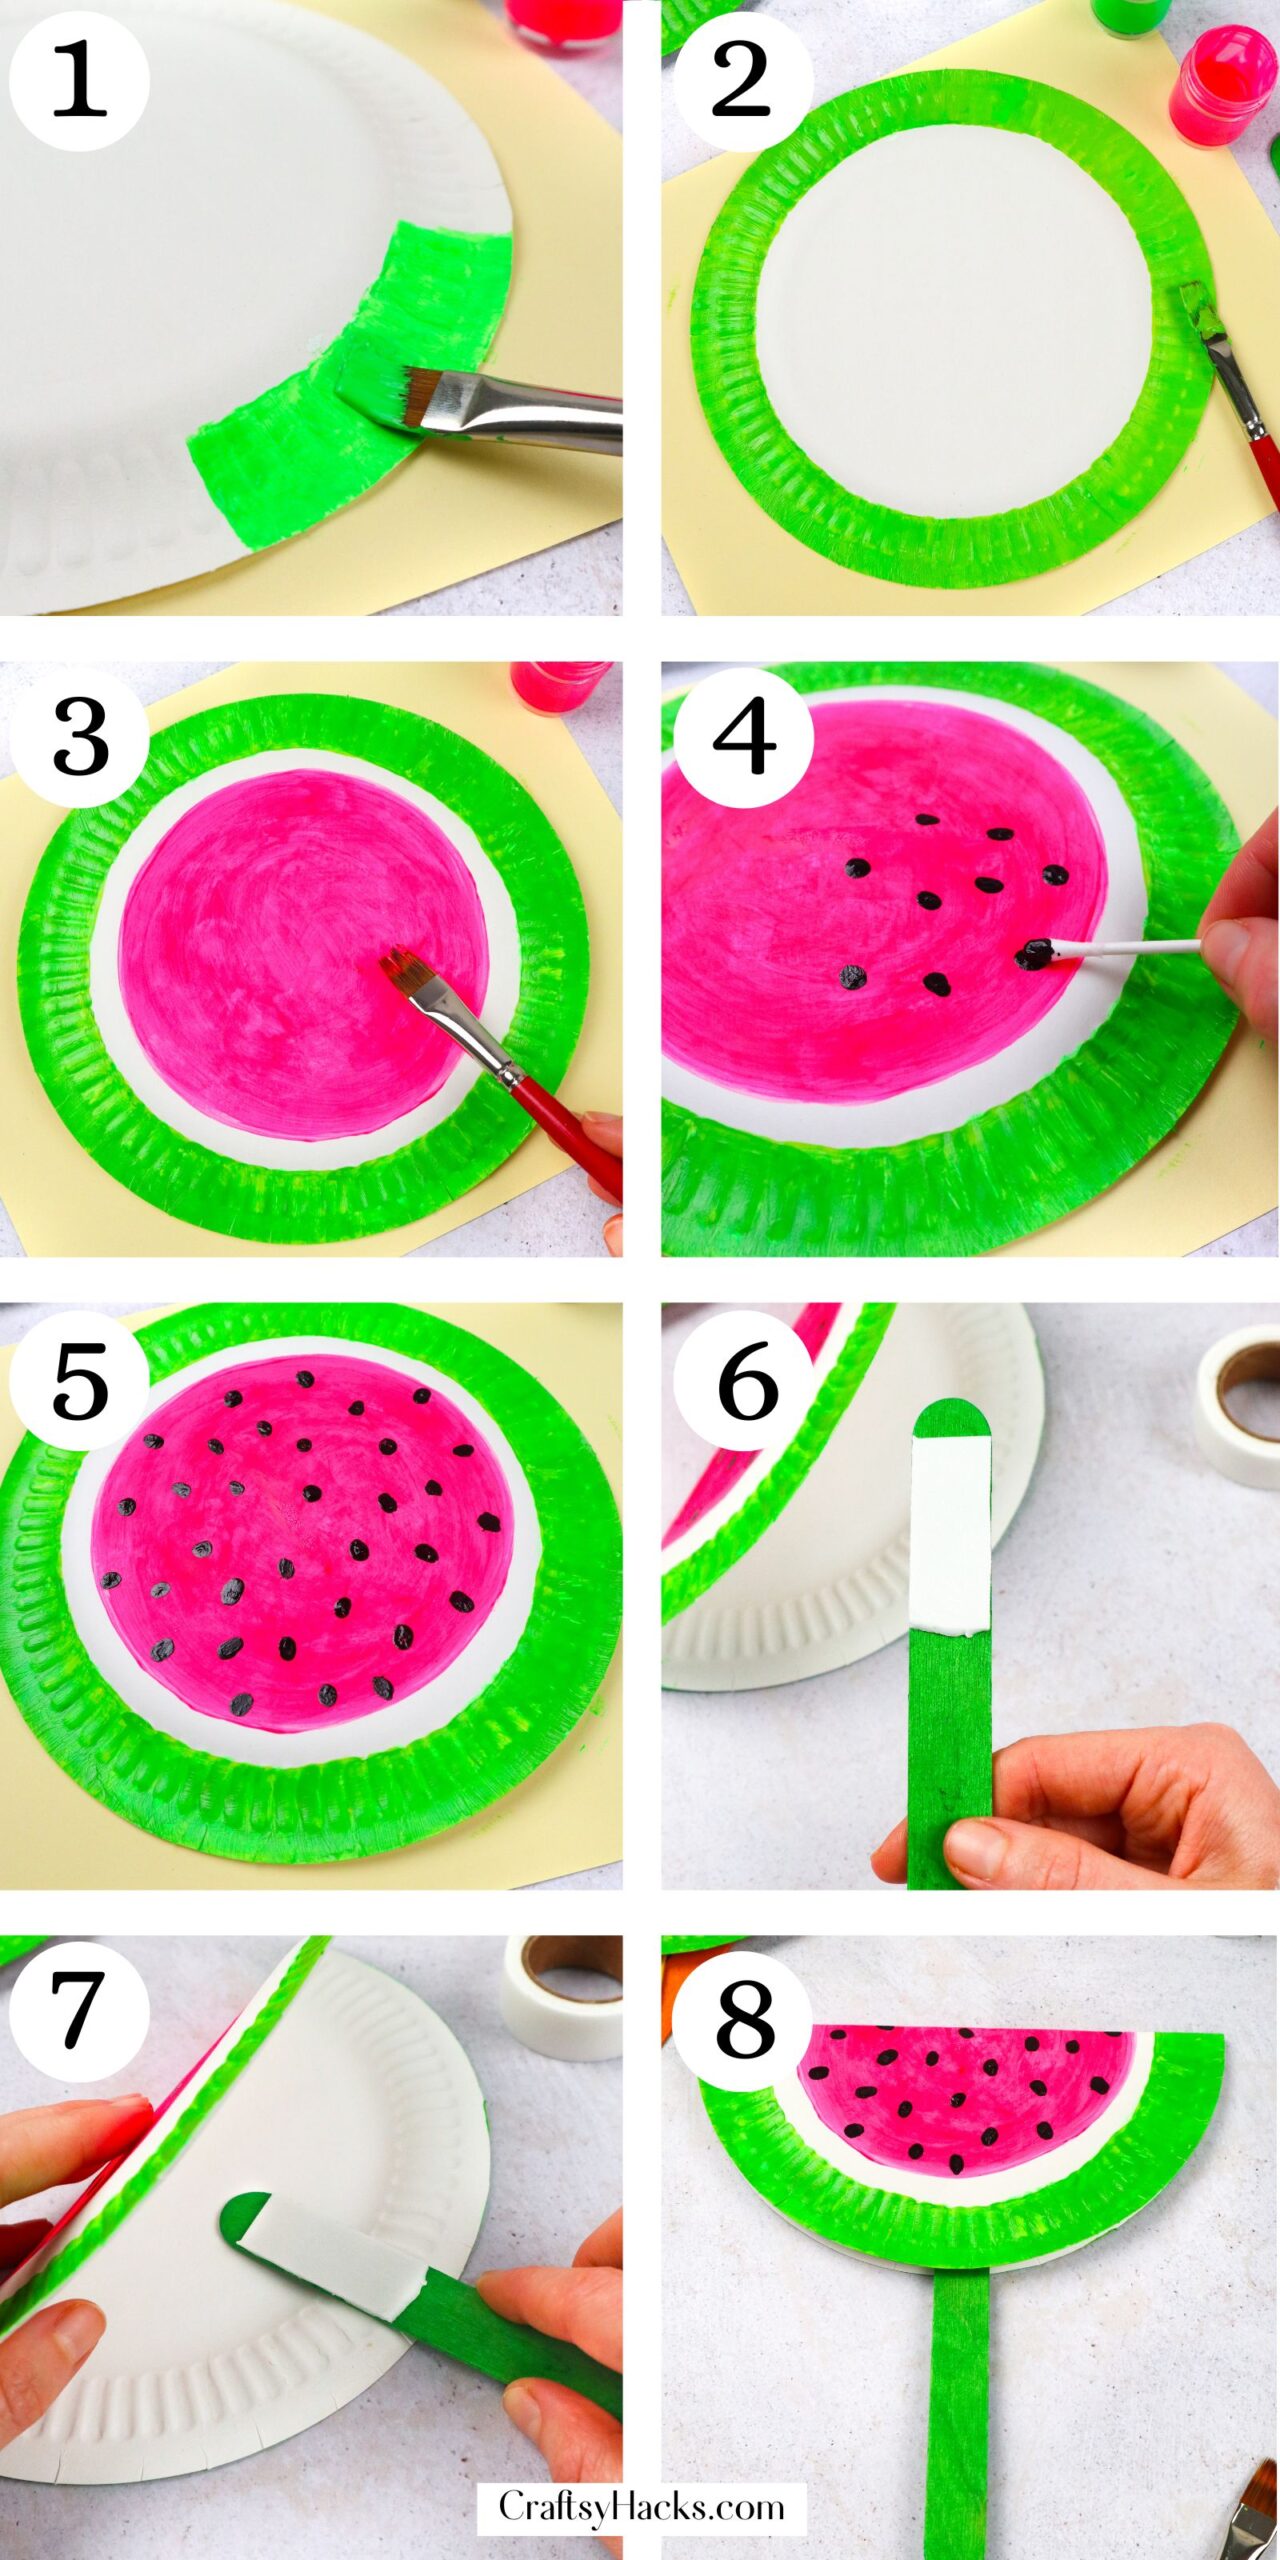
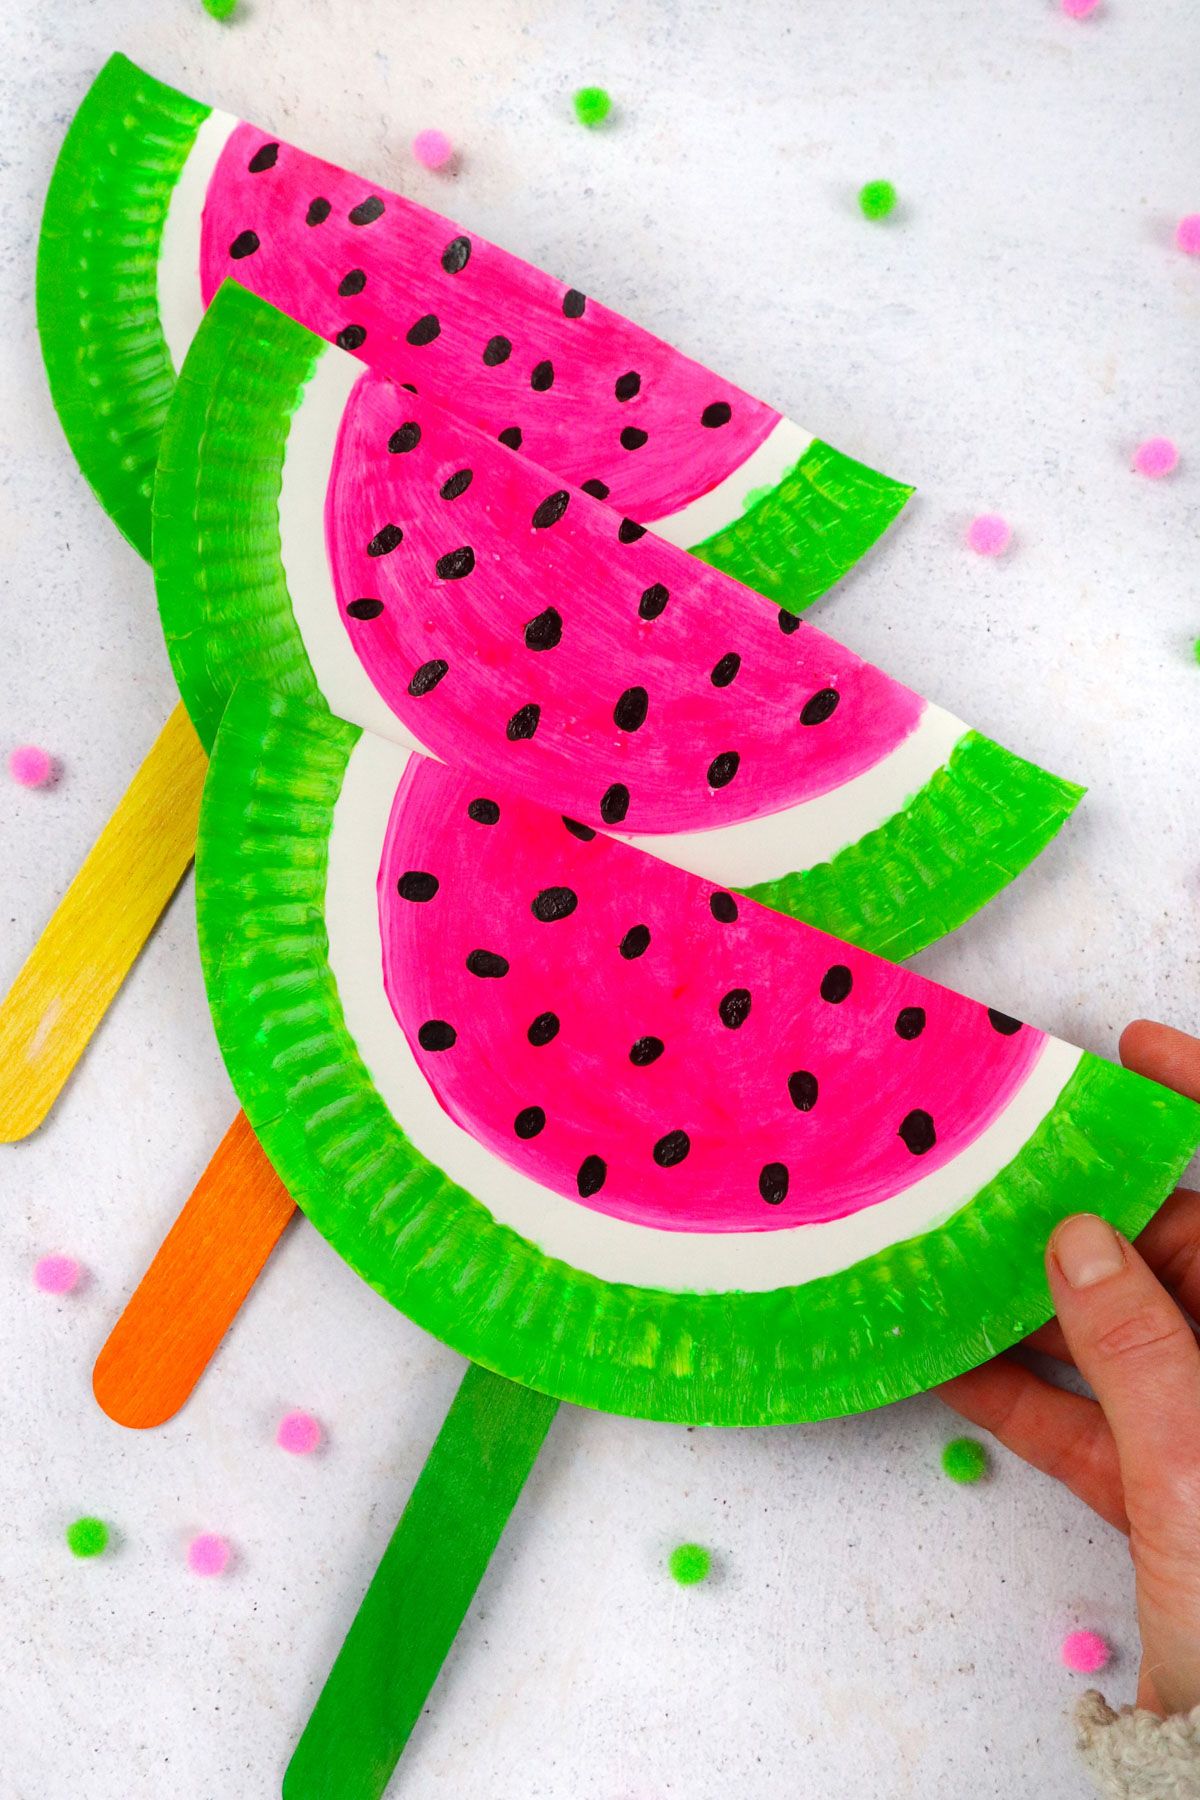
Step 1. Get started by grabbing a paper plate and flipping it over to the back. Begin painting the rim of the plate with your acrylic green paint.
Step 2. Continue painting until the entire rim is green.
Step 3. Grab your pink paint and fill in the center of your plate until it is beautifully pink. Allow it to dry and see how it looks. If it is not as vibrant as you’d like, you can always add a second coat of paint and then let that one dry as well.
Step 4. It is time to add the watermelon seeds now! Get some black paint and a cotton swab.
Dip your swab into the paint and begin to dot the pink watermelon center with the black paint to create the seeds.
Step 5. You will be finished making the seeds when your entire pink circle is dotted with black paint. Allow the paint to dry before continuing onto step 6.
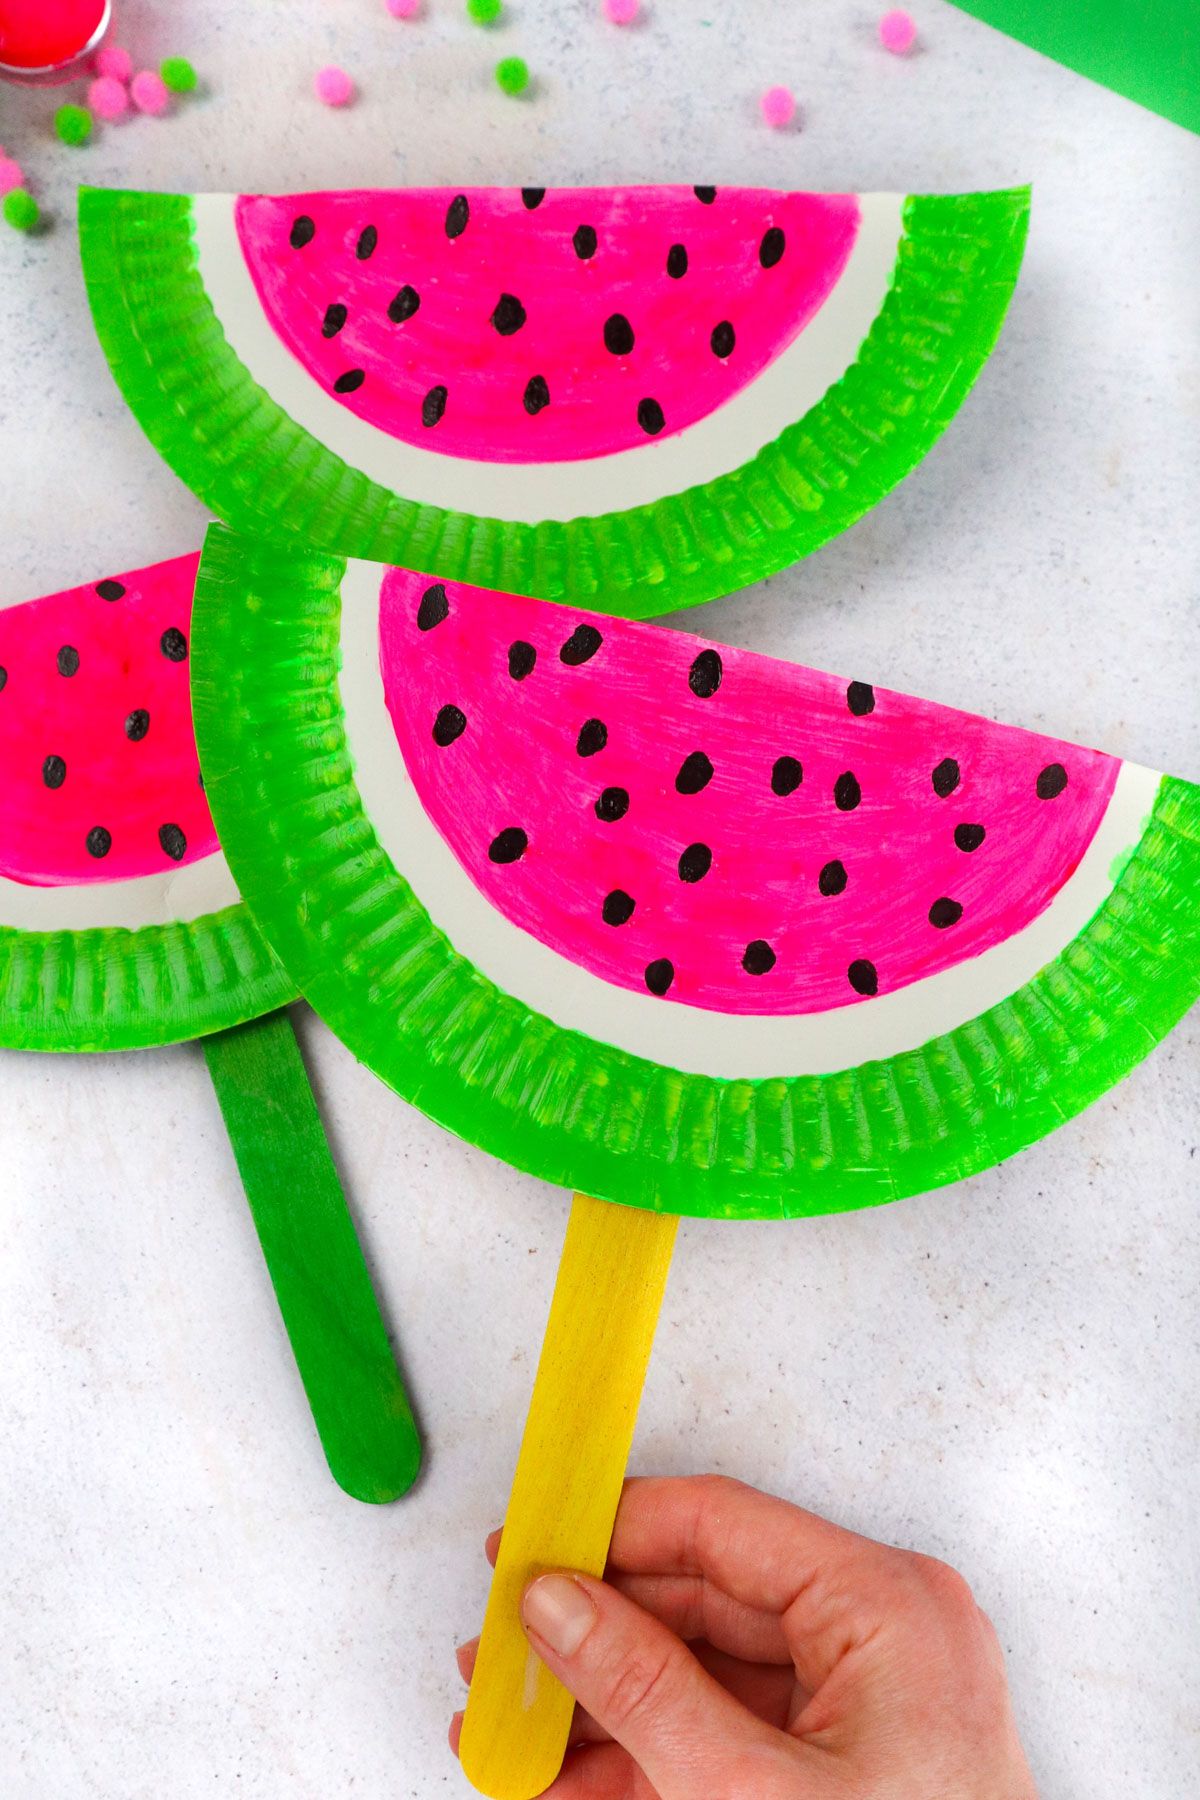
Step 6. Flip over your plate so that the dried and painted side is facing down. Fold the plate in half and get a piece of double-sided tape to place on both sides of a craft stick.
If you have unpainted craft sticks and wish to paint them, you can do that now. Just allow them to fully dry before moving on!
Keep in mind that you can always use a hot glue gun instead of double-sided tape on your craft stick if you prefer.
Step 7. Place the craft stick in between both sides of your plate on the unpainted side of the plate.
Step 8. Close your watermelon securely so that the painted side is visible from both sides, front and back. Enjoy your summery watermelon!
Watch How to Make
How Long Do These Watermelons Take to Make?
These watermelons are fast and easy to make. The longest part of this craft is waiting for the acrylic paint to dry.
Depending on the type of acrylic paint you are using, it could take anywhere from 30-60 minutes to completely dry.
The other parts of the project are super quick and don’t require much time at all. Without factoring in drying time, you can expect to finish these in about 20-30 minutes.
If you are making these with a group of little kids, you can use the drying time to discuss the nutritional benefits of watermelons and maybe even give them the opportunity to try some delicious watermelons for themselves!
This craft is a great afternoon project for kiddos.
More Fun Crafts
- Ladybug Craft
- Coffee Filter Butterflies
- Paper Plate Rainbow Craft
- Paper Plate Snails
- Pipe Cleaner Flowers
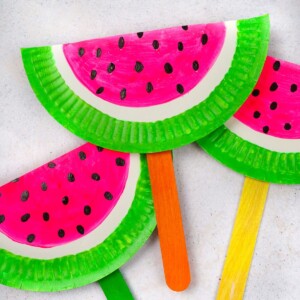
Cutest DIY Paper Watermelons
Video Tutorial
Equipment
Materials
- Paper plate
- Acrylic paint pink, green, black
- Cotton swab
- Double-sided tape or hot glue gun
- Large crafting stick
Instructions
- Grab a paper plate and turn it over so that you are looking at the back. Use your green paint to start painting the rim of the plate.
- Continue painting with green paint all around the rim of your paper plate until you have a beautiful green border all around.
- Now, start to paint the center of your plate pink. This is when it will really start resembling a watermelon! Keep in mind that you might need two coats of pink for this if the first coat isn’t as vibrant as you’d like. Allow the paint to completely dry before moving on.
- Let’s add those watermelon seeds now! Take your cotton swab and some black paint. Start to add black dots on top of your pink paint.
- Continue adding your dots until the entire circle is dotted with watermelon seeds. Again, let the paint dry before moving on with the project.
- Turn your plate over so that you are looking at the unpainted side. Fold it in half. Next, add a piece of double-sided tape to both sides of your craft stick.
- Insert your stick in between both sides of your plate and get ready to close your plate so that your beautiful watermelon design shows on both sides of the stick.
- Close the plate securely and enjoy your watermelon craft!


