Paper Plate Rainbow Craft
This post may contain affiliate links: full affiliate disclosure.
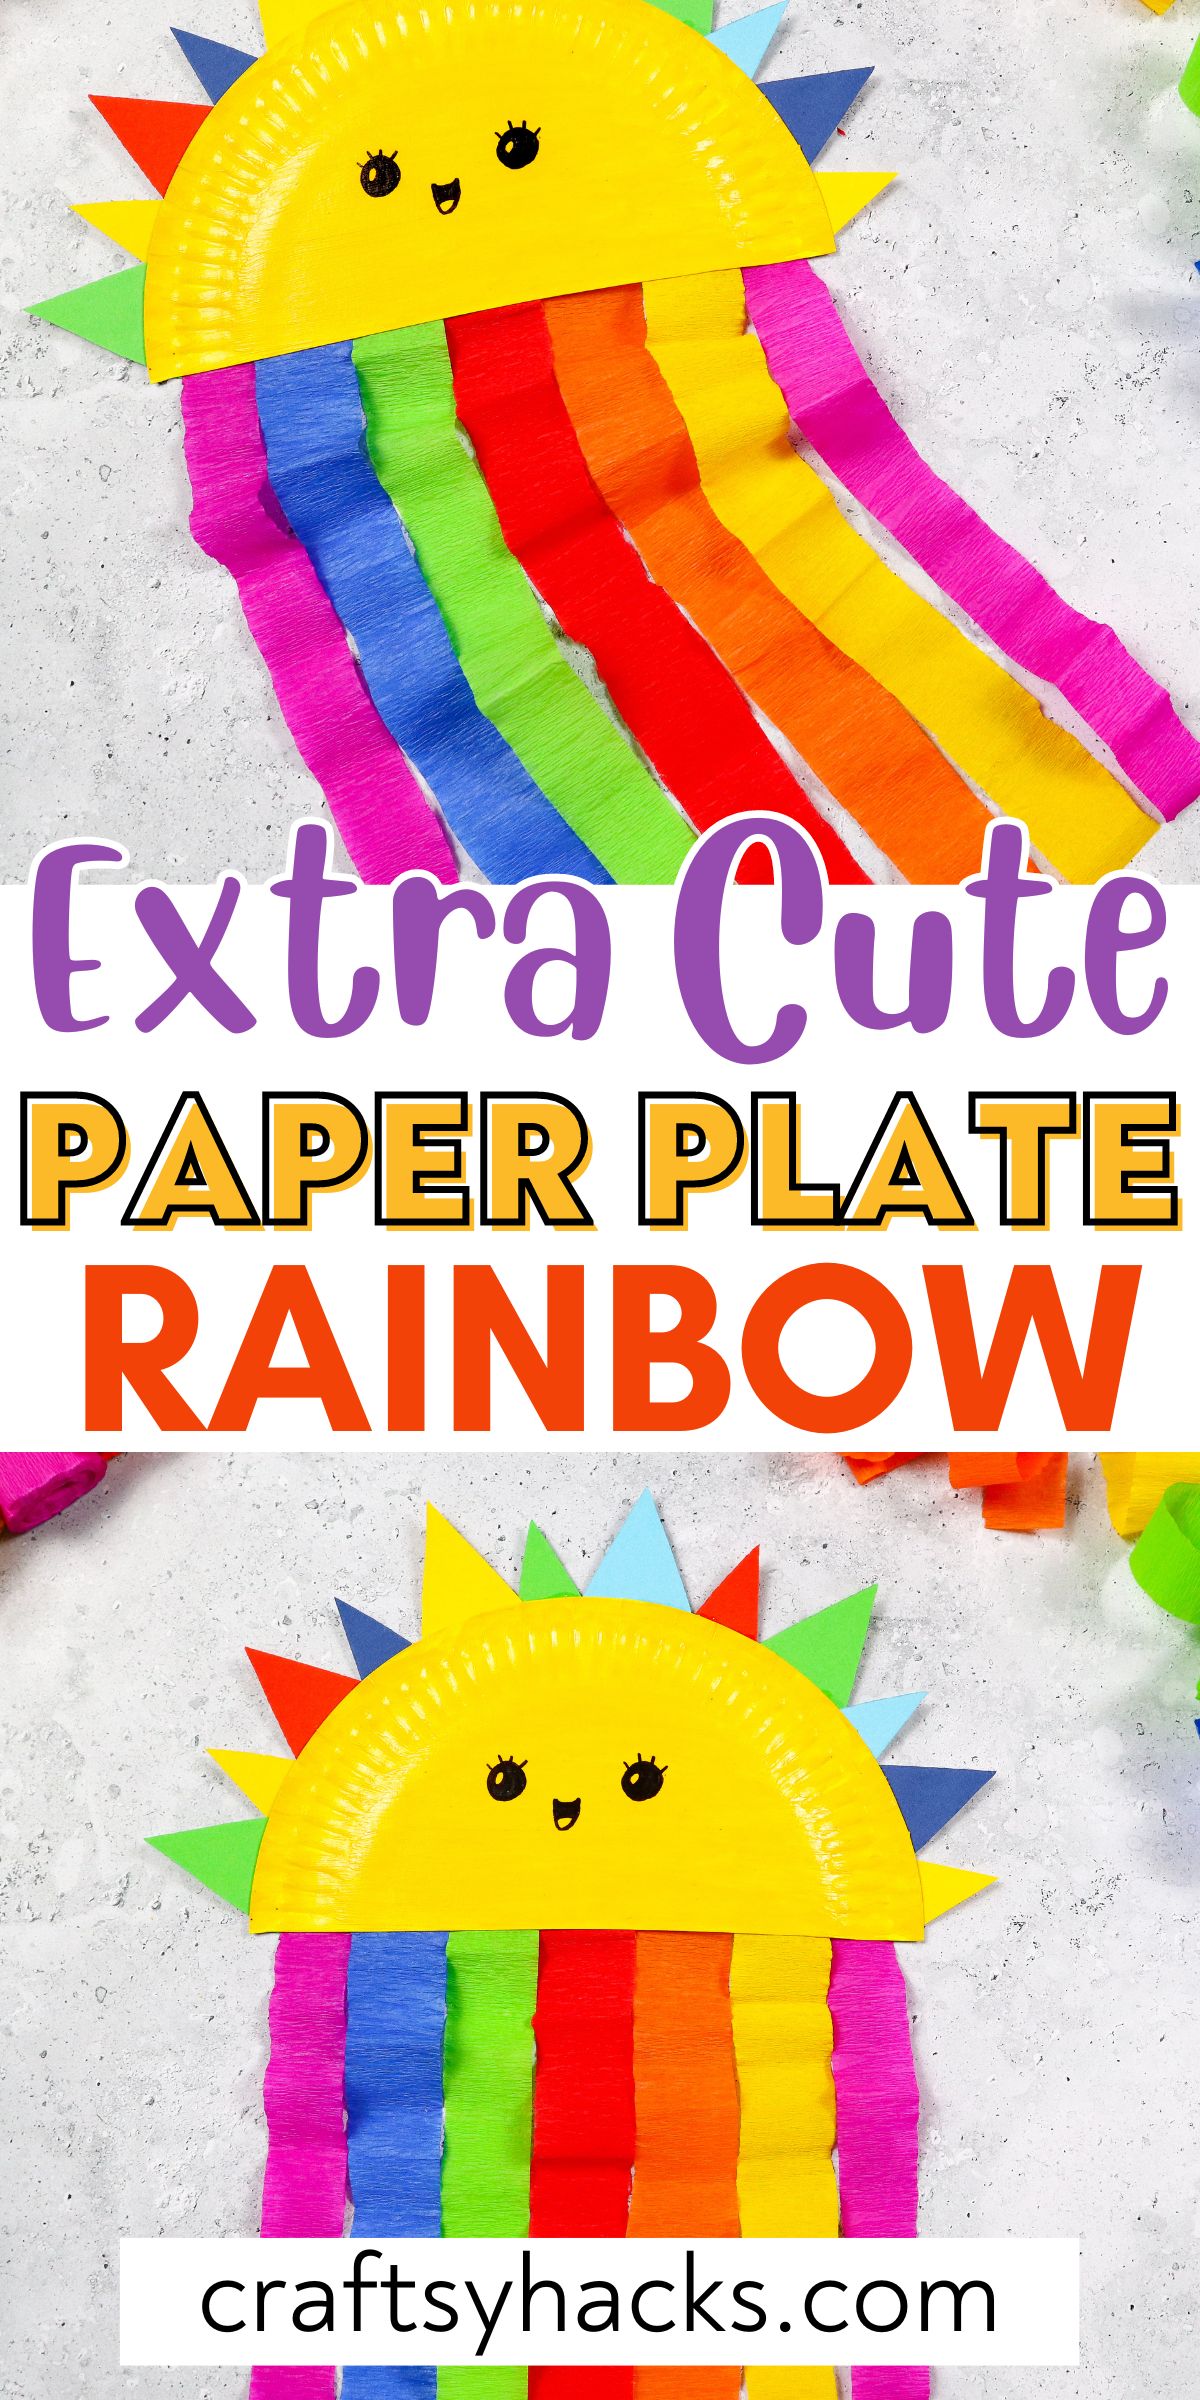
If you’re waiting for more sunny weather, you’ve come to the perfect craft! This paper plate rainbow craft is perfect for bringing some bright and sunny days into your space.
Easy and accessible to any crafter of any age or ability in skill, it’s a great option for a group of kids or a fun casual craft night. Paper plates are such a great craft option to have on hand.
Before we get fully into the post, know that if you are having trouble with the steps of the craft, check out my YouTube page.
I’ve linked the video if you need extra guidance to create this lovely little sun craft: Paper Plate Rainbow Craft.
I hope you enjoy these wonderful and bright paper plate rainbows as much as I do. Now that we’ve got all of that covered, I’m onto the post.

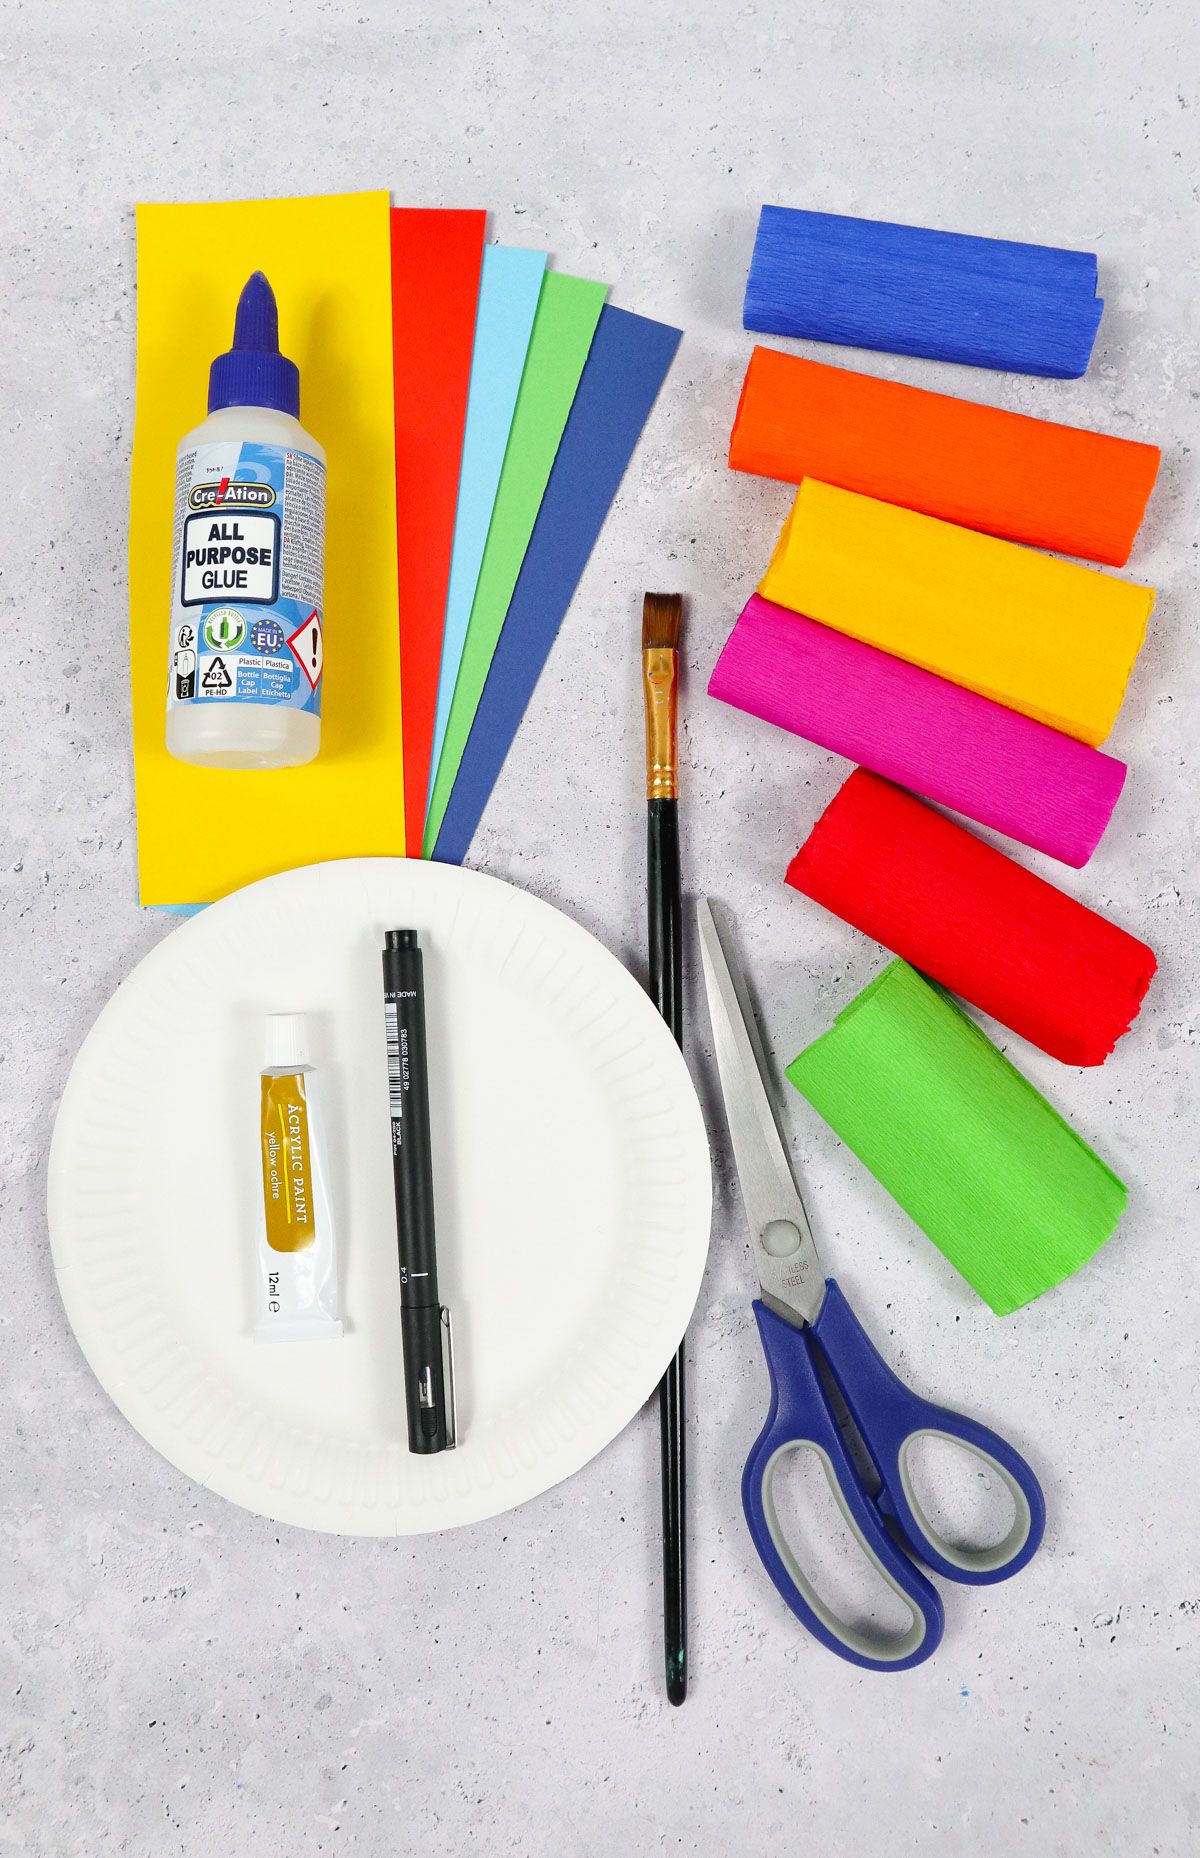
Supplies You’ll Need
Scissors
Black marker
How to Make Paper Plate Rainbow Craft
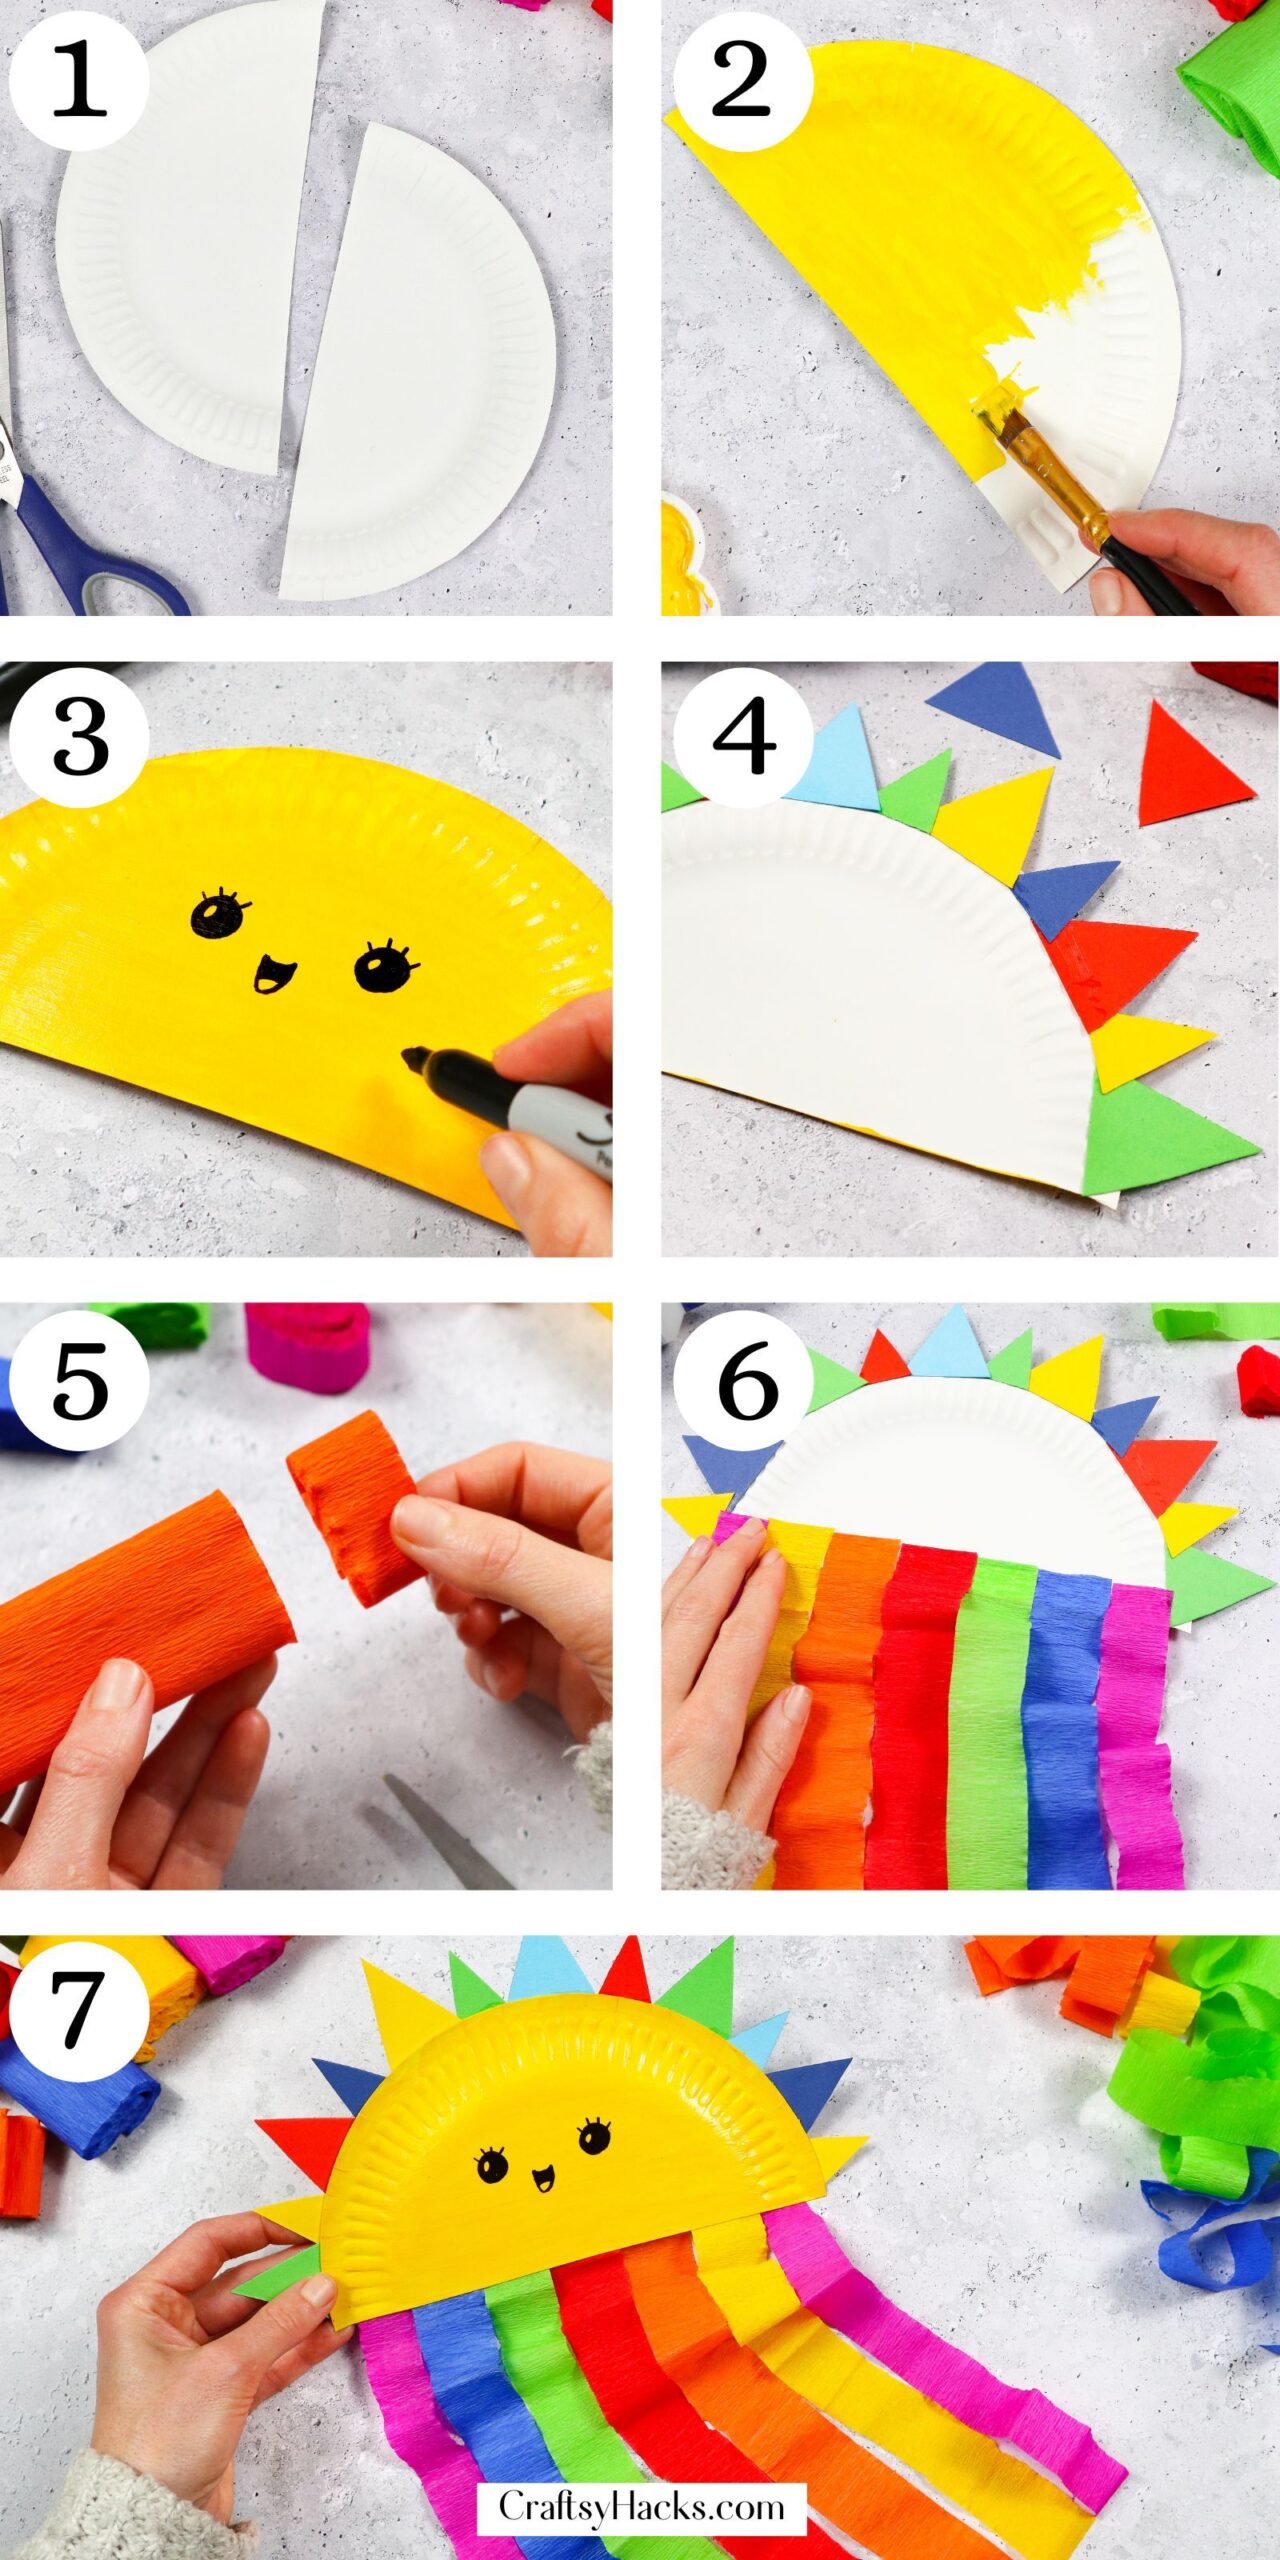
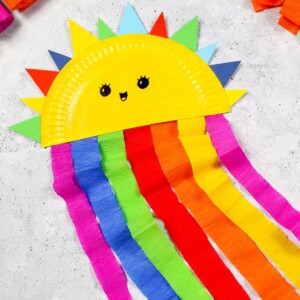
Step 1. First, grab your scissors and paper plate. We’ll cut the paper plate in half and set one half aside. If you’re doing two, keep it close by!
Step 2. Immediately after, paint the other half you still have with you yellow. Let it dry.
Repeat this step with the second half of your plate if you are making multiple. Letting the paint dry properly will make the rest of the craft go by easily.
Step 3. Once the half plate or plates are dry, draw on the eyes, smile, and any other facial features you want to add.
You can wait until later if your paint is still wet and the marker isn’t showing up well.
If the marker or adages aren’t showing up well, let the paint sit longer or substitute your marker for a different kind.
Step 4. Next, pull out some different colored sheets of paper and your scissors.
You’llcut small, colored triangles out of different colored pieces of paper and glue them to the back of the arched side of the plate.
You can make them different-sized triangles, too, if you’d like.
Step 5. Cut strips of tissue paper. Make them different lengths and colors appropriate to how you’d like them styled.
If you’d like to get extra creative (patterned scissors or specific cuts), the lengths or even shapes are fair game for streamers.
Step 6. After you’ve cut all of your colorful paper streamers, attach the strips of tissue paper to the flat side of the paper plate half.
You will not need much glue here–the less, the better. White glue can get messy here, but it does work reliably better than a glue stick.
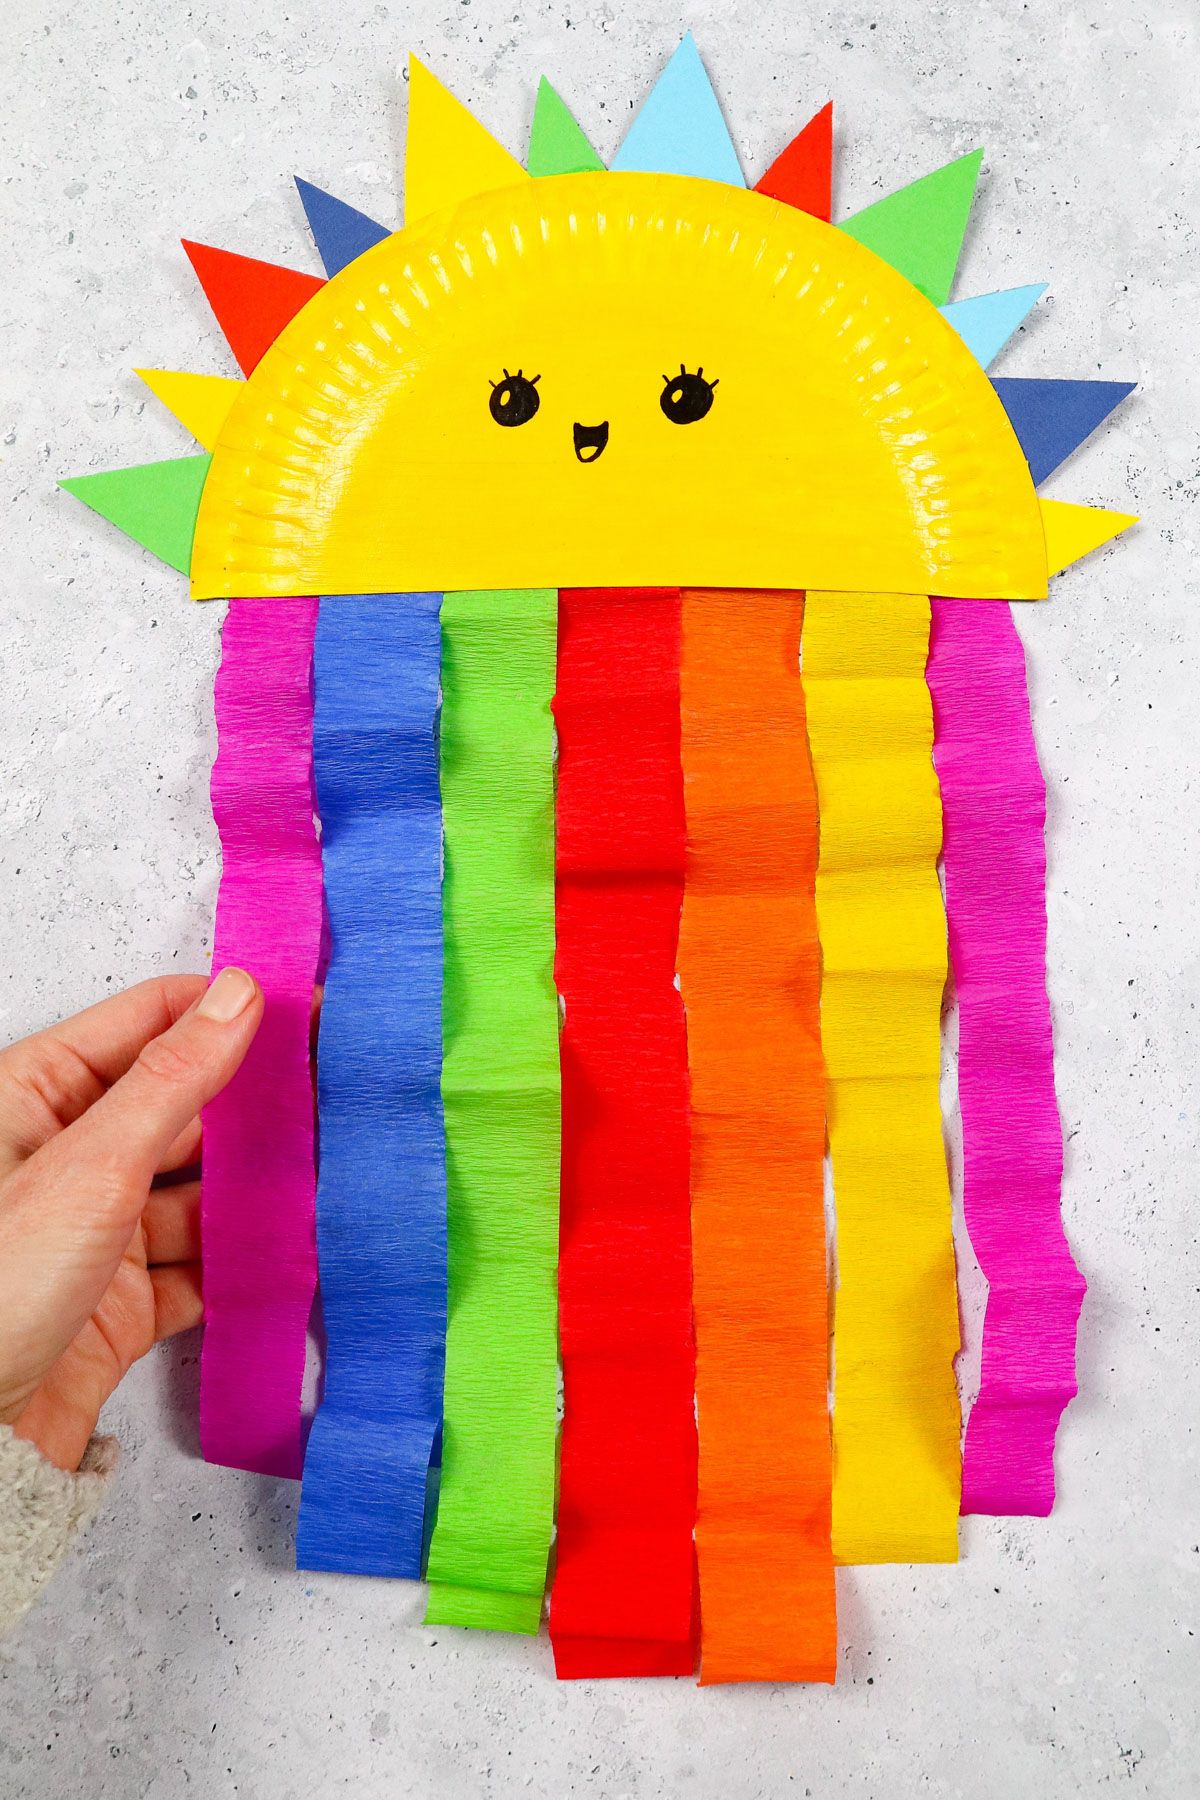
Step 7. Lastly, add any last-minute decoration items after everything has dried. I left mine pretty classic looking, but you can add fun beachy stickers, bows, sunglasses–whatever works for you and your suns.
Let everything dry properly, and there you have it!
This paper plate rainbow craft is the perfect addition to a room or place that needs extra sunshine!
It’s great for a weather lesson in a classroom or a cute seasonal addition in a kiddo’s room or play place.
More Crafts to Make
Paper Plate Rainbow Craft
Equipment
- Scissors
- Paint brush
Materials
- Paper plate
- Yellow acrylic paint
- Craft glue
- Black marker
- Colorful tissue paper
- Colorful paper sheets
Instructions
- Grab your paper plate and scissors, and cut the paper plate in half. Set one-half aside.
- Have your paint ready and paint the other half yellow. Let it dry, and grab your marker.
- With your marker, draw on the eyes, smile, and any other facial features you want to add.
- Set all your different mediums to the side and pick up your scissors again.
Cut small, different-colored triangles out of different colored pieces of paper and glue them to the back of the arched side of the plate.
You can make them different-sized triangles, too, if you’d like. - Grab your colorful tissue paper bundle and cut strips of tissue paper. Make them different lengths and colors appropriate to how you’d like them styled.
If you’d really like to make it special, use patterned scissors or cut your tissue paper in round or rigid ways. - Attach the strips of tissue paper to the flat side of the paper plate half. A bit of white glue goes a long way in this regard, even better than a glue stick.
- Once everything is absolutely dry, add any last-minute decoration items you’d like that are listed or not listed on this post.
Let it sit and dry entirely if there are new accessories or other additions that need rest time.
There you have it–an adorable paper plate rainbow craft ready to make any room shine. It is a great way to spring into Springtime.


