DIY Paper Hyacinths
This post may contain affiliate links: full affiliate disclosure.
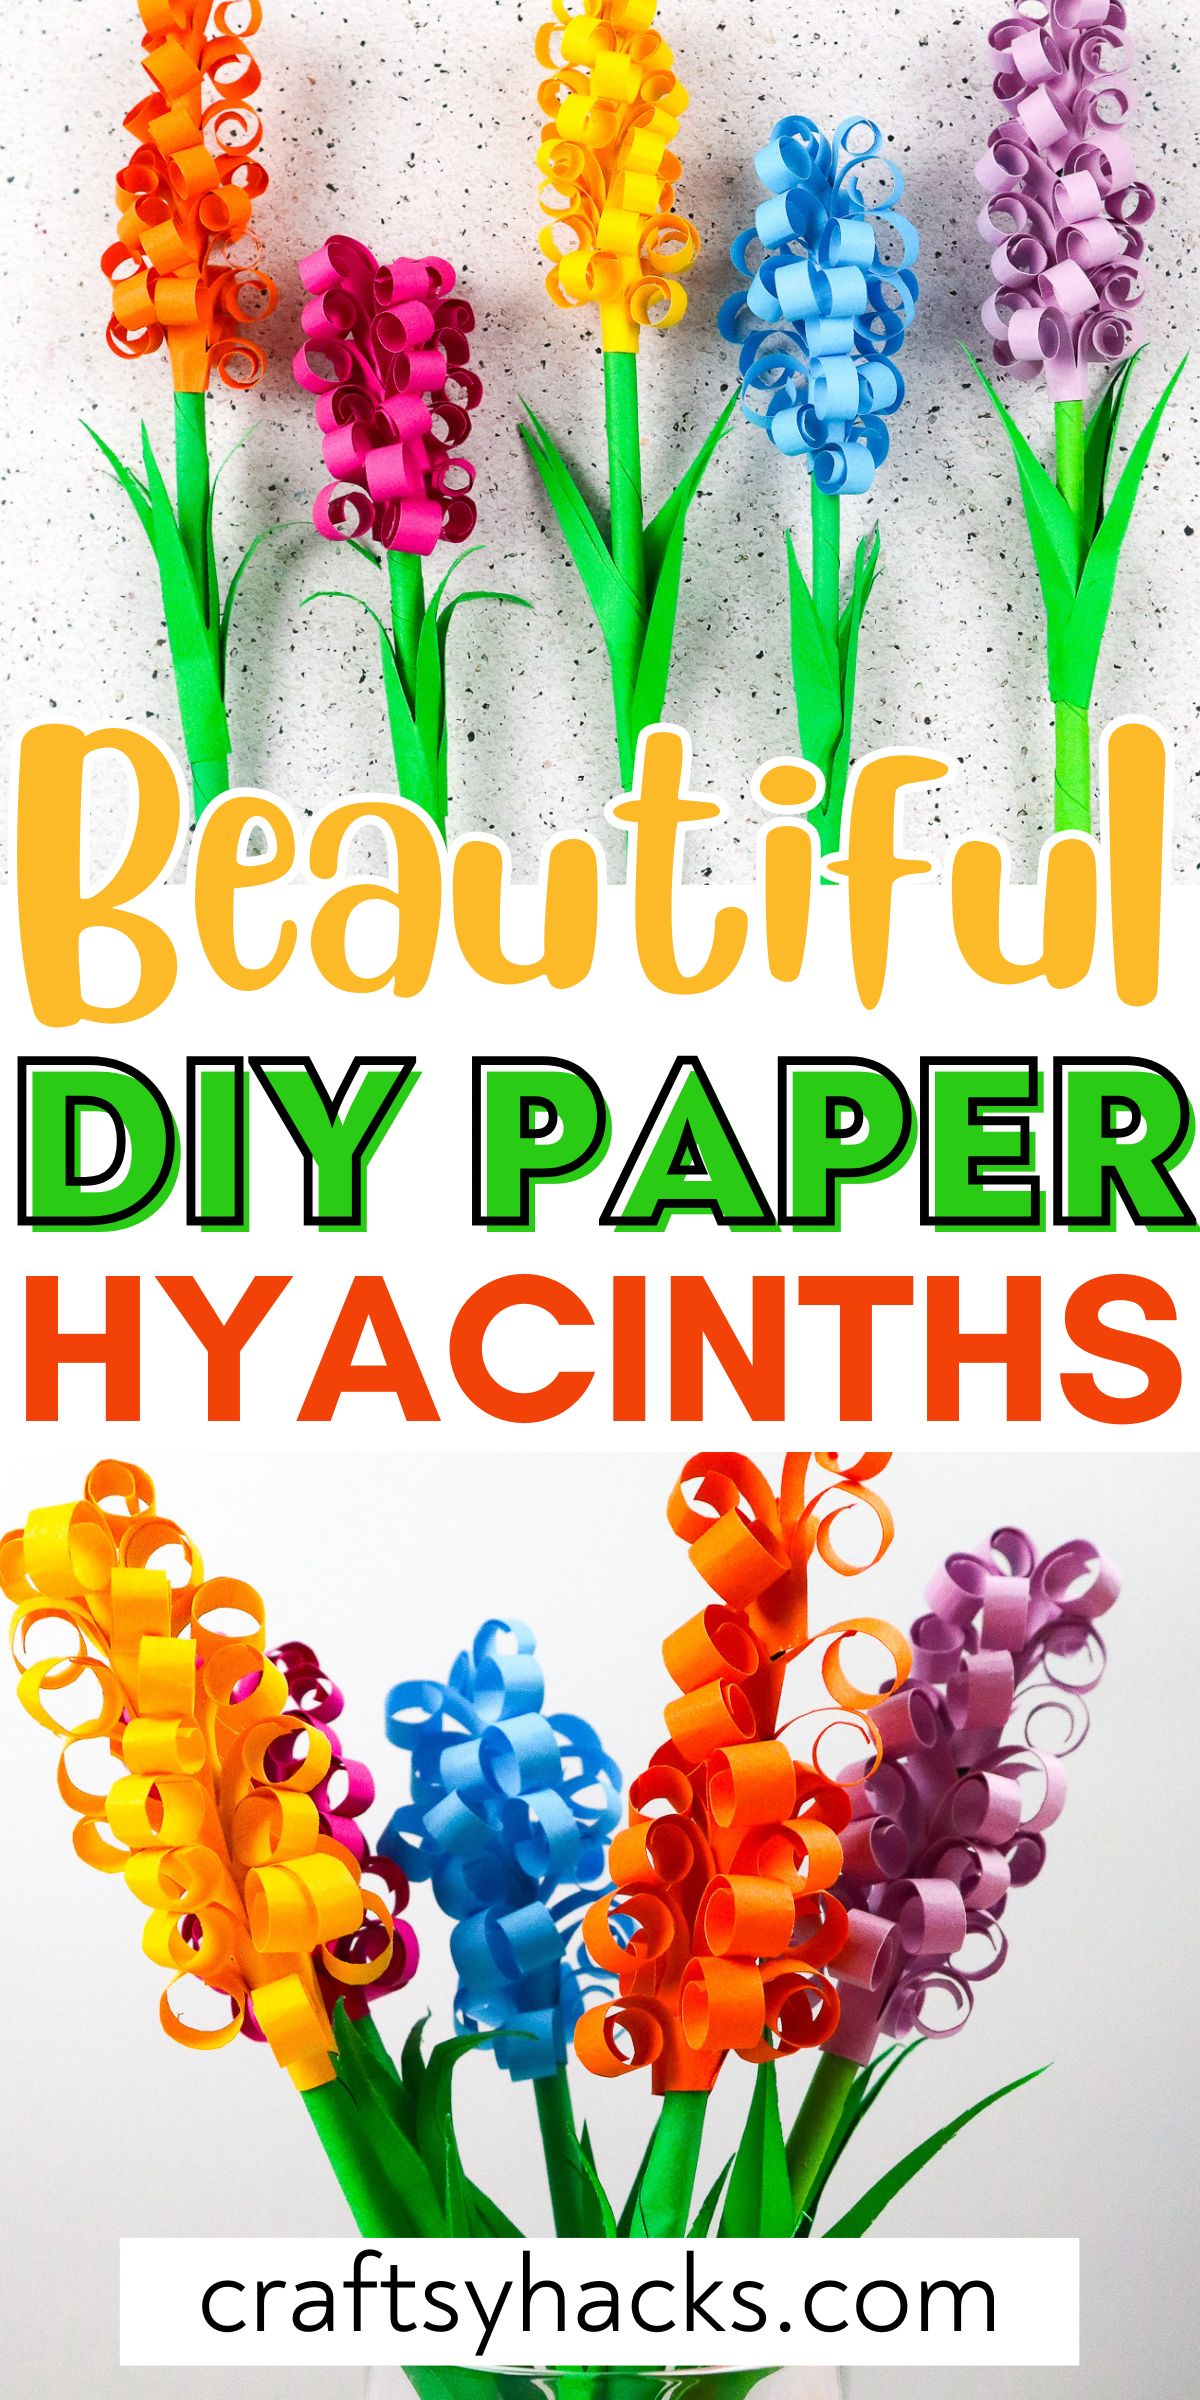
Now that warmer weather has arrived, it feels right to welcome the season with a vibrant, colorful floral craft like these DIY Paper Hyacinths.
One of the things I miss most during the long winter months is the burst of color that spring flowers bring.
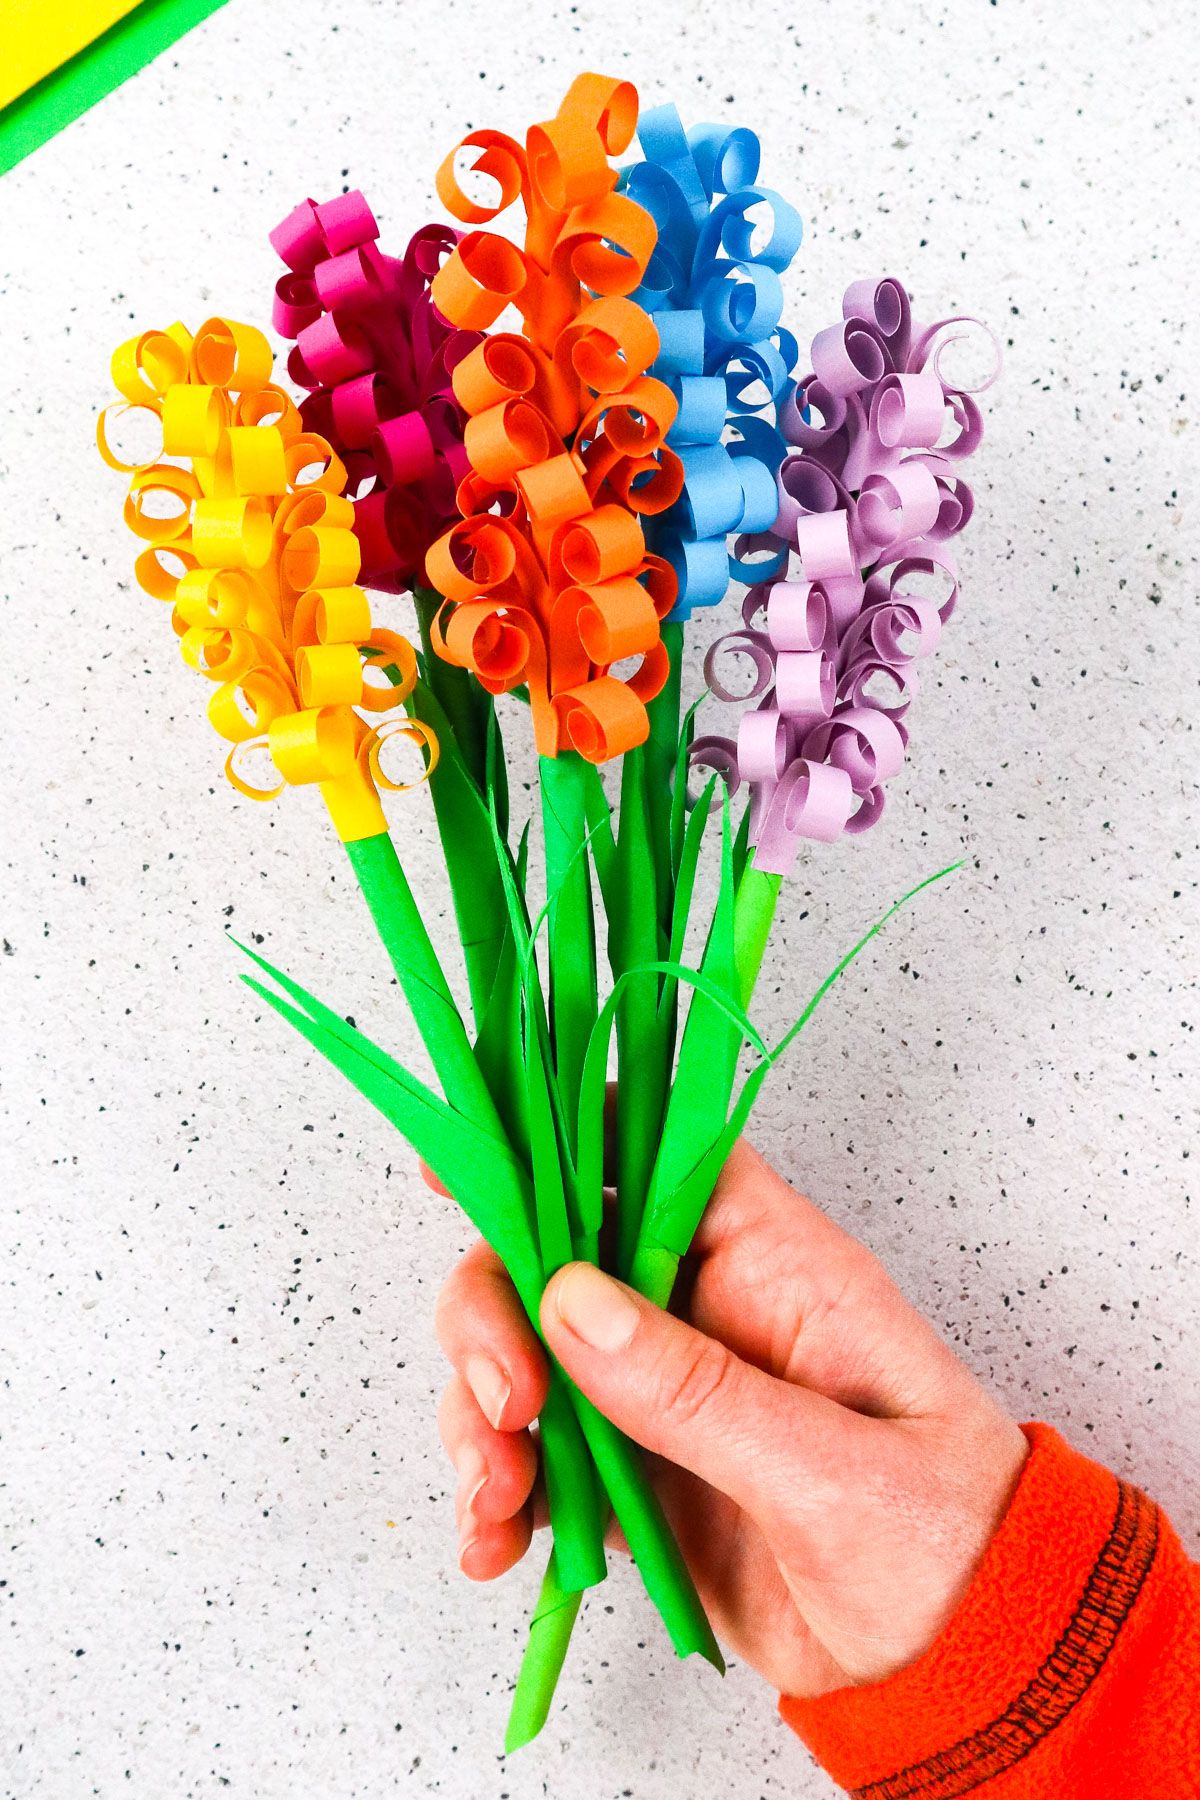
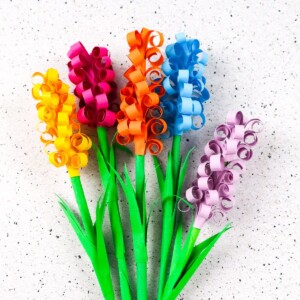
I love hyacinths because they are eye-catching and gorgeous. These paper hyacinths are a simple and elegant project perfect for the warm seasons.
You can make these as tall or as small as you’d like. They look beautiful in practically any color of the rainbow, but I especially love shades of pink, purple, and blue for these flowers.
I know that you will love making these as much as I did! Now, onto the instructions!
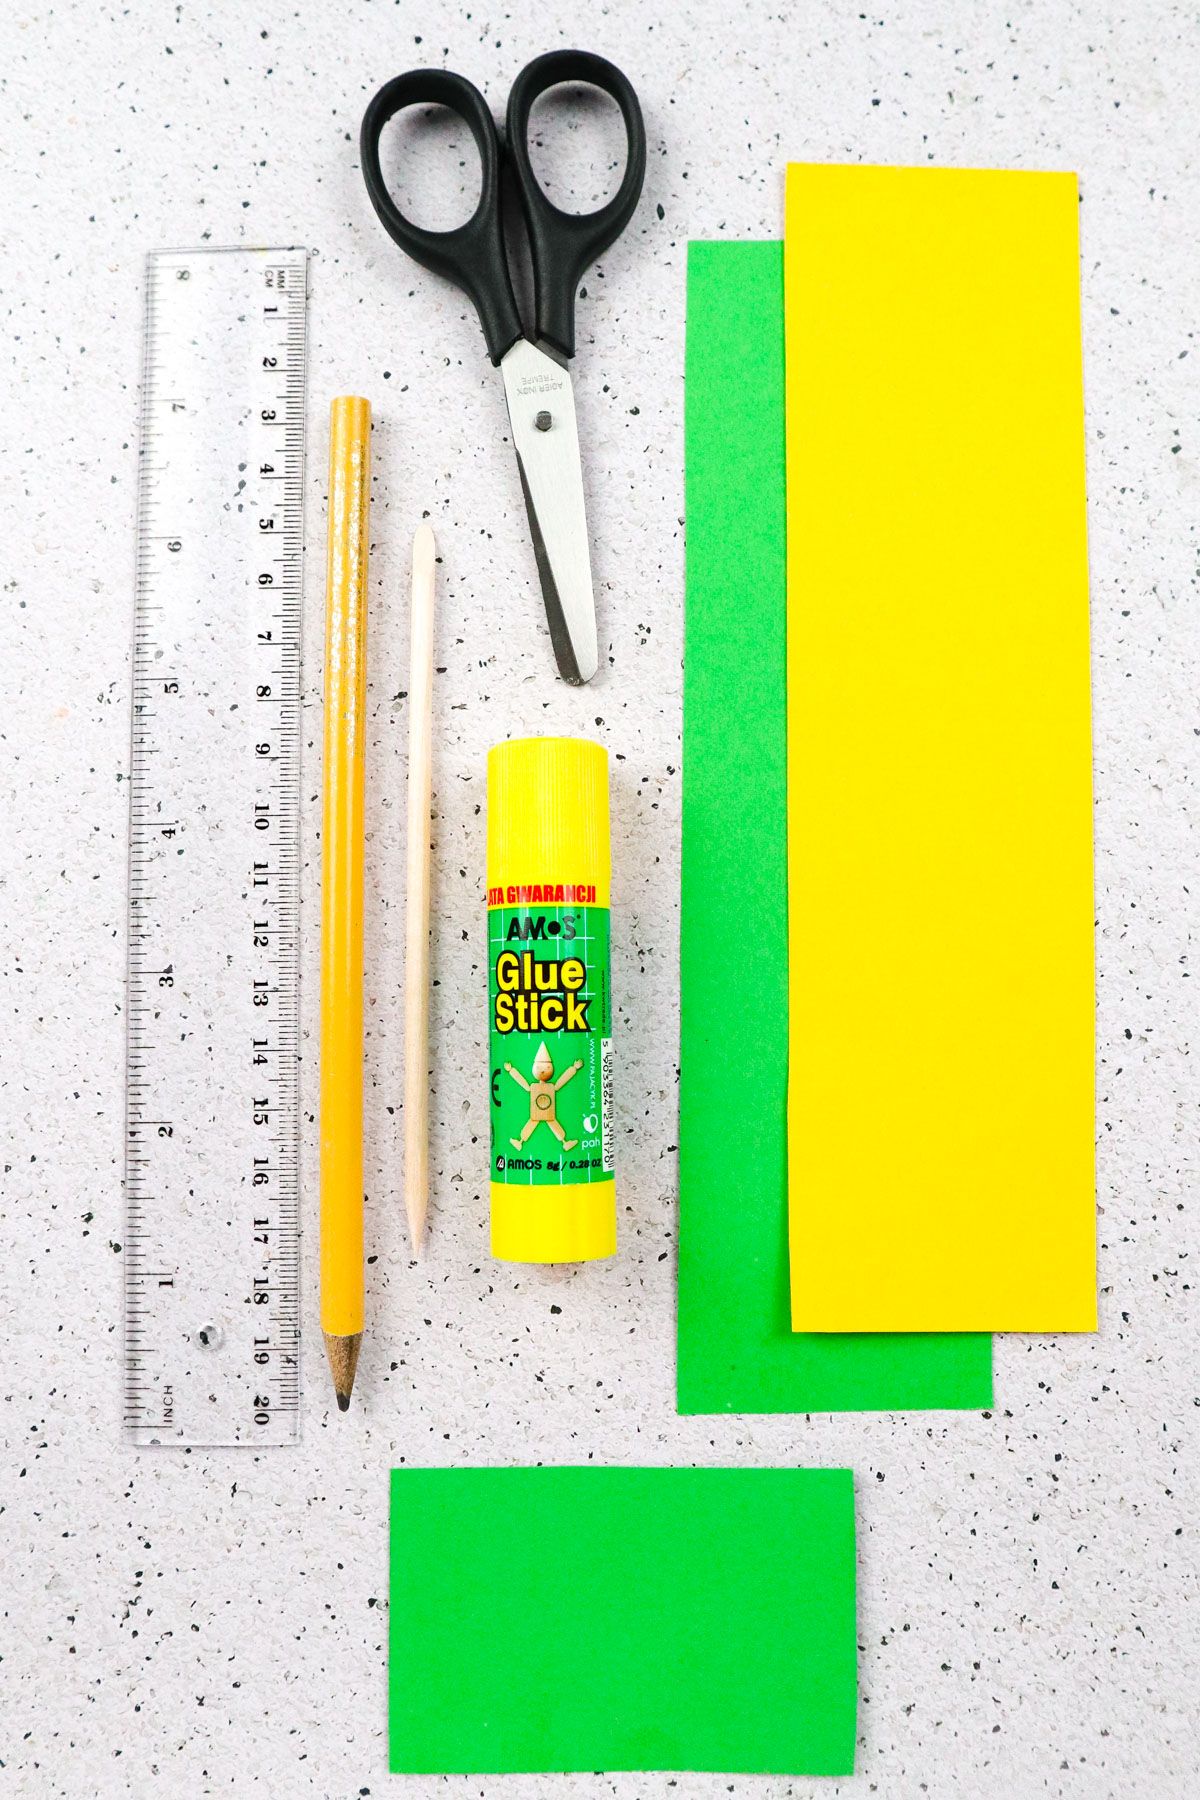
Supplies You’ll Need
Colored construction paper 8”x 2’*
Green construction paper 2″x 3″ and 8″x 2″
Scissors
Pencil
Ruler
*Construction paper is a bit thicker than regular paper.
**Or a knitting needle, barbecue stick, wooden skewer, etc…
How to Make DIY Paper Hyacinths
Step 1. Grab your ruler, pencil, and a piece of construction paper for your first flower. My paper is 8” long, but it is okay if yours is longer—you will just have a taller flower at the end!
Gently draw one long line across the paper, leaving a ¼” margin. Mark the fringe by drawing ¼” lines perpendicular to your horizontal line going all along the paper.
Step 2. Cut your fringe.
Step 3. Start curling your fringe around a manicure stick.
Step 4. Continue rolling and curling each section of fringe around the stick.
Step 5. You will be finished rolling when the entire length of the paper has been curled around your manicure stick.
Step 6. It’s time to make your stem! Take a long, green strip of paper, add some glue to one corner, and place your manicure stick on that corner.
Begin rolling the paper diagonally.
Step 7. When you are done rolling, you should have made a thin tube for your stem.
Step 8. Let’s make our leaves! Fold a small green piece of paper accordion-style along the long edge, ensuring that each fold is about ¼” thick.
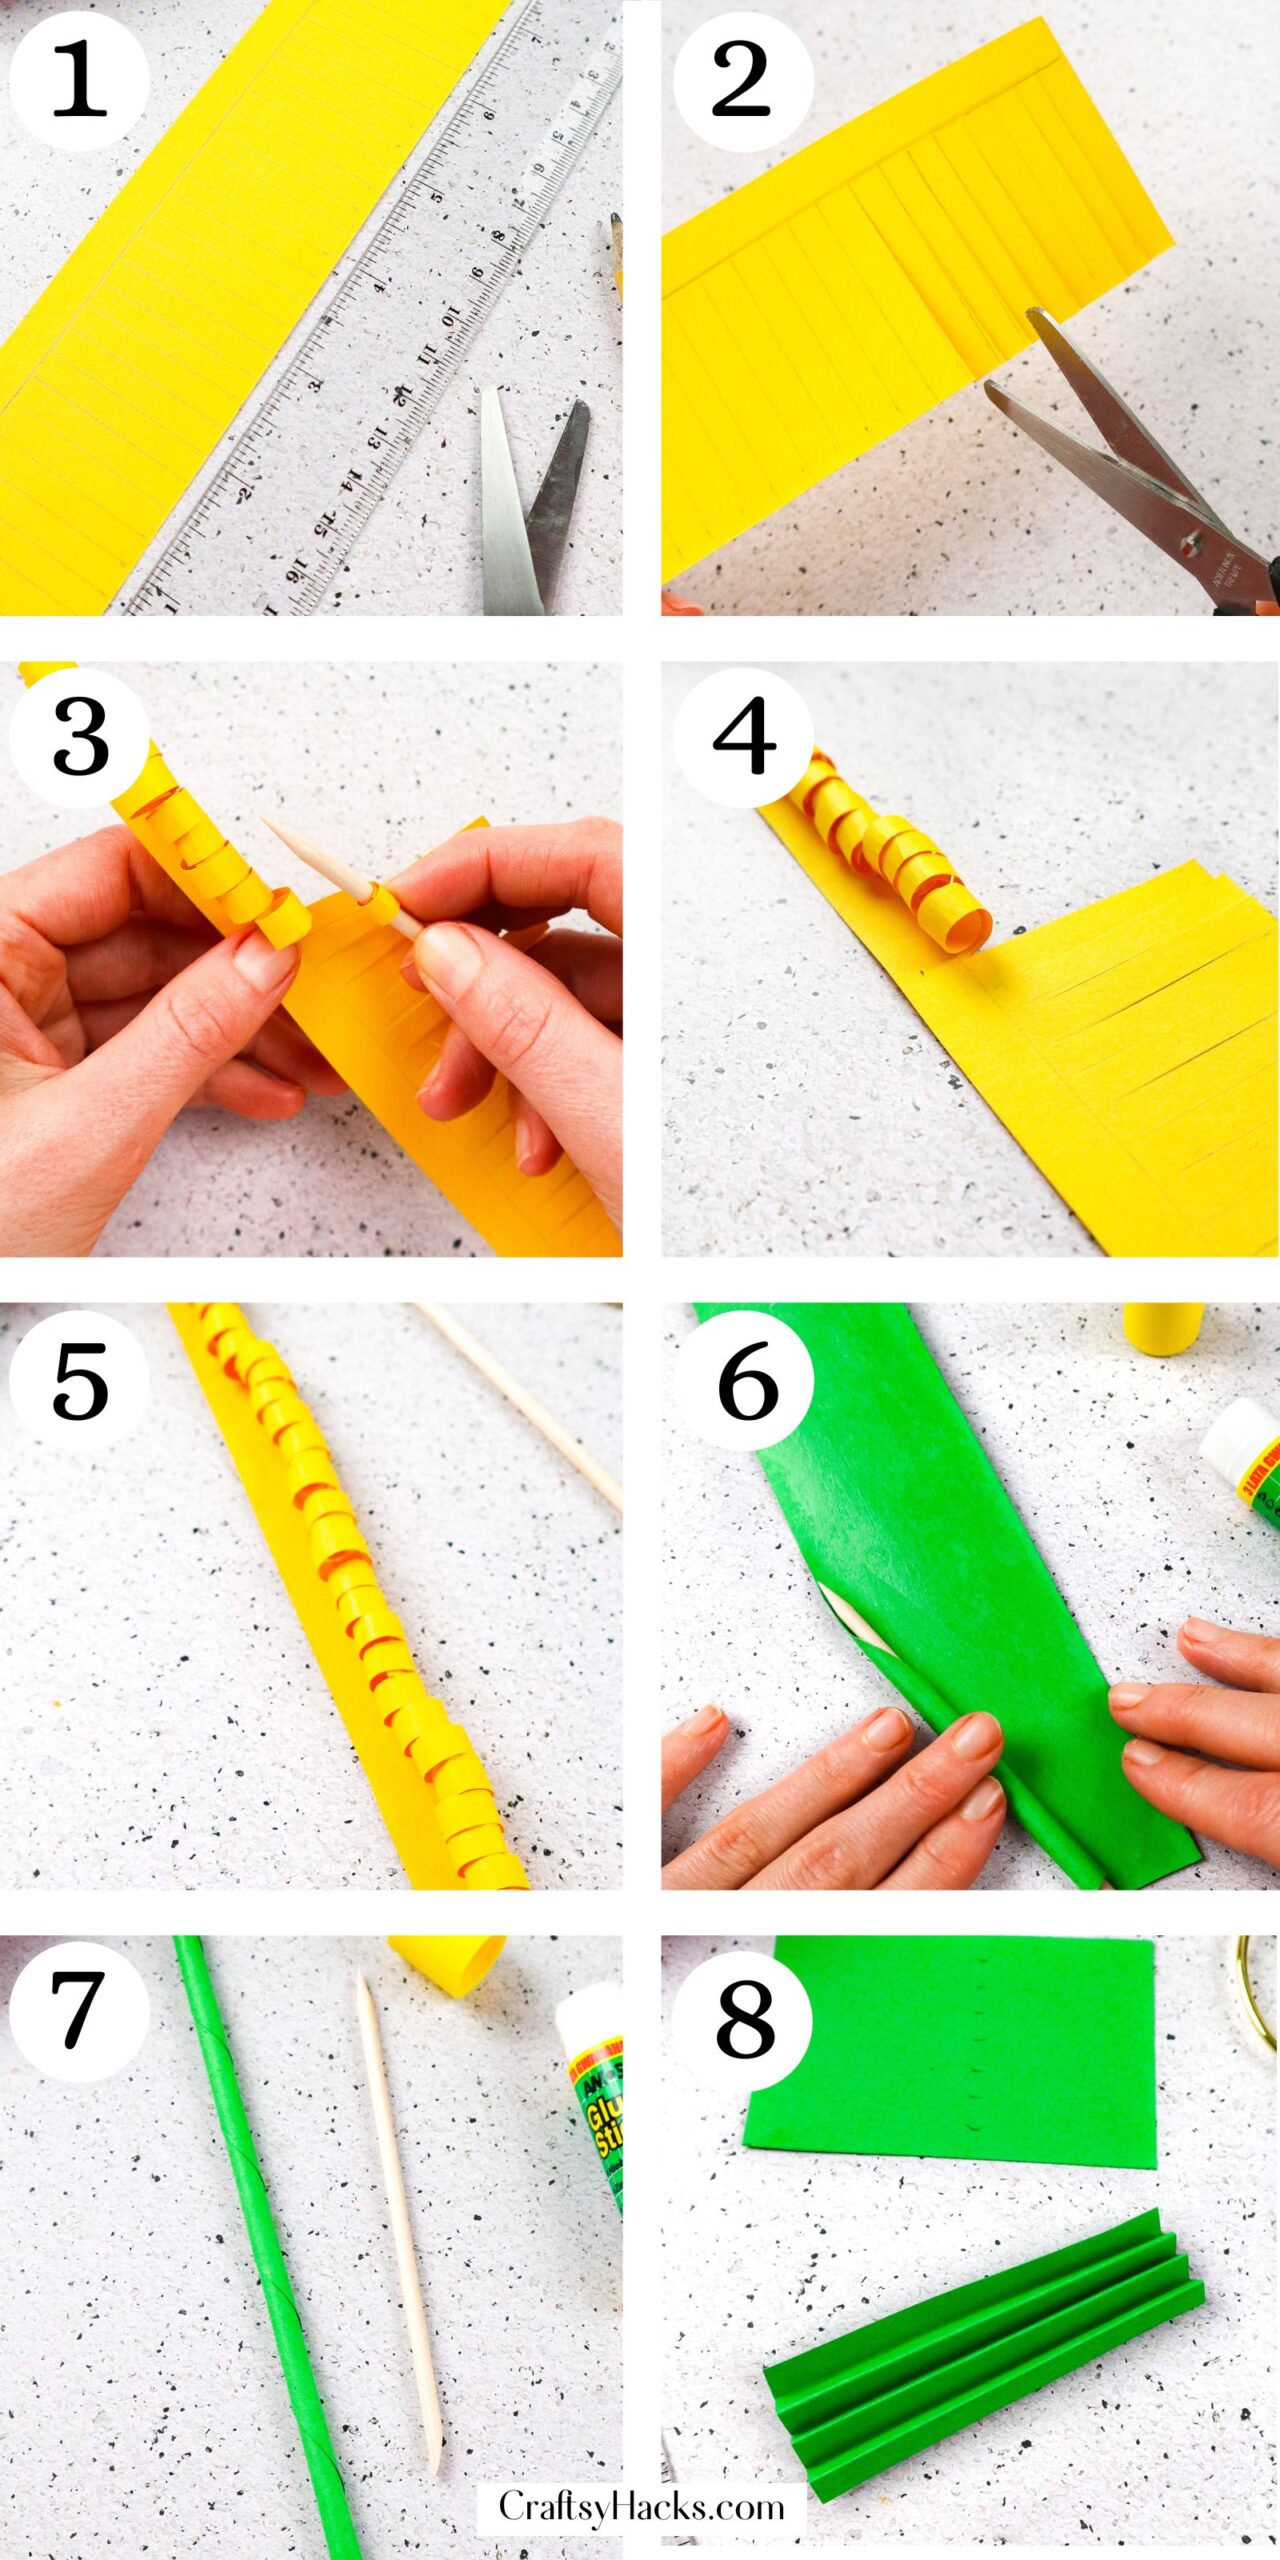
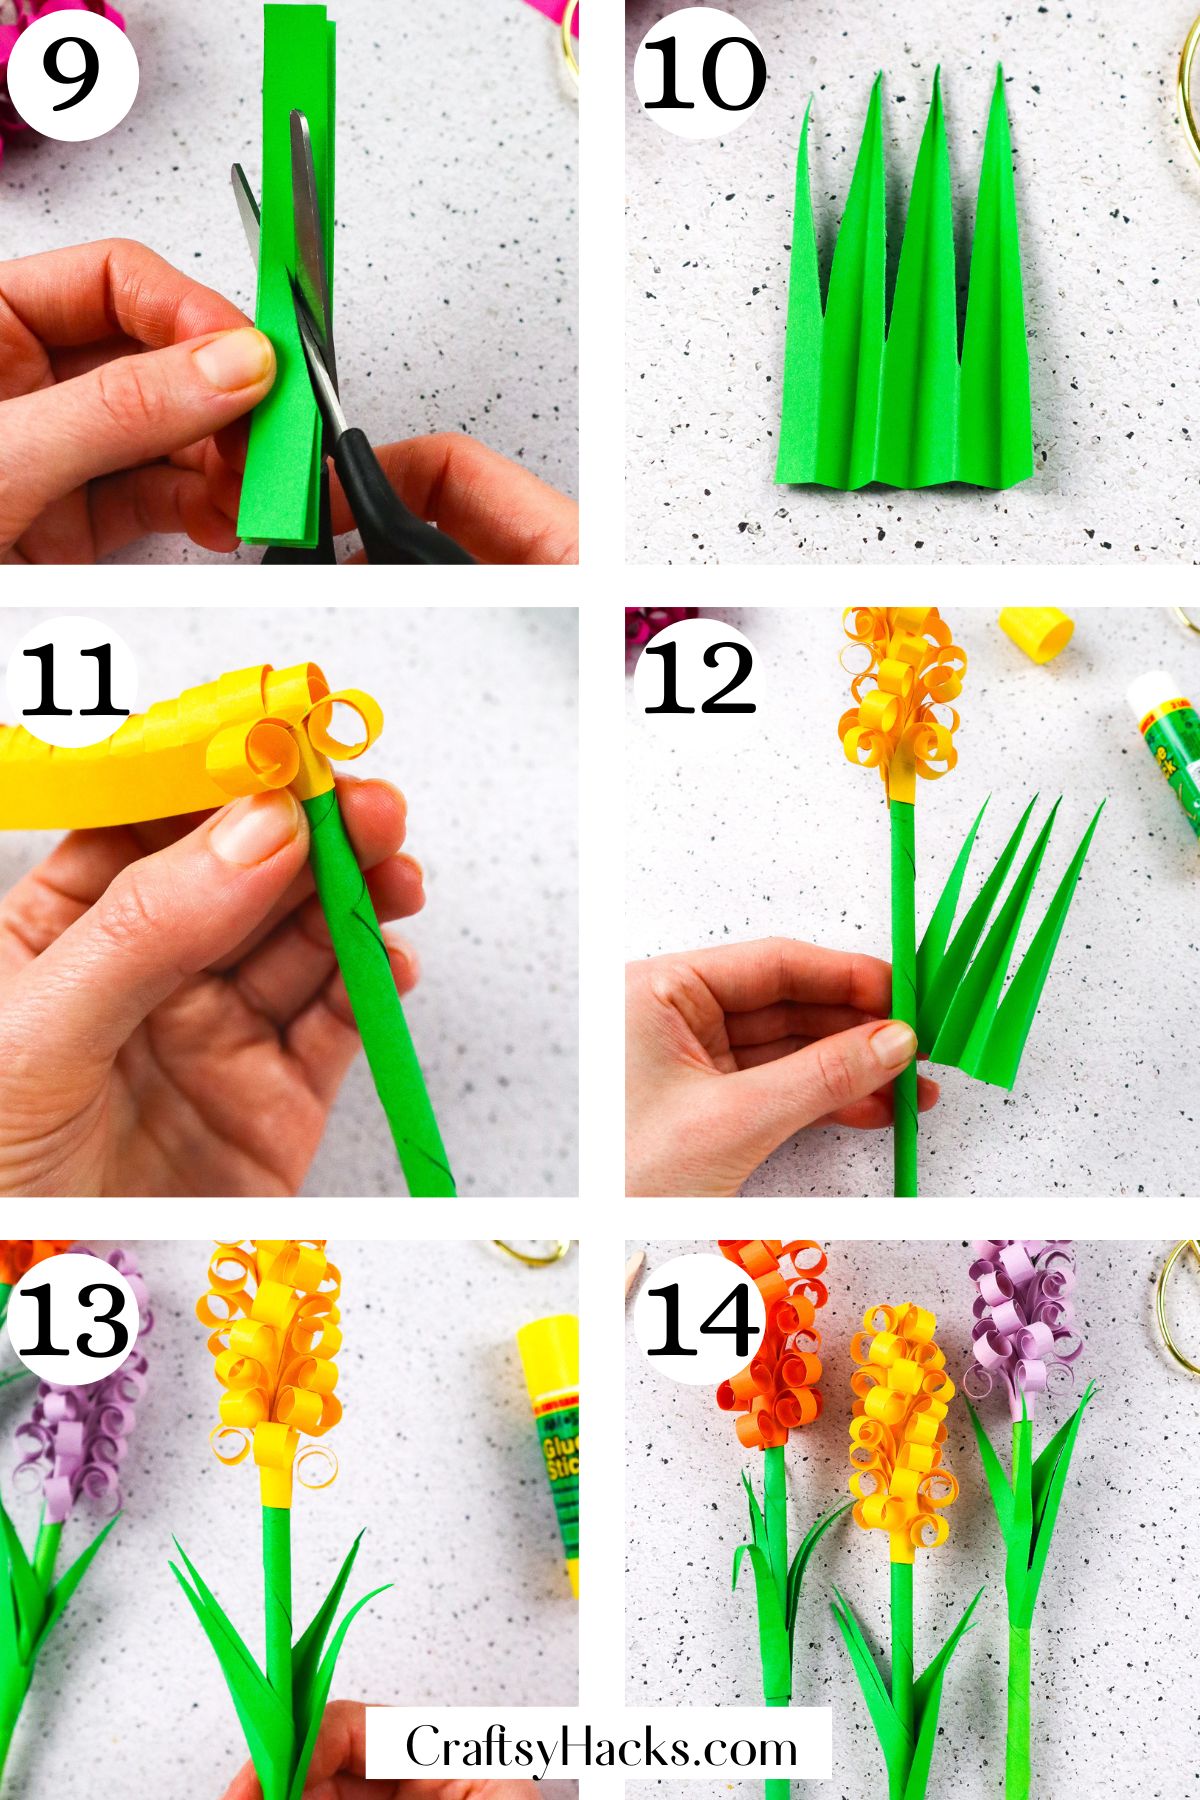
Step 9. Hold your folded green paper and cut through it to make leaves. Leave some space at the bottom so that you have enough room to attach them to the stem.
Step 10. Unfold your paper, and you should have beautiful leaves for your hyacinth stem.
Step 11. Let’s get back to the flower part. Take your rolled hyacinth, add some glue to the back, and place it over the end of your green stem.
The curly swirls of your flower should be pointing up. Continue wrapping the swirled paper around your stem tube in an overlapping fashion.
Keep it tight if possible, and add more glue as you go along if needed.
Step 12. Time to put the finishing touches on! Let’s attach the leaves to the stem by adding some glue to the bottom of the leaves.
Step 13. Now, wrap the leaves tightly around the stem tube. Placing your leaves at a slight angle and wrapping the paper diagonally will give it that natural look.
Step 14. You are all done! Repeat these steps to make as many gorgeous hyacinths as you want in whatever colors your heart desires.
Watch How to Make
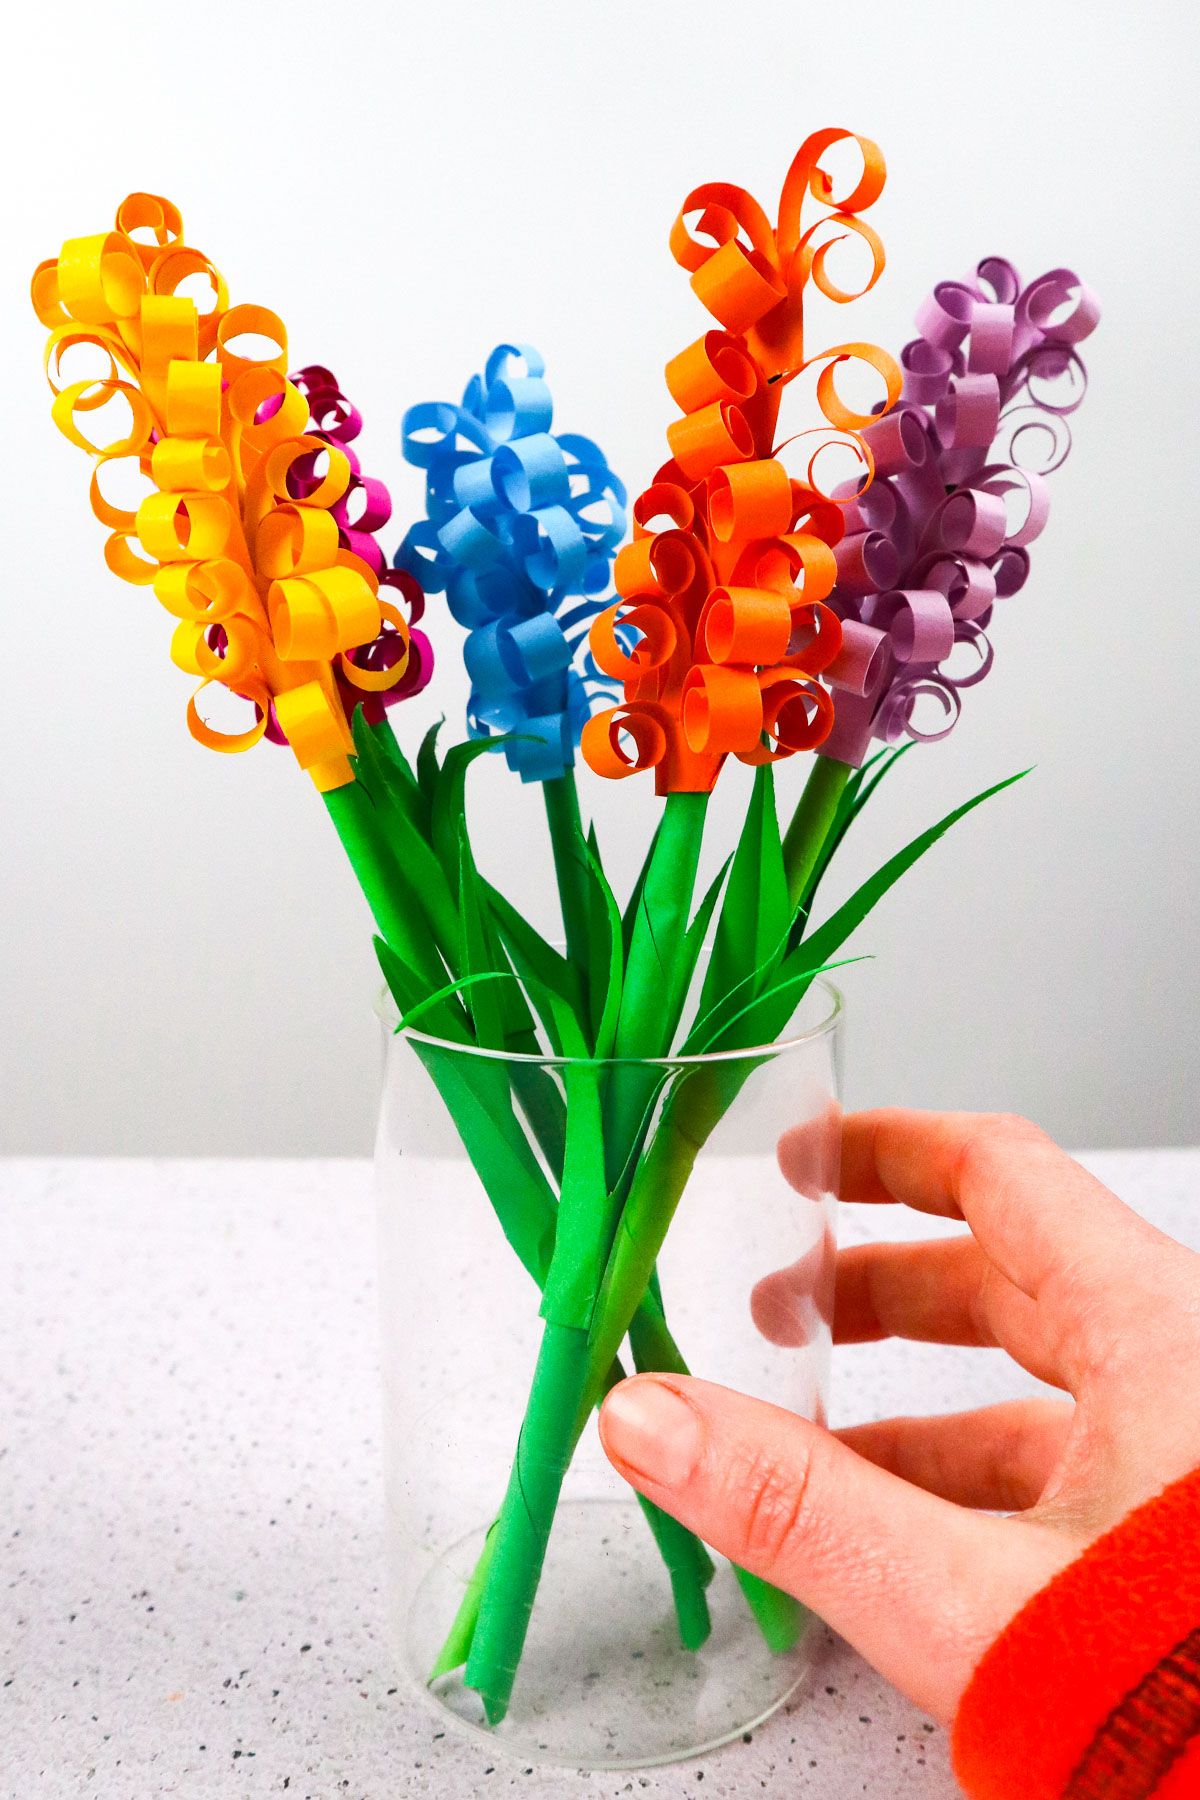
How to Use These Flowers
I love these flowers because they are so versatile!
They would look great arranged in a vase at a party, attached to walls or windows for some spring décor, or used as an accessory on a card or beautifully wrapped present.
More Crafts Like This
DIY Paper Hyacinths
Equipment
- Scissors
- Pencil
- Ruler
Instructions
- Draw a horizontal line across your colorful paper and then draw 1/4” lines perpendicular to that line to form your fringe.
- Cut the fringe.
- Begin to curl your cut fringe sections around a manicure stick.
- Continue curling each section of fringe around the stick.
- Ensure that each section has been wrapped around the manicure stick, from bottom to top.
- Add some glue to the corner of a strip of green paper and roll the paper diagonally upward around a manicure stick.
- When you are done rolling, you will be left with a long, thin tube for your stem.
- Make your leaves by folding a small piece of green paper accordion-style (each fold should be about ¼” thick).
- Cut into your folded green paper to make leaves.
- Unfold your paper to see your beautiful leaves.
- Take your rolled hyacinth paper, add some glue to the back, and place it over the end of your stem with the swirls pointing up. Continue wrapping it in an overlapping fashion and add more glue if you need to.
- Add some glue to the bottom of your leaves.
- Wrap your leaves around the stem tube at a slight angle.
- Your flower is done! Repeat as many times as you want with a variety of hyacinth colors and enjoy!


