Snowy Owl Craft
This post may contain affiliate links: full affiliate disclosure.
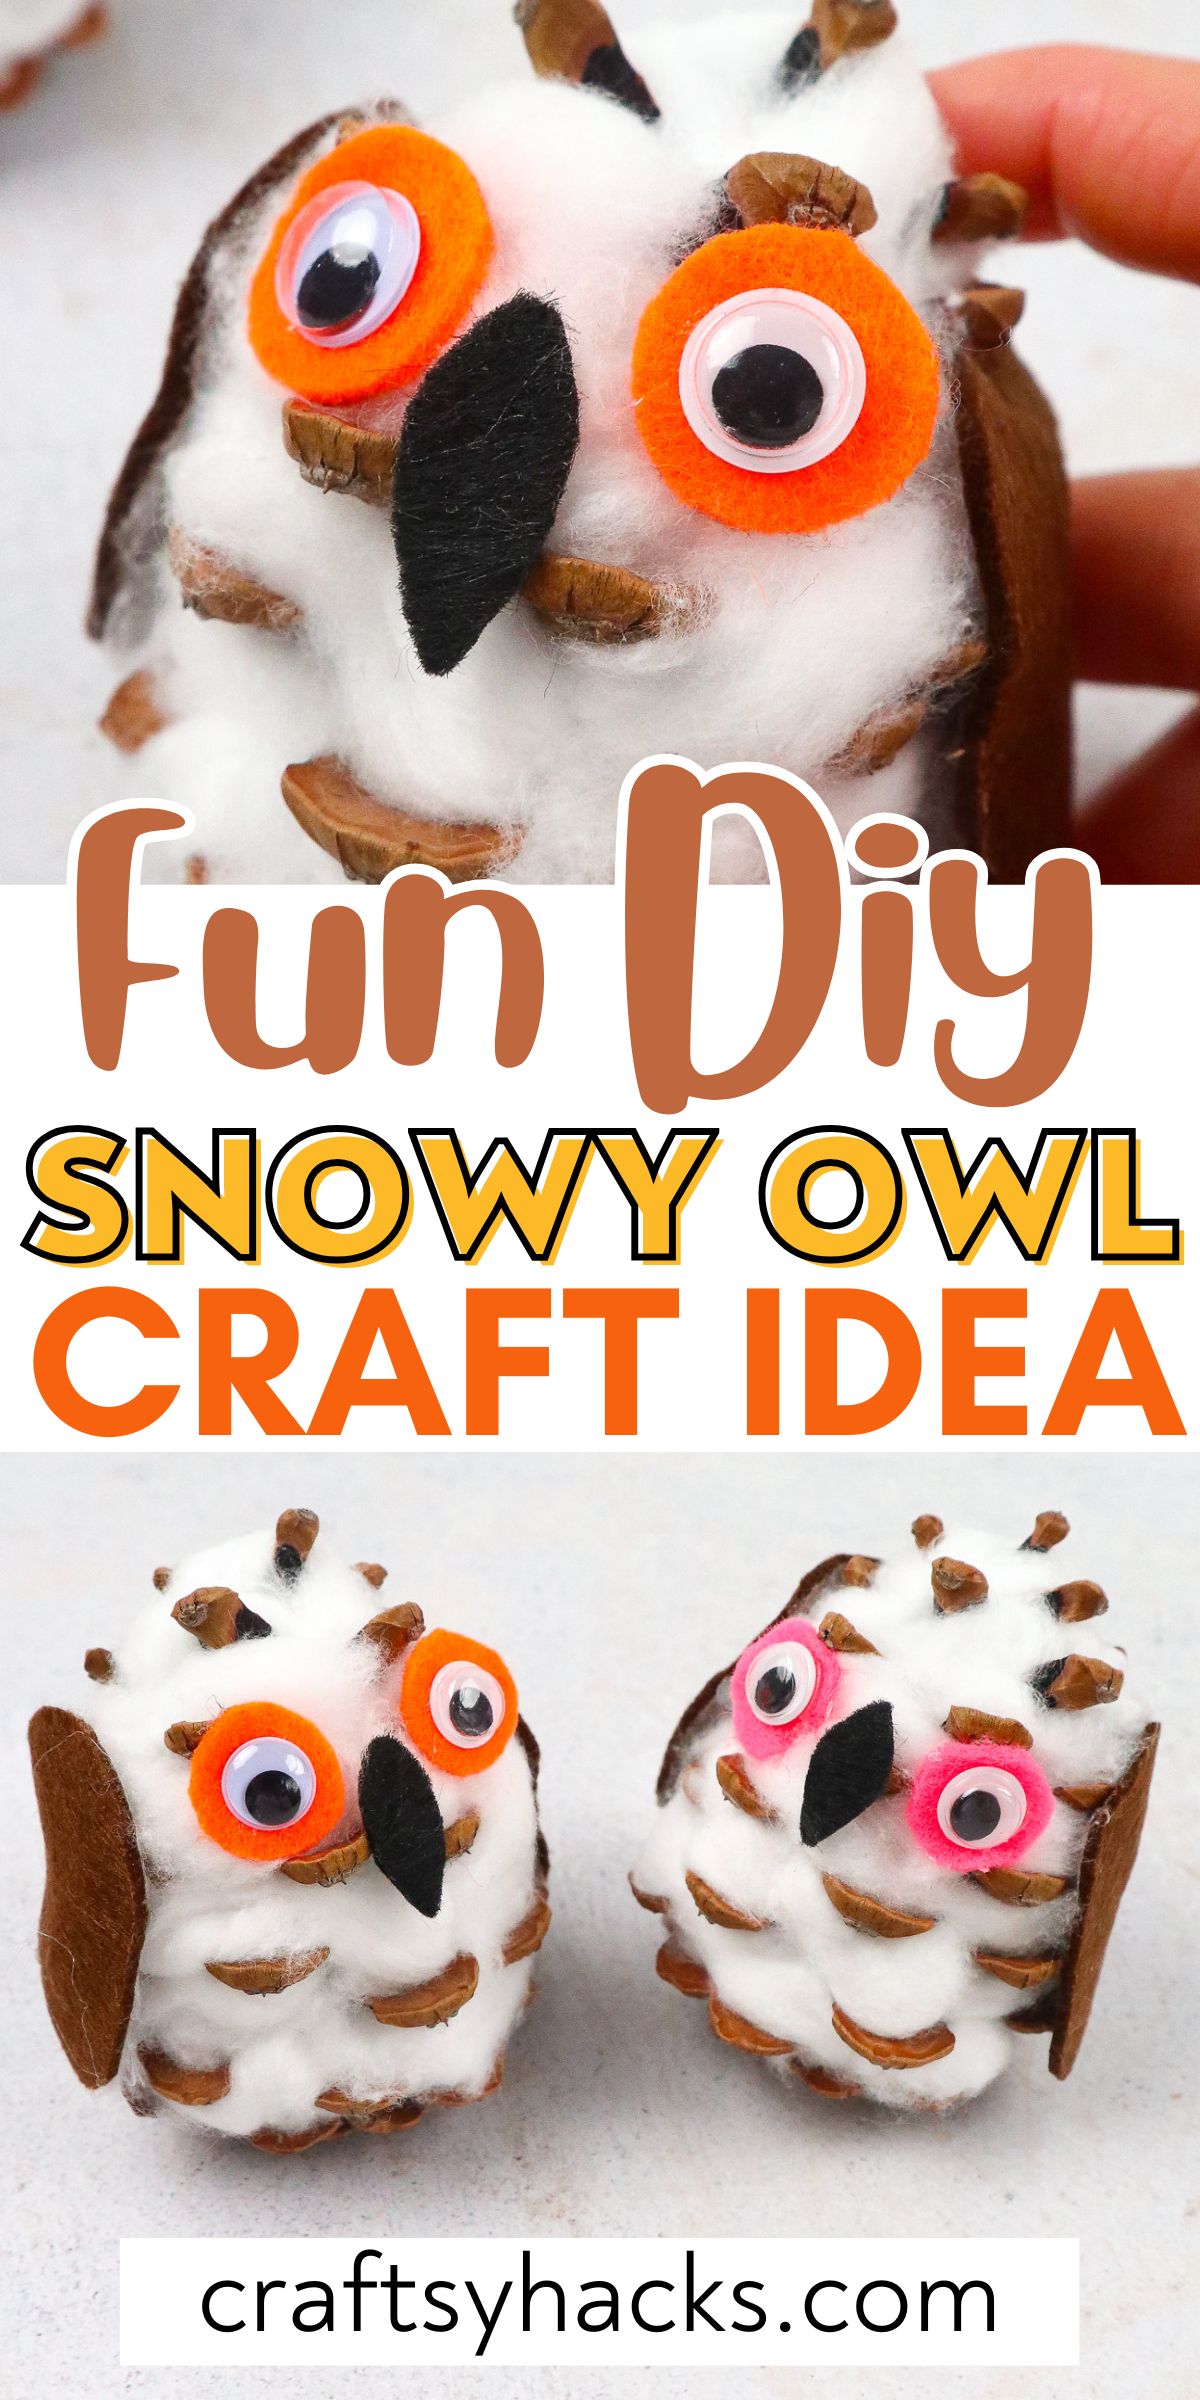
If you have been on the hunt for the cutest winter craft, I have something that you are going to love. In my opinion, you can’t get cuter than this snowy owl craft.
Made from pinecones, felt, and cotton balls, these are super fun and easy to make.
Plus, they turn out absolutely adorable. These would look great as an addition to your holiday mantle.
They can also be placed on entry tables or as part of a tablescape for a festive dinner or brunch. Another thing that I love about this snowy owl craft is that it uses elements from nature.
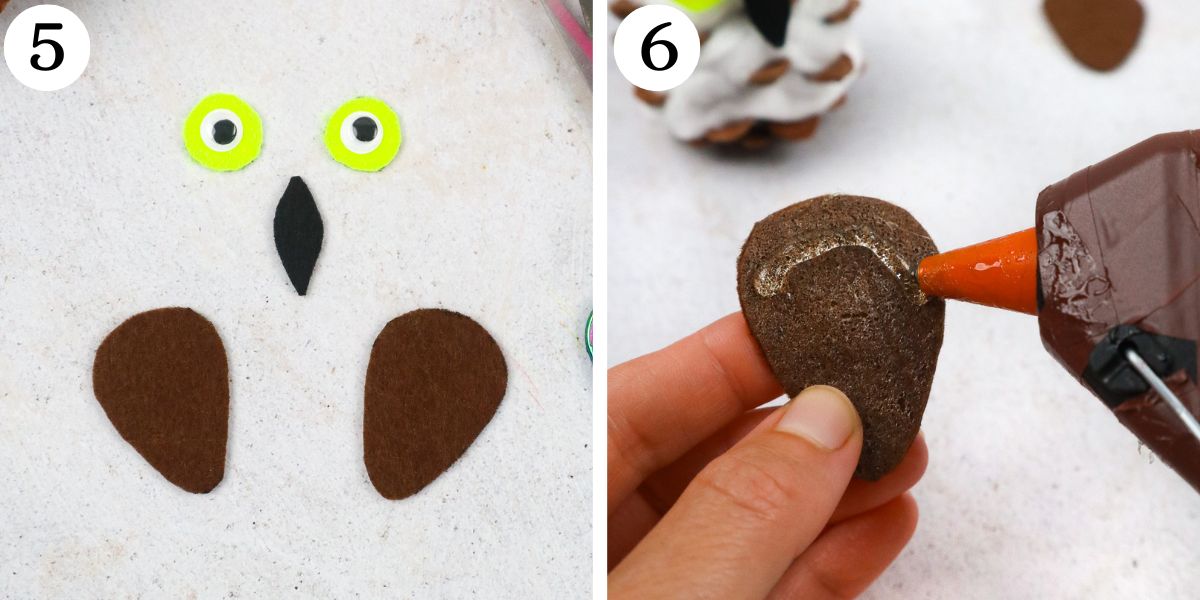
I have always thought that pinecones are so beautiful, and I really enjoy using them in crafting projects. Other than the pinecones, this project uses some of the most basic crafting supplies.
You probably already have everything on hand. You will need felt, googly eyes, a hot glue gun, white cotton balls, scissors, and a black marker in addition to your pinecones.
The instructions are simple and straightforward. I know that you will have a great time making these sweet and snowy owls!
Let’s get started!
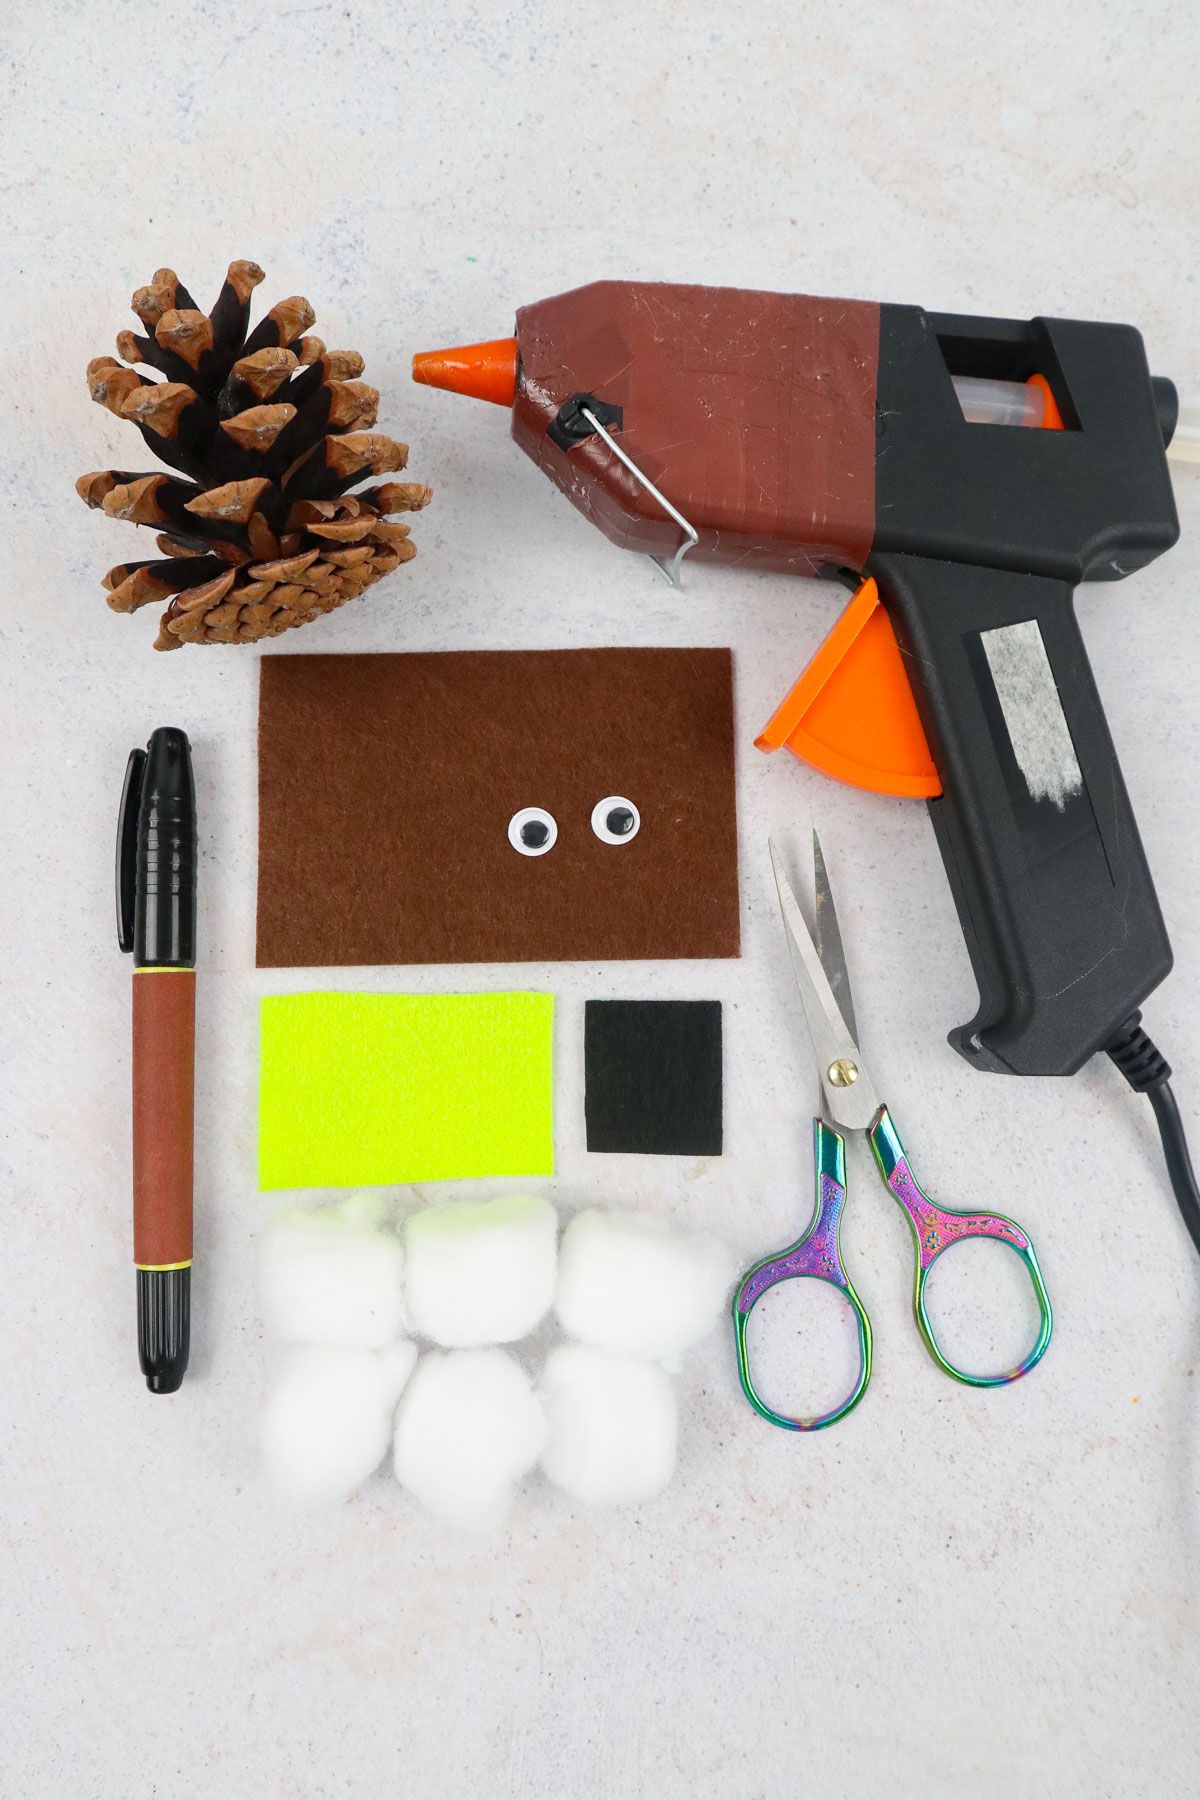
Supplies You’ll Need
- Pine cones
- Brown felt sheet
- Yellow felt sheet
- Black sheet
- Googly eyes
- Scissors
- Black marker
- Hot glue gun
- 4-6 x White cotton balls
How to Make Snowy Owls
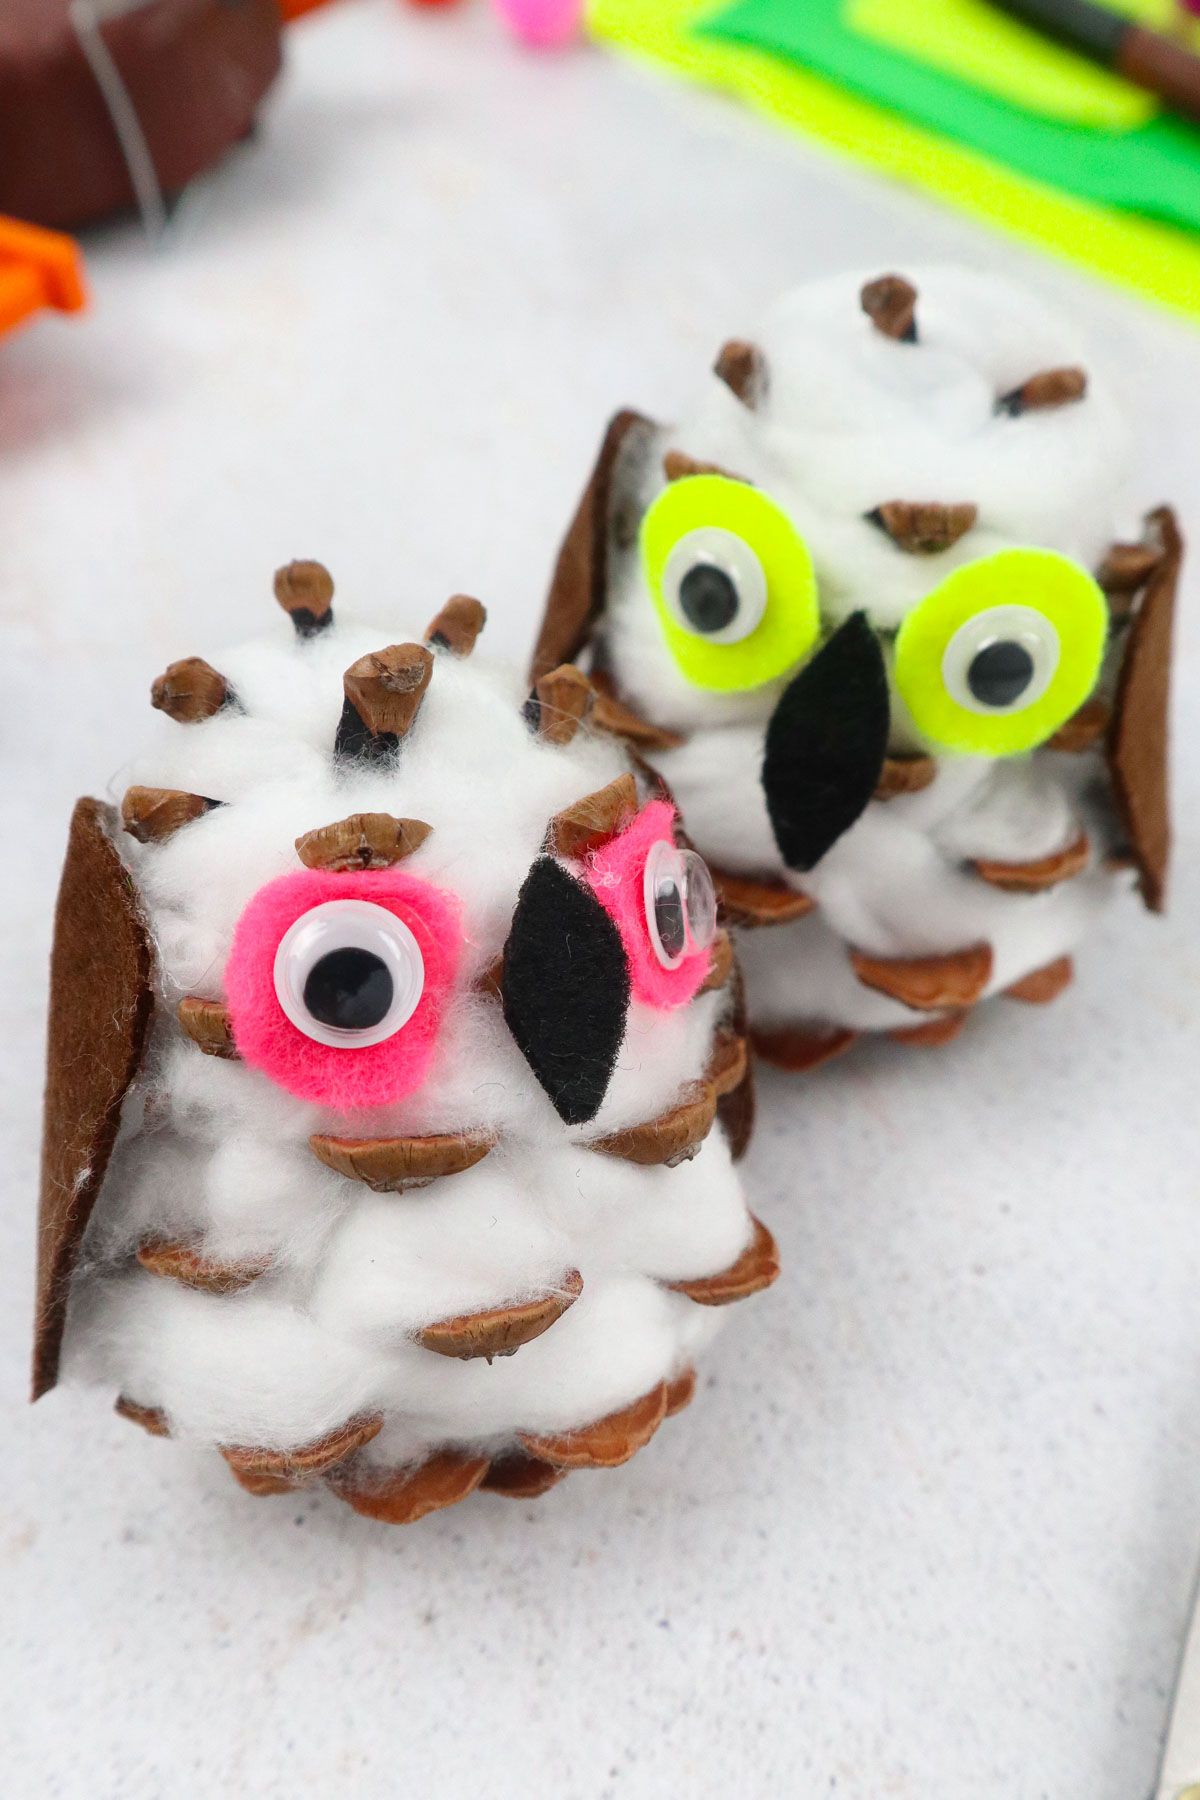
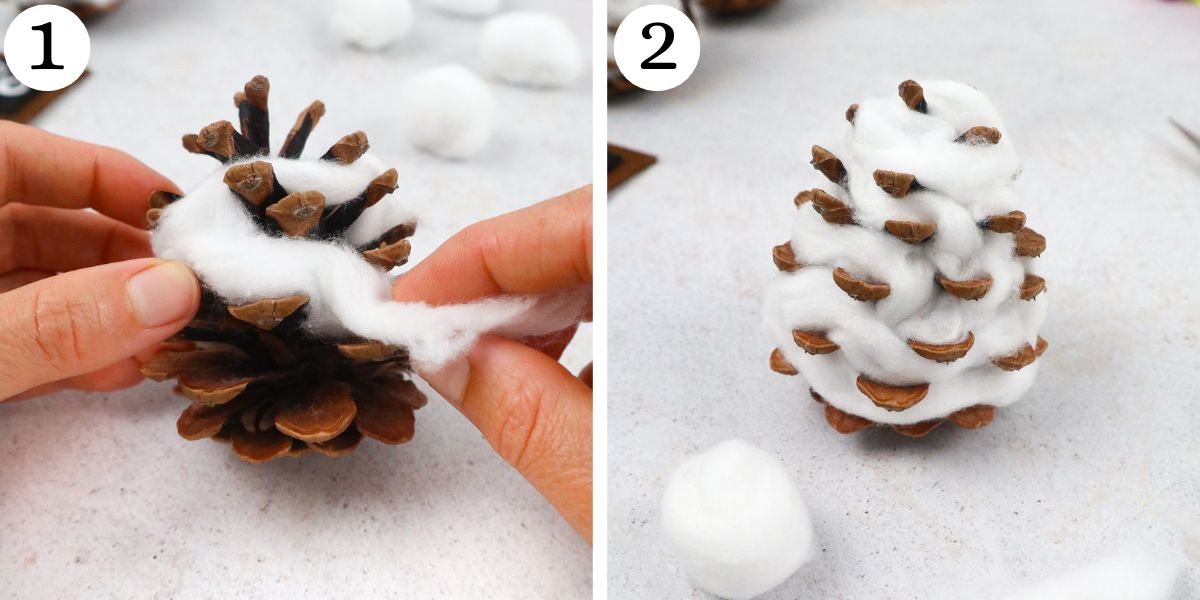
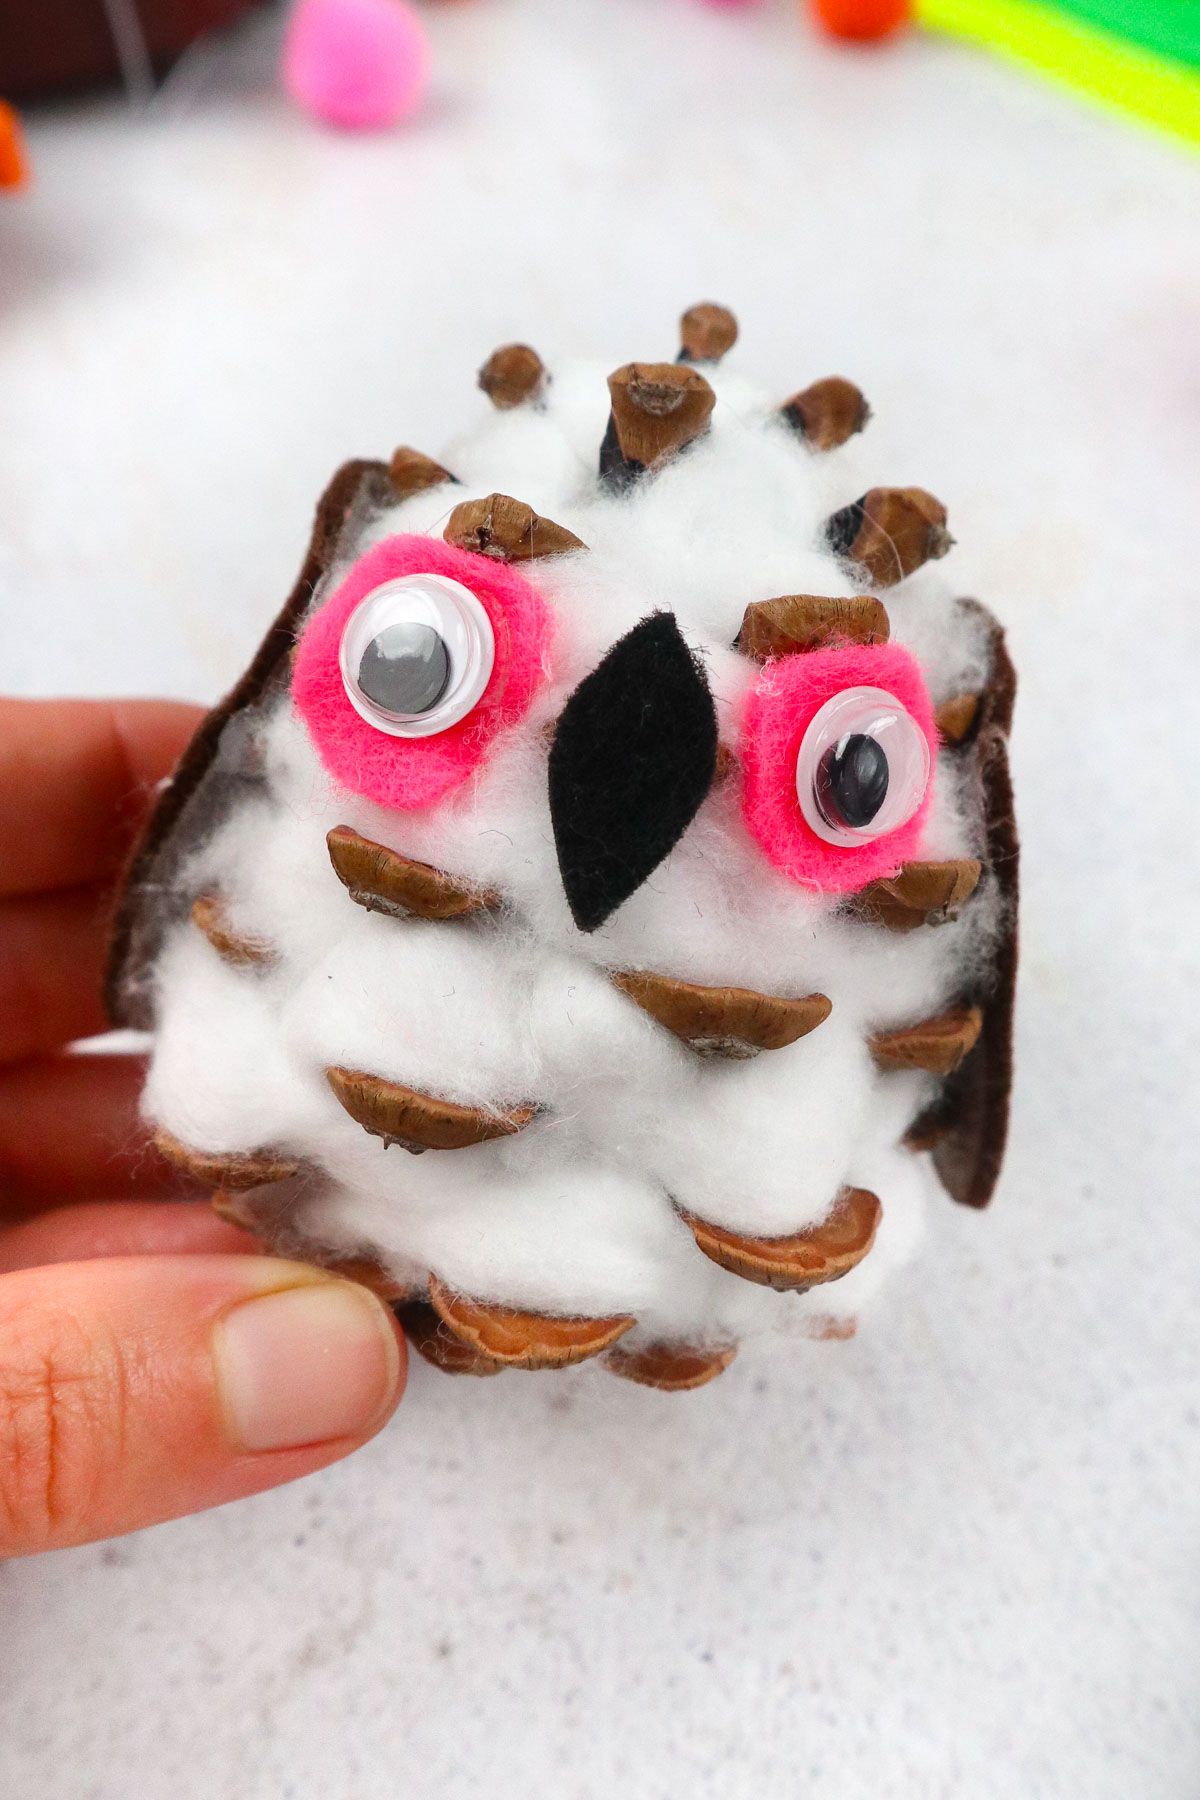
Step 1. First, we will make our snowy owl’s body. To do this, we will need to cover our pinecones with cotton.
You will need to use your hands to stretch out your cotton because a full cotton ball will not fit into those tiny crevices.
Take your time working with the delicate cotton and gently spread or stretch the cotton ball out. Stuff the cotton into the pinecone’s gaps, starting from the top of the pinecone and making your way downward.
Grab a new cotton ball whenever necessary. You want to make sure all the gaps are nicely filled in and that your snowy owl looks truly snowy!
Step 2. Keep stuffing your pinecone with the stretched/spread cotton until all the gaps are filled in with cotton. This cotton-covered pinecone will serve as your owl’s body.
Your snowy owl is off to a great start!
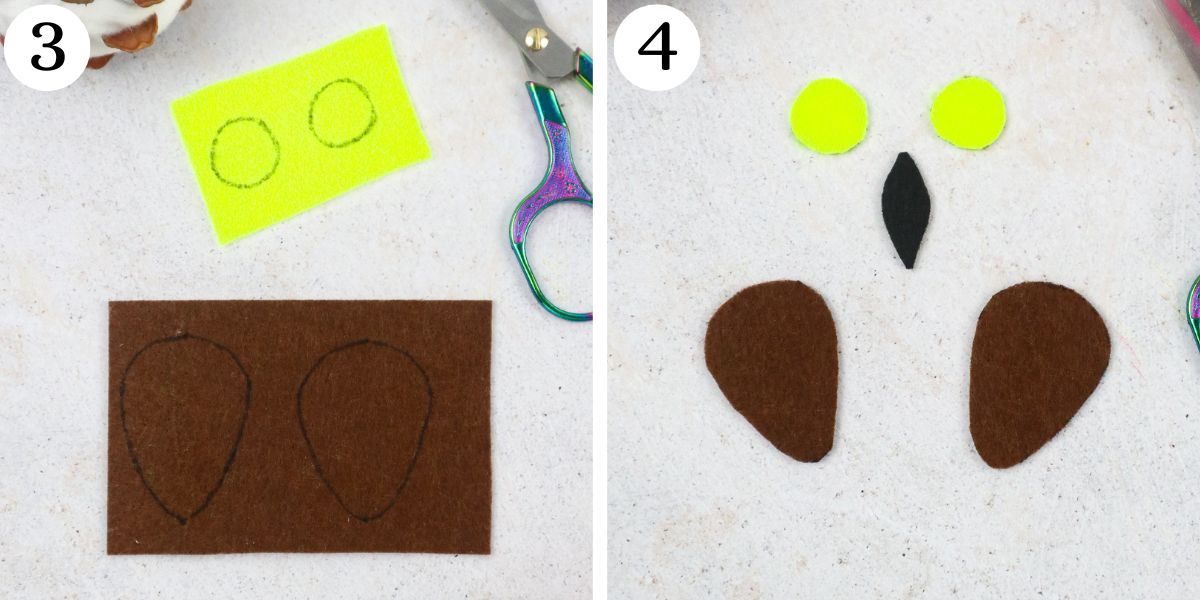
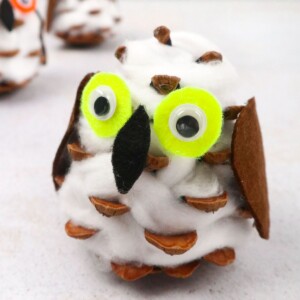
Step 3. Now, it is time to make your snowy owl’s body parts. Start by drawing two wings on your brown felt sheet.
Next, draw two circles on the yellow felt sheet for the eyes. These should be slightly bigger than your googly eyes.
Finally, draw a beak on the black felt sheet.
Step 4. Cut the wings, eyes, and beak out.
Step 5. Now, you can glue the googly eyes onto the yellow circles that you made.
Step 6. Let’ start gluing on our snowy owl’s features! Start adding glue to the eyes, beak, and wings.
Next, glue the beak onto your owl.
Step 7. Now, attach your snowy owl’s eyes. Then, attach his beak.
Step 8. Next, attach the wings.
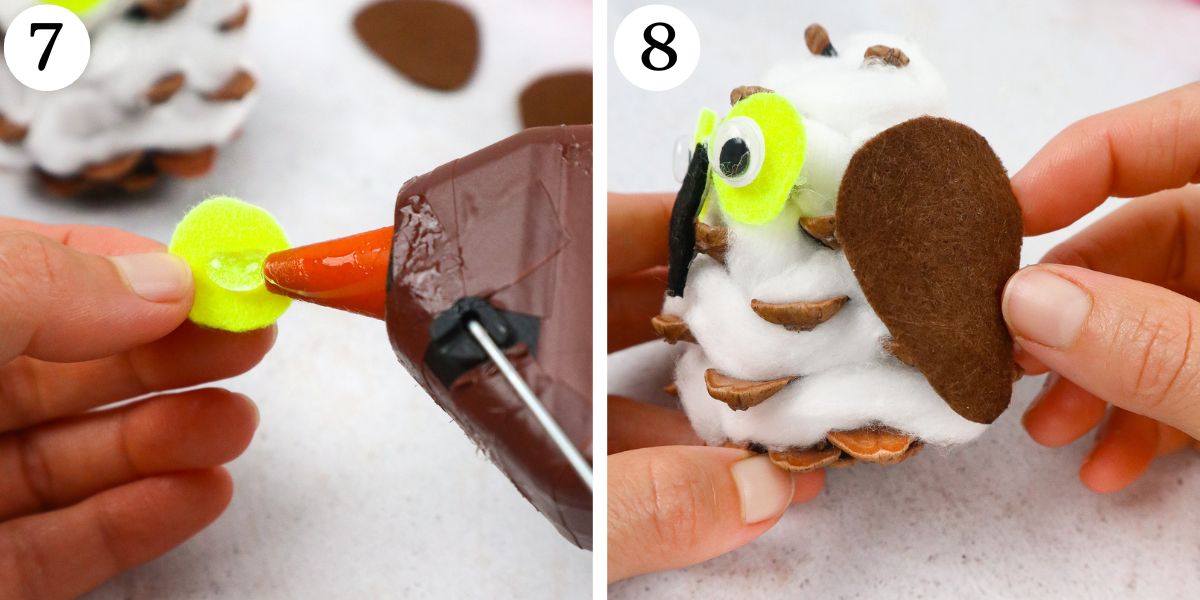
Step 9. Make sure that you are carefully attaching every element of your owl. You will need to make sure that each item is firmly attached to the pine cone so that it does not fall off.
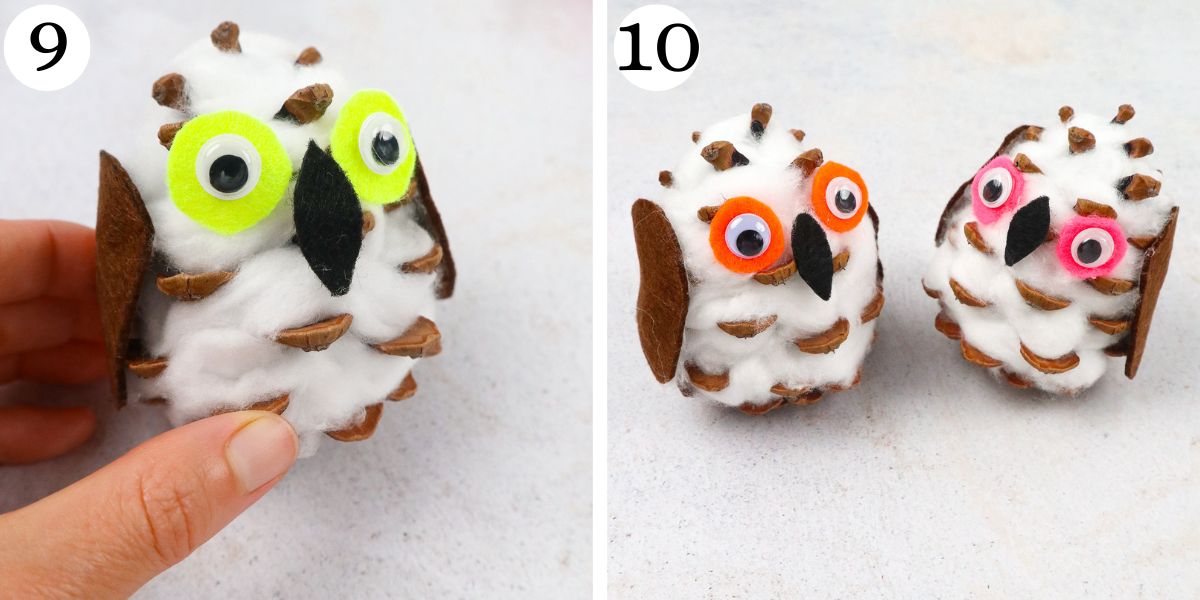
Step 10. Your cute little snowy owl is complete. Enjoy!
How Long Do These Snowy Owl Crafts Take to Make?
Quick and easy crafts are often some of my favorites. These snowy owls fit that bill perfectly because they take only 15 minutes to make.
I like to make a few at a time because they are such a fast project to make. Making a few snowy owls is a great way to spend a winter afternoon.
This would be a great activity to do at a kid’s (or adult’s) crafting party. Since these are so quick and easy, there will still be plenty of time and energy left to socialize after everyone has made their own snowy owl.
More Crafts Like This
Snowy Owl Craft
Video Tutorial
Equipment
- Scissors
Materials
Instructions
- First, we will cover our pinecones with cotton. Spread or stretch a cotton ball out and stuff the cotton into the gaps of the pinecone.
- Keep stuffing your pinecone with the stretched/spread cotton until all the gaps are covered with cotton.
- Now, let’s draw your snowy owl’s body parts. Start by drawing two wings on your brown felt sheet and two circles on the yellow felt sheet for the eyesFinally, draw a beak on the black felt sheet.
- Cut the wings, eyes, and beak out.
- Now, glue the googly eyes onto the yellow circles that you made.
- Let’ start gluing our snowy owl’s features! Start adding glue to the eyes, beak, and wings.Next, glue the beak onto your owl.
- Now, attach your snowy owl’s eyes. Then, attach his beak.
- Next, attach the wings.
- You will need to make sure that each item is firmly attached to the pinecone so that it does not fall off.
- Your cute little snowy owl is complete. Enjoy!


