Snowy Owl Craft
Make your own snowy owl with this DIY craft idea! Ideal for winter decor or as a fun project with kids.
Video Tutorial
Equipment
- Scissors
Materials
Instructions
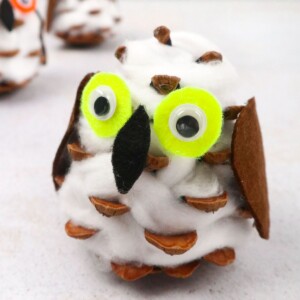
- First, we will cover our pinecones with cotton. Spread or stretch a cotton ball out and stuff the cotton into the gaps of the pinecone.
- Keep stuffing your pinecone with the stretched/spread cotton until all the gaps are covered with cotton.
- Now, let’s draw your snowy owl’s body parts. Start by drawing two wings on your brown felt sheet and two circles on the yellow felt sheet for the eyesFinally, draw a beak on the black felt sheet.
- Cut the wings, eyes, and beak out.
- Now, glue the googly eyes onto the yellow circles that you made.
- Let’ start gluing our snowy owl’s features! Start adding glue to the eyes, beak, and wings.Next, glue the beak onto your owl.
- Now, attach your snowy owl’s eyes. Then, attach his beak.
- Next, attach the wings.
- You will need to make sure that each item is firmly attached to the pinecone so that it does not fall off.
- Your cute little snowy owl is complete. Enjoy!
Tried this craft?Leave a comment below with your rating! I love the feedback and respond to every comment!