20 Best IKEA Ivar Hacks for Low Budgets
This post may contain affiliate links: full affiliate disclosure.
IKEA Ivar can be transformed in so many ways! Try these hacks to decorate your home on a low budget.

The Ikea IVAR system is an old soul, developed by Ikea over the course of fifty years to be the ultimate customizable shelving system. If we’re talking Ikea hacks, there’s pretty much no system better for the job than IVAR!
You can use modular sections to add new shelves, cabinets, doors, or desks to pretty much any room in your house. Not to mention, you can customize the individual components to make them unique to your style.
Check out twenty of my favorite ways to use the IVAR system in your home!
1. Doll Up Your Entryway
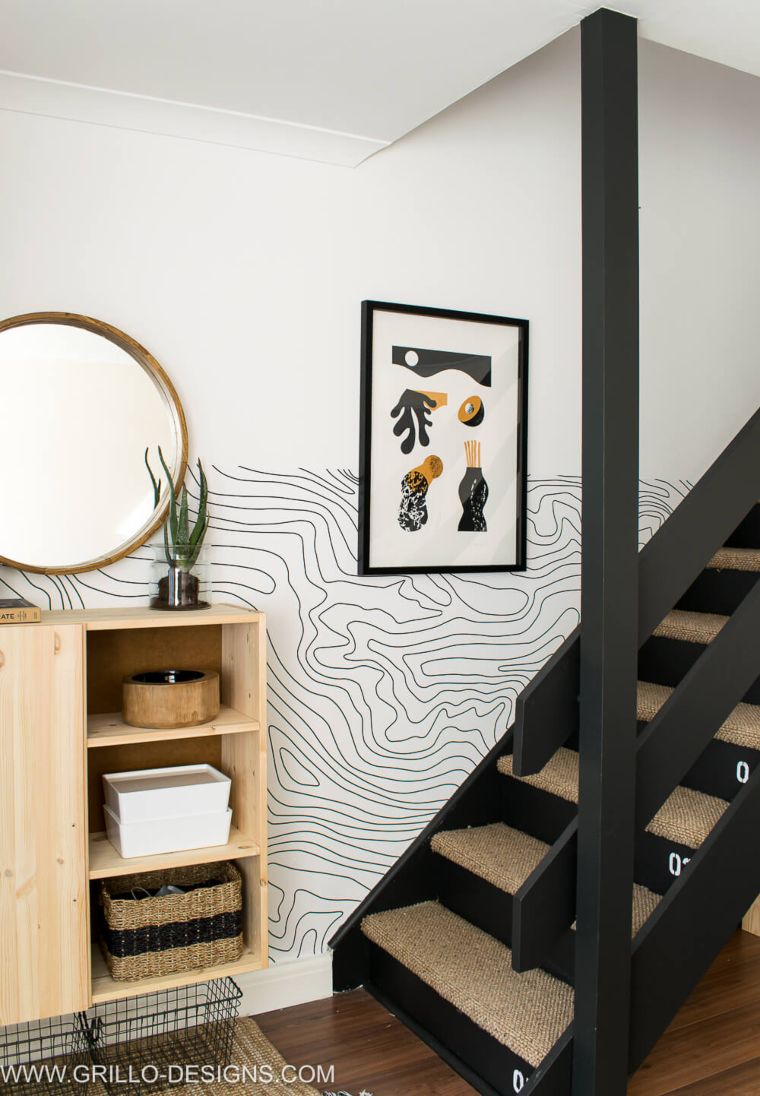
Source: grillo-designs.com
When you enter the house, the first thing you should do is to unload everything you’re carrying, so your entryway needs the storage to handle that. Enter the Ikea IVAR cabinet.
Remove one of the doors to open this beauty up and suspend it on your wall as a floating entryway cabinet. It’s the perfect accessory for a corner, including a wall-hung coat rack, a mirror, and some baskets placed beneath the shelf for your shoes.
Love this hack? You Might love these bookshelf hacks!
2. A Minimal Take on Storage
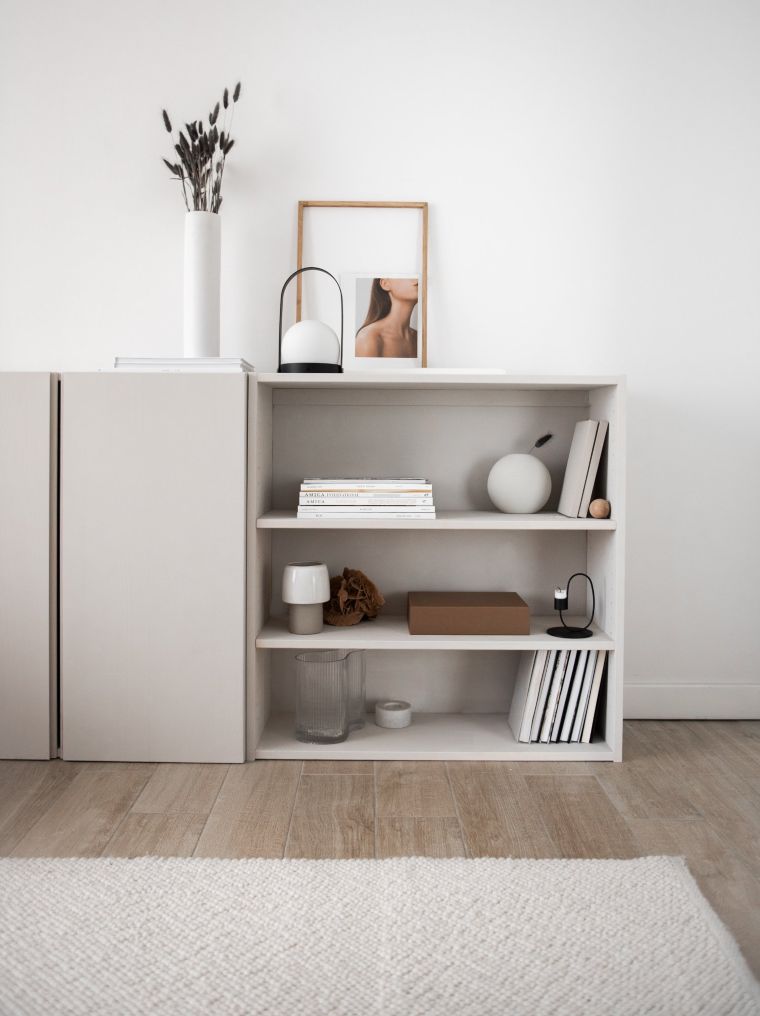
Source: passionshake.com
Speaking of entryways, liminal spaces like hallways, corridors, and corners are all ample opportunities to add some more storage to your home. Giving your Ikea IVAR a minimal once-over by deconstructing it and painting each element a gentle shade (white is usually the way to go).
Re-assemble, style, and you’re done! Electric screwdrivers make this job faster and easier, so pick one up here if you’d like a quicker DIY.
3. Ribbed Cabinets for a Sustainable Remodel
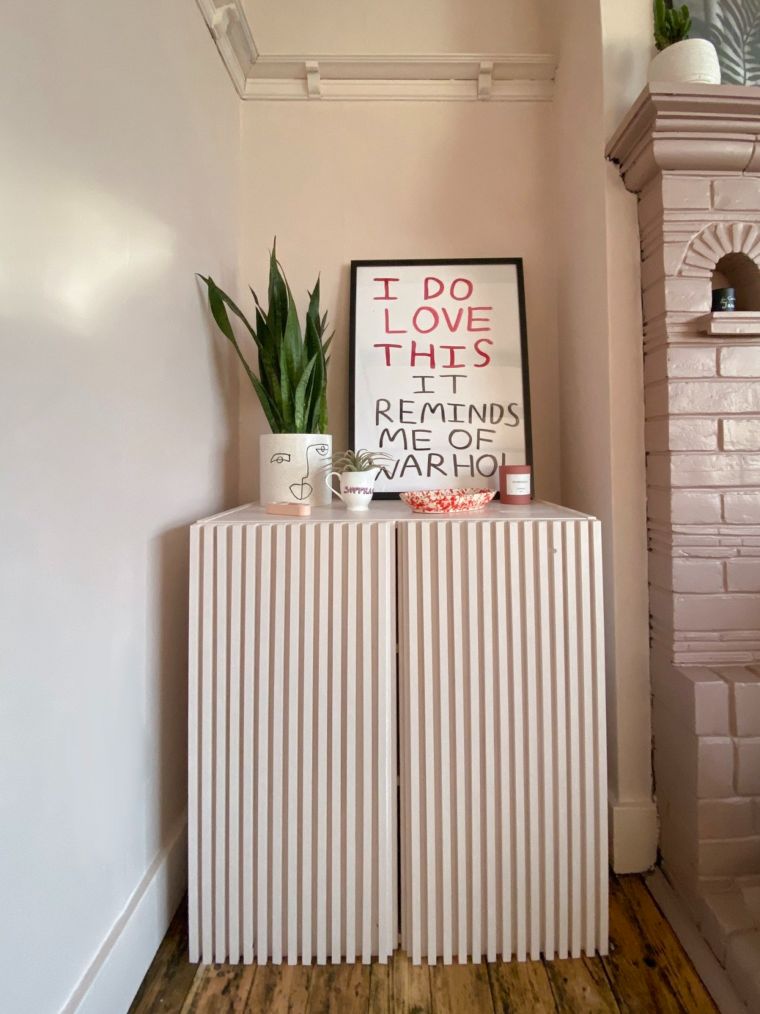
Source: emmajanepalin.com
Have you got an old IVAR unit sitting around your house? Time to give it some new life with a fluted profile.
This is great if you’ve got some spare lumber sitting around the house as well. Thus, it is meant to be a little well-worn.
Strip the lumber into smaller pieces and fit the height to your IVAR’s doors, remove the doors, and affix the strips to them with some Gorilla Glue and G-clamps. Paint with a solid color (white is a great option), and you’re done.
The ultimate sustainable furniture DIY!
4. Turn-of-the-Century IVAR Facelift
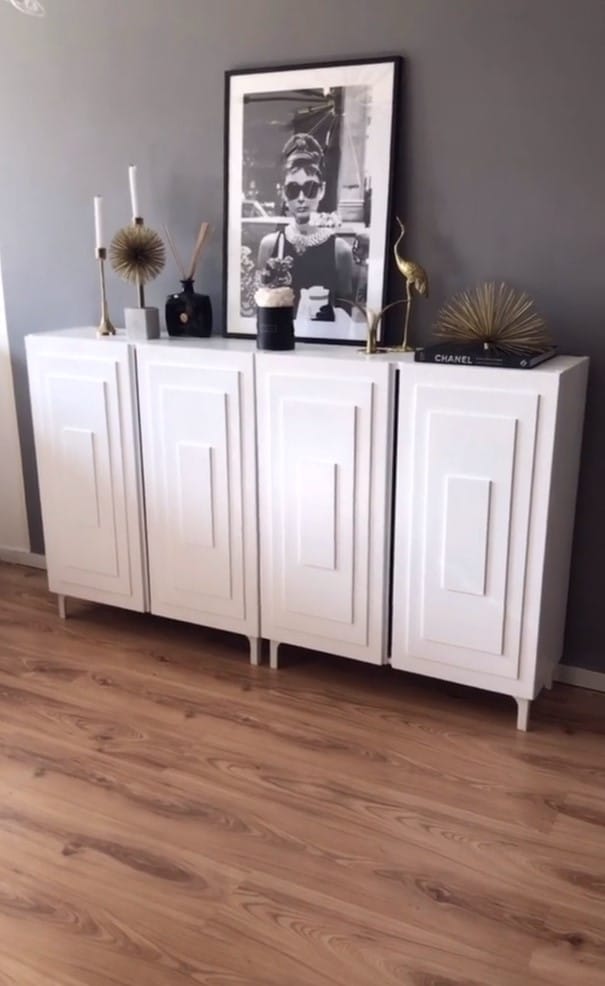
Source: Pinterest
Sometimes all an old dog needs are some new tricks, and with this turn-of-the-century inspired DIY, your IVAR will be doing flips in no time. Okay, not really, but how cool would that be?
All you’ll need for this hack is some extra MDF, some white paint, and your trusty Gorilla Wood Glue. Measure out the wood planks in progressively smaller sizes, then glue them onto the doors in a radial pattern.
It’s the perfect art-deco-inspired storage solution without being too on the nose.
5. Get Healthier with a DIY Standing Desk

Source: papernstitchblog.com
It’s the plight of the modern human to be sitting for most of our workday, but if you work from home these days, you have a unique opportunity! Create your own standing desk with a few IVAR cabinets stacked next to each other.
Lay a thick plank in matching or contrasting wood on top of the cabinets to create your desk, and add a tall stool like this one to complete the room.
This is also a cool idea for a kitchen island installation! Check out more ways to update your kitchen here.
6. Custom Blanche-Inspired IVAR Cabinet
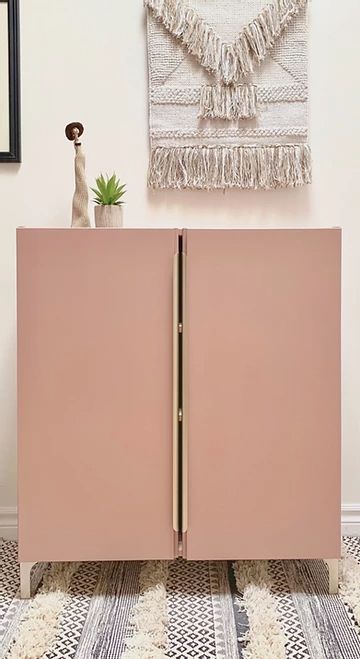
Source: idstudio-m.com
Blanche from the Golden Girls did “millennial pink” and rose gold well before us modern gals had a crack at it. So, let’s honor a tried-and-true color combination with this dusky pink and gold cabinet customization.
The gold cabinet pulls on this hack give it a sleek, minimalist aesthetic to combat the colorful retro pink enamel paint like this. You can choose to put this cabinet directly on the ground or prop it on some tall golden legs to add some extra room beneath the piece.
Ideal for shoes, or some extra wicker baskets like these for clean storage.
7. Clean Grey Minimalist Shelving
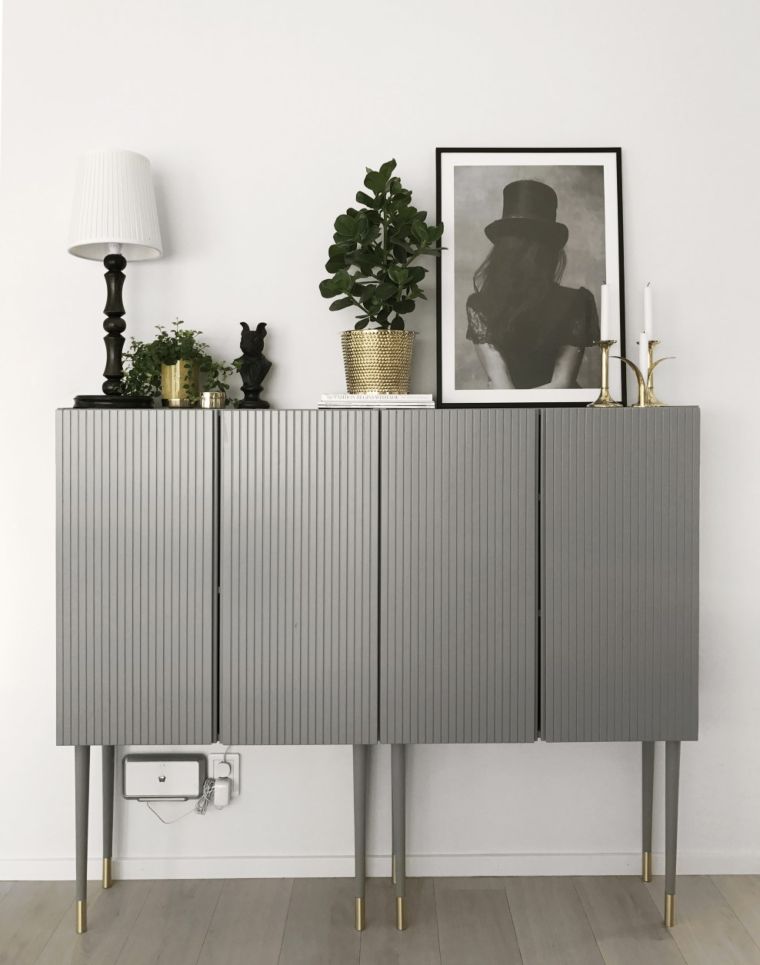
Source: prettypegs.com
This is a clean take on the third hack on this list. The rustic ribbed shelving is done minimally.
If you’re of the intense DIY disposition, then you can mill the IVAR’s doors yourself. Otherwise, you can call on a professional.
Milling the doors instead of fixing rough-hewn wood onto the front gives it a sleek appearance, so you can enjoy that Swedish styling Ikea is known for.
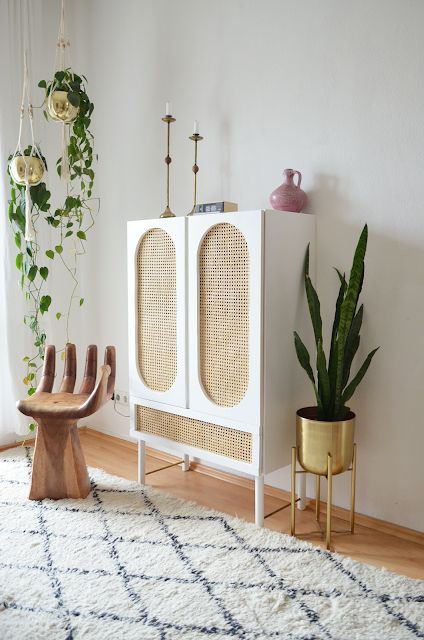
8. DIY Drinks Cabinet
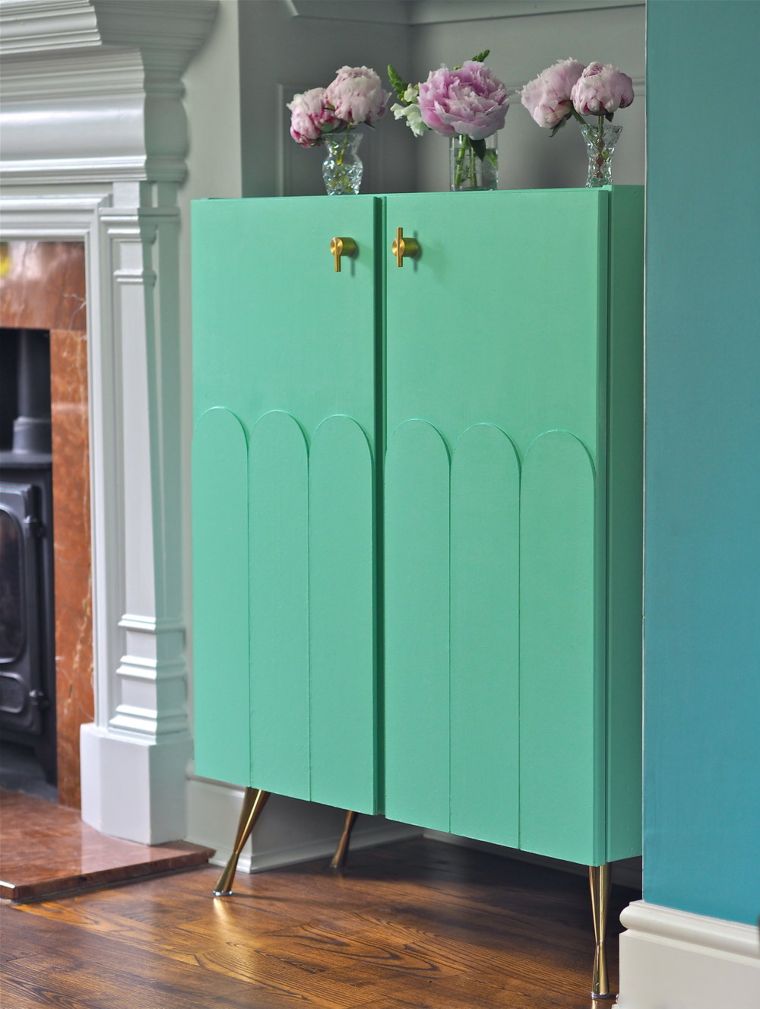
Source: melanielissackinteriors.com
There’s something so inspiring about the art deco aesthetic, and when it comes to this drinks cabinet, it’s done beautifully. The soft teal color with striking gold accents pairs so well with the rounded shapes on the doors.
Install a wine glass rack like this on the inside of the tallest shelf, invest in a golden cocktail shaker, and put on some swinging tunes. You’re practically in the Roaring Twenties.
9. A Modern Industrial Facelift
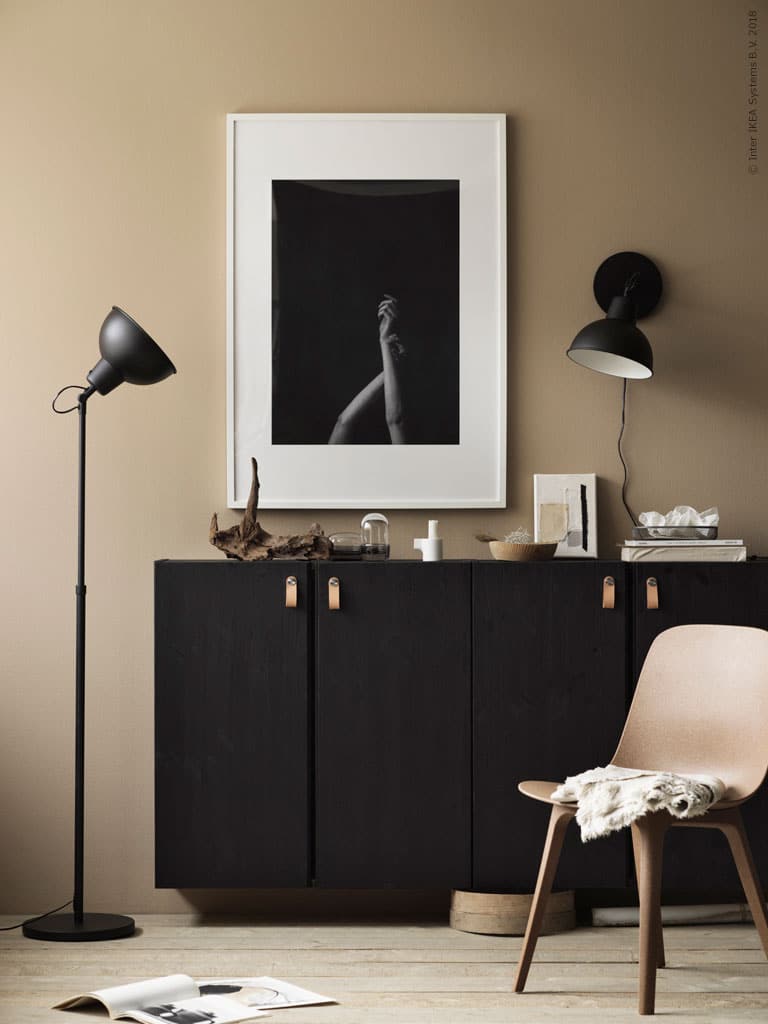
Source: livethemma.ikea.se
All you need to give the IVAR a sophisticated, modern feel is a little semi-matte carpentry paint, and some warm leather pulls. The combination is wonderfully masculine, and the black pairs well with pretty much everything (just like putting an outfit together).
If you want to see more of the wood grain, use a black glaze instead of carpentry paint to let the natural wood shine through. Replace the leather pulls with some chrome finishes for a “Mr Grey will see you now” vibe.
10. Spice Up Your Child’s Room

Source: Instagram
This DIY is an easy breezy afternoon’s work, but the payoff is so good! All you’ll need is some painter’s tape and enamel paint in your chosen color (grey looks great on the IVAR).
Block out a mountain design, some geometric shapes, or an art-deco design across multiple cabinets, lining them up together. This makes them into a continuous line, blending your storage units into one fixture.
Check out more IKEA hacks to increase storage here!
11. Decoupaged IVAR Sideboard
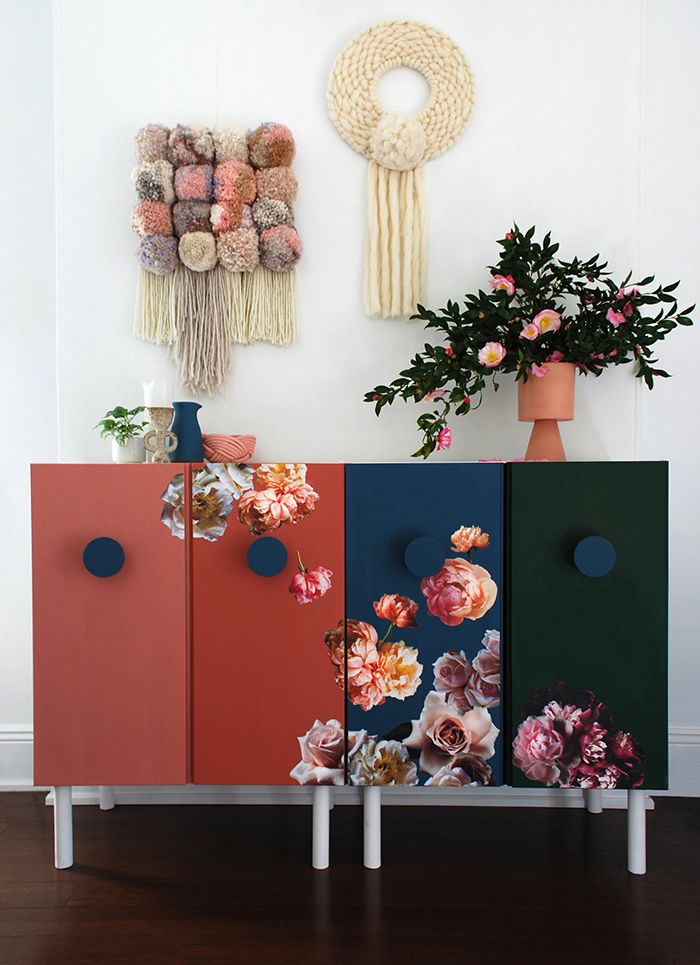
Source: we-are-scout.com
Now, this isn’t the decoupage of yesteryear. This is some seriously modernized design.
This bold sideboard is the ideal addition to dynamic home design, and if you like eclectic stuff, this is the one for you!
Each cabinet is a different color, getting darker and darker in a gradient. Then, much like the previous DIY, the decoupage drifts across the fronts of all the cabinets in a gorgeous design, rendered in chalk paint like this.
It’s the kind of thing that will make your guests stop and say, “Wow! Where did you get that?”.
12. Elevate Your IVAR Cabinets
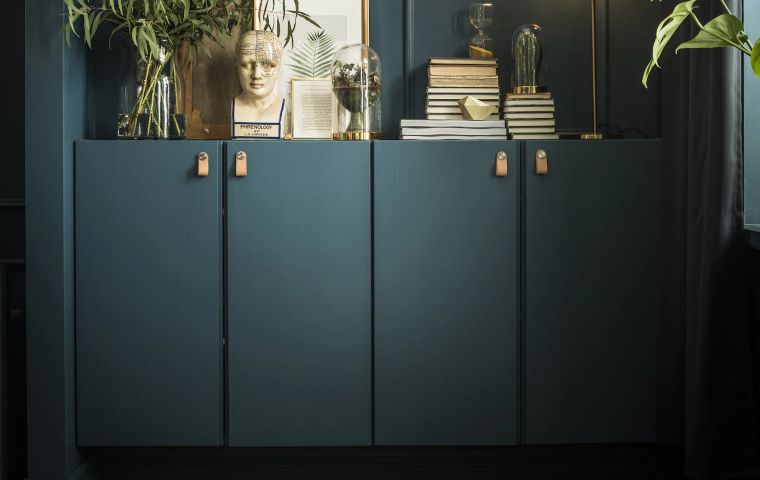
Source: ikea.com
This hack takes a boring cabinet and elevates it… literally. Hang them with vertical brackets like this on your wall for a floating cabinet look.
Even better, paint them the exact color of your walls for a camouflaged, built-in feel. Luckily for hackers and DIY-ers everywhere, the IVAR cabinets come ready to paint, so we don’t need to waste any time on primers.
Dark colors work particularly well for this project, so if you have a solid color feature wall you’re looking to update, this is the hack for you.
13. The Hack Library Cabinet
Source: cityfarmhouse.com
Many of us have always dreamt of having a library room with sweeping shelves and those ladders that roll across the floor. This isn’t quite that, but it is one step closer.
Paint your IVAR cabinets a dark grey or old leather brown for a vintage feel, and accent them with gold legs and cabinet pulls.
Make sure you only put legs on the bottom cabinet, as you’ll be stacking two Ivars vertically to simulate that tall library shelf. Add a leaning ladder like this on the side for an adorable touch of design.
Also, make sure you fix the cabinets to the wall with some for safety. It’s much safer and doesn’t take much longer. In fact, it’s imperative to do this if you’re taking on this DIY.
14. Beach-Themed Wicker Cabinet
Source: makeitboho.de
This wicker-front cabinet is the ideal accompaniment to a beachfront cottage (or the ideal cabinet if you’re hoping to get one someday!). It looks like a lot of work but, with the help of this trusty staple gun, you can make it happen in an afternoon.
The idea is to cut negative spaces into the front of the cabinet doors and cover them again with some wicker matting. First, sketch and cut the negative spaces from the doors.
Then, paint with white chalk paint before stapling the wicker to the back of the doors. Finally, assemble it, and you’re done!
15. Standalone Cabinet
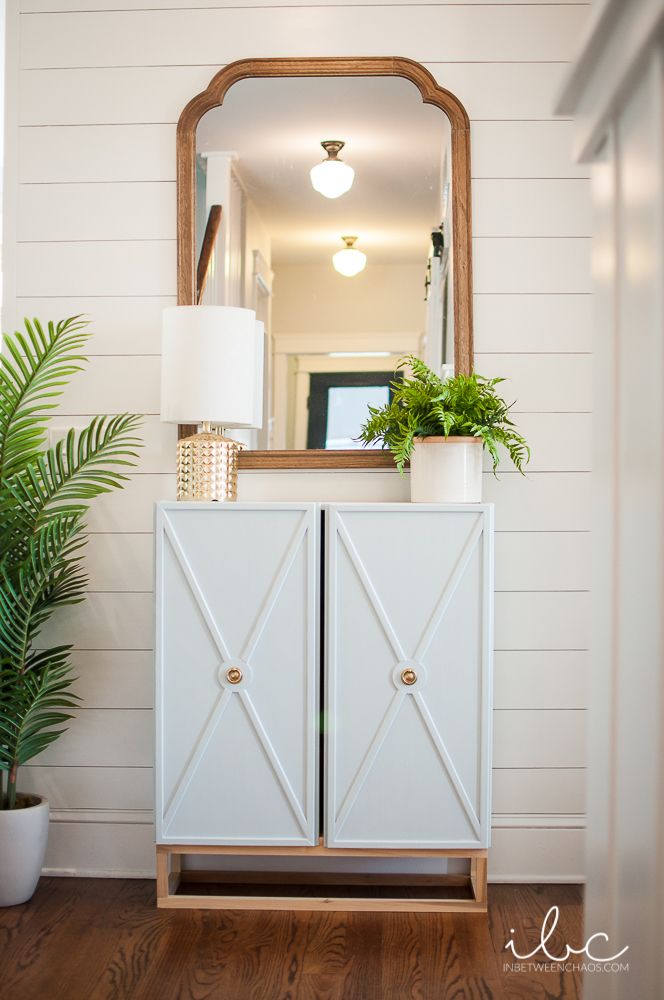
Source: inbetweenchaos.com
There are so many built-in IVAR hacks out there, so it’s refreshing to see some standalone cabinets for the hallways and entryways of the world. This one combines natural textures, gold fixtures, and white cabinets for a modern take on art deco.
For this hack, you’ll need these three-inch wooden craft circles, some three-quarter-inch doorstop, and some wood glue to make the shapes on the front. Glue them on in the right shape and paint straight over it to create a professional-looking bevel effect.
This is a gorgeous one for the sunny seasons or your kid’s room!
Check out some other kids’ room hacks here.
16. Wall-to-Ceiling Storage Block
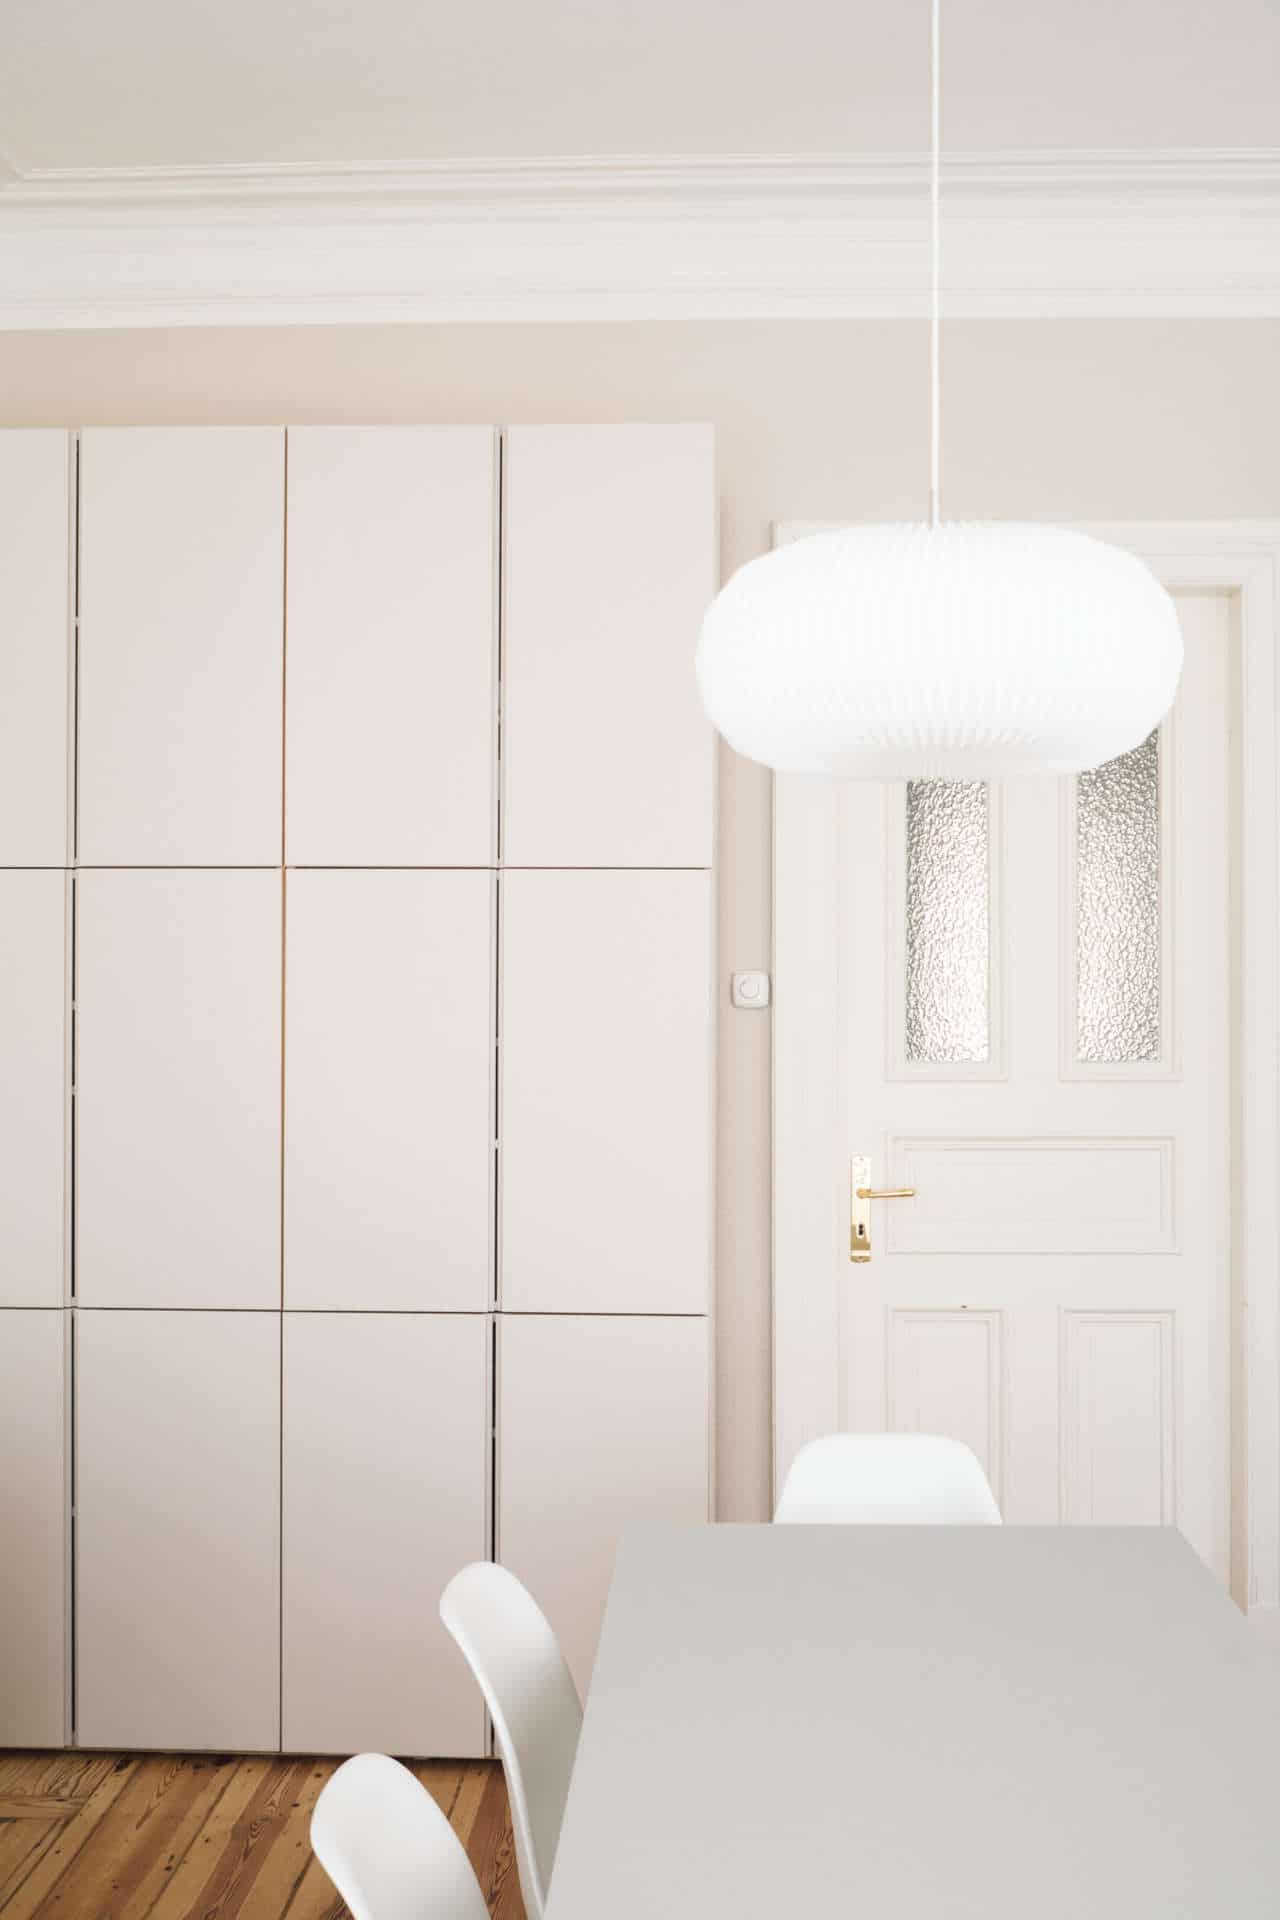
Source: paulsvera.com
This one is for those who can’t get enough storage (and really, who among us crafters isn’t like that?). Block out a wall in your craft room or kitchen for this big hack, and make sure it’s a strong wall!
You’ll be stacking the IVAR cabinets on top of each other to form a full wall of cabinets. Paint them all a uniform color, something similar to your existing wall color works well to blend the large fixture into your space.
Ensure you stack them safely on top of each other and anchor each individual cabinet to the wall with these wall anchors. It’s imperative to keep you safe!
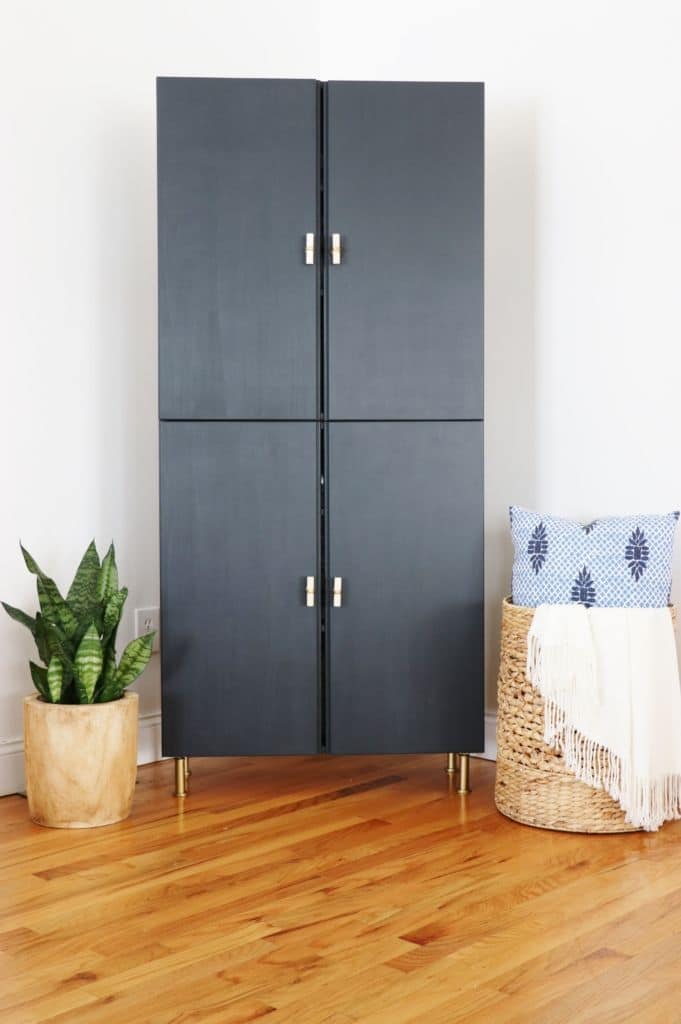
17. Create a Blocked Closet
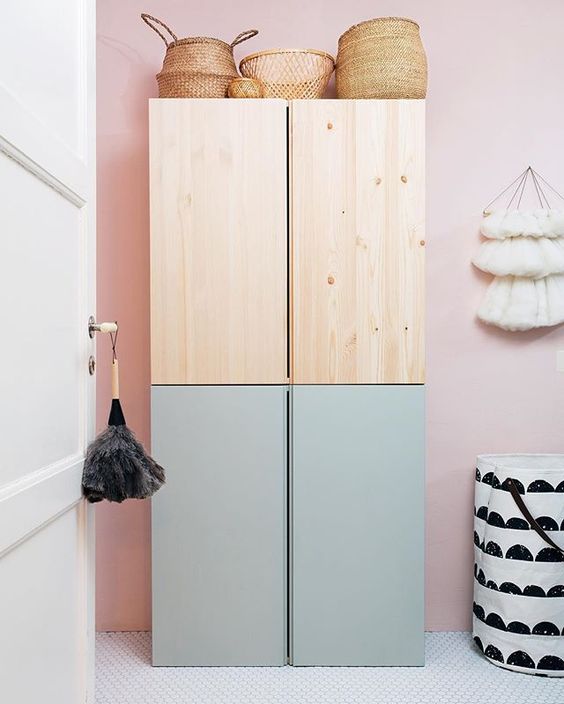
Source: petitemodernlife.com
Whether you need more storage in a kid’s room or you’re looking for another closet in your own room, this is the hack for you. It’s the work of an afternoon, but the end result is so pretty and professional!
All you’ll need is two cabinets, some paint, and some wall anchors. Paint one or both a solid block color, stack them on top of each other and fix them to the wall. Easy-peasy storage hack!
18. Hanging Study Alcove
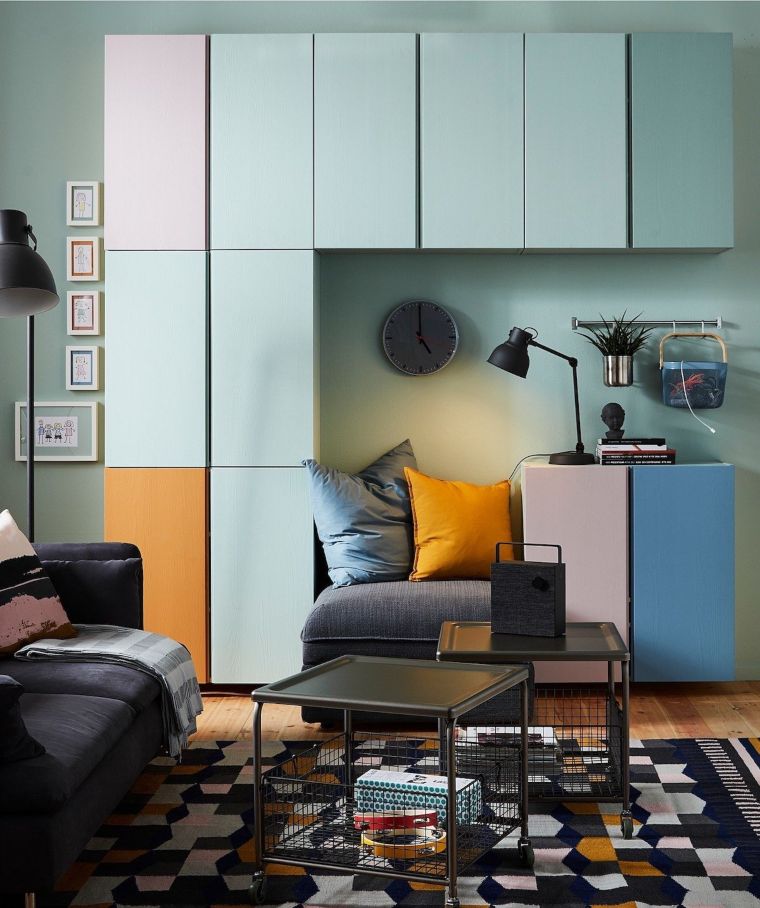
Source: clemaroundthecorner.com
There’s something amazing about carving out a spot that wasn’t in a room before, so why not give this study corner hack a try? This hack uses six IVAR cabinets, all painted different colors, and hung on the wall, to create a room within rooms.
Include a cushy day bed, a clock, a lamp, and a charging station like this to make this a true-blue study corner for your flat, dorm, or apartment.
19. Modern Art Deco Cabinet
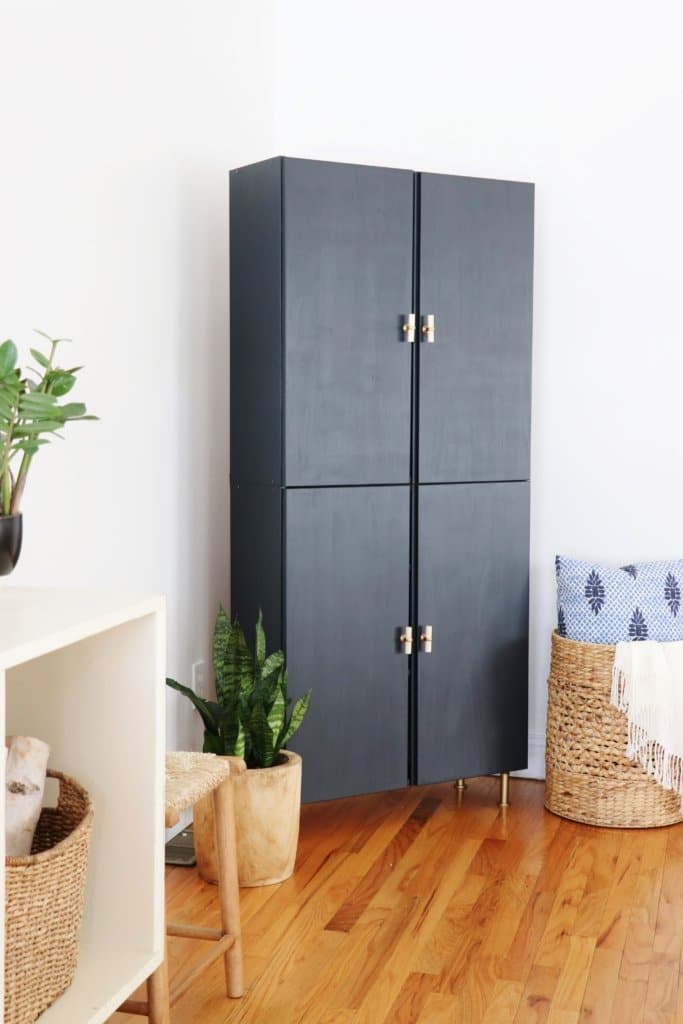
Source: clemaroundthecorner.com
If you’re a fan of the kid’s closet hack from earlier and want to replicate it for your room, give it a try with a more sophisticated color scheme.
You’d be surprised what adding gold legs and cabinet pulls can do for your IVARs. Especially if you paint them gorgeous charcoal black!
Dress the area around the cabinet with some gorgeous greenery to balance out the industrial look of the whole thing, and you’re golden…. Literally!
20. The Ultimate Retro Sideboard
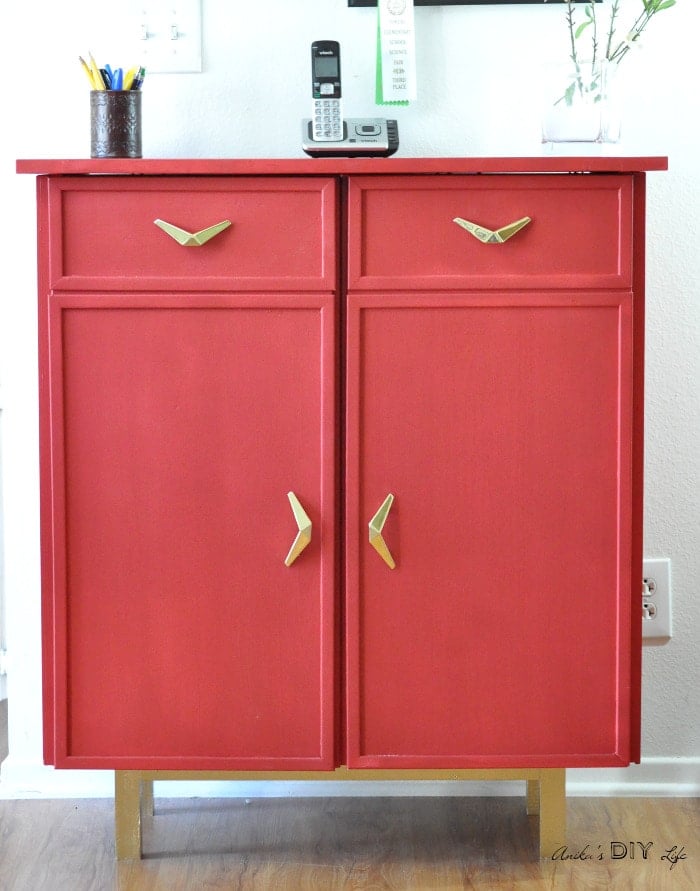
Source: anikasdiylife.com
Our final hack is an homage to English retro fashion, using red chalk paint, doorstop trims, and golden fixtures to bring the sixties back to life!
All you need to do is trim each cabinet panel with the doorstop trim, paint over it, assemble, and add handles. Voila!
You’ve got a sideboard that will make you the envy of vintage lovers everywhere. Not to mention, you didn’t have to spend a million bucks to make it happen!
Conclusion
Which one of these Ivar hacks is your favorite? Let me know!


Amazing hacks, love them all. One issue. There are no supply lists for completing the cabinets. Great to have the bones of the project, but what about the finishing pieces?
Thanks for the ideas…..
Hi Janice,
Click under the picture where it says ”Source” and you should be able to find all the supplies necessary with the instructions.