DIY Easter Sock Bunnies
This post may contain affiliate links: full affiliate disclosure.
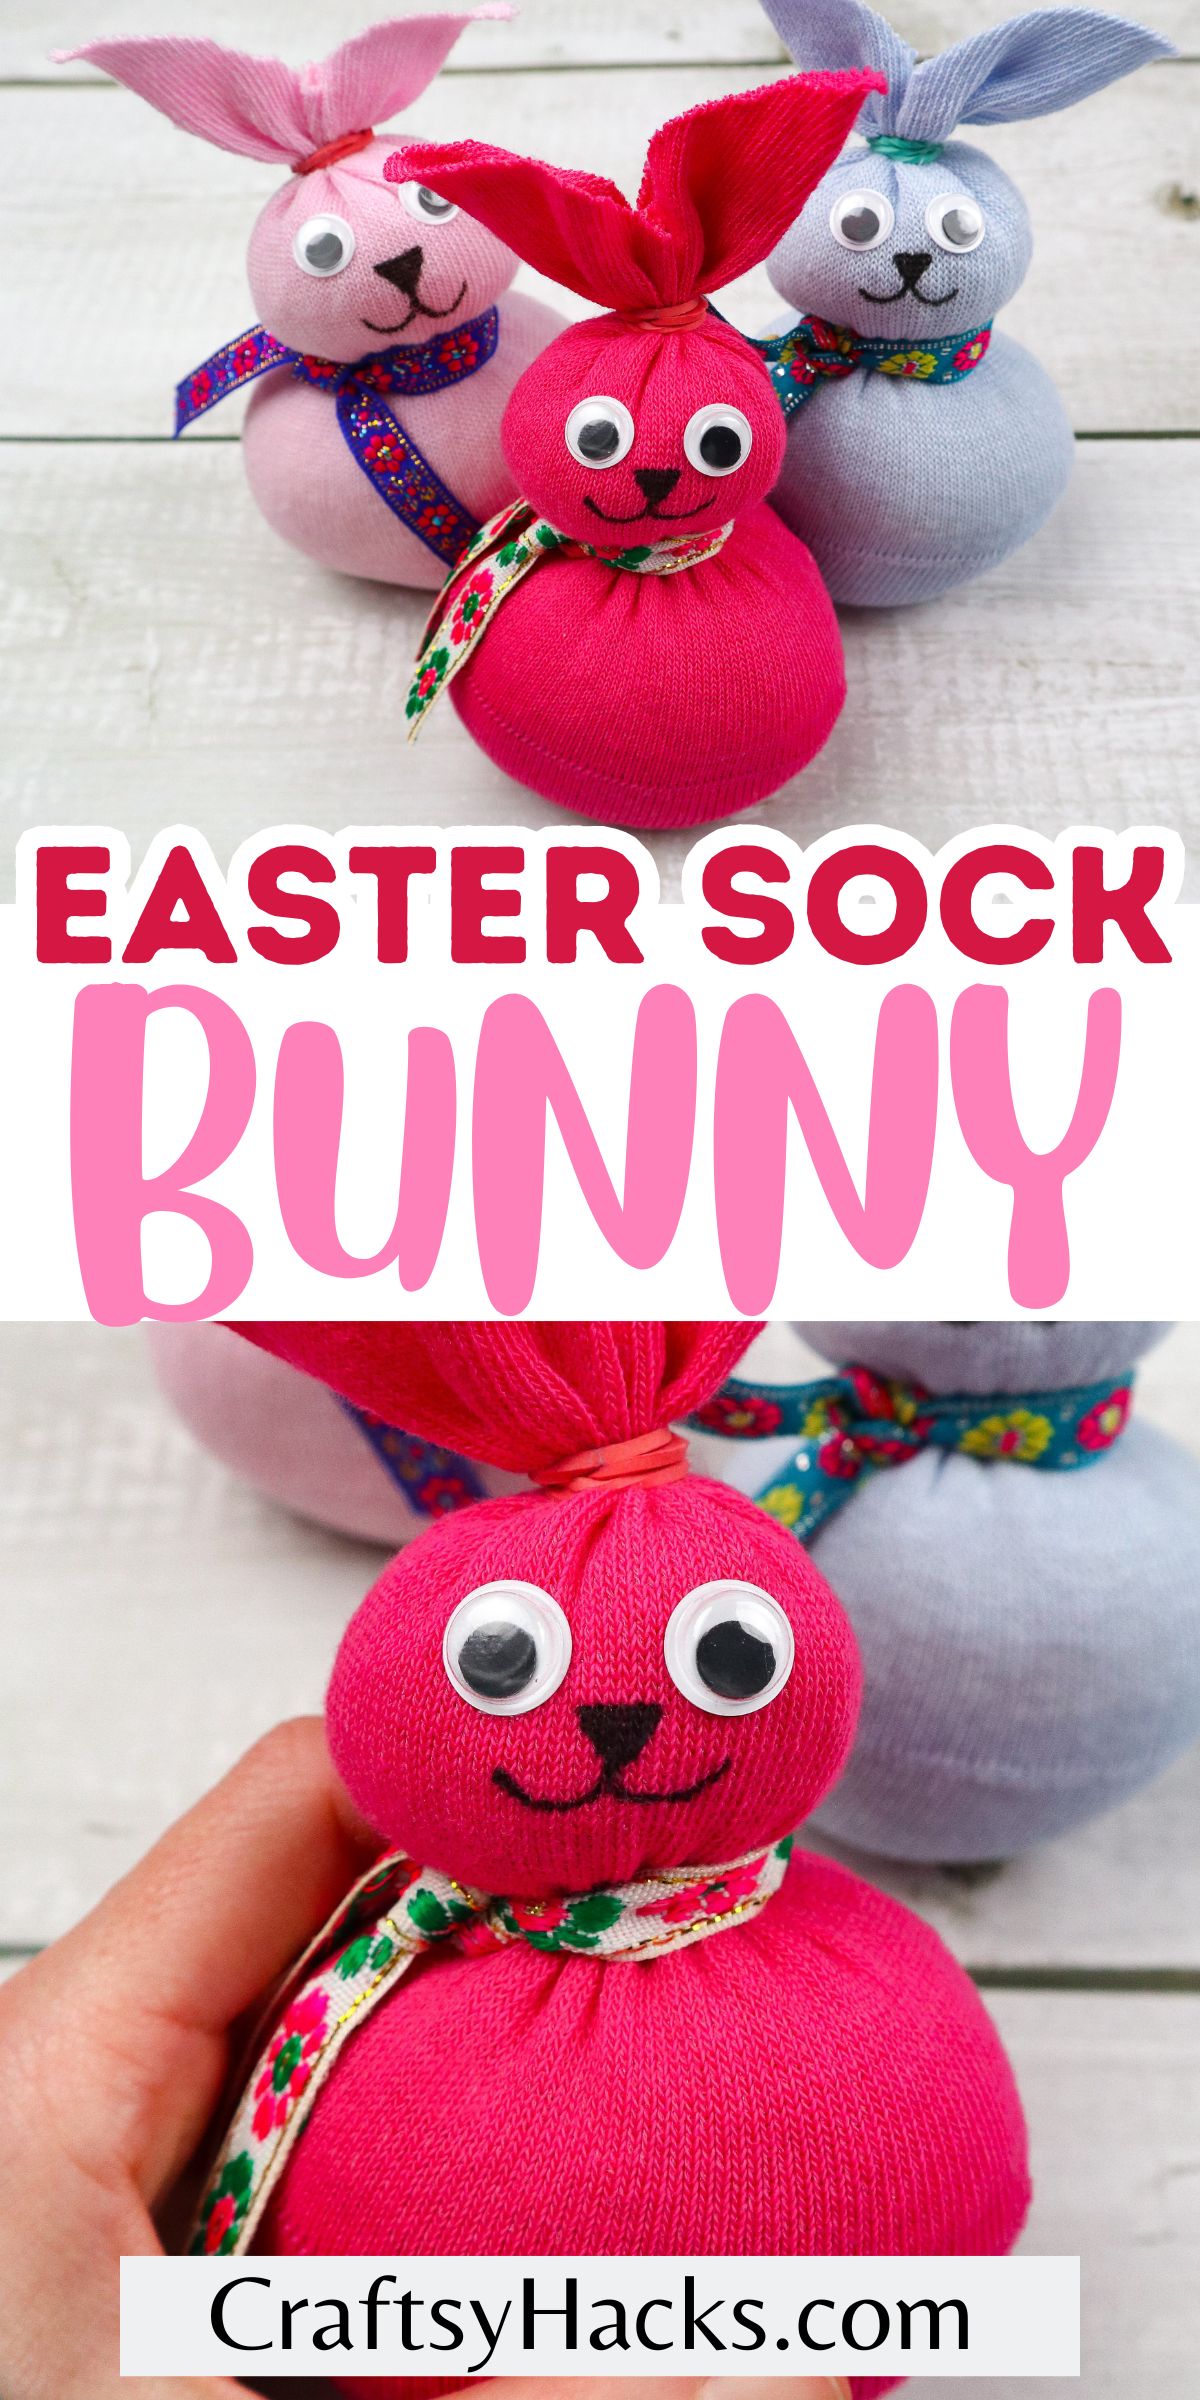
As March marches on, one hoppy holiday starts to make itself known with the mixed weather. If you love celebrating Easter, these DIY Easter Sock Bunnies are perfect for you!
It can be a great upcycle, class, or casual fun project for a rainy afternoon. Endlessly colorful, these bunnies will make any crafter smile.
A fun addition you can insert into this project is a handful of drops of essential oils or even some dried spices or herbs inside the bunnies.
Incredibly cheap but with a large impact, from a fun pop of color to name plates for Easter dinner, these bunnies are hoppy to add fun to any part of your life.
Before we start, if you need assistance walking through this craft, check out my video of the same name on my YouTube–DIY Easter Sock Bunny.
I hope you enjoy these sweet, colorful sock bunnies as much as I do! Now, on to the post!
Supplies You’ll Need
Plastic/glass cup
Uncooked rice
Rubber bands
Scissors

How to Make Easter Sock Bunny
Step 1. To start our wonderful diy easter sock bunnies, grab your cup and sock designated for the bunny. Work the ankle area over the top of the cup–this makes putting rice in the sock way easier.
This cup acts solely as a catch-all and a safer way to pour rice into a sock. Add a shallow pan beneath the cup if needed for even more security.
Step 2. As mentioned, now is the time to add the uncooked rice. The size of the bunny will depend on how large your sock, cup, and amount of rice.
I highly recommend having all these parts figured out before assembly begins! The last thing you want to do while crafting is substituting and working on the fly with some integral parts of the craft.
Step 3. Take one rubberband and secure the top of the sock so the rice stays put. Make sure to use a rubberband that won’t budge easily to ensure your rabbit’s life span.
A few loops around the top should do the job–secure enough that no rice will fall out but not tight enough that it affects the overall look of the bunny.
Step 4. Once the top is secured, work another band onto the body after shaping a head. This rubber band will maintain most of the bunny’s silhouette, so make sure it’s flexible.
These rubber bands should be tight enough that you won’t have to manipulate them once the head is formed. Looping them over once or twice works as well.
Step 5. This next step is optional but adds a sweet pop and adorableness! You’ll grab another rubber band and secure it on the backside to create a tail.
Shape it similarly to the head but smaller.
Step 6. Prep the top of your sock, above the first rubber banded area, for ears. Fan the area or rearrange it so it’s sitting nicely for cutting.
Step 7. After the area is prepped, cut down the middle, ensuring it does not hit the rubber band. Trim and shape the ears as needed.
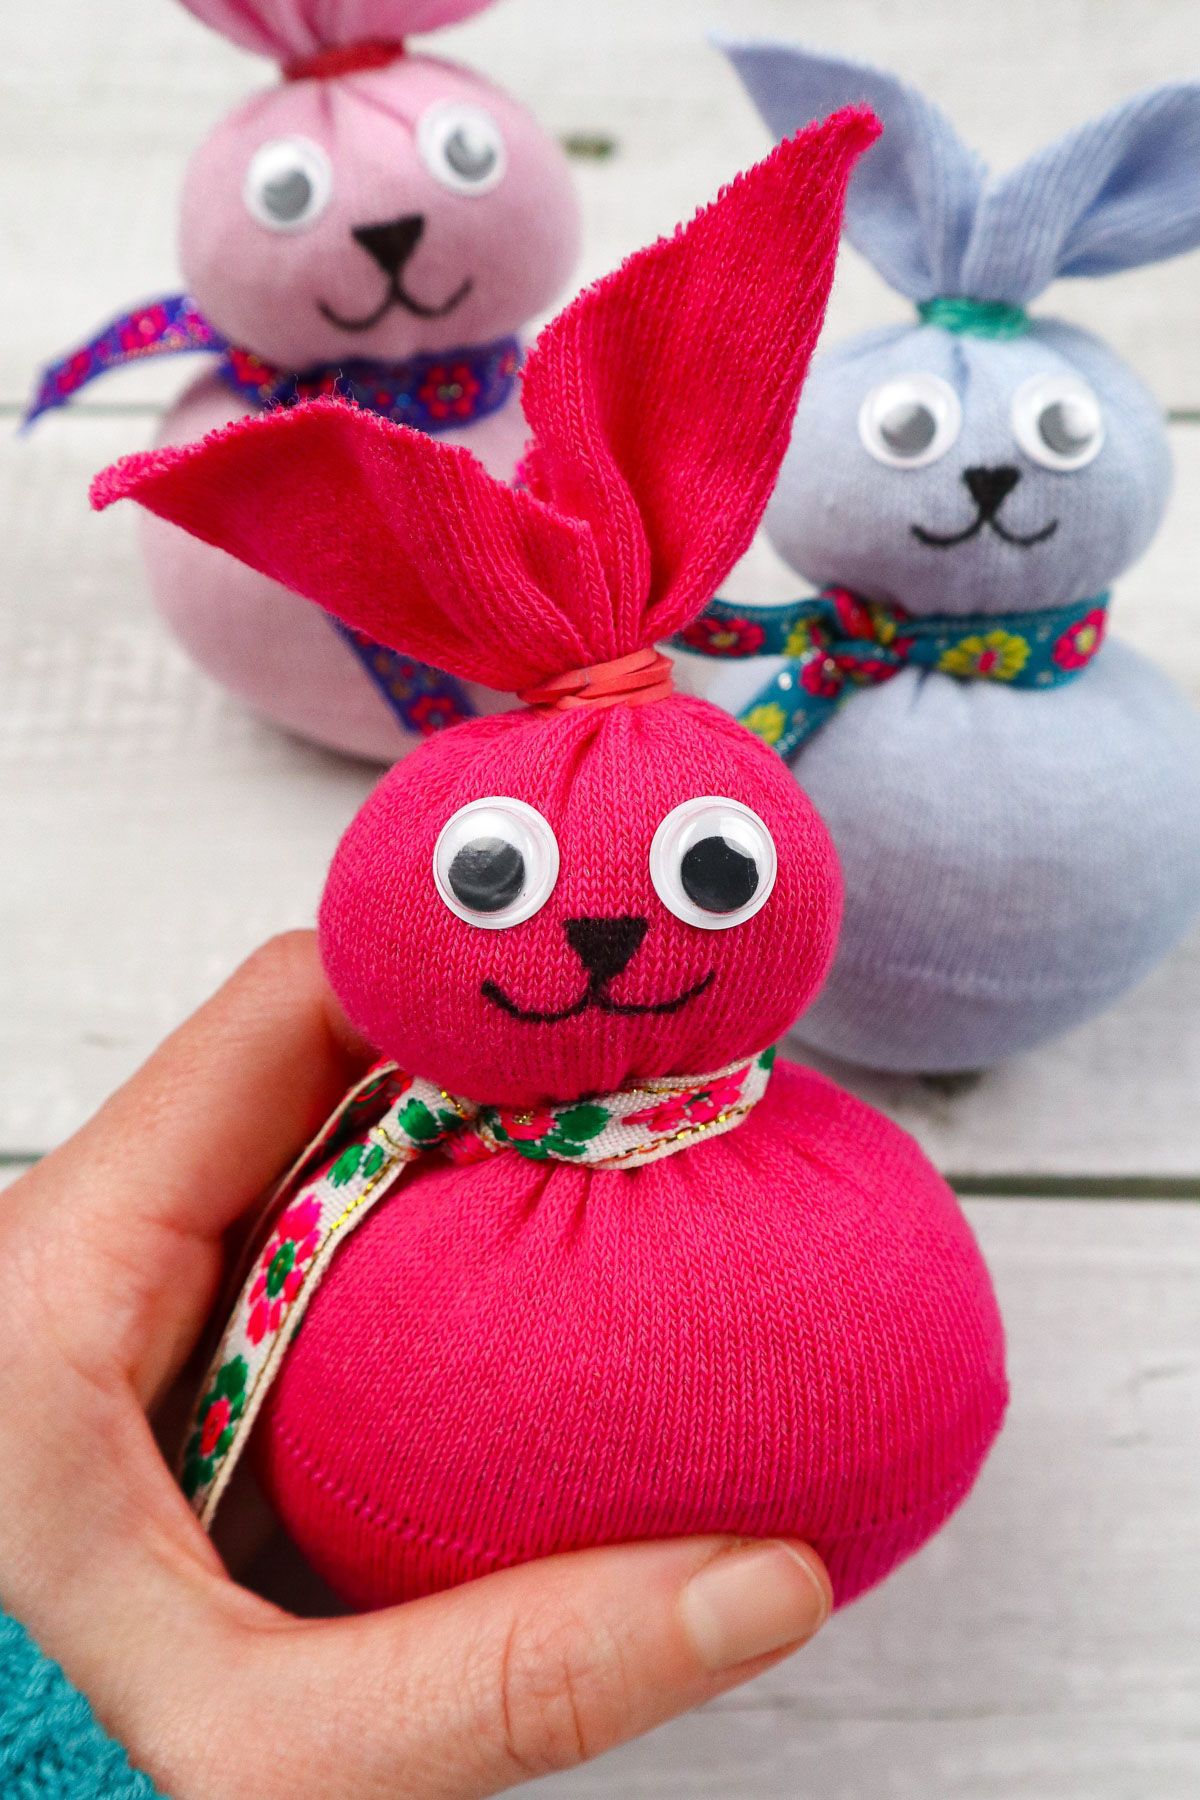
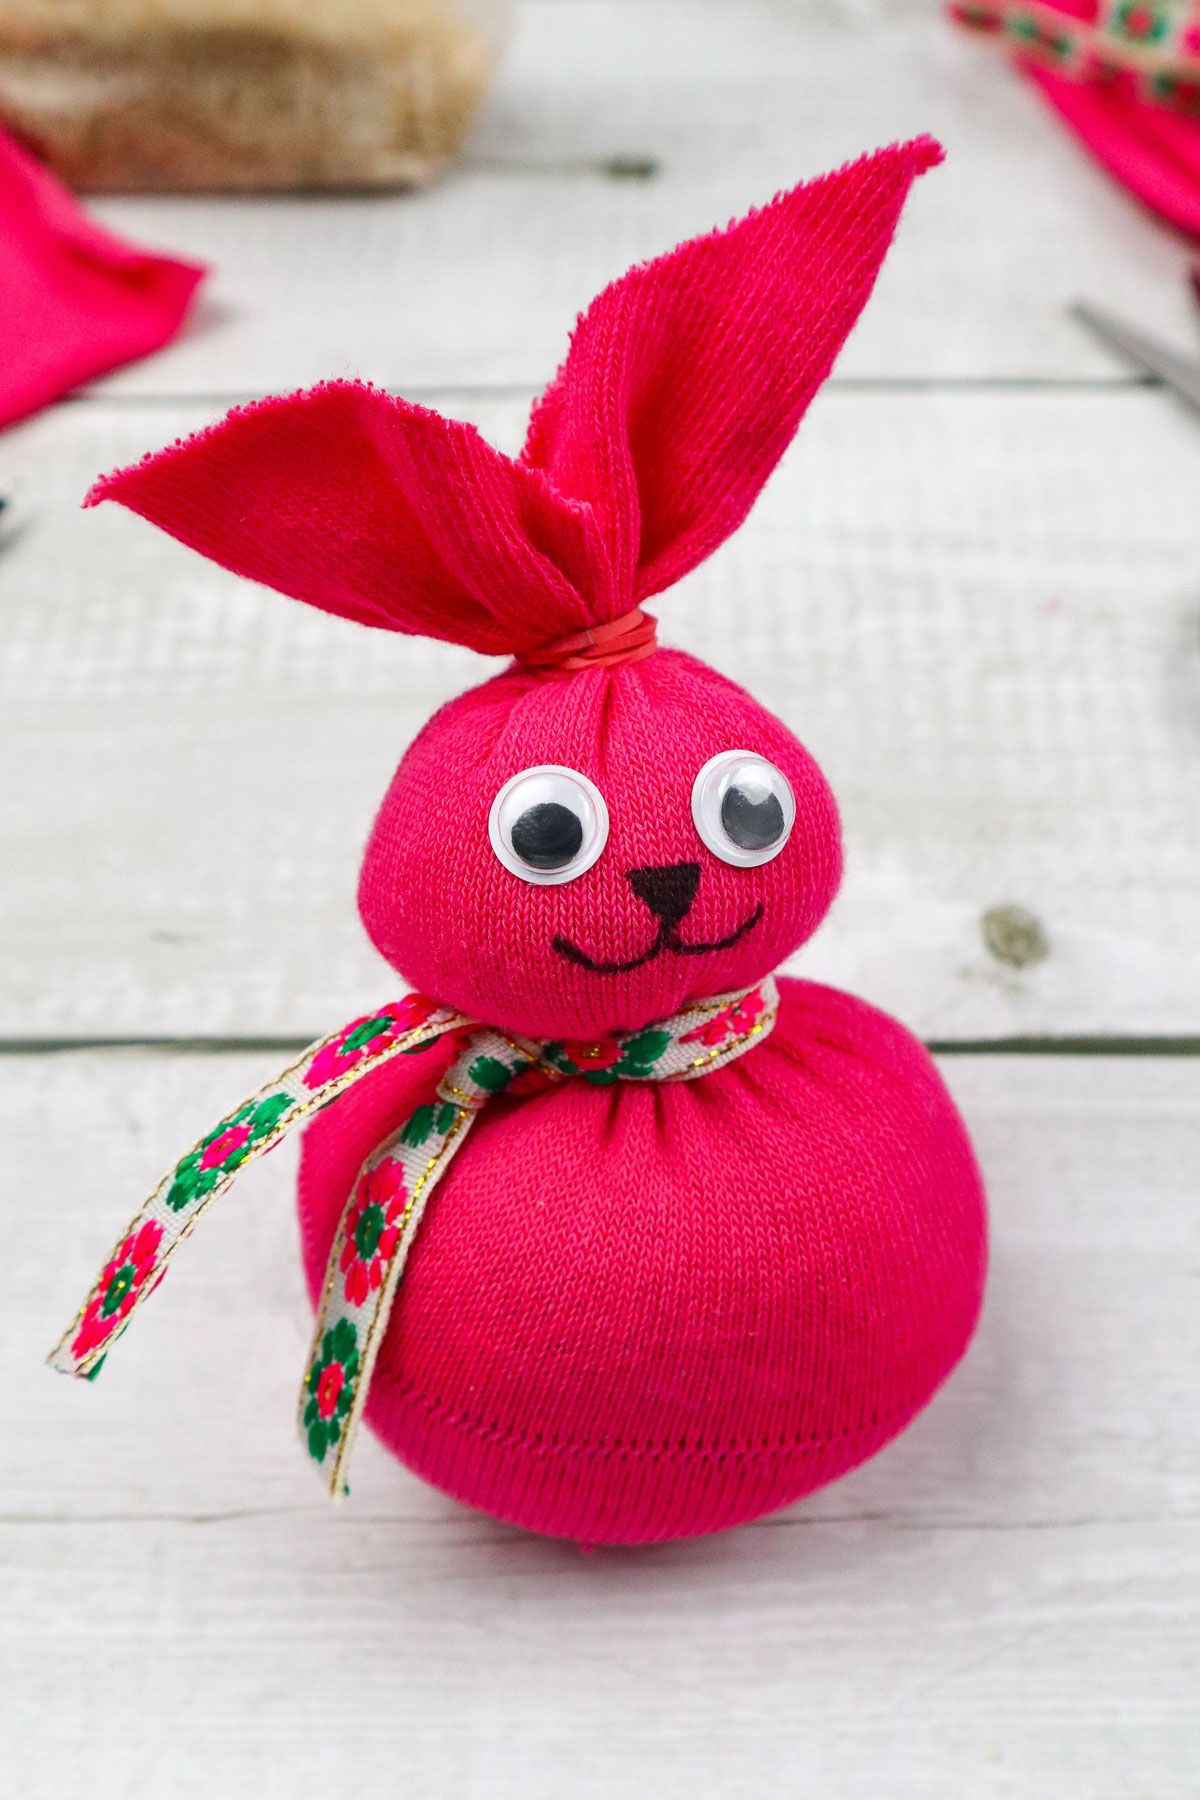
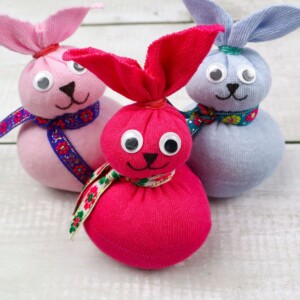
Step 8. Finally, the fun part–facial features and accessories! Make your Easter Sock Bunnies minimal or maximal with features, whether they’re just like mine or just the silhouette.
Sometimes, I like to cover all aspects of the rubber bands with various scraps of fabrics or props.
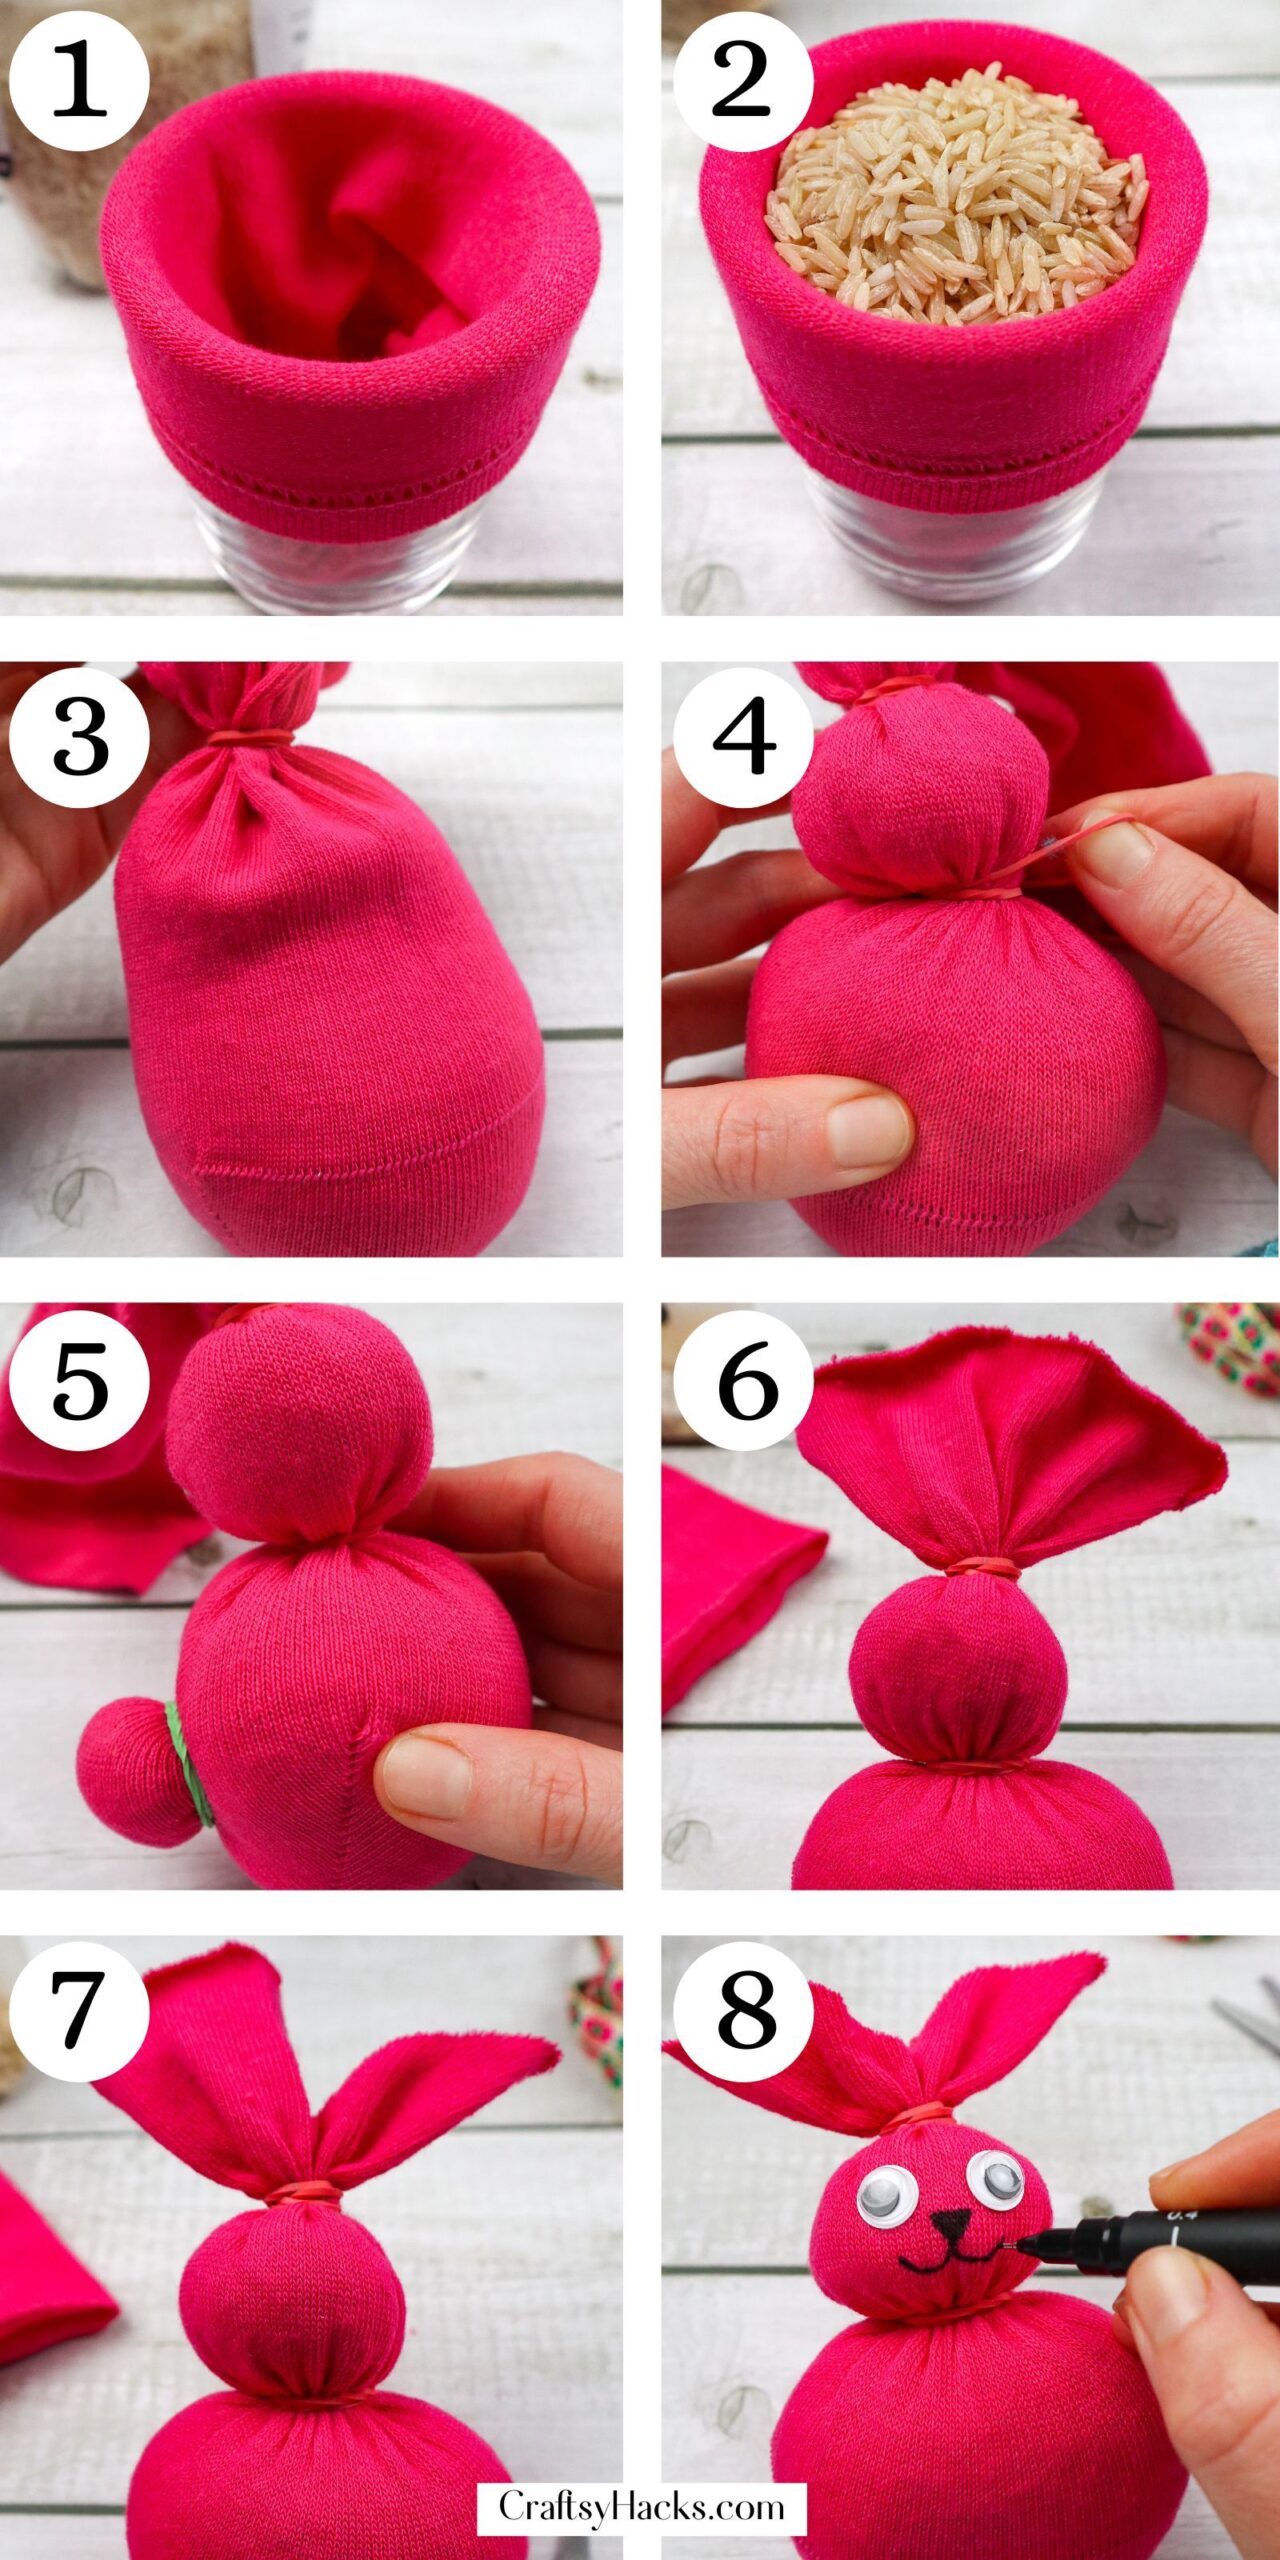
A good tip–use a fabric marker for a smoother application! The last thing you want is a jumpy smile for your bunny or bunnies.
Once decorating is done, you have your darling and adorable DIY Easter Sock Bunny! Perfect for casual home decor, presents to loved ones, or easy tablescape settings.
More Crafts to Make
DIY Easter Sock Bunnies
Equipment
- Plastic/glass cup
- Rubber bands
- Scissors
Materials
- Plain socks
- Uncooked rice
- Black marker
- Decorative ribbon
- Googly eyes
Instructions
- Place your cup or jar in front of you and work your designated sock onto the rim for easy pouring.
This cup acts solely as a catch-all and a safer way to pour rice into a sock. Add a shallow pan beneath the cup if needed for even more security. - Pour the rice into the sock. Be aware of the amount of rice to the sock size and your cup or jar.
- Secure your current sock’s state by adding a rubber band to the ankle area. Make sure to leave a bit of tail for the bunny’s ears.
- Shape a head in the sock near the top, just underneath the rubber band. Once formed, slip another rubber band onto the body and secure the head.
- Do the same thing for the bunny’s tail. Grab a small rubber band after you’ve shaped a small area for the tail on the back side of your sock.
- Fan out and prep the bunny’s ear area–or the top above the first rubber band. Remember that you’ll be cutting this area into a pair of ears.
- Make one cut through the middle (not far enough to hit the rubber band) and then shape each side respectively. Make the ears in any fashion you’d like–just make them even!
- Add the facial features or any discerning elements you’d like to add to your DIY Easter Sock Bunny.
Some of my favorite add-ons are googly eyes, a mini basket with goodies, and a simple doll’s hat reworked for a bunny.
A good tip–use a fabric marker for a smoother application! The last thing you want is a jumpy smile for your bunny or bunnies.


