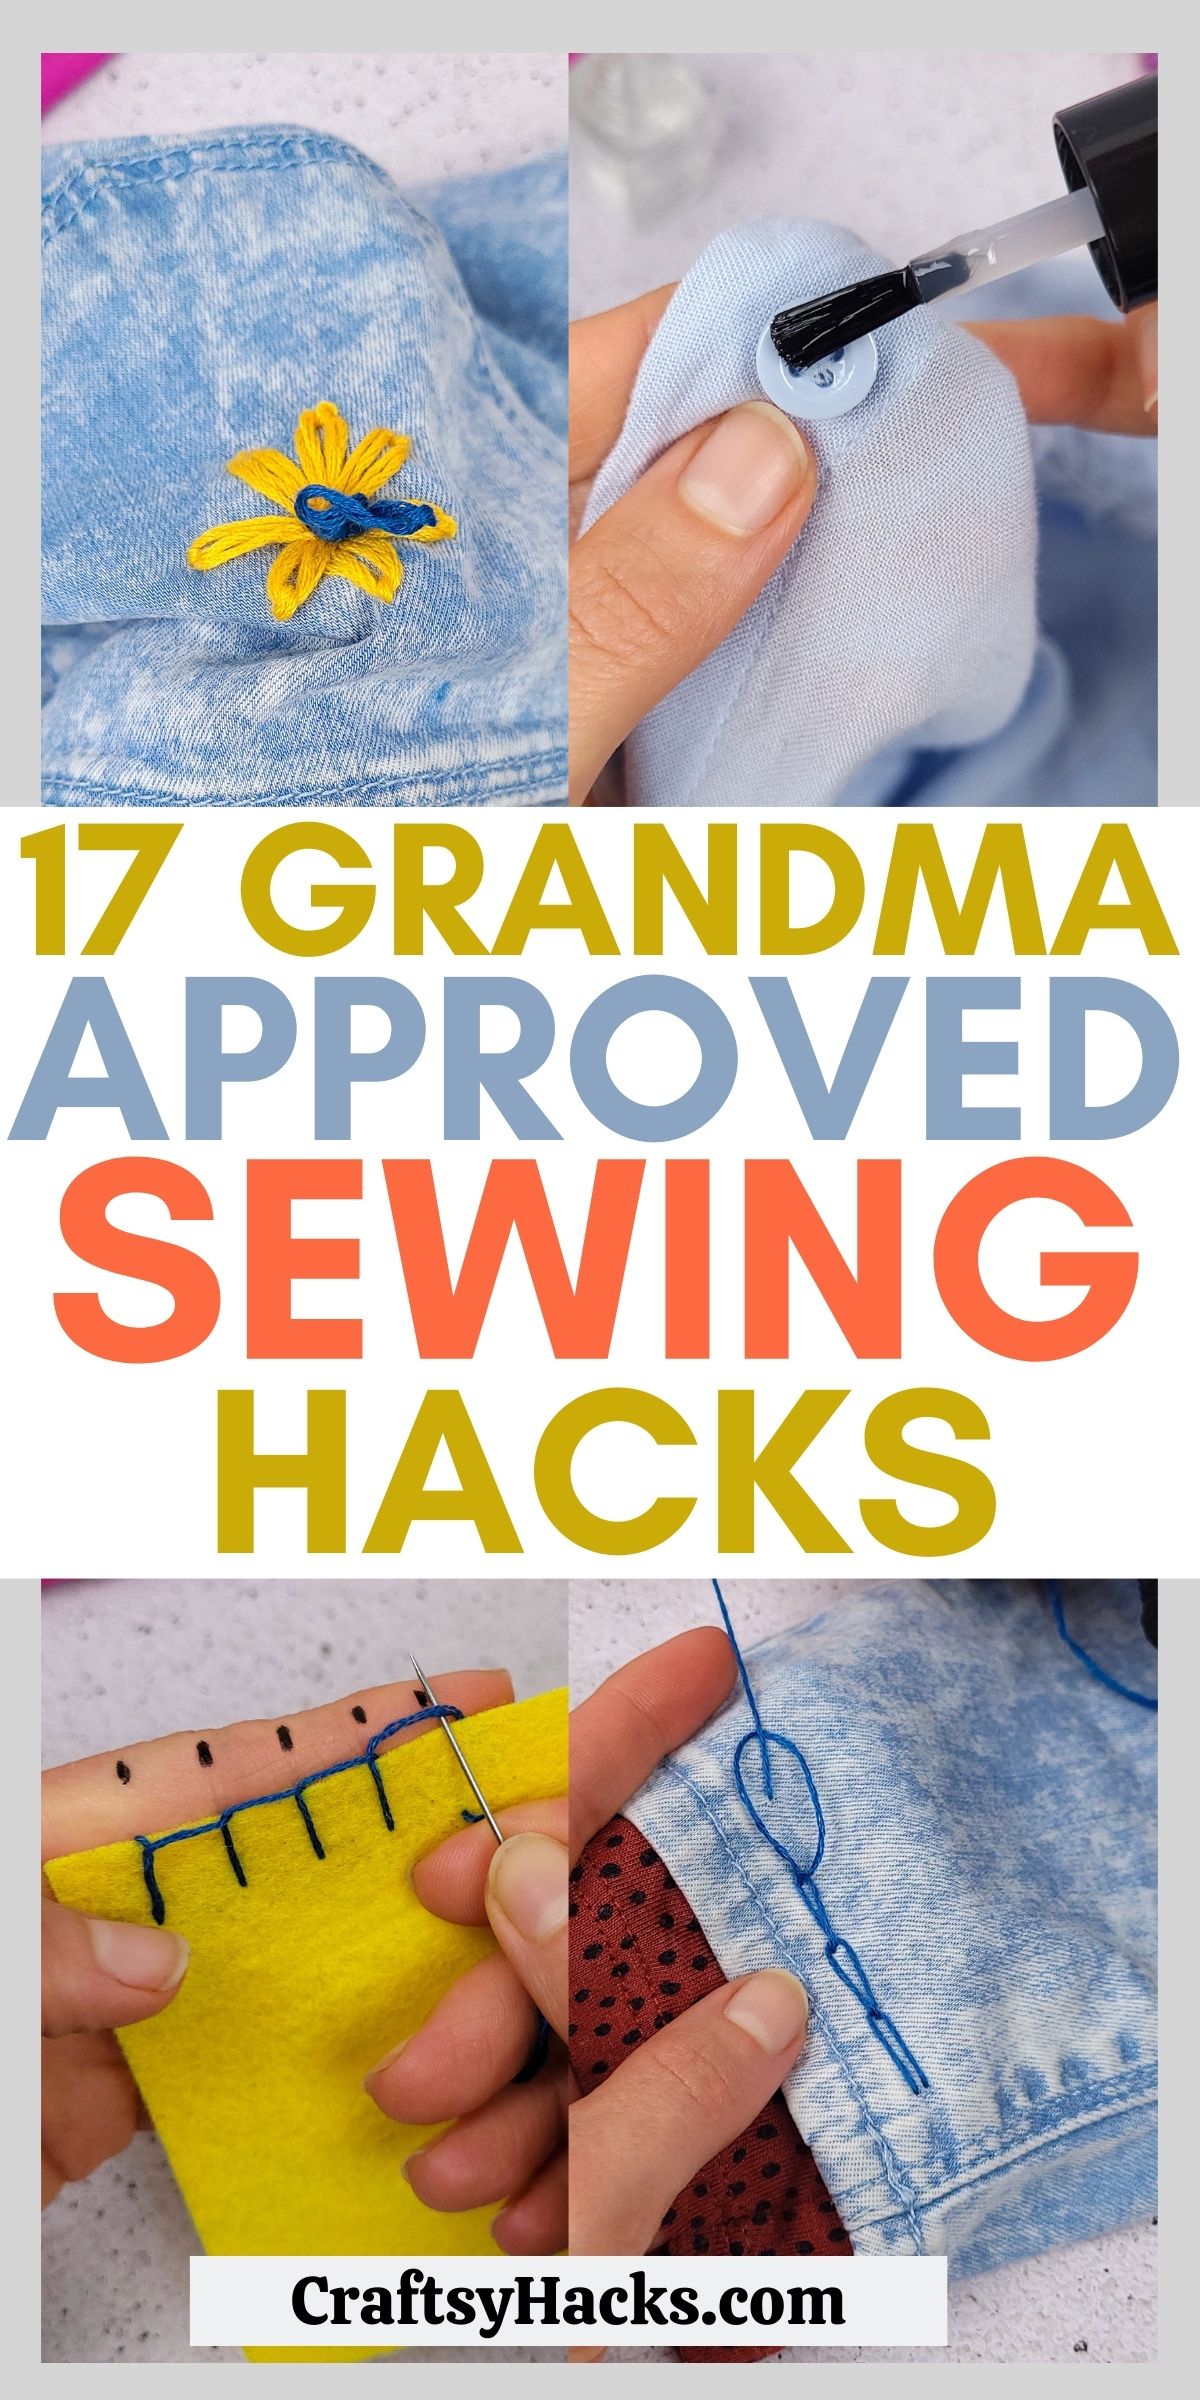
17 Sewing Hacks That Will Make Your Life Easier
This post may contain affiliate links: full affiliate disclosure.
Beginner to sewing? These sewing hacks will change the way you sew!
There are just so many ways to approach sewing. Not every stick needs to be as elaborate or painstaking as you might think and you don’t need any fancy equipment or tools.
Sometimes, a needle and thread is more than enough.
These 17 hacks will prove just how easy and quick sewing can be to make your life a whole lot easier!
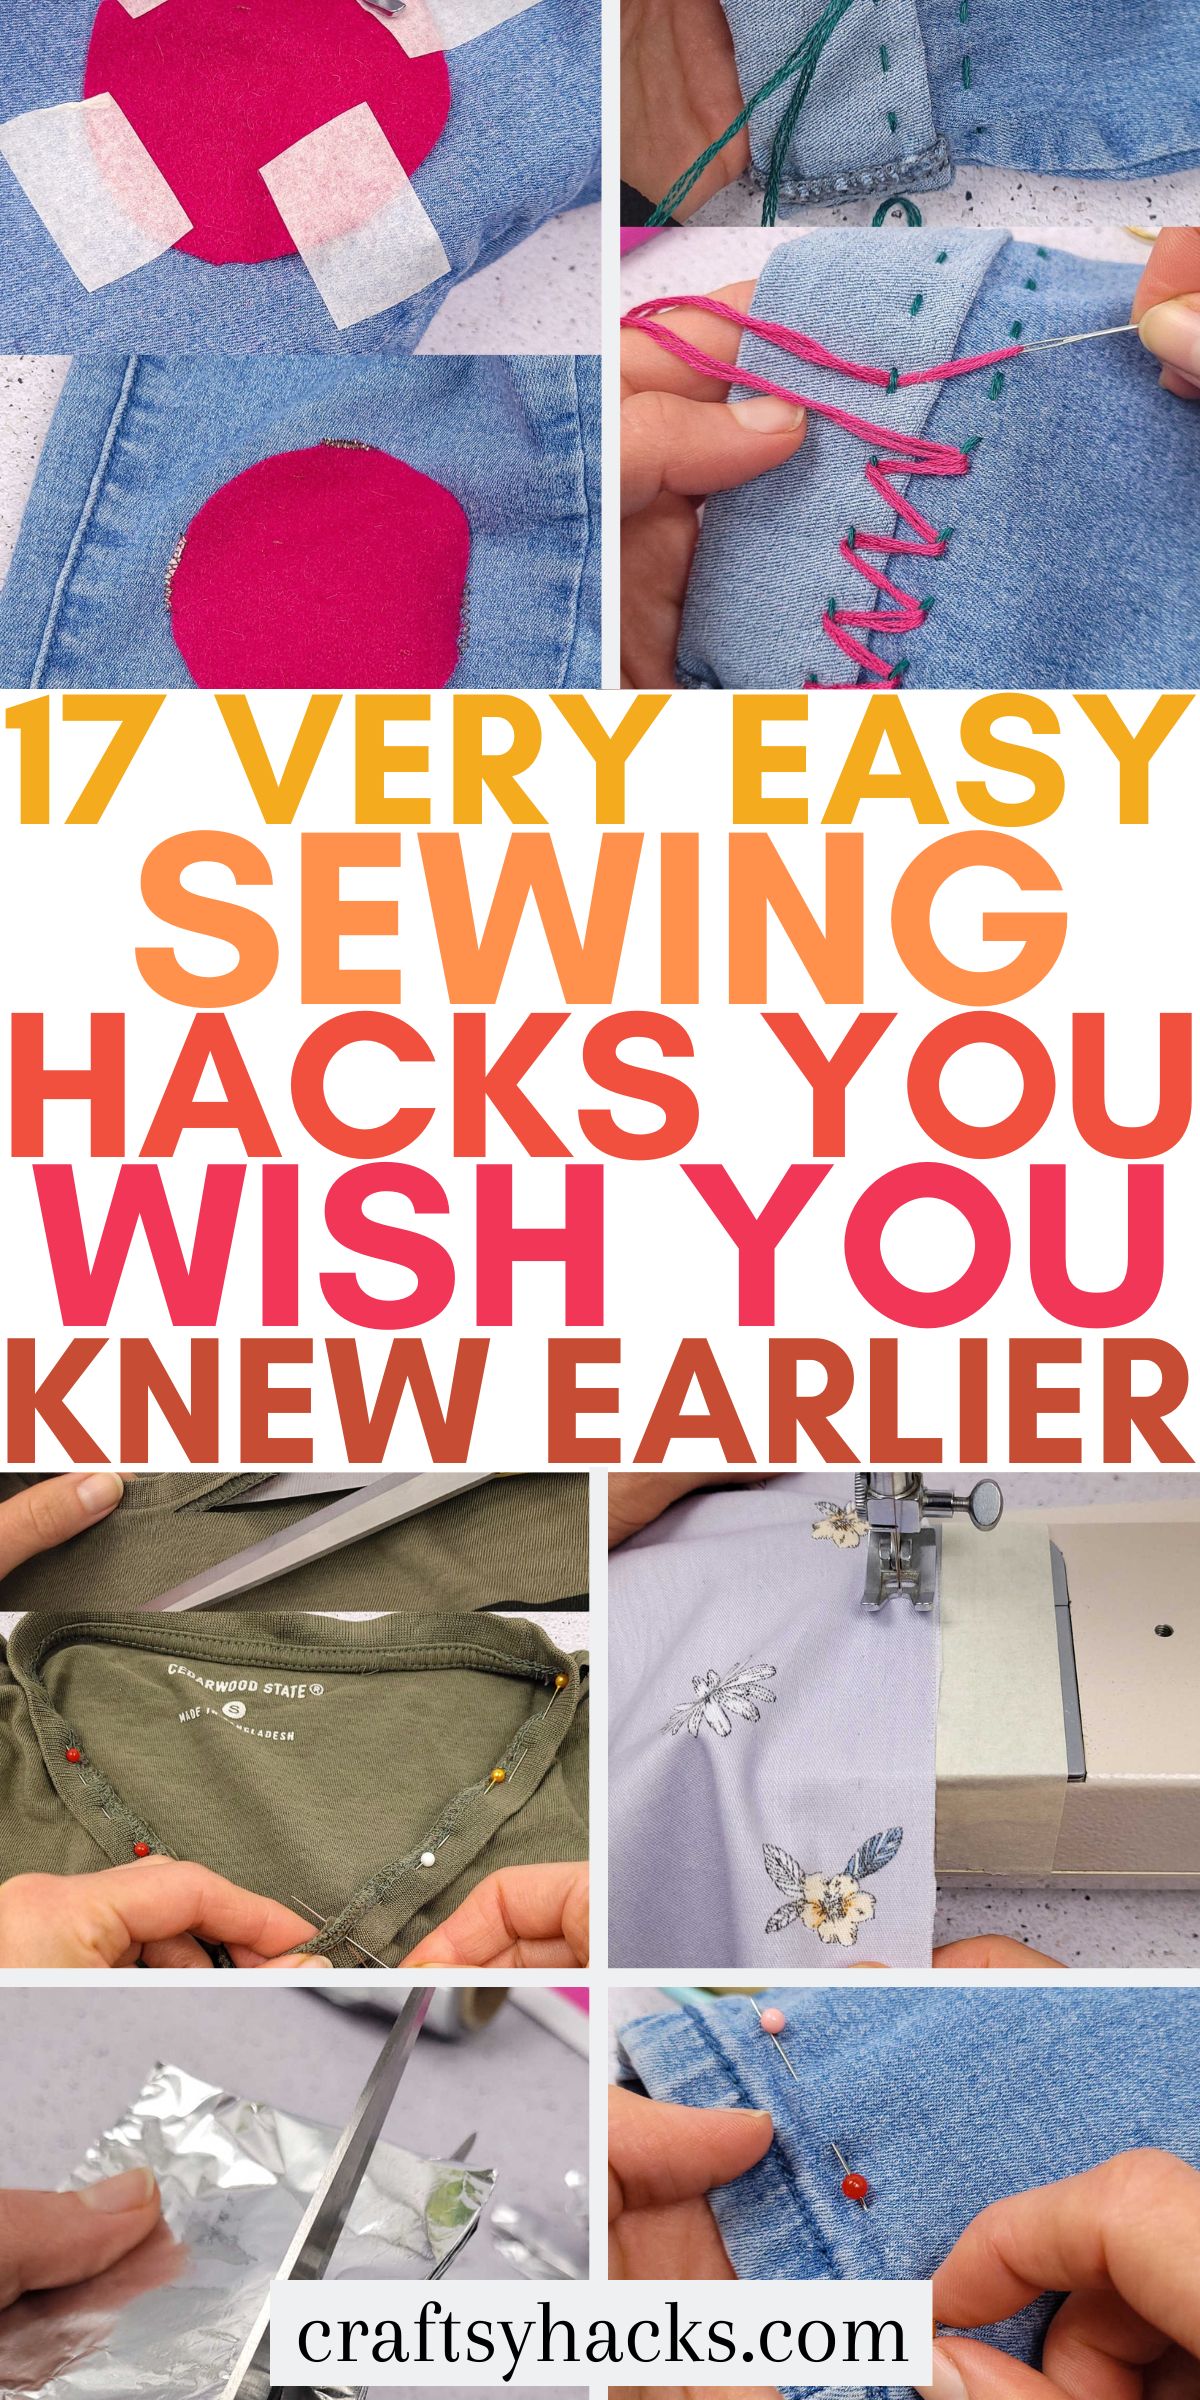
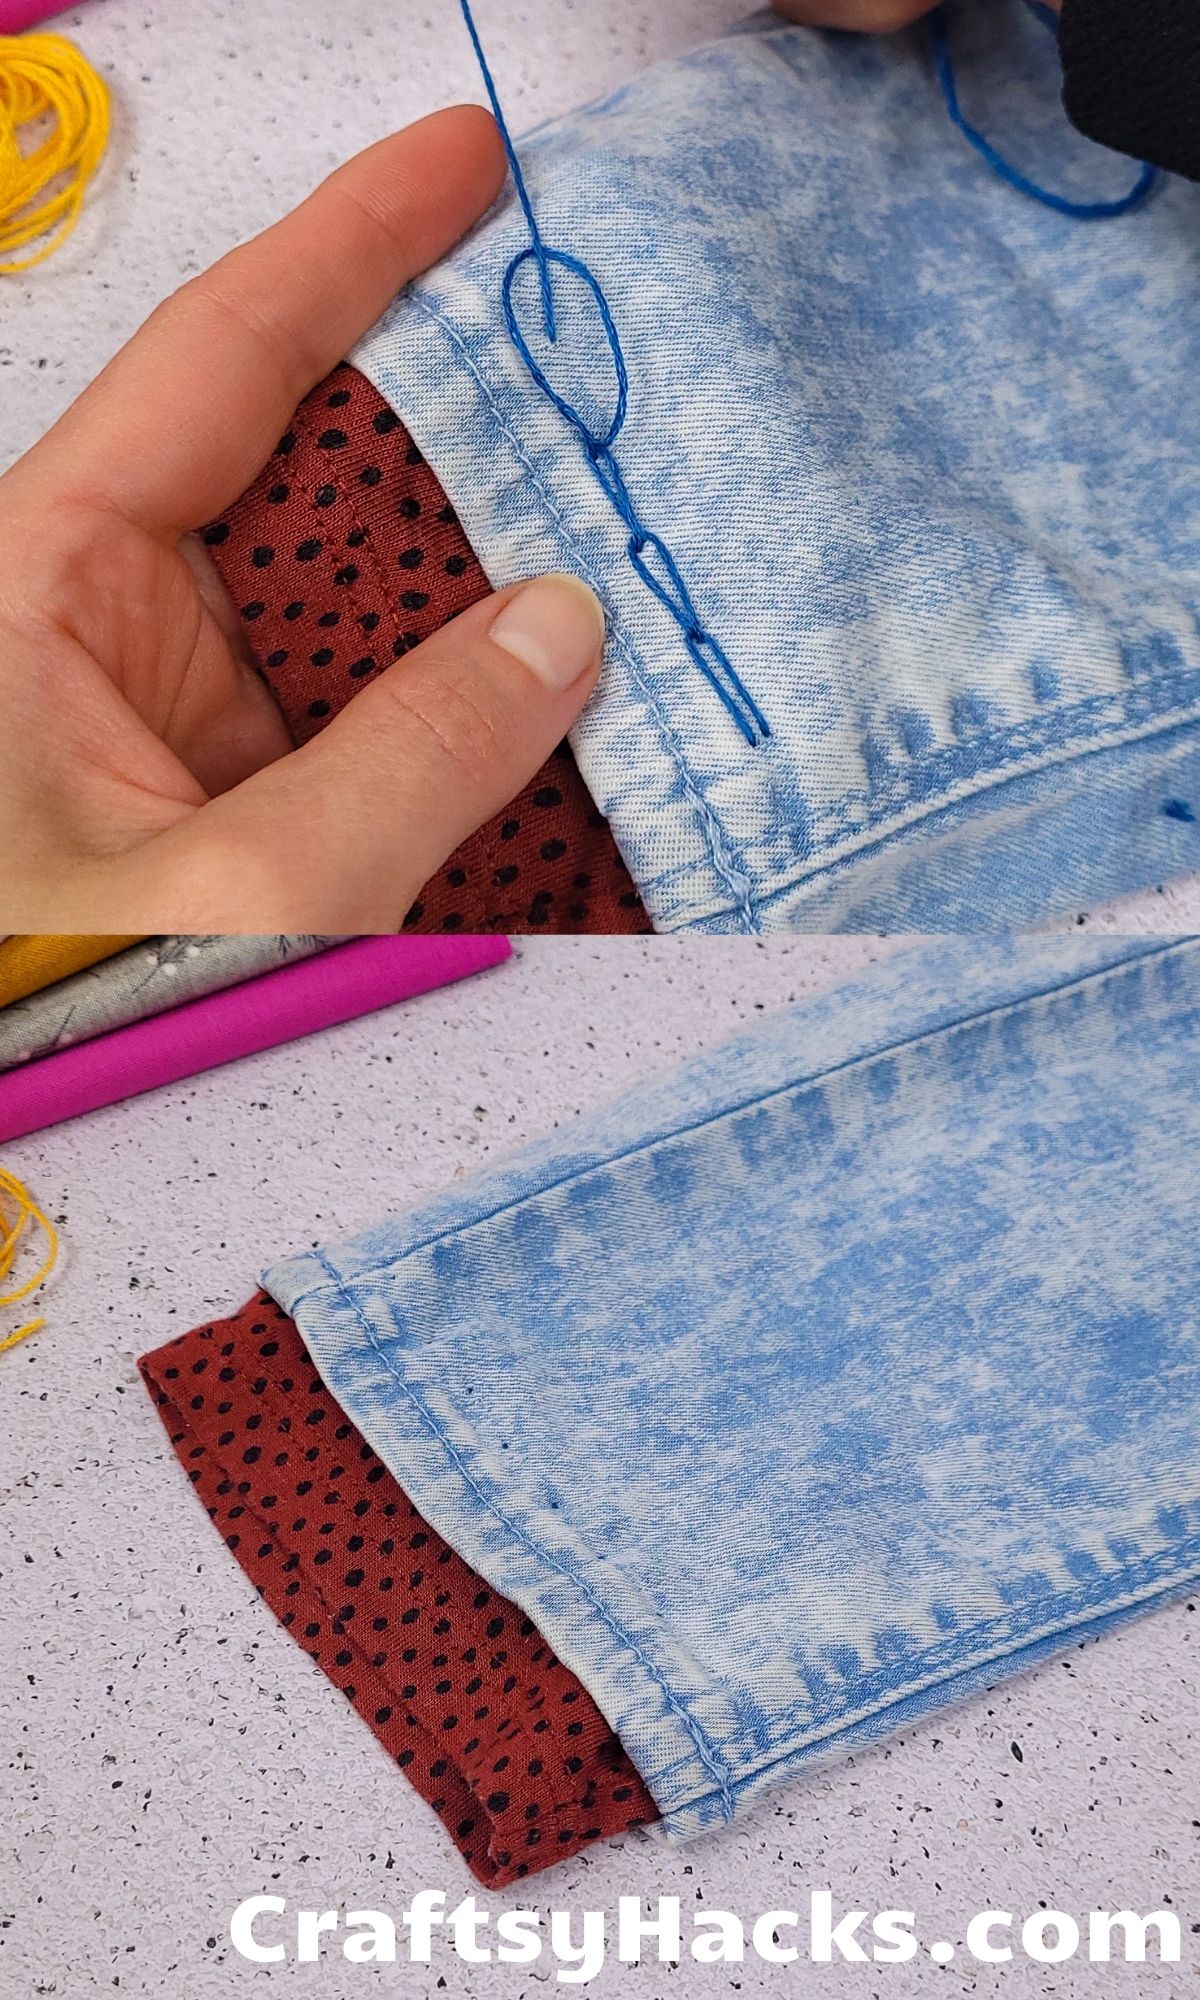
1. Hem Jeans Easily
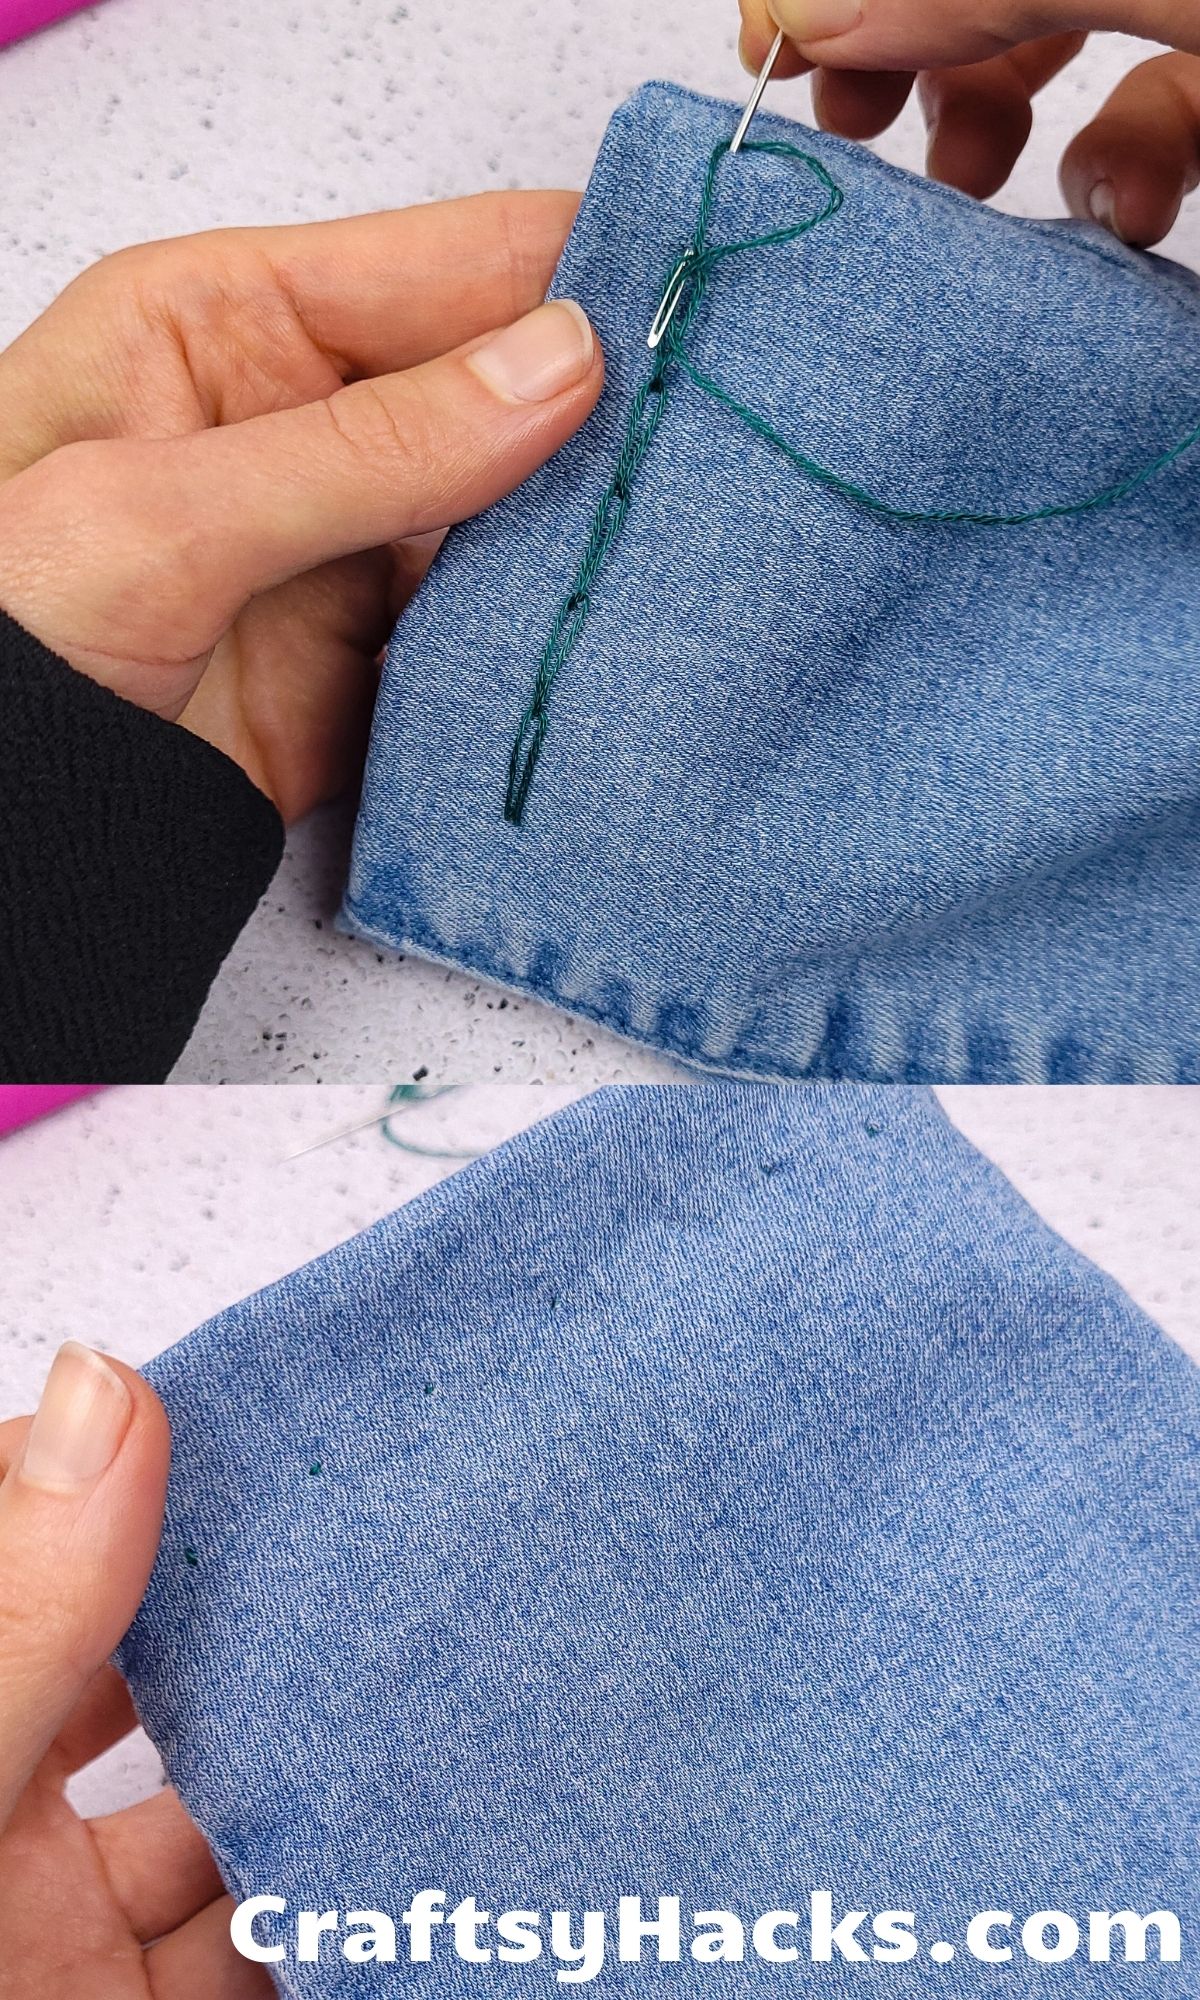
Don’t you just hate it when your jeans are too long and they keep slipping down around your ankle? Then it’s time you hemmed those jeans and here’s a really cool hack to do that!
With a few invisible hem stitches, you can automatically hike up those ankles and tuck them inside the jeans. When you’re done with your stitches, then comes the fun part.
Just insert the needle into that last hem stitch and tug it through. You’ll find that the thread magically pulls through to the back, leaving you with a smooth hem.
Check out more sewing projects!
2. Fix Clothing Holes with a Cute Flower
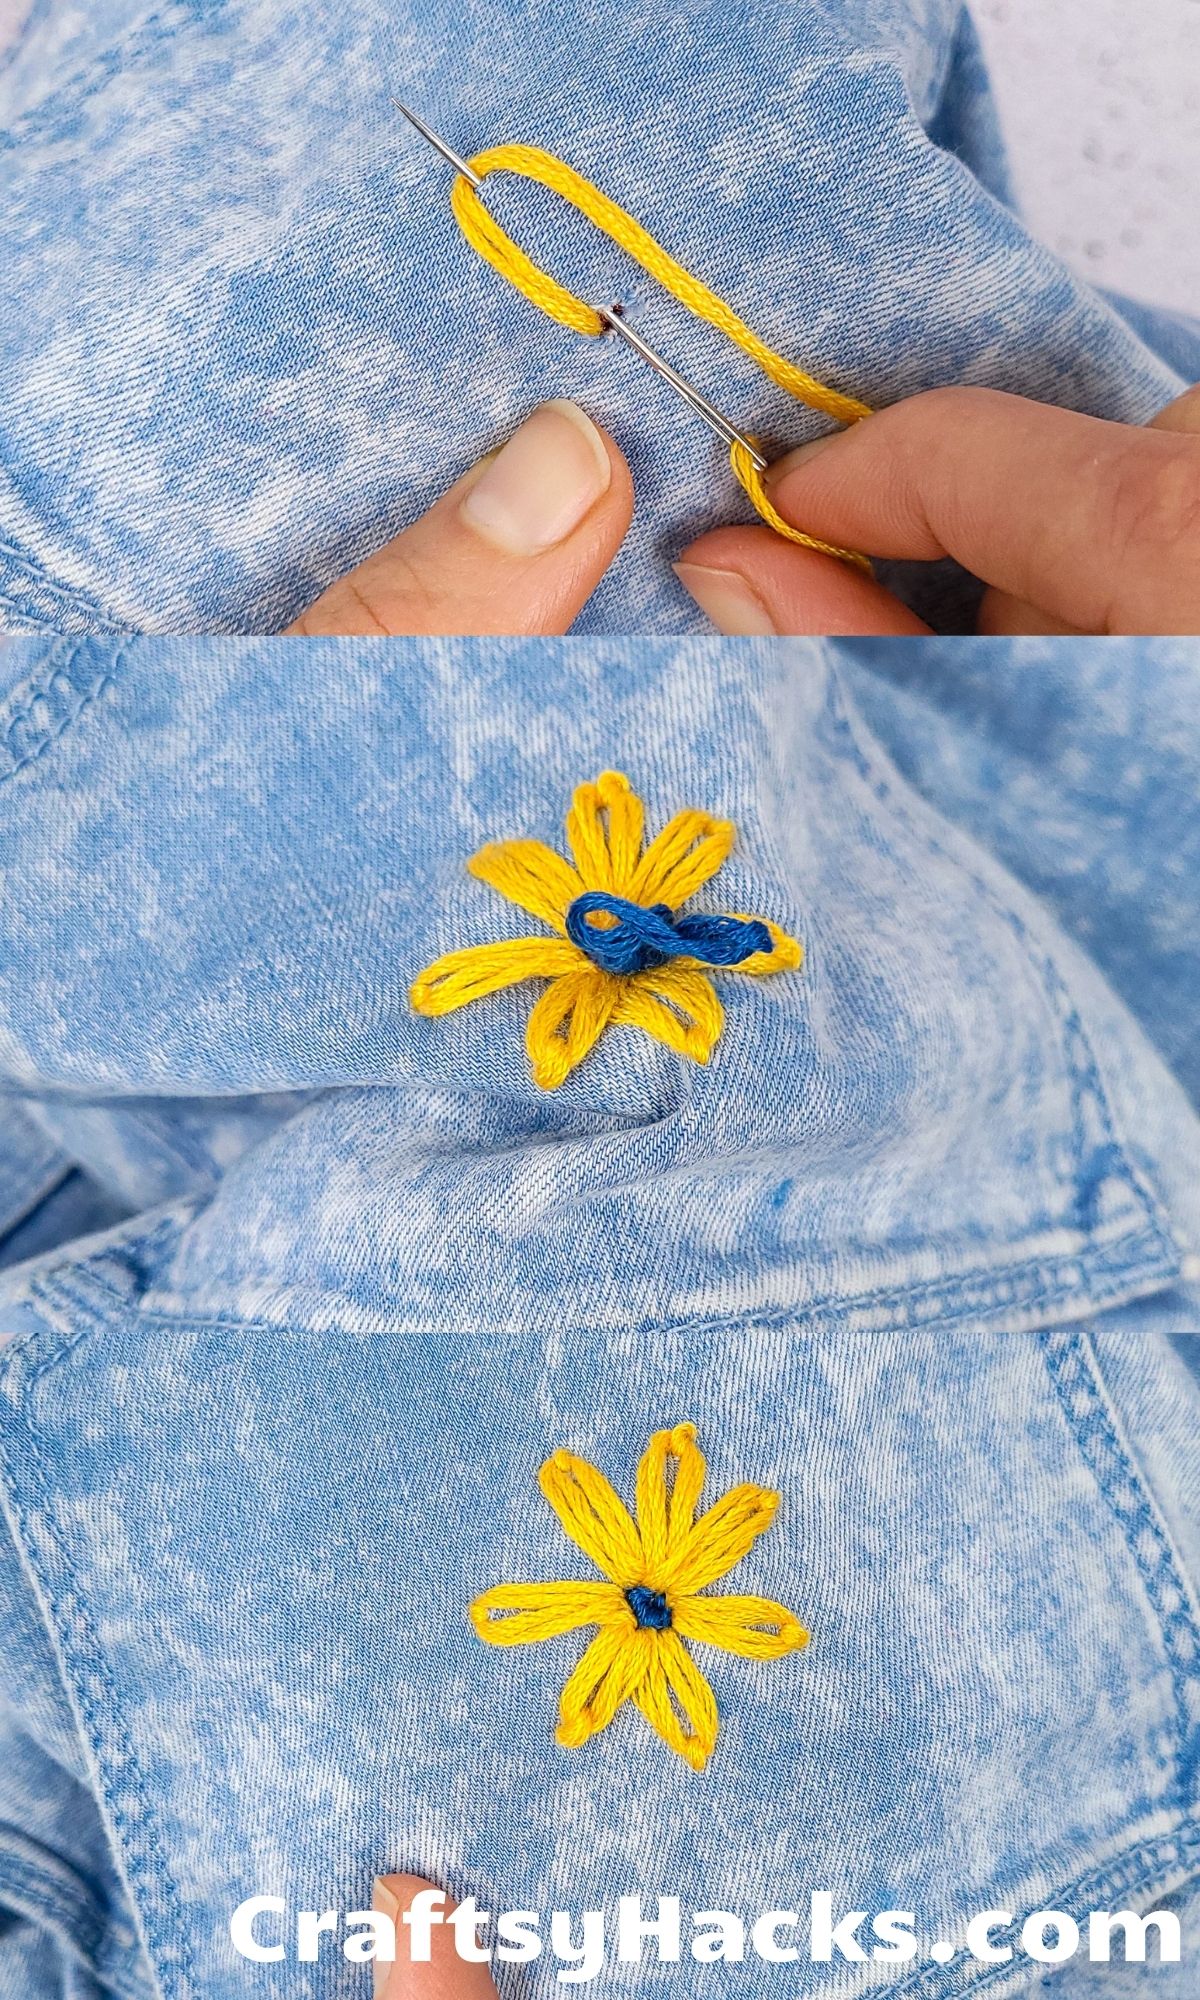
Have you ever found that pesky little hole in the back of your jeans or around the sleeve of your jacket or pockets? The next time you do, here’s a really cute way for you to hide that hole.
You’re going to grab your needle and thread and simply sew on a simple little flower around that hole. That way, you not only sew up the hole, you also get to decorate your outfit a little.
This is a great opportunity to let your quirky personality shine through. These flowers are just really adorable and you’re going to love playing with colors and designs, too!
Need more ideas? Check out these easy sewing gifts!
More of a video learner? Check all these sewing hacks in action!
3. Use Clear Nail Polish to Protect the Thread
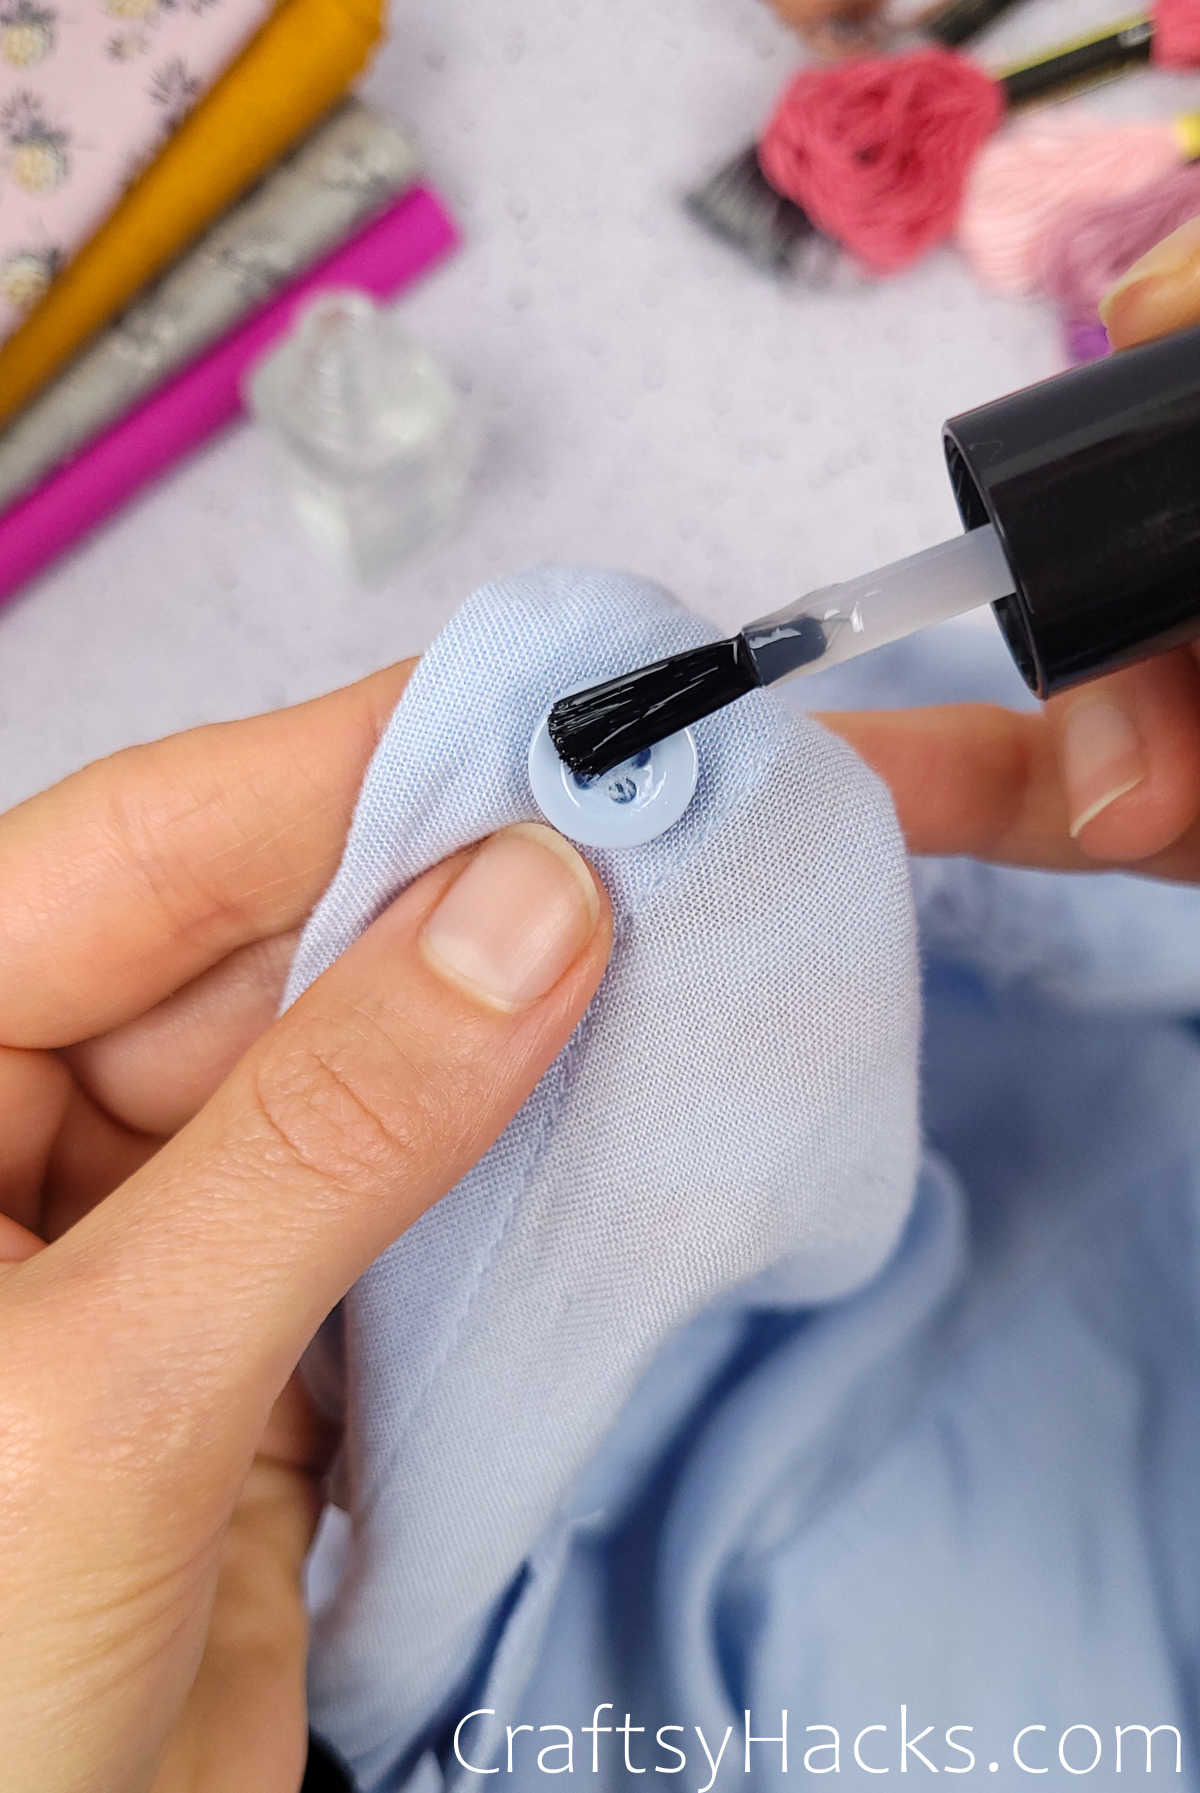
This is one of those hacks that you’ve got to be a little careful with. Applying a coat or two of clear nail polish over the thread can definitely secure it in place.
It can even prevent it from fraying or getting dirty. But, it all comes down to where you apply the polish.
If it’s over the thread on a button, then it’s a great way to increase the lifespan of that button. But if it’s somewhere right over the fabric, then you might end up damaging the fabric when the polish dries and hardens over it.
4. Start Your Sewing Without a Knot
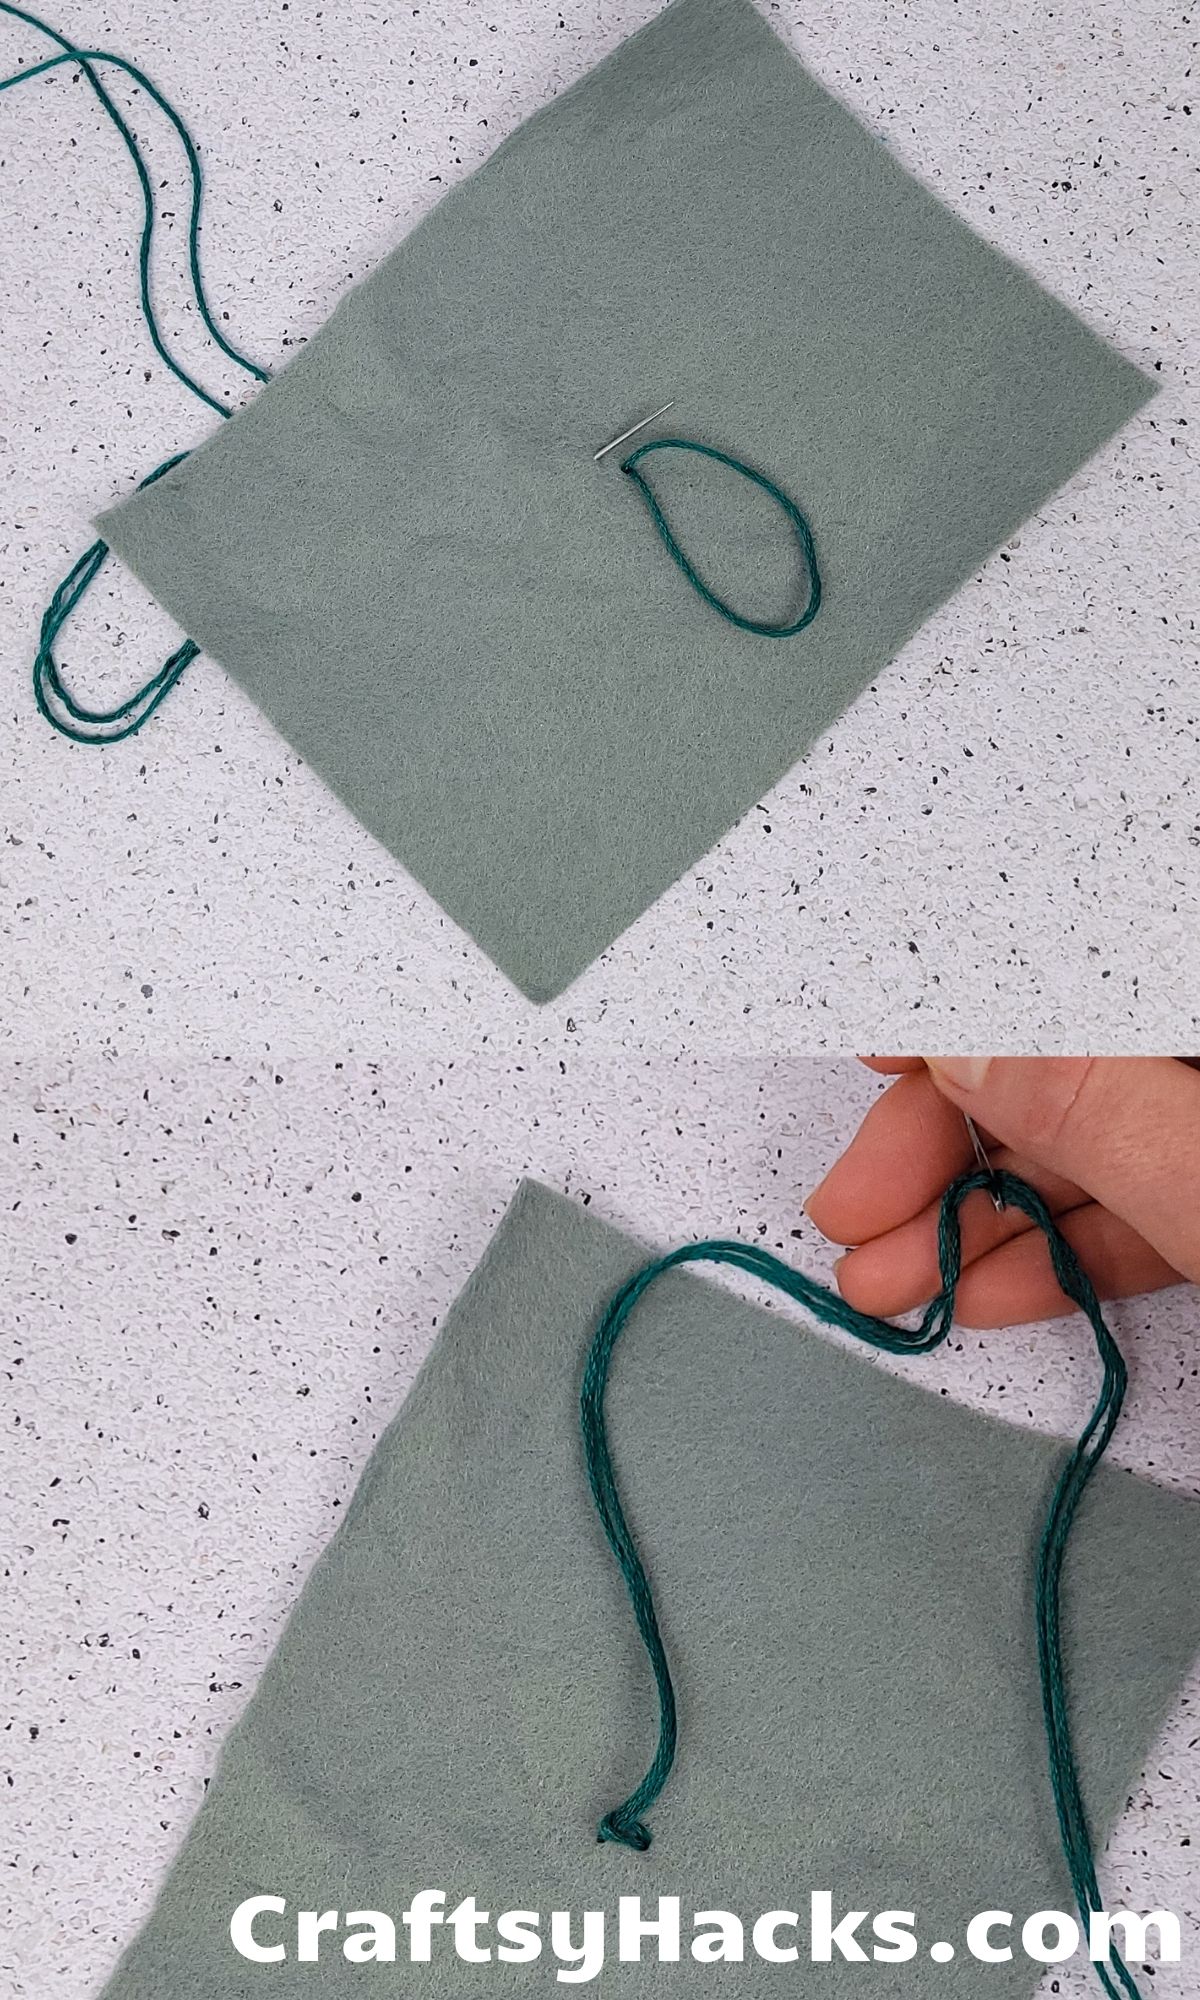
Struggling with that first knot? Or perhaps you just don’t like that messy tangle of thread, even if it is in the backside of your fabric.
Either way, if you want to start sewing without that initial knot, then here’s how you do it. The key is to fold your thread in half and then loop both ends through the eye.
Now, when you insert the needle through the fabric, you will have a looped end. Just pull the needle through that, tug, and voila, you have a neat knot in place, without all that struggle of that initial first knot.
5. Prevent Fraying When Threading Needles
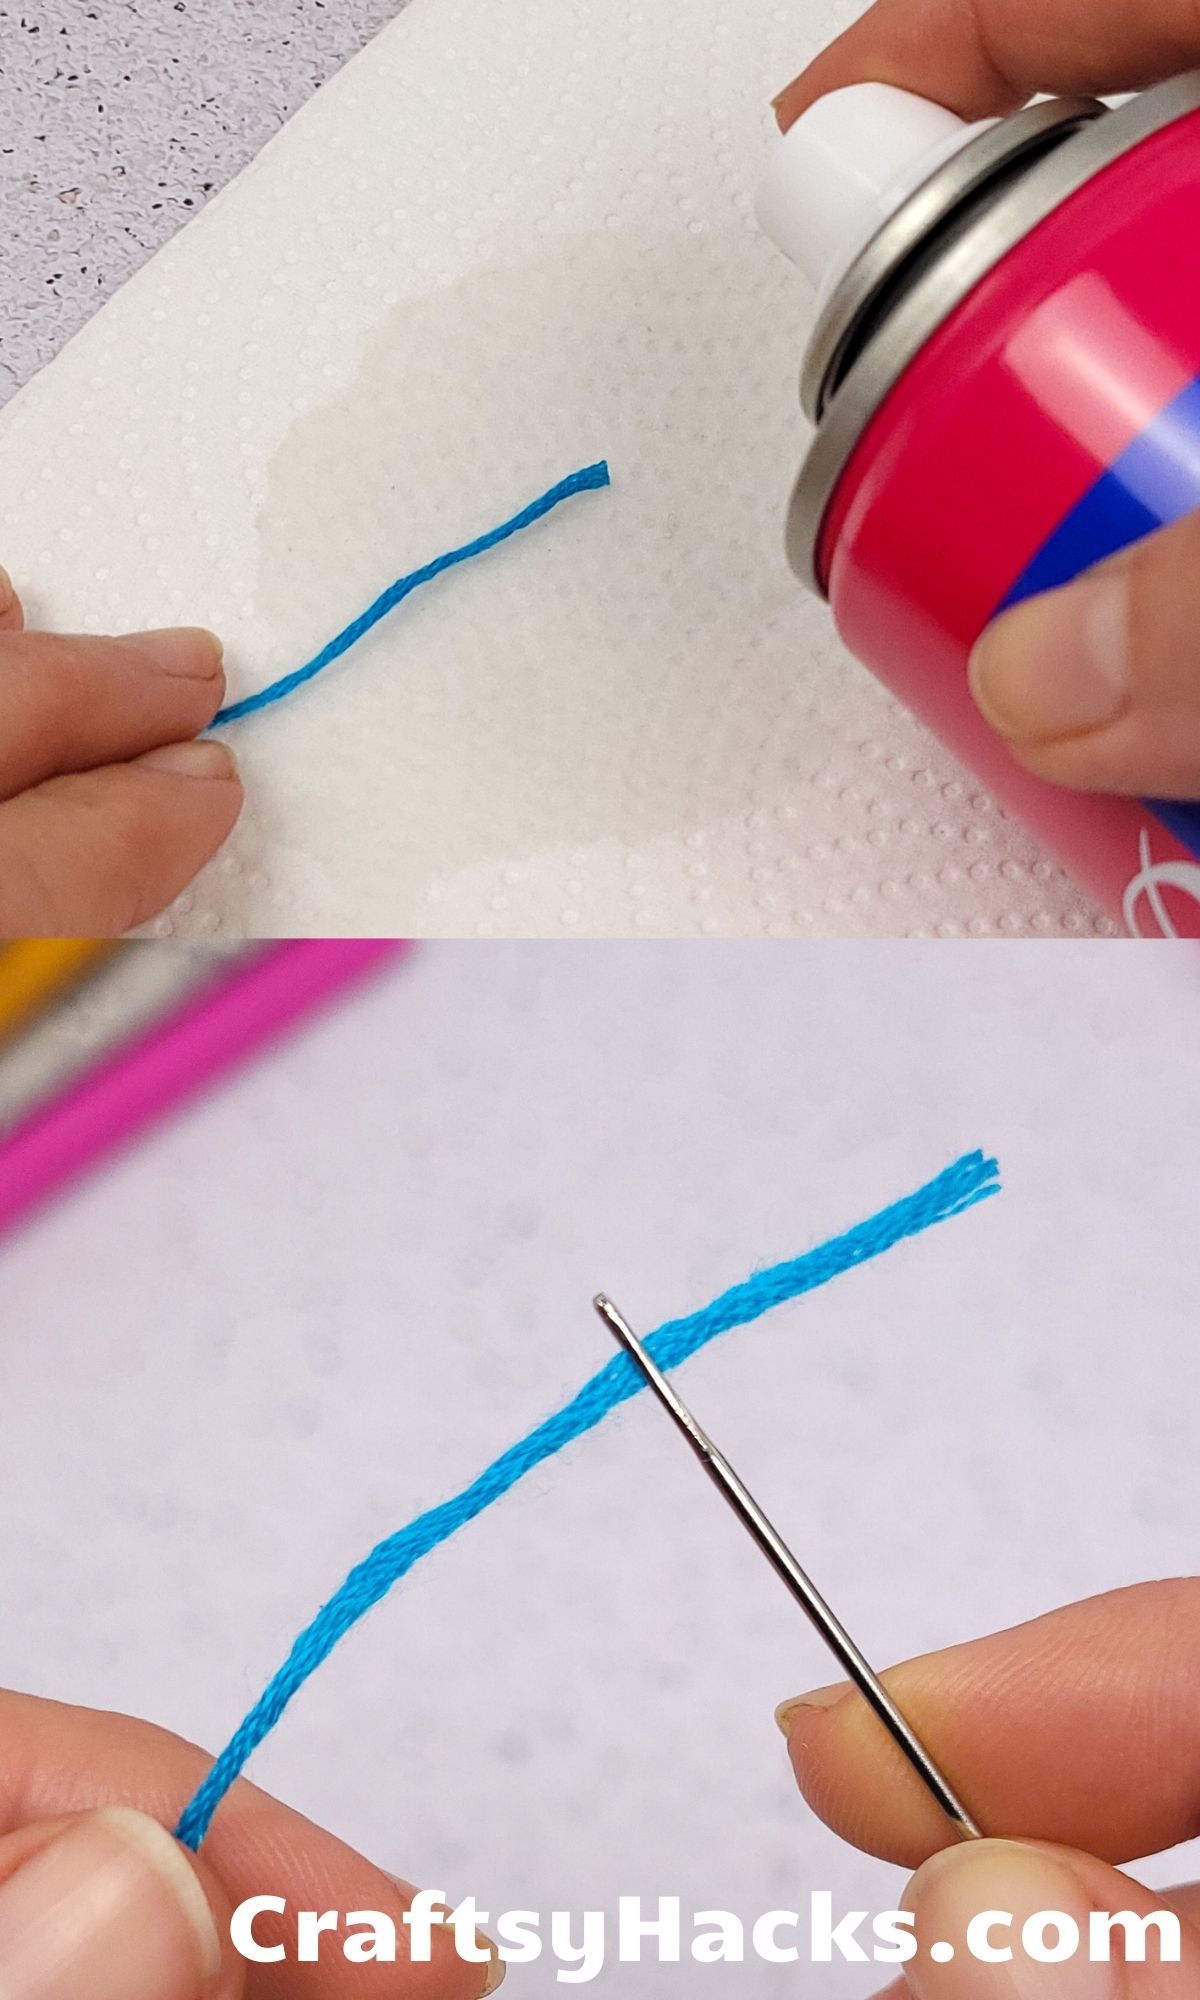
Speaking of all the needless yet necessary hassles of those first few steps before you can finally get to the actual sewing…don’t you just hate having to thread the needle?
I can’t stand licking the end of the thread; it only splits the individual strands, making it harder to pull through. There’s a way to stop your thread from fraying and it’s going to save you all the time in the world.
You’re going to simply spray a setting agent–something as simple as hairspray works–over the thread. Alternatively, you can also dip the ends in beeswax, too, which works just as well.
6. Create a Perfect Ruffle on a Shirt
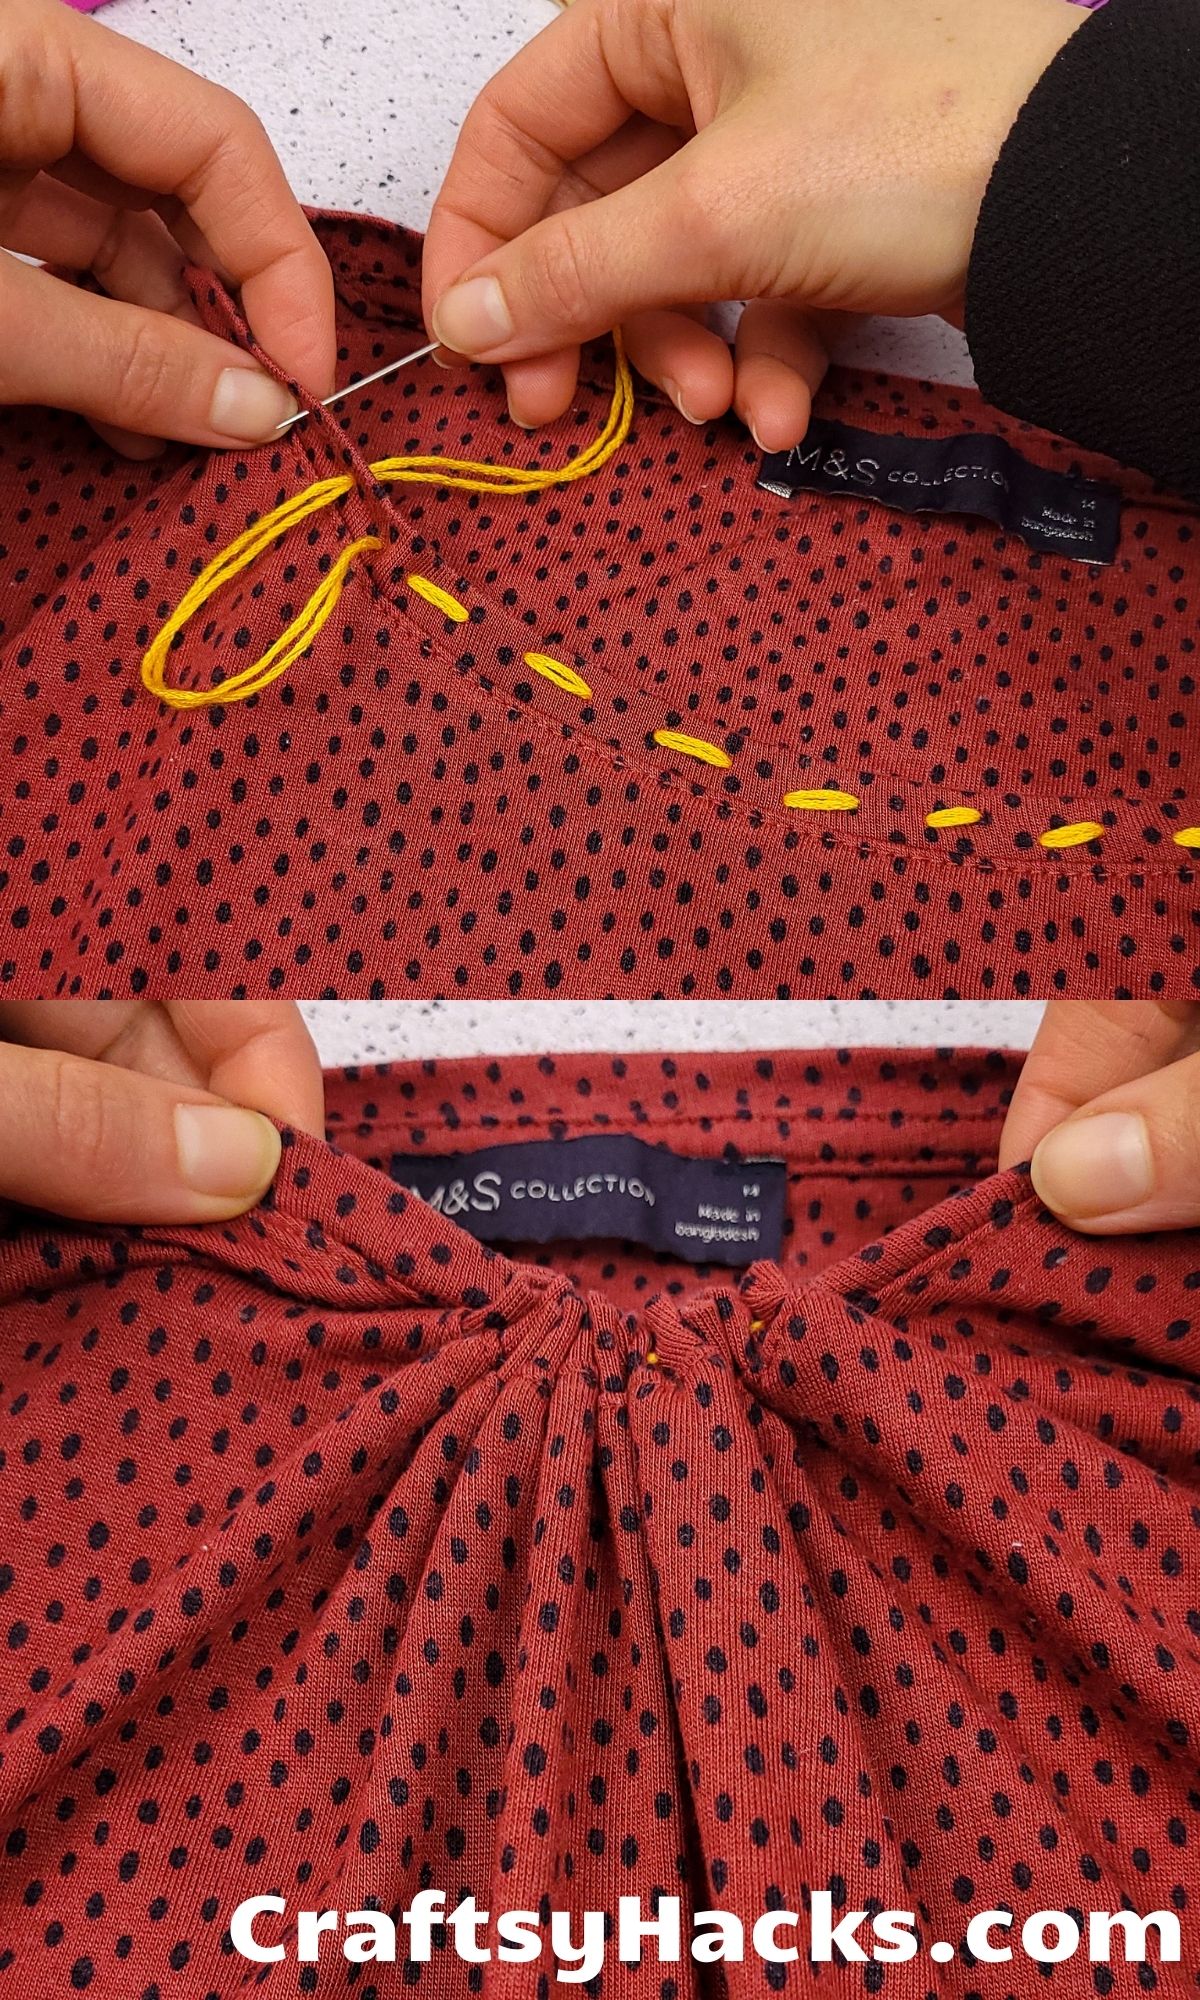
There’s just something super flirty and sassy about ruffles. They’re a really quick and simple option when you want to jazz up an old blouse and give it back some life and spunk.
With just a needle and some thread, you can pull your fabric into a bunched-up gather around the neck. The bunching will create pleats or ruffles, depending on the fabric.
So the next time you want to get rid of a plain old blouse, just stop and see if you can ruffle it up! Pair it with a pencil skirt and you’ve even got yourself a work outfit in the making.
7. Make Sleeves Longer
There’s nothing quite as annoying as the end of your sleeve riding up your wrist. That’s what happens when the sleeve is actually a little too short for you.
Here’s a neat hack to help you increase the length of your sleeve. If you play around with fabric and colors you can even turn it into a trendy and pretty border for your shirt.
First, measure your sleeve’s circumference and accordingly, cut out a strip of the fabric you want to use to extend your sleeve. Then, if you remember that disappearing hem stitch you used on your jeans earlier, use it here to sew the fabric on.
8. Ruffle Your Sleeves
Whether it’s because you’re bored with your blouse’s sleeves or they’re too big and flowy and you want to tighten them up a little. Either way, there’s a really simple and neat hack you can learn if you’re looking for a way to ruffle up your sleeves.
You can either sew on a small circle of ruffled fabric around the sleeve, which will look great but might end up altering the look, length, and even the finish of the blouse. Alternatively, you can just use a needle and thread and pull a knot through the fabric at one point.
This will gather the fabric from around the knot and create a nice ruffle.
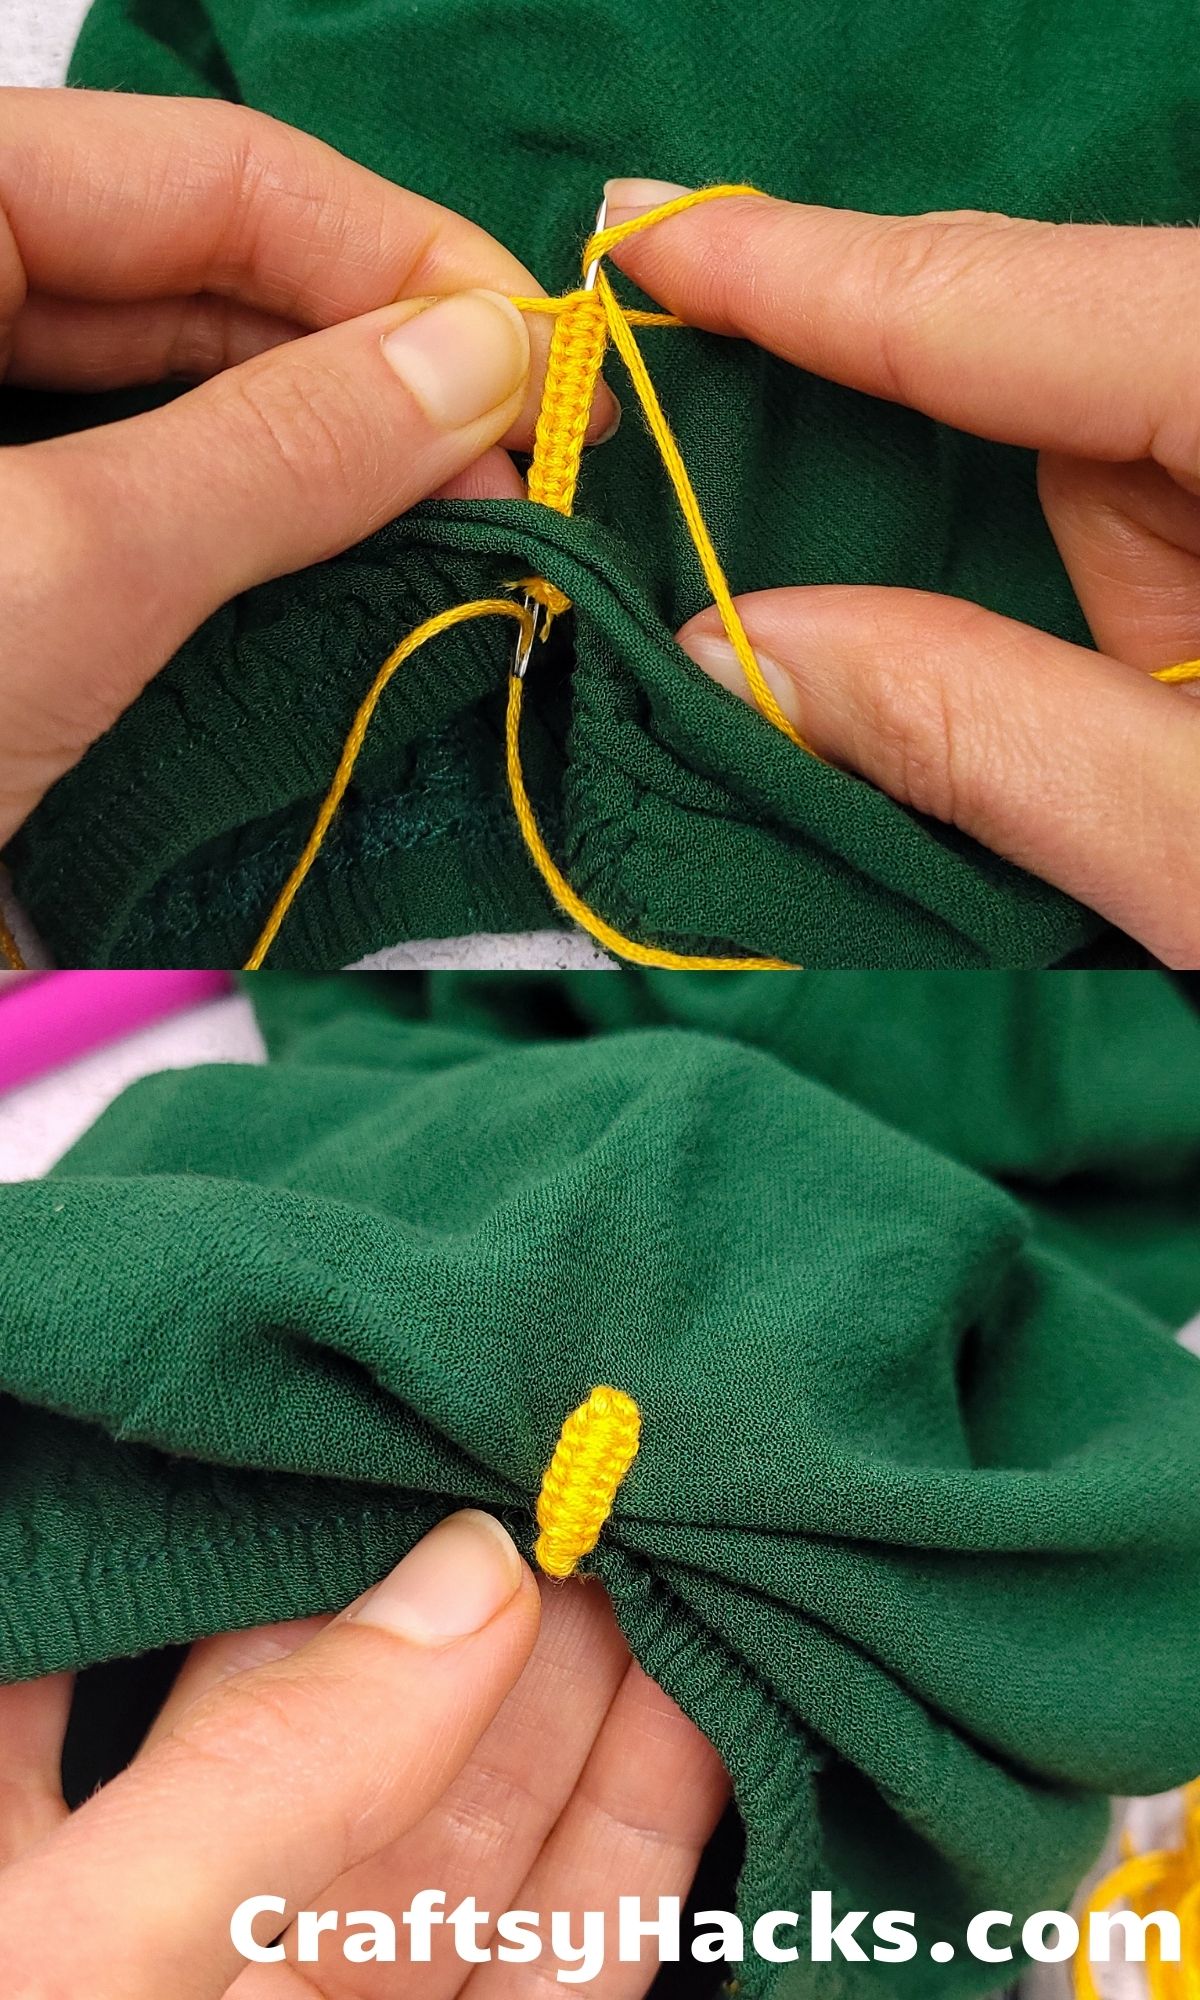
9. Sew with Finger as a Stitch Guide
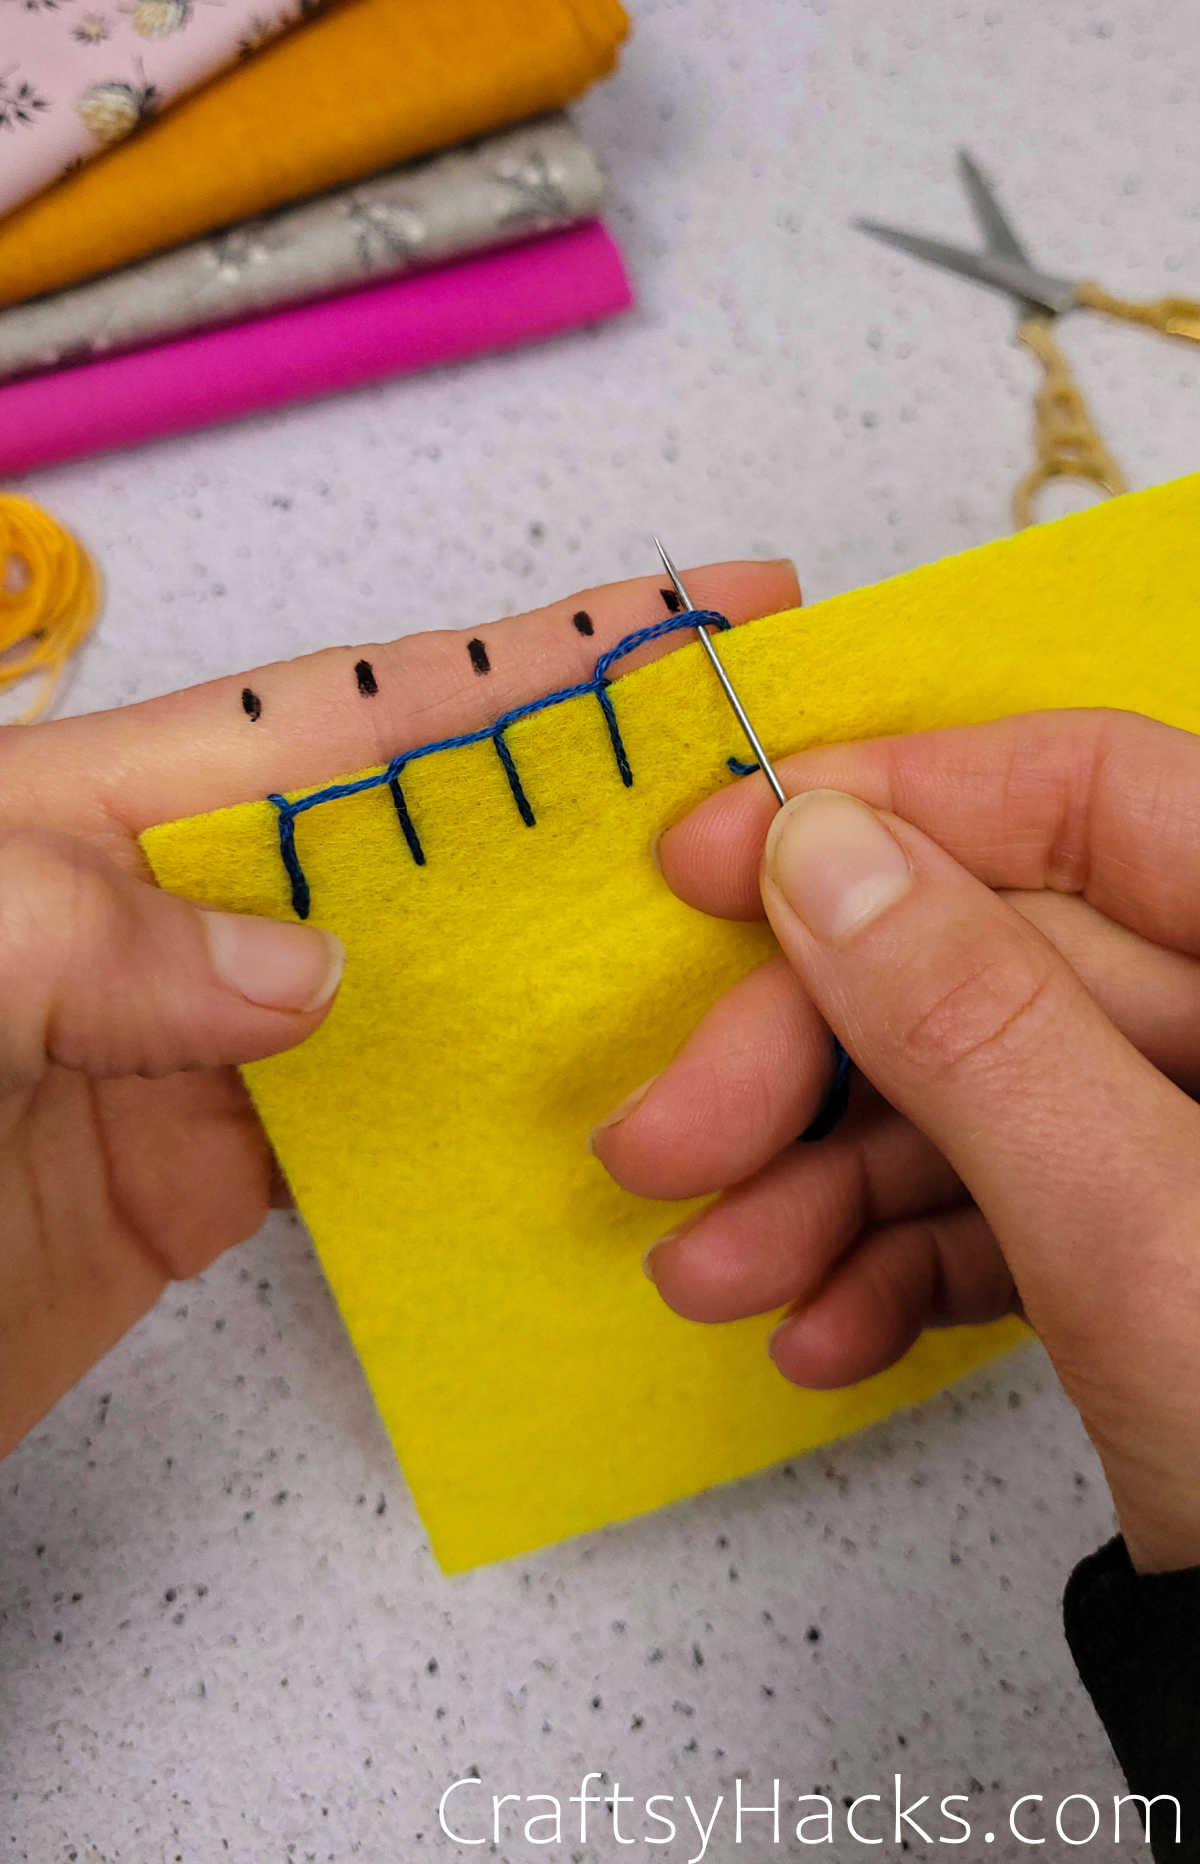
If you’ve ever struggled with getting the same length and distance between stitches, then you know that the struggle is real. It can make all the difference in the world–or rather, to the finish and quality of your dress–if you space out your stitches evenly.
Here’s what you need to do. First, grab a black marker–not the permanent kind, mind. Now make three to four evenly spaced out markings along the outer side of your index finger, in your non-sewing hand.
Now, when you use your left hand to hold up the fabric while you sew, you’ll have those marking to help you with your stitches!
10. Sharpen Scissors with Aluminum Foil
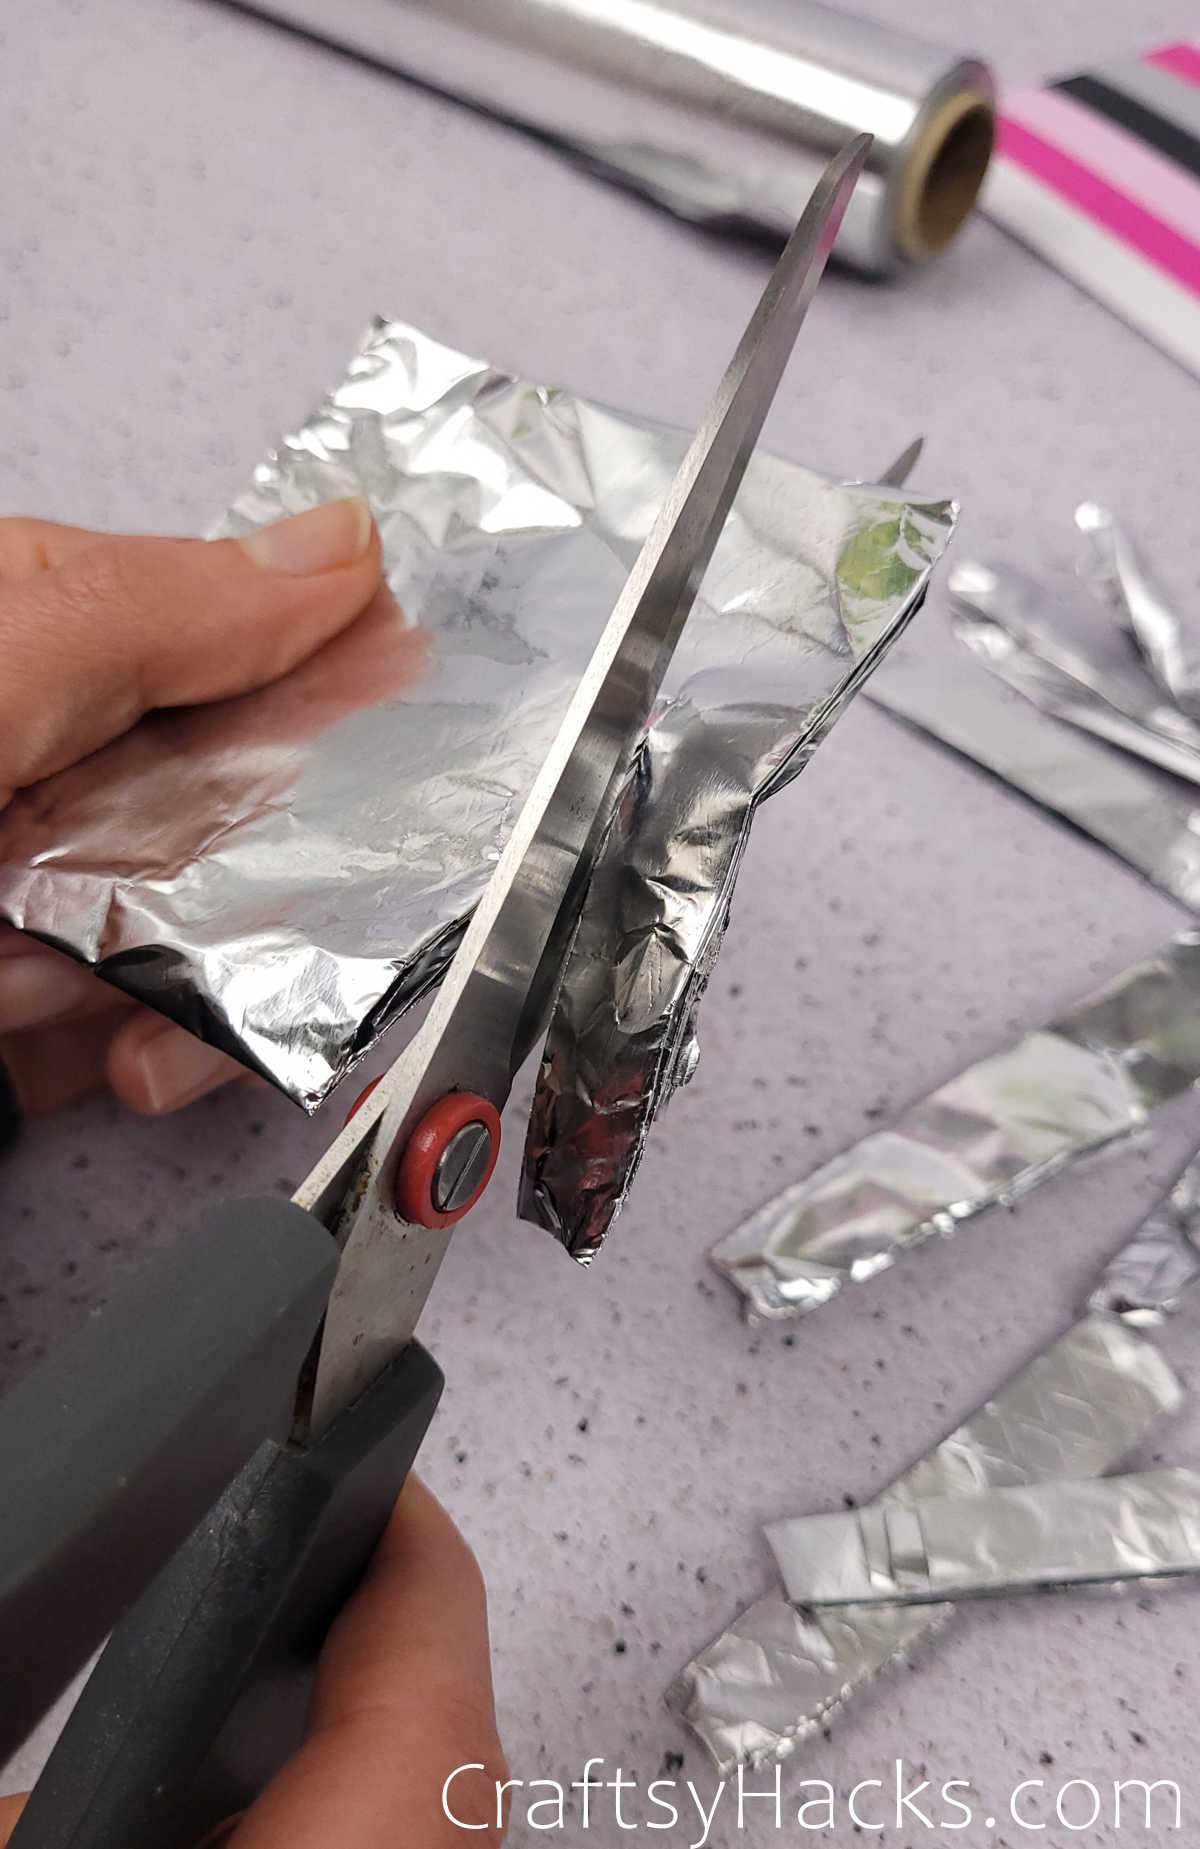
Did you know that you can actually sharpen your scissors by cutting aluminum foil? I bet this is a hack that you already know of.
You might have even used it in other avenues, if not to sharpen your sewing scissors. Just grab a length of foil and fold it a couple of times so you have a thick surface area to cut.
Aluminum foil won’t just sharpen your scissors, it will also increase the performance. It will clean out any dirt or grime along the blades of the scissors, allowing it to cut through whatever you like much more efficiently.
11. Use Washi Tape as a Sewing Guide

Finding it difficult to keep your lines straight when sewing? Use washi tape to get your stitches just right.
It’ll look neat and nice with little to no effort for you!
12. Use Painter’s Tape to Help Sew Straight
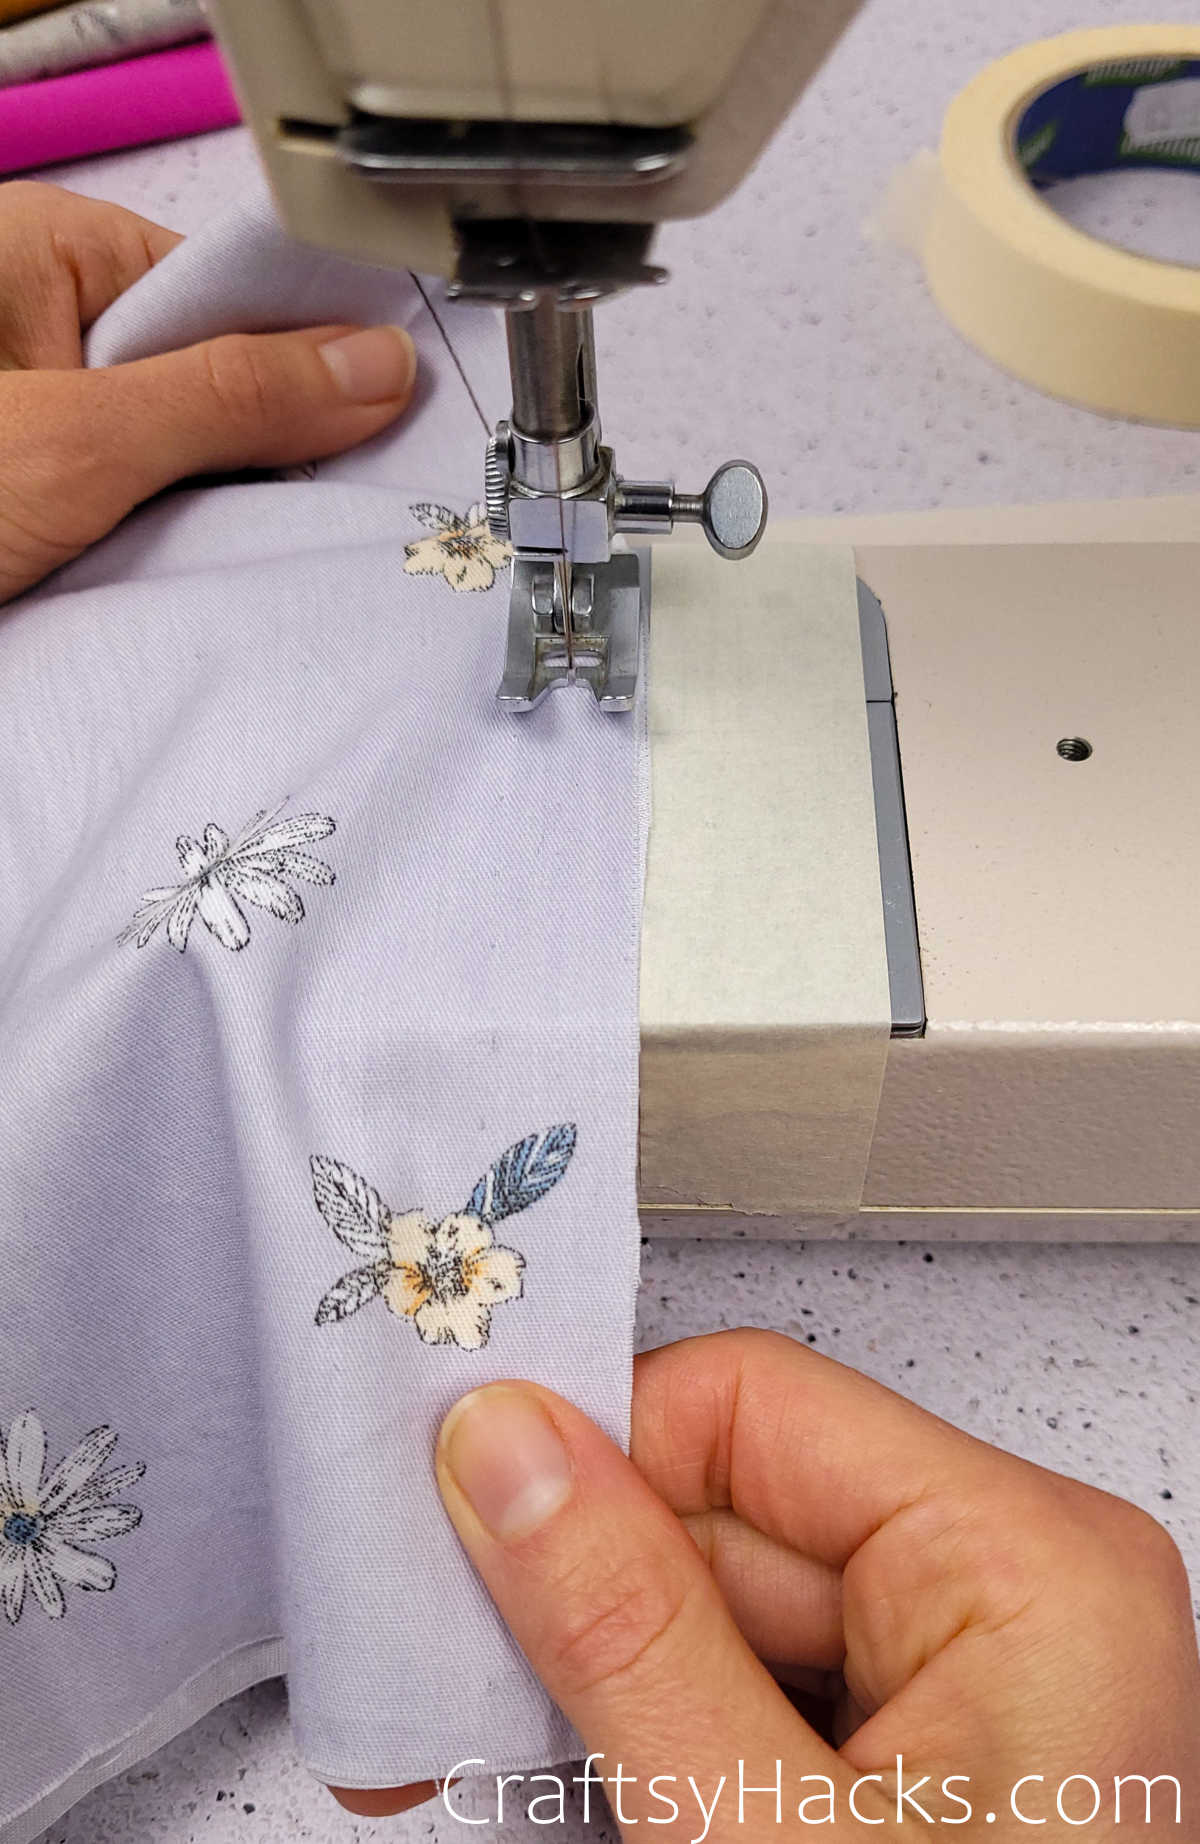
You’ve probably used a ruler or measuring tape to help you sew straight. You would have had a hard time keeping either one in place as you maneuvered the sewing machine, right?
Well, I’ve got just the hack for you to try. Go ahead and grab a strip of painter’s tape. Simply stick the tape to the right of the sewing line. Make sure that the edges of the tape are carefully aligned and straight.
Now, when you sew your fabric, just line the edges up against the edge pf the tape and start sewing for straight stitches all the way!
13. Easily Shorten the Zipper
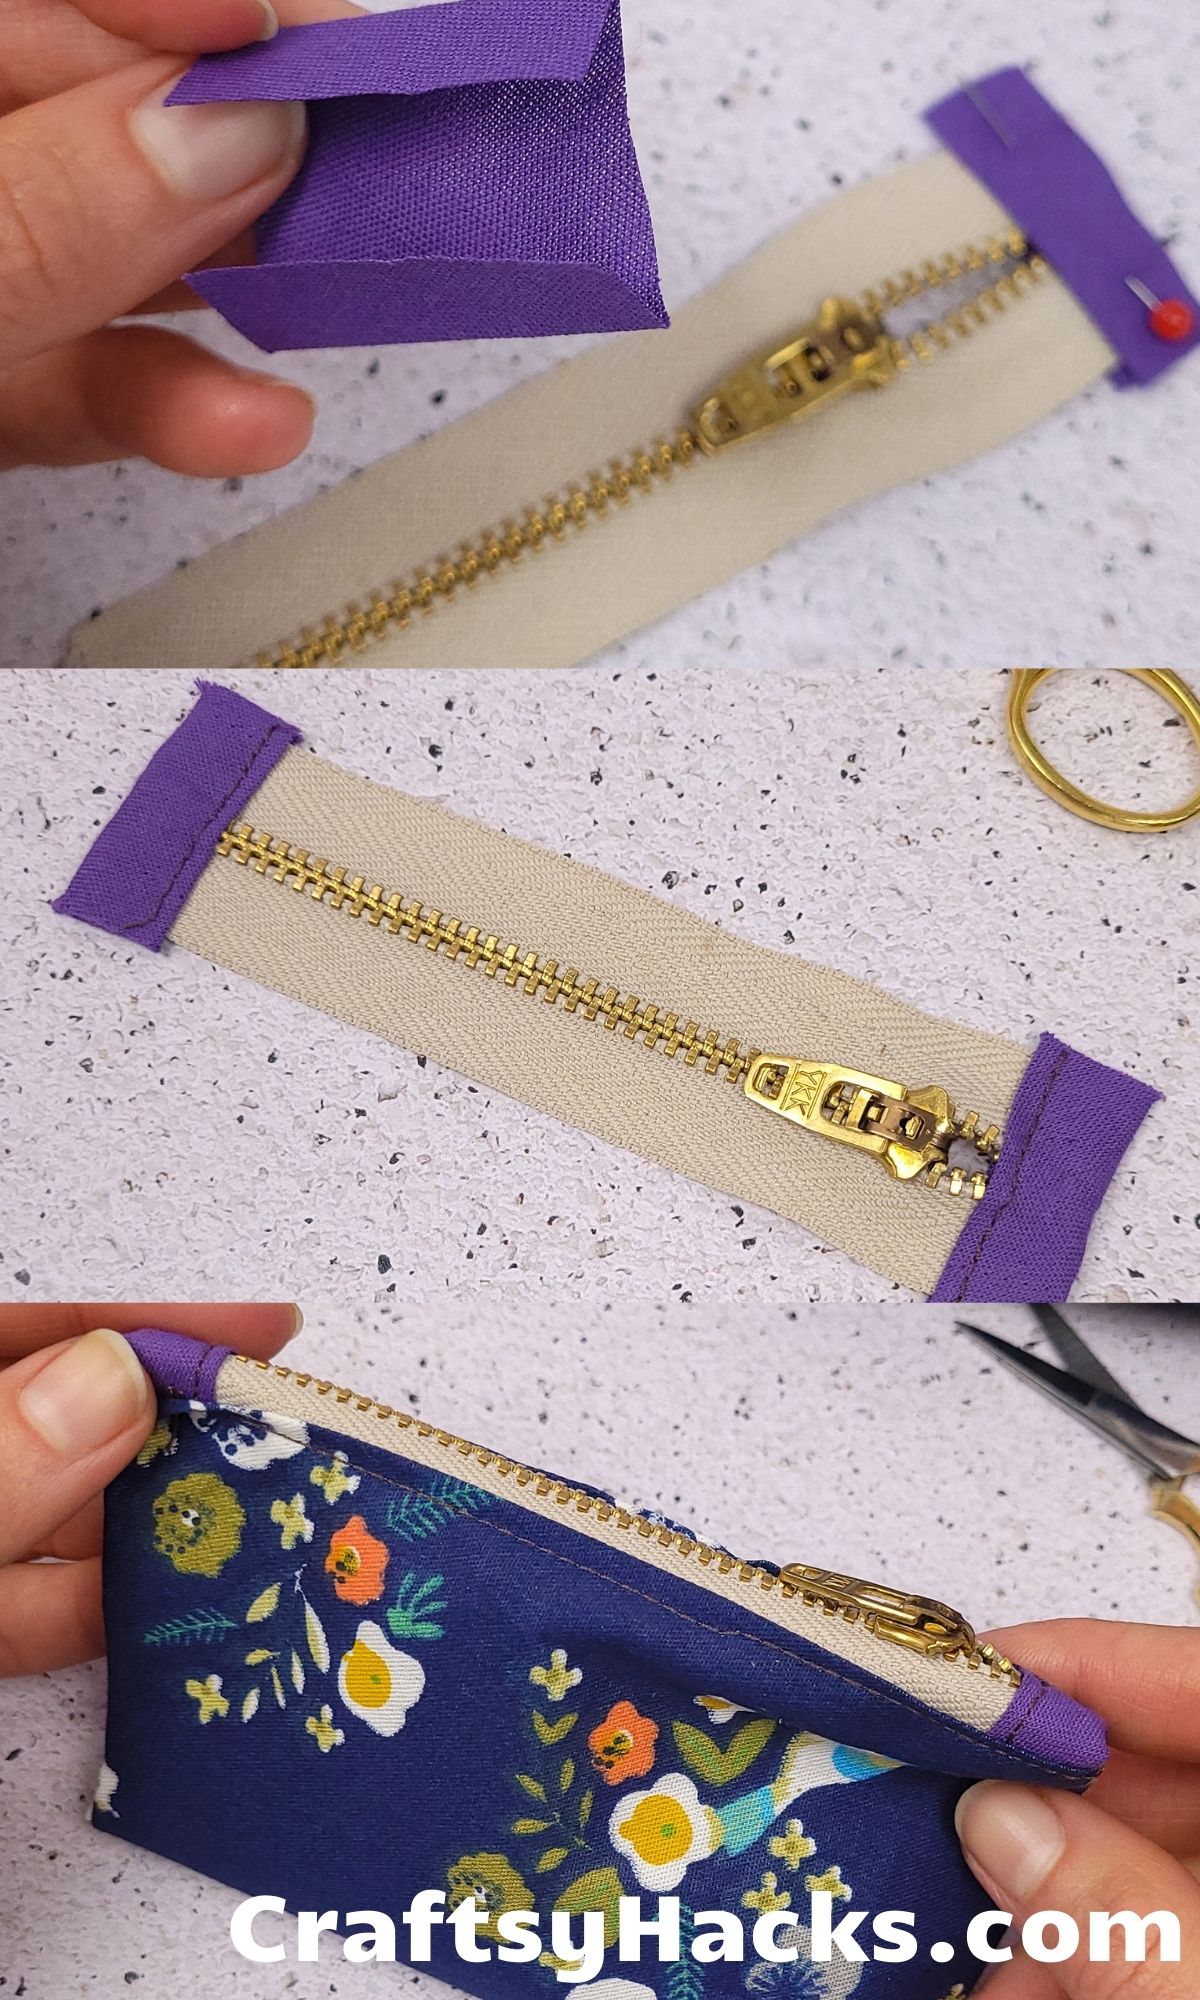
Shortening the length of a zipper can seem like a tricky task. But with the right tools and this easy hack, it’s going to be a breeze!
First, measure where you want to cut the scissors and remove the teeth up to an inch beyond that point. Once you’ve removed the teeth, just go ahead and snip off the fabric of the zipper.
That’s pretty much it. Now all that’s left to do is sew the ends and tuck them into your pouch, or whatever you plan to use the zipper on.
14. Use Bar Soap to Help Pins Glide Through the Fabric
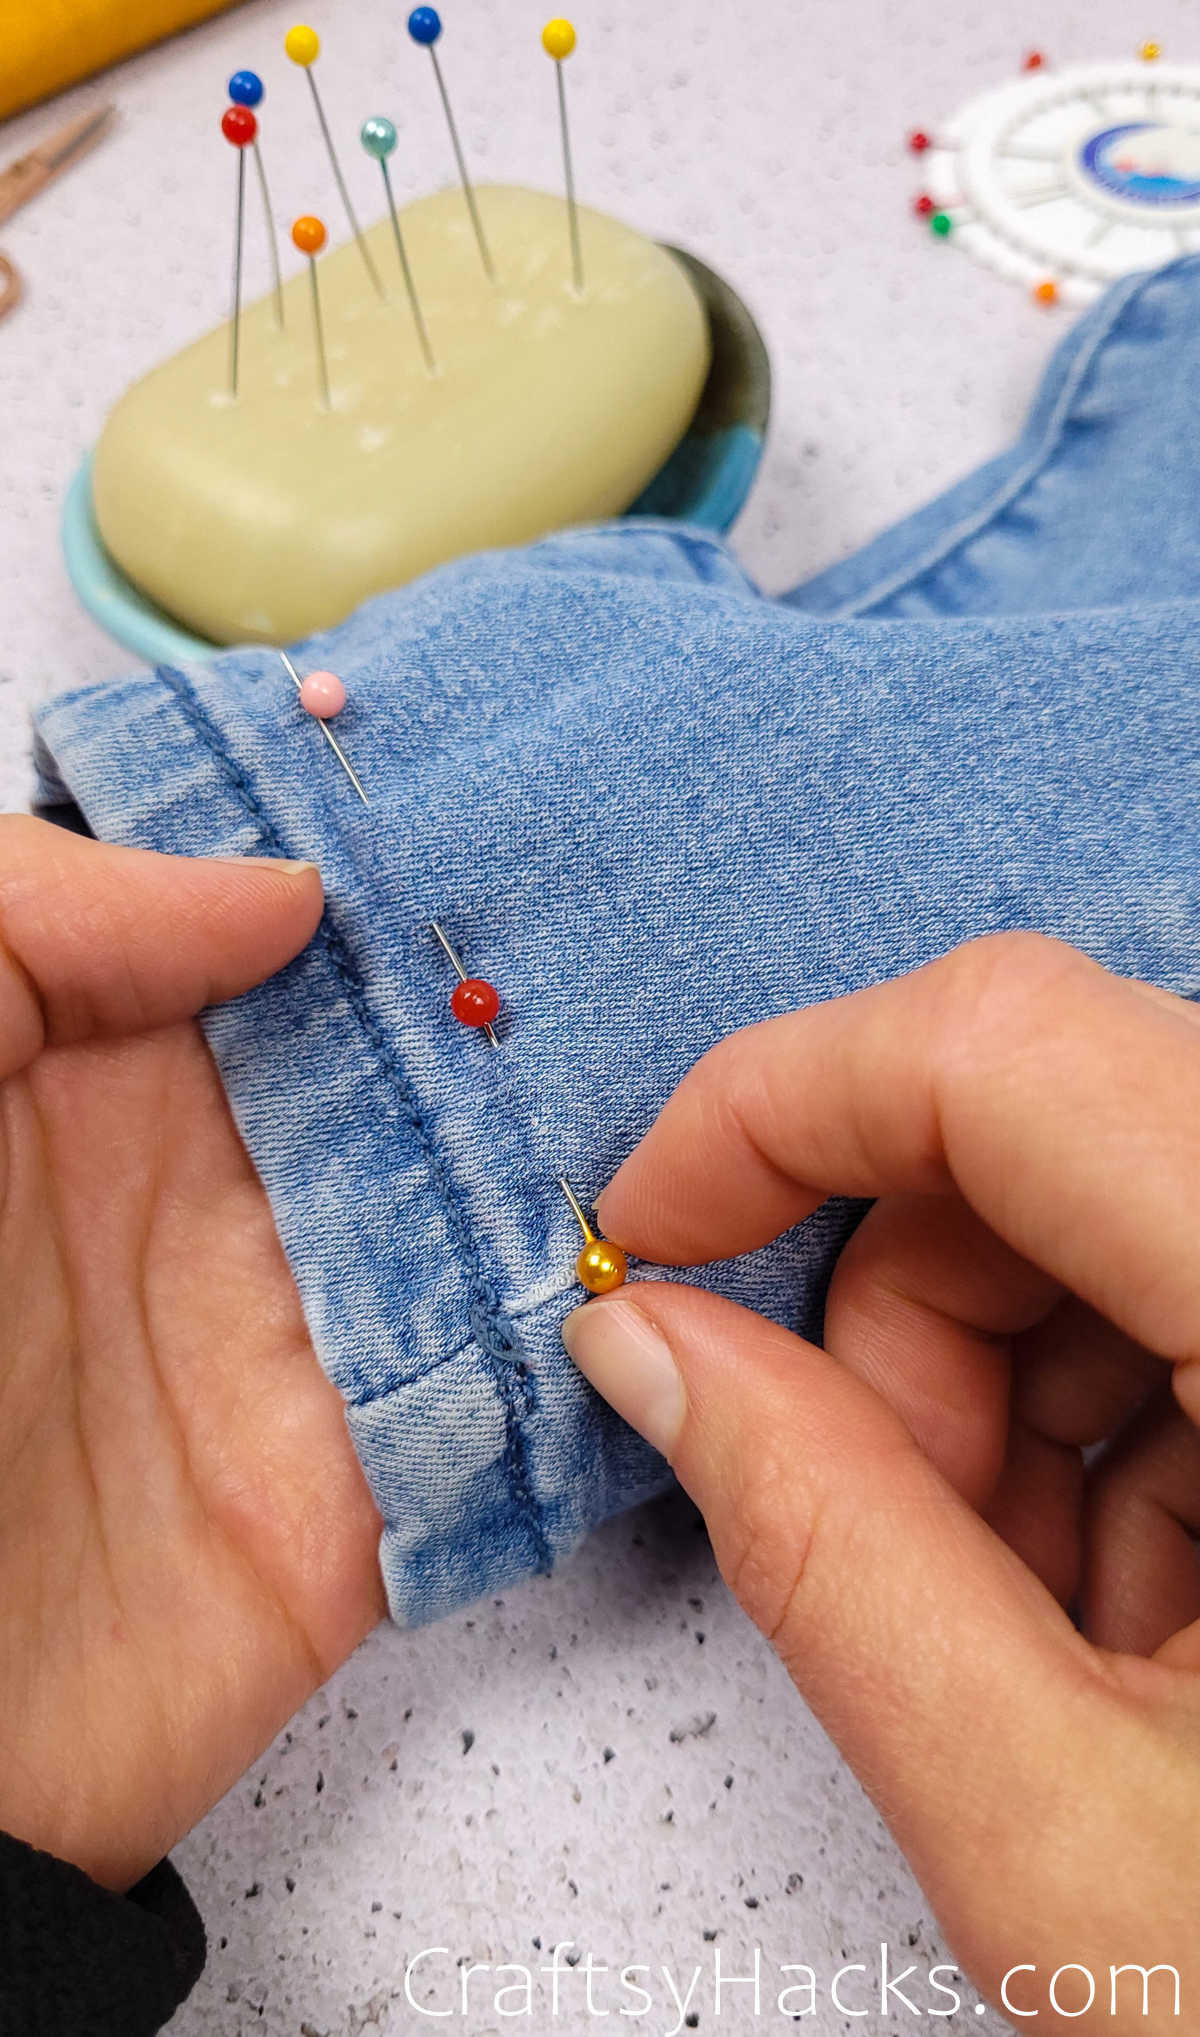
I can’t quite get over how utterly creative this particular hack is. Who would have thought that a bar of soap would be so useful when you’re sewing.
There are so many ways in which this soap bar comes in handy. You can use it as a pin cushion of sorts, only it also has the added benefit of helping the pins pierce through your thicker fabrics much more smoothly.
The soap coats the sharp tip glide through any coarse and thick fabric, allowing for easy insertion and removal.
15. Hem Jeans with a Pattern
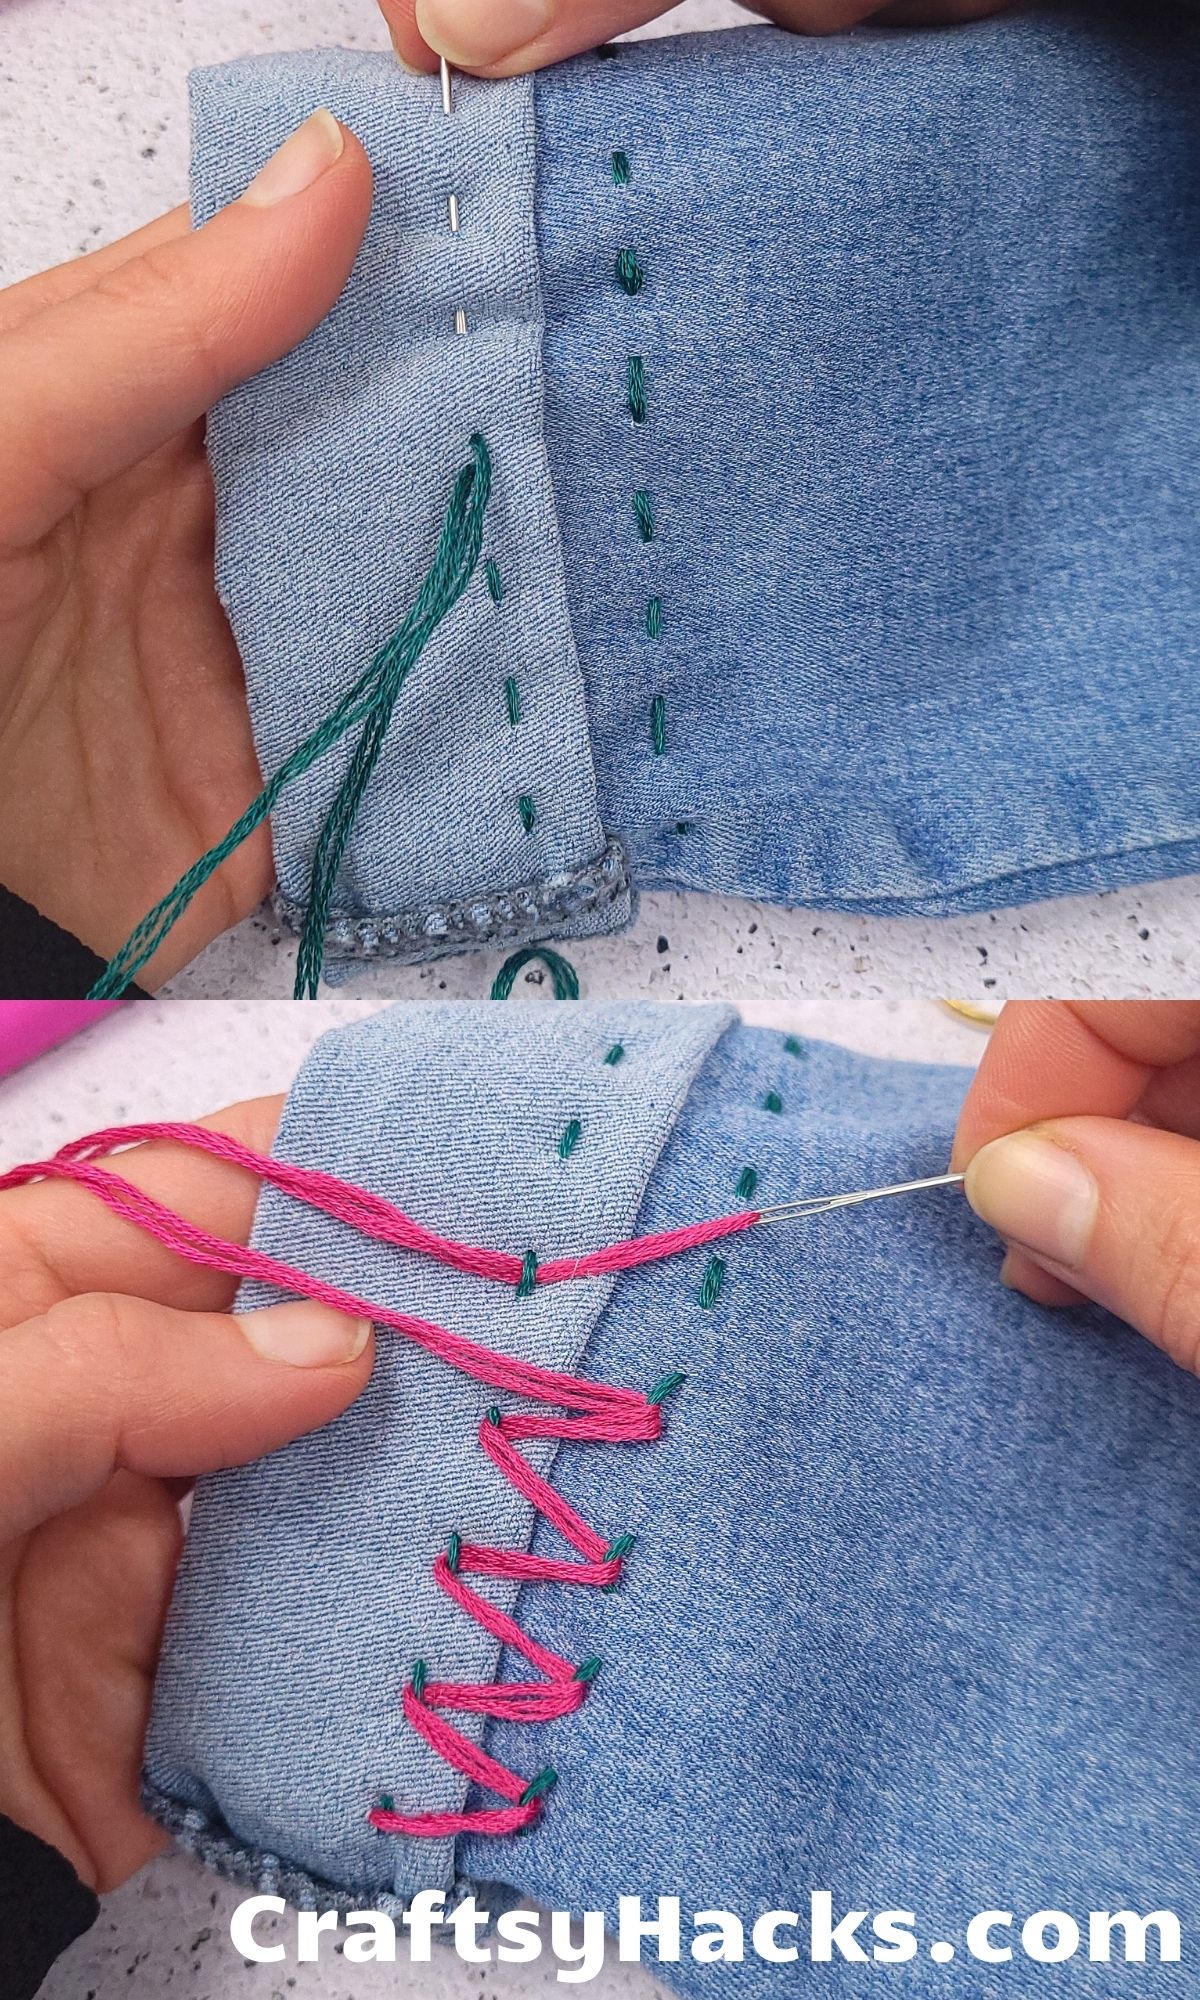
This one is quite the opposite of that seamless disappearing hem stitch you worked on earlier. If you don’t really care whether the thread is visible or not, then why not use the opportunity to get a little creative.
You can sew a pattern using contrasting colored thread and you’ll have a really personalized, unique, and quirky hemline on your jeans. The most common–and easiest, too–choice would be to sew a laced zig-zag pattern all the way across.
16. Turn T-Shirt into a V-neck
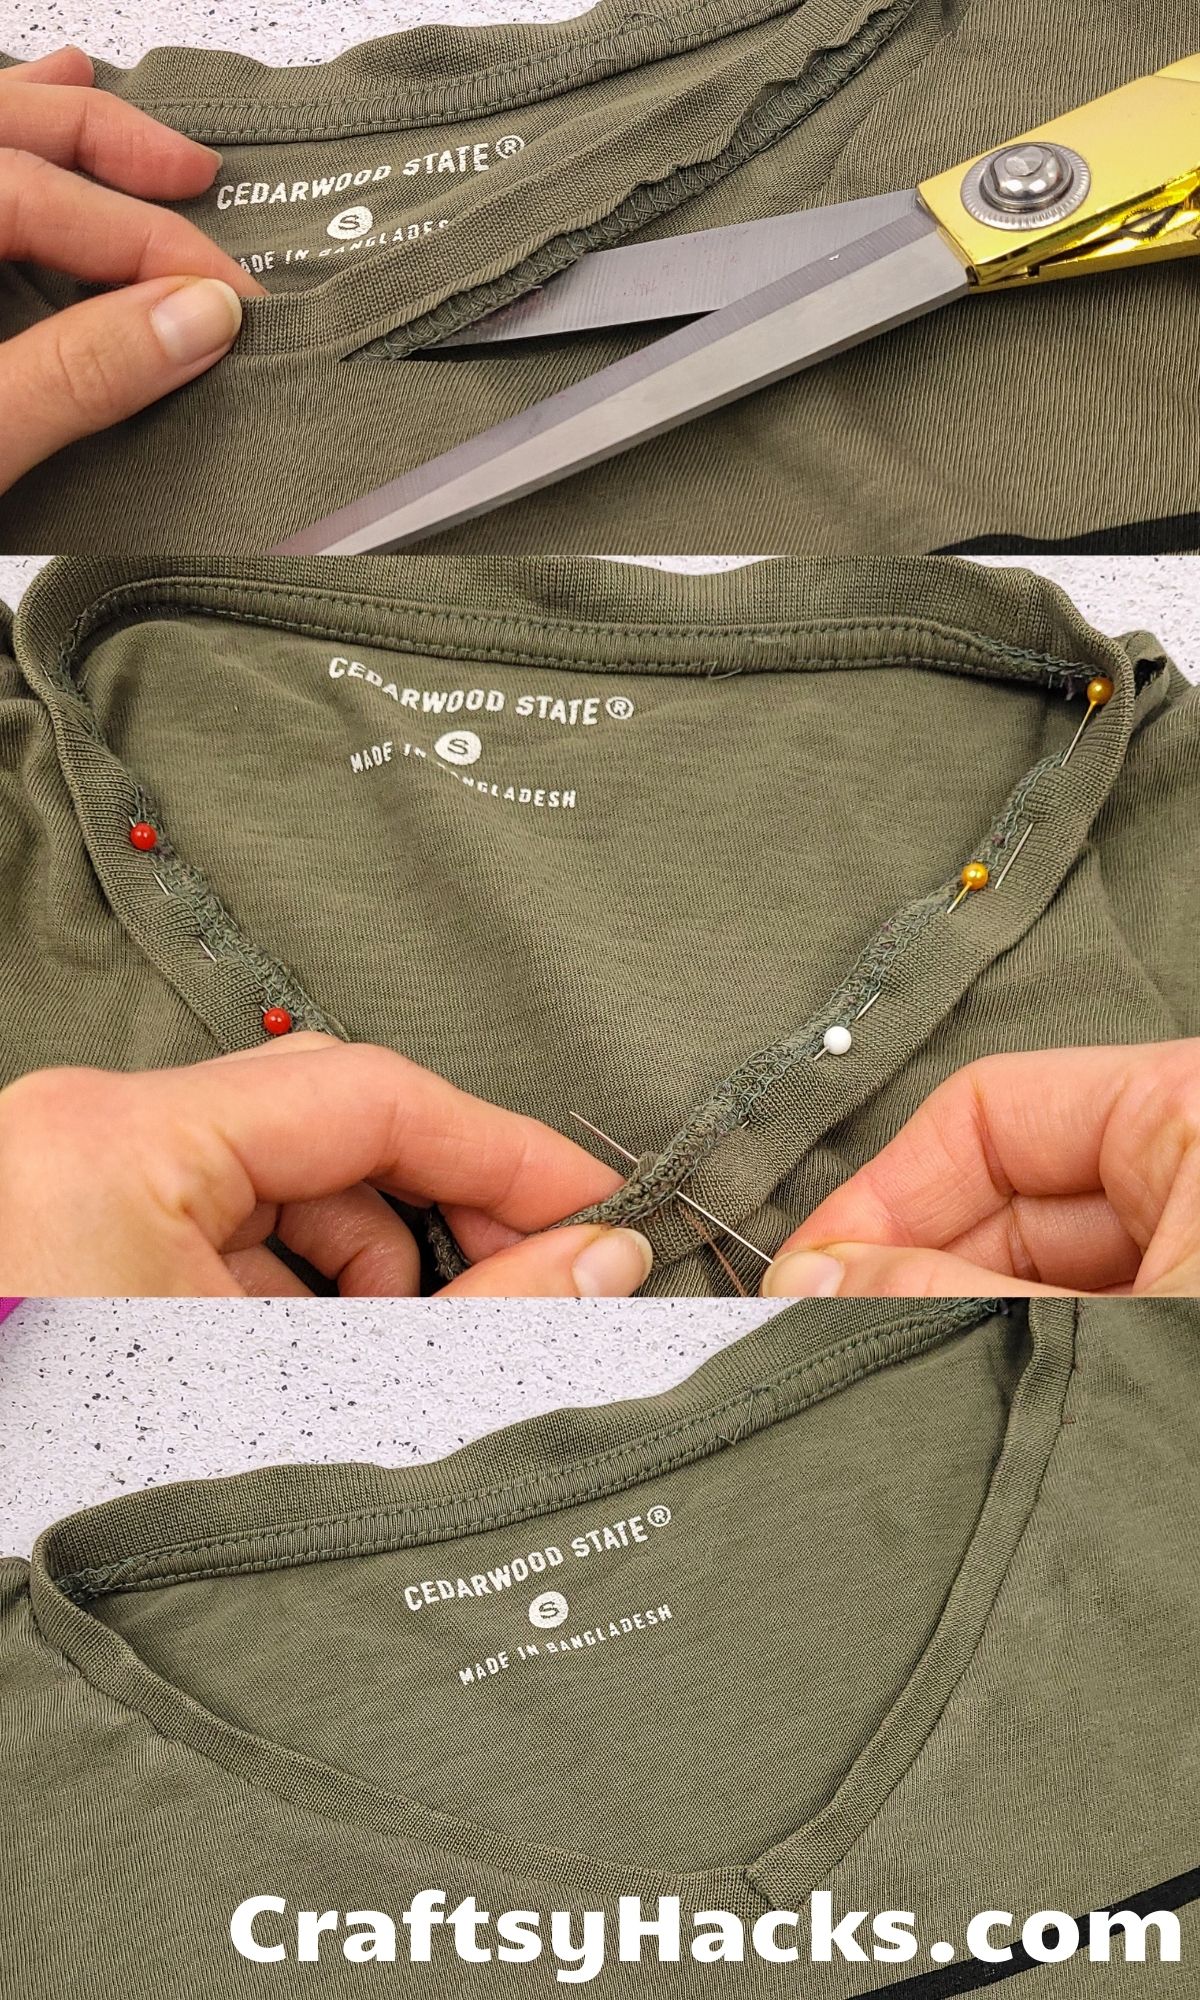
We all have that stash of old tees in the back our closets. You’ve either been meaning to dump them or at least donate them. How about you use them to practice some sewing hacks?
Did you know that you could turn a plain old round neck tee into a v-necked one? All you need are a few sewing pins to help you hold the neck back in place as you sew around it.
Simply pull the neckline back by a centimeter in a rough v-shaped dip, fold it, press it down, and stick pins into the fold. Finally, just sew along the neckline to turn it into a pretty and cute v-neck tee.
17. Patch Big Holes in Your Clothes
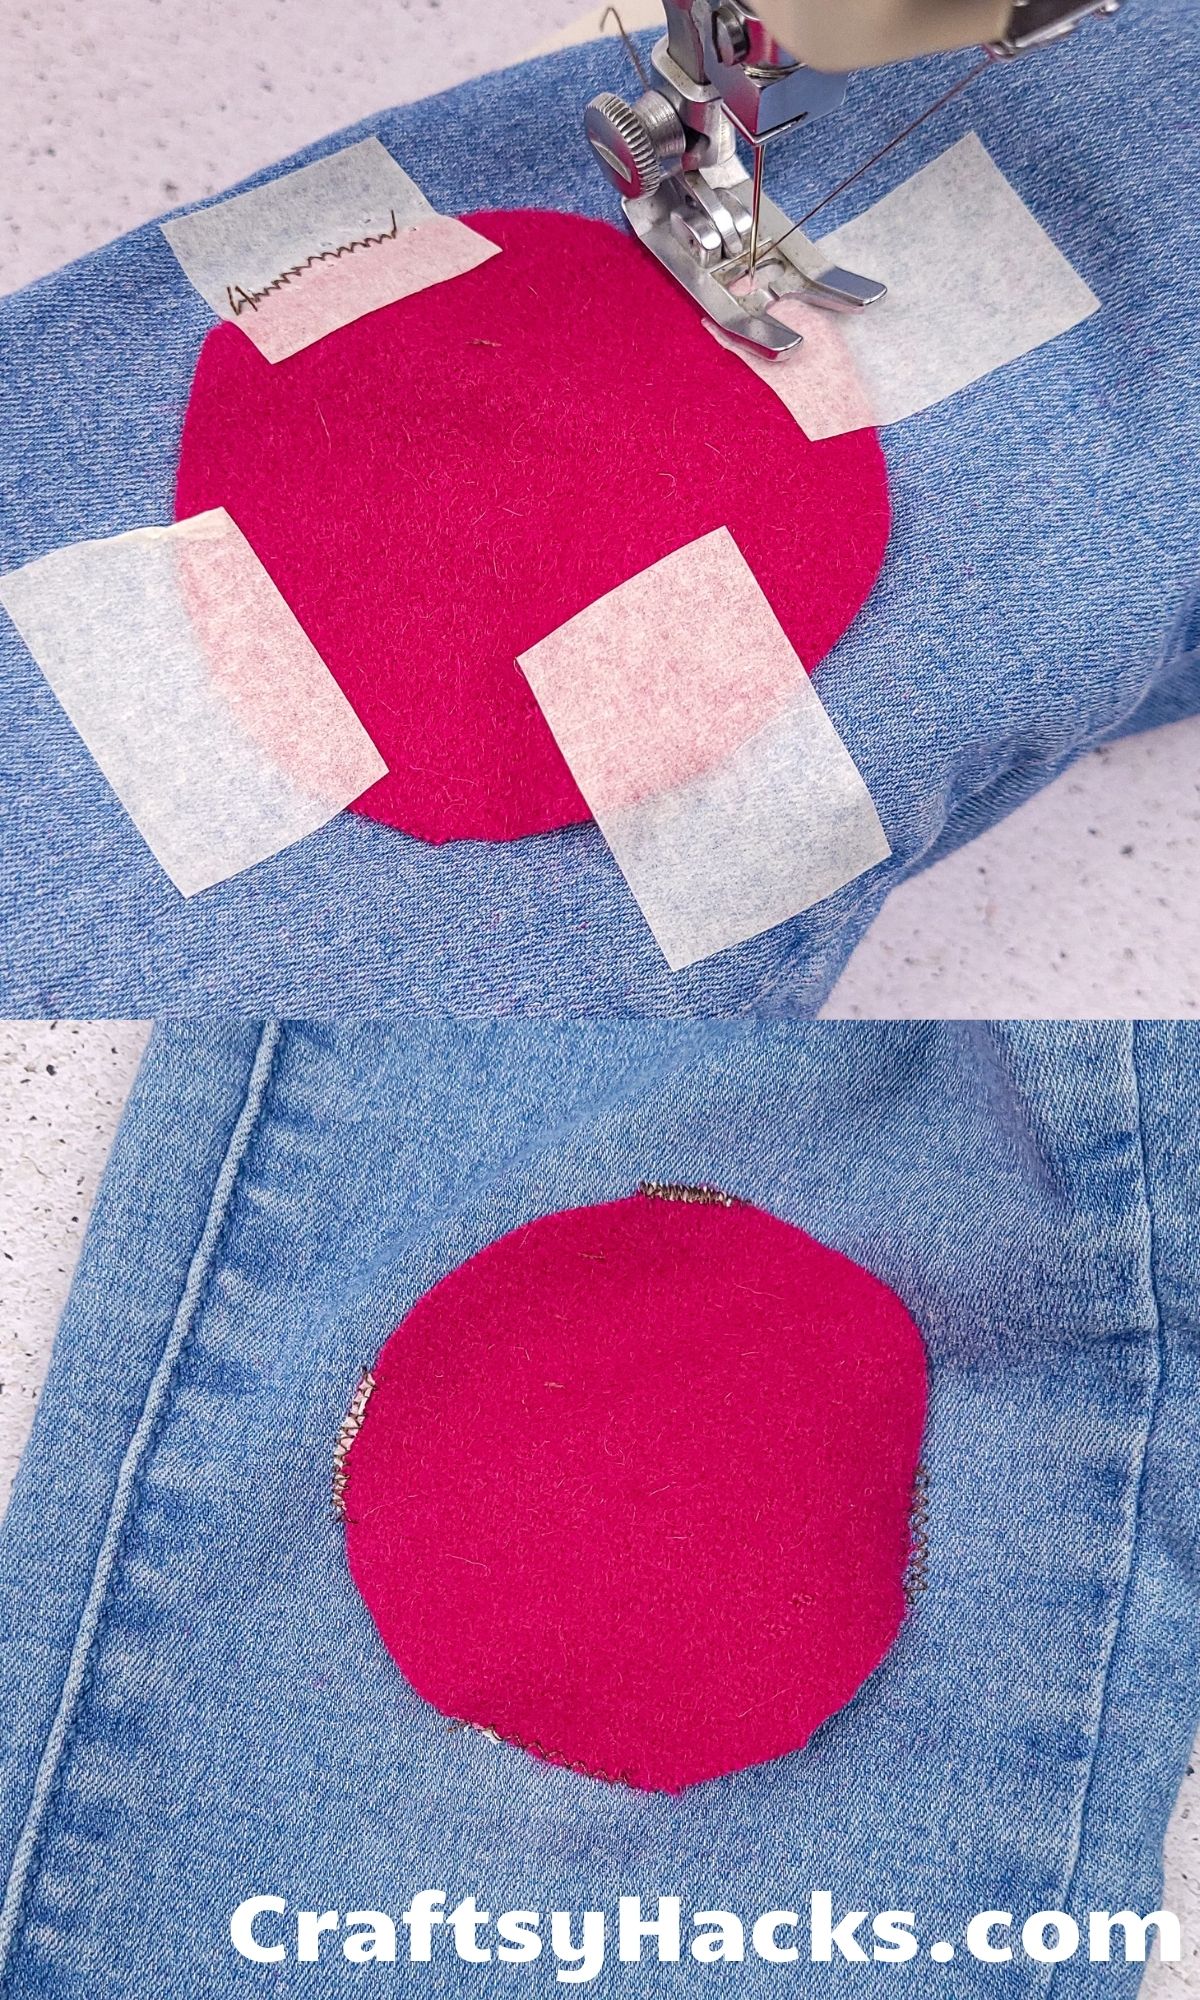
Sometimes, the holes in your clothes are just too big. You can’t sew a huge flower over these holes, that would be pretty out of place. You can, however, sew a patch over it.
Hear me out, patches are pretty quirky and unique. It gives you the opportunity to introduce a new color, texture, and even design–depending on the fabric you use–to your original clothing.
Go ahead and pick out patches, or just use up scrap fabric from previous projects, as well!


how about a printable version of the 17 sewing hacks that will make your life easier.
Haha 😛 Not a bad idea 🙂