DIY Woven Bowl Out of Paper Plate
This post may contain affiliate links: full affiliate disclosure.
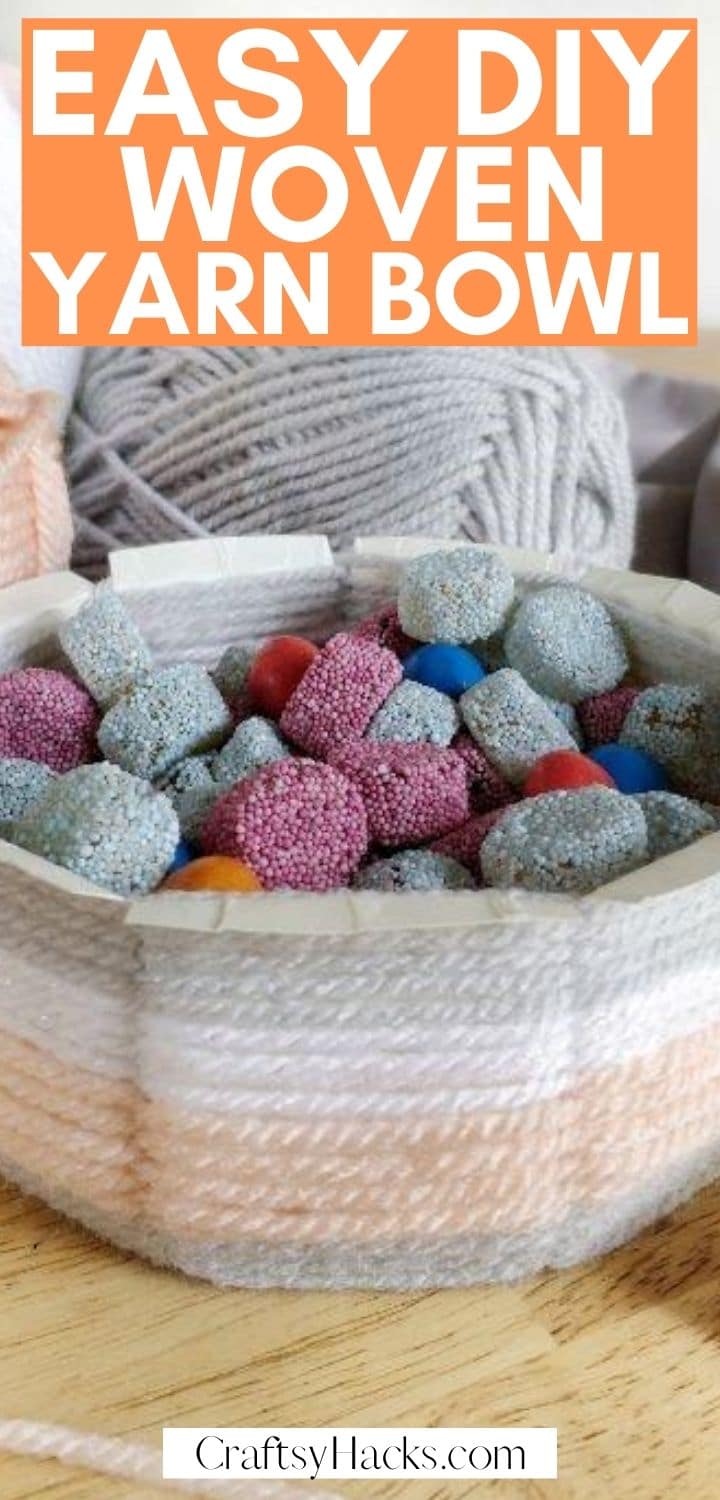
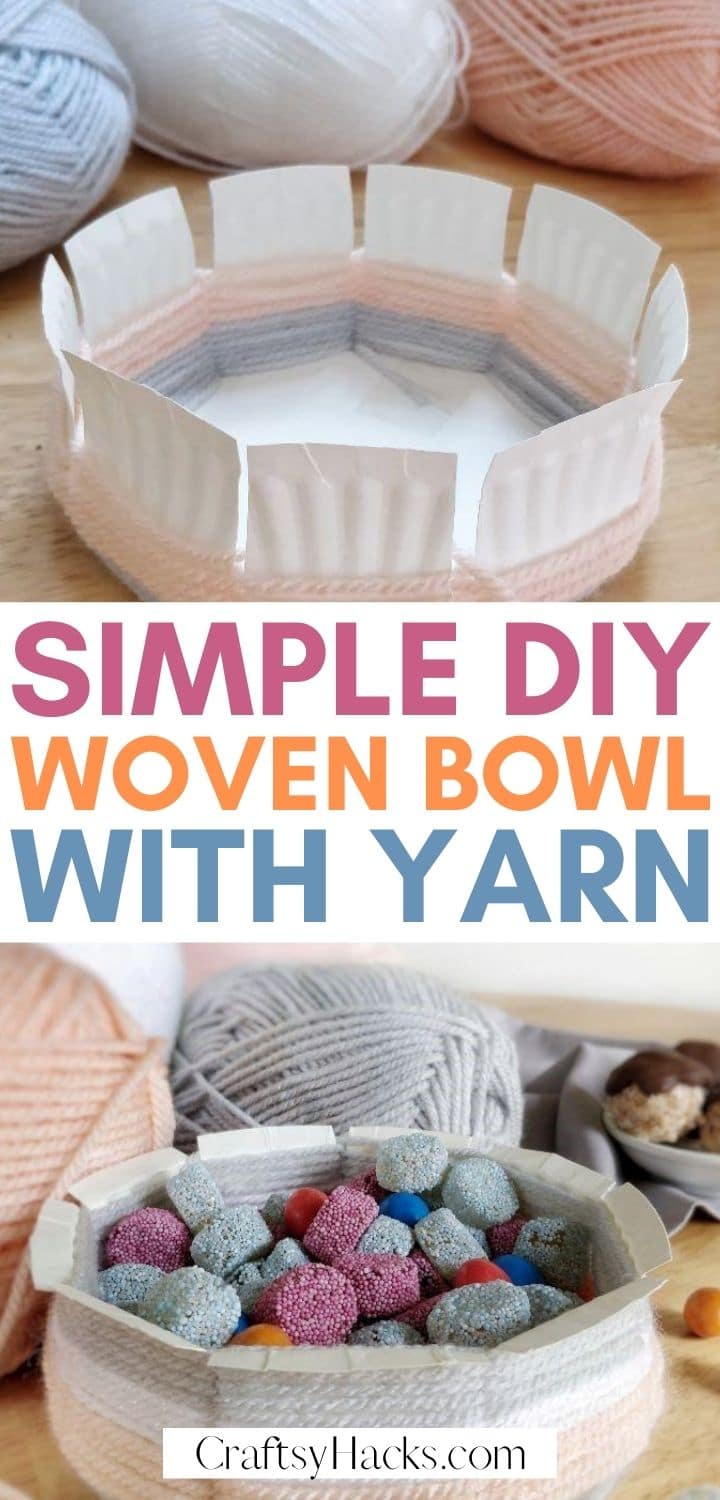
A practical woven bowl you can make with a paper plate and a few yarns. It’s a fun, practical craft you can use for storage.
I don’t know about you, weaving is a form of therapy for me. It’s a very relaxing craft and a very fulfilling one, once you see the finished product.
Another thing I love about weaving is that you can do it using almost any material. In this DIY project, I show you how I made a bowl out of woven yarn.
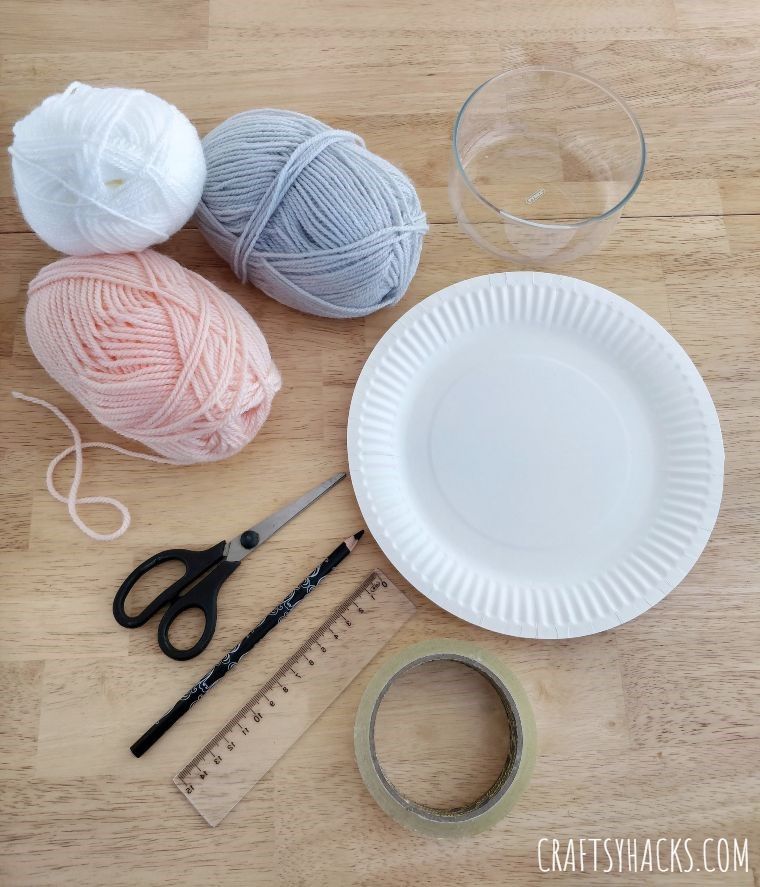
What You’ll Need
- 1 paper plate
- Scissors
- Pencil
- A bowl
- Thick yarns
- Scotch tape
- Ruler
How to Make DIY Woven Bowl
Here is how to make this bowl!
STEP 1
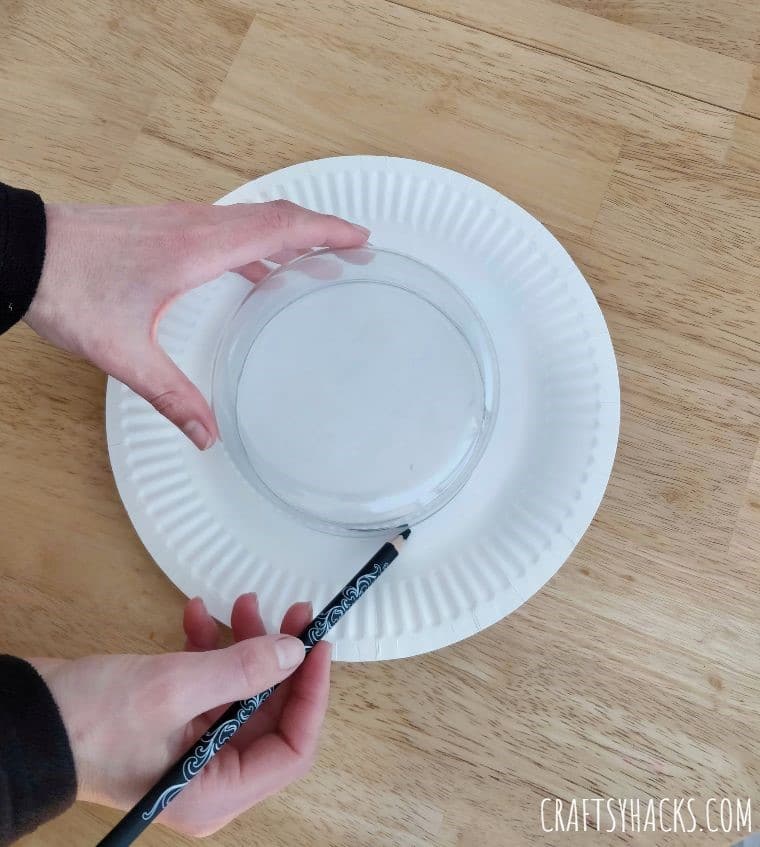
Once you have all your materials ready, start by positioning the paper plate right side up. Grab the bowl, turn it over so the base is facing you, and the mouth is directly on the paper plate.
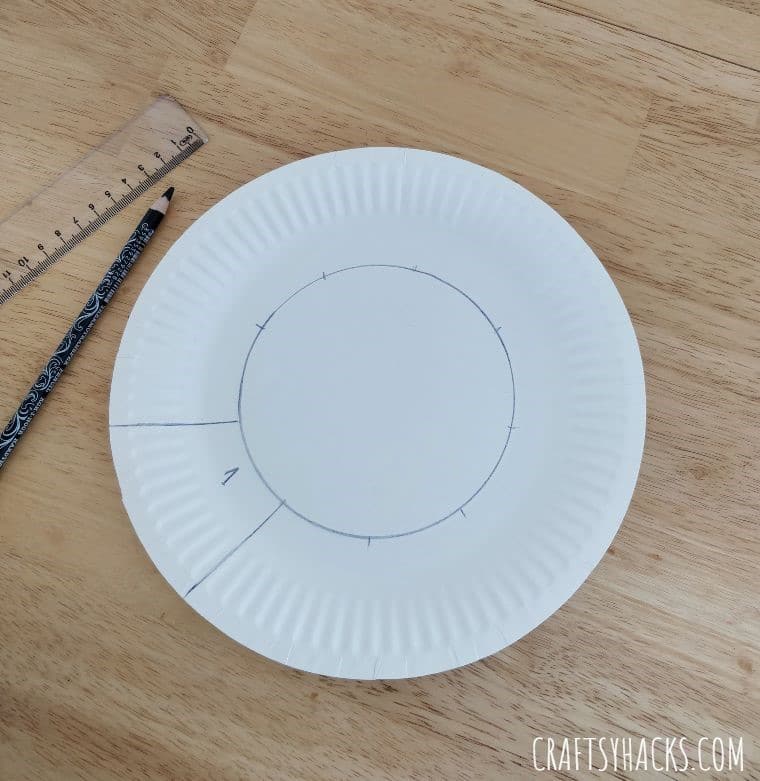
STEP 2
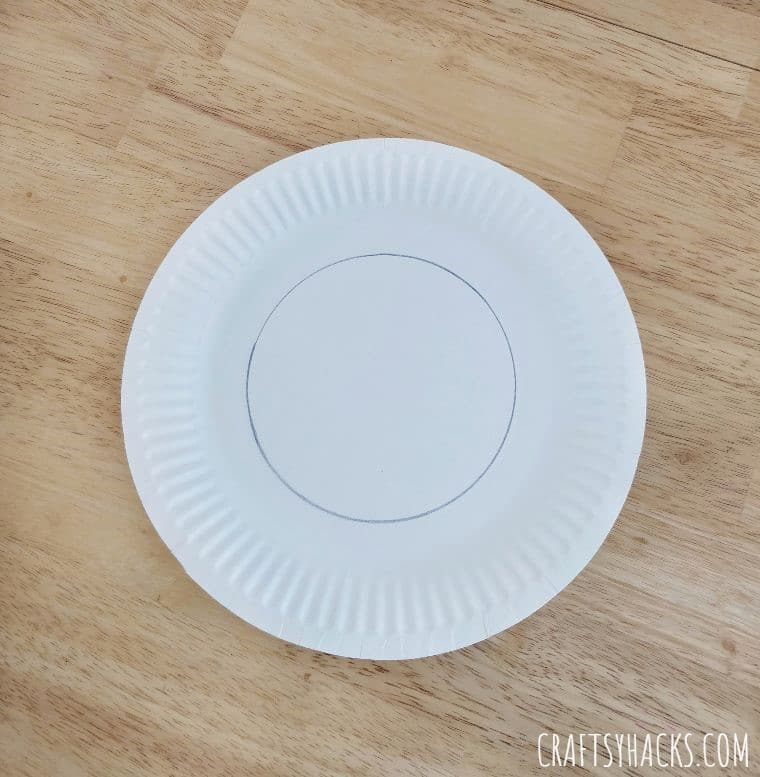
Using the pencil, trace along the edges of the bowl to create a perfect circle inside the paper plate.
STEP 3
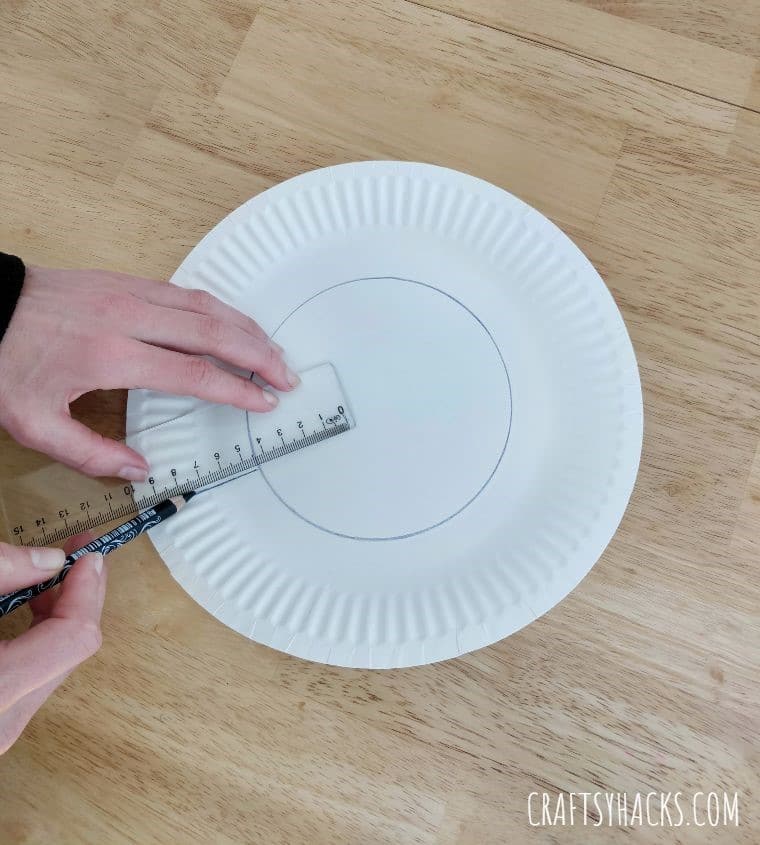
Grab the ruler and use it to draw a straight line from the edge of the circle to the edge of the paper plate.
STEP 4
Using the ruler again, measure 4.5 cm (1.8 inch) from the tip of your first line and mark that point using your pencil. For the purpose of this guide, we will call these marks your “gap marks”.
Measure another 4.5 cm (1.8 inch) from the gap mark, and create another gap mark. Continue doing this until you’ve marked around the entire diameter of the circle.
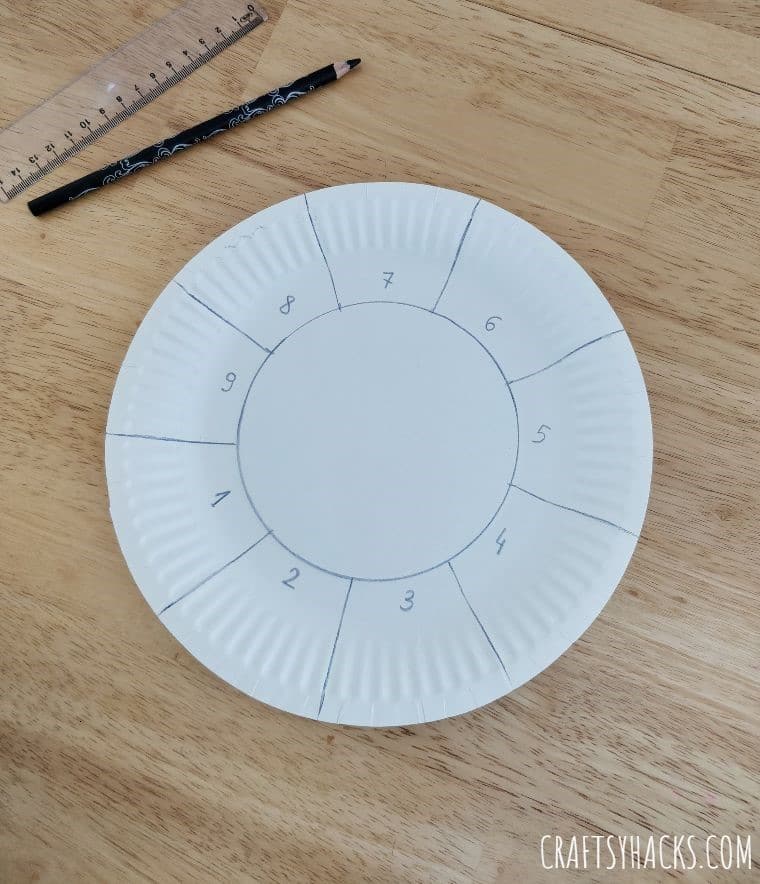
STEP 5
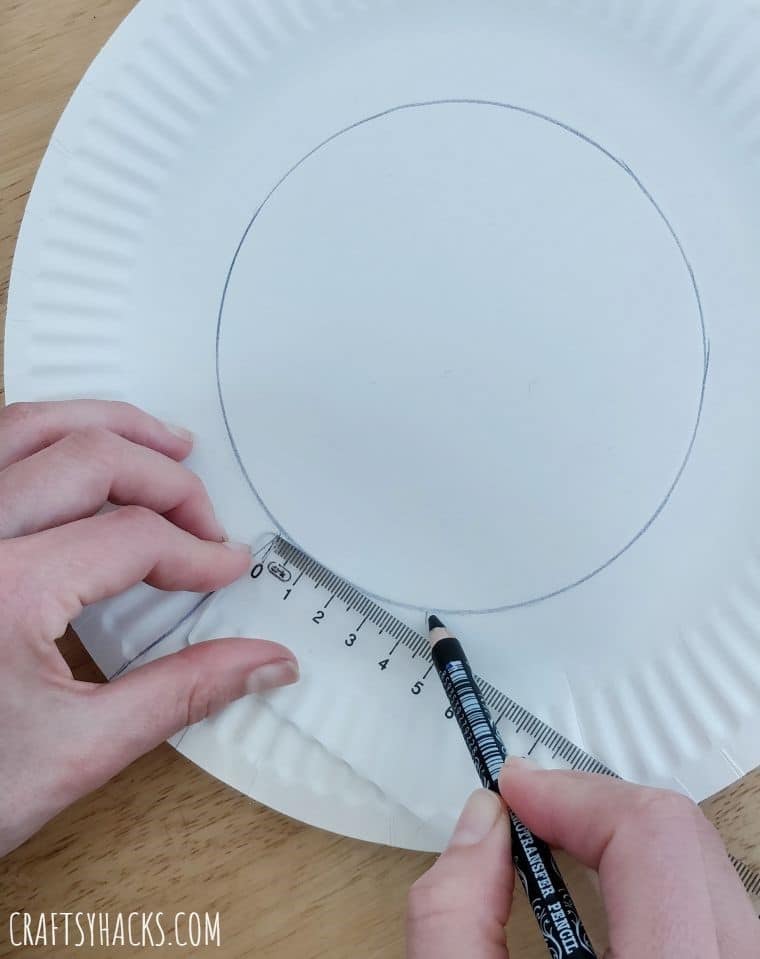
Use the ruler and pencil and draw another line from the first gap mark to the plate’s edge. This should create a shape like a slice of cake, like the one shown in the photo.
Mark the first shape with the number 1.
STEP 6
Continue creating your cake slice-like shapes by using drawing lines from each gap mark to the edge of the plate. Remember to number the completed shapes in order.
By the time you finish drawing lines, you should have nine equal shapes, each marked with their corresponding number.
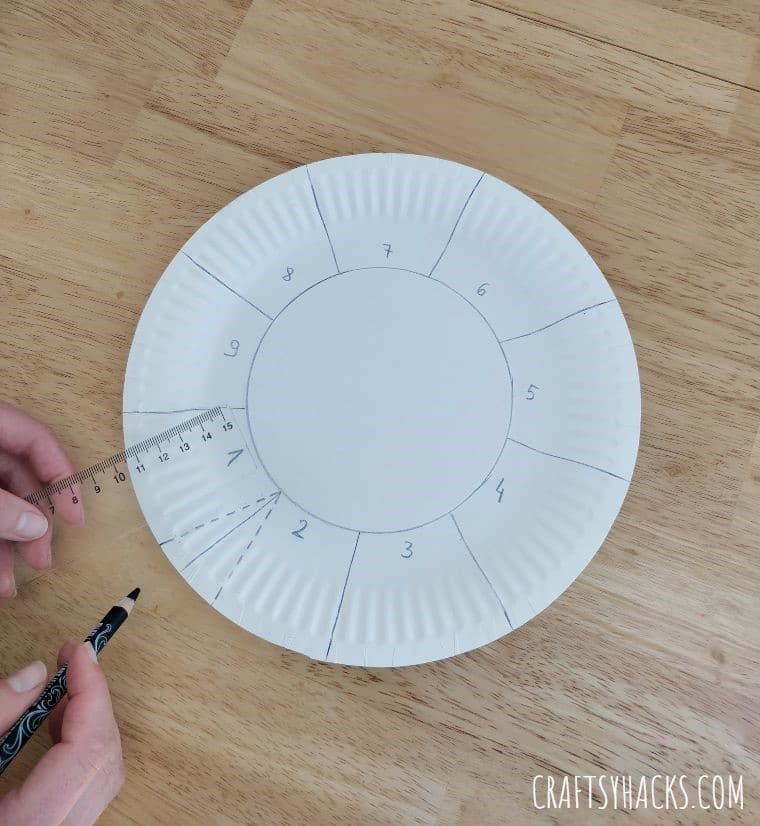
STEP 7
Using the pencil and ruler again, draw a triangle using the first line as your halfway point. Make sure to use dashed lines for the outline of the triangle to avoid confusion with the solid lines you have made earlier.
Do this again until you complete the entire diameter of the paper plate.
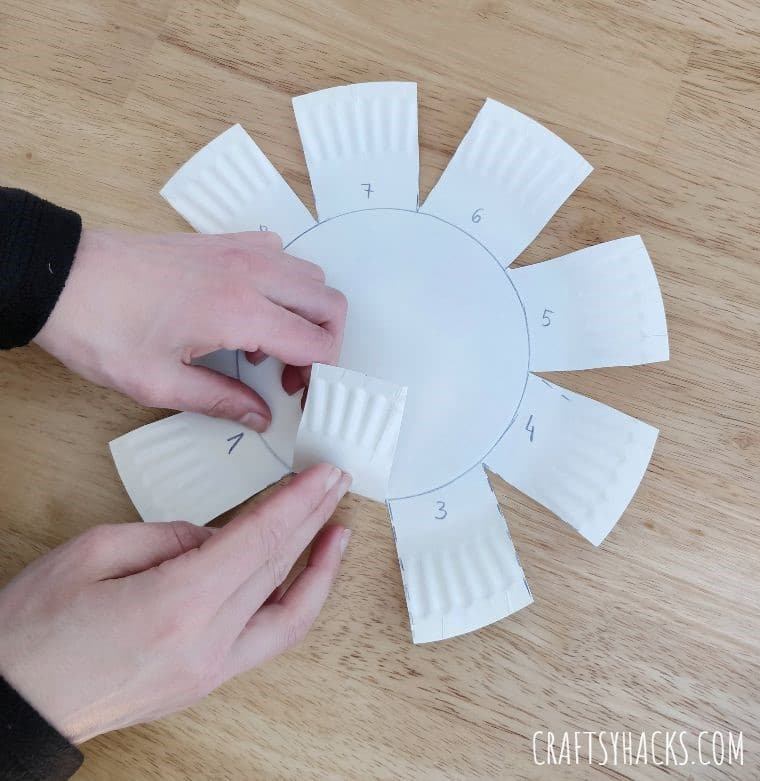
STEP 8
Use your scissor and cut along all the dashed lines you made. You should have a total of nine cut triangle pieces.
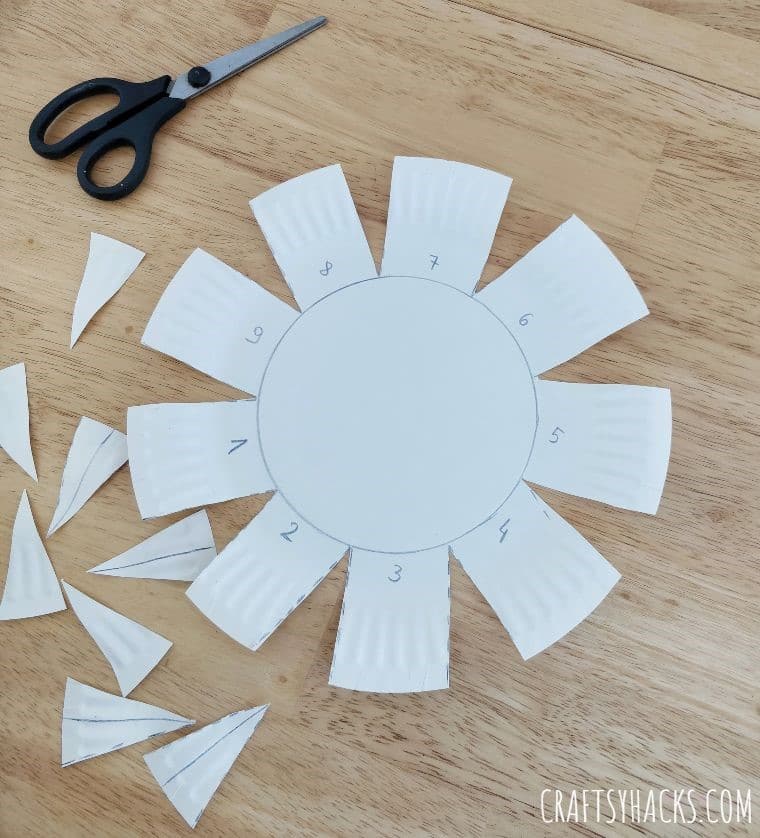
STEP 9
Discard the cut-out triangles and start working on the sides of your DIY bowl by putting each flap up. Make a slight crease on as you fold for added standing stability.
STEP 10
Do this with the next flap and carry on with the rest of the flaps until you have folded up all flaps. You should have a bowl-looking base once you’re done with this step.
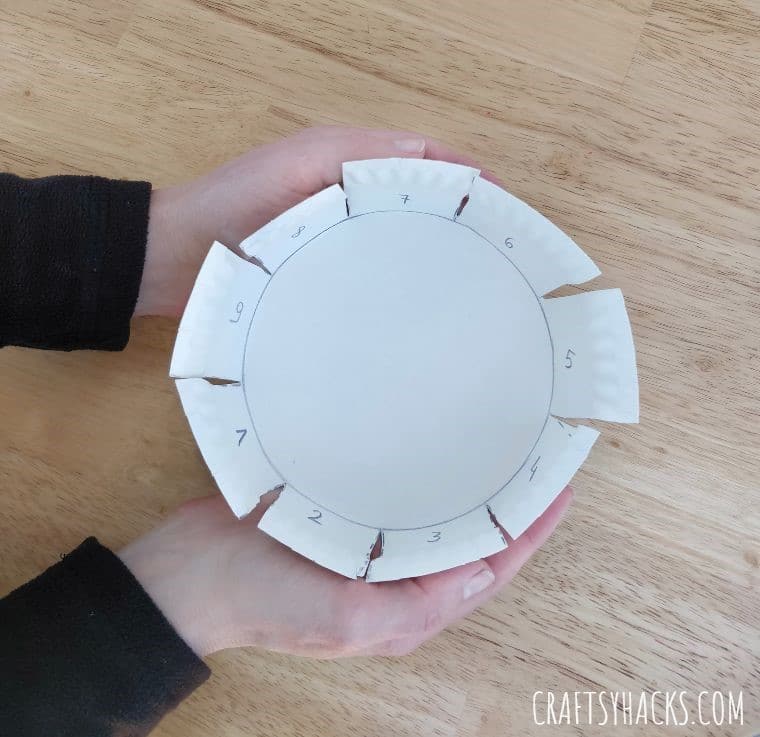
STEP 11
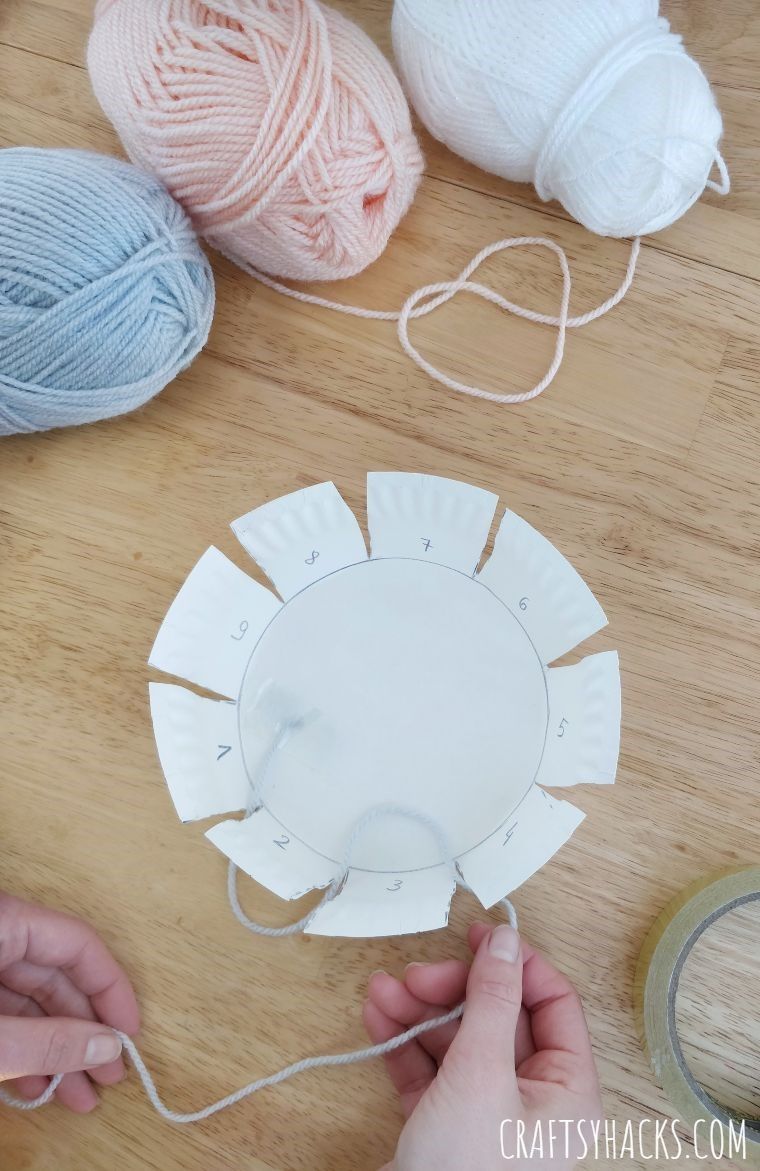
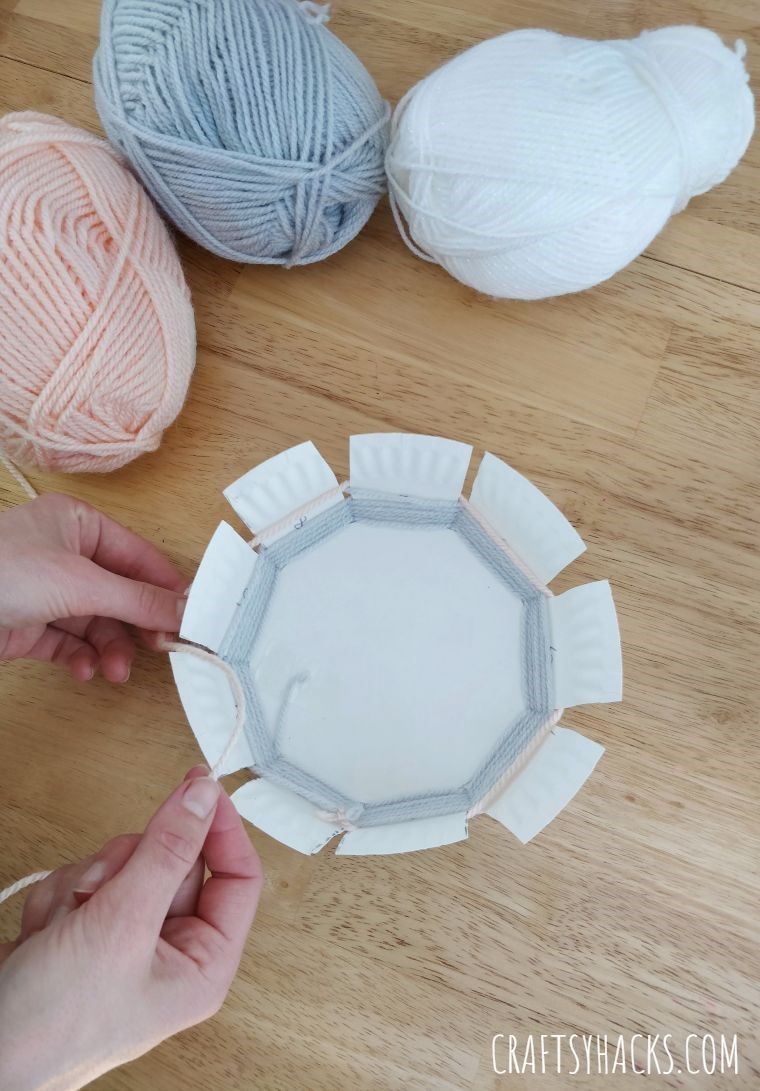
Now that the base is completed, this is where the fun weaving part begins!
Grab the first yarn color and use Scotch tape to attach it to the inside of your pre-drawn circle. Once it’s securely and firmly attached, start weaving through the numbered flaps in an alternate direction pattern.
While doing this project, I started by passing my yarn outside of flap number 2, then inside of flap number 3, then outside of flat number 4, and so on.
STEP 12
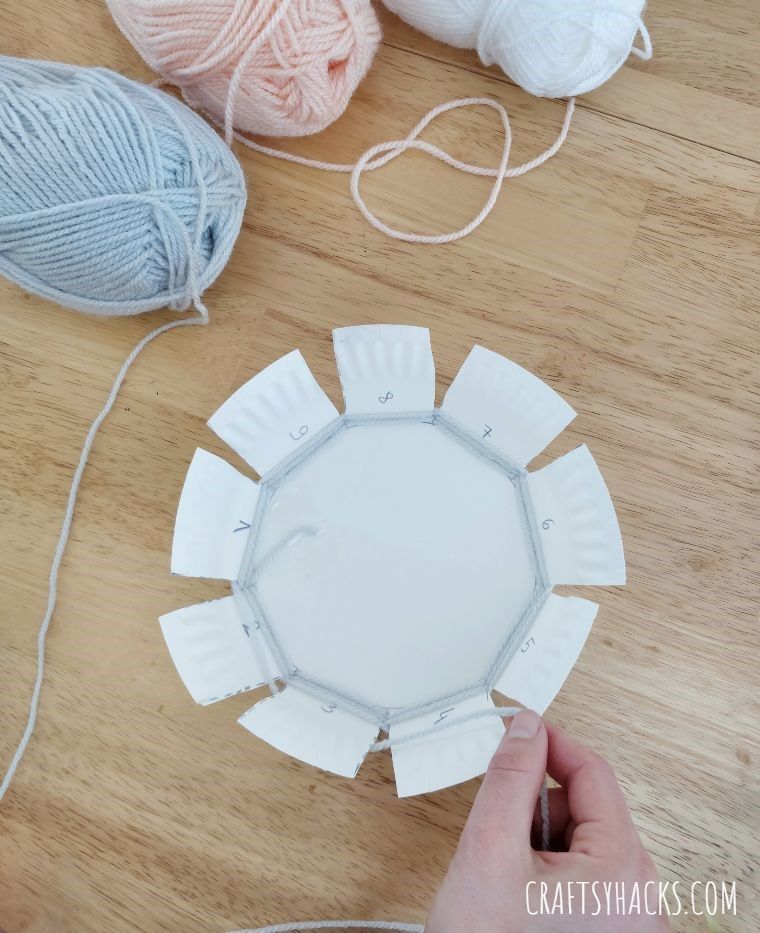
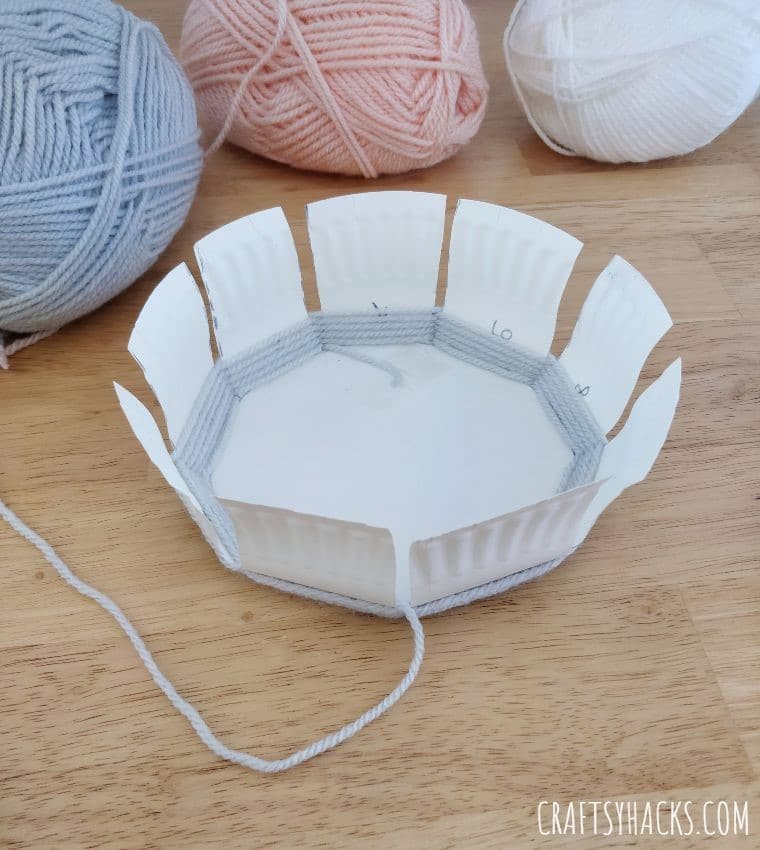
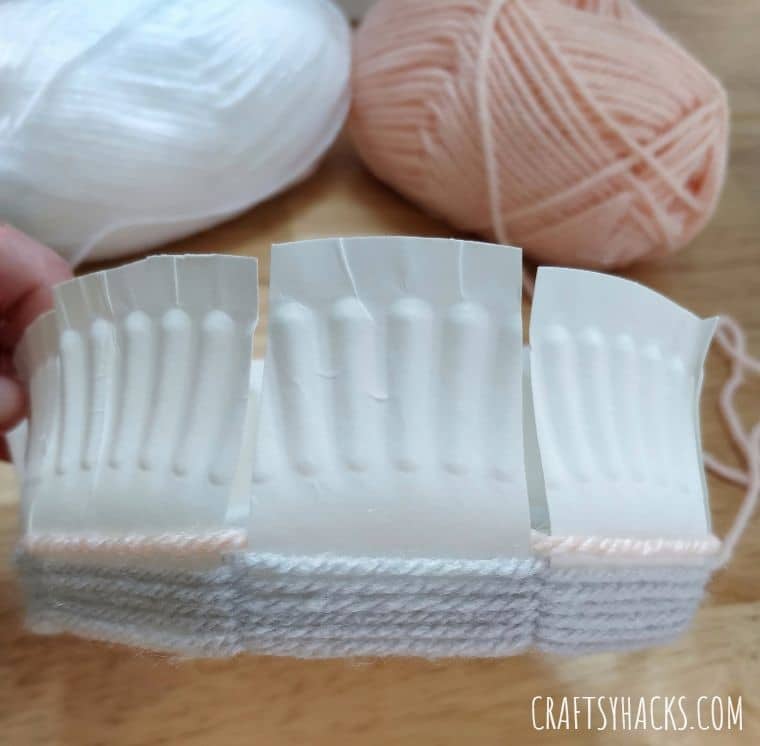
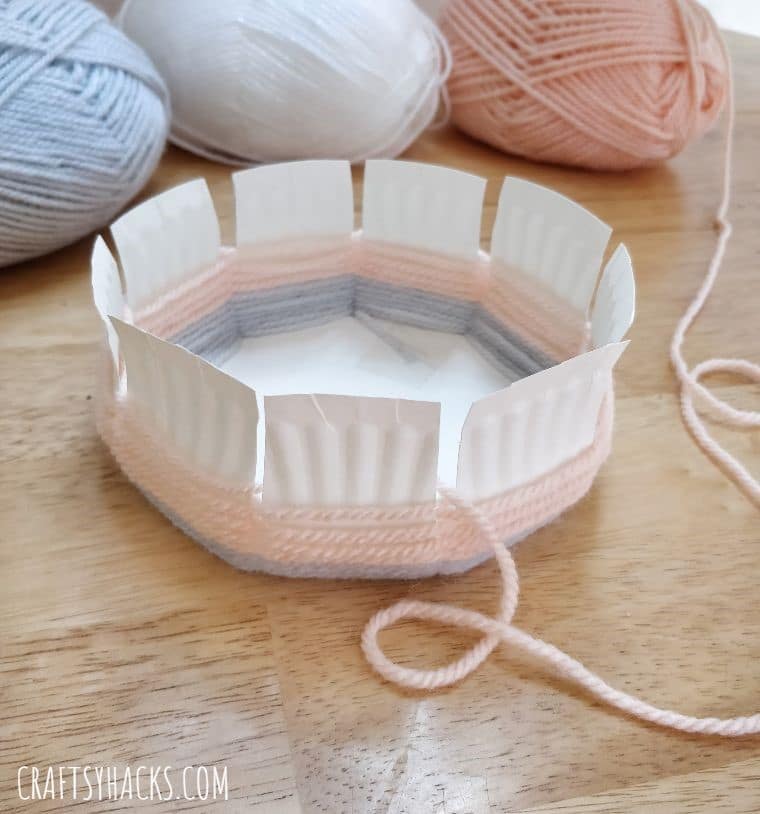
Follow this alternating pattern of weaving until you complete the entire circle. Repeat this process for about for our five more times (or until you reach your desired height for that specific color).
STEP 13
Once you’ve reached your desired height for your first yarn color, stop about two flaps away from the spot you started your weave. Use the scissor to cut the yarn, leaving at least two inches from your last weave.
The remaining two inches should cover the last two flaps but don’t weave this just yet.
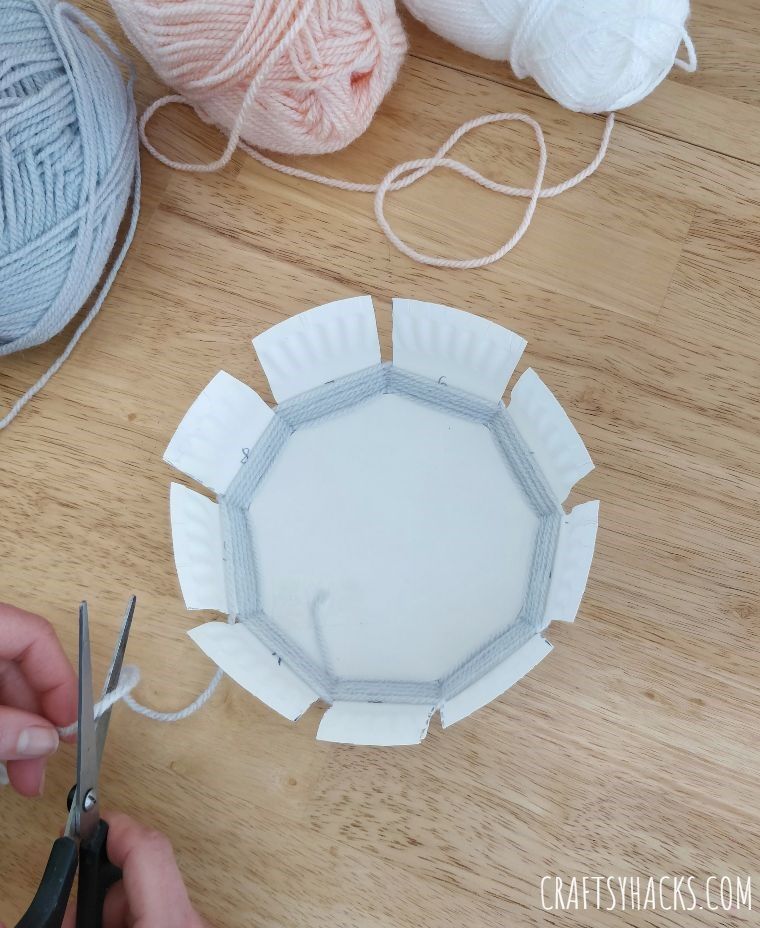
STEP 14
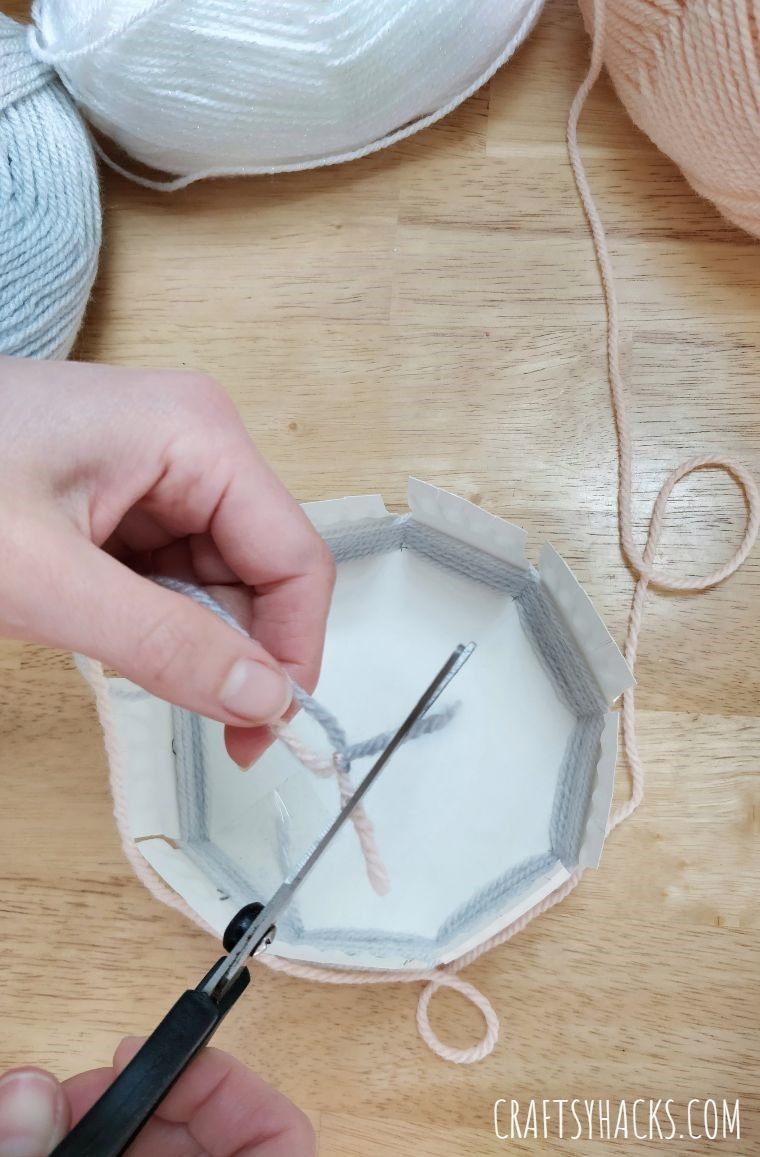
Grab your next yarn color and combine both colors using a simple knot.

STEP 15
Trim away any excess yarn, for a cleaner knot finish.
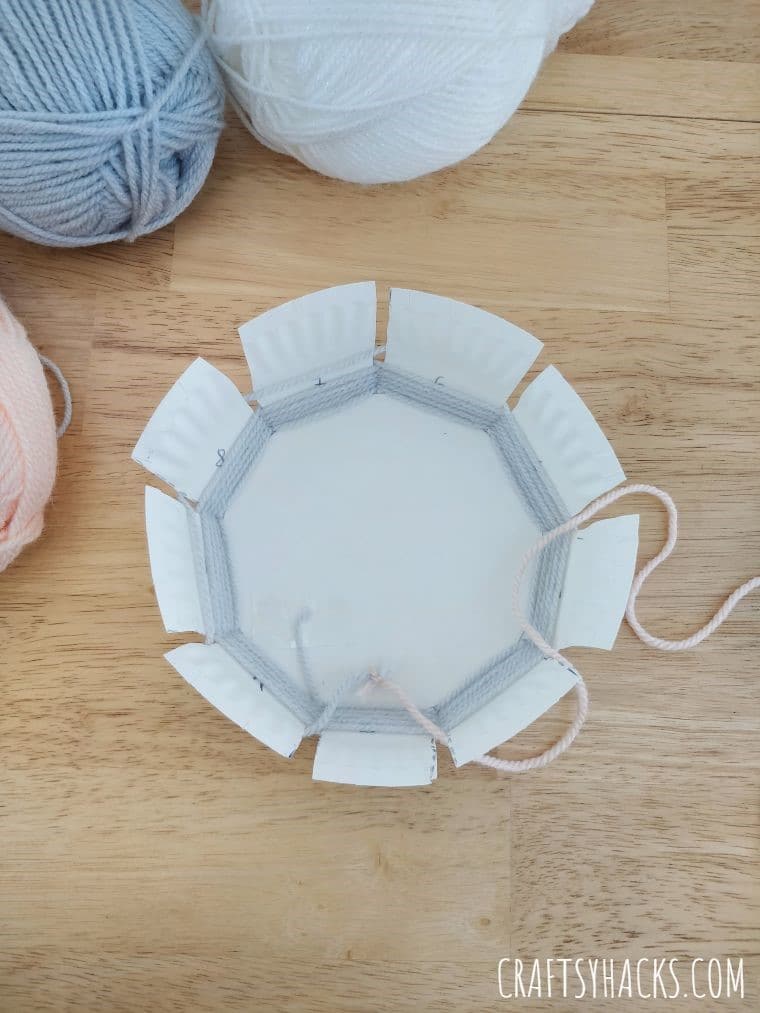
STEP 16
Start your weave by making sure the knotted ends remain concealed inside the bowl. Follow the alternating pattern you used for the first color.
STEP 17
Your weave should look like this – no knots visible and the second in-and-out patterns of weave are consistent with the first yarn’s weave pattern.
STEP 18
Continue weaving just as you did the first time until you again achieve your desired height for the second yarn color.
STEP 19
Remember to end your second color’s weave the same way you did the first: flaps away from where you ended your first yarn color’s weave.
STEP 20
Again, cut your second yarn color, leaving a good two inches to cover the last two flaps.

STEP 21
Grab the third color and repeat the knotting and weaving process you did when you combined the first and second yarn colors.
STEP 22
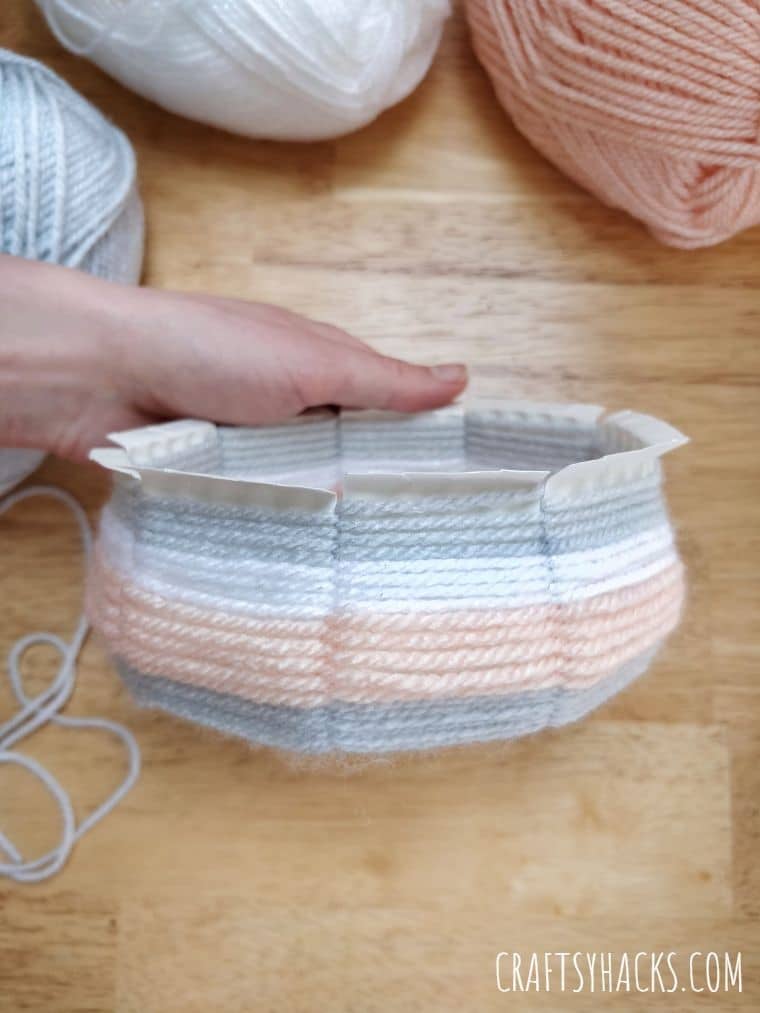
Continue weaving until your desired height, it is best not to cover the sides of the bowl entirely. Leave about 1 cm or two.
End your weave on the inside of the bow, as shown in the photo.
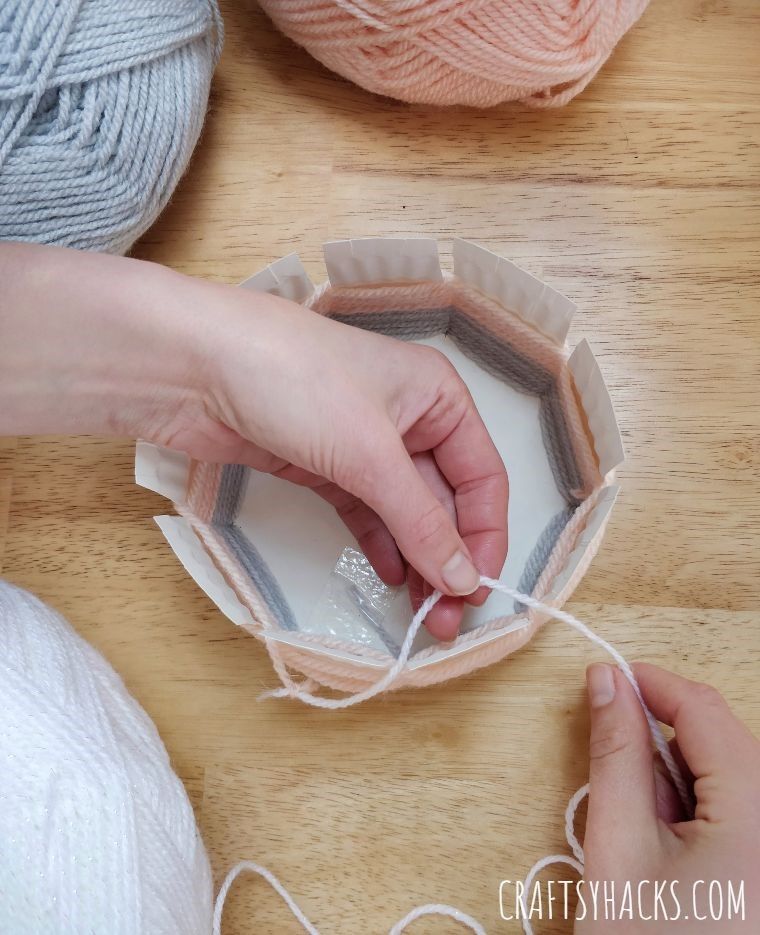
STEP 23
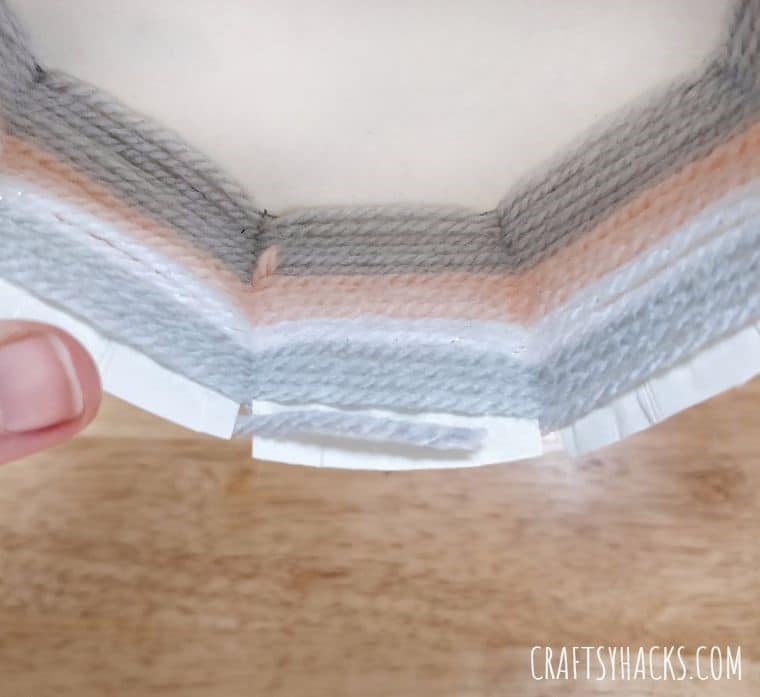
Use the tip of your closed scissors to tuck the last strand neatly into the yarn layers below it.
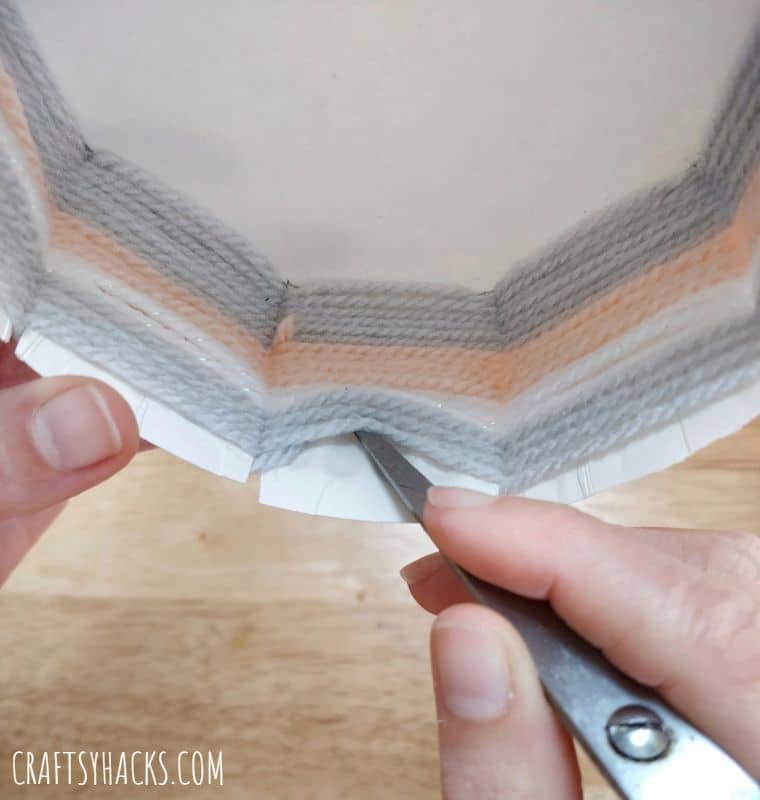
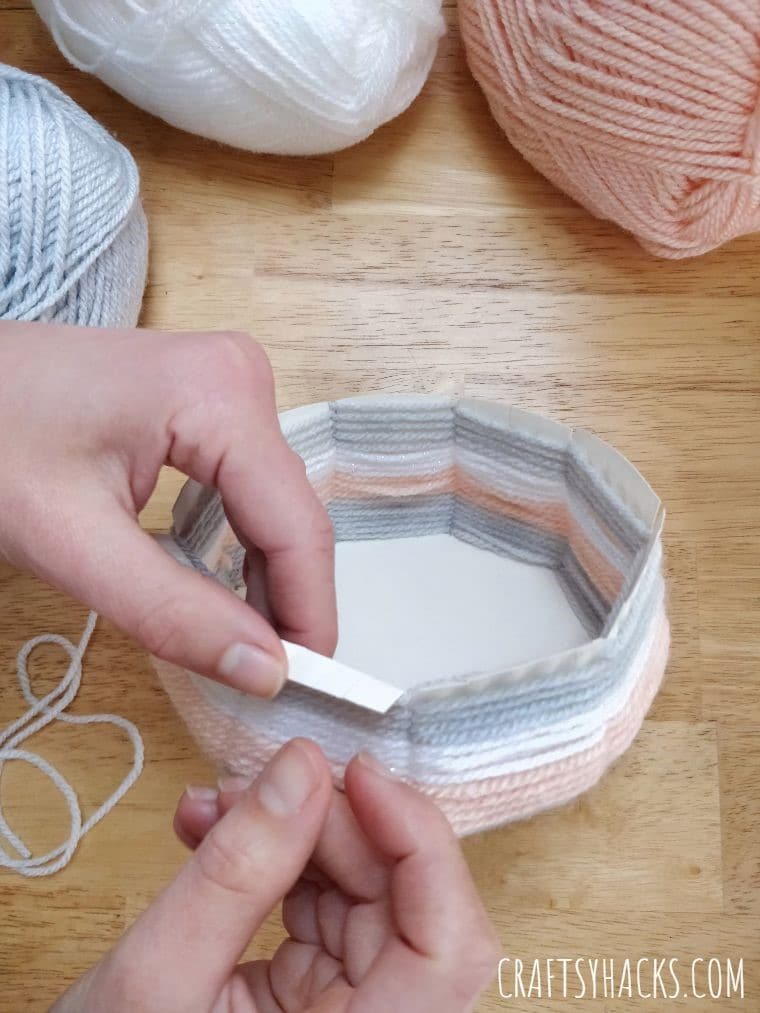
STEP 24
Remember the first strand you taped on the plate? Gently peel off the tape and again use the scissor to tuck this end neatly into the yarn layers above it.
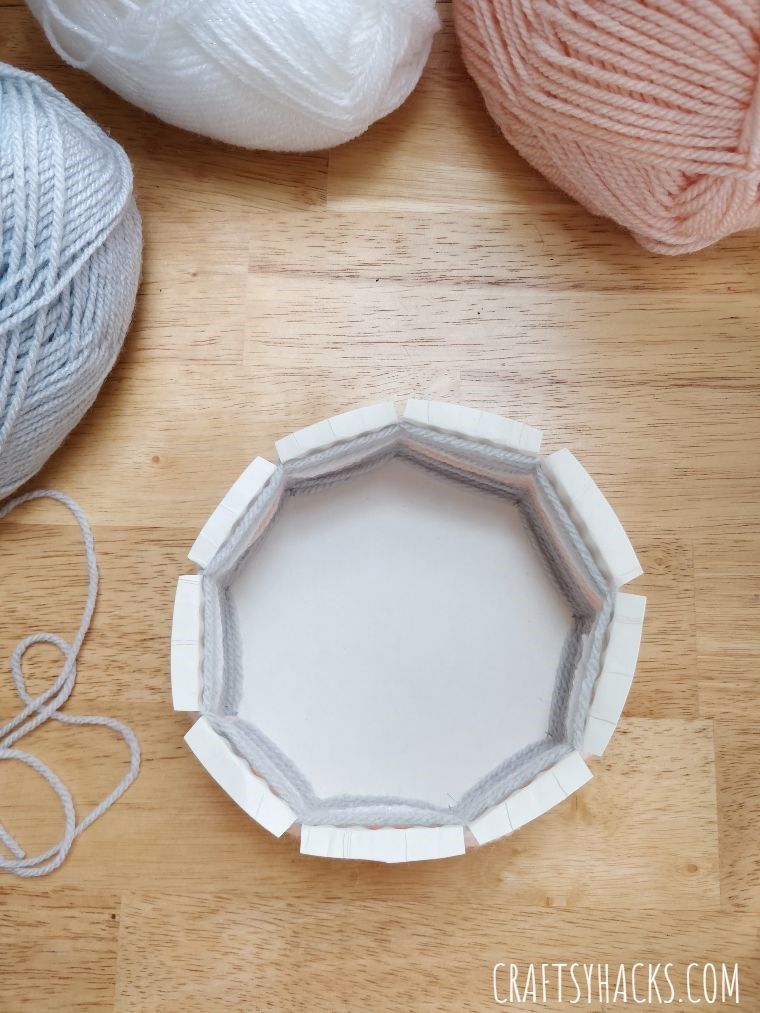
STEP 26
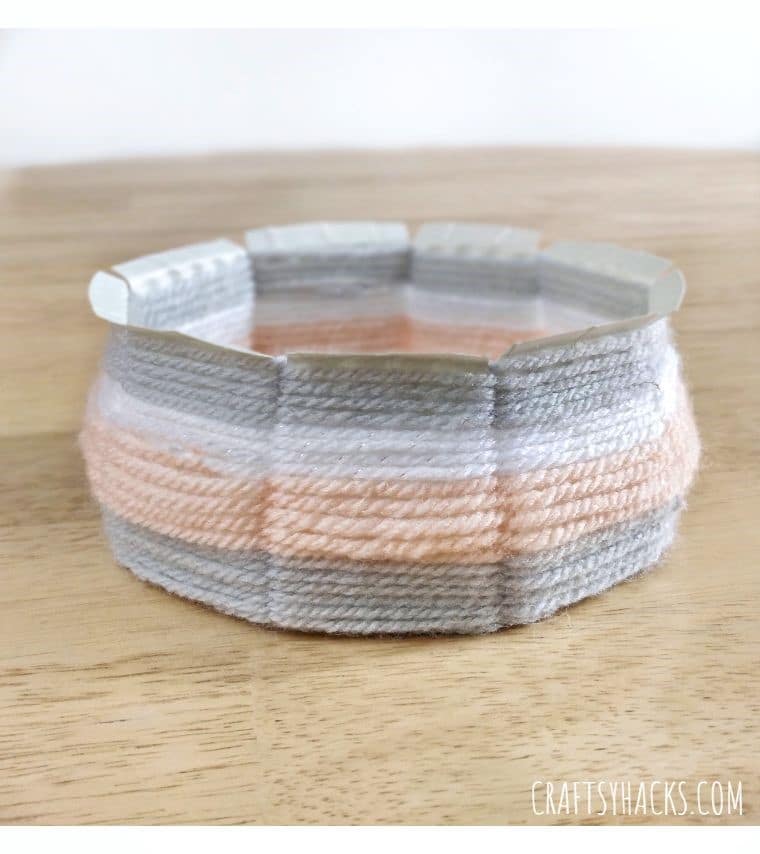
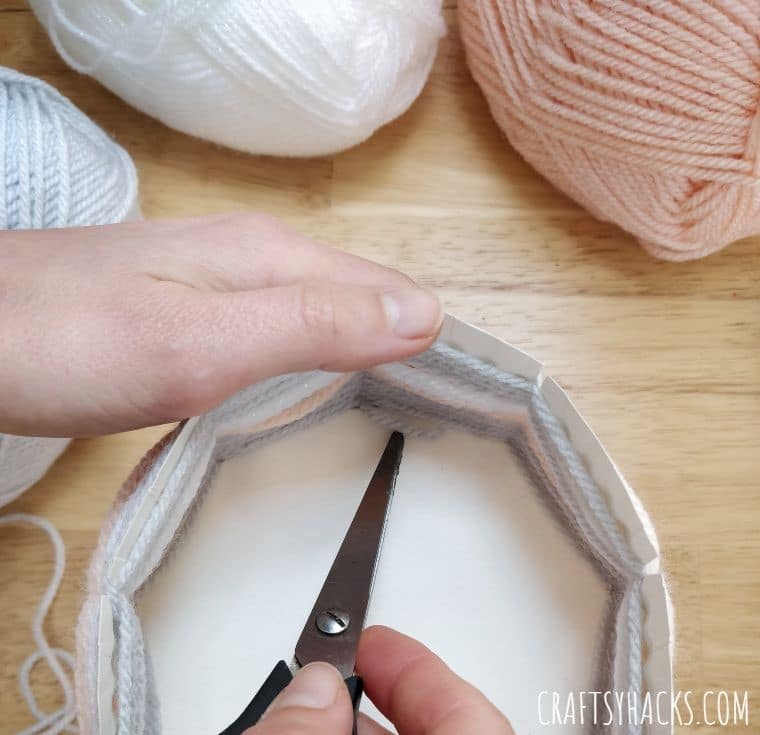
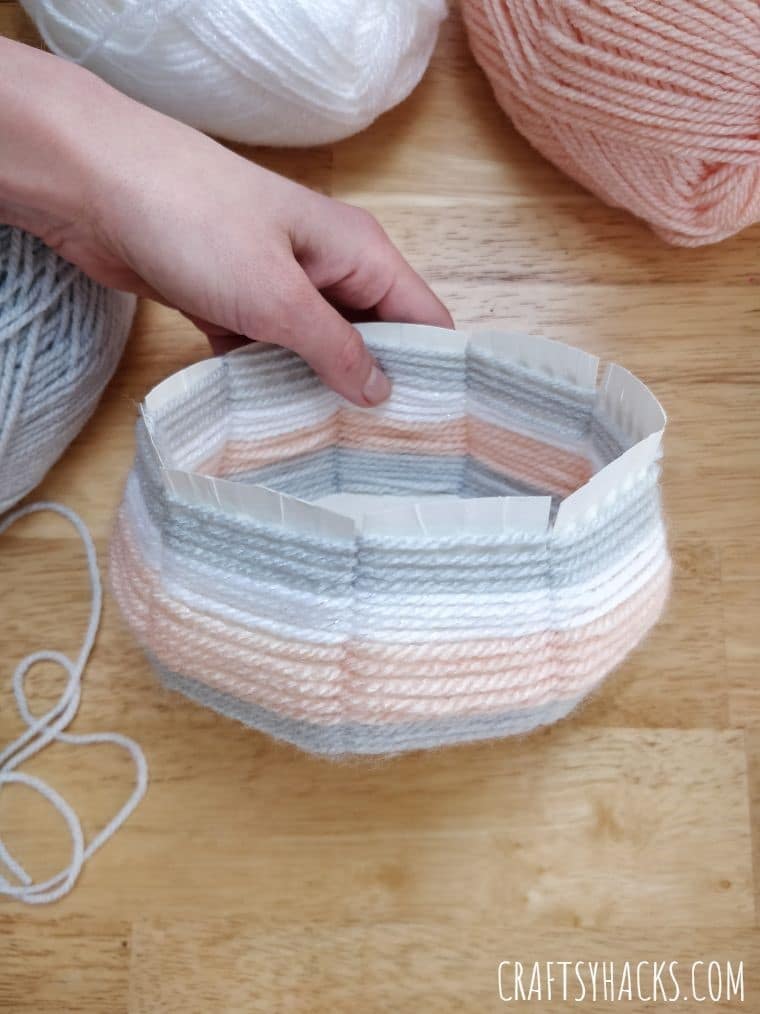
I didn’t cover the bowl completely with yarn because I wanted the bowl to have a nice rim. Do this by folding the flaps outwards, creating a nice overlap rim.
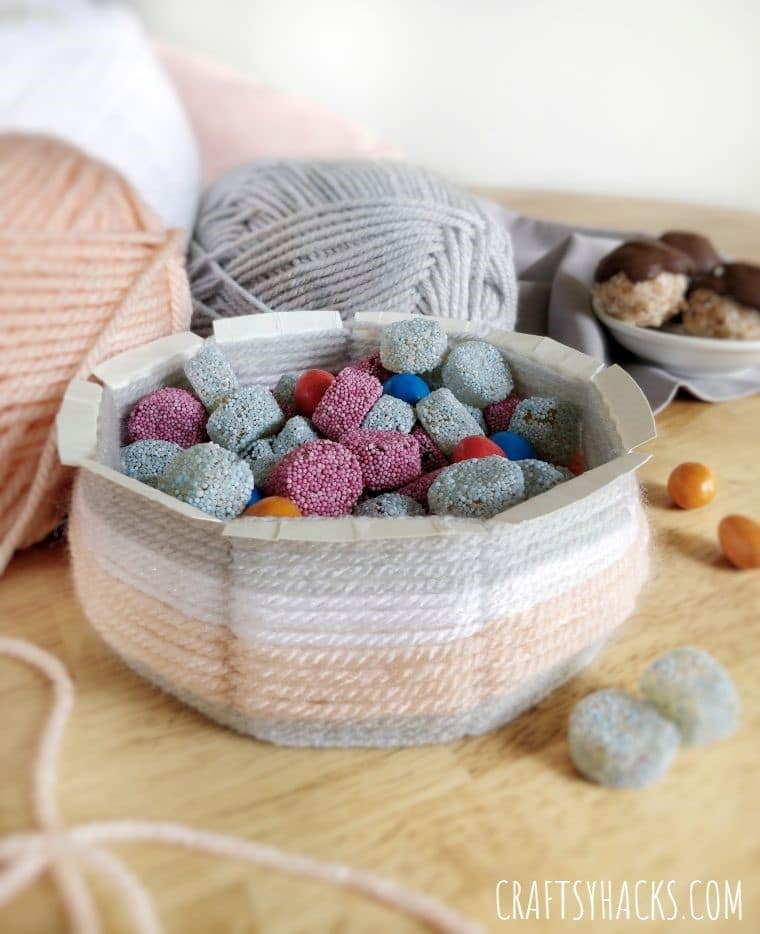
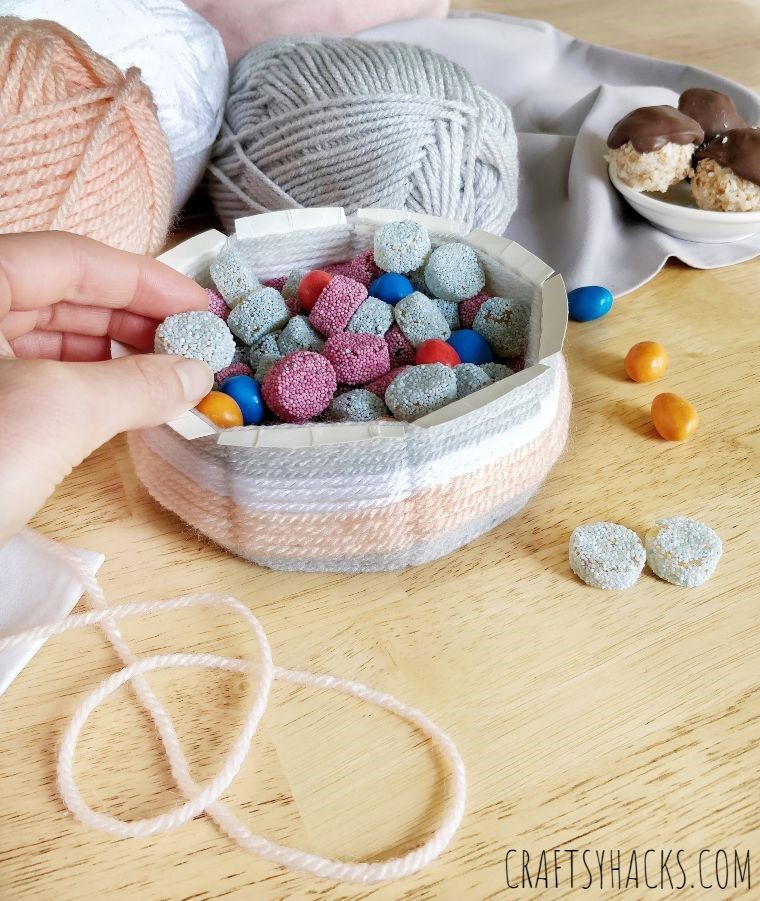
Where Can You Use These DIY Woven Bowls?
The great thing about these woven bowls is their versatility.
- Use them to store tiny knick-knacks on you or the kids’ desks.
- Pop it on your hallway table to hold your car and house keys.
- They can also be used as sleeves to conceal your old or unsightly indoor plant pots.
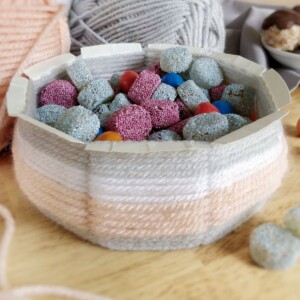
- These bowls are also great for parties. Use yarn that matches the event’s color theme, and use the completed bowls to hold wrapped food (such as candies for a kid’s birthday party).
- You can also use these bowls to hold your kids’ hair clips, hair ties, and accessories.
- There is so much more you can use these bowls for: the general rule is, if it’s dry, you can pop them onto this bowl!
Other Crafts You Can Make
- Yarn-Wrapped DIY Flower Pot
- 20 Dollar Store Decorating Ideas
- 20 Craft Projects for Adults
- 21 Creative Dollar Tree Crafts for Low Budgets
DIY Woven Bowl
Video Tutorial
Equipment
- Scissors
- Pencil
- A bowl
- Ruler
Materials
- 1 paper plate
- Thick yarns
- Scotch tape
Instructions
- Collect all your materials.
- Use the rim of a bowl to draw a circle pattern on the paper plate.
- Using a ruler, draw one straight line from the edge of the circle to the paper plate’s edge.
- Use a ruler to measure a 4.5 cm distance from the tip of the first line. Mark this spot and measure another 4.5 cm from this mark.
- Continue making these marks until you’ve finished marking around the entire circle.
- Use the marks to create your straight line from the edge of the circle to the plate’s edge, as you did the first time.
- As you complete a cake slice-like shape with your lines, number these shapes in order.
- When you’ve finished with your lines, you should have a total of nine shapes.
- Use your ruler to create triangles around each of the lines you’ve created. Use the lines as the middle of the triangle, and draw the edges of the triangle using dashed lines.
- Cut along the dashed lines, cutting out a total of nine triangles.
- Fold up the flaps to create the sides of the bowl.
- Grab your first yarn color and stick the edge on the surface of the plate using Scotch tape.
- Weave around the bowl using an alternating pattern until you reach your desired height for that color.
- Grab your second yarn color and attach this to the edge of your first yarn using a knot.
- Weave the second yarn color as you did the first one.
- Continue you the same process for your third yarn color, leaving at least 1 cm of paper plate material.
- Use a scissor to neatly tuck the end of your last yarn into the yarn layers below it. Do the same for the first edge of yarn you taped on the surface of the plate.
- Fold the excess paper plate material outwards, to create an overlapping rim for the bowl.
- And just like that, you’ve just created yourself a beautiful, woven bowl!


This is so clever! My daughter loves making things. She is going to love this bowl made by weaving yarn with a paper plate. Genius!