

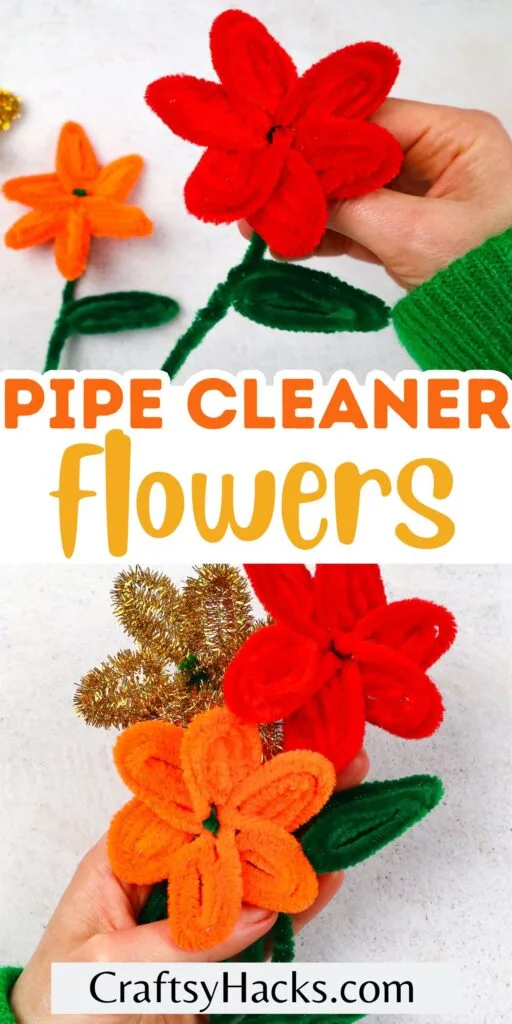
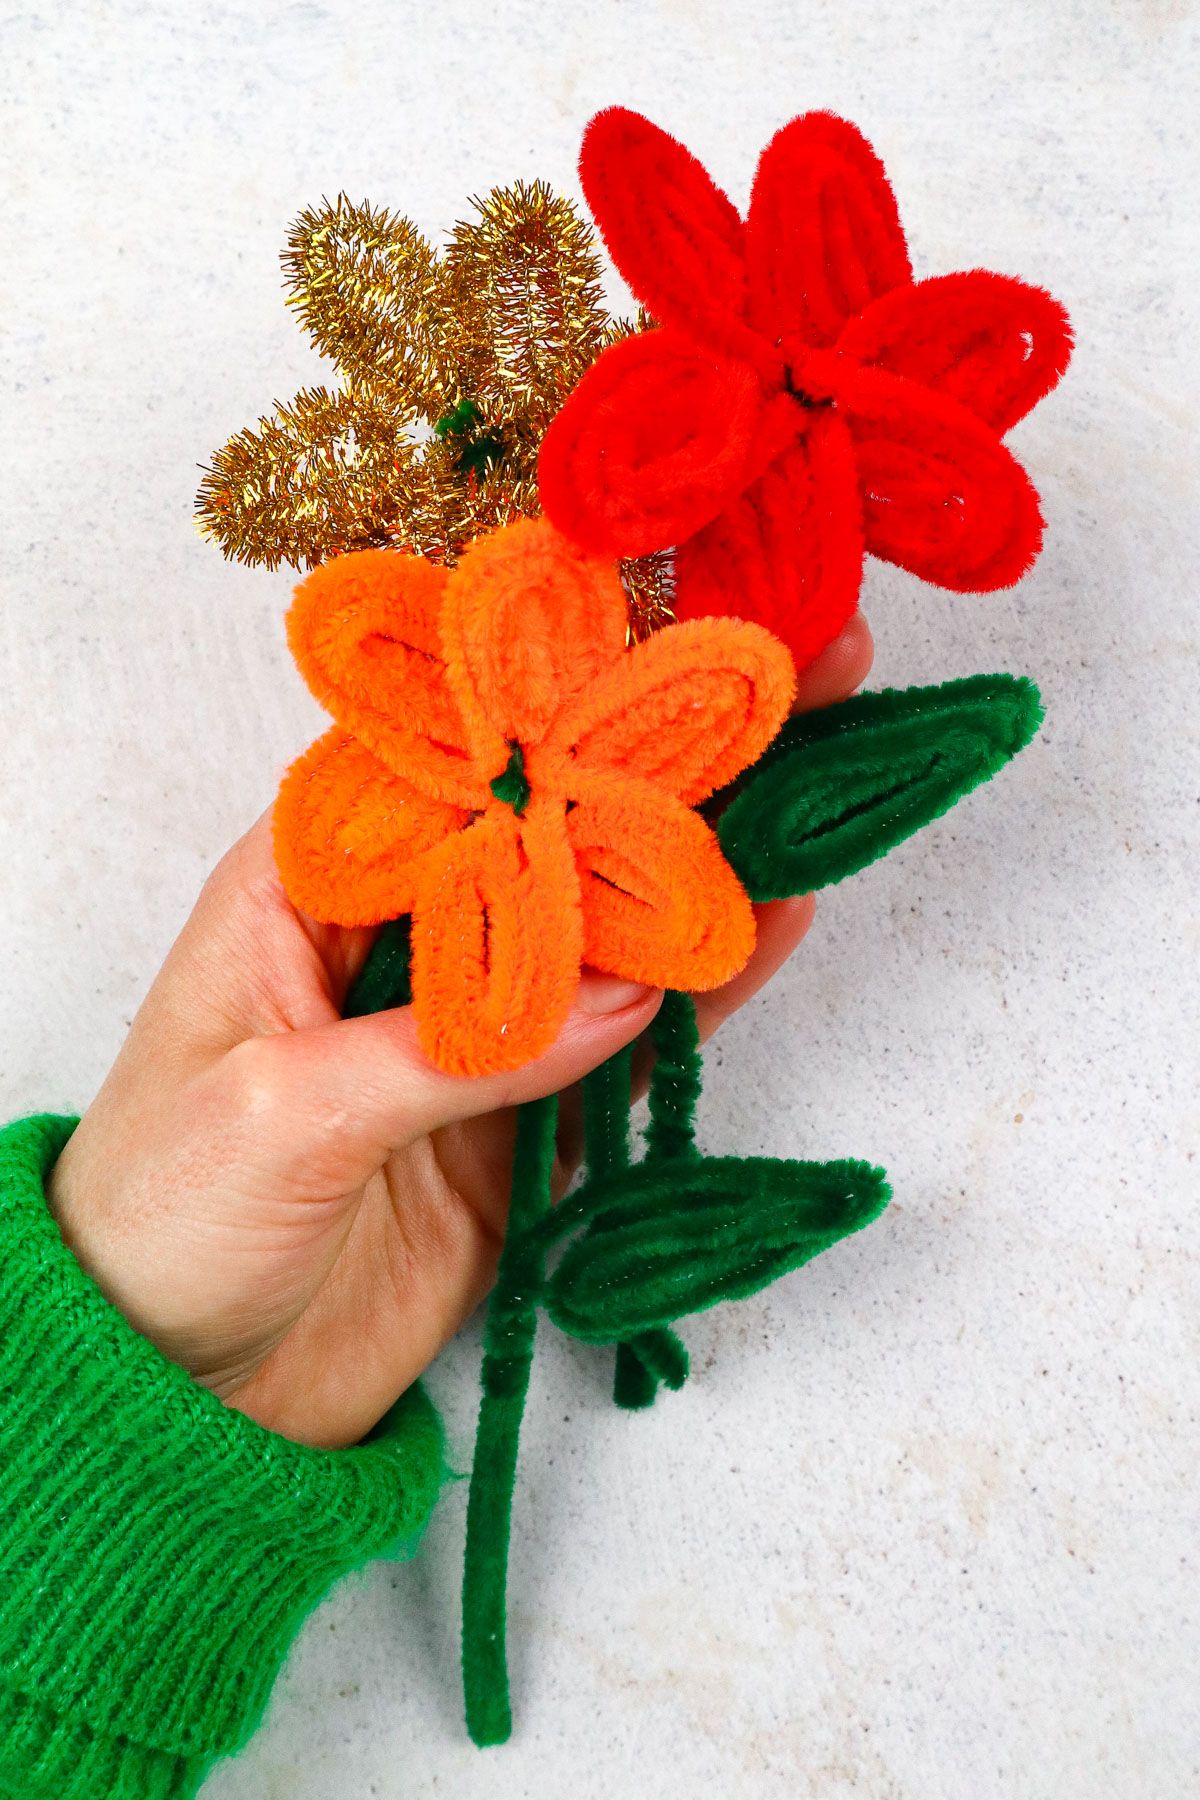
Nothing is better than some bright, cheery flowers, right? Especially ones that have a longer shelf life, and these sweet pipe cleaner flowers take the cake.
These blooms couldn’t be easier to make or simpler! With pipe cleaners as the only–yes only–supply needed, it’s one of the simplest crafts I may have ever shared on the blog.
Add these flowers to a card, throw them in a vase, or turn them into fridge magnets! They are a wonderful craft on their own but also add an excellent pop to basic projects.
Before we get to the post, if you need any extra help in assembly, check out the YouTube video of the same name: Insanely Cute DIY Pipe Cleaner Flowers.
I hope these pops of colors bring some brightness to you or your loved ones’ days’. With that, let’s get on to the post!
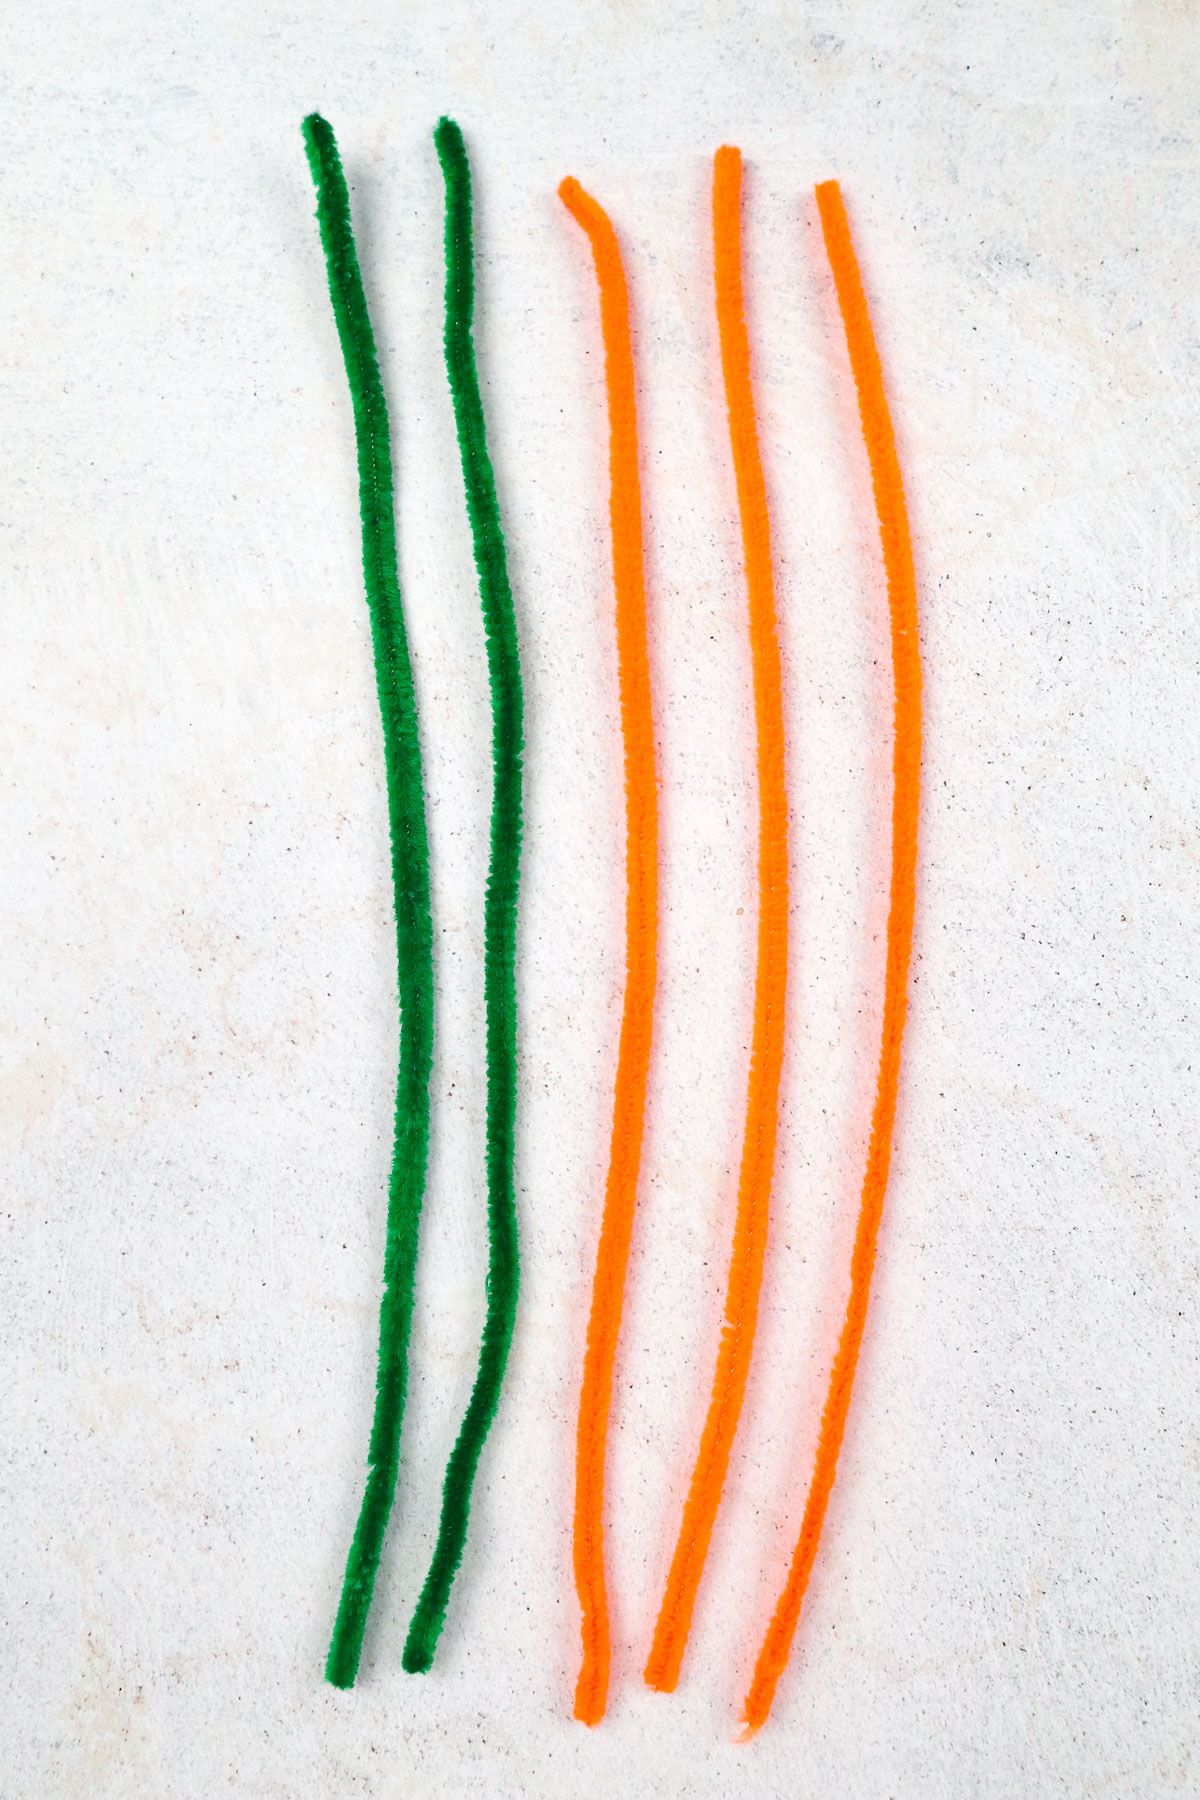
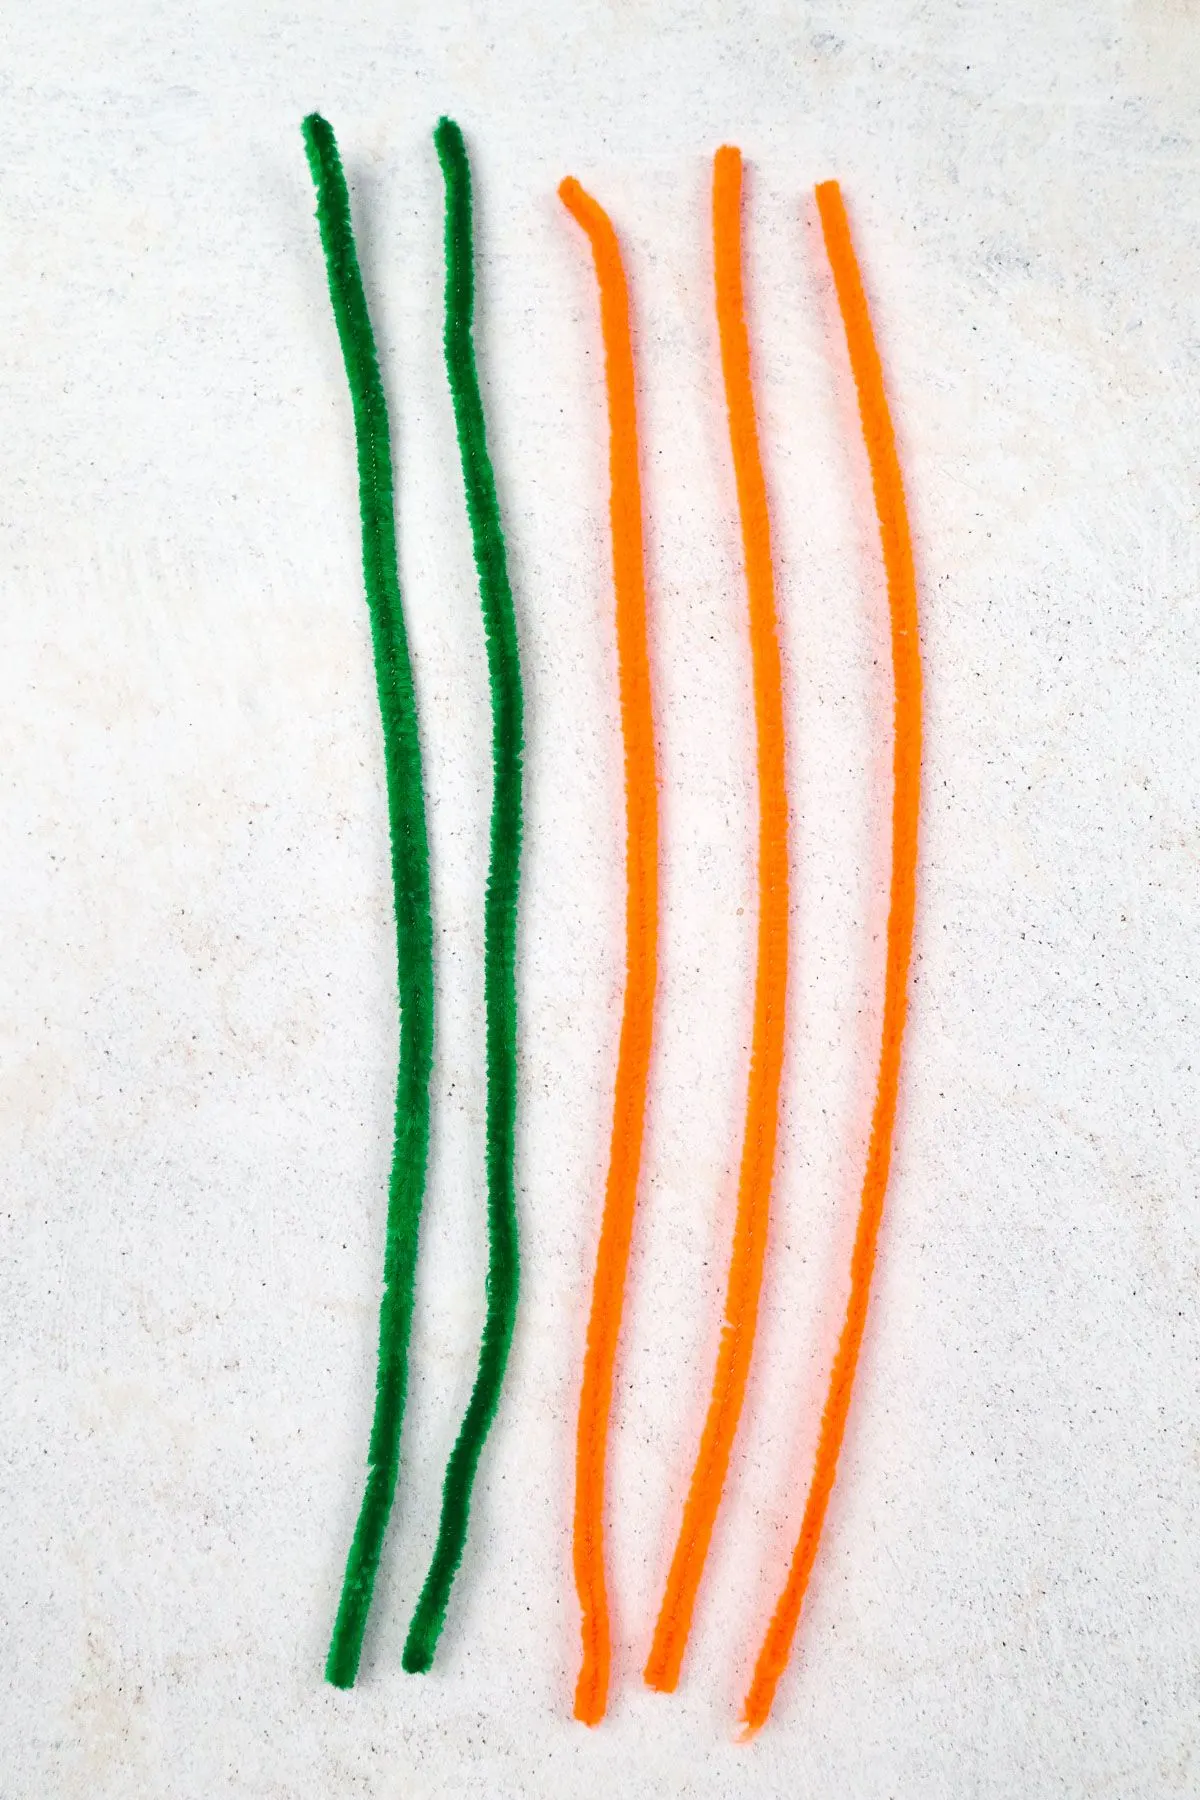
Supplies You’ll Need
3x pipe cleaners 12″ long (for the petals)
2x pipe cleaners 12″ long (for a stem and leaf)
How to Make Pipe Cleaner Flowers
Step 1. Start by grabbing all of your pipe cleaners dedicated to being the petals of the flower and the green pipe cleaner for the stem. Bend all of them in half to create a “V” shape.
Step 2. Once you have all of your pipe cleaners from the first step in order, we’ll start assembling. Hold the green pipe cleaner so the opening on “V” faces downward.
Add your petal pipe cleaners to the downward stem one so the “V’s” are all meeting and locking with the stem’s “V.”
It should look like a party hat with confetti on top of a volcano exploding.
Step 3. After you have settled the shape of your party hat/volcano, take the green pipe cleaner and give it a twist or two.
Once twisted, the lines on the pipe cleaner should be going in opposite directions–one facing downward and the other to the left or right.
Step 4. Separate all of the spokes of the colorful pipe cleaners to start on the flowers. Once they are spaced, start rolling them inward toward the anchored part of the stem.
Step 5. Continue this idea until the pipe cleaner reaches the middle part. Shape or manipulate as needed.
Alternatively, you can wait until the end to reshape or manipulate. Repeat and continue all petal rolls in one direction for a more uniform look.
Step 6. During the last couple of petals assembled, ensure everything is sitting well, continue to shape the petals inward, and reshape them as needed.
Step 7. As you finish the petal formation and arranging, move back toward the stem.
The tail sticking out to the side of the pipe cleaner gets wrapped around the very back of the flower to help with its stability.
Step 8. Once the green pipe cleaner’s tail is becoming shorter, move it down the stem to secure the weight behind the flower. Give the very end of it a good pinch to make it stick better.

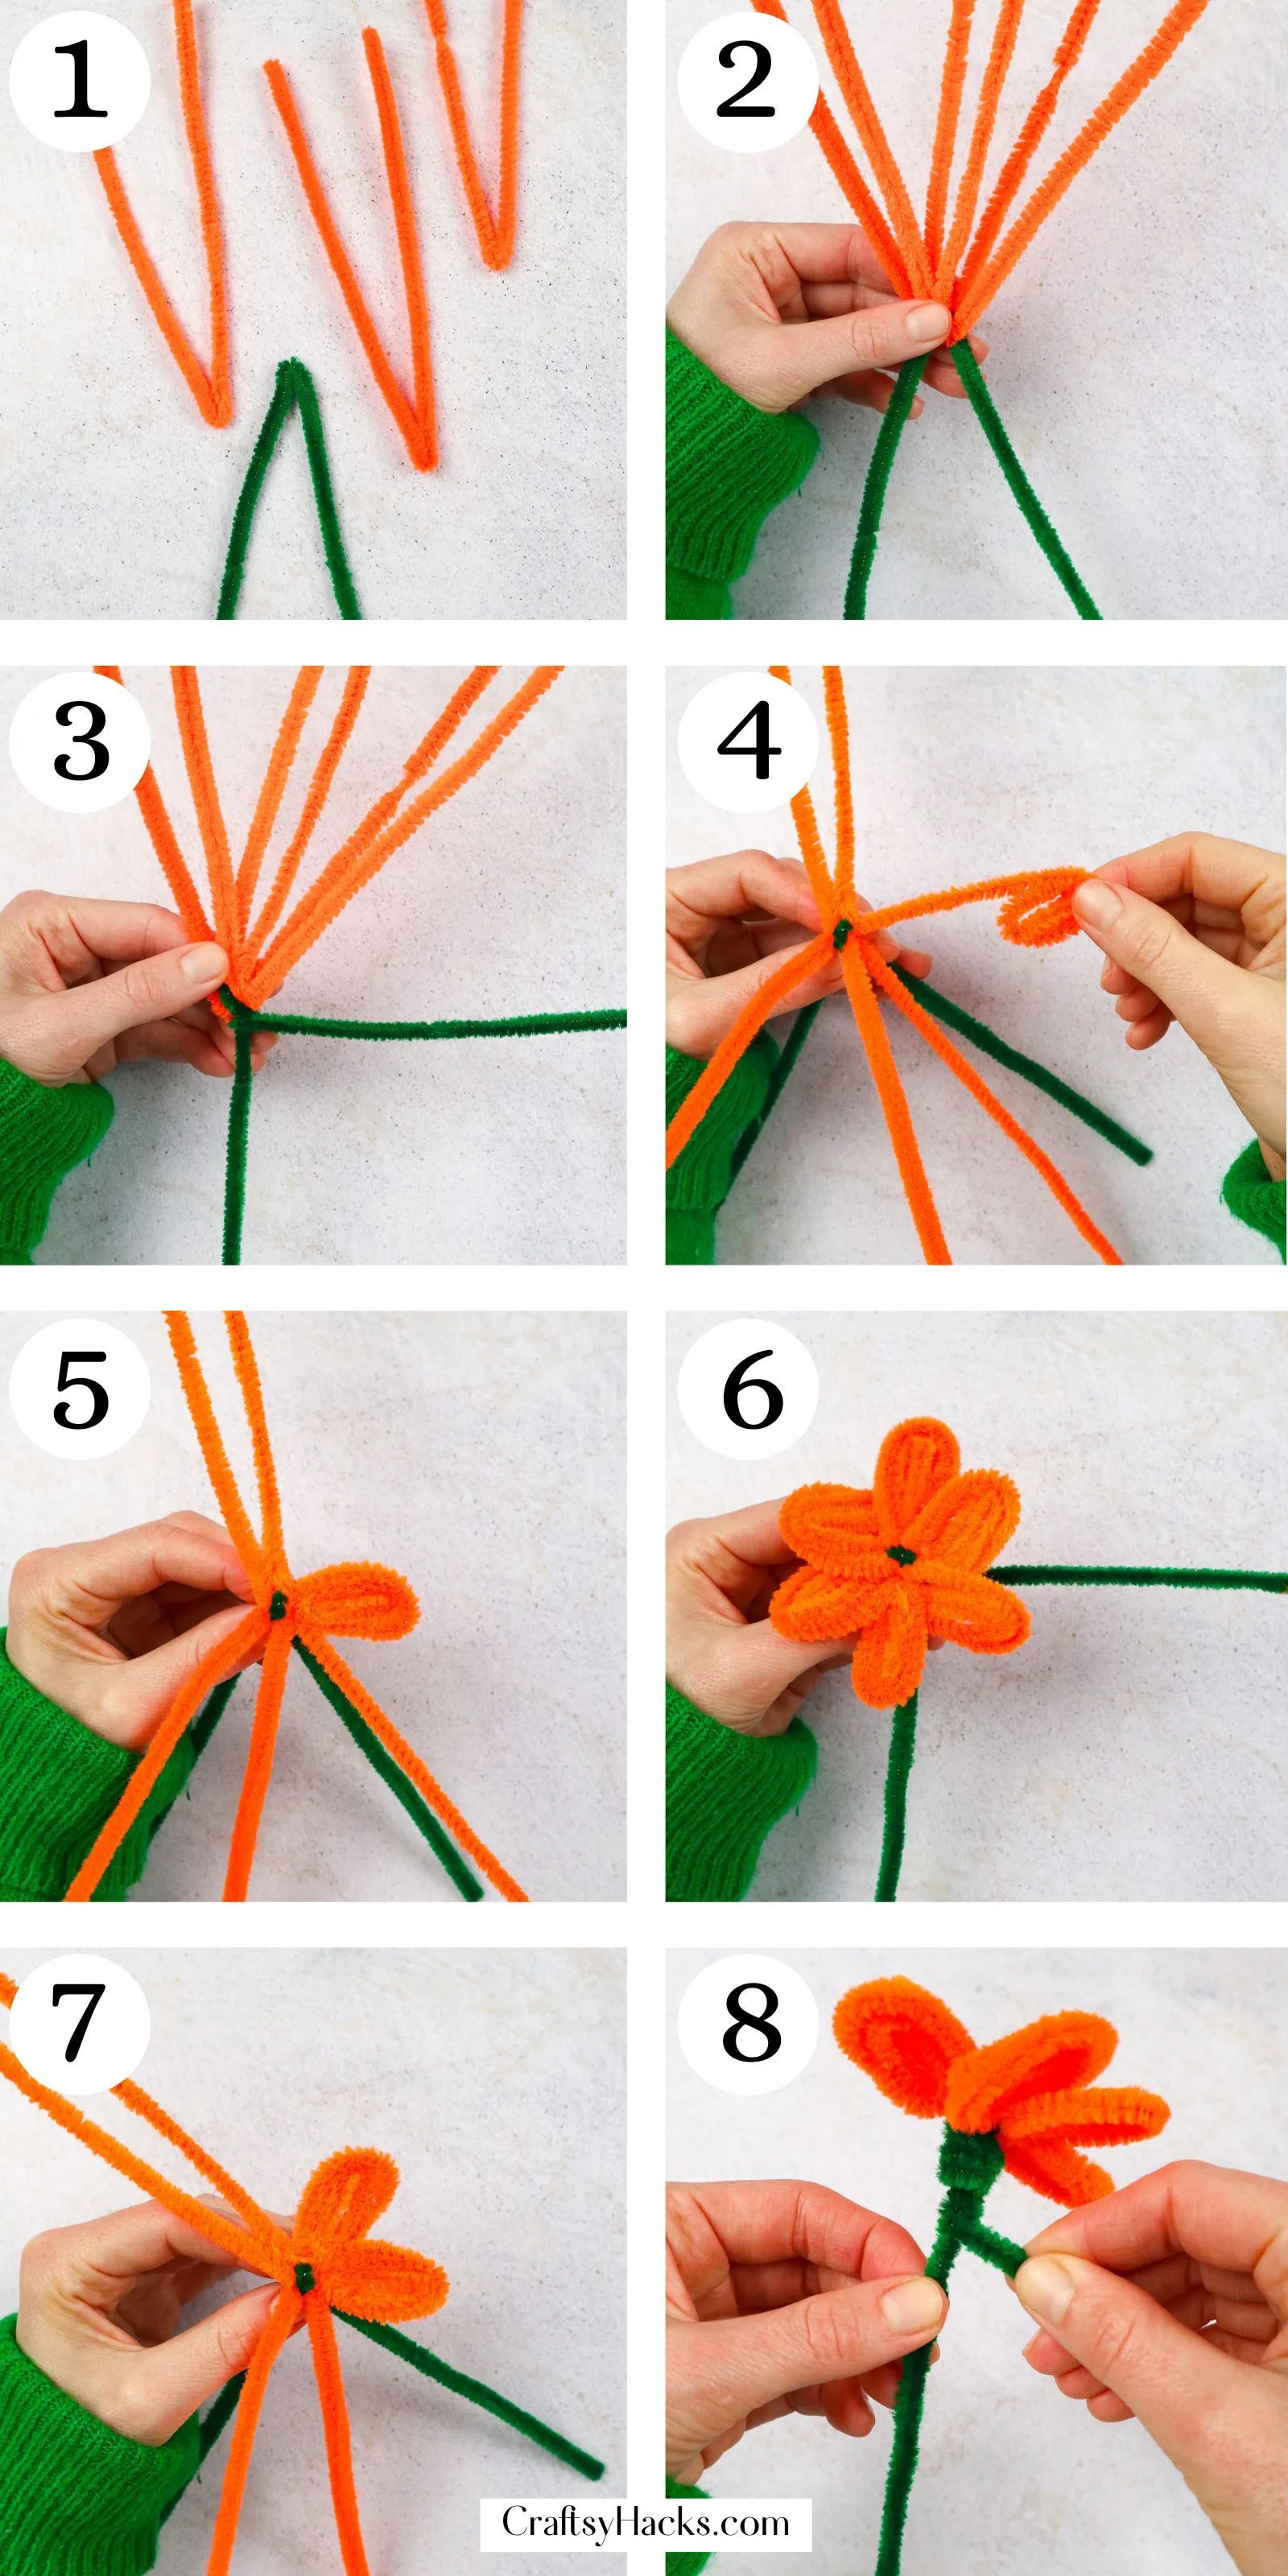
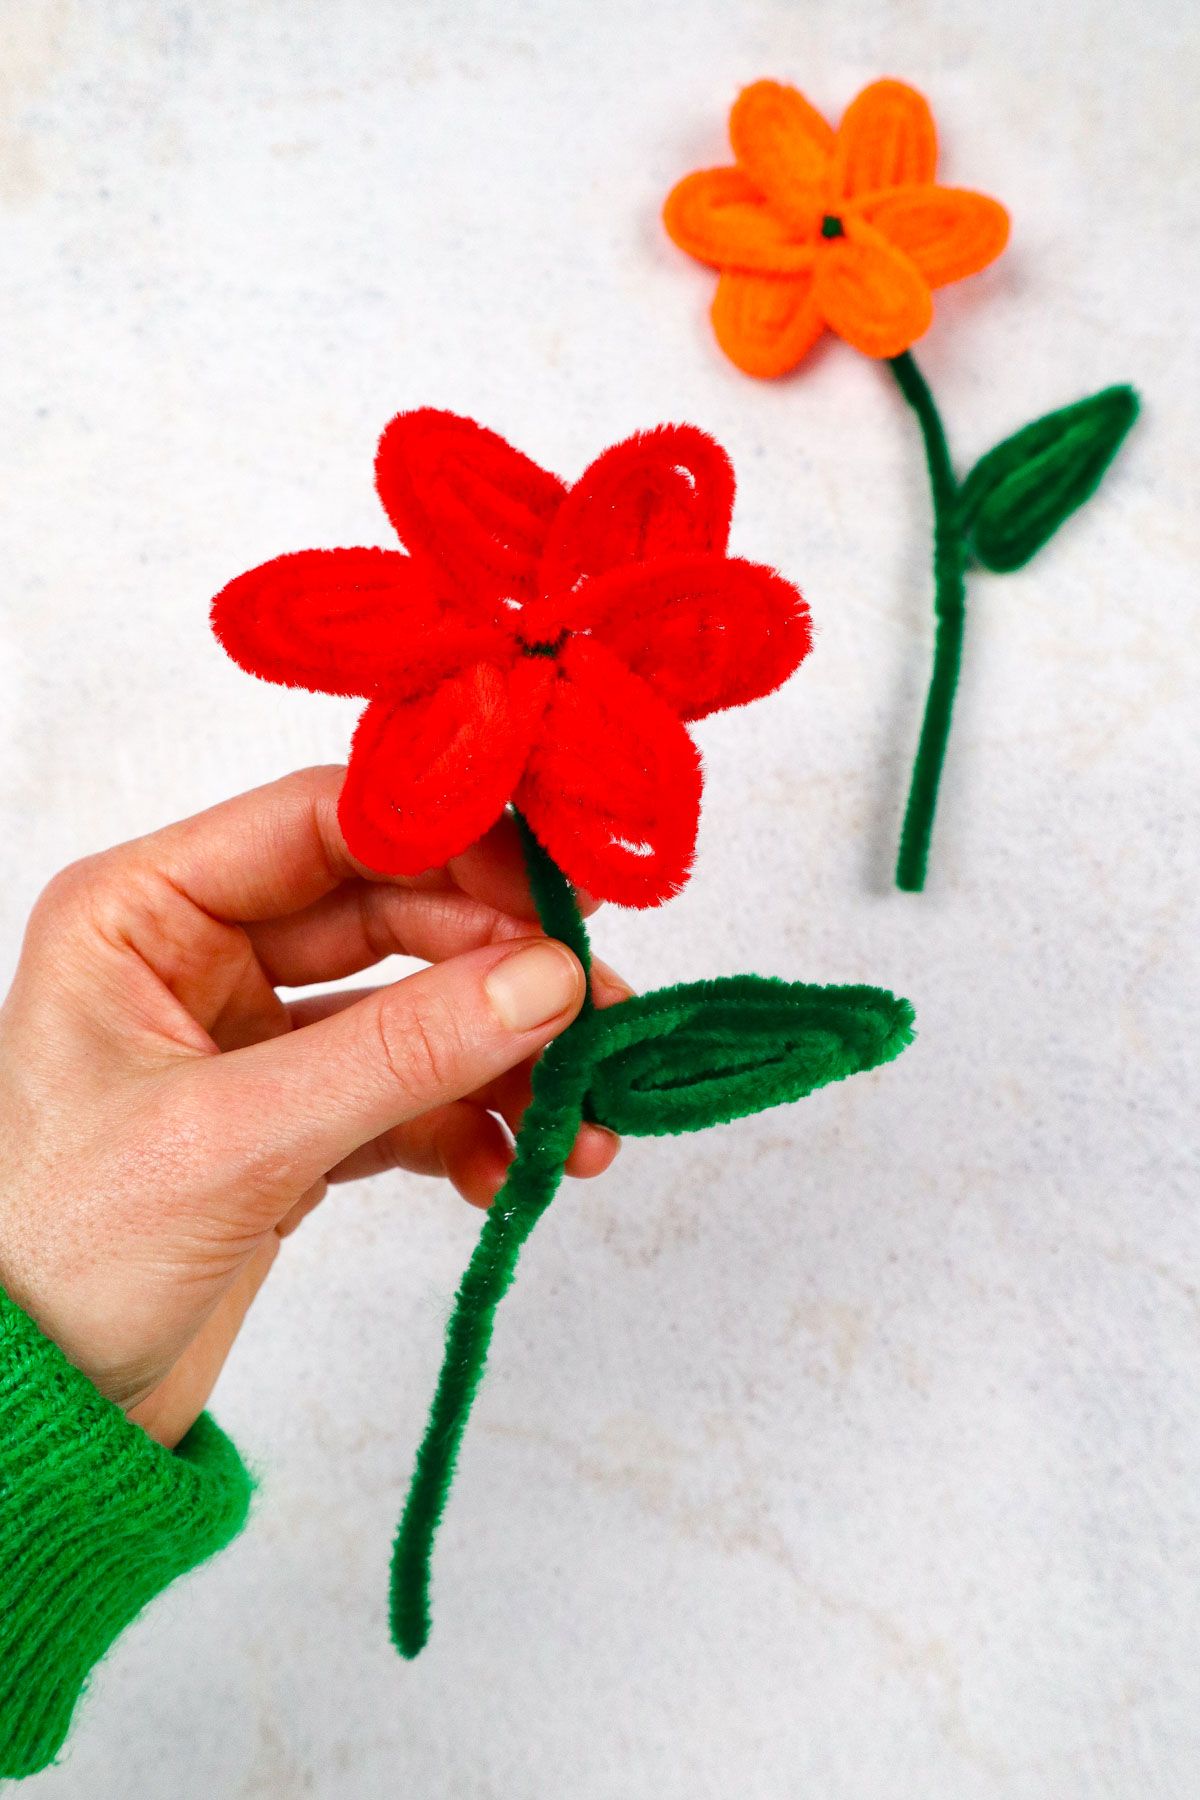
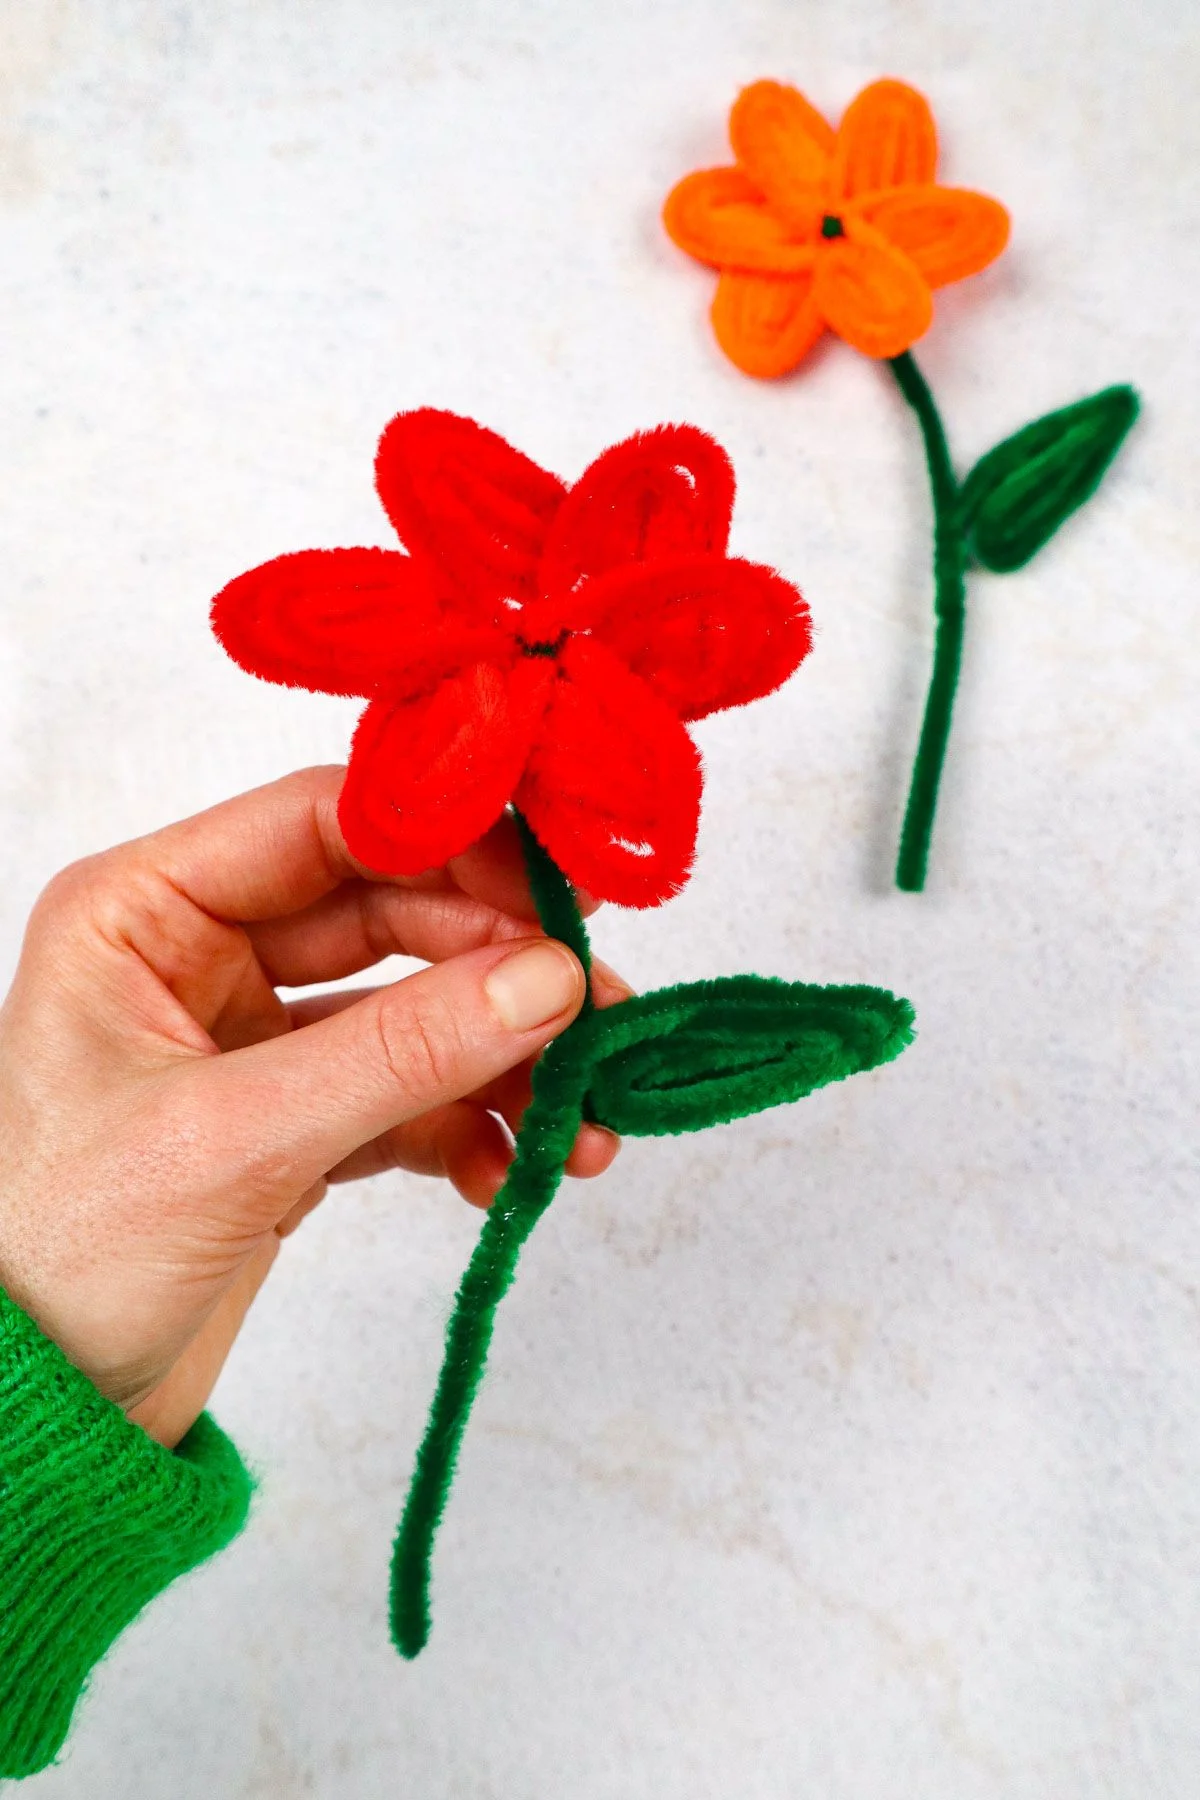
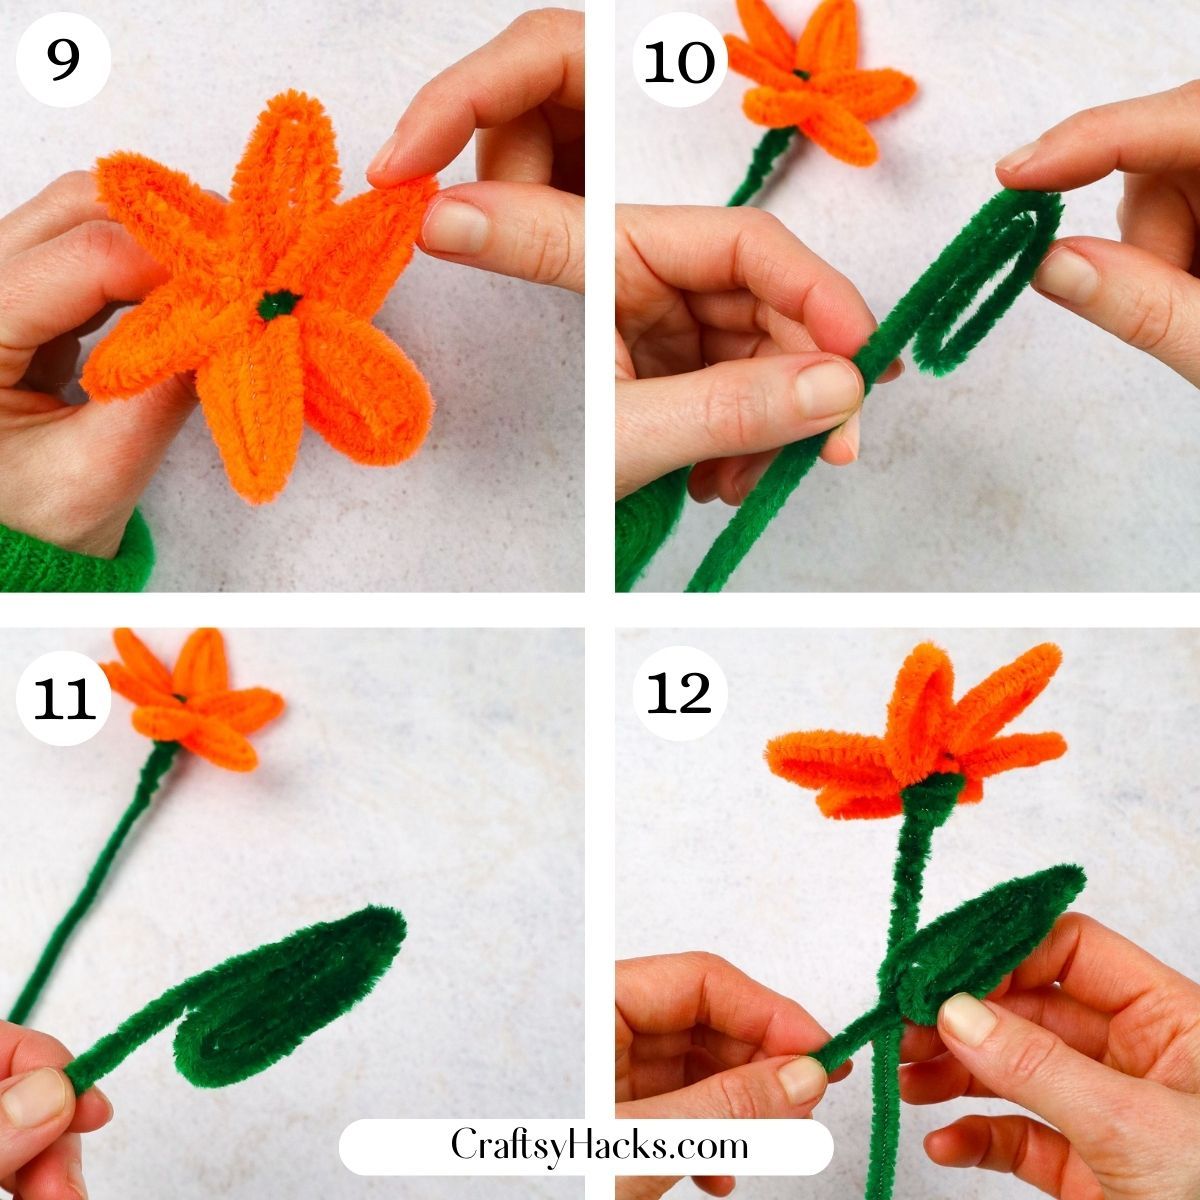
Step 9. Reshape, reorganize your petals or backing, or tweak any last-minute changes if you’ve been working on them throughout the steps.
You can also leave your petals rounded! Whatever works best for you.
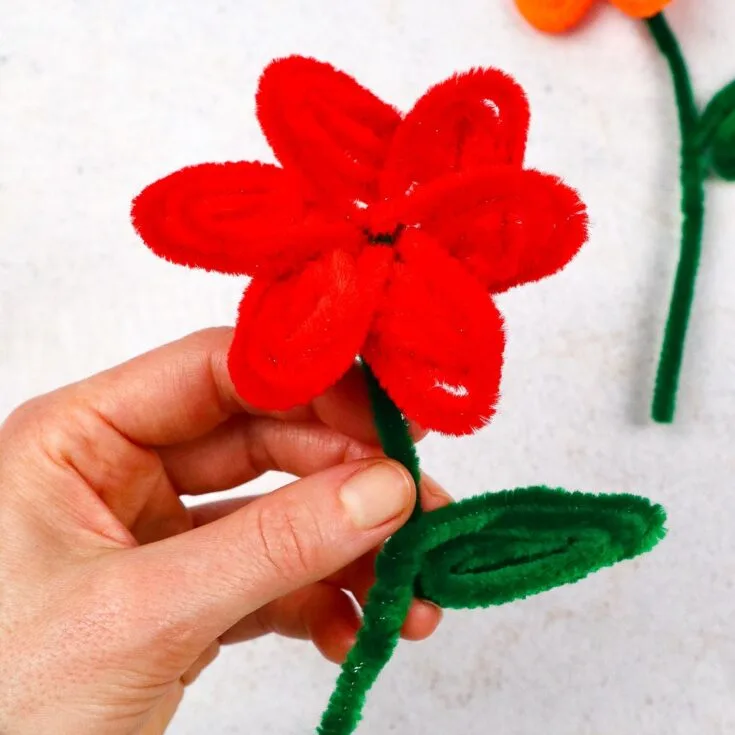
Step 10. Grab your other green pipe cleaner and get ready to make a leaf. Start rolling your last pipe cleaner roughly to resemble a paper clip–don’t roll it all the way so it can attach to the flower.
Step 11. Once the leaf is assembled and you have a bit of a tail left, take the tail and start wrapping it around the stem. This placement can be wherever you want!
If you have more green pipe cleaners, feel free to add more leaves.
Step 12. Finish attaching your leaf or leaves and pinching the ends to help cement their place on the flower.

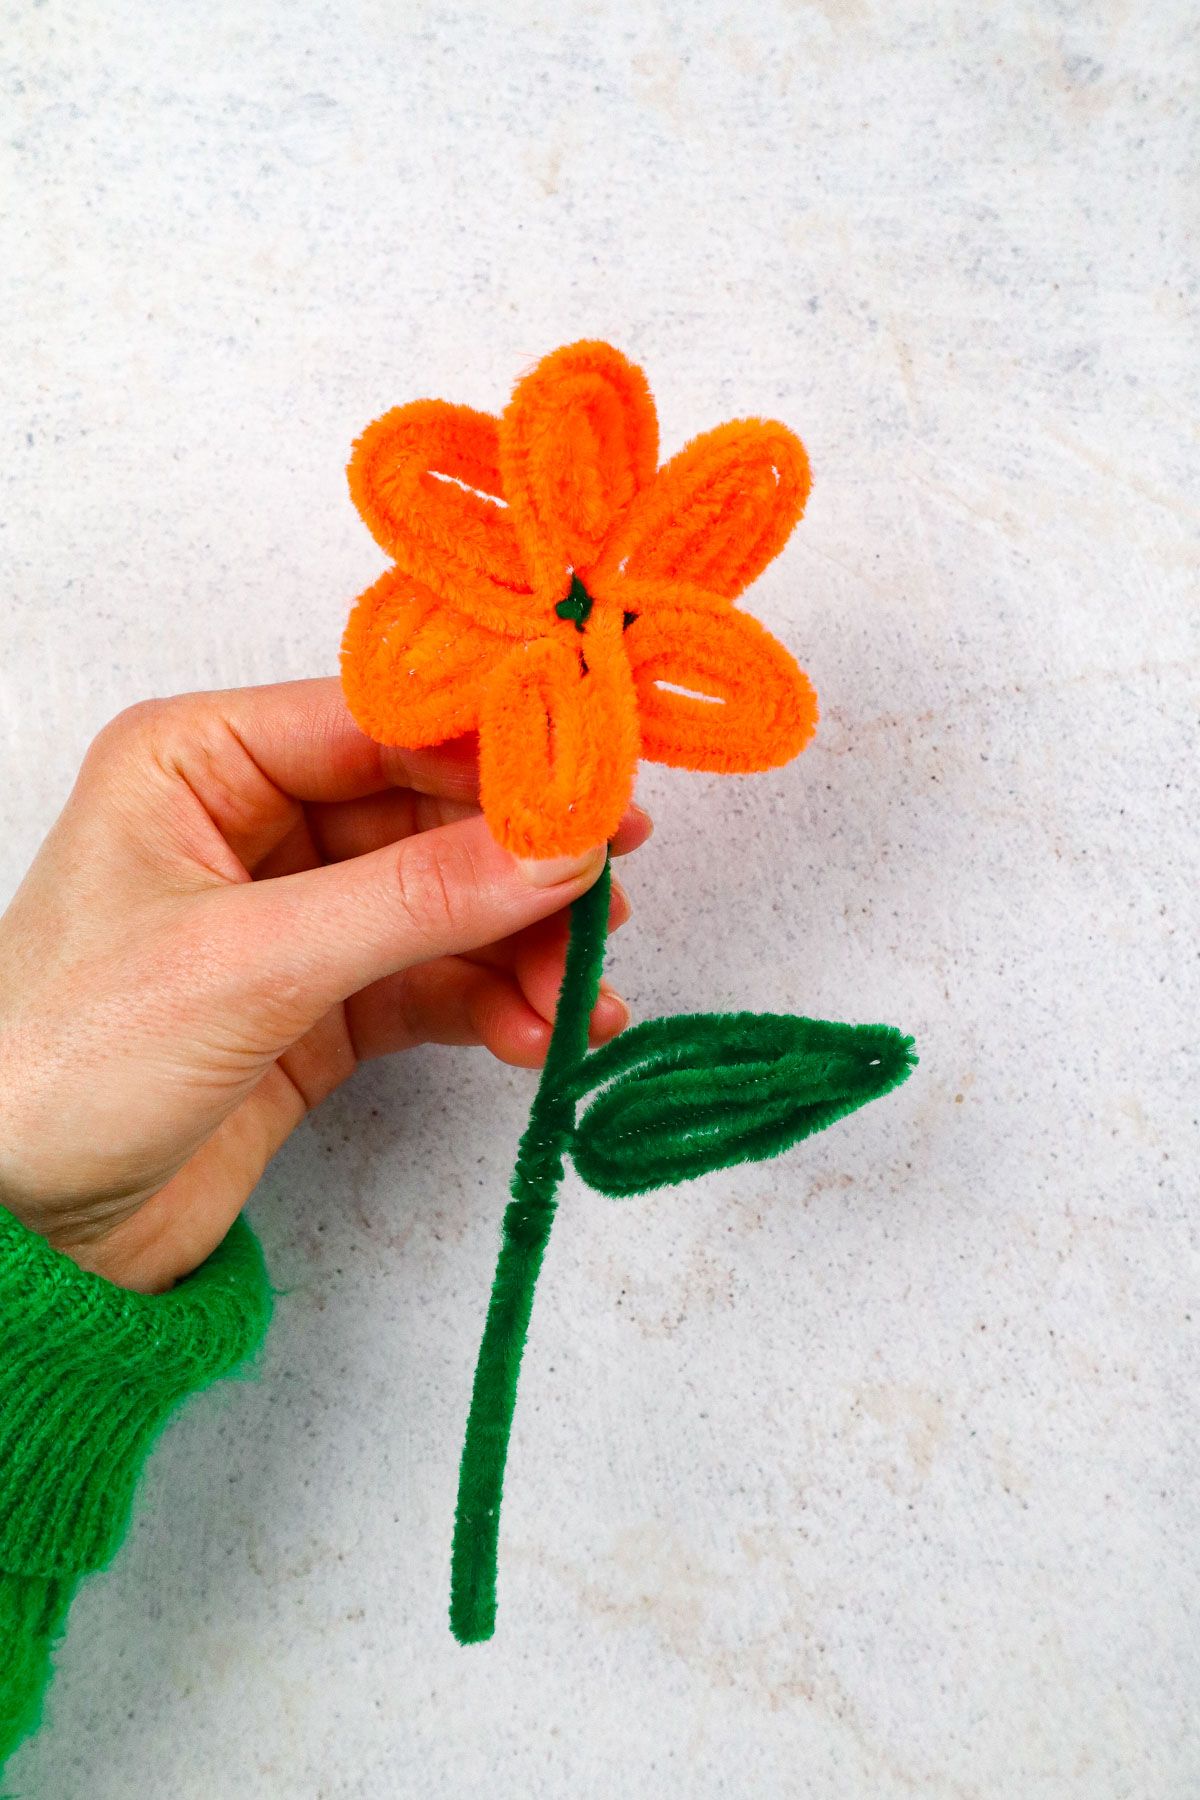
There you have it–an insanely cute DIY Pipe Cleaner Flower!

How to Use These Flowers
-Hot glue magnets to the back of them for fridge magnets.
-Glue them onto some strong cardstock for a darling card.
-Make a bouquet for story or playtime.
– Add them to a vase or shadowbox for room decor.
-Attach name cards for seating arrangements.
-Make a class art project on a bulletin board with each child’s flower.
-Springtime lesson or bulletin board display with counting or color recognition.
-Attach them to writing utensils in an office, classroom, or personal use.
-Memory or matching games for kids or students.
-Make flower crowns for play, a school project, or production.

More Crafts to Make
DIY Pipe Cleaner Flowers

Elevate your craft sessions with charming these DIY pipe cleaner flowers. An awesome DIY craft for adults and teens!
Materials
- 3x pipe cleaners 12" long (for the petals)
- 2x pipe cleaners 12" long (for a stem and leaf)
Instructions
- Grab all of your petal pipe cleaners and one green one. Bend in half to make “V” shapes.
- Take the green pipe cleaner and face it downwards.
Add the petal pipe cleaners and hook them to the green to make an “X” shape. - After adding all the petal pipe cleaners to the “X” shape, twist the green one several times.
The tails should face downward and to the side, respectively. - Fan out all of your petal tails so they look like spokes on a wheel.
Curl each one individually toward the center point of the stem. - Continue to roll petals inward toward the center. Adjust as you go, or wait until all petals are created.
- Repeat until you come to your last petals. Start adjusting to fit the last few into the space.
- Take the stem tail to the side and wrap it at the base directly behind the flower.
- As the tail shortens, work it down the stem to help everything stay in place. Give it a pinch at the very end.
- Reshape or organize petals if you haven’t already done so.
- Time to make the leaf or leaves–roll them to resemble paper clip size.
- Before rolling the leaf entirely, leave a tail.
- Use the tail of the leaf and attach it anywhere on the stem.
And then you’ll have your adorable pipe cleaner flowers!