DIY No-Sew Shirt (Cut T-Shirt)
This post may contain affiliate links: full affiliate disclosure.
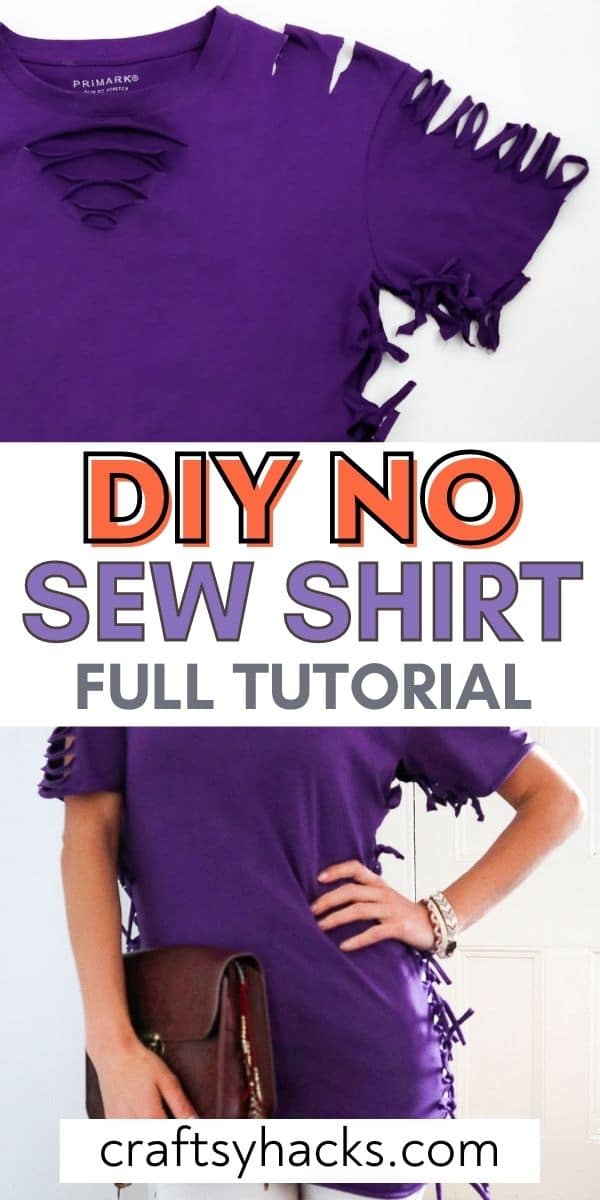
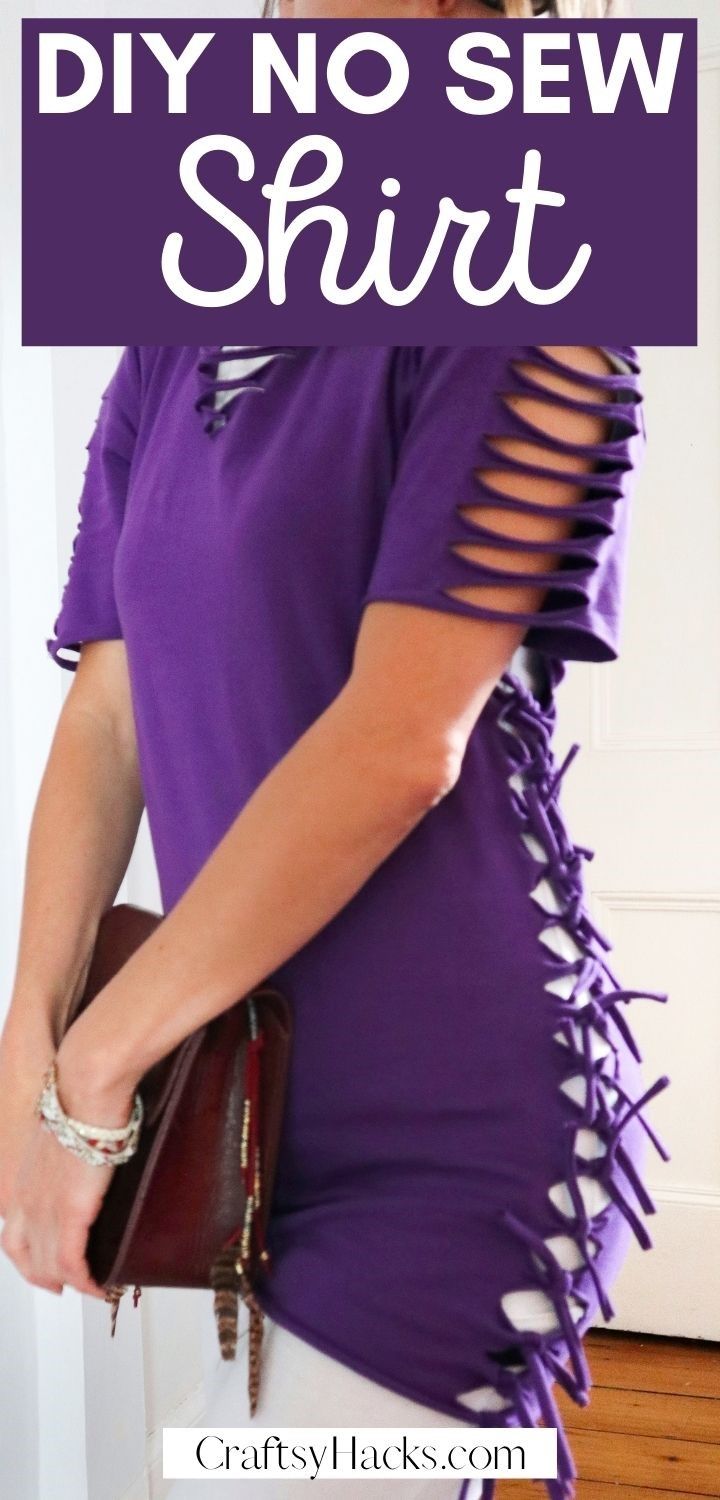
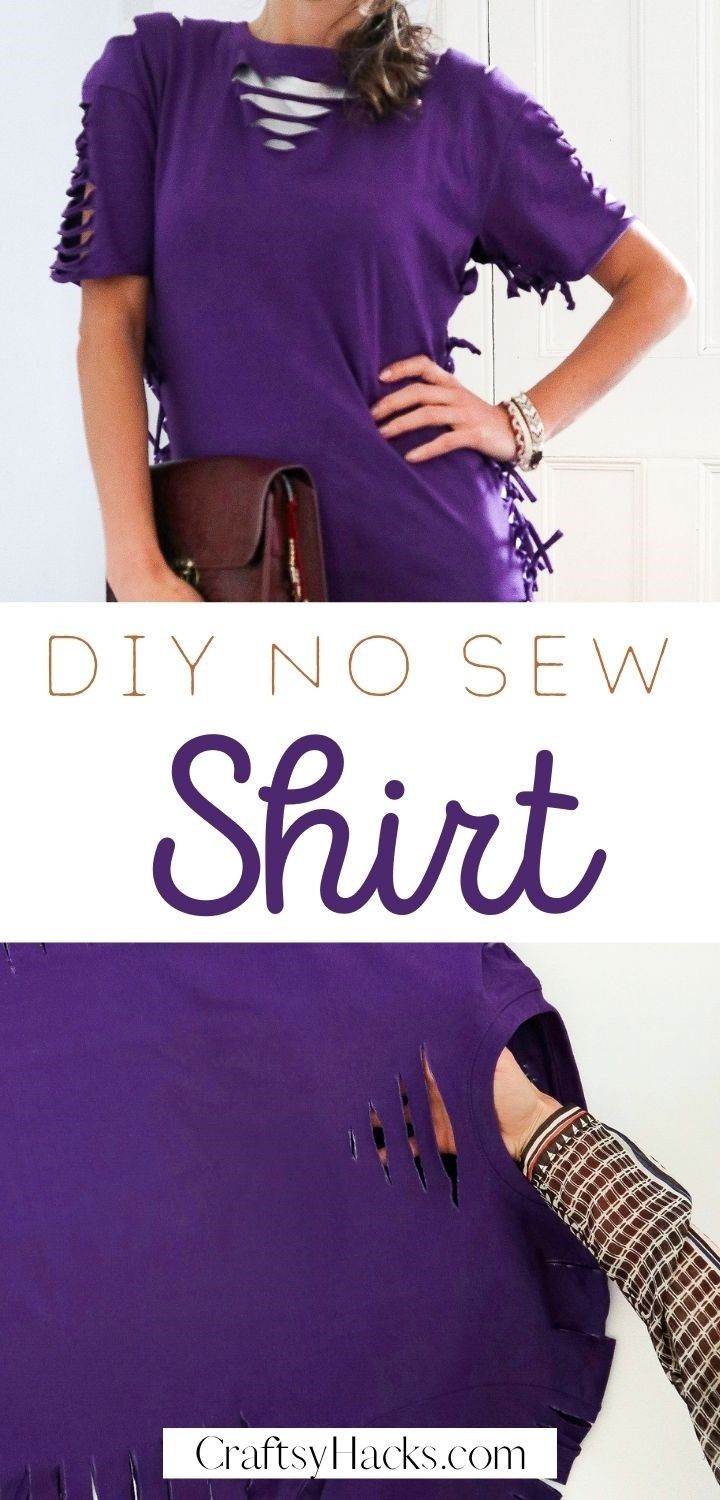
Take your fashion upcycling game to the next level with this easy, breezy, no-sew t-shirt hack. Customize it with fabric paint and embroidery, or leave it as is for something simply chic! This is an overall beautiful DIY shirt project!

In an age where we’re all focusing a little more on sustainable fashion, a craft for upcycling old clothes is perfect. Enter: this DIY No Sew Shirt!
The principles of this DIY can be applied to almost any old garment. All you need is a little imagination and an old shirt to get this craft off the ground. So, what are you waiting for?

Let’s get started!
What You’ll Need for the Shirt
- An old t-shirt
- Chalk pencil or tailor’s chalk
- Fabric scissors

How to Make a DIY No-Sew Shirt
Here’s how to take an old shirt from zero to hero in a few simple steps!
Step One
First, pick the right size of the t-shirt. Head to your local second-hand store, and you’ll find all kinds of t-shirts up for grabs.
You want to pick a shirt that’s one or two sizes bigger than your usual. All the tying, cutting, and tightening will take this shirt down a size or two.
So, if you pick a slightly larger shirt, it’ll end up fitting you like a glove. Or, you can go a little bigger if you want something baggier at the end.
Step Two
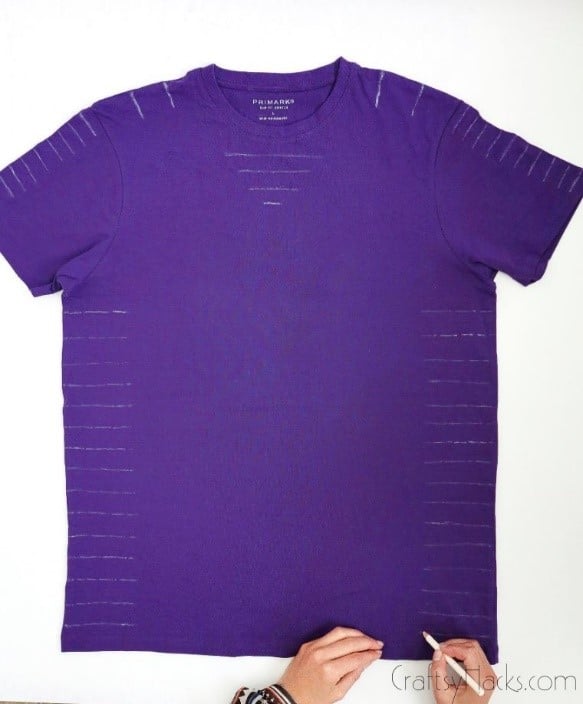
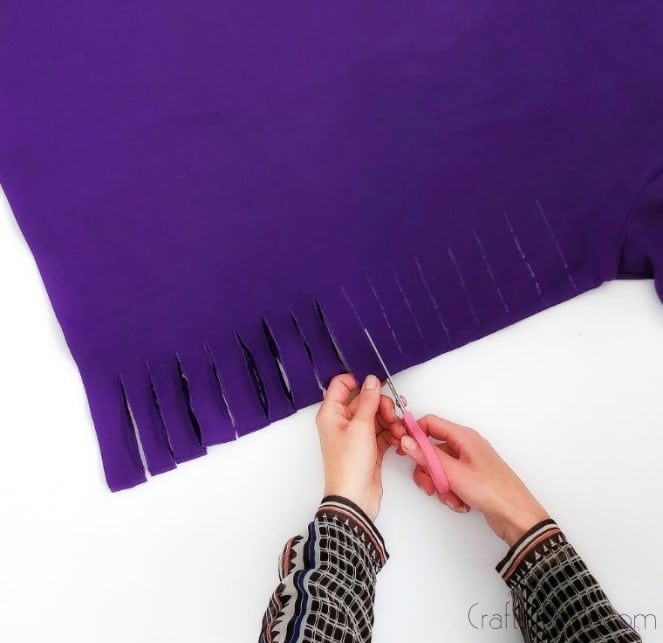
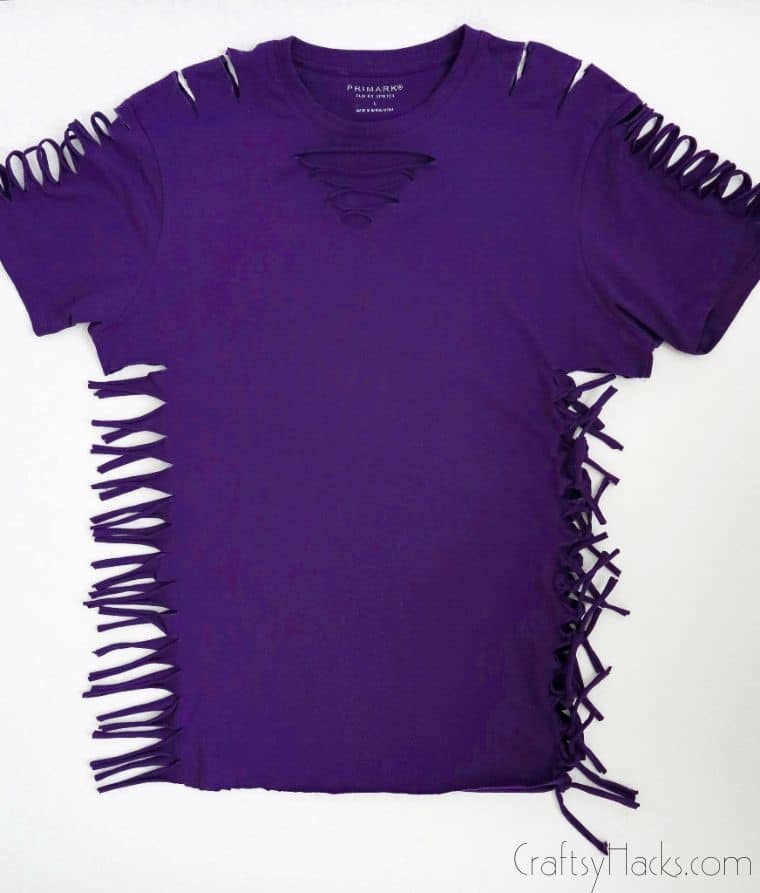
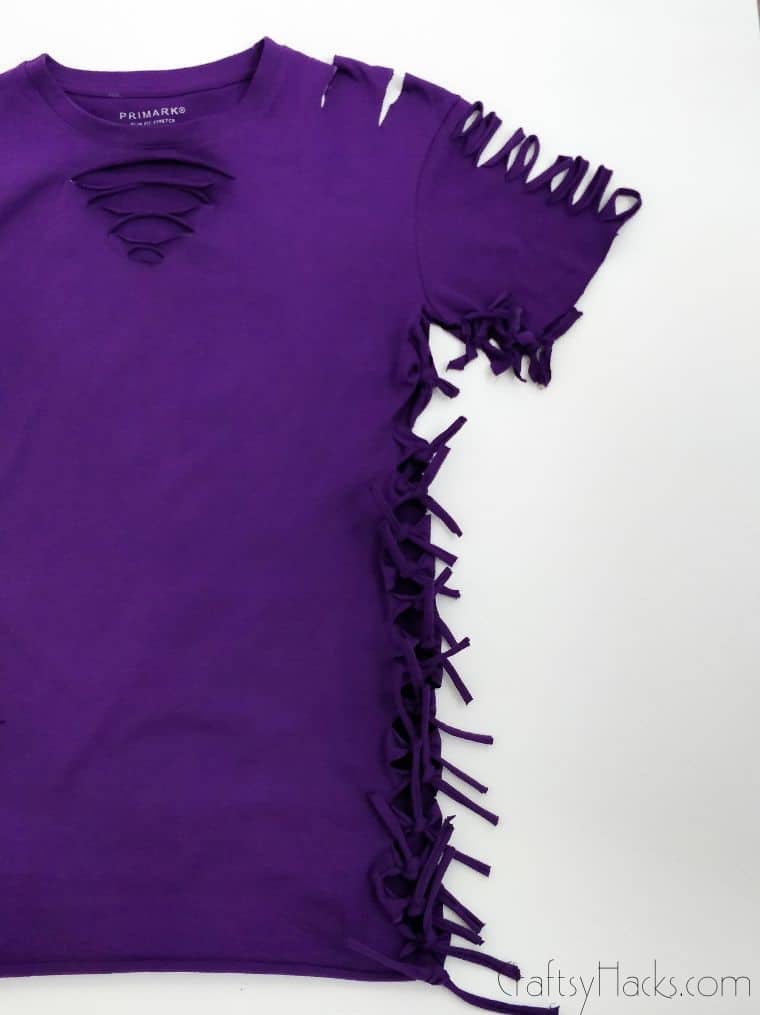
Start by laying your shirt out flat on a tabletop. Now, whip out your chalk because it’s time to start marking out your cutting lines.
The number of lines you choose to cut will depend on how big your t-shirt is and how much smaller you want to make it. Essentially, the more lines you cut, the more chance you have to tie it tighter.
For this t-shirt, I decided to set the marks roughly 1.5cm apart. I made the cuts on the t-shirt’s sides about 4cm long.
Step Three
Start cutting each of your lines, making sure the front and back line up as you cut along any folds. At this point, you can always put the shirt on to see if you like the placement of the cutouts.
You can even stop here if you like how the shirt looks, or you can keep going to step four. With this DIY, it’s all up to you.
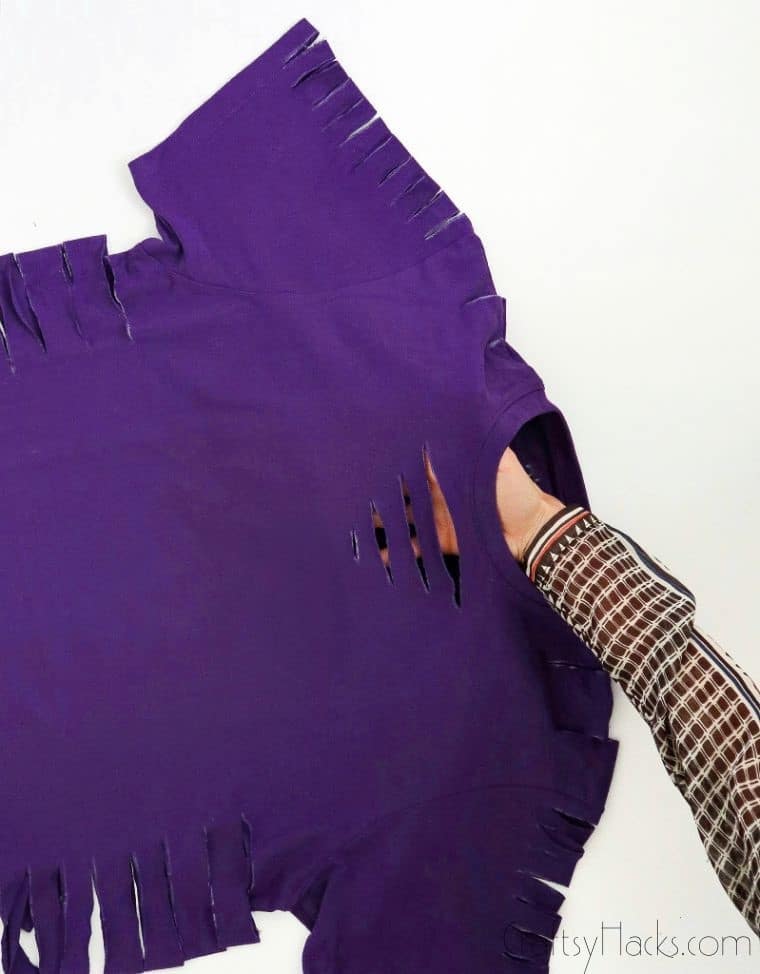
Step Four
Grab each strip and start stretching. You’ll want to pull from both sides, keeping an even and gentle pressure to make sure you don’t rip anything.
Remember, you can’t un-stretch the shirt, so don’t be afraid to try it on as you go. You can always stretch more later if need be!
Step Five
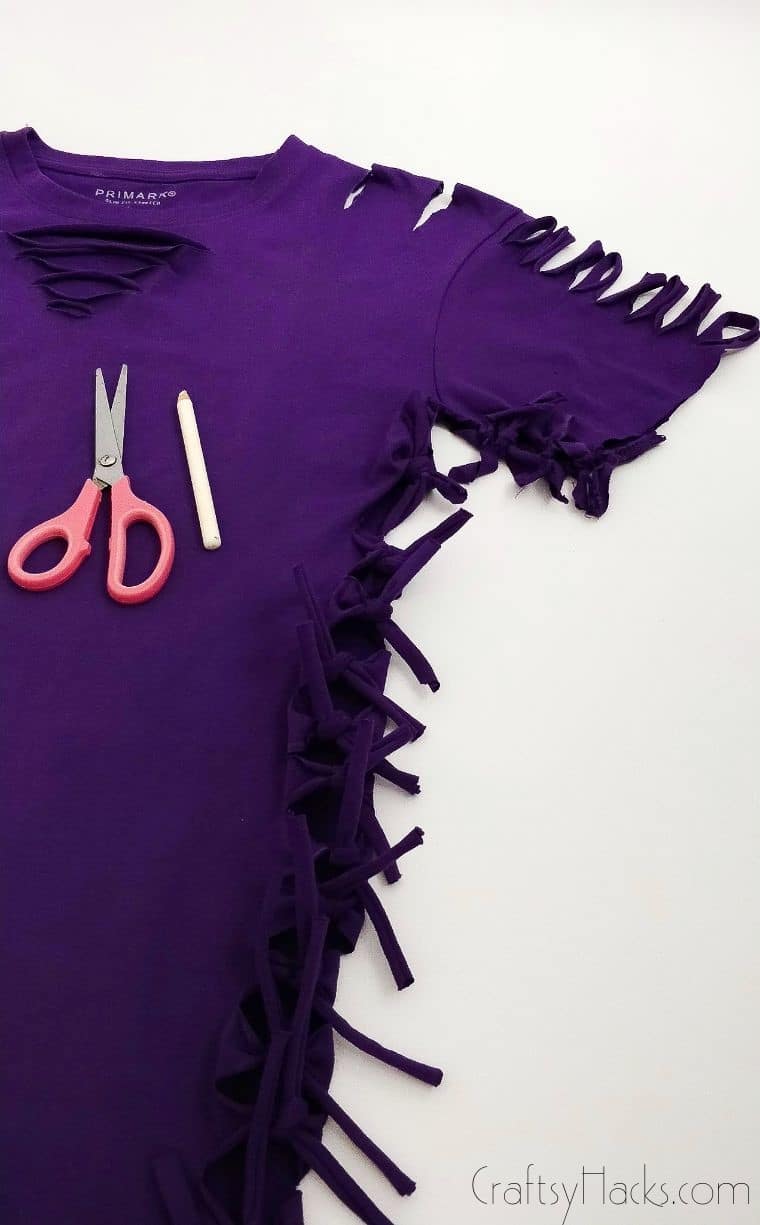
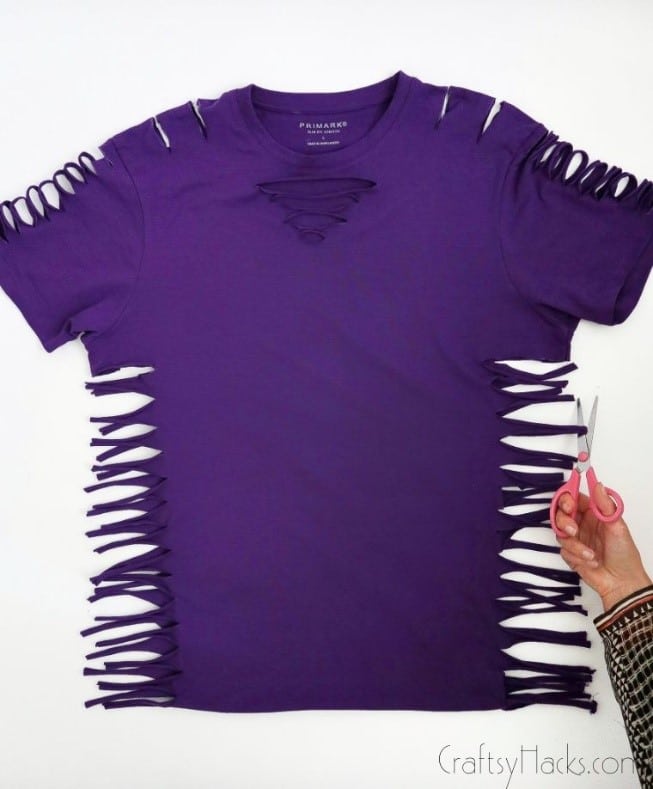
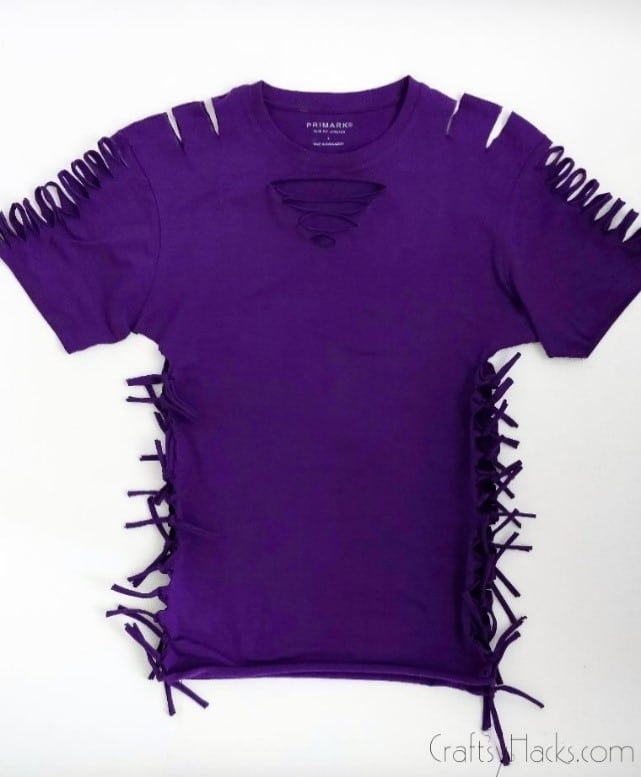
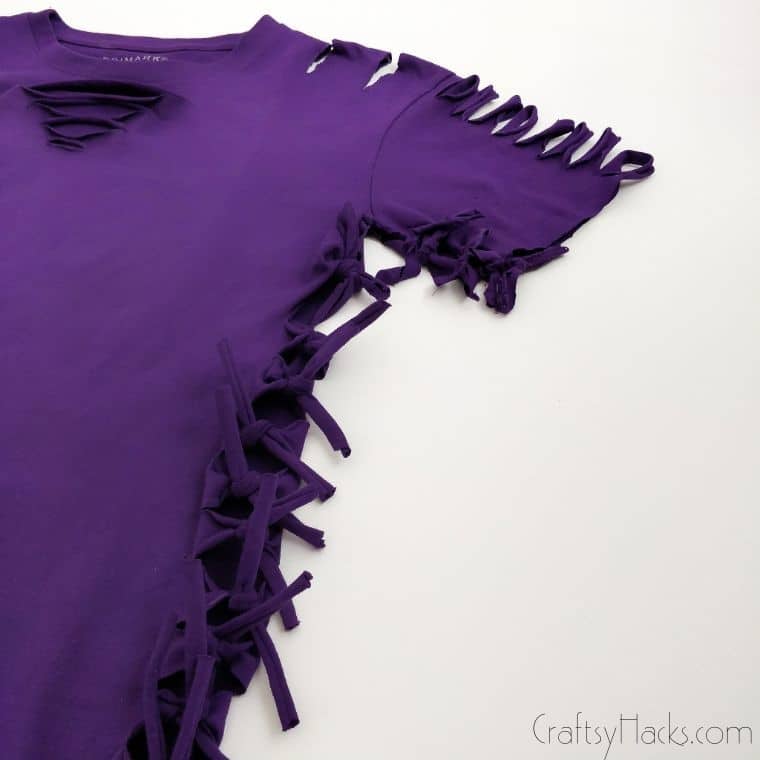
Now, we’re going to turn those stretched out loops into ties. Whip out your scissors once again and chop through the loops on the sides.
Make sure you’re only chopping through the sides of the shirt, not the shoulders, arms, or collar!
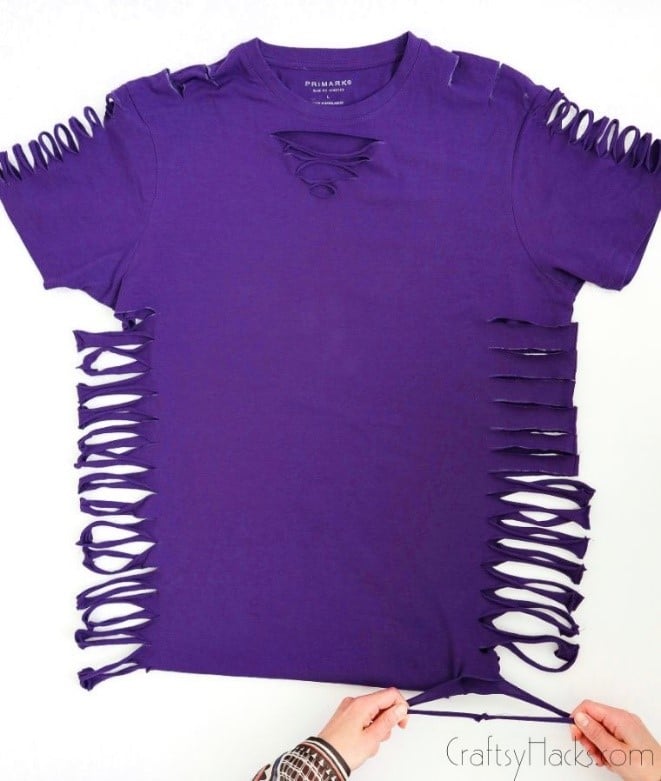
Step Six
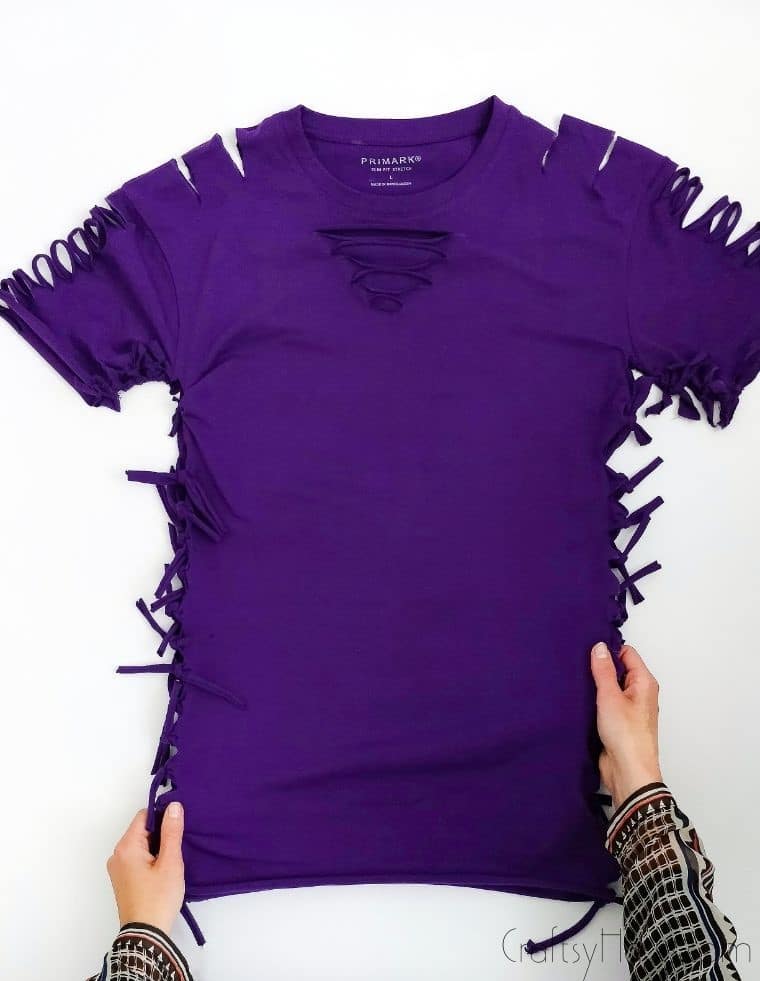
Now that you’ve got your strings all sorted, it’s time to start tying. Pair up the strips from the front and back of your shirt, tying them together with a basic double knot.
The loose ends give an almost frayed look.
Once again, don’t be afraid to try on the shirt multiple times as you do this. Repeat the tying on both sides of the t-shirt.
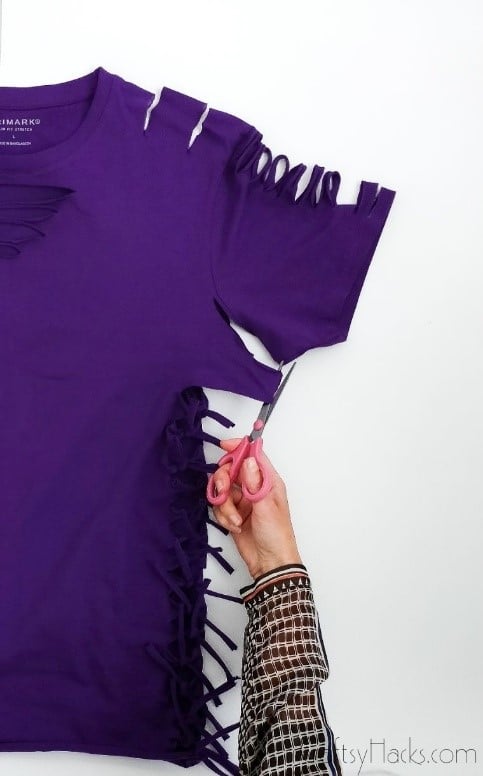
Step Seven
While we’re not busting out the full contingent of tailoring tools here, we are going to make some alterations to make the shirt fit even better.
Cut a slit up the armpit of each side on the t-shirt, following the armpit seam. Don’t cut too far into the shirt.
You just want a flap big enough to create a tie. Snip the loop as you did the others.

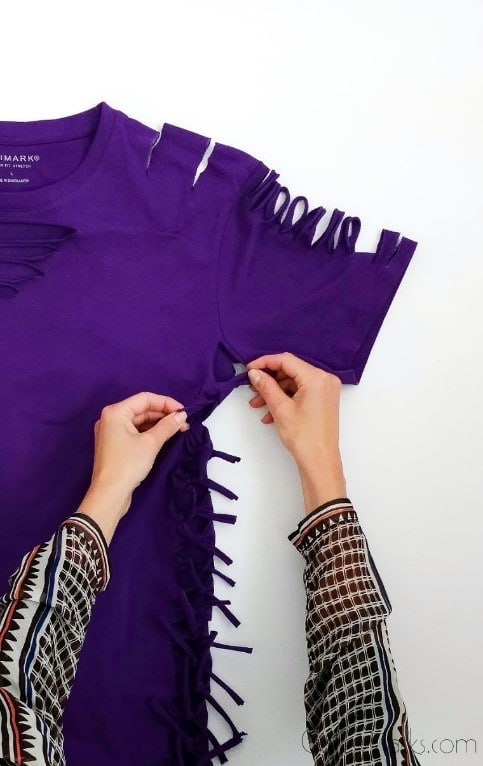
Step Eight
Tie the loop under the armpit, making sure you do a double knot to keep it strong. This loop acts as a tailoring mechanism. It will draw the shirt tight to your body, giving it a flattering and comfortable shape!
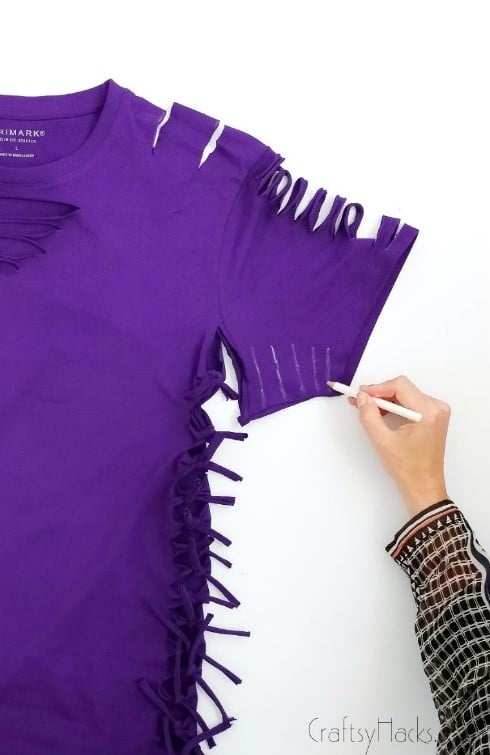
Step Nine
Sketch more lines on the bottom of the sleeve. These should be about the same distance apart as the rest of the lines are to keep the design consistent.
These lines are there to make the sleeve tighter. By placing them in a more discreet area of the body (under the arm), we’re making the shirt look seamlessly tailored! Smart, right?
Note: you might want to stop here and skip the rest since the following steps are for tailoring really big t-shirts. Just keep trying the shirt on to see what suits you.
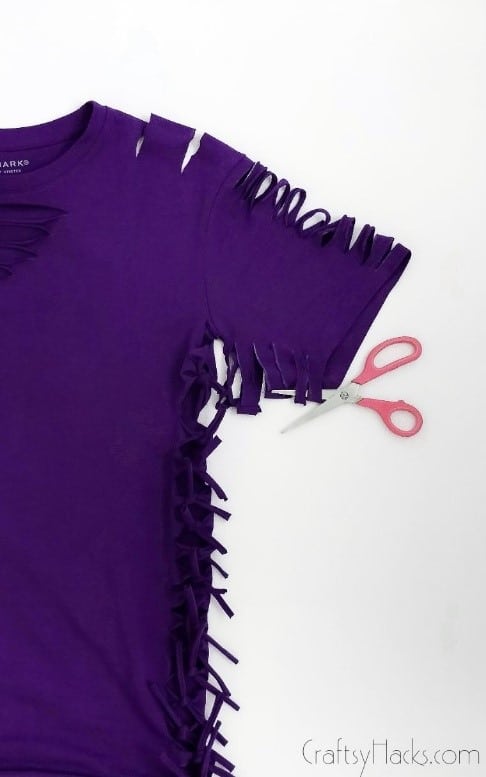
Step Ten
Snip through the lines to create loops. Then, snip through the ends of the loops to create ties, just as you did with the rest of the shirt.
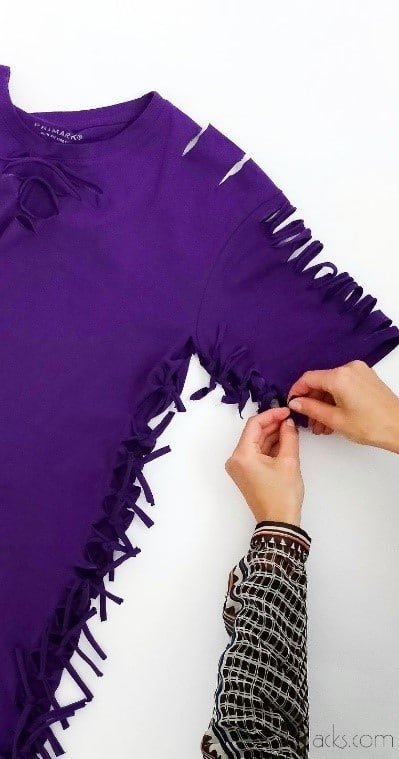
Step Eleven
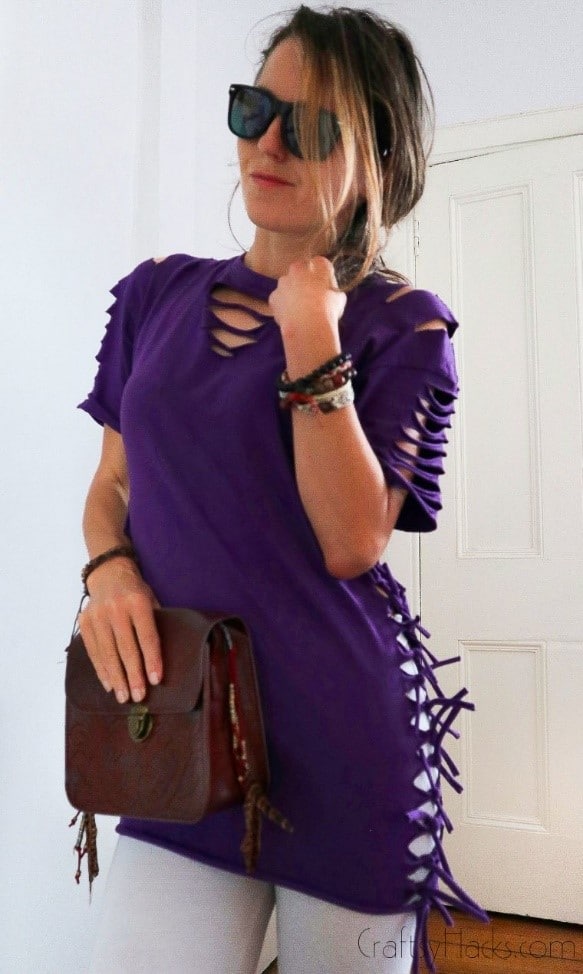
Use the ties to tighten the shirt’s sleeves, turning it into a more fashionable clothing item than a loose t-shirt. At this point, it’s important to keep trying the shirt on as you go.
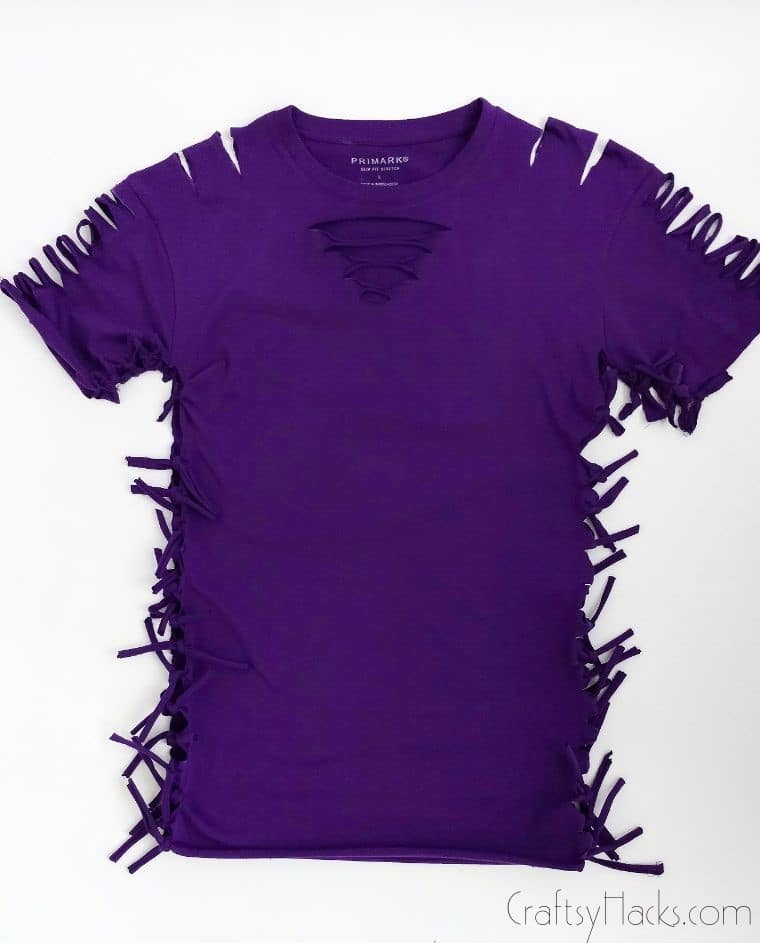
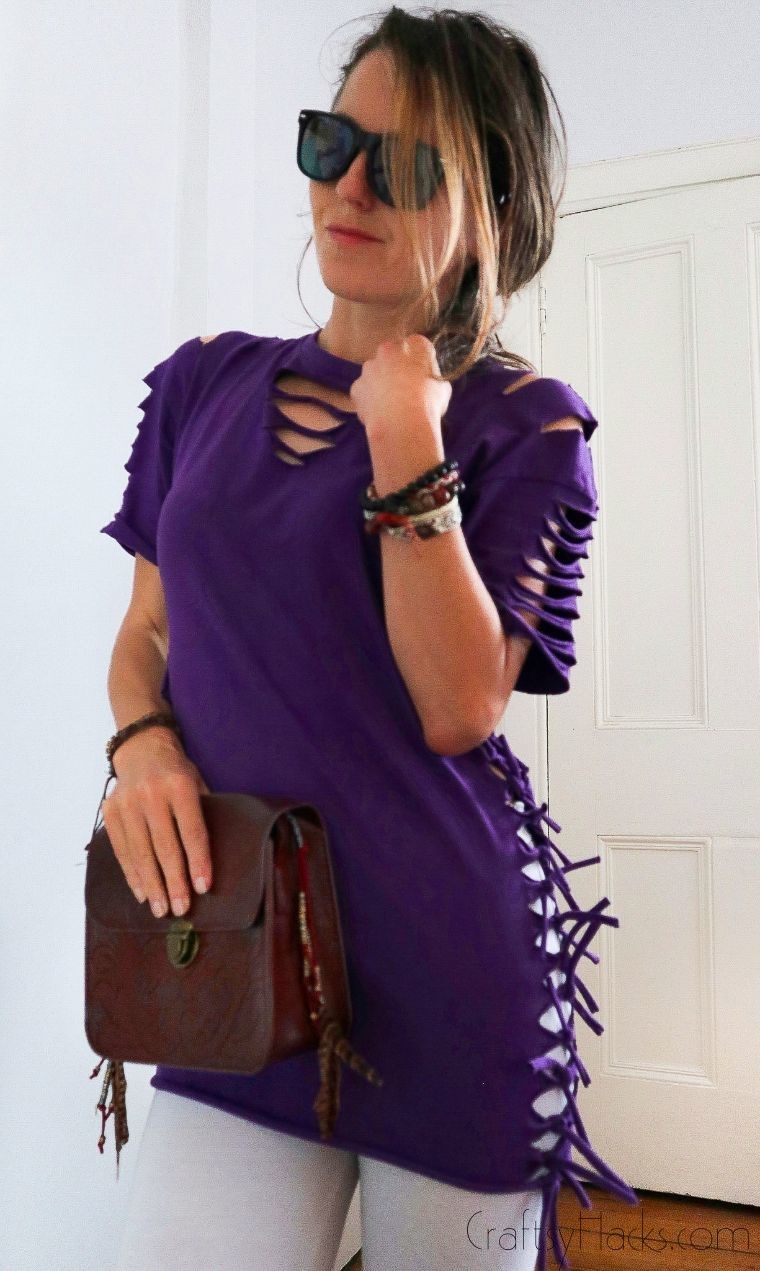
There you have it, a perfectly tailored and fashionable t-shirt. No needle and thread in sight!
Other Crafts You Can Make
- 20 Craft Projects for Adults You’ll Have Fun With
- DIY Woven Bowl with Yarns
- DIY Macrame Leaf Earrings
- 40 Cute DIY Crafts for Teens

DIY No-Sew Shirt (Cut T-Shirt)
Video Tutorial
Equipment
- Chalk pencil or tailor’s chalk
- Fabric scissors
Materials
- An old t-shirt a few sizes bigger
Instructions
- Gather everything you need.
- Lay the shirt out flat, making sure the seams are aligned and laying straight.
- Sketch in the cutting lines with your chalk pencil, spacing them about 1.5cm apart. Places to put these lines include the sides of the shirt, the shoulders, the tops of the arms, and even as a detail on the front.
- Start cutting! Carefully take your scissors to the garment, making sure to line up the front and back when cutting through both.
- Stretch out the loops on the sides of the t-shirt, gently pulling until they’re thin strips.
- Cut these loops in half using your scissors.
- Match the ties from the front and back of the t-shirt together, then tie them in a double knot. Make sure this is tight enough to survive the washing machine, but not too tight! You can even do this step as you wear the shirt to get the best possible fit.
- Stop here if you’re happy with the sizing or keep going to alter the sleeves.
- Cut along the armpit seam, stopping about halfway. Cut through the loop you’ve made and tie it together under the armpit, thus tightening the sleeve.
- Sketch more chalk lines on the underside of each sleeve, spacing them as you did for the other lines.
- Cut the lines out and cut through the loops, then tie together. Make sure you’re checking how tight the sleeves get as you tie. After all, this shirt is meant to fit you and only you!
- Voila! You have a completed shirt, tailored beautifully to fit your unique shape.


Great!! Thank you for the step by step.