
These cute, easy, and cheap pipe cleaner butterflies are an excellent place to kick off all of the Spring feelings.
These butterflies only have three main components, and it’s easy to make a solo fluttering friend or a whole flock! Once you start making these, you will not be able to stop!
Before we officially begin, if you do need a little extra, help or guidance, check out my YouTube video tutorial here: Pipe Cleaner Butterflies. Now, onto the sweet cuties!


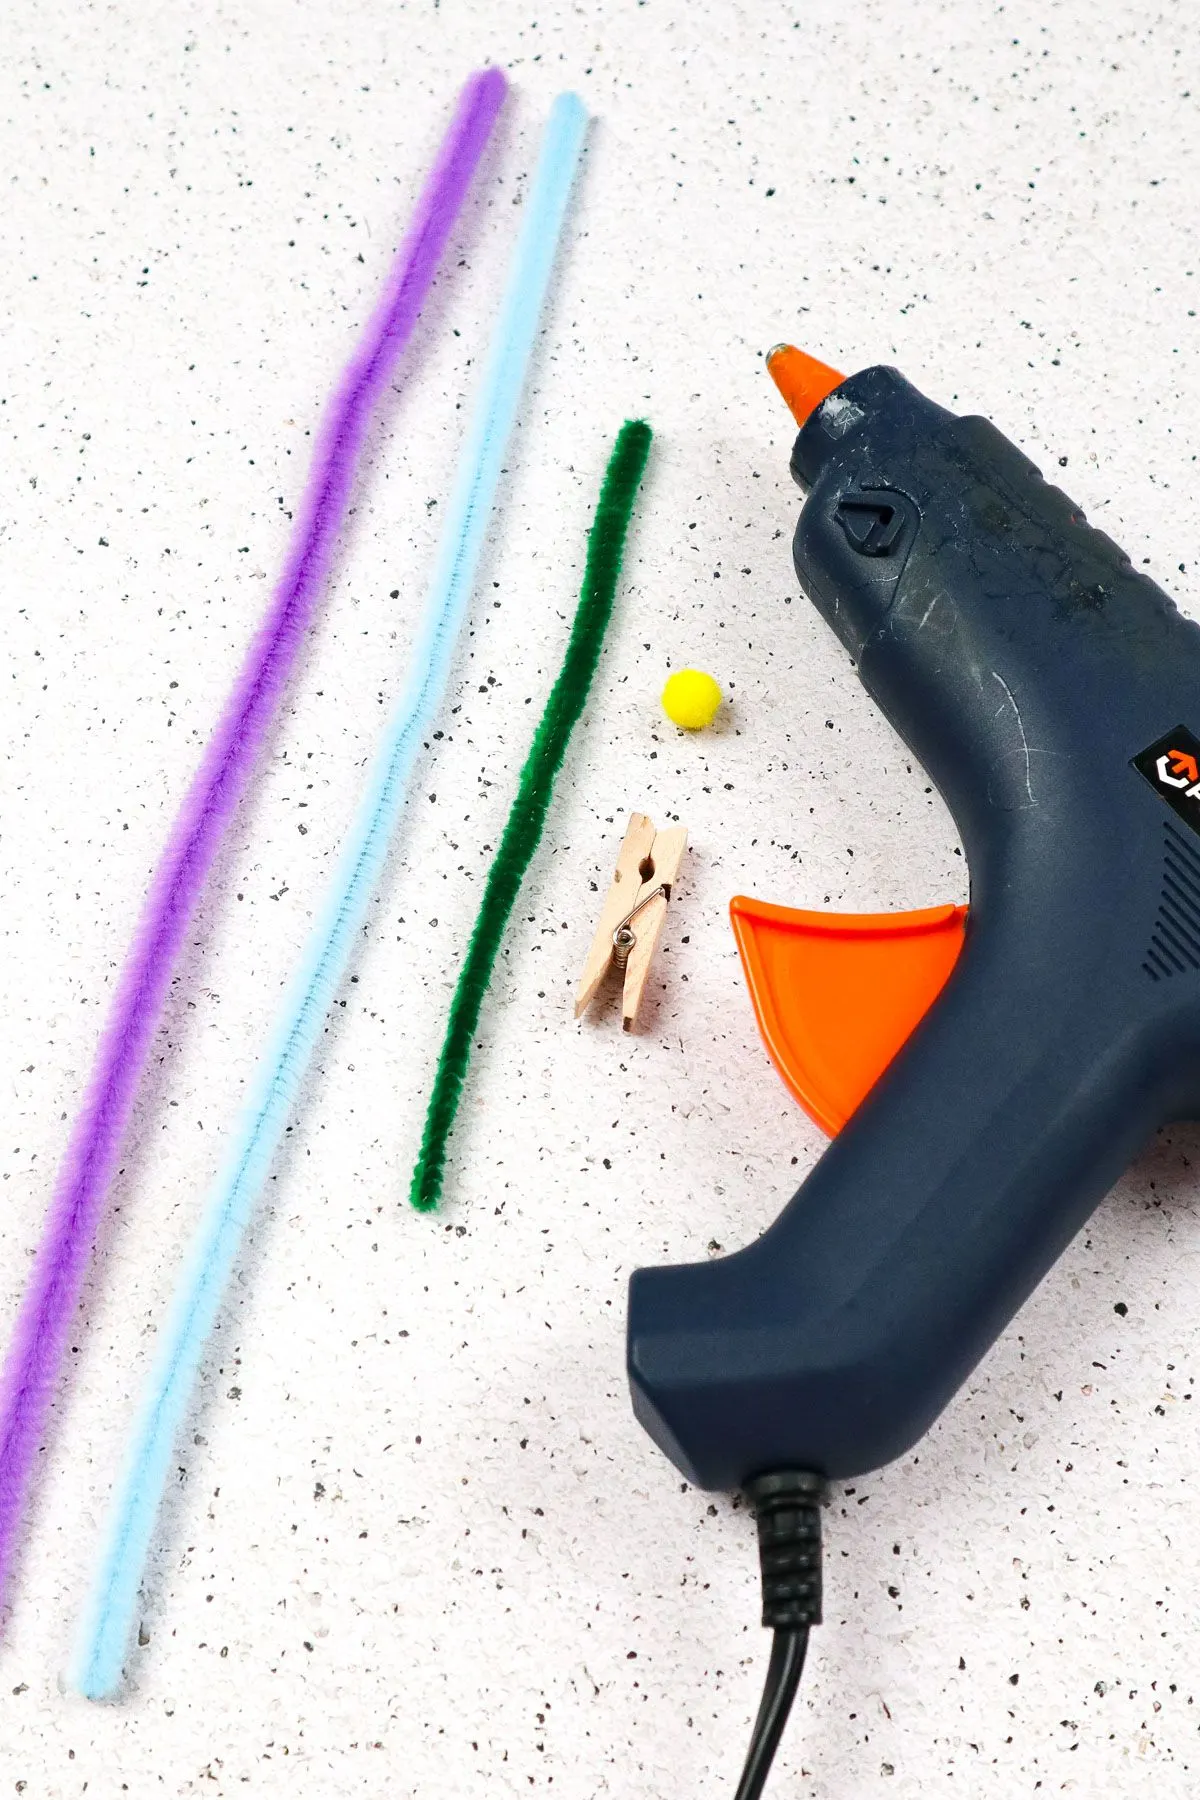
Supplies You’ll Need
2x colorful pipe cleaners (12″ long)

How to Make Pipe Cleaner Butterflies
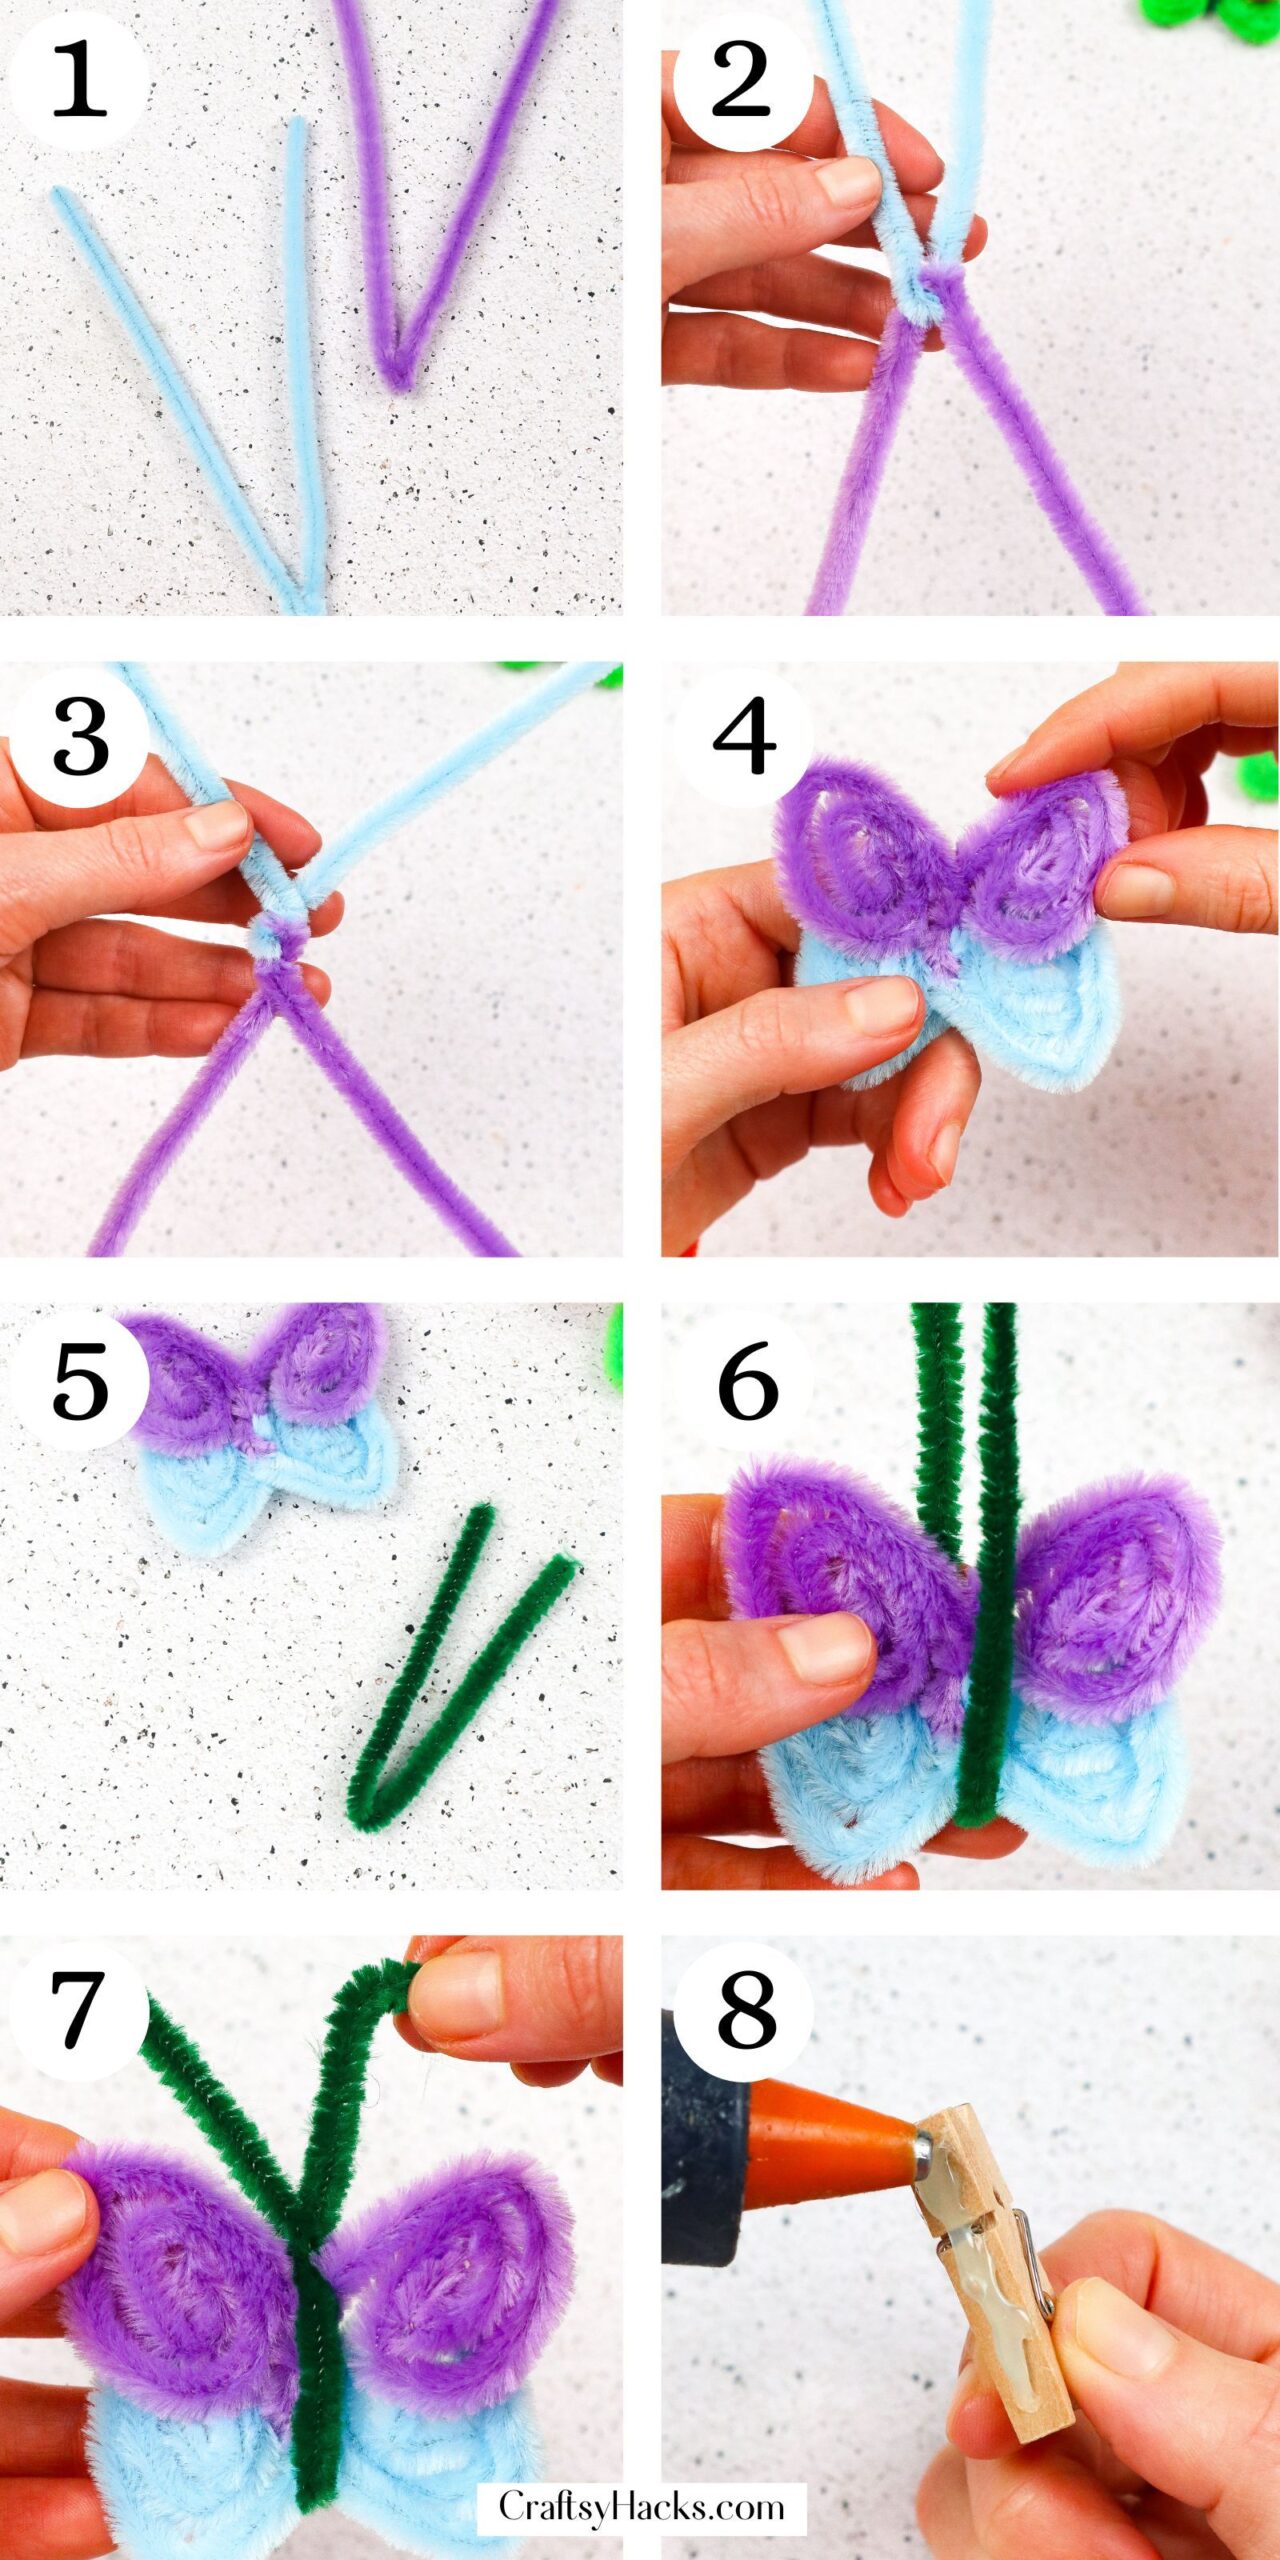
Step 1. First, we’ll start with our two colorful pipe cleaners and bend them directly in half.
They should like the capital letter “V,” and it’s important to keep the pipe cleaners even and balanced so as not to make wonky butterflies.
Step 2. Take the two “V’s” and have their middles meet so they now look like the capital letter “X.”
Before twisting them, ensure they are evenly placed so the wings won’t be uneven later on.
Step 3. Once they sit evenly, twist both pipe cleaners in opposite directions. A few good twists will work.
Start curling the pipe cleaner inward toward the center and repeat thrice. While doing this, determine what color you’d like, such as the top and bottom, if there are multiple colors.
Step 4. Once all wings are curled inward, start shaping the wings for top and bottom, respectively. This step means pinched wings, moving the bottom wings back, etc.
Step 5. Grab the shorter, six-inch pipe cleaner after your butterfly or butterflies are shaped. Make another “V,” but fold it almost entirely in half.
Step 6. Take your short, skinny “V” pipe cleaner and slip the butterfly’s body into it. Your butterfly should be supported by and sitting at the lowest point of the pipe cleaner.
Situate the body evenly and fix any unevenness of the shorter pipe cleaner.
Step 7. When you have the pipe cleaner situated, we’ll do another couple of twists to secure the antennae to the body. Then, bend the tops of the antennae to your liking.
That is the main body of the work! The next part is for those who want this as a decor piece or a more versatile tool.
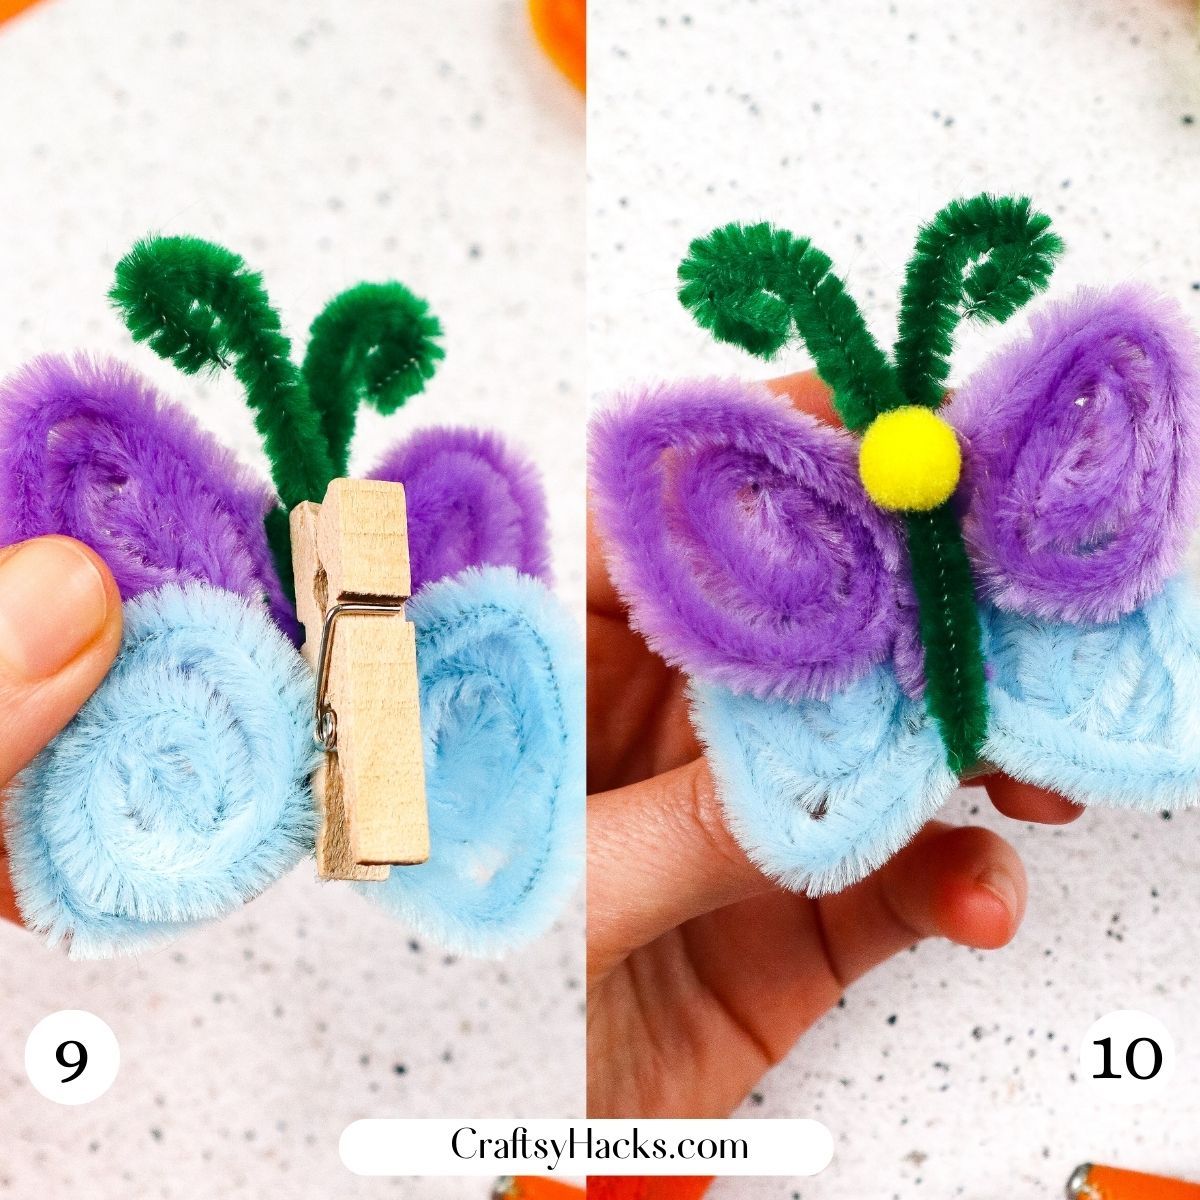
Step 8. Grab your mini paper clip and hot glue gun the back of the clip. Immediately attach it to the back of your butterfly and let it dry.

Step 9. Make sure to orient the clip in the direction you’d like it to face for your purposes. It’s important to allow enough drying time for the clip on the back of the butterfly.
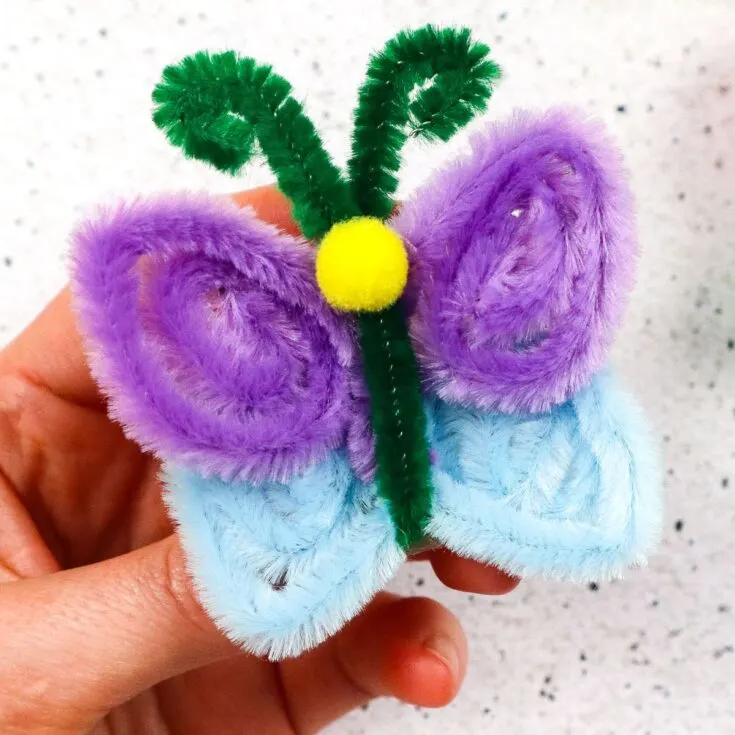
Step 10. Lastly, to make your butterfly pop, hot glue a pom pom to the front to represent the butterfly’s head! Also, allow the pom pom to dry completely onto the pipe cleaners.

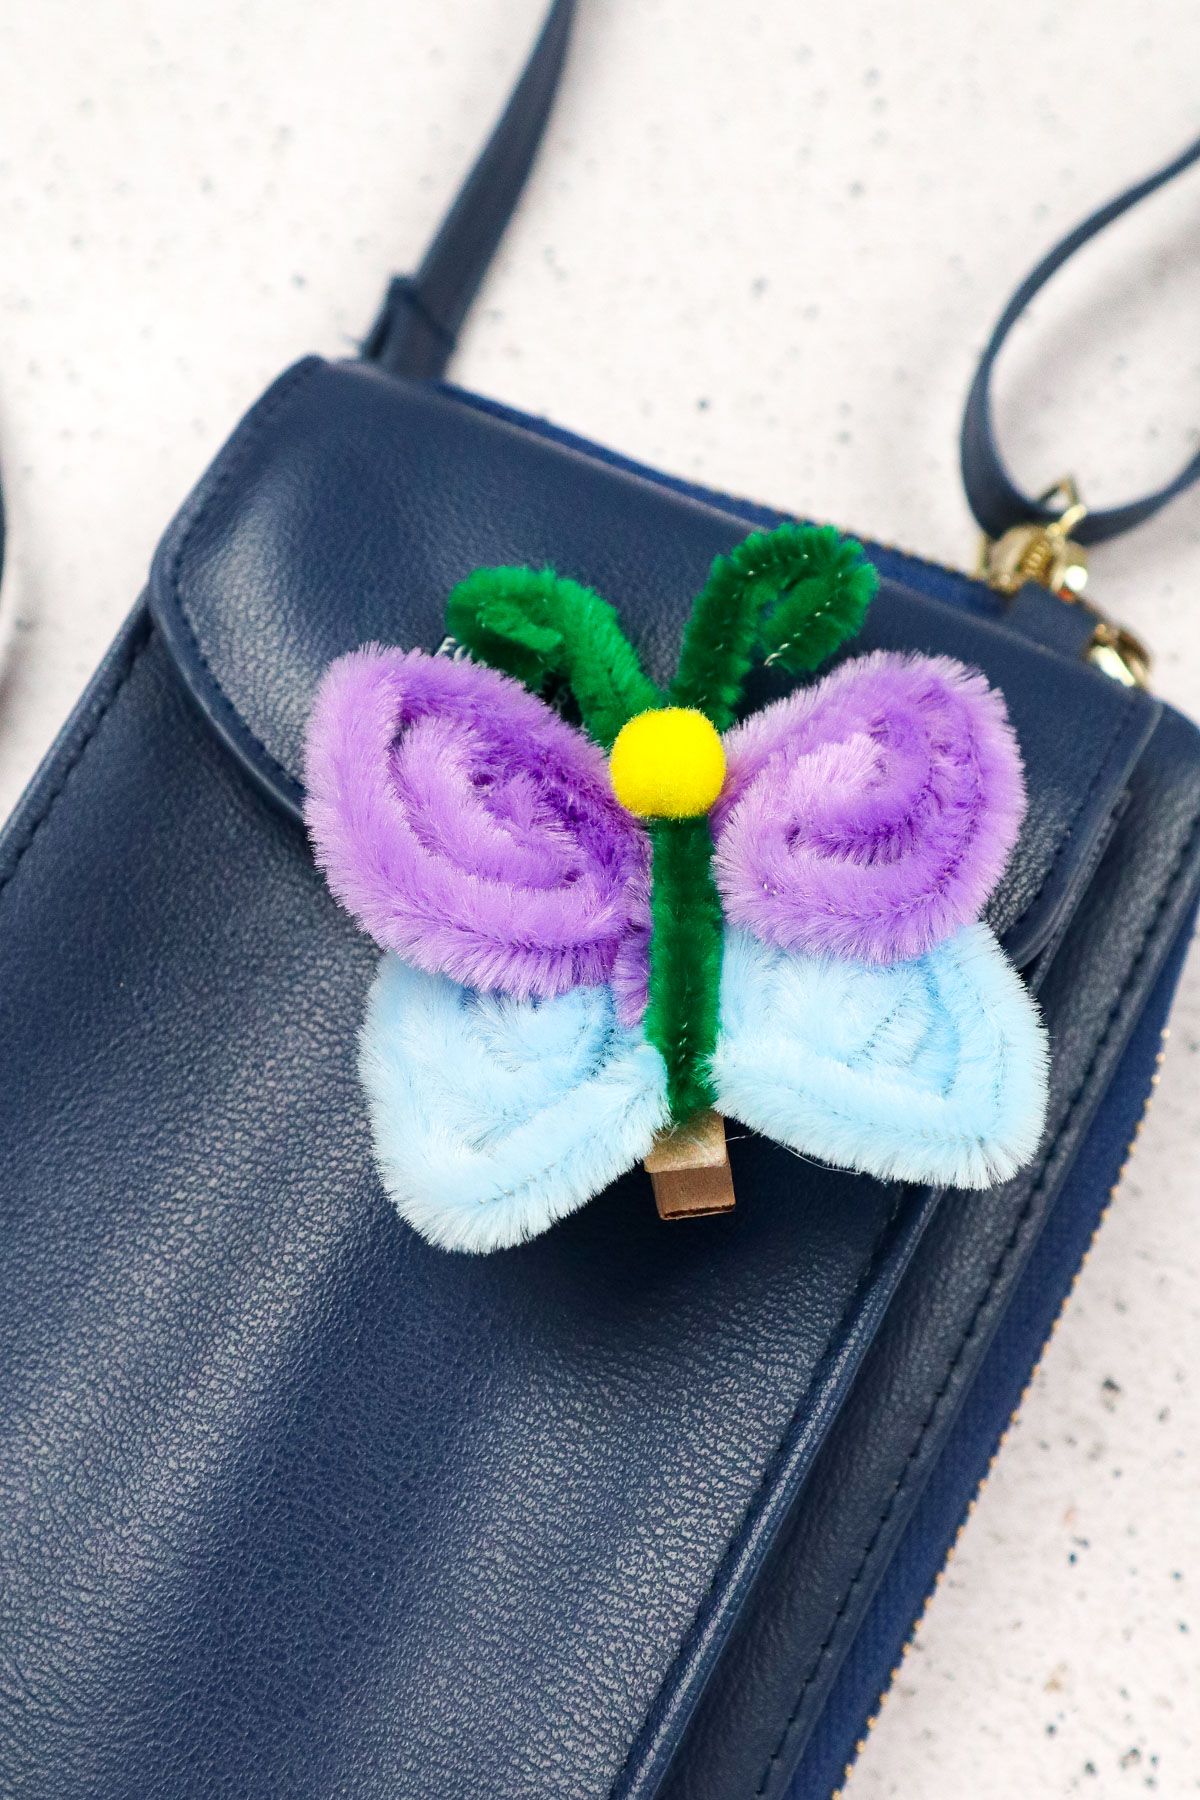
Once completely dry, add your butterfly or butterflies to home decor, gifts, or any other place where you need a pop of Springtime colors.

Other Crafts to Make
DIY Pipe Cleaner Butterflies

Materials
- 2x 12-inch colorful pipe cleaners
- 1x 6-inch pipe cleaner
- 1x small clothespin
- 1x pom pom
Tools
- Hot glue gun
Instructions
- Bend your two colorful pipe cleaners into “V” shapes. Make sure they are even.
- Invert one of the “V’s” and interlock them, having their middle meet, creating an “X” shape.
- Once the “X” is on, twist either side of the shape a few times. This step secures the butterfly’s body.
Also, decide what wings are top and bottom and curl them inward toward the butterfly's body. - Reshape and organize the situating place of the butterfly’s wings.
This step could involve pinching the wings to a specific shape or moving the wings forward or back, etc. - The six-inch pipe cleaner gets the same treatment as the twelve-inch ones–a “V” shape but a little squished.
- Slip the butterfly's body into the “V” so the center supports its bottom.
- Once even, twist the pipe cleaner at the top a few times to secure the body fully.
Directly after twisting the six-inch pipe cleaner into place, bend the antennae to your liking. - Set aside the butterfly–grab the glue and mini clip and add adhesive to the back.
Make sure you situate the clip according to your needs. - Add the clip to the butterfly's body immediately with the hot glue and let it sit.
- The same idea applies to the pom pom–add hot glue and immediately add it to the front to represent the head.
Once dry and completed, add it anywhere or to anything that needs a fun and colorful pop of Springtime colors!