Q-Tip Snowflakes
Looking for a creative family activity? This cardboard craft is just for you! A DIY project for teenagers, kids, and even adults. The perfect winter craft! Explore our Q-tip snowflake tutorial and embark on a crafting adventure together.
Equipment
- Scissors
- Hole puncher
Materials
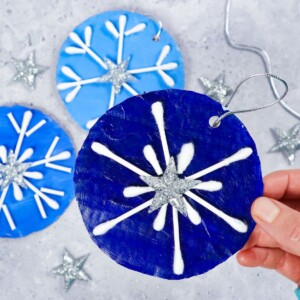
- Cardboard circles
- Cotton buds
- Acrylic paint
- Craft glue
- String
- Star stickers
Instructions
- Pre-cut your cardboard circles. Paint the circles and let dry.
- Paint a second layer to coat the cardboard well. Let it dry.
- Start prepping your materials and organizing them into tubes, tips, etc.
- Continue to prep and organize material–start practicing layout designs for each space.
- After organizing your materials and laining out some snowflakes, it’s time to glue. Use glue on each individual piece.
- Start with your largest pieces of the snowflakes to ensure the proper spacing.
- Work in the smaller ends once the big bits are situated.
- Move further inward to add more into the middle of each snowflake–this can look uniform or different.
- Add a star sticker or, alternatively, a pom pom to each Q-tip’s middle section. Let everything sit for a couple of hours up to 24 hours.
Tried this craft?Leave a comment below with your rating! I love the feedback and respond to every comment!