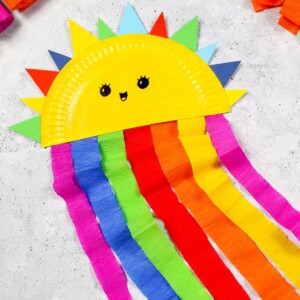
Paper Plate Rainbow Craft
This colorful paper plate craft for kids will brighten everyone's day. Bring the rainbow into your household with this easy DIY project that will brighten up the day of the little ones and keep you happy too!
Equipment
- Scissors
- Paint brush
Materials
- Paper plate
- Yellow acrylic paint
- Craft glue
- Black marker
- Colorful tissue paper
- Colorful paper sheets
Instructions
- Grab your paper plate and scissors, and cut the paper plate in half. Set one-half aside.
- Have your paint ready and paint the other half yellow. Let it dry, and grab your marker.
- With your marker, draw on the eyes, smile, and any other facial features you want to add.
- Set all your different mediums to the side and pick up your scissors again.
Cut small, different-colored triangles out of different colored pieces of paper and glue them to the back of the arched side of the plate.
You can make them different-sized triangles, too, if you’d like. - Grab your colorful tissue paper bundle and cut strips of tissue paper. Make them different lengths and colors appropriate to how you’d like them styled.
If you’d really like to make it special, use patterned scissors or cut your tissue paper in round or rigid ways. - Attach the strips of tissue paper to the flat side of the paper plate half. A bit of white glue goes a long way in this regard, even better than a glue stick.
- Once everything is absolutely dry, add any last-minute decoration items you’d like that are listed or not listed on this post.
Let it sit and dry entirely if there are new accessories or other additions that need rest time.
There you have it–an adorable paper plate rainbow craft ready to make any room shine. It is a great way to spring into Springtime.
Tried this craft?Leave a comment below with your rating! I love the feedback and respond to every comment!