Paper Plate Pumpkin
Get creative with paper plate pumpkin crafts! These easy-to-make pumpkins are ideal for Halloween or fall decorations.
Equipment
- Scissors
Materials
Instructions
- Add one coat of paint to your paper plate. Let it dry a little.
- Add a second coat of paint and let it dry completely.It should take about 30-50 minutes to fully dry. You can speed up this process by using a hairdryer.
- Draw two triangles on your plate to make your pumpkin’s eyes.
- Draw your pumpkin’s mouth.
- Add teeth to your pumpkin’s mouth.
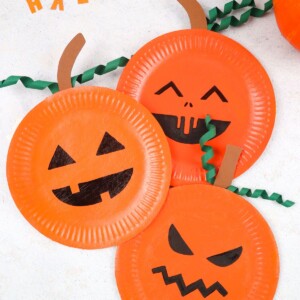
- This picture shows the different possibilities for your pumpkin design. You can make round eyes, a zig-zag mouth, or a wide smile.You can also cut out your pumpkin’s features and glue them onto your plate instead of drawing them on.
- Get your brown paper and use your marker to draw a stem.You can draw a curved or straight stem.
- Cut out your stem.
- Cut out two thin strips from your green paper to make leaves.
- Curl your leaves by wrapping them around a barbecue stick or pencil.
- Glue your stem and leaves to the back of your pumpkin.
- Your paper plate pumpkin is complete!
Notes
*or a pencil to curl leaves
Tried this craft?Leave a comment below with your rating! I love the feedback and respond to every comment!