How to Make Wire Ornaments
These wire ornaments can genuinely be used for anything. They’re so easy to make, cost nothing, but they look like a million bucks. They’re a great craft for teens and a lovely addition to your DIY gift.
Video Tutorial
Equipment
- Marker
- Pliers
- Scotch tape
- Cardboard
- Adhesive super glue
Materials
- Colored yarn
- Wire
Instructions
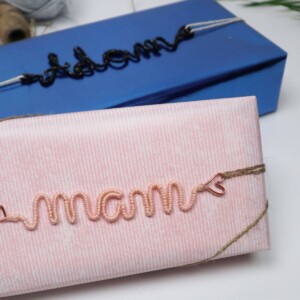
- Gather all your supplies, paying attention to the color scheme you wish to portray. For instance, I find that light-colored yarns look gorgeous with copper wire.
- Draw the name you’ve chosen on a piece of cardboard in cursive. If possible, your pen shouldn’t leave the page, as this will ensure the wire can follow the path. (If it must leave the page, I have a technique you can use later).
- Cut a length of wire. Preferably, more than you think you’ll need. Tape it to the left side of the cardboard, leaving some wire hanging over.
- Twist and bend the wire to follow the name, then close the ends with your pliers to create tie-on loops.
- Tape your chosen textile (I used yarn) to one side of the metal name.
- Wind the yarn around the name (tightly), being particularly careful around the corners.
- Glue the end of the yarn down.
- If one of your letters needs a separate part attached, such as a capital A or T, it’s easy to do. Simply create that piece separately—yarn and all—then glue it in place on the finished product.
- You're done! You can use these ornaments for absolutely anything you can think of, so go nuts!
Tried this craft?Leave a comment below with your rating! I love the feedback and respond to every comment!