How to Make Paper Roses (Step-by-Step)
Make these fun DIY paper roses! A fun craft for teens and adults out of paper.
Video Tutorial
Equipment
- Pencil
- Ruler
- Scissors
Materials
- 4 x paper squares* 3.5" x 3.5"
- Paper glue
- Toothpick
- Wooden skewer
- Ruler
Instructions
- Gather your supplies to get started on making these paper roses.
- To begin with, take the first of your four square sheets of paper and fold it in half to form a triangle. Fold it in half once again to form a smaller triangle, and crease it down the middle before unfolding this last fold.
- Grab a pencil and make a marking about 1.5 inches from the top centre. Bring the opposite corner up towards that mark and fold the paper all the way down. Repeat this step with the opposite as well, and fold the coinciding corner.
- Now grab your pencil and draw the petal. You can experiment with the shape and size. Grab a pair of scissors and cut out your six-petal flower sheet. Repeat these steps with all four sheets of paper.
- Next, grab a wooden skewer and place it along the center of one petal, carefully curving the paper around the skewer to plum up the petal. Repeat this with all six petals of all four sheets till they look like little hexagonal cups.
- Now grab a toothpick and curl up the very tip of the petals of just two of the four sheets of paper. These will be the outer petal layers and will make your rose look fluffy.
- Take one of the inner sheets and line the tips of two opposite petals with glue.bring them up and stick the ends together to form a conical bud. Repeat this with the remaining two opposite-facing petals till you have a nice bud for the center of the rose.
- Take the next layer and apply glue to the center before sticking the center bud on top of the second layer. Hold the two together till they adhere. Now use a toothpick to apply a thin line of glue down each petal and gently bring them inward and overlap them when you stick them to the back petals of the bud.
- Repeat this step with the two outer petal layers, too. You will notice that the tips will be fluffy frow=m when you curled them with toothpicks.
- You can stick a bit of washi tape around the bottom of the flower, too, for an added decorative touch.
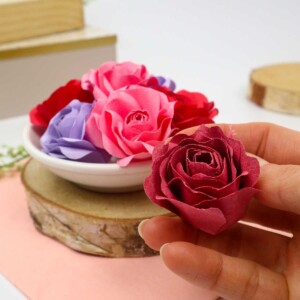
- Your paper roses are all ready. Just allow them to dry completely first, and you’re set.
Tried this craft?Leave a comment below with your rating! I love the feedback and respond to every comment!