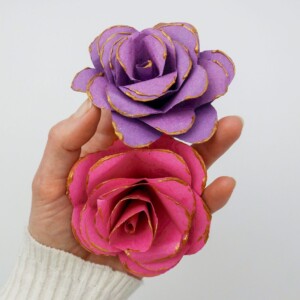
How to Make Paper Flowers
Grab some paper and make these beautiful DIY flowers. A perfect paper craft for the whole family to make and use for decorating!
Video Tutorial
Equipment
- Scissors
- Pencil
Materials
- 4 x paper squares 4’’x 4’’
- Craft glue
- Glitter glue
Instructions
- Gather all your supplies and lay them out on a flat surface.
- Fold a square sheet of paper diagonally into a triangle and press to crease it.
- Fold the paper again into a smaller triangle.
- Next, grab your marker and draw an arc—this will be the shape of your petal for the first layer. Cut out the petal and unfold the paper.
- Next, cut out one single petal in this layer and set it aside.
- Note: As you work your way up every layer, you will need to cut more and more of the paper to help taper your paper flower. For example, for the second layer, you will need to cut out two petals, three petals for the third layer, and so on.
- For the tip of the flower, simply curl one single petal into a cone-like center.
- Stick all the ends of every layer together, making sure they overlap and that they have pointed ends that curve the petals inward.
- Once you’ve stuck the individual components, it’s time to stick them all together and create your flower.
- Just layer the insides of the first layer and stick the next layer over it, holding in place till it sets.
- Once your flower has dried completely, you can curl the ends using a pen.
- The final step is to decorate it with glitter glue, and your paper flowers are good to go!
Tried this craft?Leave a comment below with your rating! I love the feedback and respond to every comment!