How to Make Air Dry Clay Bowls (DIY Jewelry Trays)
These air-dry clay bowls are easy to make and work as beautiful jewelry trays. These are a perfect clay craft for teens and adults!
Video Tutorial
Equipment
- Acrylic roller (or a bottle instead)
- Nonstick placemat
- Bowls (different sizes to use as molds)
- Paint brushes
- Craft knife
- Fine sandpaper
- Ball chain, beaded chain (optional)
- Embossing rolling pin (optional)
- Stamps (optional)
Materials
- Air drying clay
- Acrylic paints
- Acrylic gloss varnish optional
- Artificial leaf optional
Instructions
- Gather all your supplies to get started.
- Cut away some clay and repack the rest in an air-tight package.
- Knead the clay with your hands until lump-free, soft, and pliable.
- Next, use a rolling pin or glass bottle to roll the clay over a flat surface, about 5 mm in thickness.
- Grab a bowl and place it over the clay. Use a craft knife to cut around the rim and carefully peel the excess clay away.
- Remove the bowl, and, using your fingers, gently press the clay into the bowl with a mind not to press too deep or leave fingerprints on it. You can add a drop of water to help you smoothen the edges or any cracks that may appear.
- For the next few bowls, you can press a leaf, or a ball chain, or any other engraving you might have over the clay first. Use a rolling pin to imprint the design on the clay and then gently pull it back.
- Then, repeat the process of placing a bowl over the design, then cutting around it before you smoothen the clay either into the bowl or around the outside.
- Allow the clay to dry for 48 hours. The hardened clay should detach easily, but if it doesn’t, use a sharp knife to cut around the rim.
- Next, use a sandpaper to smoothen the clay all around the sides, under it, the rim, and also the inside. Grab a brush or a paper towel and dust all excess dust and particles out of the way.
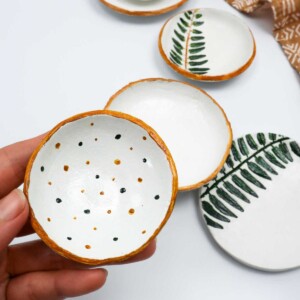
- Paint and decorate the bowls as you see fit and feel free to add color to the finer details and designs.
- Finally, seal the paint by layering a clear gloss or matte-finish sealant like Mod Podge or varnish. Let that dry completely, as well before you use your clay bowls. Alternatively, you can eschew a sealant for a more rustic-chic finish.
Tried this craft?Leave a comment below with your rating! I love the feedback and respond to every comment!