DIY Squishy Donuts
DIY squishy donuts are the perfect craft for kids and teens! Easy, budget-friendly, and super cute.
Video Tutorial
Materials
Instructions
- Start by cutting the foam into a circle shape.
- Take your time to make a round, smooth circle.
- Now, cut a hole in the middle of your circle to make the foam piece look like a donut.
- Again, take your time to make sure that your hole is smooth and round.
- Paint your donut with light brown acrylic paint.
- Keep painting until you have colored the whole donut.
- Now, add a layer of acrylic paint to the top of your donut. I have mixed red and white acrylic paint together to make pink.Let it dry. This will take a few hours.You can speed up the drying process by using a hair dryer.
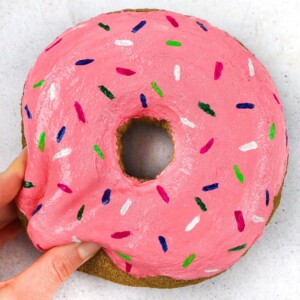
- Make your frosting using pink puffy paint and add a thick layer to the top of your donut.Let your donut dry overnight or use a hair dryer to speed up the drying process.
- Now, use a thin paintbrush to add colorful sprinkles to the top of your donut.
- Let it dry completely. Your donut squishy is complete!
Notes
*You can also use density foam.
* Feel free to use acrylic paint instead of puffy paint but just keep in mind that there is a risk that the acrylic may start to peel off from the surface or crack over time.
Tried this craft?Leave a comment below with your rating! I love the feedback and respond to every comment!