DIY Mail Organizer (Step-by-Step Tutorial)
Organize your mail with this beautiful DIY wall mail organizer. It's a great fabric project to declutter your office and keep that mail at bay.
Video Tutorial
Equipment
- Scissors
- Sewing pins
- Sewing machine
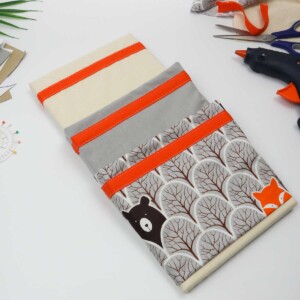
Materials
- Artistic canvas 10"x 16"
- Main piece of fabric 14"x 20"
- 2 x cardboard pieces 6" x 10"
- Cotton twill tape
Instructions
- Gather all your supplies to get started on this project.
- Lay your fabric of choice on your work surface. Fold it in half with the wrong side facing out.
- Pin three sides together with sewing pins but leave the mouth open. Repeat this with the other fabric, too, as you’ll need two pockets.
- Next, sew both your fabric pockets separately with a sewing machine. Keep in mind not that the mouth of the fabric should remain open.
- Flip the pockets inside out with the right side facing out.
- Then, cut out a bit of cardboard sheet into the appropriate size and slip it into the pocket to use as resistance. Center it so that the cardboard has the same amount of fabric on all four sides.
- For the next step, pin a length of twill tape across the pocket. Make sure you pin it so that the cardboard is also aligned with it. Then, sew both the top and bottom of the tape while making sure you sew the cardboard in place, too.
- Repeat these steps with the other pocket.
- Next, grab your base fabric and sew on some twill tape on it as well. Turn it around and lay it on your table with the taped side facing down.
- Place your canvas board over the base fabric and center it.
- Apply hot glue on all four sides, carefully pull the fabric over and press it down to cover the frame. When you’re folding in the corners, use additional glue to tuck the fabric in and secure it.
- Turn your canvas around and lay out your pockets over it with the larger one at the bottom. This pocket should be the one that overlaps and sticks out over the smaller top pocket.
- So, to start sticking the pockets in place, grab your hot glue gun. Fold the bottom and sides of the pocket about an inch before you stick them onto the canvas. This will raise the pocket up a little. Make sure you glue the sides as well.
- Repeat the previous step with the bottom pocket and once again fold the bottom and sides of the fabric before you glue them down.
- Your DIY Mail organizer is ready to use once the glue has dried up!
Tried this craft?Leave a comment below with your rating! I love the feedback and respond to every comment!