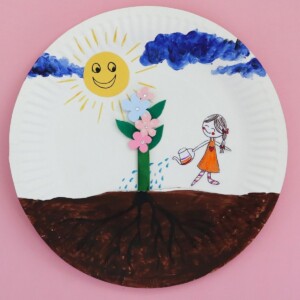
Paper Plate Flower Craft
This DIY paper plate craft is a great educational tool. On top of that, it’s just a fun kid craft to make.
Video Tutorial
Equipment
- Pencil
- Pen
- Scissors
- Brush
- Safety cutter
- Glue
Materials
- Paper plate
- Green craft stick or dyed lolly stick
- Construction paper
- Acrylic paint
- Markers
Instructions
- Raid your art cupboard for all the required supplies!
- Start by sketching out the clouds and the land, then filling them in as you like. I used paint and paper, but you can use any method you want.
- Create a Sun for your scene. Once again, I used paper for the Sun and a marker for the rays, but you can do it however you choose.
- Using a craft knife, slice a notch into the paper plate wide enough for your plant to fit through.
- Either cut flower and leaf shapes out of colored paper or draw them on white paper before cutting them out.
- Assemble the leaves and blooms onto your prepared popsicle stick. You can make a tree, a vegetable plant, a fruit tree, absolutely anything you like!
- Gently insert the completed plant through the notch.
- Finally, help your child sketch and color themselves in (make sure they're holding a watering can!).
- Cut them out, then glue them directly next to the 3D vegetation.
- Now that you're done, you can use this paper plate as a tool to explain how plants grow!
Tried this craft?Leave a comment below with your rating! I love the feedback and respond to every comment!