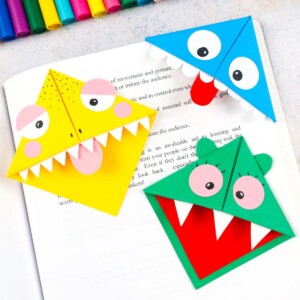
Origami Corner Bookmark
Learn how to make origami corner bookmarks with our easy tutorial! This simple paper craft is perfect for beginners and book lovers.
Video Tutorial
Equipment
- Scissors
Materials
- 1 6"x 6" Thin colored paper square*
- 1 Thick red paper **
- 1 Thick white paper ***
- 1" circle hole punch
- Glue tape ****
- Black marker
Instructions
- Get your square origami paper.
- Fold it in half diagonally to create a triangle.
- Fold the right corner to meet the bottom corner.
- Do the same with the left side.
- Unfold the corners so that you are looking at a triangle.
- Fold the top flap of the triangle point upward so that it meets the top edge. Don’t unfold it.
- Fold the right corner in to meet the top edge.
- Do the same on the other side.
- Unfold both the right and left corners.
- Use the right crease that you made earlier to fold the right corner down.
- Tuck it underneath the flap.
- The right side should now be folded and tucked.
- Do the same thing with the left corner. This is the base of your bookmark.
- Add eyes to your bookmark (draw them out or use a hole punch like I did).
- Glue your eyes and add the eye details with marker.
- Cut out the teeth in whatever pattern you would like from white paper.
- Glue the teeth to the face.
- Here are some ideas for teeth.
- Draw a tongue on red paper and cut it out.
- Glue your tongue underneath the teeth.
- You could make either a mouth or tongue out of red paper (or patterned paper).
- Cut out another circle and then cut it in half to make eyelids. Glue these above your character’s eyes.
Notes
* We need thin paper so that it is easy to fold. Origami paper or copy/printer paper would work best. You can choose any color you want!
** This will be for the tongue or stiffening so thicker paper would work best, but it is not essential.
*** These are for the eyes and teeth.
**** You could also use any craft glue.
Tried this craft?Leave a comment below with your rating! I love the feedback and respond to every comment!