How to Make a Paracord Bracelet
Want to make an easy DIY accessory? Learn how to make a paracord bracelet on a budget!
Video Tutorial
Equipment
- Scissors
- Lighter
- Ruler
Materials
- Paracord
- Buckle
Instructions
- Gather all the supplies listed out to get started on your DIY paracord bracelet.
- Measure the width of your wrist to calculate the length of cord you will need. This project calls for a cord of 85 inches or 7 ft to make a bracelet for a wrist that measures 6 inches.
- Grab a pair of scissors and cut the cords. You will need to mult the ends to avoid unravelling and fraying. Fold the cord in half so that you have a loop on one side and two end cords on the other.
- Pull the looped end through the buckle clip and secure it with a lark’s head knot.
- Then, pull the two end cords through the insert clip. Loop the buckle and insert clips around your wrist to measure the length of cord you need. You can adjust the width by tightening and loosening the two end cords.
- Carefully place the project on your work surface, making sure not to disrupt the cords.
- Next, you’ll be making a series of square knots down the length of your cord.
- To make the first half of your square knot: grab the left cord and pull it over the middle cords to form a loop. Next, pull the right cord over the left, then under the middle cords, and through the loop. Tug the ends to make the knot.
- For the second half of your square knot, grab the right cord and pull it over the two middle cors to form a loop. Now, grab the cord on the left and pull it over the right cord, under the middle cords, and through the loop. Tug the ends to secure the first square knot in place.
- Continue to make square knots all the way down the length of the two middle cords. When you make the last square knot right about the insert clip, cut the extra bits of cord off.
- Now, grab a lighter and melt the ends of the chords before flattening them into the sides of the bracelet and towards the back. Be careful, it’s bound to be hot.
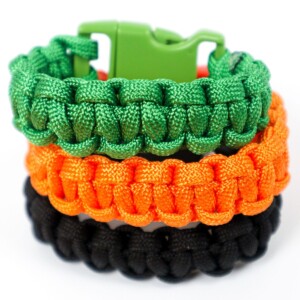
- Your DIY paracord bracelets are all done!
Tried this craft?Leave a comment below with your rating! I love the feedback and respond to every comment!